|
|
|
|
|
|
The old girl is in this months (July 2017) ‘Mercedes Enthusiast’ mag!
An interesting perspective from a seasoned road tester who is completely new to the whole superturbodiesel concept.
Before he took the wheel I took him for a drive - the first time I put my foot down he could not believe what was happening.
Great write up and some cracking pictures.
I have also been busy, new hybrid diff has been built… and a couple of other details. Ill write more soon with some pictures…
|
| |
|
|
|
|
|
|
|
Jun 19, 2017 17:19:12 GMT
|
|
|
| |
|
|
bsd
Part of things
 
Posts: 35
|
|
|
|
|
Congrats on the magazine article. I think this car and the whole Super Turbo diesel concept is immense. I will have one in time...
|
| |
|
|
|
|
|
Jul 10, 2017 11:03:02 GMT
|
|
Rear end big diff action.
Nothing wrong with this 1:2.87 185mm CROWN wheel diff, it’s perfect, silent and leak free. I also have an equally perfect 1:3.06 210mm big diff. But what I need for the next top speed event is a longer ratio 1:2.65, and if I’m gonna do that it might as well be a larger and stronger 210mm diff that of course requires prop modification. They are hard to find too with the ABS sensor on the front.
Eventually I found a mint one in Germany – a good friend picked it up for me and brought it back to blighty. The condition had to be seen to be believed – easily the cleanest Merc diff I have ever come across - no rot, leaks or wear. Might as well been new – I recon its from a pranged car, its clearly never seen rain.
Anyway…
Cleaned up, modified so that it would fit into a w124 subframe/driveshafts, speed sensor bracket fitted/welded up too so she won’t move and then painted. Superb.
The new diff will now eliminate the weakest point in the drive train which was the weedy 90mm 6 hole rubber flex disc designed for 160bhp. It now sports the big 8 hole 110mm used on the big engined heavy cars.
While I had the diff out I replaced the sub frame diff bushes with some poly bushes I made. If they work well I’ll produce them in small batches as the standard bushings are weak. There should be minimal N&V transmitted to the body as these bushing are mounted into the rear subframe and that is rubber bushed to the body. Time will tell.
I removed the bushes with a 27 piece install removal kit from the net. £80 – and it made the removal/install process a piece of cake. Money well spent!
|
| |
Last Edit: Jul 17, 2017 15:23:36 GMT by maxypriest
|
|
|
|
|
Jul 10, 2017 12:33:31 GMT
|
 Out you come!!!   Totally shot, can't blame them really, 2 years of 460ft/lbs after being on the car for quarter of a century... |
| |
|
|
|
|
|
Jul 10, 2017 12:36:43 GMT
|
 Bush selection - I opted for the ones i built up on the right. Only one way to see how they perform. |
| |
|
|
|
|
|
Jul 10, 2017 12:40:40 GMT
|
  Look at the diff - she's a big' un! Slotted straight in. ... and look at that subframe - W124 ones are usually disgusting - but this one like the rest of the car is remarkably clean. |
| |
Last Edit: Jul 10, 2017 18:51:22 GMT by maxypriest
|
|
|
|
|
Jul 10, 2017 18:17:20 GMT
|
|
Which diff ratio are you running Max? I've got a 2.65 waiting to go into mine, but need to find the correct shorter prop-shaft first.
|
| |
1988 Mercedes w124 superturbo diesel 508hp
1996 Mercedes s124 e300 diesel wagon
1990 BMW E30 V8 M60 powered!
1999 BMW E46 323ci project car
|
|
|
|
|
|
|
Jul 17, 2017 15:26:02 GMT
|
|
I made the gear linkage myself, the lever end is a modified Rally Design type 9 sierra job. Sometimes it rattles, to the point where it is a bit annoying….
I have looked on the web and it appears this is a known trait; fortunately some people have come up with a fix that is similar to one I was thinking of doing involving a bolt slightly deforming and thus tightening the spherical bearing tolerances – so it’s nice to see I’m probably on the right track.
So what I was thinking of doing was to improve the fix of using a lock bolt to push against the spherical bearing by using a sprung loaded ball in a M10 x 16 grub screw.
So I started the job and while taking the drivers end of the gear linkage apart one thing is immediately apparent; the spherical bearing on the bottom of the gear lever is of appalling quality, one of the seals has gone AWOL and the tolerance is very slack.
In my head - “What about just buying a decent SKF bearing and installing that with a bit of Loctite bearing retaining compound between the bearing and the housing?”
Chinese GE20ES-2RS bearing £2.30
SKF GE20ES-2RS bearing £20
Hopefully the increased price is a reflection of the quality…
|
| |
|
|
|
|
|
|
|
|
|
|
The SKF bearing arrived and guess what – night and day difference… however there is still a very tiny bit of slack which I was not expecting, the bearing arrives bone dry (with a graphite coating) and I’m hoping that greasing it up will take up the little slack left.
I drilled the gear linkage housing and fitted a grease nipple. You can just see the bearing grease feed hole in the pic.
I then installed the bearing and Loctite bearing retaining compounded it into place complete with its original circlip (that made a bid for freedom and managed to fly down a 3mm gap between a cupboard and a wall. If I had a box of 100 of the bu&&ers there isn’t a cats chance in hell I’d be able to replicate the flight path. Grrrr)
Then I greased it up. And re fitted to the car.
Feels great.
I’ll test drive soon ish and report back.
|
| |
Last Edit: Jul 24, 2017 12:17:28 GMT by maxypriest
|
|
|
|
|
|
|
Chinese poop  New SKF bearing in situ - (God – just look at that welding :-( I was having real problems at that time; I thought I was just a rubbish welder, then I had a go with an little old Clarke welder and laid down some beautiful beads with great shape and penetration. Found out that my SIP TOPMIG 180 has wire speed issues thats a known problem…. GRRRRRRR.)  Grease nipple hole - you can just see the bearing oil gallery  |
| |
|
|
|
|
|
Jul 24, 2017 12:56:16 GMT
|
|
The speedo gears are in (from Garagistic). Pics below to show the process. I greased them up with some Superlube.
The plan was to swap my 160mph speedo face and needle onto the Elec unit which is again 160mph (so the fading or lack of would match), but would you believe it – they are not interchangeable!!! Neither are the needles – the shafts have different diameters!
Then I sent the speedo head unit off to a company who can reset the gears to the correct mileage of my car.
When the unit came back I installed it into the cluster, connected the elec unit to the speedo loom I made with a Healtech speedo converter loom that is in turn will be attached to a speed sensor attached to the diff via a pre installed bracket (I was thinking ahead…).
I also included a bulb for the glow plugs so I know when to crank (I’ve been counting to ten) and also it shows up codes if there is a fault with one of the plugs.
I cleaned and lubed the rheo (works really well – top W124 tip) for the dash lights and installed some LED’s for the dash illumination, lower heat and the same about of light – double happiness.
All tested OK with the exception of the speedo, until I get the prop back on she ain’t going anywhere….
|
| |
|
|
|
|
|
Jul 24, 2017 13:00:07 GMT
|
|
|
| |
|
|
|
|
|
Jul 24, 2017 13:00:49 GMT
|
|
|
| |
|
|
|
|
|
Jul 24, 2017 13:03:17 GMT
|
... and the new gears are fitted and greased .... The washer is a loose spacer, should stop some potential cross meshing Blast i hope they work!   |
| |
|
|
|
|
|
Jul 31, 2017 10:00:29 GMT
|
|
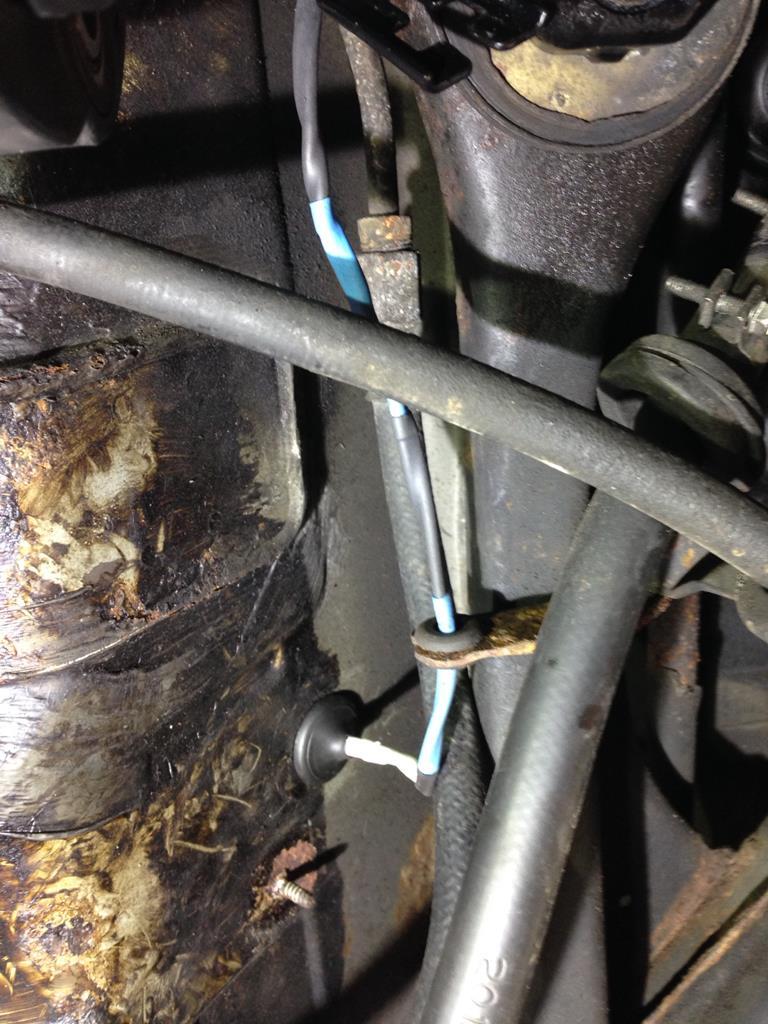
…… Crapola - nothing is ever straight forward - the bl00dy ABS sensor is on the other side of the diff nose so the wire is too short and the connections are different. Apart from that its a straight swap….
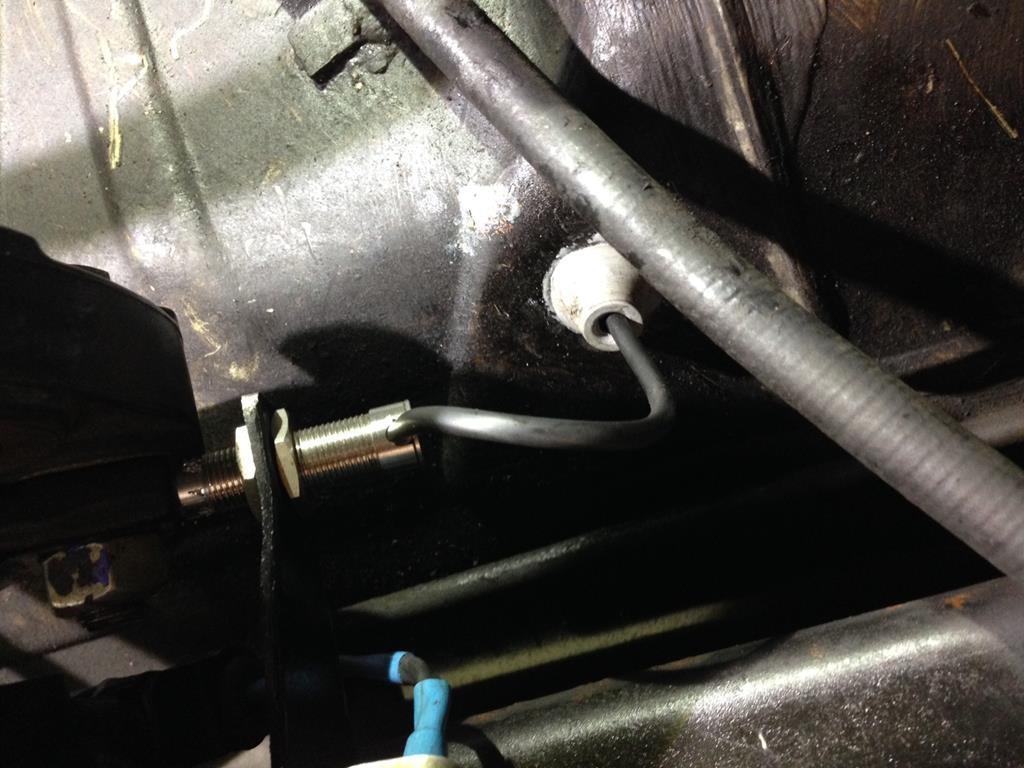
So I have wired in a hybrid (hence different coloured shrink wrap – I was running out of black!) R129/W124 SL500 ABS sensor (that incidentally is 90degress differently orientated than a W124 one…) . Done.
I’ll also fitted the speed sensor to the diff and drill/grommet’d the wire through the body. I ran the wire under the back seat and over the top of the transmission tunnel to meet up with the loom I made to run the electronic speedo.
….It took 1 hour to push the wire 4” under the carpet because it’s so well fitted to the floor.
Prop and exhaust back on next.
|
| |
|
|
|
|
|
Jul 31, 2017 11:35:39 GMT
|
 Extended hybrid R129/W124 abs sensor. |
| |
|
|
|
|
|
Jul 31, 2017 11:37:29 GMT
|
 Speedo sensor and grommet. |
| |
|
|
|
|
|
|
|
|
Damping and Control
Before I fitted the new Meyle HD transmission mount I thought I would firm it up a touch with some 20 shore polyurethane. The original plan was to just fill the top airspace and leave the bottom free, but as usual I went mad at the last minute and filled the whole bl00dy thing. It’s the mk3 version in the following picture.
The G-box JUST fits the tunnel and the space between the top and the transmission tunnel roof is very tight – hence the various mount incarnations in the picture. To be honest the Mk2 version has been the best one so far.
The Mk1was terrible. It’s a 95 Shore job and rock hard and the car felt like a tractor from the initial start up and got worse from there.
I have only moved the car 20 yards in the garden (see the next post) however the initial thoughts are I may have gotten away with the Mk3 madness – start up has not shown anything untoward. Road test this week – the Mk2 may make a return... we will see.
|
| |
|
|
|
|


