iainw
Part of things

Posts: 103 
|
|
|
|
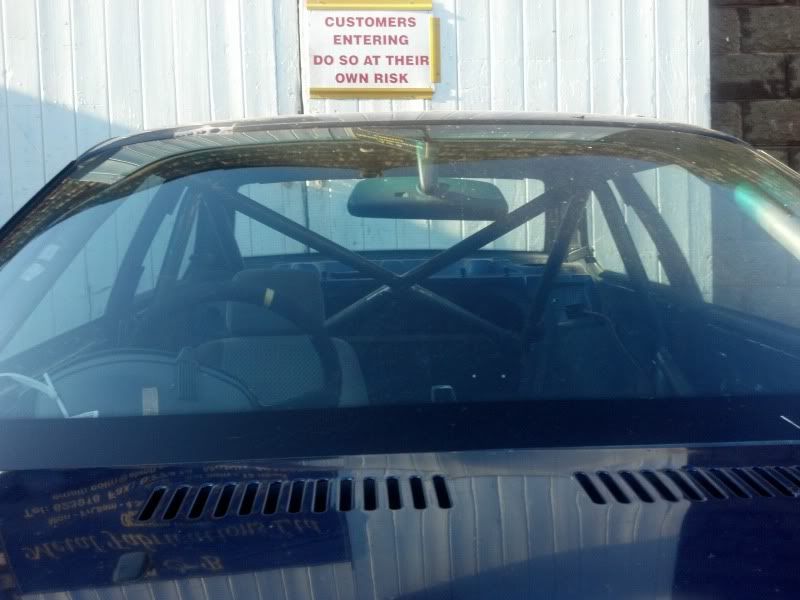
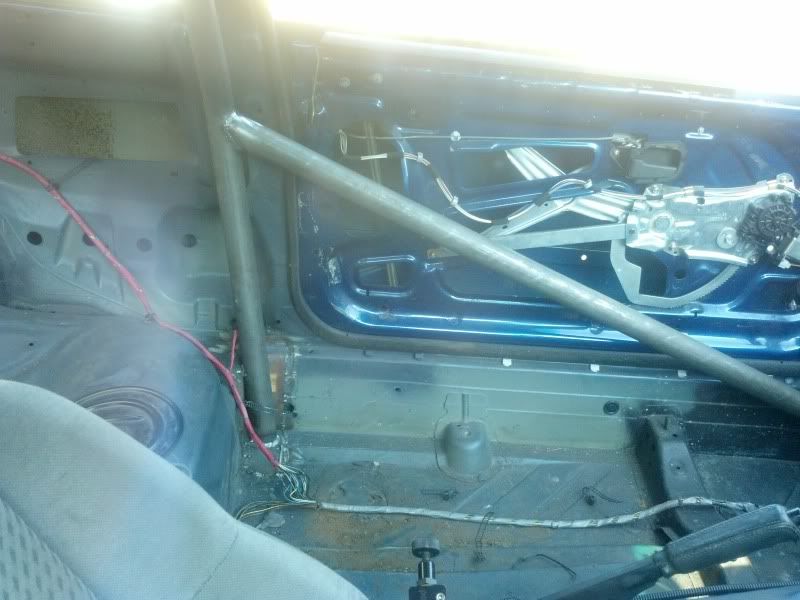
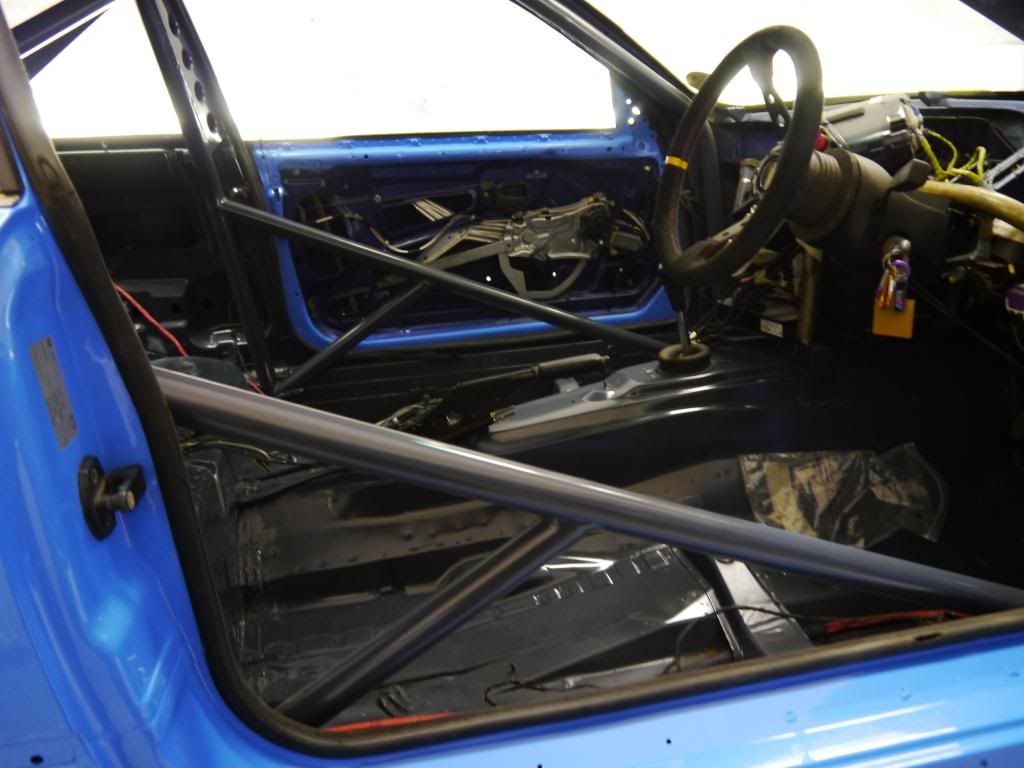
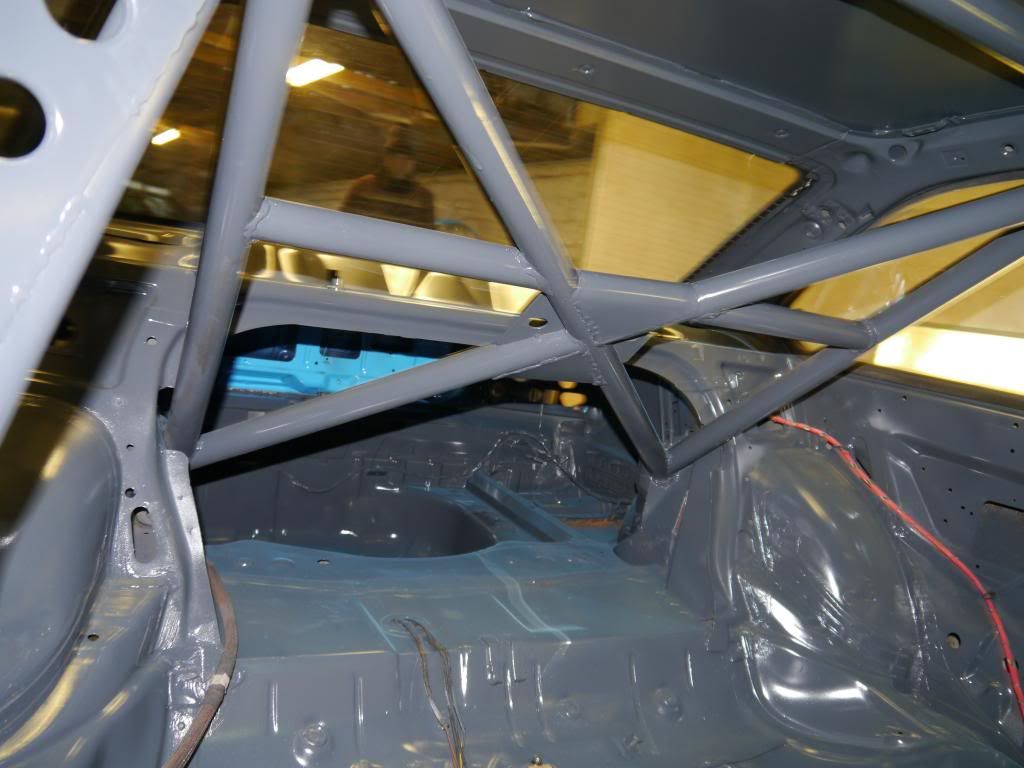
Seeing as the e30 m3 is slow going (stuff is happening, just not interesting stuff) i thought i would chuck up my other (turned into long term) project that spiraled out of all control / budget / spec / timescale for you to laugh at ;-) Well guess a short explanation is in order: This has been acquired for a couple of reasons: 1) Everything i do to the e46 M3 to make it better on track, makes it slightly less comfortable on the road, and on my current trajectory it will end up being very little fun at all for anything other than a short hop, so I really need to stop messing about with it. 2) My e30 318is has gone to a new owner, so i now have a little space. 3) I start to physically twitch if i don't have something to mess about with. So with the above in mind I decided it was time for something more track orientated bet that would also be quick enough for me to more or less be able to leave the engine alone, it also had to be cheap. So after looking at a few options, and probably better cars :lol: an e36 N reg 3.0 coupe was found. It was/is curse word and had been fairly extensively dissembled. 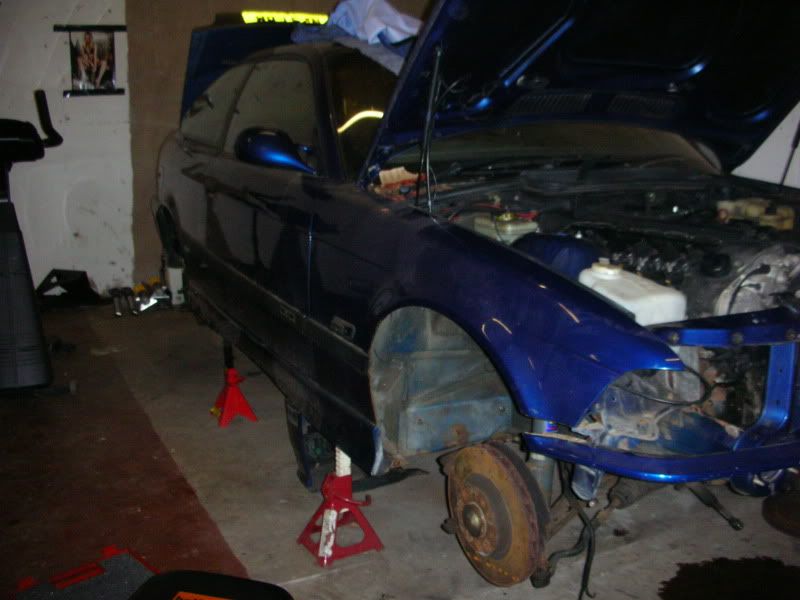 However a deal was struck for the princely sum of £1350 to include a two piece GT rep spoiler, a Mocal 10 row, evo front lip, bonnet pins, and was supposed to include a decent looking 6 point cage. This left me with a problem as i (for work reasons) live on the Isle of man and the car was in bits in Shrewsbury :roll: So a few calls were made and the many wel knows forum individuals came both to assist and put me up for a night. (special thanks to: Ollie, Coxy, Passenger Face "lee", Sniff Petrol who all pitched in to get the job done in a day, it couldn't have been done without their help) Either way after a bit of a mammoth effort where exhausts didn't fit and brake hard lines needed to be completely replaced the car was rolling again, sadly there was no way the roll cage would fit, it just wasn't happening  so not sure what to do about that at the moment, chances are it will be a new cage. Anyway, having got into a safe condition, i then nursed/flogged it 140 miles up to Heysham ferry, ensconced in this very fetching gentleman's smoking seat. 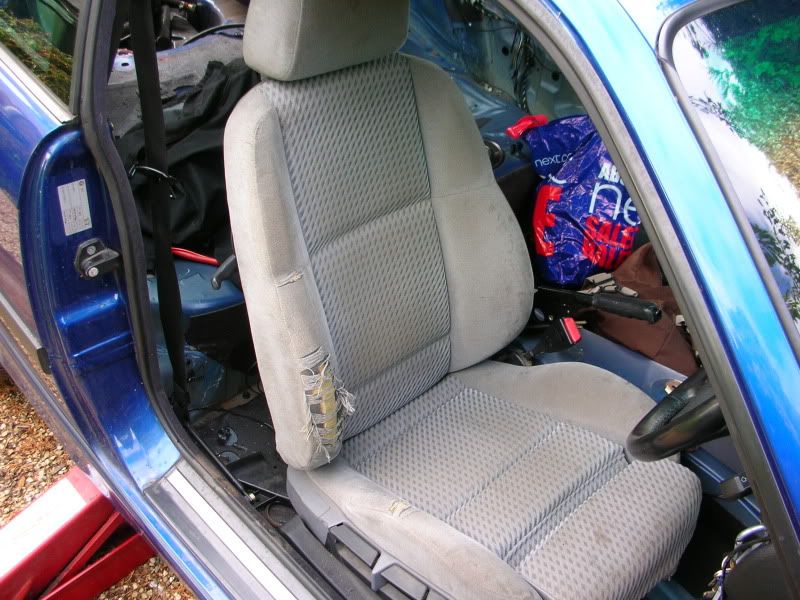 It was, er, nice. To be honest i have done curse word all on the car until this weekend as its just too dark and too wet, and i couldn't be bothered after the weekend spent putting it all back together. So i have started to get cracking this weekend, we Sunday afternoon anyway. So all sound deadening removed (still needs a wipe down) 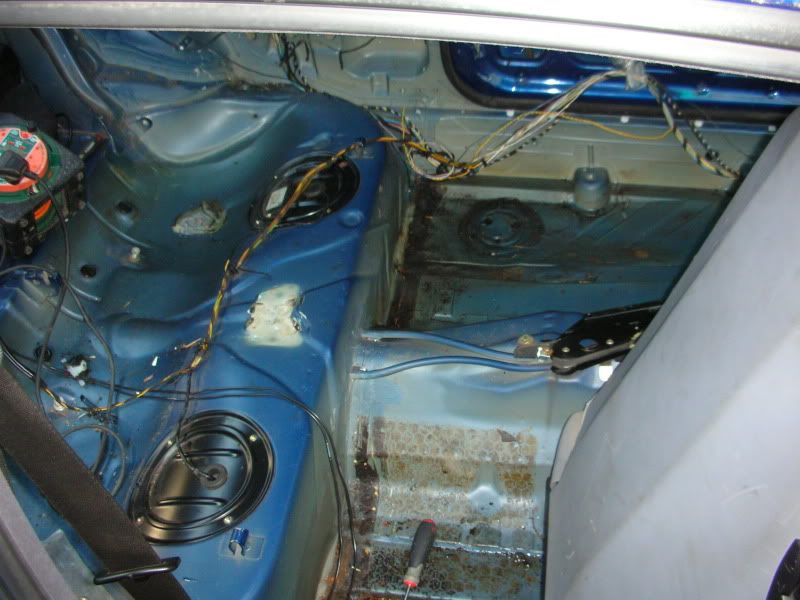 Most of the rear wiring removed: 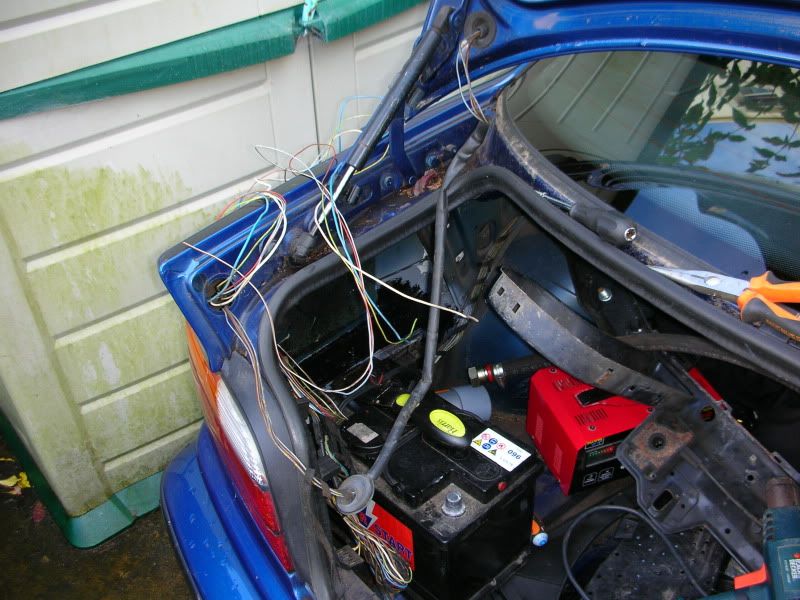 Take another look at the nice ALLOY doors the car has! WOOT! 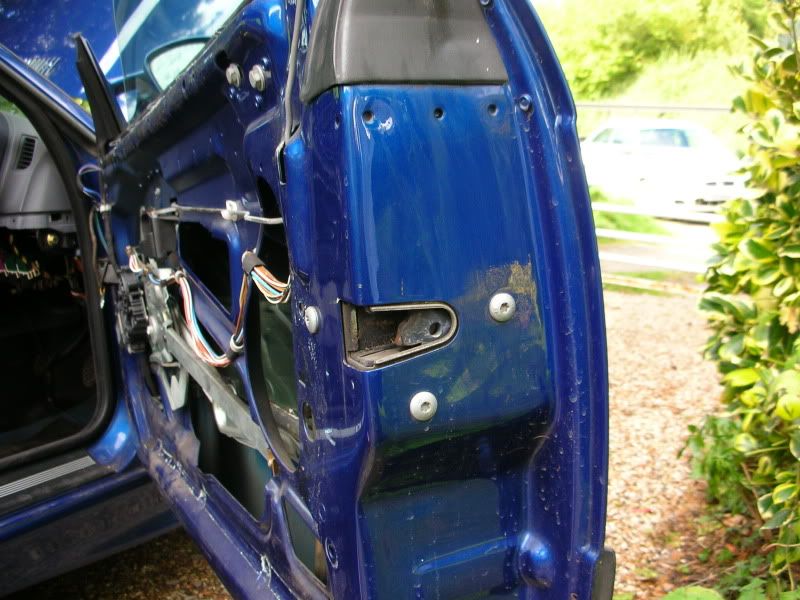 As the original center section is completely dead I bought the Stainless evo one the seller had for £40, problem is its got no lambda fittings, so Drill first skin: 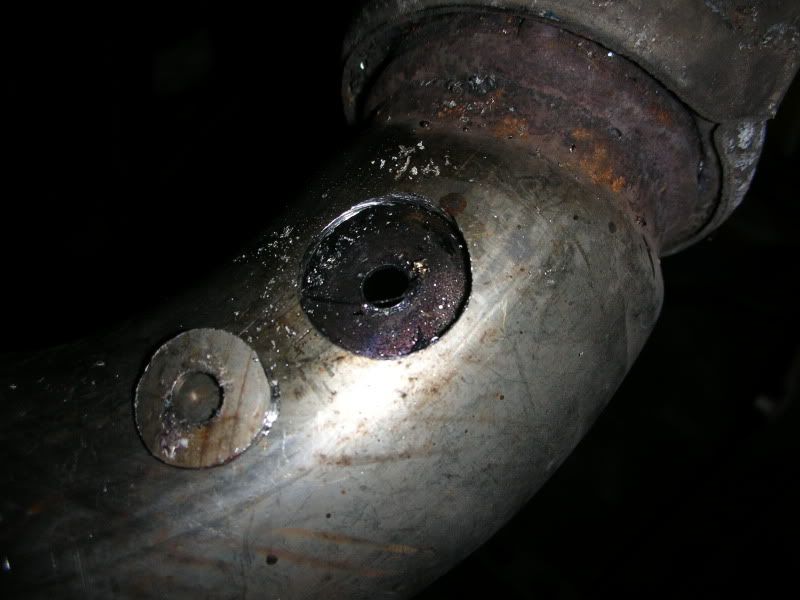 Finish drilling the rest of it :roll:  Fit lambda boss's 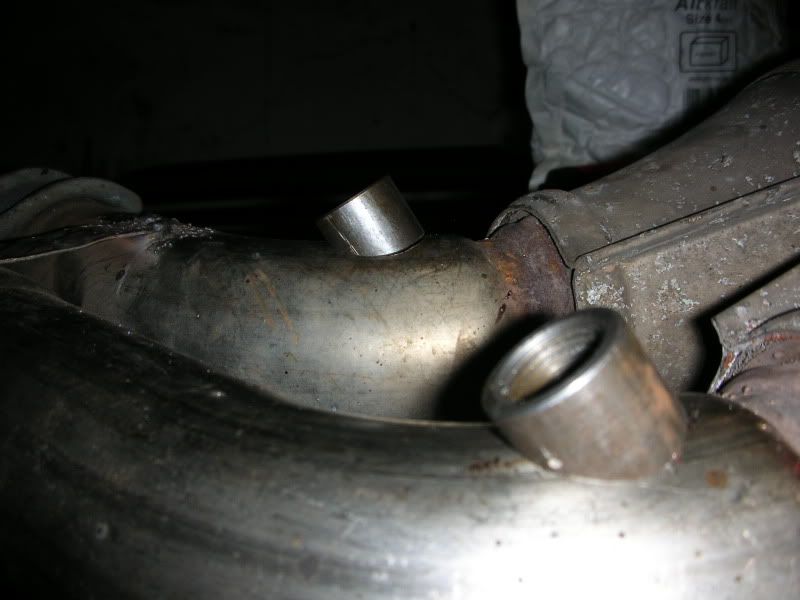 Will get that fitted to the car later, but at least its ready to go on. Job list includes: Fit ARP bolts and new bearings (hopefully that will sort the very very slight knocking that i can now hear round cyl 5/6 :cry: :roll: ) Repair and weld rusty rear arches Seam weld any sections that look like they need reenforcement. Fit electric fan Flock Dash Remove all body brackets and wiring that is now redundant Fit standard e36 rack Replace ALL new balljoints and bushes. Fit plumbed extinguisher Fit proper roll cage Replace diff plates and install lower ratio Polly rear windows May look at fitting an evo head and itb's twin pump and foam baffle in tank Sort out brakes Replace fuel and brake lines spray car and interior Fit livery Lots of other things i have forgotten :lol: Man that list looks big. Looking to try and achieve this for about 3/4k so if i cant do it myself, it won't be getting done. |
| |
Last Edit: May 30, 2017 20:47:49 GMT by iainw
|
|
|
|
iainw
Part of things
Posts: 103
|
|
|
|
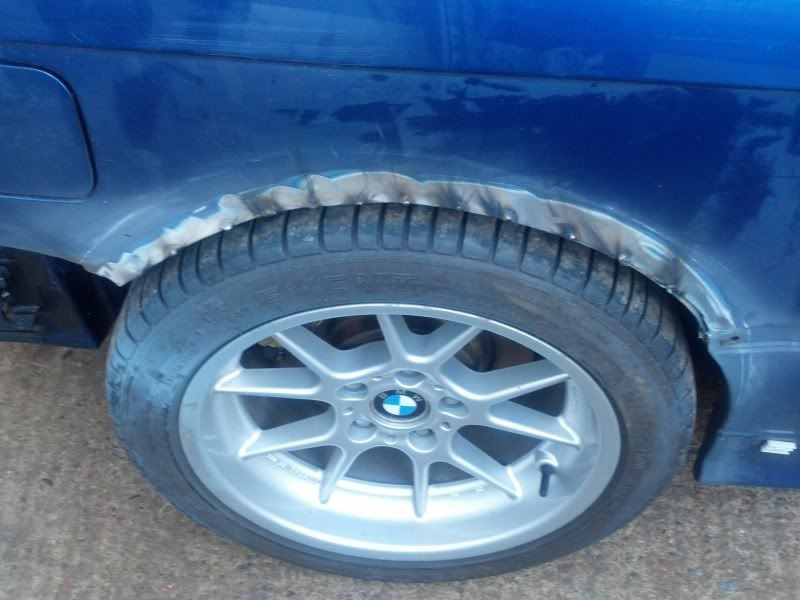
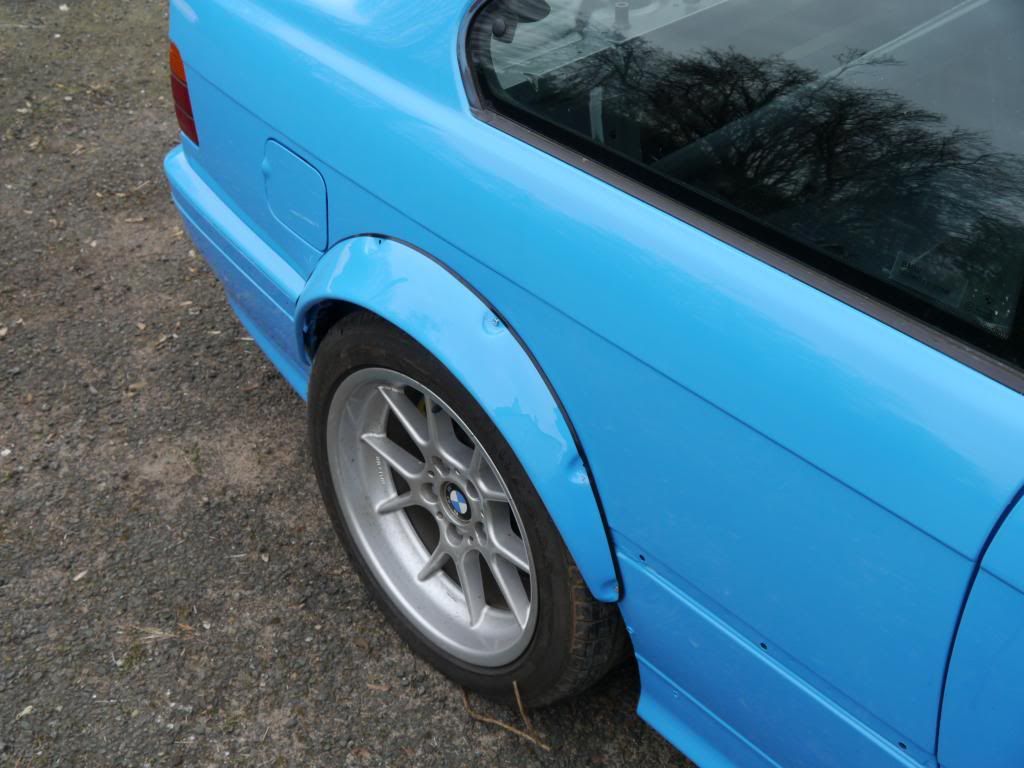
Well another late start of a Sunday (just too dark by the time i get back during the week) i got cracking on the rusty rear arches, ergh :roll: Well in short the offside cleared up to bright metal ok 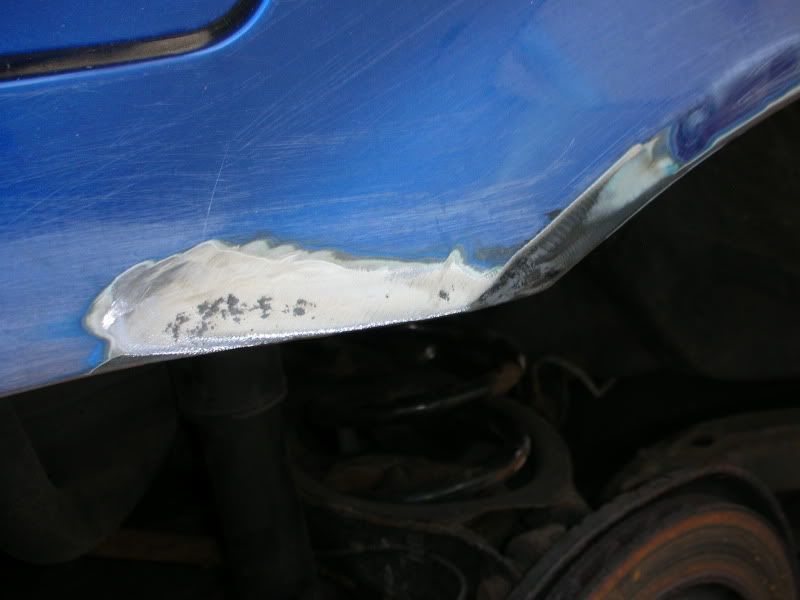  But the nearside not good, to be fair i knew it wasn't going to be pretty. 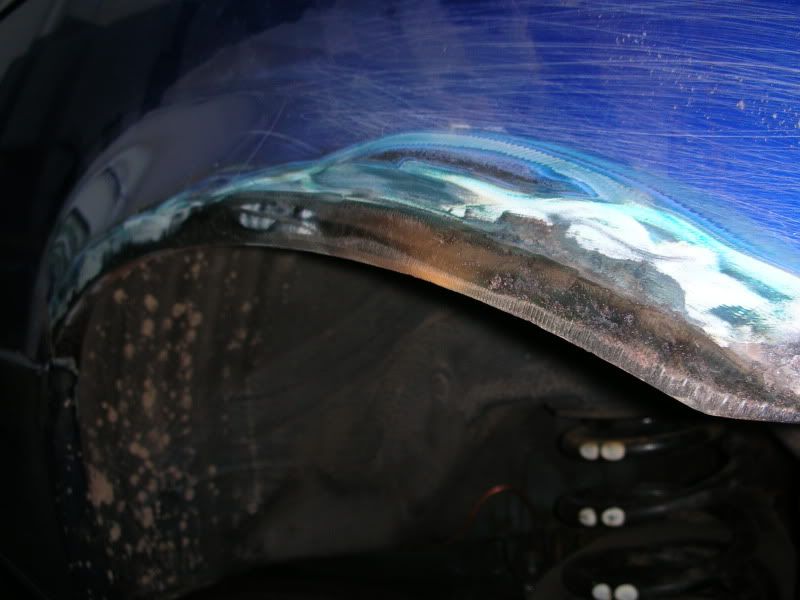 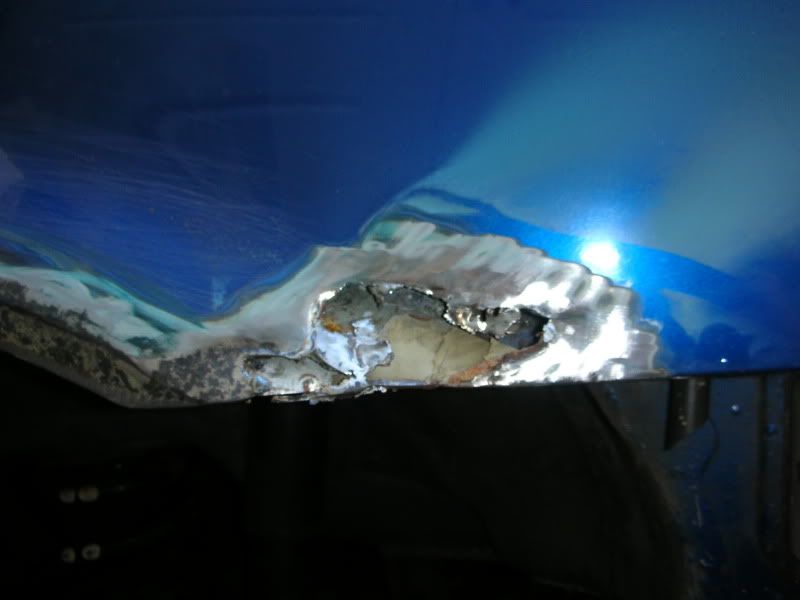 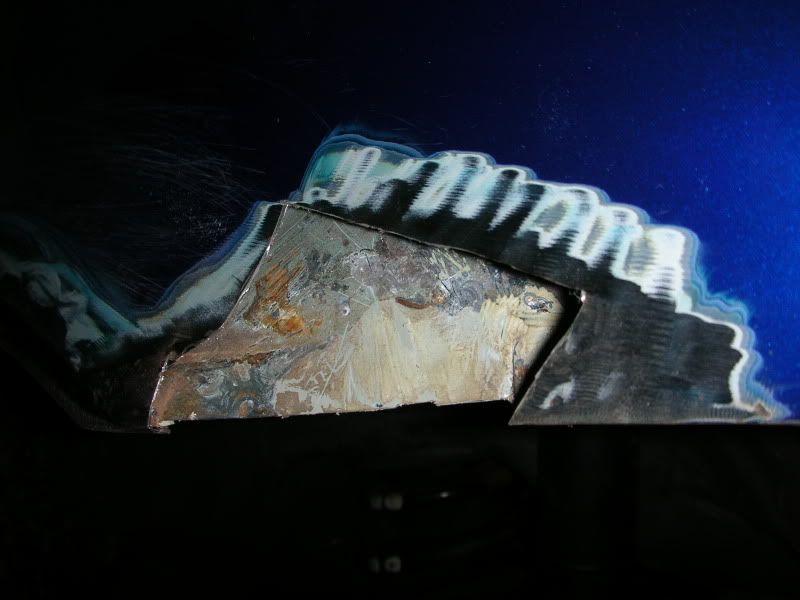 Interestingly, there seems to be a obvious reason why they all rot out at this point on the arch  The inner and outer arches, are not welded, they are simply bonded together with the same seam sealer you can feel in the inner lip, could be worth considering if your considering if your going to rake it all out to roll the lips. There is the odd spot weld here and there, but the bulk of the outer arch is secured just with seam sealer! boot came up ok though! 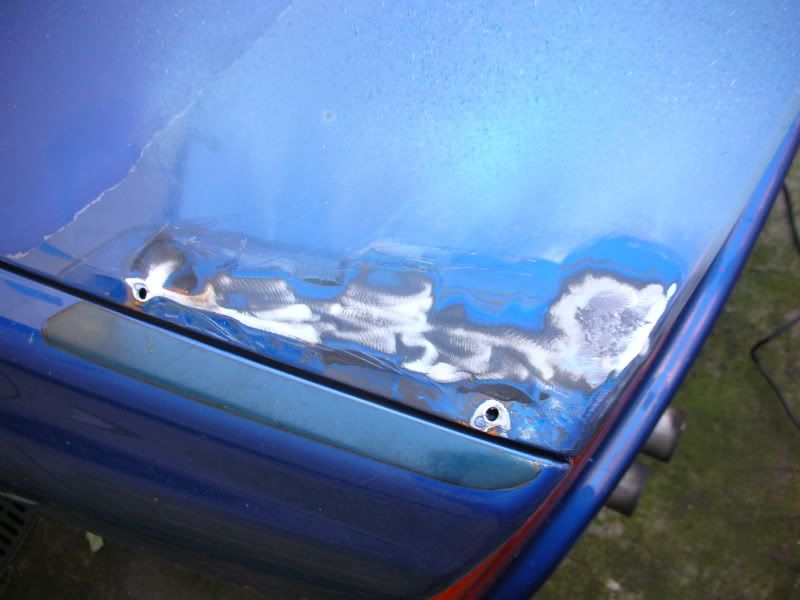 |
| |
|
|
iainw
Part of things
Posts: 103
|
|
|
|
Ok, so what has happened, well I have been lying on my back in the dark while snow falls around me with my balls trying to utilise the warmth of my small intestine, i get frostbite on my cock and rust in my eyes. Frankly the car is a bit manky underneath, though fortunately nothing that cant be resolved with a flap disk and some por 15 and seam sealer, though i dare say if it was left for another few years it would be game over for the shell. Fist off diff out and back axle down (this is a curse word in the cold, on your tod on axle stands)  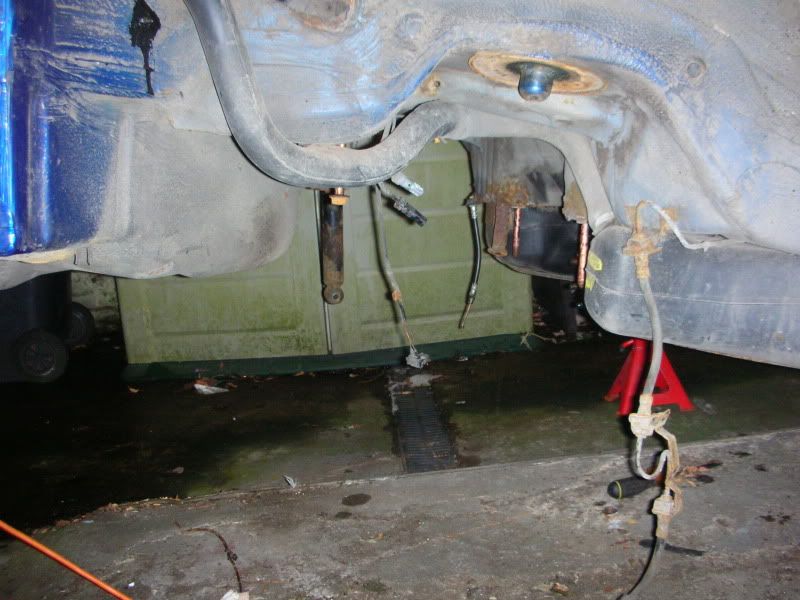 This was almost plain sailing, with the notable exception of one of the unbelievably rusty rtab bolts :evil: :roll: 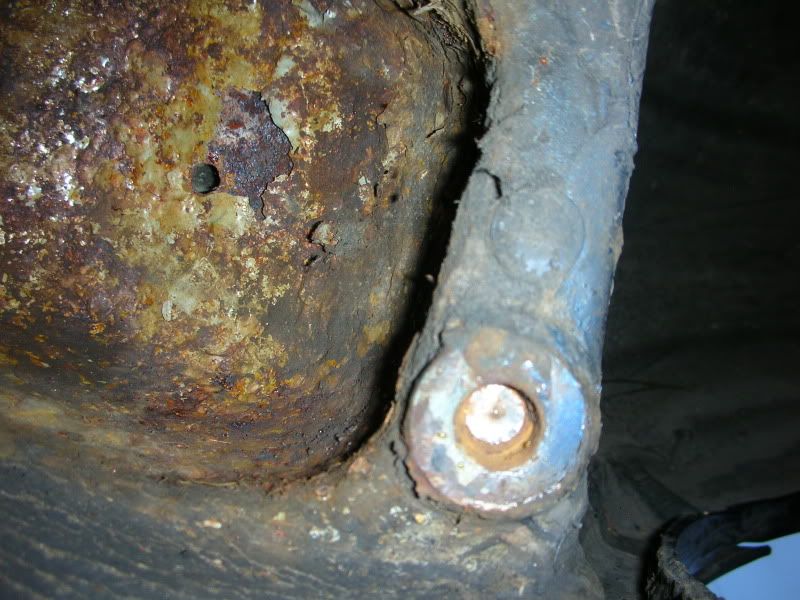 This will doubtless be a ball ache to get out, but one way or another it will get sorted, even if i have the fill it with weld and drill and tap it, curse word thing. Then in the warmth of my basement i broke the axle down and stripped the diff. It was very crusty Roll bar 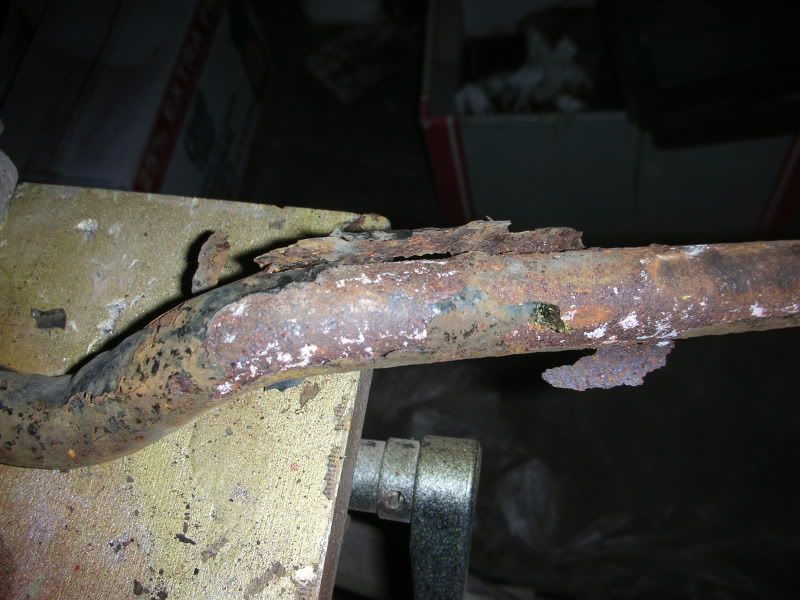 De-crusted 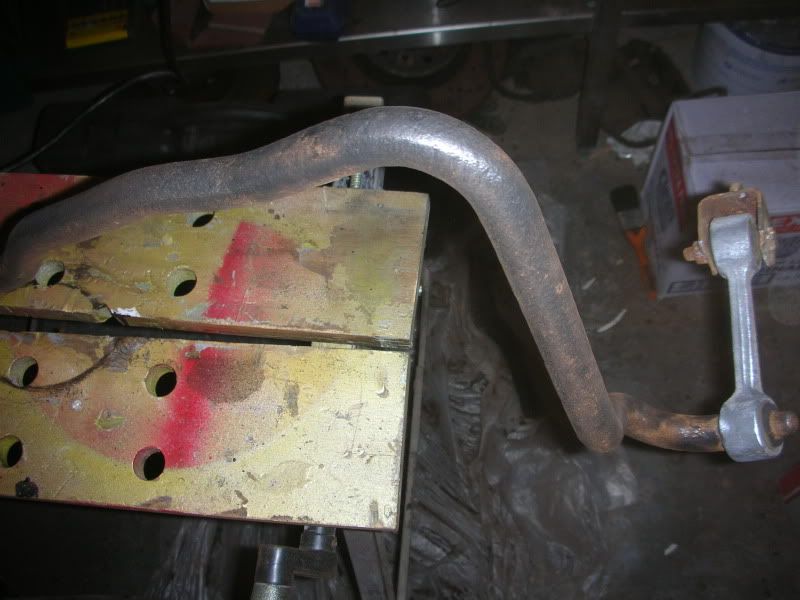 done 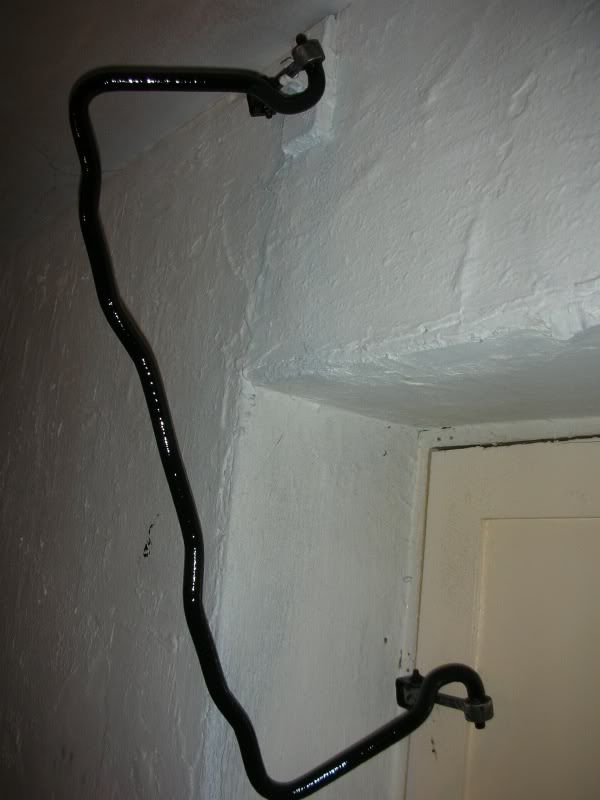 Diff case and bearing races de crusted and treated 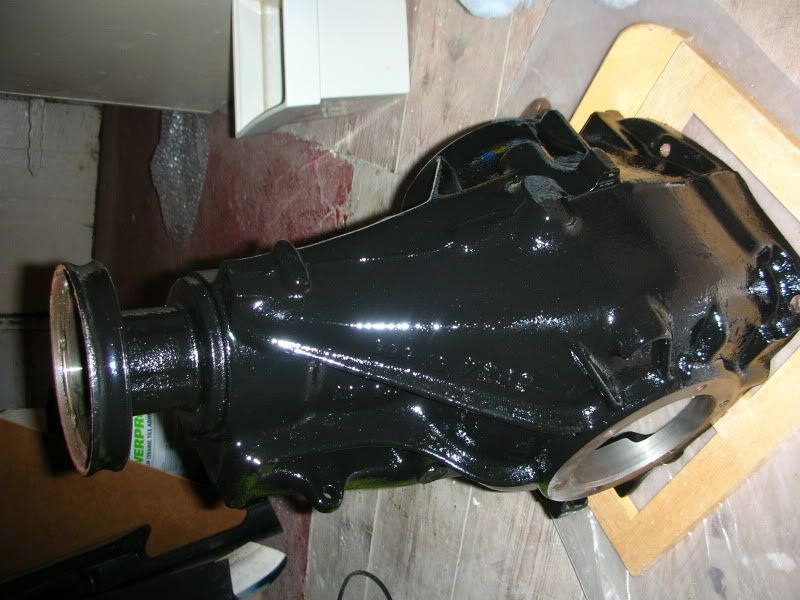 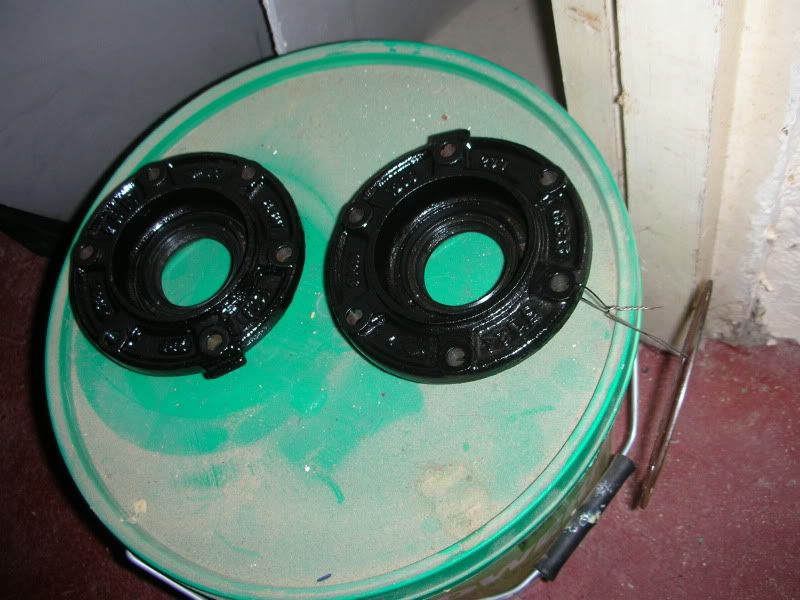 Diff has been completely stripped, de-greased rebuilt with the tolerances measured ready for its reduced ramp angles, 3.64 ratio and possible 4 plate conversion. 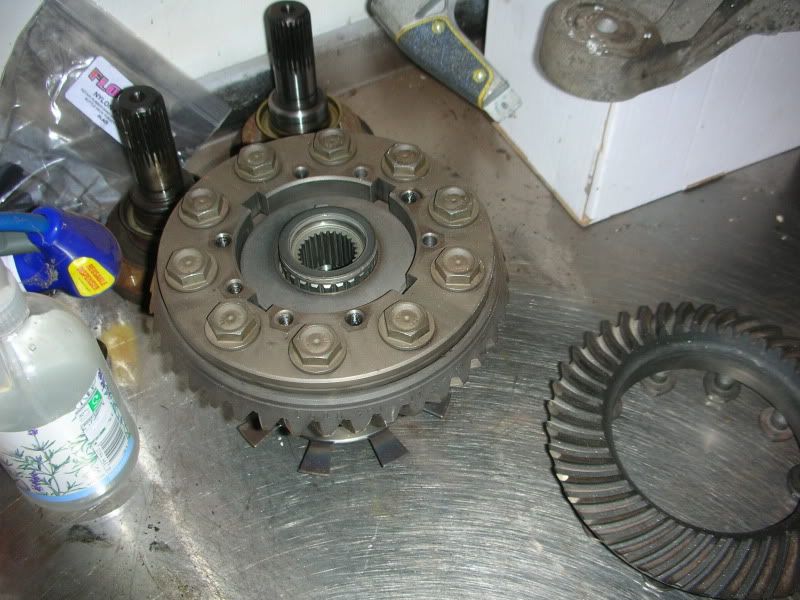 Rest of the axle will recive the same treatment, with either 90 grade polly bushes, delrin diy bushes, or alloy inserts, or as a last resort oem replacements, all bolts will also be replaced, as they were all fooked. 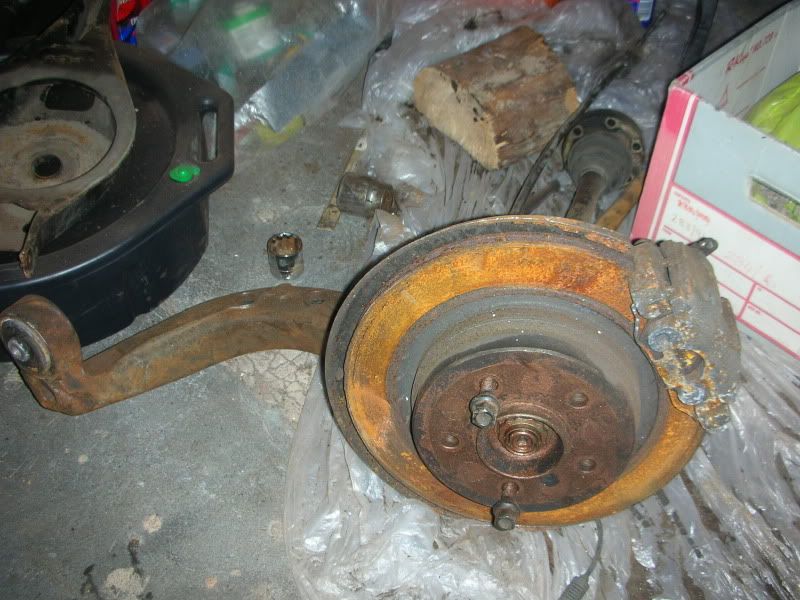 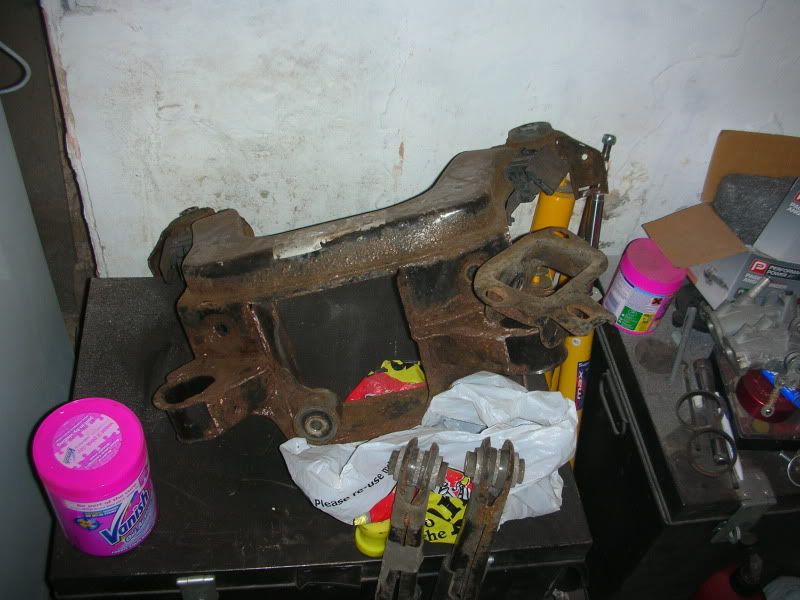 Massive pile of ultra hard polly bushings 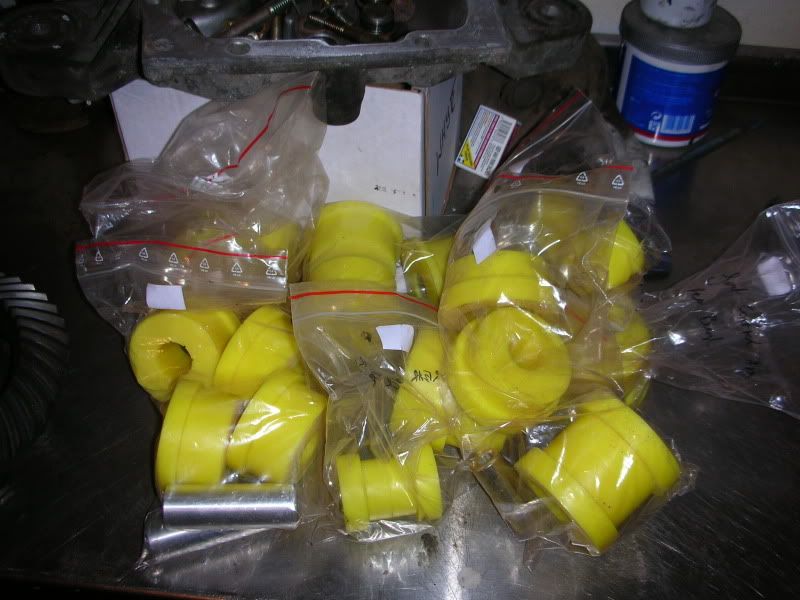 I also started practicing my flocking, I will be keepoing the center surround but I'm not sure on the glove box yet, it just strikes me as handy to chuck curse word in without it rattling all over the gaff. Flocked GB, still needs a final brush 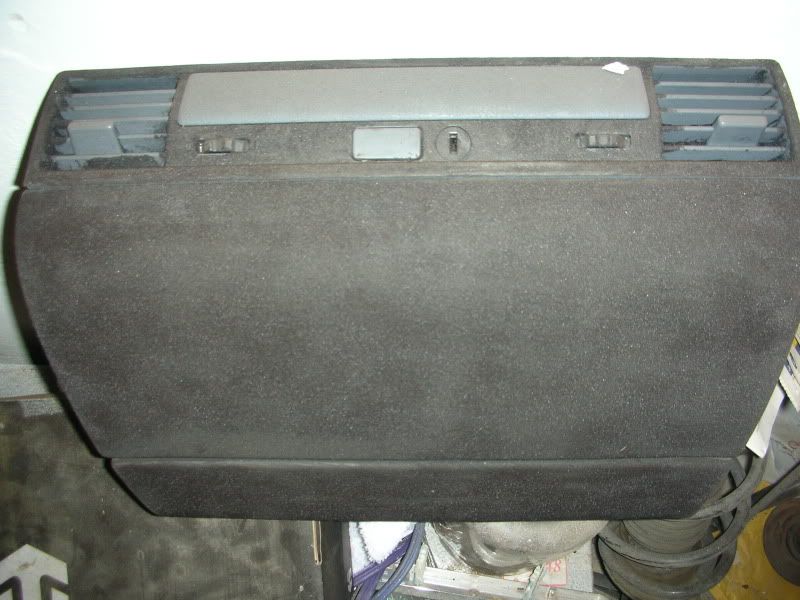 Flocked surround but retaining a little of the extended leather 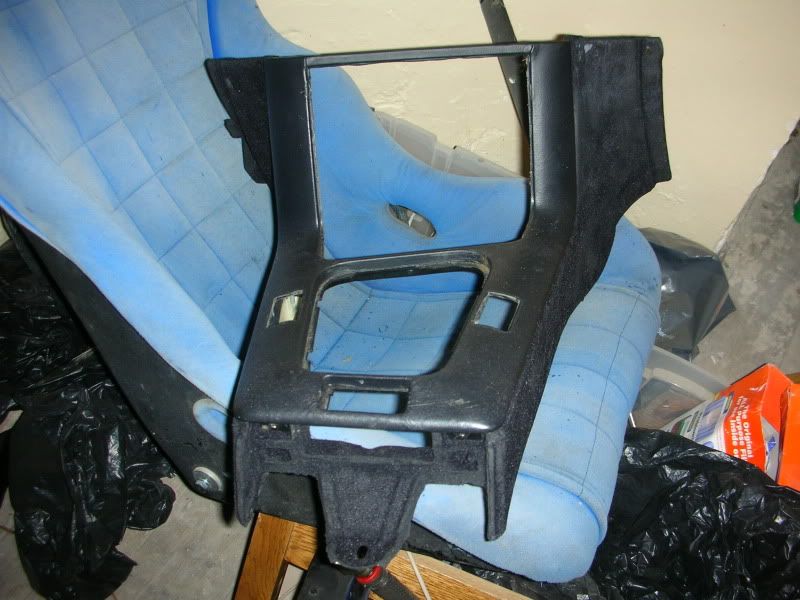 On the parts front things have still been moving Motordrive Kevlar composite buckets, tatty but light £40 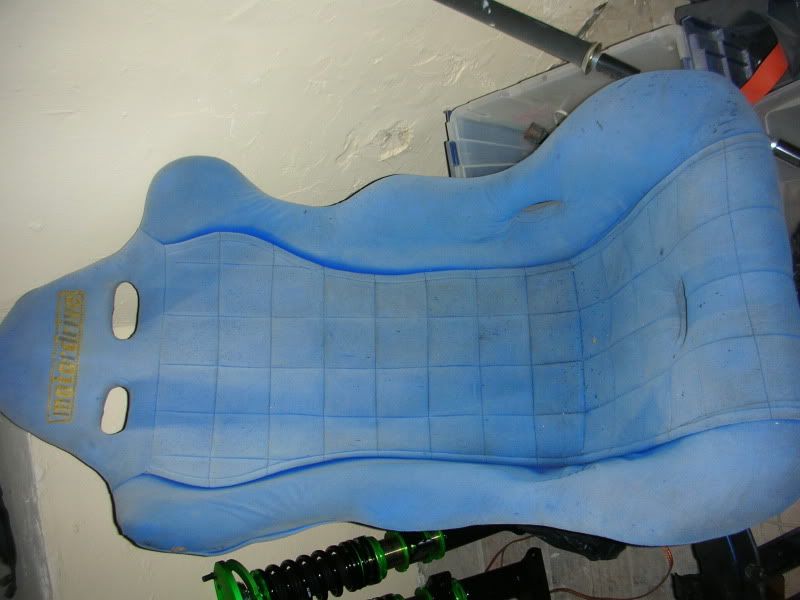 Willwood brake Bias controller (with the weight shifting to the front i want the option to limit rear brake pressure and its a pice of curse word as the rear lines will be internal £10 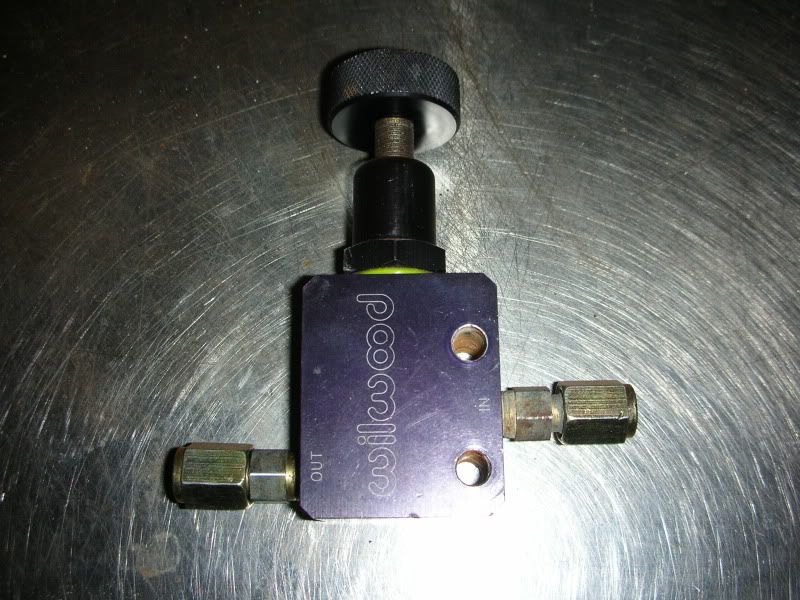 All in one gauge kit (bit like a rally budget stack dash) has Oil temp, Oil Pressure, Water temp, Battery volts, 8k Rpm meter, oh and a clock :lol: Comes with all the relevant sensors and adapters £80 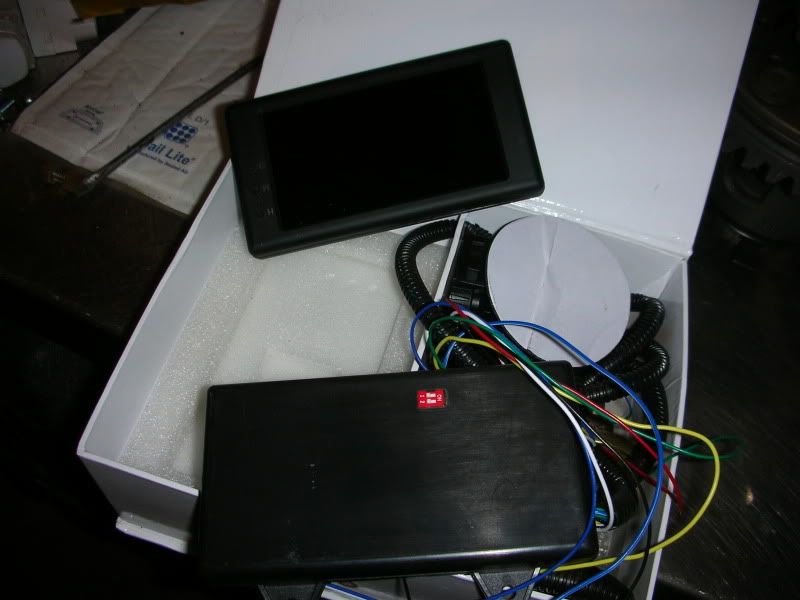 This is an idea of what its like outside :lol:  |
| |
|
|
iainw
Part of things
Posts: 103
|
|
|
|
Well i pulled my finger out a bit on Saturday eve and got a few bits done. Picked up the carrier/platforms/rtab housings from the grit baster, for £20 they blasted the whole lot so it seemed like a no brainer really. 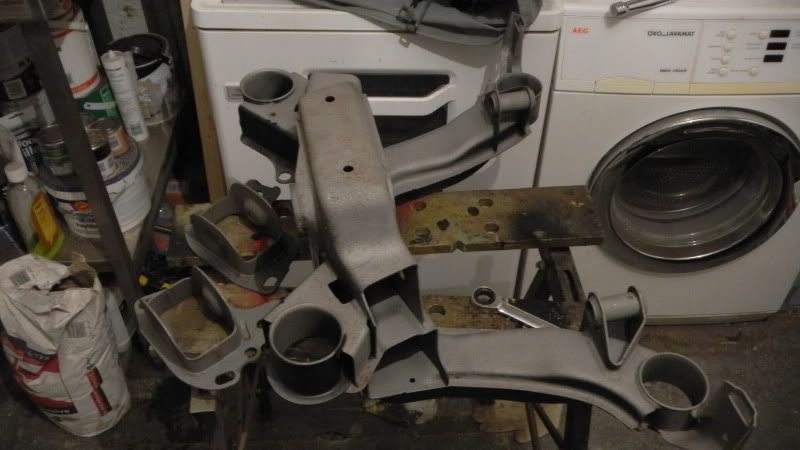 Pressed in the replacement front diff bush (very simple to do tbh) 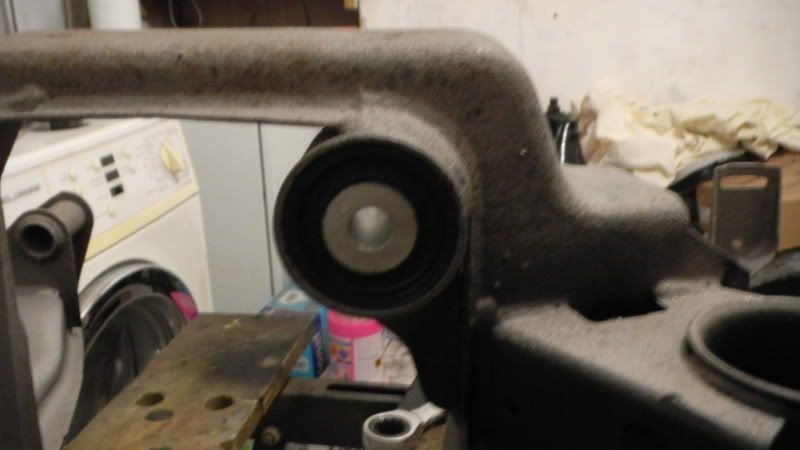 These were then painted with por-15 direct to the roughened metal, then given a coat of epoxy paint and a top coat of silver, so should stay corrosion free for a good while. I then fitted the 90shaw poly bushes Inner upper (don't think anyone other than strong flex makes these in poly) 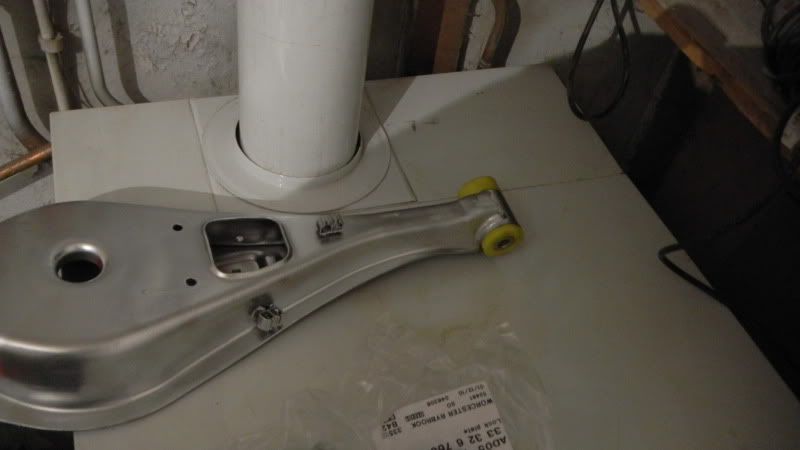 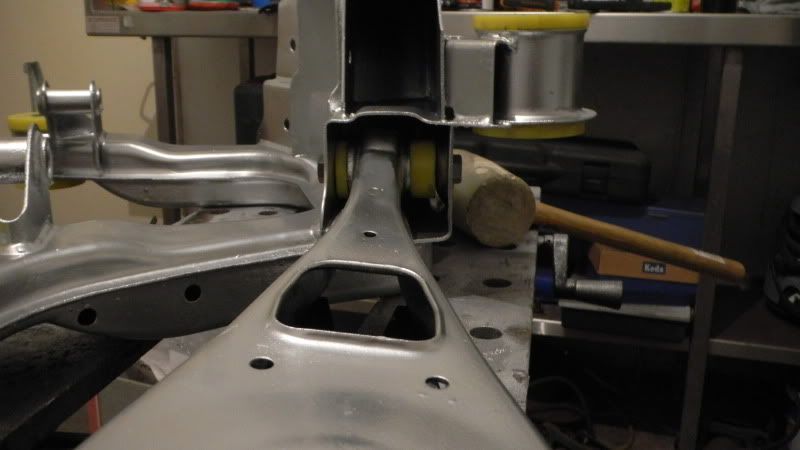 Carrier bushes 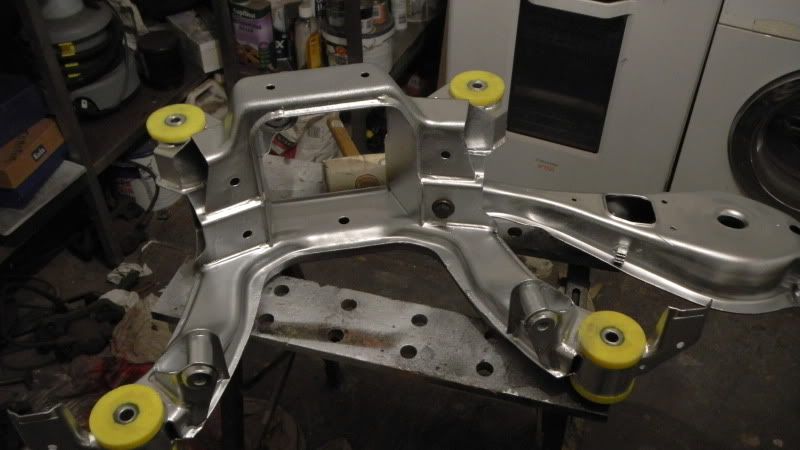 Then the lower adjustable arms (don't like thee really, they are probably 2.5x as heavy as the standard ones, but i have them and they will give me plenty of adjustment without the hassle of the camber bolts.) these were also coated in chassis epoxy 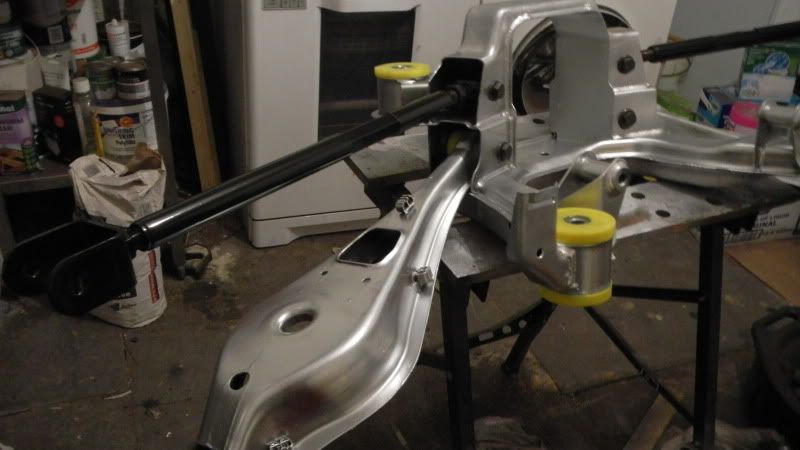 The diff cups are off being machined done to 30 degrees and the new 3.64 pinion is fitted, however the input seal doesn't look all that clever on further inspection so i need to swap that before doing much more with it. Once its not raining i will start getting it all back on the car and get to work on the front :thumb: |
| |
|
|
iainw
Part of things
Posts: 103
|
|
|
|
Bit more done. 30 degree ramps (spark eroded and polished) 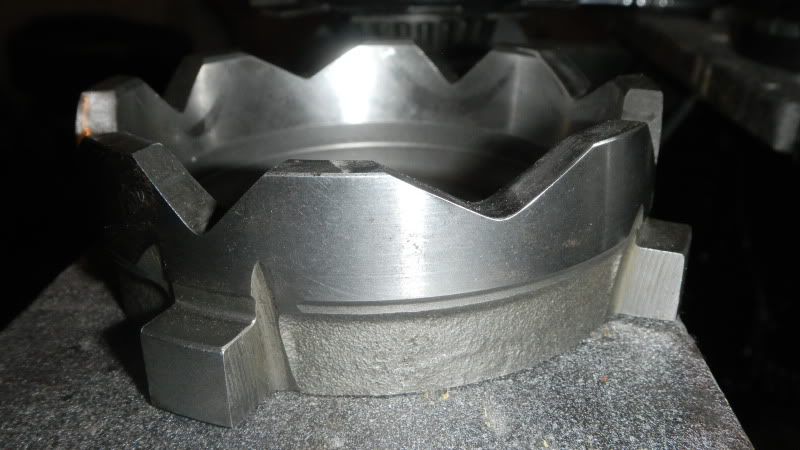 3.64 CROWN and pinion 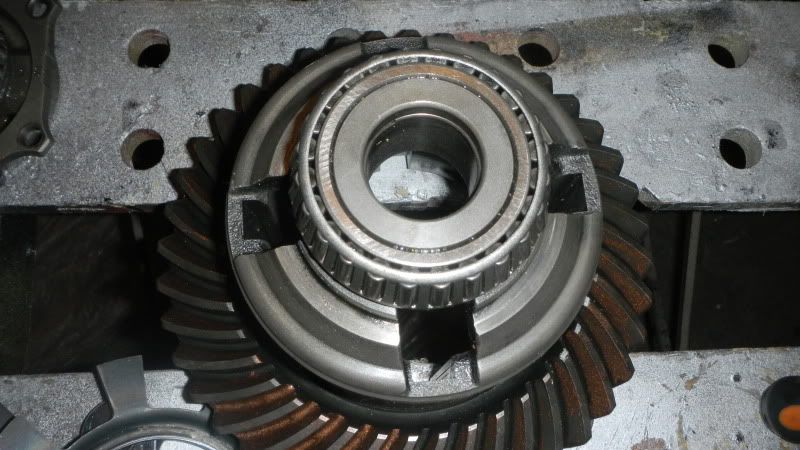 4 clutch plate conversion 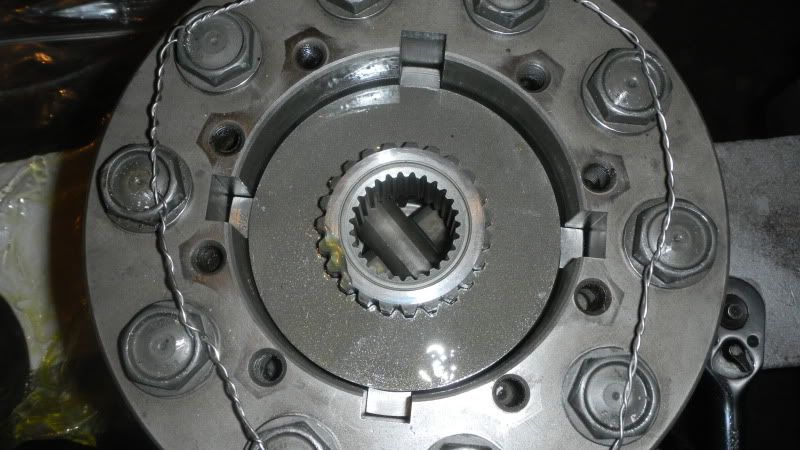 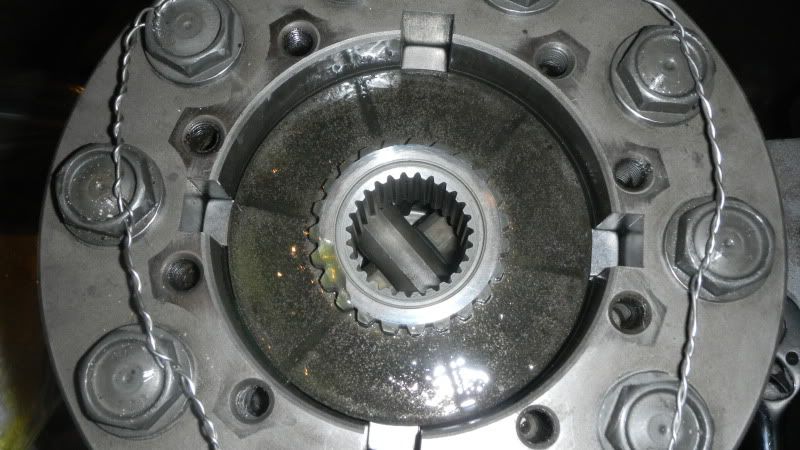 used 14mm precision tube to make bolt spacers for fitting the m12 bolt CROWN to the m14 bolt m3 cluster 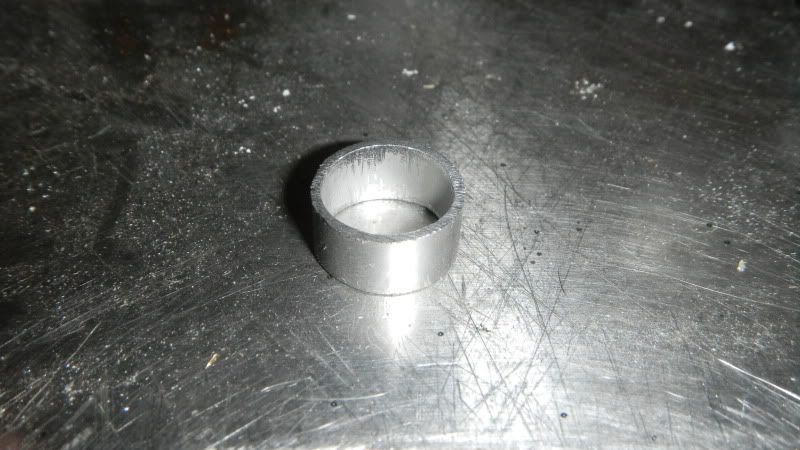 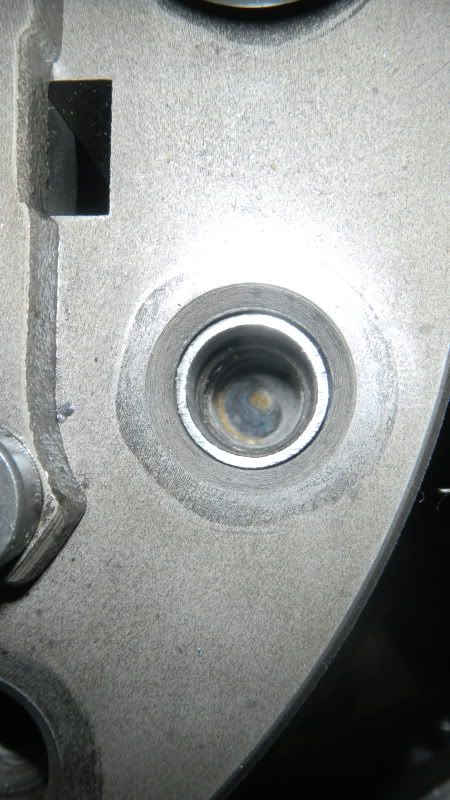 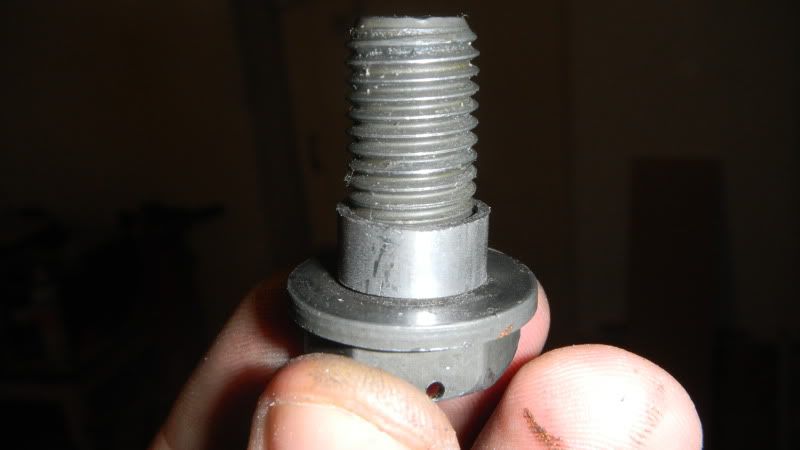 Drilled and wire locked the lot to be sure they will all be staying put! 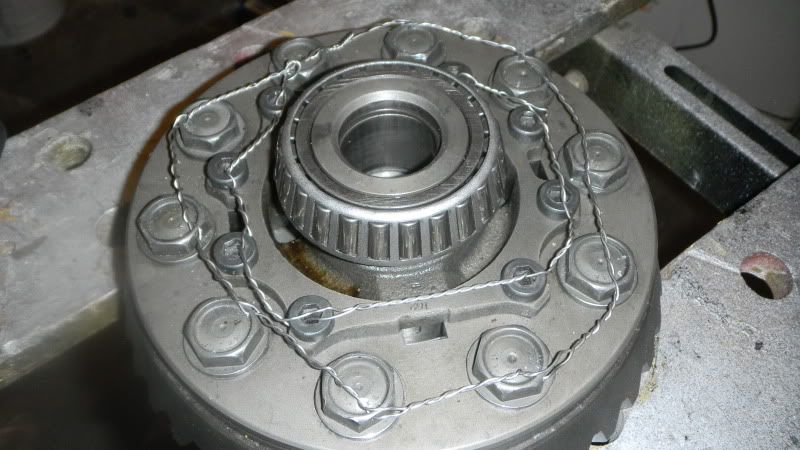 Also replaced all the seals in the diff to keep it good and oil tight and the cover bolts as the old ones were pretty rotten. All together eventually! 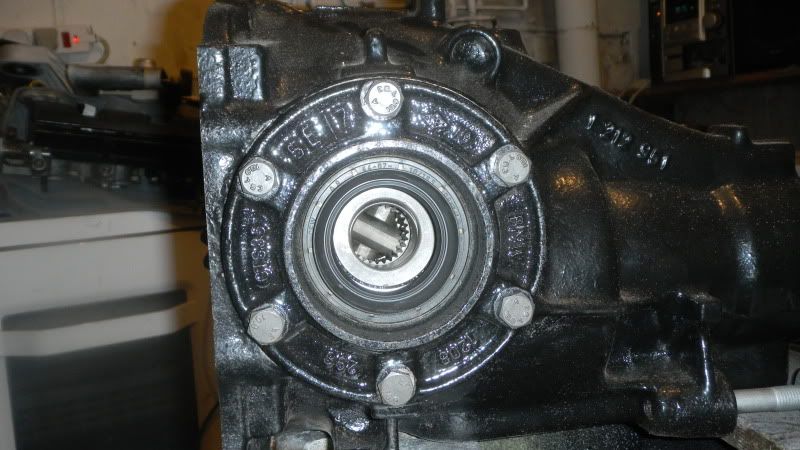 |
| |
|
|
iainw
Part of things
Posts: 103
|
|
|
|
|
|
| |
|
|
iainw
Part of things
Posts: 103
|
|
|
|
|
|
| |
|
|
iainw
Part of things
Posts: 103
|
|
|
|
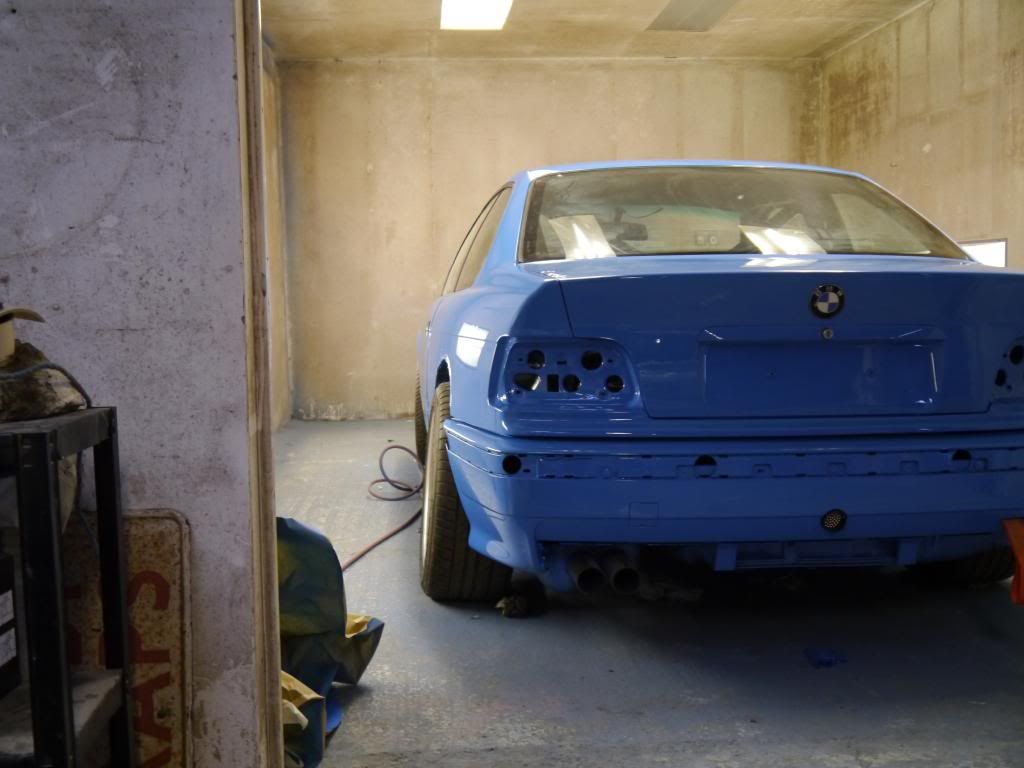
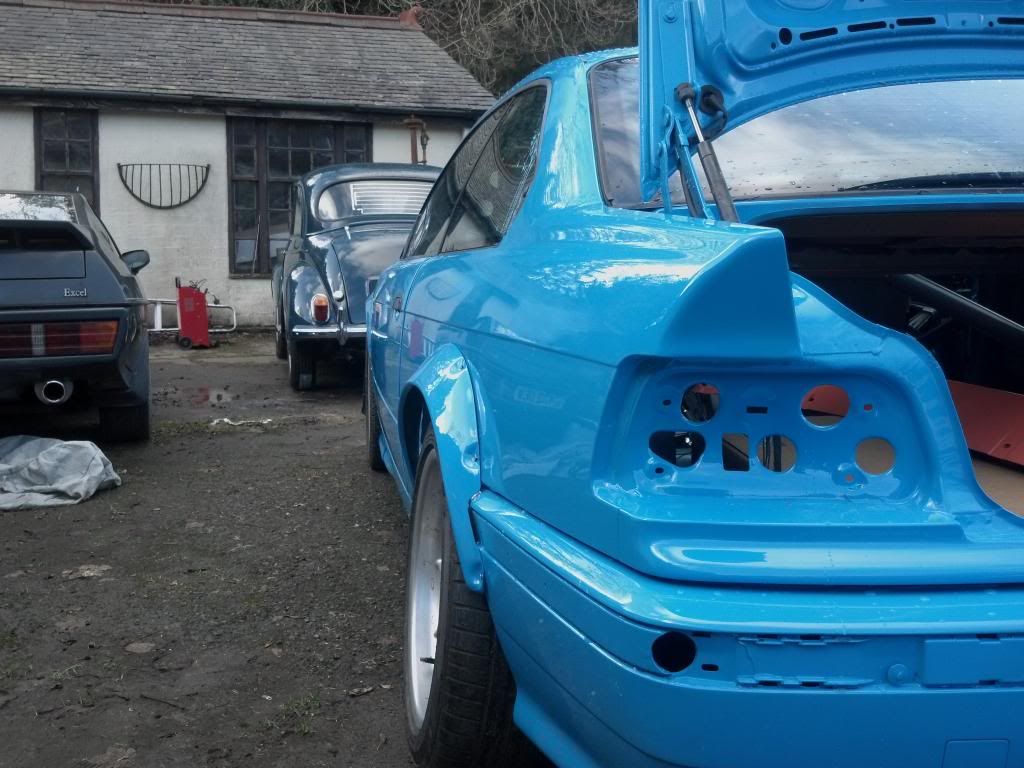
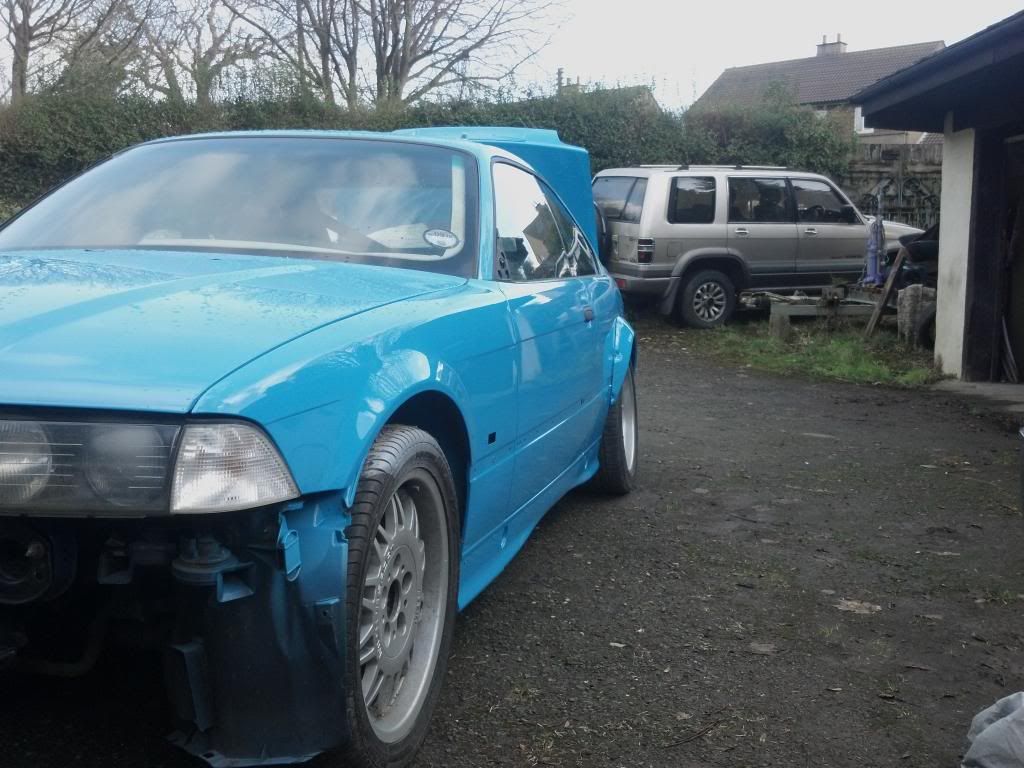
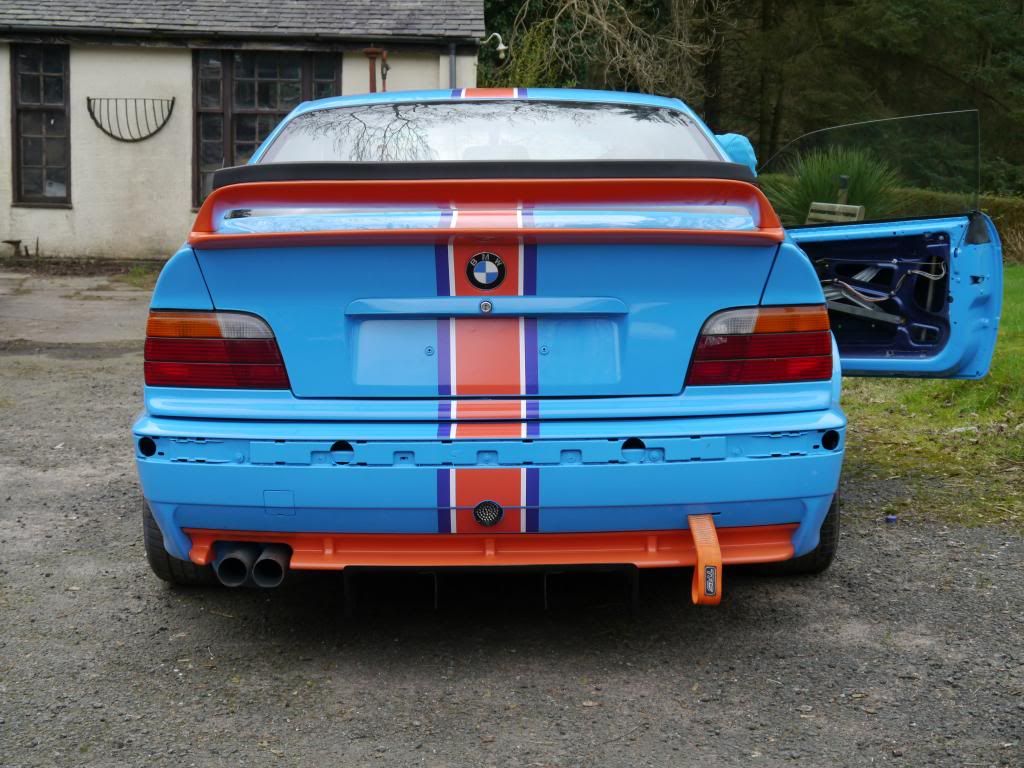
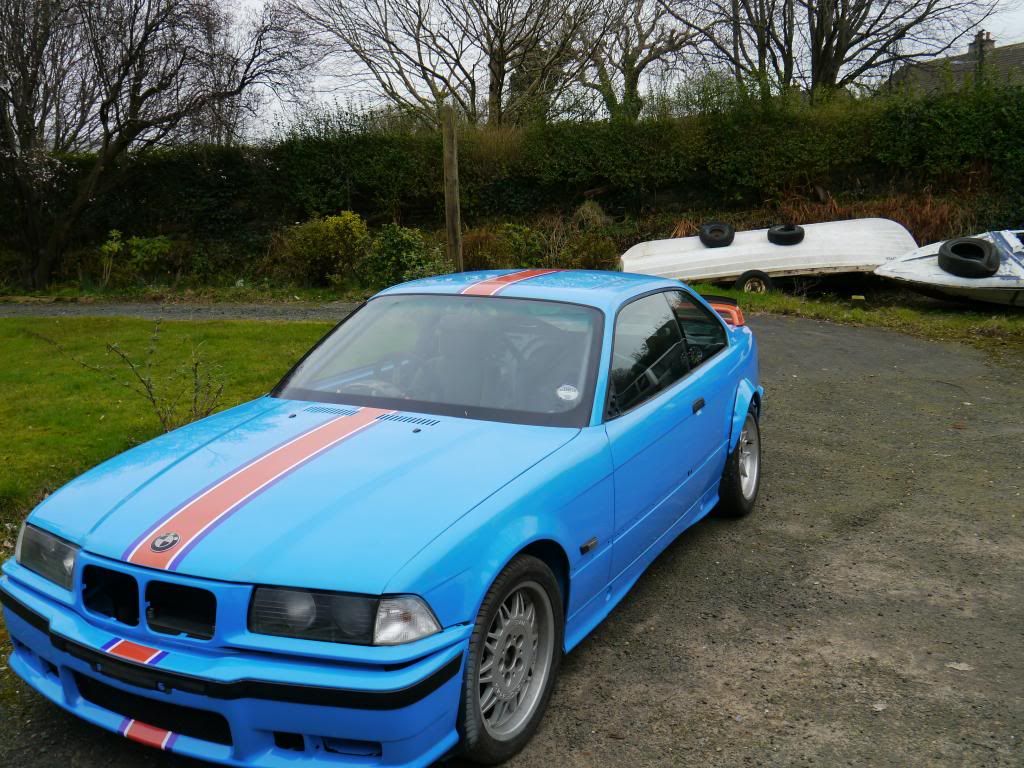
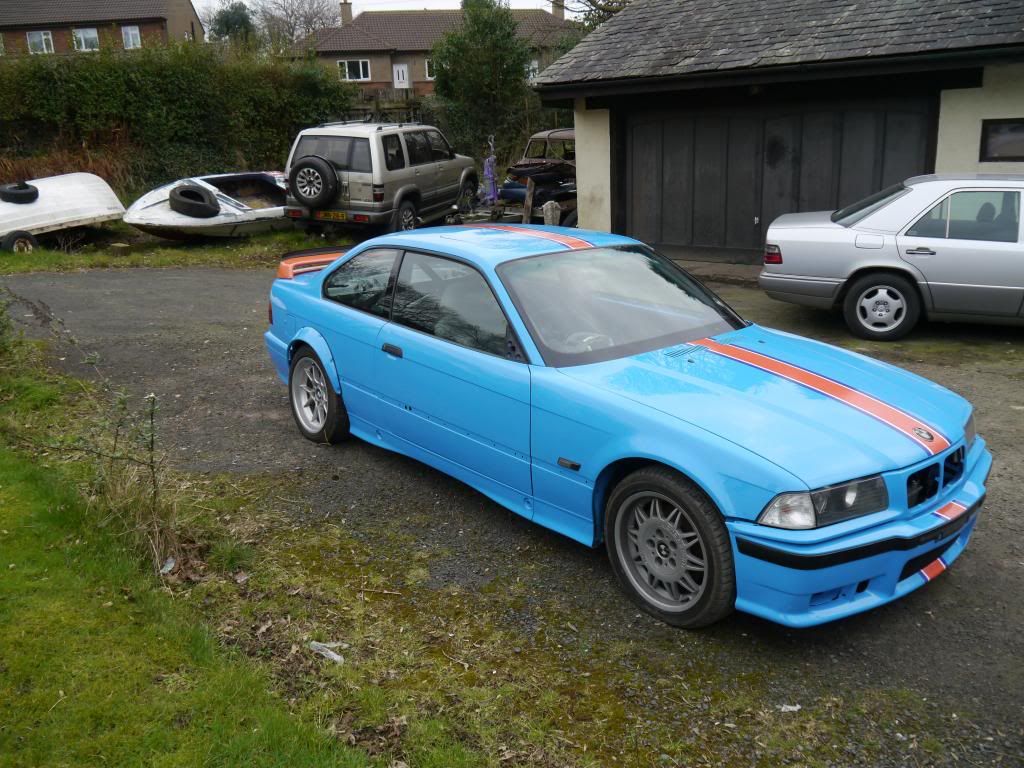
Few more, the colour is not Santorini, its Porsche Riviera Blue. Still working to a cost, just an increased one, but still one that i am completely comfortable with. 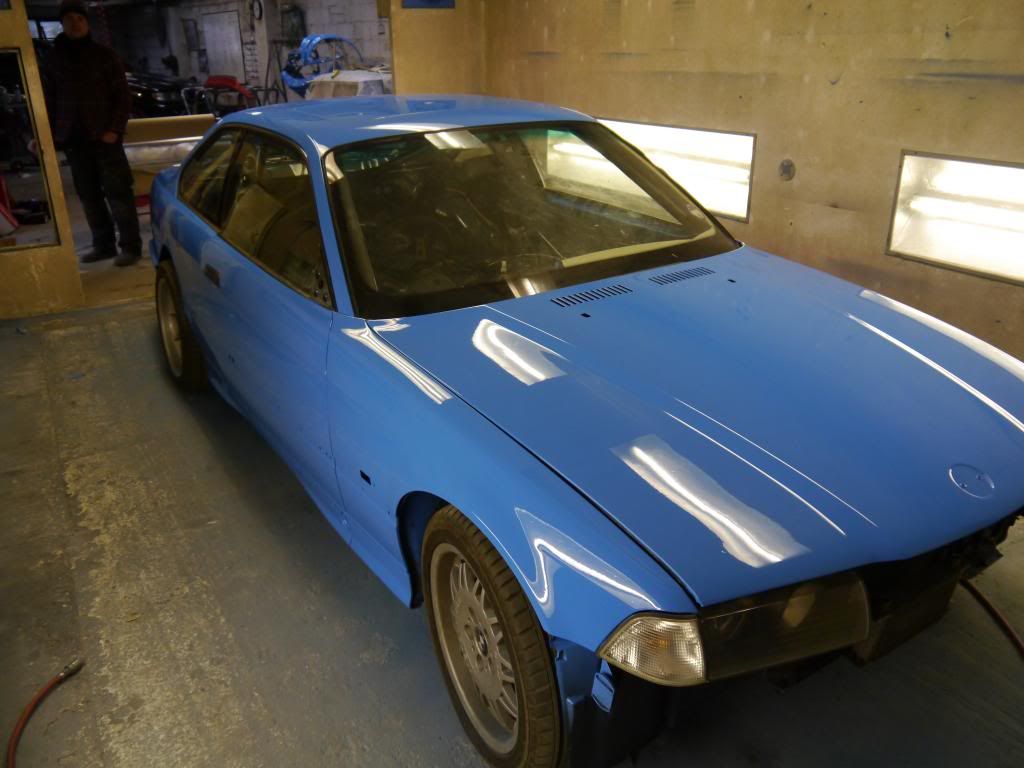 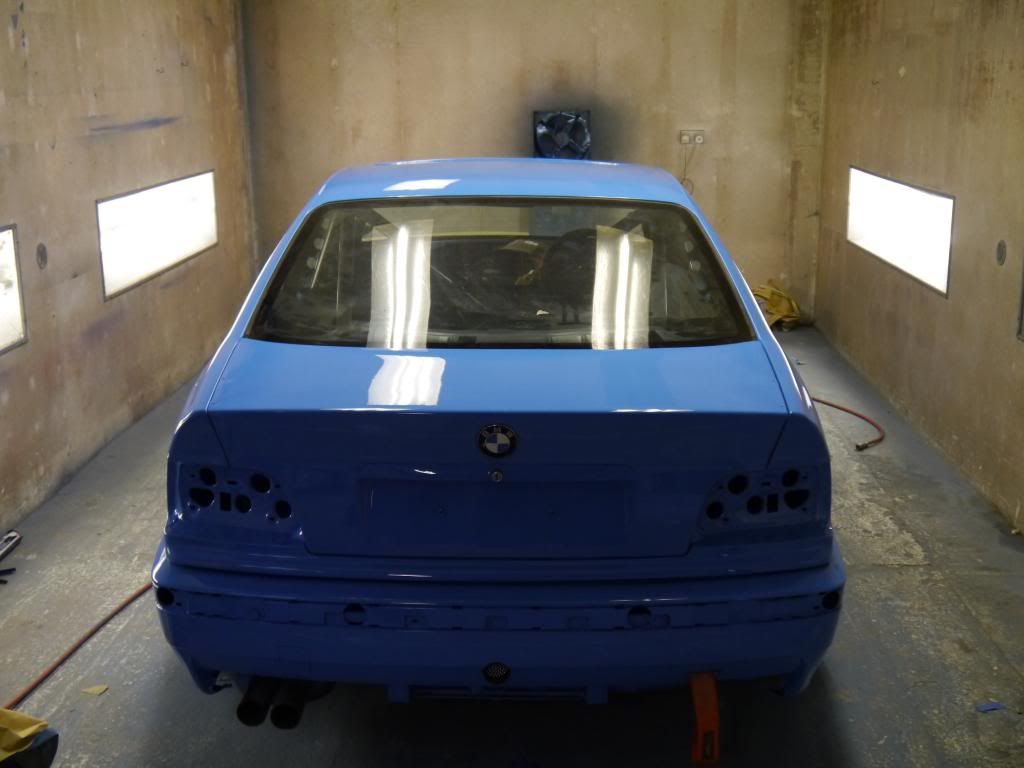 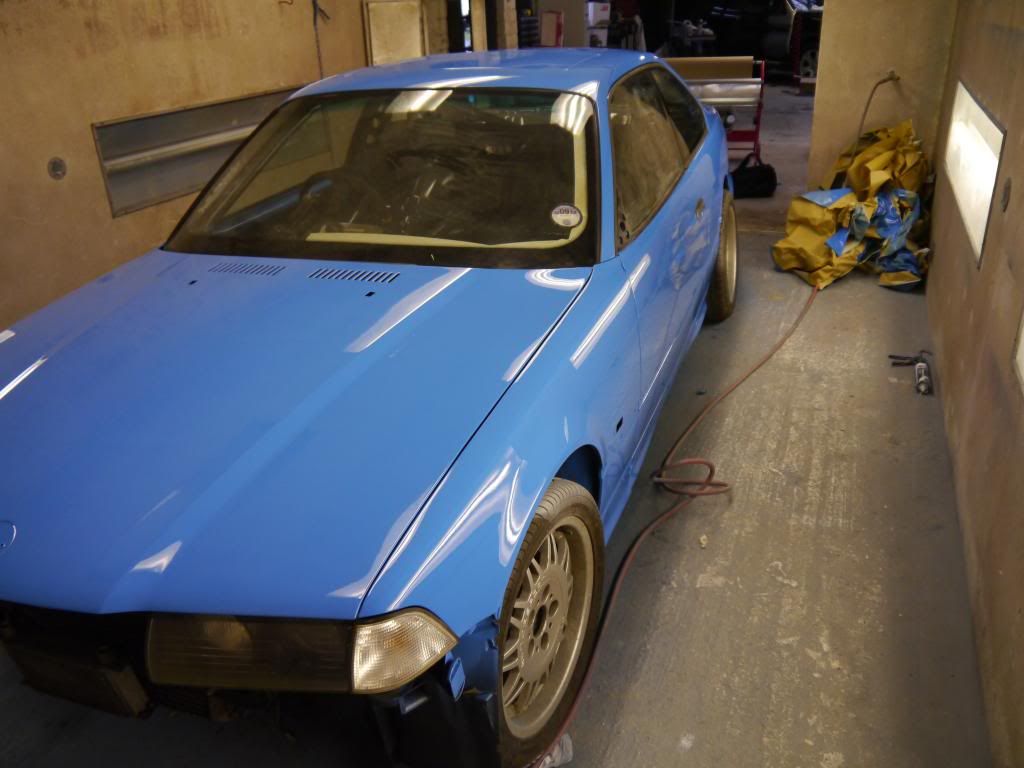 |
| |
|
|
|
|
iainw
Part of things
Posts: 103
|
|
|
|
|
|
| |
|
|
|
|
iainw
Part of things
Posts: 103
|
|
|
|
Nothing hugely interesting. Converted the car to alpha-n (no pics as we know what a pair of chips looks like) Took the engine to bits as it was minging and leaking from everywhere. Installed a group-n restrictor as i have decided that i will fit the evo head at a later date when i have some more time. Process: remove cover grub screw: 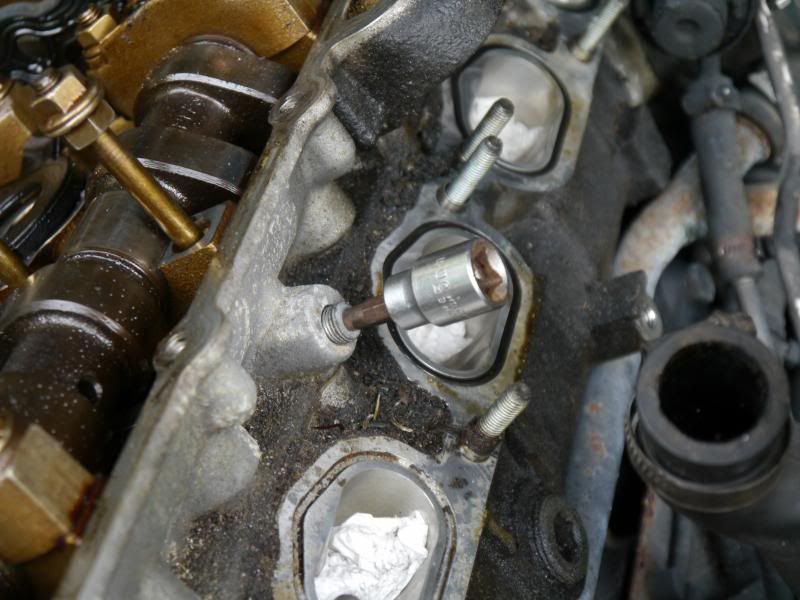 Remove cam cap studs:  Remove cam cap 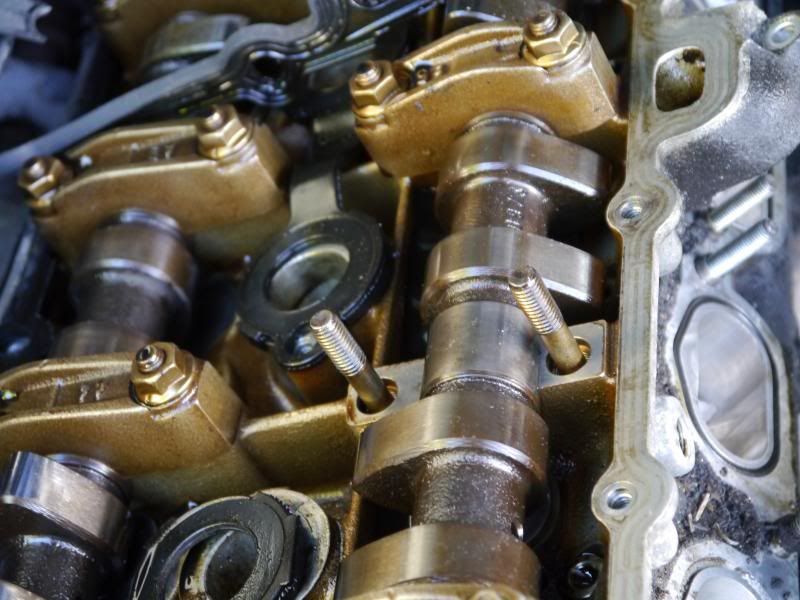 Remove cam cap studs with the two nut method. 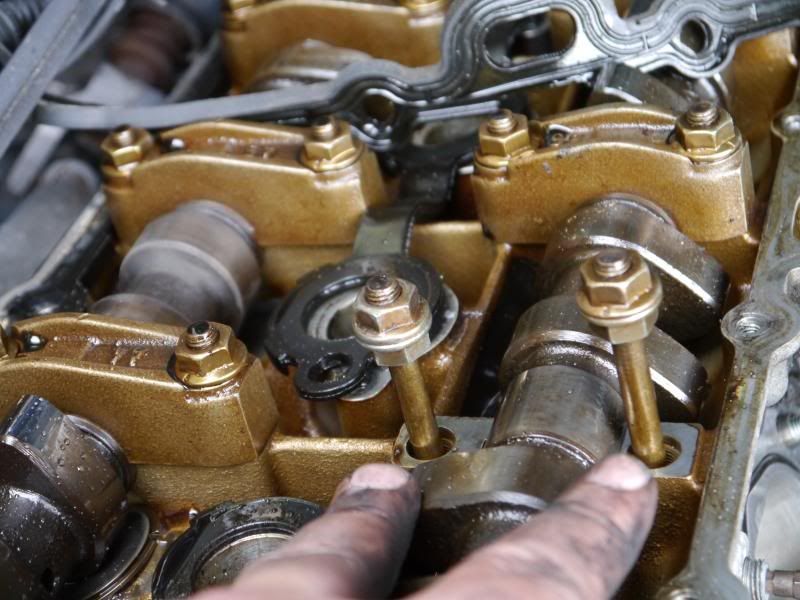 leaving this: 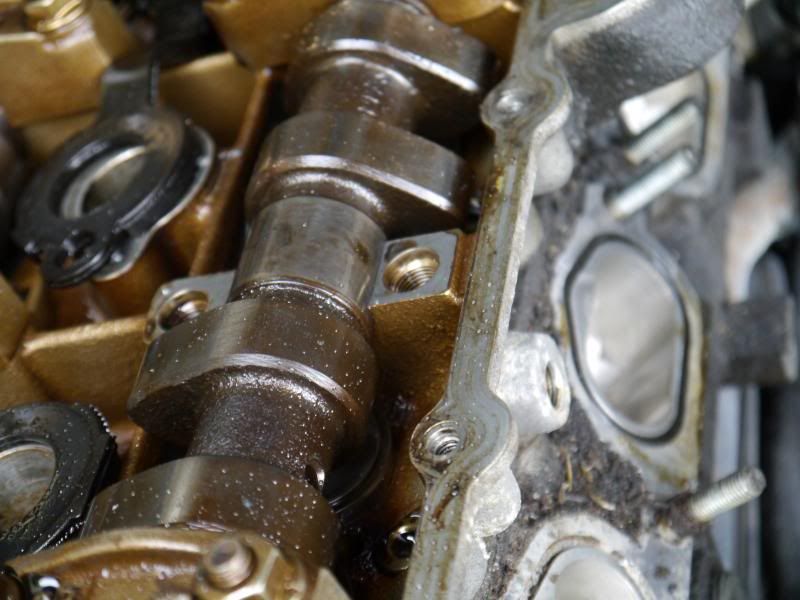 Take one of these: 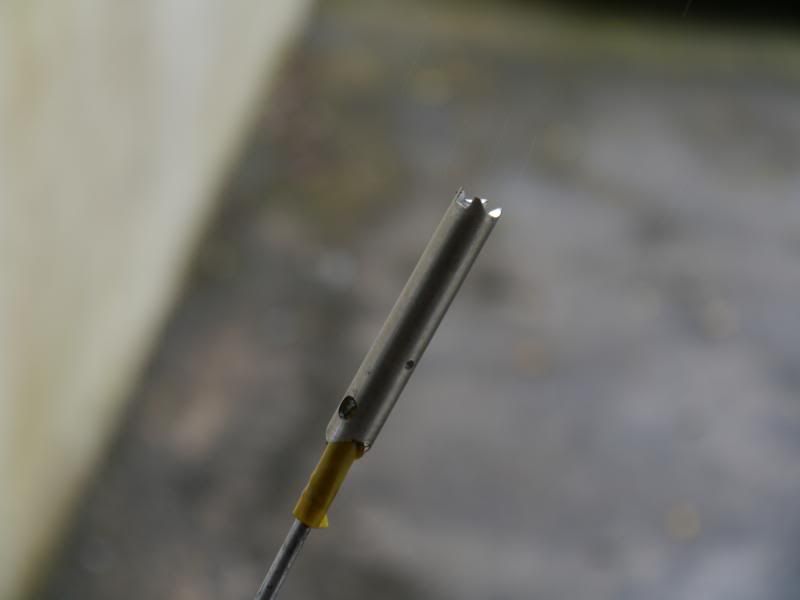 Shove in hole: 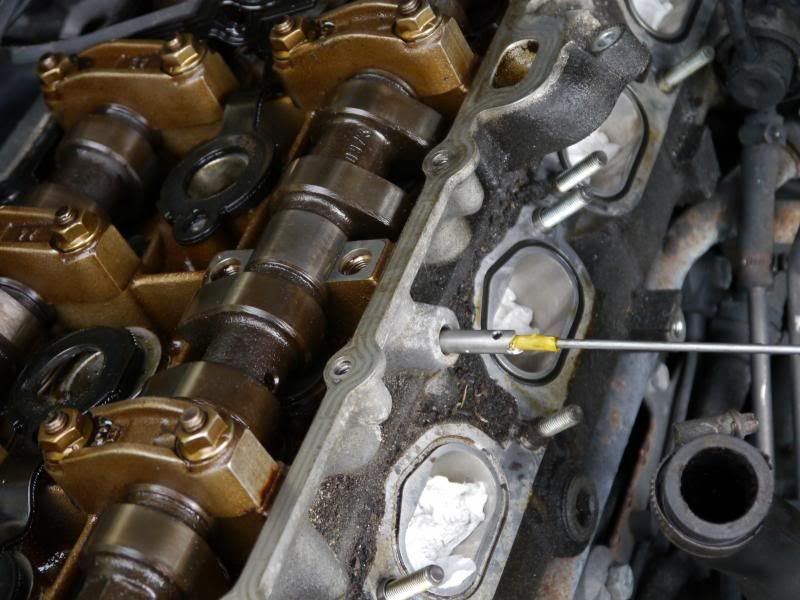 Put it back together (not done much of this as i have lots more jobs to do while I am in there, BTW thats not grit all over my cams, its rain :lol: ) Next up, rebuild injectors in your kitchen. Strip all removable parts from injectors, and throw in cheap and nasty ebay ultrasonic cleaner 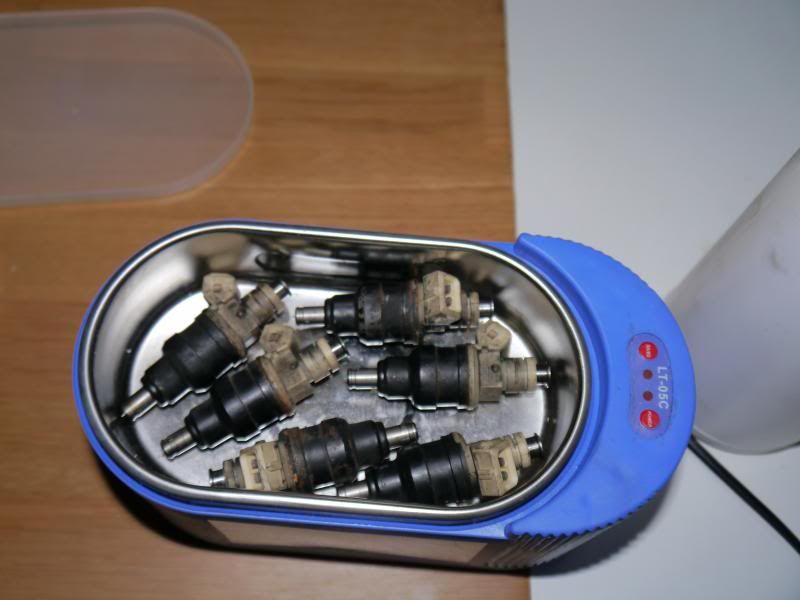 Leave to vibrate away at full power in a mix of boiling water and ultrasonic carb cleaner 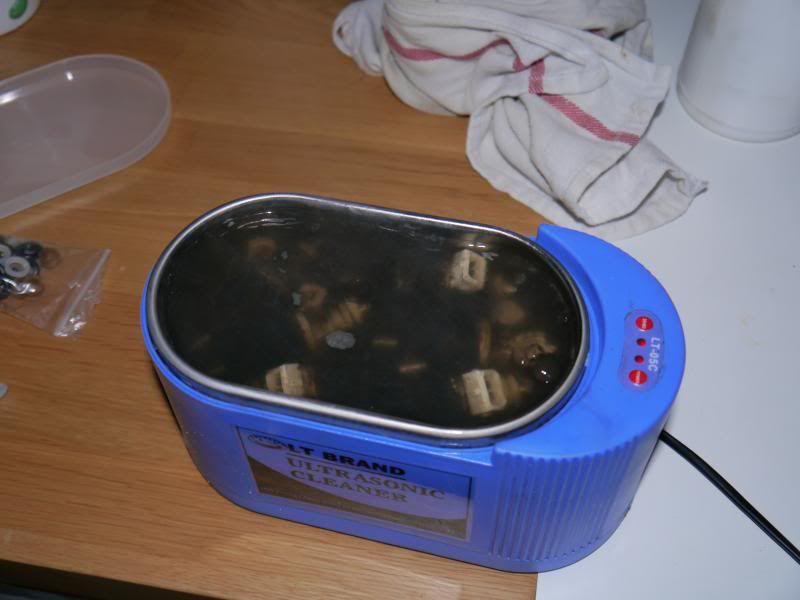 I made the mix probably about 300% too strong (not in the mood for curse word about) and possibly as a result all the paint came off the injectors as well as all the dirt :lol: ) 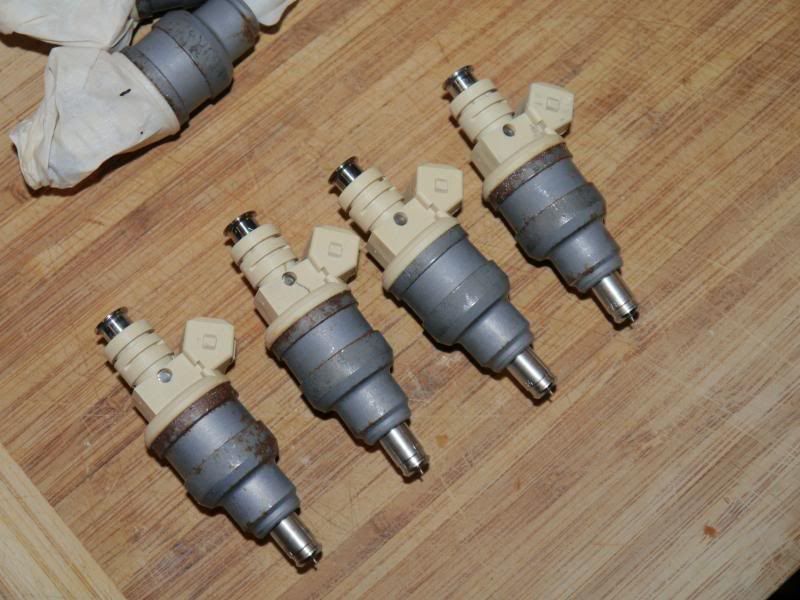 Prime and repaint all your injectors :roll: 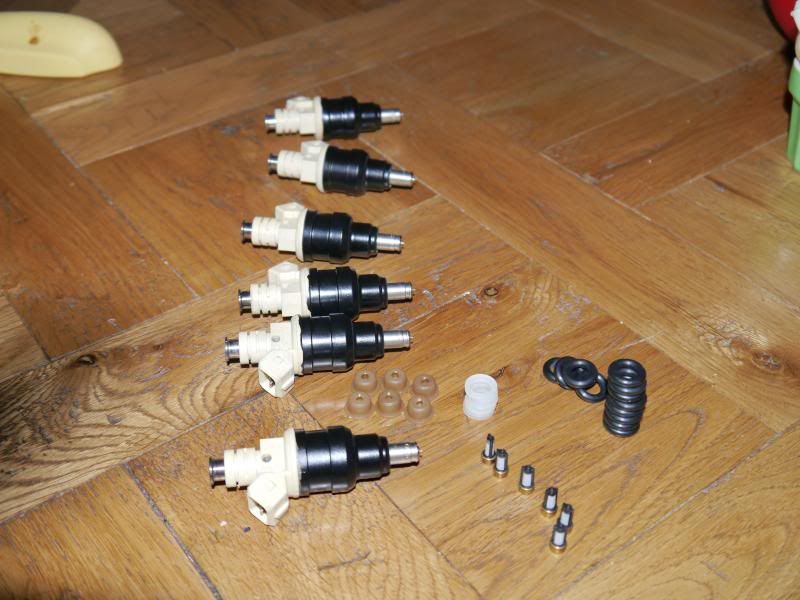 Fit all new filters. pintle caps, spacers and seals 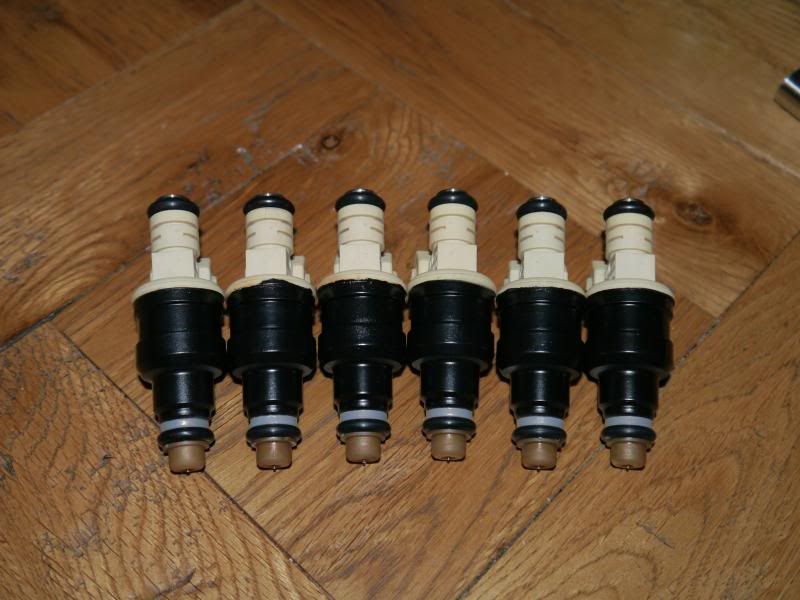  |
| |
|
|
iainw
Part of things
Posts: 103
|
|
|
|
I was going to pull the head off and fit the nice rebuilt evo one i have, but it can wait as its just another big bit of work and as its looking like i will be back off to india for another month (not to mention that when i started this project i have 0 children and i now have 2!) i need to try and stop some of the scope creep unless i want this thing to become a permanent drive ornament. This is where the engine is at: 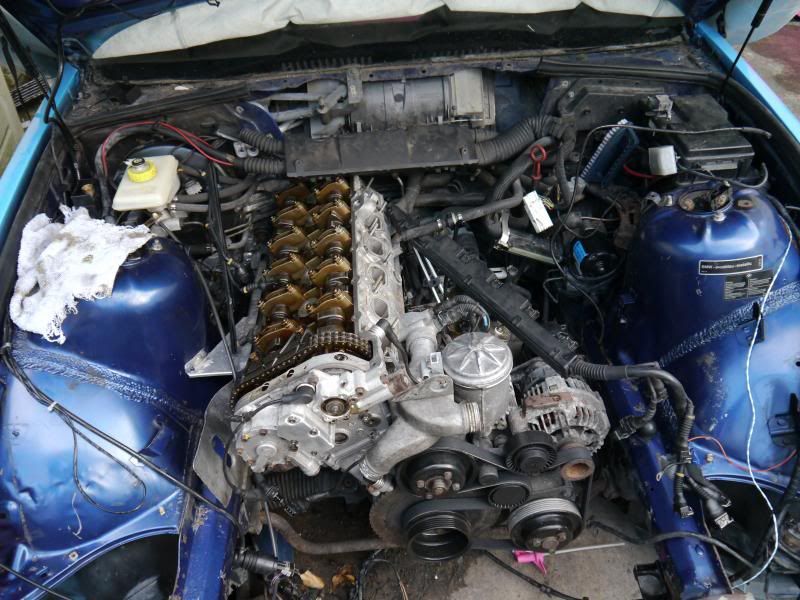 [/URL] 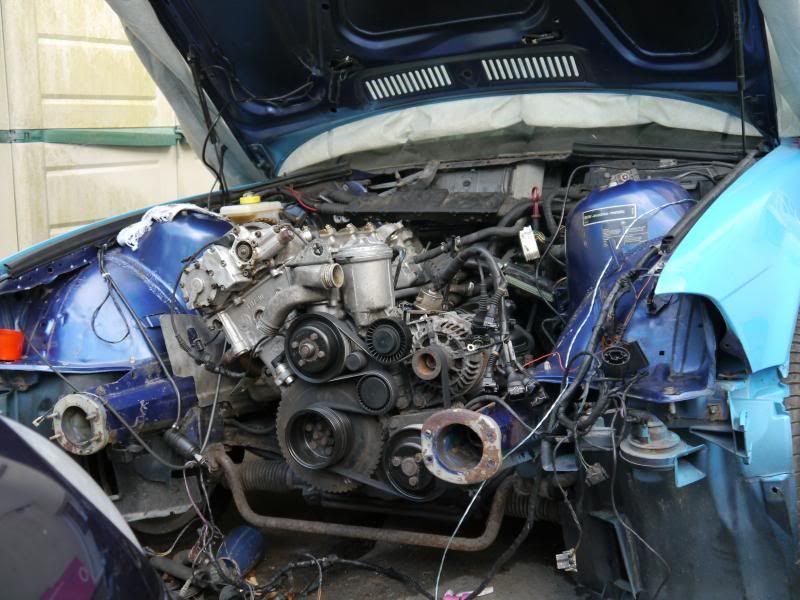 [/URL] Current spec is: Group-n Restrictor E46 m3 crank pulley Evo chain tensioner Shims to factory spec Alph-n ecu and vnc software Still to do: evo sump Evo Pump ARP rods new shells Airbox/induction In the future (when i feel like it and the car has has some use). Cams skimmed evo head ported 3.0 throttles In other news I have been working on the aero. So i started off with the flower shop at the end of my road getting a refit, so i asked if i could have some of their old signage. This stuff is brilliant, its aluminium composite so 1mm alloy then a 2mm PPE core and another 1mm alloy sheet, i was going to buy a load but sheets this size would be about 200 each with shipping so for free was a bonus. Started with this: 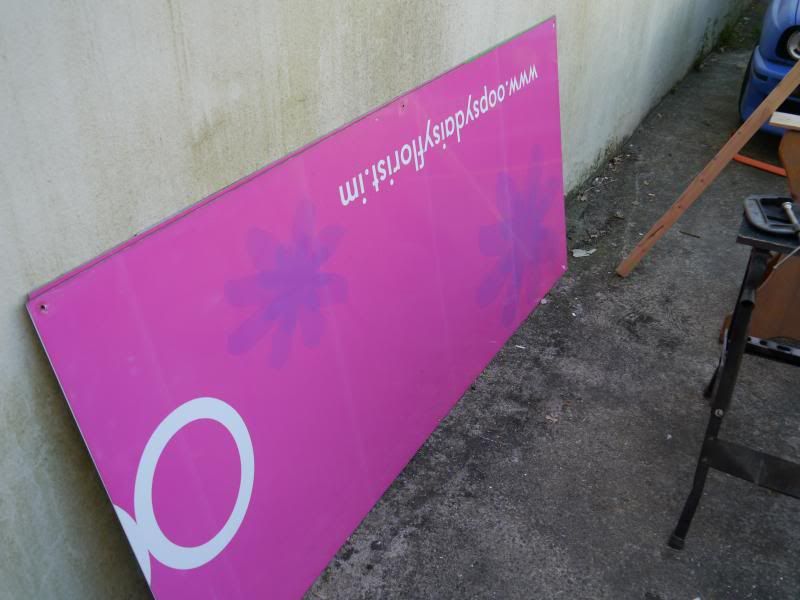 Chop chop 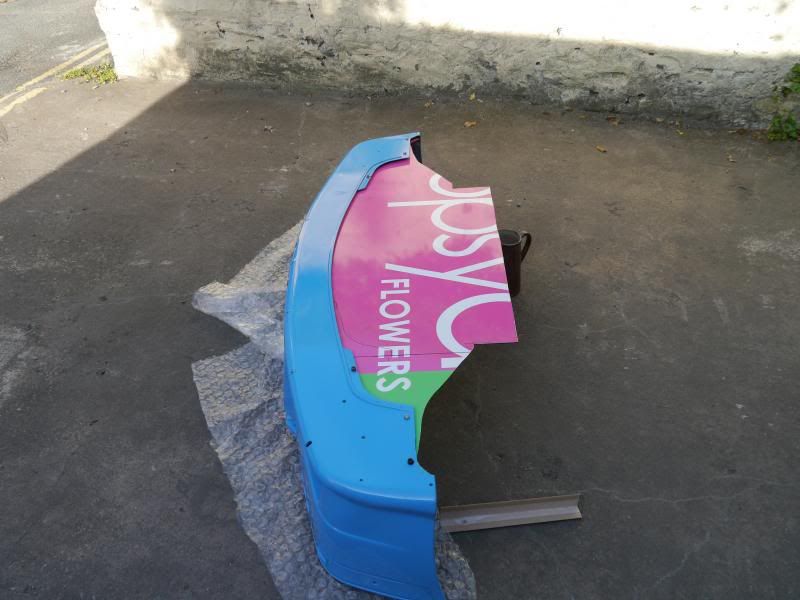 More or less finished, need to clip it back tight to the ARB 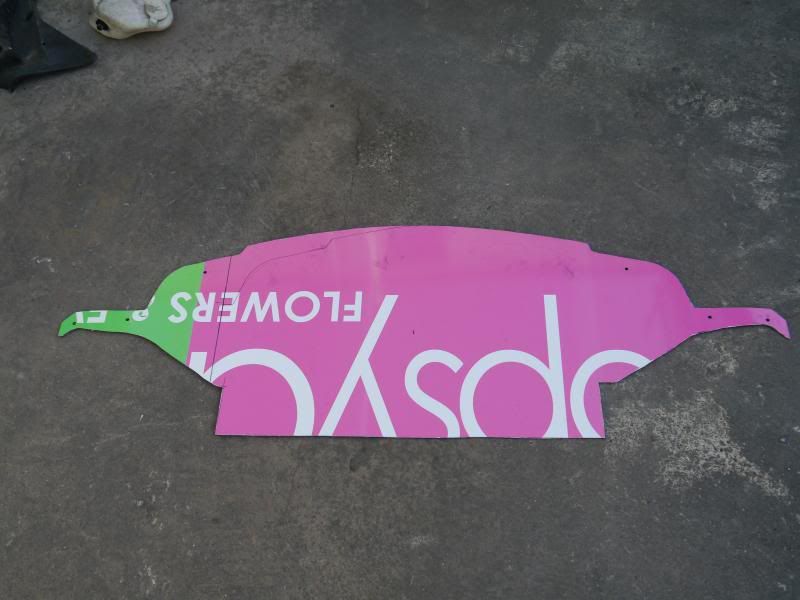 I will be making a rear dam and an adjustable splitter from the same material. |
| |
|
|
heathrobinson
Part of things
Broken everything
Posts: 848
Club RR Member Number: 111
|
|
|
|
|
Looking good, I'm watching how you use the sign with interest - I've a big butterfly farm sign that may end up going the same way!
|
| |
|
|
iainw
Part of things
Posts: 103
|
|
|
|
Looking good, I'm watching how you use the sign with interest - I've a big butterfly farm sign that may end up going the same way! yea, its good stuff, easy to cut, light strong and you can get big sheets! Further fiddling and side work. Time to do some of those annoying ball ache type jobs while access is good. First off blanking off the air pump, blanking off the rubber pipe just was not cutting it for me as it leaves behind all kinds of curse word like vacuum lines and one way valves (which was completely rotten btw) but removing the engine to fit a blanking plate wasn't on the cards either. So i looked at other options, unscrewing the one way valve gave access to the stainless pipe running from the port so i opted to plug this properly with a 22mm stainless hydraulic bung, not quite as tidy as a blank plate, but a close second imo. 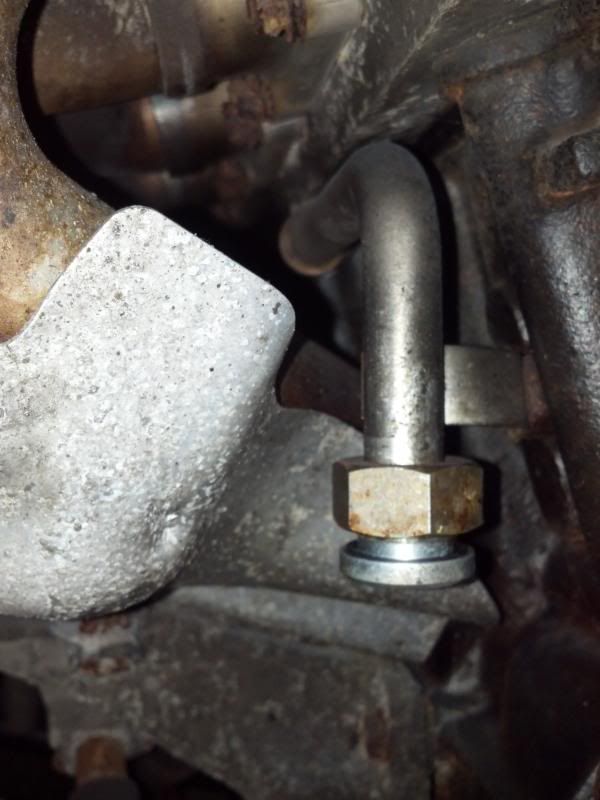 Next up, a few shims, my engine only needed two but worryingly cly1 exhaust valve one had closed down or been mis adjusted to .015 so a 3.10 needed to come out and be replaced with a 2.95, the other was just a simple size up. 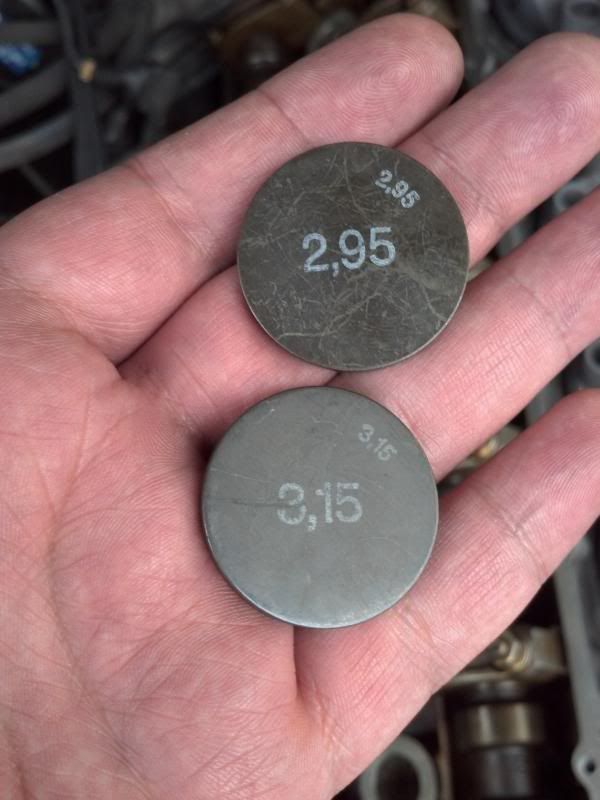 [/URL] There is a bmw tool for this job but BM want something like £100 for it, sod that. Its perfectly possible to do it with a flat blade screw driver, a sharp awl and a magnet. 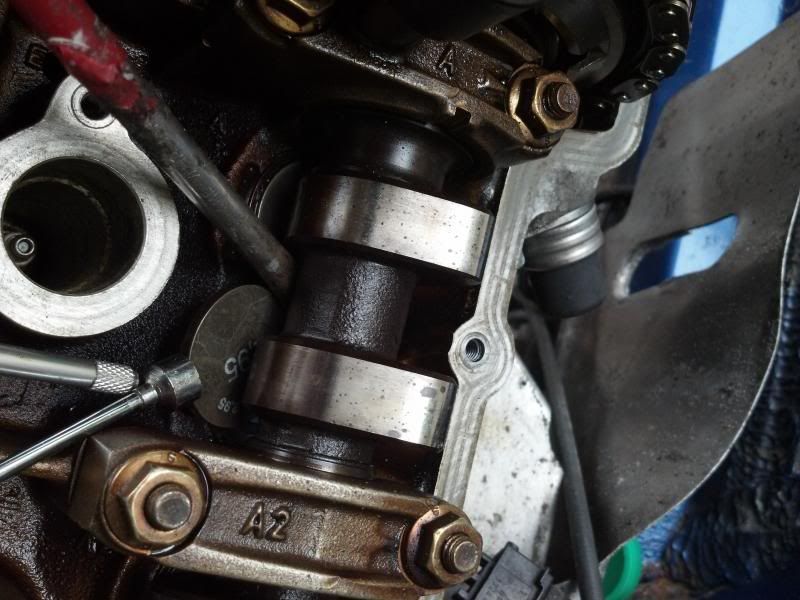 Removed the nasty 3.0 tensioner in favour of an evo unit (also part of the next job). 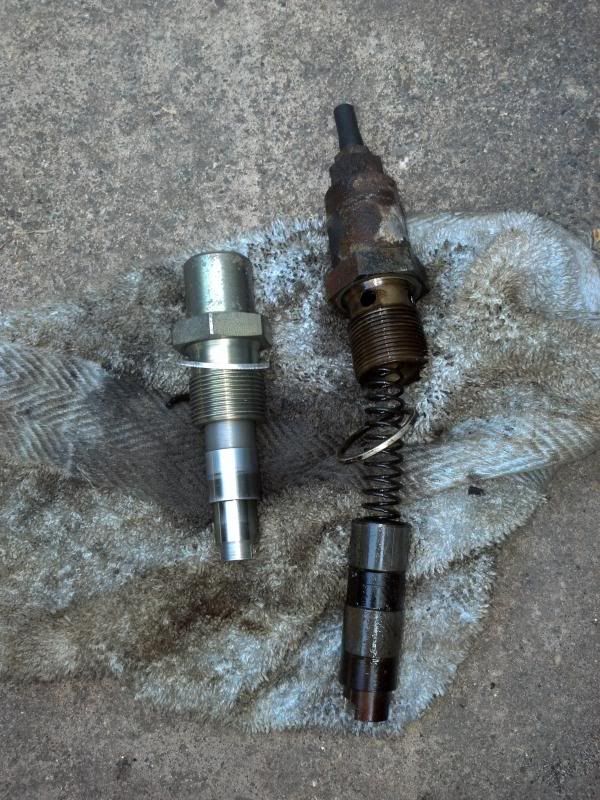 Next up was a bit of a concern, this engine leaks, from everywhere. so it needs a lot of seals. One of the more concerning ones was from the tensioner pad pivot. problem being that if you pull the pivot out the pad could slide into the timing case and i would have to strip the case to recover it. Never the less i sacked up and did it anyway. remove circlip 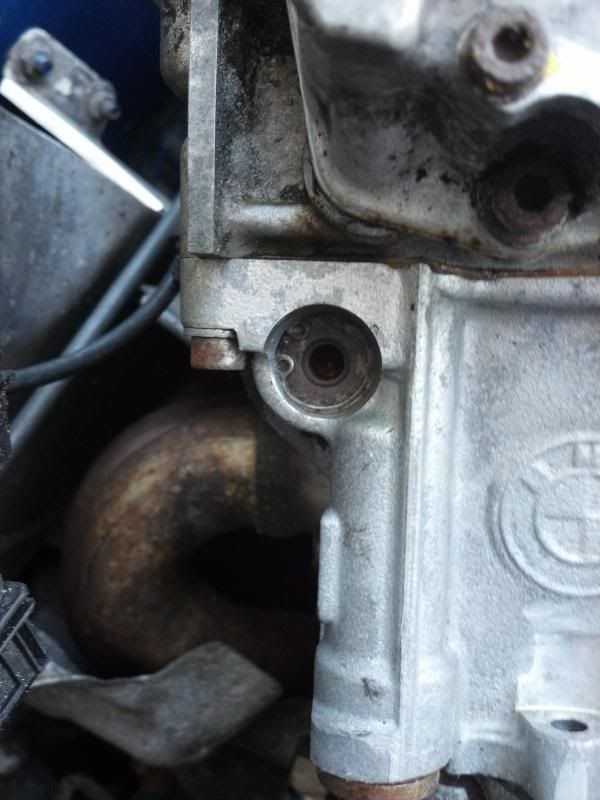 If you have a slide hammer use that, if not (like me) use a bolt and some muscle and twisting. 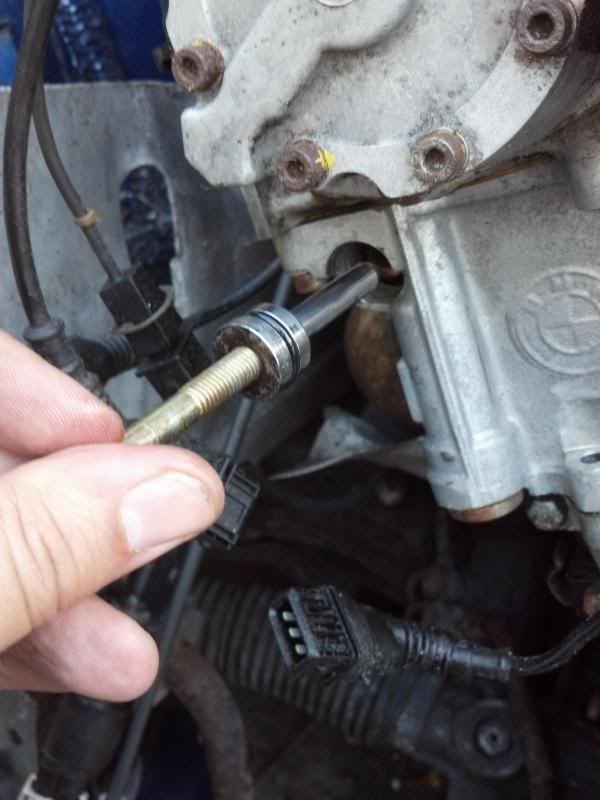 This is the worry, you can see the pad is unsupported and has slipped down, i had my finger in the tensioner hole to support it, but its possible that the chan even when slack may hold is in position enough, i didn't however feel like trying to poke it down to test that theory. 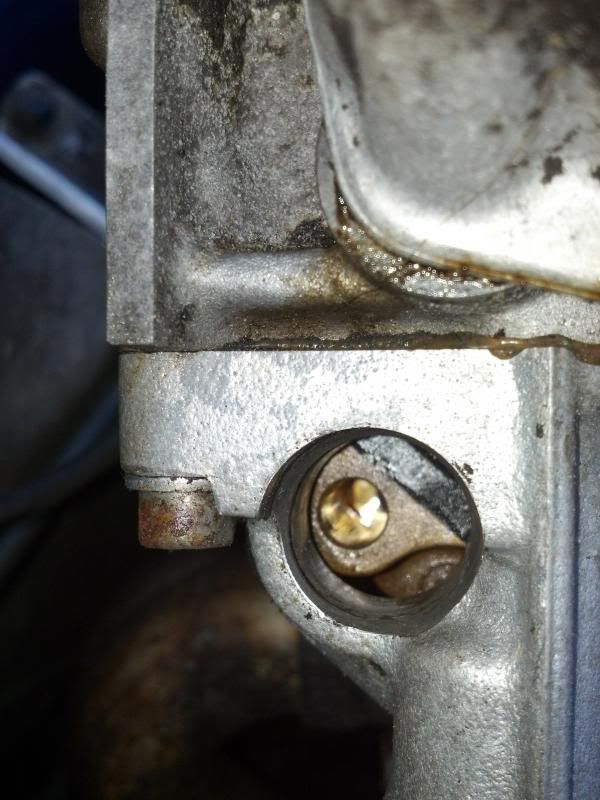 [/URL] New seal on and wiggle it back into position through the slack tensioner pad and into the head, drive in with a mallet and replace the circlip, done. 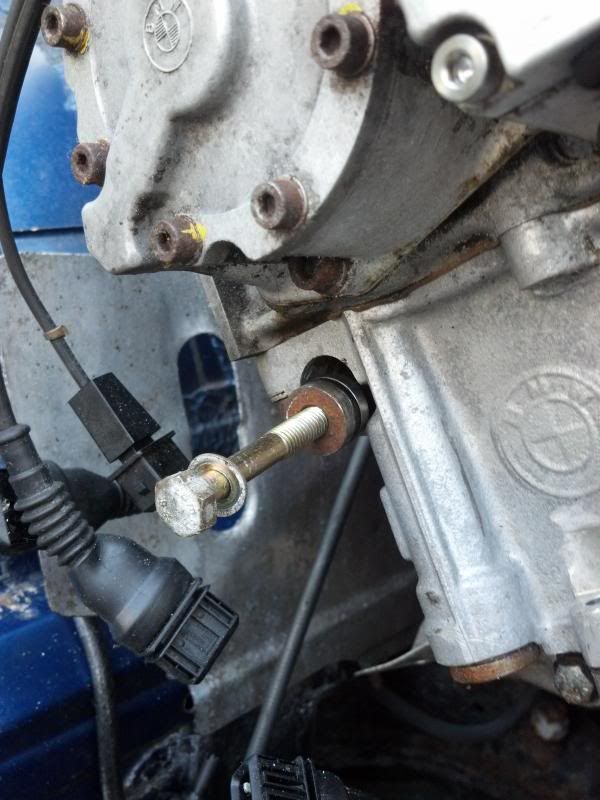 Finally in an effort to stop it raining on my cams i bought a gasket set from bga (very cheap £17 iirc) which almost fitted perfectly i chucked the covers on after grit blasting and a few coats of texture paint (if the throttles look weird its because they are just balanced on).  |
| |
|
|
iainw
Part of things
Posts: 103
|
|
|
|
right, pulled out my finger after this has been neglected for some time as my thoughts and time have been focused on the e30 m3, rather than this thing, but screw it, its got to get done right? So, on with the front, Pulled the complete front axle off in one, so shocks, rack, wishbones, hubs, brakes, engine cradle, the lot, most of it will be going in the skip to be honest. Then it was time to pull the sump and windage tray off so i could both switch in the evo sump and pump setup and fit some acl racing bearings (is surely the rod bearings would be screwed (130k and running on curse word oil with an 8k rpm limiter) That was easy, apart from it wasn't, the 3.0 has a lot of long bolts that hold the sump, they are steel, the sump is alloy so they can galvanicly corrode, all but one came out, however one sheared and proved to be a complete curse word, i ended up having the beat the sum off after drilling about 3cm of the old bolt shank. Fortunately removing the bolt from the block was easy once the sum was off. Onto the bearings, surely they would be buggered? Actually no. 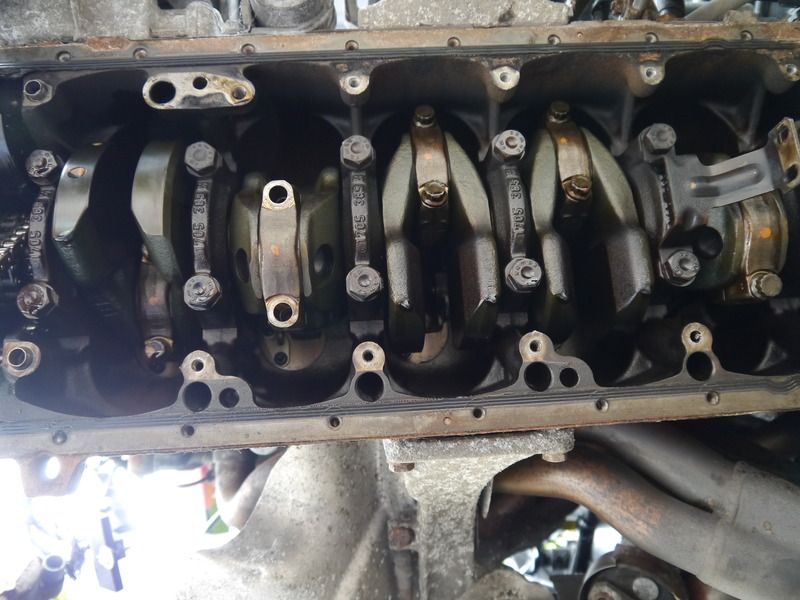 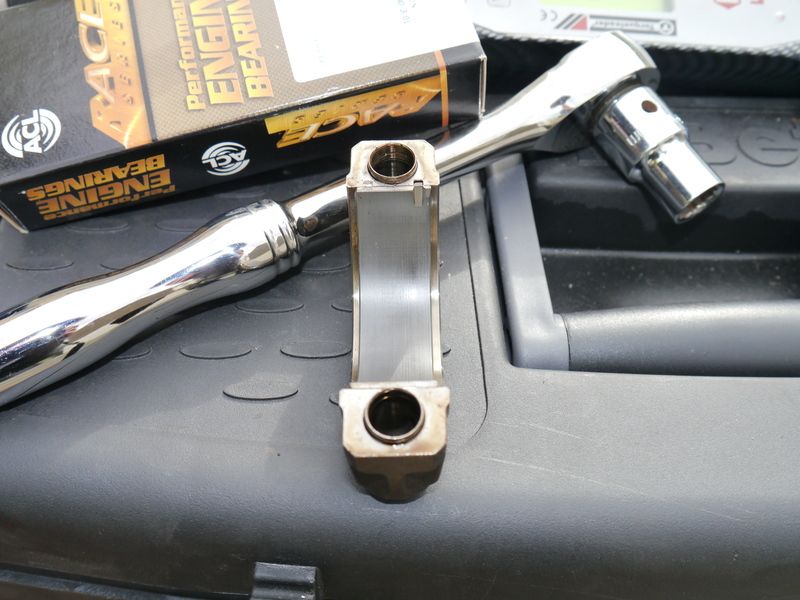 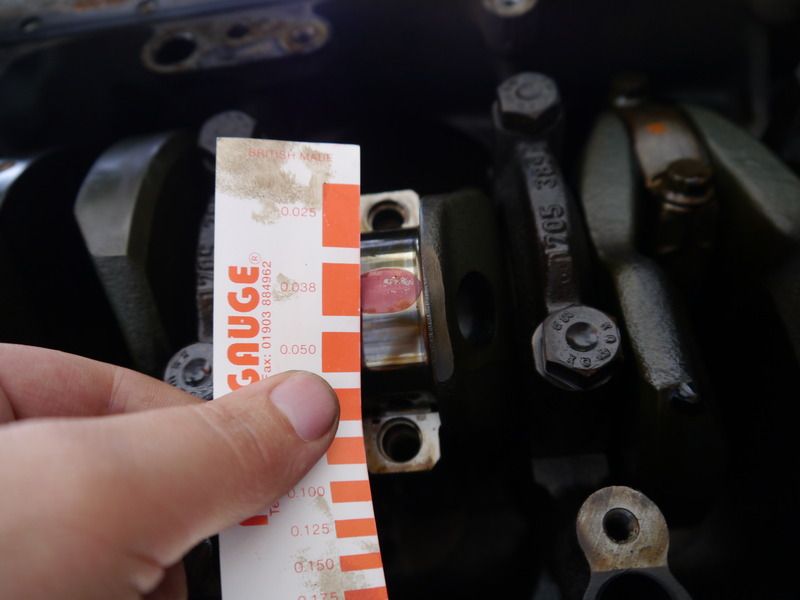 They actually measured up at the tight end of the factory spec! though there was a little wear on the upper bearings it was only to the outer lead layer. Anyway that is the 3.0 bottom end, i fitted acl race bearings and ARP studs using my ridiculously over speced Torqueleader aircraft wrench (love that thing, you can print torque graphs off it and curse word) 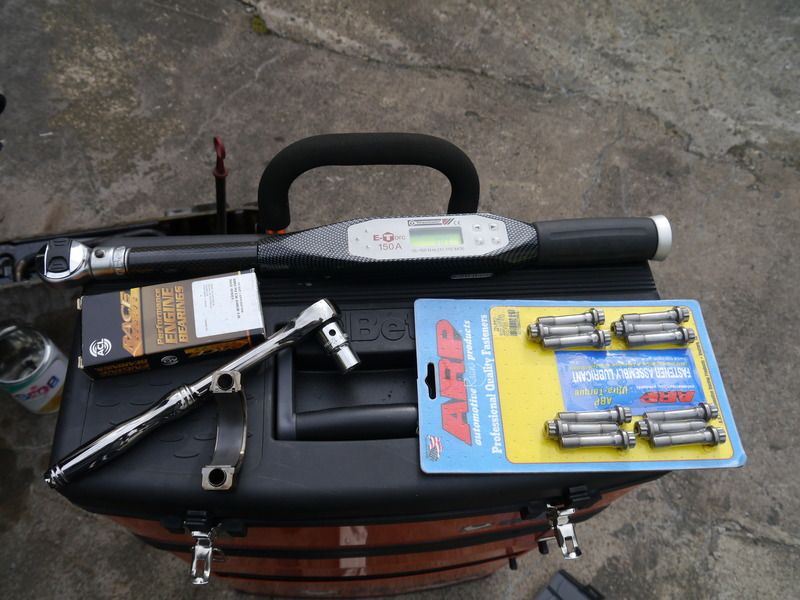 Got rid of all the greasy old 3.0 sump set up 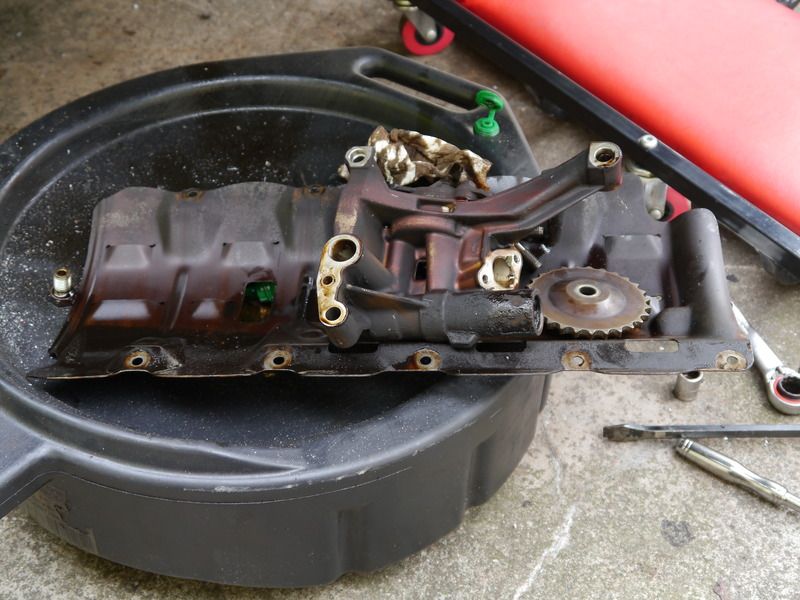 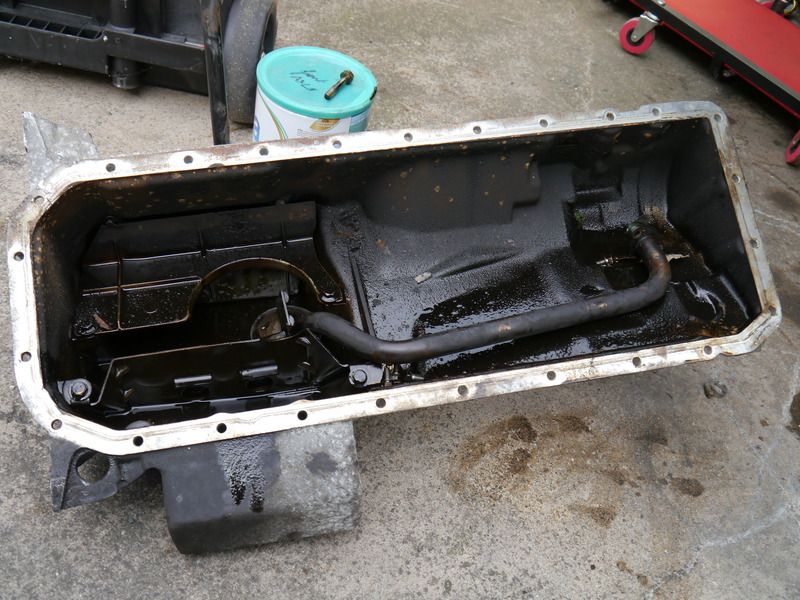 From there it was onto fitting the evo sump and pump, there are some key differences, the evo doesn't use a windage tray, and requires supports for one of the pickups to be bolted onto the main caps as you can see below.  I had picked these up years ago to do this job, but worth noting that if you are looking to do this, you either need them from the donor, or you need to see the dealer, iirc they are not expensive at about £7 each. Then it was onto fitting the evo pump, which is a straight swap, once you have removed the old 3.0 brackets and fitted the evo ones. 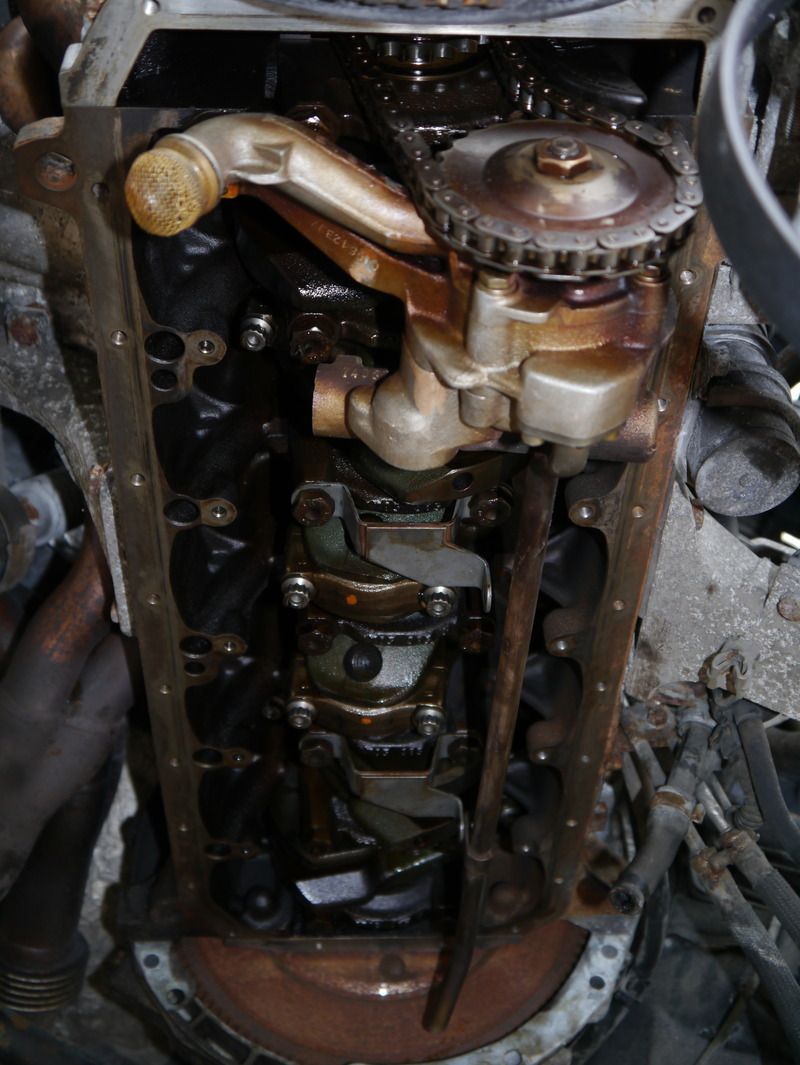 Lots of horror stories (mostly from the US where manual leavers are some sort of novelty) about the pump nut spinning off, i find this a bit hard to take as its a LH thread and is on fairly tight, but whatever, i felt it best to address this, lots of people weld them on, but that means its not going to be easy to strip the bottom end again, and i think its possible that i may be back in here at some point, so no reason to make like hard. Drilled the nut and pump shaft (really should have done this off the car, but completely forgot) and wire locked them, no chance of that coming off accidentally! 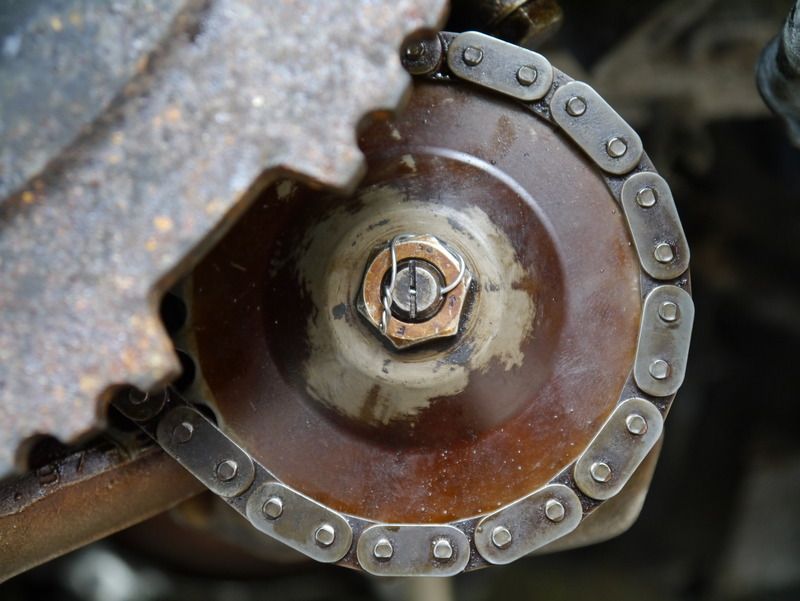 Fitted the evo sumo with a decent now gasket. 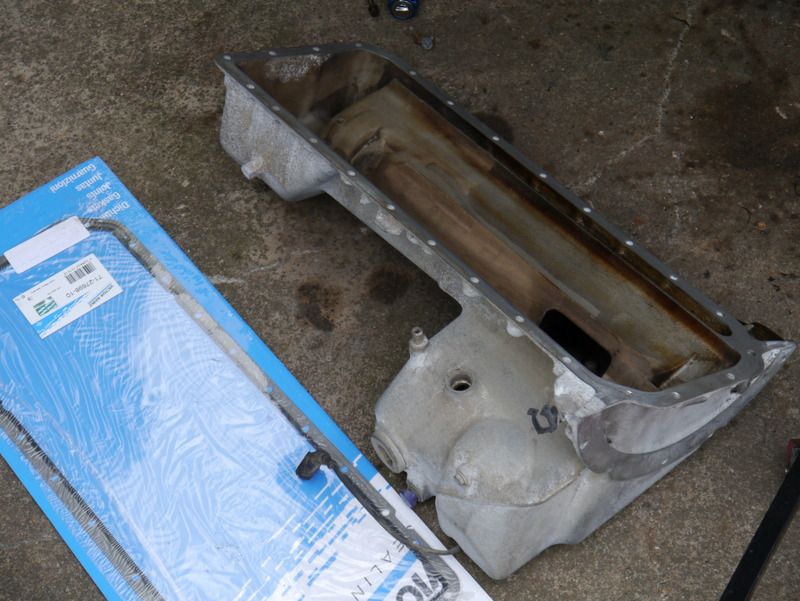 Then it was onto the dipstick tube. Lots of stories of people dending the tube to make it fit, etc etc, its all curse word. the tube is point blank too long. (by 10mm it you were wondering) so if the bend it then it will stay put in the bracket but your oil level will be off and it wont have the o-ring properly seated in the sump so that' s a curse word way to do it. what you need to do is cut 10mm off the end (i cut a little bit more (12mm ish) so it wasn't absolutely rammed into the base of the pan. 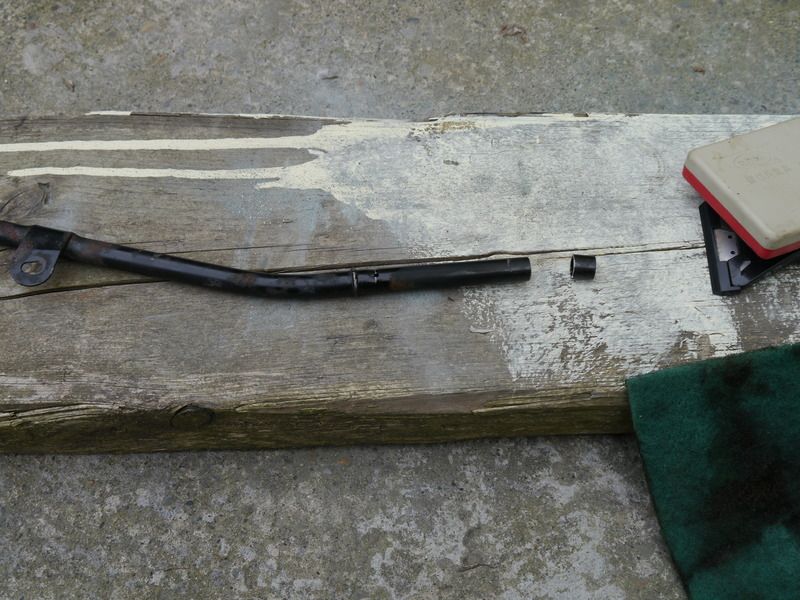 So thats it for this thrilling installment, ARP's, Acl Shells, Evo sump and pump conversion. |
| |
|
|
|
|
|
|
|
|
Woa, loads of quality work done. Look forward to seeing more
|
| |
|
|
iainw
Part of things
Posts: 103
|
|
Jul 10, 2015 13:03:18 GMT
|
|
well, lots left to do annoyingly, still need to finish the interior, gearshift, brakes, get the shocks re-built, fir a quicker steering rack, all the front suspension, stop the diff leaking oil, give the underbody a tidy up and chop a bit of grot out of one of the x members.
few days right.....LOL!
|
| |
|
|
iainw
Part of things
Posts: 103
|
|
Jul 12, 2015 21:28:49 GMT
|
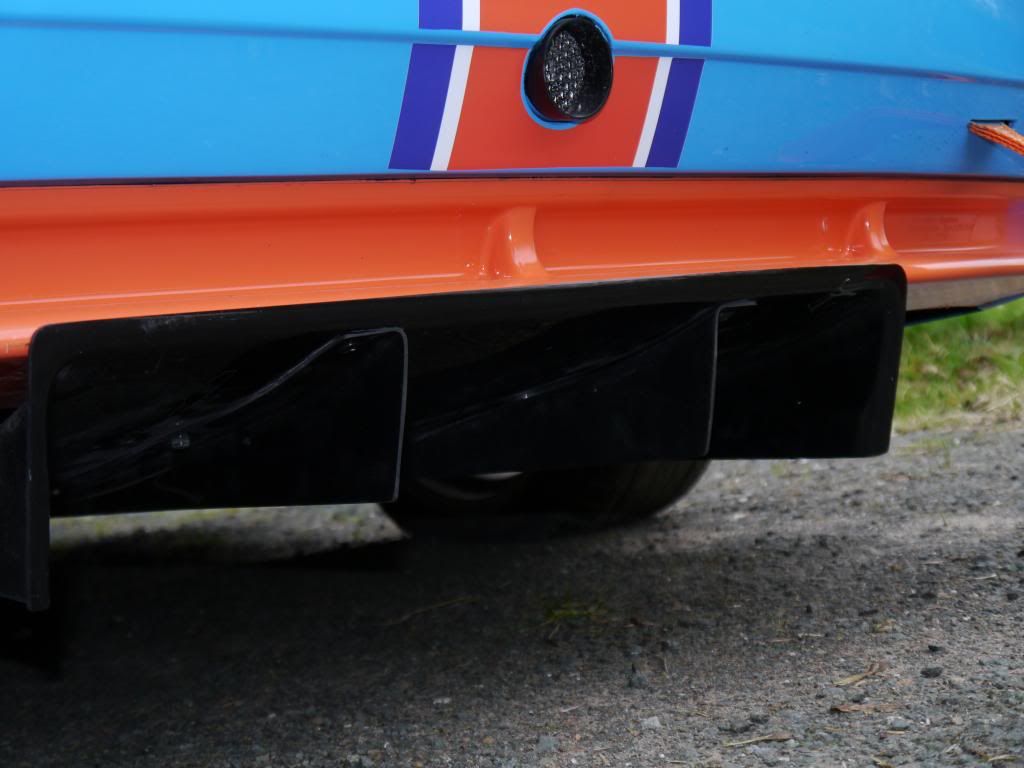
shop sign, u channel, some vinyl and a £10 jigsaw = splitter / undertray. Not finished yet but you get the general idea (still need to add stays and some reinforcement 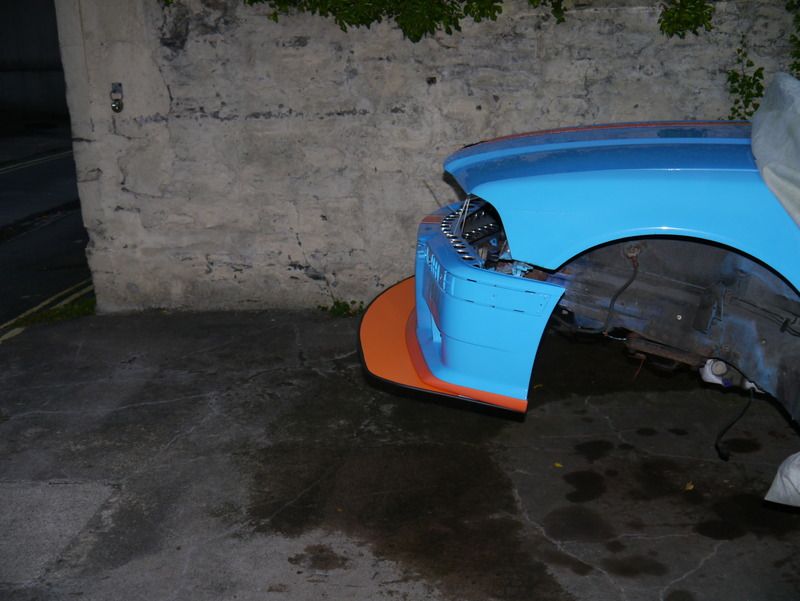 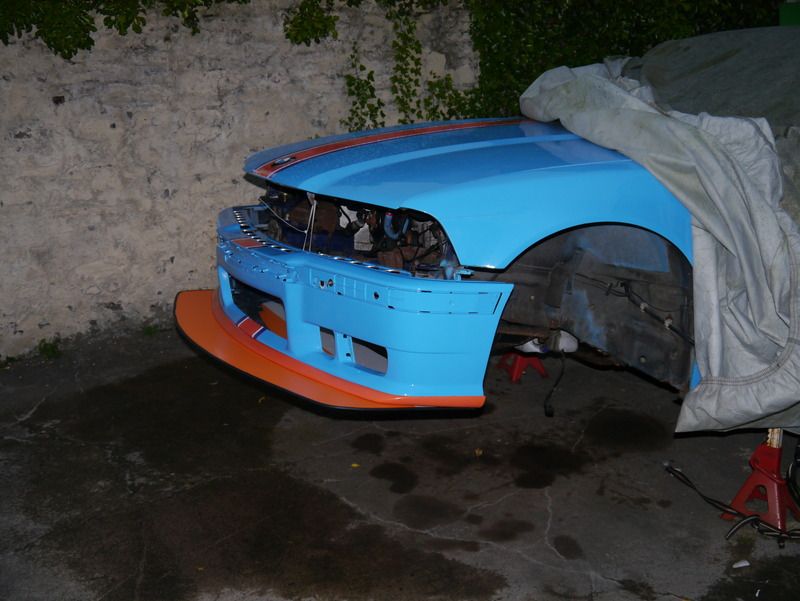 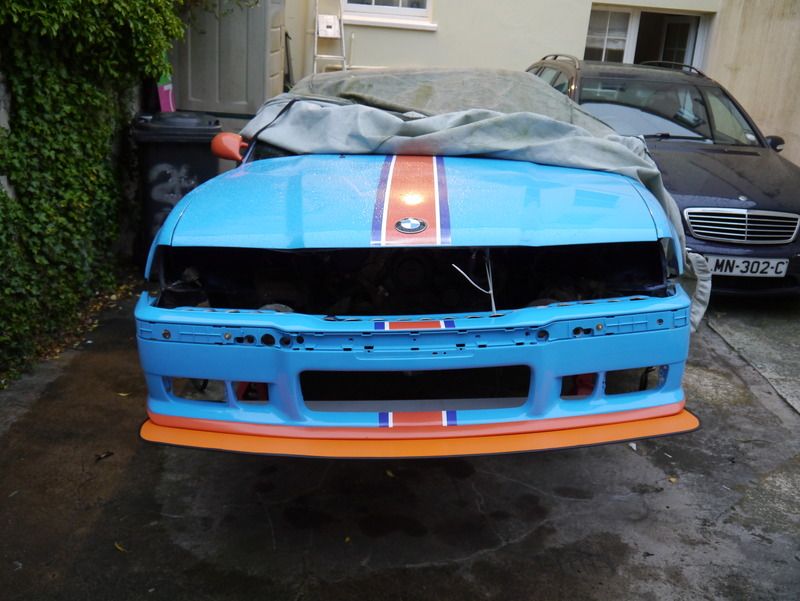 |
| |
|
|
|
|
|
Jul 12, 2015 22:18:56 GMT
|
|
Looks alright! What is that which looks like an acidity test used on the bearings?
|
| |
|
|
iainw
Part of things
Posts: 103
|
|
Jul 12, 2015 23:33:47 GMT
|
Looks alright! What is that which looks like an acidity test used on the bearings? PLastigauge, its an engineering tool which is basically i thin fillet of soft plastic, so when cushed between the bearing and the crank you can then measure the clearance in the bearing, to bigger the splodge the tighter the tolerance on the bearing. |
| |
|
|
|
|


 so not sure what to do about that at the moment, chances are it will be a new cage.