|
|
|
|
|
Ok, so I know my Caravan build is massively overdue for an update, but in the meantime, here is my new project. About a year ago, I had the idea of making my own bass guitar. I haven't played for about 16 years, but always enjoy picking up either a guitar or bass when I'm over at someone's place and mucking around. To start with, I started doing some research into tonewoods. Generally, they're from trees that are hardwoods, and in Australia we have quite a few gums/eucalypts that fit the bill. After looking around, I found someone on Gumtree that had the energy company chop a grey gumtree down on their property, but didn't remove it. The wood was free to anyone who rocked up with a chainsaw, so I roped a mate in (he owns a garden care business) and we chopped up a few bits of wood, most of which was suitable for firewood due to rot. But I did manage to get a decent bit that was roughly 45x70cm. I haven't done much woodwork in the past, but most people will tell you that you have to air dry the wood for a while to get rid of moisture. I did this last April and promptly left it in the outside laundry on an old clothes drying rack. 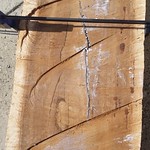 20150413_100137 20150413_100137 by Sciclone, on Flickr Fast forward to last week. I'm sat at home recovering from a knee operation wondering what I can make/build as I can only play games so long before boredom sets in. I remember my bit of timber, so go out to have a look. The age has made some fine cracks appear, and so I start buy gluing them up with PVA. 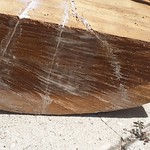 20150413_100148 20150413_100148 by Sciclone, on Flickr Then I stick it in a big quick clamp for the day (it's mid-autumn, but still 25deg here) so the glue can set. As you can see in the first picture, there's a couple of deep gouges from the chainsaw, so I do my best to flatten them down using a flap disk (most of my tools are either metalwork or cars) til the slab is somewhat level. I then printed out a rough Telecaster template, stick it all together (it was tiled), then cut out the basic shape. I taped it to my bit of timber, before stenciling it with some engine enamel I had lying around. The slab is too big for the size I need it to be, so using my circular saw I chop it down to rough size. 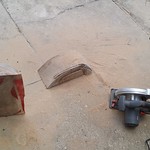 20150413_163901 20150413_163901 by Sciclone, on Flickr So now my slab looks like this. 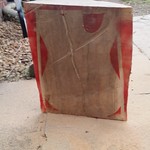 20150413_163856 20150413_163856 by Sciclone, on Flickr That's where play finished on Monday. I need to borrow a planer and belt sander from a mate so I can get the front of the slab level (which will take off the enamel) before I start doing anymore woodworking. In the meantime, I ordered a few bits and bobs online to start the later steps. Things like pickups, machine heads, bridge and nuts. So I will update this when either they arrive or I get to borrowing. I'll also need to print out a good quality blueprint that I can transfer to MDF before I start cutting into the wood again. Stay tuned folks. |
| |
Last Edit: Nov 18, 2015 4:57:08 GMT by sciclone
|
|
|
|
|
|
|
|
|
I've done some more... One of the painful things about knee injuries (other than the pain itself) is that I can't drive anywhere at the moment. After asking some friends if they had an electric planer, one said that he had, but it needed new blades. I had intended to get some that day, but because I couldn't drive to the hardware store, it had to wait until my mum was able to take me (I feel like I'm 15 again). While I was there, I grabbed a few bits of wood to start making up a mitre box. Frets require you to be near perfect with your straightness, so that will come in handy down the track. Anyway, on Sunday, I went over said friends house, and after stuffing around trying to find the right socket, he was eventually able to fit the new blades. However, electric planers being what they are, it broke the blades on the first pass!!! Very annoying, and a waste of $15, but my mate also had a cordless planer (less grunt, and the batteries get chewed up), but at least that was working. After a fairly lengthy planing session, he eventually got the face of the wood to mostly level. A beverage later and he also had my mitre box whipped up. In the last picture above, you can see a diagonal gouge from when we chainsawed this bit of wood off the tree. Now I had a near flat bit of wood, but had a few plane rows in it. So today, I busted out my Aldi DA sander and started the task of getting rid of the ridges/rows. 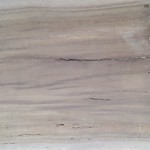 20150421_153136 20150421_153136 by Sciclone, on Flickr As we can see above, we have a pretty nice looking piece of spotted gum. Half an hour of sanding later, and we have this. 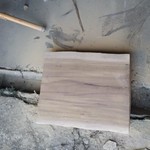 20150421_153141 20150421_153141 by Sciclone, on Flickr I think I'm going to just oil/varnish it when I'm done. Before I finish on the prep though, I do have to fill a few gaps. 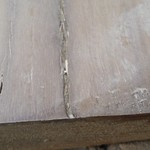 20150421_153151 20150421_153151 by Sciclone, on Flickr This one is probably the worst and I might have to sacrifice that section when I route the neck cut out. We shall see. Next step is to go to a local office supplies place that prints large scale formats like A1 or A0. I have a few different template PDF's that I'll need printing, then once that's done, I'll transfer them to some plywood I have sitting around. This means I can have reusable templates. Then I can just cut the shape out, transfer the outline to the wood again (pencil, not engine enamel this time), and finish up the sanding/filling before I start routing the pickup and dial holes. I'm hoping that I can get this done before I have to go back to work.. we shall see. |
| |
|
|
93fxdl
Posted a lot
 Enter your message here...
Posts: 2,000
|
|
|
|
|
If you decide to varnish for your finish, I would suggest thinning the varnish, to allow it to soak into the surface a bit, you will have to build up several layers though, possibly try painting at night so cooler temps give a longer wet time
Ttfn Glenn
|
| |
|
|
sal
Part of things
Mk2 Cavalier CD
Posts: 240
|
|
Apr 21, 2015 12:28:49 GMT
|
|
Looking forward to seeing this progress as I play bass myself. Always liked the telecaster basses but never got round to buying one as a Jazz has always worked for me.
What's your plans for electrics and pick guard etc? Traditional Fender or a more personal set up?
Good luck with it.
James
|
| |
|
|
|
|
|
|
|
|
Watching with interest, although I can't play a note!
Hope the knee recovers well.
|
| |
|
|
|
|
|
|
|
Looking forward to seeing this progress as I play bass myself. Always liked the telecaster basses but never got round to buying one as a Jazz has always worked for me. What's your plans for electrics and pick guard etc? Traditional Fender or a more personal set up? Good luck with it. James The pick guard is going to be a little special. I kept the bark from this tree (actually it fell off after about 3 months of drying), so I'll be wetting it to make it pliable. Flatten it out then resin/lacquer it. And cut/route to shape. It's got a lovely red/black mottled colour, so should contrast nicely with the lighter colours of the wood. I've ordered a set of Chinese p and j humbucker pickups. I'm not expecting them to be fantastic, but this is my first build, and I'm more concerned about getting the fretting, intonation, truss rods etc done properly. This will affect the sound more than a cheap set of pickups, plus if I'm happy with all the above, then I can swap out the pickups for good quality ones at a later date. George: Thanks for the well wishing. The knee is getting better, but the time off work is allowing me time to do this! 93fxdl: Thanks for the heads up Glenn. Woodwork/varnish etc isn't my strong point, but fortunately, the mate who's planer I borrowed is a carpenter/deck installer/furniture maker and has a lot more experience. I've already started thinking about my next build/s as well. One will be a neck-through design with a body shape that looks like a the retarded love child of a Gibson SG and Musicman Stingray. Then I'm going to try my hand at making a Hofner 500-1 (Beatle bass), a Gibson Dot-355 and a Gibson Les Paul. If I still have the motivation, I'll do a strat as well. This is just for a bit of hobby. Plus it takes less time that metal work.. Today I got 4 plans printed out on A0 for $4.00 each. I'll transfer these to the plywood tomorrow for template making, as well as fill the gaps in my body thingy.. |
| |
|
|
|
|
|
|
|
So this morning after a bit of a lie in, I set to work about 10am. First up was to fill the cracks in the wood face. Fortunately, we recently bought some gap/crack filler for doing a door jamb that got chipped whilst moving furniture. So armed with a rubbery wedge usually used for tinting, I started filling the gaps. 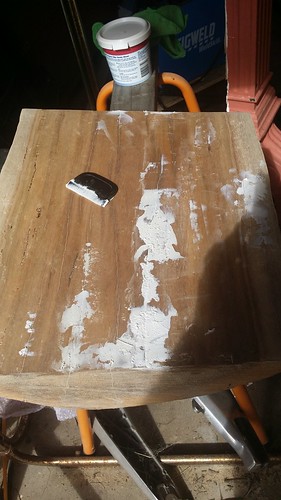 20150424_101224 20150424_101224 by Sciclone, on Flickr. If it looks like I used too much, I probably did. Then I had to leave it for 3 hours to dry before sanding. Then my brain got to thinking about making the neck for this thing. I haven't received the truss rods yet, but that won't stop me from thinking about things. About 8 months ago, I picked up some free timber from the freight forwarder we use at work. They use this dunnage wood when they pack cars and boats into containers. Some of it is cheap pine, but I also spied some that had FSC Hardwood stamps, so I grabbed them as well. These have been sitting out in the weather, but it was only when I looked out the window, that I remembered the hardwood posts. That'll do for now, instead of having to buy some for the time being. I can guarantee that I'll probably stuff something up as it'll be my first time using a router, but at least it will be on free wood.. Anyway, here I cut 1.2m length from the middle. 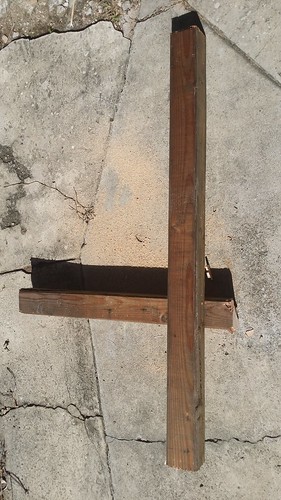 20150424_103026 20150424_103026 by Sciclone, on Flickr Being cheap dunnage wood, it has plenty of splits, but I figure by the time I route it down, I should be past all of them 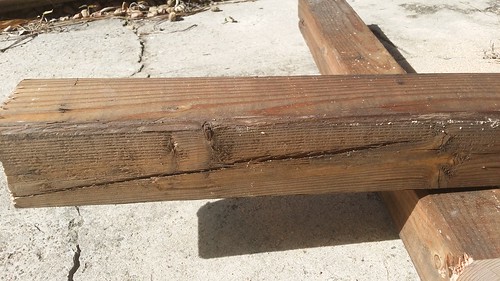 20150424_103039 20150424_103039 by Sciclone, on Flickr Next, with the telecaster template I had printed out yesterday, I started by gluing the main body area to the plywood I had. 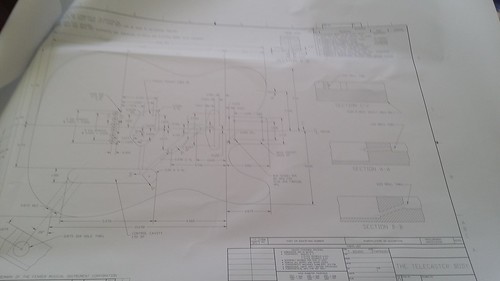 20150424_104413 20150424_104413 by Sciclone, on Flickr But for some inexplicable reason I can't find my craft knife! So that's just waiting until I can cut off the excess paper and then jigsaw/sand the body template. After a bit of lunch and a couple of logic puzzles, it was now 3 hours since I gap filled the wood. I busted out the DA sander again to get rid of the excess. 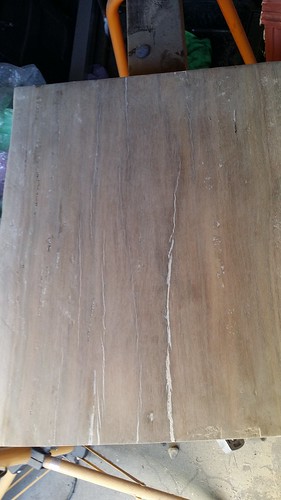 20150424_134302 20150424_134302 by Sciclone, on Flickr Unfortunately the filler is a lot whiter than in the pictures, and looks a bit out of place, so I think that I'll have to either use that area as the neck attachment (route it out) or cover it with the pick guard. Well, that's it for today. My strings and 6.5mm plug sockets turned up, but they won't be needed until later on. |
| |
|
|
|
|
|
|
|
|
On cracks and I don't know if it would work on gum, but back in the UK I obtained a nice old pine interior door which had around a 1/16" crack top to bottom in one of the panels. Started feeding it with linseed oil. Took a while and a few applications but it virtually disappeared. Not sure about being able to varnish/paint afterwards. I just carried on with the oil as I wanted it the natural colour.
Maybe start to feed a piece of seasoned wood for your next one?
|
| |
|
|
|
|
|
Apr 27, 2015 12:34:24 GMT
|
On cracks and I don't know if it would work on gum, but back in the UK I obtained a nice old pine interior door which had around a 1/16" crack top to bottom in one of the panels. Started feeding it with linseed oil. Took a while and a few applications but it virtually disappeared. Not sure about being able to varnish/paint afterwards. I just carried on with the oil as I wanted it the natural colour. Maybe start to feed a piece of seasoned wood for your next one? I'm wondering if it's because pine isn't as tight grained, so it may have the ability to absorb more? Something to think about anyway I'll have to see how I go. I've been keeping an eye on Gumtree for other people that have free wood going, but with my inability to drive myself at the moment, it makes it hard to score when the time is right. There's some mango wood going, which usually has a nice pattern. I haven't done anything today, but my truss rods showed up (now just waiting on pickups etc). In other musings, I've been looking around for alternative fretboard/fingerboard wood. Traditionally on guitars/basses, this has been either rosewood (which is subject to humidity changes), mahogany, maple (gives a bright tone supposedly) or ebony. Now except for Jacaranda (closesly related to Brazilian Rosewood) or Queensland Maple (different grain to Rock or Sugar maple), none of these woods are easily available here, so I've been on the hunt for alternatives. This is maybe a little bit of enviro responsibility on my part, but also because I'm tight, and to buy imported brazillian or indian rosewood, honduran or african mahogany, american maple or ebony costs a bit due to their being known as fret wood. So what has the same hardness ratings that are easily accessible?? After quite a few hours looking, it seems that locally grown Jarrah (from Western Australia), Merbau/Kwila (both the same wood, but Indonesian or New Guinean names) and Meranti (Phillipine Mahogany) are easily available, and at a good price ($4-7), because they're commonly used for decking! The upshot of this is that all three types of woods are sustainably grown (Australian Government requires it, plus it salves my green conscience) and available from a well respected lumber yard for a decent price. Also, as the planks are generally 1.5-1.8m long and 19mm wide, by the time I convert it to 6mm thick fretboards, I should be able to get 4 or 6 fretboards from one plank of timber! Not a bad price when unsawn, but pre-marked fingerboards usually start from $55. So I can make a mistake and it's not heaps of $$$$ down the drain. Anyway, this seems to be where I'm headed with this build. I'll get to jigsawing my template tomorrow (need to work on cars and computers as well) then hopefully, I can stencil out the body, cut it and start practicing my routing. That's all for now, stay tuned folks. |
| |
|
|
ChrisT
Club Retro Rides Member
Posts: 1,637
Club RR Member Number: 225
|
|
Apr 27, 2015 16:04:09 GMT
|
Will be keeping an eye on this project, always fancied making one but then I see other builds and realize the details involved and the fact my woodworking skills are minimal, (I did re-finish this one but it took a lot longer than expected and the finish wasn't as good as I'd hoped) - so I'll stick to just buying them instead..... Have you been on Ulitmate Guitar? The gear building forum has some interesting stuff and good info - www.ultimate-guitar.com/forum/forumdisplay.php?f=53 |
| |
Last Edit: Apr 27, 2015 17:29:32 GMT by ChrisT
|
|
|
|
|
|
|
|
|
Ok, so after making a good start with this, I got a nasty cold/flu that hung around for 2 weeks, sapping me of strength and filling my head with snot. I'm now back at work, so my time is back to being limited again. Yesterday afternoon, I was determined to do something, anything to progress one of my projects. "Dear diary, Today I popped my cork. It didn't hurt at all, but was an unusual feeling using a jigsaw for the first time." I've had a jigsaw for about 6 months, but I hadn't even taken it out of the box yet. I got home, unwrapped it and set to work. 15 minutes later I had this: 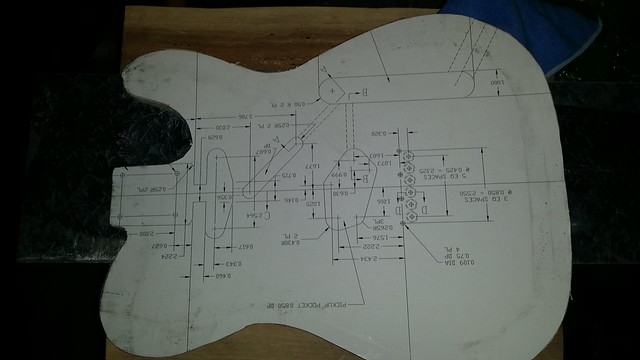 20150525_172108[1] 20150525_172108[1] by Sciclone, on Flickr Although I stayed mostly outside the lines, I found it easy to use the jigsaw to shave off little sections to get them closer to the template. It was pretty easy in the end, and even the hard corners came out ok. 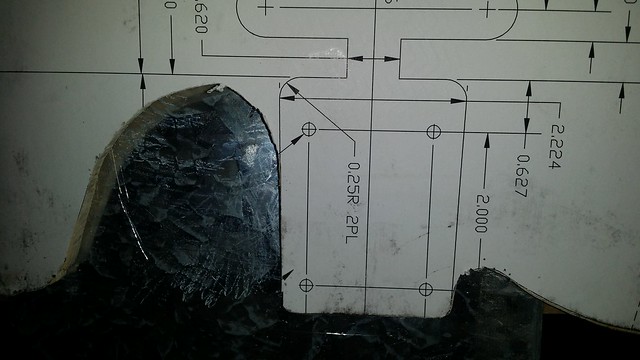 20150525_172119[1] 20150525_172119[1] by Sciclone, on Flickr This afternoon, I'm hoping to drill the holes on the template for the dials and pickups, then trace the template onto my body. Lets see how we go. |
| |
|
|
|
|
|
|
|
So on Tuesday afternoon, I got back into the shed. First port of call was to drill some holes so I could start jigsawing internal holes for the dials and pickups. The pickups aren't really critical as this is going to be a bass, not a guitar, so the pick up shape will be different, but the dial plate will be in the same place as normal. 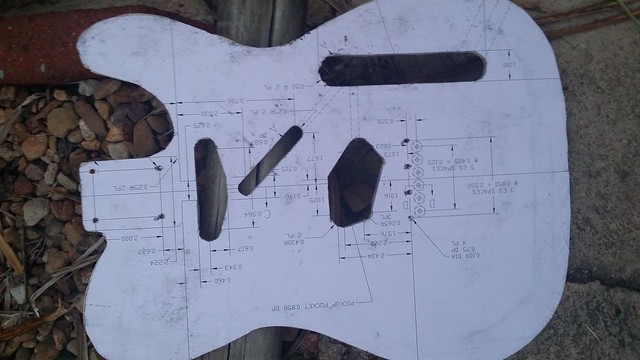 20150526_170937 20150526_170937 by Sciclone, on Flickr With daylight fading, I managed to roughly draw the shape onto the body using pencil. 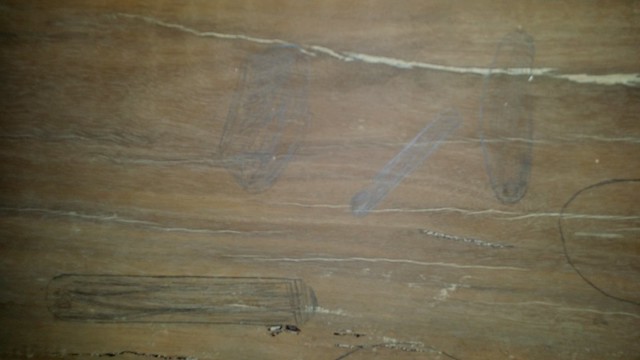 20150526_171124 20150526_171124 by Sciclone, on Flickr Nothing too exciting, but I might even get to bust out the router this afternoon. I've never used one before, so I might go easy and clamp the face of the body to the bench and remove some width, so I can get a feel for using it. |
| |
|
|
|
|
|
|
|
|
2 comments.... why don't you try to find a woodworking company who will have planer they could put the body through to make it perfectly flat all over...and wher did you get the drawings from?
Keep going bookmarked
geoff
|
| |
I would be rich if i had not spent so much money on Cars and fast women...oh, i did waste some of it as well!
|
|
|
|
|
|
|
2 comments.... why don't you try to find a woodworking company who will have planer they could put the body through to make it perfectly flat all over...and wher did you get the drawings from? Keep going bookmarked geoff I've found another mate who has a thicknesser, so I'll go over there at the end of this week (the soonest he was free) and plane it down to size. At least then I'll be able to cut the body out, as the extra thickness prevents me from jigsawing it out. As for the templates, I got the Telecaster template form tdpri.com, whilst the other template drawings I have, I got from various places over the web. search "(insert guitar model) template pdf" and you should be able to find them. I'll hopefully have some progress on this this coming weekend. |
| |
|
|
|
|
|
|
|
|
Cool thanks☺looking forward to updates
|
| |
I would be rich if i had not spent so much money on Cars and fast women...oh, i did waste some of it as well!
|
|
|
|
|
|
|
Ok, so the intended thickness planing did not go ahead. I was busy, my mate was busy, but after a chat on the phone and some pictures, he was hesitant, as he wasn't sure his thicknesser was up to the task. With the amount that needed taking off (up to 4cm in some places) it would have taken quite a few passes as well. He suggested I get the additional material off, then I could thickness it just to skim both sides flat. After talking to another friend (the one that helped me hand plane the face), he said I could try cutting numerous slots in the extra bit with a circular saw, then use a sharp chisel to break them off. That sounded like an option I could do, with one problem... I don't have a sharp chisel. I could buy some for not too much money, but money in general is tight at the moment, so I would have to make do with what I had or wait until I had some coin spare. Tried option B, but the longer I wait, the less likely this project is going to be finished, so yesterday afternoon, I busted out the circular saw and started cutting slots out of the top. Circular saws are great for quick cuts and are relatively accurate when using straight wood, but none of this piece of timber is straight, so I had to adjust the cut of the circ saw so it didn't go deep than my desired thickness. My circ saw is a cheapy from Bunnings (think B&Q own brand tools) and after setting the cut depth at 15mm, I cut some slots. These were fine, but by the last one, the clamp had already vibrated loose, meaning I could have plunged right into my body, and no amount of filler would have undone that. After cutting a slot across grain, I decided to switch to hand saws. Last year, when I first started plotting this project, I bought a very fine kerf (cut width) japanese saw from Japan for doing the frets, but at the same time I bought a 2 sided J saw that had both cross-cutting and ripping teeth. For those who aren't in the know, Western hand saws generally cut on the push stroke. Given that I've never been much chop with western saws, so I thought I'd give a J one a try. (got them from Tools from Japan in case you're wondering). I have to say I'm suitable impressed. The saw is nice and sharp and cuts through this timber (which snapped tungsten carbide planer blades as soon as it touched it) with relative easy. Cue much sawing later. 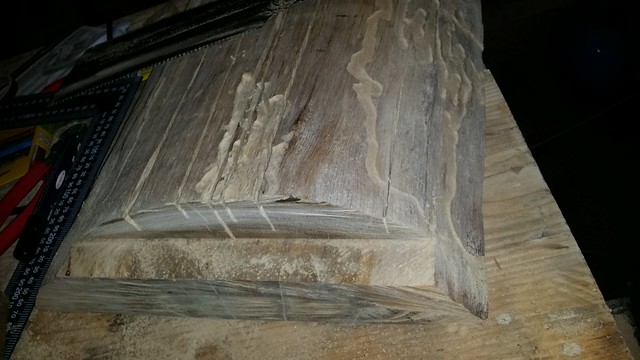 20150706_170541 20150706_170541 by Sciclone, on Flickr 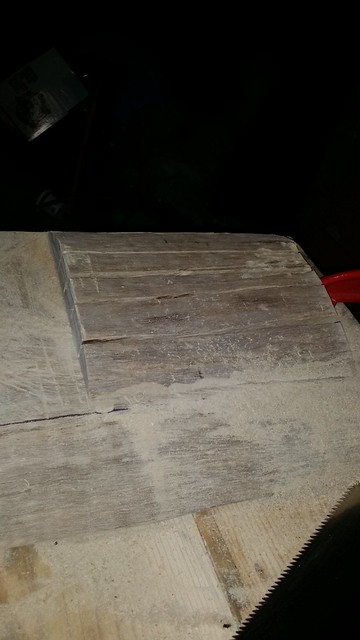 20150706_173709 20150706_173709 by Sciclone, on Flickr 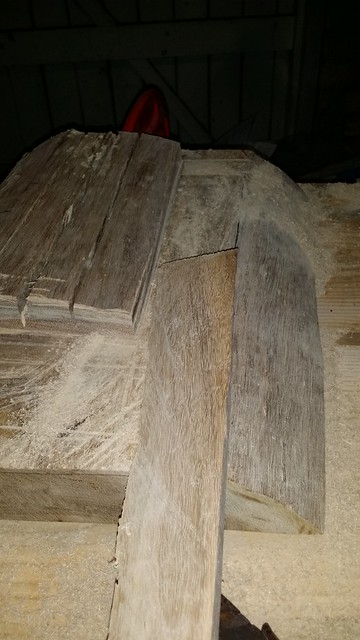 20150706_174515 20150706_174515 by Sciclone, on Flickr By the time dinner was ready, I had quite a sizeable section of the extra material off. In the last picture, you can see the smoothish finish the saws leave on the wood. I think another hour or so of saw in and I'll just about be ready to thickness plane the the body. I might even jigsaw out the shape before then though. Any questions, let me know |
| |
|
|
|
|
|
|
|
|
Good to see a little progress and if nothing else, I've just learned about Japanese saws. Thanks.
|
| |
|
|
|
|
|
|
|
|
Couldn't be bothered loading a single, terribly taken picture, but I have finished cutting off the remainder you see in the picture above.
The level is all over the place, so, I'm hoping a few passes through a thicknesser will get it a bit more even.
|
| |
|
|
|
|
|
|
|
|
Superb, looking forward to seeing the outcome of this project, will you post a video of it being played when it's finished?
|
| |
|
|
|
|
|
|
|
Superb, looking forward to seeing the outcome of this project, will you post a video of it being played when it's finished? Perhaps. I haven't played in a few years, so I'd be super embarrassed, not just with my playing, but also the quality if it turns out rubbish. This is more about having a go, learning some different skills etc. |
| |
|
|
|
|