|
|
|
Jan 16, 2016 23:56:57 GMT
|
So brake backing plate reassembled  The springs aren't exactly the same as the old springs and rub a little on the cylinder, also the auto adjuster doesn't always turn the adjuster cam I can remember talking to someone a long time ago, and they said the auto adjuster just don't work and I'd be better off removing them and just manually adjust the shoes as and when, what do you think? I'd be reluctant to ditch them if they work! Then there was this little hole behind the passenger seat 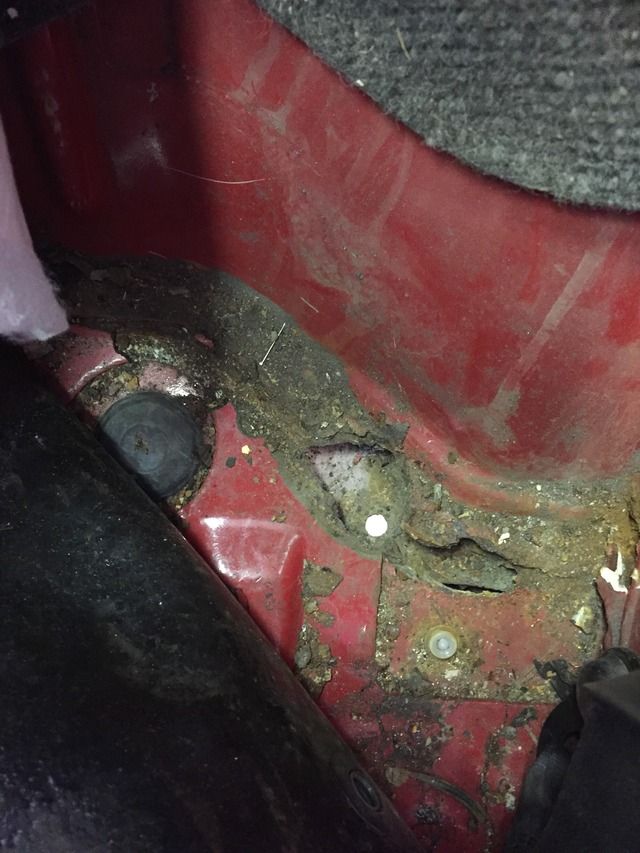 I've not been looking forward to welding this as it's awkward to access, and even when done, I'll have trouble protecting the back of the metal, as it's the floor pan I used some 2mm steel instead of the 1mm I've been using, it makes it a little easier to weld but harder to shape right, I found I could turn the power up more than with my body work, but there were still some questionable areas I was welding too (which looked OK initially) 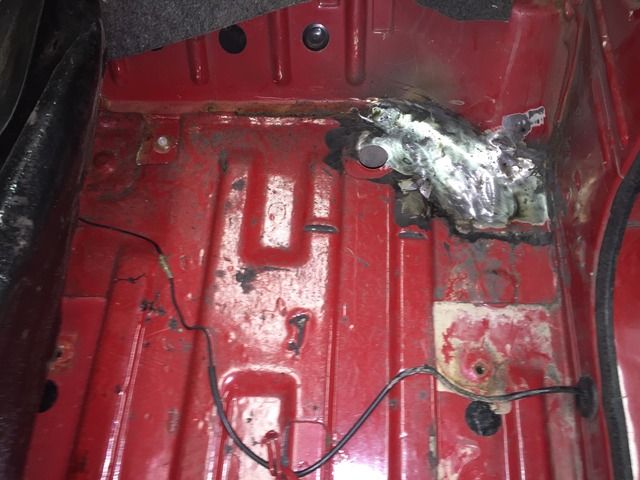 So I fixed this area but the seam still didn't look fantastic, so I ran the flappy wheel down it in my angle grinder, and found another patch that needed fitting 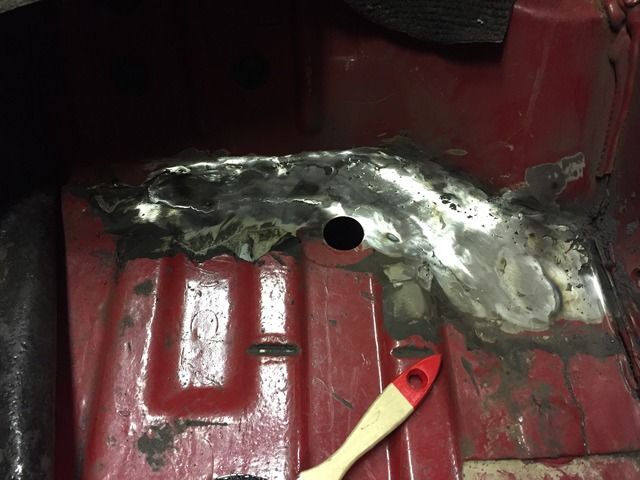 So I'd done! No more patches required..... Success! So I whipped the paint out to cover it, I painted the patch then looked in the passenger footwell, where I'd patched it from the outside, it needed painting. So I scraped some of the sound deadening out around it and found....... 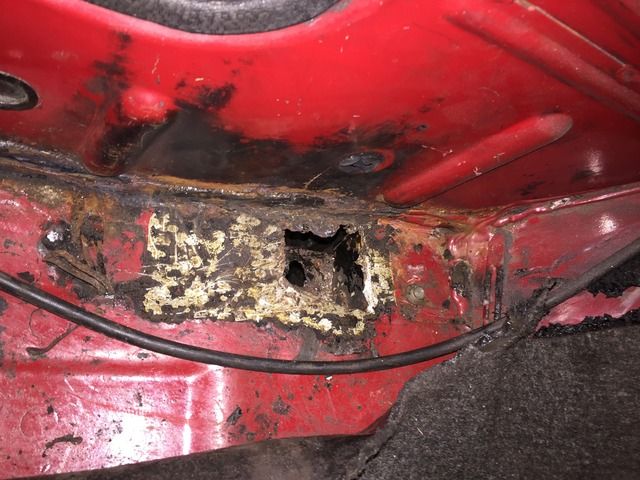 Another hole, oh well easily sorted, so all patched and painted! |
| |
|
|
|
|
|
|
|
|
|
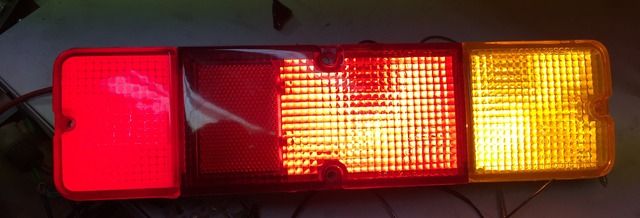
So these arrived, 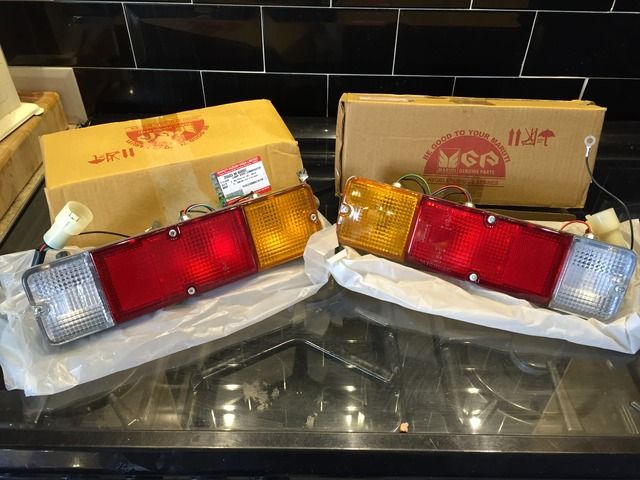 To replace my tiered and broken originals 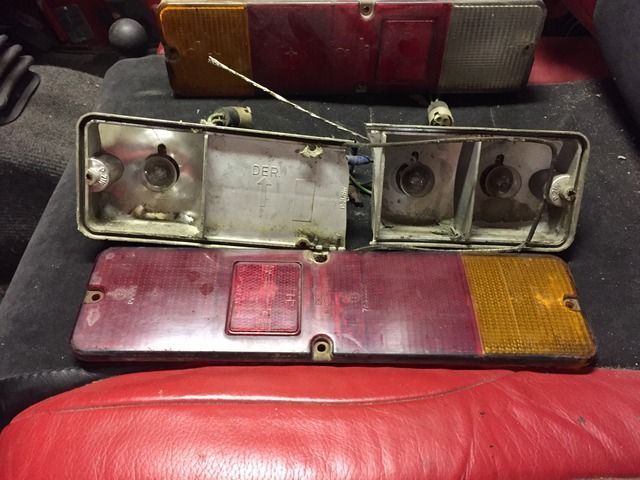 It's great getting new bits through the post, I've not had new 'genuine' bits before so I particularly liked the labels on the boxes! 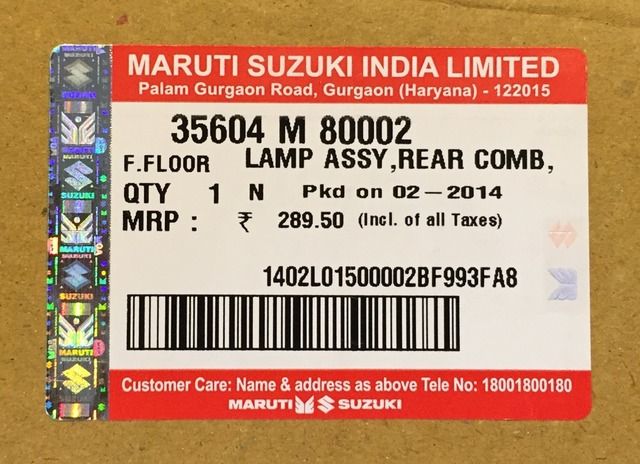 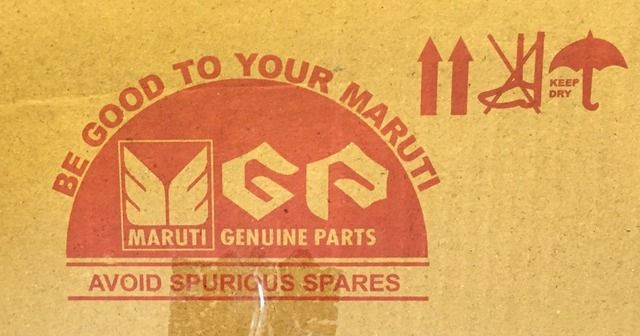 The new lights (European spec) don't have a fog light, just x2 reverse lights, I was going to fit a red lamp but I decide to paint my lense instead, I used some RC car lexan body paint, 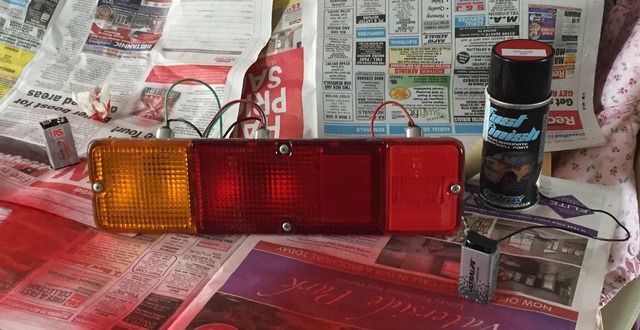 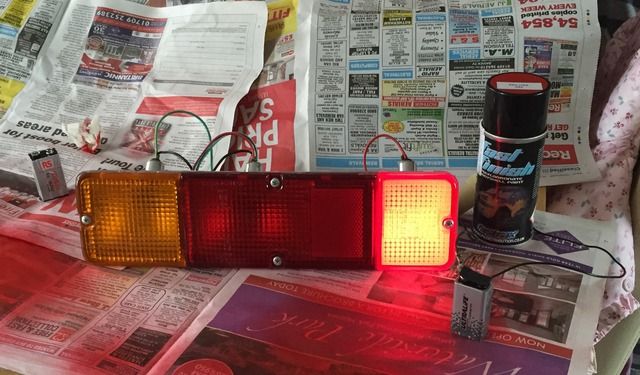 I also finished off the sill trim hangers on the passenger side..... 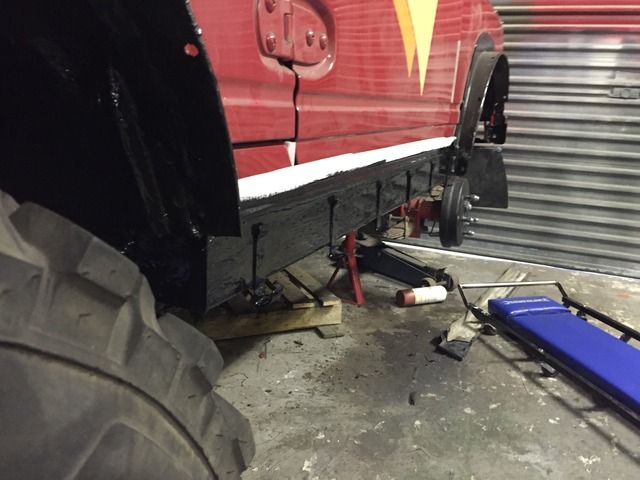 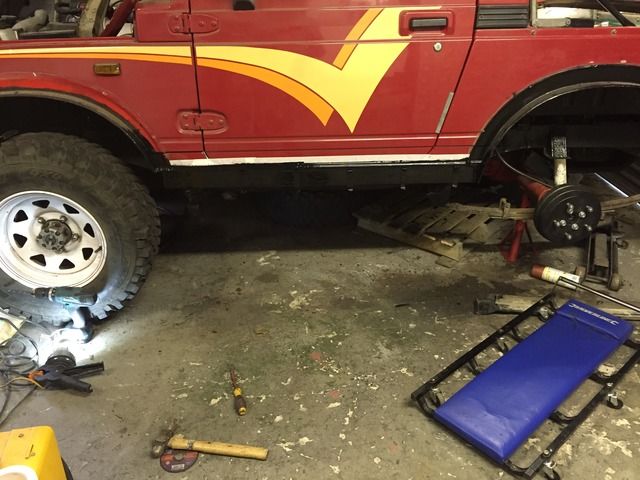 When the paints dry I'll fit my trim and it should be just about done |
| |
|
|
Chris™
Part of things
 This is clearly filler material.
Posts: 519
|
|
|
|
|
New lights look ace - can I ask where you got them from and how much? Good progress with the rust too, there's always new holes to discover in these...
|
| |
1989 Volvo 340
1986 Suzuki SJ413
2000 BMW 318ti
2006 Lexus IS250
|
|
|
|
|
|
|
New lights look ace - can I ask where you got them from and how much? Good progress with the rust too, there's always new holes to discover in these... Hey Chris, they are ebays finest www.ebay.co.uk/ulk/itm/321811877489 but obviously if yours is a late SJ like mine, you'll need to paint the lense for the fog light too. if yours is a an early one, chances are you'll already have a separate fog light. luckily they still make the maruti and sell them new in places like Cyprus and Malta, so consumables like this are easy to get hold of - but I bet you know this already! Oh and I forgot to add, the connector looks similar to the original, but it's different, so you'll have to swap that too, |
| |
|
|
Chris™
Part of things
This is clearly filler material.
Posts: 519
|
|
|
|
|
Thanks for the link - added to my 'wish list'!
Mine's an 86/87 and it had a separate foglight originally but I don't really want to bolt it back on anyway!
Did you just cut and splice on the old connector?
|
| |
1989 Volvo 340
1986 Suzuki SJ413
2000 BMW 318ti
2006 Lexus IS250
|
|
|
|
|
|
|
 Yeah, I just cut and soldered the old plugs to the new lights- which surprisingly had matching colour coded cables, I had to do a bit of cable corrosion removal with vinegar & salt solution followed by a bicarb soda water bath before the old cables would solder, as they were black with corrosion. After the clean they soldered together fine, |
| |
|
|
|
|
|
|
|
Not a big update, but as its a hobby/fun I only work on it as and when I have the time and am inclined to do so, I fitted my new rear lights with old connectors 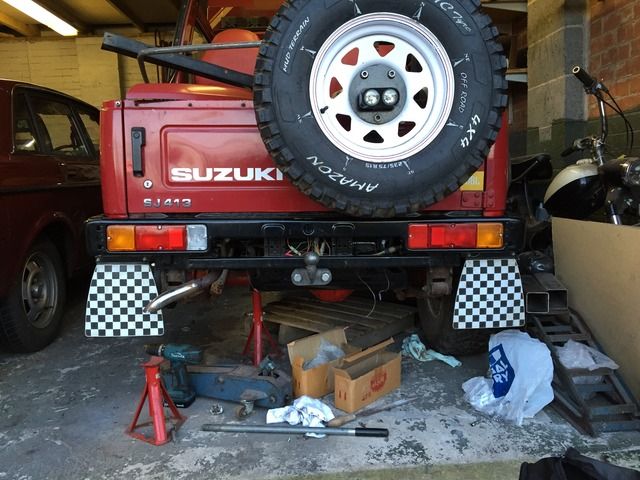 I changed how the lights mount as I've never liked the self tapper that holds them in (and it doesn't help that my bumper tabs had all worn) so I fitted a stainless steel m4 nut and bolt through the tabs so the threads poke back through the holes of the light fitting. It all seemed to be going great then I realised I couldn't get a socket on the nut when the light fitting was in place as the fittings have depressions around the screw holes, the nut & washer would fit in the depression but the socket wouldn't! To counter this I put a 1/4 drive deep socket in my drill and set it running whilst I took a flap wheel in an angle grinder to the end, it ground down nicely and sort of true, and fits snugly on the lense nuts, tada, an easy job taking ages! And still not finished! But on the bright side the mounting screws won't ever rust which was a pet hate! Another thing that has been annoying me is my rear number plate, because of where my towbar is my number plate is about 20mm forward of its normal position, this is fine, but it means that the number plate is secured at the bottom & it means that it can flex (not that it does much, but it doesn't feel right only fitting the screws in the bottom) I also don't like its position because the number plate lights are partially obscured. So I made this, it locates on the original screw holes, tilts the number plate and supports it 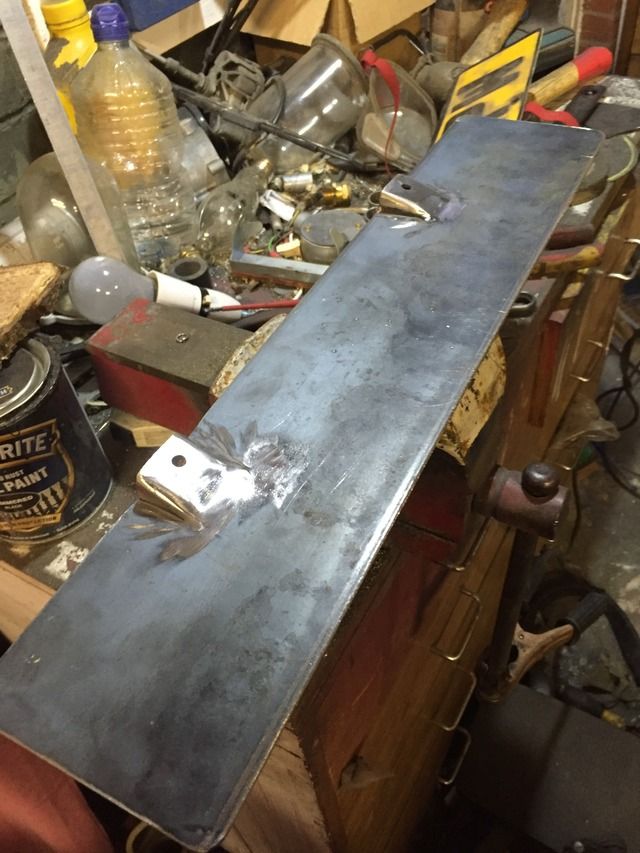 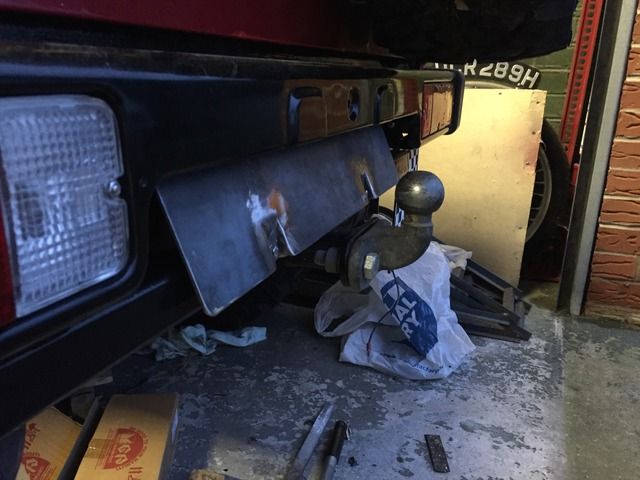 It just needs a lick of paint now, |
| |
|
|
|
|
|
|
|
So look what happened ? I changed the zook around so I can get in and do the drivers side rear brake hose  'The kraken awakes' I then delved into my hazard/indicator not working issue, I quickly narrowed it down to the hazard warning switch repeated operation had it working in a fashion, but no where near reliable enough to send it for an MOT so I pulled it out and started the strip, 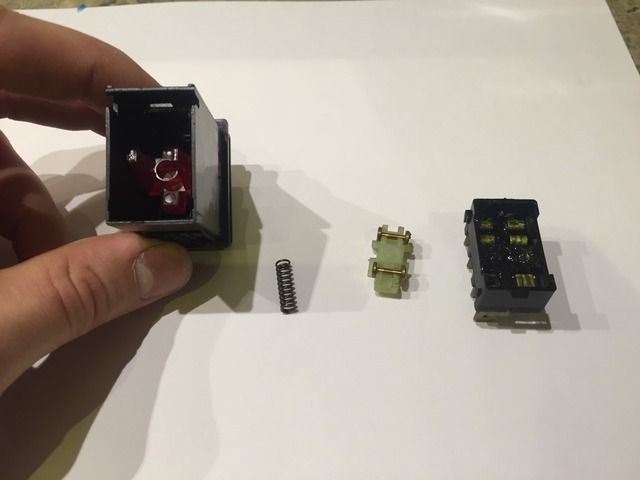 Full of old dried up grease, I cleaned it out and put some Vaseline in to repleace the tar I removed (Vaseline because it's non conductive) 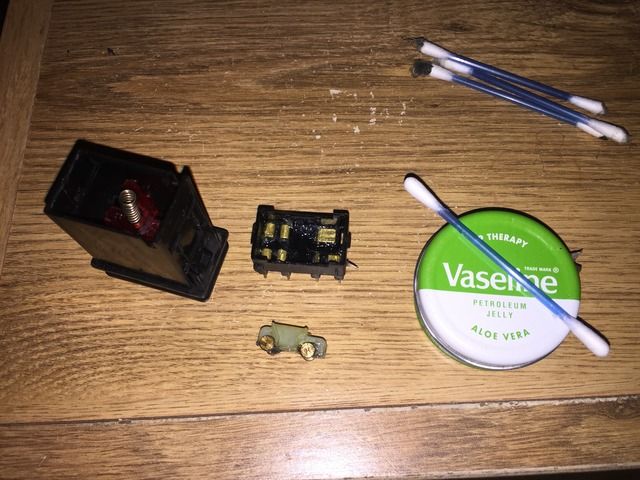 I was feeling rather smug as it all went back together, I refitted the switch and...... It didn't work, I thought I'd try swapping the direction of the carriage (as it has long nose on one side) I reassembled it and it only latches in one direction now, :er: i think I may have lost a spring in the disassembly process! So Andy from SuzukiClubUK forum sent me a replacement switch, and we have success! Hazards and indicators both work, I then replaced the drivers side wheel drum brake studs for new, it was easier than I thought, as I was anticipating pulling the half shaft again, but luckily I could do it all in situ, 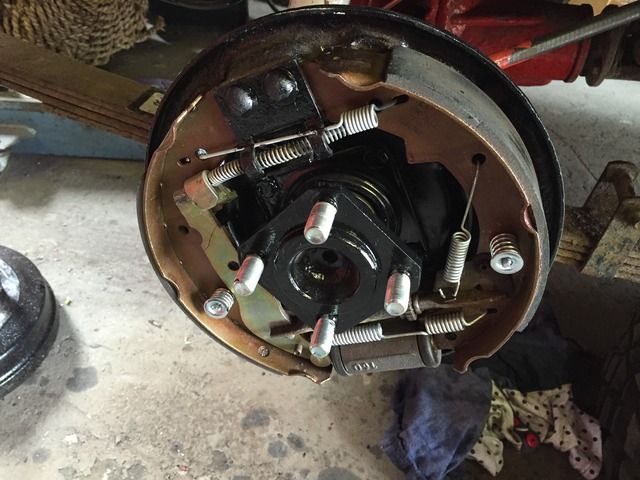 I also replaced my drivers side rear copper brake hose, another job I wasn't looking forward to but was surprisingly easy, I then had to wait for some m12 stainless washers before I could fit my drum back on and wheel, When they arrived I fitted my wheel then I had a look at my drivers seat, it really struggled to push backwards on its runners, I noticed that when the bolts were tightened the rear of the runners were a little splayed indicating the runners were too far apart on the seat base, I removed the runners, opened up the bolt holes and reattached them, it was better but not perfect, so I got them off again 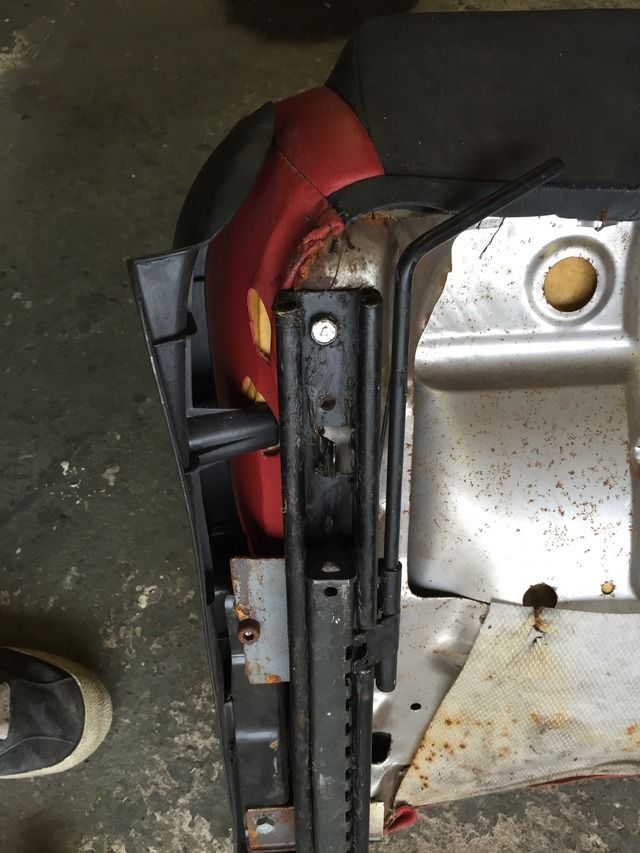 I noticed one of the plastic slides was damaged 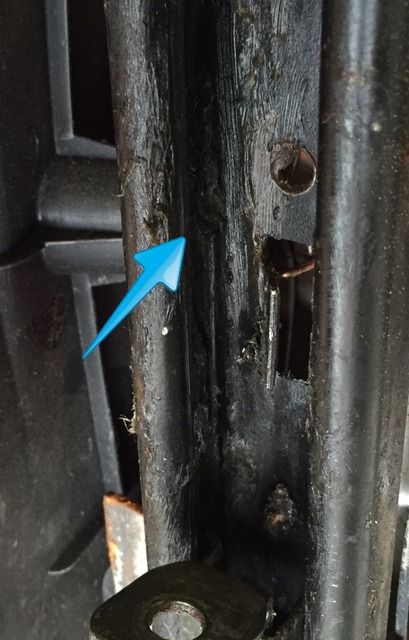 Although you can't see it very well, I'll try and source some new ones at some point Then this happened 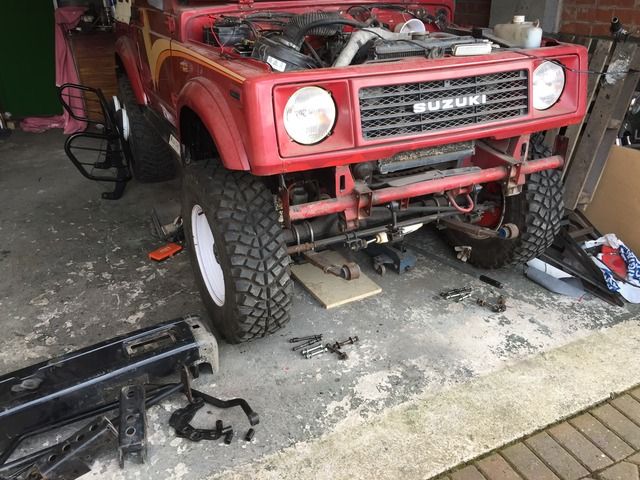 I wanted to add some braces to the chassis where the calmini kit fastens to it, I intended to do this with some suitably sized bits of tube, a by product of this means I have plenty of bits to go to the powdercoaters, This much stuff 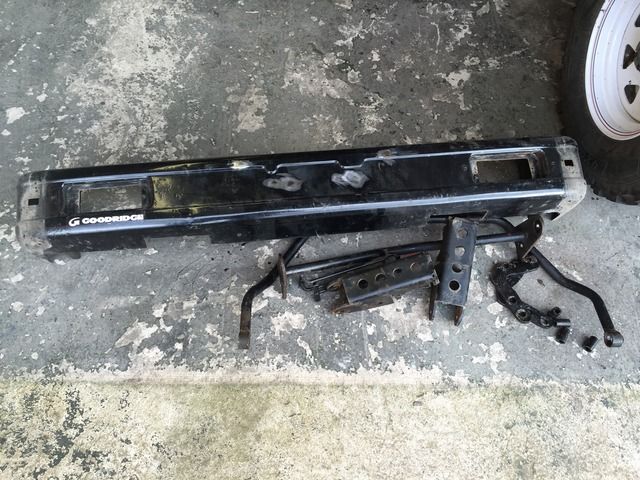 The bumper had a couple of holes in which I filled with weld and ground back, hopefully it will be all smooth and virtually invisible after its paint, I had to remove the bushes from my anti roll bar which was a pain 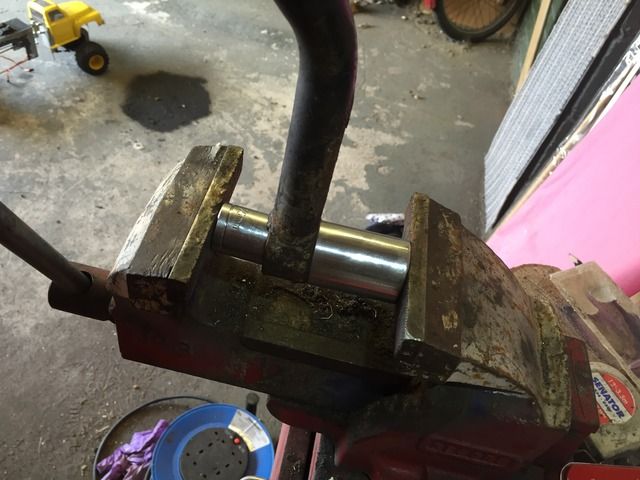 I guess I'll be looking for some new bushings for them then! I was also a little worried about the shackle, 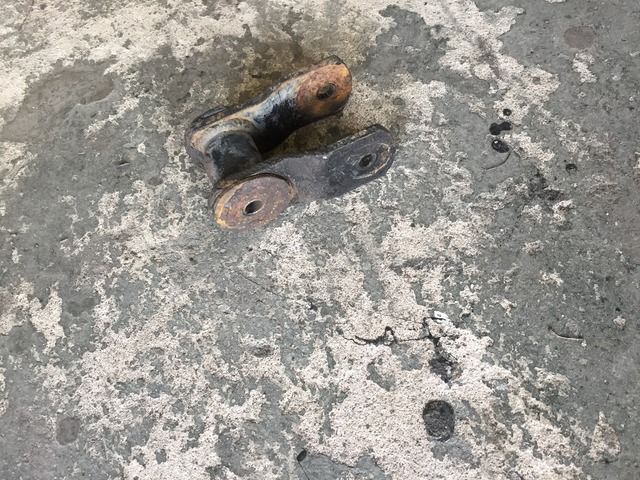 It had more bushes in and I didn't really want to replace them, but I did want the shackles galvanising so I've had to ordered some more bushes from bits for vits, These for the anti roll bar www.bits4vits.co.uk/store/samurai-/-sj/anti-roll-bar-link-to-chassis-bushes/prod_993.html And these for the shackles www.bits4vits.co.uk/store/samurai-/-sj/sj-/-samurai-leaf-spring-poly-bushes-axle-set-floflex/prod_1175.html So I should have all the bits, it's just a shame the leaf Spring polybushes are orange isn't it?! Blue would match the others! As for the anti roll bar bushes has anyone fitted them before? They look like they are one piece? Also, I want to get my anti roll bar galvanised and powdercoaters, to do that you have to make sure the galvanic liquid can get into hollows, is the ARB solid bar or hollow? And what would your thoughts be on on drilling holes in it to let the liquid in? I don't want to lose any strength from it, |
| |
|
|
JoshO
Part of things
Posts: 337
|
|
|
|
I really like this and what you aqre doing to it should be pretty cool  My dad had one of these when my brother and I were little, I do want one at some stage. |
| |
|
|
|
|
|
|
|
So I managed to progress this a little, we started out as this....... 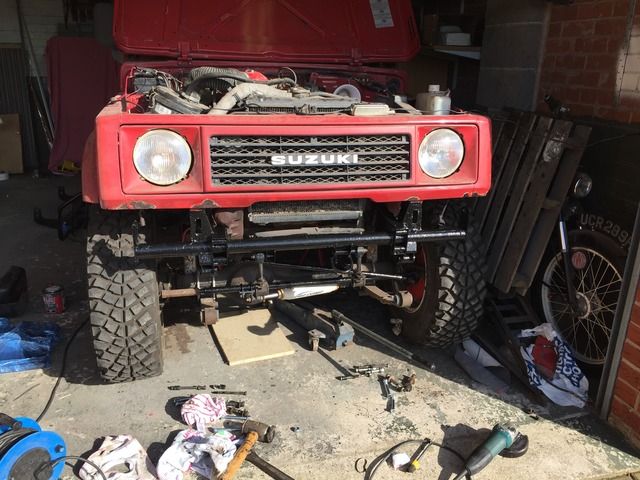 I fitted my freshly galvanised & powdercoated calmini towers, 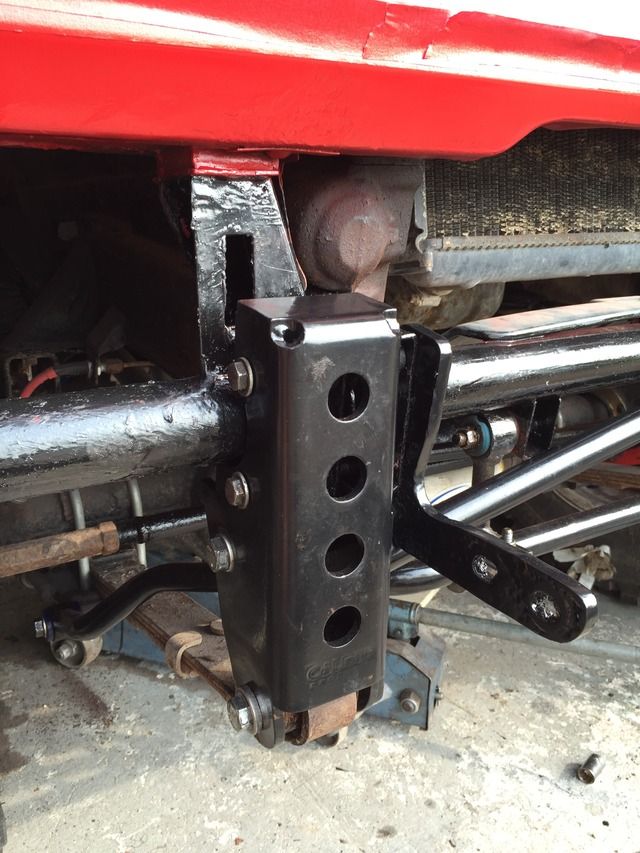 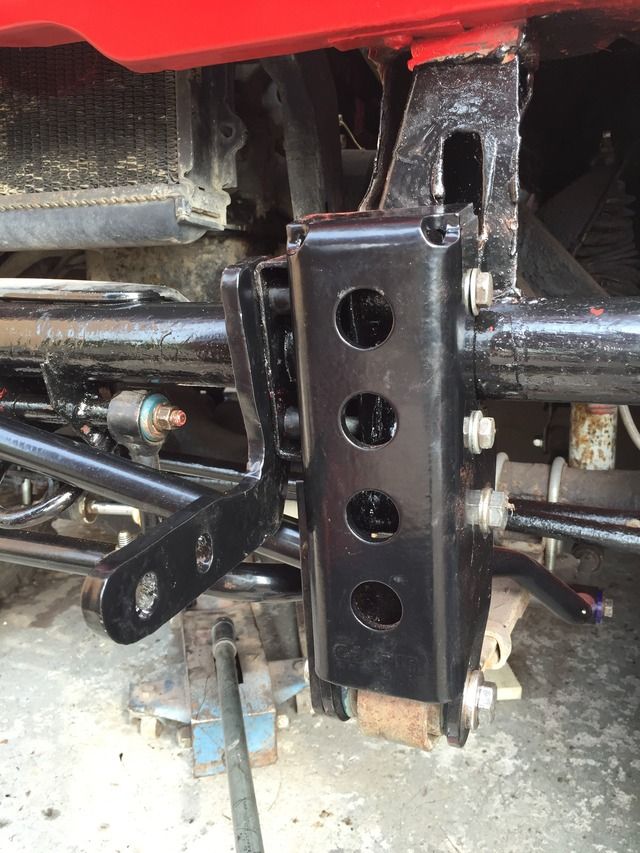 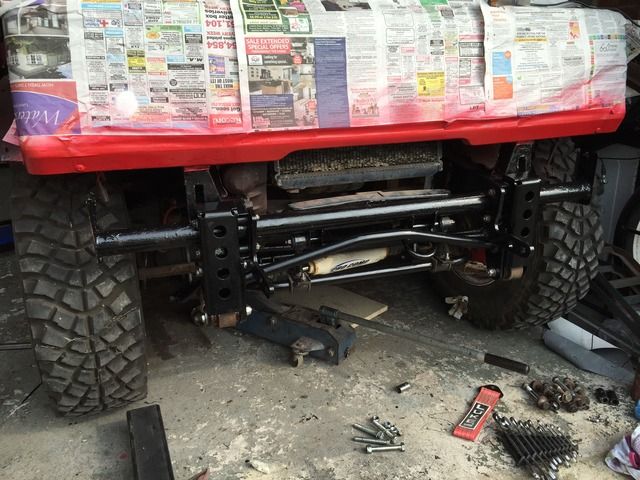 I had to repainted the bottom of the front clip as there were a few areas of rust, these I ground back and treated with rust converter before spraying, the paint (as I've said before) is not the right colour, but it's all I've got at the moment and I don't think it's too noticeable as I painted up to the curve of the metal so most of the time it would be a different shade of red anyway (due to the lighting) Once it was painted the bumper and lights were assembled and refitted 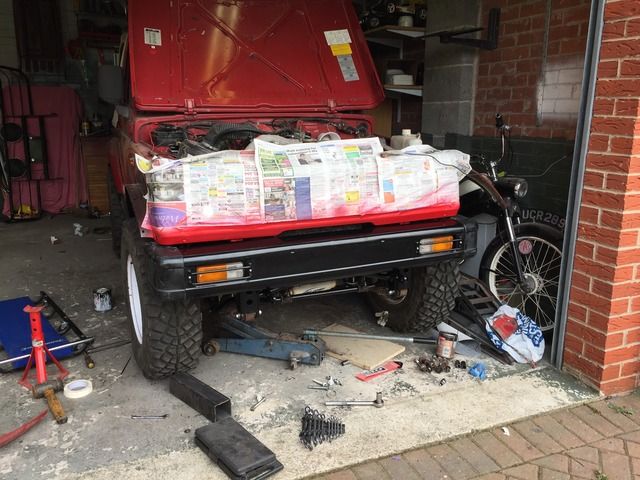 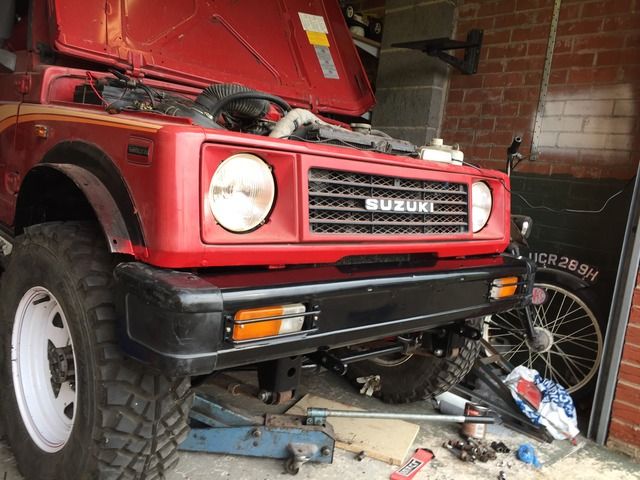 Then the Bullbars back on 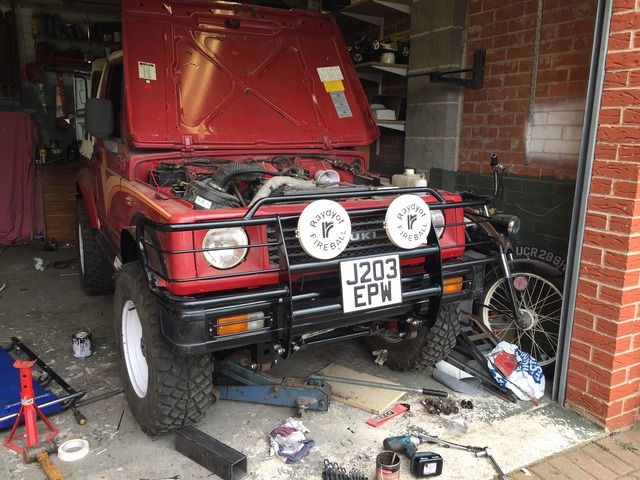 All my shiney goodies, shame you can't see them very well! 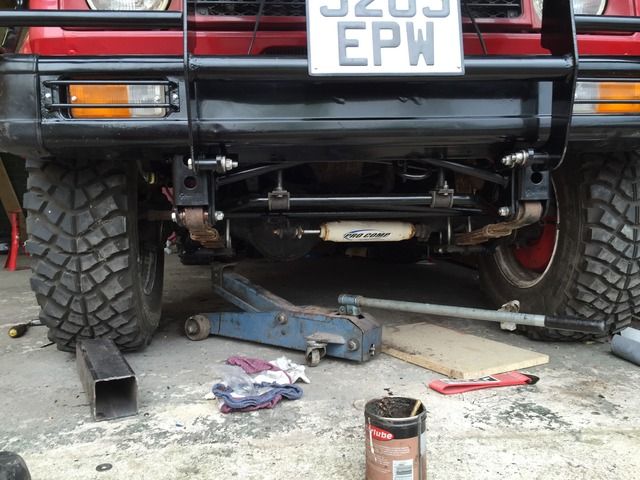 Finally the underside....... I continued painting it, all the chassis is done and the majority of the bottom, this isn't a very good picture, but you get the gist 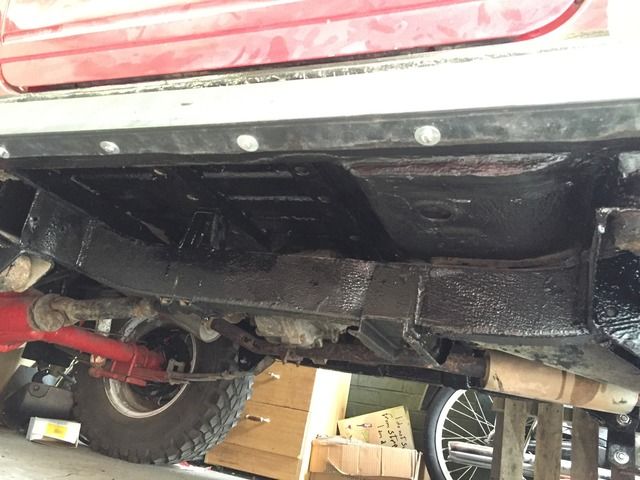 All I need now is a service and MOT! |
| |
|
|
|
|
|
|
|
May 17, 2016 11:49:24 GMT
|
Boom MOT passed and out and about! 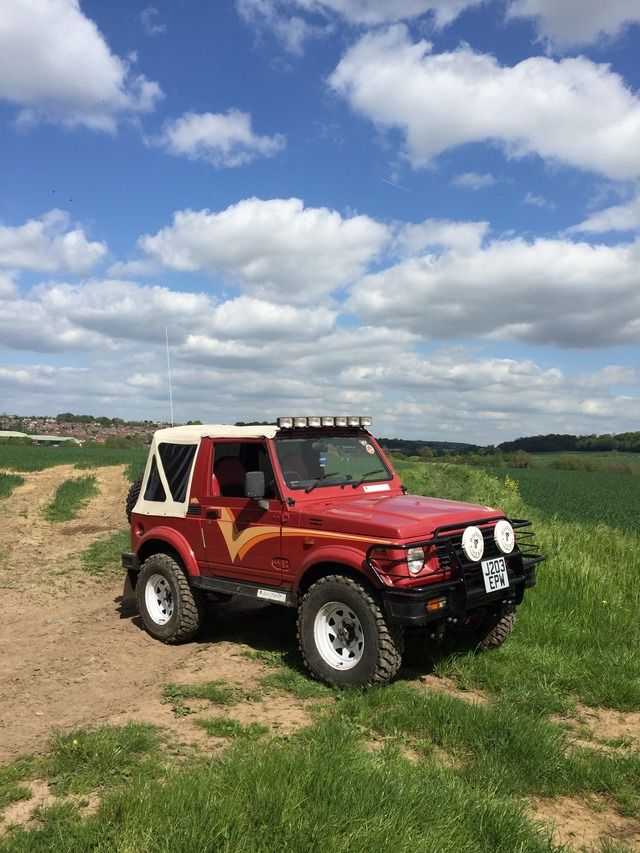 |
| |
|
|
|
|
|
|
|
So update, I replaced the petrol tank with a new one, my repair work on the old tank was giving me nightmares (I know I need a life) but coming to replace it, one hose had to be cut, unfortunatly the 1" I took off it made it approximately 1" too short for the next tank!!!! Oh well, new pipe was ordered cut and fitted. Whilst out of action I also took the oppertunity to replace an o ring to the distributer. I had replaced this o ring prior to it going off the road in 2009, I knew the replacement was the wrong size but I needed the car so in it went. It's been niggling me for a while to replace it so whilst waiting for the hose I whipped the old ring out, I used my vernier a and ordered a replacement. When the new ring arrived..... Too big! I'd only gone and measured the outter diameter of the hole instead of the inner! So let's go order another, boom, that arrives, still too big! As me fuel hose had come I took a chance and cut the ring, I put the joint to the top and it seems oil tight at the moment, I've ordered another o ring 2mm smaller, hopefully this should be right this time! With all the fannying about I was doing I decided to go mad and I ordered a new soft top, my old one was a monsoon soft top. I contacted them, but apparently they no longer do smoked glass in white hoods, which was what I really wanted. So I had a look further afield. In the end I decided on a smittybilt top which I ordered in from California, this has the smoked Windows I wanted and also has the zip out sides and rear, 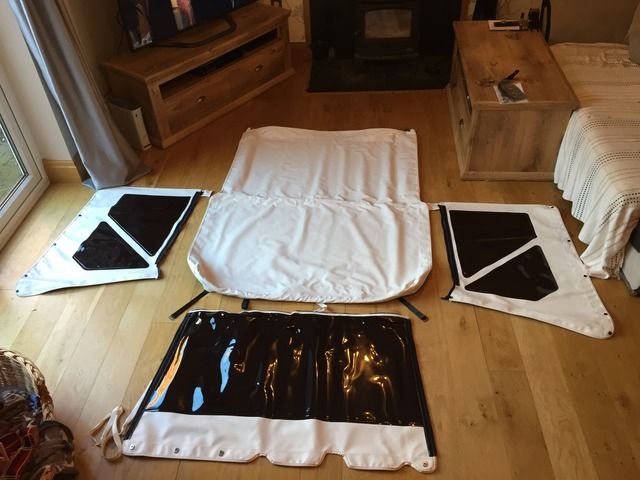 And fitted 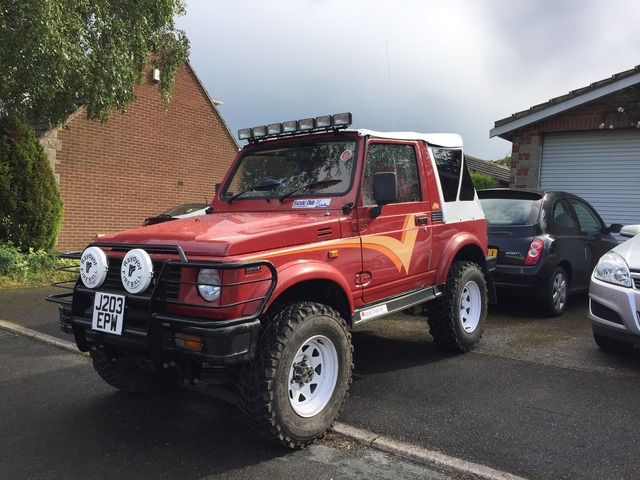 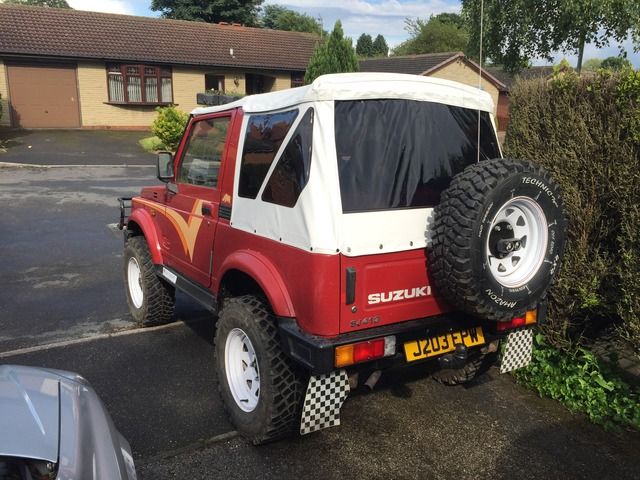 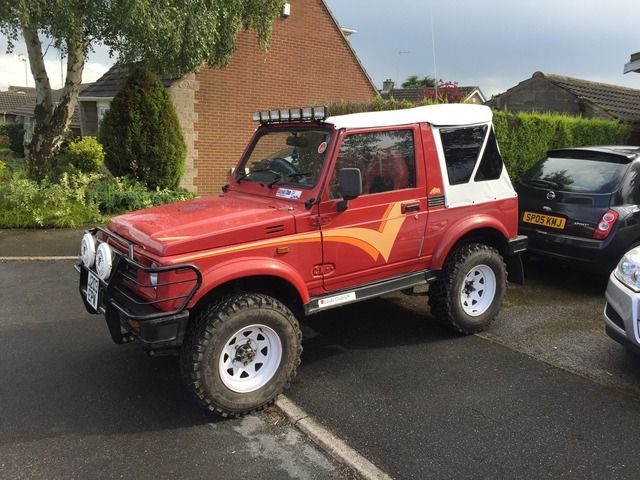 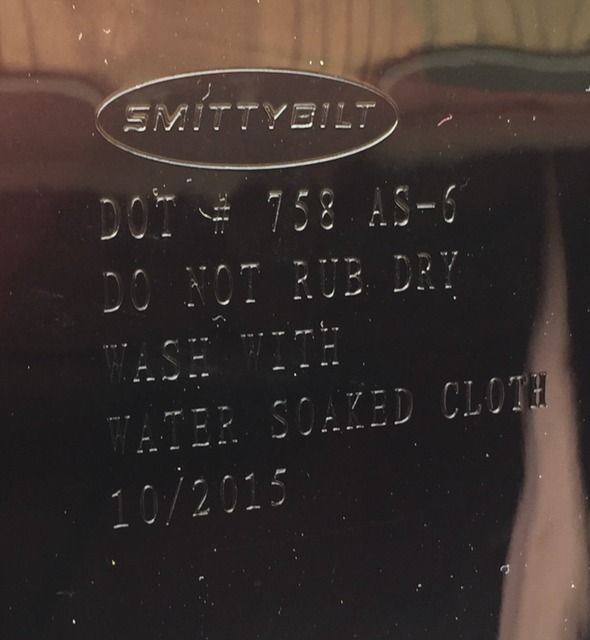 I'm dead chuffed with it, all though it doesn't sit as cleanly over the soft top frame at the rear (the monsoon roof sat really nicely) but it has extra zips in there now and a lip to keep the rain away from the join. In the end my old soft top was getting long the tooth and was beginning to show its age with a number of rips and holes, unfortunatly I managed to rip it some more removing it so it will not be going back on! It's had a good innings though, it was on my Suzuki when I bought it and has pretty much stood the test of time, |
| |
|
|
|
|
|
Jun 27, 2016 20:09:35 GMT
|
And the best thing about my new soft top........ 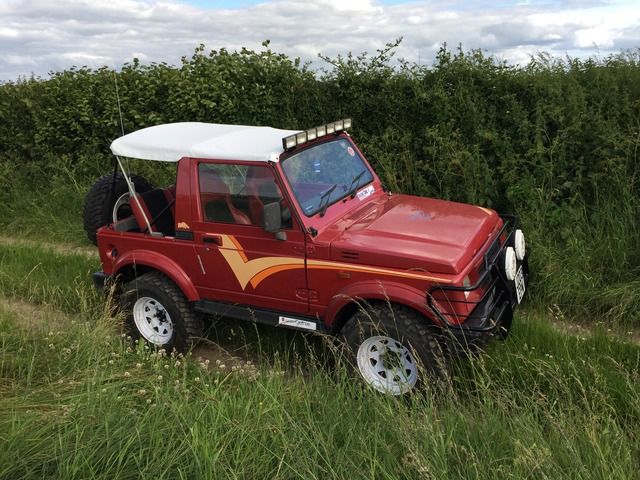  |
| |
|
|
|
|
|
Jun 27, 2016 23:01:50 GMT
|
|
The seat rails are still available new from Japan. The drivers side you can buy seperately, but the passengers side rails come as a set.
|
| |
|
|
|
|
|
|
|
The otherday, on my way home from work I attacked some more local (to my work) byways, and had a pretty good time, I do enjoy 'exploring'  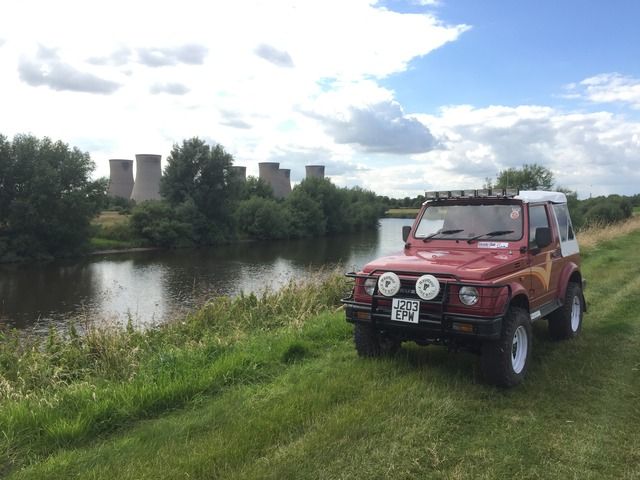 |
| |
|
|
|
|
|
|
|
So a month or so ago, there were some stones I needed to collect for my garden, so of course, a perfect excuse to break the zook out, 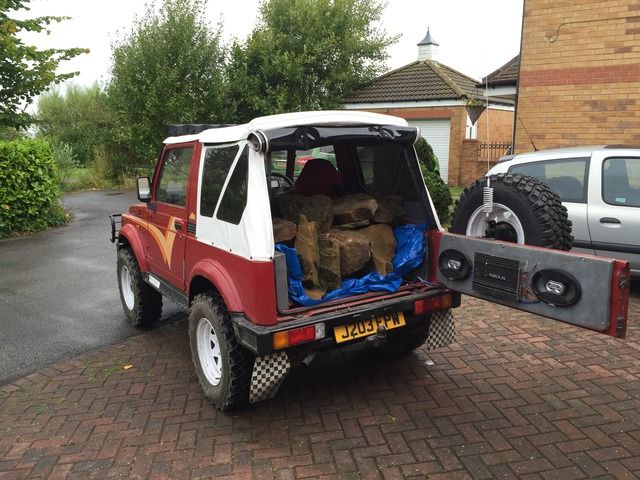 Whilst unloading I noticed a bit of oil under the zook, it looked like I developed an oil leak round the back of the head, I suspected the rocker gasket as it was a little ropey, But when I investigated.....hmmm 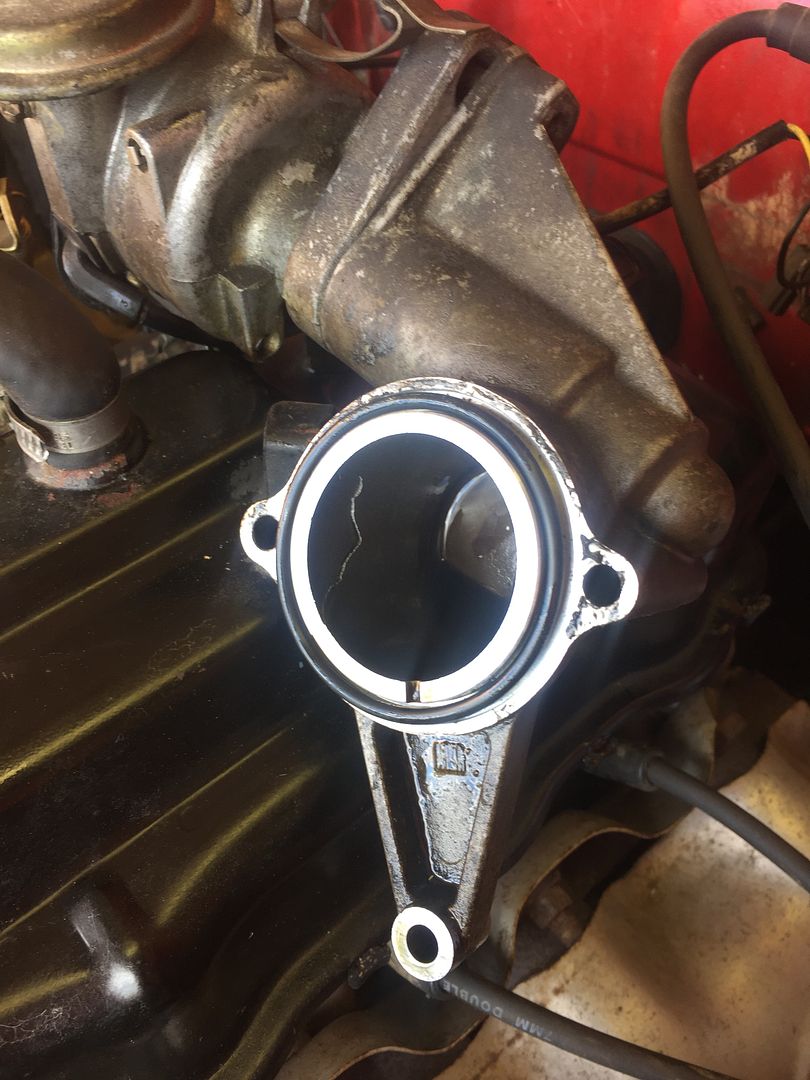 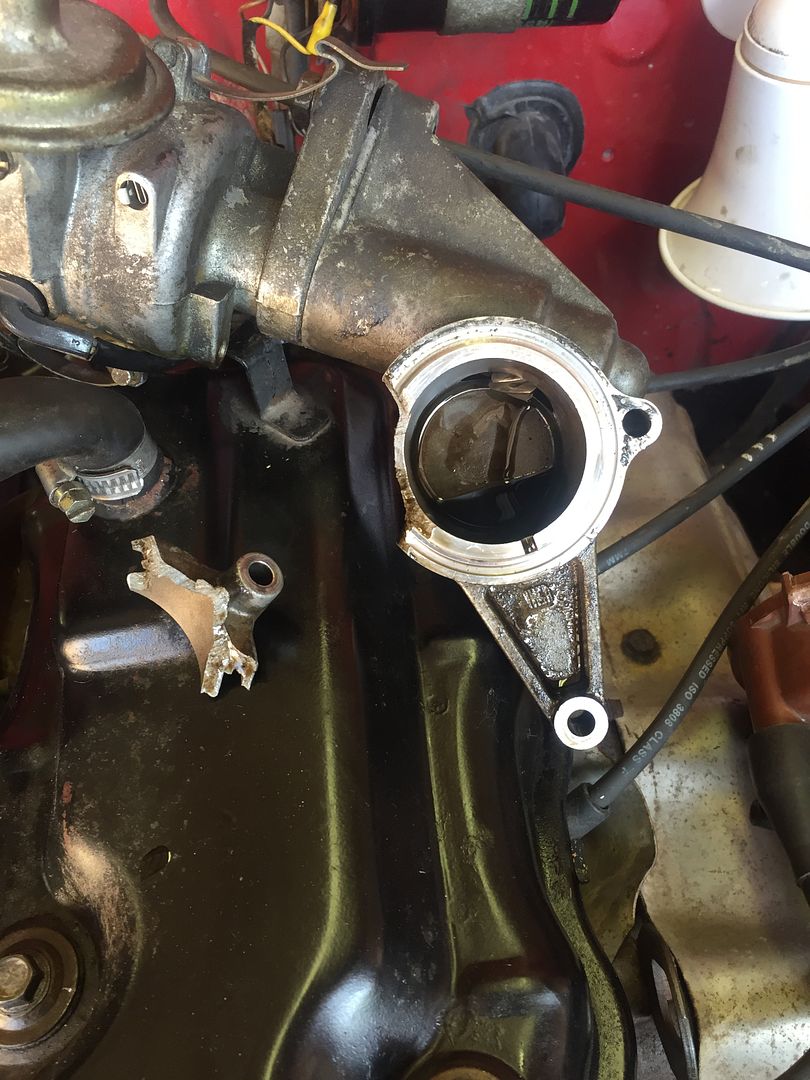 That was me then. Refitting it after I did the tappers, I think the cause was my o ring 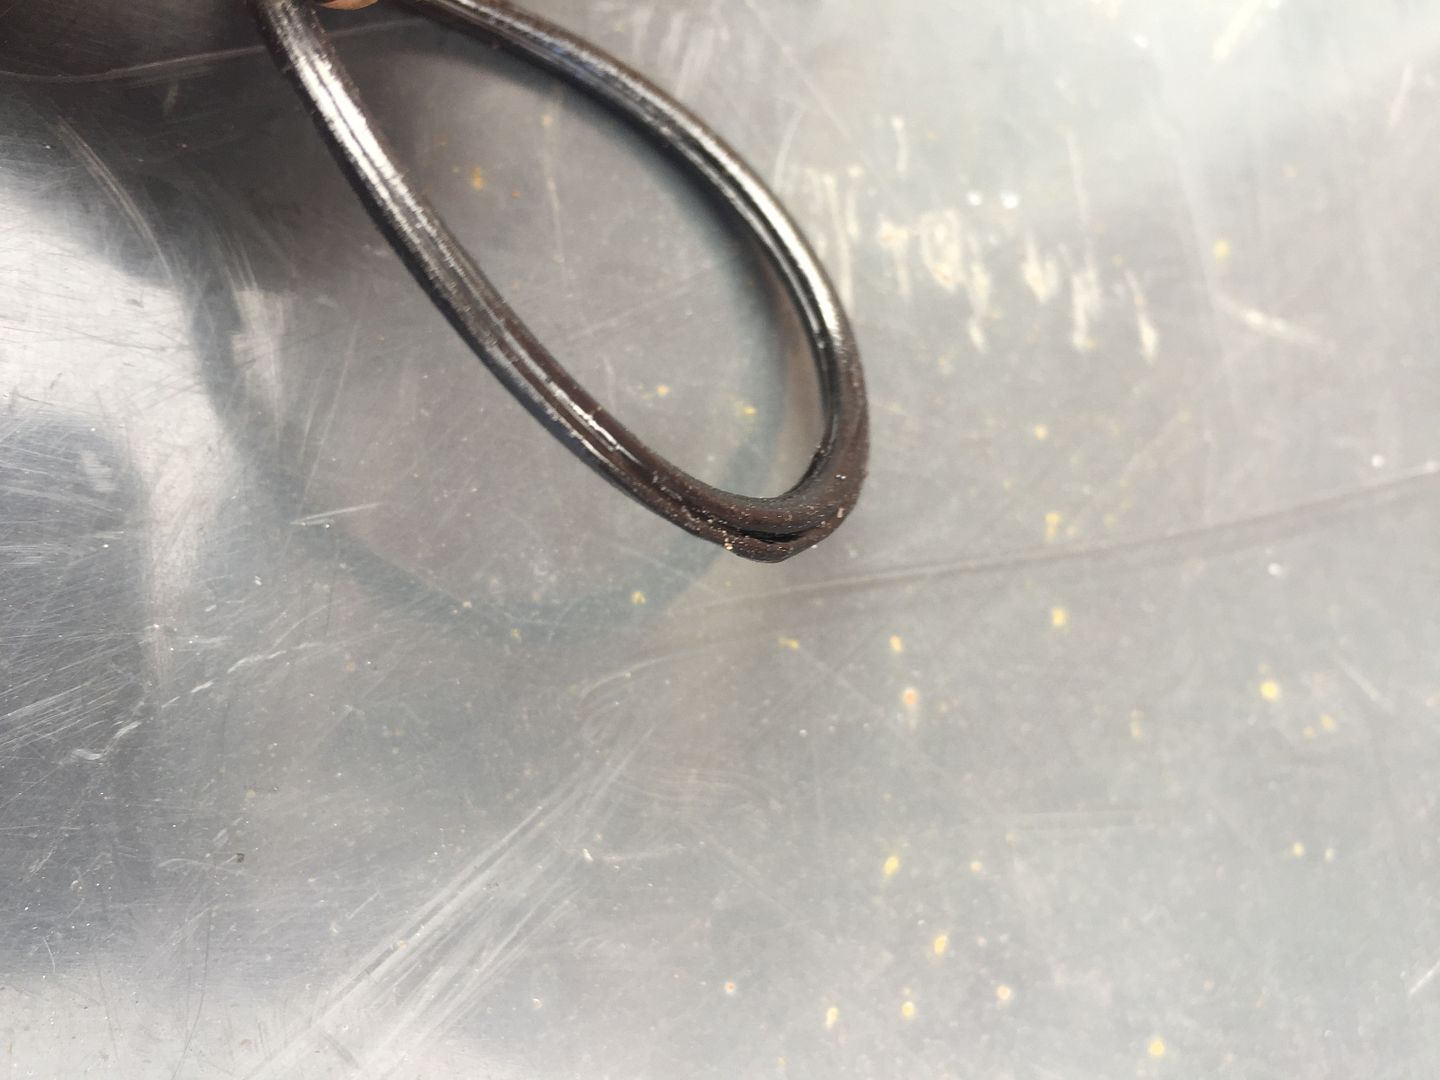 You can see how it's pushed out at the mating face, Serves me right for guessing the size and not just buying a proper replacement. I did some research the distributer o ring is part number 09280-56004, it is 1.9mm cross section with 55.5 inside diameter measurement, I found a used replacement adaptor and sent some money. Whilst I was waiting, I decided to freshen up the metal surrounds on the high level spot lights, 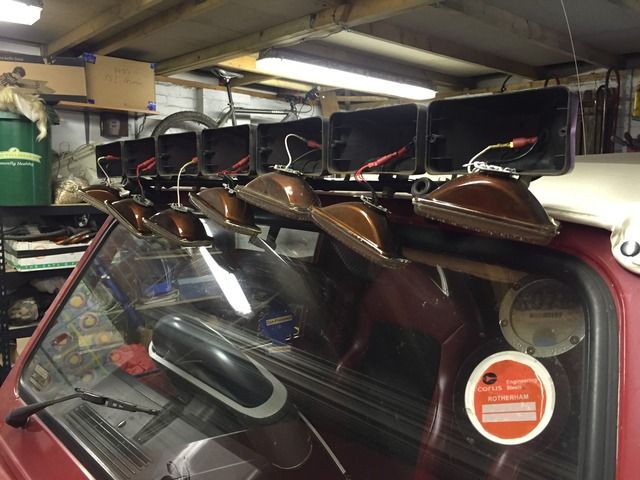 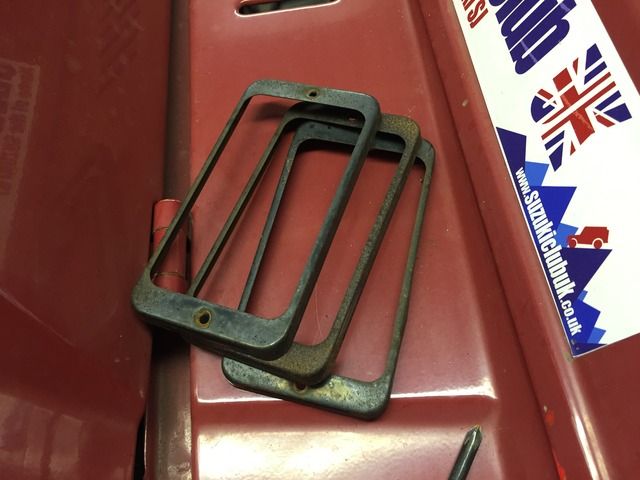 They were defiantly starting to look scabby, so I whipped them off, blasted them and painted them.... Much better! 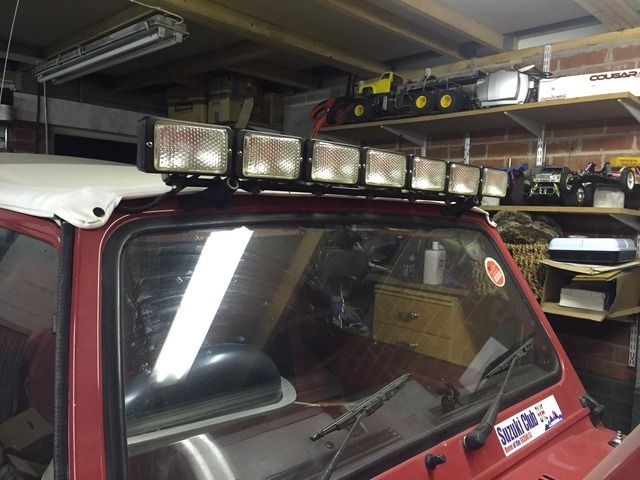 Then when my adaptor came I got ready fit it. This is my old one 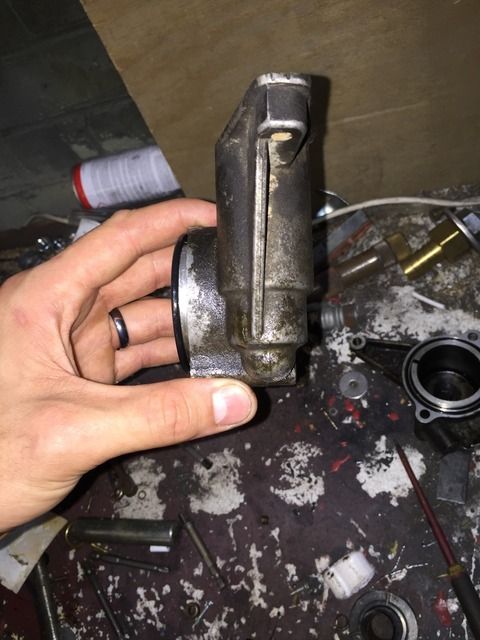 Notice the lack of bolt at the bottom nub, And my replacement 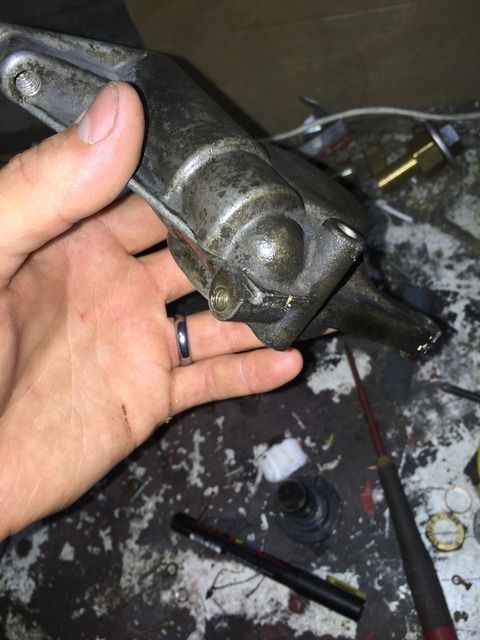 I tried fitting my shaft and distributer into the new housing but it wouldn't slide in, I checked and..... My old 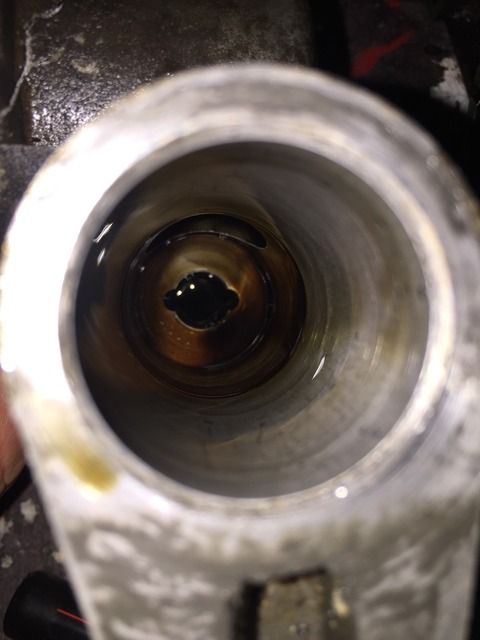 And my replacement, 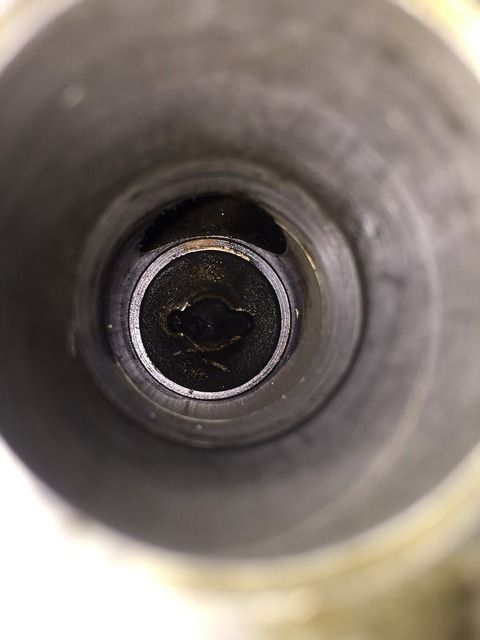 Apparently they do x2 different types and I had the wrong one! I found another ordered it & it arrived. I cleaned it up a bit, & gave it a bit of a polish (oh-er) but I didn't go over the top, it's not like I'll give it any attention when it's fitted, 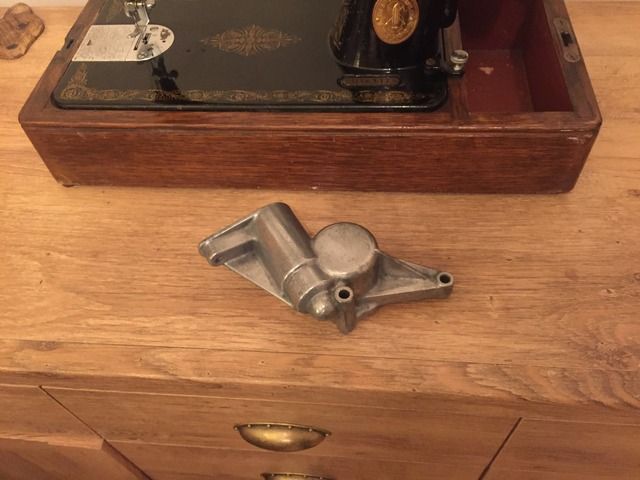 I lined up my collection of adaptors, 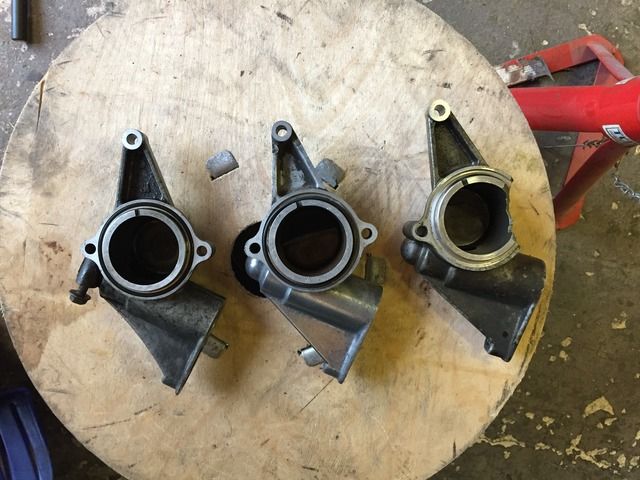 I was going to use the o ring from the adaptor which had the smaller diameter hole, but when I got it out it broke as it had gone brittle. I did order a new o ring but it seemed a little bit small. When the old one broke I was forced to use it, I had to heat it up and pull it a bit to get a t to stay in its groove as it kept trying to roll out. But then, it all went together  I had to set the timing again but damn, it's good to be back on the road!  |
| |
|
|
|
|
|
|
|
|
really nice Sammy you have there. surprised you stuck with rear drums though , fitting discs on the back of mine was one of the best nods I ever did. you can only throw enough mud encrusted linings before you give in!
|
| |
'80 s1 924 turbo..hibernating
'80 golf gli cabriolet...doing impression of a skip
'97 pug 106 commuter...continuing cheapness making me smile!
firm believer in the k.i.s.s and f.i.s.h principles.
|
|


 My dad had one of these when my brother and I were little, I do want one at some stage.
