sb
Part of things
 
Posts: 725 
|
|
Sept 18, 2016 19:52:38 GMT
|
Welcome x factor avoiders. So lets get straight into it and look at some horrendous sills (FUN RIGHT?!).  Plenty of violence and I had this removed.  Lets look into the gaping void, the space where rust is born. 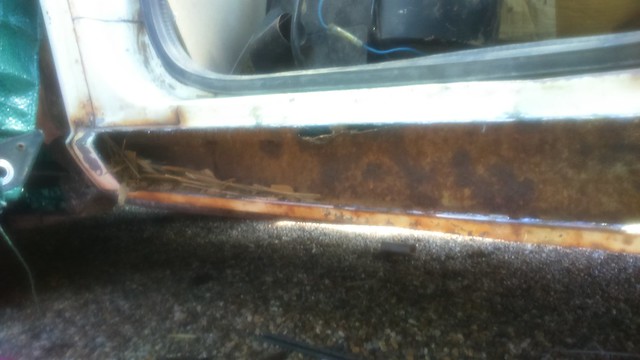 Whats that in the corner? Oh its bits of the truck and the Australian outback! Please do note this is the 'clean' version. I've already blown this out (while the sill was still in place) and this was still left. 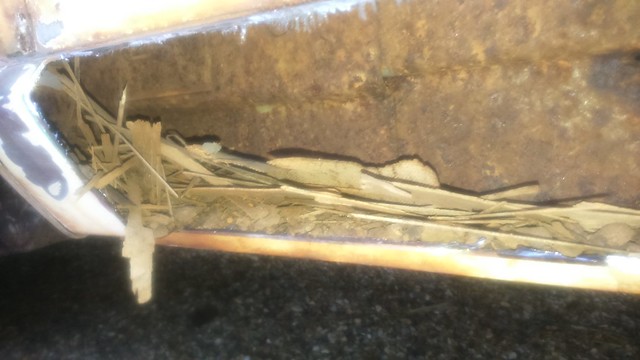 So now I had to repair the inside of the side so I could re attach the outside. This area is meant to be where the cab reinforcement is spot welded on I'm pretty sure, but it was totally gone.  As you'll see here I need to rebuild the top of it as well before I can put the floor in.  In the last picture there's a big hole above the small piece I welded in that needed filling. So say hello to a very awkward shaped repair piece.  Like a glove! If the glove maker has never seen a human hand before and made said glove out of Lego...  But out with the Metal Inserting Glue (pretty sure that's what MIG stands for...) and we got that sucker in.    No time to rejoice, or cry with embarrassment, on with the next hole.  Metal shaping doesn't need fancy tools, just a vice and a hammer  Look at that, radiused and everything! Okay so it turned out it wasn't actually a great radius, it didn't line up very well. But that's what hammers are for right?!  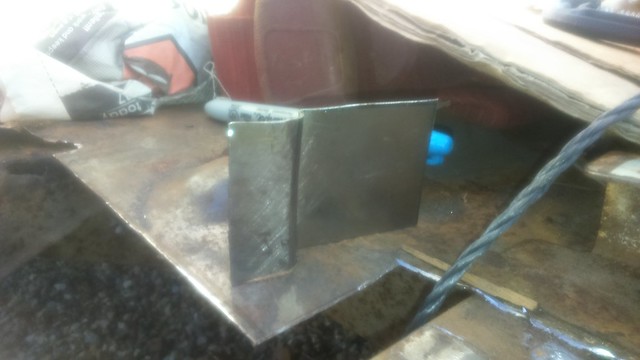 Heres the actual shape I needed, I know it seems like a massive waste but the extra size makes it a lot easier to bend and form.  Bam!  Hopefully Ill get the outer sill on this week. |
| |
Last Edit: Sept 18, 2016 19:56:05 GMT by sb
|
|
|
|
sb
Part of things
 
Posts: 725 
|
|
|
|
It took me 2 and a half hours to upload these pictures, then I managed to tab back and lose everything I wrote... So you swines better appreciate this! Last time I finished up the inside of the sill, last repair before fitting was this patch in the top. Although not obvious it had started to rot. Also the whole sill sags down at this point (its the same on both sides, either by design or more likely has dropped over time).  Again bad picture, but I'm actually happy with this repair, all went very smoothly with good welding.  As before I was given these sills for free.  But they were too big so I cut off the extra step for the door and slit them so I could make them narrower.  Then slit them to take the shape of the depression mentioned above. I could have put in the work to make it all straight but it would require cutting and re welding basically everything under the door from sill to floor which isnt worth it.  Cleaned and prepped inside the sill and new panel.  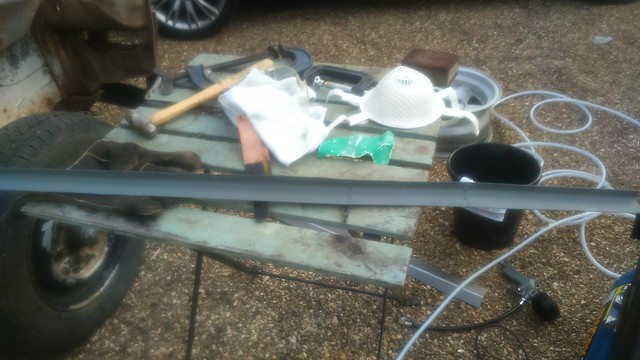 Tacked on the top half to check the shape and fit. The original was hardly precision engineering so not bothered about it being perfect.     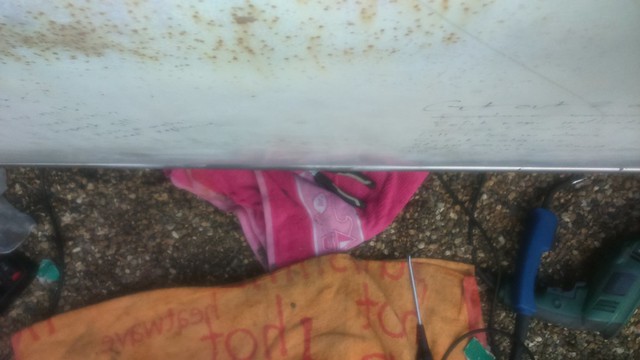  (Sidenote: I made a thread for the stereo thing in the background here: retrorides.proboards.com/thread/192706/speakerbox-boom-box-radio-thing) Heres another issue with the sills. The new ones arnt quite the same profile, so Ill go with the new and work them into the original shape and nobody will know or notice the change.  Next up was the balancing act of holding, aligning and welding the bottom half with nowhere near enough appendages. On reflection my foot looks tiny in this photo, I'm going to blame it on the angle rather than my hobbit like proportions. 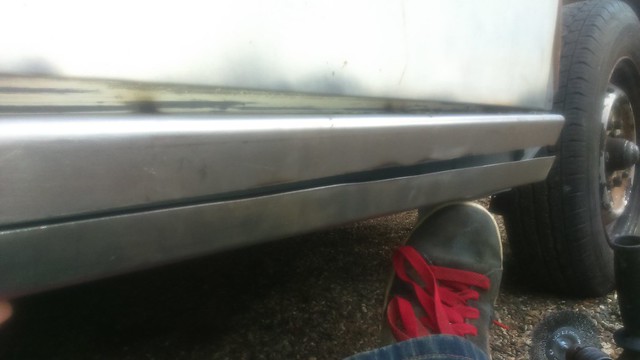 But I got there in the end.     As you can see they overlap quite badly. I tacked them together like this then cut them with the angle grinder. This meant the join was always a perfect line between them as they were cut at the same time. 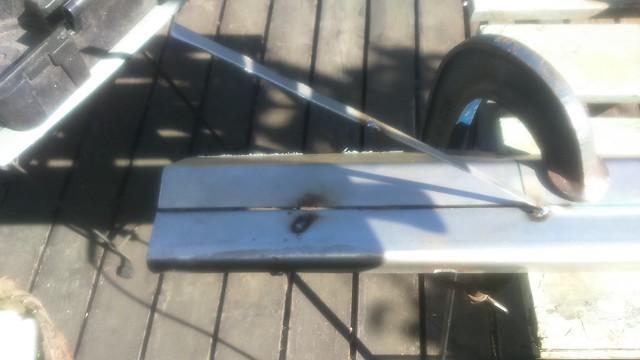  I did them one half at a time. This meant they were always held the correct distance away. Cut one half, clean and tack. Then cut the other half and the new tacks hold it where it needs to be.    You can see here how much the profile has changed (and unfortunately warped a little from the welding)   Little bit of fun, I was testing some wheel colours.   I think I want something between the two copper colours and definitely not metallic! Also because my phone doesnt have a great camera I edited a picture to try and show what colour the wings really are. Its closer to this than the others, just a little less full on.  |
| |
Last Edit: Oct 7, 2016 20:03:12 GMT by sb
|
|
mattiwagon
Part of things
  Just got a work truck
Posts: 445 
|
|
|
|
|
Love your ideas dude. Great work on the resto, keep it up
|
| |
If they cant be nice f**k em!
84 low t25 panel 1.9td beige and rust combo
97 Goped Bigfoot G260RC with clutch conversion
97 Impreza turbo 2000 builders wagon 76k sold
04 Fabia vRs 50mpg pocket rocket
04 battered T5 pickup in blue!
Chainsaws lotsa Chainsaws
|
|
|
|
CaptainSlog
Part of things
 
Posts: 510
Club RR Member Number: 180
|
1969 Datsun 521 Pick-upCaptainSlog
@captainslog
Club Retro Rides Member 180
|
|
|
Bookmarked - love the trucks from Zimbabwe days. Like the way this is headed - get on with it  |
| |
|
|
sb
Part of things
 
Posts: 725 
|
|
Oct 11, 2016 10:24:33 GMT
|
Love your ideas dude. Great work on the resto, keep it up Some very smart work in here. Bookmarked - love the trucks from Zimbabwe days. Like the way this is headed - get on with it  Cheers for the kind words all! |
| |
|
|
sb
Part of things
 
Posts: 725 
|
|
Oct 24, 2016 19:09:44 GMT
|
So I finished a sill! Sort of... Almost... First fence panels are great for clamping angled pieces.   So I committed to the cut and shut sill. Checked it while I went. Was happy with it. Then I stepped back.    The step I put in was just too much. With the door shut you could really tell the sill was dipping in the middle. Cue a dumb idea! 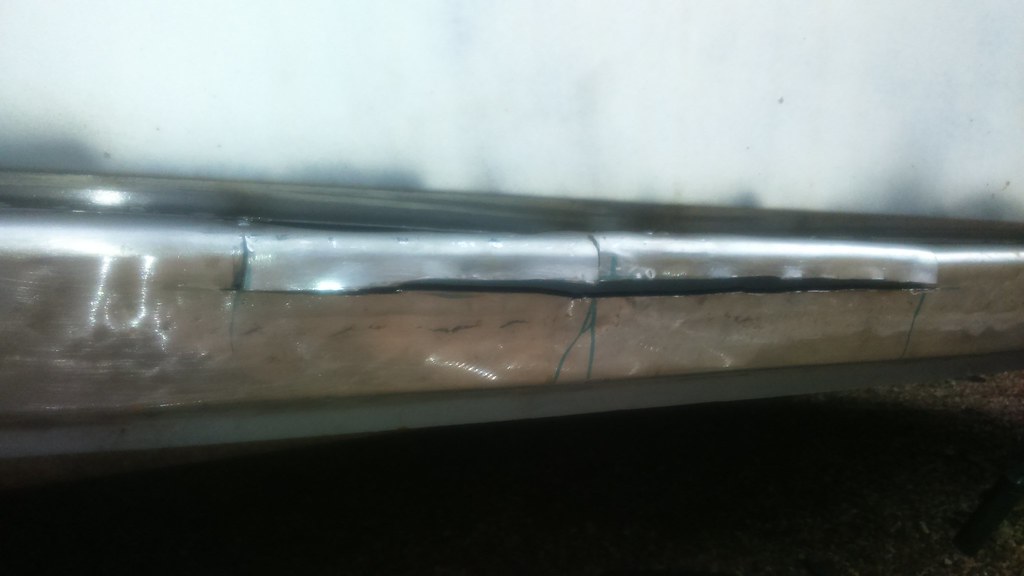  I cut a big hold and stretched the metal back up into a straight line. Problem was I no longer had anything to weld to the door shut on top and the hole was too big in the middle. I'm not gonna lie, I bodged the curse word out of it, and it really showed. It was a total  to weld and it basically kept getting worse. Manned up and started again on the piece with an offcut from when I cut down the sill in the first place:   So today after god knows how many weeks it is finally in primer!  With the door shut.   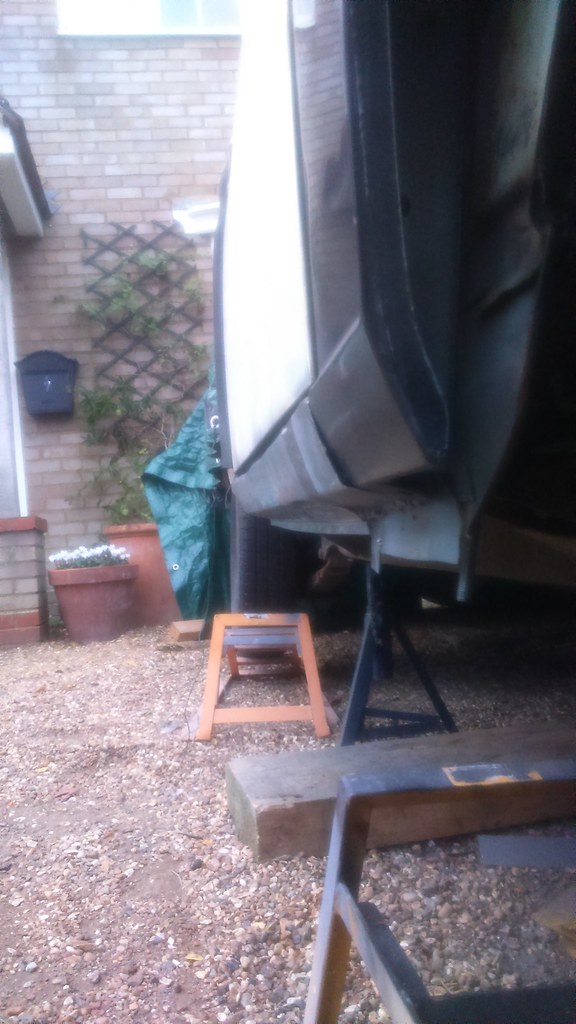 Its a bit wobbly and wavey in places as I'm still learning the ropes with controlling heat but its in there! I know the shut line looks huge but thats the standard fit. If I tried to bring it any closer I would basically have to raise the entire sill and door shut. inside and out which just seemed way too much work for a minor detail. This highlights the issues, so not perfect in metal but its not a horrendous issues. Oh the sins you can hide with filler...  Just got to add the cap on the end for the wing to bolt to and its done. Also please note the ramps in the photos are not doing anything, they're just tucked up there out of the way. |
| |
Last Edit: Oct 24, 2016 19:11:58 GMT by sb
|
|
|
|
|
|
|
|
Nice truck- looking good.
So, need a new bonnet? Bought one for my 411, but it's identical but about 2 inchs too wide so must be 5 series.
Shout if of interest, before I EBay it..
Cheers
|
| |
|
|
sb
Part of things
 
Posts: 725 
|
|
Oct 25, 2016 10:12:56 GMT
|
Nice truck- looking good. So, need a new bonnet? Bought one for my 411, but it's identical but about 2 inchs too wide so must be 5 series. Shout if of interest, before I EBay it.. Cheers I've sent you a PM |
| |
|
|
sb
Part of things
 
Posts: 725 
|
|
Nov 18, 2016 16:30:16 GMT
|
So no update for a while, not going to lie its because its been cold and miserable and I'm a little curse word... The longing for summer to return begins again. So here's a teaser, points for the person who can tell me what its off.  |
| |
|
|
|
|
Paul Y
Posted a lot
  
Posts: 1,951
|
|
|
|
Going to say Mustang just so I can contribute something other than a thumbs up. P.  |
| |
|
|
sb
Part of things
 
Posts: 725 
|
|
|
|
|
A bit of idea testing and POC:
|
| |
|
|
|
|
|
|
|
|
Nice lights, are they off a toyota celica?
|
| |
|
|
sb
Part of things
 
Posts: 725 
|
|
|
|
Nice lights, are they off a toyota celica? They are indeed. These are just reproductions as I'll no doubt end up damaging them at some point while I play around with them. |
| |
|
|
sb
Part of things
 
Posts: 725 
|
|
Dec 21, 2016 22:05:22 GMT
|
Got my ATTINY84s through so I could put the code on them and test the lights as a standalone without the arduino. An overall:  The ATTINY is currently powered from 3x AA batteries. (Should be ~4.5v, reading at 3.6v). Eventually this will be powered by a 5v regulator if it does end up in the truck.  The ATTINY is currently coded to just cycle the lights with no logic to control this. Eventually pin 0 will control it but for now it just cycles pins 1 through 5.  The chip is currently switching some transistor test rigs.  The transistor is passing 9v from a 9v battery, if implemented it will just pass the 12v from the vehicle. Depending on the LEDs or drivers I may need to do some stuff to ensure the longevity of parts. This then goes to the current LEDs.  In action. So next steps will be to get a 5v regulator and check everything is happy with a car battery. Then decide on LEDs and drivers. Then make up some dedicated boards. But I don't know how much further Ill take it at this point considering I am a long way away from even knowing if I can mount the lights... I get ahead of myself a lot. |
| |
Last Edit: Dec 21, 2016 22:06:57 GMT by sb
|
|
mattiwagon
Part of things
  Just got a work truck
Posts: 445 
|
|
Dec 22, 2016 19:08:02 GMT
|
|
Cool!😎
|
| |
If they cant be nice f**k em!
84 low t25 panel 1.9td beige and rust combo
97 Goped Bigfoot G260RC with clutch conversion
97 Impreza turbo 2000 builders wagon 76k sold
04 Fabia vRs 50mpg pocket rocket
04 battered T5 pickup in blue!
Chainsaws lotsa Chainsaws
|
|
|
|
|
Dec 23, 2016 12:41:00 GMT
|
|
great effort going on here with those sills.....scares and inspires me at the same time to get mine done!
JP
|
| |
I know its spelled Norman Luxury Yacht, but its pronounced Throat Wobbler Mangrove!
|
|
mattiwagon
Part of things
  Just got a work truck
Posts: 445 
|
|
Dec 23, 2016 17:25:03 GMT
|
|
|
| |
If they cant be nice f**k em!
84 low t25 panel 1.9td beige and rust combo
97 Goped Bigfoot G260RC with clutch conversion
97 Impreza turbo 2000 builders wagon 76k sold
04 Fabia vRs 50mpg pocket rocket
04 battered T5 pickup in blue!
Chainsaws lotsa Chainsaws
|
|
|
|
sb
Part of things
 
Posts: 725 
|
|
Dec 28, 2016 13:57:53 GMT
|
great effort going on here with those sills.....scares and inspires me at the same time to get mine done! JP Thanks, honestly the idea of tackling the entire sill with not a great deal of experience scared the bejeesus out of me. I thought it was gonna be an easy job with the ready made replacements but either way sometimes you just have to crack on! Ahaa yeah I was the one that made the initial suggestion and started that conversation. I'm currently looking into individual LED control to see if I can do something fancy like that. Thanks! I think its cool to compare the relays shown in your Bluebird thread to how far we've come being able to use a chip just bigger than my thumb nail. |
| |
|
|
|
|


 to weld and it basically kept getting worse.


