madmog
Club Retro Rides Member
Posts: 1,160
Club RR Member Number: 46
|
1968 Mercedes W114 saloonmadmog
@madmog
Club Retro Rides Member 46
|
Nov 22, 2014 22:16:25 GMT
|
That's a honey! I had a black one, but it was a stinking nail...... Noticing your sig, a quick power steering question if I may. I currently have no power steering but it was an option on /8s. If I got a /8 power steering rack but installed a different engine with power steering pump, is it likely to work if I got hoses made up to join them or are the pressures or volumes of fluid (or something else) likely to differ on deffierent vehicles? Or more generally, is it possible to mix and match pumps and racks or must they be a matched pair? Thanks |
| |
|
|
|
|
|
|
|
Mar 15, 2018 22:34:03 GMT
|
|
Snap! I also have one if these.. mine being black with brown interior also with the colum shift. Currently restoring it with a modern twist/update. How are you finding yours?
|
| |
|
|
madmog
Club Retro Rides Member
Posts: 1,160
Club RR Member Number: 46
|
1968 Mercedes W114 saloonmadmog
@madmog
Club Retro Rides Member 46
|
|
|
|
Hi Mafmercmicheal, funny you should ask today. As I don't have somewhere to do it, I took my Merc somewhere to change the engine since the M180 engine had some issues and its cheaper to find a newer engine. Anyhow, they've not moved forward much and I haven't seen the car for a couple of years. I've contemplated getting it towed back home unfinished but I've been so busy I wouldn't be able to do much with it here. I'm now looking at easier engine transplants and thinking of bringing it back. I was trying to see if anyone over in Germany had fitted something like an M103 or M104 engine.
It currently has a C220CDi engine in but there are a lot of interferences between things.
So to answer your question, I haven't got to use it much and not at all for the last few years so can't really say. I have a W123 as a daily but it doesn't do it for me like the /8.
Are there any pictures of yours? Is it a manual column shift or auto column shift?
|
| |
|
|
madmog
Club Retro Rides Member
Posts: 1,160
Club RR Member Number: 46
|
1968 Mercedes W114 saloonmadmog
@madmog
Club Retro Rides Member 46
|
|
|
I got exactly what I hoped in that it's rust free. Oh how naive that was. UPDATE TIME It wasn't rust free. Far from it. Being busy with a new baby daughter and not having anywhere indoors to work I sent my Merc off to somewhere on the other side of the country to change the engine. The old M180 engine was a mix of bodges. While they had the engine out I got them to get someone to weld up the firewall as water was getting into the cabin somehow. Long story short the person changing the engine didn't get around to doing much as they had personal issues to deal with. At the time I didn't have the space or capacity to do anything much myself so focussed on other things. So after 2 years I got the car back without engine. The car had been in a barn where feral cats had ruined the interior and scratched all over the boot climbing on it. It was marginal whether I would bother trying to put things right. Enough whinging though. 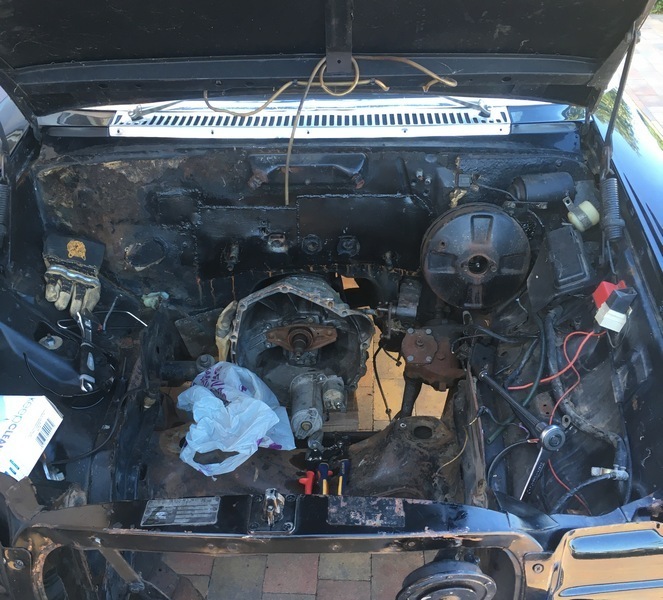 Here's the welded up firewall. Wait a minute though, what's this? 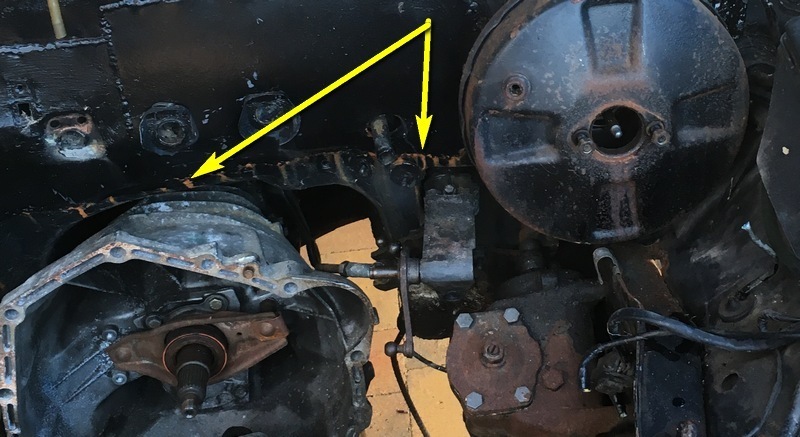 This doesn't look good. Okay, to explain what's going on I need to take a step back. There's a joke in German /8 circles about how the W114/5 is a heater fan with a car welded around it. It's not quite true but a good approximation of reality. The blower fan lives in a space between the front and rear upper firewall. Like this. 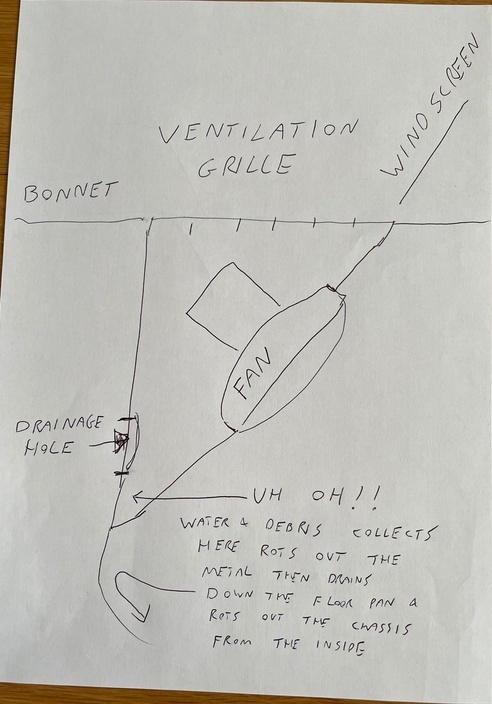 There's a design flaw (or planned obsolescence!) in that the three drainage holes are not at the lowest part of this so as the sealant inside ages and cracks water gets between the panels, rots them carries on to the floor-pan and sits hidden under the carpet where it works its way through into the chassis rails where it rots them from the inside out. I have a theory that /8s were used in James Bond movies and similar as villain cars that got blown up or crashed over cliffs because they looked fantastic on the outside but were write-offs because of this problem. That and their superficially similar design style to the W600 dictator cars or very similar W108/9. 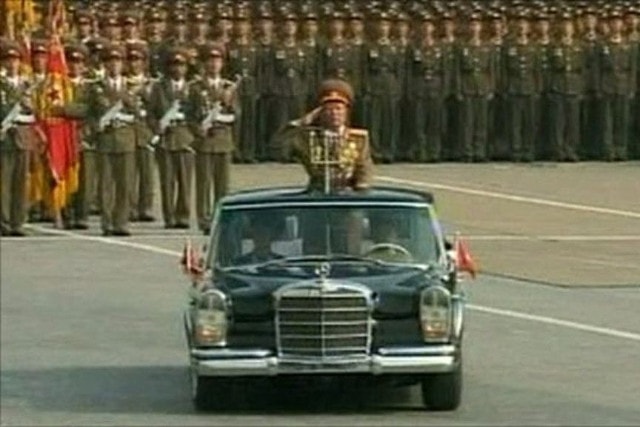 www.autotopnews.de/de/644/no/3/bilder/detail29506.htm www.autotopnews.de/de/644/no/3/bilder/detail29506.htmThen I found out a few months ago that in the raid on Entebbe, the Israelis used a W115 lang full of blacked up Israeli Commandos to masquerade as Idi Amin, his W600, and entourage. Steady wokesters - it was acceptable in the '70s. Might even have been a diesel cos if you're being politically incorrect, might as well go big or go home. Looks for link: external-content.duckduckgo.com/iu/?u=https%3A%2F%2Ftse2.explicit.bing.net%2Fth%3Fid%3DOIP.e3iGafPGg1fd2PzZXCVpIAHaE8%26pid%3DApi&f=1Anyhow I just know this repair is going to be a botch. With the wrecked interior and paintwork I'm at the stage where I might just call it quits but on the other hand, when at that stage there's nothing left to lose. So you can be drastic. I hatched a plan to cut away and see just how bad things were. First rule of problems is understanding the problem in as much detail as possible. 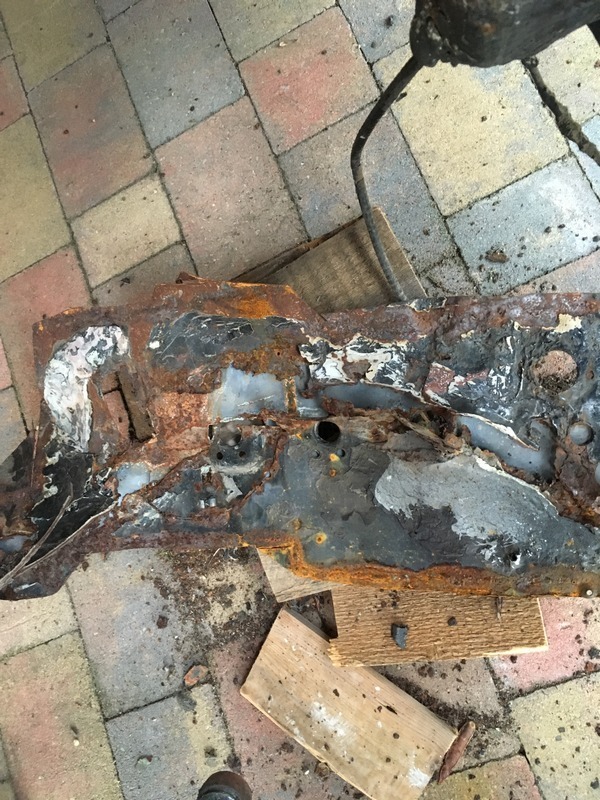 Out comes this - the classic 'weld some new metal over the top to hide the mess' 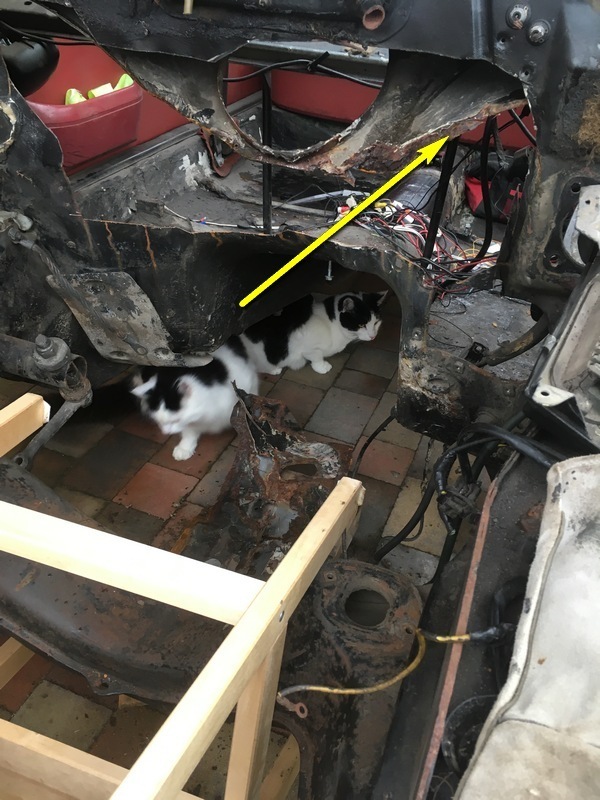 At this stage I haven' chased back all the rust, there's more to come out here. |
| |
|
|
madmog
Club Retro Rides Member
Posts: 1,160
Club RR Member Number: 46
|
1968 Mercedes W114 saloonmadmog
@madmog
Club Retro Rides Member 46
|
|
|
Or to clarify, this is from a few years ago. Spoiler alert, I've fixed this rust already - here's how. Don't know how to ping Battles, Dez, Mark, geoff115, dickdarsterdly, mafmercmicheal to this thread as they may have an interest as well as berendd. This mess - and this is only what I'd found thus far, would cost too much to pay someone else to do. So going to have to get one of these: 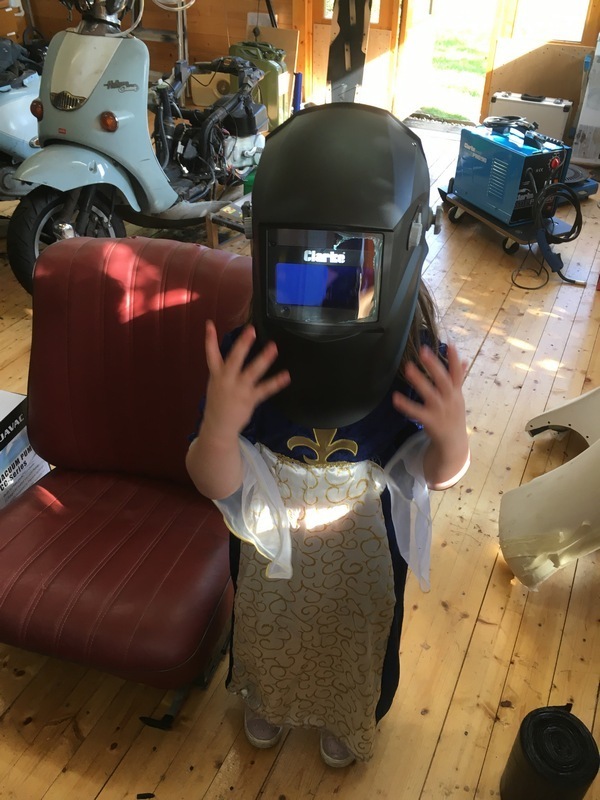 No, not a welding fairy, this: 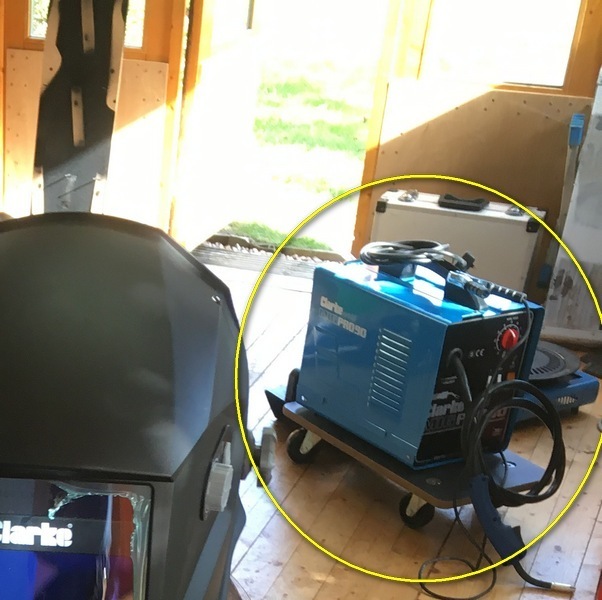 And since I'll be working outside, this: 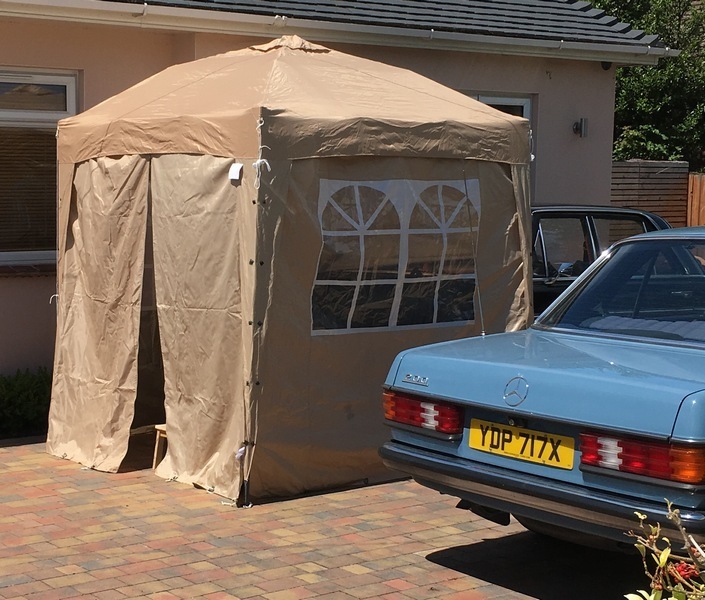 Which needed quite a few wheels to hold it down against the wind yet still blew against the car and damaged the paintwork. Having bought a welder and gazebo, it's off to try and weld weld we go. Well, after hoovering up every thin metal welding youtube video. Why do American youtube videos always begin with heavy metal music btw? Classic cardboard template, cut, weld, grind, repeat. Note zintec so an additional step of getting the zinc of the parts to be welded. 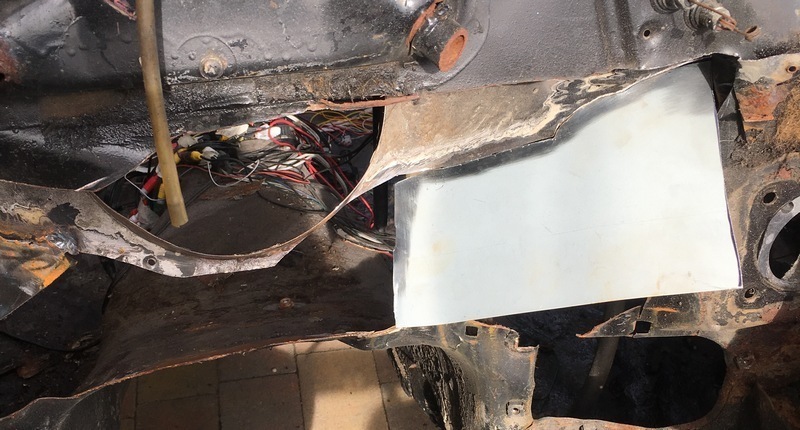 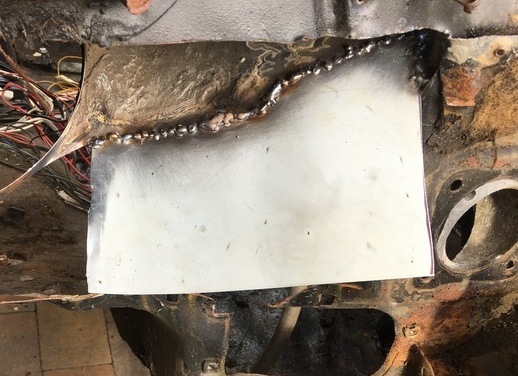 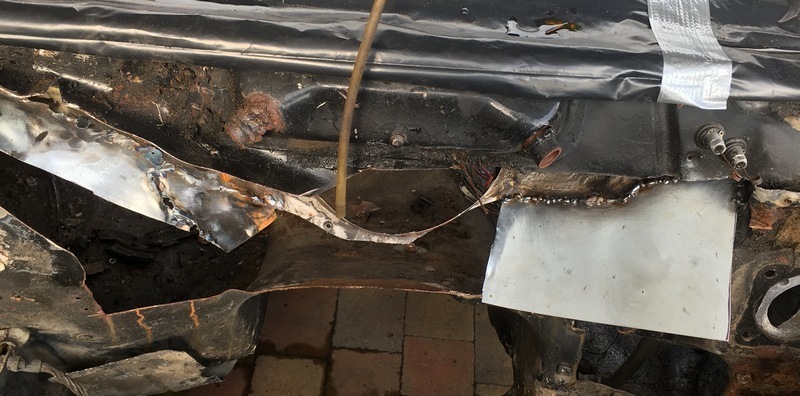 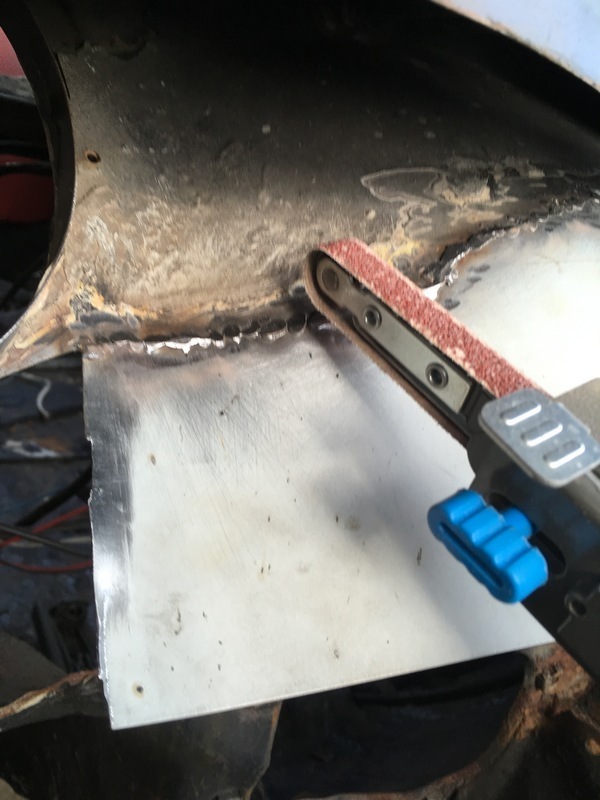 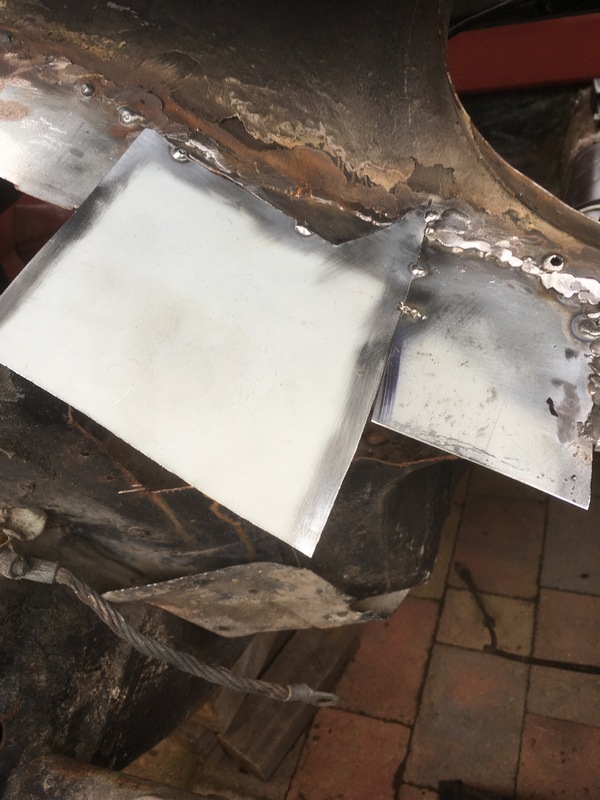 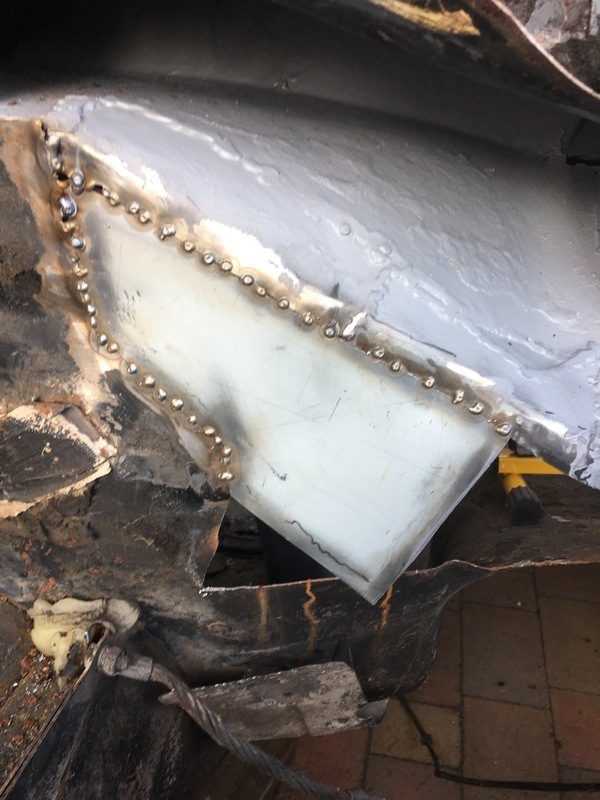 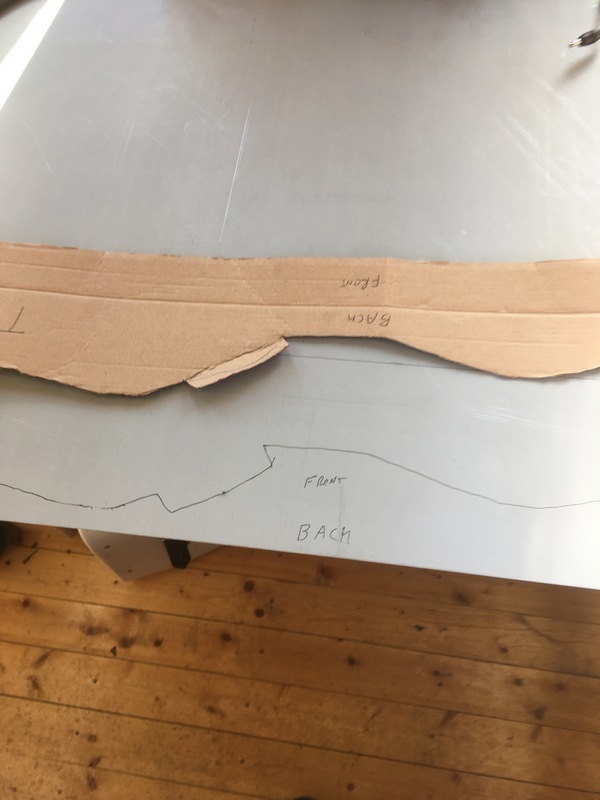 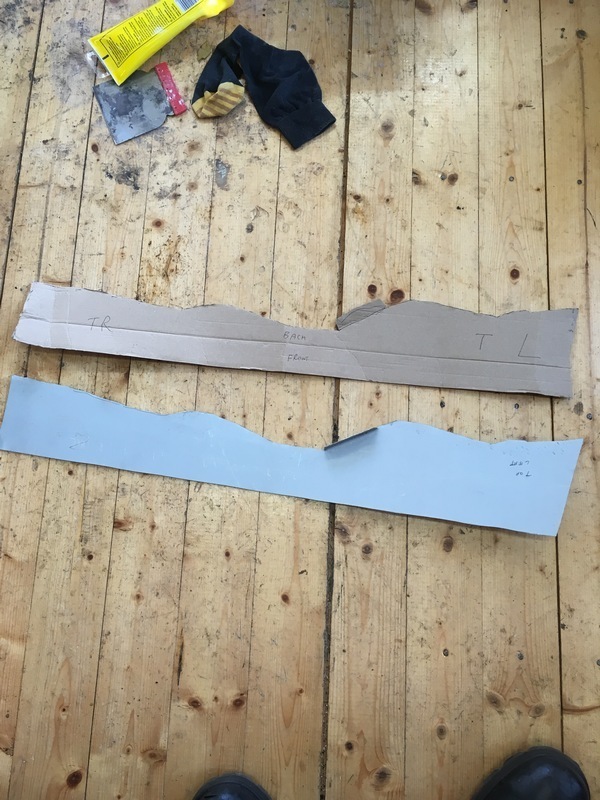 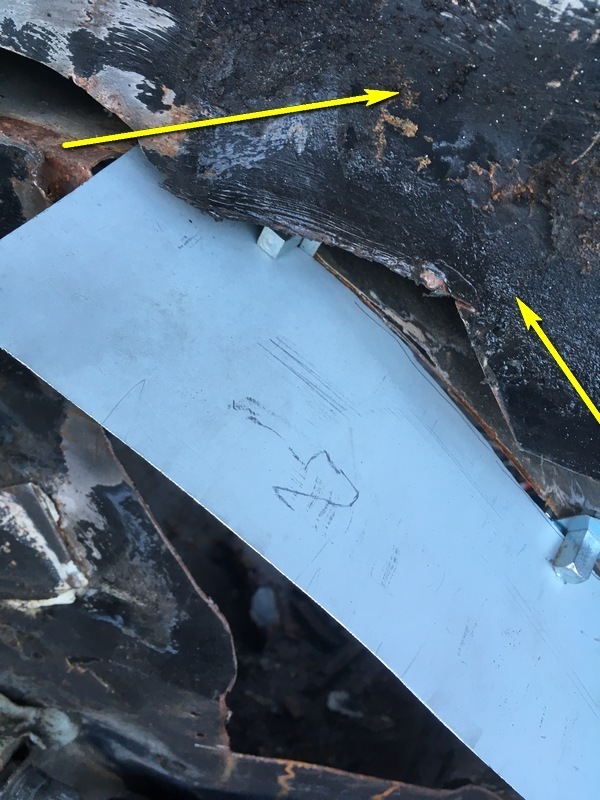 Need to just removed the arrowed metal to get a the part I need to weld. Which leads to a plan to improve the original design to solve two problems 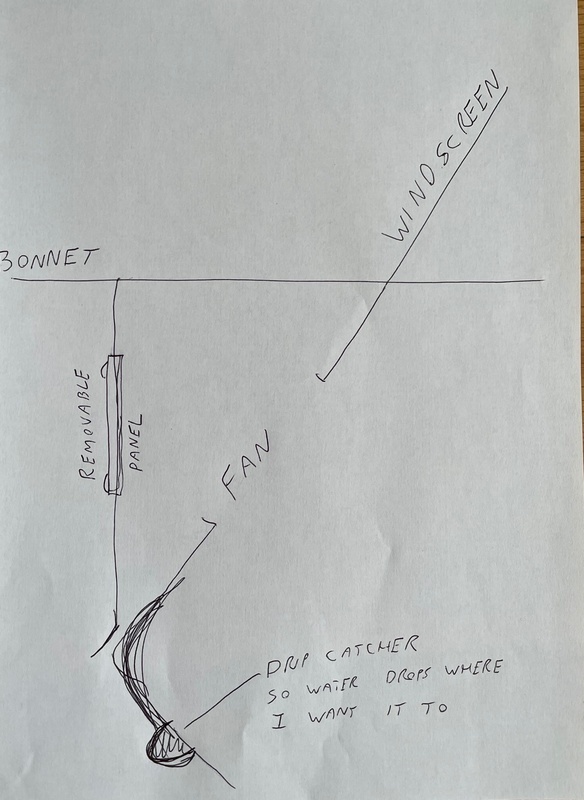 Firstly the aforementioned drainage should be at the bottom of the 'V'. Secondly, the fan motor needs oiling periodically to stop it whining but it is inaccessible*. Some have fashioned twisted tubes to manoeuvre down the vents in the hope of oiling the motor bearings with some success. I'm going to remove a big chunk of the firewall anyway so the new metal might as well have a access panel for fan motor oiling and re-applying dinitrol/waxoil to the cavity. *inaccesible:- to get at the blower motor you need to remove the heater matrix box and controls. To remove that you need to remove the dashboard - and the centre console. To remove the centre console you need to remove the front seats. And to weld the firewall you need to remove all of this plus the engine. Hence this problem making it very expensive to repair if you pay someone to do it. Which makes the concept of, 'a heater fan with a car built around it', not that far from the truth. |
| |
|
|
madmog
Club Retro Rides Member
Posts: 1,160
Club RR Member Number: 46
|
1968 Mercedes W114 saloonmadmog
@madmog
Club Retro Rides Member 46
|
|
|
As the inner firewall is a bit of a complex shape, I built it up in small pieces from above to below, then bent to shape after welding to allow for distortion. Sometimes I would cut back what I had previously welded to get the shape better. A larger piece could be bent more smoothly then the lower part could be cut away. 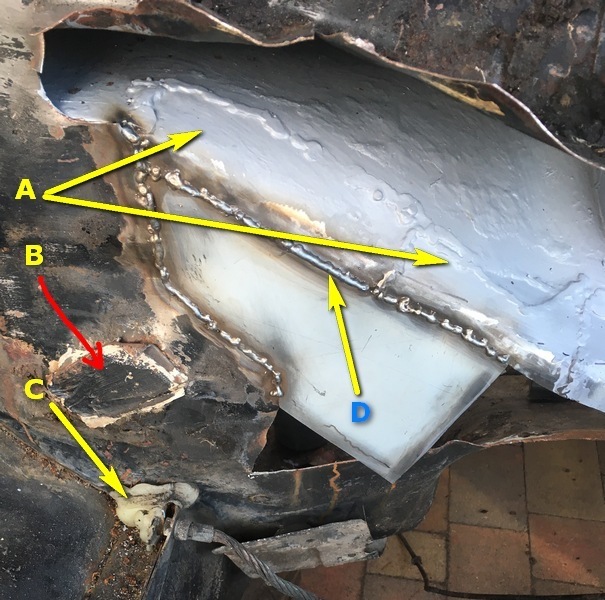 A) Previously welded, cut back and epoxy primered. It was often quite a few days or weeks between welding sessions so I always planned to finish by painting what was done. This was very slow progress. Months. I'd never Mig welded before. D) Joining the dots on the latest piece. I'd usually weld from within the engine bay and also inside the cabin. B) To be investigated. C) Some gummy goop blocking what should be a drainaway for no good reason. If nothing else, at the end of the firewall from hell I had more of an idea how long repairing things would take. Looking around the engine bay, I found some more holes, probably related to 50 years of brake fluid overspills. 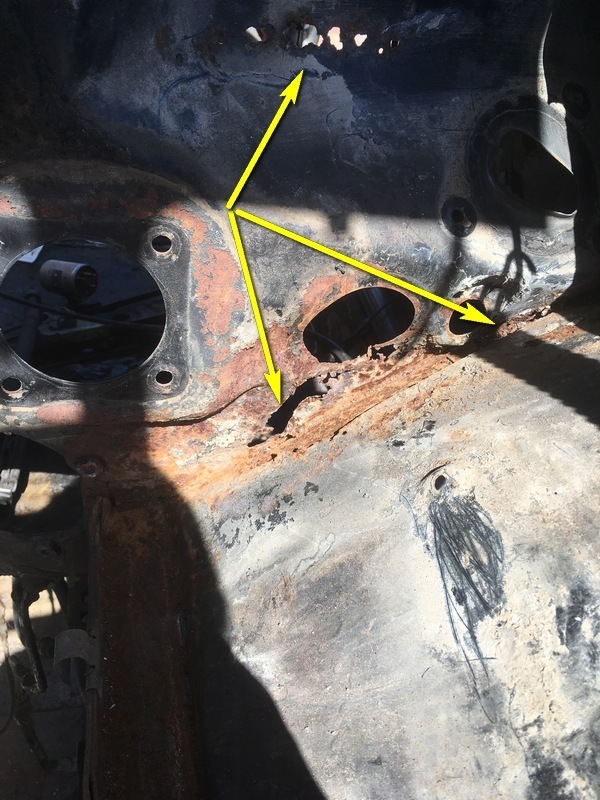 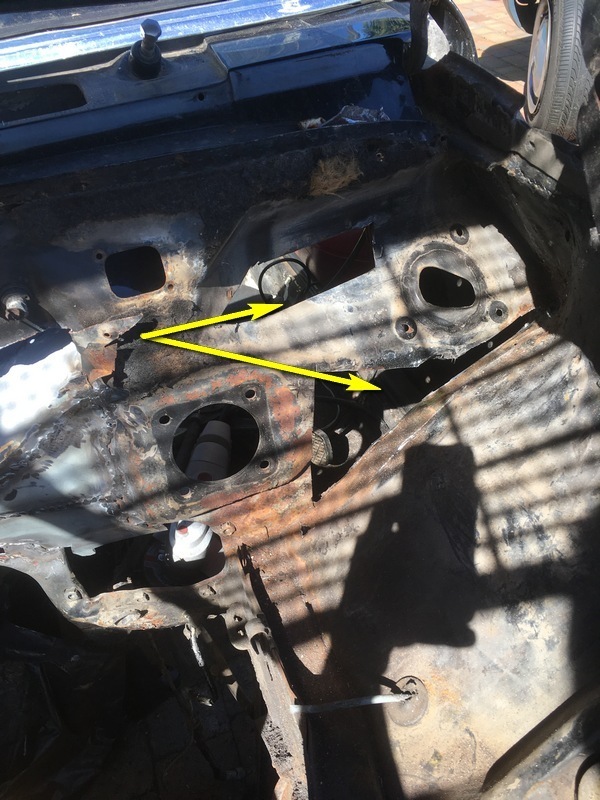 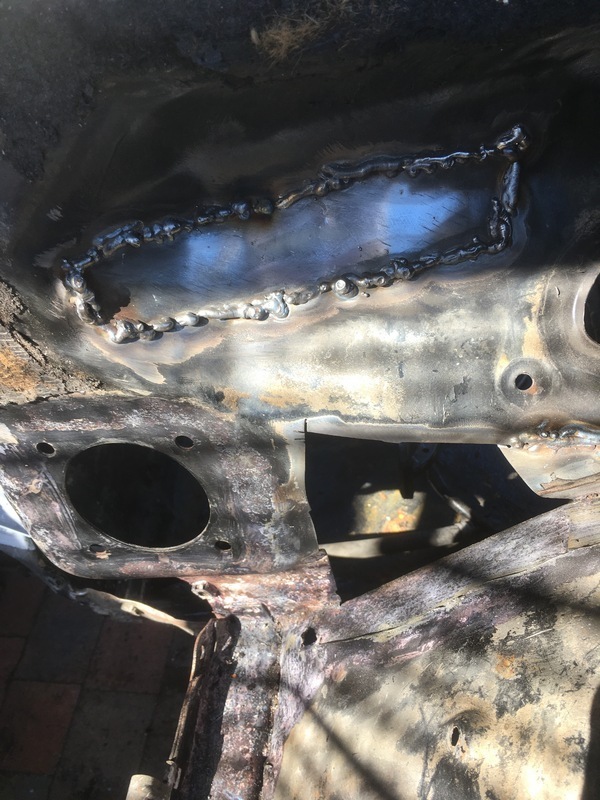 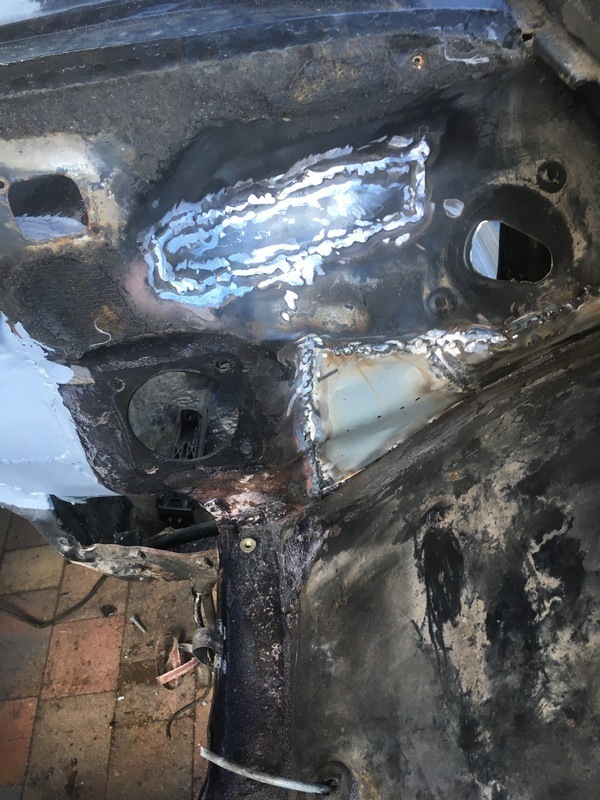 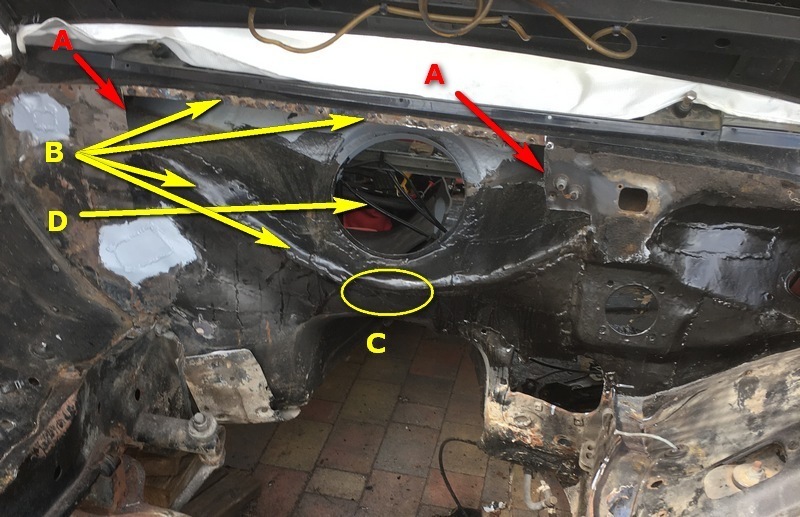 Having built up all the awkwardly shaped parts of the inner firewall, the outer is much easier. One large piece, mostly plug welded with some butt welds at the ends and a big service hole for the blower motor. A) butt weld B) Plug weld C) unwelded to leave 4 inch gap at bottom for water egress. D) Blower hole. |
| |
|
|
madmog
Club Retro Rides Member
Posts: 1,160
Club RR Member Number: 46
|
1968 Mercedes W114 saloonmadmog
@madmog
Club Retro Rides Member 46
|
|
|
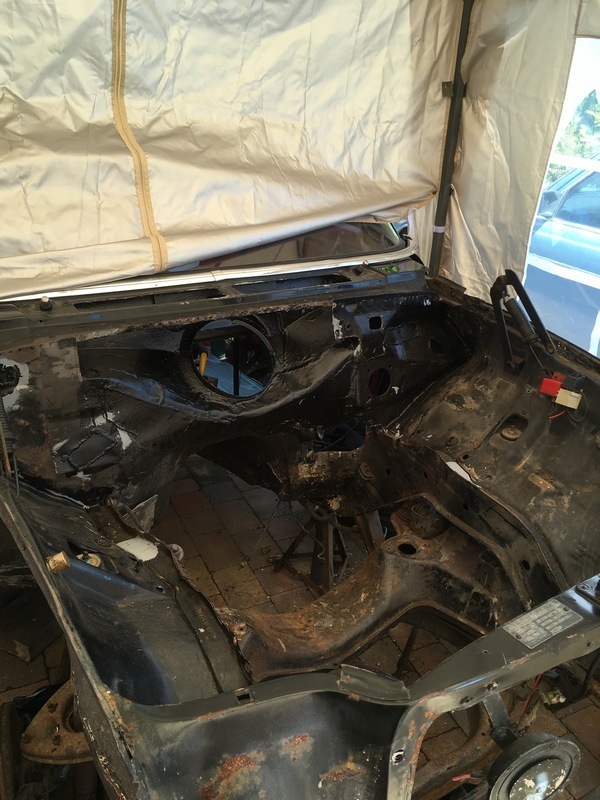 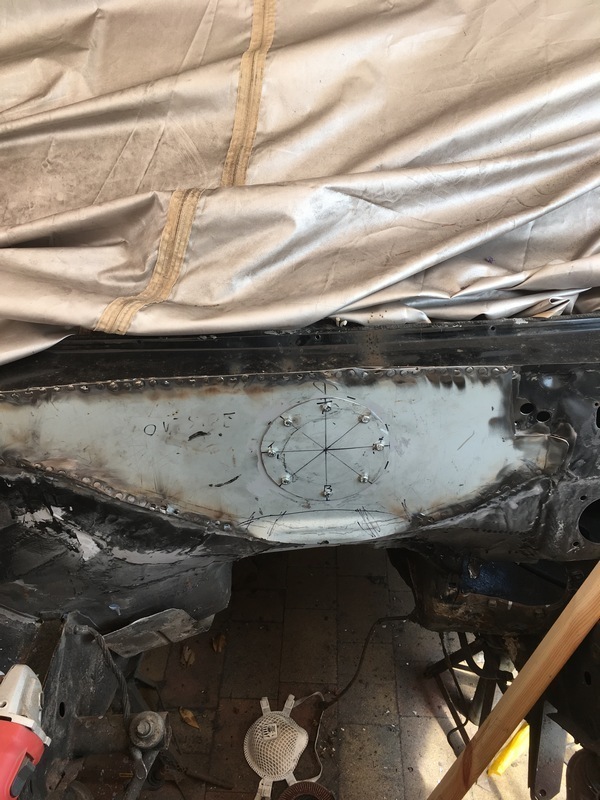 Note the lip at the bottom bent a few times to build strength. Somewhere in all this welding I decided that I didn't like the look of - or wanted to investigate more of the front end so off came the wings... and front subframe. It's becoming obvious that this car has had multiple repairs over the years. Some good, some less so. Lots of neglect so while it's not going anywhere might as well prepare to do some stuff in my shed over winter. 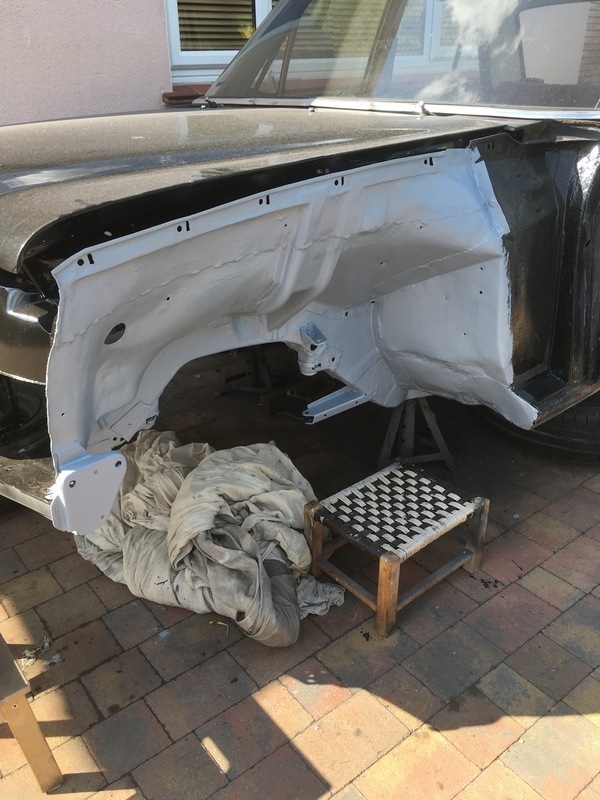 Lots and lots of work with the purple scouring discs. to get back to bare metal and find any botches or problems 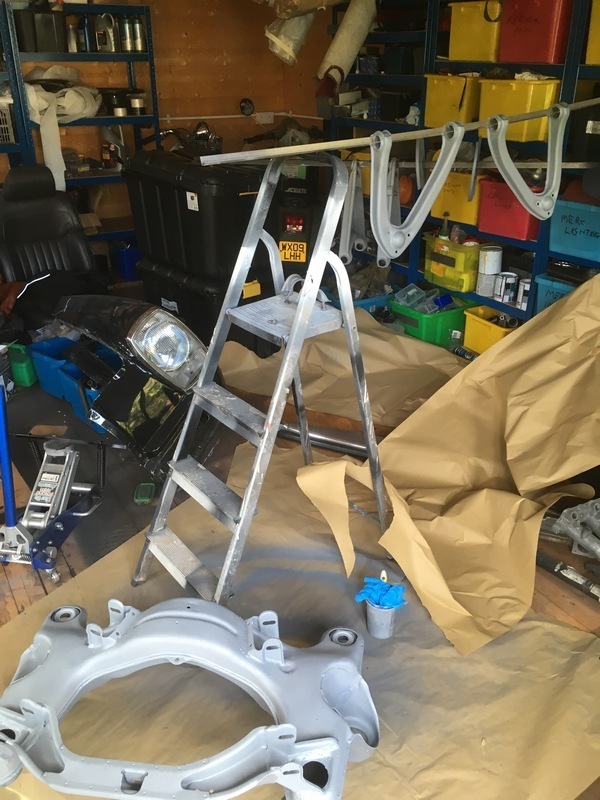 Anything that could come off went to the aqua blasters then epoxy primered in the shed. Stinky stuff. Used quite a few charcoal masks. 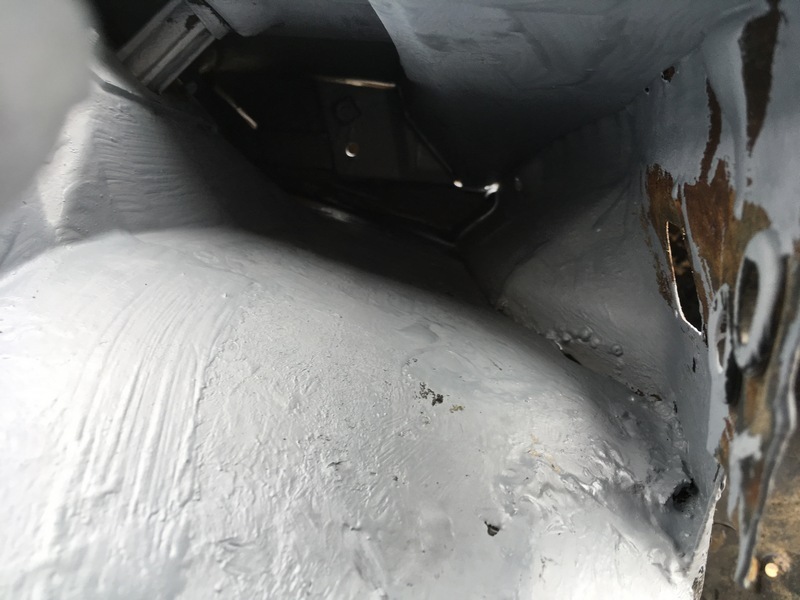 Inside the cavity between the inner and outer firewell lots of wire brush on extension activity. Then epoxy primer, epoxy chassis paint, seam sealer dinitrol. This cavity goes from side to side and also forms a drain for the area where the bonnet hinges locate. 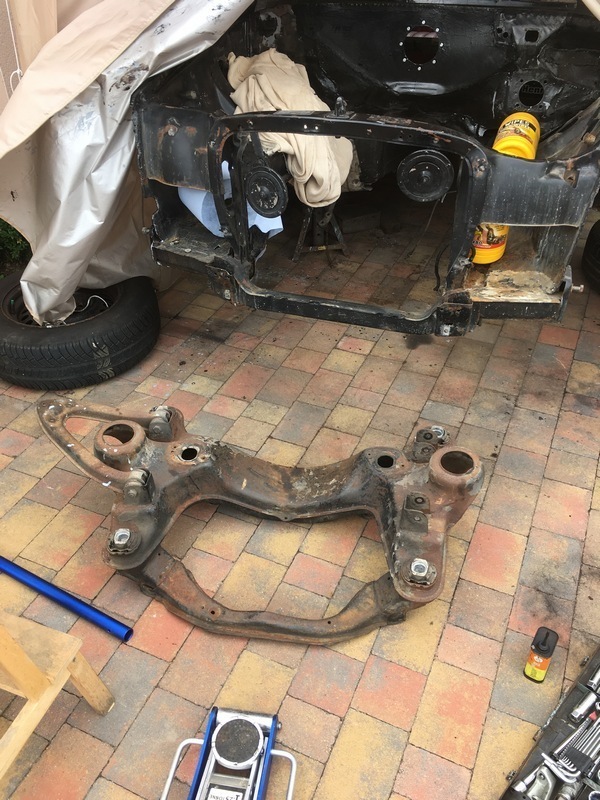 Can't remember if this is my subframe or the one I got for £20 in order to get the Mercedes SL hubs for the bigger SL brakes. 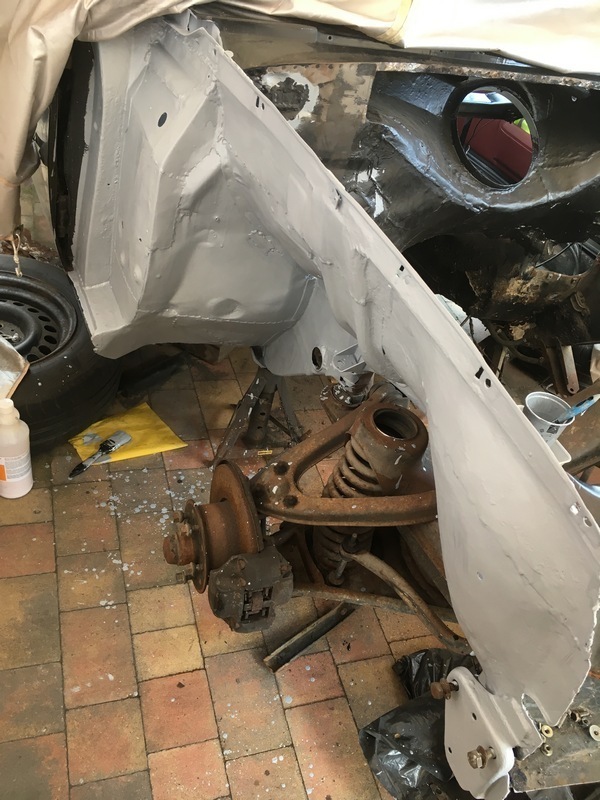 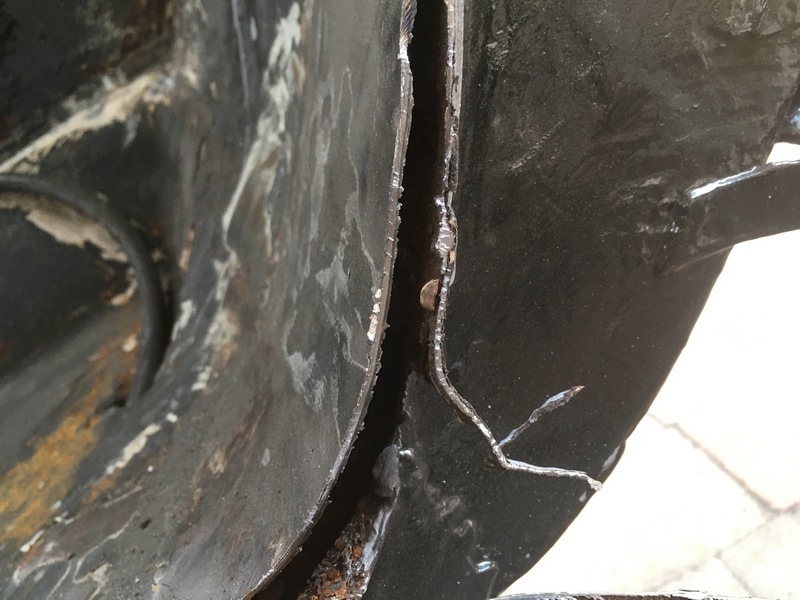 Some kind of bodge job here. I'm on a roll now though, so cut and investigate 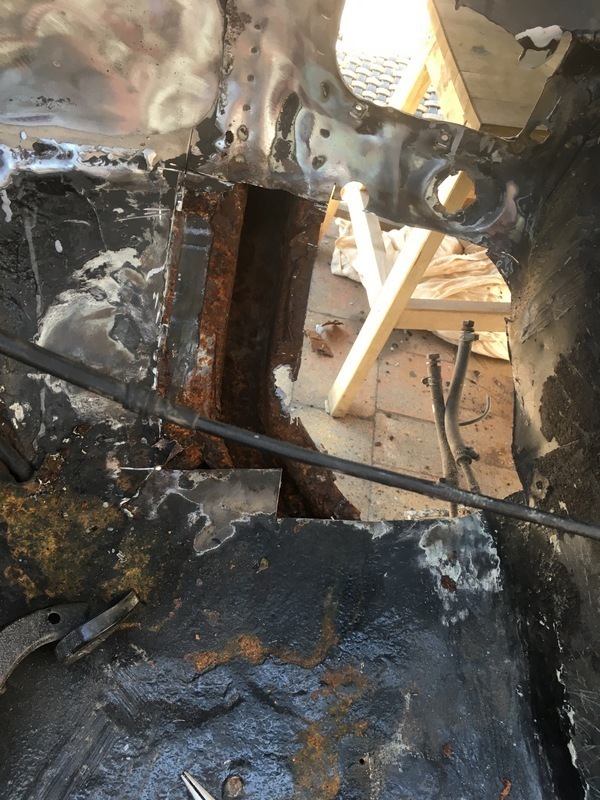 So, inside the car, driver (Left hand drive) footwell. Water got into this chassis rail Not as bad as it looks. The rail is actually solid with just surface rust. So lots of wire brushing & purple rust eater. 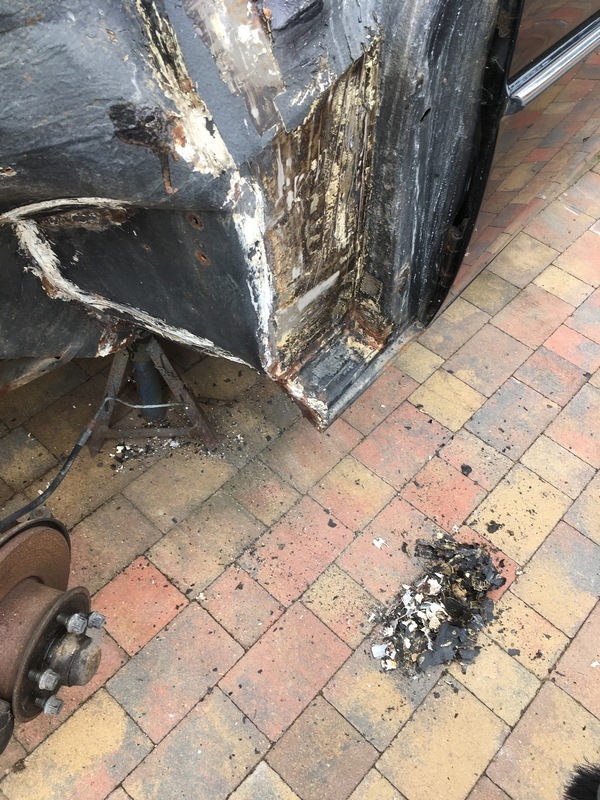 This inner wing had I think one small hole to deal with. A lot of the car seems to have had seam sealer or filler used like paint and slathered all over bare metal. Took a long time to get off and leaves a lot of mess. 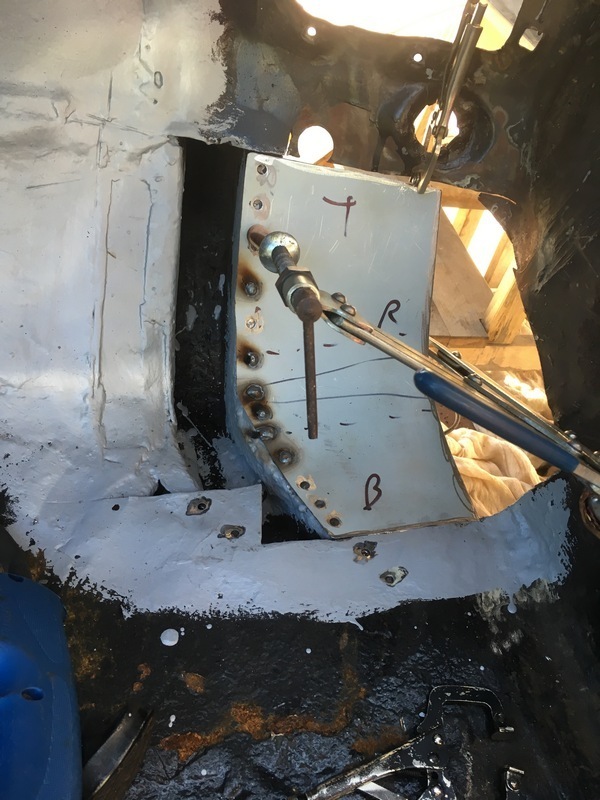 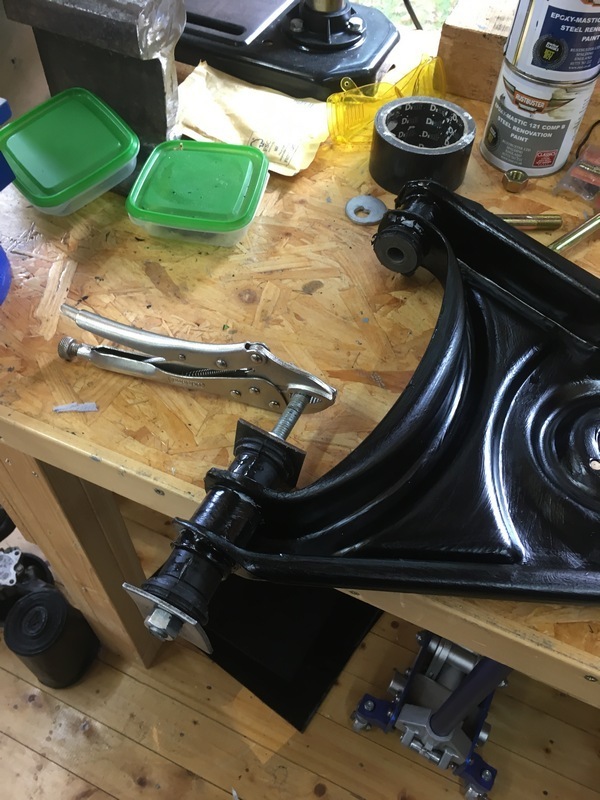 fitting new wishbone bushes 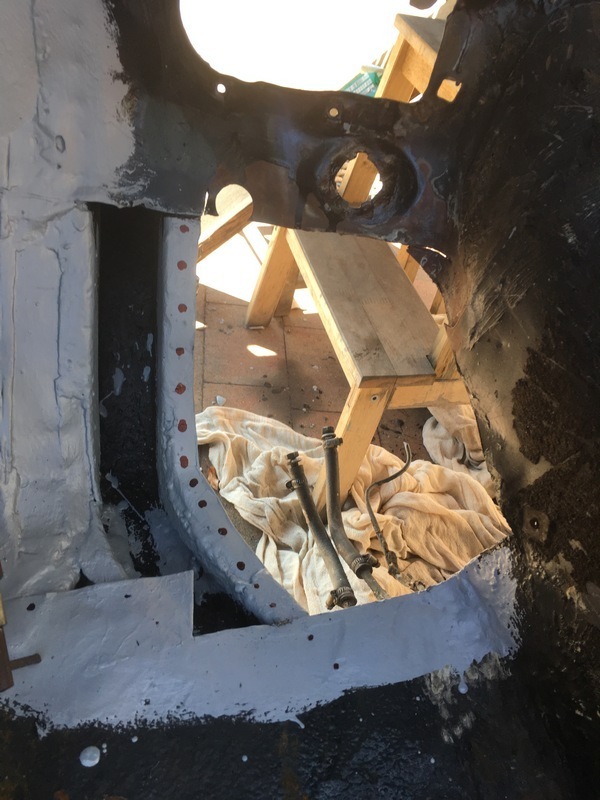 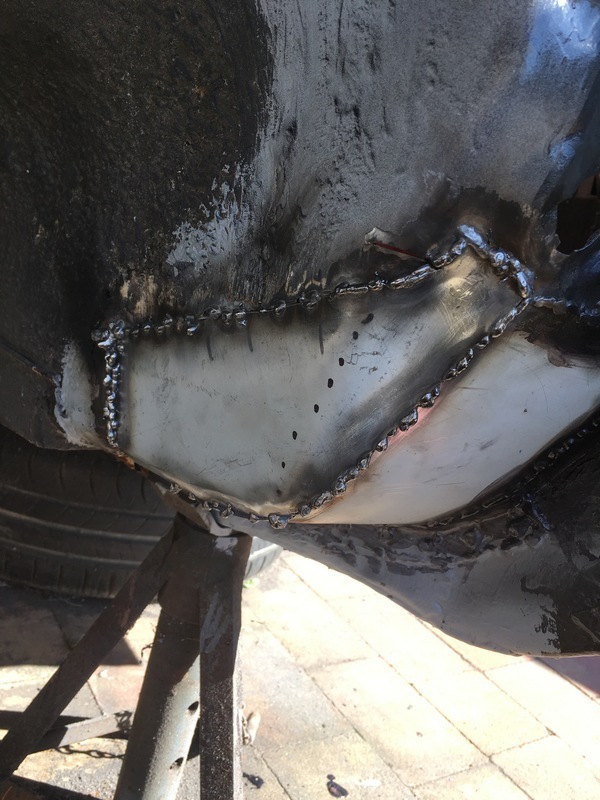 had to do this a few times before I was happy. 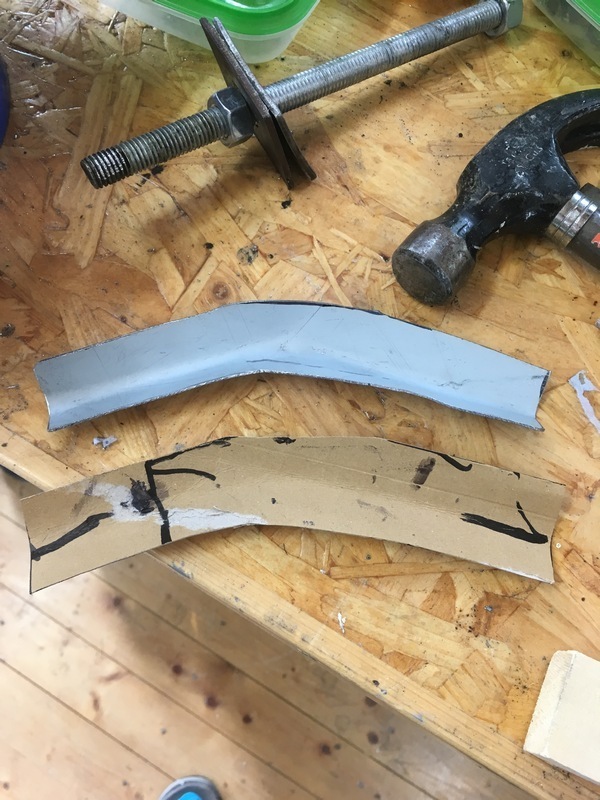 more cad 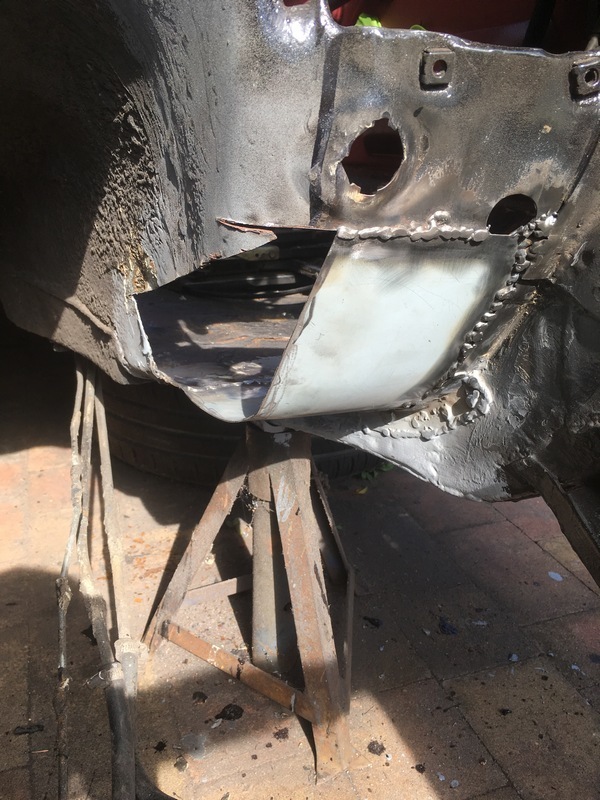 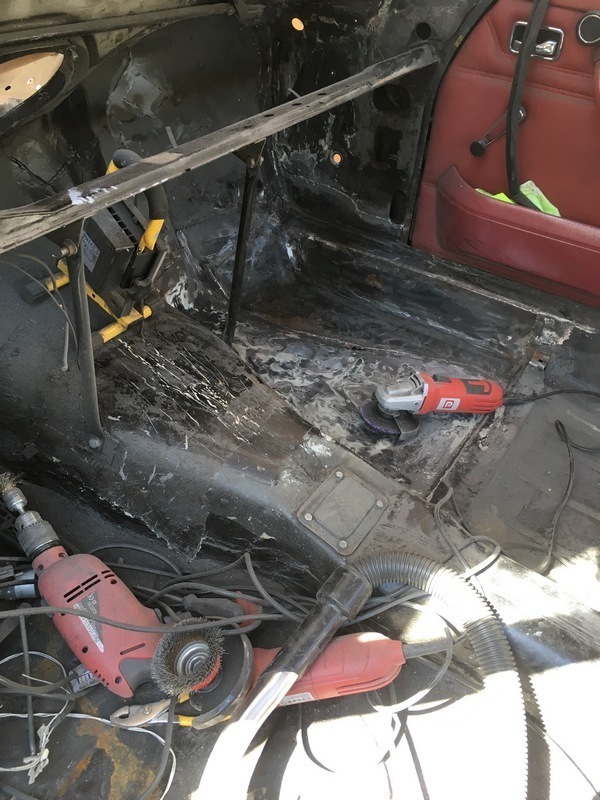 purple disc, vacuum, new purple disc vacuum. 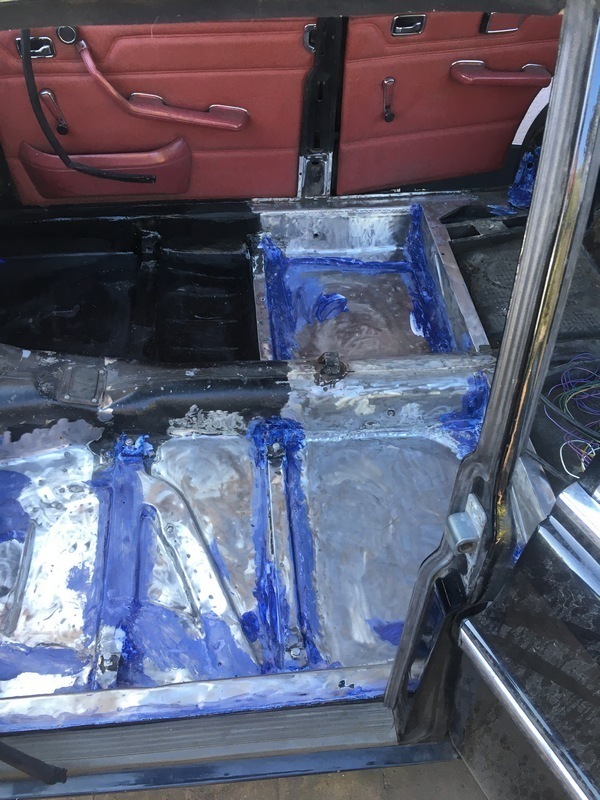 each quarter of the floorpan took at least an afternoon. This car had had new floorpans added at some point. The welding seems fine but the 'paint' or whatever was used after was very strange 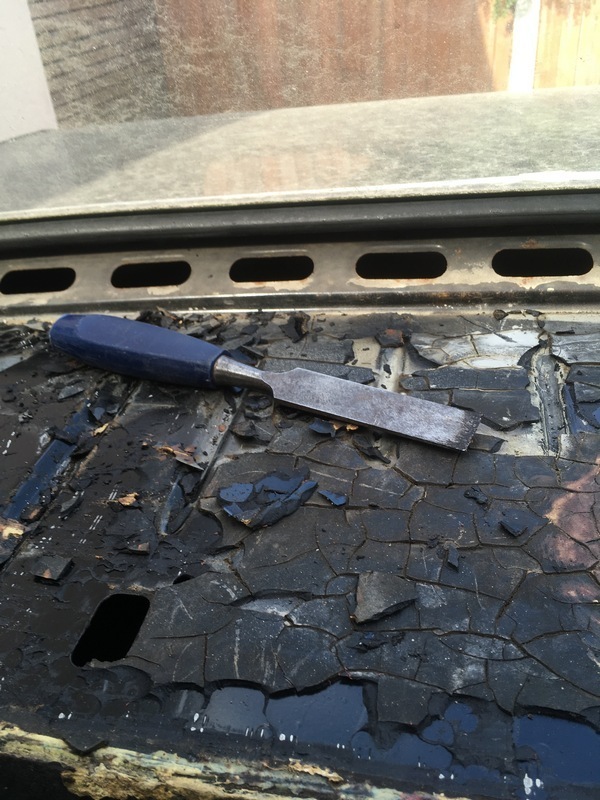 old insulation off the rear parcel shelf 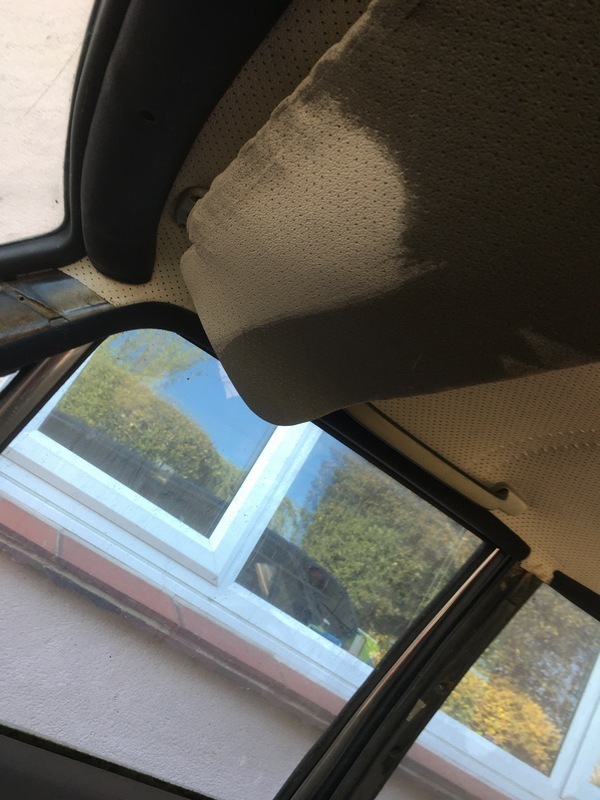 This is how dirty the inside of the car gets when you purple disk off the floorpan grot. 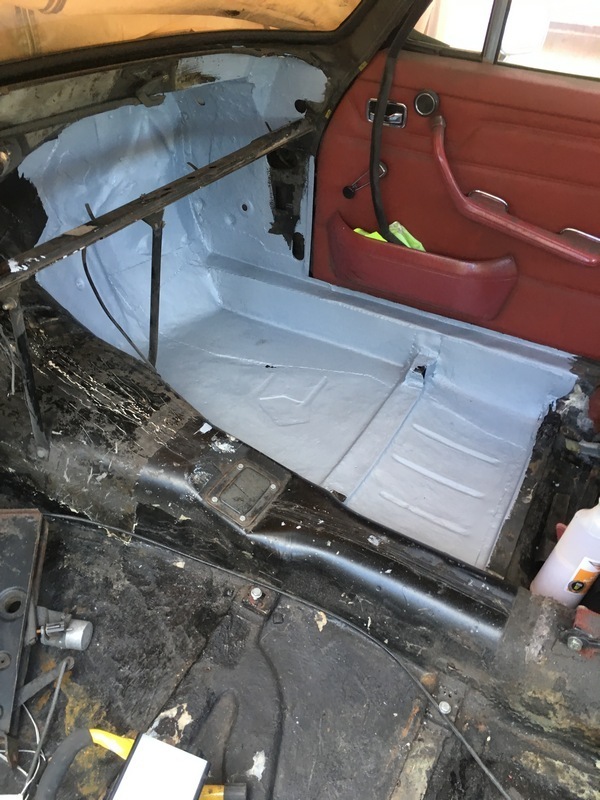 |
| |
|
|
|
|
|
|
|
|
Quite an undertaking! Lovely to see this old car being pulled back together and redesigned and improved.
Great work, bookmarked!
|
| |
|
|
madmog
Club Retro Rides Member
Posts: 1,160
Club RR Member Number: 46
|
1968 Mercedes W114 saloonmadmog
@madmog
Club Retro Rides Member 46
|
|
|
Quite an undertaking! Lovely to see this old car being pulled back together and redesigned and improved. Great work, bookmarked! Thanks Motardman, there's a lot more to come as all of the above is over a year old. |
| |
|
|
madmog
Club Retro Rides Member
Posts: 1,160
Club RR Member Number: 46
|
1968 Mercedes W114 saloonmadmog
@madmog
Club Retro Rides Member 46
|
|
|
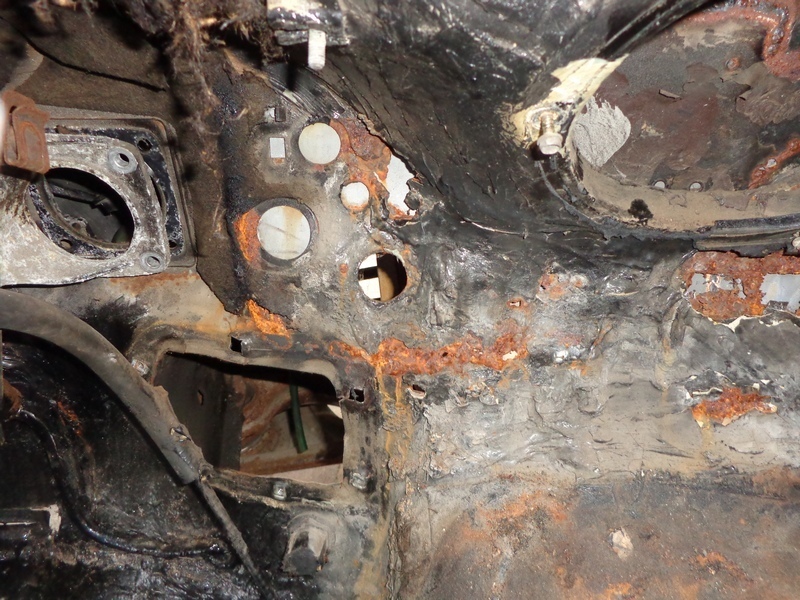 I dug out another picture of the 'repair' I had to cut out - you can just see the zintec sheet through some of the holes 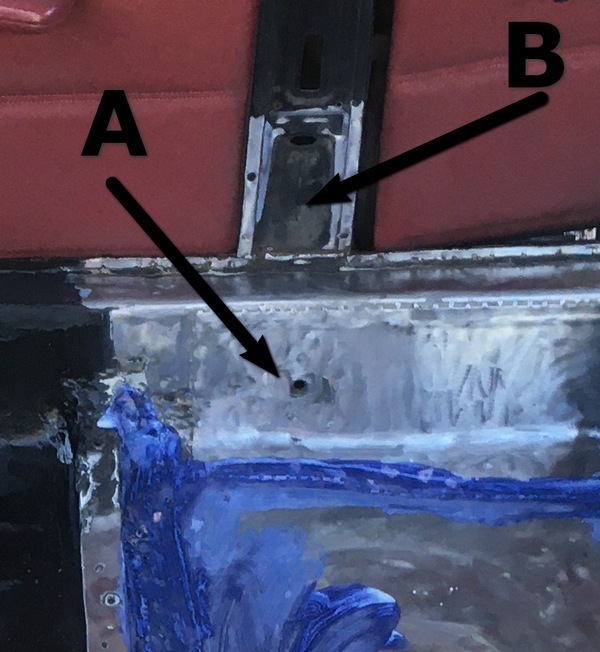 A) is where the seatbelt reel attaches. If you push the seat back too far it catches the reel and pivots it out of alignment meaning the seatbelt locks up. B Would be a better placement and I'm sure I've seen later /8s with this setup. So 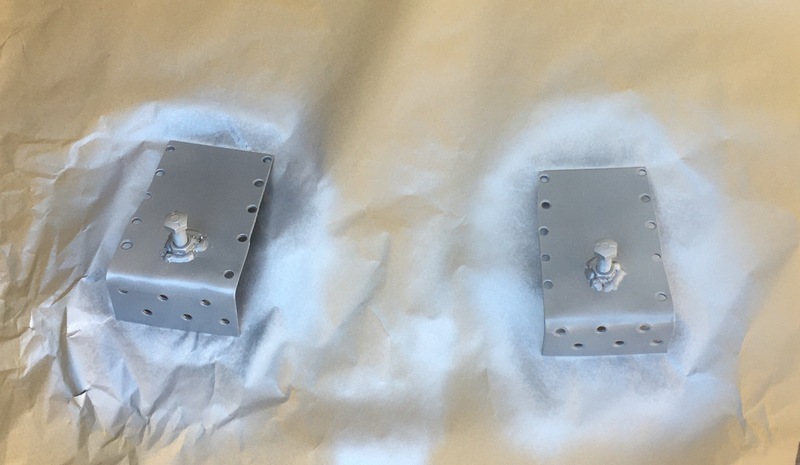 Seatbelt captive nuts welded to the back, lots of hammering to get each of these to sit nicely ready for plug and edge welding 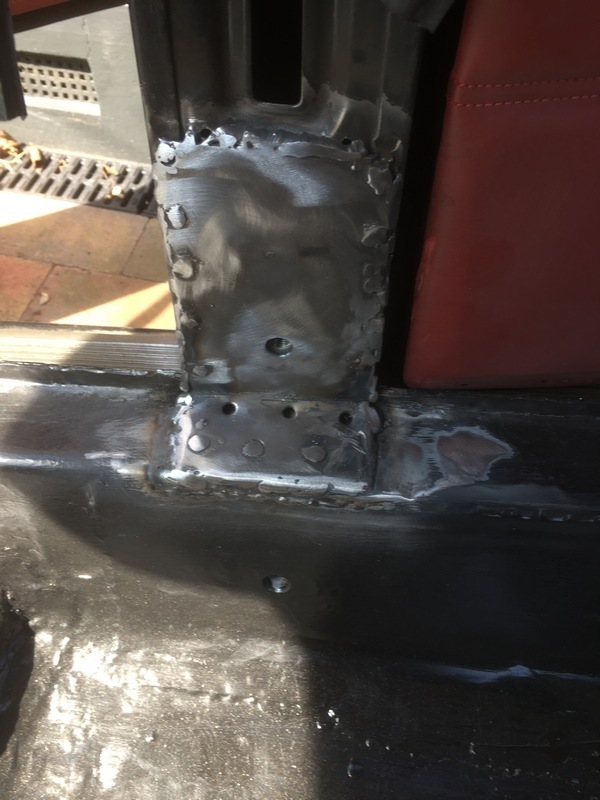 Like so 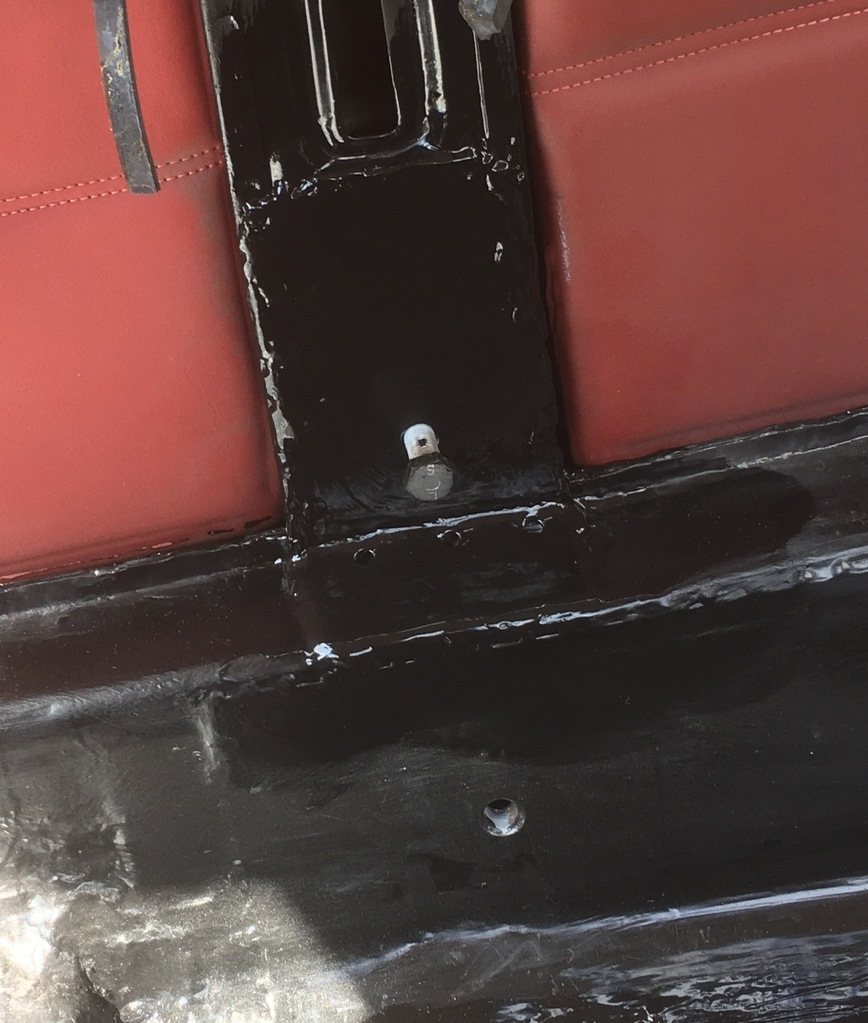 Then painted |
| |
|
|
|
|
madmog
Club Retro Rides Member
Posts: 1,160
Club RR Member Number: 46
|
1968 Mercedes W114 saloonmadmog
@madmog
Club Retro Rides Member 46
|
|
|
There were two more places that needed welding, a minor piece below and the rear left arch. I had assumed both arches would be in a terrible state so pre-emptively bought some lower outer rear wings in preparation. It turns out I didn't need these parts and I have offered them up on RR but no serious interest. The outer arch needed a 2" x 1" piece of metal and was straightforward. The inner arch needed a bit more. The inner arch was the hardest part of all to weld - not because it was difficult welding but because fitting my head and the welding torch in the space involved painful contortions. 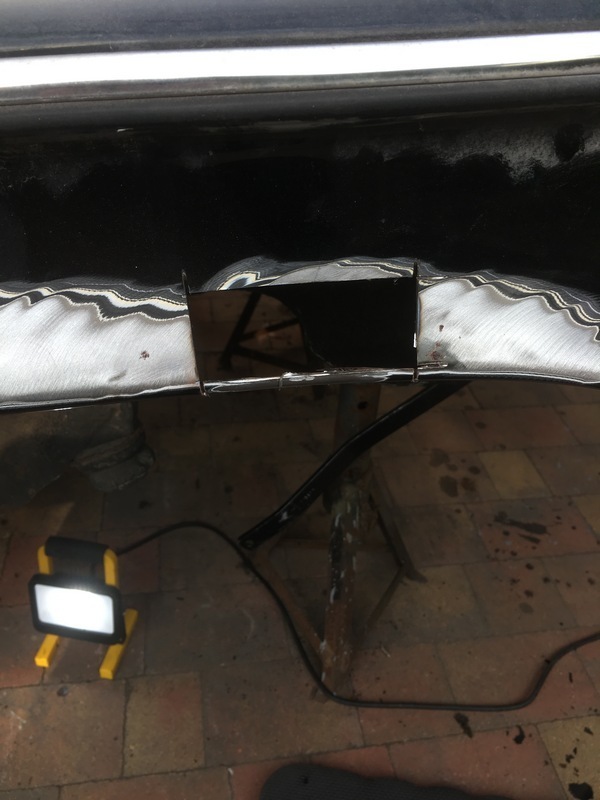 Simple cutout 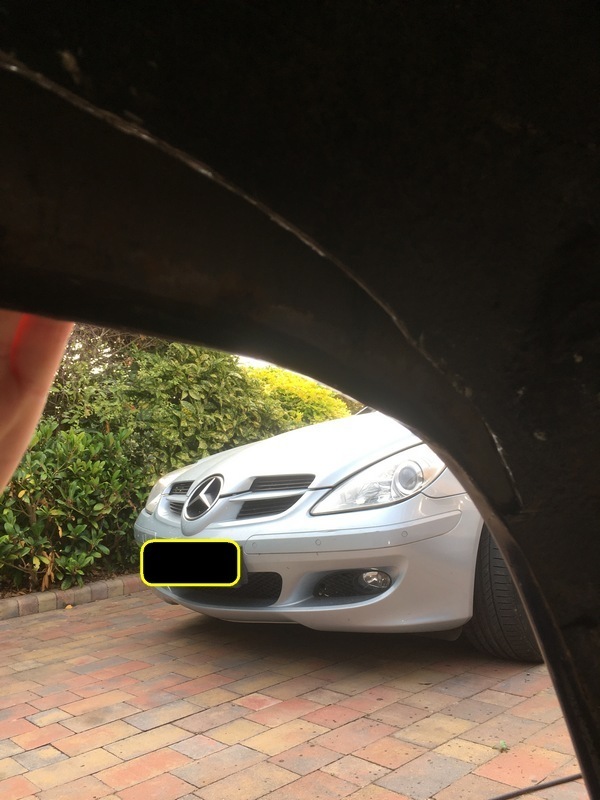 more extensive inner wing cutouts 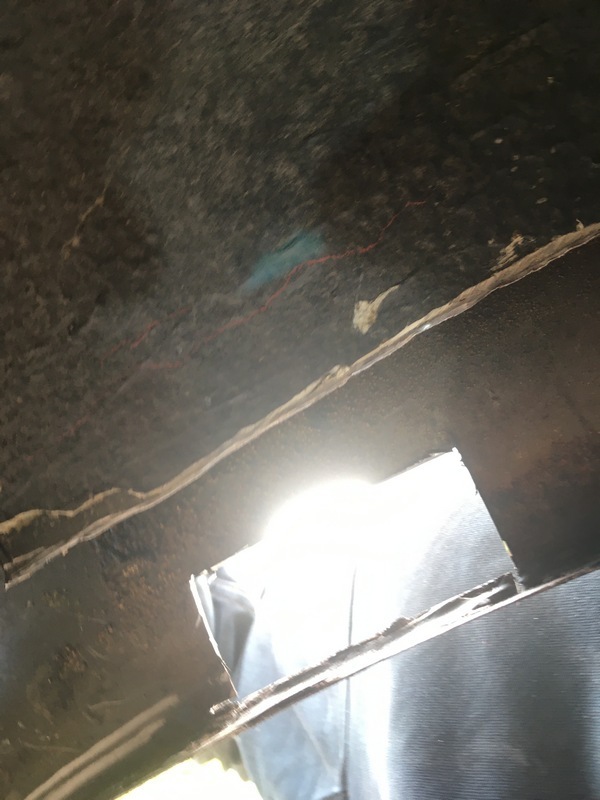 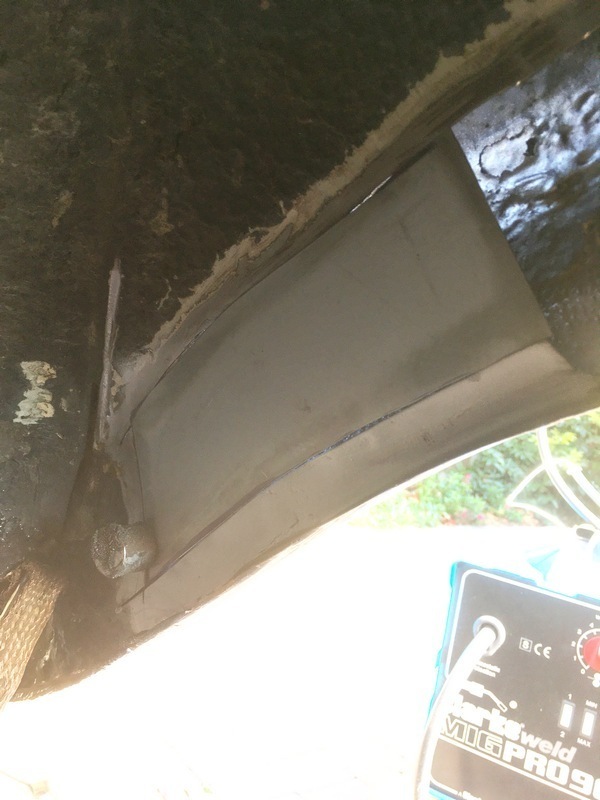 more templates 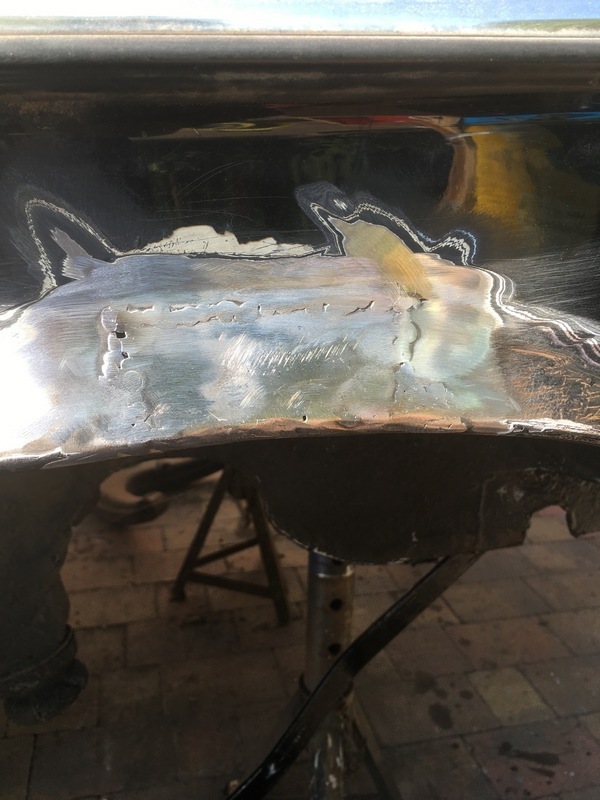 nearly finished. 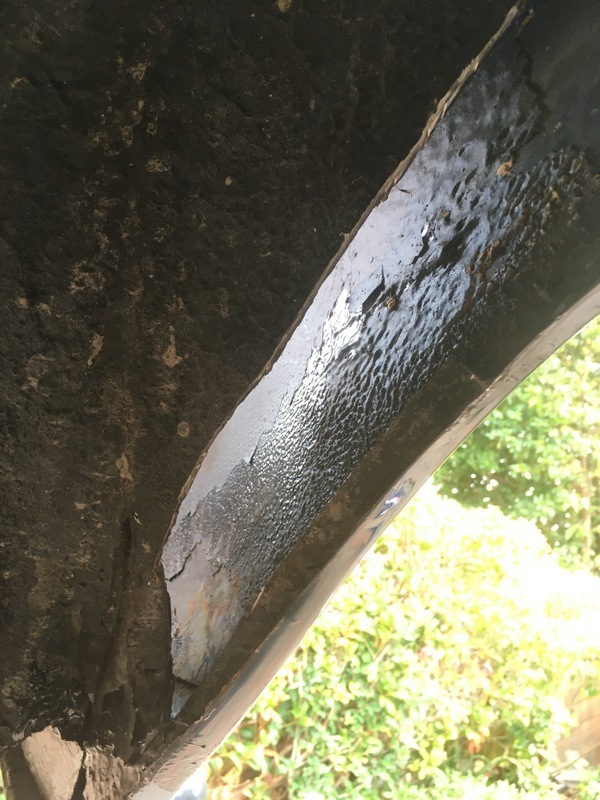 |
| |
|
|
madmog
Club Retro Rides Member
Posts: 1,160
Club RR Member Number: 46
|
1968 Mercedes W114 saloonmadmog
@madmog
Club Retro Rides Member 46
|
|
|
Between welding the front and welding the rear arch I did a bunch of other things. Winter I work in my shed, nicer weather on the necessary outdoor things. Here's some of these mini-projects in no particular order because I can't remember when I did things 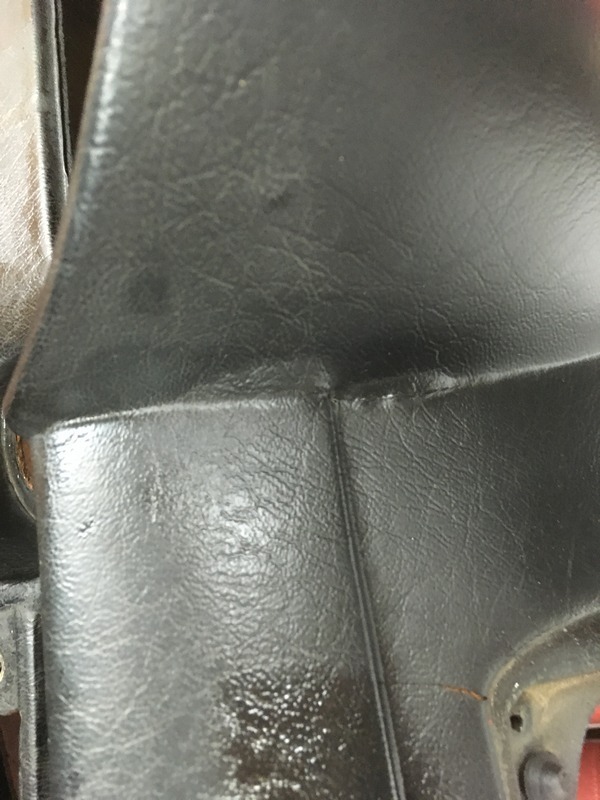 The dash is quite damaged at the top. Bubbles and cracks 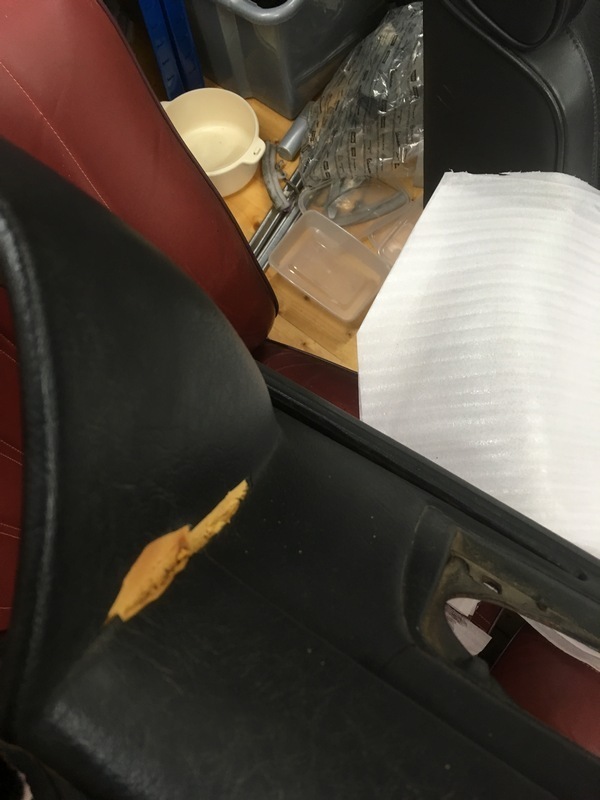 Ruthlessly cut them out 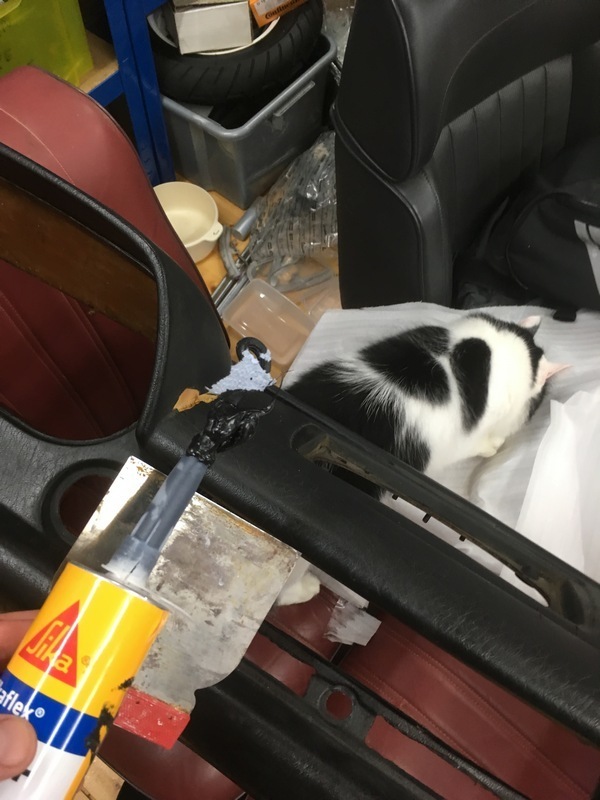 And fill with Sikaflex. Didn't notice nosey cat in this picture until just now. 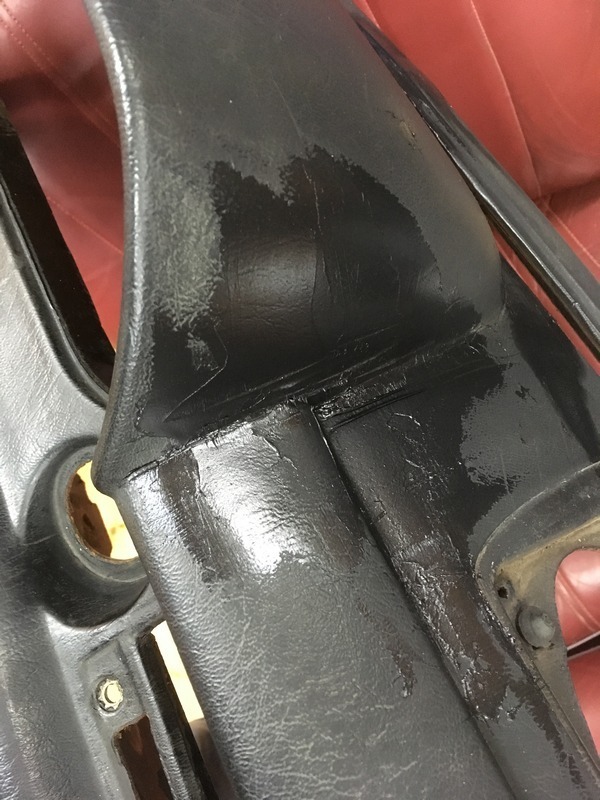 Get the approximate shape back 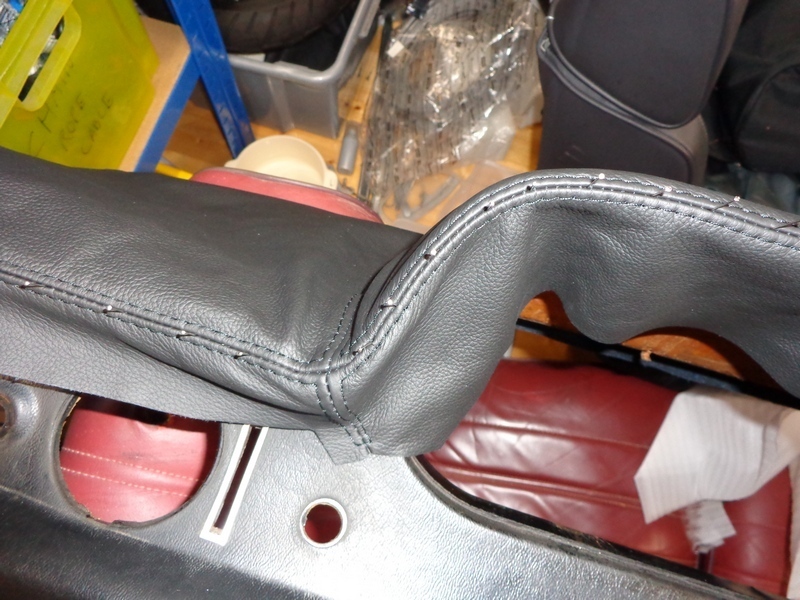 Then a leather cover from a supplier off Ebay. As the seam is the part that will catch the eye, I need to keep it as true as possible. Solution: use sewing pins between the stitching to lock the seam into position before doing any gluing. The upholstery glue doesn't tolerate moving. Once the two glued sides are pushed togfether they want to stay that way. 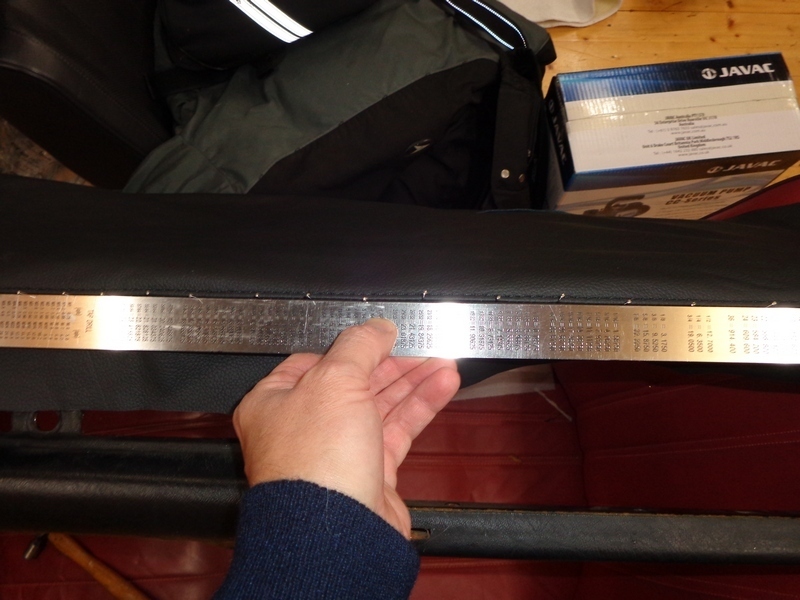 Ruler to ensure straightness 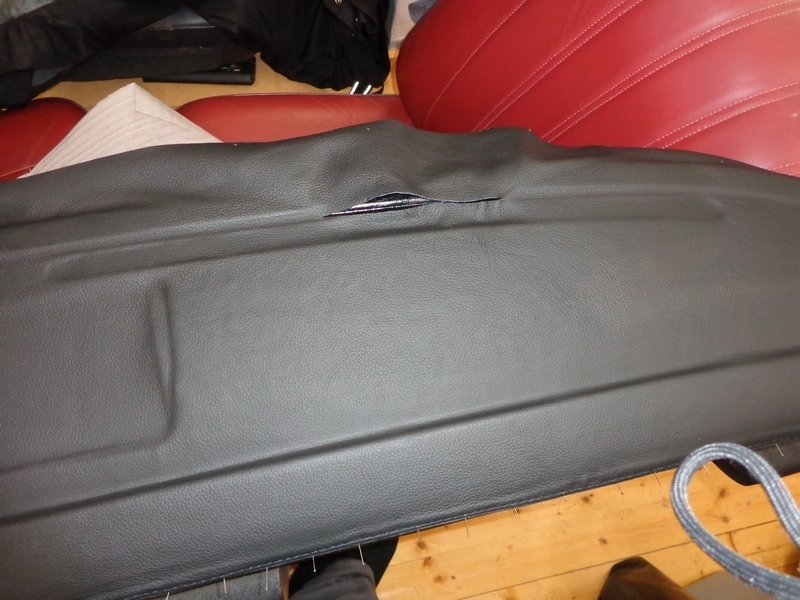 Pulll the top into shape then down onto the glue. Annoyingly the slits pre-cut for the vents were way out. They would do better not to cut these at all and let the fitter do it. 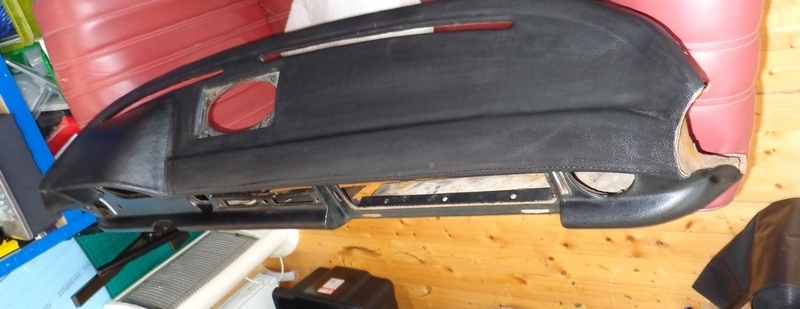 Then repeat below. This leather kit was made for the more luxurious/later dashboards with the zebrano trim running along the centre. These dashboards have a larger recess for the wood so even if I got the correct wood trim from somewhere (which I don't want to do) it wouldn't fit this dash. The wood would hold the leather overlap under itself and make a nice join. For the upper leather I carefully scalpelled back the excess flush with the crease in the dashboard. For the underside of the dash I'm not going to bother as I wouldn't be able to get a good finish. 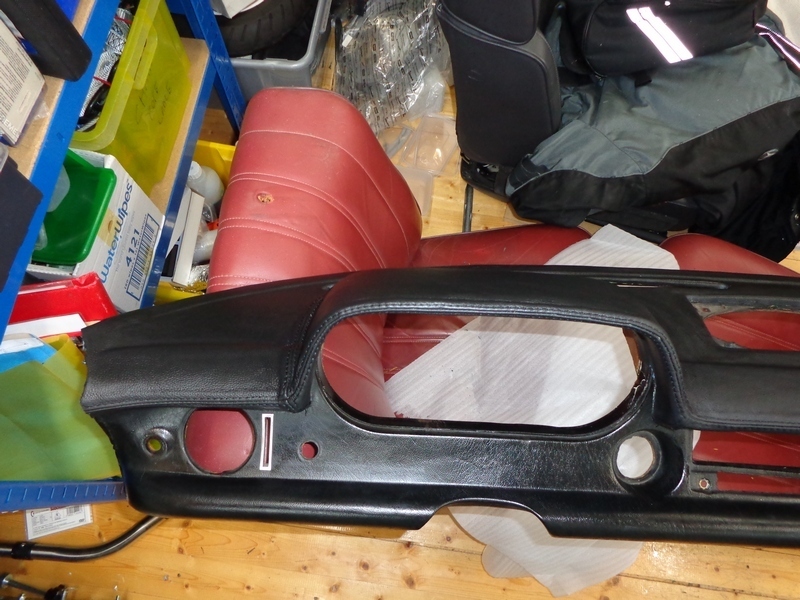 |
| |
Last Edit: Aug 9, 2021 14:12:55 GMT by madmog
|
|
madmog
Club Retro Rides Member
Posts: 1,160
Club RR Member Number: 46
|
1968 Mercedes W114 saloonmadmog
@madmog
Club Retro Rides Member 46
|
|
|
At some point I decided to reluctantly change my engine plans from the Merc 4 cylinder 220CDI turbodiesel engine to something much simpler - for me a least - A 2.6 M103 that I picked up cheap. Everyone wants the 3.0 version, the 2.6 has enough power for what I need. This was before Baldur created his programable ECU for Merc diesel engines but since I got my /8, Diesel has become to be perceived very differently. The guy who was going to do the engine got as far as putting it in the engine bay I can't take any credit for that. Not running and not fully mounted. So the diesel was sold off. 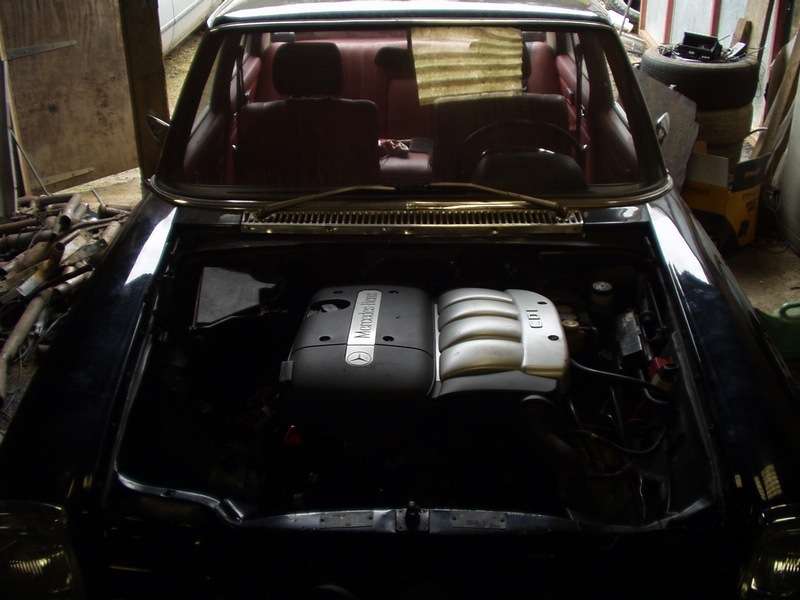 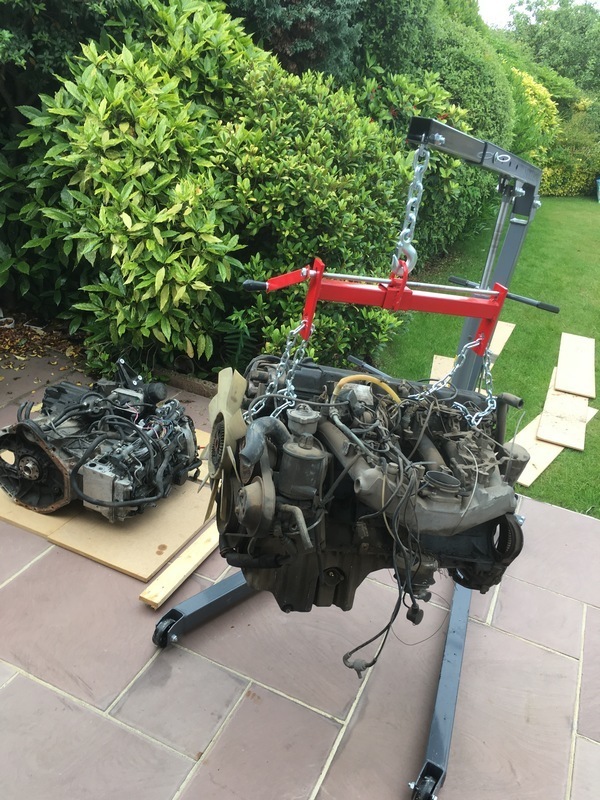 Out with the new, in with the old 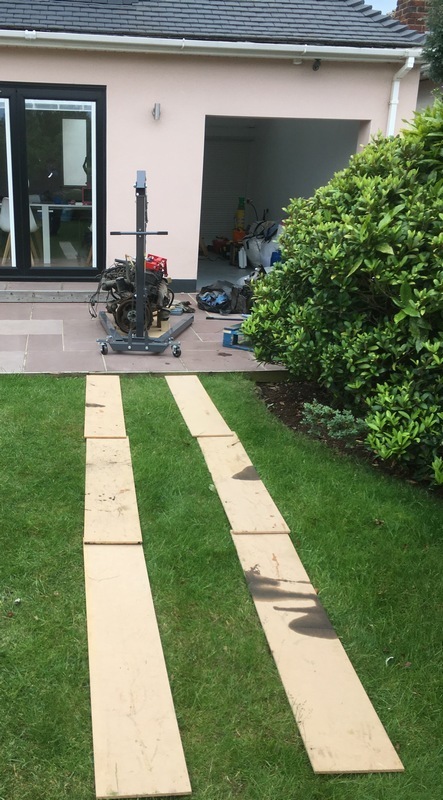 How to move an engine across the lawn without leaving tracks |
| |
|
|
madmog
Club Retro Rides Member
Posts: 1,160
Club RR Member Number: 46
|
1968 Mercedes W114 saloonmadmog
@madmog
Club Retro Rides Member 46
|
|
|
SUBFRAMES The front subframe came out while I was welding the front. Aqua blasted, painted, new bushes and bearings then put back. Then the car went up on its side which needs the axles and hence subframes in place. After the car had finished being on its side the rear subframe came off and received the same treatment. I'll document the subframes together though. But first a useful diagram from Mercedes showing where to apply waxoyl/dinitrol/Col Sanders grease 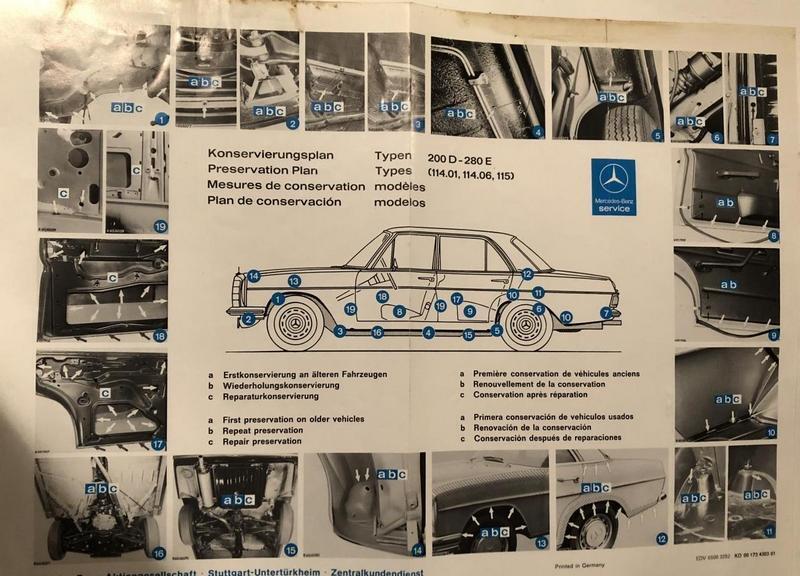 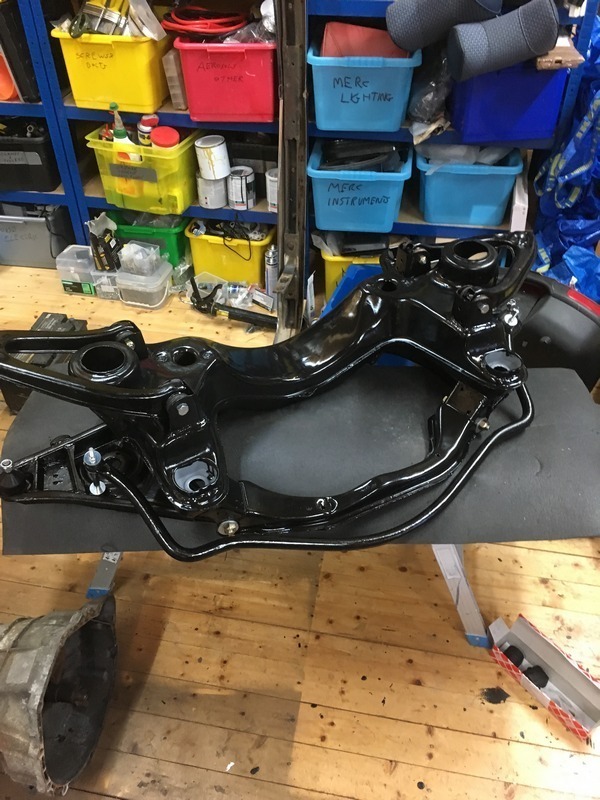 The front subframe and wishbones back together 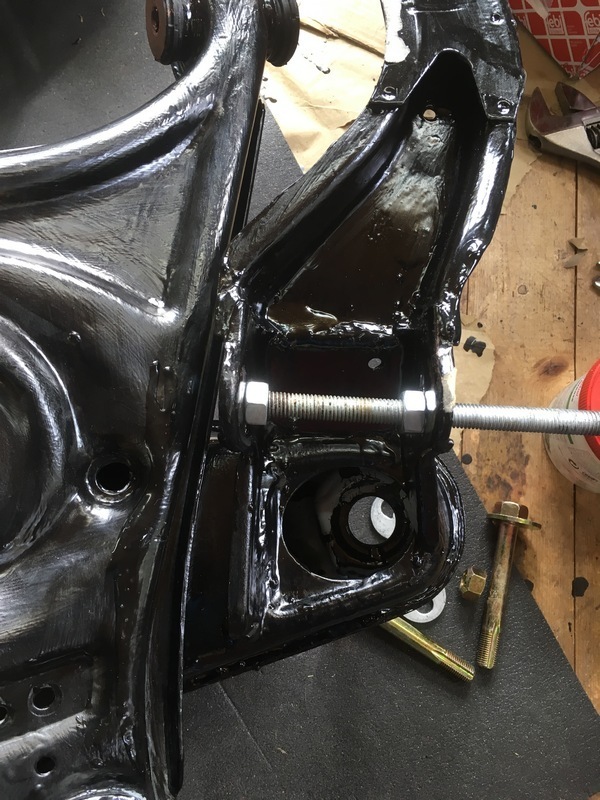 Some parts needed persuading to let the bushes back in 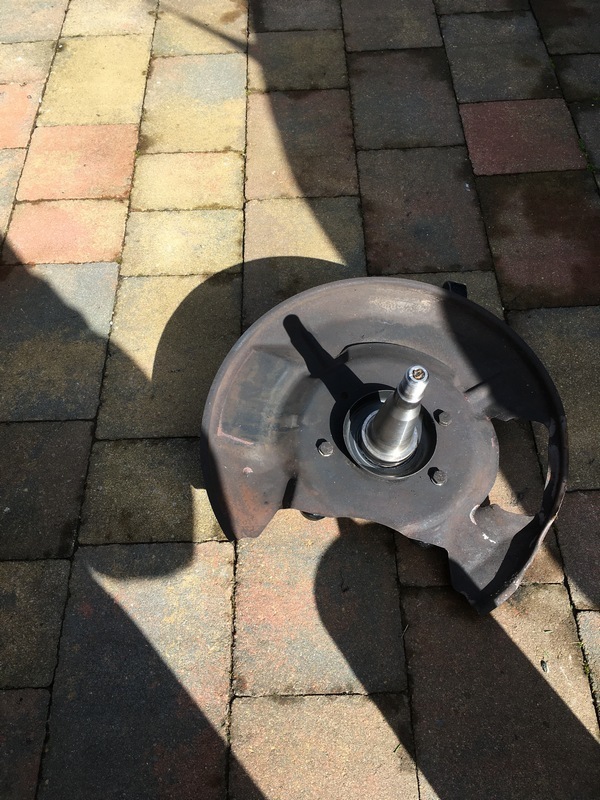 Merc SLC R107 backing plate as R107 hubs and brakes will be fitted. R107s are more much more common and their brake parts seem considerably cheaper. You need to use the R107 hubs though. 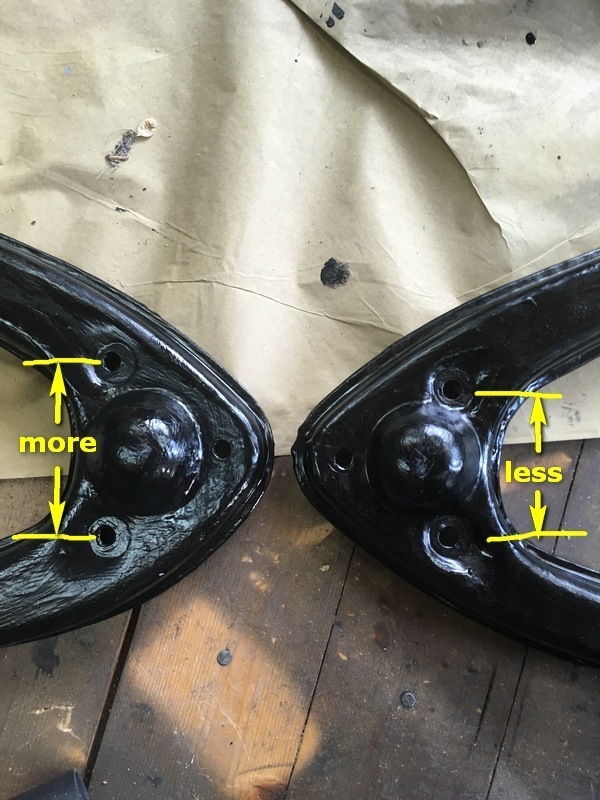 It turns out that there were two different types of upper wishbone. One had bolt in balljoints and the other riveted but you can grind out the rivets and bolt in a new balljoint. They had different bolt spacing as per picture and different part numbers. One is easy to get new and the other a bit more difficult. If anyone needs part numbers or dimensions I can dig them out but don't have the information to hand. 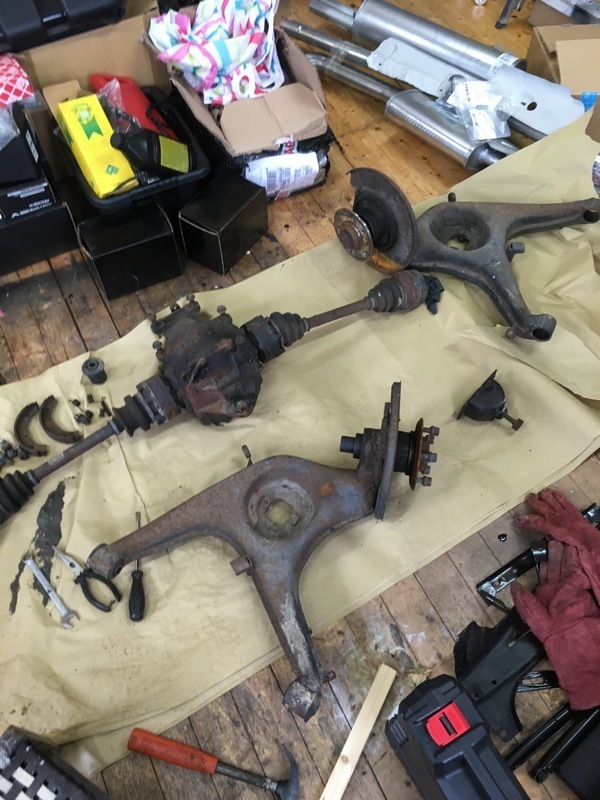 stripping down the rear subframe for blasting, new bushes... 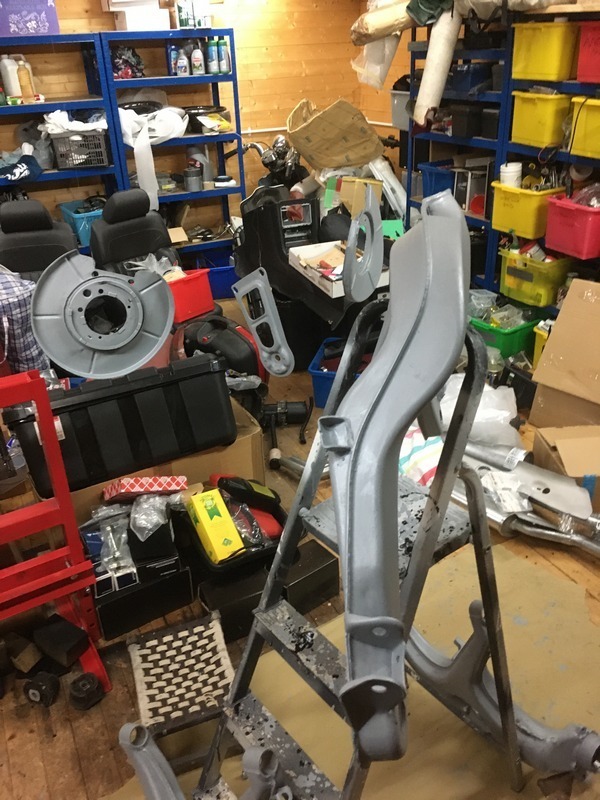 paint always transforms 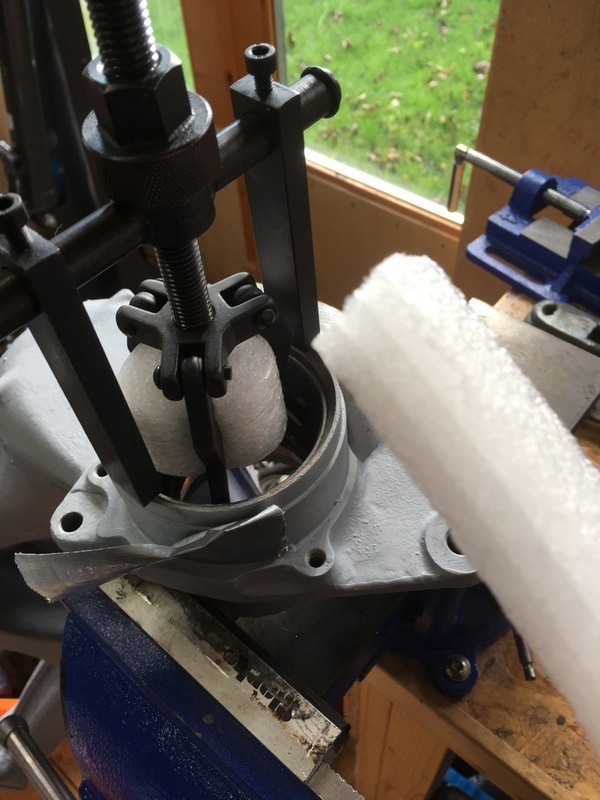 Adding or removing a bearing surface from the rear hub. Seems odd that the rear hub is part of the lower wishbone. Can't have cost much more to have had a separate lower wishbone and stub axle hub. The rear wheel up and down movement is more like a swing axle when it could have kept the tyre parallel with the road. 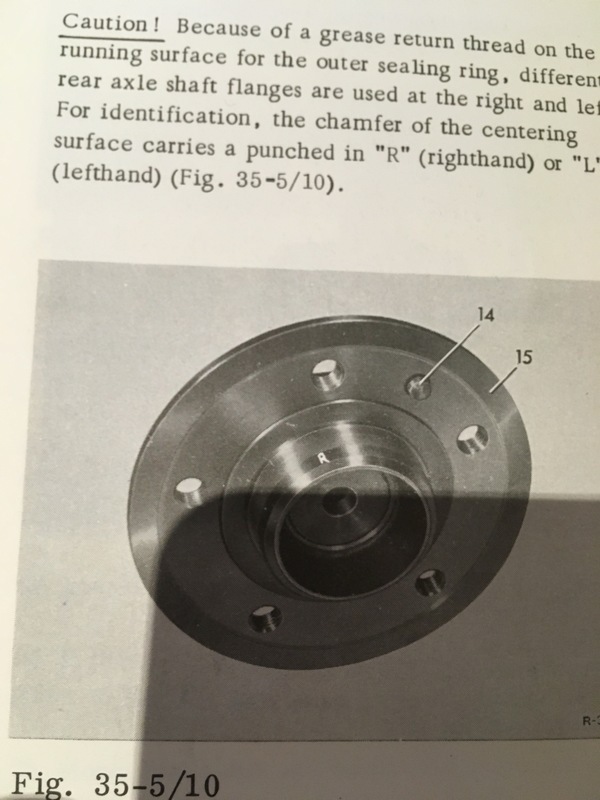 That "R" or "L" is not there after 50 years. 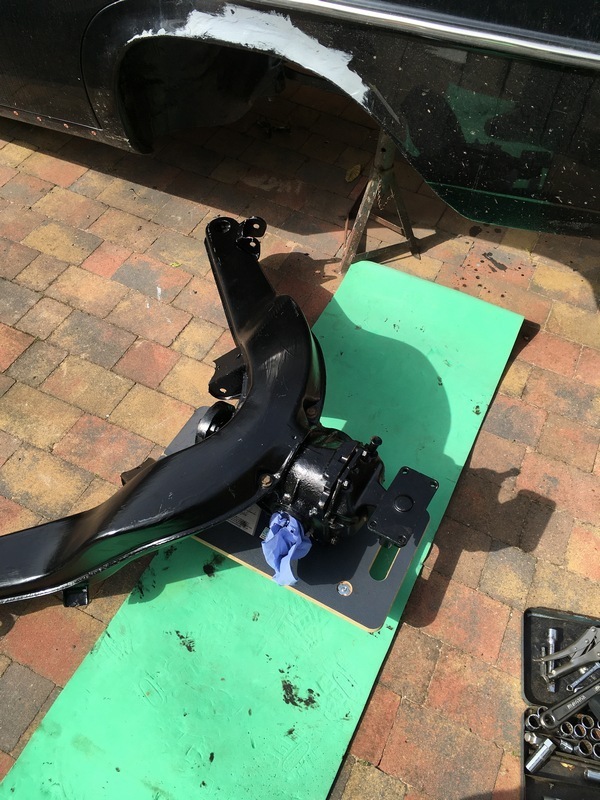 As it's so heavy I took it out of the shed in pieces and assembled by the car 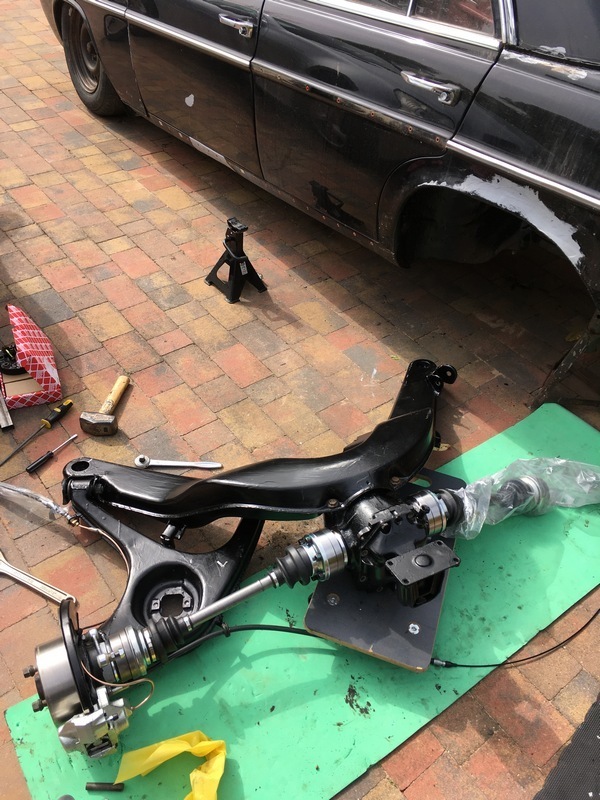 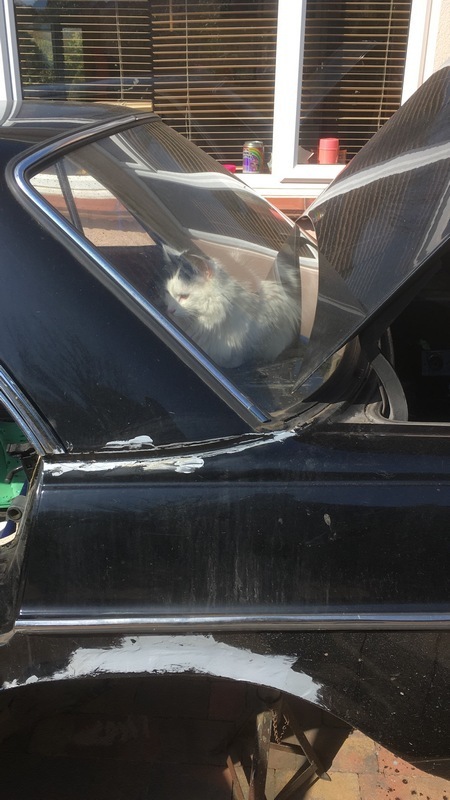 not watching you 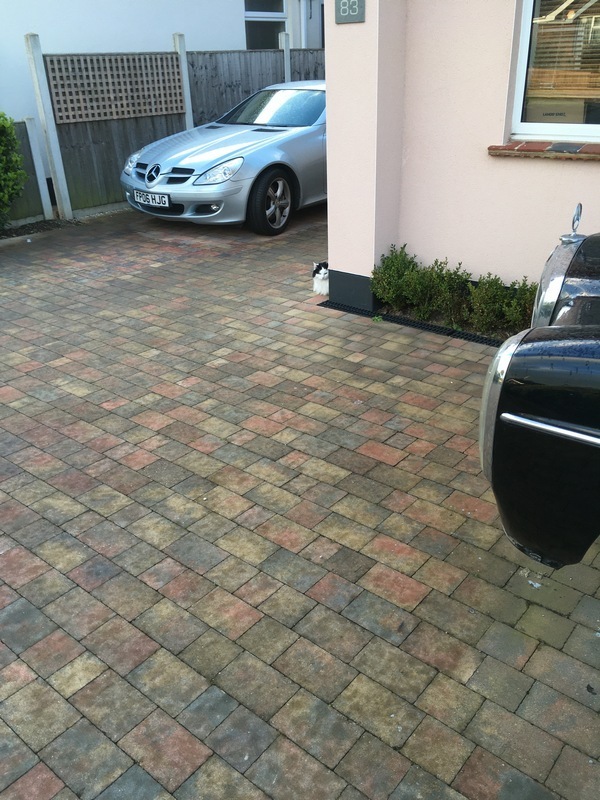 or stalking 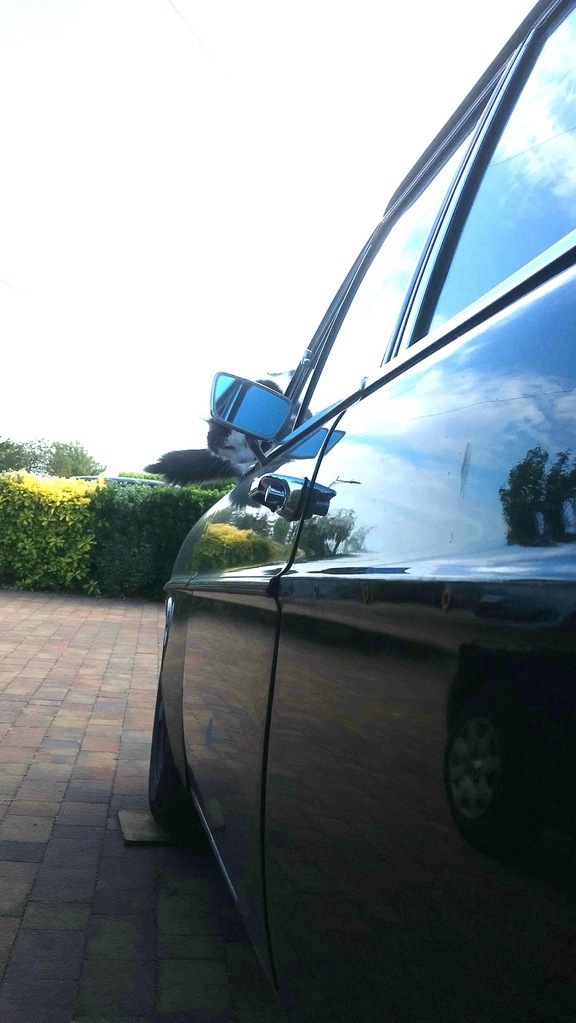 nope 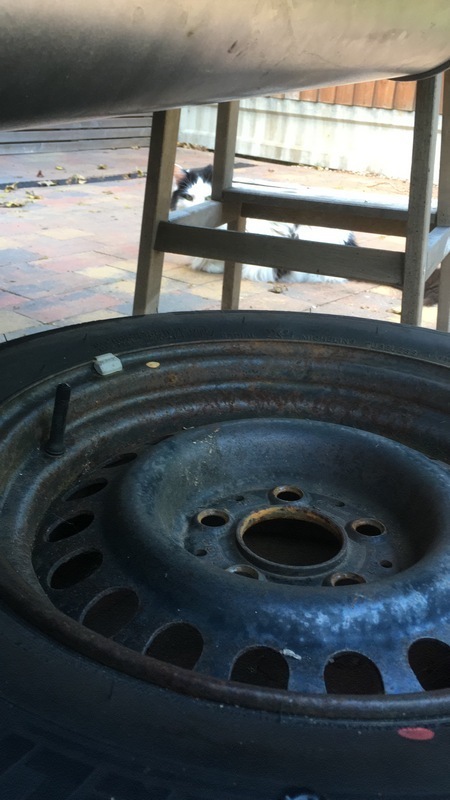 What are you looking at? 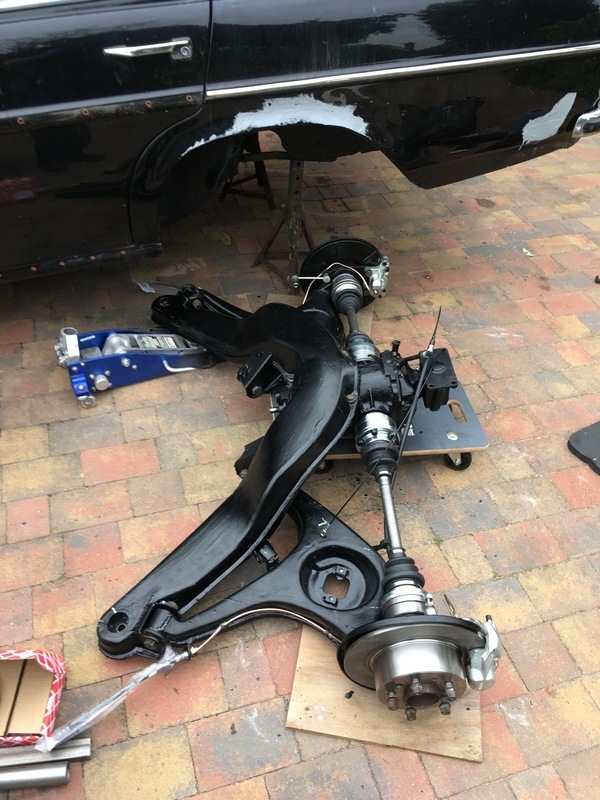 6 bolts away from fitting ... and discovering that while a W123 rear diff will fit, its backplate is deeper, meaning it won't bolt up to the body. I wanted to use the W123 type backplate as the rubber part is easy to get cheaply and the /8 rubber is really really expensive. So W123 diff for economy but re-using the W114 backplate. None of this wanted to go together, everything was a sweaty fight |
| |
Last Edit: Aug 9, 2021 15:30:38 GMT by madmog
|
|
madmog
Club Retro Rides Member
Posts: 1,160
Club RR Member Number: 46
|
1968 Mercedes W114 saloonmadmog
@madmog
Club Retro Rides Member 46
|
|
|
Some random stuff from way back. In order to get this car registered in the UK (it was originally from Greece) I had to change to an mph speedo and RHD lights. I don't think I have pictures of the front lights but you can just change the front glass and leave the housing but with the main bulb fitting filed so the bulb is angled the other way. I picked up a whole mph instrument housing from the States. Bonus is that it was from an auto meaning I have a little glass window behind which I can add some warning lights. 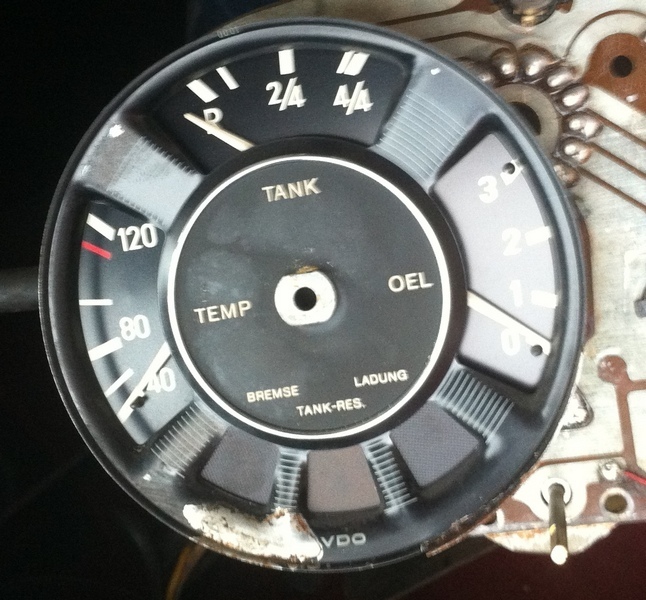 German spec 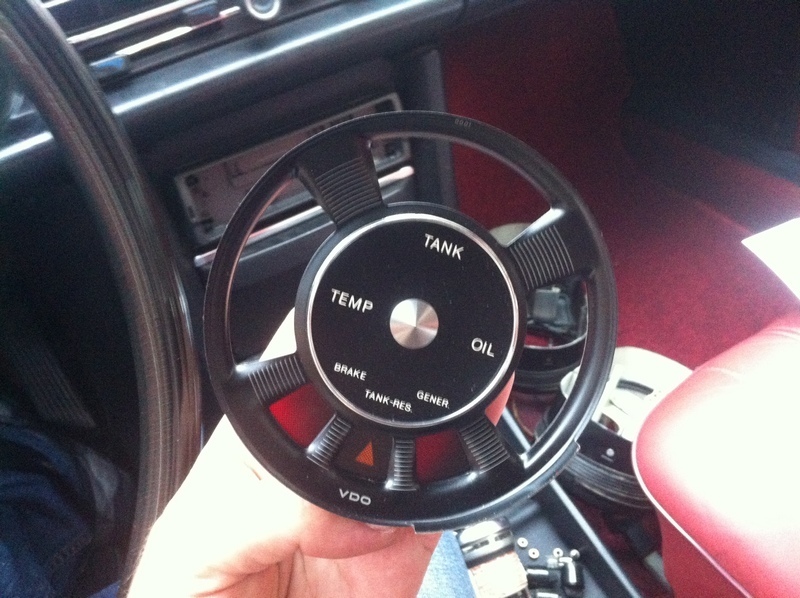 US spec 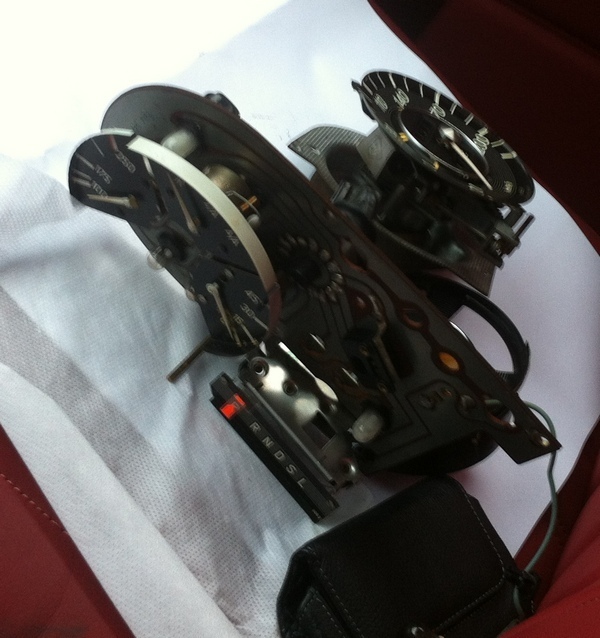 Anyone need the auto gear indicator? Or any other odds or ends? |
| |
|
|
madmog
Club Retro Rides Member
Posts: 1,160
Club RR Member Number: 46
|
1968 Mercedes W114 saloonmadmog
@madmog
Club Retro Rides Member 46
|
|
|
REAR LIGHTS The inners were heat damaged but easily repaired with Epoxy then sprayed with silver paint. Early /8s had both a parking light (where only the left or right would light up) and a tail light of the same wattage. Later ones used the same bulb for both functions. On mine, I discovered this as my tail lights didn't line up. Ie one was higher than the other. One part of the fitting had burned out so a previous owner botched the tail to the parking light. 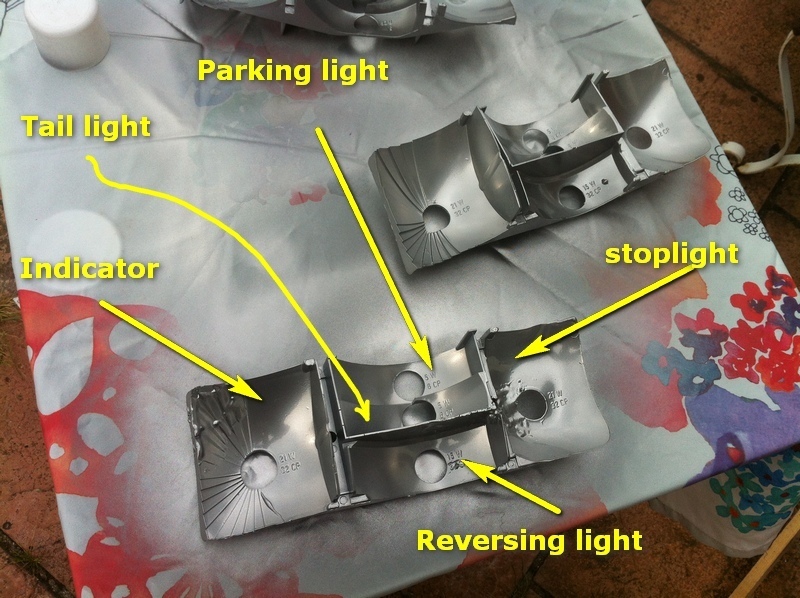 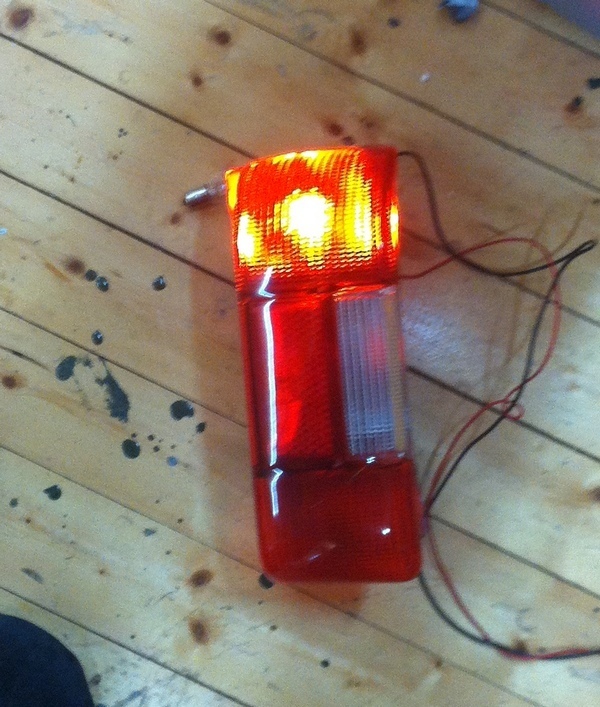 If the orange bulb is bright enough (Cree LED) it'll shine orange through a red lens. 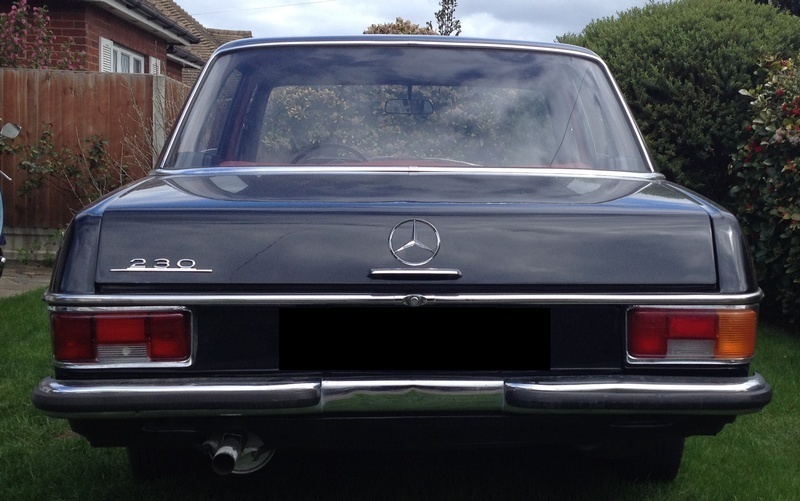 red to the left, amber to the right. Console 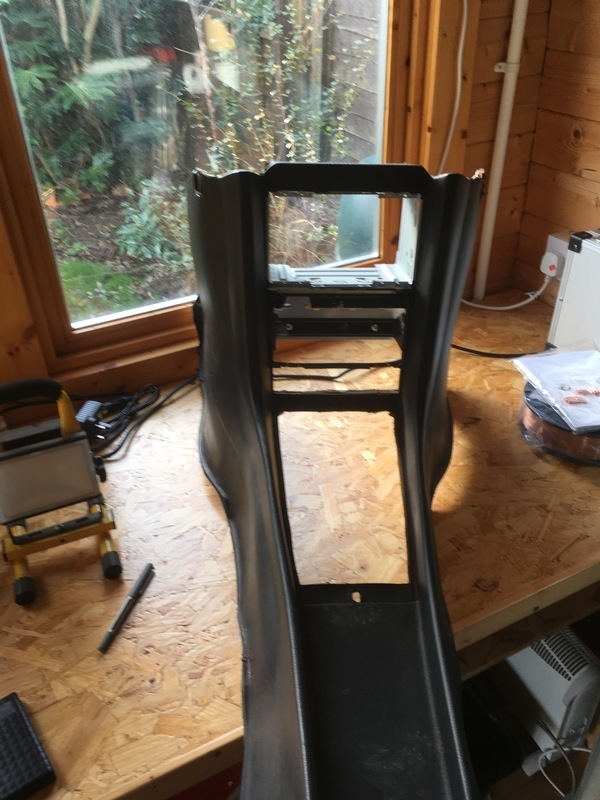 Notice anything unusual? it's altered to take a double-din radio. 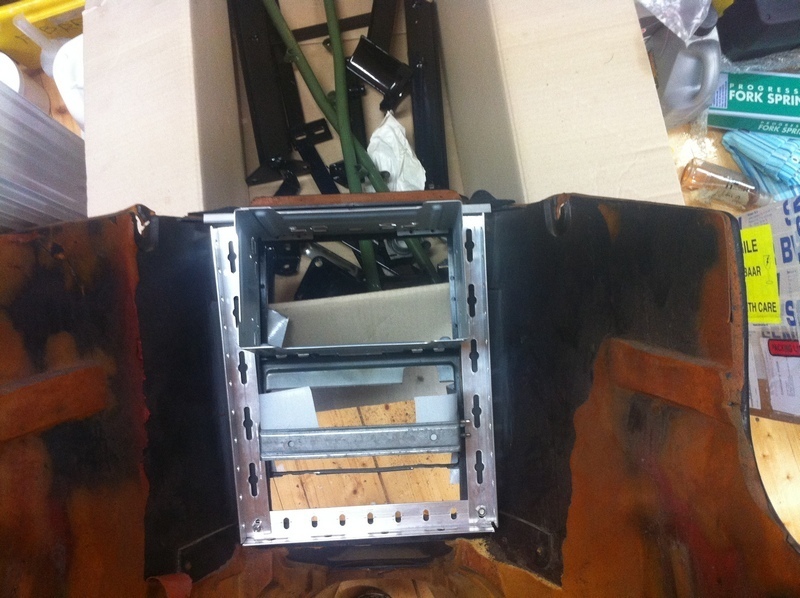 Quite a bit of reinforcement to hold the radio and move the ashtray down one din from where it started life. |
| |
|
|
madmog
Club Retro Rides Member
Posts: 1,160
Club RR Member Number: 46
|
1968 Mercedes W114 saloonmadmog
@madmog
Club Retro Rides Member 46
|
|
|
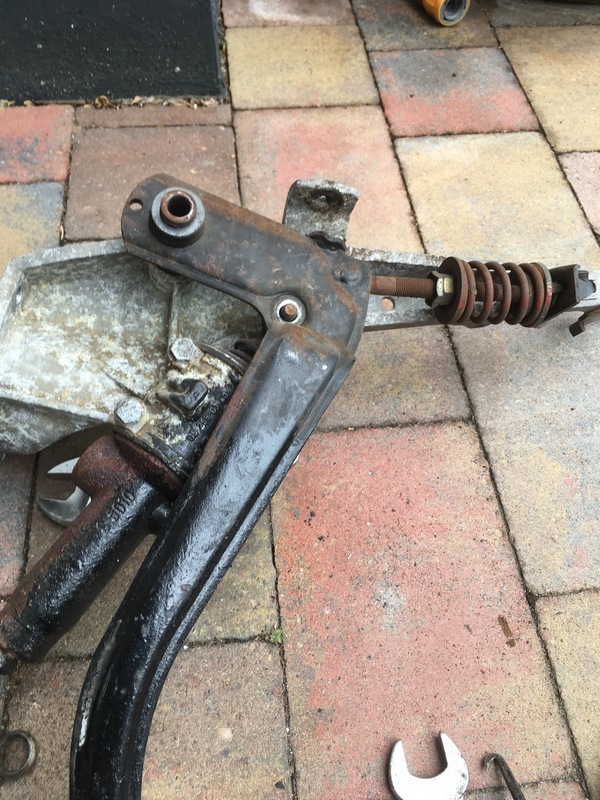 Everything is old and grotty but usually solid. Clutch master was gone and a new one cheap; albeit a different type that needed a bit fabricated to stop the plunger travelling too far. No pics unfortunately. Cleaning up and painting the small stuff takes forever. 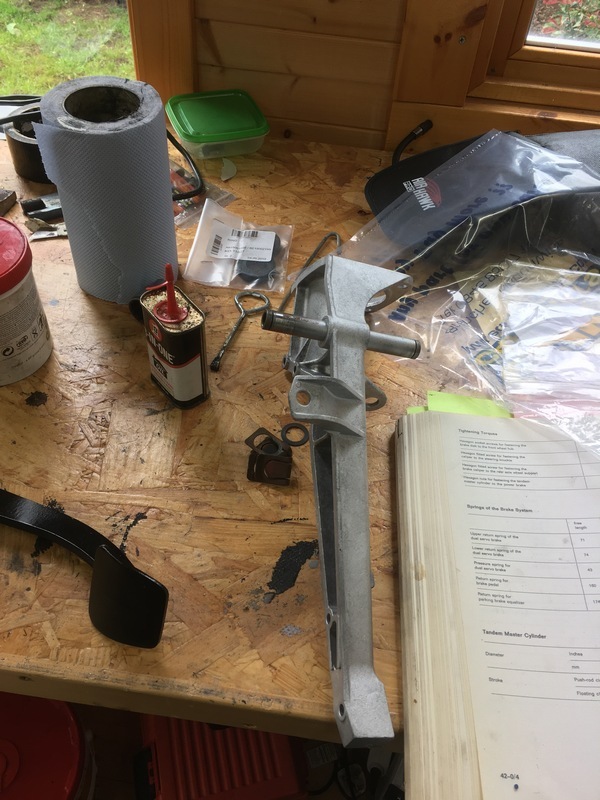 Casting blasted. I take a big pile of stuff at a time, I don't bother the blasters with little odds and ends on their own 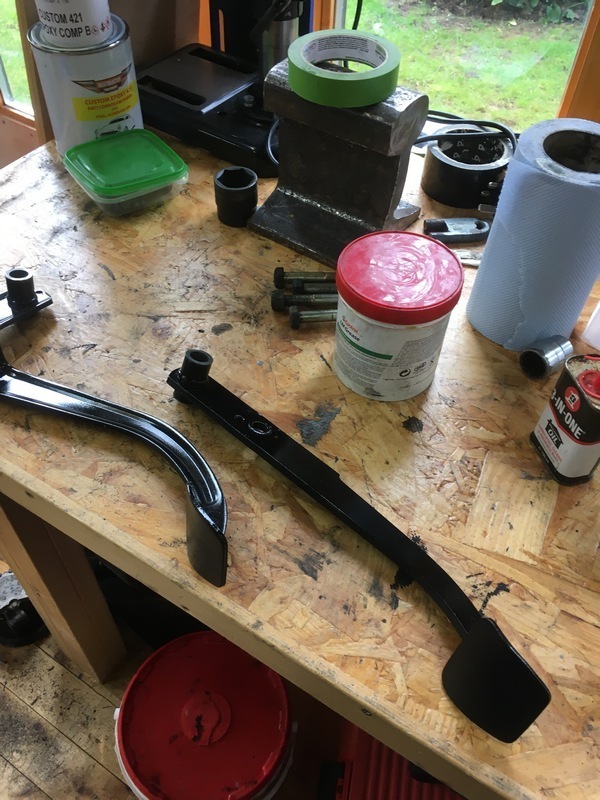 blasted then rattle can. Put up the gazebo in the garden as a cleaning up grotty metal then rattle canning it station 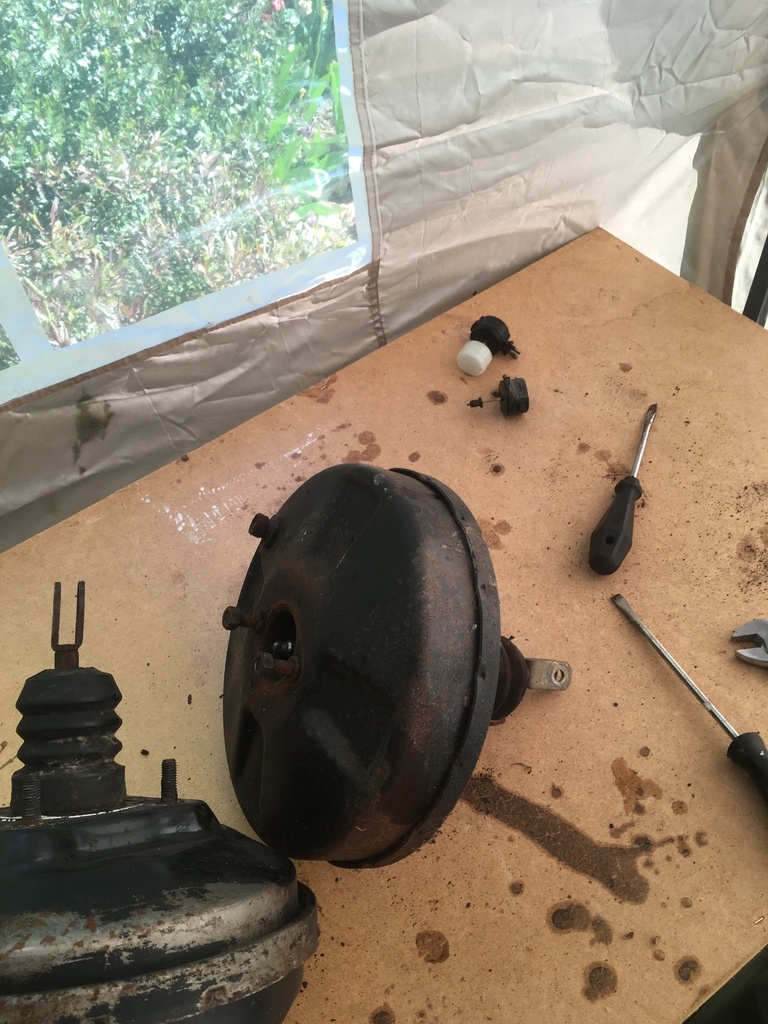 Grot 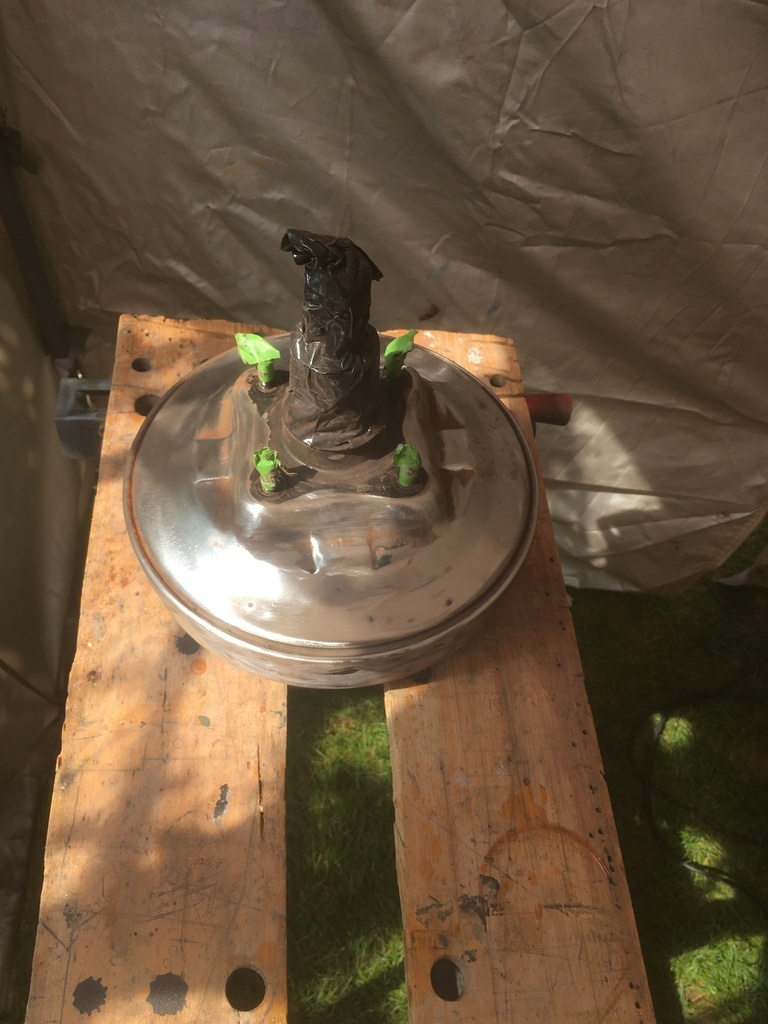 Shiny metal 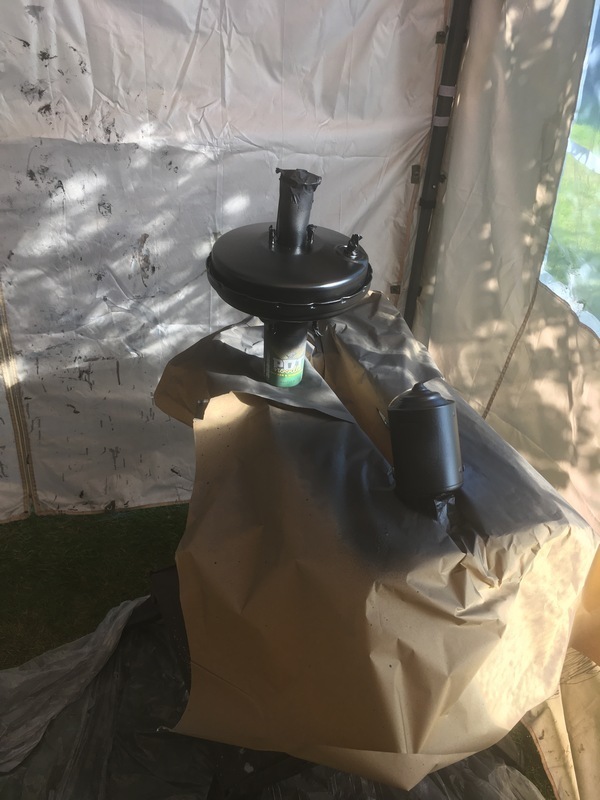 Much better 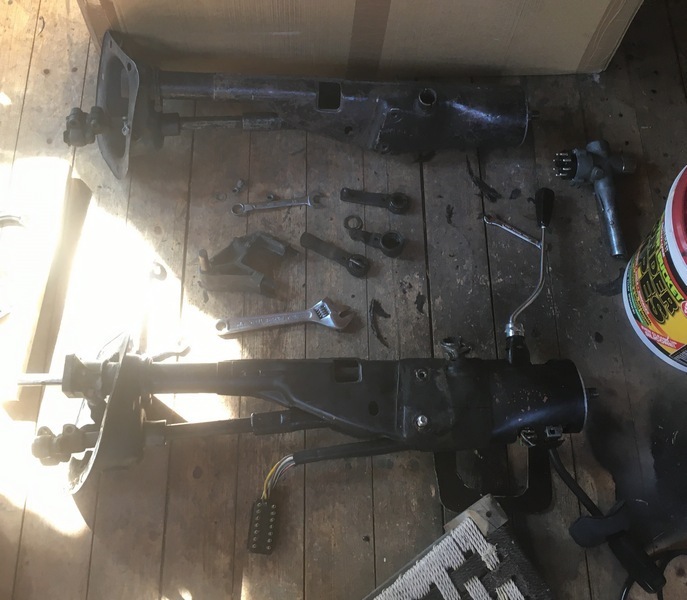 As the steering box was knackered I found a rebuilt power-steering version. This necessitated a shorter steering column. You could use up the telescoping that is there for accidents but that doesn't sit well with me. So found a shorter column and cannibalised that. I watch a lot of things on German Ebay waiting for a cheap one to come along. |
| |
Last Edit: Aug 9, 2021 16:51:52 GMT by madmog
|
|
madmog
Club Retro Rides Member
Posts: 1,160
Club RR Member Number: 46
|
1968 Mercedes W114 saloonmadmog
@madmog
Club Retro Rides Member 46
|
|
|
Time for more of the dirty big work. Having sorted all of the bodywork in the front 1/3 of the car and in the cockpit I was aware of some weird stuff underneath so I got one of those car tilters. 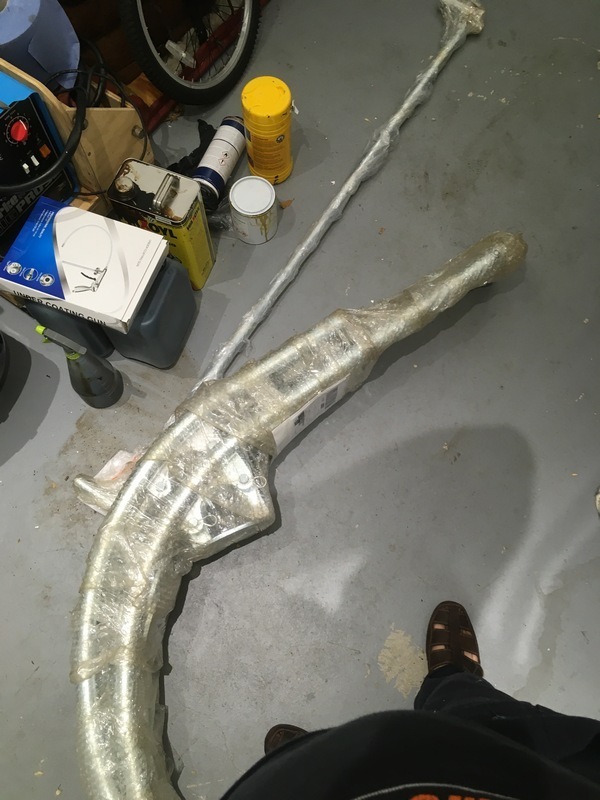 Which arrived like this 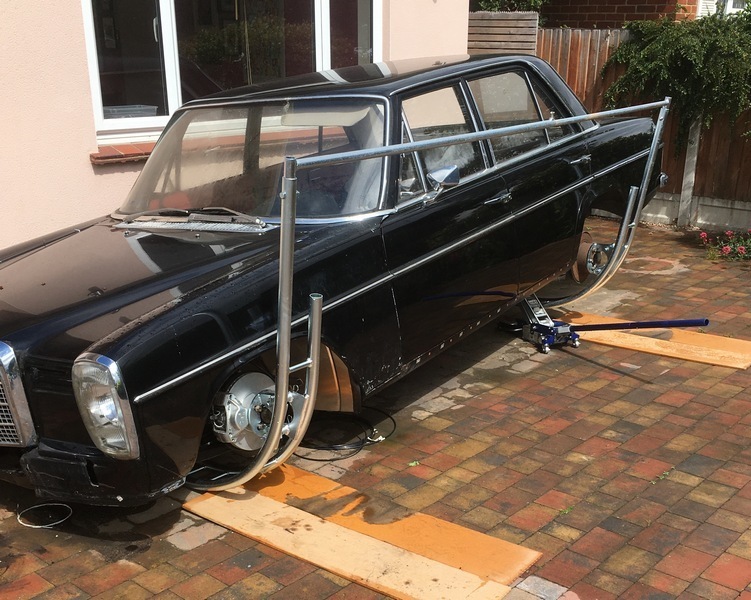 And goes together like this. I don't like doing all this 'unusual' stuff in the front garden where I can be seen. Luckily thre was a lot of building work going on next door and nearby so my angle grinder sound blended in. No neighbour complaints whatsoever. 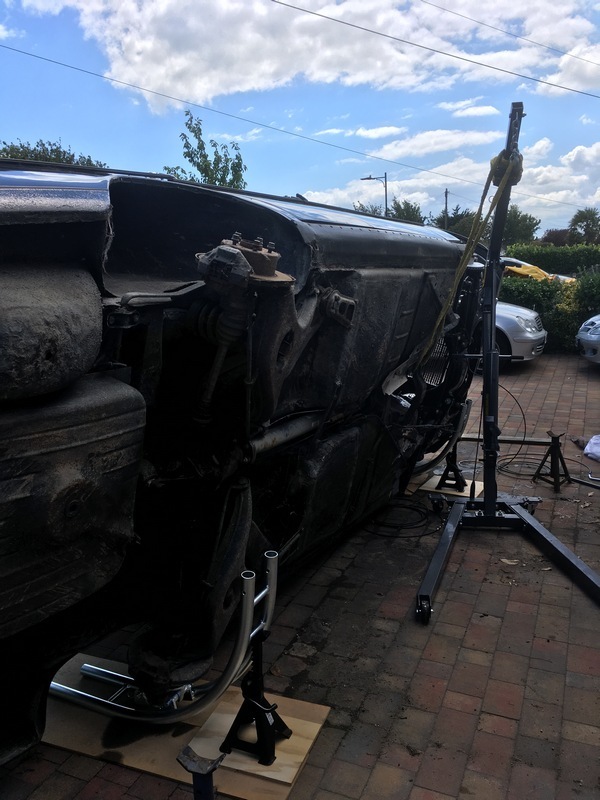 Generaly sound but so many repairs previously 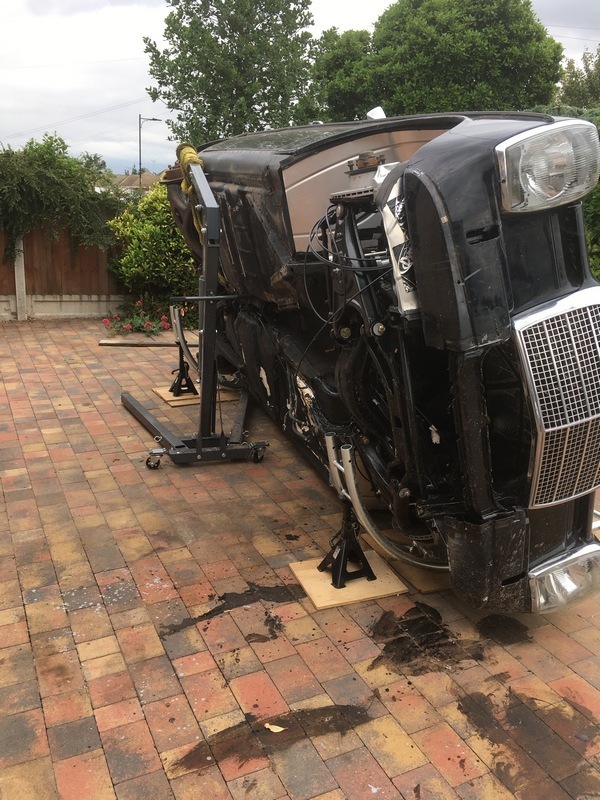 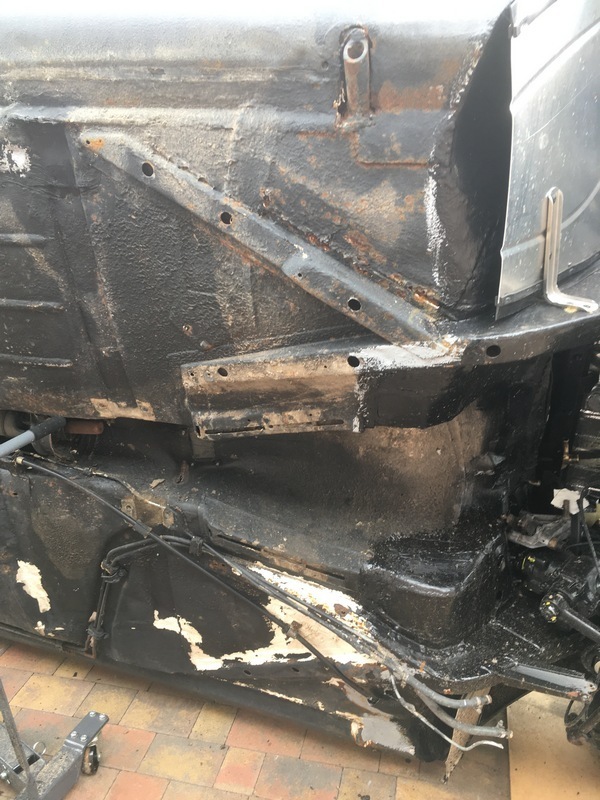 Never comfortable when I find seam sealer apparently used as paint. I say seam sealer, might have been bath sealant as the black stuff didn't really stick to it. 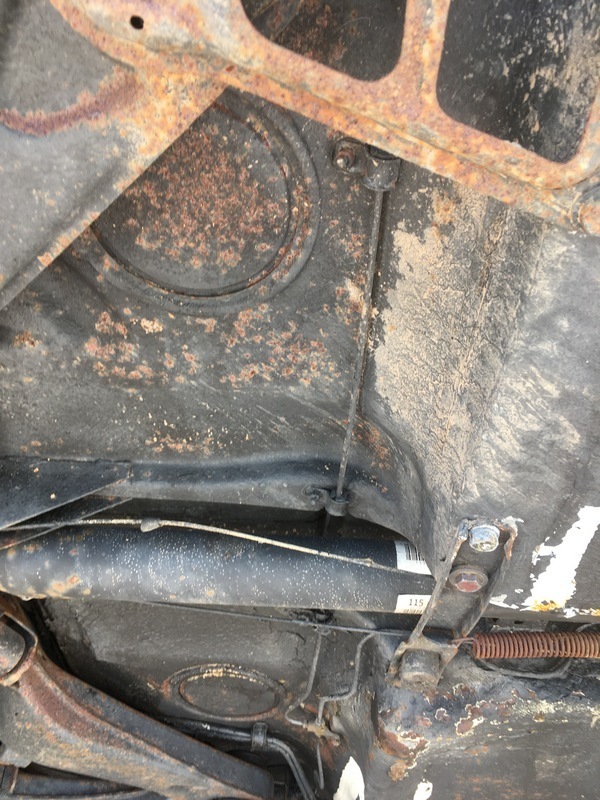 Surface rust 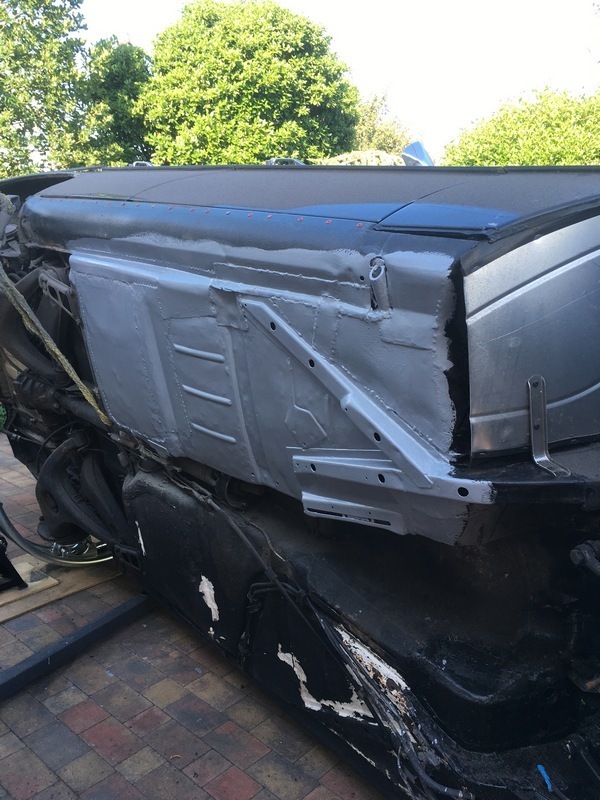 ground back and primered you can see how much of the car is. Patches everywhere. Ugly welding but solid. No more patches over rust. 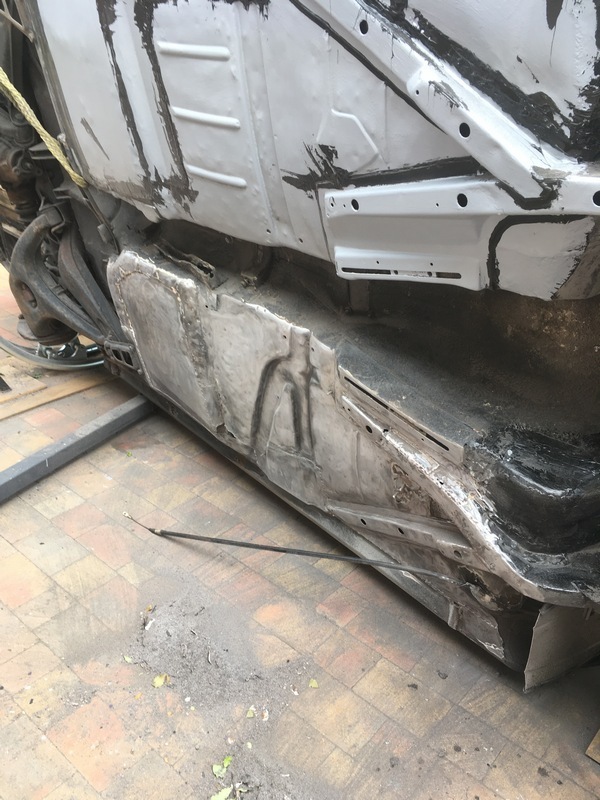 Takes so long and makes so much mess. 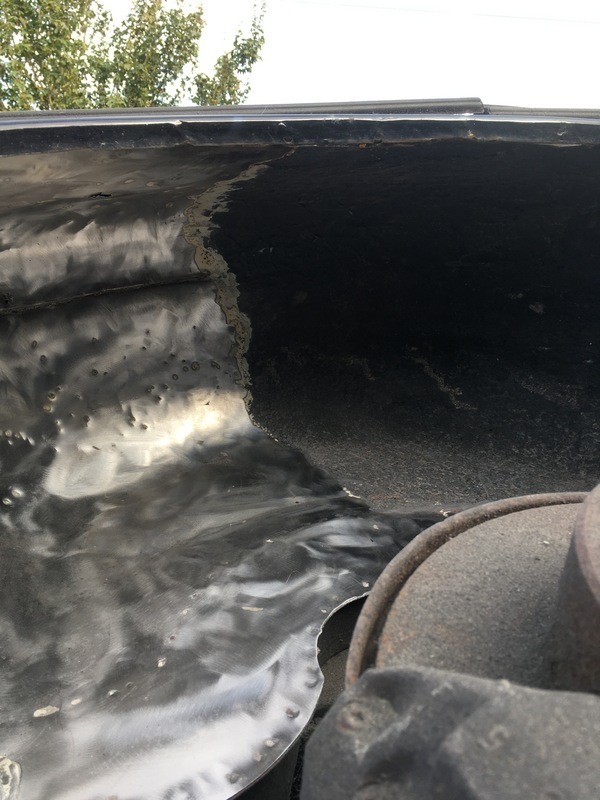 Not sure what caused the pocks, they aren't spot welds 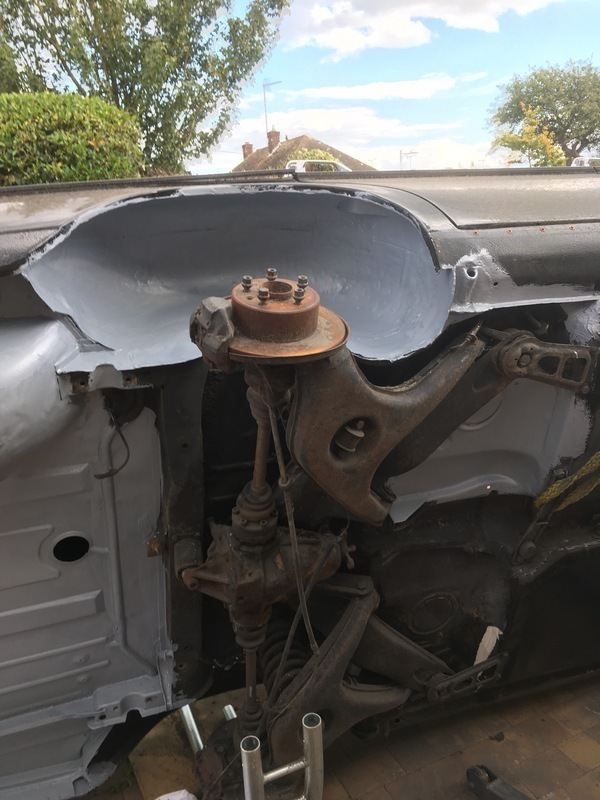 I can't get a the part above the axle so that will be dealt with when the car back level and the back subframe is removed. 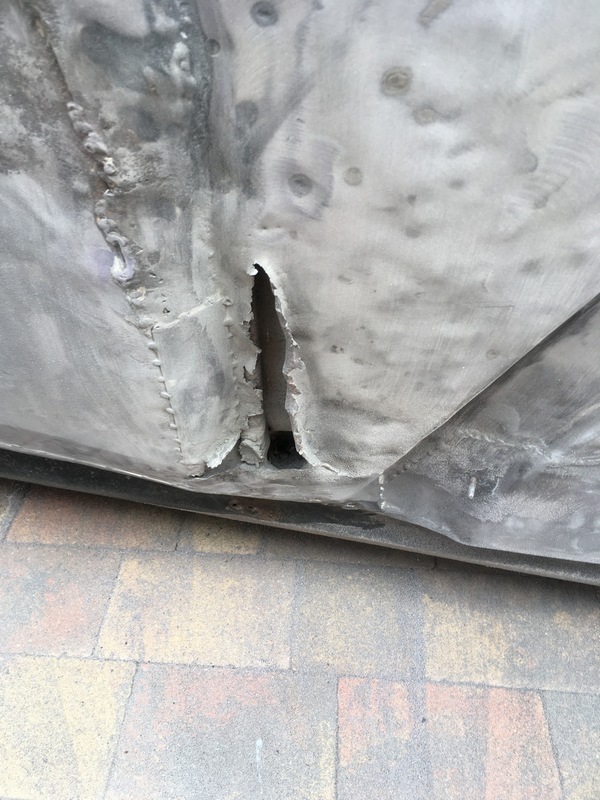 Thjis was the only part that needed cutting and welding. It's the bottom of the box section upon which the seat lives. Actually quite easy and no, no of the welding you see in the pic above is mine 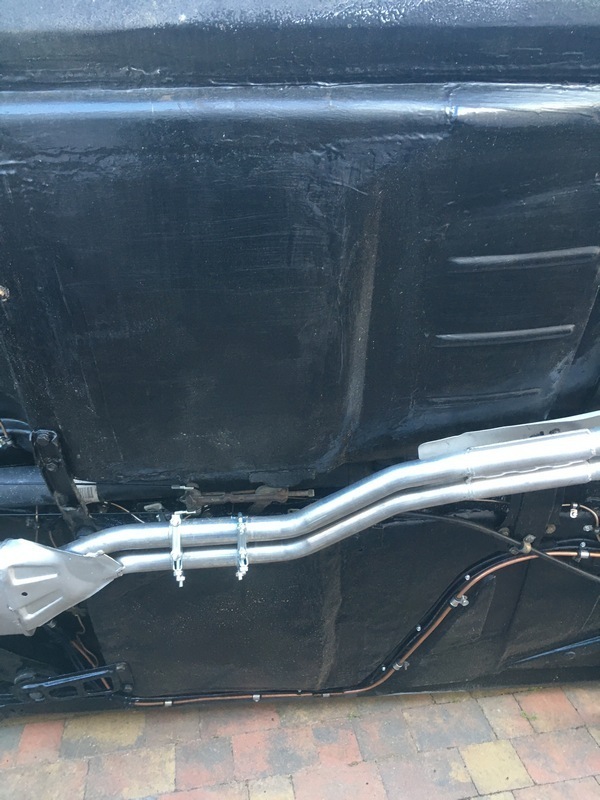 This is cut to the second lifting; after the rear subframe has been rejuvenated. Annoyingly I must have pushed the parking brake because I couldn't get the cabls to meet to reconnect. When it was back down i release the brake and could link everything up. 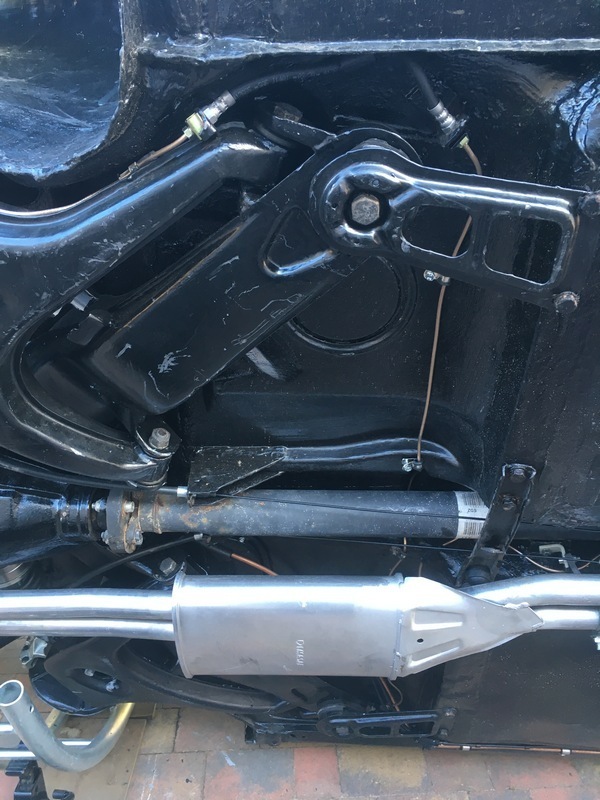 I took a lot of photos while dissassambling and re-assembling the underside. If anyone gets stuck as to what goes where, let me know as I may have a pic. |
| |
Last Edit: Aug 9, 2021 17:36:26 GMT by madmog
|
|
madmog
Club Retro Rides Member
Posts: 1,160
Club RR Member Number: 46
|
1968 Mercedes W114 saloonmadmog
@madmog
Club Retro Rides Member 46
|
|
|
The first time I brought the car back down to the horizantal I found that it had somehow moved closer to the house. The engine hoist was tight between the house and edge of the car. At the point of no return the crane had to move under the car so the top creased the door and one of the wheels crushed the opposite sill. 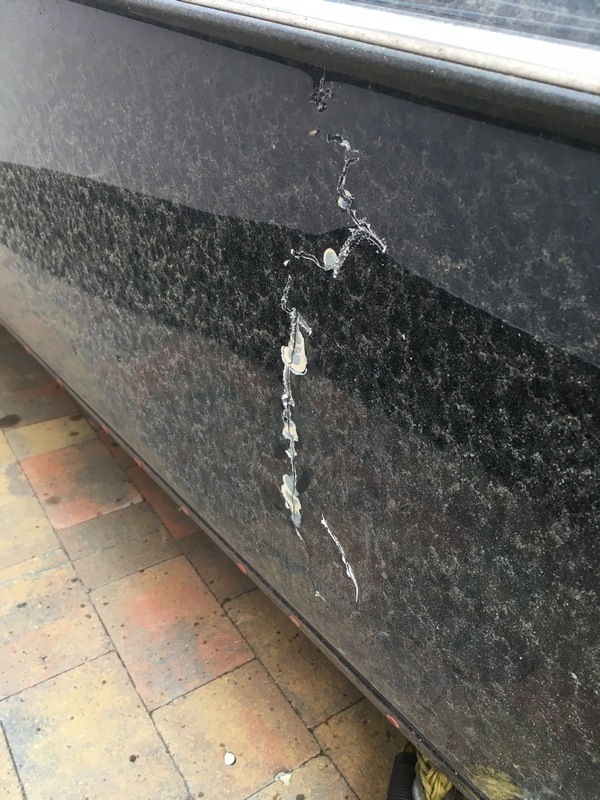 This crease is quite deep and other than sealing the metal with epoxy primer I'm going to leave it alone so I don't make things worse. 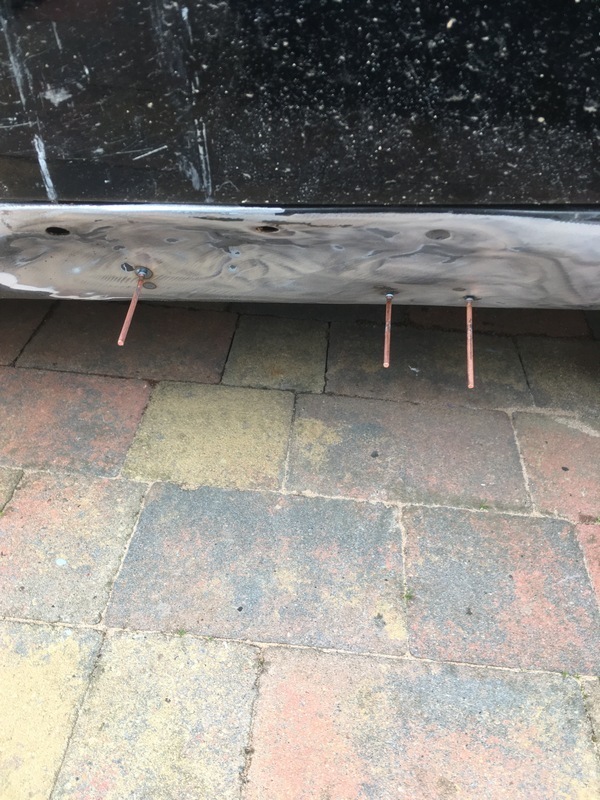 This is the pushed in sill. You can see it better to the left. After ruminating for a bit I remembered something I'd seen on Wheeler Dealers that welded nails or keys onto a panel so it could be pulled out with a slide hammer. There's a similar concept with hot glue but I don't think the glue would be up to it. I did think of cutting a square hole in the sill and butt welding in a repair. It's a single plane curve so would be easy enough to make an accurate panel. But I had a feeling that this would introduce a weakness, possibly a stress concentrator in such a critical element of the car. So the slide hammer thing. 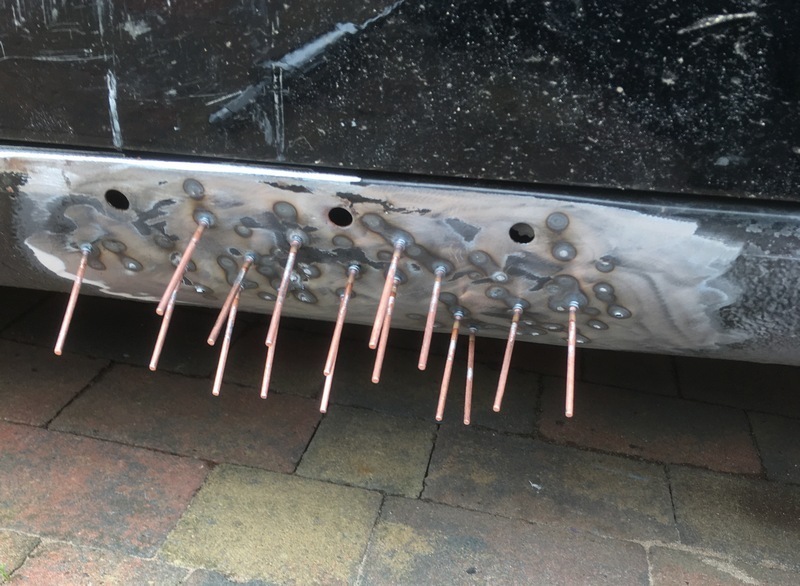 I eventually did a reasonably good job of getting this back to nearly true. Probably took an hour. Easing each bit out a little bit, trying not to stretch the metal or make a crease. Rather than perfect it's close enough to finish with filler. 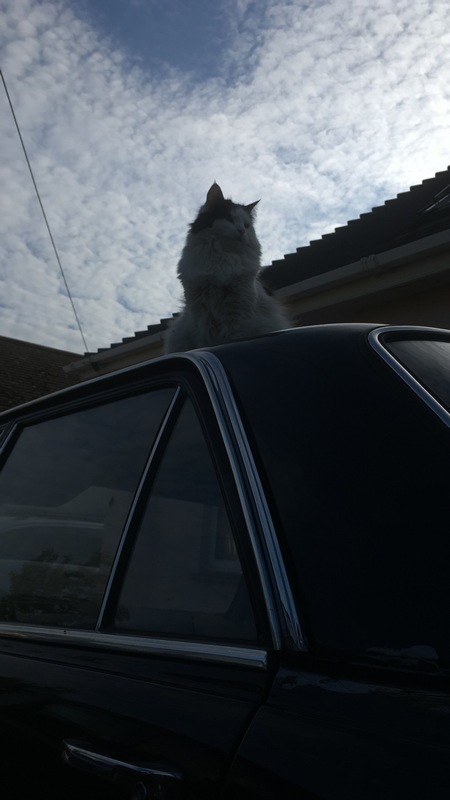 No idea how the car moved though... |
| |
|
|
braaap
Posted a lot
  
Posts: 2,744
|
|
|
|
|
|
| |
|
|
|
|


