vulgalour
Club Retro Rides Member
Posts: 7,287
Club RR Member Number: 146
|
|
Sept 18, 2020 22:47:35 GMT
|
Good news and bad news today. Before work I had some time and determined to quickly replace the leaking gaskets on the engine of the Princess. I had two culprits, the first was the blanking plate where a mechanical fuel pump can be fitted, this is really common for leaking. The second was the cambox end plate, the one with the thickness specific gasket that caused all the fuss, this one isn't so common for leaking. I removed both plates, cleaned off the old gaskets which had both partially blown out on the lower edge, and then sanded the mating faces to check for level. There was no warping evident in either the head or the plates, so I had to assume the gaskets had just failed. I didn't have any pre-cut gaskets to suit so opted to use cork sheet since I'd recently acquired some. The gasket paper I have was too thin for the cambox end plate, and it is sensitive to the thickness of the gasket because if it's too thin the camshaft binds against the plate, the cambelt slips, and then all the valves meet all the pistons. Ask me how I know (actually don't, because I'm still grumpy about it happening the first time). Fuel pump blanking plate went very smoothly, no problems there. 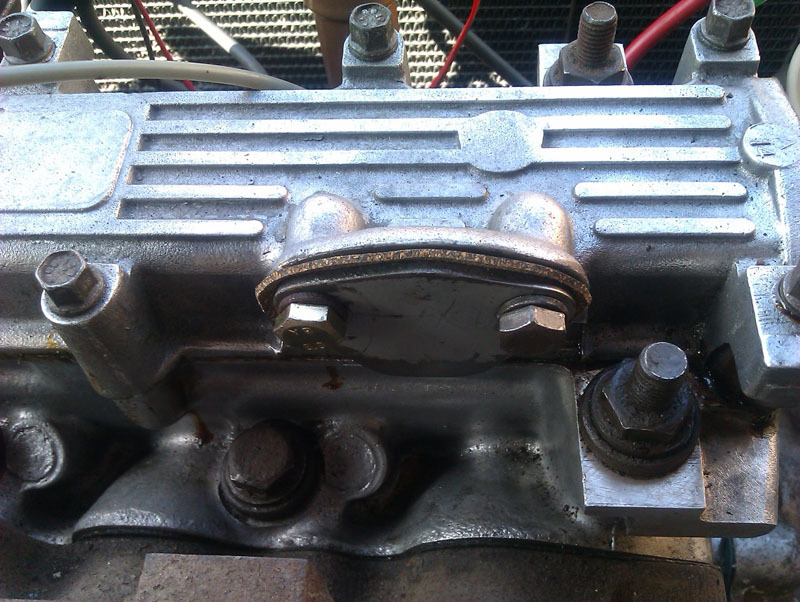 The cambox end plate is a little trickier. It's a complicated shape and if you don't clear the camshaft properly it causes problems. The first attempt I found I hadn't cut the upper hole large enough, as evidenced by the oil witness mark. To test fit I fixed the plate and then tried to turn the engine MANUALLY. I've learned my lesson, no turning the engine with the starter and hoping it's right. I'm glad I did, it took several attempts to get the shape of the gasket just right and I tested the camshaft was free both with and without the spark plugs in. 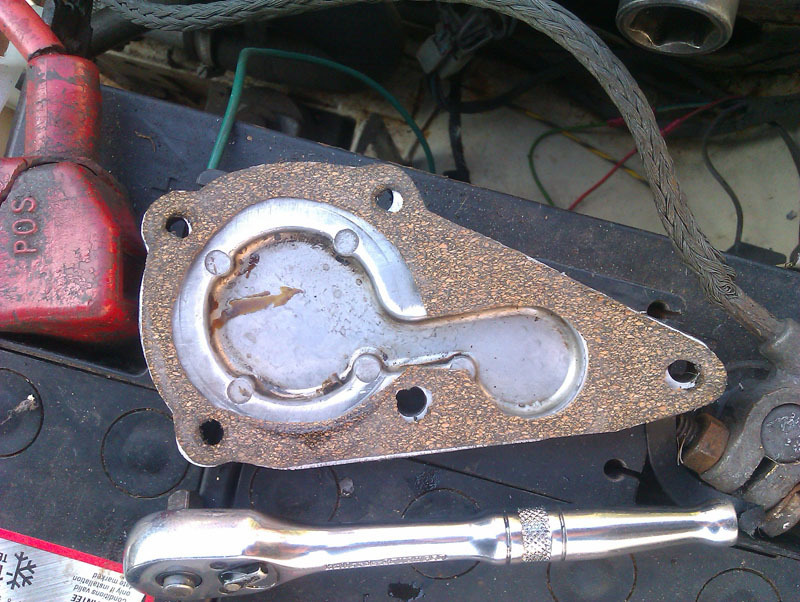 Everything had gone smoothly so I let the car idle for a bit and no oil was reapparing. Set off for a test drive of about a mile, that's usually enough to get the temperature up to something like normal after the car has been idling a while. Didn't experience any problems on the test run, pulled up at home and found the oil leaks were apparently cured. Good job. However, the coolant bottle was looking murky and the idle was now a bit lumpy so something wasn't right. I kept an eye on the usual suspects and then noticed bubbles in the coolant bottle. Pushed the Lanchester out of the garage so I could get to the torque wrench, double checked the head bolts on the Princess and found they were all fine. the bubbles kept appearing and there was clearly oil in the coolant now. The longer the car idled, the worse the problem became so that's a blown head gasket. Again. I'm hoping it's just a bad gasket, the one that's fitted has only done about 70 miles and I've not been doing anything silly with the car since I've been bedding in the new valves and shims. I've ordered a new head gasket kit and when that arrives I'll pull the head off again and see if there's anything obviously amiss. I'm not getting water out of the exhaust or any sign of water in the oil, at the moment it's just putting a bit of oil and a little bit of exhaust into the coolant so I reckon it must have popped on the test run which means I've caught it early. The car didn't overheat, it didn't even leave the usual temperature range on the gauge and didn't drive with any cause for concern. I don't really know what would have caused this gasket to fail other than a bad gasket to be honest. As I say, this gasket has only done about 70 miles, it was fitted after the valve busting issue when I didn't refit that cambox end gasket that I didn't know was so critical at the time, so it's on a newly skimmed head, new head gasket, new valve train, new fluids, new cambelt, basically a freshly built top end really. It's never given cause for concern with temperature or performance or behaved out of the ordinary, it just seems to be one of those things. Rotten timing though. I'd just booked it in for a suspension regas and have had to cancel that until I find out what's gone wrong and how much it's going to cost to put it right. I do know where there's a NOS engine and we may yet go that route, there's just no price listed for it and I don't currently have the tools for an engine swap or the space to keep said tools safe. If replacing the head gasket doesn't work to solve the issue I'm genuinely considering putting my resources into the Lanchester instead and using that since it will do everything I need a car to do. Not the most practical solution, perhaps, but it's a solution I have access to. In the meantime, I'll just have to rely on the other half for transport and my own two legs. I don't feel I can trust public transport or taxis in the current climate. |
| |
|
|
|
|
melle
South West
It'll come out in the wash.
Posts: 2,011
|
|
Sept 18, 2020 22:52:38 GMT
|
|
Get yourself a bicycle! Sorry to hear about the head gasket...
|
| |
www.saabv4.com'70 Saab 96 V4 "The Devil's Own V4" '77 Saab 95 V4 van conversion project '88 Saab 900i 8V
|
|
stealthstylz
Club Retro Rides Member
Posts: 14,962
Club RR Member Number: 174
|
|
Sept 19, 2020 9:27:38 GMT
|
|
How much has been skimmed off the head? Did you check to make sure the head bolts aren't bottoming out in the block?
|
| |
|
|
|
|
|
Sept 19, 2020 9:33:00 GMT
|
I wasn’t wishing to question you, but my thought was was head torqued down in right order.... more along the lines of conflicting info than you going rogue But head bolts is a better suggestion, from someone who builds engines for a living too  |
| |
|
|
brc76
RR Helper
Posts: 1,108 
|
|
Sept 19, 2020 11:31:56 GMT
|
|
Well, that sucks. I'm really sorry hearing oil water mixing again. I actually was going to ask how the princess was.
|
| |
|
|
|
|
|
Sept 19, 2020 13:24:05 GMT
|
|
What a pain that was just looking like it was sorted. There isn't a blockage causing the gasket to blow is there?
|
| |
|
|
vulgalour
Club Retro Rides Member
Posts: 7,287
Club RR Member Number: 146
|
|
Sept 19, 2020 14:07:54 GMT
|
It was a ten thou skim. I have no idea if the head bolts are bottoming out, maybe they are? Torque sequence as per the book. When I say I don't like working on engines, I really don't like working on engines, so it's pretty annoying that I keep ending up working on engines XD. When the new gasket kit arrives I'll pop the head off and we'll see what we see. --- Today on the Lanchester, it's time to backwards engineer a door card. There's a lot of different ways to redo door cards, and this is one of the more involved approaches since we're trying to save and reuse as much of it as possible. The thing that makes this more difficult than it might be is that we're having to replace the board itself so that means stripping the whole thing into the component pieces to understand how to put it back together on a new board. The first stage of the process is to take a lot of photographs so you have the best record you can of construction. You'd be amazed how often something is confusing on assembly that a photograph will help explain, even if you weren't deliberately taking a photograph of the confusing item at the time. We've opted to go for the least damaged of the door cards, they all follow the same basic construction and this will give us the most accurate reference point since it has the least amount of missing or damaged parts. This approach can help if you're trying to rebuild a door card that's pretty far gone, it allows you to make educated guesses. The damage on this door card is limited to water damage along the bottom edge, the glue coming unstuck on the top edge, and a couple of missing tacks. 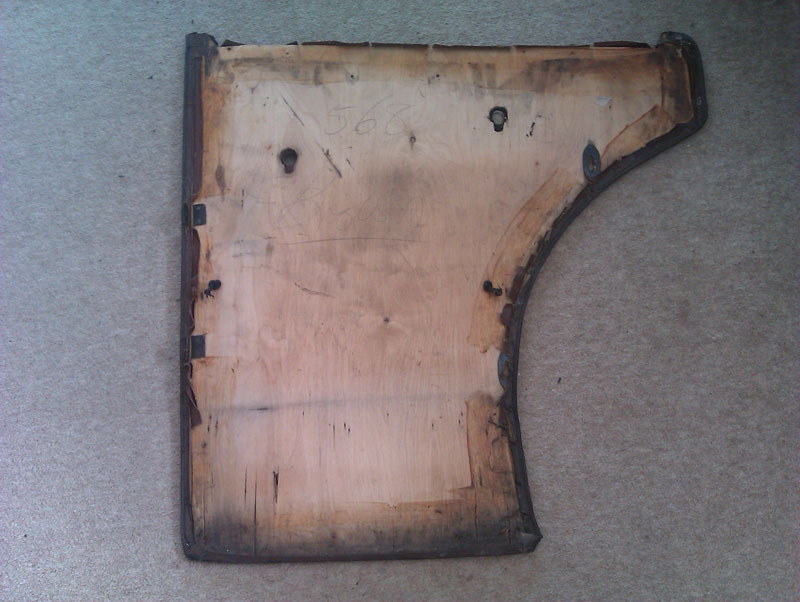 When you take your detail shots, pay special attention to where materials overlap and how they interact. You'll find as you unpick each layer you'll need to take more images. If you're reusing the original material, as we intend to do, it's easier to see where things go because generally they want to go back where they were. Understanding the original construction means you're less likely to put undue stress on the fabric, and retain an original looking finish, especially when it comes to things like the way the end of the piping trim is closed, or the way it hooks around bracketry to keep a good clean line when the card is refitted. 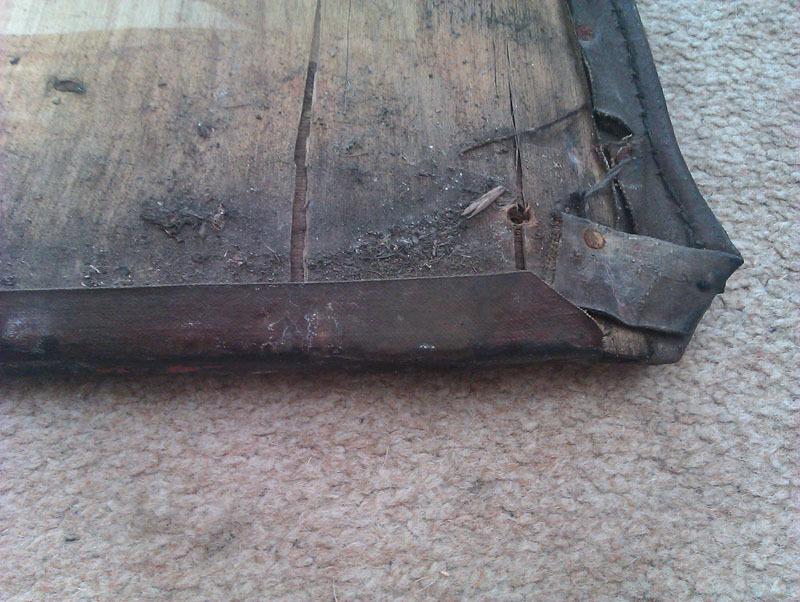 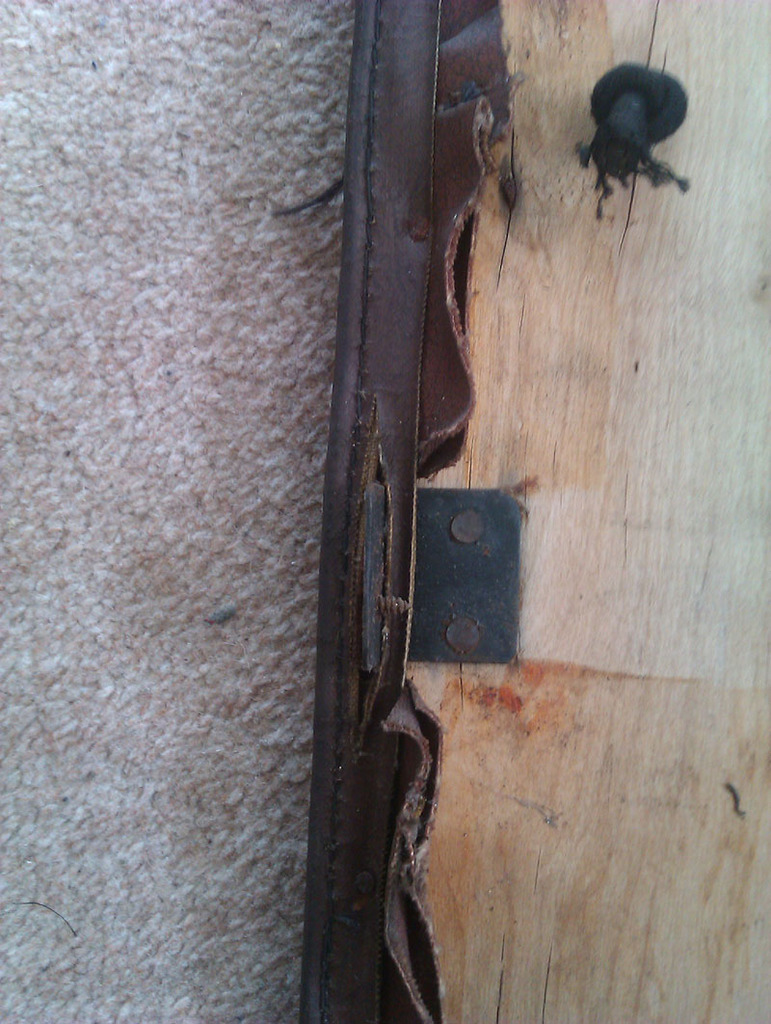 I also make a rough plan as I go along, marking all the details as I find them. I don't worry about measurements every time I do it, and I didn't in this instance either. I'll be transferring the measurements from the old card to the new pretty much by tracing, so the measurements aren't that vital at this stage. If the door card was more badly damaged then a to-scale diagram would be the choice. I also generally draw what I see to save on annotation and a confusing diagram, this used with the photographs gives me a very clear idea of what goes where and saves some time plotting everything out. 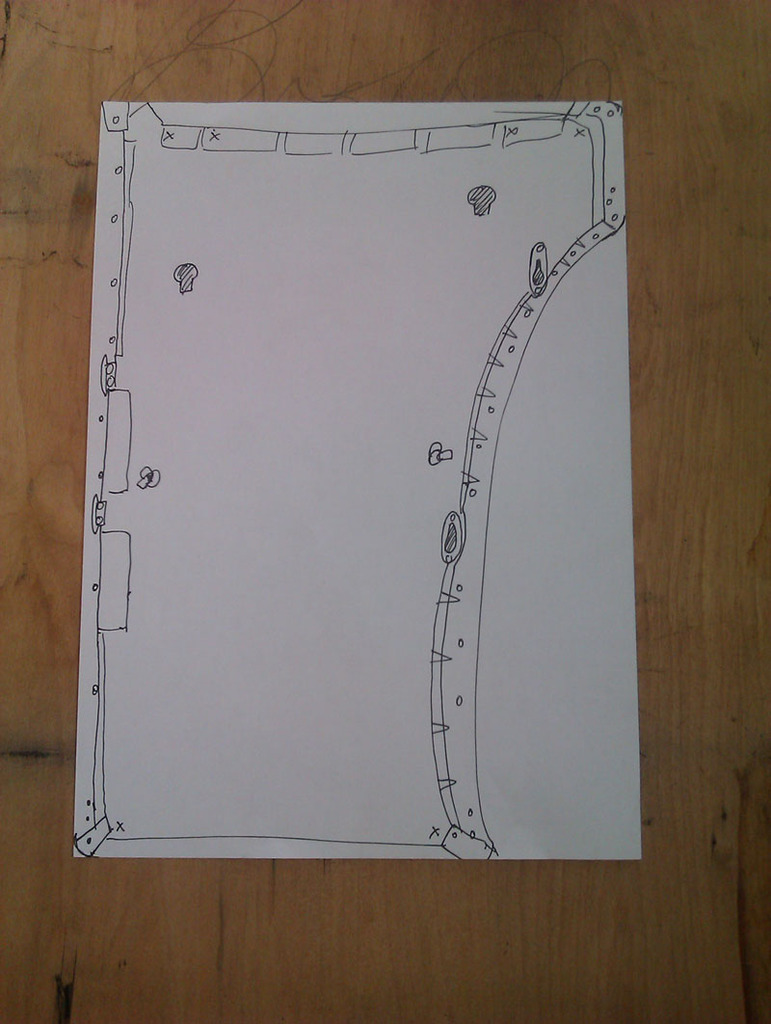 The whole panel is held together with tacks and some glue and the cover is a layered construction. It makes for a quick assembly and a smart finish without need of specialist tooling. The only stitching is on the edge piping, the binding edge for the carpet panel, and the piping seam for the pocket elastic, that's a benefit of Rexine not fraying, you can save a lot of time by not having to finish raw edges. The first task was pulling the tacks I could see, this removed the edge piping and revealed some more tacks underneath holding the main cover in place. Once those tacks were removed the carpet panel could be carefully folded up so it lid face down on the rest of the door card and that revealed the three tacks holding it down. To get a nice sharp edge, Barker opted to tack the panel and then fold it rather than sewing and pressing, and that makes the job of removal a lot easier. 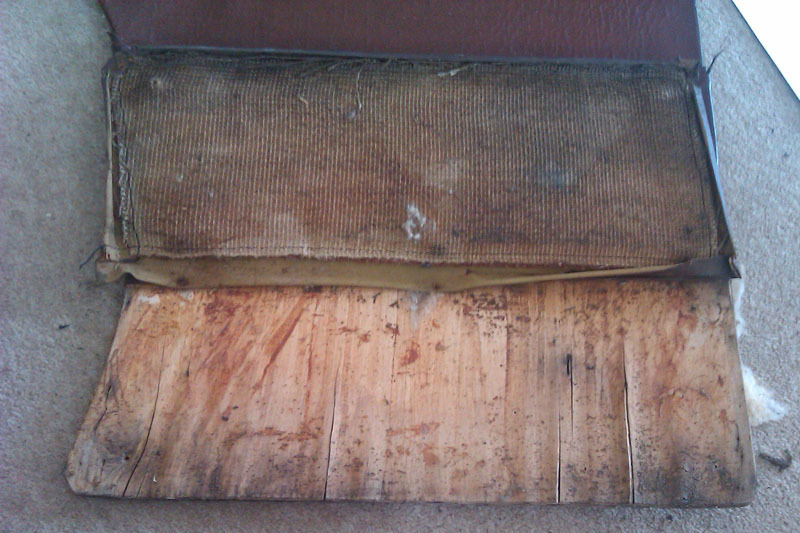 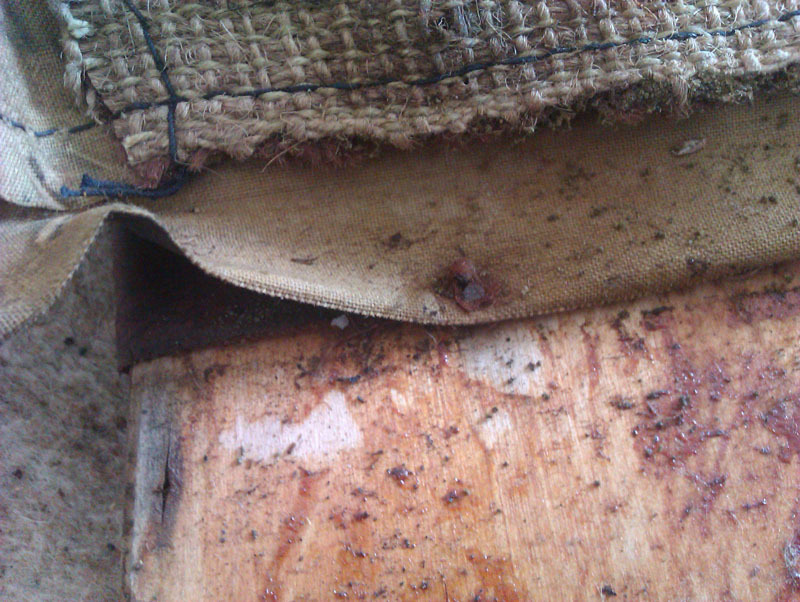 With the carpet panel tacks removed there were several more tacks holding the bottom of the pocket in place. 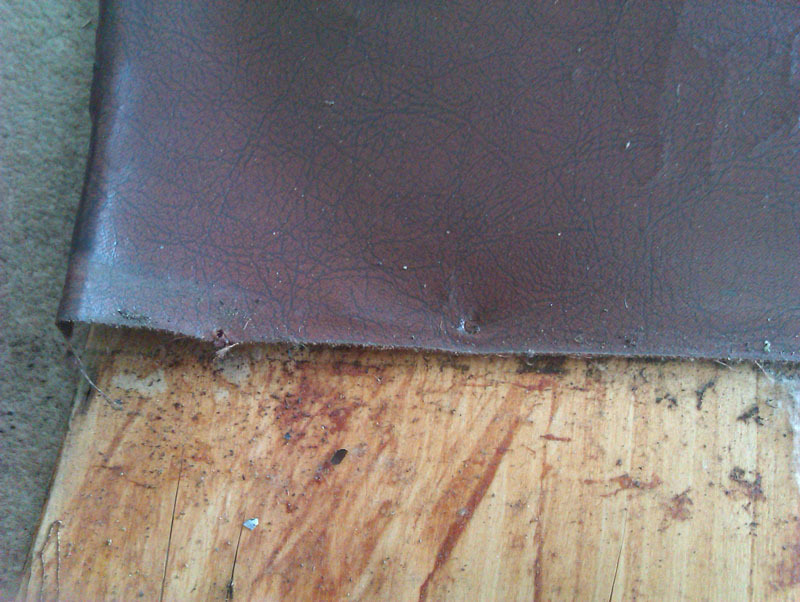 With those removed, the pocket panel could be opened, again up so it's face down against the door card, and that revealed the doubled-over cotton wadding used to give the pocket shape and softness. 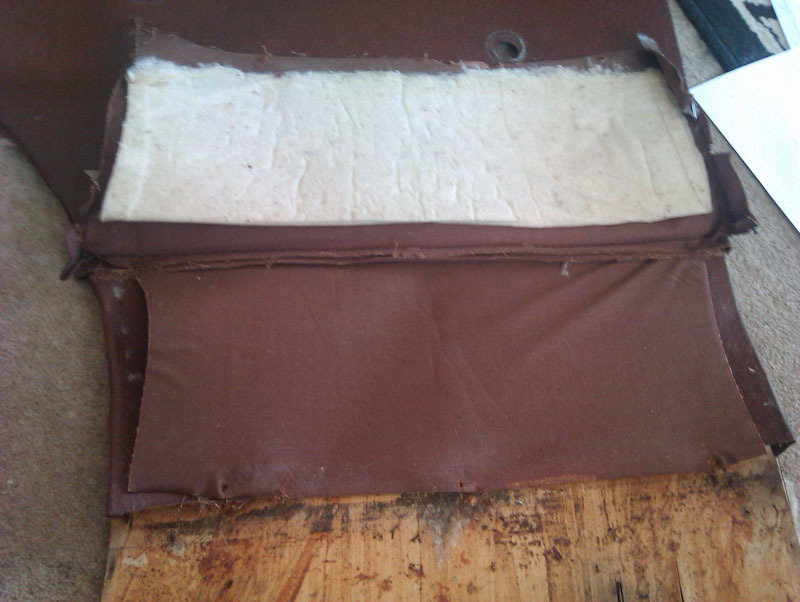 After that, fold the fabric upwards again until you get to the elastic cord. The cord is held in place by both the knots in it that stop it pulling through the door card, and two half inch tacks that are driven through the board (through the pocket fabric rather than the cord itself) and then bent over. This will be reduce strain on the corners of the pocket panel and prevent it tearing, also to prevent overstretching of the elastic cord that would result in saggy pockets. All of that removed we could carefully lift the rest of the cover free and reveal what was underneath. From the carpet panel up, the door card has a single layer of cotton wadding glued on. This is to give a smoother finish and a 'soft touch' to the rexine. It's understandably quite flat now and water damaged so will need replacing. Fortunately, this is a readily available material both from automotive suppliers and craft stores, the latter selling it for use in quilting. 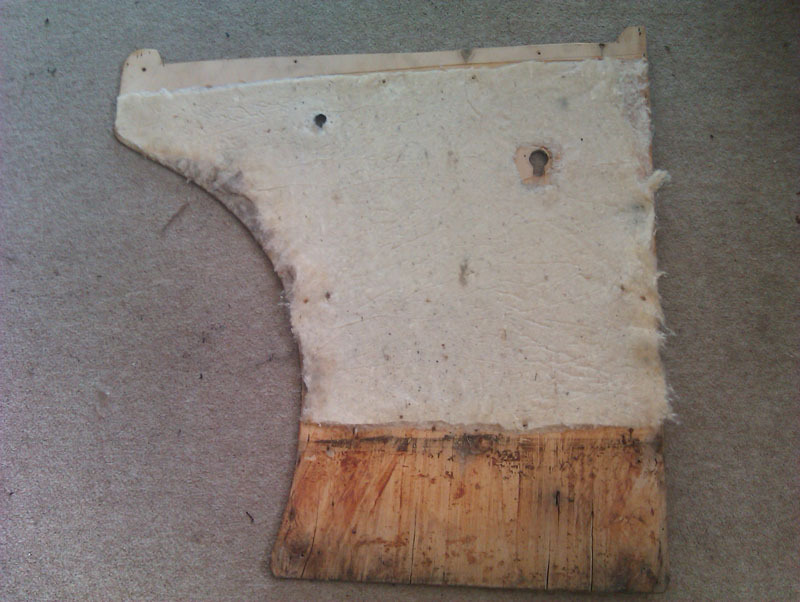 We will be using the same material rather than a modern foam equivalent for a number of reasons. The first is cost, there really isn't any saving to be had by using foam over the original cotton wadding. The second is smell, the interior of this car is almost entirely natural materials and as a result has a complex combination of smells that give it that 'old car smell', as soon as you start introducing modern materials like foam, you start getting 'new car smells' and we don't want that. The smell of a car is just as important as all the rest of the details. That said, there was one other item underneath the wadding layer and that's a felt pad for the door handle. There doesn't seem to be one for the window winder, it doesn't look like it's fallen off or worn out, there just isn't any evidence that one was there, so we shan't be fitting one unless the other door cards suggest there should be one there. 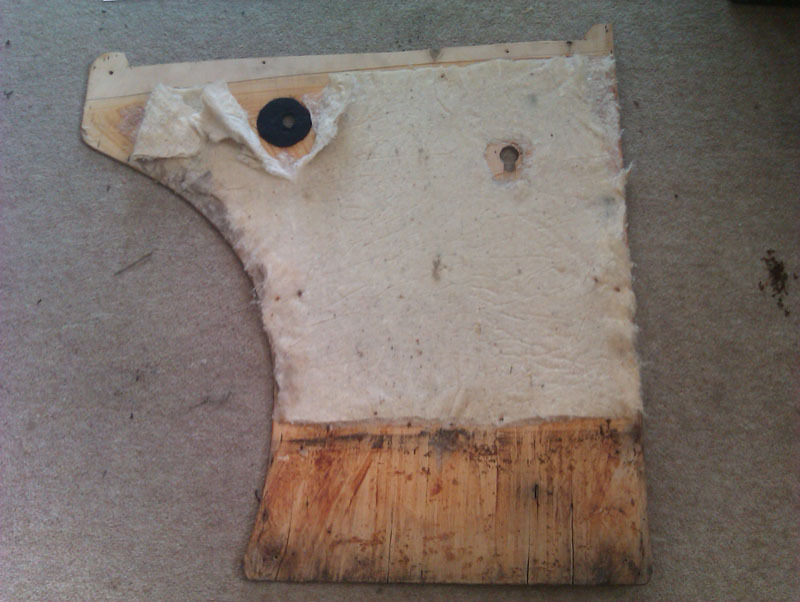 Finally, we have all our pieces separated and ready for the next phase. 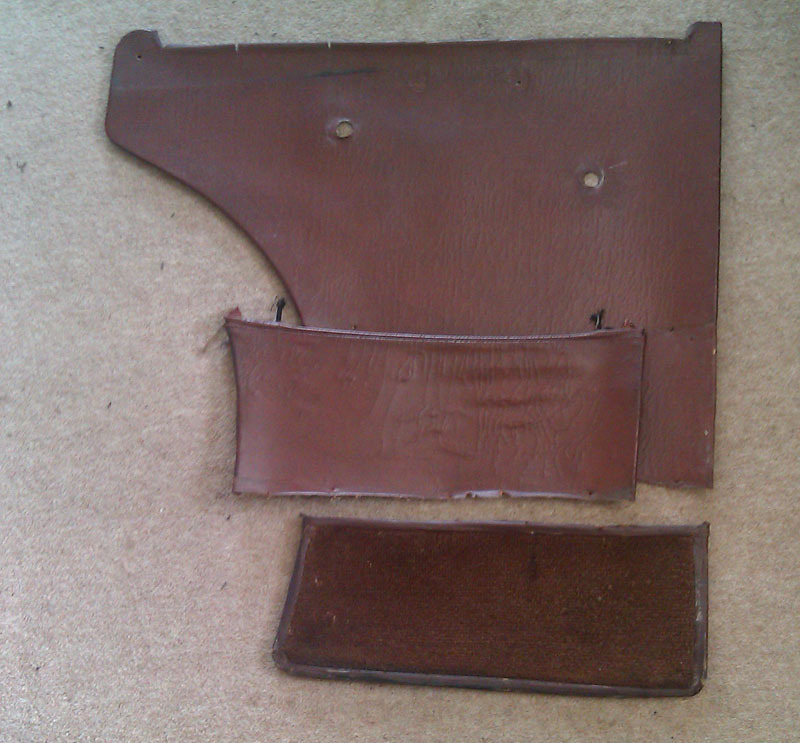 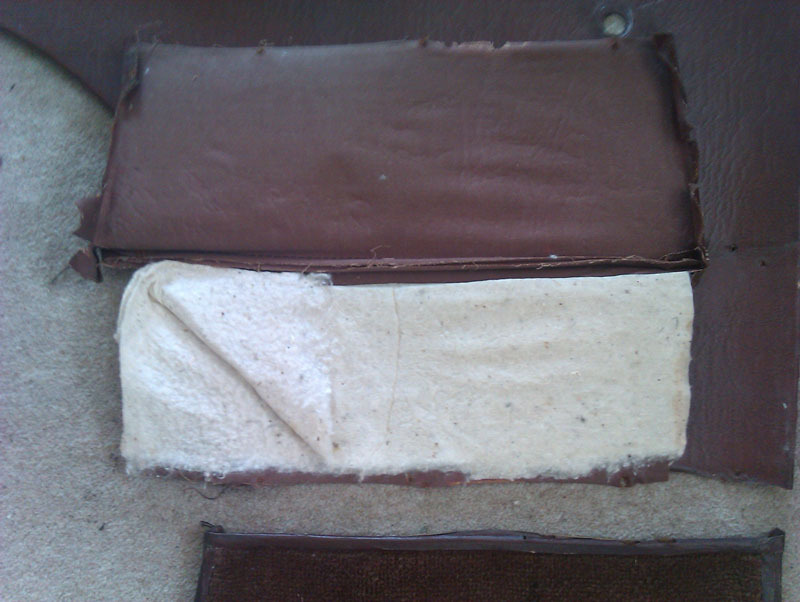 In all, I removed 55 of the shorter 1/4" or 6mm tacks, and two of the bigger 1/2" or 12mm tacks. We're undecided if we're using tacks or staples to put everything back together, tacks are more original and possibly easier to remove should we have to, but staples do the same job and are easier to install. We'll figure it out when we try and acquire suitable hardware of either variety. 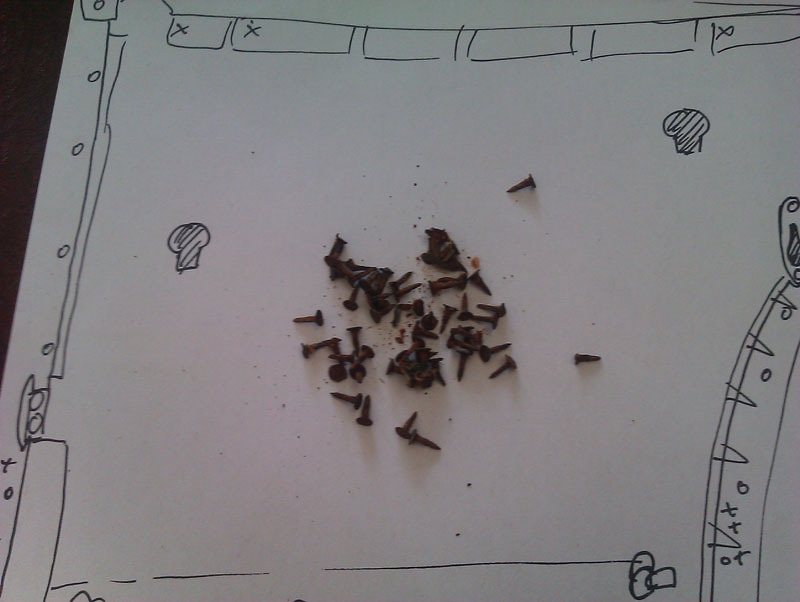 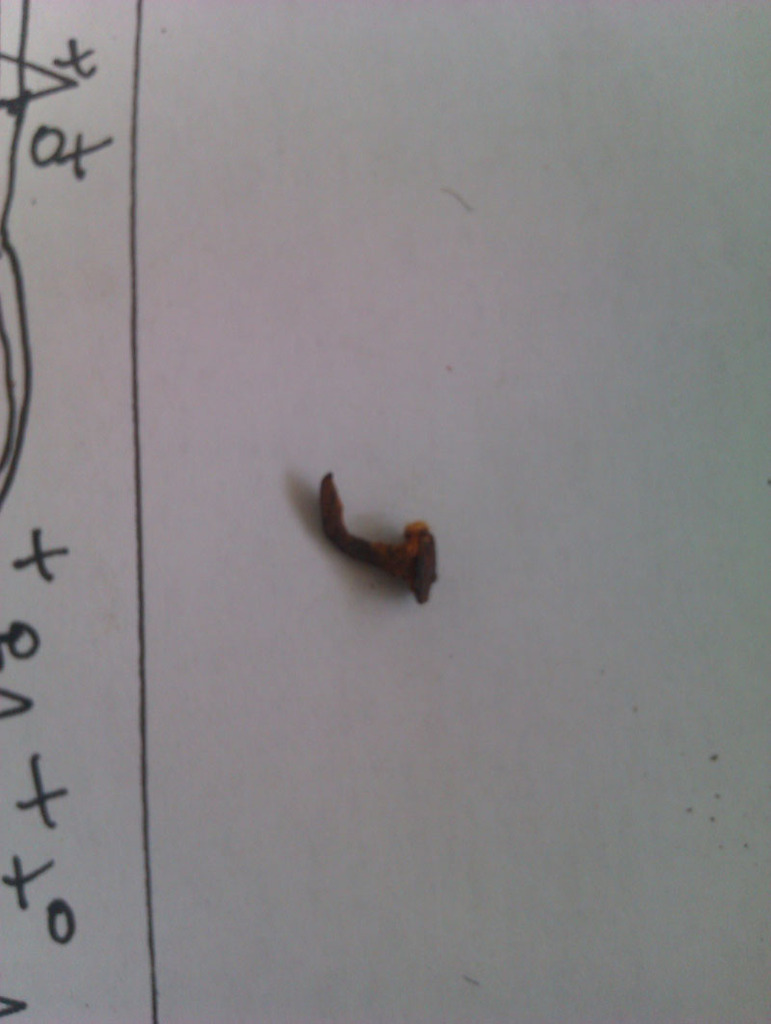 After all that, the plan of the door card had evolved somewhat. There's still a couple of items to remove from the backing board, we've opted to leave them in place for now so we don't loose them, we'll remove them when we cut the new card so they can be transferred straight over. 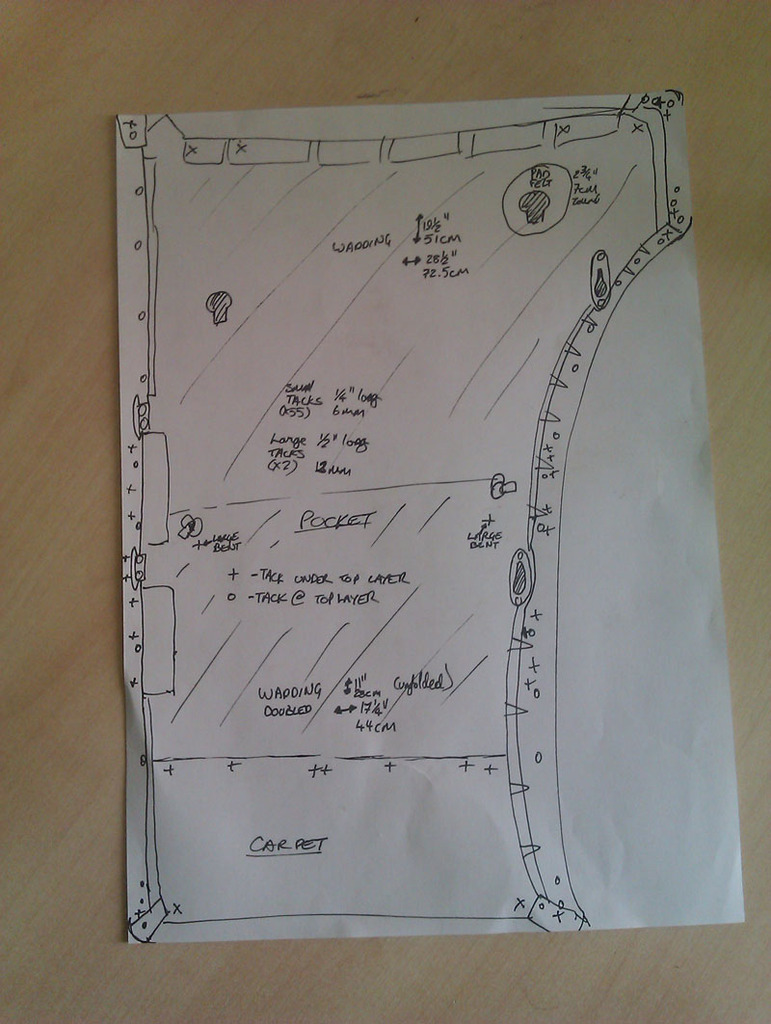 Given how easily the carpet sections come off, and that these are the most badly damaged portion of all the doors, we're considering replacing all of them when we fit the new carpet. That way it should blend in since the change between old and new is also a point where the materials change in type and texture so, in theory, it shouldn't be that noticable. That does give us an element of Project Creep since it means to finish the door cards we've got to get the carpet, and to do that we've also got to replace the missing kick panels since the carpet goes onto those and if we're doing that we should really get the front speakers for the entertainment centre... so we'll probably just redo the old door cards and leave the carpetted section off for now and then do all the carpet and kick panels later when we have the materials for that and have completed some of the other jobs instead. |
| |
|
|
|
|
|
Sept 19, 2020 17:37:12 GMT
|
With regards to replacing the tacks with self-same versions, obviously there is a distinct chance that thumbs and fingers can get in the way of the hammer. I appreciate that there are ways of avoiding this hazard. When building up frames to put into bee-hives there is a gadget called a 'Magnetic Brad Driver'. Have a look at www.beekeeping.co.uk/products/magnetic-brad-driver_590771I still have mine, from bee-keeping days and it is a very useful tool. Just a thought. |
| |
|
|
|
|
|
Sept 19, 2020 17:55:16 GMT
|
|
Beaten to it with the head bolts bottoming out or having clag in the bottom of the holes giving a false torque reading. Is it possible to put a thick washer under each head maybe 3 or 4mm they aren't stretch bolts are they?
|
| |
|
|
|
|
|
Sept 19, 2020 20:44:17 GMT
|
|
Also check the bolt holes in the block, the top thread can pull up a bit it's simple to fix, just run a countersink in the top of each hole.
|
| |
|
|
|
|
|
Sept 19, 2020 21:00:17 GMT
|
With regards to replacing the tacks with self-same versions, obviously there is a distinct chance that thumbs and fingers can get in the way of the hammer. I appreciate that there are ways of avoiding this hazard. When building up frames to put into bee-hives there is a gadget called a 'Magnetic Brad Driver'. Have a look at www.beekeeping.co.uk/products/magnetic-brad-driver_590771I still have mine, from bee-keeping days and it is a very useful tool. Just a thought. Also known as a pin push, |
| |
|
|
glenanderson
Club Retro Rides Member
Posts: 4,362
Club RR Member Number: 64
Member is Online
|
|
Sept 19, 2020 21:06:37 GMT
|
|
The coach trimmers where I used to work had tack hammers that had magnetic heads. You put the pin on the hammer then whacked it in with a swift sharp wallop.
|
| |
My worst worry about dying is my wife selling my stuff for what I told her it cost...
|
|
|
|
|
Sept 20, 2020 8:53:06 GMT
|
The coach trimmers where I used to work had tack hammers that had magnetic heads. You put the pin on the hammer then whacked it in with a swift sharp wallop. Having first filled your mouth with the intended tacks; selected one tack with your tongue, and pushed it between your lips. Then attached the tack head onto the magnetic tip of the hammer, whilst avoiding mimicking a sword swallower. Having successfully attached the tack to the hammer, and not having swallowed the tacks, then use the hammer to secure the tack in the appropriate place. No thanks, I'll stick with my suggestion; just so much easier for the sometime upholstery. |
| |
|
|
glenanderson
Club Retro Rides Member
Posts: 4,362
Club RR Member Number: 64
Member is Online
|
|
Sept 20, 2020 9:01:56 GMT
|
|
🤣🤣
Yes. All that. Plus, I never had the required coordination to get the tack exactly in the right place either.
|
| |
My worst worry about dying is my wife selling my stuff for what I told her it cost...
|
|
vulgalour
Club Retro Rides Member
Posts: 7,287
Club RR Member Number: 146
|
|
Sept 20, 2020 22:52:52 GMT
|
Our goal today was to remove the dashboard and starter motor so that they could be refurbished. We started with the dashboard since it looked to be a more involved job and it was going to take a while to figure out how it was held in place. As it happens, the main fascia of the dashboard is held in by three screws, on in each A pillar, and one in the centre, hidden from view. I couldn't get the camera to focus on the hidden one because of all the other items it wanted to focus on instead. Access to all the fixings is tricky and since it's all flathead screws that have gone a bit soft with rust, removal was a fraught endeavour. The two circles are the hole in the bracket, and the hole in the A pillar and this gives you some idea of what it was like to try and see what we were doing while working under the dashboard today. Also imagine bits of the floor jabbing into your back when you least wanted it, and stuff falling out of the dashboard into any part of the face you don't want it to. 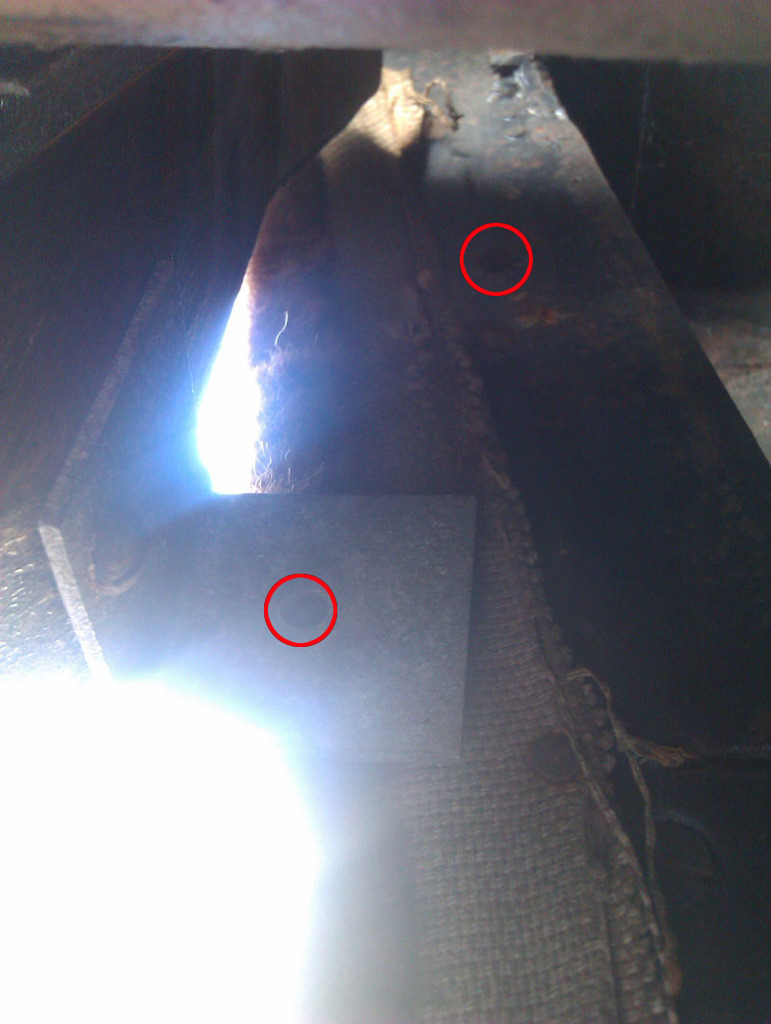 With that removed it was then time to figure out how to get the panel out. We couldn't risk removing the steering wheel as we didn't have the screws needed to replace the one that was threatening to self destruct last time, and there were a lot of items attached the dashboard that needed to not be. While we were under the dashboard we saw one possible reason for the wiper motor linkage rubbing against the back of the dashboard, there seems to be a missing screw in the plate that holds it. 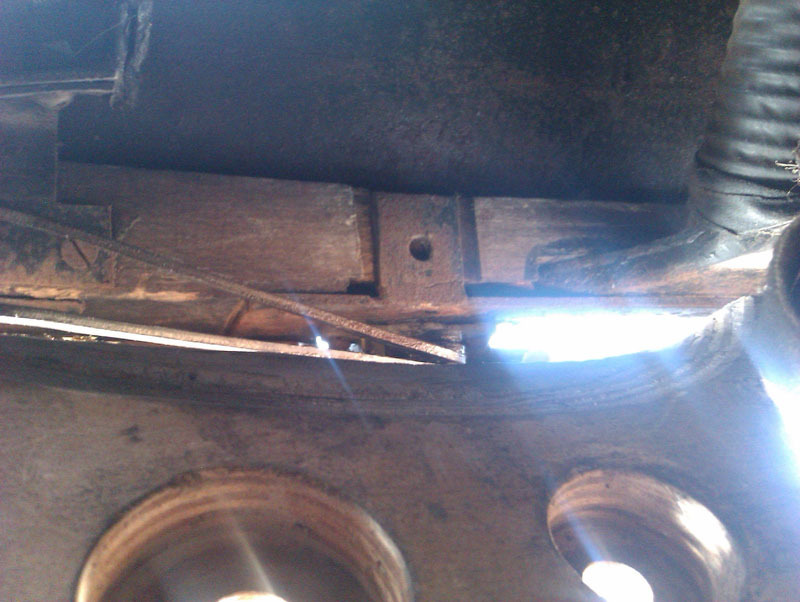 The other items we needed to disconnect were the heater switch, ignition switch, instrument binnacle, choke cable, starter cable, and fuel reserve cable. All of the cables are held to the back of the dash with a large nut recessed into the wood of the dashboard. All bar the fuel reserve cable nut came undone by hand, the fuel reserve required careful use of narrow pliers since none of the spanners could fit in the gap. The choke cable was disconnected from the carburettor and on trying to pull it through the bulkhead, the cable came out of the sheath and now doesn't want to go back in, judging by the state of the cable it's not the first time it's done that. To disconnect the fuel reserve cable we had to remove the passenger side front floor board for access, the fixings were just too difficult to get to from underneath the car. The starter cable proved the most difficult, the fixings for the cable on the starter motor are in such a place that it's really difficult to get to them, added to that the size of the bolt head that screws in to clamp the cable in place didn't seem to match any metric or imperial tool we owned, it was only after we finally got it out with pliers that we understood why. 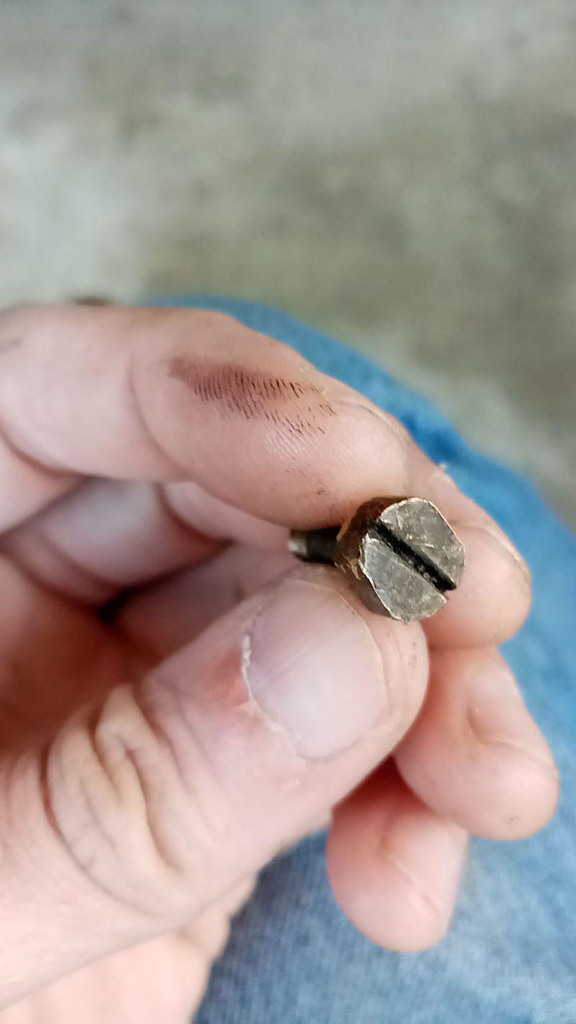 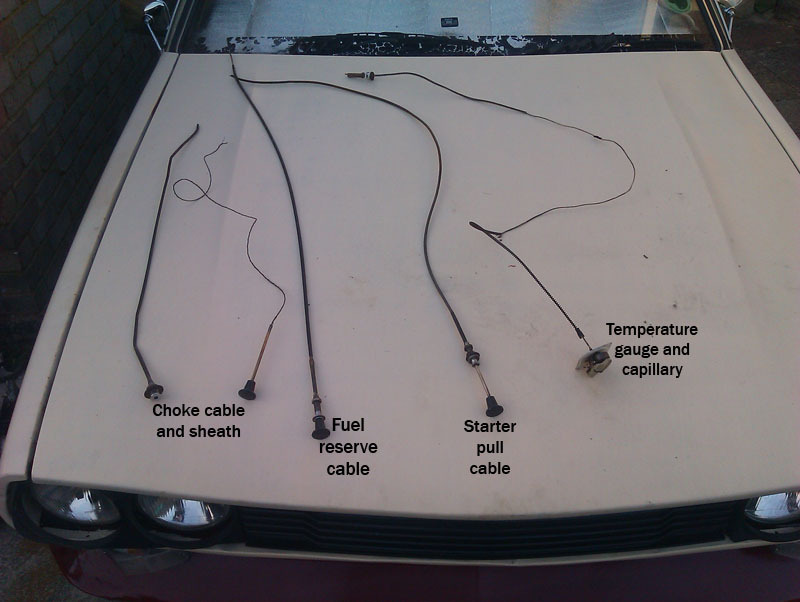 The capillary line for the temperature gauge was removed when we got the dashboard free, we unscrewed the temperature gauge from the instrument binnacle and then very carefully fed the capillary line through from the engine bay into the car. We couldn't see any other way to do this at the time, there didn't seem to be any obvious way to disconnect the line from the gauge. Our biggest obstacle to removing the dashboard now was the steering wheel, but I knew that on some cars if you unfasten the bracket that holds the column to the bulkhead, the column will drop down a bit, preventing the need to remove the steering wheel. I can also tell you that undoing the three bolts that hold the column to the bracket is nigh on impossible with the dashboard in place because you can't actually see all the nuts and bolts you're trying to undo. We did get there in the end. The top rail of the dashboard is held in with four screws, one at the outer corners, and one near each wiper spindle, all of these screws are awkward to get to, we are not looking forward to trying to reassemble everything. 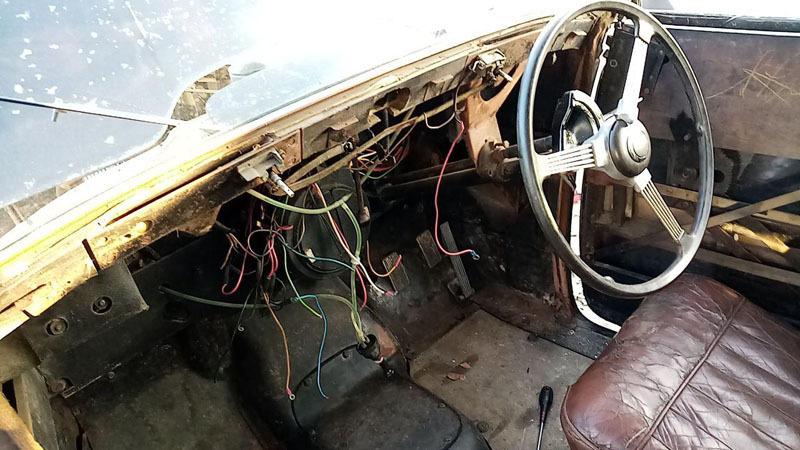 There was one casualty along the way which was the driver's side cubby, there was signs of water damage on it and as we tried to wiggle everything out past the steering column it started to collapse. It's intact enough that we can take a pattern and make a new one and since the glovebox is similarly tatty we'll redo both and reupholster them in something suitable, though perhaps not the original beige wool. 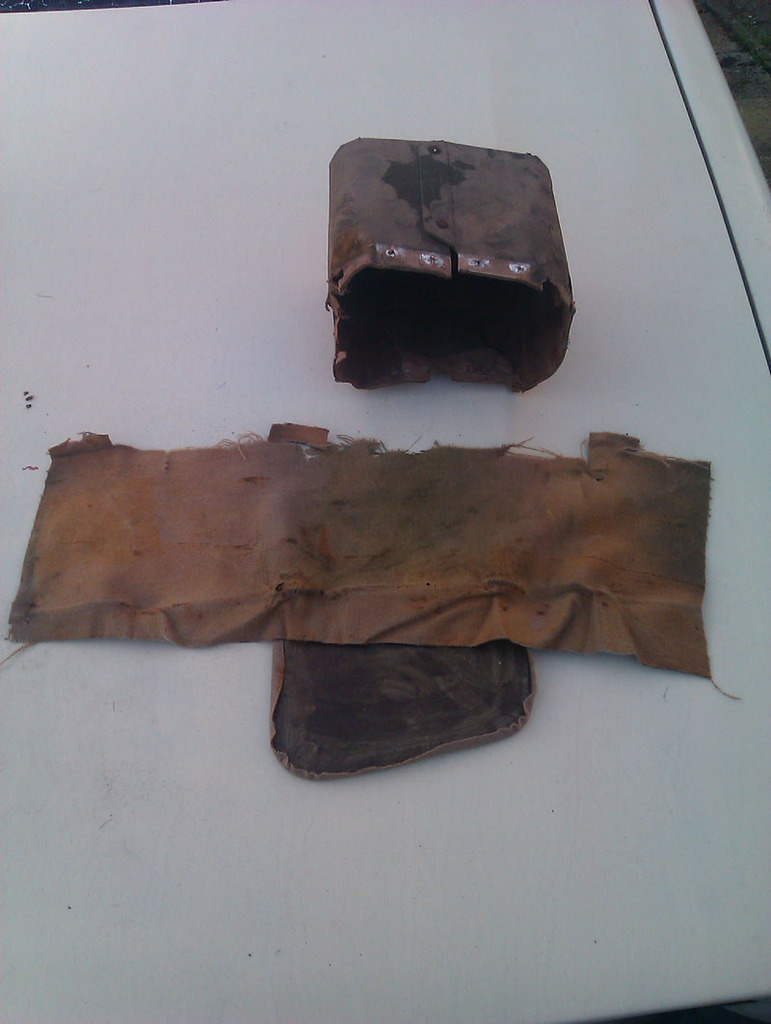 With everything all out we could now get a look at the new wiring that had been let in. The work has been done reasonably well except for the fact that none of it is tidied away, it's all just draped over the top of the heater. Just as well we've ordered a brand new loom, this looks like it was just waiting to be an accident. 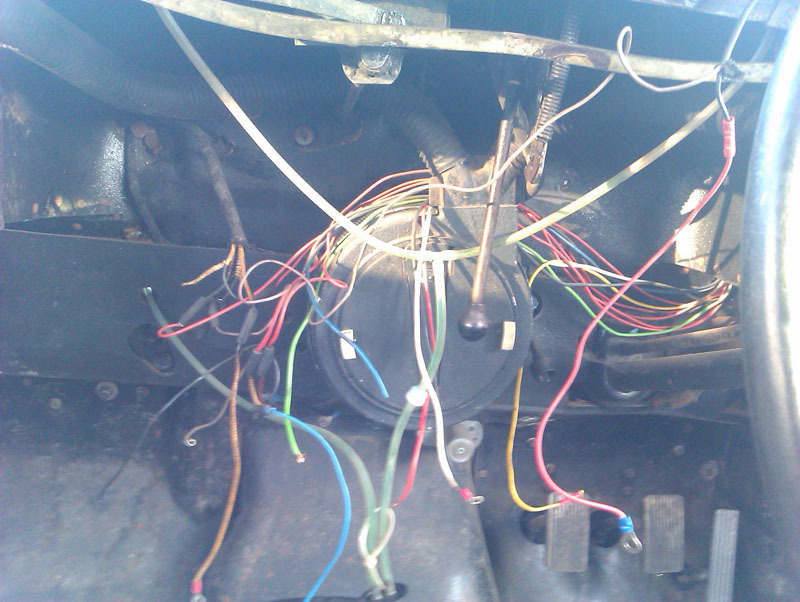 The dashboard needed to come out both for refinishing and so we could more easily do the wiring loom, so as horrible a job as it's been, it was absolutely necessary. Another thing it's allowed us to do is see that the wiper mechanism is very sloppy, the main linking arm wobbles around quite a lot and it's not exactly clear how we're going to tighten this up again at this point, we'll have to investigate more thoroughly when we have more time. It was also quite clear someone has been behind the dashboard before as several screws were missing, including on of the two that holds the instrument binnacle in place, and there were a few newer screws here and there, all items we'll need to rectify on reassembly. With it removed, we could now get our first proper look at the dashboard, the condition of which isn't too terrible aside from a little water damage on the corners and the wear from the loose wiper mechanism. The radio blanking plate (we assume, it's about the right size) and controls are all in pretty good shape. 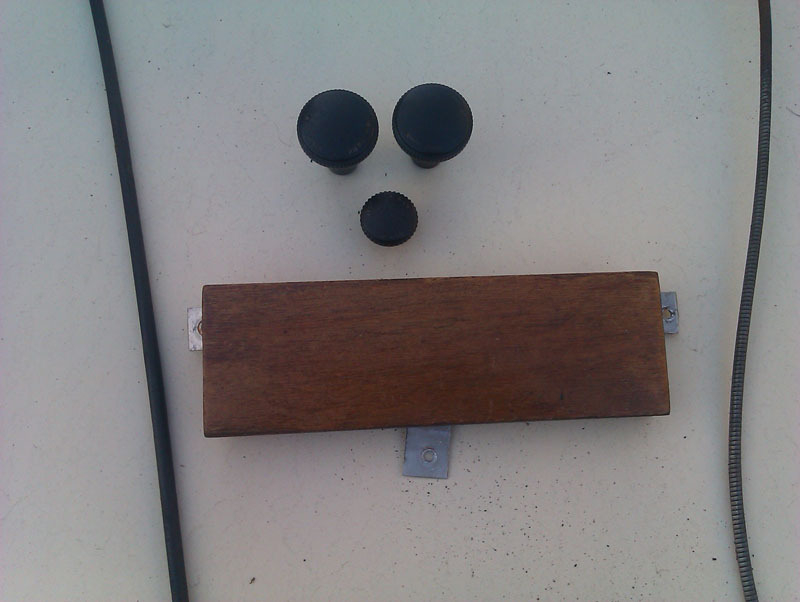 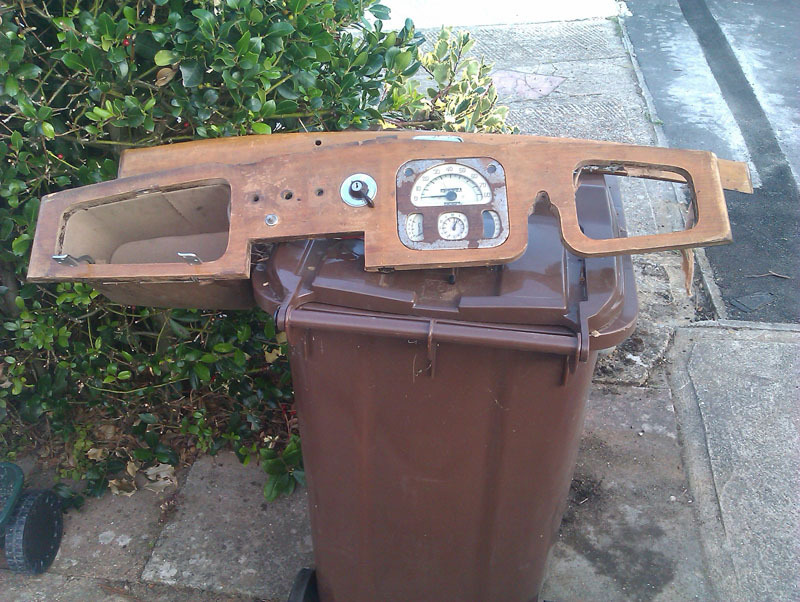 On the speedometer there is a red line, it doesn't show up as red in photographs for some reason. Is this some sort of visual reminder for which gear to be in? Maybe instructing you to be in top gear by the time the needle gets to this point? EDIT: apparently this is to serve as a reminder of the speed limit in built-up areas. 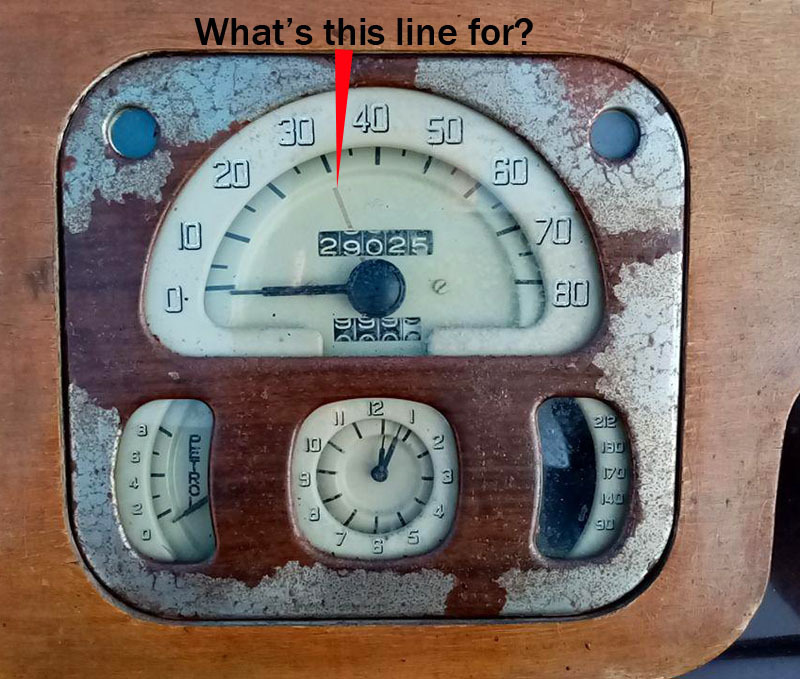 The boot handle was screwed back on now we have a working key for it and that makes life a lot easier on that front. I also put all the spanners into my old plywood toolbox which just happens to fit perfectly in the bottom portion of the Lanchester's boot. 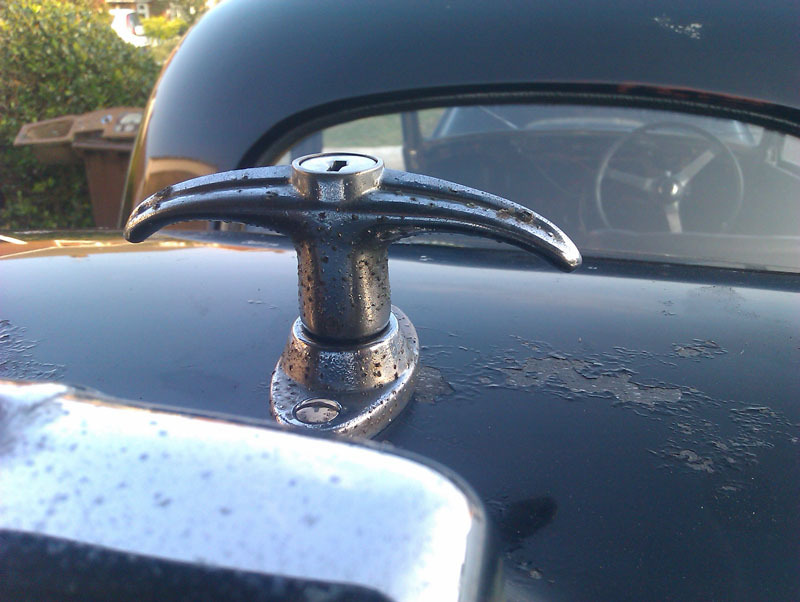 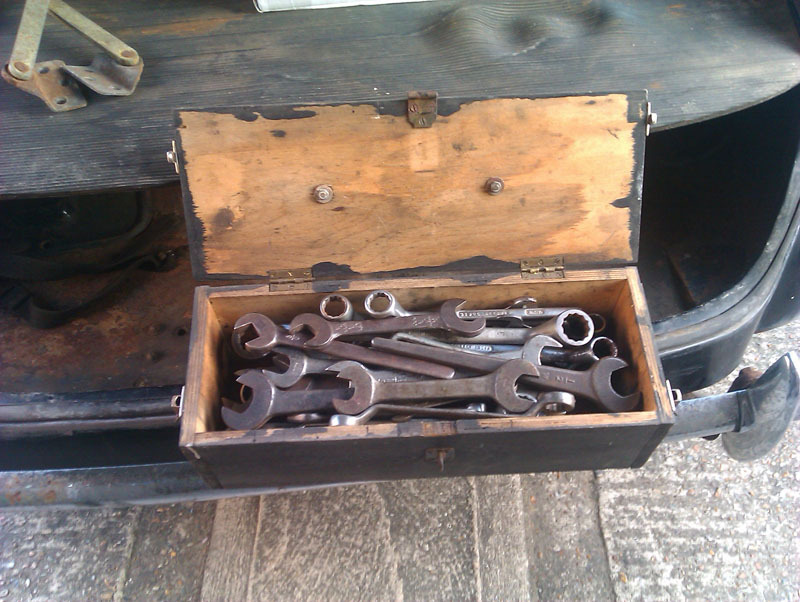 After a break we then spent some time scraping old varnish off before putting the first fresh coat of Danish Oil on the dashboard. As with the other wood, it's come up beautifully. There's a few tiny pieces of veneer missing that we're not worrying about since they're hidden by other bits of trim that overlap. With another couple of coats of oil, this dashboard is going to look excellent and will be a real treat when it's back in the car. 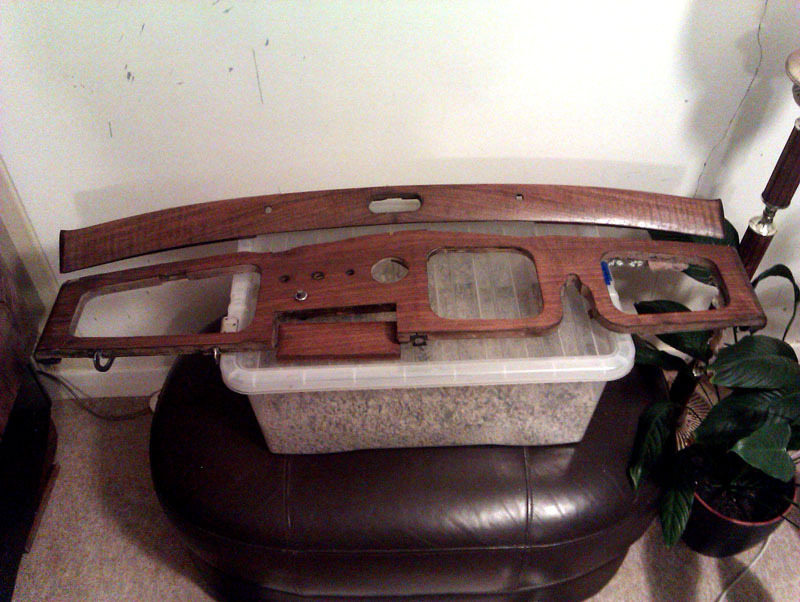 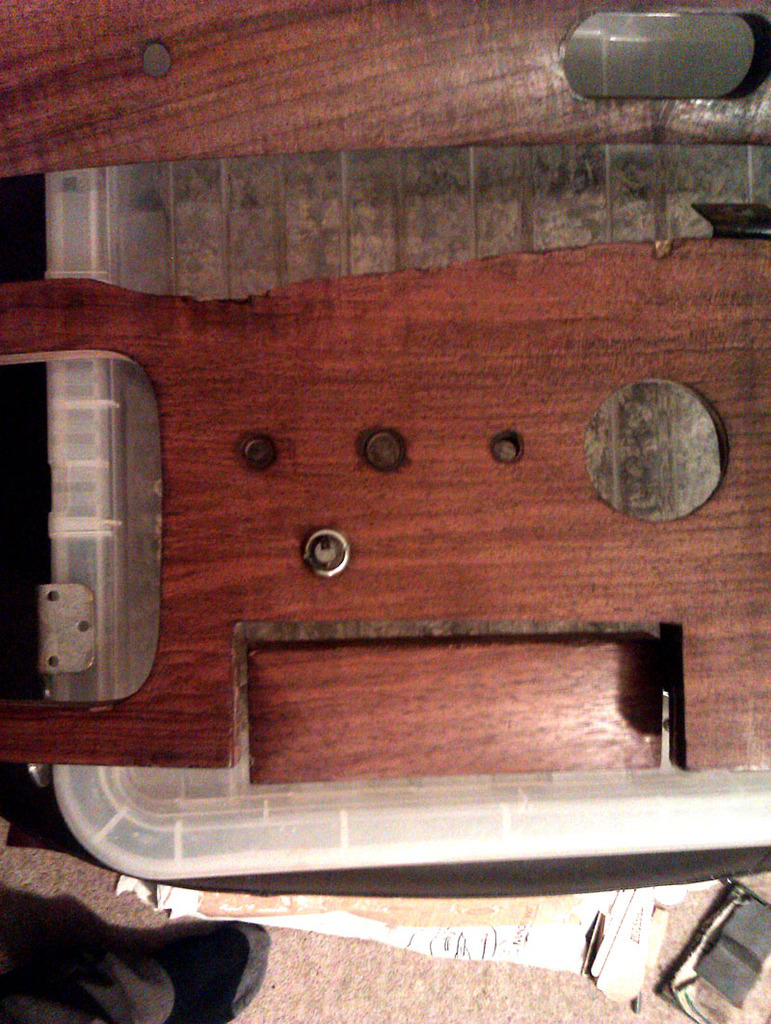 |
| |
|
|
|
|
|
Sept 20, 2020 23:40:49 GMT
|
|
Your red line is "Urban Speed Limit", as stated.
A fairly new introduction and was added as a reminder before the massive proliferation of road signs became popular.
I believe it was in effect anywhere street lighting was employed, post-war.
Phil
|
| |
Last Edit: Sept 20, 2020 23:42:40 GMT by PhilA
|
|
|
|
|
Sept 21, 2020 8:58:53 GMT
|
Your red line is "Urban Speed Limit", as stated. A fairly new introduction and was added as a reminder before the massive proliferation of road signs became popular. I believe it was in effect anywhere street lighting was employed, post-war. Phil Re 30 mph speed limits on roads, they always had street lighting, and the lamp posts had to be spaced a specific distance aprt, which for the life of me I cannot now remember. With those suitably spaced lamp-posts, it was deemed unnecessary for constant reminders of the 30mph limit. Other roads were also lit by street lights, the spacing often being greater than that which applied to 30mph roads. Therefore no good telling Plod that you were not aware of what the speed limit was when travelling in a 30mph limited area. |
| |
|
|
|
|
|
Sept 21, 2020 14:07:21 GMT
|
|
If you want a bit more lustre you could add French polish. The next coat melts the last and that gives the depth.
|
| |
|
|
vulgalour
Club Retro Rides Member
Posts: 7,287
Club RR Member Number: 146
|
|
Sept 23, 2020 21:30:02 GMT
|
Certainly an option to consider for the future, should we wish to change from the Danish Oil. --- Work has been progressing steadily on the dashboard. Drying times aside, this has been a very quick job. One of the issues was that when you turned the heater knob, the whole assembly turned and we were concerned the controller might have seized. Luckily, it was just that the nut holding the controller to the back of the dashboard was a bit loose. Even so, we did take the heater controller apart, a case of prying back three metal tabs on the casing, so that we could get a better look inside it. It's a very simple item and therefore very easy to sort out. It was a bit corroded from sitting around, so we gave it a thoroughly clean to give it the best fighting change. It all cleaned up very well and moves much more freely than before. 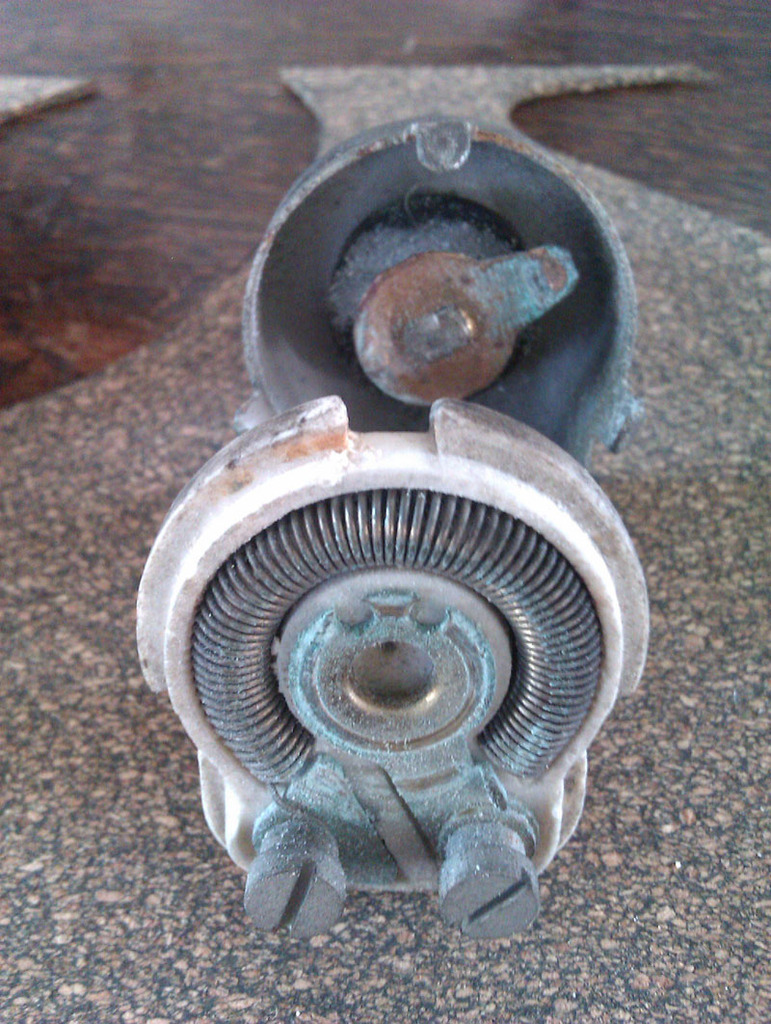 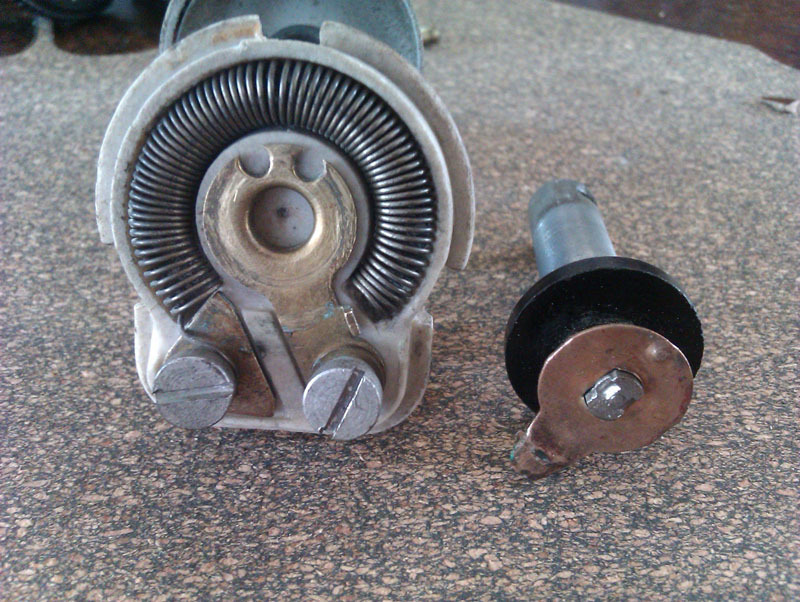 This was then reassembled and attention turned to sorting out the dash control knobs. Most of the original paint in the lettering on the knobs was missing, or discoloured to a degree that it was no longer legible. A good scrub in plain water followed by picking out any stubborn bits of old paint with a pin was followed by some good quality acrylic paint. You don't have to be at all tidy doing this, just load up the letters with as much paint as they'll take, wait for it to dry, and then polish the paint off on a piece of paper towel. This gives a nice crisp finish for minimal effort and can be redone just as easily in the future if needed. A good quality acrylic paint was chosen rather than enamel as it doesn't yellow with exposure to UV. Some people use Tippex or nail varnish for this job, the former has a habit of flaking off, the latter can be more difficult to clean since you have to use a solvent and that can lift paint out of the lettering as you clean. 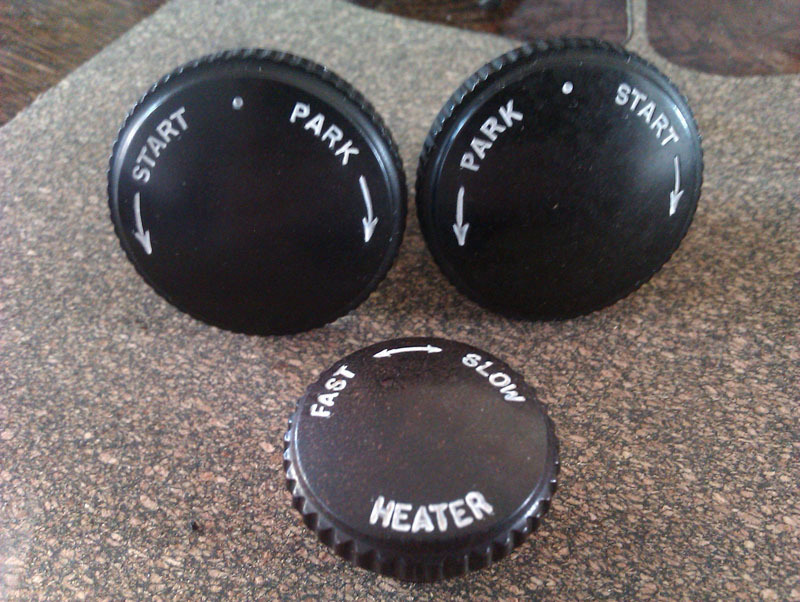 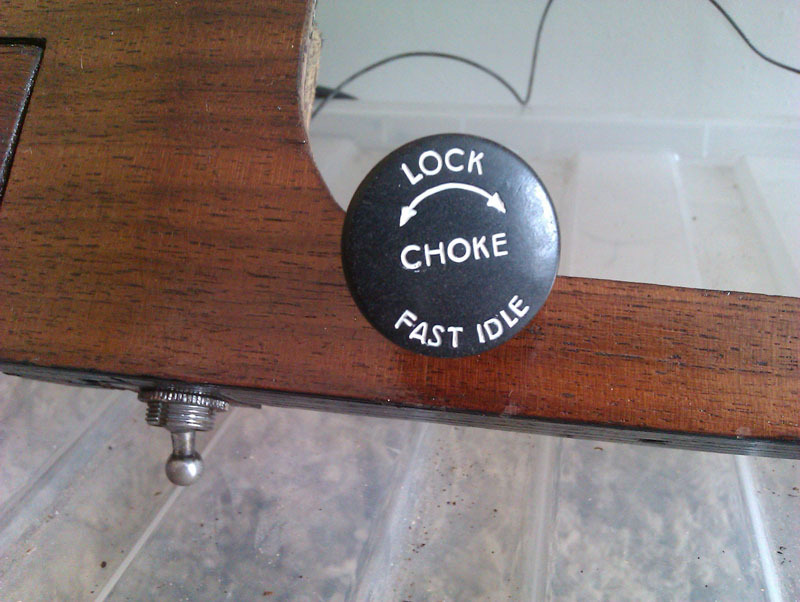 All of the exposed plywood edges were originally painted a dark brown, this seems to be common practice with mid-century modern furniture too. I used black, since I had some left over from the restoration of an antique sideboard that's made in the same way as this dashboard, and that works just fine. It's a slightly translucent paint so it does allow some of the brown of the plywood to show through, the finish ends up closer to dyed wood than painted. 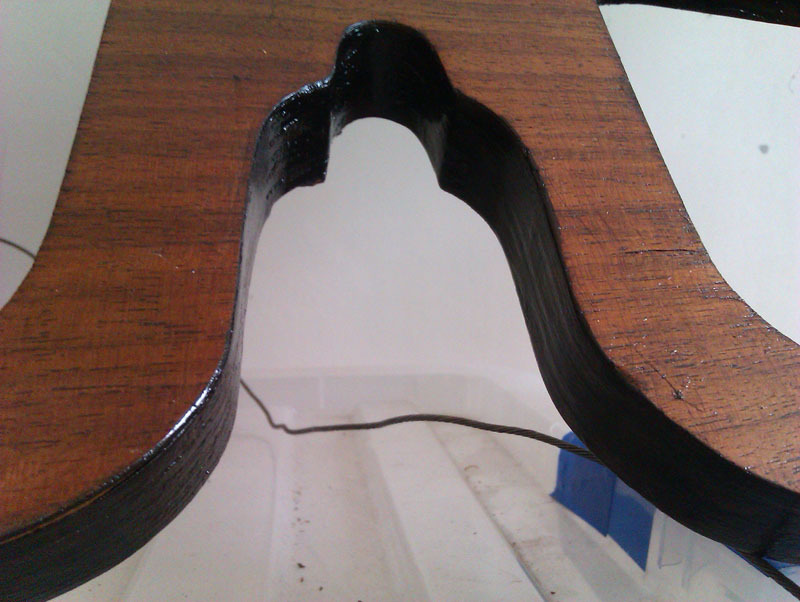 I then reassembled all the bits of the dashboard I could that were finished. The only item I'm having difficulty with is the choke cable which does not want to thread through from the front. Because of the way the sheath is made, you have to thread the cable in from the engine end, the step of the sheath as it goes into the holder that screws into the dashboard is such that it always catches whatever cable or wire you try to thread through. I'm considering getting some very skinny plastic pipe, threading that through from the engine end of the sheath, fitting the cable into it and then pulling the whole lot back through to get around the step. Failing that, unsoldering the cable, threading it through from the engine end, and the re-soldering it into the brass tube ferrule might be the only way to do it. It'll sort. the other item that was tidied up on the dashboard was the flaking paint on the ignition/headlight switch. You can get a black sticker with white lettering for this which is usually for Land Rovers. We're either going to get a reproduction sticker to match the original cream paint with brown lettering, or we'll get the three positions stamped into the polished bezel and then put paint in the recesses as with the control knobs. There was no saving the original paint, it had basically turned into confetti. 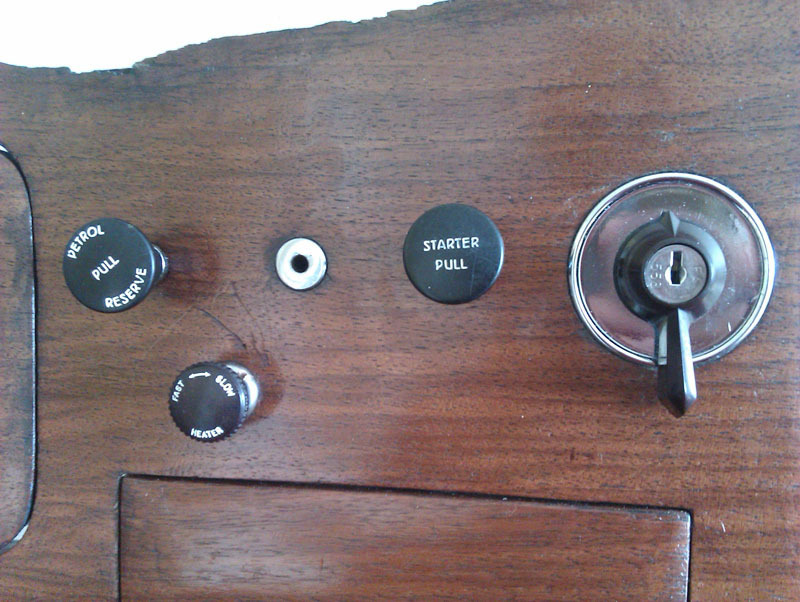 Finally, we got the opportunity to see the dashboard all together since all the finishes on it were done that could be. The collapsed cubby box might actually be salvagable, most of the damage is to the front edge so in theory we should be able to just cut the first inch or so off it, strengthen any weak spots with resin or similar, and recover it, both dashboard boxes need recovering anyway and this would be the most cost effective solution as things stand. Obligatory before and after shots. 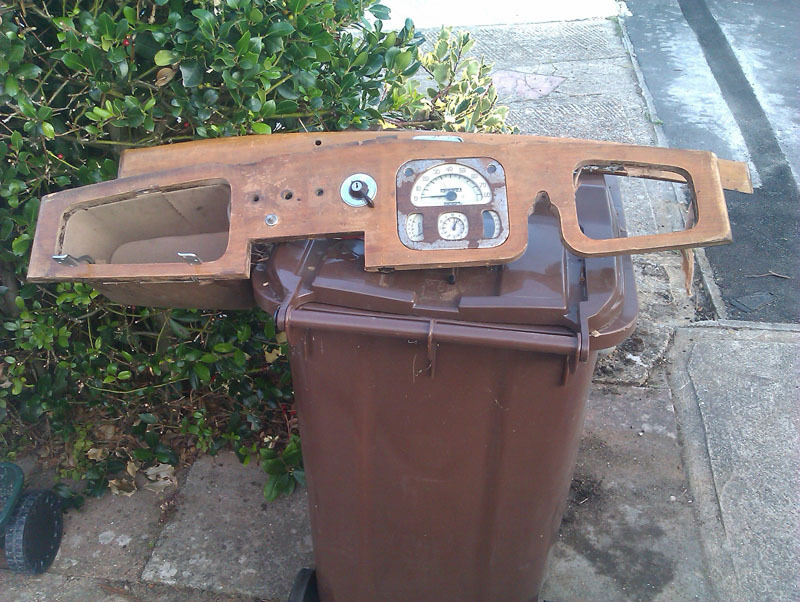 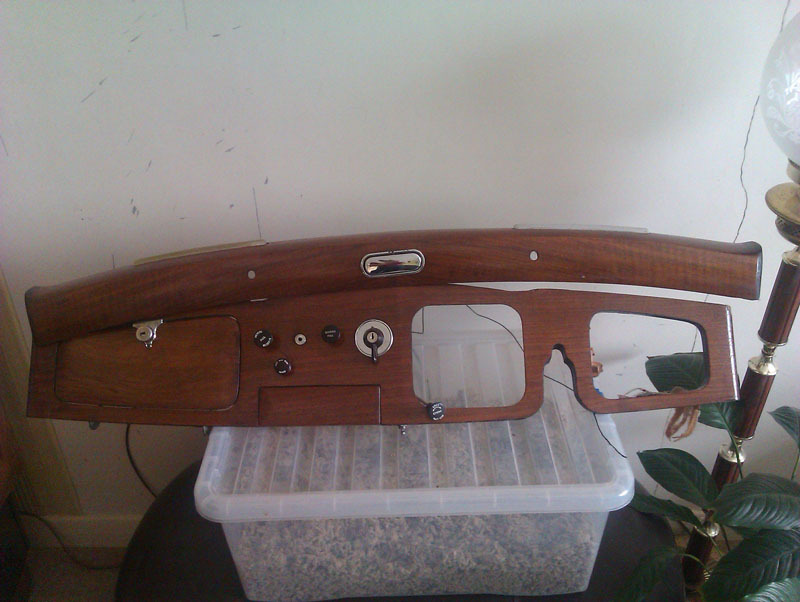 In Princess news, the brand new head gasket kit arrived from ANG, a company I've used a few times over the years and not had issue with quality. I'm hoping to pull the head off this weekend and see what's going on. |
| |
|
|
|
|
|
Sept 23, 2020 21:52:52 GMT
|
|
That is a proper transformation. A really nice piece of work. If I'd done that I'd spend the evening with it on my knee grinning at it. And probably making "brum brum" noises.
I have seen Danish oil finishes that looked really shiny, almost like a varnish. I think it depends on how many coats you put on so you'll probably find you can tweak it to get the finish you want.
I use danish oil a fair bit around the house but I specifically use it because I want a very natural, almost dry looking finish. I do find that it needs reapplying occasionally. Even on surfaces that aren't handled such as picture rails. I guess it soaks into the wood which is what you want.
|
| |
|
|


