vulgalour
Club Retro Rides Member
Posts: 7,287
Club RR Member Number: 146
|
|
Aug 22, 2020 23:33:42 GMT
|
|
Now that I've finished work for the week I can add a little more to the previous posting. Just as I was packing up car stuff to go to work, a neighbour appeared and we got chatting, the thread stripping isn't an issue he's had with carburettors but it is an issue he's had and suggested as a shuffle-around-the-drive solution since there is a little bit of thread there that can grab the bolt, a good wrap in PTFE tape might just allow it to bite enough as a temporary solution. This would be ideal for seeing if the car will actually start and idle reliable after doing the other work and would make getting it in and out of the garage easier if it did work, even if just for one day, so I'll give that a try tomorrow if I can find the bolt.
Either way, we're going to have to push the car out of the garage to find that bolt because the dynamo is in such a place it's difficult to get around the car in any meaningful way where it is in the garage. If there weather is at least dry, pushing the car out of the garage will allow us to get on with some other jobs. I'd like to pull the passenger seat out both to repair the cover and make it easier to get to the battery while the car is in the garage since we disconnect it every time the car isn't in use and it's a bit of a faff being unable to get in through the back doors at the moment.
If it turns out the bolt has disappeared into the Sock Dimension, replacements are available, and helicoiling the stripped thread should be a viable solution since there is still a good amount of material still there and it would be stronger than drilling out and tapping the casing to a large size, I suspect.
Our gut feeling when we tried to start the car is that it'll go, it cranked so much more willingly than it has since we got it now we have the timing dialed in properly, we look to have a much stronger spark than before which is hardly surprising given what the gap was on the points, and the freshly charged battery helps lots too. We do know it runs because we've had it running.
I also want to check where the oil is leaking out under the car so we can sort or ignore that problem, it's impossible to get under it in the garage to have a proper look but it's got enough ground clearance that we can just about wiggle underneath the car without even jacking it up when it's on the drive.
So tomorrow then. We'll see what it brings. It had better not rain all day.
|
| |
|
|
|
|
|
|
|
|
|
|
You could just epoxy the Banjo bolt in.
|
| |
|
|
|
|
|
|
|
|
To fit a helicoil you have to re-thread it to quite a considerable oversize, not sure you have enough material for that there.
I don't think epoxy fot a bolt will work either because to need to somehow get the tension to make it seal
The only option I can think of is to get a hollow stud made up with a portion x drilled like the banjo, cleanth thread you have got up and screw the stud right into the very bottom where there are probably some undamaged threads with epoxy a blackpopracing suggests. Let this all set up then re-fit the banjo with a domed nut.
|
| |
|
|
|
|
|
|
|
|
Chemical metal then drill and tap it. Jobsagoodun.
|
| |
|
|
|
|
|
|
|
|
|
| |
Last Edit: Aug 23, 2020 9:28:52 GMT by westbay
|
|
vulgalour
Club Retro Rides Member
Posts: 7,287
Club RR Member Number: 146
|
|
Aug 23, 2020 21:05:39 GMT
|
I'm going to attempt a helicoil first for the banjo bolt and see how we go, there's not a lot of material to work with whatever we do. The PTFE tape idea didn't work, there simply isn't enough thread left for enough of the length of the bolt for it to grab. At least you folks have given us some other options to try if the helicoil doesn't work. --- Monster update today since we've done a lot of busy work. First thing, after pushing the car out of the garage, was to get on with degreasing some more and trying to find the magical disappearing banjo bolt. A lot of the oily deposits weren't that bad, it hadn't built up the usual thick crust so we wondered if maybe it was only leaking from the rocker gasket since we haven't seen any other obvious leaks. We'll get in on all this for a deeper clean eventually, for now it's just nice to be able to see what we're doing and not have grease all over our hands any time we touch anything. 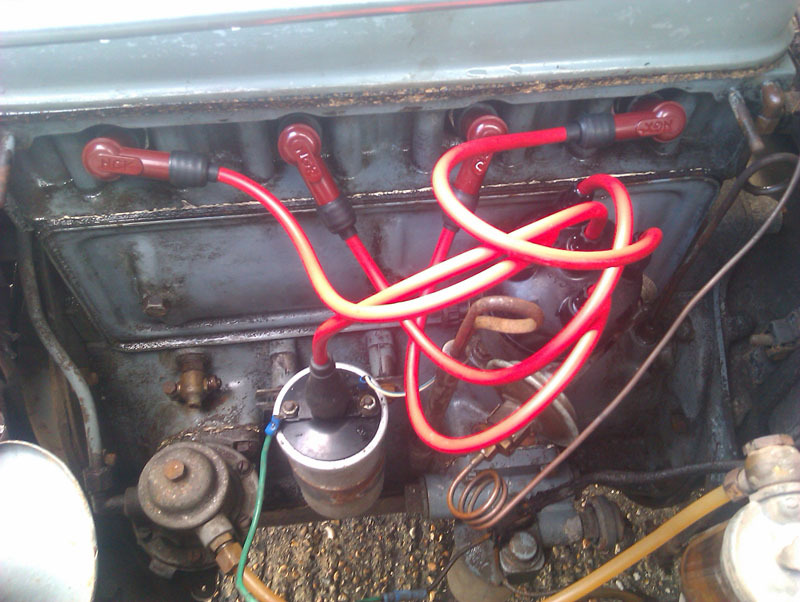 Happily, we did eventually find the banjo bolt. It was completely invisible and it was only by first degreasing and hosing down the dynamo side of the engine and then groping and fumbling about in the tiny gaps that we eventually found it. With both of us working blind, we found each other's hands and got the banjo bolt out that was firmly wedged underneath the dynamo. 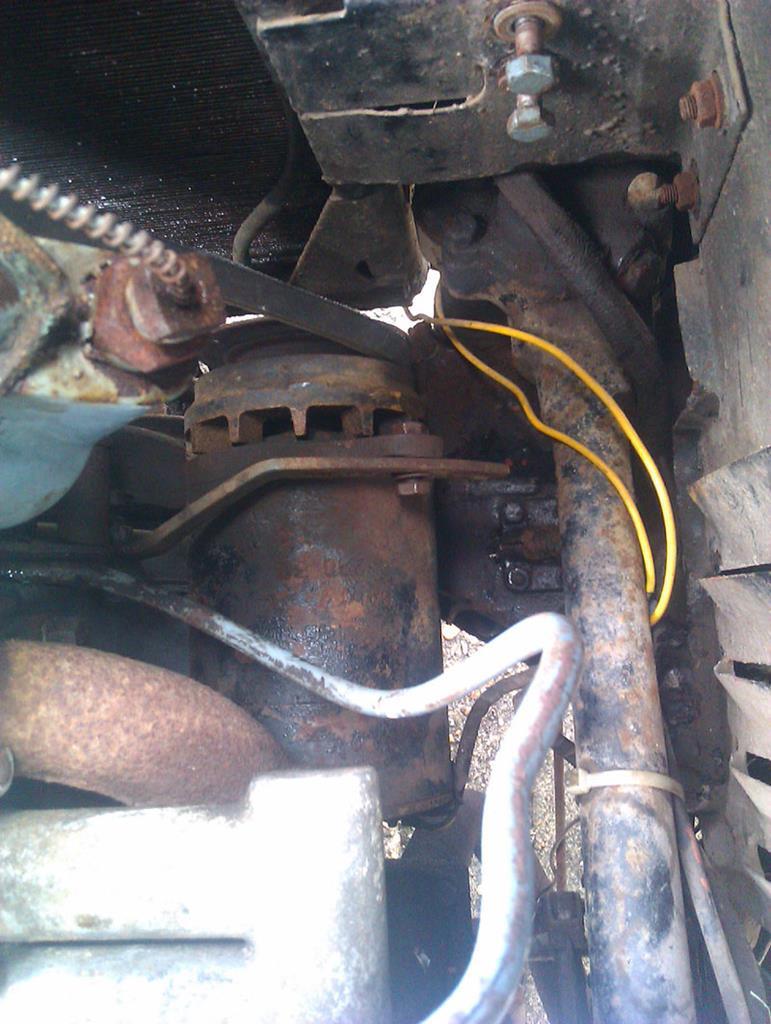 I now know it's a 7/8ths" wide thread, what I don't know is the thread pitch so rather than take a guess I've ordered a thread pitch gauge since I don't actually have one and it'd be handy. It's probably a 7/8ths" BSF thread and helicoil kits for that size are quite pricey so I want to be certain before I order the kit. 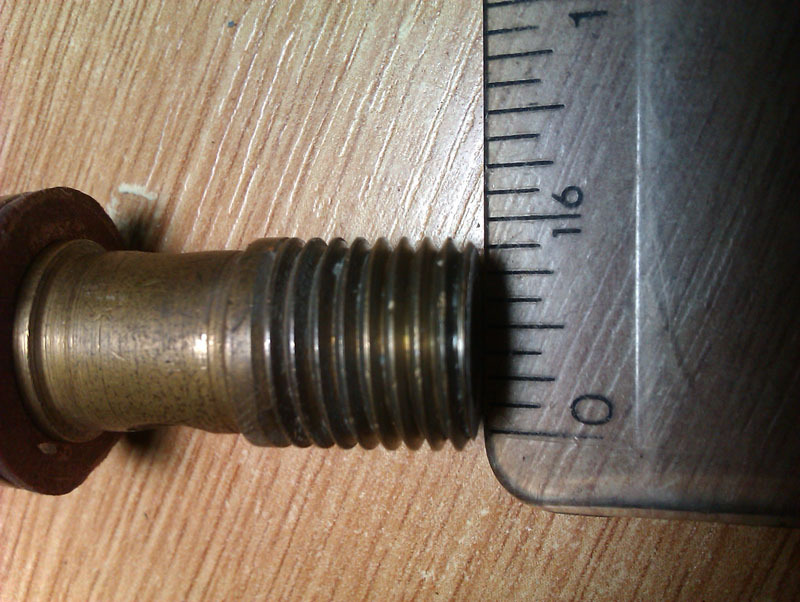 It was such a relief to have found the bolt, even though there are alternatives out there that would replace it, there's something reassuring about finding something like this that you've dropped. With that out of the way and put safe, I decided to take off the other horn. Other half and I have decided that since both horns need an overhaul anyway, and it's in the engine bay, we're going to restore them rather than keep them grey, a visual marker that we've done some work on the car in a way and also because the grey paint is pretty thick and unattractive. I noticed straight away that this horn was only held in with one bolt, that wasn't tight, and the missing bolt is also missing the captive nut. I'm not sure what's happened here, but the hole where the captive nut and bolt should be is stretched out. I'm thinking the sensible solution here is likely to be a rivnut or similar since these horns do apparently benefit from being very firmly attached and one bolt doesn't feel adequate. 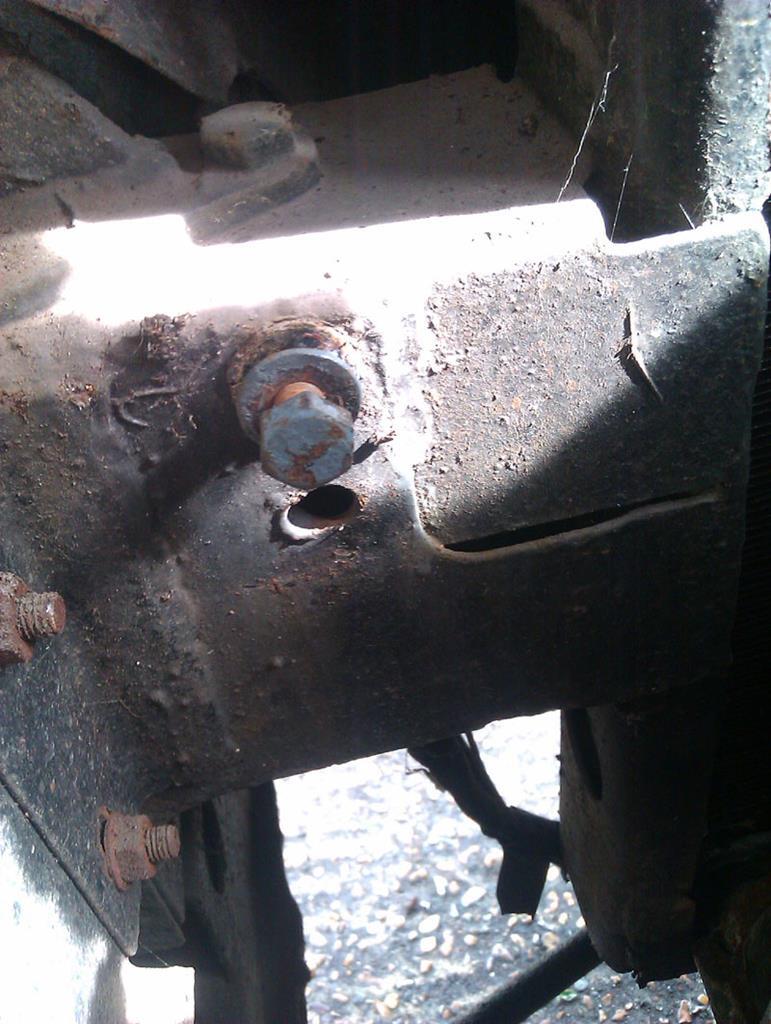 Next was the sediment bowl which had caught my eye and was annoying me by looking dirty. I had assumed it was old yellowed plastic when we first got the car, it wasn't until I removed it that I learned it's actually glass. Simple, if fiddly, to remove. There's a wheel under the bowl that you spin loose and then you can finegle the bowl out and it's pretty much impossible not to spill some of the contents in the process. It's pretty grim inside which at least means its doing its job, it also means it hasn't been cleaned out in quite some time. I wonder if this is from another car too, there was some dark blue paint on the bowl and a little on the holder. 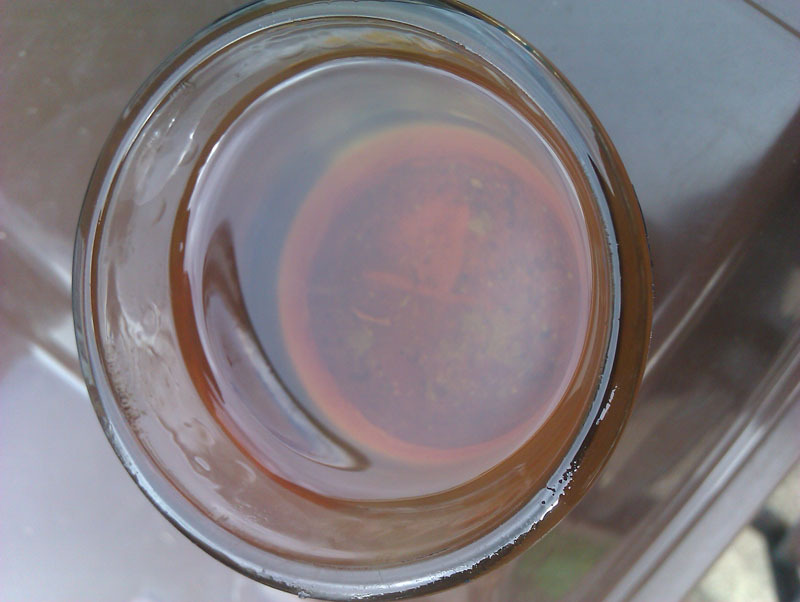 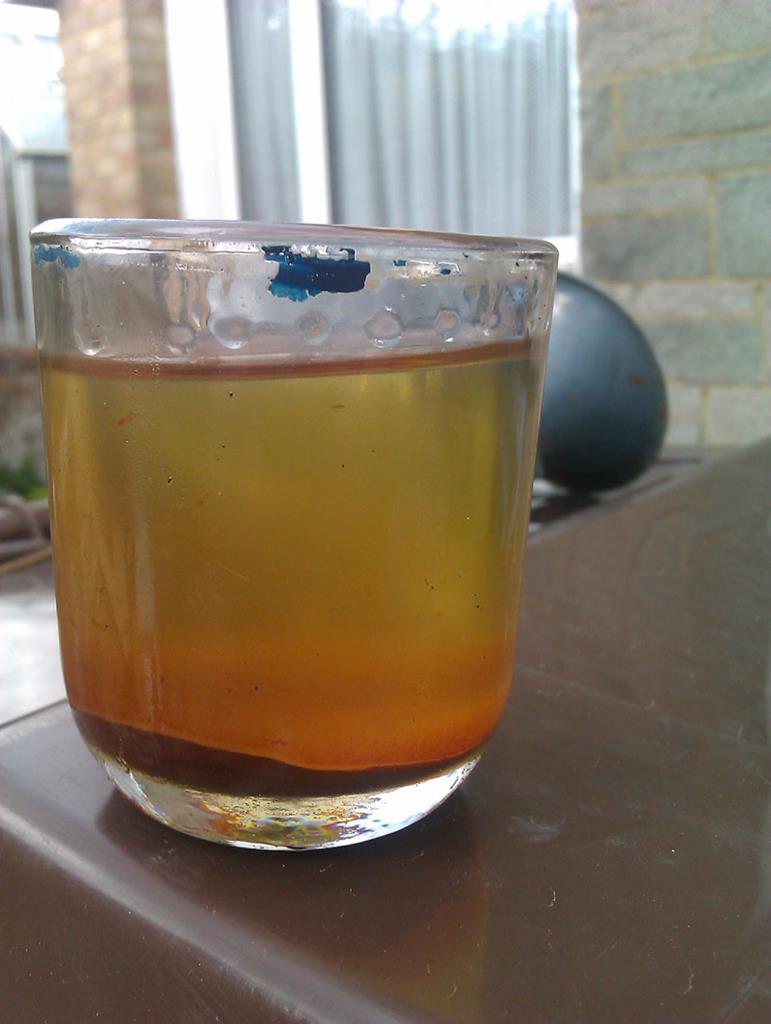 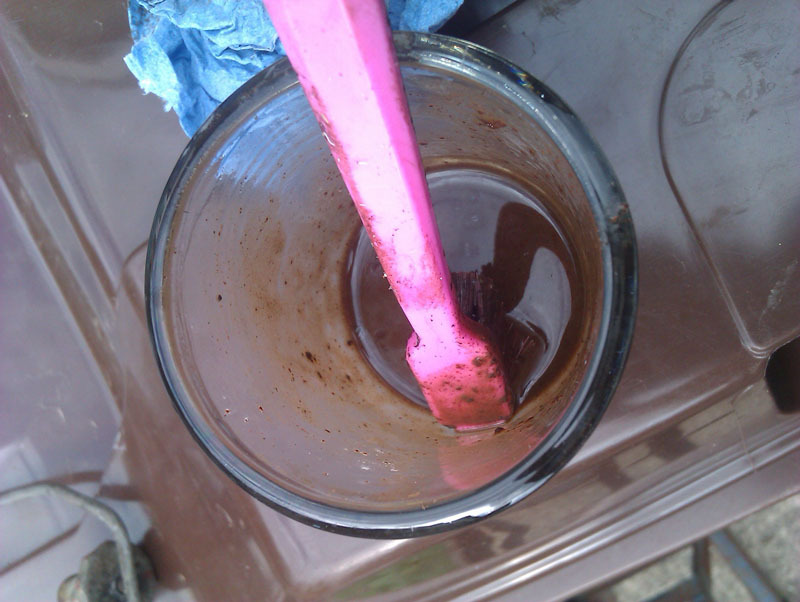 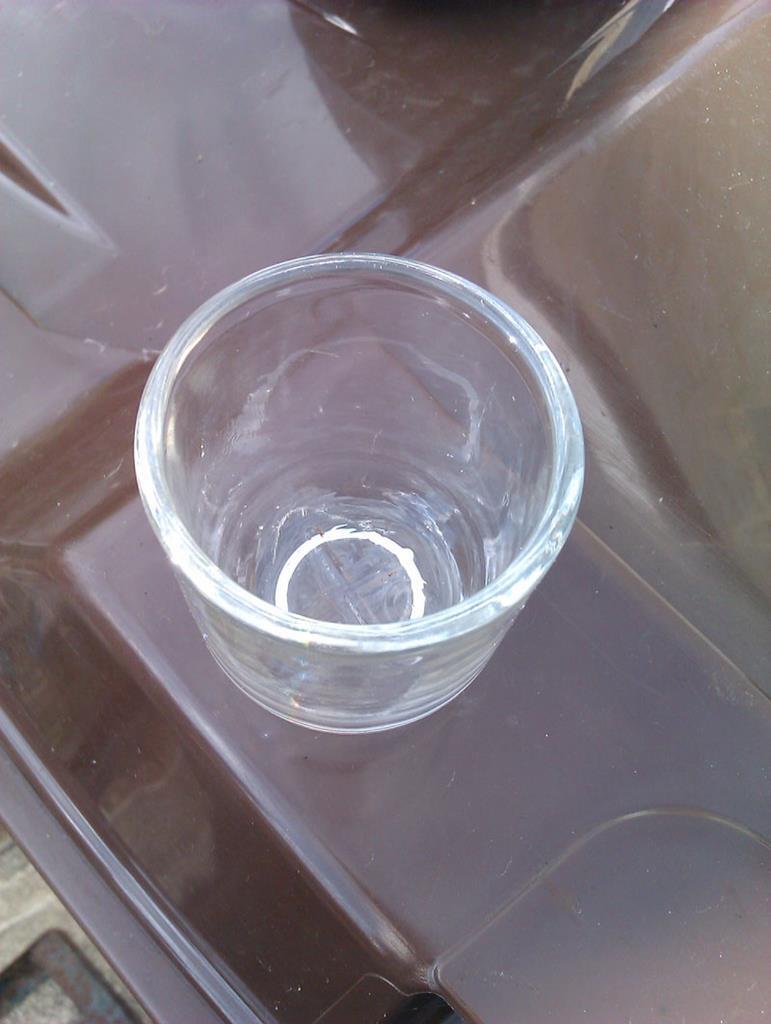 Much better. Refitting was straightforward and it does look much nicer now. We'll be able to get a quick sight on the state of the fuel coming through too. 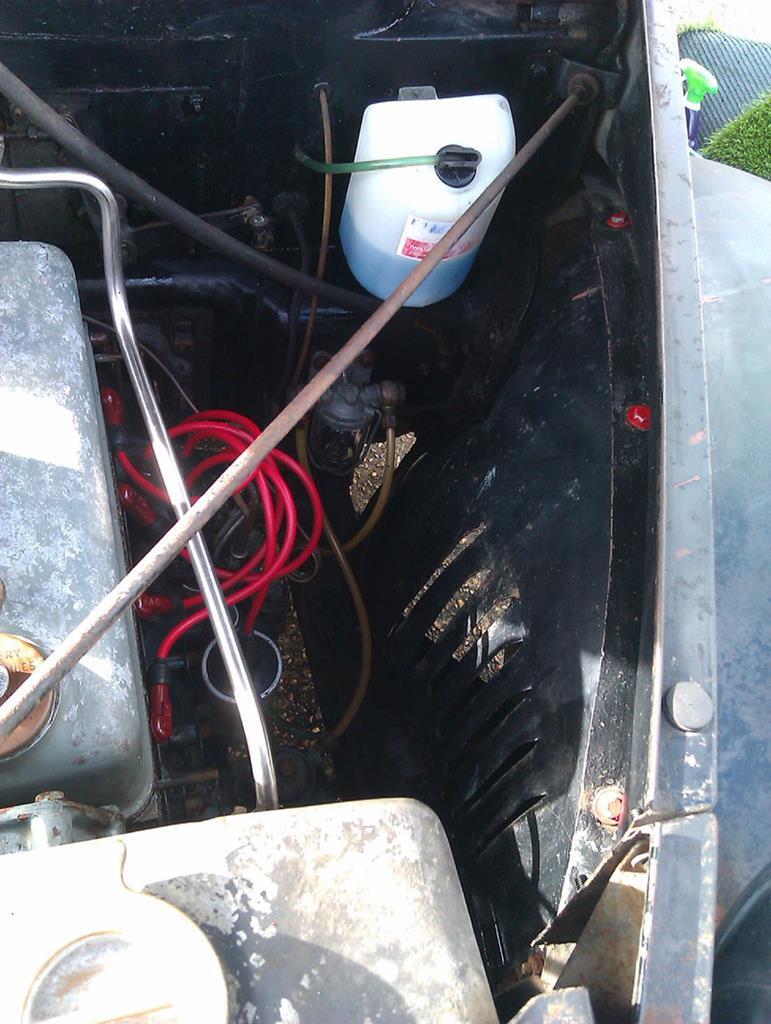 While I was in this area I noticed there was a P clip floating loose on the fuel line. There's also a little bracket on the chassis leg that the P-clip fits, so I put a new nut and bolt through it all to hold it in place. I'm not sure this P-clip is actually for the fuel line because there's some wiring that goes to the coil from here along almost the same path. Regardless, it's nice to have another item fastened down instead of rattling about. 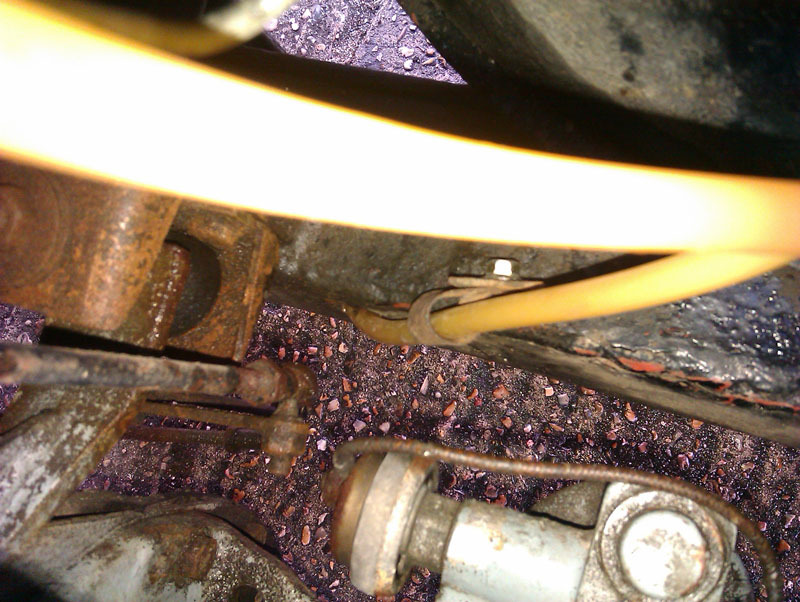 Poking around the car was very much the order of the day and we decided to have a closer look at the jacking points. None of them are pristine, as is usual on older cars, and none of them are completely ruined. There's an interesting repair on the rear driver's side one where someone has strengthened the jacking tube with a thick piece of metal and a bolt, I imagine this even works quite well since it's making use of the strongest part of the tube and reinforcing the weak top part where it looks to have torn a little, possible due to rust and/or the original style jack falling over or something of that sort. 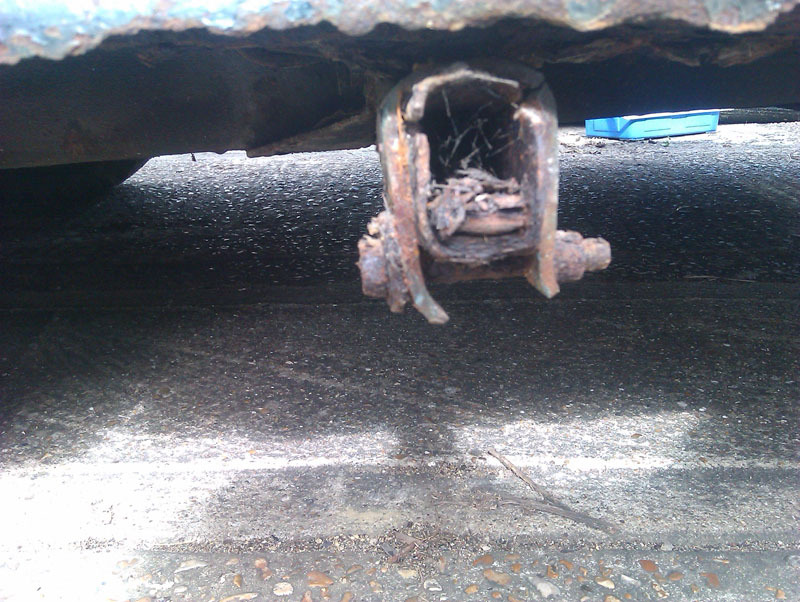 The underside of the outer sills has a closing plate that runs along the bottom, it's just flat steel to stop moisture and dirt getting thrown up inside the sill. Most of the back end of this one is missing though the rust is entirely limited to the non-structural bits of the car, it doesn't spread into the chassis or outriggers beyond a bit inside the jacking tubes as you'd expect. 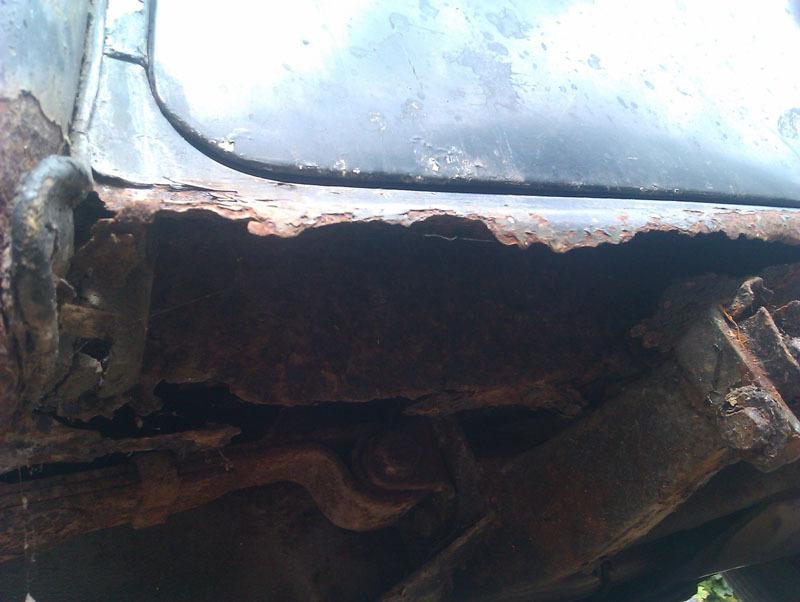 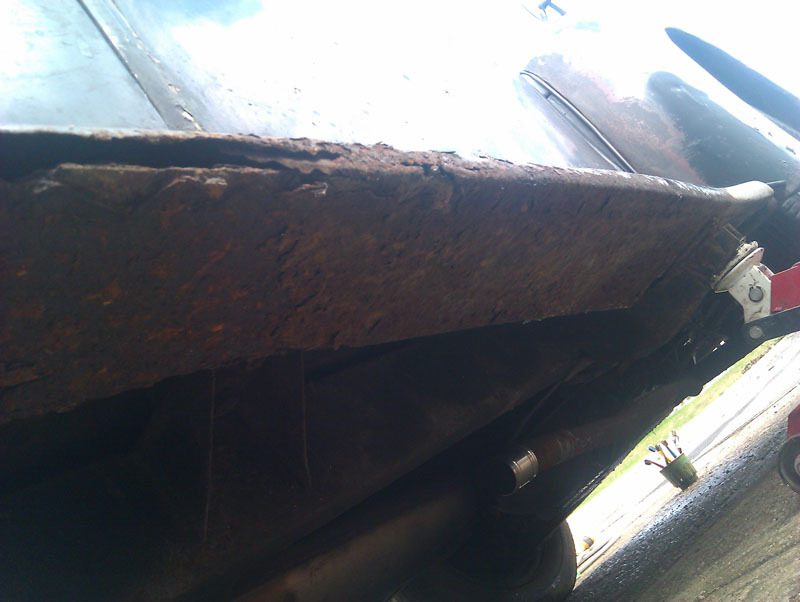 The jacking points are strong enough to jack the car with no scary noises and we've been making use of them so they definitely aren't that bad. The metal on this car is so much thicker than I'm used to, when you see rust you can pretty much brush it off and you're back to good metal fairly quickly, so repairing this sill shouldn't be too difficult. While we were under the car, it's a good opportunity to show off perhaps the newest thing on it (bar the items we've added) which is the Frankenstein's monster of an exhaust. It's definitely function over form on this one and I suspect if we fixed the snapped flexipipe at the front it probably works perfectly fine. Even so, we do want to replace the whole system with something that fits the car properly. 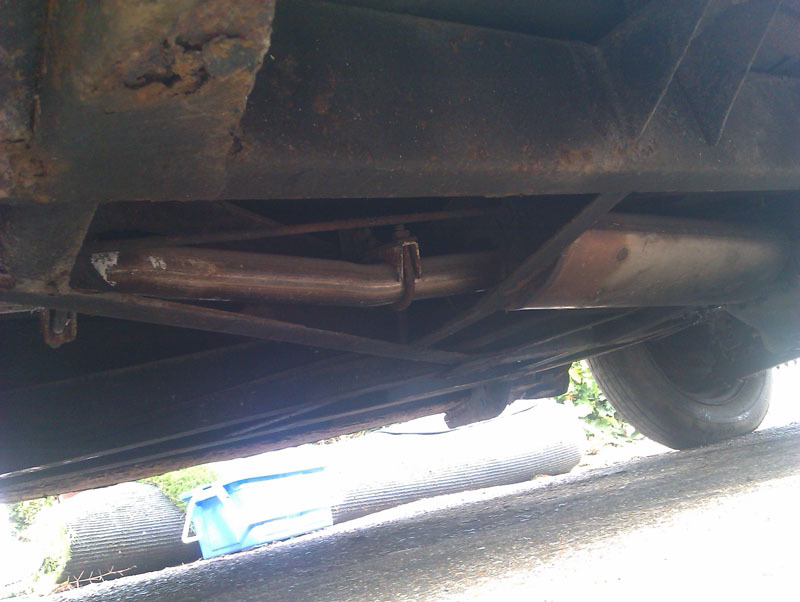 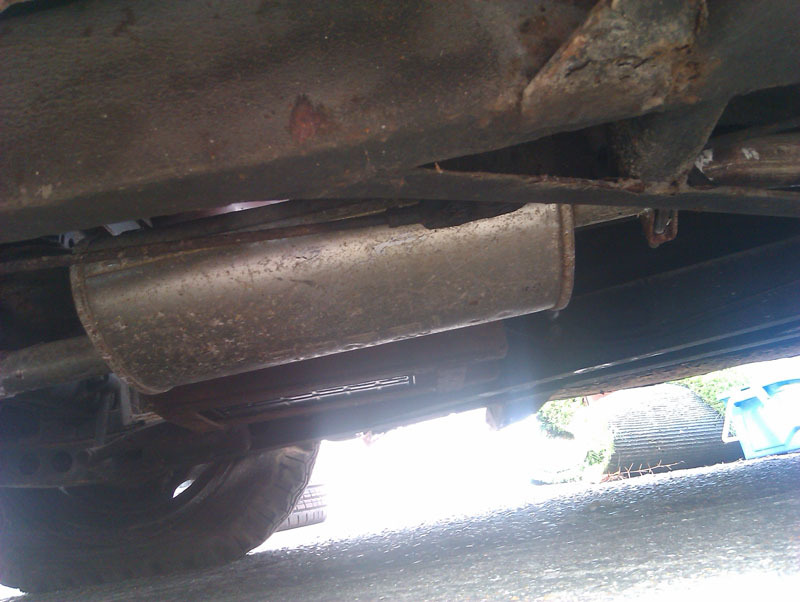 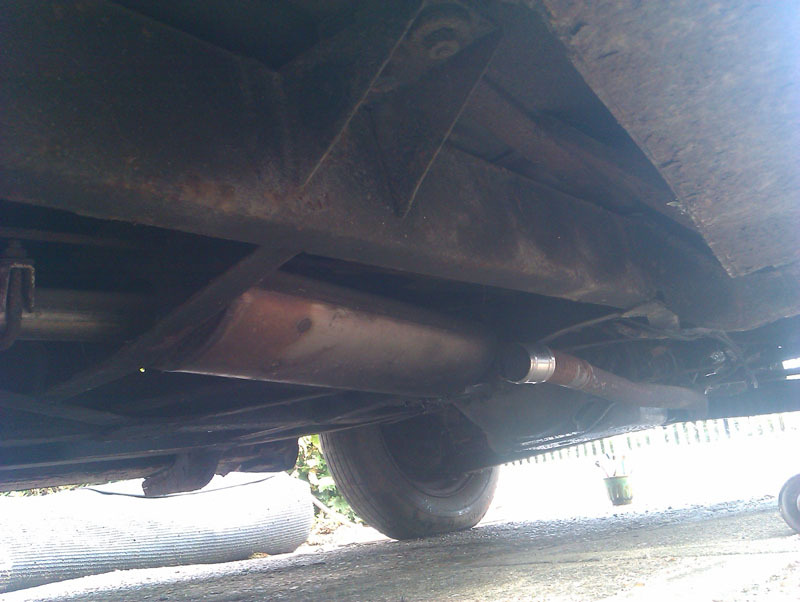 Another item for under the car was the oil leak. Because the garage floor is unsealed concrete the leak looked significantly worse than it was in reality. Once the car was pulled out of the garage, it's barely leaving more oil on the floor than my considerably newer Princess so I'd say that's pretty impressive for a car of this vintage that still has oil in it. 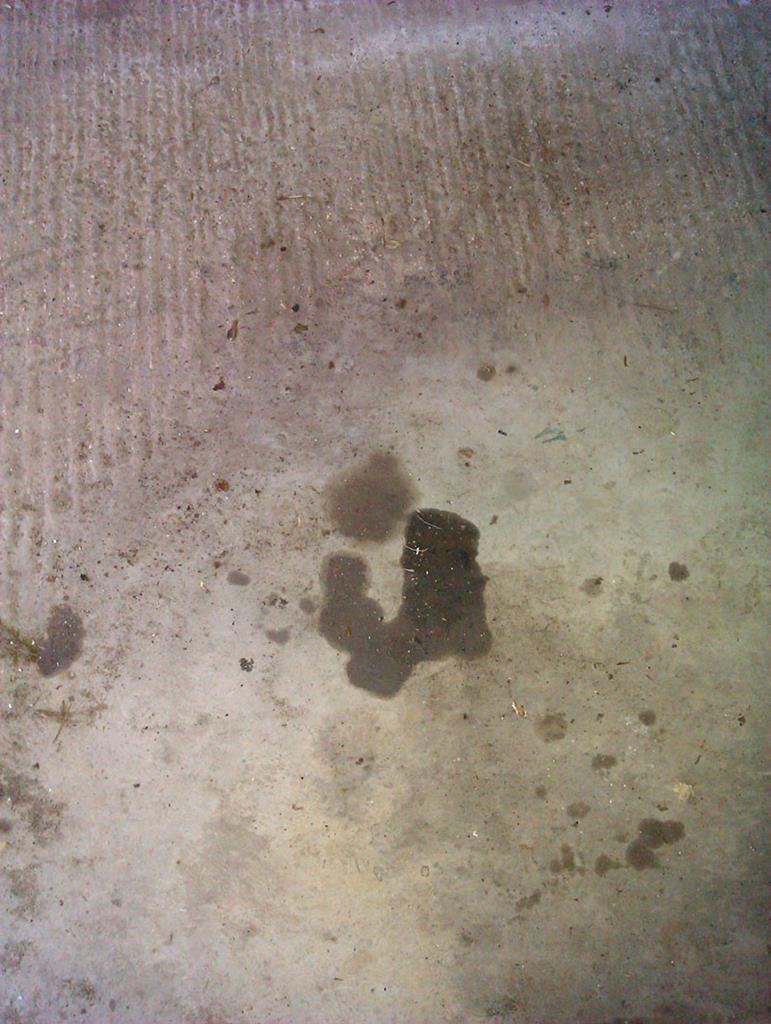 The oil seems to be coming from somewhere around the gearbox or back of the engine, it's difficult to tell really because there doesn't seem to be one single point. We're wondering if maybe a gasket or seal is weeping somewhere. It's not very oily underneath really, so whatever is dropping the oil can't be that serious. 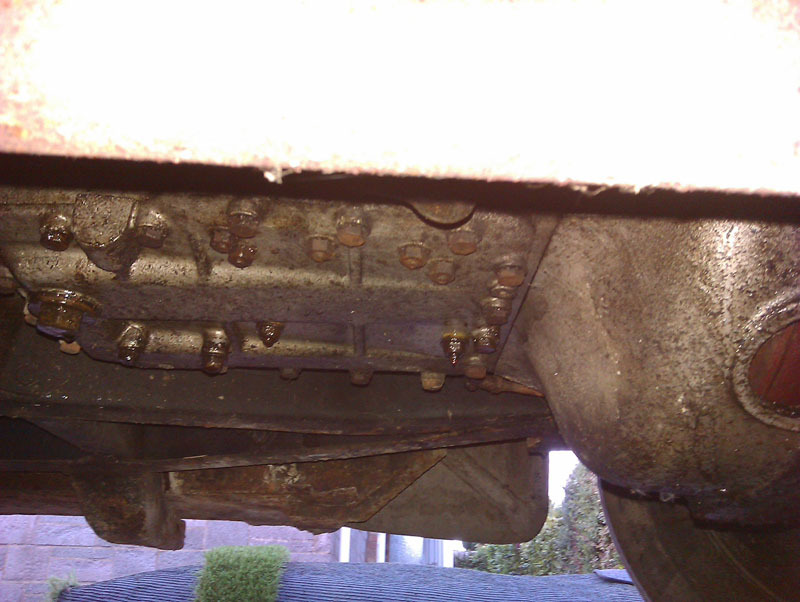 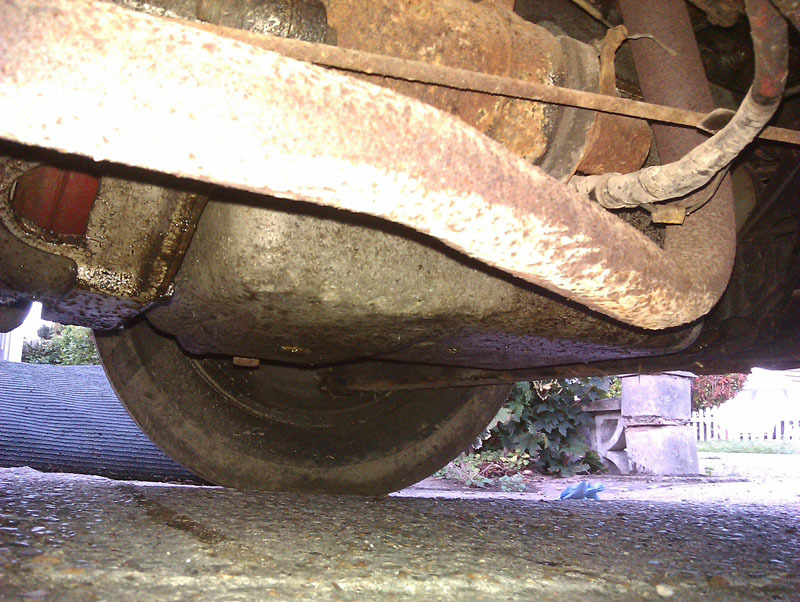 That's the mechanical out of the way, so let's break here and I'll do the cosmetic update next. Mechanical progress is now merely held up by waiting on parts arriving. |
| |
|
|
vulgalour
Club Retro Rides Member
Posts: 7,287
Club RR Member Number: 146
|
|
Aug 23, 2020 21:16:49 GMT
|
Since the opportunity was there, I decided to pull the passenger seat out of the car so it could be repaired. It also meant that while the car was in the garage it would be a lot easier to get to the battery since there wouldn't be a seat to clamber over. At first, it looked fairly straightforward to remove. Both front seats tip forwards (this seems to be a standard thing in cars up to the 1970s for some reason, even 4 door Austin 1100s did it) and the only thing holding them down is the front hinge brackets. It looked like a case of simply unscrewing four flat head screws and so that's what I did. Only, the seat was still very firmly attached because there were two more screws with no way to get to them. 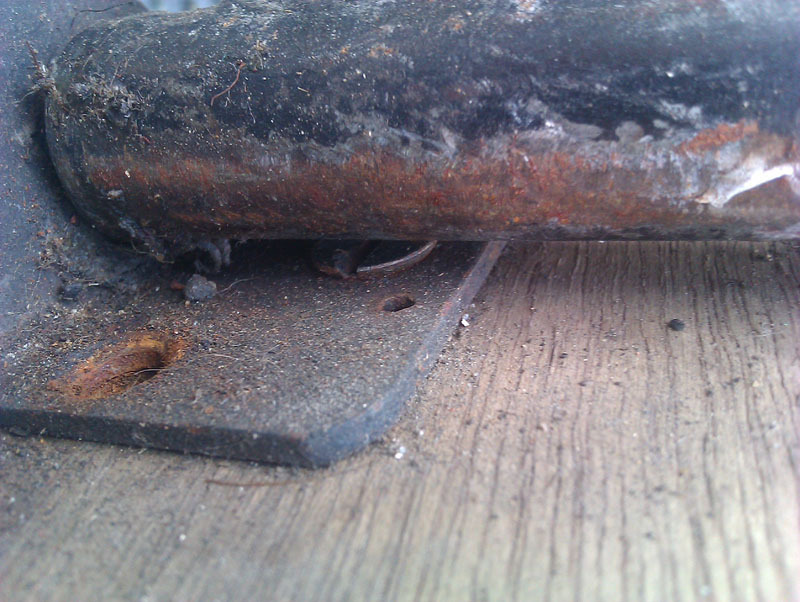 That bar blocking the screw head is the seat hinge, you can't move it any more out of the way than it is there. On the reverse side is a non-captive bolt so I have no idea how you're supposed to separate the seat from the floor. As a result, I just removed the floor with the seat since that's also held down with a handful of flathead bolts. 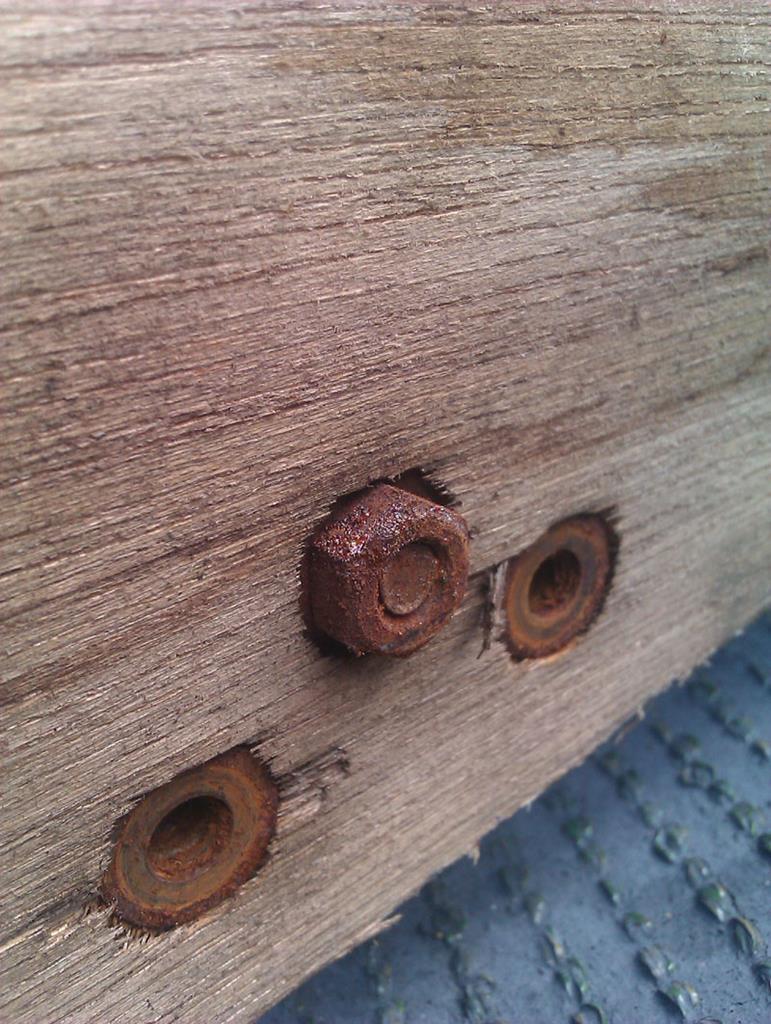 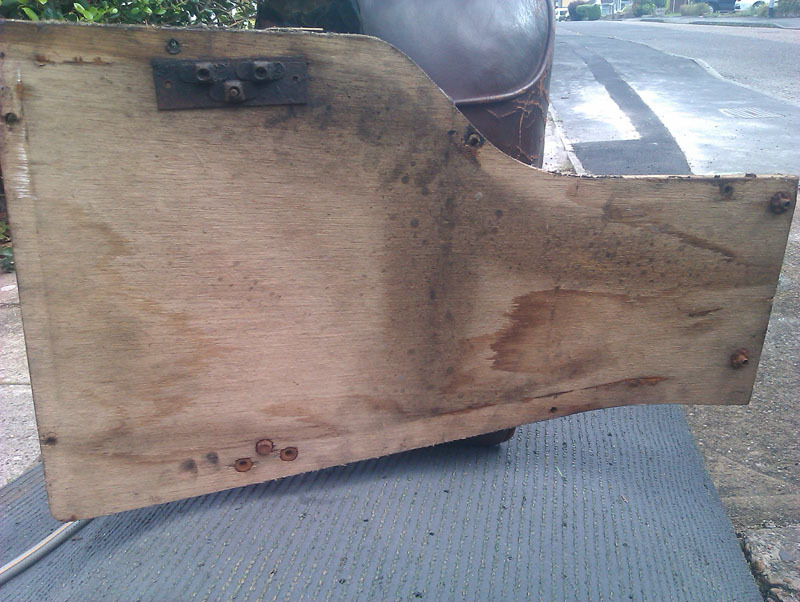 With that out I could at least get a better look at the seat and it's pretty good news. The worst looking cracks on the front panel of the seat have no missing material so, providing I glue something to the back of the leather, this should be repairable, a little suitable filler and dye and you'll never know. 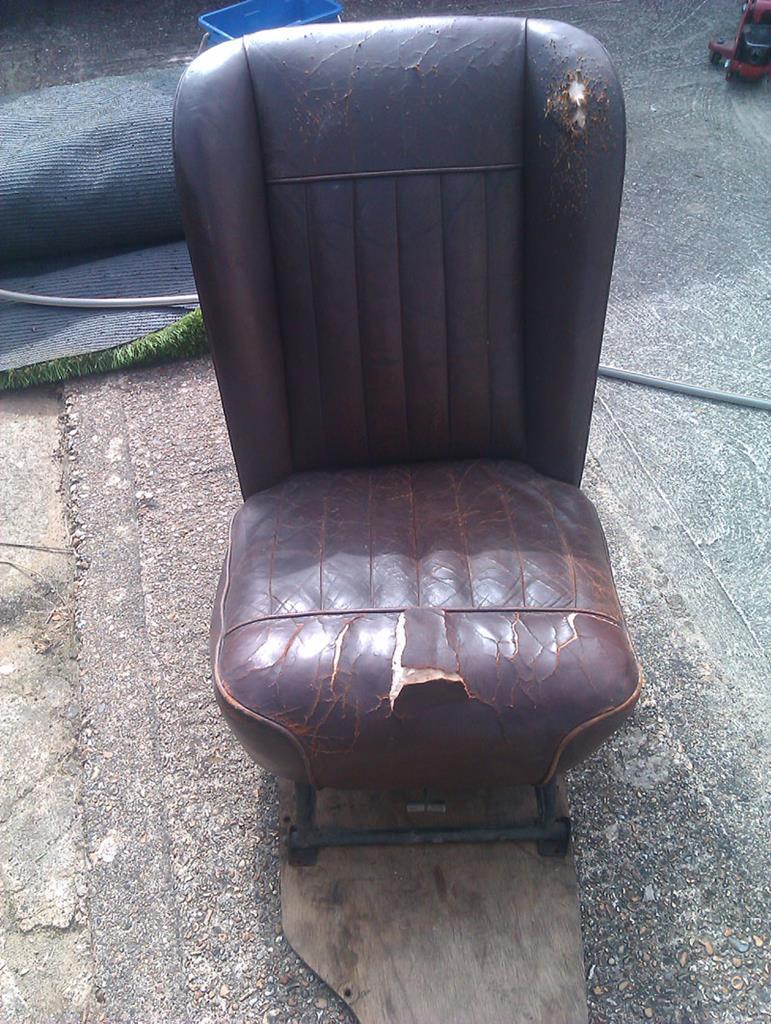 The cover is held on with tacks that go into the wooden frame. Those are going to be a little more awkward to remove but it will at least make my life easier when it comes to removing, repairing, and refitting the cover. I do hate fighting with hogrings so it's nice not to see any here. 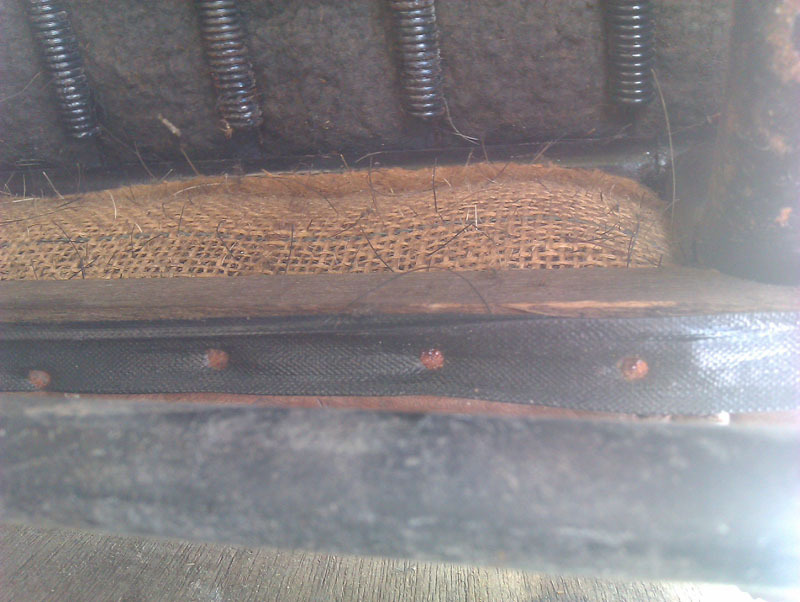 The cat damage is a little more annoying to repair because some of the leather is missing. Fortunately, Sharon kindly sent some leather offcuts along with those tyres so I can replace this panel with some leather that's dyed to match. The damage across the top of the seat will probably fill and dye without need of replacing the fabric, it looks like it's just the surface that's damaged with no perforation, fortunately. 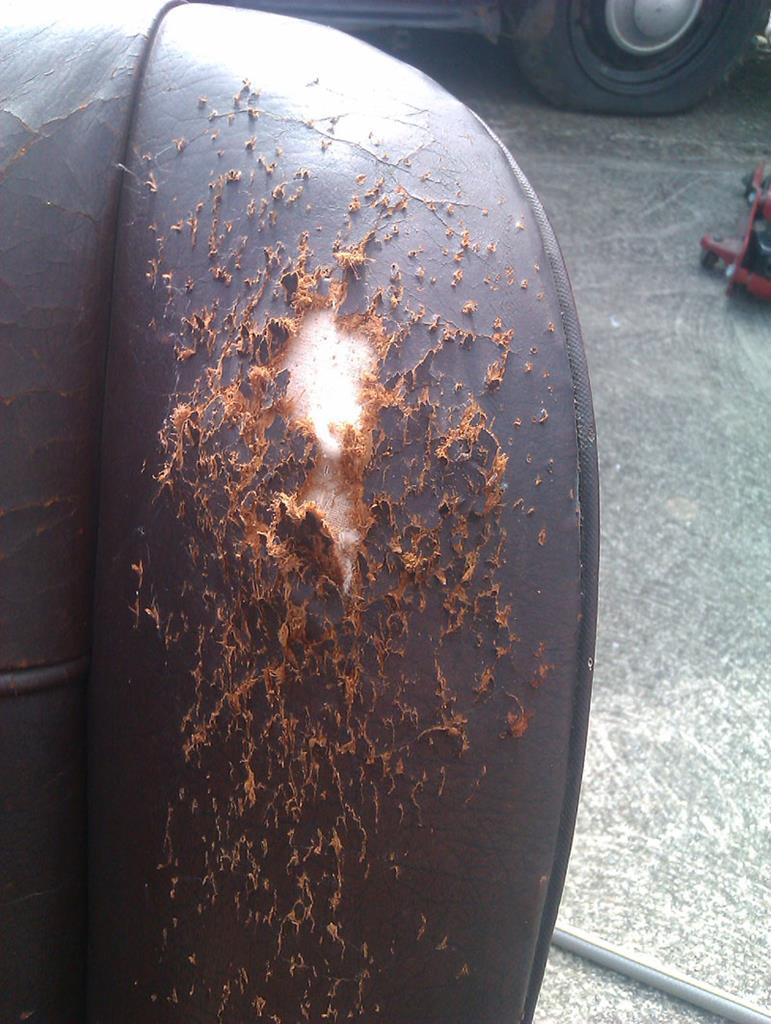 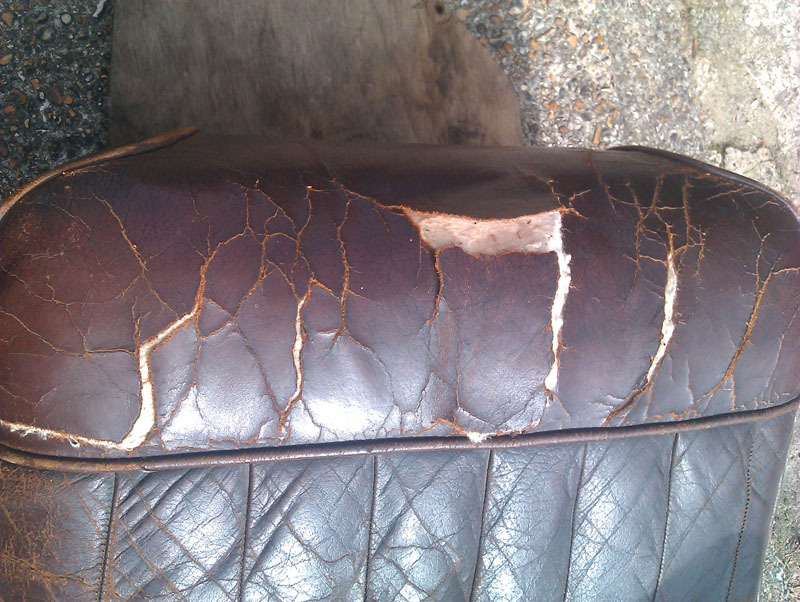 Underneath the passenger floor is a... thing. I'm not really sure what this is and it has two threaded holes with nothing in. I couldn't figure out what it operated, and there's no mention of it in the manual. It's not for the gearchange, that's on the inboard side of this floor, and it doesn't seem to be for the brakes. Suggestions welcome. 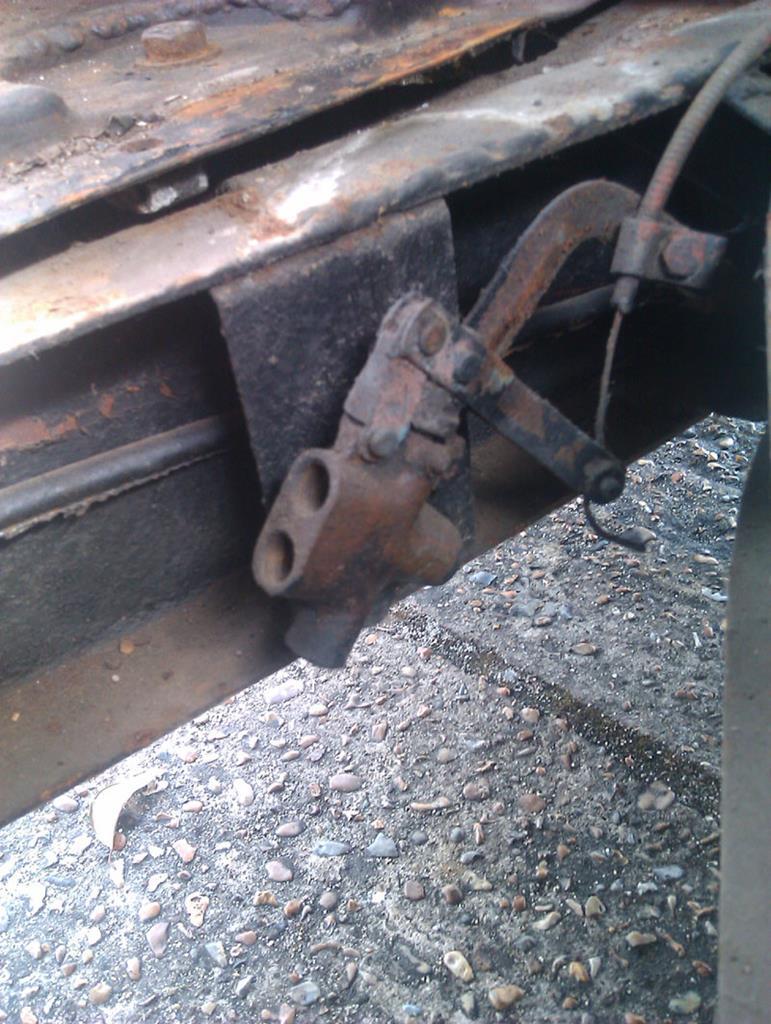 While we were getting into everything we tested the wipers now we had wiper blades fitted and while the motor can be heard running and moves the blades happily when the arms are lifted, it only moves them a tiny amount on the screen, even when the screen is wet, as though the resistance of the rubber blades against the wet glass is too much. We suspect the wiper box probably needs servicing or replacing, it does sound quite loud even for what it is and it's likely the internal grease has dried up. Underneath the dashboard we found the purpose of the mystery toggle switch which is to turn the dash illumination on and off. Because it didn't look original, we didn't think to look in the manual for what it was, it seems to be a factory item. The dash illumination itself is actually working as well as it ought, both bulbs installed are as bright as they should be, we'll upgrade them with warm white LED equivalents to improve the light output and reduce the demand on the system, that feels like a sensible upgrade in this instance. The other items in this image are the fresh air lever (large black ball below the toggle switch), the clock adjustment, and the odometer reset (I've forgotten which is which, they're the black and silver ones, I know which is which when I'm in the car). 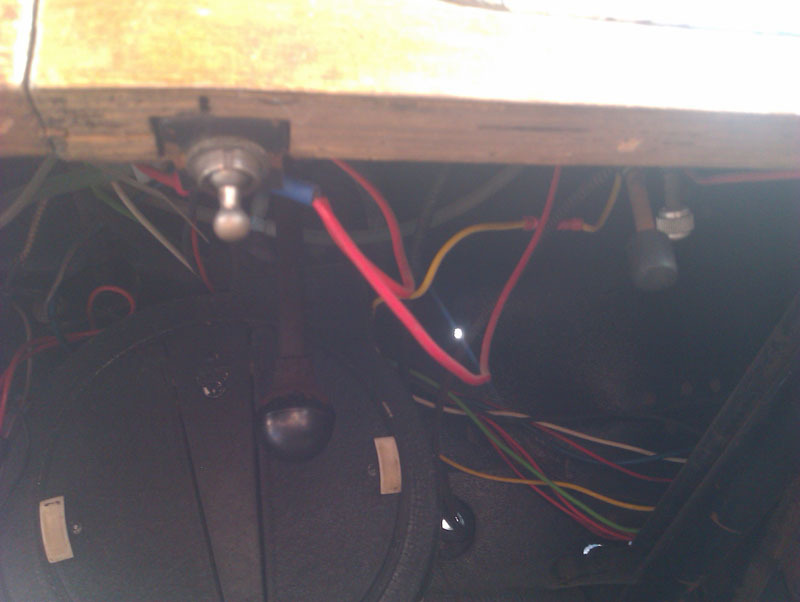 Underneath the dashboard there's a big round thing with two white handles, this is the heater. While we don't know if the heater core is good, we do know the fan works. We also know the bearing in the fan is quite loud so that will need some attention. Heater is factory fitment too, so far as we can tell. The big silver button beneath it is the foot operated headlight dimming switch. You can also get a glimpse of the patchwork of wiring. It's not that the wiring is bad in the usual sense, the new wires that have been put in have been done very well, it's just that they're bridging the original wiring which really doesn't look that great and clearly isn't doing its job properly because we're still getting intermittent issues with various items on the car even just in short periods of testing what works and what doesn't. 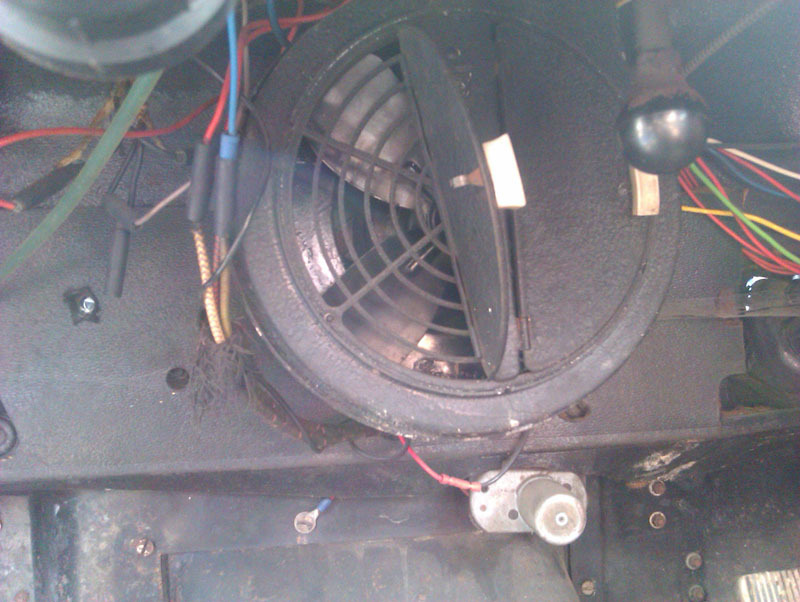 On the outside of the car, we noticed the rear bumper was a little loose, it wasn't just the overrider, and closer inspection revealed an interesting solution to bent bumper irons. We'll get the bumper off and straighten the rear bumper irons properly and then reinstall everything, just to neaten this up. 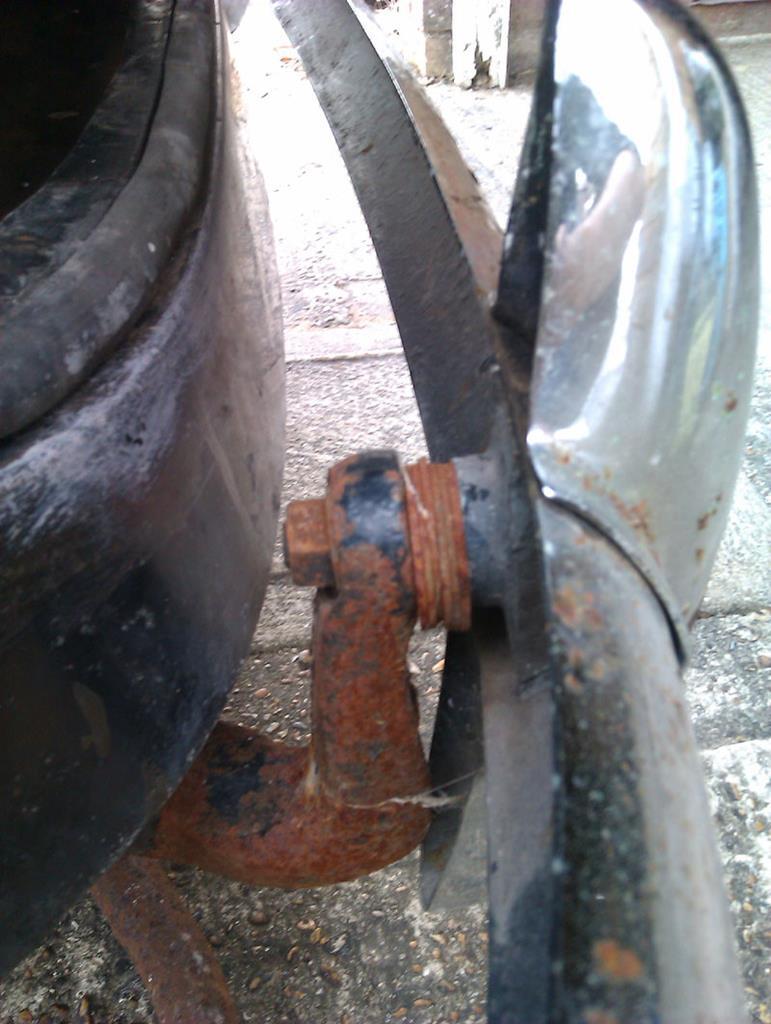 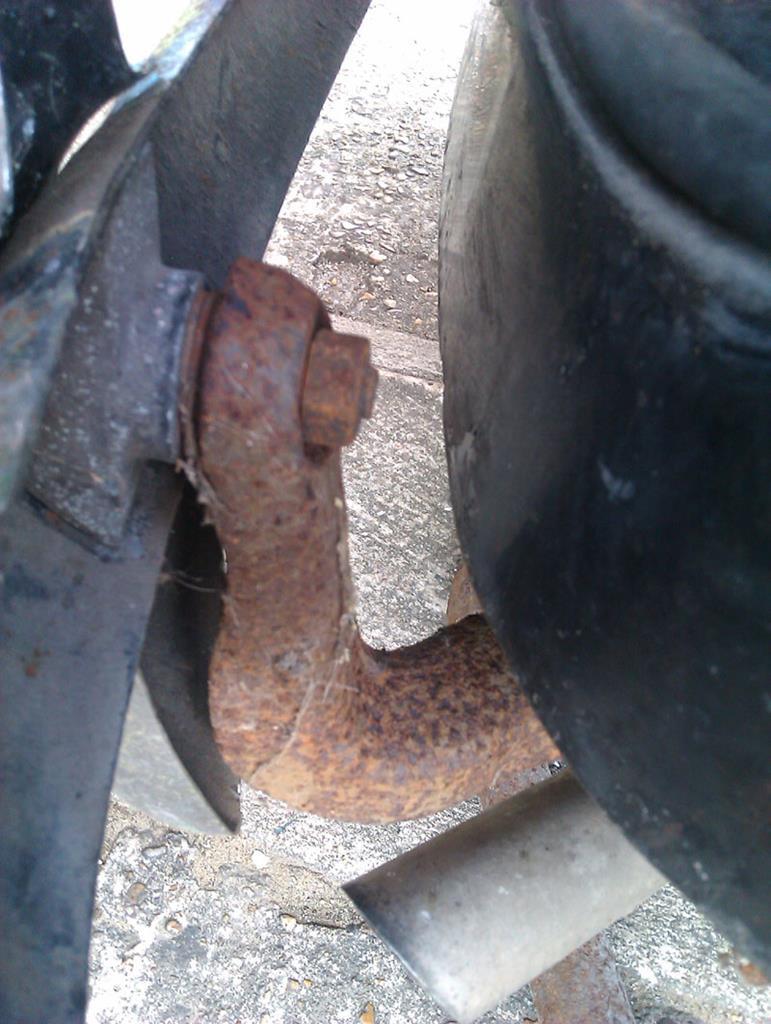 The weather was very kind today, not too hot, not too breezy, a little overcast. I spent a very enjoyable few hours hand polishing all of the passenger side of the car which came up a treat. The black T-cut works wonders as a finisher on this car, it dulls down all the bright spots and dries black in the textured areas rather than white of the plain T-cut which brings out the best of the patina. I still use the plain T-cut for the first four or five passes (even more for the boot lid and roof) because the black just doesn't seem to be able to cut through the oxidised paint as well. 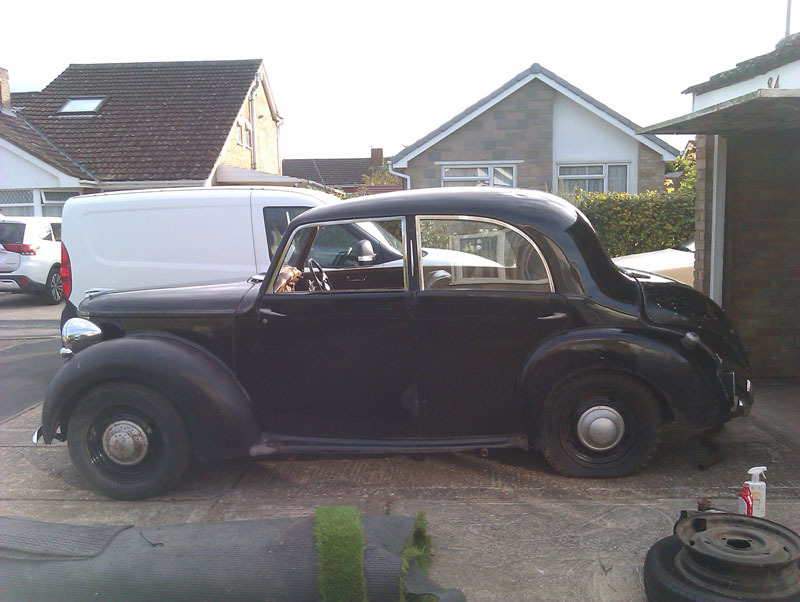 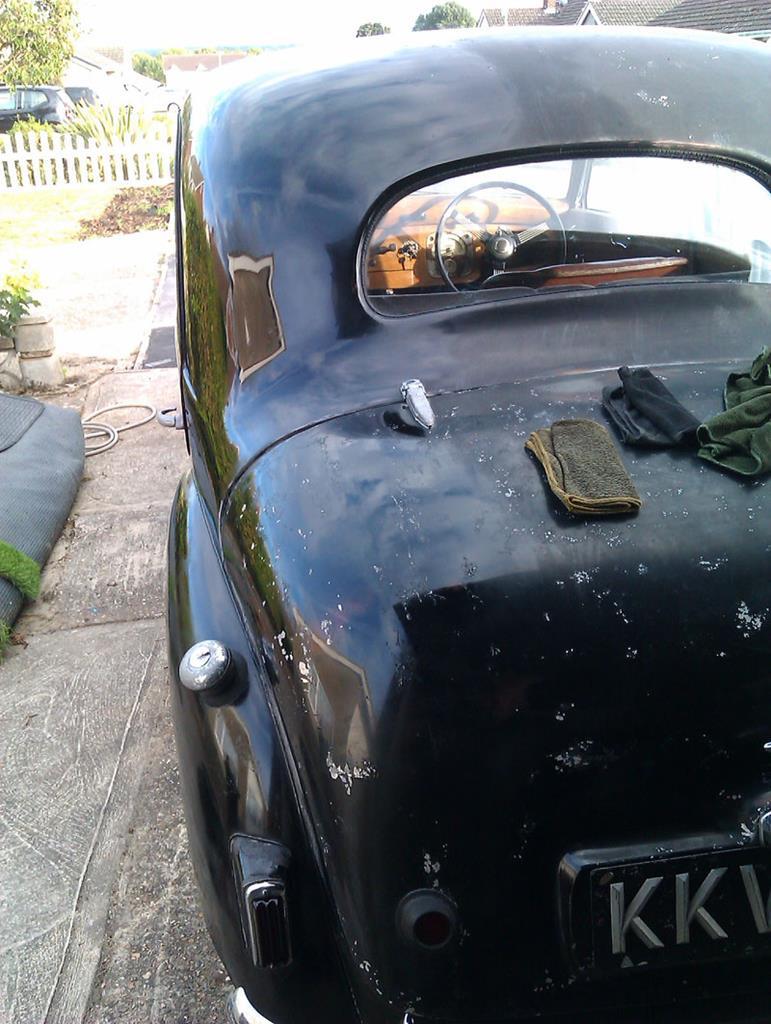 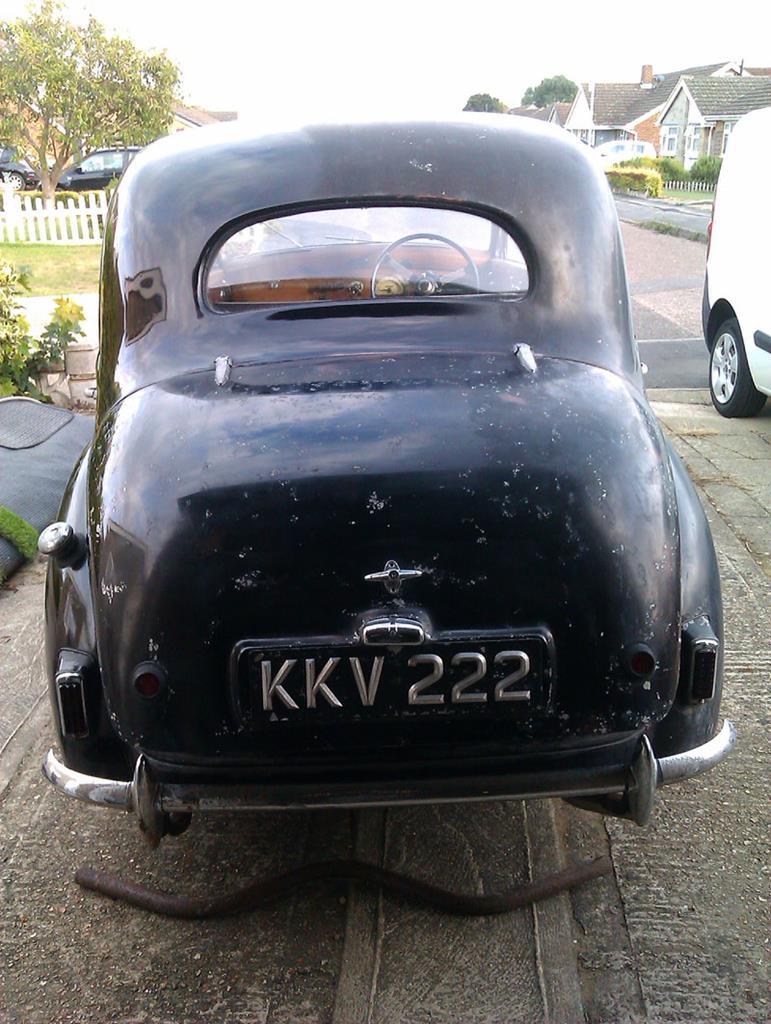 There's about 6-8 hours of hand polishing so far on this car and I'm about three quarters done. Personally, the finish it has on the passenger side I find ideal for a car of this sort. It looks used, but not neglected and it has a bit more character than if it were just a pristine black paintjob that in this instance, feels more appropriate. There's a few areas, like the wheel arch lip, that may get some fresh black paint let in just to protect what's there, we'll just have to take the same careful approach as was used on the front number plate so it looks like we haven't actually done anything at all. A tricky balance. Still, one side done, most of one side and the top to go. 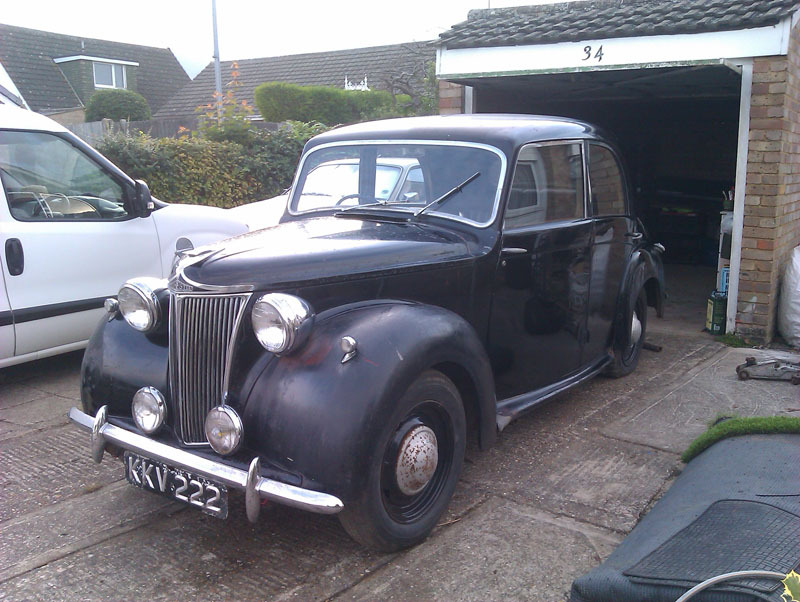 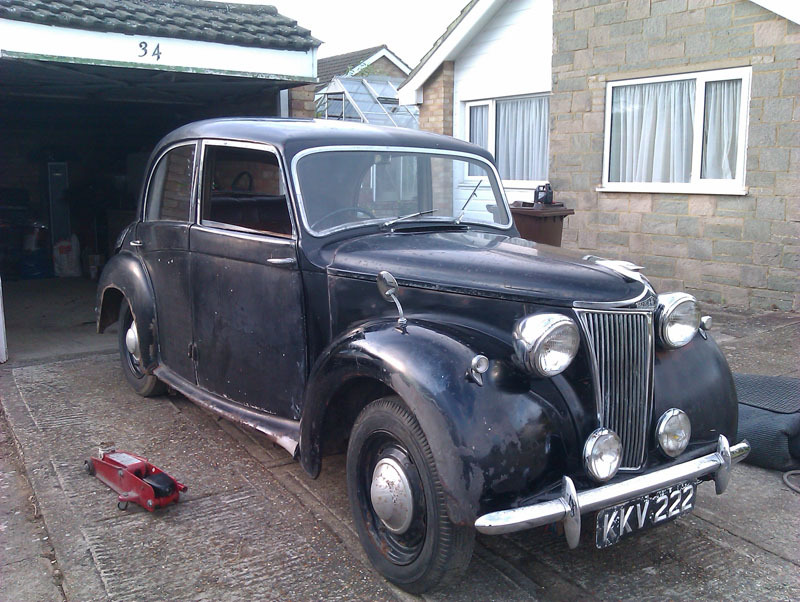 |
| |
|
|
|
|
|
Aug 23, 2020 21:17:15 GMT
|
|
Steel thickness is great on these old cars.
My 1949 anglia was great to weld. You only had to cut back a couple of mm from a rust hole to get to thick, solid metal.
Some parts had been bare metal for probably 40 years and didn't even have surface rust!
Loving the lanchester
|
| |
|
|
vulgalour
Club Retro Rides Member
Posts: 7,287
Club RR Member Number: 146
|
|
Aug 23, 2020 21:20:37 GMT
|
|
|
| |
Last Edit: Aug 23, 2020 21:21:21 GMT by vulgalour
|
|
glenanderson
Club Retro Rides Member
Posts: 4,362
Club RR Member Number: 64
|
|
Aug 23, 2020 21:25:00 GMT
|
|
That’s 7/16” not 7/8”...
I’d have thought it would be a BSP fitting, but it doesn’t look big enough to be 1/4” BSP, which is a little over 1/2” diameter, and it’s too big to be 1/8” BSP which is nearer 3/8” dia.
It could well be 7/16” UNF. You need to treat yourself to a cheap set of thread gauges and a vernier.
|
| |
My worst worry about dying is my wife selling my stuff for what I told her it cost...
|
|
goldnrust
West Midlands
Minimalist
Posts: 1,889
|
|
Aug 23, 2020 21:31:16 GMT
|
Nice work pushing on methodically, shame about the stripped thread in the carb, but it doesn't sound like it will stop you for long! Unless I am mistaken, that fuel sediment bowl, is actually a fuel filter with the replaceable element missing. It looks suspiciously similar to the one in my Daimler, which was also missing the filter element when I bought the car. 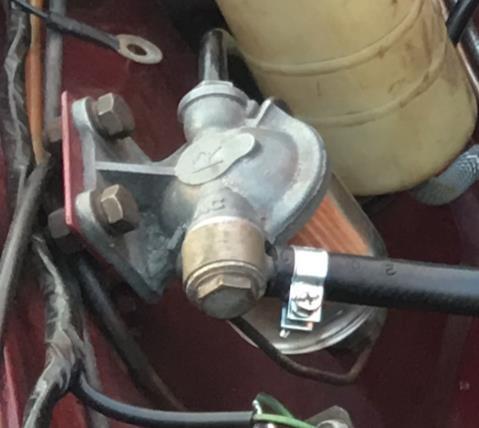 |
| |
Last Edit: Aug 23, 2020 21:31:39 GMT by goldnrust
|
|
glenanderson
Club Retro Rides Member
Posts: 4,362
Club RR Member Number: 64
|
|
Aug 23, 2020 21:35:54 GMT
|
|
Mystery item looks like it might be a cable operated valve of some description. Any idea where the cable goes?
Heater is the same as Series 1/2/2A Land-Rovers. Motor has plain bushes rather than bearings, and they dry out. It’s a fiddly, but entirely doable job to strip, clean and lubricate the motor.
What kind of wiper motor is it, can you see? Most likely a proprietary Lucas one. Again, while fiddly, far from impossible to sort.
|
| |
My worst worry about dying is my wife selling my stuff for what I told her it cost...
|
|
vulgalour
Club Retro Rides Member
Posts: 7,287
Club RR Member Number: 146
|
|
Aug 23, 2020 21:50:26 GMT
|
|
I'm definitely rubbish with fractions. Imperial for big measurements, metric for small, and I'm mostly okay then. I'll have a better look for cable routing on the mystery item, I didn't think it was heater since it's not exactly close to it and I can't think what's on the other side of the bulkhead that it could connect to, I must have missed the routing somehow. If the wiper is still the original (it probably is) than it's a Lucas 735510 according to the manual.
Shall see about getting a filter in the sediment bowl, it would be reassuring to have a fuel filter rather than relying on the bowl and the mesh on the banjo bolt. It probably is the same as the Daimler one because of course Daimler and Lanchester were knitted together by the time this car was built.
|
| |
|
|
|
|
|
Aug 23, 2020 22:02:01 GMT
|
|
I'm with Glen on the heater valve. Trace that cable to the cylinder head. If not its obvs the ejector seat.
|
| |
|
|
vulgalour
Club Retro Rides Member
Posts: 7,287
Club RR Member Number: 146
|
|
Aug 23, 2020 22:21:53 GMT
|
|
Remeasured that bolt width in mm and it's 12mm wide on the thread. The internet tells me that's 0.47", and I have absolutely no idea to convert that into a fraction that makes any sense. Perhaps someone else does?
|
| |
|
|
melle
South West
It'll come out in the wash.
Posts: 2,011
|
|
Aug 23, 2020 22:29:39 GMT
|
|
15/32"
|
| |
www.saabv4.com'70 Saab 96 V4 "The Devil's Own V4" '77 Saab 95 V4 van conversion project '88 Saab 900i 8V
|
|
glenanderson
Club Retro Rides Member
Posts: 4,362
Club RR Member Number: 64
|
|
Aug 23, 2020 22:32:06 GMT
|
|
I would hazard a guess that it could be a worn 1/4” BSP. If it’s 19 tpi then that’s a possibility.
1/2” x 20 UNF is another.
There’s always a remote possibility it could actually be M12...
Do Burlen list a banjo bolt for the carb?
Whatever it is, there’ll be a solution.
|
| |
My worst worry about dying is my wife selling my stuff for what I told her it cost...
|
|
vulgalour
Club Retro Rides Member
Posts: 7,287
Club RR Member Number: 146
|
|
Aug 23, 2020 23:22:17 GMT
|
|
I've not yet been able to find a listing for the bolt on Burlen or otherwise. I had hoped a search for the carb would bring up some specifics, no joy yet. I'm probably just not searching for quite the right thing.
My gut feeling is that 1/2"x20 is the most plausible, but it could be melle's 15/32" since 15/32"x19 has been suggested has a possible candidate. Without the proper tools to measure I shan't know, so I'll just have to shelve this until they arrive.
Plenty to be doing in the meantime at least, going to have a crack at those horns tomorrow, see if I can get them tooting again.
|
| |
|
|
melle
South West
It'll come out in the wash.
Posts: 2,011
|
|
|
|
|
15/32" bolts must be extremely rare, I've never seen one and they're certainly not an industry standard.
Going by your measurement and assumption that it's 19 or 20 tpi, I think these are the most likely candidates:
7/16x20 UNF and 1/2x20 UNF are standard sizes (this is "American" SAE thread with a 60˚ angle and flat CROWN and roots on the teeth, not Whitworth which is 55˚ and has rounded crests and roots)
1/4x19 BSP is a standard size (this is an "English" Whitworth type thread)
M12x1.25 is a standard size for banjo bolts; a 1.25mm pitch is very close to 20tpi (Metric is 60˚ thread like SAE)
|
| |
www.saabv4.com'70 Saab 96 V4 "The Devil's Own V4" '77 Saab 95 V4 van conversion project '88 Saab 900i 8V
|
|
|
|
|
|
|
|
That P clip on the fuel line should have a rubber sleeve/bush in it (on it?) ...
Great progress ! bit like an archaelogical dig uneartthing the treasures!
|
| |
Last Edit: Aug 24, 2020 9:15:20 GMT by westbay
|
|


