vulgalour
Club Retro Rides Member
Posts: 7,268
Club RR Member Number: 146
|
|
Apr 16, 2023 12:22:07 GMT
|
I've been gradually feeding rusty things through the oxalic solution and being amazed at the results. Literally you just leave stuff in a bucket of oxalic acid solution for 24-48 hours, rinse off in plain water sometimes giving it a bit of a scrub with a suitable stiffness brush, and all the work is done for you. 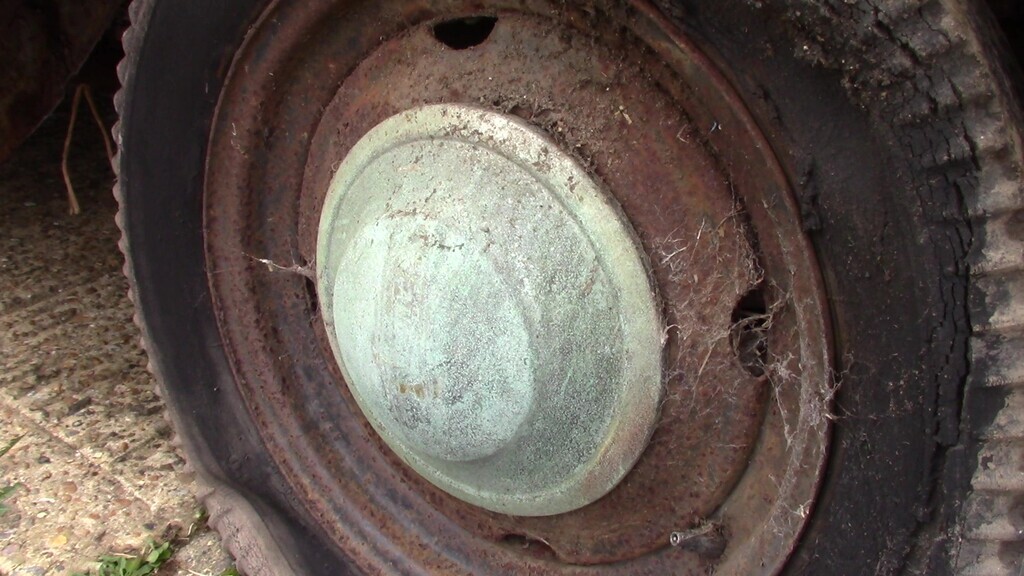 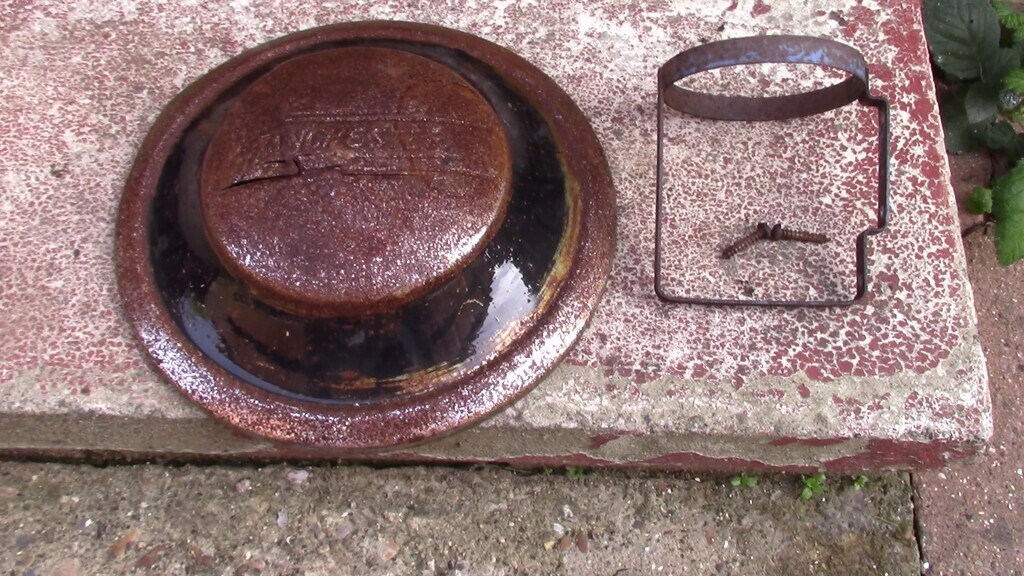 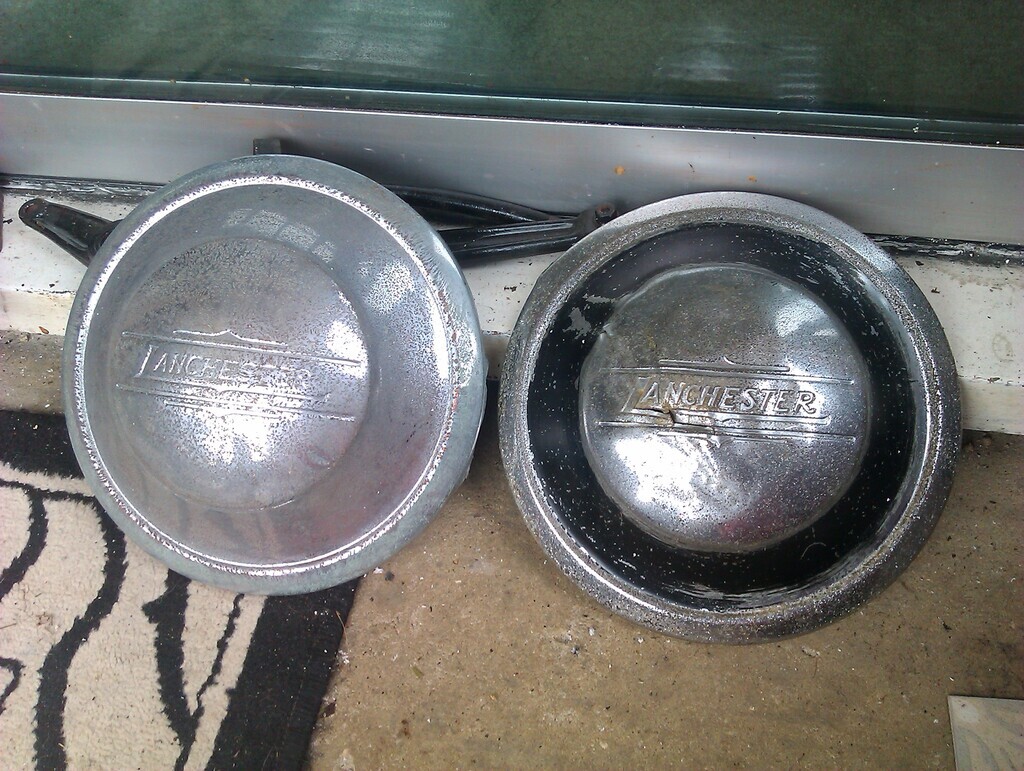 It's also highlighted just how minor a lot of that very visible rust is on some components. The water pump, for instance, is very restorable and needs little more than new bearings, fresh paint, and reassembling. All the parts look to be there, which is nice, so I'll definitely be sorting that out once I have time. Flash rusting doesn't seem to be much of an issue either, surprisingly, though any parts like the hubcabs above do get given an immediate spritz with WD40 just to keep things clean until I can get the time to do a more thorough protection job. The other thing I had a little bit of time for today was finding where the numbers were hiding on the block of the dismantled engine and I can only find two so hopefully that will help with identification. The general consensus across fora is this is a rebuilt/remanufactured unit done by Daimler in '58. I haven't seen any really obvious damage beyond the bent push rods so it's entirely likely it is rebuildable and while I still don't think I'm the one that's going to do it, I can at least clean and protect the parts that are there for someone else to tackle. This casting on the block appears to read 1 (bolt hole) 181889 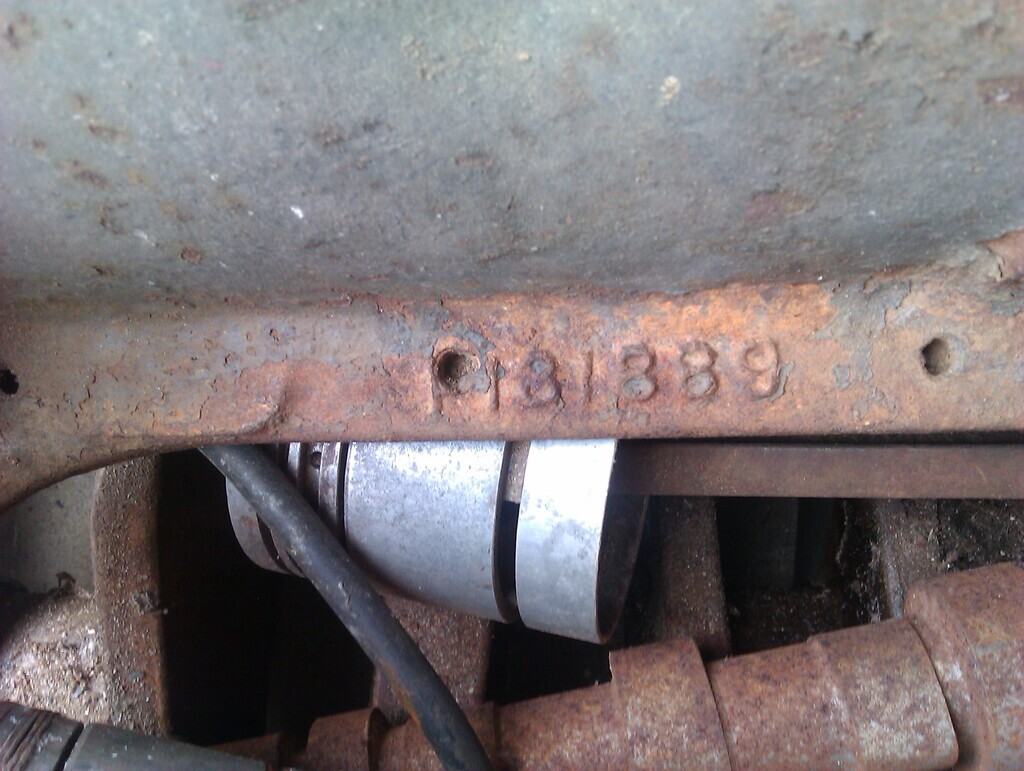 This little brass plaque on the other side of the block appears to read 31371 (the 1 also looks a bit like a triangle, but I think that's just how it's stamped) 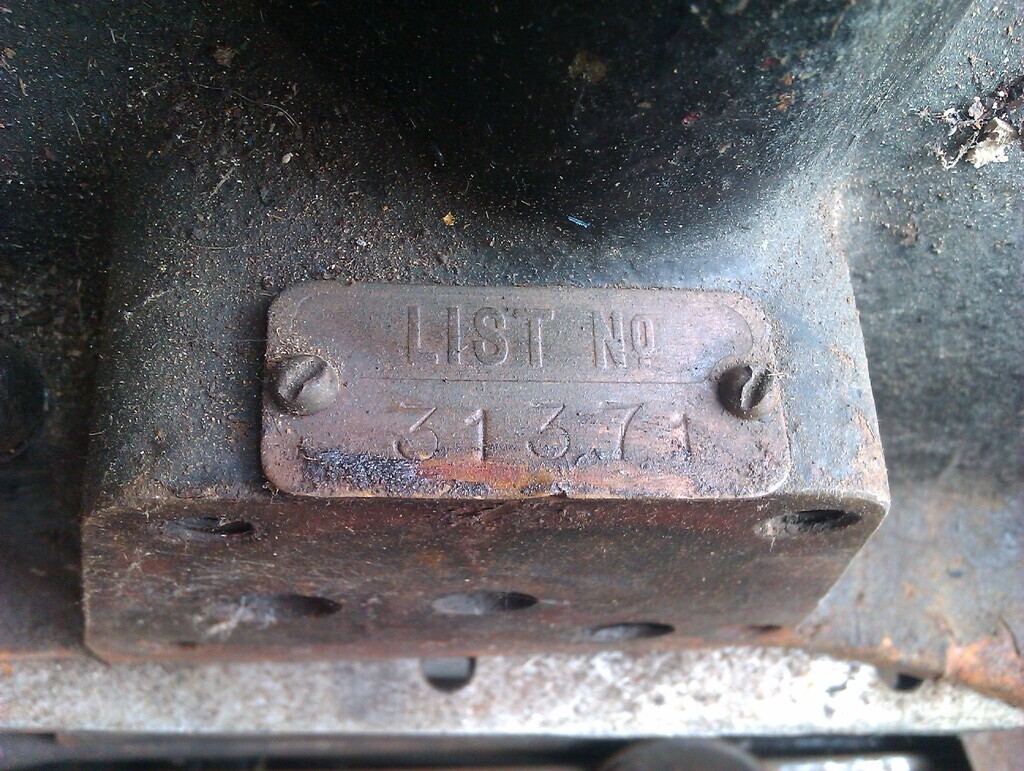 Pat also salvaged a sturdy gazebo which should offer some weather protection and extend the amount of time I can work on things outdoors which will be particularly useful since April has decided to be maximum April this year. |
| |
|
|
|
|
vulgalour
Club Retro Rides Member
Posts: 7,268
Club RR Member Number: 146
|
|
Apr 17, 2023 18:03:34 GMT
|
Had a brief bit of spare time to do some pressure washing on the front of the donor car so that I could see the fixings for the components. Previously, this was mostly just lumps of ancient grease. 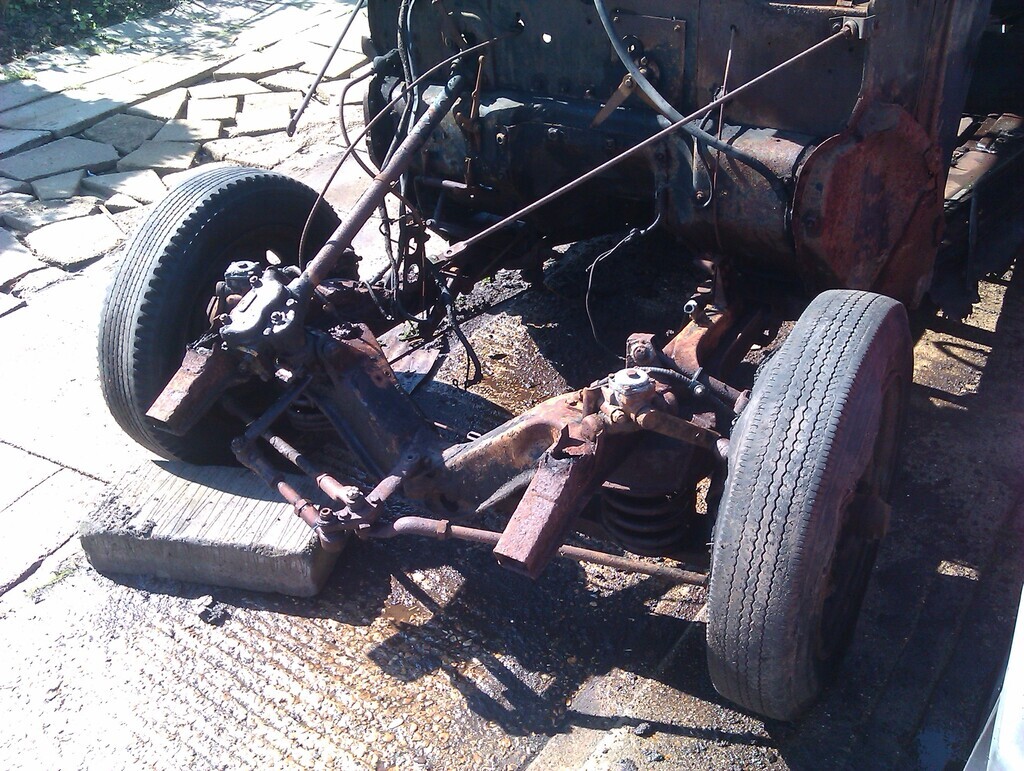 The grease will hopefully have helped preserve the fixings and we might stand a chance of undoing things. Hopefully it means components aren't too badly worn either since it suggests someone was at least greasing things regularly, if messily. 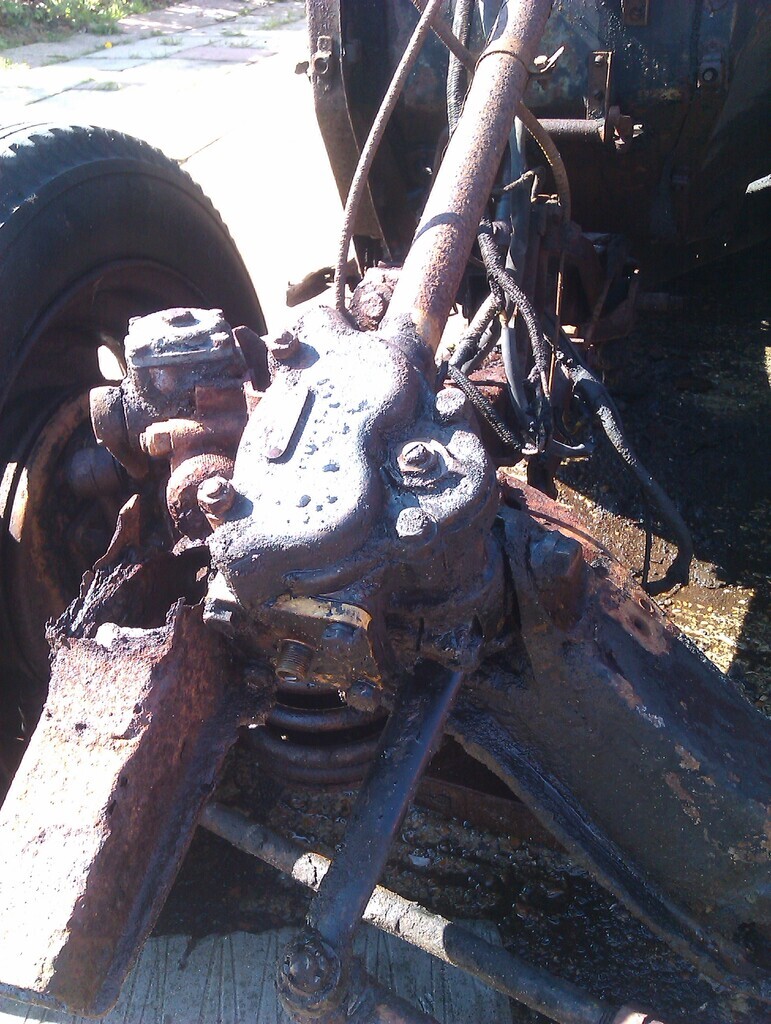 The components are very tightly packed in, I'm not expecting disassembly to be much fun because a lot of it looks like it's going to be spanners only due to access. 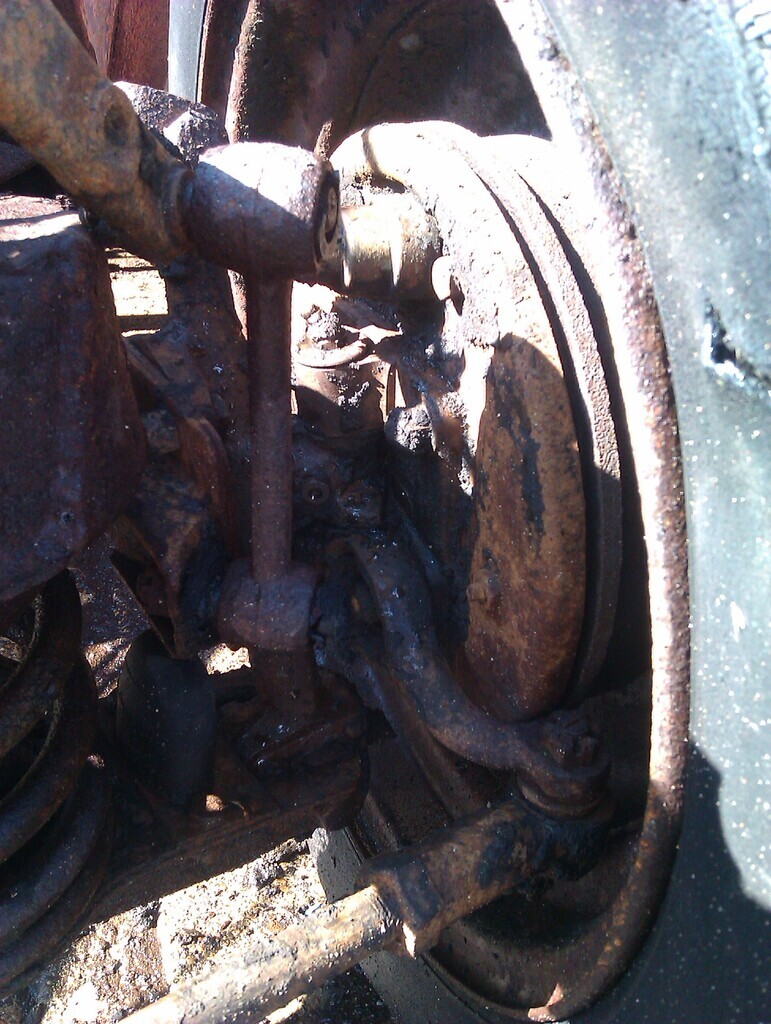 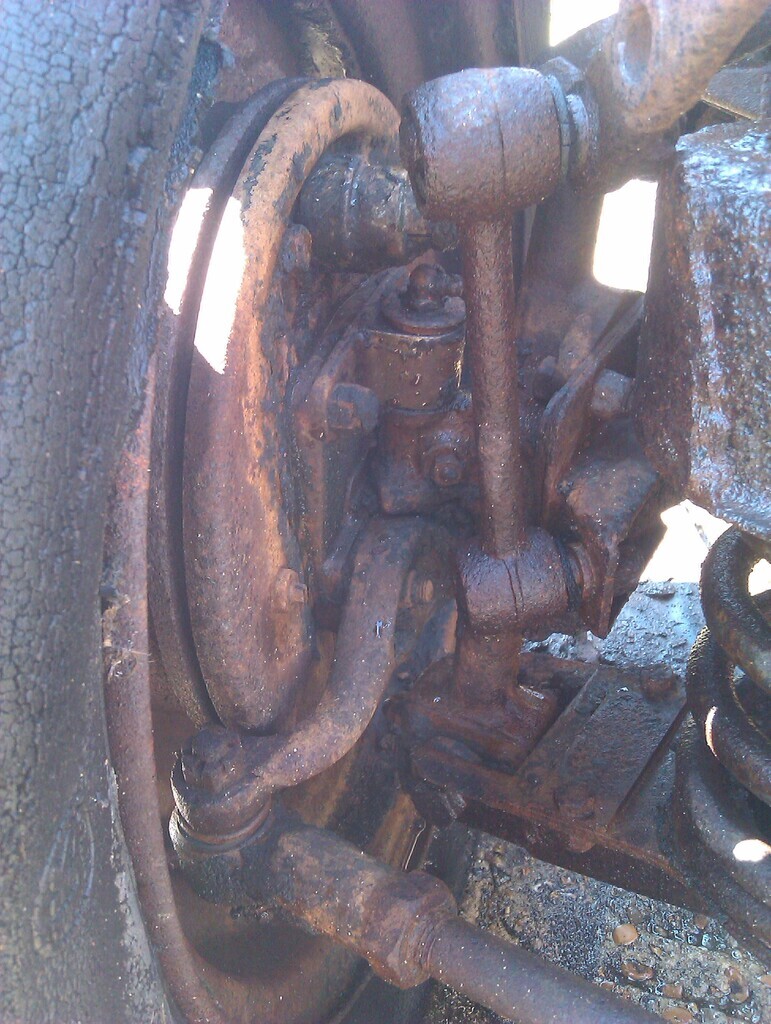 These two bolts in the front crossmember were totally invisible until I got the scrapers, screwdriver, and pressure washer on them. Seems to have kept the rust at bay, so that's something, and this is one of the few bits I can probably get a socket on. 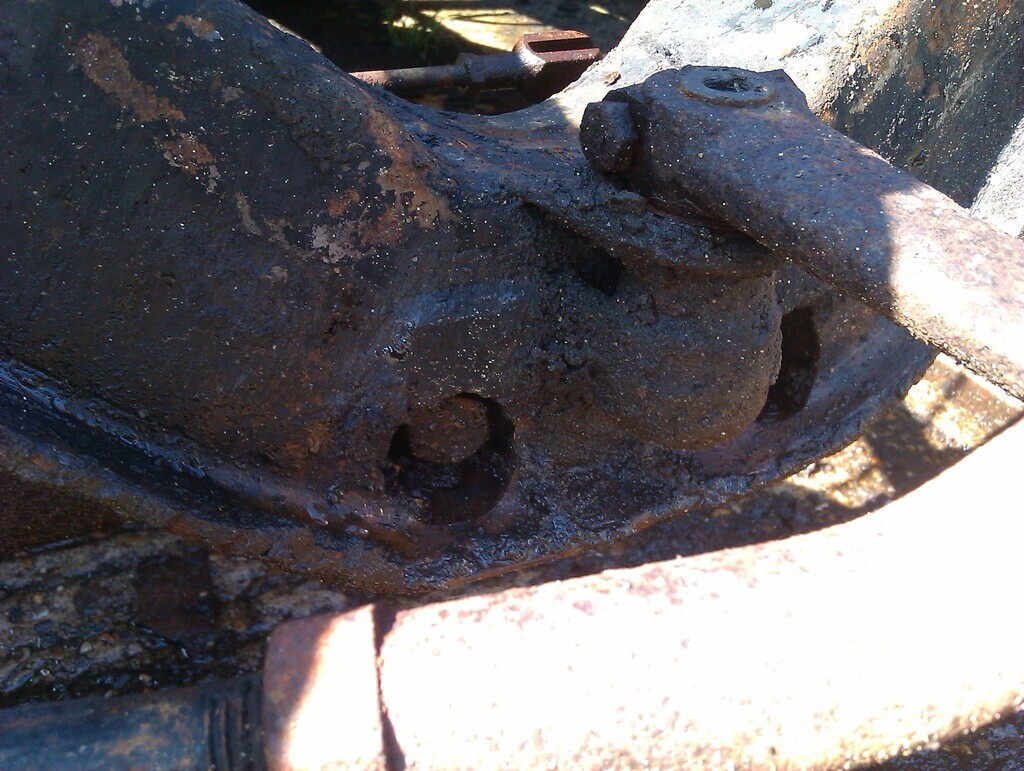 Later this week/end I'm hoping to start disassembling all of this. I'm not sure what order to approach it in, nor how I'm going to deal with the front springs since I don't think my compressors will fit them. We shall see what happens, it's going to be a learning experience. |
| |
|
|
|
|
|
Apr 17, 2023 19:29:50 GMT
|
|
a pre emptive squirt of water displacer formulation 40 and the 'hot spanner' on standby! sometimes dismantling things is like a therapy, especially when you can hit things with hammers although hammers do also have the tendency to be attracted to the part you are trying to preserve. these days i start with a rubber mallet...
also please take care with the springs!
|
| |
 2006 Audi A3 2003 Fusion 2 looking for a project.... |
|
vulgalour
Club Retro Rides Member
Posts: 7,268
Club RR Member Number: 146
|
|
Apr 18, 2023 17:44:20 GMT
|
Today after work I got the front wheels off. Happily, the wheel nuts came undone quite easily, with one on each wheel being tighter than the rest, presumably these were the ones sat in the mud. 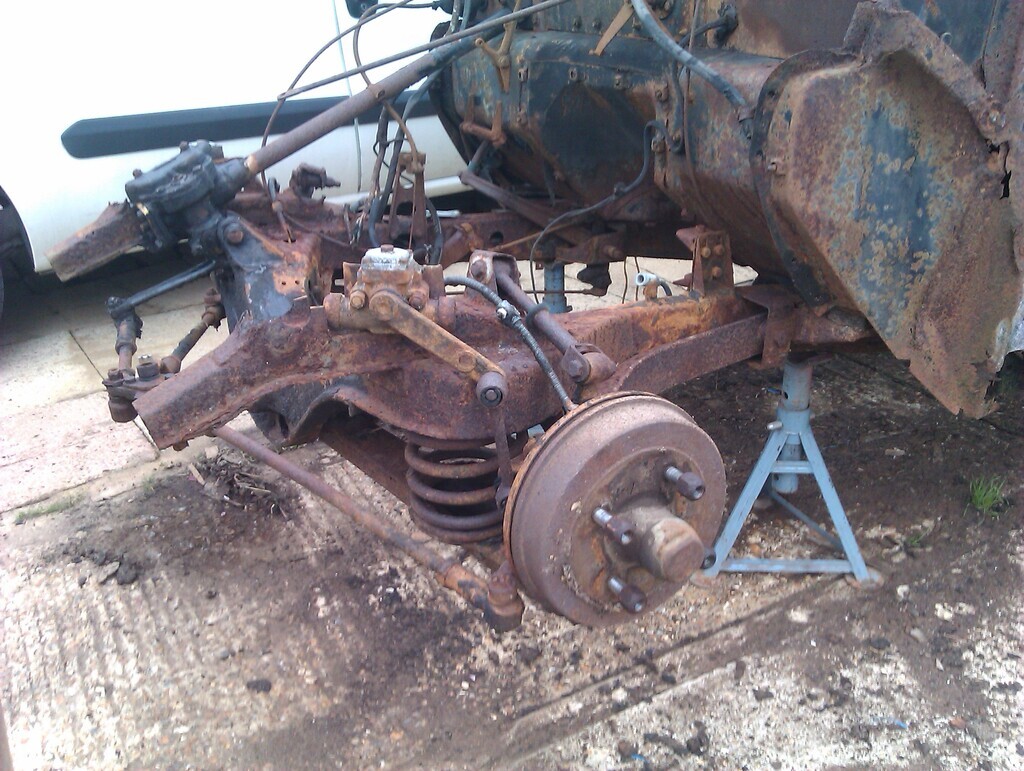 With it up on stands the suspension droops a lot more than expected and gives much better access to the springs so I should be able to get my compressors on there after all. 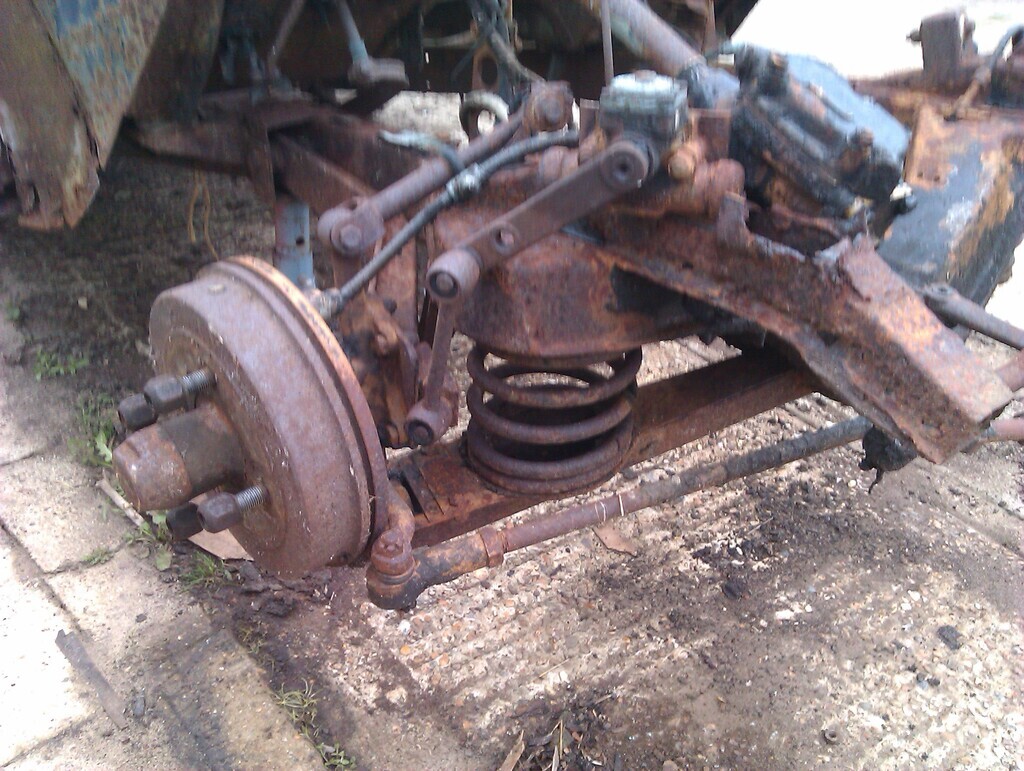 One thing I hadn't realised is that there is no antiroll bar or links fitted to the donor car. Presumably a previous owner removed them along with a few other things - front apron, both bumpers, driver's seat, gearbox, radiator - that didn't come with the car. With the front wheels off I can see better how everything goes together and have a slightly better idea of how to dismantle things. It will be interesting to get a look inside the brakes and possibly swap some parts over there. On KKV222 one of the front driver's side wheel studs comes out with the wheel nut, which isn't at all ideal, but the studs on the donor behave normally so that should solve a problem we have there that might otherwise have been a bit difficult to resolve. Front wheels look in reasonable shape too so hopefully they will restore nicely. As I've been cycling parts through the oxalic acid I have learned that three of the four hub caps are probably re-chromable, and the water pump is complete and rebuildable. The former is unlikely to happen for quite some time, I'll just be sure to store the hubcaps better so they don't degrade further. The latter is going to be a little project for me to undertake once the donor remains are disposed of since I don't want to start more projects before completing existing ones if I can at all help it. I'll continue chipping away at what I can as time permits. |
| |
|
|
glenanderson
Club Retro Rides Member
Posts: 4,319
Club RR Member Number: 64
|
|
Apr 18, 2023 17:51:54 GMT
|
|
I’d not worry about trying to compress the springs. Just take the weight of the car on the underside of the bottom arm to compress the spring a bit, and then undo the arm and drop it down.
|
| |
My worst worry about dying is my wife selling my stuff for what I told her it cost...
|
|
vulgalour
Club Retro Rides Member
Posts: 7,268
Club RR Member Number: 146
|
|
Apr 18, 2023 18:21:43 GMT
|
|
I wasn't sure if that would be safe, I don't know what sort of tension they're under even though they look pretty soft.
|
| |
|
|
Rich
Club Retro Rides Member
Posts: 6,320  Club RR Member Number: 160
|
|
Apr 18, 2023 19:37:40 GMT
|
I wasn't sure if that would be safe, I don't know what sort of tension they're under even though they look pretty soft. Can't go anywhere if the weight of the car is still on them. The weight of the car is the weight of the car. It's how you remove MGB springs. |
| |
|
|
|
|
|
Apr 18, 2023 19:51:26 GMT
|
|
Put some rope through the coils & around the chassis for good measure.
|
| |
|
|
|
|
|
Apr 18, 2023 20:57:26 GMT
|
I’d not worry about trying to compress the springs. Just take the weight of the car on the underside of the bottom arm to compress the spring a bit, and then undo the arm and drop it down. i like that idea better than spring compressors! maybe also place the engine block or something equally heavy where the engine should be? sand bags/ barrel of water/ large (brave and willing) person etc as a ballast! |
| |
 2006 Audi A3 2003 Fusion 2 looking for a project.... |
|
|
|
|
Apr 18, 2023 22:04:05 GMT
|
|
Re: chromed things storage- lanolin. Cover everything in it. It'll preserve the remaining chrome nicely.
|
| |
|
|
vulgalour
Club Retro Rides Member
Posts: 7,268
Club RR Member Number: 146
|
|
Apr 21, 2023 13:56:13 GMT
|
Finally got the engine components processed through the oxalic solution and cleaned enough to see what I'm actually dealing with now the grease, loose rust, and other detritus is off. Something went very wrong at some point in its history and this engine had a bad day. I noticed when I was cleaning stuff up, some of the oil feed holes in the bearings were completely blocked. This may have been historic, this may have been from storage, I'm not sure, however given what else I saw I'm leaning toward the former. With all the parts laid out it looks like we're possibly missing a couple of bits. There's also two bearing shells that appear to be brand new still with the packing grease which I thought was old grease like everything else until trying to clean it off. I'm not sure those bearing shells are even for this engine. 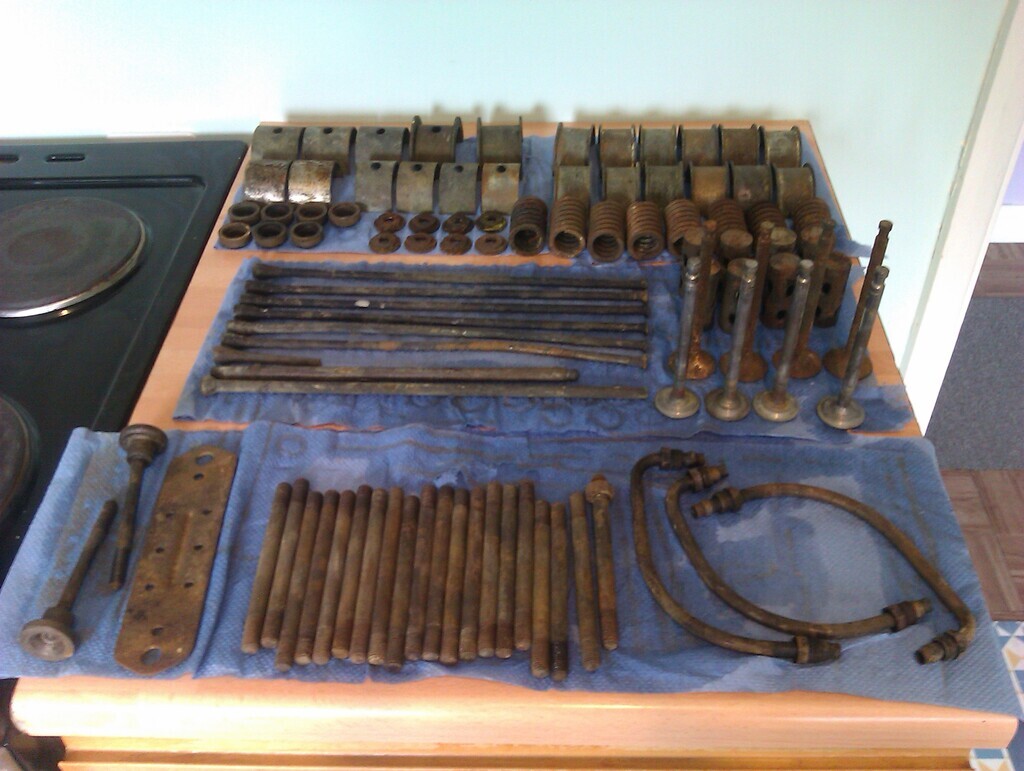 Some of the damage is from poor storage of the car before it reached us, with some pretty extensive rust pitting due to parts being in containers that were filling with rainwater. That's done for four of the valves and not given the valve springs or the valve spring seats a good time either. 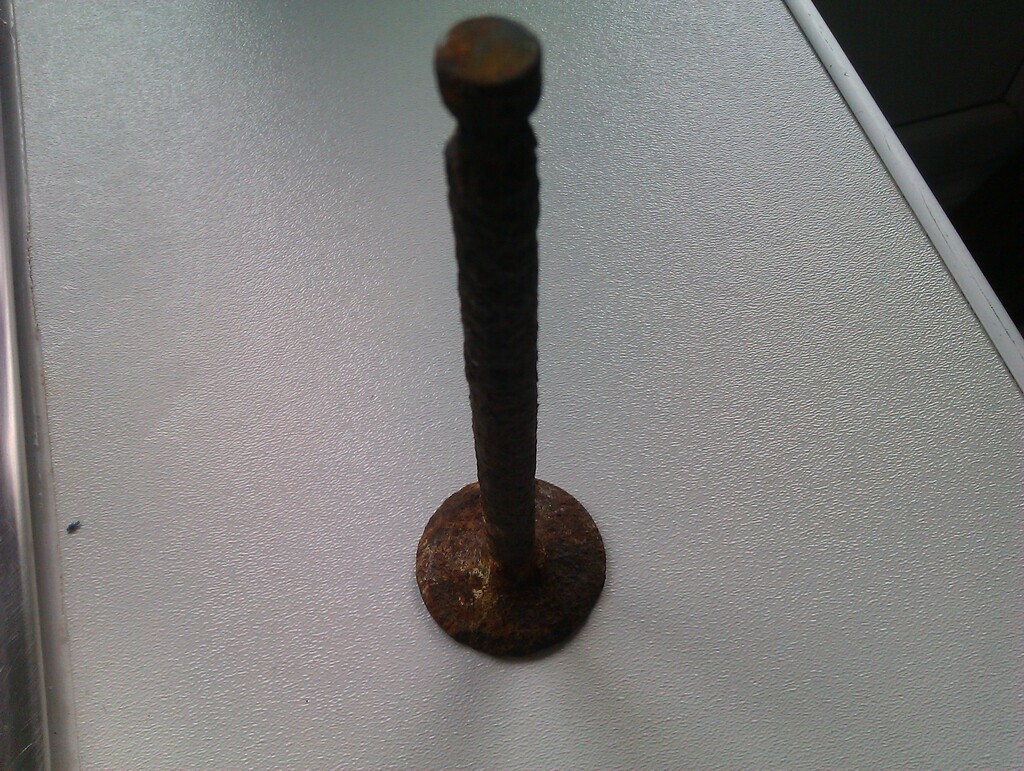 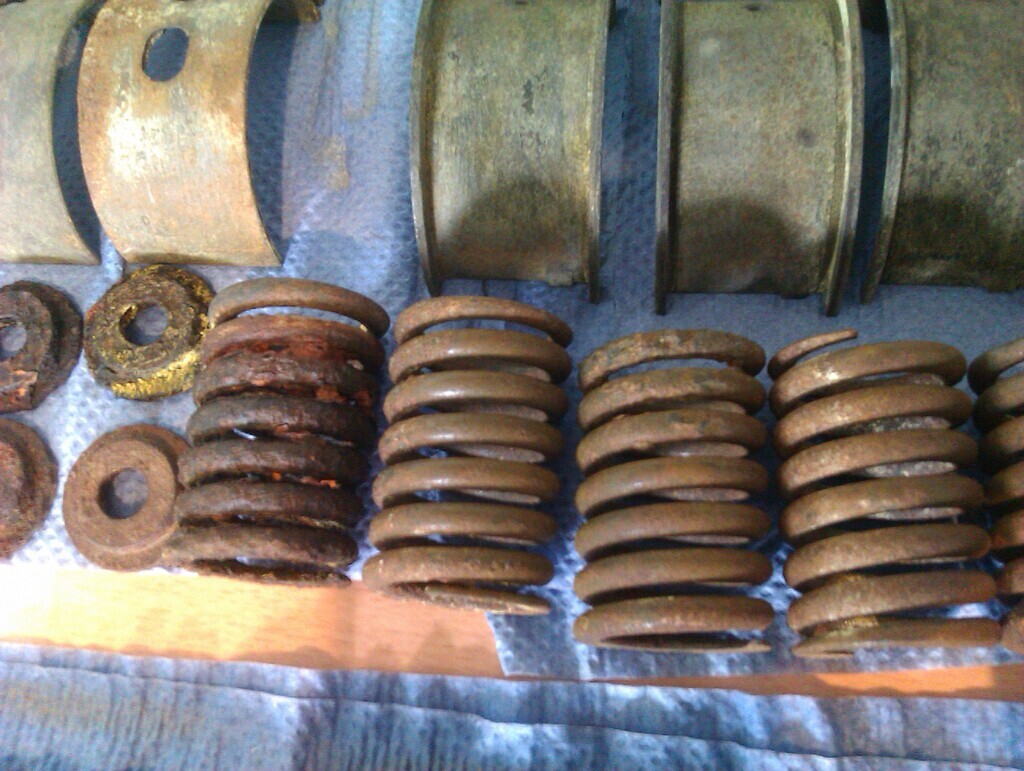 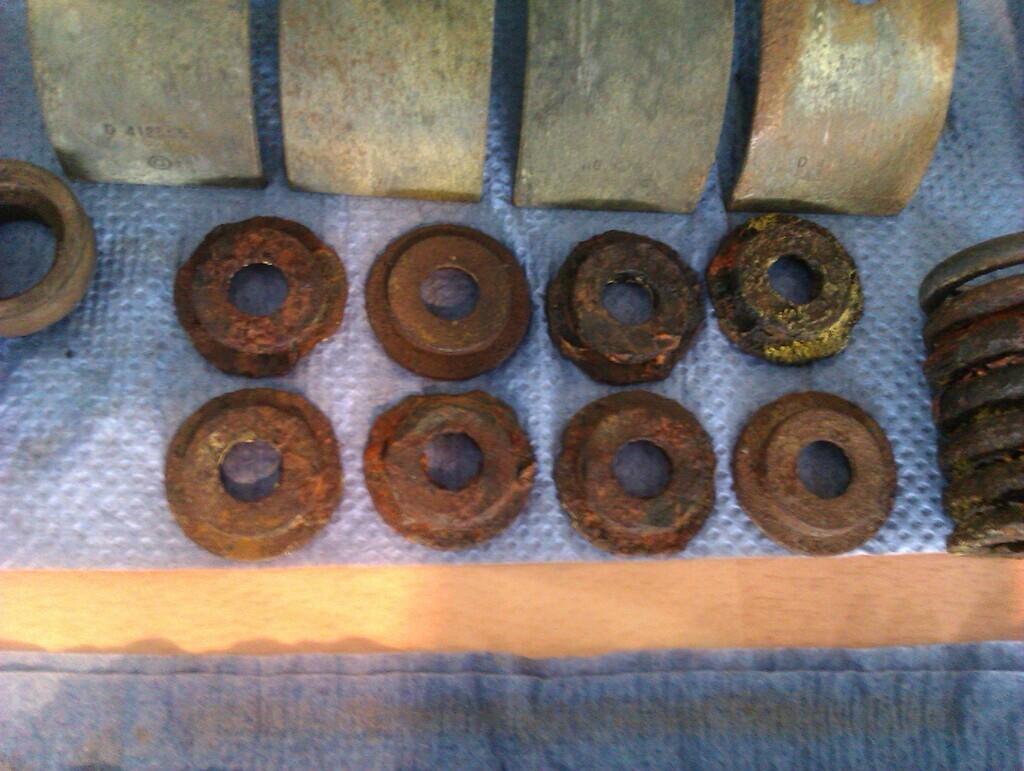 One of the bearing shells showed some bad scoring even before cleaning. After cleaning, several of the bearing shells have scores that are pretty deep. 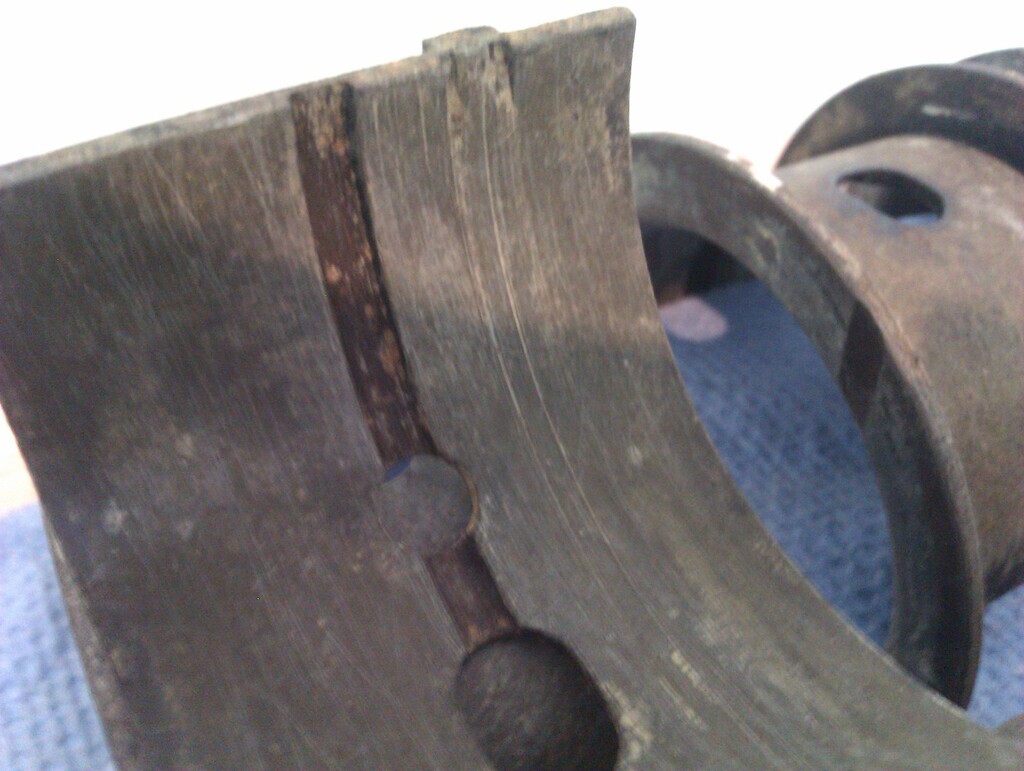 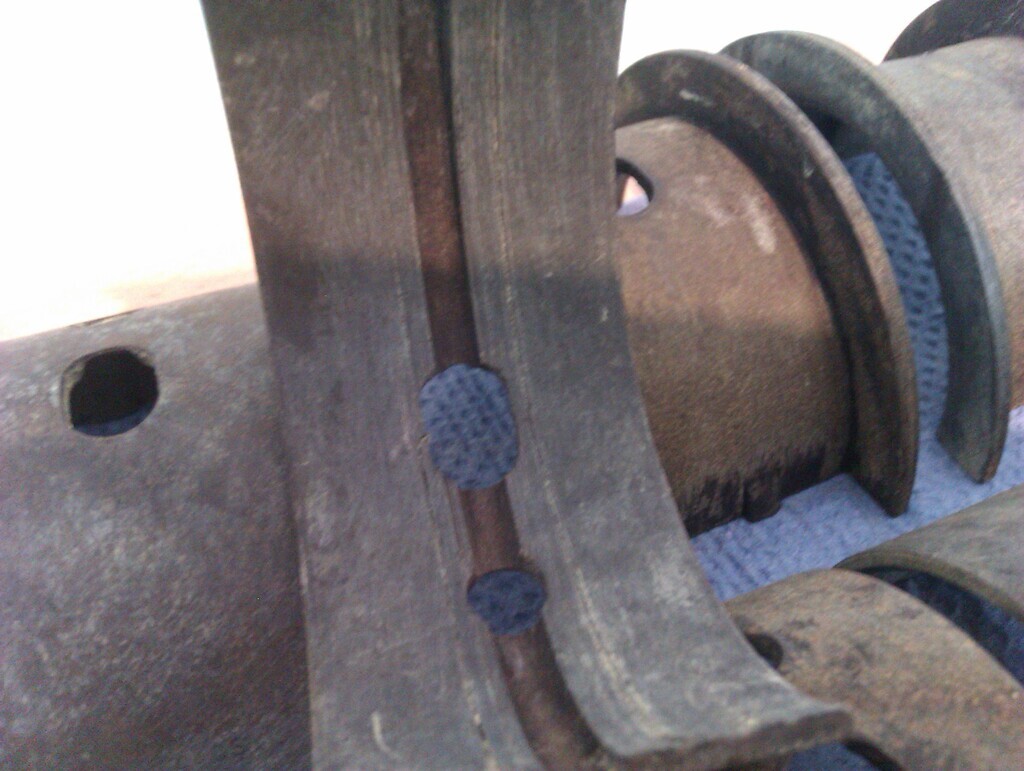 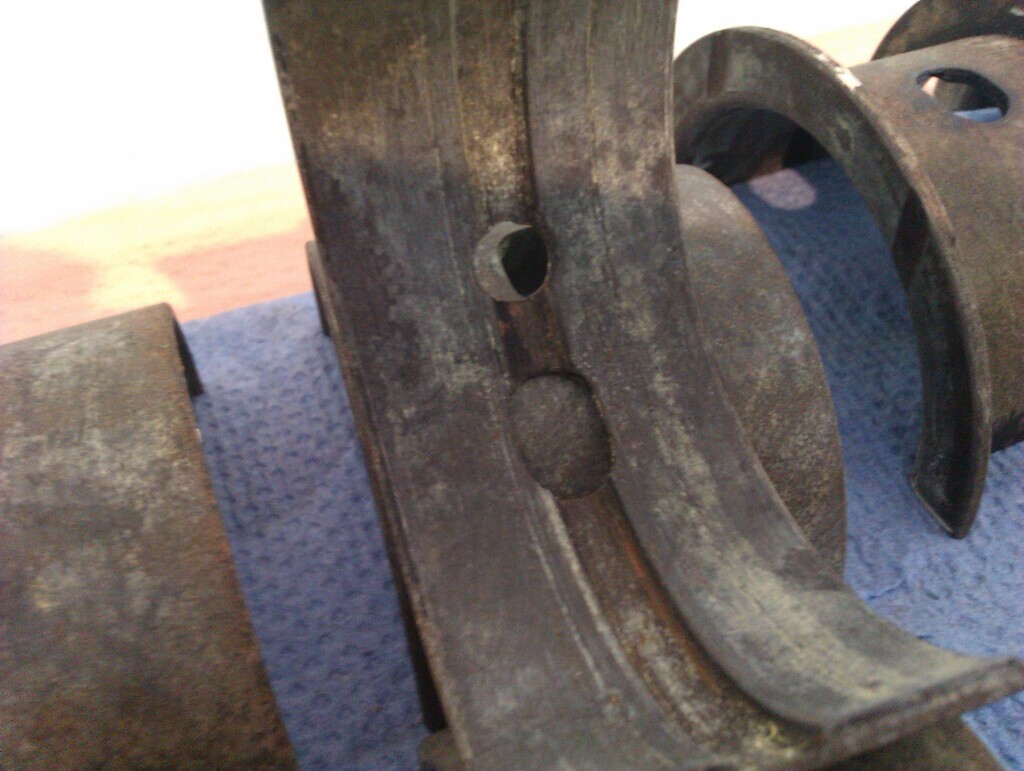 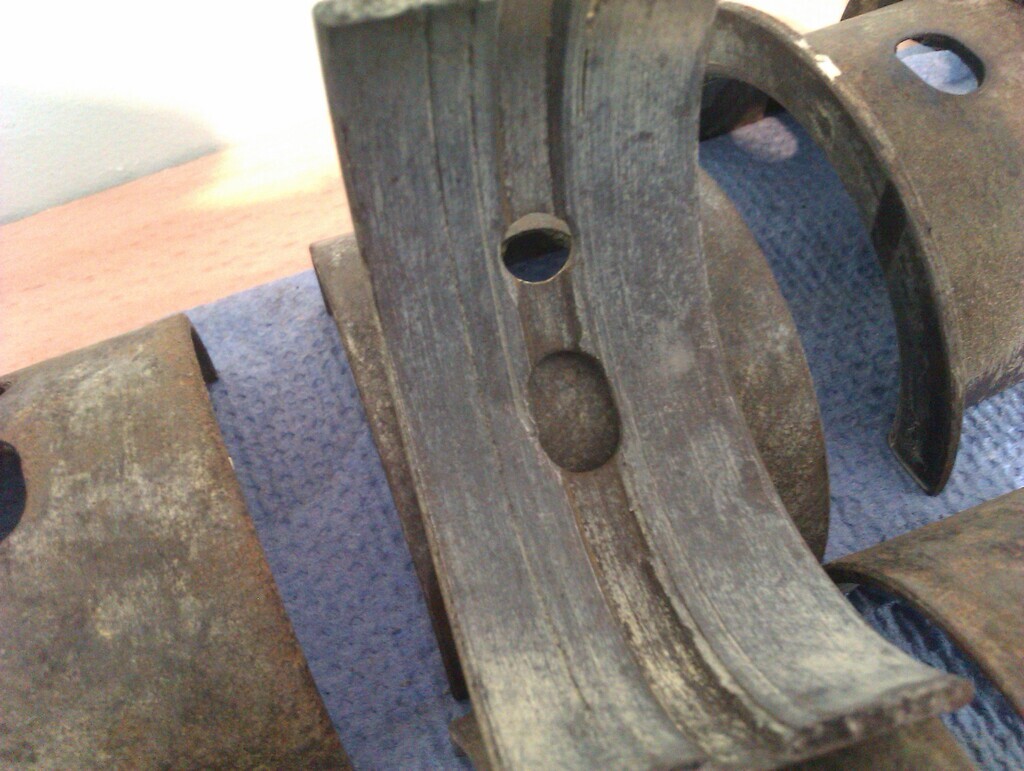 Then there's the pushrod situation. Of the original eight, only six and a bit are actually present with two from entirely different engines. The stub of the snapped pushrod looks like a twist-snap rather than a bend-snap and I've no idea how you manage to do that. The bent ones could probably be hammered straight again. Thing is, where do you even get pushrods for this engine? Maybe they're generic, I don't know. 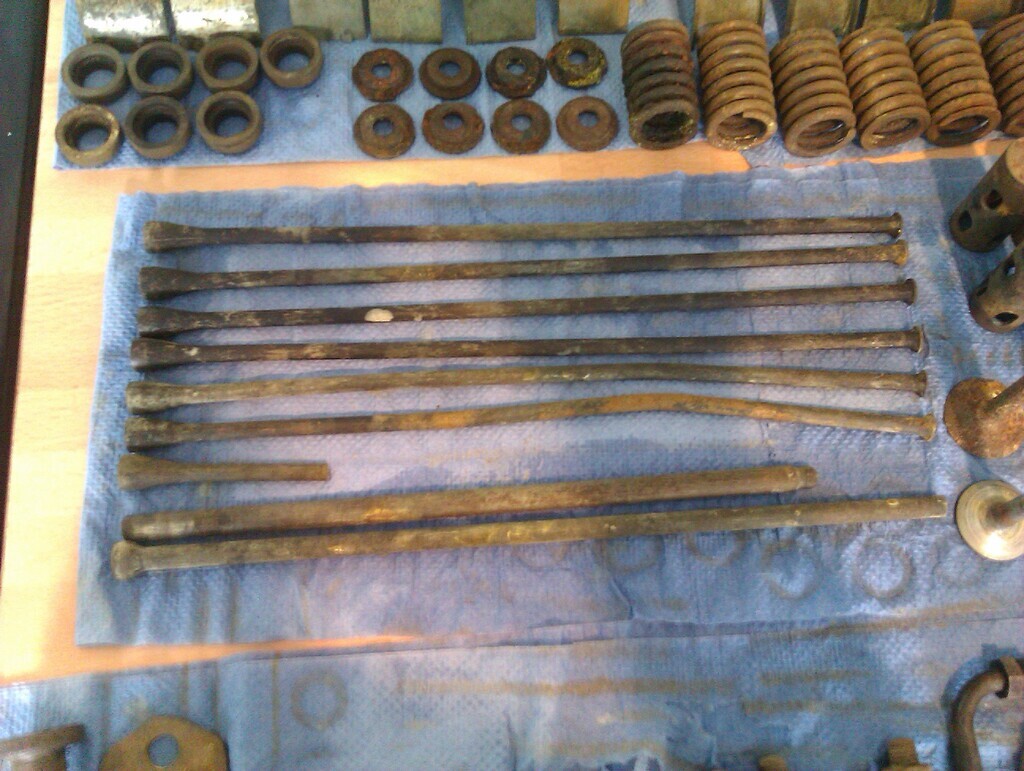 In addition to all that, the four valves that are still quite shiny and rust free have impact marks on the surface of three out of the four. Could you use these again? Would you want to? Probably best to add that to your rebuild shopping list. 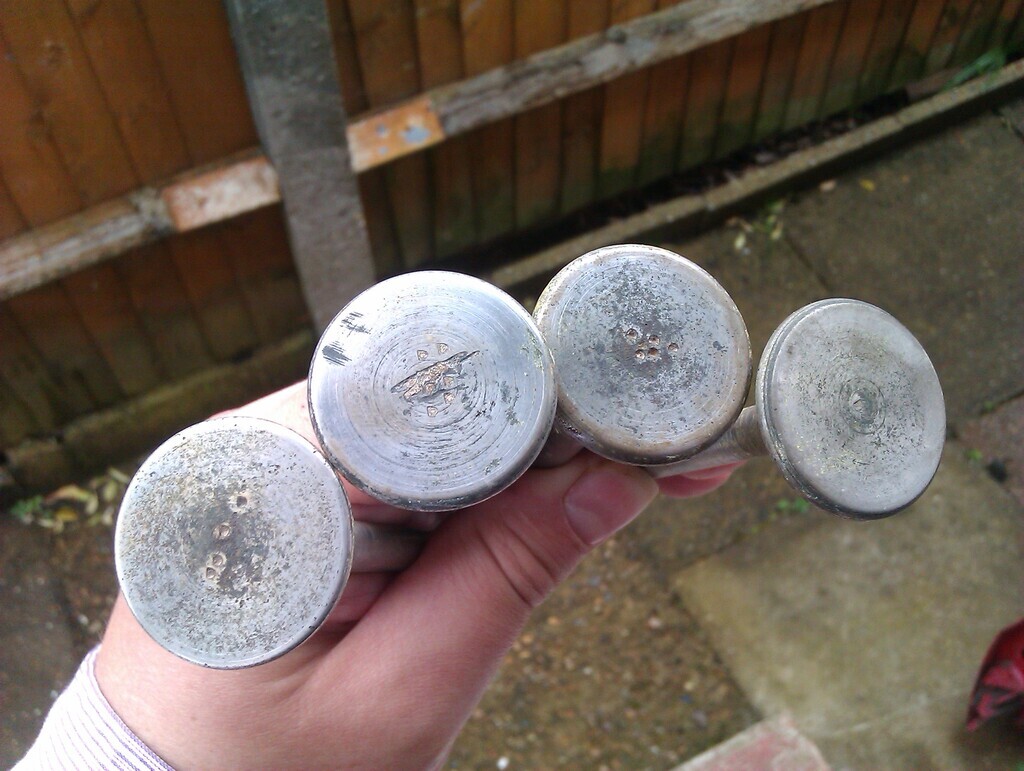 I'm definitely not getting into the rebuild of this. For one, I still don't like working on engines, and for another I've plenty of other things I'd rather spend my limit time and money on than this. I'll strip it of parts that are useful to us and that we can store, and the rest will be moved on. After I've cleaned it, I'll weigh the engine parts we're not using and they'll be available at scrap value, can't say fairer than that can I? Or make me a reasonable offer before then to save me the hassle, even better if you can collect it and get it out of my house. |
| |
|
|
vulgalour
Club Retro Rides Member
Posts: 7,268
Club RR Member Number: 146
|
|
Apr 26, 2023 17:46:44 GMT
|
I've been nibbling away at dismantling as time permits this week and have made a bit of progress. 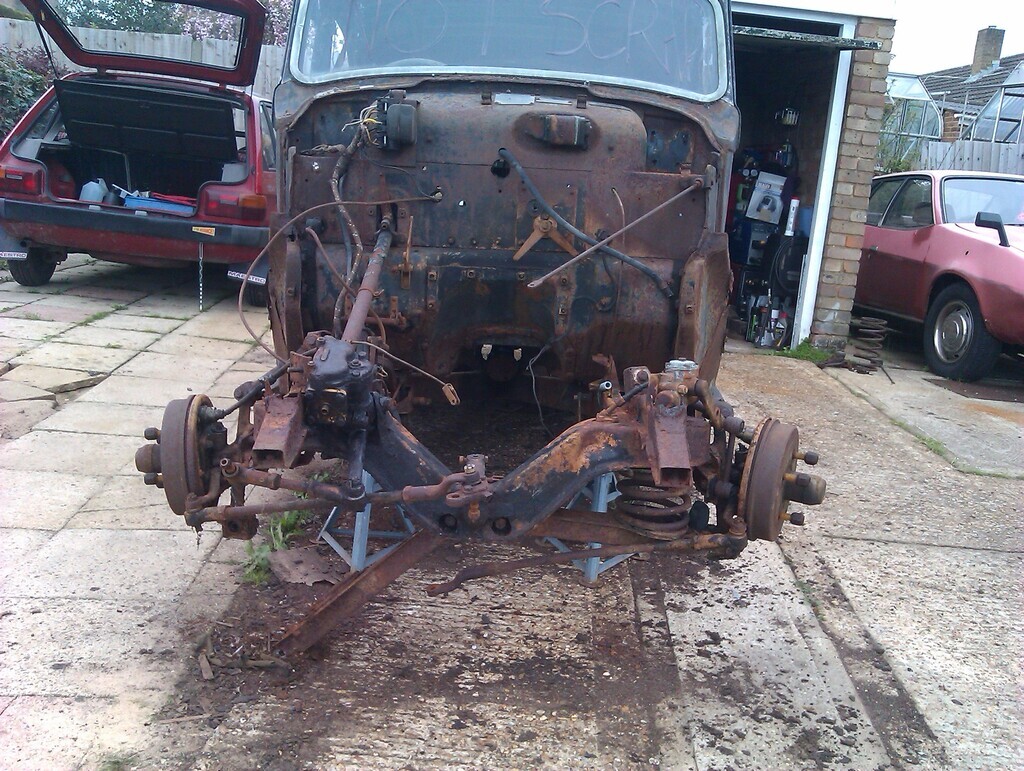 As you can see, some of the driver's side suspension is now off. Since I'm not sure of the proper process, I've just gone for what appears to make most sense and see where it takes me. First up was grinding what remained of the bolt heads holding down the brake cable plate, this was tricky because the steering column and box are still attached. I normally wouldn't resort to grinding bolt heads off but in this case it was necessary since the heads were closer in shape to pyramids than hexagons. I then unbolted the lever arm suspension damper thingy which, amazingly, just unbolted from the car. Minor disassembly issue in that one of the bolts can't actually be removed without removing the steering box so I guess the steering box went on after the suspension originally. 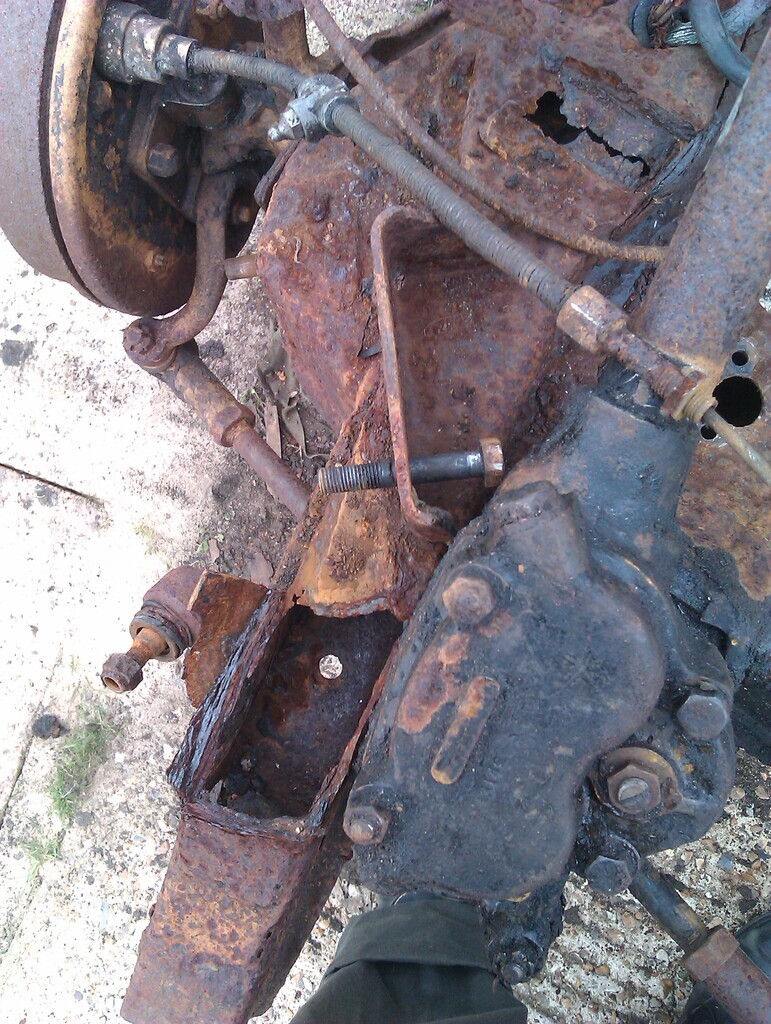 I wasn't sure how I was going to unbolt the suspension piece from the droplink at first. Turns out it wasn't a problem because the rubber bush was so badly degraded the components simply fell off. I imagine normally there's some resistance with this part. That done attention turned to the lower bolt that holds the hub to the lower arm. I had hoped this would just unbolt since it looked in reasonable shape, however it quickly became apparent the only way it was parting company was with the help of an angle grinder so I did just that. With a jack under the arm and a little help from Pat to put some downward pressure on things as I knocked the stub of the chopped off bolt through, I then released the jack and let the pressure from the spring gently lower it. No need for spring compressors, happily, just a bit of patience as the spring pushed the lower arm out of the way and could then be lifted out safely. 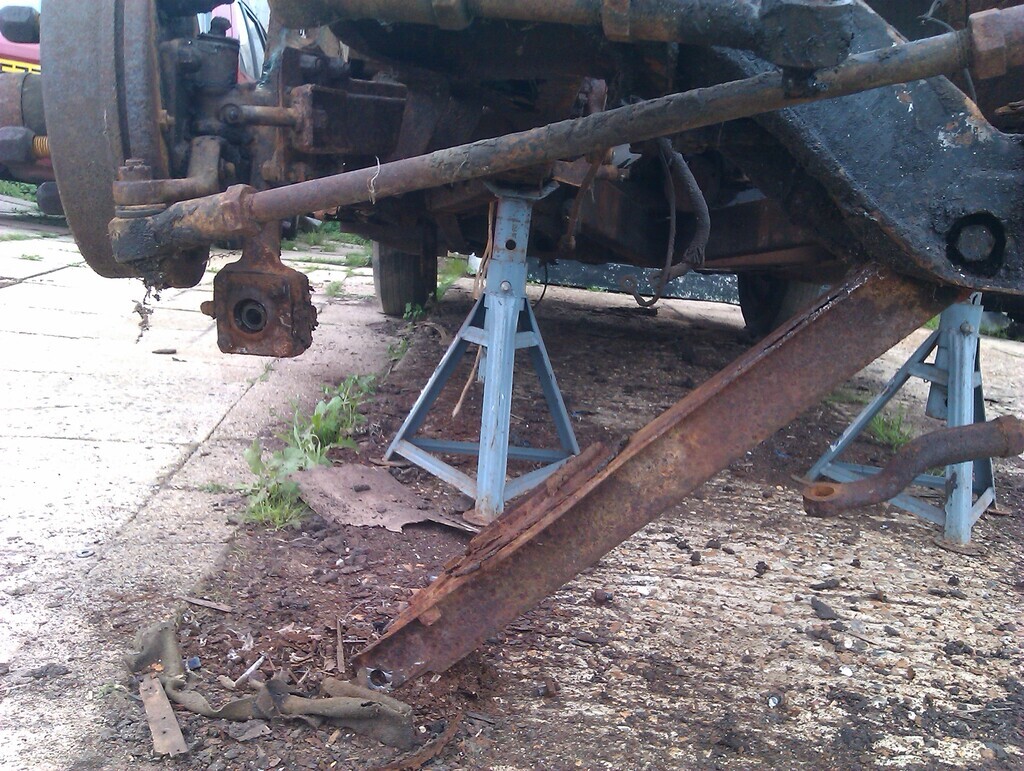 I set aside the rubber bushes that locate the bottom of the hub in the arm just in case I need those in the future for reference or use if they're still okay. I had hoped to then remove the lower arm since it's now only held in with a bolt that goes through the crossmember. Unfortunately, the bolt is completely stuck in the bushing and I can't get it to let go. The nut did come undone really easily. I'm assuming there's a rubber bush inside that's binding everything up, it's not a problem for now. 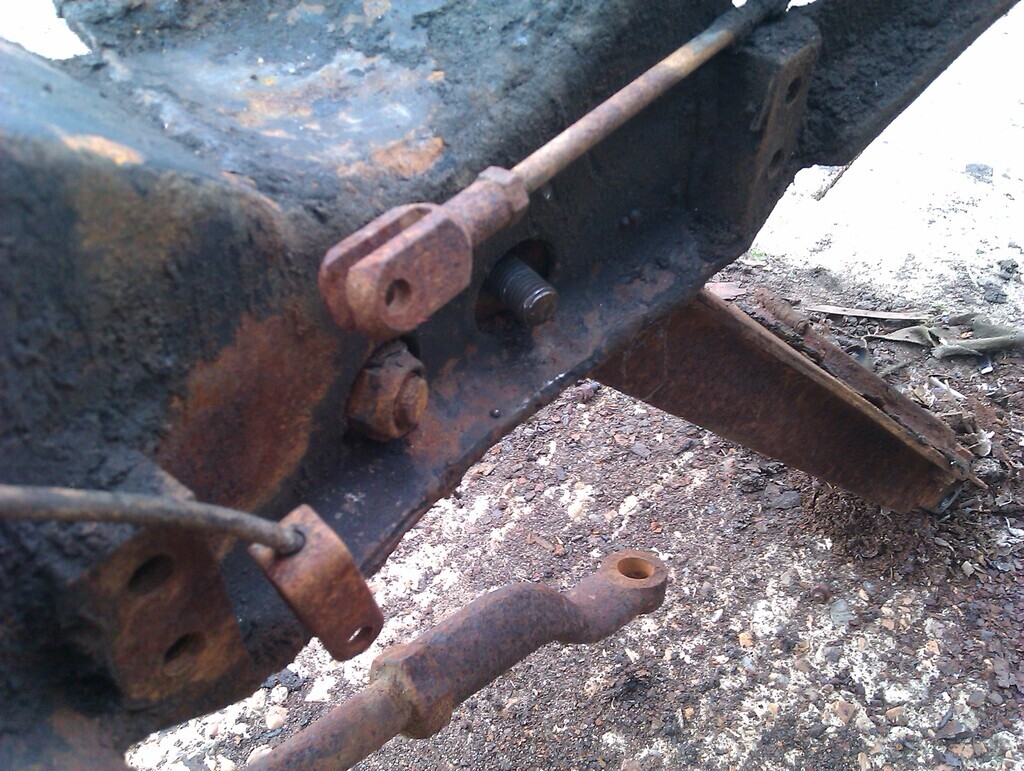 Once that's out the only thing that looks to be holding this hub on is the through bolt at the bulkhead end that goes through the chassis and the long arm. I made an attempt to undo this on my own but I think this is a two person job so that you can get a decent amount of force on each tool used. 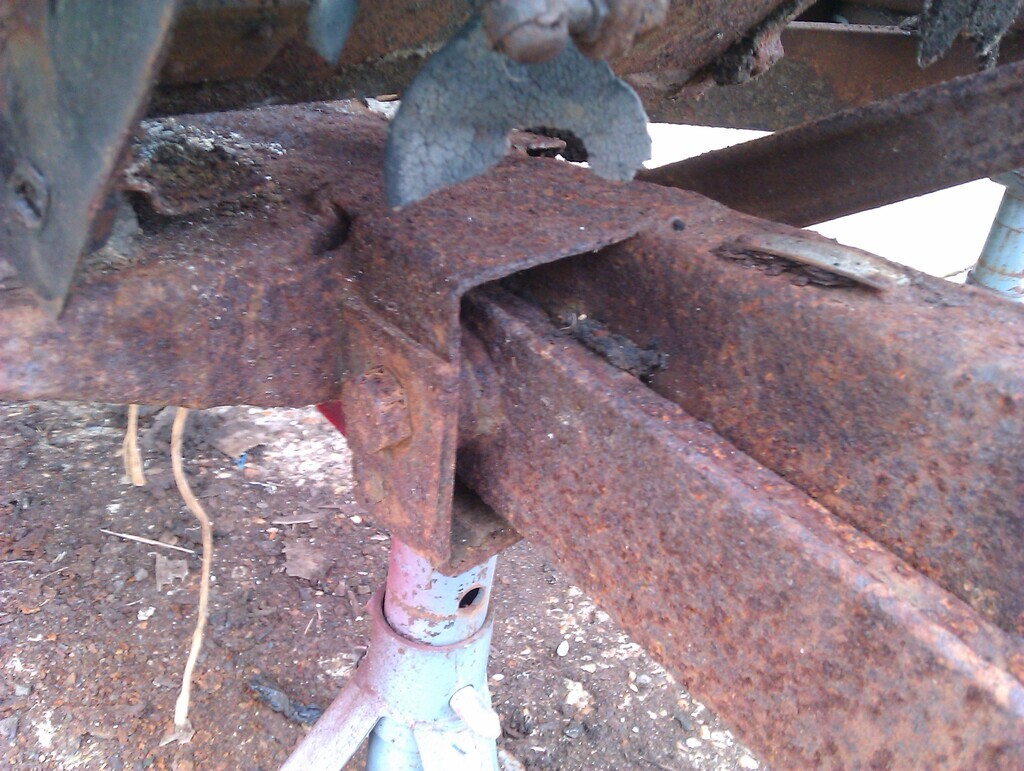 All done, a few pieces liberated One front spring, a lever arm shock absorber thing, droplink, brake cable guide plate, bulkhead wiring harness clamp, a couple of bushes, and one of the radiator stays since I was fed up of it poking me in the head. 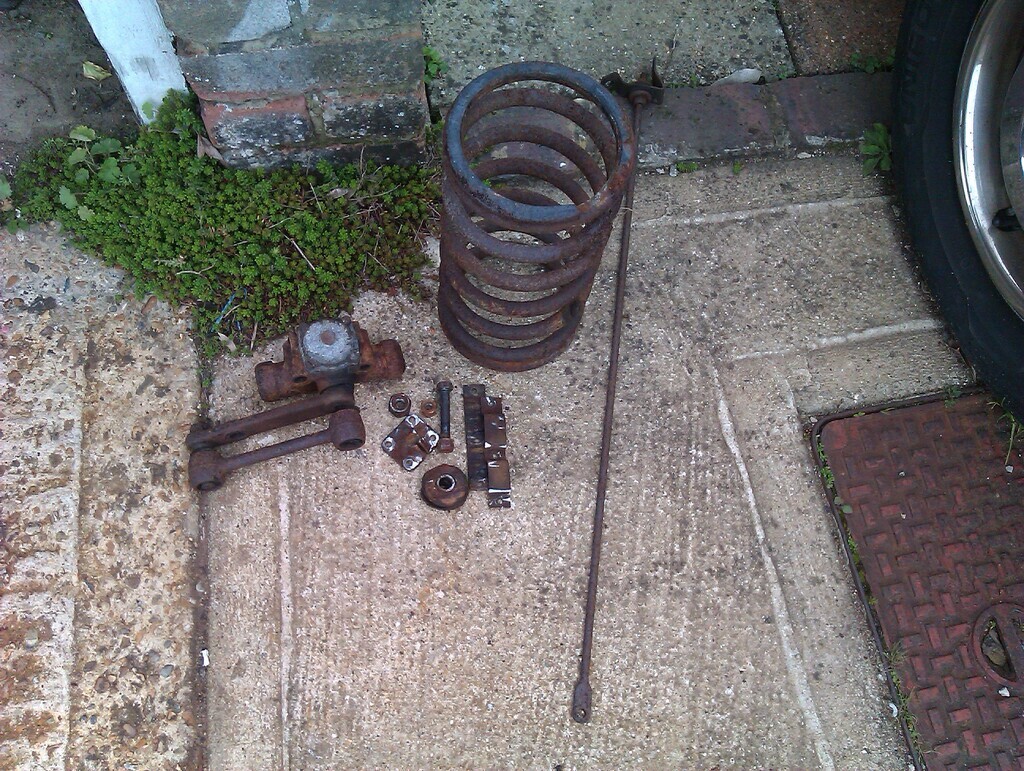 |
| |
|
|
vulgalour
Club Retro Rides Member
Posts: 7,268
Club RR Member Number: 146
|
|
Apr 28, 2023 12:54:30 GMT
|
I win! 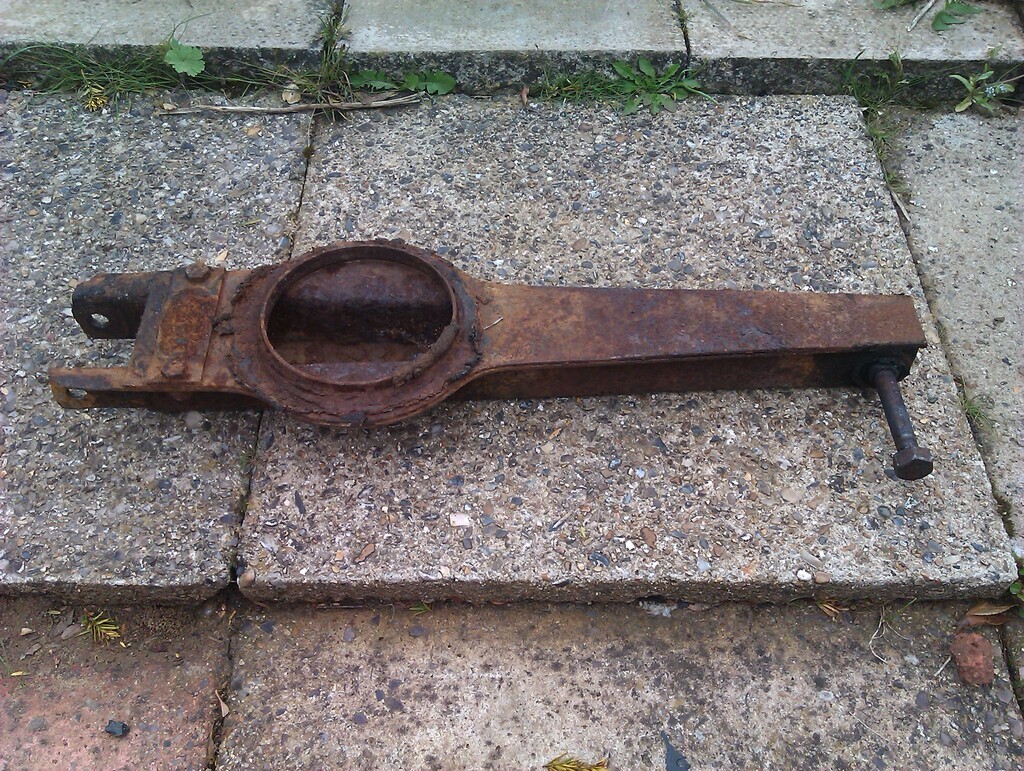 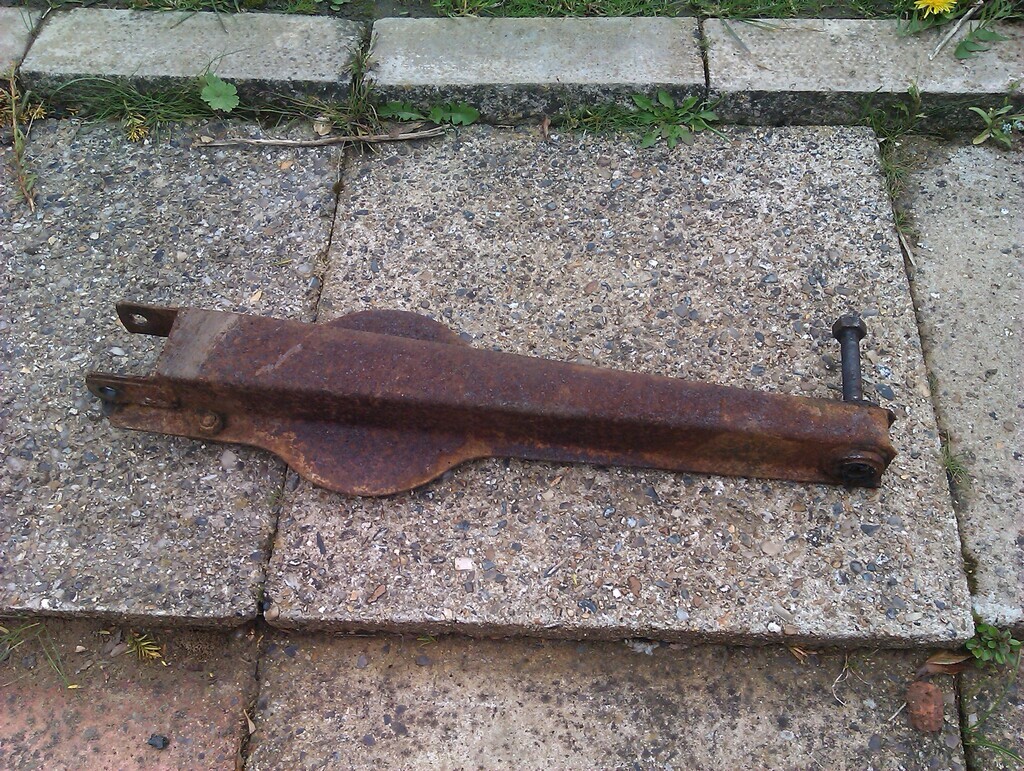 That was more effort than it should have been, not as much effort as it might have been. Arm looks to be in decent shape, just some cosmetic rust really. The bush still seems to be okay too, surprisingly. To get it out I tried a variety of approaches, the most effective was to get my little butane torch in as close as I could - initially I was trying to melt the rubber bush, this was something it turned out I couldn't actually do - and then walloping the threaded end of the bolt with a lump hammer. This has made a mess of the threads, predictably, but since you couldn't leave the nut on and hit that since it wouldn't pass through the hole the bolt goes through it was one of those things that was unavoidable. Once the bolt was to a point that I couldn't hit it with a hammer I drifted it through first with a socket extension and then a large punch and eventually got it out. The reason you can't actually set fire to the bush is the arm has baffles in to protect it and align the bolt, on the plus side, this means the bush is still in pretty good shape as far as I can tell, just a bit messy with old crusty oil deposits from the surrounding crossmember. 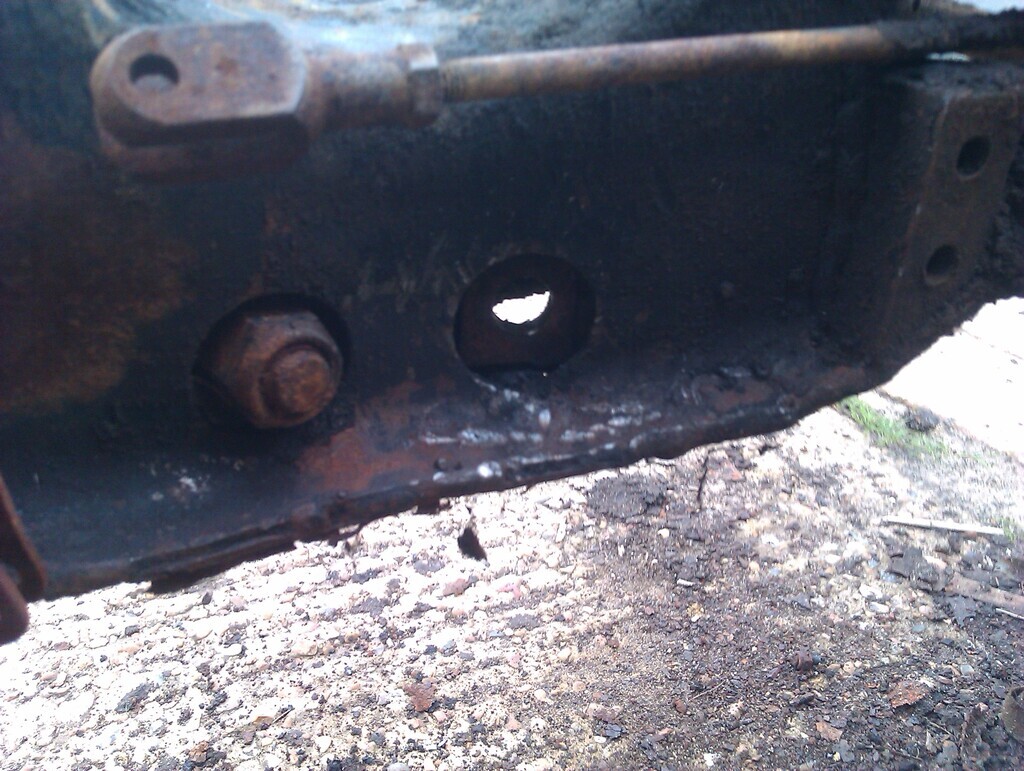 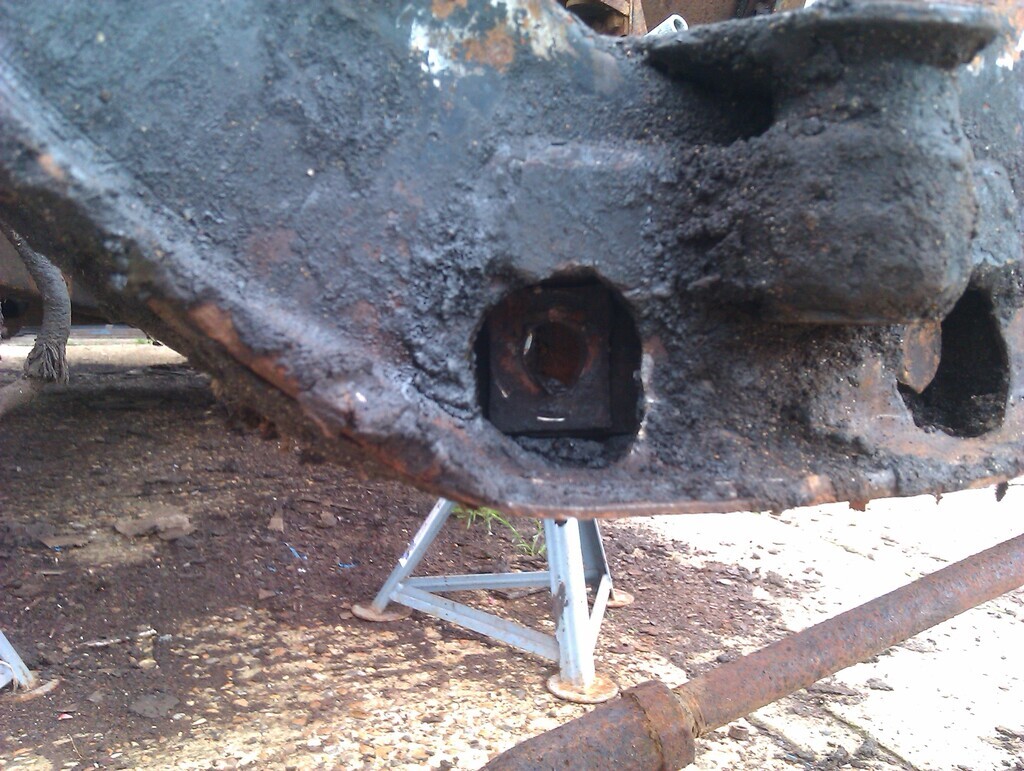 The reason the bolt was stuck wasn't what I'd expected. I assumed it was seized to the metal inner collar of the bush and the rubber had deteriorated which is why it would rotate but wouldn't push out. Turns out, the old grease on the shank of the bolt had just got so sticky and solid it was preventing the bolt from sliding. Heat from the butane torch softened the grease just enough that applied force could move things apart. 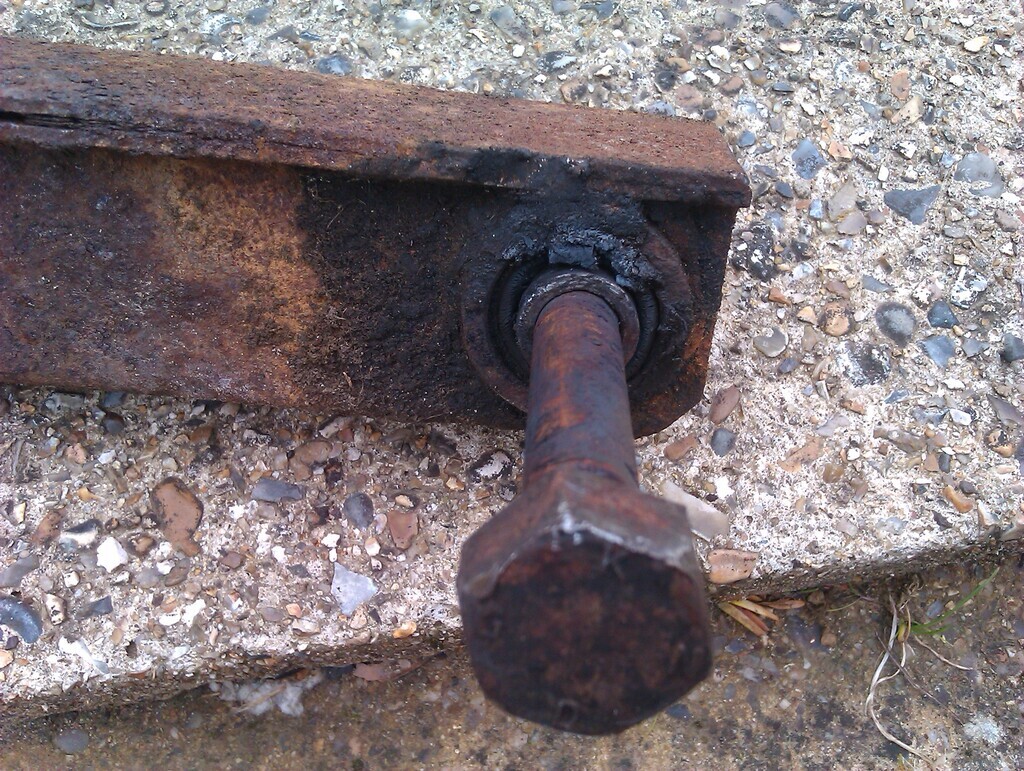 I'll see if I can file out the damage to the bolt threads so that I can get the nut back on and keep the arm together for storage purposes. Ideally, you'd replace the bolt. It's one more little piece of the puzzle solved, last thing for this corner is that bolt for the long arm which hopefully Pat and I can tackle this weekend. |
| |
Last Edit: Apr 28, 2023 12:55:39 GMT by vulgalour
|
|
vulgalour
Club Retro Rides Member
Posts: 7,268
Club RR Member Number: 146
|
|
Apr 29, 2023 17:40:02 GMT
|
Pat and I got the front and rear screens out today and discovered quite a lot of rot. 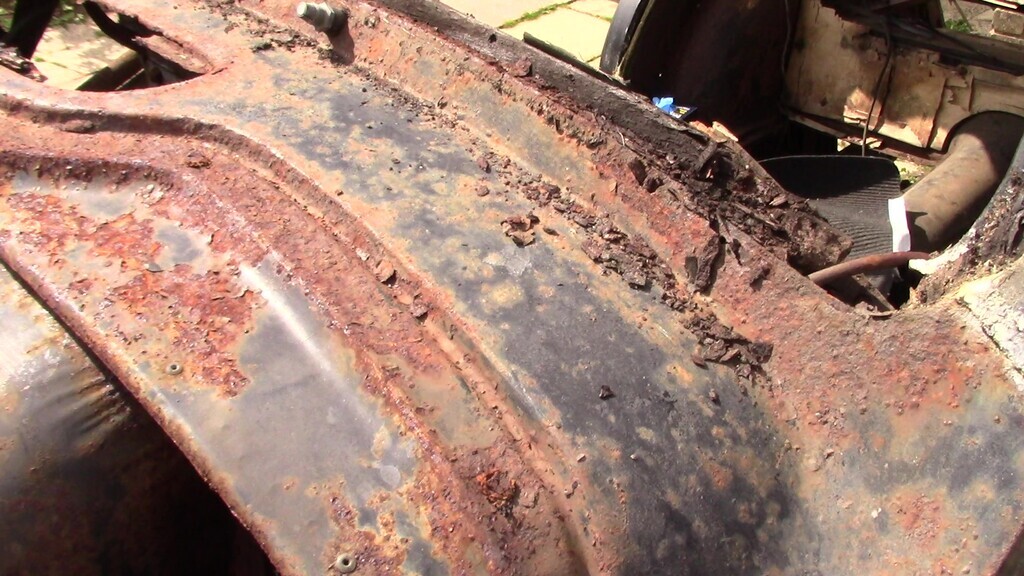 The rear screen is afflicted with woodworm in the frame. What was rather concerning is that after removing the glass we realised that some of the body was moving independently of the rest of the body even though it should be bolted to the chassis still. We knew we would probably have to break the body down, there's literally no market for it and it needs such extensive repair work to the metal and the wood that one has to accept when a thing is used up. I carefully marked out the cuts I'd make to remove the rear quarters in as whole a section as I could with minimal cutting and made a start, only to have the car begin to dismantle itself part way through the process. 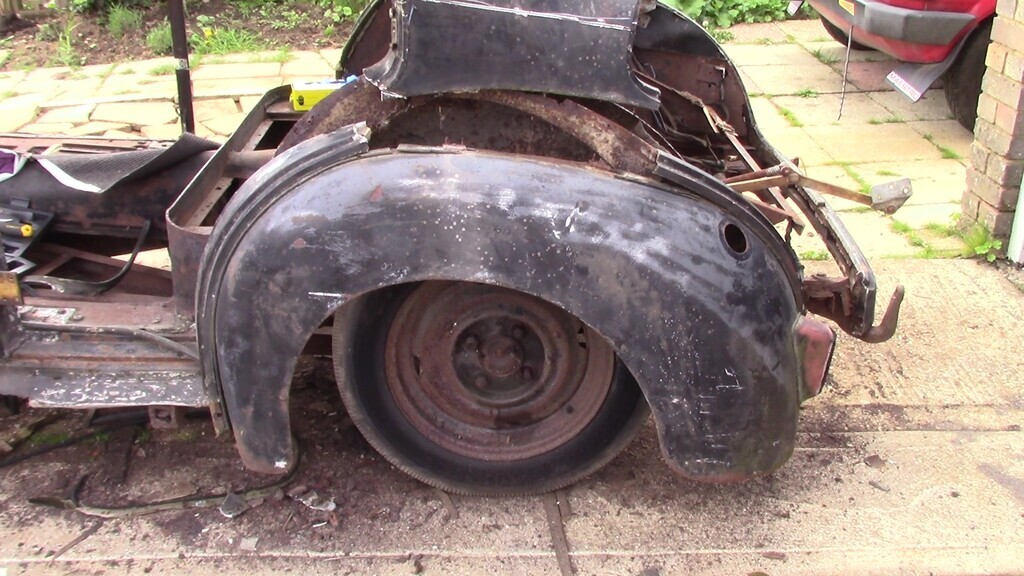 That would explain the bodywork movement. Quite a lot of the rear arch framework is totally rotten and where it isn't rotten, it's riddled with woodworm, and where it isn't riddled with woodworm or rotten it is simply gone. I ended up mostly removing the rear quarters with hand and very little in the way of force, given how fragile the state of things were it's a surprise the car actually made it all the way from Burton to Kent in one piece. 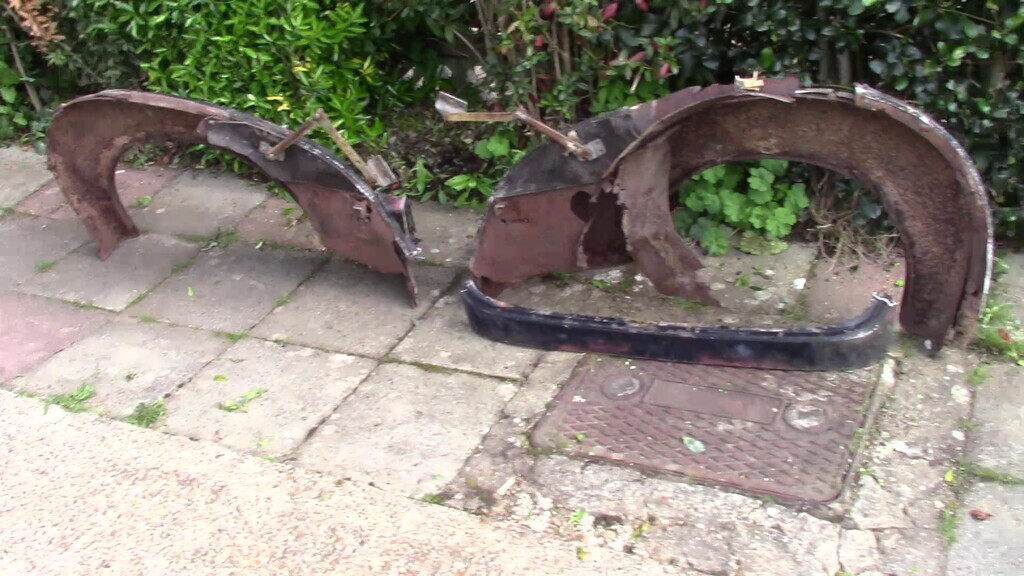 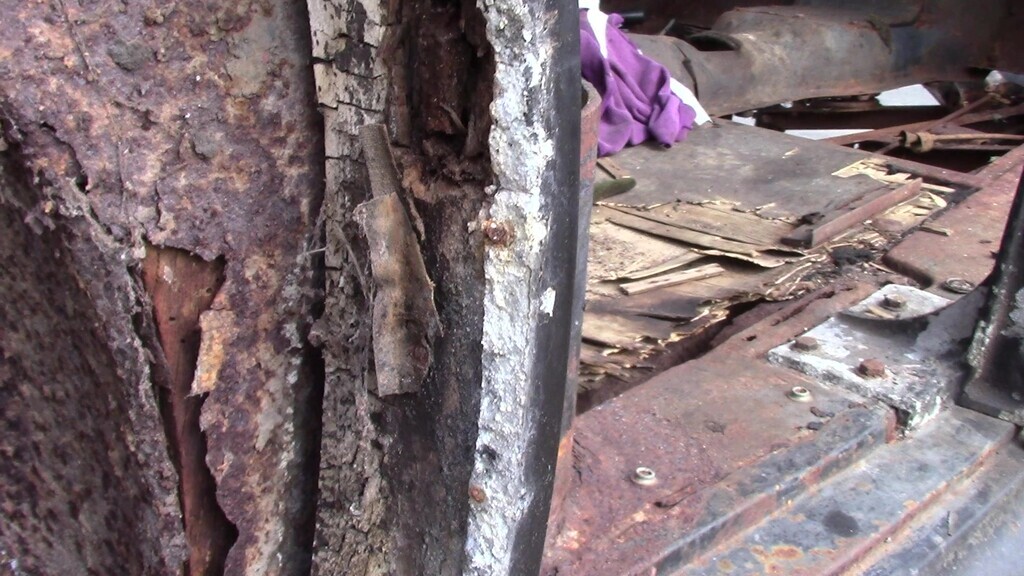 So much for salvaging a frame cut to help repair ours in the future where I've been dealing with the woodworm. With the quarters off the body was still technically bolted to the chassis, you just wouldn't know it from how much it was now wobbling about. Another long discussion was had about what to do with the rest of it. There's no way restoration was viable, the roof had woodworm in the frame and being aluminimium wasn't really desireable amongst the classic modifying community and wasn't even of use as a donor panel. The value in the roof was definitely the outer skin, most of which I'll salvage and store for future use. The wooden frame is little more than firewood. So off it came. 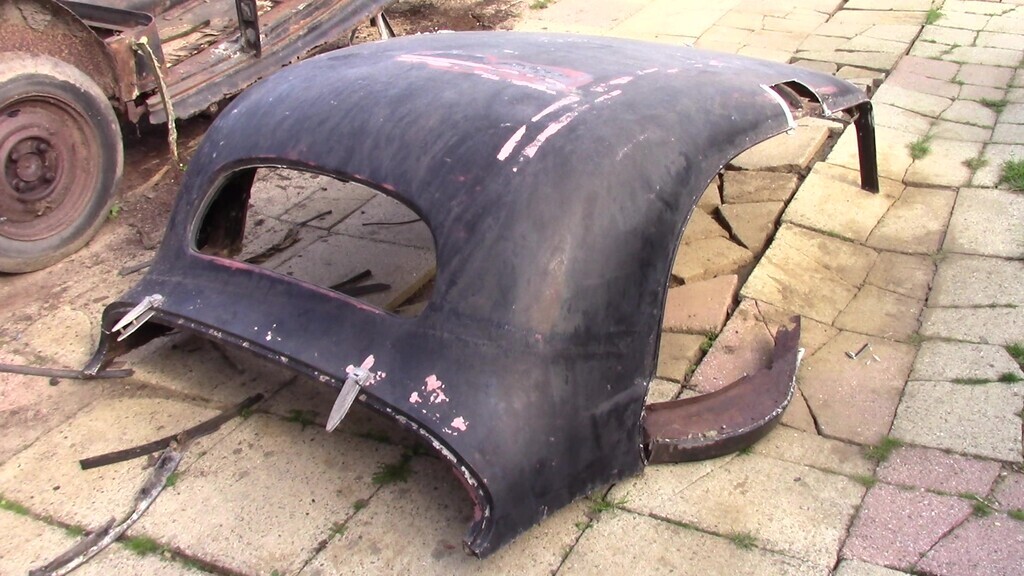 I wasn't at all keen on doing this. I know we're restoring one and I know this one is too far gone to save, it just doesn't make it feel any better chopping up what is a very rare car. The only consolation is that parts saved from this one that might otherwise have been scrapped will go one to help at least one more survive. 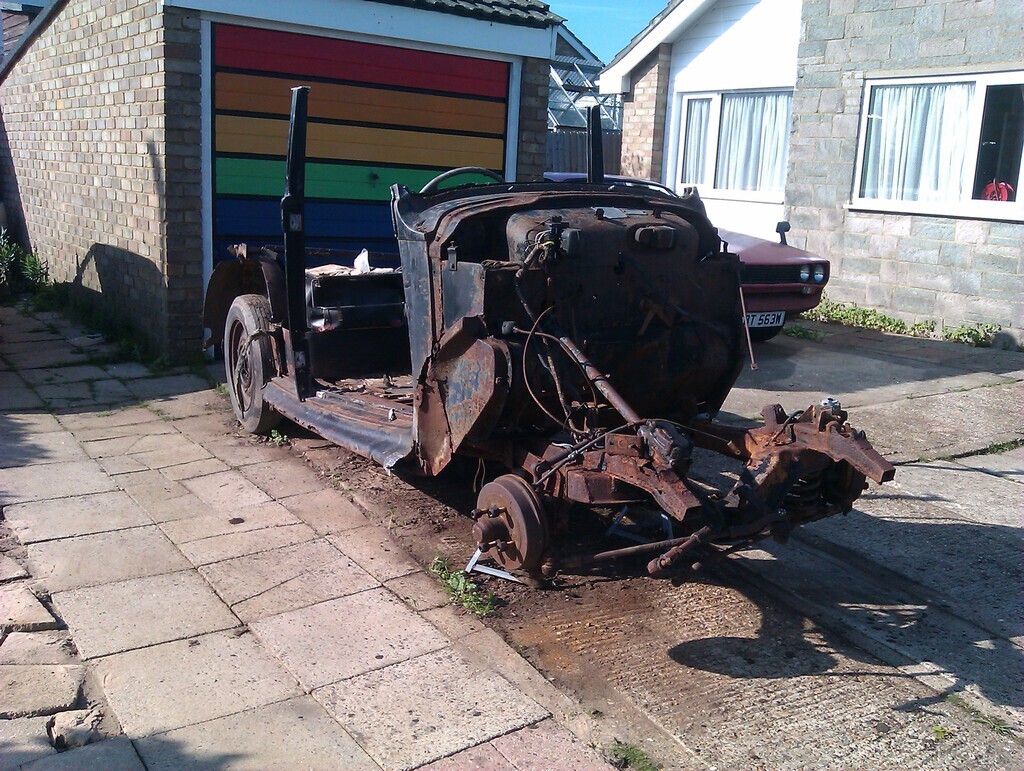 I ran out of time and energy to deal with the bolts holding the B pillars to the car, that's 8 bolts that are definitely going to be seized solid and need the heads grinding off, I just didn't have it in me to do it today. The rot has even got into the very sturdy angle iron support that holds the intermediary boot floor. On this car it has all the consistency of melted cheese. 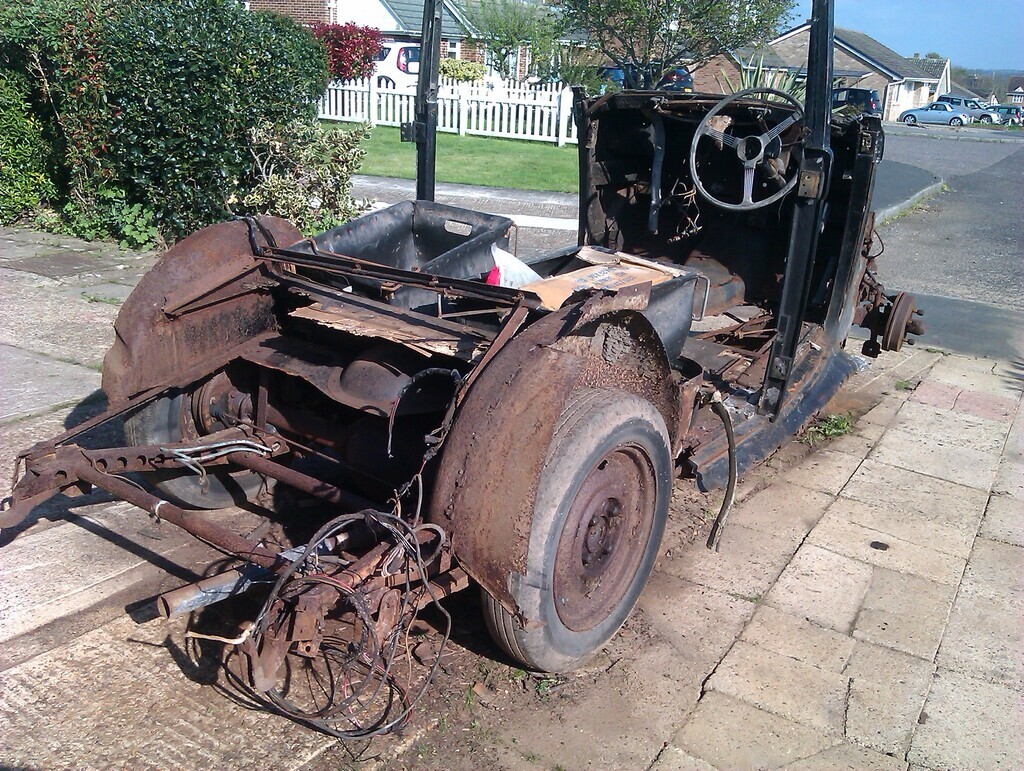 The pile of dirt, rust, and wood dust is growing beneath the car. Every time we do anything on it more falls off and the rot holes grow larger. There's still more to remove like the wiper motor assembly, all of the running gear, and even the battery box. Not having the bulk of the body on the car is going to make removing what's left a lot easier and I think we'll end up chopping off the remains of the steel body from the chassis to aid in clean up and dissassembly. |
| |
|
|
vulgalour
Club Retro Rides Member
Posts: 7,268
Club RR Member Number: 146
|
|
Apr 30, 2023 16:07:45 GMT
|
I was supposed to be having a rest day today, sitting around doing nothing, recharging... I'm rubbish at that so I did some tinkering on the donor car instead since the weather is so nice. I didn't plan to get the power tools out, I told myself that's too much like work, and then I did it anyway. First of all, here's some better shots of the rot in the roof. I wanted to scope out the shapes to see if there was anything similar to the rear arch shape that could be salvaged but I'm going to have to accept that if we do need to repair that in the future it will have to be with new wood cut to shape since there's nothing to really salvage from the donor roof frame. 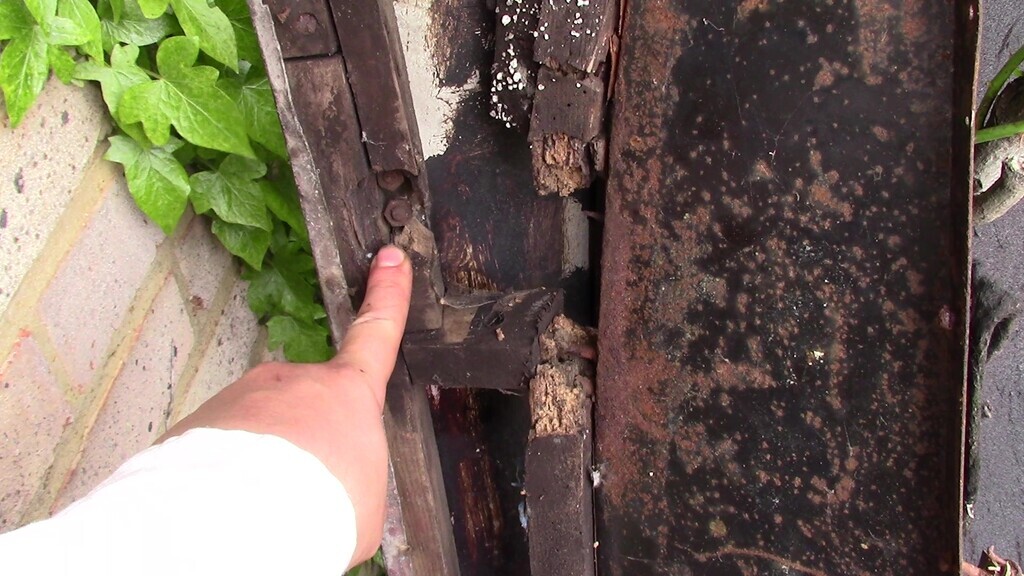 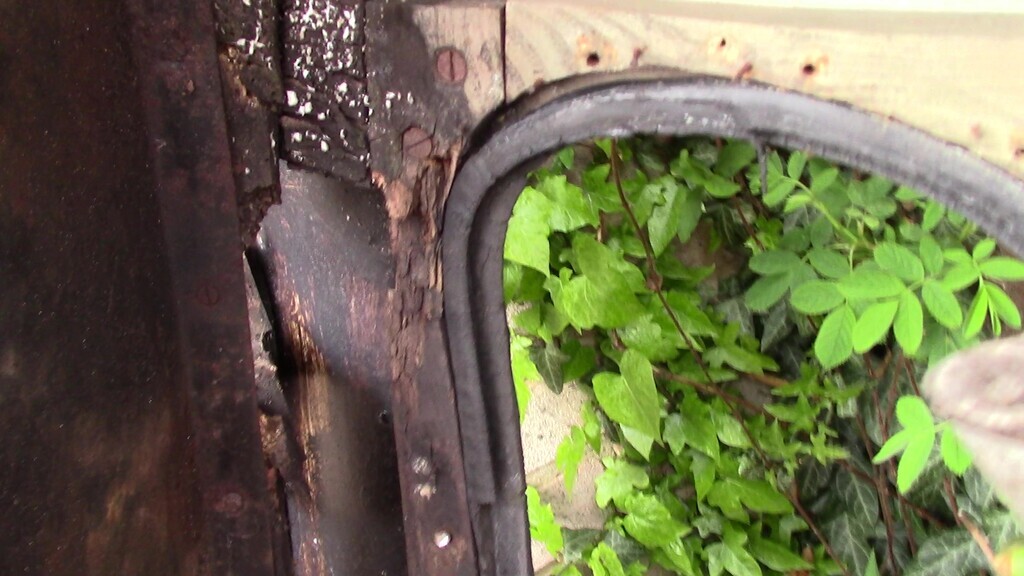 There's a lot of busy work now to remove all the items of value to us. I'll go into more detail in the videos I'll eventually post on this. For now I can tell you the voltage regulator looks like it might be decent (won't know until we test it, of course), the wiper motor assembly pretty much fell off the car due to rot in the structure it was screwed to. Column gear selector mechanism didn't put up any fight at all, which is nice, the other radiator stay rod was removed, the floor dim-dip switch was liberated, and the removable gearbox cover unbolted with no real trouble either. 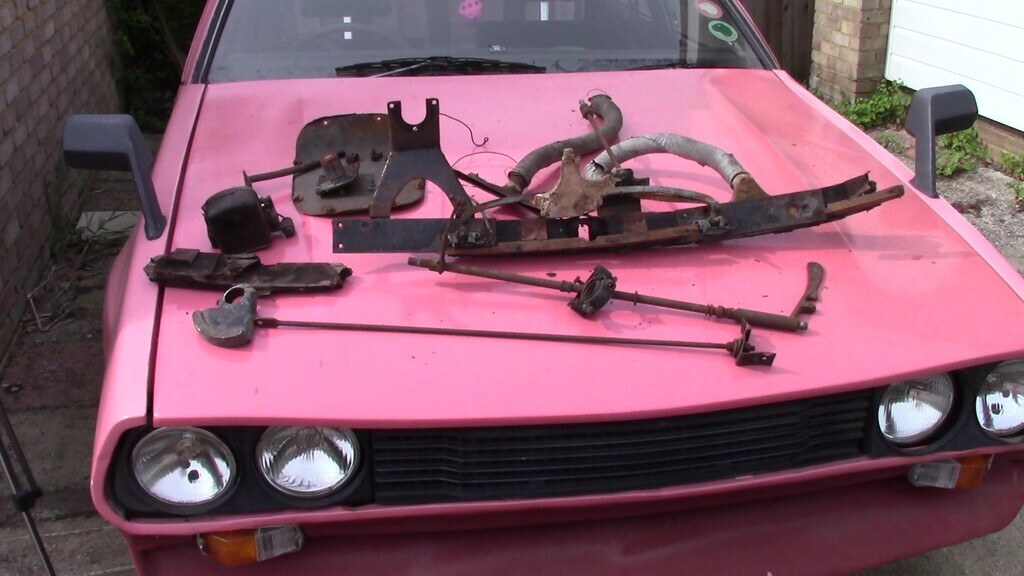 Additionally, I learned that the larger portion of the gearbox tunnel unbolts separately and can be removed whole. The same is true of the entire toeboard. Both panels are in surprisingly good shape considering the state of the rest of the car and I've salvaged those. I don't know how the steering wheel, column, and box come apart from one another and it was easy enough to remove the whole thing from the car by unbolting the steering box from the chassis and slicing through the bracket that screws to the bulkhead as a strengthener/supporter for the steering column. 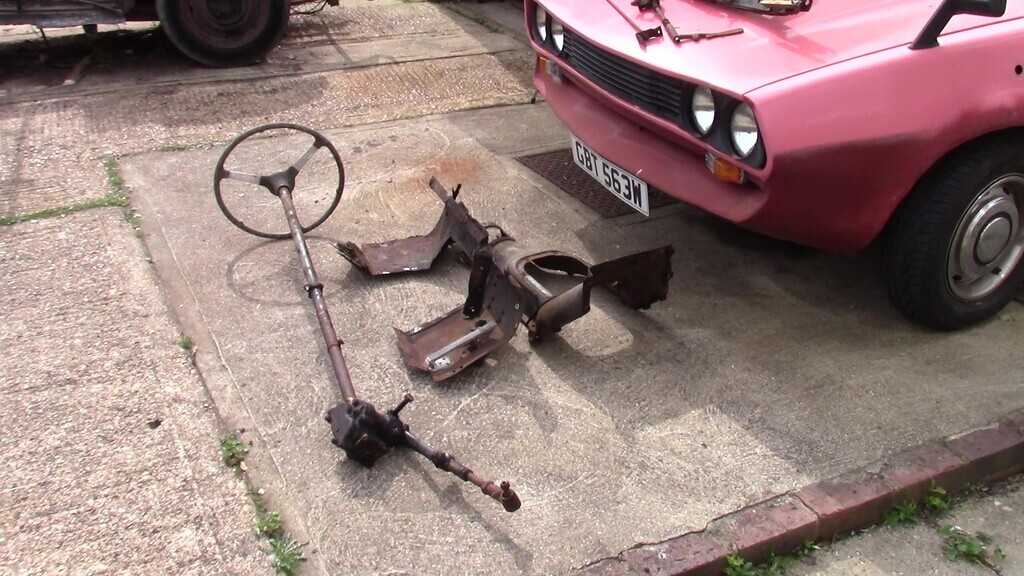 Access to the mechanical stuff still to remove at the front is much better now. 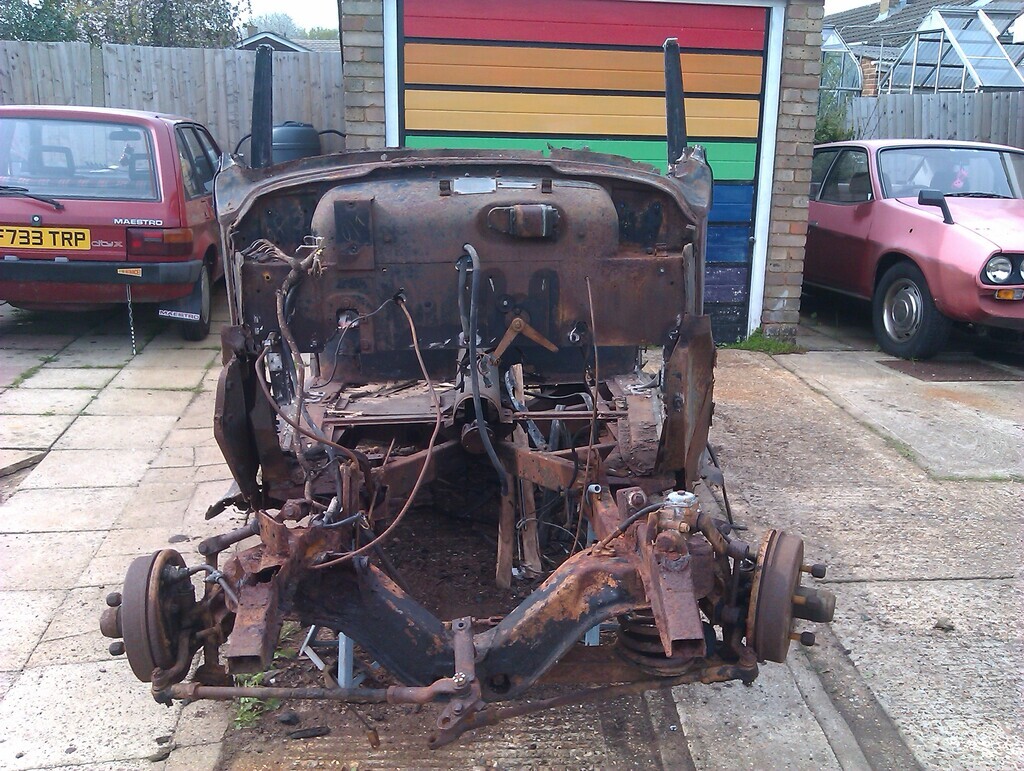 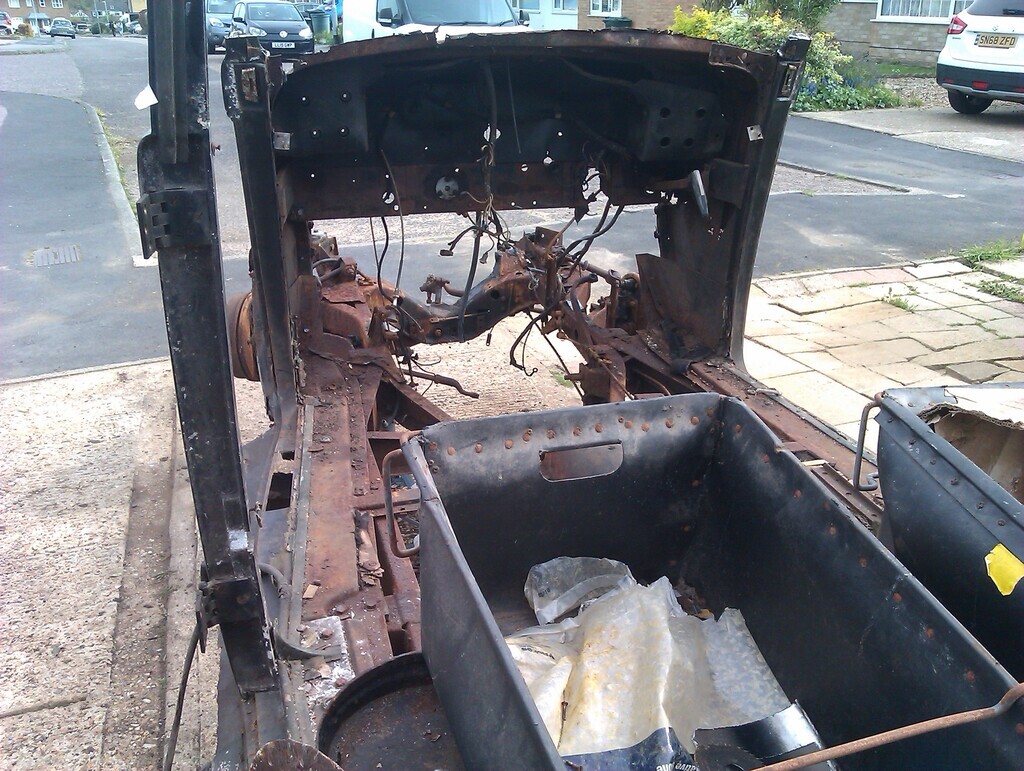 |
| |
|
|
|
|
|
Apr 30, 2023 17:15:45 GMT
|
|
The frame still looks moderately sound. Would that be salvageable?
|
| |
|
|
vulgalour
Club Retro Rides Member
Posts: 7,268
Club RR Member Number: 146
|
|
Apr 30, 2023 18:20:50 GMT
|
|
Which frame?
|
| |
|
|
|
|
|
Apr 30, 2023 19:29:41 GMT
|
|
US English frame = UK English chassis.
|
| |
|
|
|
|
|
Apr 30, 2023 19:33:53 GMT
|
|
Long ago I broke an Austin Somerset for parts, it didn't look too bad however the roof & transmission tunnel were the only things holding it together, the main chassis rails just crumbled, they were full of rotted acorns.
|
| |
|
|
vulgalour
Club Retro Rides Member
Posts: 7,268
Club RR Member Number: 146
|
|
Apr 30, 2023 19:37:14 GMT
|
|
Oh, of course; 'body on frame'.
It's not terrible, it's not great. The front of the driver's side rail needs repairing due to rust, and there's a spot on the rail under the driver's seat that needs repairing that I saw today. All depends what the DVLA say before a decision is made about the fate of the chassis, it'll hang around until we know one way or another.
|
| |
|
|


