vulgalour
Club Retro Rides Member
Posts: 7,268
Club RR Member Number: 146
|
|
Feb 18, 2023 18:14:36 GMT
|
It's important to keep yourself motivated with a project and Pat and I have been looking at all the fun things people do with 40s/50s style cars. Last year we picked up a 50s exterior sun visor and today finally got it properly mocked up on the car to see what needs adjusting. It's made of pressed steel, which means I have all the tools and materials to sort out the fit fairly easily. 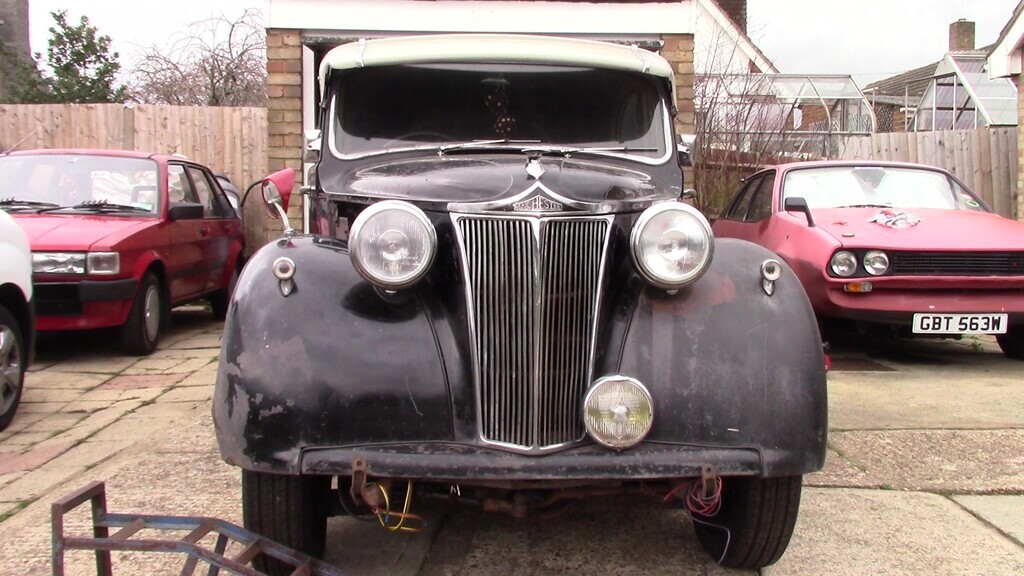 I am aware this will not be to everyone's taste and that's fine. The centre section is a smidge too wide so it needs a little bit taking out, or the bolt holes under the chrome trims slotting to compensate. It also needs the upper fixing bolts moving forward a little to correct the angle slightly. That should make the whole thing sit flatter and more in line with the roof. All that aside, it does look the part and suits the car really well, helps that the front end styling is more than a little American. Since I need to pull it apart to strip and restore it anyway, the adjustments shouldn't be too much hassle to do at that point, and I can reprofile edges where required. We also considered spats to try and sort out some of the dumpiness without chopping the body about. Austin Princess A135 spats have a profile we like and while there is a pair on eBay currently for about £300, I reckon we could make something at home that will do well enough using the same basic principle. No need to lower it either really, the wheels fit the arches really nicely aesthetically speaking and lowering it isn't necessary. As Pat put it after I introduced him to the wonderful world of bombs, "Like that, but British." and I'm totally okay with that. 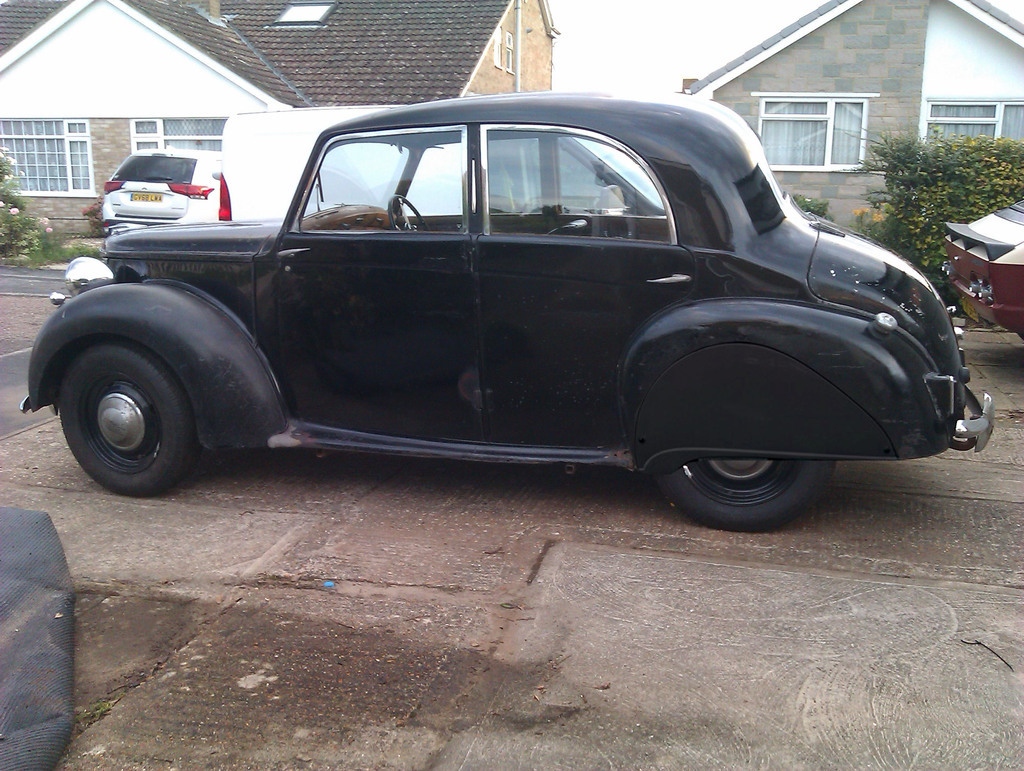 A few sets of stainless full wheel hubcaps will probably make their way onto the car too in the future, they're a great way of totally changing the look of the car very quickly without compromising what's underneath it all. The trick is keeping the accessories on the classy side and keeping the colour palette restricted to blacks and chromes. There will be no Halfords stick on chrome letters here. |
| |
|
|
|
|
vulgalour
Club Retro Rides Member
Posts: 7,268
Club RR Member Number: 146
|
|
Feb 26, 2023 16:09:29 GMT
|
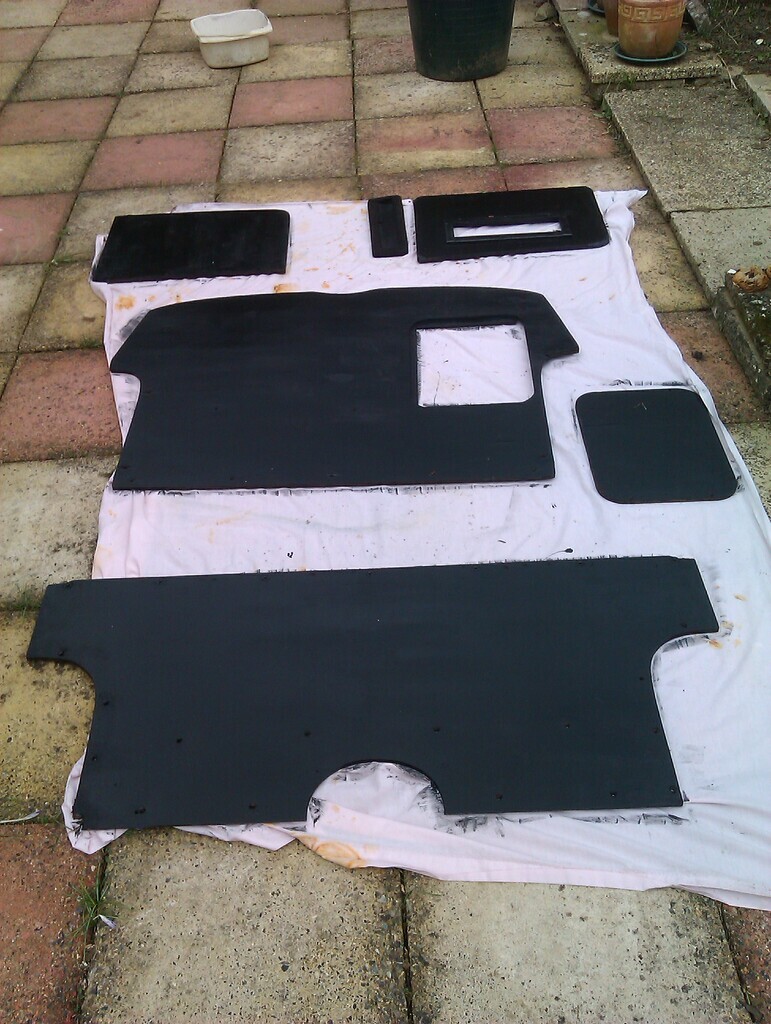 This job, it is almost finished. 3 coats of woodworm treatment both sides. 2 coats of black paint on the side you can't see, 1 coat on the side you can, 1 more coat to go. Then they're ready to reinstall, I just have this short list of things to get through before I do: - Replace missing/damaged wool felt strips to edges of panels so they don't rattle - Refit rust-treated wiring loom chassis clamps - Weld the small cut in the under seat support frame from when the angle grinder went a little further than I wanted it to removing a seized fixing - Make and fit wiring extensions for new high level rear lights since I've got really good access right now (also order correct wiring colours so it matches making fault finding later easier) - Make and fit brackets for said lights - Remove rear passenger wing - Remove exhaust so that I can remove the fuel tank because it's right next to where I want to weld - Might as well clean up and paint the fuel tank while it's out too! - Weld up rear passenger inner arch - Weld up bottom boot floor corners - Paint all of that - Weld small hole in rear passenger wheel arch while it's off the car - Refit said arch - Wait, should I also repair the sill end since I've got the arch off and it's not in the way? - Paint all of the bottom boot floor and the inner steel surfaces of the boot - Paint the repaired inner arch on the wing side - Paint, blending carefully to retain the patina, the repair on the outer arch - Refit said arch - Refit boot intermedary floor and trim panels - Refit cabin plywood panels - Refit seat And that's how you deal with woodworm. Simple. |
| |
|
|
vulgalour
Club Retro Rides Member
Posts: 7,268
Club RR Member Number: 146
|
|
Feb 28, 2023 15:09:11 GMT
|
|
Princess' turn to have a video spotlight this week. Only a very short vid. Watch me try and destroy a breaker bar.
|
| |
|
|
|
|
|
|
|
|
unusual engine issues there, not too sure whats going on but could it be down to thermal expandature? maybe there is a seep when the temperature is cold? many possibilities i agree, something to keep a good eye on, also would be interesting to see if you can re create the oil use doing a similar 400 mile trip? i know space is always a issue when it comes to engine storage, but would sourcing either a known good or complete engine to rebuild be a option? theres still a few guys about with parts and parts cars, probably worth a look about, you may even find a six pot!
next bit of comment i wasnt sure if i should put but i was cringing when you were undoing those wheel nuts, ive seen many people leave half there knuckles behind doing it that way! so apologies in advance i don't want this taken any more as advice, if your comfortable doing it the way you do then please ignore me! but i always find it easier (and safer) when undoing wheel nuts to have the bar at the 4 O clock position and lift to undo, i find it gives more control, i am sure its a technique i learned from watching my grandfather when i was a lot younger! also for tightening use the torque wrench from 8 O clock.
slight rant over! looking forward to the next installment, whether it car or craft related!
|
| |
 2006 Audi A3 2003 Fusion 2 looking for a project.... |
|
|
|
|
|
|
|
When using a breaker bar you should always cup the joint end with one hand while levering with the other.
The way you are leaning on it you are putting half the force downwards and not into a twisting action. You are also far more likely to have the socket come off the nut.
Try it as above and you might be suprised how easy it is to undo a nut.
|
| |
|
|
vulgalour
Club Retro Rides Member
Posts: 7,268
Club RR Member Number: 146
|
|
|
|
Very valid points there and I don't disagree with the advice given since those approaches were taken before I turned the camera on. What you're seeing is what I had to resort to. I've never had wheel nuts on my own car so tight that I had to put the handbrake on, put it in gear, chock the wheel, and resort to standing on a breaker bar. Normally, I can remove them with some effort and a standard wheel brace. When I tried to lift instead of push I couldn't get the nut to budge, all I managed to do was strain my back. When I tried to cup the joint end I couldn't physically apply enough force on the bar to get any movement at all, it would have helped if I were bigger perhaps, there's not a lot of me to help apply force to the lever. --- Today the weather was okay and I had some time to do some prep on the Lanchester for the weekend since I really want it back in one piece again. Typically, to put it back together I've got to take some more of it apart. 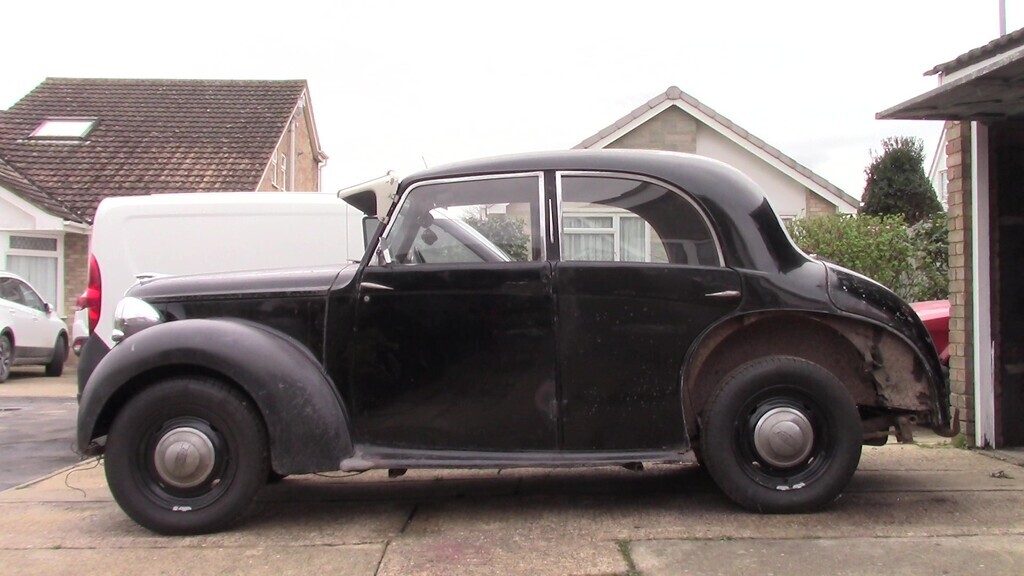 Getting that rear wing off was slightly scary since it required an angle grinder in a tight space very close to my face. If it had been bolts I could at least have stood a chance of just torquing the heads off, but no, more fine thread flat head screws instead which were, predictably, rust blobs. Still, it's off and I can get access to the rust I need to repair loads easier now both on the car and the rear wing. Hoping for decent weather this weekend so I can blitz this corner and get it all lovely again, there weren't any horrors hiding, which was nice, and almost everything I need to replace is flat panels that I now have really good access to. This is the bad side too, so I'm hoping when I move on to the other side it goes a lot quicker and easier. |
| |
|
|
vulgalour
Club Retro Rides Member
Posts: 7,268
Club RR Member Number: 146
|
|
|
|
I am having a bit of a sabbatical this weekend because my mental health requires it. Been flat out on all sorts for too long playing catch up and it all caught up with me so for the next few days I'm going to be selfish and do what my brain wants me to do and today it wanted to do welding and rust removal. We didn't get as far as the welding, that might happen tomorrow, but we did do a good amount of rust removal. 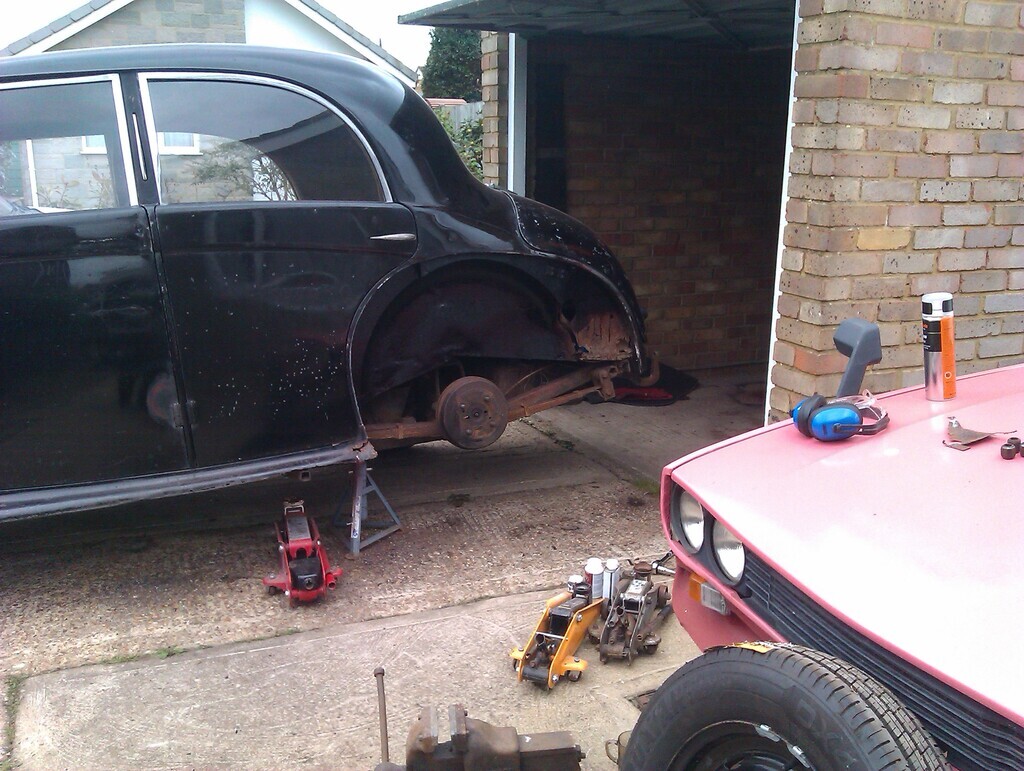 The fresh black has had the rust removed, treated, primed, and painted since that's all that's needed. The areas that need repair I cleaned back but otherwise left alone. Some very simple repair panels to go in here, it's going to be so much easier than I'm used to and access is excellent. The steel splash guard is still in good enough shape to warrant some edge repairs rather than making it from scratch. 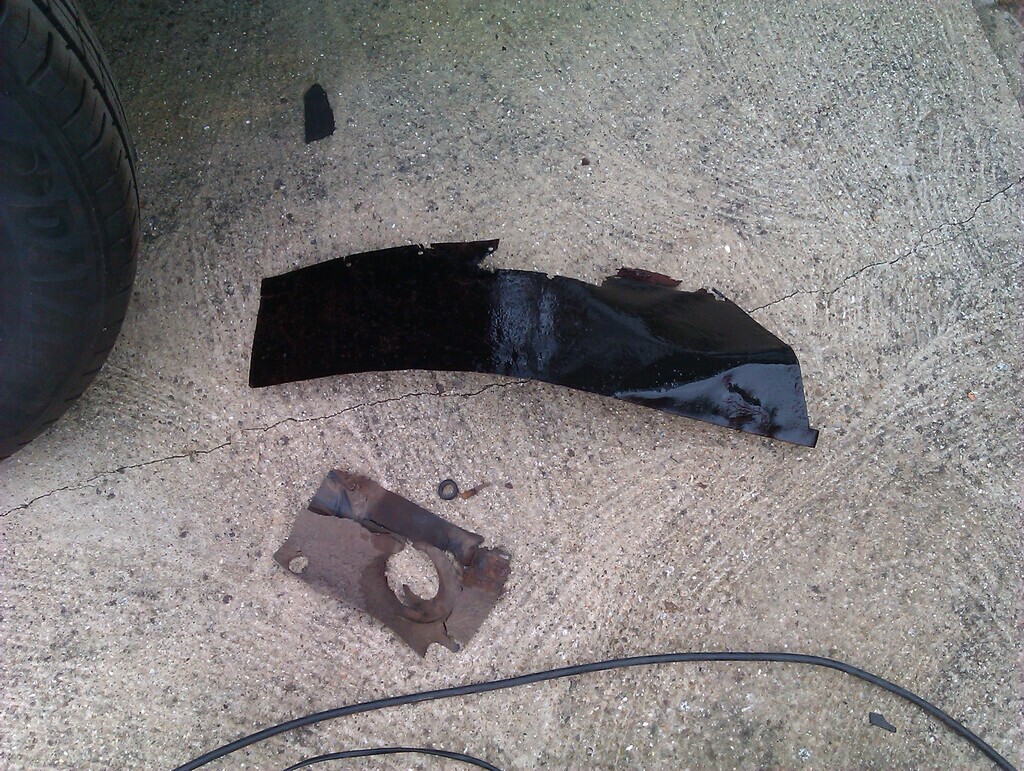 I've actually really enjoyed this today, just being selfish and doing hobby stuff guilt free, ignoring work obligations to lift some stress off. I managed to get three of the five wing bolts out with just WD40 and vice grips. Two are being rather more stubborn. The thick metal plate the wing bolt screws into is in turn screwed to the wooden frame of the car. Because of this, you can't really get much heat into it in the conventional way and they're properly stuck. I'm going to try welding a bolt to the stub of the stuck fixing first since I've had some luck with that in the past. If that doesn't work, I'll drill out the head of the wood screws holding the plates to the frame, they're flat head and quite soft due to age and corrosion and try as I might they will not unscrew with a screwdriver and being countersunk, there's nothing to grab hold of with pliers or similar. 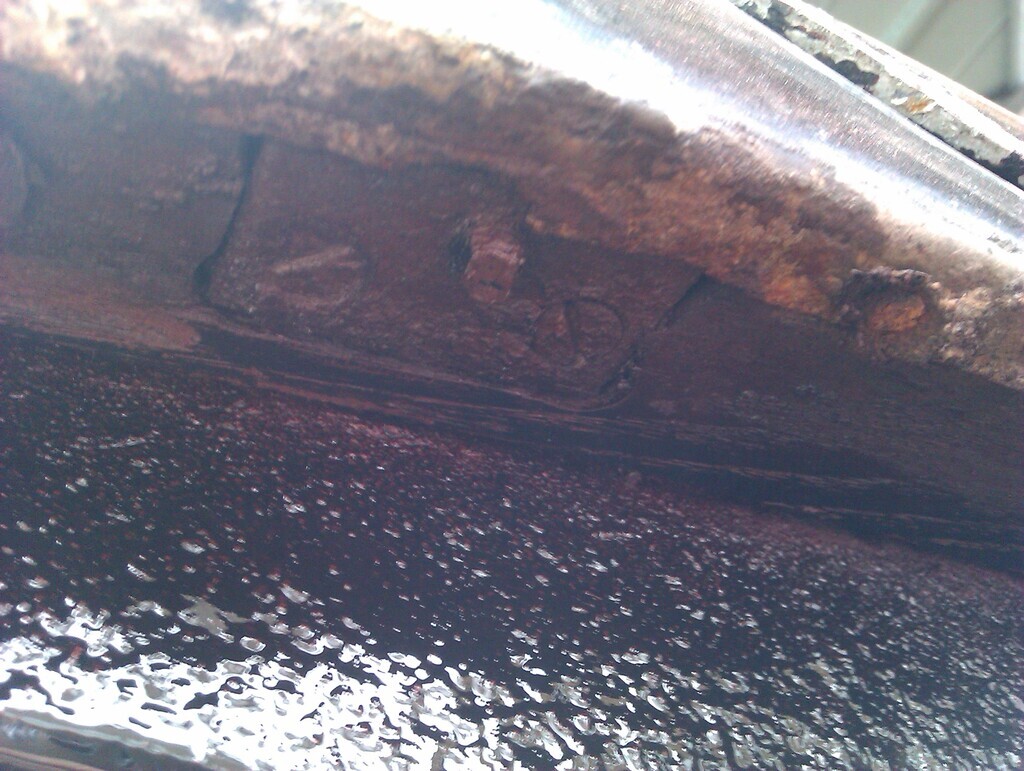 We'll have to see what tomorrow brings. I might be in a mood to do more, or I might need a day where I sit and play games, or watch telly, or go for a walk... whatever my brain needs to be happy for the next couple of days really so I can recharge a bit. |
| |
|
|
|
|
|
|
|
|
Do you have a decent battery powered drill? They have big torque and are excellent at undoing stuck screws/nuts.
You put all your force into pressing the drill screwdriver tip into the screw and the drill does all the turning for you.
|
| |
|
|
vulgalour
Club Retro Rides Member
Posts: 7,268
Club RR Member Number: 146
|
|
|
|
|
I do, but I don't have a bit for it that's a good fit for the screw head. On another forum, someone suggested putting a soldering iron on the head of the wood screw for a while as a way of getting it hot and then being able to undo it, a method that worked for them on their project, so I'm going to try my rubbish soldering iron and see if it's up to the task first and go from there.
|
| |
|
|
|
|
|
|
|
|
With wood screws a tap on the head from each side can also help loosen them.
I know what you mean about needing a break we have gone away for the weekend to get a break from DIY at the wife's parents and the grown up kids.
Only issue is I have taken a Mache GT to evaluate, the charging infrastucture in Norfolk is hopeless, so we have spent half the day trying to find somewhere to charge the damn thing which will take less than 10 hours. Sufice it to say I won't be joining the electric revolution!!!
|
| |
|
|
vulgalour
Club Retro Rides Member
Posts: 7,268
Club RR Member Number: 146
|
|
|
|
Seems a lot of folks are in the same sort of head space this week/end. Today I had a very fun and rewarding time. Got the fuel tank off the car, which is in surprisingly good shape and should clean up very nicely. 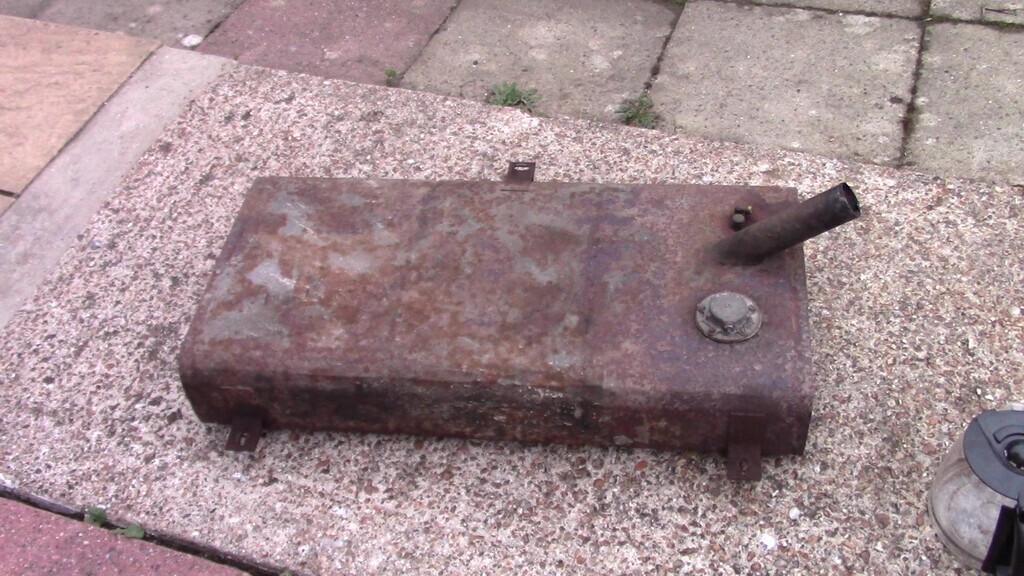 Also ended up getting a bit carried away with the welding and fabrication and completed all the inner arch work that's needed. 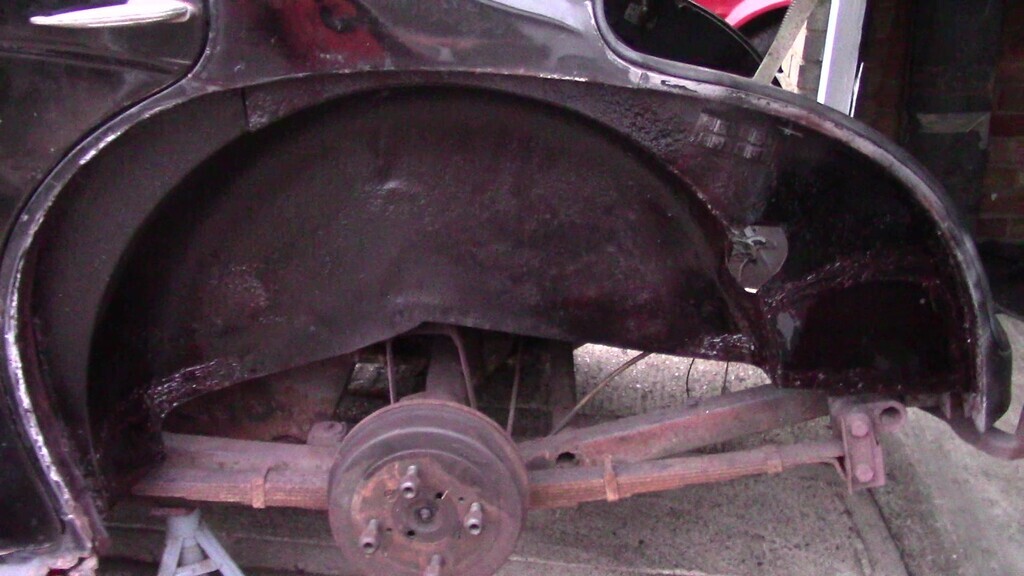 Is it the most beautiful restoration work you've ever seen? Definitely not. Does it matter? Nope. Fact is it's all solid now and I can't see the driveway through the boot floor any more. Very easy shapes to make, great access, and didn't even set the wooden frame on fire once. Turns out if you douse the frame with some water and then weld next to it you just get steam and not fire. Huge morale boost really, this was the scariest bodywork on the car and it's now done so the rest seems a lot less daunting. I am going to have a super lazy day tomorrow though, both to give the neighbours a break from me using power tools and to give me a break from using power tools. |
| |
|
|
glenanderson
Club Retro Rides Member
Posts: 4,319
Club RR Member Number: 64
|
|
|
|
|
Excellent.
A day off often means you make more progress afterwards than you would have done if you’d slogged through.
👍👍
|
| |
My worst worry about dying is my wife selling my stuff for what I told her it cost...
|
|
|
|
|
|
|
|
Great progress, looks like it could be on the road for the summer?
|
| |
|
|
vulgalour
Club Retro Rides Member
Posts: 7,268
Club RR Member Number: 146
|
|
|
|
|
That would be nice, wouldn't it? Mustn't forget it's been off the road for nearly forty years, so a rapid return was never likely. August this year marks the three year ownership point. The biggest problems are definitely dealt with now, insofar as getting it road ready is concerned, so now it's a case of plodding on and getting the rest of the jobs done.
As of today's work, I know a bit better what needs doing. In a way, the woodworm ended up being a bit of a blessing since it focused my attention on one of the worst bits of the car and got it done.
Welding:
Rear outer wings
Both sills, mostly the bottom edge and the corners, non-structural stuff so not vital
Inner rear wing driver's side might need some small repairs
Cabin floor corners at the rear, both sides
Rear outriggers might need replacing, these are really just jacking points and not vital
Mechanical:
Radiator repair as it leaks (it holds water long enough that we could get around the block in it, just not go on a drive)
Front engine mount replacement - got the parts, just need to get it done
Dynamo needs checking over
Starter motor still doesn't always behave for me
Front brakes need adjusting, rear brakes seem to be okay, all need inspecting and checking over anyway
New battery lead from starter to battery for safety, need to route it better too
Exhaust repaired/replaced. It has some newer parts, bit of a mess really.
Fuel tank to clean out and refurbish
Rebuilt water pump and new fan belt to fit once the engine mount is sorted
Oil change
Coolant change along with flushing the block
Sundries:
Finish connecting the wiper motor, indicators, the high level rear lights, and the horns (got all the stuff to do this now)
Make high level rear lights bracket to put them in the right place (got the stuff to do this too)
Acquire new body panel piping all round, and new rear wing fixing bolts
Make new kick panels and missing B pillar trim now I have all the materials for that
Make new floor panel to replace the one with historic water damage
Put the interior back together
Get a spare tyre and fit it to the spare wheel, already got the inner tube for that
There's probably some stuff I've forgotten here too. It's slow going, but it's a lot less than it was. The items on the list are generally getting smaller in nature now because it's gone from things like "fit the wiring" to "connect the indicators" and that sort of thing.
There's a very good chance I'll have all the important stuff done this year, and a reasonable expectation it'll be on the road before the year is out. There's just no guarantee of that and I shan't hold myself to trying to make it happen either. It either will, or it won't.
|
| |
|
|
|
|
|
|
|
|
List doesen't look too bad, even if you only get to drive it a few hunded metres it will be a great achievement, at the end of the day it's a hobby that's supposed to be fun, take the time to enjoy it.
|
| |
|
|
vulgalour
Club Retro Rides Member
Posts: 7,268
Club RR Member Number: 146
|
|
Mar 11, 2023 20:14:28 GMT
|
Progress has been steady on the driver's side this weekend. A lot less welding to do, things are generally in much better condition which is very nice. Had just enough paint to get the inner arch in black so that's the good news this side. One afternoon will see the few patches required this side done without too much grief, happily. 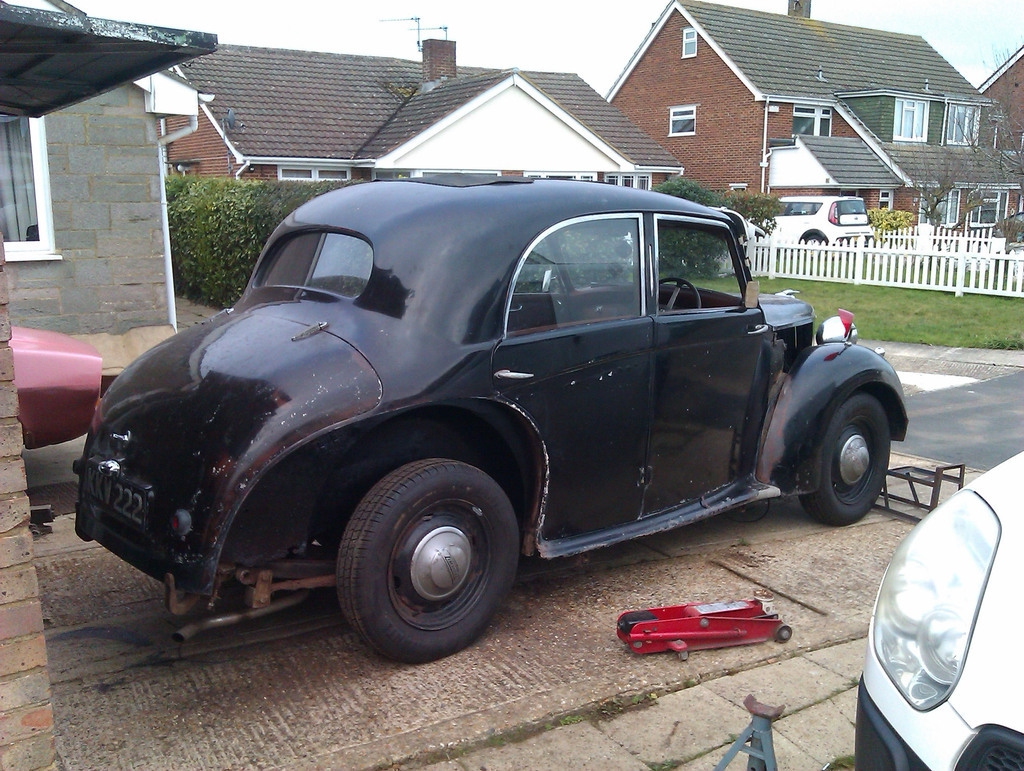 Now the not so good news. Woodworm has got into the frame. 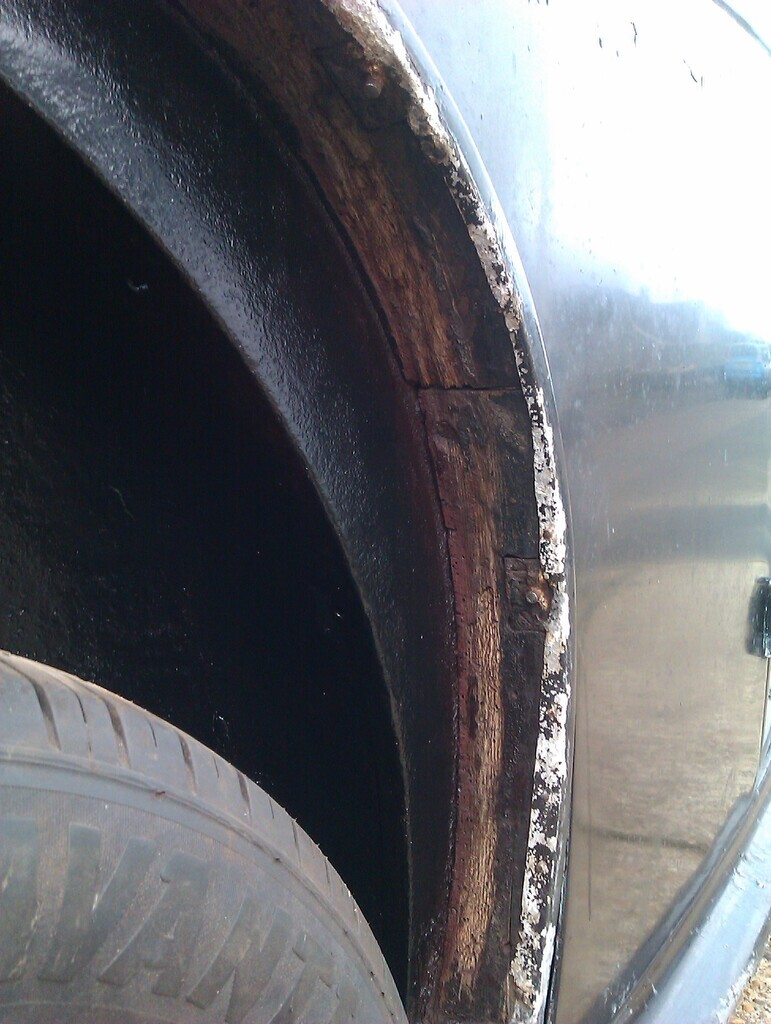 It's not the end of the world though. To repair this properly I'd need to peel off the aluminium and inspect the timber, probably remove and replace a couple of sections, and then rebuild it all. To do that, I need a workshop, and some carpentry skills, and some tools. I can't do that so instead we're doing it the other way which is to chip off the soft bits with a screwdriver first to reveal the worst of the damage, then scrub thoroughly with a brass brush to get back to solid material, and then douse liberally with woodworm treatment. I've ordered some syringes to inject the holes since unlike the plywood I can't get to both sides of this and need to make the best job of it I can. When that's all treated, I'll be using some wood epoxy to rebuild most of the lost surface. The damage isn't actually too deep where the woodworm is so that should fill and reprofile well. The frame isn't particularly wobbly so I think I'll be okay. The other issue (not pictured) is some historic rot. To get access to as much of this as I could, I removed the inner arch leather and rexine trims, the arm rests, and the carpet trim on the seat riser. This allowed me to find more tiny cocoons that might be from the woodworm (common furniture beetle most likely) and really get the deep recesses cleaned out properly. The rot is a small section of the wheel arch frame above the wheel, it looks like the rear window seal has leaked a long time ago and got into the car, causing some surface rust and some wood rot. Again, it's not so advanced the frame is toast, but it does need addressing to the best of my ability. I'll use some wood hardener and have already used woodworm treatment just in case. I'll either cut a new piece of wood and glue it in, or rebuild with wood epoxy, it's borderline which way I go since most of the damage isn't that deep and might just fill. After all that, I'll give the exposed wooden frame a coat of paint to prevent it happening again. The woodworm damage has happened on a tiny strip of bare frame that's exposed between the inner arch and the outer wing, this strip might have had a bitumen or similar finish on it once as much of the internal frame does, or it might have always been bare, either way it proved an easy entry point for the pests. I knew the risks going in to this project so I'm not disheartened by this. I'm learning something by dealing with it and if we ever buy another wooden framed car, we'll know what to expect. It hasn't really slowed me down today though, the wing came off much easier, and I got the inner arch cleaned, rust treated and painted. I also got the boot floor cleaned and rust treated ready for paint after I've welded the inner arch bit. 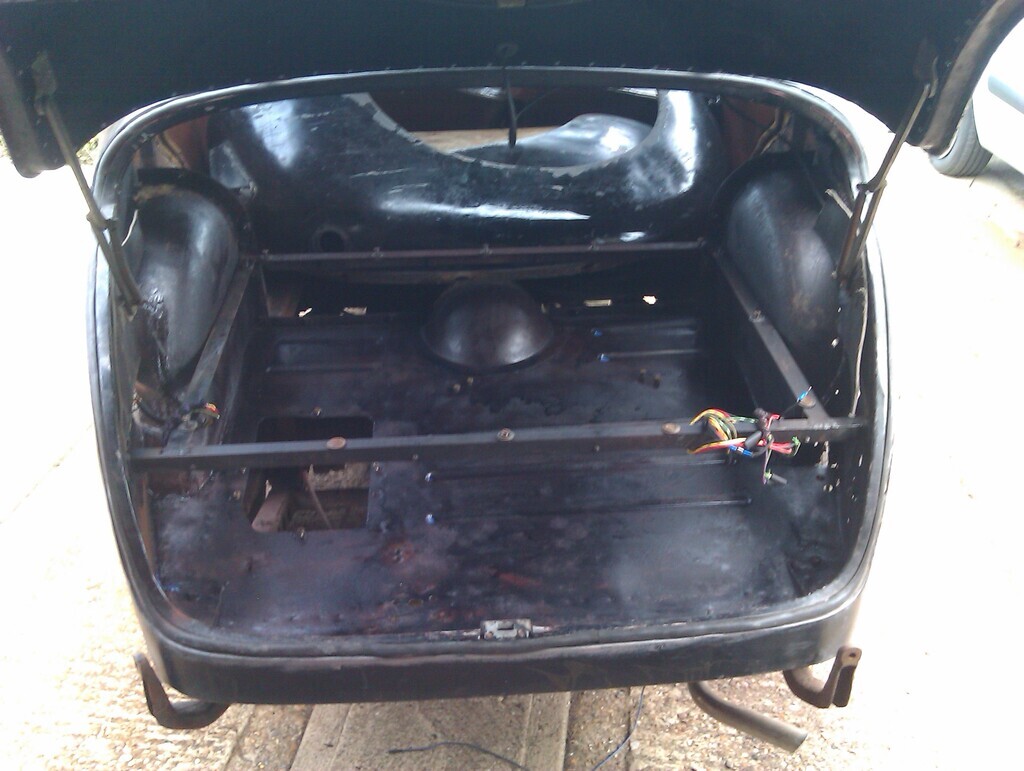 Progress has been made, that's the important bit. |
| |
|
|
|
|
|
Mar 12, 2023 16:13:50 GMT
|
|
thats good going, more progress than your giving yourself credit for. id be quite lost with the traditional wood/aluminium stuff! particularly with the wood worm! i did wonder what fuses the electrical system uses? and if you could implement some modern fuseholders as either an upgrade or temporary measure until the gremlins are worked out?
i need to look more into lanchesters, as its not a car i have met in the metal, or much elsewhere!
|
| |
 2006 Audi A3 2003 Fusion 2 looking for a project.... |
|
vulgalour
Club Retro Rides Member
Posts: 7,268
Club RR Member Number: 146
|
|
Mar 12, 2023 18:17:08 GMT
|
It has the grand total of 2 glass fuses for the electricals. The thing that's helped me not be scared of the repairs is to think of it more like a piece of furniture than a car. Once you get into that mindset, it's a lot easier since then it's "only wood" and the repairs aren't so daunting. Managed to draw a line under some stuff today. Passenger inner arch is now done. 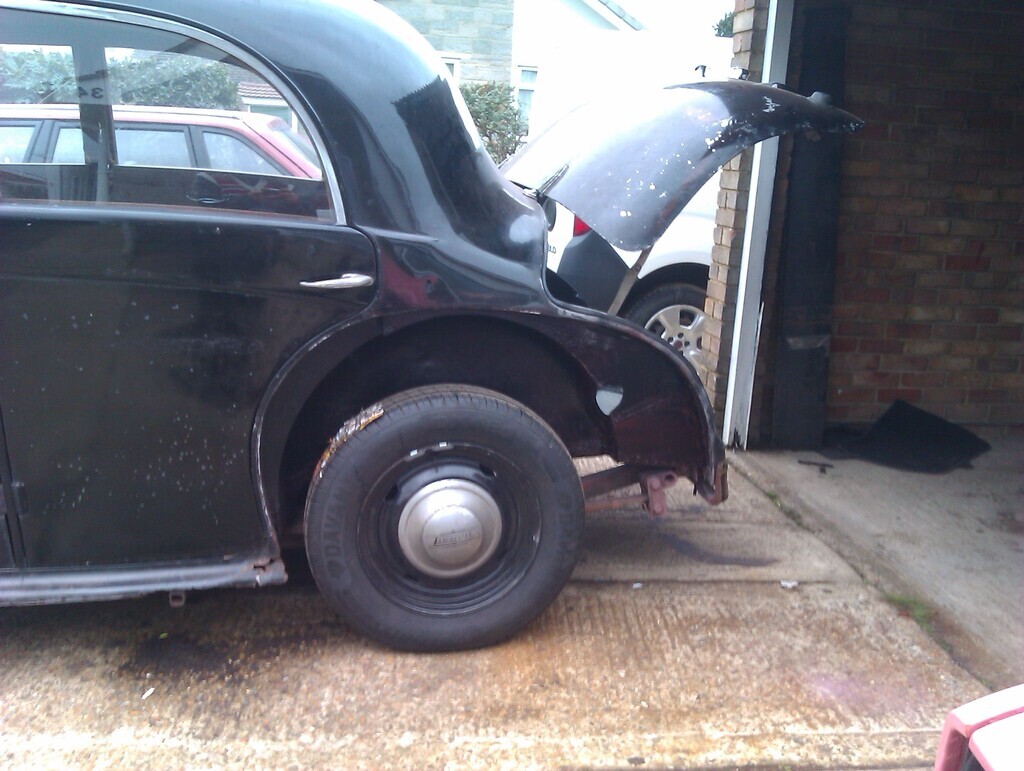 Driver's side inner arch is also now done. This was hugely easier and the metal was in much better shape than expected. 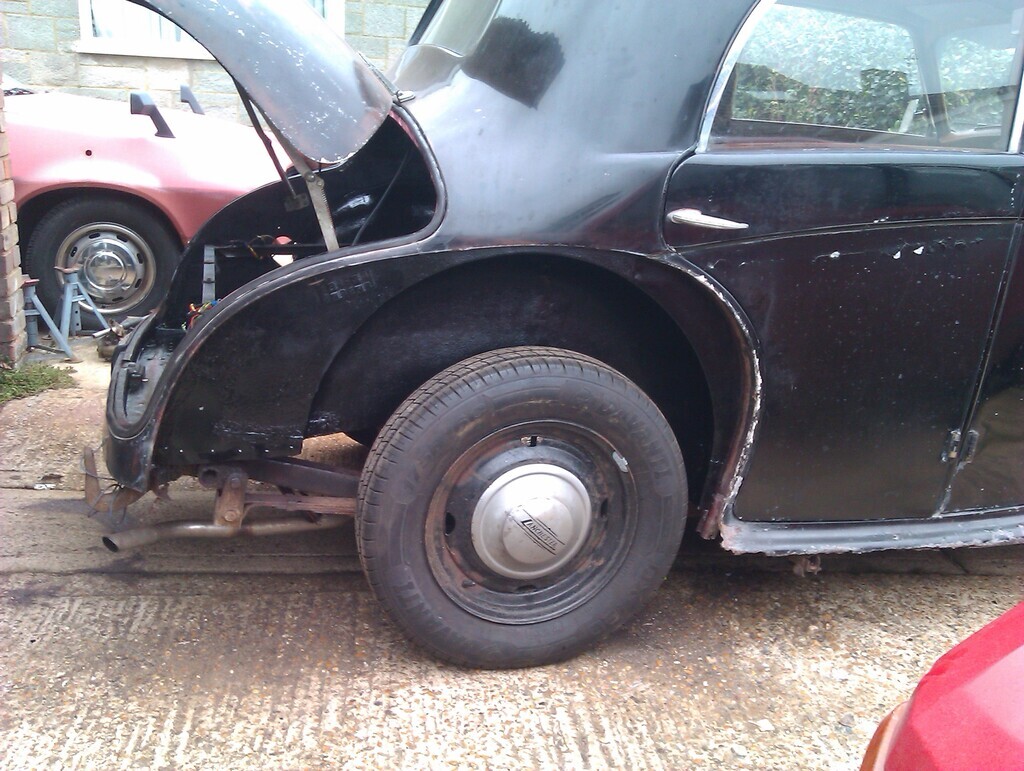 Boot floor and inner arches have all had two coats of satin black (it's wet here, hence it looking gloss) and can be considered done too. 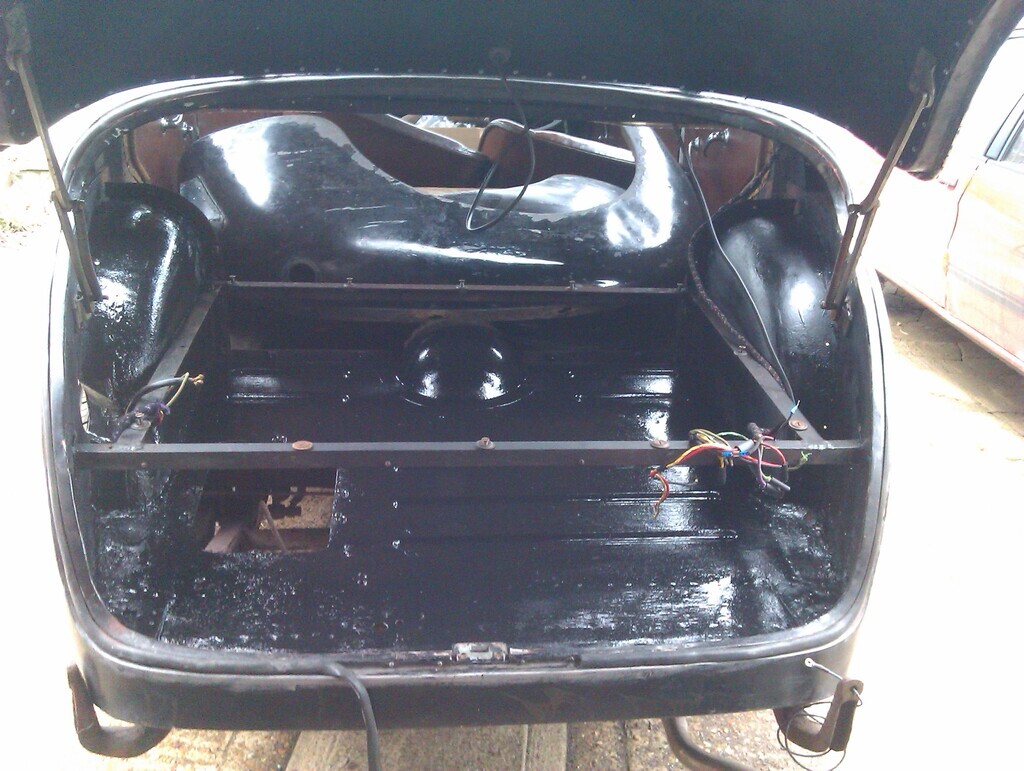 The next thing is to work out the process of reassembly and what jobs I need to do along the way. Because of the way the car is built, you have to attend to each layer as you go which means being methodical. You can't really shortcut things because if there's damage on one layer it'll carry through to the next, and to repair either you have to repair both. I'm struggling for space a bit at the moment so I need to get the rear end back together ahead of anything else and that's become one of those situations where to put it back together, I have to repair each layer as I go and this is the current plan of attack: Repair wooden frame damage Remove stuck rear wing bolts from fixing plates Repair/replace and refit rear splash guards Create brackets for high level rear lights Complete wiring for high level rear lights Refit boot interior trims Repair rear cabin floor Clean and repaint all metal in rear cabin Refit rear cabin interior Repair sill ends Acquire wing piping and new hardware for rear wings. Repair and refit rear outer wings |
| |
|
|
|
|
|
Mar 12, 2023 18:44:05 GMT
|
|
Laminated marine ply to the thickness of the timber Will be much cheaper than ash.a thin template of hardboard is useful to help make the cuts. Screwing the template to the wood and using as a guide for a router is one way. Obviously using a bit with a guide wheel. I find using a jigsaw or a band saw on thick wood a bit tricky so prefer the router. If you prefer to treat the wood and address when you have more time you could use a chemical hardener after the wood worm treatment.
|
| |
|
|
vulgalour
Club Retro Rides Member
Posts: 7,268
Club RR Member Number: 146
|
|
Mar 12, 2023 18:54:42 GMT
|
|
I picked up some wood hardener today, I've got some wood epoxy in the post, and I'm just hoping that there's enough material left in the one bad spot I can simply rebuild with epoxy rather than needing to put a wood patch in. We shall see. My biggest limiting factor is a total lack of workbench or anywhere to put one. I also don't have a router or a band saw for the same reason, so whatever wood I cut if needed will be done with hand tools on the floor or, at best, a jigsaw on the floor. I'm also a rubbish carpenter.
|
| |
|
|


