vulgalour
Club Retro Rides Member
Posts: 7,264
Club RR Member Number: 146
|
|
Dec 21, 2021 11:05:22 GMT
|
|
I'm heartbroken this morning. After such a good time with us and a perfect day today with a well-behaved walk, a full meal eaten, he's just started behaving like a different dog. I'll tolerate a lot with a rescue dog, I really will, and his progress so far has been remarkable. But today is the first day I genuinely feel unsafe around him. When he crosses the line at playtime he normally apologises with a lick of the hand later, today he won't. If I'm near him he tries to jump up on me and nip at my hands, if I use the commands to get him to stop and settle, he turns his ears off and starts growling, grown-up barking, and trying to get taller than me. I have to accept that I'm not safe on my own with him and after him being so affectionate and relaxed around me the last few days, it's come as something of a shock. He's not even like the dog we picked up at the rescue centre. He's not scared like he was when he arrived, and he's not relaxed with occasional puppy moments.
I'm in bits about it. He's been so good and responded so well, he's worked so hard to be a good dog that we really thought we'd make it. If he were smaller, say an actual puppy, I could deal with it. A fully grown GSD I can't, paws on my shoulders he's as tall as I am. I have to accept that around me at least, he's now become a dangerous dog and I don't understand what I could have done to cause it because we'd been getting along famously. I won't even get to say good bye to him because he won't let me near without trying to get hold of my hands or be the boss.
It doesn't mean I won't ever have a GSD or that I won't ever have a rescue dog again. I'm just so sad for this one because he's been such a good and silly boy.
|
| |
|
|
|
|
|
|
|
Dec 21, 2021 13:30:36 GMT
|
|
Sad to read, is there any behavioral tricks/training the rescue centre can to to rectify this?
I must admit I don't trust GS dogs, having been attacked by two in my life, give me a soppy Labrador every time.
|
| |
|
|
|
|
|
Dec 21, 2021 14:22:05 GMT
|
|
Sorry to hear about the dog, did you find out about his history before you got him? they are pack animals and I guess he wants to be top dog, keep going you will find one that suits but next time it might be worth getting a curse word?
|
| |
|
|
vulgalour
Club Retro Rides Member
Posts: 7,264
Club RR Member Number: 146
|
|
Dec 21, 2021 15:28:37 GMT
|
|
The environment of the rescue centre isn't conducive to training him out of the issue and besides, he'd made up his mind I was a problem. It happens sometimes. We don't know his reasons beyond possibly pack heirarchy and jealousy, which can be an issue with GSDs. Because he'd been so friendly with me and basically my shadow, the turn was very unexpected. That unpredictability is what made him dangerous, he's the only dog I've owned that I've felt unsafe in my own home with. He never got as far as attacking me because I managed to get out of the situation but there's no guarantee I could the next time if there was one.
We chalk this one up to experience, and process the grief. We try again in the future. As for labradors, I'm allergic to them for some reason so I can't have one of those, and I've always found girldogs harder to train and live with than boydogs.
With Max we went with what we knew and sadly it didn't work out. That's the gamble you take. The really sad thing is that we'd just started introducing him to people and letting people know we had a dog, including putting his name on seasonal cards (because Pat and I are both soppy gits) and now we're going to have to keep facing the loss every time someone asks about him. It's going to be a tough time for both of us, losing a pet is never easy.
|
| |
|
|
|
|
|
Dec 21, 2021 16:24:42 GMT
|
|
It does seem an issue with GS dogs. we had a neighbour who was a police chief, he had a retired GS police dog, which also turned on him and although he hid it for a while he eventually had to admit defeat & have the dog put down.
|
| |
|
|
vulgalour
Club Retro Rides Member
Posts: 7,264
Club RR Member Number: 146
|
|
Dec 21, 2021 16:32:07 GMT
|
|
In other news...
|
| |
|
|
|
|
|
Dec 21, 2021 16:47:37 GMT
|
|
That’s a real shame about the dog. As others have said, predictable behaviour is not a trait of GSDs.
Like many fashionable breeds, they have been over bred for decades resulting in personality and physical health defects. It’s hard to beat a rescue mongrel; invariably good natured and no expensive genetic health problems.
|
| |
|
|
glenanderson
Club Retro Rides Member
Posts: 4,318
Club RR Member Number: 64
|
|
Dec 21, 2021 19:45:57 GMT
|
Sorry to hear about the dog. It’s amazing how quickly we get invested. Some dogs however, no matter what your intentions or experience, just have a past that renders them unsuitable for life as a pet. We’ve always had dogs, and have had several German Shepherds over the years, most of them rescues, but they’ve never really been my first choice. Our current hound is the only one that I have chosen as an adult experienced dog owner and had from a pup. She’s a Springer/Cocker spaniel cross. She is simply the most obedient, biddable, trustworthy and devoted companion I have ever had in nearly fifty years of life with dogs. 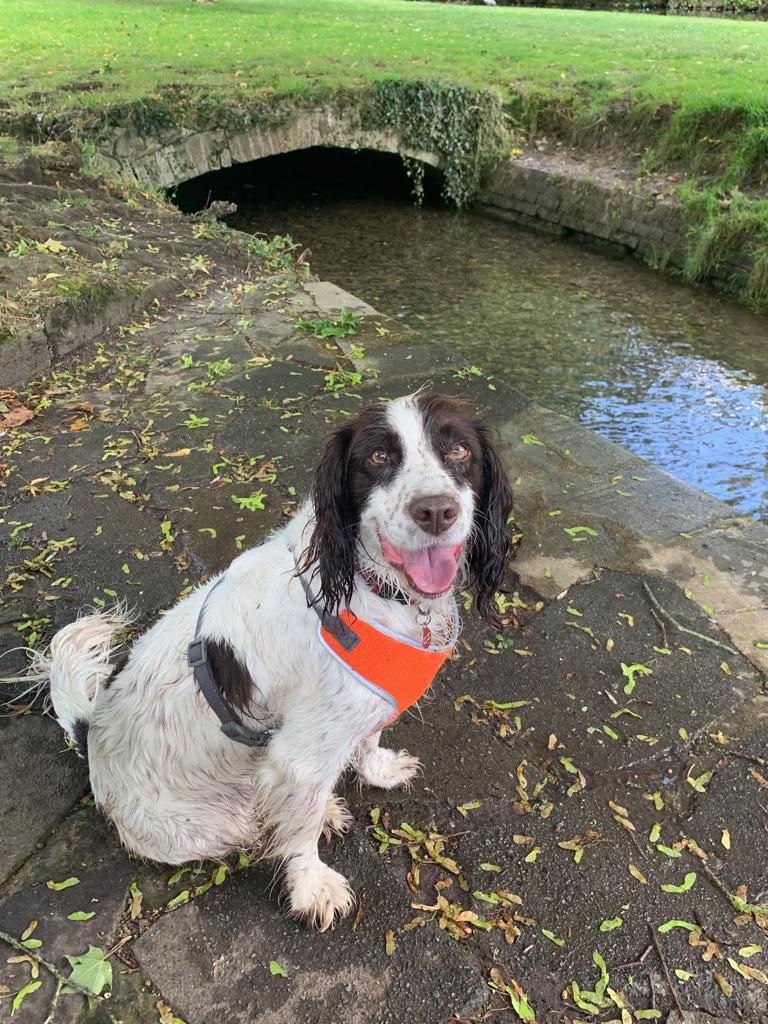 |
| |
My worst worry about dying is my wife selling my stuff for what I told her it cost...
|
|
|
|
|
Dec 21, 2021 22:23:52 GMT
|
|
If the exhaust was smelling like peppered smoked beef then yes, the fuel had expired.
Glad to hear it's running better!
(I'm happy, I found my battery charger)
|
| |
|
|
vulgalour
Club Retro Rides Member
Posts: 7,264
Club RR Member Number: 146
|
|
Dec 21, 2021 23:41:51 GMT
|
|
You know, that's a weird description and also pretty close to the smell it was making, with overtones of carbon and a hint of varnish. Something to do with the ethanol content maybe?
|
| |
|
|
|
|
|
|
|
You know, that's a weird description and also pretty close to the smell it was making, with overtones of carbon and a hint of varnish. Something to do with the ethanol content maybe? I don't think so, probably something more to do with the stabilisers they put in. The Renault smelled like that last time I started it up, and that had E0 in which had sat for 8 months or so. It is also very difficult to get to start, even if I cycle the fuel pump a few times (it's a pressure relief circulatory system so running the pump without the engine running results in the lines between the tank and engine being purged). Once the engine was warm it ran okay but certainly wasn't happy. Flat spots and bucking. A full fresh tank of fuel and a razz up the bypass should see it better. Sorry to hear about the dug. Win some lose some, particularly with dogs who've suffered prior trauma, it can come back to visit. Phil |
| |
Last Edit: Dec 22, 2021 0:27:56 GMT by PhilA
|
|
|
|
|
Dec 22, 2021 10:14:49 GMT
|
|
Sad news indeed, but, at least you tried.
|
| |
|
|
vulgalour
Club Retro Rides Member
Posts: 7,264
Club RR Member Number: 146
|
|
Dec 24, 2021 22:41:34 GMT
|
|
A little festive bonus for you all, it's only about three minutes long.
|
| |
|
|
vulgalour
Club Retro Rides Member
Posts: 7,264
Club RR Member Number: 146
|
|
Dec 26, 2021 18:55:40 GMT
|
Words and pictures time on the latest Princess video. Not bothering for the Griswold Special since that's a tiny video and it won't cost much of your time to give it a watch. I have been putting this job off because I hate working on engines and there's every chance that what's wrong is going to be difficult and expensive to put right. Alternatively, it might be something simple and I could've fixed it ages ago when the weather was nicer. I chose to drive the Maestro instead of thinking about it too much, but when the Maestro started shedding wheel arches faster than I could weld them back on, I begrudgingly set to on the Princess. Look how happy I am to be doing this wretched job. 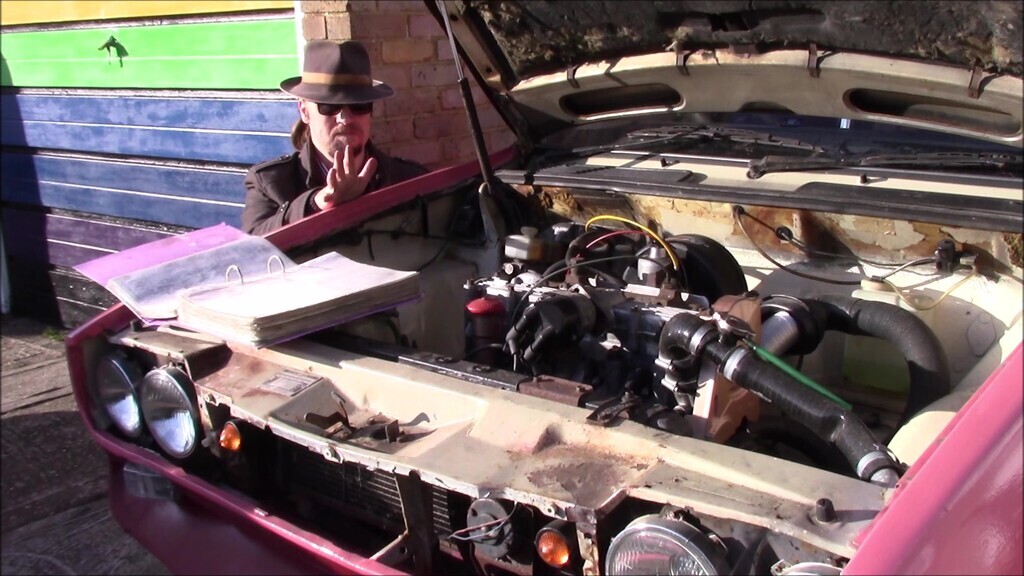 We begin by consulting The Book. My manual fell apart years ago and I carefully dismantled it and put it into A4 ringbinder folders so now it's a mostly wipe clean reference. 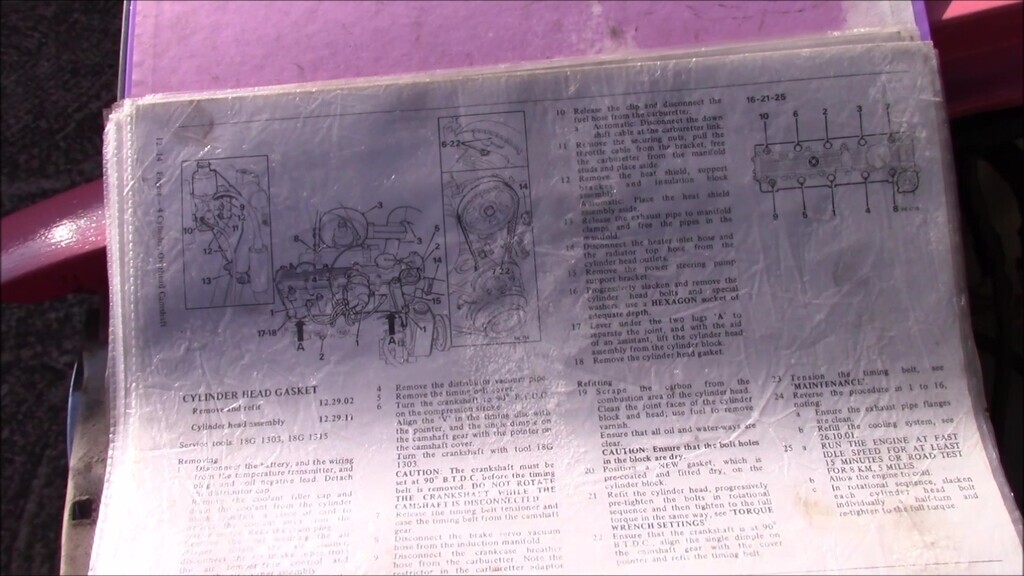 The manual helps as a guide for what needs to come off and what doesn't. Follow it step-by-step and it takes longer to do the job, instead make your own method up. First thing, pull off the belt cover. The little conical rubber grommet things I had been told years ago were impossible to find when in fact you can use classic Mini heater cable grommets, which are part number CAM5969. They're cheap and plentiful, so if you've got a rattly cam cover on your O-series, that's the thing you need to stop it. 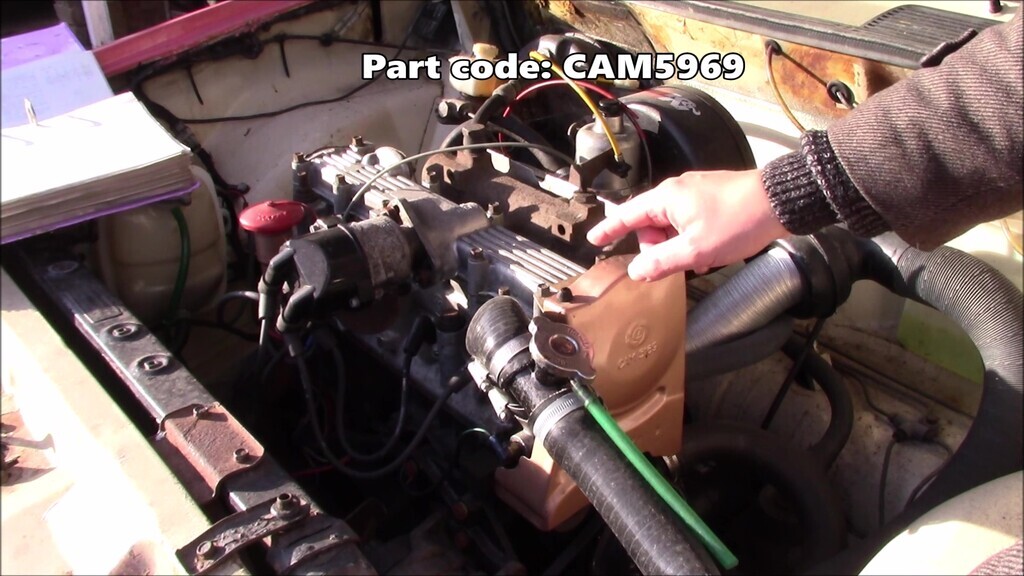 That off, you can then rotate the engine. Don't do as I do, do as I say here, and remove the spark plugs. It makes life a lot easier. However, since I'd lost a good bit of compression in one cylinder it wasn't too difficult. I haven't got anything I can turn the crankshaft pulley with so I do it on the camshaft which, over the ten years I've owned this car and the many times I've had to do this job, has so far not been an issue. Your mileage may vary. What you're aiming to do here is line up the dimple in the camshaft pulley with the hole stamped in the cover bracket. You also want the pointer to line up with the relevant location on the crankshaft pulley, but I didn't film or photograph that. Suffice to say, if you've got the book it tells you how to do it. This sets the engine to the right point to make it safe to pull everything apart. (It's not actually aligned here, but it was when I did the belt). 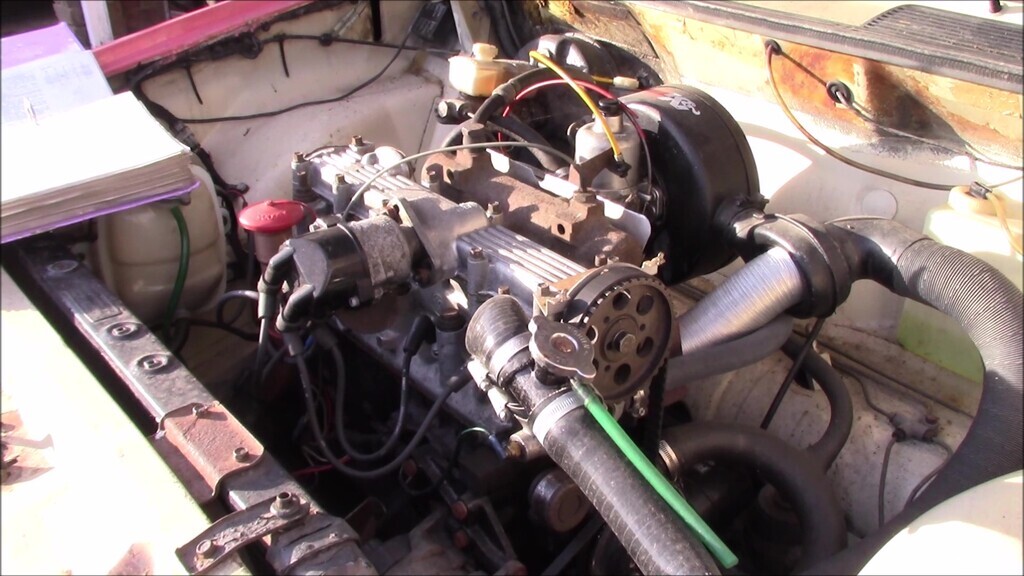 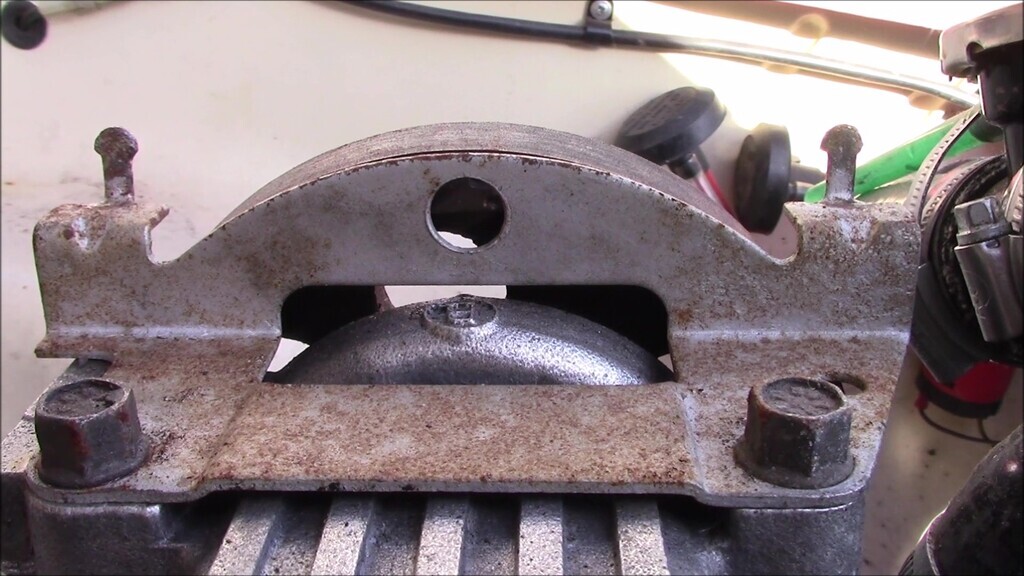 Then, remove the carburettor. You can remove all the bits separately, but don't, you're wasting your time. Instead undo the four bolts that hold it all to the exhaust manifold because that's easier. The aluminium heat shield on my car is non-standard, the original fibreboard thing fell apart years ago and I was getting proper heat soak issues, so I fabricated this aluminium one which solved the problem very nicely. 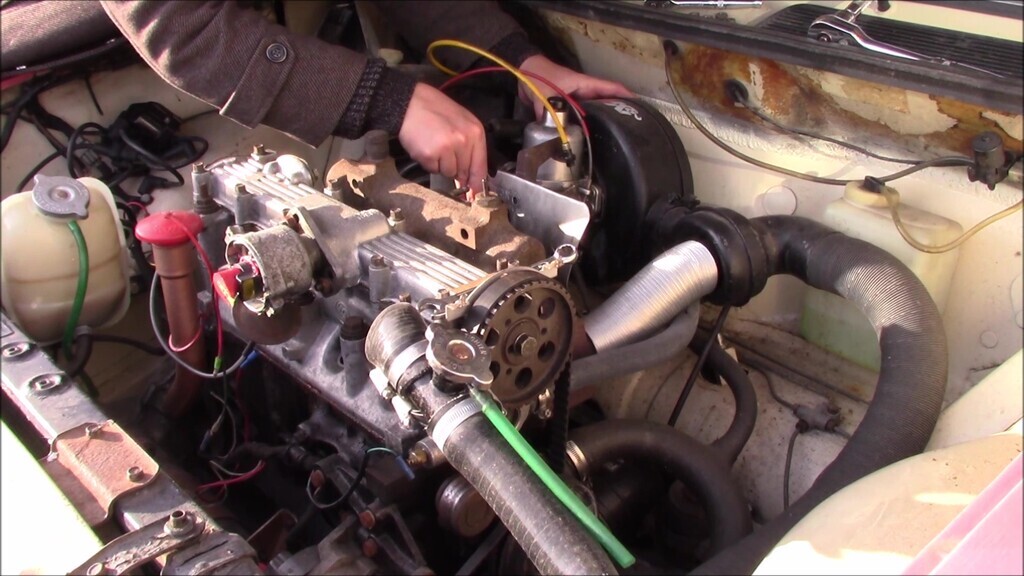 If you opt not to remove the dashpot on the carburettor - and I opted not to because I don't want to accidentally bend the needle - then you need to slacken off all four bolts to slide the assembly back on the manifold studs before you can get all of them undone, because the dashpot housing fouls one of the nuts. This is a common theme on this engine and one thing I hate about working on it. 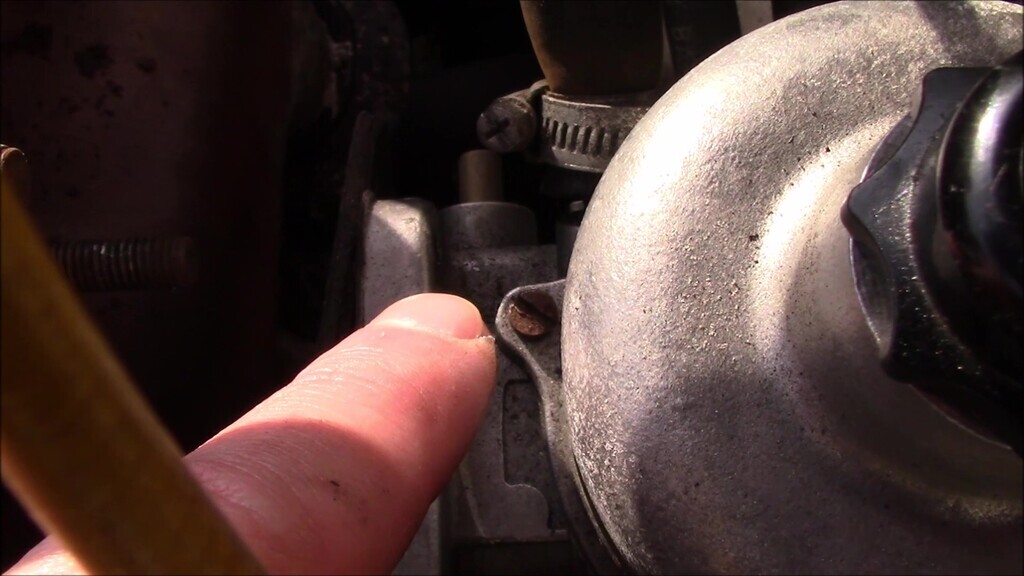 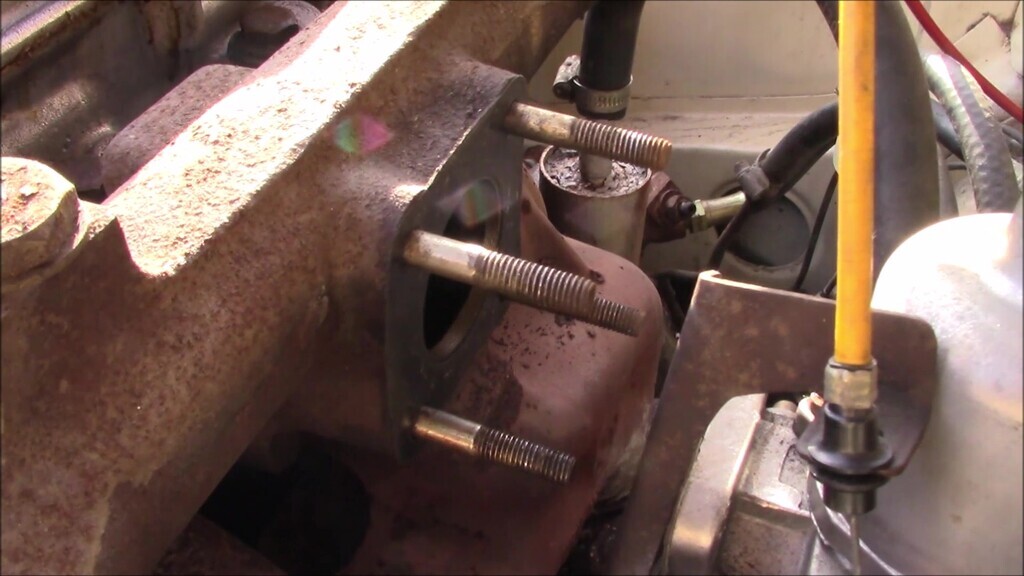 The manual would have you disconnect the exhaust from the manifold. Do not do this. Instead, unbolt the manifold from the head. It's a little more work now but you won't have a blowing exhaust that refuses to seal later if you do it this way. Trust me, I've been there so many times. Mini and Maxi owners will also know this pain. I even have upgraded cast brackets on this car instead of the useless pressed metal ones it originally had and they're such a nightmare to get aligned and sealed nicely that I've vowed to only disturb them in emergency situations, and even then only if there's absolutely no other workaround. 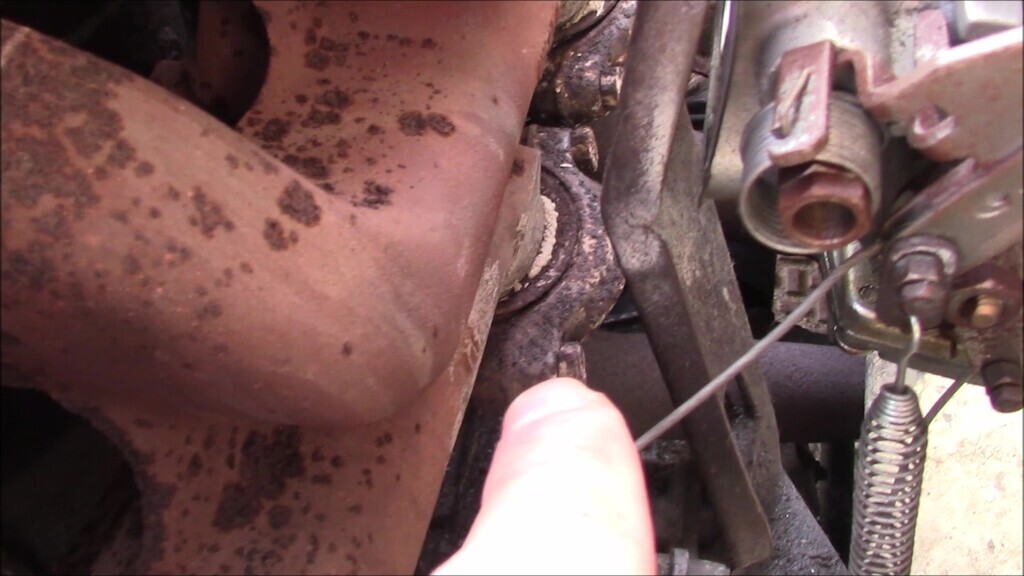 With the manifold unbolted, it offers no obstruction to the head at all. Reinstalling it is a bit fiddly, you have to thread a bolt through the manifold and the manifold gasket at each end (ideally one at a time) to get things lined up with the head, but once you've done that it's pretty plain sailing. Do all the bolts up most of the way before fully tightening, this then allows a bit of wiggle room if you need it for alignment, especially useful since some of the bolts have to be done by feel. 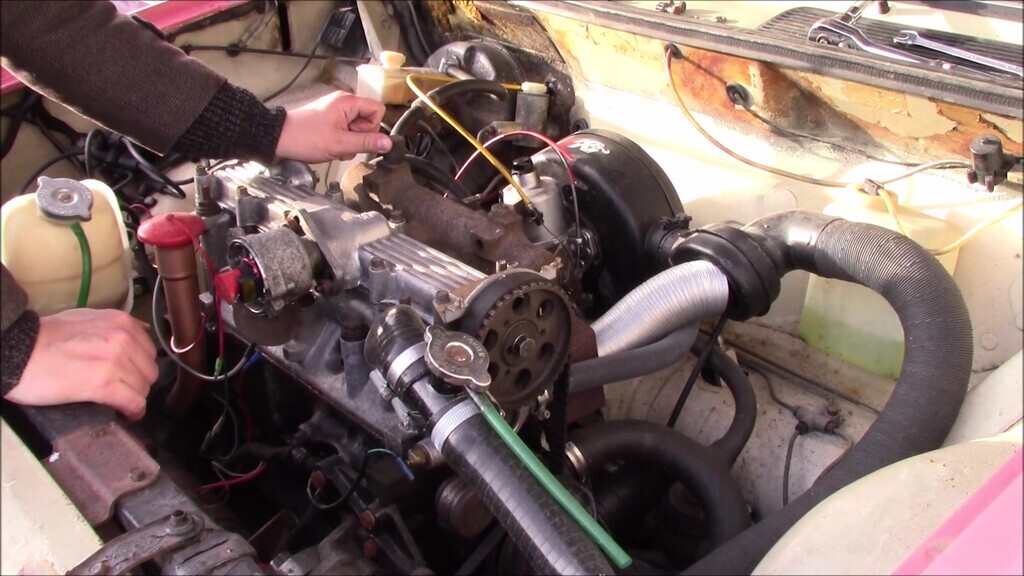 You will now believe you are ready to remove the head. Drain the coolant and undo the bolts in the proper spiral pattern and set them aside for reassembly. 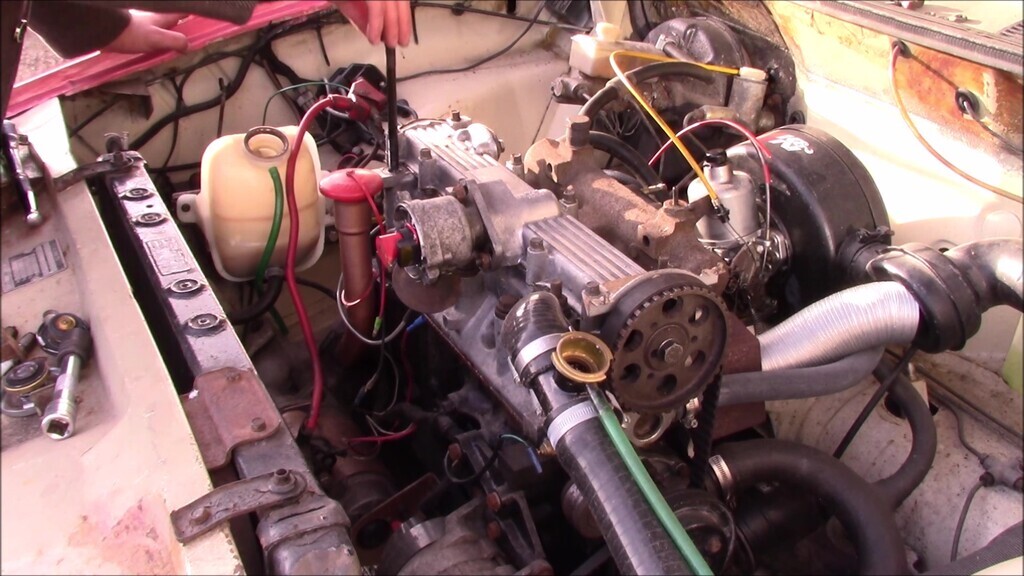 Except for the one that fouls on the distributor casing meaning you have to remove the distributor. 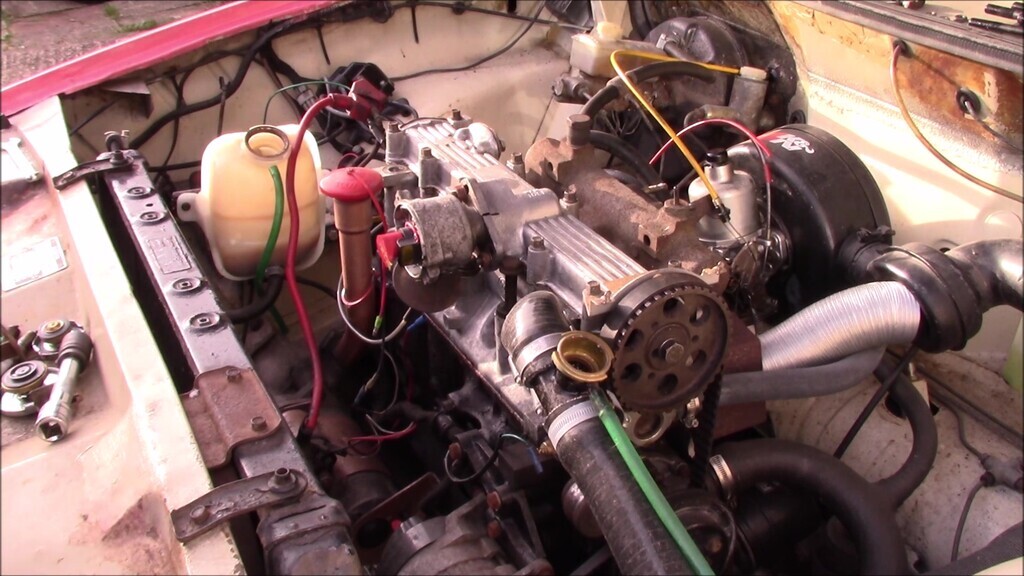 Mark the distributor casing and the cam cover so you've a rough guide for where the timing needs to be set on reassembly, this saves a good bit of time later and the marker pen is easily removed for a nice clean finish afterwards. 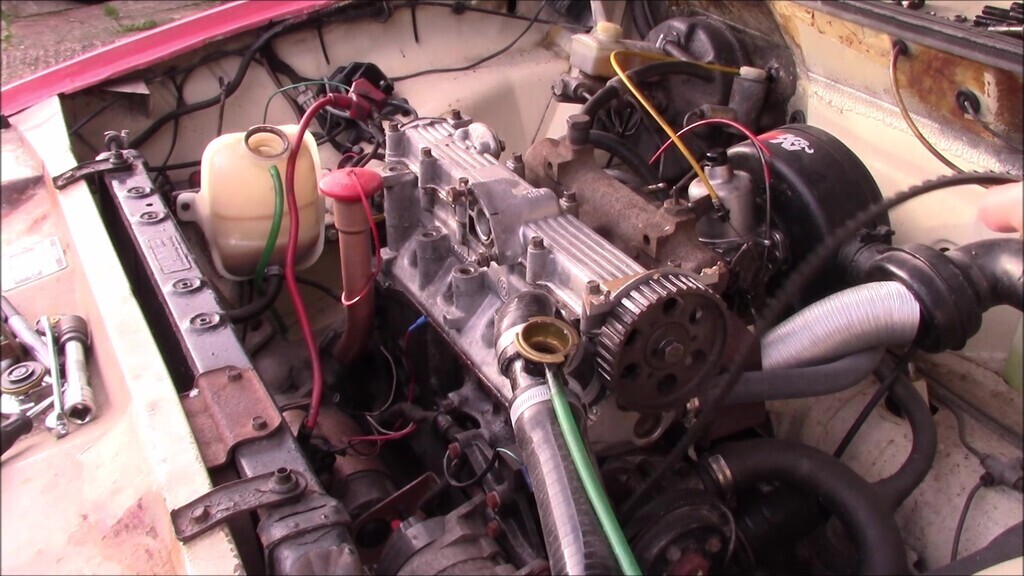 Happily, being aluminium, the head weighs almost nothing and it wasn't even a little bit stuck having been done not very long ago. 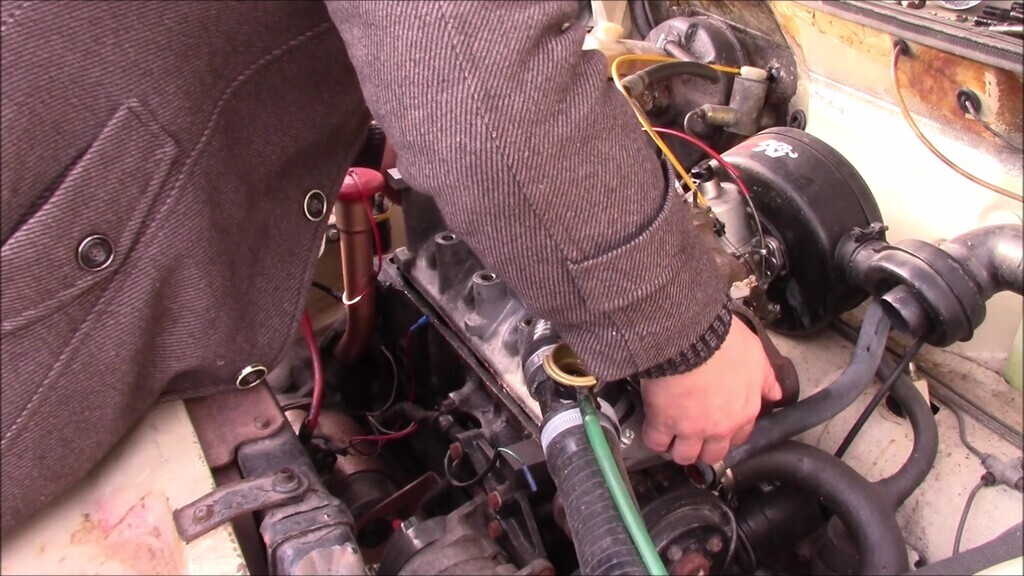 Then be very confused that there's absolutely no obvious sign of failure anywhere. Even though you've checked the torques a bazillion times, used brand new parts, cleaned things to within an inch of their life, had the head pressure tested and skimmed properly... there's no obvious cause for failure in here. 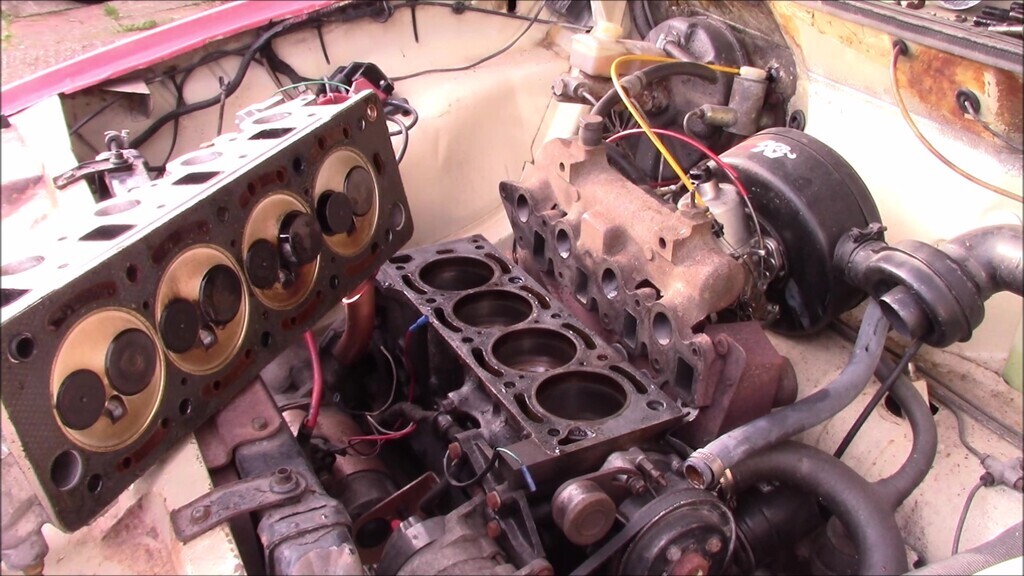 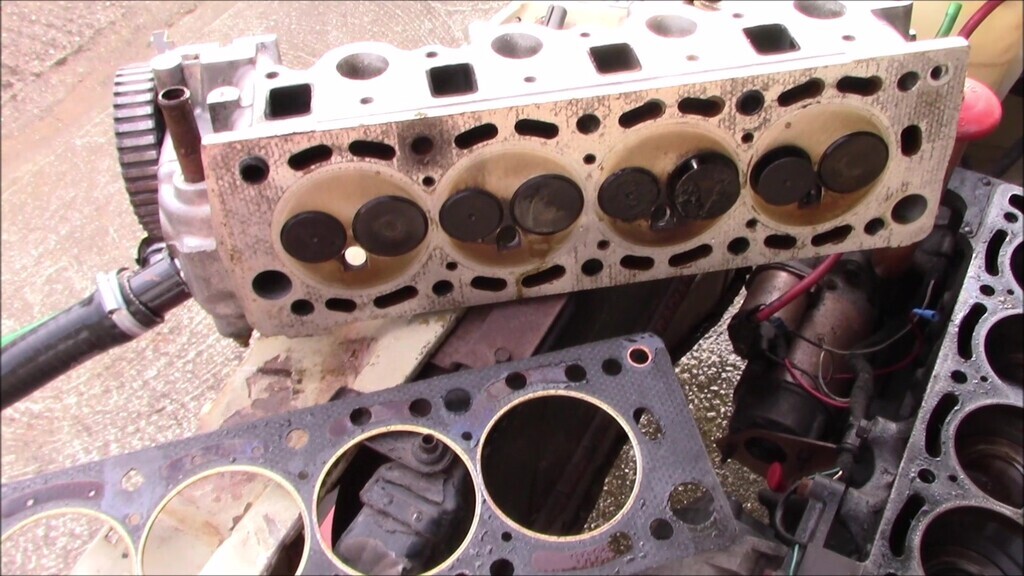 In fact, the only thing slightly amiss is that the affected corner of the gasket looks ever so slightly shrunken compared to what it should be. Whether that's the actual failure, or a symptom of the engine running with the gasket failed, I'll never know. Suffice to say it's sort of a good thing there's nothing obviously wrong and sort of a bad thing that there's no smoking gun. Oh well, get it cleaned up and reassembled I guess. 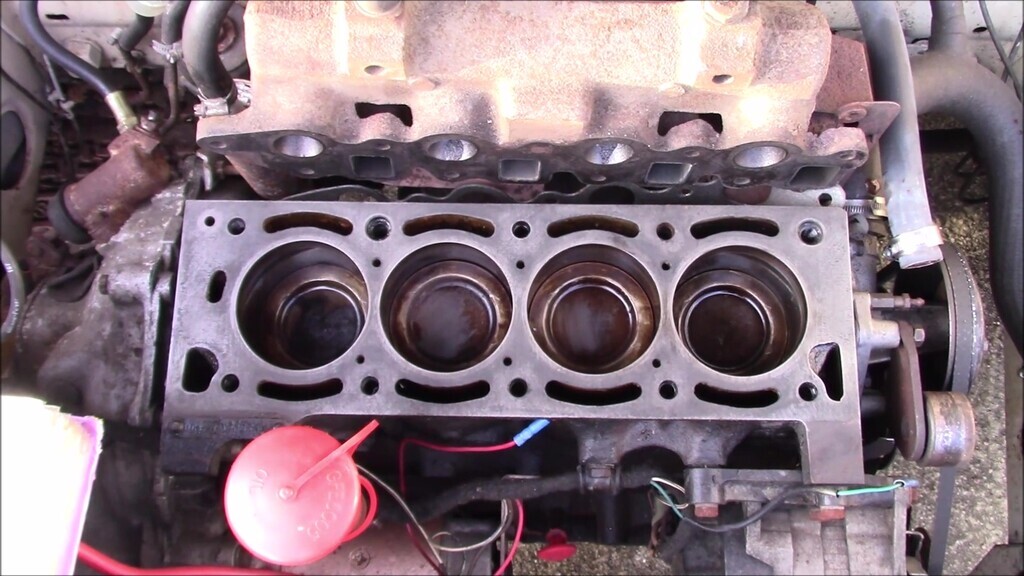 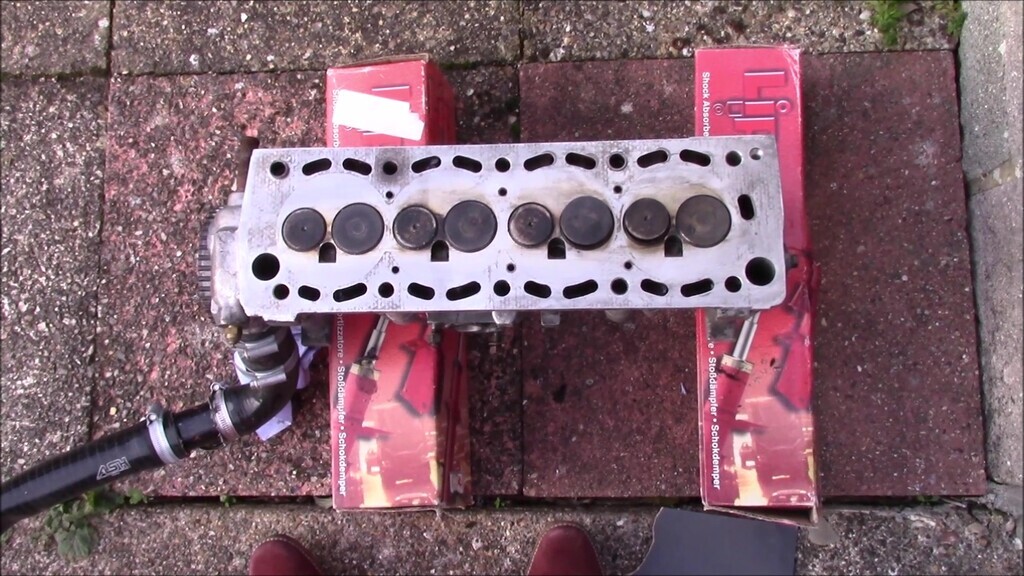 I did put a metal rule across the surfaces and look for any obvious deviations on head and block surfaces and found none. I'm aware that's not a perfect solution, nor to engineering tolerances, but it would highlight if there was a bad spot somewhere. Fact is, it all seemed fine. The only issue was some powdery corrosion that wiped off without leaving any visible pitting on the affected end of the head surface and similar powdery corrosion on the head gasket. Not enough to be a concern, and likely due to water leaking past the gasket and getting stuck there since it literally wiped off with a finger. Next, dig out the spare head gaskets (yes, I keep multiple in stock). First one I dug out was a NOS item from a supplier I don't normally use. It had to go in the bin. I don't even remember who the supplier was of this one and I don't think I can blame them since it looked fine from the visible side in the packet, it had rusted on the carboard side of the packaging which must have got damp at some point. 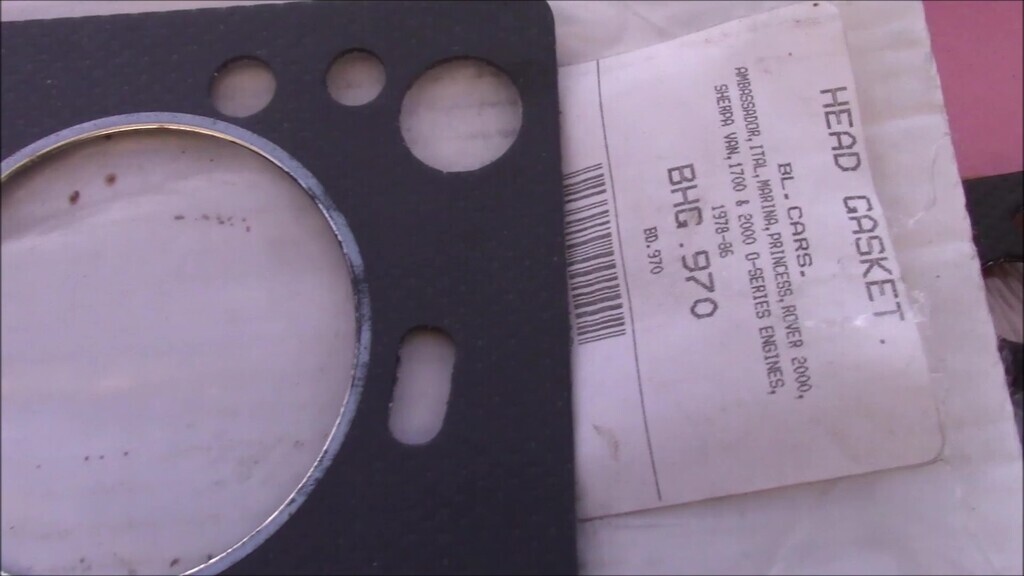 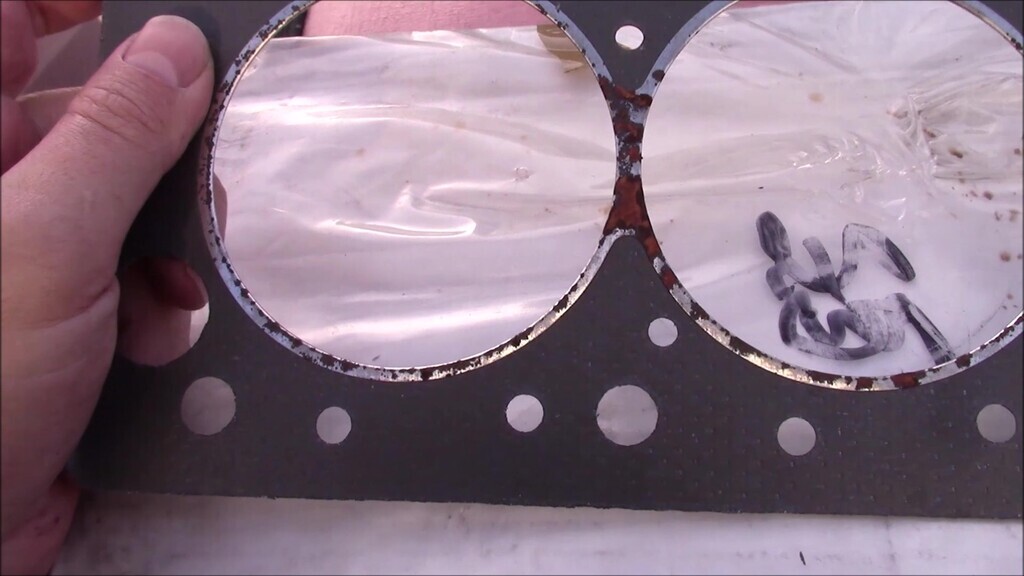 My other gasket was a full set from www.angclassiccarparts.co.uk who I've used many times over the years and who have never let me down. It also gave me a new manifold gasket to use which would be handy since I damaged the old one when I fumbled it with cold-numbed hands. 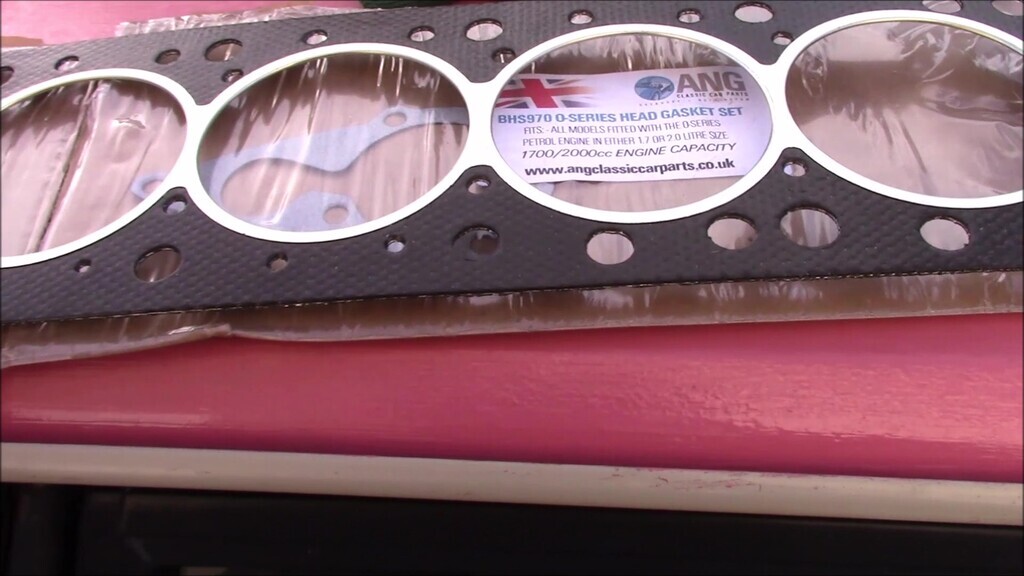 Fit the nice new gasket which did feel substantially better than the one I removed, and torque everything according to the book. 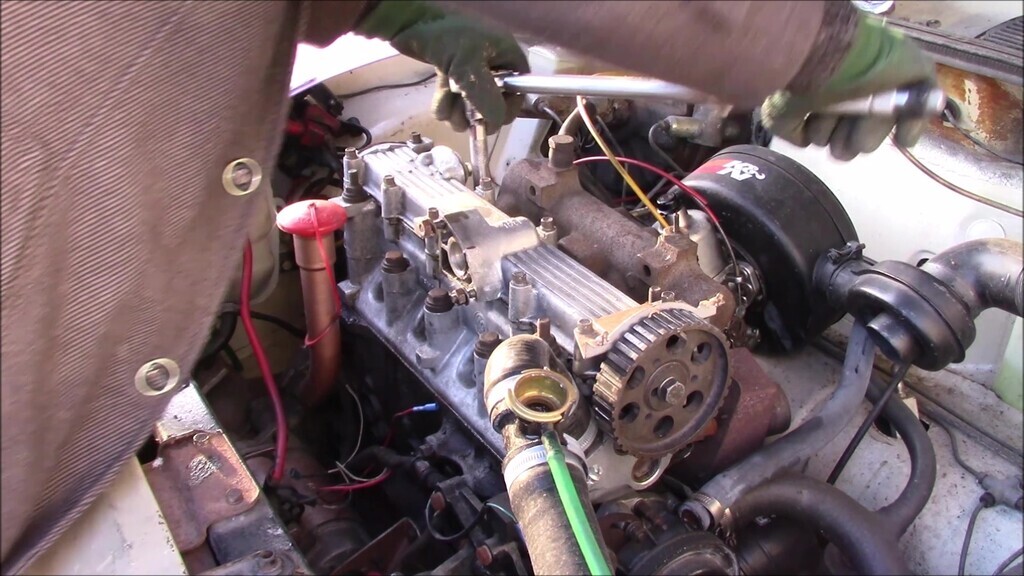 Refit the spark plugs... 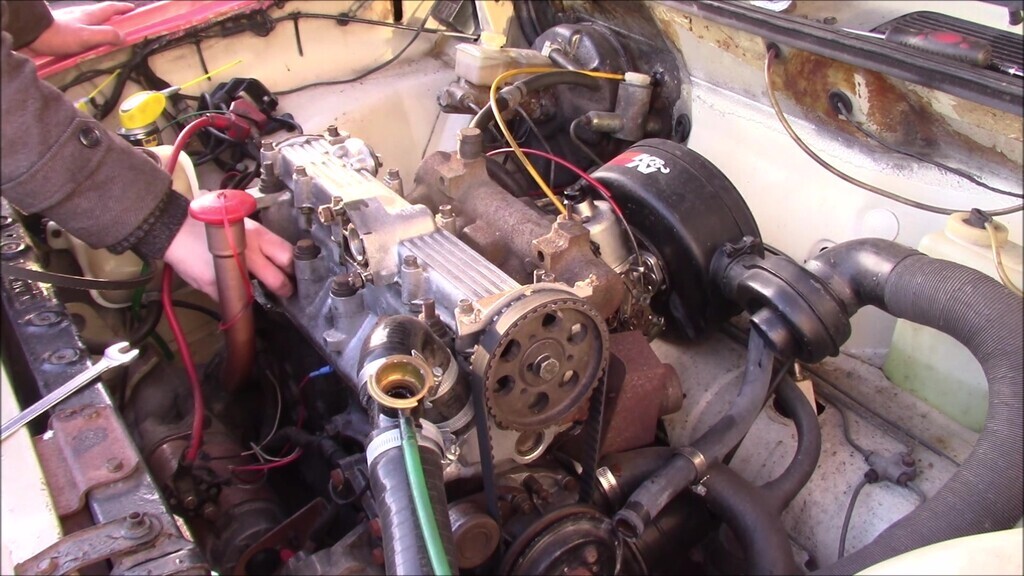 ...and the manifold and carburettor assembly... 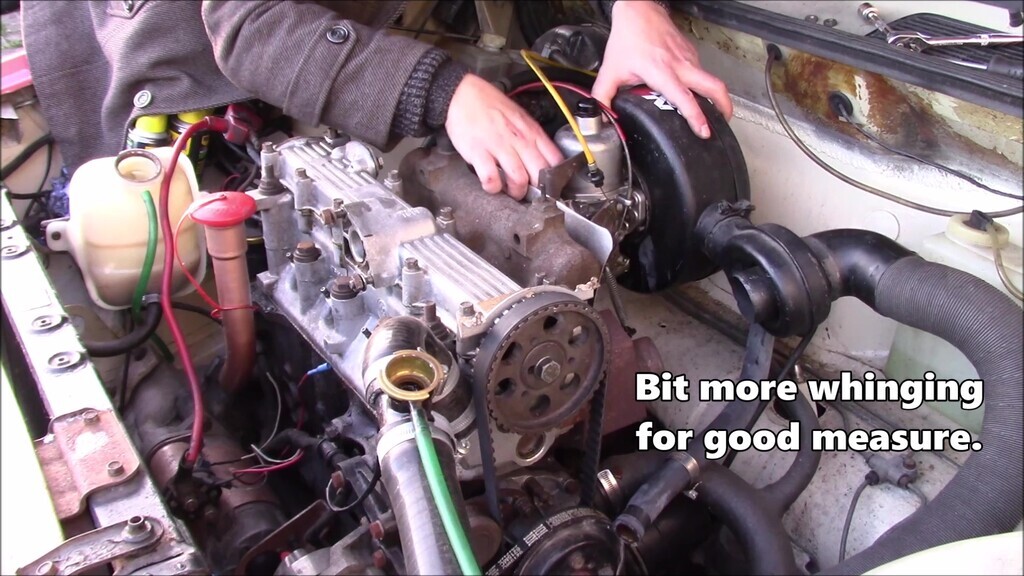 ... coolant caps, pipes, and any other odds and sods. 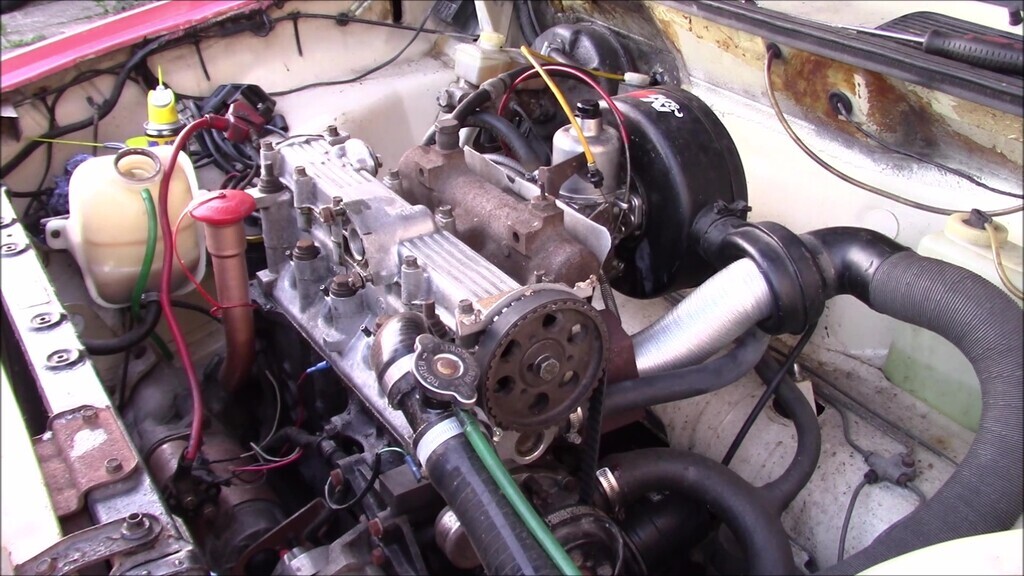 Then give up for the day because the sun is speeding towards the horizon, it's frickin cold, you can't feel your fingers, and you're desperately in need of a cup of tea. The rest can happen another day (and it did, more on that in the future). Look how happy I am to have been working on an engine. Positively delighted about it. 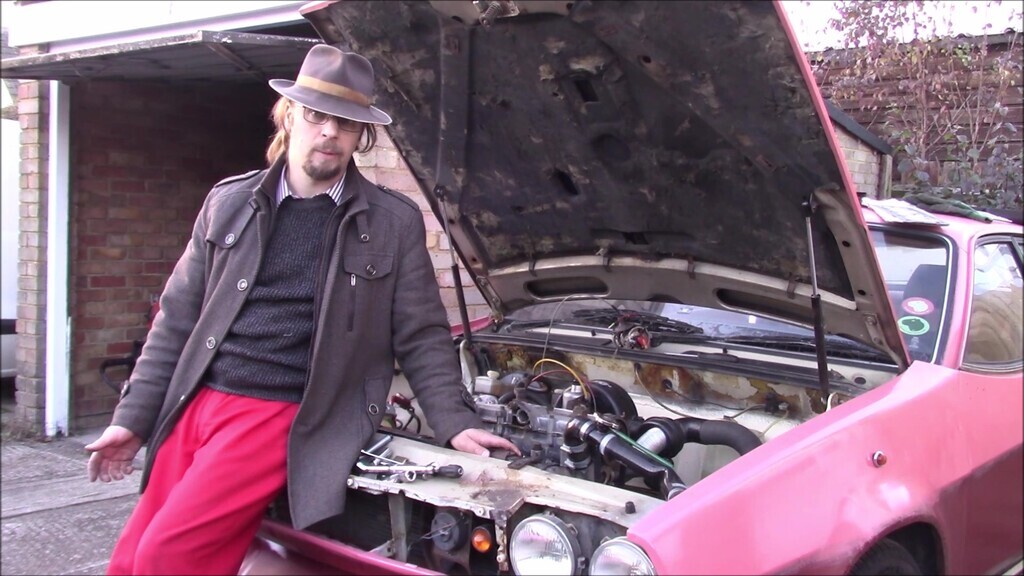 Ah well, it's done for this update. Next update we'll get the rest on and see about getting it running. 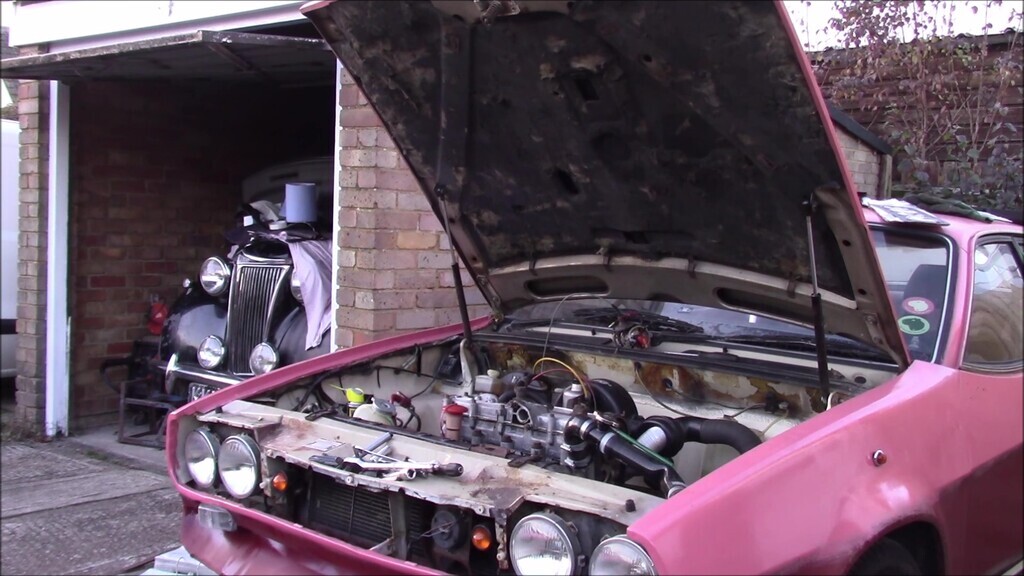 |
| |
Last Edit: Dec 26, 2021 19:10:18 GMT by vulgalour
|
|
vulgalour
Club Retro Rides Member
Posts: 7,264
Club RR Member Number: 146
|
|
Dec 28, 2021 15:41:47 GMT
|
|
Another video. There won't be words-and-pictures on this one due to the nature of it. I take a look back at the last year, where the projects are at currently, and what the whole Youtube experience has been like. Hope you like monologues!
|
| |
|
|
vulgalour
Club Retro Rides Member
Posts: 7,264
Club RR Member Number: 146
|
|
|
|
|
Let's fix the Princess.
|
| |
|
|
vulgalour
Club Retro Rides Member
Posts: 7,264
Club RR Member Number: 146
|
|
|
|
For the whole story, check out the video above. For those that prefer, here's some words and pictures. We pick up where we left off with the engine almost fully back together. First stop, check in the book to see where the timing needs to be and where the distributor should go back in. I don't remember if this shot of the crank pulley is for setting the timing for taking the head on and off, or setting it for the distributor, but do what the book says either way. 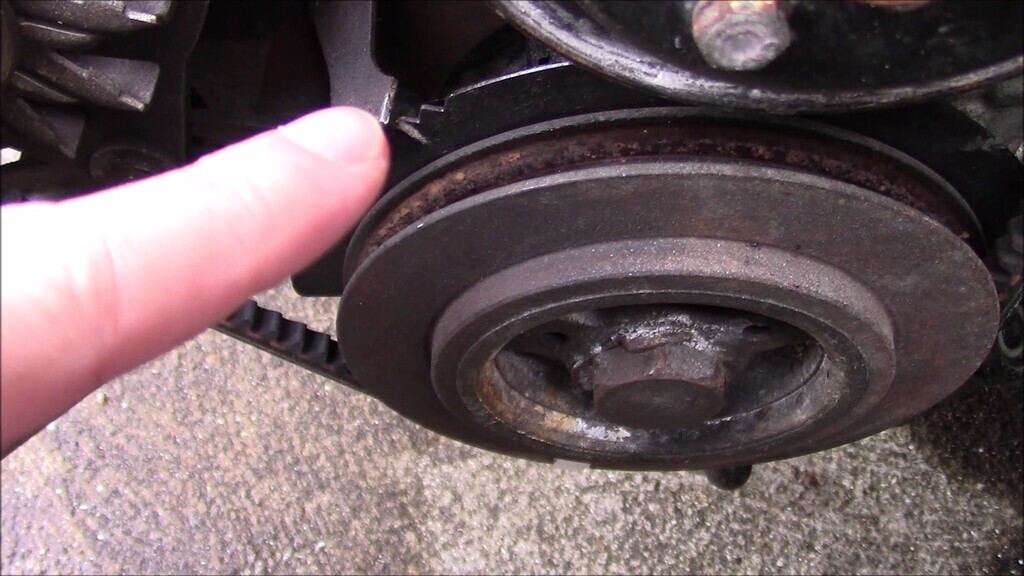 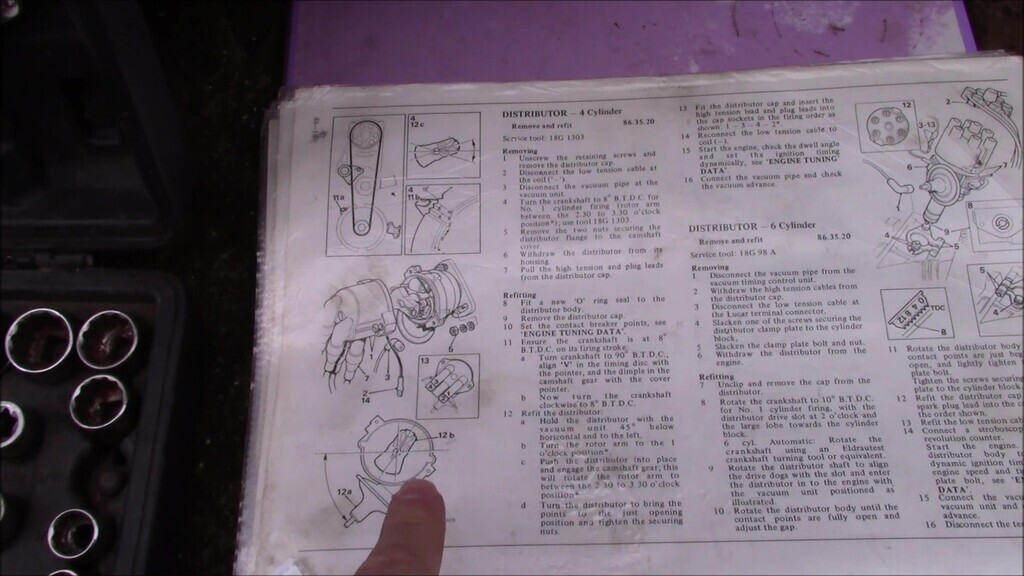 That figured out, we do that. With the vacuum UFO and rotor arm in the relevant position, you push the distributor home and the rotor arm will spin around to the new relevant position. Don't push the distributor all the way home because the studs will then be too close to the body of the unit for you to get the nuts on. You can't really shorten the studs either because then there's not enough thread for the nuts to go on. Another great bit of design work that makes these jobs a bit more irritating. Usually you have to replace the O-ring on the distributor shaft but since the one fitted was done very recently it was good to go again. Eventually the O-ring will leak a bit of oil out onto plug 2 which is when you know you need to replace it. Good luck finding the actual size you need when you do. 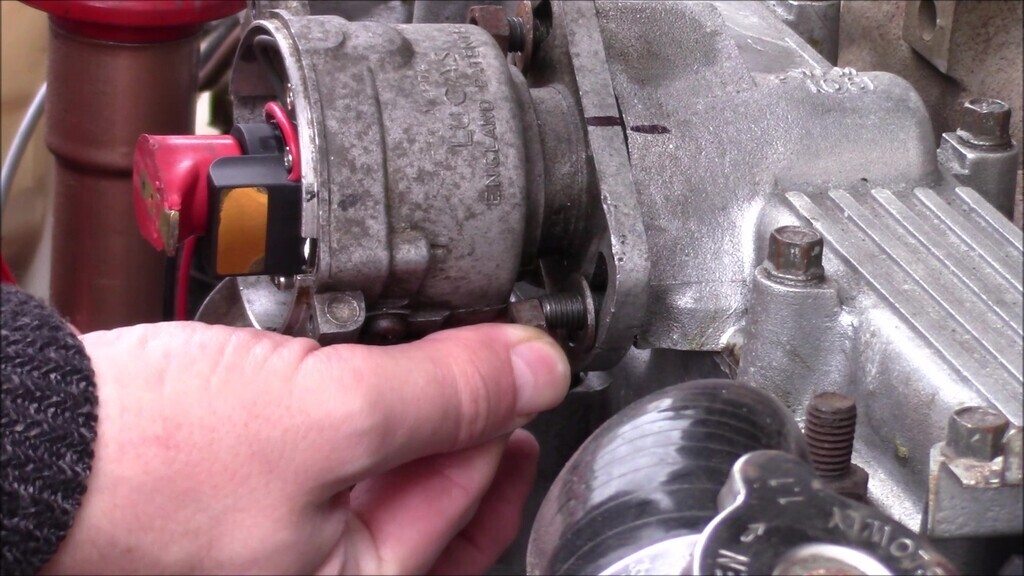 Then work out where the plugs should go to. Make sure you don't do as I do and get it wrong by thinking the pulley end is 4, because the pulley end is actually 1. You count the cylinders right to left, 1-4, on the Princess because the O-Series was originally a RWD application, then mounted transversely in the Princess. I assume they didn't put it in the car with the pulleys on the left because then the spark plugs and ignition stuff would be round the back of the engine and a right war to get to for servicing. 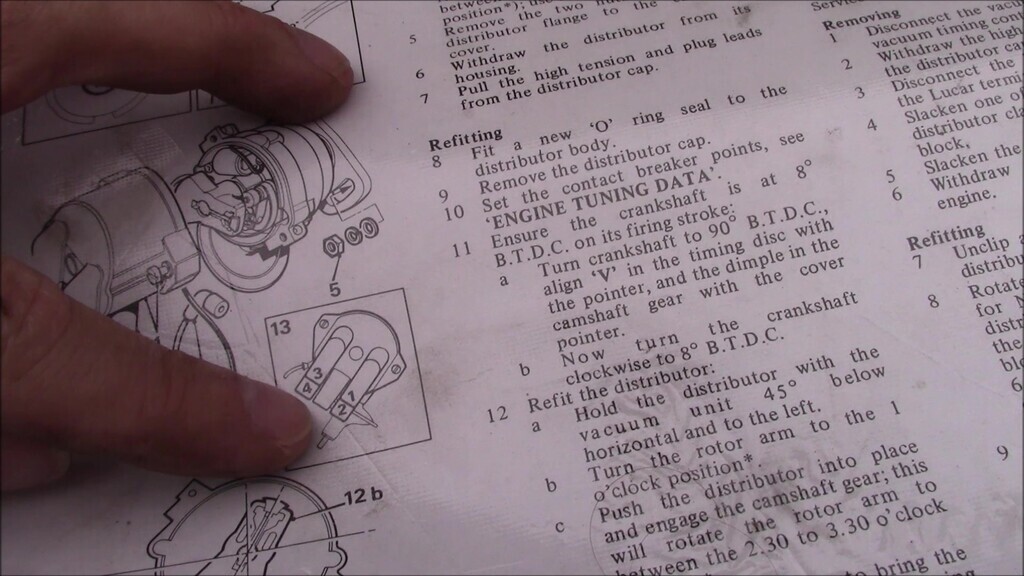 Do your final checks to make sure you've not missed anything, double check you've got the timing as right as you can, and attempt to start. Find out it won't, but it will misfire occasionally. Still don't realise you've got the plugs in the wrong order and, in the process of trying to figure it out, end up with a 1-2-3-4 firing order which very definitely doesn't work and get very frustrated with a job you hated before you even began it. 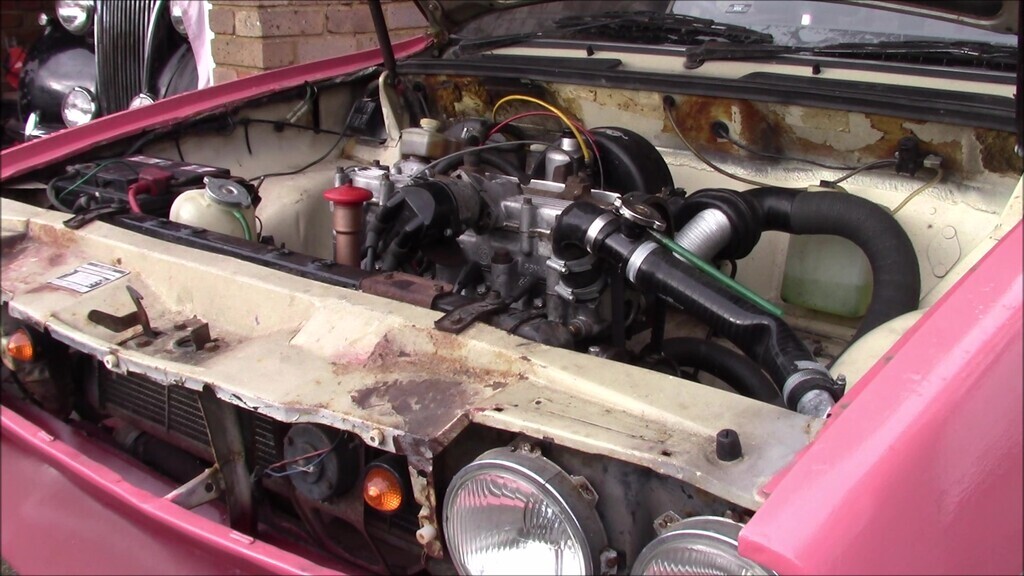 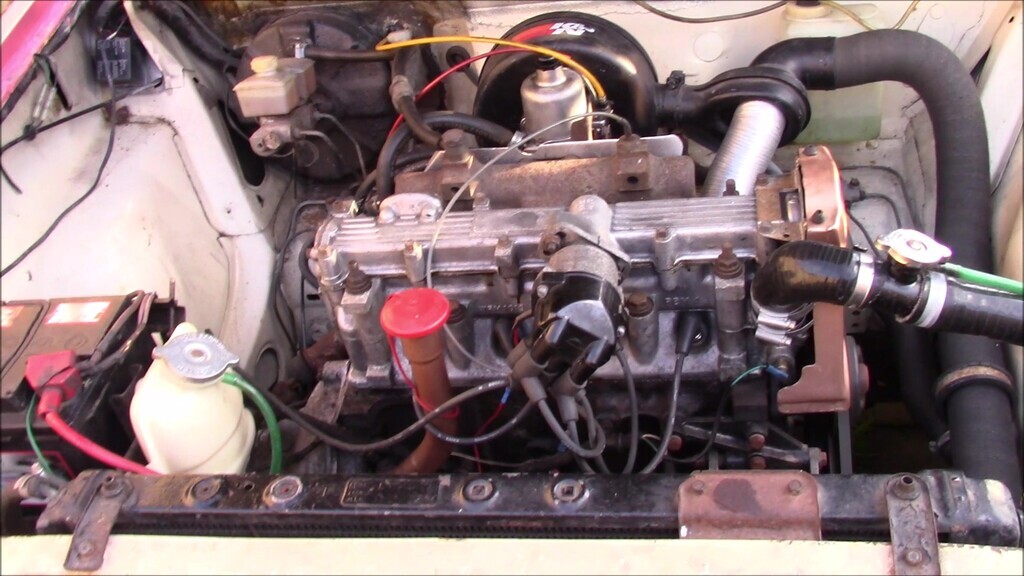 This plug lead mistake may have ended up being a blessing in disguise. Because the engine wouldn't fire properly, it meant I was double-checking everything repeatedly and I noticed the timing marks were drifting. This wasn't just that it was on the wrong rotation, it was that every full set of four combustion cycles, the location of the timing marks on the pulleys was drifting further apart. This being an interference engine means that's a bad thing. So I took the new belt on and off a few times to find it was still the same result. Something was amiss and the only thing it seemed it really could be was the belt itself. 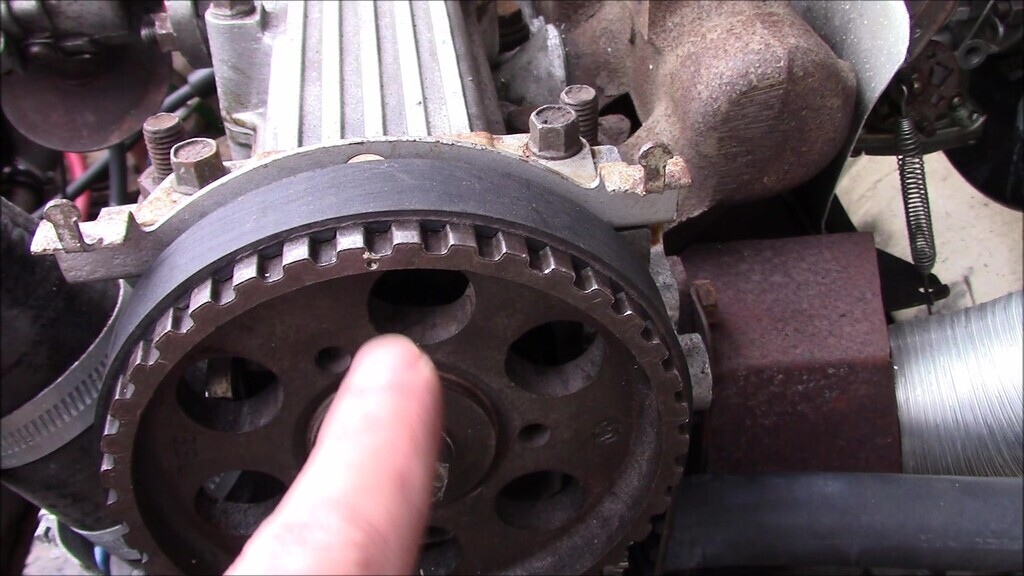 Even though it's a brand new belt from a usually good supplier, I ordered another new belt to try and see if that would resolve the issue. Once I had the new-new belt in hand it became apparent that the old-new belt was definitely wonky somehow. Difficult to convey on camera, but the old-new belt felt slightly spongey and the tooth profile in places wasn't deep enough, it was also a lot more 'wibbly' than the new-new belt. 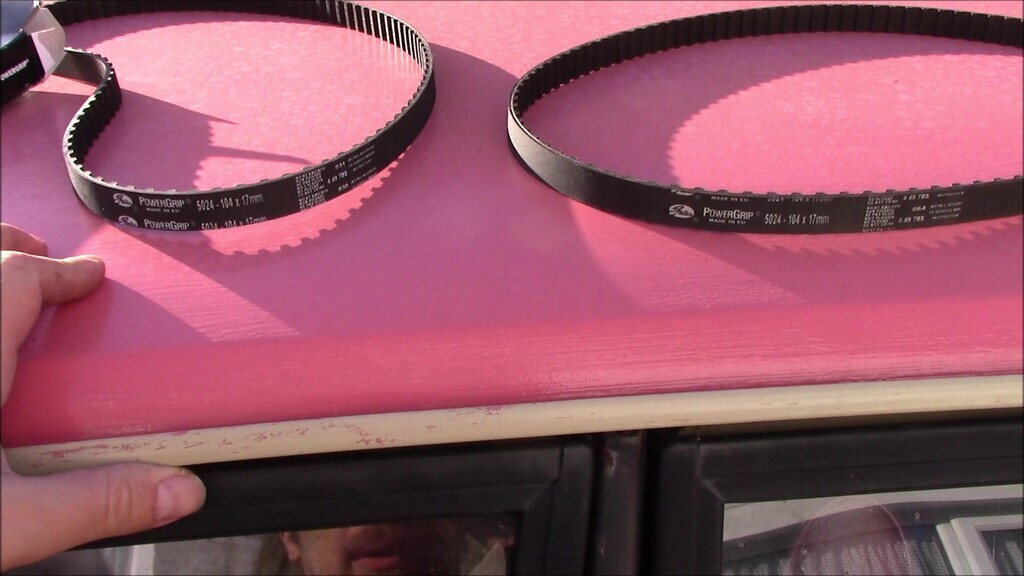 Fitted the new-new belt and the timing stayed put like it should. Finally figured out what I'd done with the plug leads, in part due to posts here on the forum (thanking you), and the car fired up as normal. A bit grumpy about it because it was cold and running on 4-5 month old unleaded but it was running again. Initial signs were promising, but I still wasn't any more enamoured of engine work than when I began. 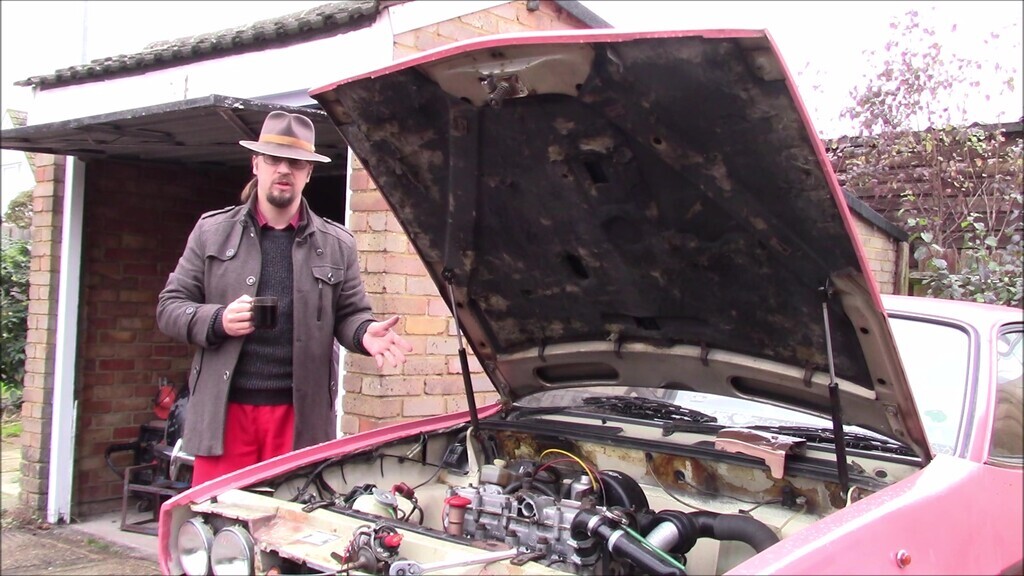 Two options for testing are to either sit at high idle for five minutes, or take it for a five mile drive. I took it out for about 8 miles and found that it was mostly behaving itself. I suspected the old fuel was causing some issues, and proved it later when I put fresh fuel in and everything improved quite a bit. All levels were sitting where they should and aside from a noisy valve due to needing the shims doing again, I was cautiously optimistic. 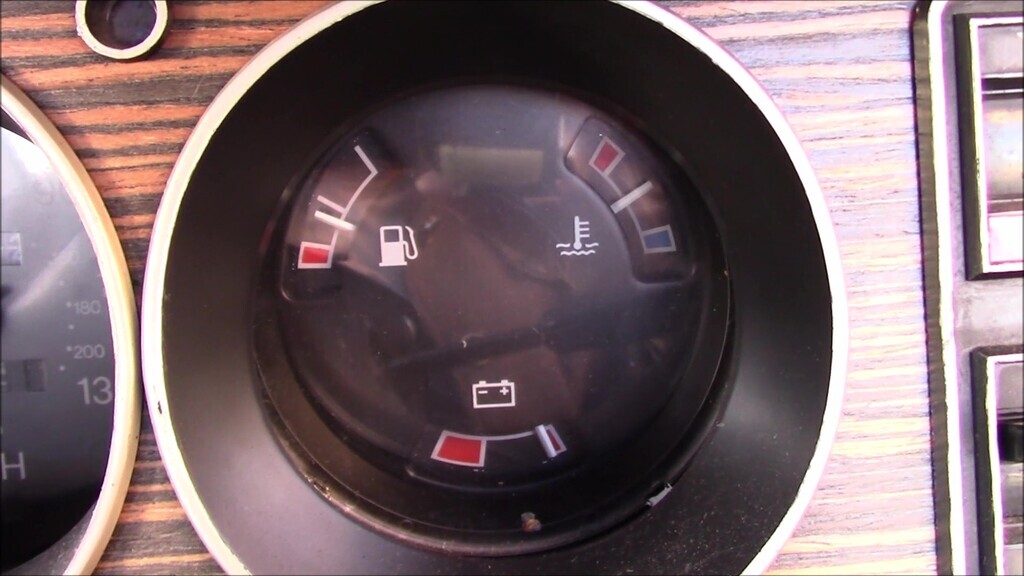 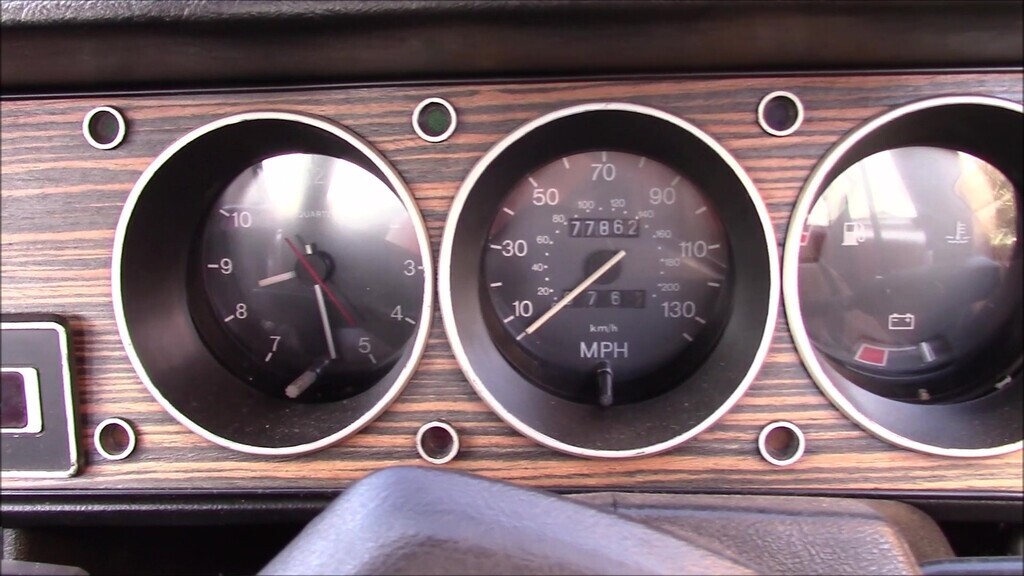 Then I found that the hazard warning light switch didn't operate the indicators any more, it operated the interior light and that made me make this face.  I did figure out what was causing the issue with the switch, more on that in a future Princess video. For now, I can tell you we've now completed just over 100 miles with absolutely no engine issues. Whatever had caused the head gasket to fail remains a mystery, I'm just happy that it is now apparently resolved and for minimal expense. Hopefully it'll be a good long while before I have to do it again. |
| |
|
|
|
|
|
|
|
|
Good. Hopefully just a faulty gasket.
|
| |
|
|
vulgalour
Club Retro Rides Member
Posts: 7,264
Club RR Member Number: 146
|
|
Jan 15, 2022 17:48:56 GMT
|
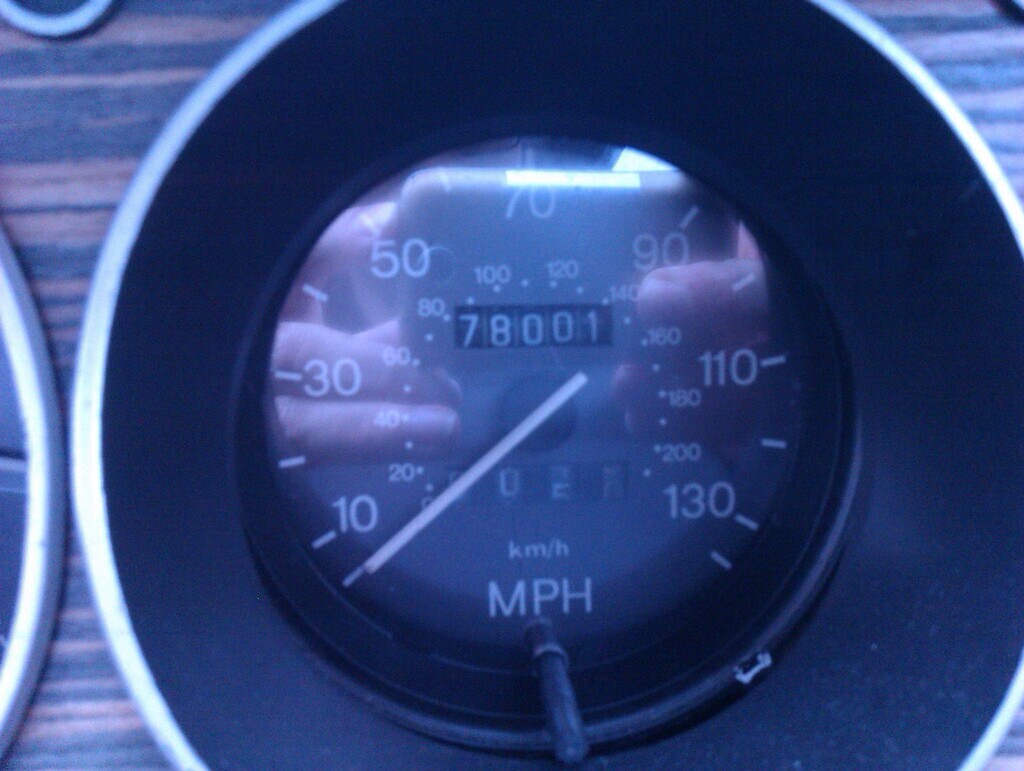 That's an achievement I suppose. Not enjoying the E5 fuel being £1.63 per litre, especially since the Princess only gives back around 18mpg urban, but I also don't do enough miles that it's breaking the bank just yet. |
| |
|
|
vulgalour
Club Retro Rides Member
Posts: 7,264
Club RR Member Number: 146
|
|
Jan 17, 2022 20:24:57 GMT
|
|
Today there was petrol on the floor behind the Princess. It does this in the summer sometimes when the back of the car gets hot and its got a full tank of fuel. While it does have a full tank of fuel, it's hardly summer. Normally, unscrew the cap to release the excess pressure and then it's fine once you've burned a few liquid dinosaurs. This time, I unscrewed the cap and was greeted with about half a litre of unleaded flooding out of the filler neck, narrowly missing my shoes, and spilling down the side of the car. Then I made the mistake of wiping it off and took the freshest paint clean off to bare metal where I'd done some repairs a year or two ago. Not sure what that's about to be honest, it's almost like the tank has over pressurised due to a blocked vent tube or similar and it's not something it's ever done in winter before. It's also become reluctant to start on the first attempt of the day, usually taking three attempts to actually catch and idle so there's something amiss. Once it's actually started its fine and behaves all day long so again, no idea what that's about. It probably hates me. I painted the bare metal with blue enamel paint because it's all I had to hand and I didn't have time to drag the Lanchester out of the garage to get to the proper colour and since I'm doing the paint later this year I couldn't give any less flips than I currently do about the state of the paintwork.
|
| |
|
|


