vulgalour
Club Retro Rides Member
Posts: 7,257
Club RR Member Number: 146
Member is Online
|
|
|
|
|
That's a good illustration of how it is on other doors I've worked on and it was what I expected to work on the BX but something about the shape of the apertures and the flap meant that water kept getting past and into the car. I suppose with enough time I could find the correct shape to make the flaps work, it was just easier to do as Citroen did and, I'm pleased to report, has thus far been 100% successful at keeping the water where it should be.
I'm still getting a bit of water in the front passenger footwell, but since there doesn't appear to be any point of ingress for it I suspect that's just draining out from under the sound deadening panel and collecting in the lowest point. When it rains, water isn't pouring in like it was. Got the carpets shampooed today and they were dirtier than they looked, and the new underlay arrived, so I'm looking forward to getting the interior back together this week.
|
| |
|
|
|
|
vulgalour
Club Retro Rides Member
Posts: 7,257
Club RR Member Number: 146
Member is Online
|
|
|
|
I splurged some cash on something nobody will ever see; underlay. This is from Coverdale and it's almost identical to what I removed from the back of the BX carpets, pretty cheap too since I only need 2 metres to do the whole carpet and I know it can be dried out fairly easily if it does take on water. It also smells right, and that's important to me, the smell of a car's interior is just as important an experience as all the other factors. Easy to fit this stuff, simply draw around the carpet onto the paper backing that protects the sticky side of the underlay, cut out with good sharp scissors, and slap it on the back of the carpet. I used the old glue outlines on the carpet to help me figure out what shapes to cut. There's no underlay on the inner sills, if you put it there you won't get the side trims on. I did the rear carpet in two pieces, as that was easiest, and it also shows how it looks when fitted and the carpet when scraped of glue. I used a metal filler scraper/blade/knife thing to remove the glue which worked really well without damaging the carpet itself. 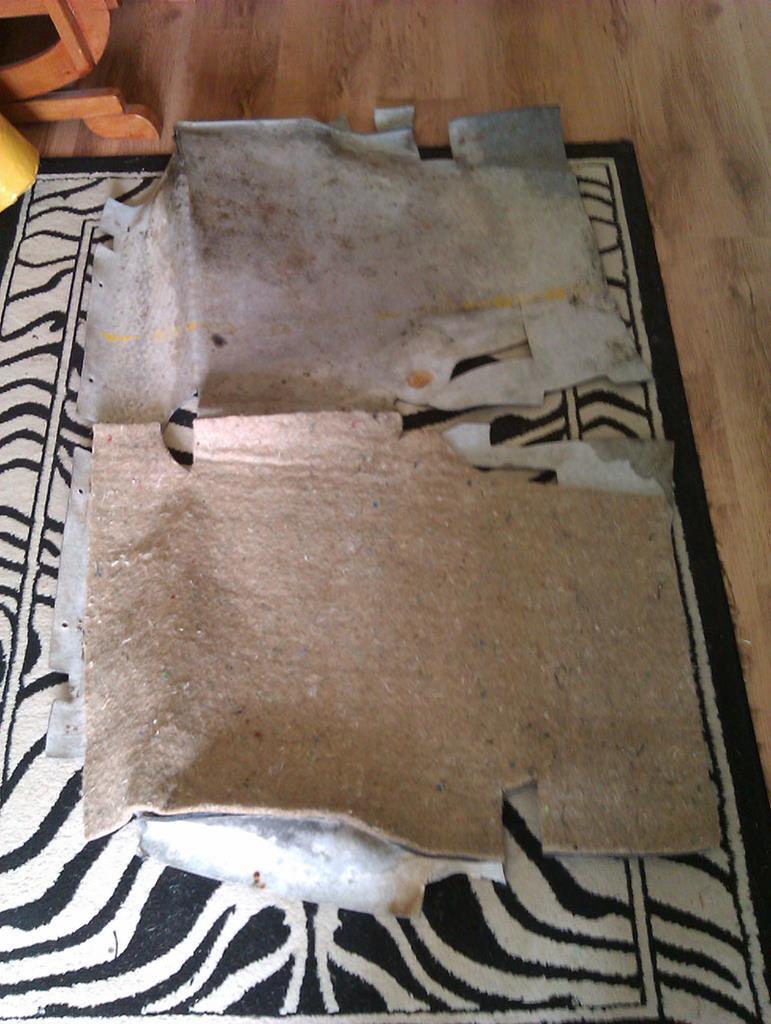 I did both front sections too, they have a little bit of variation on the edges since you don't put it over what little inner arch intrudes into the cabin and for the driver's side there's a big round plastic stop on the back of the carpet to avoid. With that all ready to go in the car I found it easier to remove the centre console to install it. I also wanted to clean the centre console up since I wouldn't easily get another chance to do that and it's a much easier thing to clean out of the car. To remove the centre console there are very few fixings: one big plastic screw at the front, the gearknob, a small bolt under the plastic grommet, and a small nut hiding behind the blanking pocket (that someone has used as an ashtray in the past, which is a bit annoying). If you ever wondered why the bottom of the handbrake slot on the centre console had that bigger wide bit at the bottom, that's so you can get it over the handbrake when you remove and refit since the handle is too wide to go through the other sections easily. The rear pocket prises out, there's two spring-tabs at the top and and at the bottom. 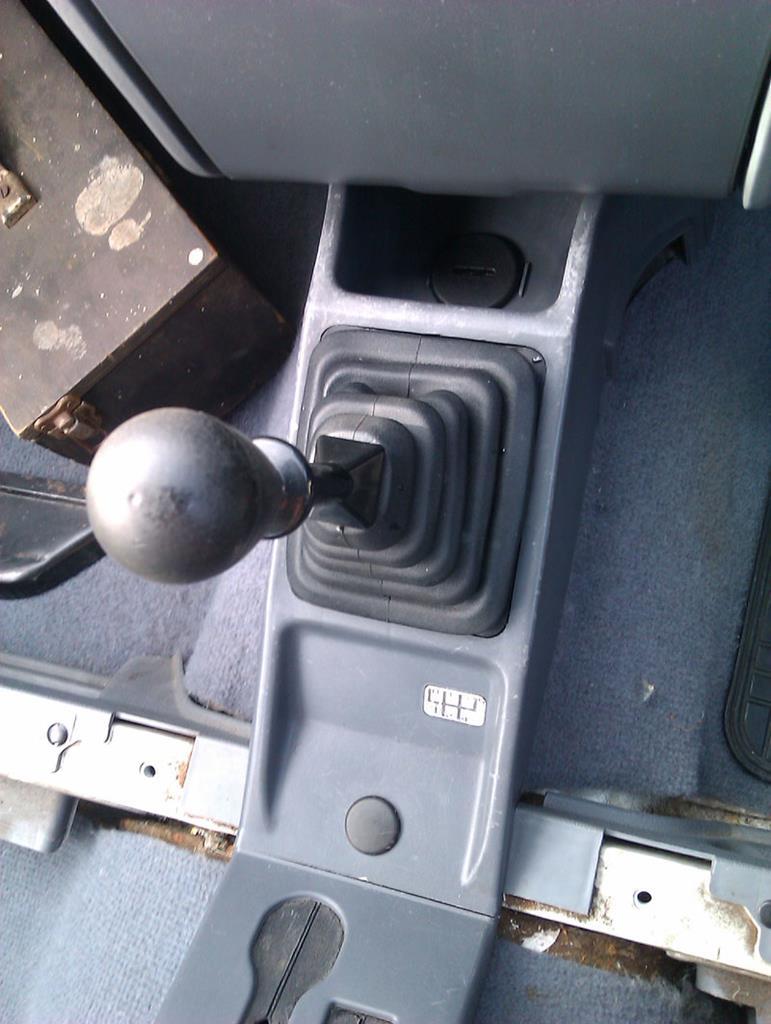 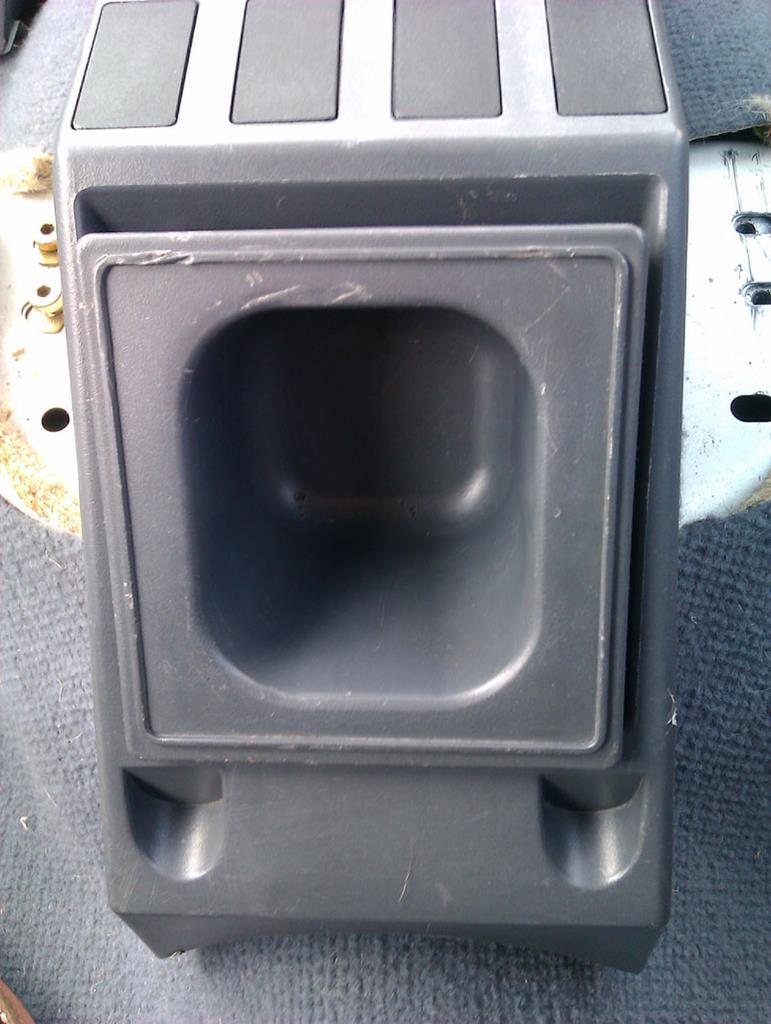 This is the bolt the big plastic screw at the front goes on. You can unscrew this with a regular screwdriver, you don't need a massive one, it's not very tight.  This little bolt is hiding under a rubbery cap that simply prises off. The front portion of the centre console overlaps the rear. You can remove the rear portion without removing the front, if you're careful, but you do have to undo this bolt to do it. 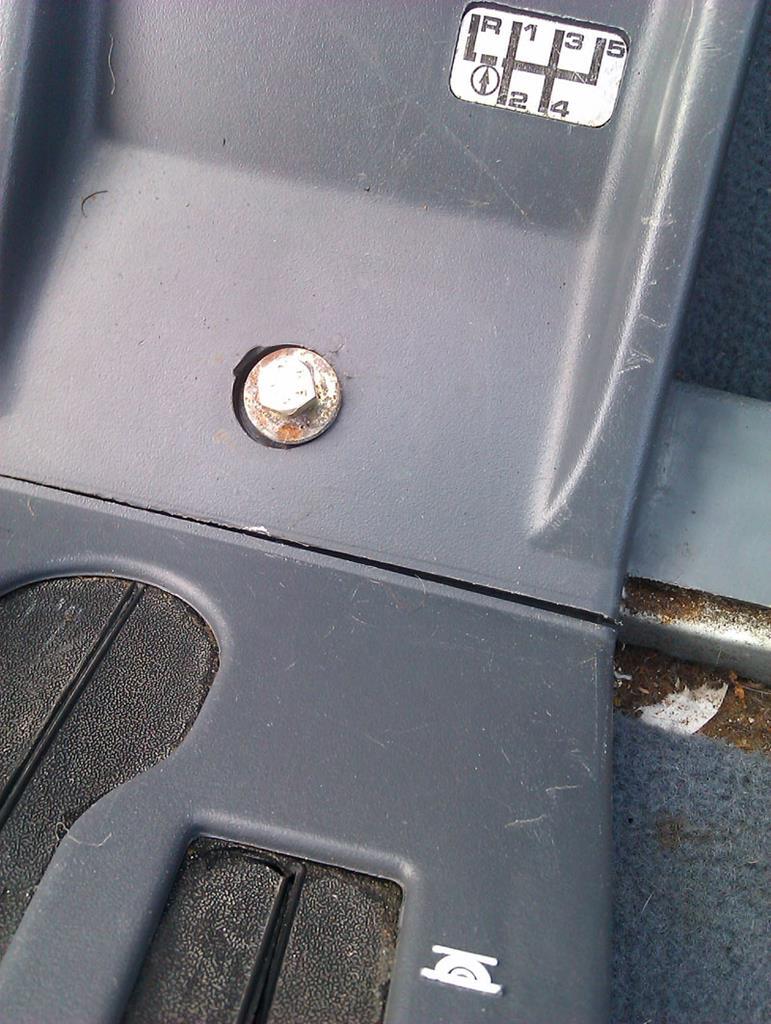 The gearknob simply unscrews. There's a spring underneath which isn't under any tension, and the black plastic portion of the gear lever goes some way underneath the boot and onto the metal part of the gear lever, so be aware of that when installing and removing. 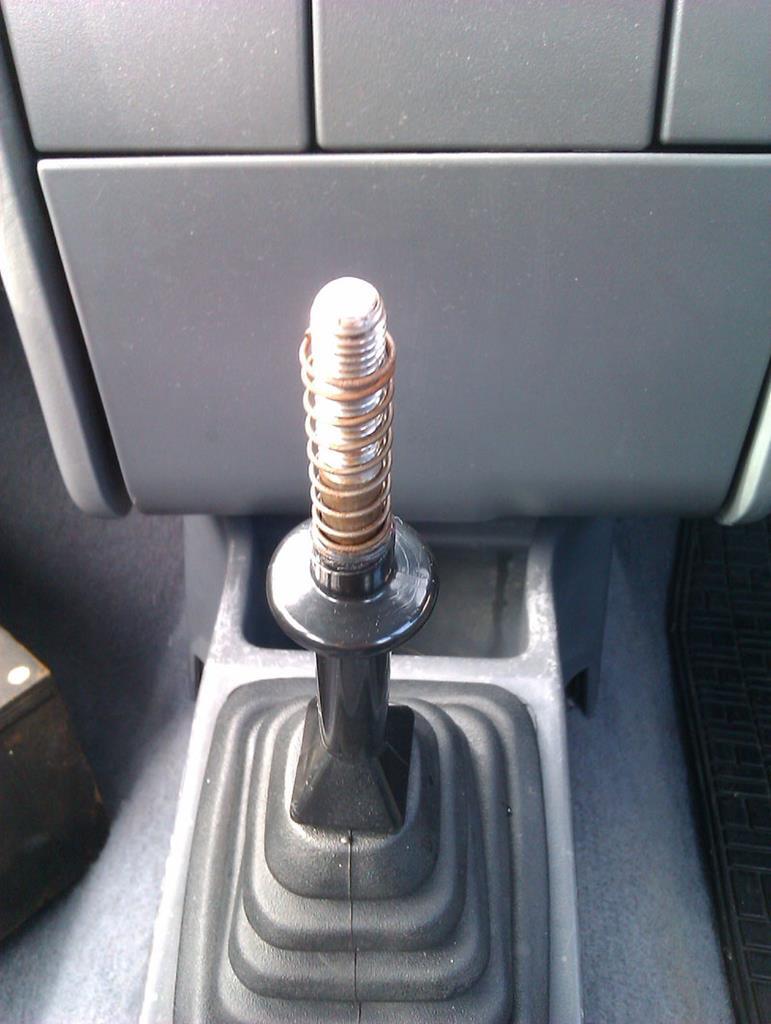 The nut hiding behind the pocket at the back of the console also has a washer, this is the prevent the plastic cracking from the nut being over tightened. Easy to remove. 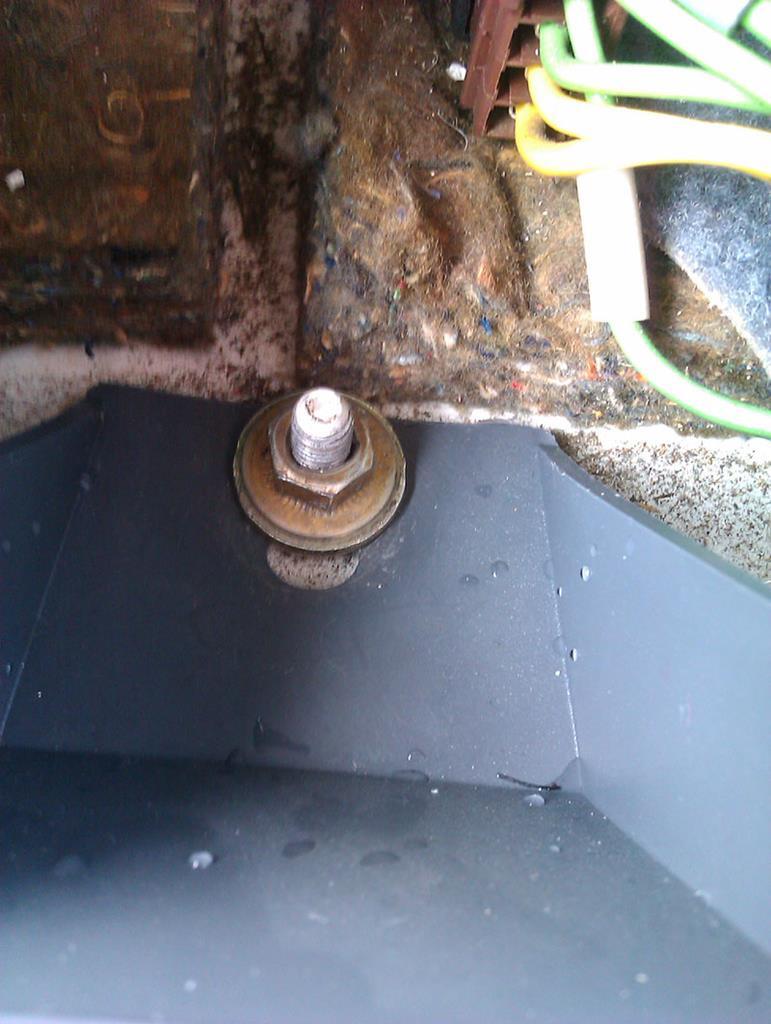 With all that done, the console is very easy to remove from the car and very easy to refit. One of the easiest centre consoles to do since there's no sneaky hidden fastenings or really any particularly twisty way to get the thing in and out. With that out and cleaned, I could reinstall the carpet which was equally very easy. I didn't remove the rear door trims, I found I could just push the carpet underneath them when the screws were loosened a bit. There's four fir tree style trim clips under the rear bench to hold the carpet down there, again you needn't remove the seat, you can push the carpet through the gap between the floor and the seat if you lift the seat base up a bit, then fold the seat base fully forward to push the trim clips home. There's two screws holding down the plastic trims at either end of the seat bench that also help hold everything flat. 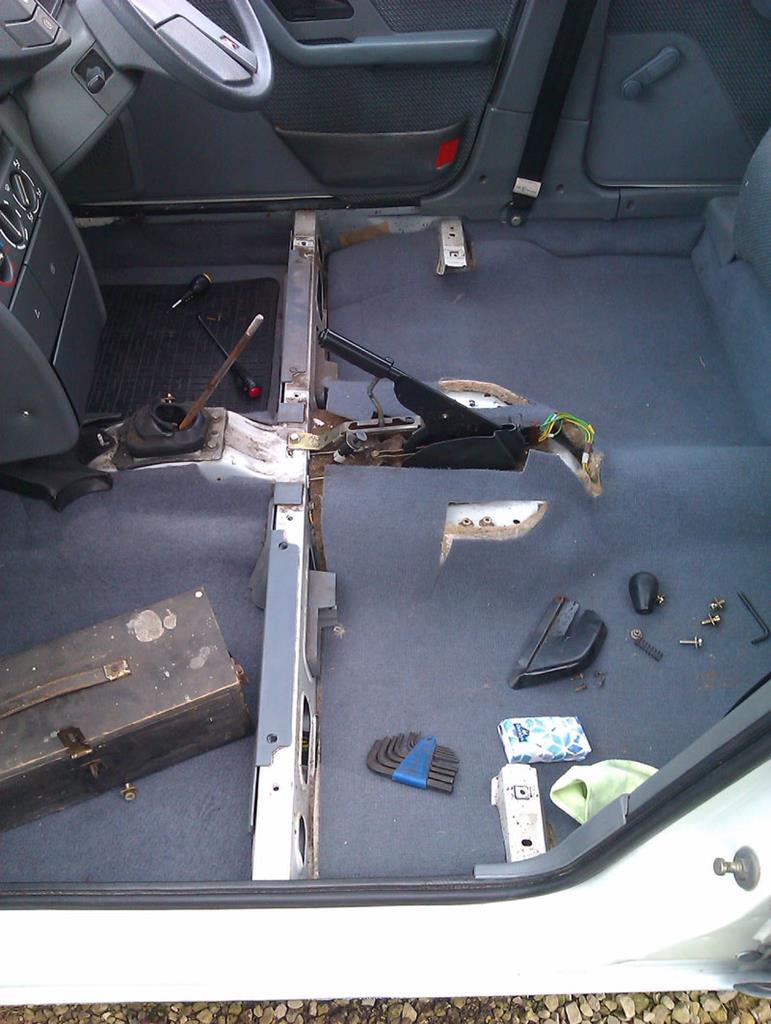 For the seats, it's 5 allen headed bolts. I found it easiest to push the seat all the way back to do the front ones, then all the way forwards to do the back ones. Don't fully tighten the front bolts until you've got the rears in, the floating captive nuts Citroen use for the seat bolts give you a lot of adjustment that should make fitting the seats easier. Unfortunately, I didn't have a socket small enough for these, so had to do it with allen keys, which is a chore. The front ones aren't very visible and removing the seat base doesn't make life much easier. 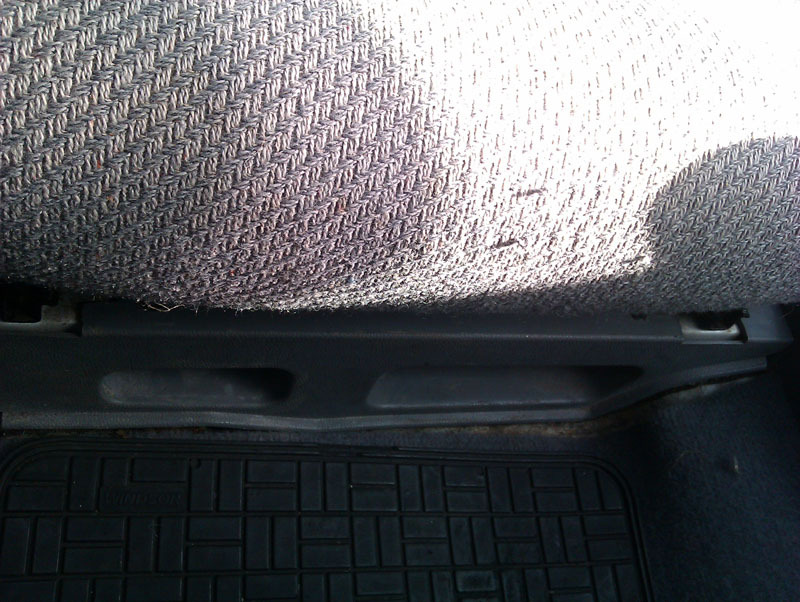 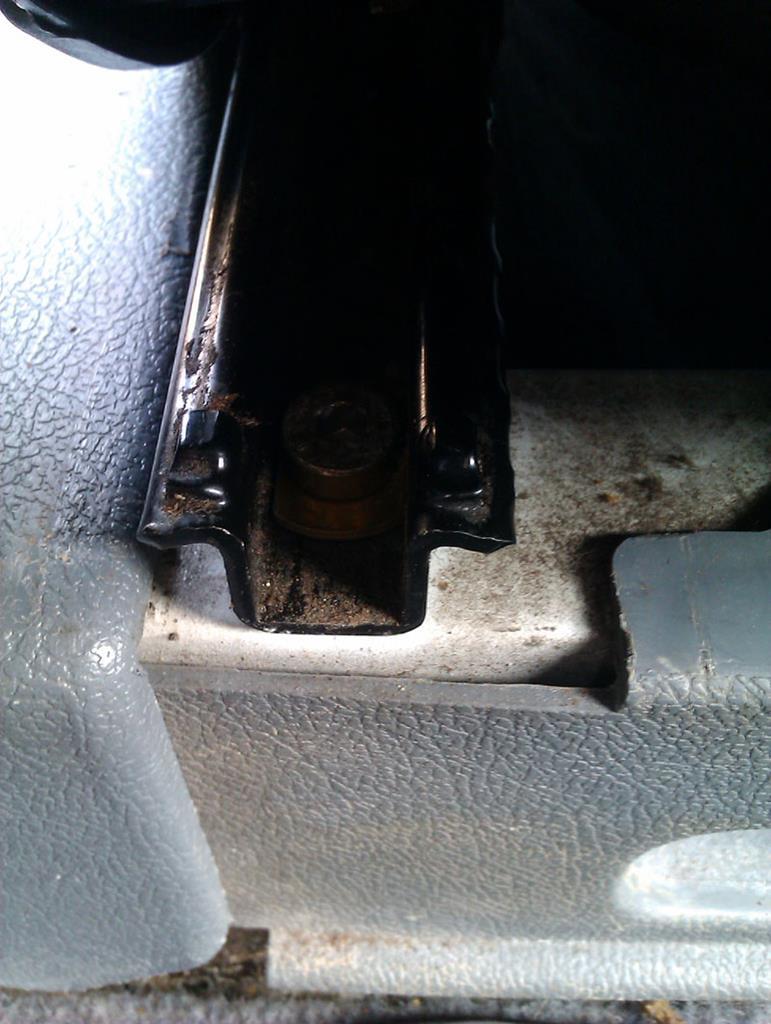 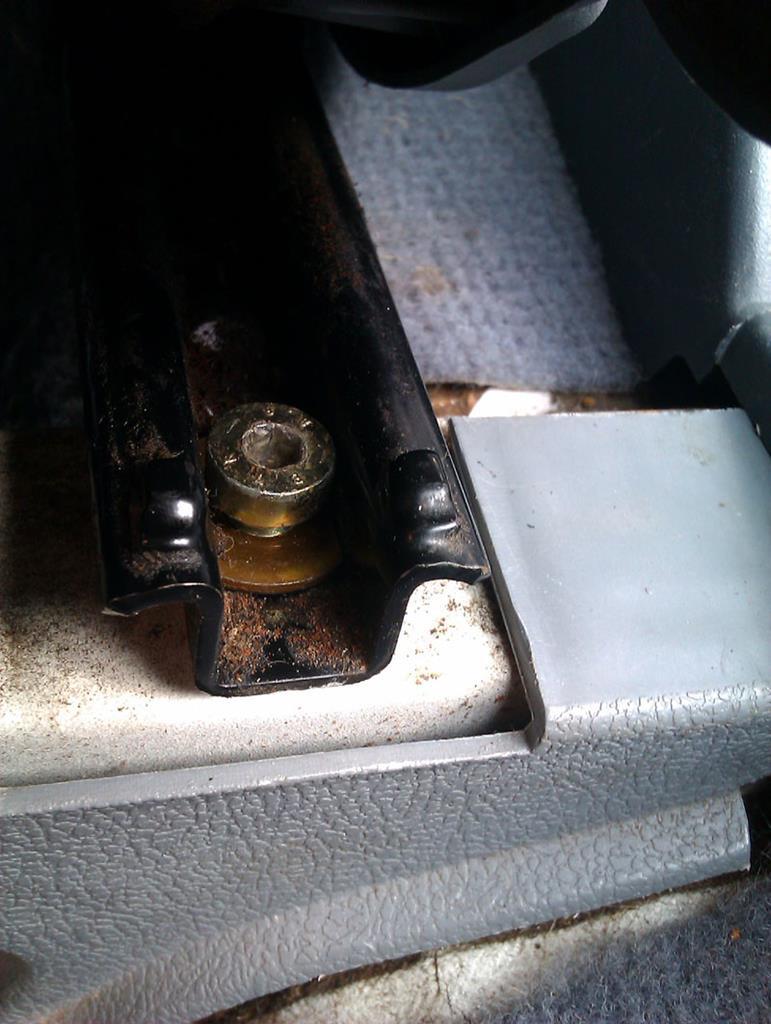 At the rear of the seat the sill side is a single bolt, the seatbelt side is two bolts and a metal plate. This metal plate serves in part to cover the raw carpet edges but I suspect is also to help spread the load for the seatbelt, there being two bolts here rather than one is probably also to do with that, I expect. 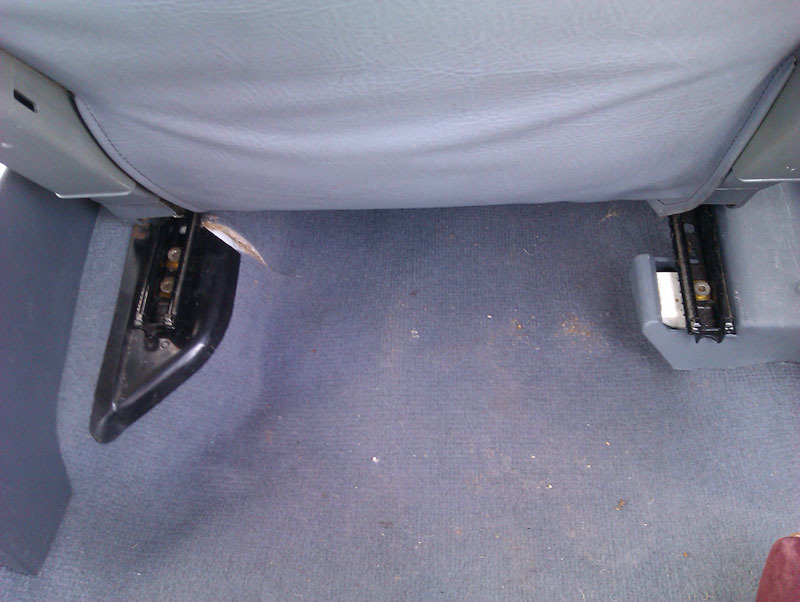 So, with all that in I vacuumed the carpet to get the dust from my shoes out and the fibrous bits from the underlay off and enjoyed the much softer feeling carpets. I swapped the front seat bases too, since there's rarely anyone in the passenger side, I thought it best to put the original fabric base on that side to reduce wear until I can make up my mind what I'm doing about the faded and worn seat fabric. 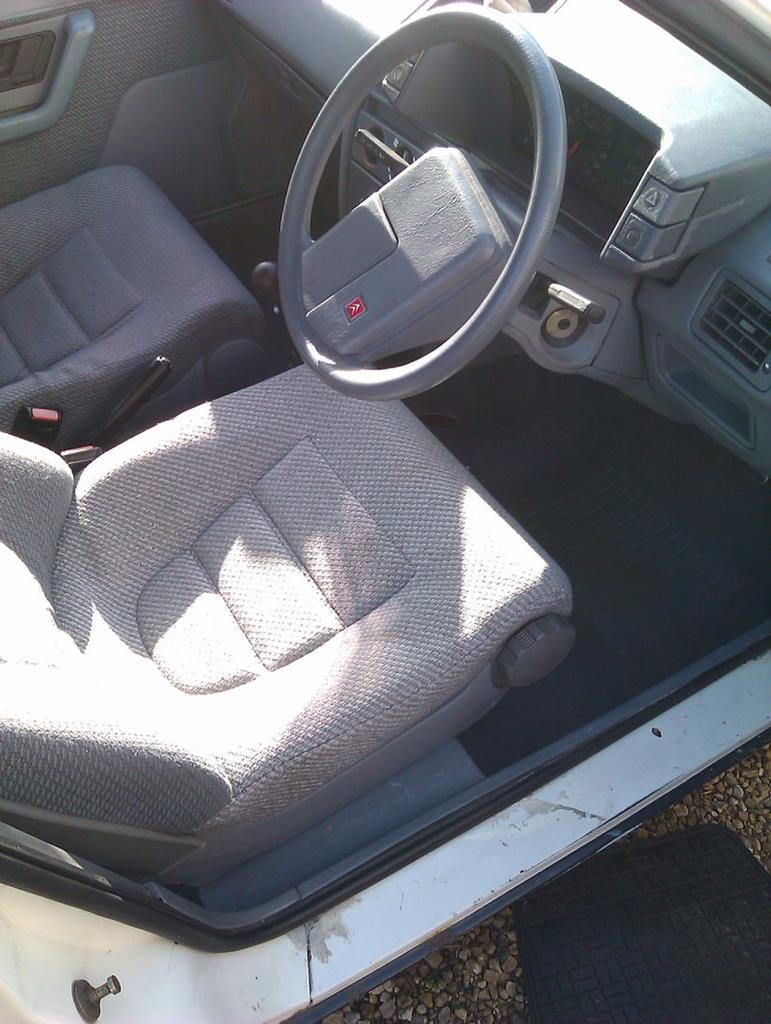 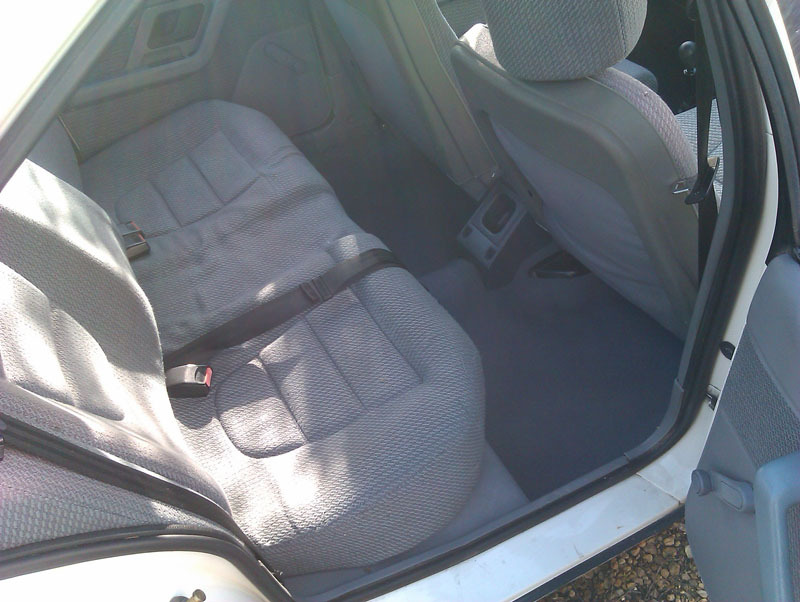 I reinstalled the wind deflectors too. On rainy days they make the car so much nicer to be in since I can crack a window open and have some fresh air coming in without getting wet. It's so much nicer inside for having the new underlay and having the carpets shampooed, it's a relief not to have to put up with the boom from having no carpets or passenger seat in the car.   |
| |
|
|
Rich
Club Retro Rides Member
Posts: 6,317  Club RR Member Number: 160
|
|
|
|
If you were wondering, which someone may be I guess.. The 2 recess bits in the pic here are where the headphone sockets go on suitably equipped versions. |
| |
|
|
vulgalour
Club Retro Rides Member
Posts: 7,257
Club RR Member Number: 146
Member is Online
|
|
|
|
|
I was wondering! They look like they should be recesses for fixing screws.
|
| |
|
|
|
|
|
|
|
If you were wondering, which someone may be I guess.. The 2 recess bits in the pic here are where the headphone sockets go on suitably equipped versions. For rear seat passengers? |
| |
|
|
Rich
Club Retro Rides Member
Posts: 6,317
Club RR Member Number: 160
|
|
|
|
If you were wondering, which someone may be I guess.. The 2 recess bits in the pic here are where the headphone sockets go on suitably equipped versions. For rear seat passengers? Yea, the rear speakers in the BX were little more than tweeters so the rear seat passengers in the high spec cars had the option to use headphones which turned off the rear speakers when plugged in. All very ahead of its time, made the Meriva A look old hat by the time that appeared on the market. |
| |
|
|
vulgalour
Club Retro Rides Member
Posts: 7,257
Club RR Member Number: 146
Member is Online
|
|
Oct 14, 2019 15:35:04 GMT
|
|
My BX doesn't even have rear speakers, just two in the door pockets that have seen better days.
Gave the BX a wash today, and a wax, for the first time in a few weeks because of the weather being a bit rubbish. I've a couple of niggles I should address at some point:
Central locking
I'm not sure what's broken on this, central locking is not my forté. If you unlock the driver's door, all the doors unlock except the passenger door. If you unlock the passenger door all the doors unlock. If you have unlocked the passenger door and attempt to lock the driver's door, the locks bounce back up to unlock position. This is true if you've used the key in the passenger door, or if you use the pull knob inside the car. I can't get my head around how the system would manifest this fault, I would have expected the passenger door to work, or not work, on the central locking, not this odd sort-of-both sort-of-neither thing it's doing.
Clutch pedal
I have an intermittently creaky/squeaky pedal. I've tried oiling the pivot points I can get to and it makes no difference. Some days it's really creaky, others it's quiet, and I can't find any regular factor that determines what it's going to do from one drive to the next.
Weather stripping
Interior weather stripping on the front door cards likes to roll over on itself when you put the front windows down, with the passenger side being much worse than the drivers side. I've tried cleaning, polish, even WD40, to no avail. Every time you put the front windows down the weather strip inside the car just rolls over and tries to jam up the window. The rubber is still quite pliable and the windows are as clean as I can get them so I'm wondering if perhaps there should be some flocking or low-friction coating on the rubber that's just rubbed off over the years so it's now grabbing the glass too effectively. The rear doors don't have this issue.
Mystery Creak
Somewhere at the front, sometimes, there's a creak. It seems to be driver's side. I can find absolutely nothing amiss and, annoyingly, when I go to investigate the issue the issue is never there. Usually it appears on the first lift of the day and disappears before you've driven a mile. It might just be a Citroen thing.
Exhaust
Sometimes it likes to play the bongos on first start up. I cannot find what it's banging on and nothing appears amiss on the hangers. I'm aware it's not sitting quite right at the back so this could just be that the back box needs finegling to get it just so. This is another intermittent issue, some days it doesn't do it and some days it's really bad.
|
| |
|
|
Rich
Club Retro Rides Member
Posts: 6,317
Club RR Member Number: 160
|
|
Oct 14, 2019 17:56:23 GMT
|
|
Central locking is a jammed solenoid or a wiring fault. Remember, when you turn the key in whichever door, you DIRECTLY MECHANICALLY unlock that door and send an ELECTRONIC signal to pulse-unlock the other doors. The reason the doors don’t lock is because the door solenoid in the passenger door won’t ‘lock’ so the car ‘assumes’ the door is ajar.
As per the creak, I had a weird creak around the A pillar area, lubricating the the check straps and hinges for the door seemed to cure it. No idea if it’s your noise but worth looking at.
|
| |
|
|
vulgalour
Club Retro Rides Member
Posts: 7,257
Club RR Member Number: 146
Member is Online
|
|
Oct 14, 2019 21:43:58 GMT
|
|
I think it's something suspension related for the creak, rather than doors. The front doors don't creak, one of the rears does, but since the noise is always ahead of me and always related to suspension movement, I don't think it's a door, hinge, or strap, that's causing it.
New solenoids aren't too expensive it seems - £10ish for used, £15ish for aftermarket, or £40ish for Valeo branded - and easy to get hold of since they appear to have been used in the entire PSA range for quite a while. I'm going to pull the one out of the door now I know where it is thanks to another BXer's thread and see if it can be repaired first. It also seems to be incredibly common for the passenger front door solenoid to fail, jam, or otherwise disconnect itself which seems a bit weird. At least what you've said reinforces that it should be a simple fix, other info I've had is pretty much exactly the same on how to sort it so it should be an easy one.
|
| |
|
|
vulgalour
Club Retro Rides Member
Posts: 7,257
Club RR Member Number: 146
Member is Online
|
|
Oct 15, 2019 17:09:25 GMT
|
Today the foam arrived for the rear reflector panel so I could get that fitted. First sight to greet me was some lovely post-rain beading all over the car, I guess I did a reasonable job with the wax to get that. 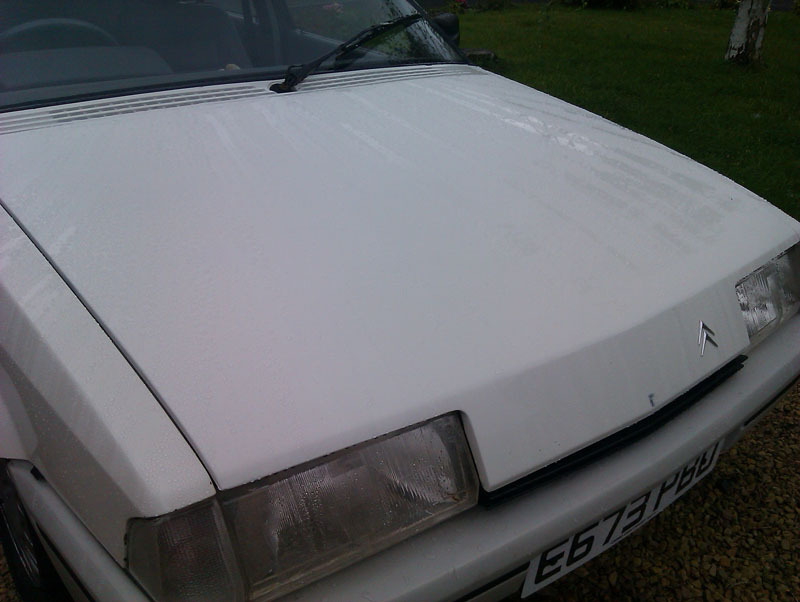 This would come back to bite me. I'd already filled the extraneous holes in the rear panel using more Gorilla epoxy, because it's pretty good stuff for the application. I now needed to do the same on the tailgate for reasons of strength on the panel. I had got some longer screws to accomodate the extra thickness of the foam I'd fitted to the panel and, annoyingly, one of the holes stripped the thread and broke the surface of the panel so to fix that I needed to fill and redrill the hole. A simple matter of putting tape on the reverse of the panel and filling with glue from the front, then leaving the tailgate open (disconnecting the boot light) for as long as it took the epoxy to set. 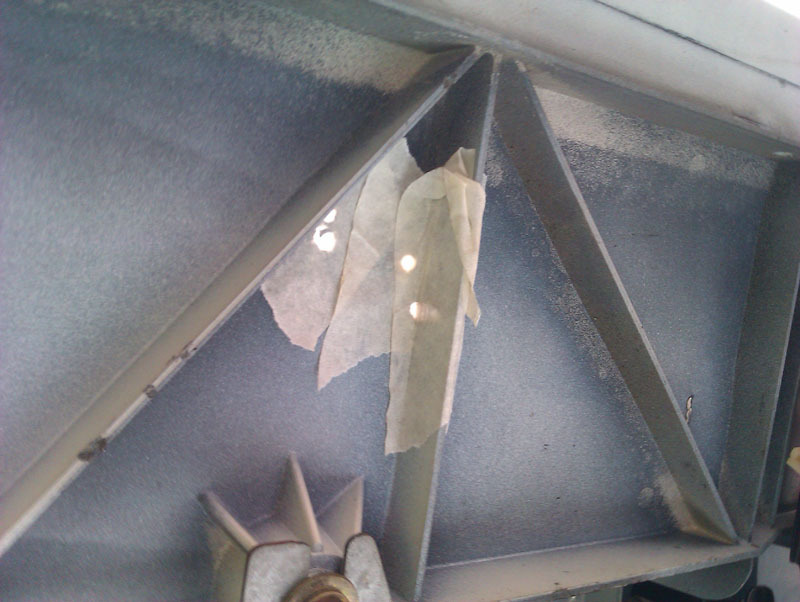 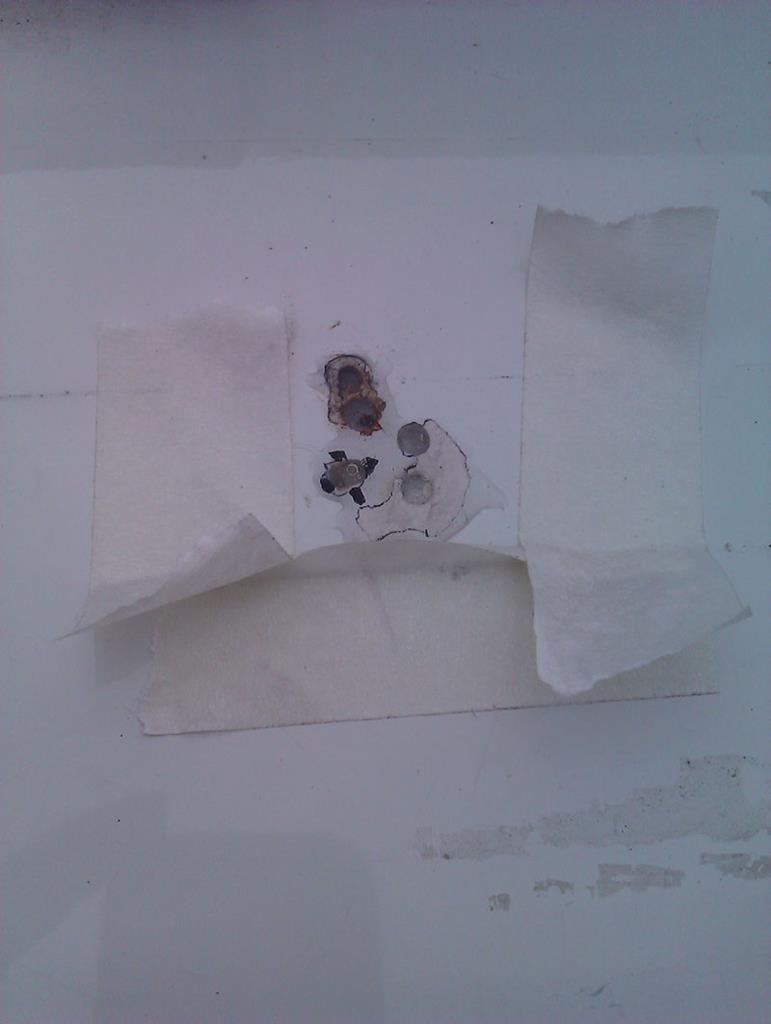 There's been a lot of holes drilled in this panel over the years. I'd already done the same to the rear panel, then fitted the new self-adhesive foam sheet to try and elimate the risk of damaging the trim panel and cut down on the rattling it made when the tailgate was closed. I had planned to make a tape template from the rear panel to make drilling the holes easier, however because I'd waxed the rear panel, the tape just fell off. So it was the tried and tested method of measuring carefully and drilling the holes... then finding you'd managed to somehow cock up the measuring and drill the holes in the correct place. 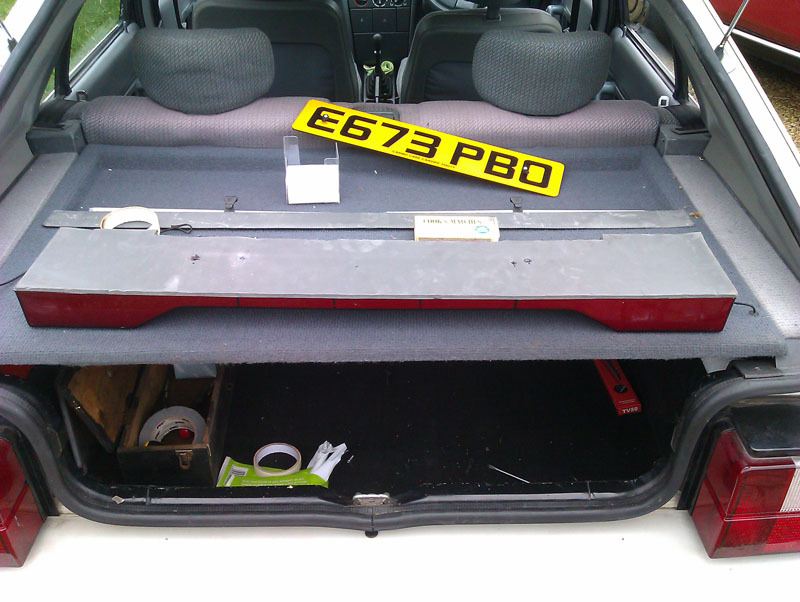 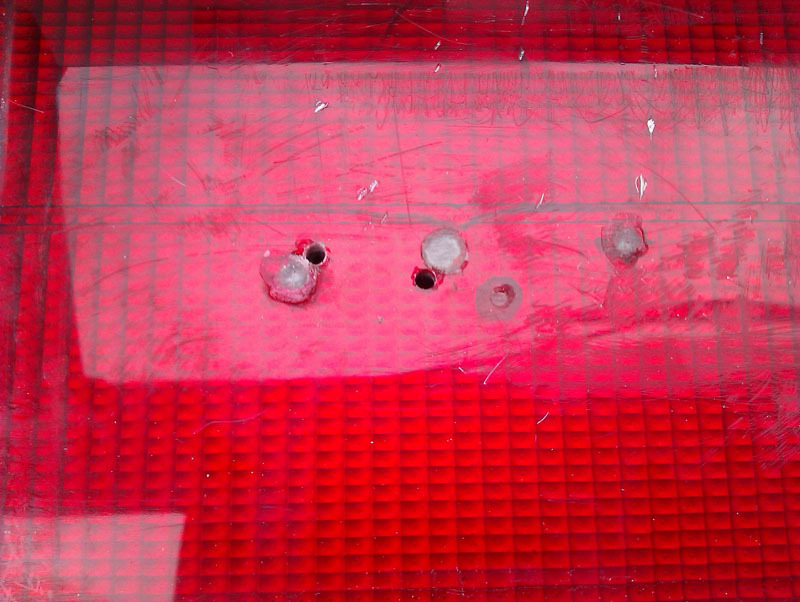 With that all ready to go, I drilled out the epoxy-filled holes on the tailgate in the appropriate place and screwed the trim panel down. The foam does help a lot and makes the delicate reflective panel feel less delicate while also keeping that nice thunk that the BX tailgate has due to it weighing a lot. 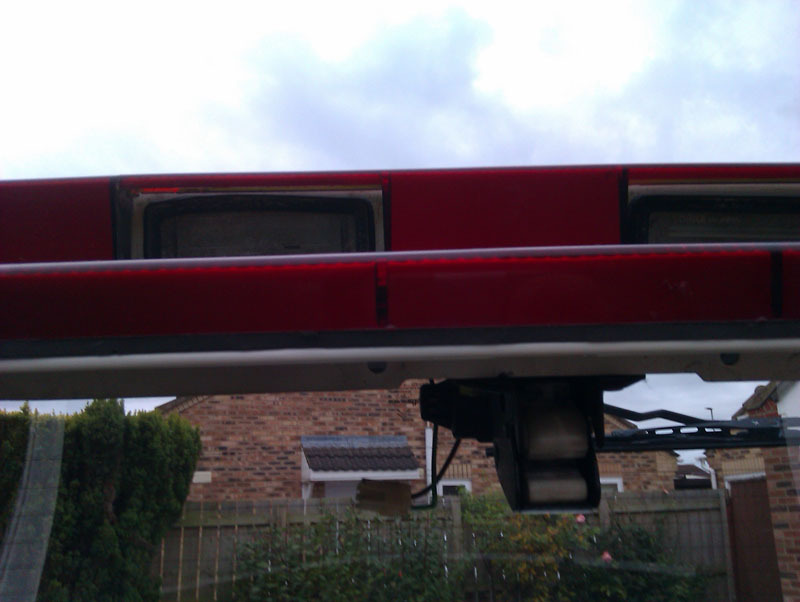 Unfortunately, as I was tightening the screw that had previously stripped the thread on the hole I'd filled, very carefully I might add, I found a soft spot on the epoxy that hadn't cured (presumably because it's too cold outside for this job) so now one side is a little loose and I can't do anything about that until tomorrow when the epoxy should be fully cured. Oh well, that's how these jobs go sometimes. Of interest is that the original tailgate lock solenoid is still in the tailgate, presumably broken since someone fitted a manual lock to the tailgate. If I can get hold of a proper BX button and the correct solenoid, I'd like to return this to standard so all the locks work off the central locking properly. 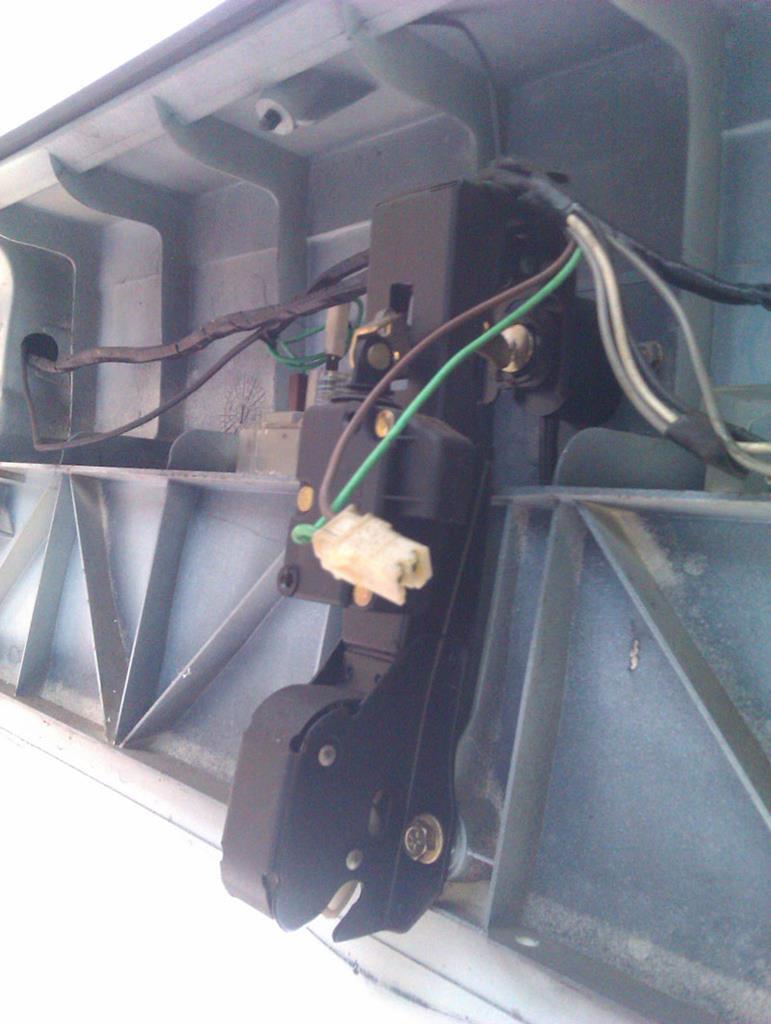 I have to agree with popular opinion on the rear panel, the car does look just that bit more finished at the back with it fitted. Tomorrow I'll redo the epoxy that hasn't quite gone right and all should be good. I've also got an experiment to fix the front window weatherstrips that are rolling under because the flocking has gone on the top edge. This experiment involves glue, and velvet ribbon and a trial run highlighted that it has promise as a solution. 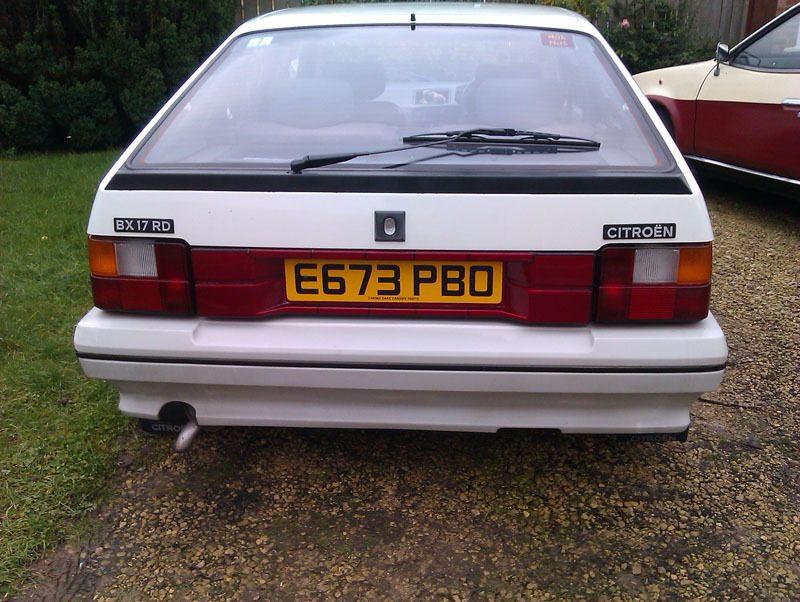 |
| |
|
|
|
|
|
Oct 16, 2019 13:20:09 GMT
|
that looks great, i'm a big fan of "backing-with-masking-tape-and-filling-with-epoxy" p.s could you remind us who did your repro dealer plates? genuinely in need of some (not serck font though, just your average 1980s one) i might even take it on the chin if companies cant do the little griffins logos around the small text (i its too complicated) 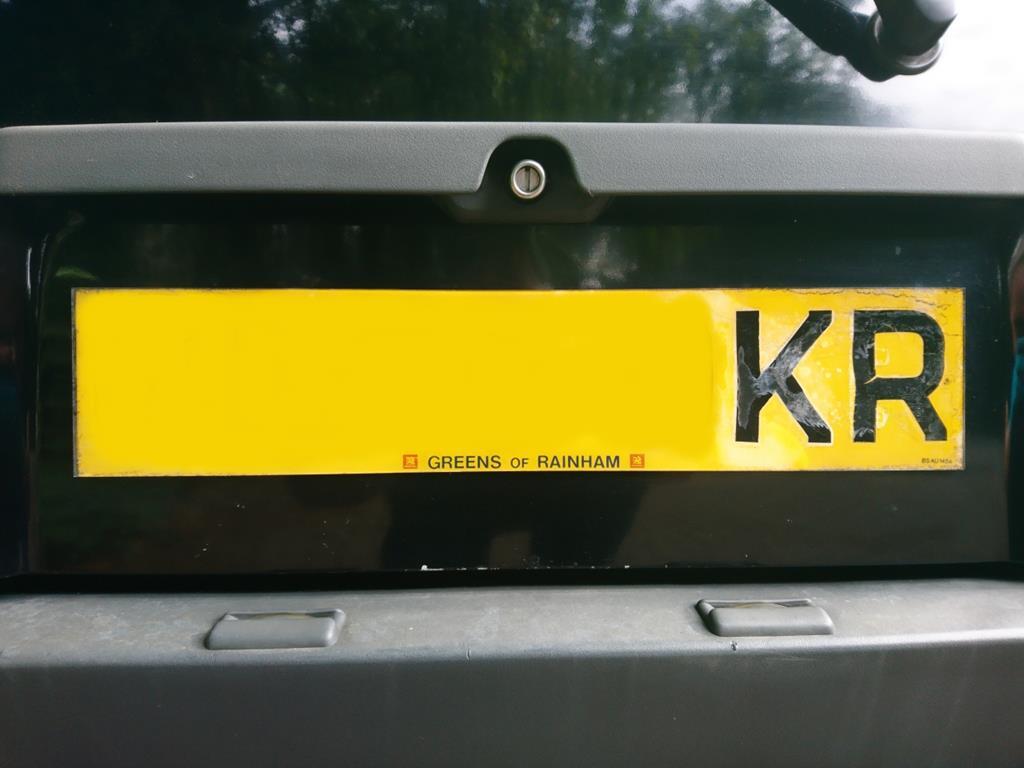 |
| |
|
|
vulgalour
Club Retro Rides Member
Posts: 7,257
Club RR Member Number: 146
Member is Online
|
|
Oct 16, 2019 13:41:27 GMT
|
|
I used A1 Show Plates, they can't do the little logos as far as I'm aware. Tippers and Framptons also do plates but again, I don't believe they can do the little logos. It's a real shame DMB Graphics don't do plates any more, they used to do excellent replica dealer plates including all the little logos.
|
| |
|
|
|
|
|
Oct 16, 2019 21:05:16 GMT
|
Your front creak could well be wear in the struts - especially as you get it on first lift. I had one that creaked away happily at times for quite a lot of it's 285 000 miles  |
| |
1968 Mini MkII, 1968 VW T1, 1967 VW T1, 1974 VW T1, 1974 VW T1 1303, 1975 Mini 1000 auto, 1979 Chevette, 1981 Cortina, 1978 Mini 1000 1981 Mini City, 1981 Mini van, 1974 Mini Clubman, 1982 Metro City, 1987 Escort, 1989 Lancia Y10, 1989 Cavalier, 1990 Sierra, 1990 Renault 19, 1993 Nova, 1990 Citroen BX, 1994 Ford Scorpio, 1990 Renault Clio, 2004 Citroen C3, 2006 Citroen C2, 2004 Citroen C4, 2013 Citroen DS5. 2017 DS3 130 Plenty of other scrappers!
|
|
vulgalour
Club Retro Rides Member
Posts: 7,257
Club RR Member Number: 146
Member is Online
|
|
Oct 17, 2019 12:52:16 GMT
|
Could be, it's got over 100k on it already and has had a chequered past of loving and neglectful owners. -- Right, I'm a little bit confused about something on the BX today. I have a cold (I'm dying!) but I soldiered on (I'm not long for this world!) and checked the Milliput I'd used yesterday had now set. I decided to go this route because I really didn't trust the rear panel and the Gorilla epoxy to hold the weight of the back panel through two screws since it wasn't a great thickness of material for the screw threads to bite into. Knowing how strong Milliput is, and the fact it's in a very sheltered location, I'm confident this will be a good strong lasting repair and allow me to more easily fit and remove the rear panel whenever the whim takes me. It's easy stuff to work with, very cheap, but has a very long cure time of several hours which is even longer if you're leaving it to cure on something outdoors, so overnight it was. Drilled a 3mm hole which is smaller than the threads on the screws and let the screws cut their own thread, and now the panel is lovely and secure once more. 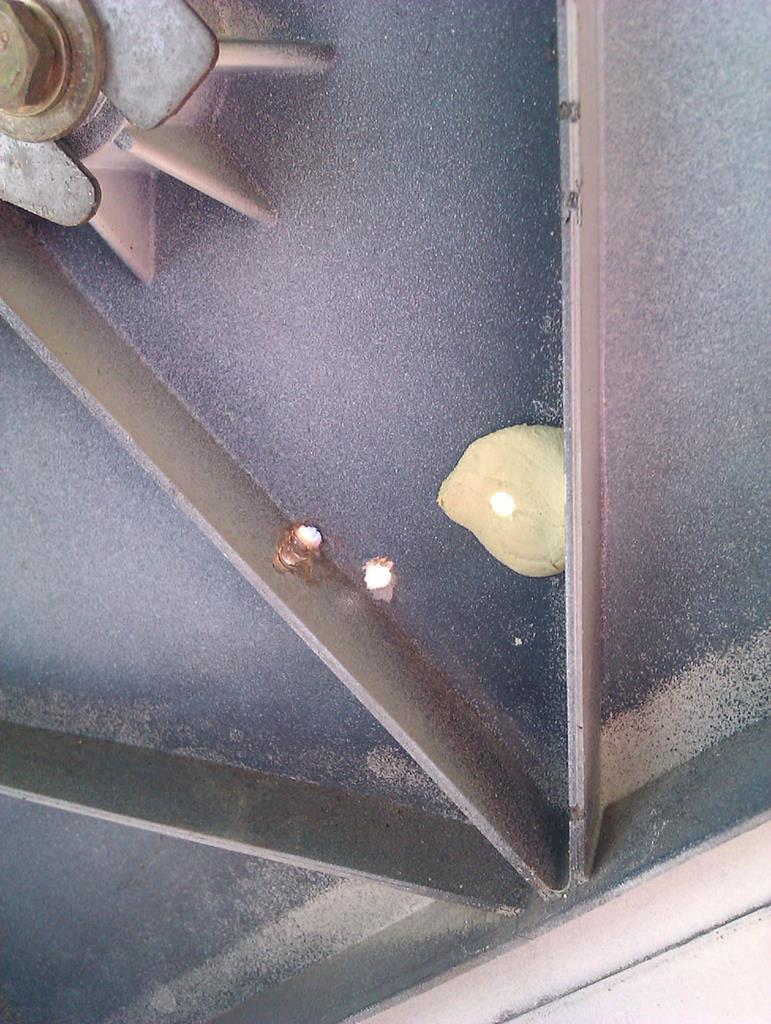 While I had access to the tailgate solenoid it seemed rude not to test it. I could see a plug hanging loose so simply plugged that in and, with the parcel shelf removed just in case, closed the tailgate and tested the central locking. It works! So that leads to even more confusion as to why it was unplugged and a key-lock put in there in the first place. I tested it a few times and it reliably worked locking and unlocking as it ought. I can only assume it either has an intermittent fault which will manifest at some point in the future, or a previous owner didn't like having to unlock the entire car to get in the boot, so retrofitted the manual lock. Either way, I'm very pleased it now works properly. When I'm not full of snot and coughing up a lung, I'll take the passenger door card off and see if the fault there is similarly easy to fix or if I actually need a new solenoid. 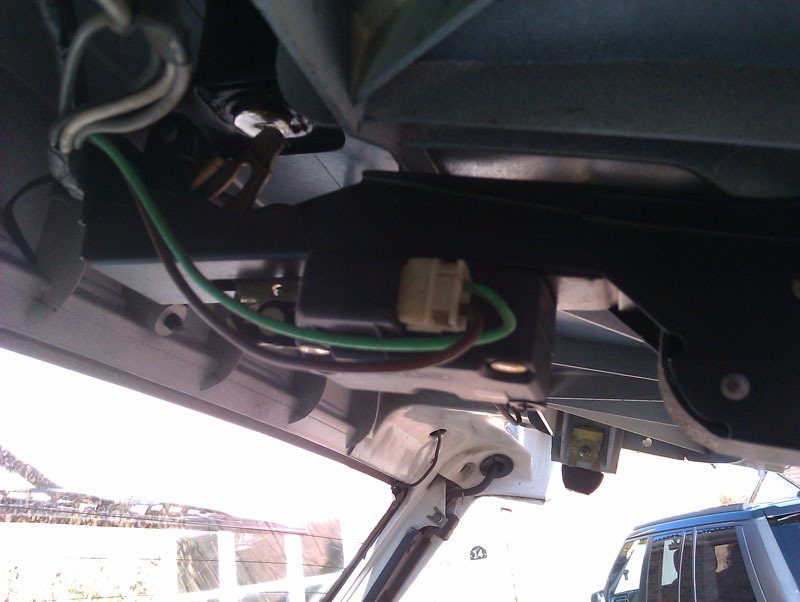 Refitted the tailgate panel, pushing the annoying fir tree clips home since that's how Citroen do this, and then enjoyed the pleasing thunk of the tailgate now that the rear panel has that foam layer fitted. The rear panel also feels much less fragile than it did and doesn't rattle, so I'm very happy with that. 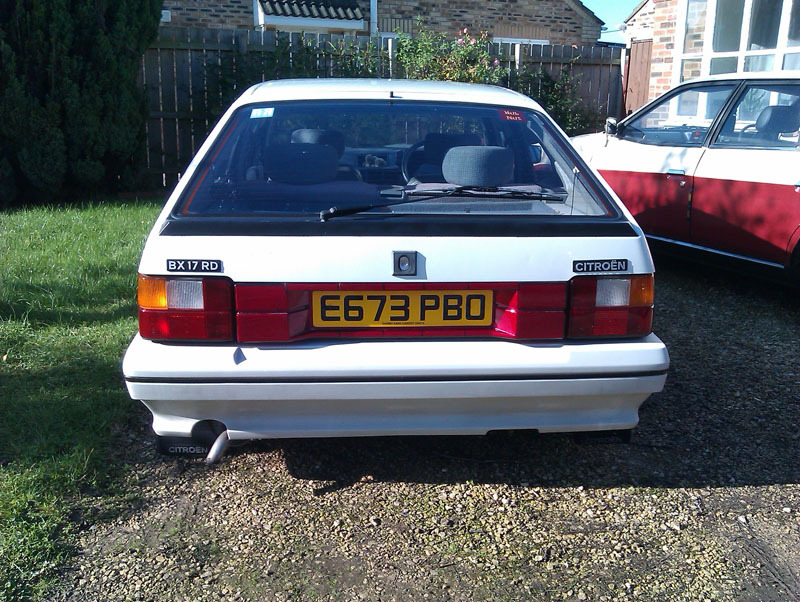 Now just to find a replacement black button for the tailgate so it looks right. |
| |
|
|
|
|
|
|
|
|
I had the same issue with my passenger door lock, turned out to be the rod that the pull handle bit attaches to had slipped, causing it too be extra long and thus causing the mechanism to bind. I thought it was central locking related at first because that's all I use haha. But one day I had to pull it open by hand and discovered it forced itself back down again.
|
| |
|
|
|
|
|
|
|
|
I really like your BX. Great looking car.
I am happy with my little Alto but would not mind something
a little bit more special like your BX.
A BX wagon would be awesome. I like older wagons.
|
| |
|
|
CaptainSlog
Part of things

Posts: 510
Club RR Member Number: 180
|
|
|
|
Looking good there - The only thing that detracts from this view though is the tail pipe. |
| |
|
|
vulgalour
Club Retro Rides Member
Posts: 7,257
Club RR Member Number: 146
Member is Online
|
|
Oct 18, 2019 17:50:09 GMT
|
I'll get that exhaust sorted eventually. After the success of the tailgate central locking - which has been working perfectly fine with no issues so far - I determined to investigate the inoperative passenger door solenoid. I strongly suspect I'm the first person to be in here since the door was sealed up with the moisture membrane since the solenoid I pulled out was made in West Germany, which hasn't existed for quite some time. Annoyingly, while the door seal on the same door isn't leaking anywhere near like it was, it is still leaking, so I'll be getting a fresh generic door seal to sort that out because I cannot be doing with water getting into my cars. 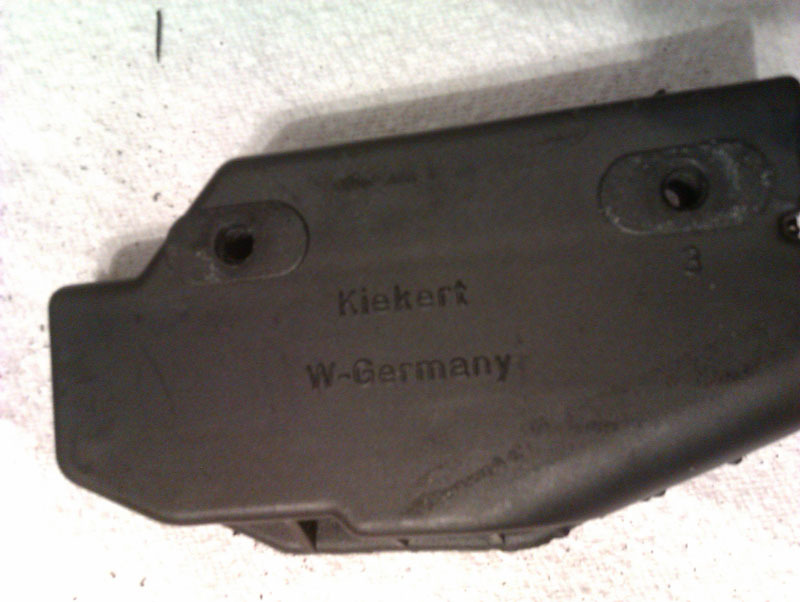 I hoped to open the case and find broken plastics or similar inside. Instead, I found that the case was almost impossible to open. I got there in the end with a model making saw, some screwdrivers, and a couple of trapped finger tips when the plastic snapped shut on them. Once inside, there was nothing obvious amiss, I'd managed to break a wire with a screwdriver, but I knew if that was the fault it could be repaired if needed. Nothing visually broken or missing inside once opened, and everything free moving as it should be, where it should be, so far as I could tell. 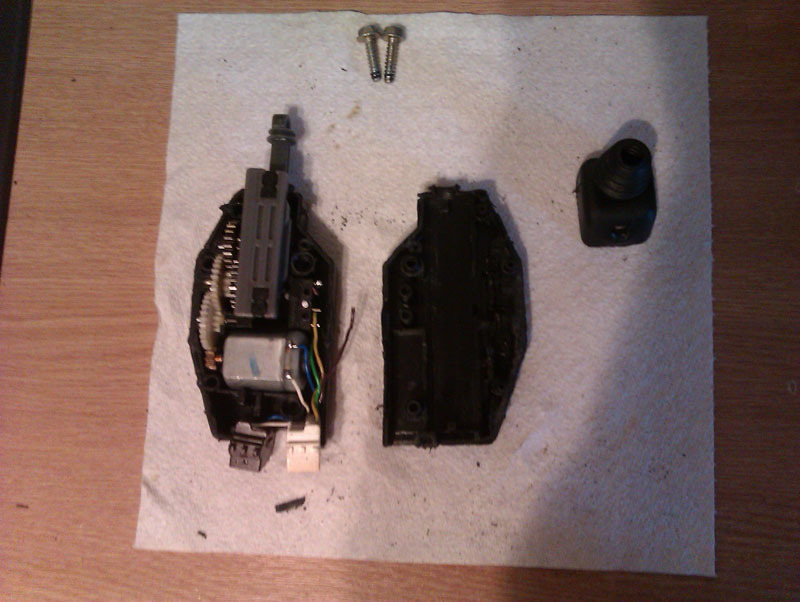 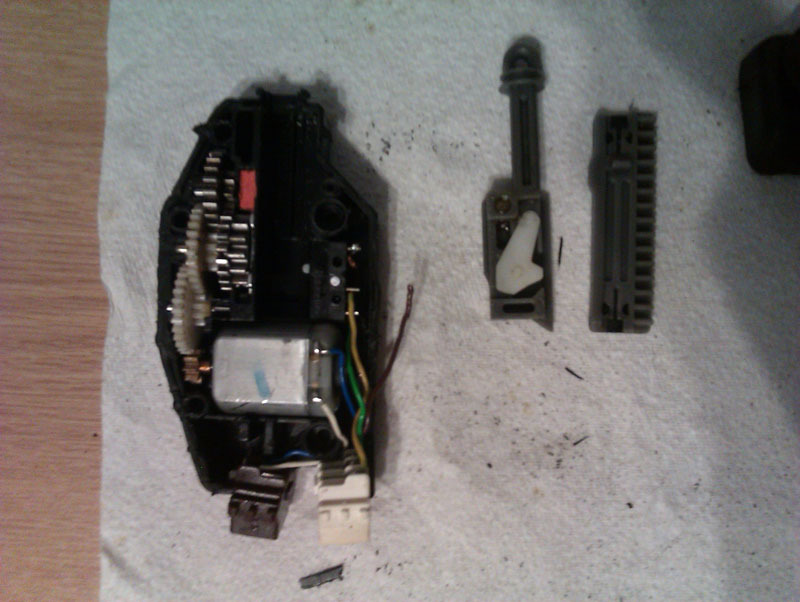 Now I know what the inside of the door solenoids look like and have a rudimentary understanding of how it all works. Further inspection revealed the little electric motor was jammed and, after a little patience to free it up, it was found to be dead. I expect it's worn out brushes inside and even though it's potentially repairable and I could put the case back together and refit it to the car, new replacement solenoids are very easy to acquire, and affordable. So I've ordered a replacement, which isn't identical but matches where it matters, and has been a successful replacement for other BXers with this problem. I can't go further with that until the new part arrives, probably early next week, so since the passenger door card was off for this I decided to try out the experiment. The reason, I believe, that the inner weather strips are rolling when the window goes down is that a lot of the fuzzy flocking is missing, so the plain rubber is grabbing the glass. Now, you can no doubt get this weatherstripping new online somewhere but I'm a little concerned at how fragile the door cards are so don't want to be fighting the clips off to remove the existing strip, and I fancied giving this experiment a go just in case it does work and can be used on future projects. The following picture is fuzzier than the the thing I'm trying to illustrate. 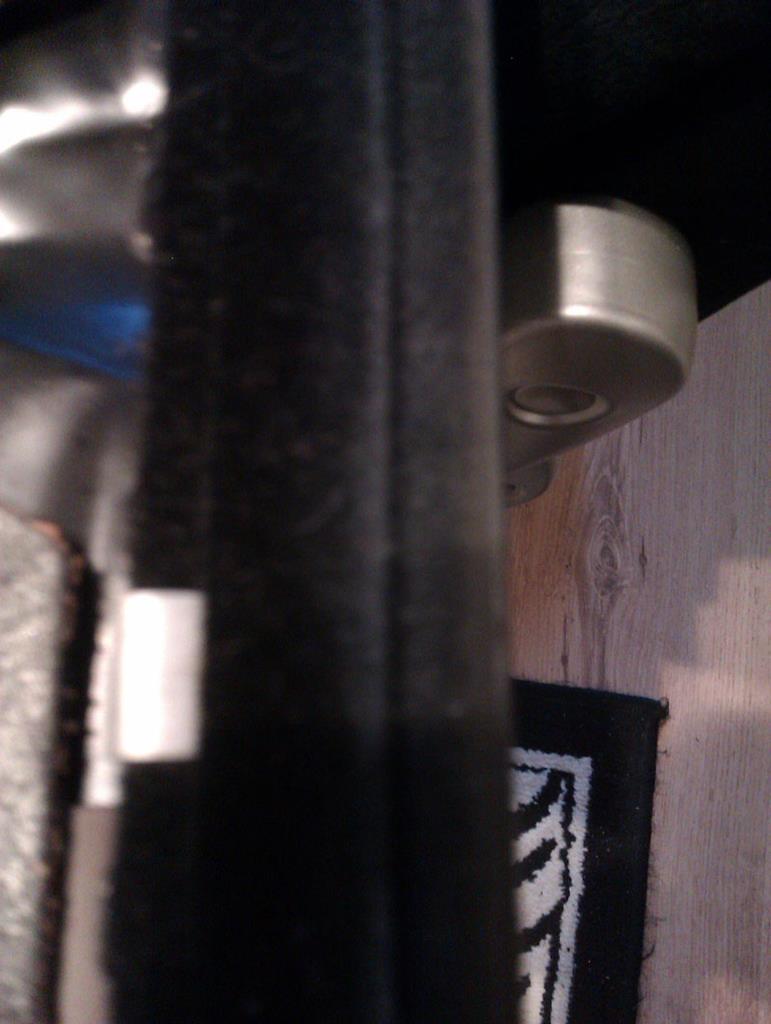 After scouring shops - because I'm stubbornly trying to buy things in actual shops still - I secured some velvet ribbon of a suitable width and some hopefully suitable glue. If this was the exterior weather strip I wouldn't try this experiment because it's exposed to so much more sun and moisture, I hope being the interior strip it wouldn't receive quite as much punishment. The gecko on the packet is simply an added bonus and not the reason I went for this particular brand. It seemed more appropriate than a lot of the other offerings on the shelf. 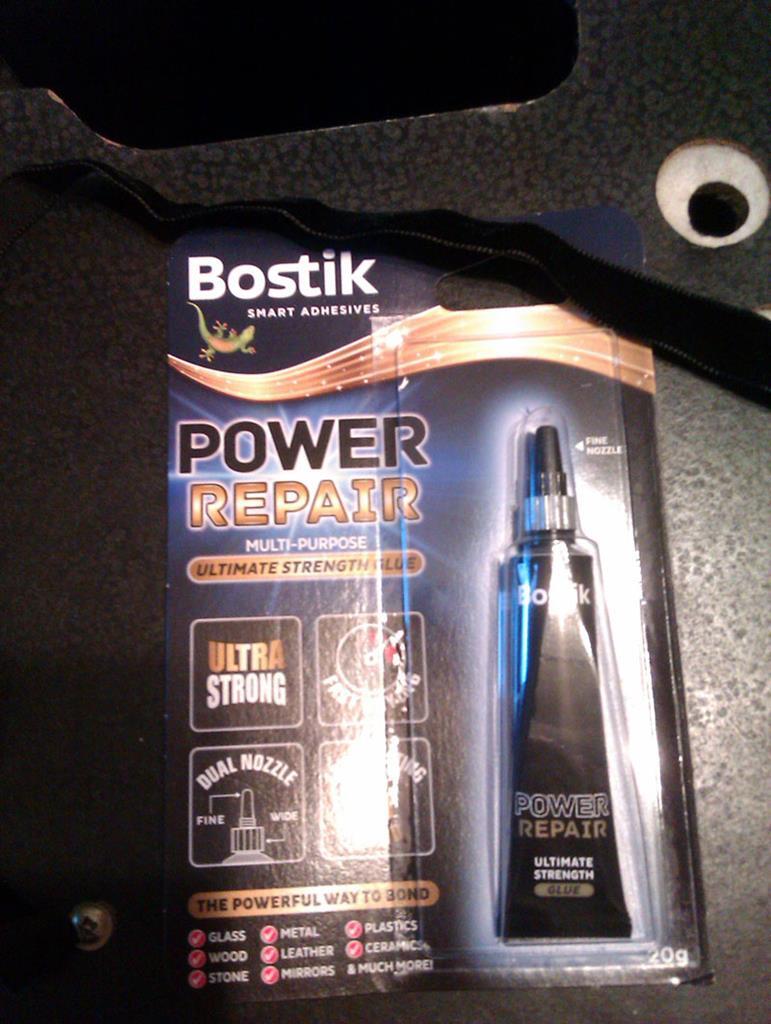 Applied the glue to the weather strip, carefully align the ribbon, and then apply a bajillion tiny bulldog clips to keep everything as secure as possible while the glue sets. I did check to see if the velvet has a directional pile as it sometimes does, and this one seems to be on the length of the ribbon rather than the width, so it shouldn't bind up against the glass. 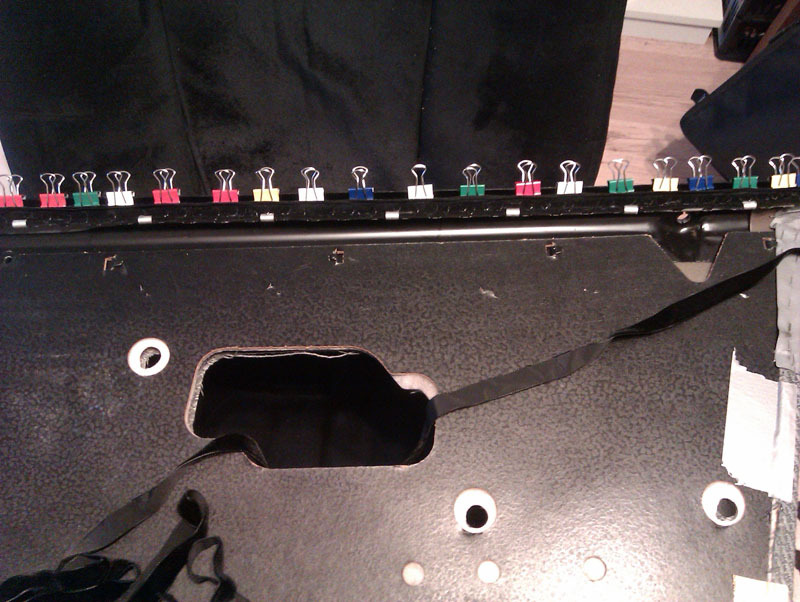 When I get the new solenoid fitted, I'll reinstall this panel and we'll see whether or not the experiment is successful. If it is, I'll do the driver's side too and we'll see how long it lasts. |
| |
|
|
|
|
|
Oct 20, 2019 21:24:50 GMT
|
|
Nice progress on the BX! It's starting to look really tidy and makes me wonder why I can't be bothered to fix mine. I suppose it's got something to do with the Xantia being so faultless...
Anyways, if the new solenoid makes no difference, I'd check the wires. I've had 4 BX's and replaced the drivers door wiring on 3 of them. And the one I didn't have to meddle with was a poverty-spec one with wires only for the speaker. I suppose the colder winters up here are especially harsh on the brittle old insulation, but it's something to keep in mind.
|
| |
|
|
vulgalour
Club Retro Rides Member
Posts: 7,257
Club RR Member Number: 146
Member is Online
|
|
Oct 21, 2019 17:42:50 GMT
|
Noted. You should definitely give your BX some love, consider this an official project poke  It's been nearly a month since my last Princess update, so how far along are we with this job? Well, clashing schedules haven't much helped on the speedy repair front but everything is now lined up and this weekend I'll be off to my friend's place so we can extra double check the shims are correct before final assembly on the head. I've no real cause for concern on the shims, but since my friend has spare shims and the suitable tools for checking, it seemed silly not to do it and it's always nice to visit friends in far away places. Before I got all that underway, an impulse purchase saw me snag a couple of Princess hubcabs online so I now have a full compliment and a spare. I've also got a spare Allegro hubcap (pictured) if anyone fancies it, it's in reasonable shape and would suit a not-show-car vehicle. Here, you can see the difference between the Allegro (on the left) and Princess (on the right) hubcaps. 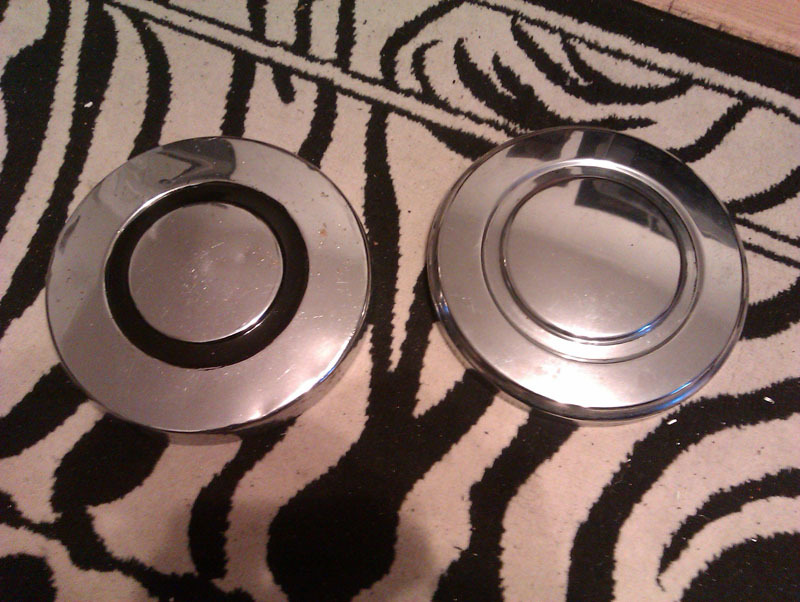 On the engine front, it was the tedious job of valve lapping mostly. They didn't need a huge amount of work at least and Mike had already cleaned off the deposits on the stem side for me so I didn't have to faff with that, so it was just a fairly straightforward process of twiddly stick and grinding paste followed by plenty of cleaning. 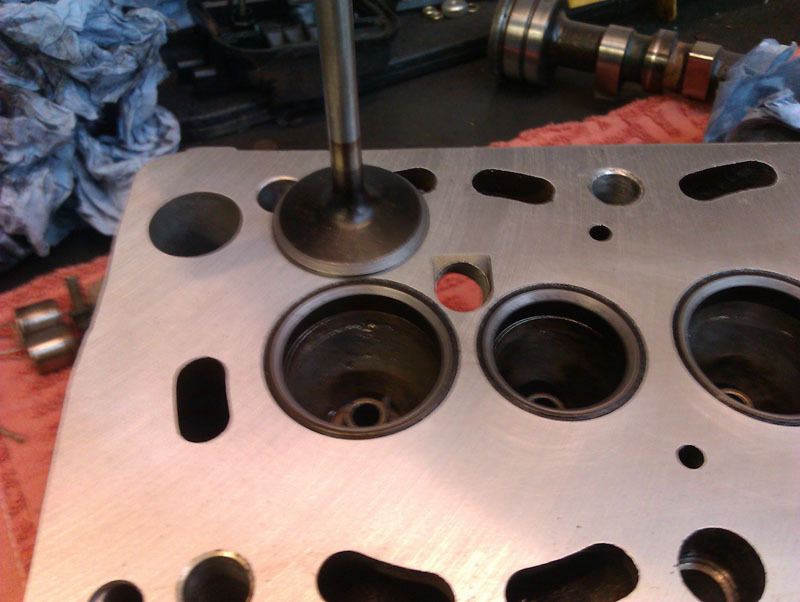 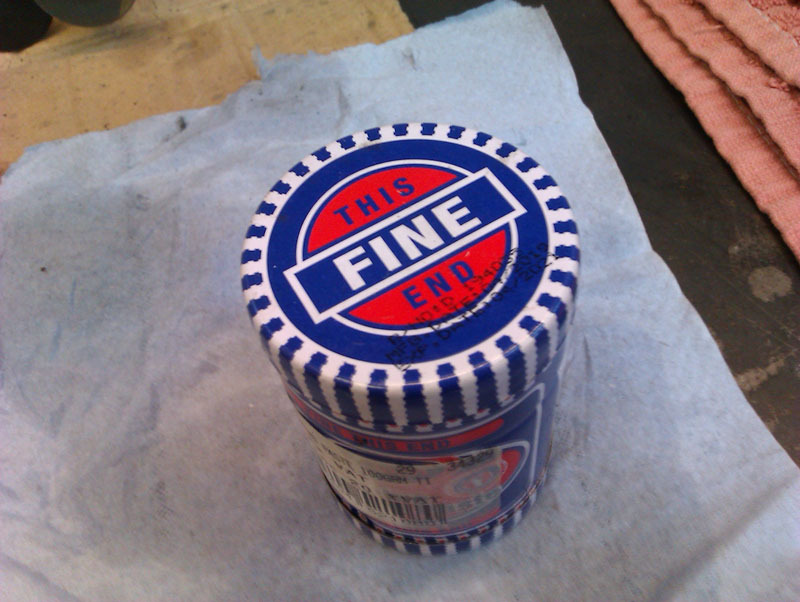 Once they were nice and matchy-cleany again it was time to reassemble. It's a bit awkward to do but not really difficult. New valve stem seals on the valves that needed it, as per the book. 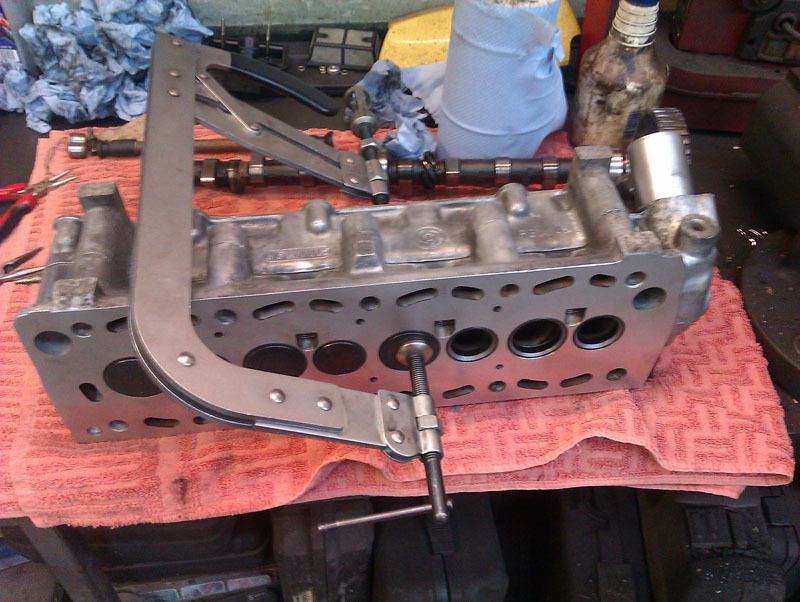 Once all the valves and springs were in, it was time to refit the shims and buckets. Again, this is straightforward. There's no noticeable wear (to the naked eye) on the components, or on the camshaft, so I suspect that when we check all this on the weekend we'll change nothing and just button it all down. 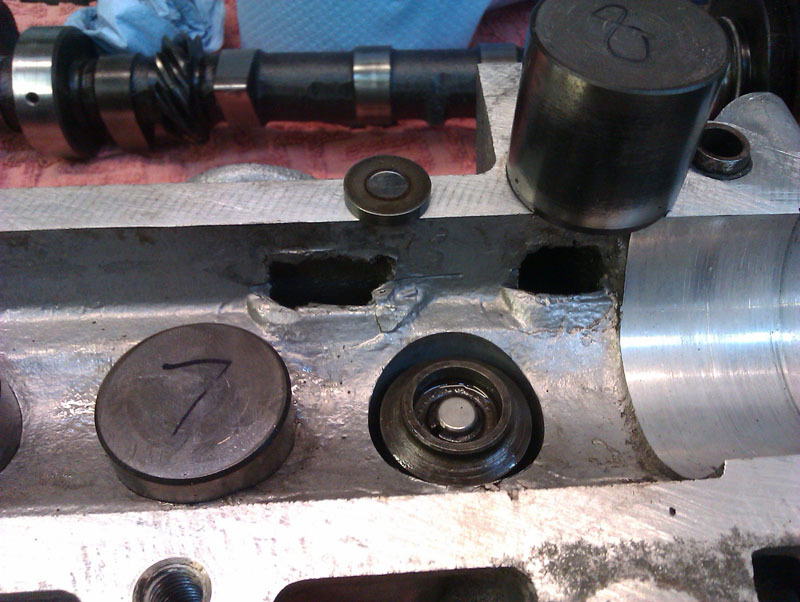 I replaced both camshaft seals, tightening the camshaft pulley to torque as per the book after replacing the big seal. Then I loosely bolted the cam box top half down so nothing comes out of place and popped the whole thing in its box ready for the weekend. 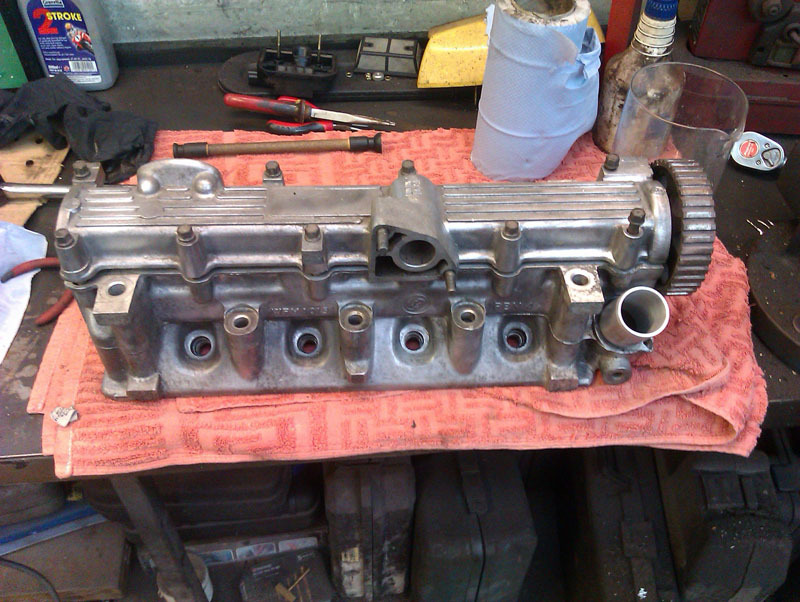 I can't wait to get this back on the car, it looks so nice already! |
| |
|
|