vulgalour
Club Retro Rides Member
Posts: 7,256
Club RR Member Number: 146
|
|
Sept 26, 2019 17:02:56 GMT
|
I didn't come away empty handed for my own car, of course. I splurged £80 and got myself this little selection. Unfortunately, all of the really nice interior bits and pieces he had were black, or higher trim, so I didn't have a great deal to choose from but I'm still happy with what I did haul away. 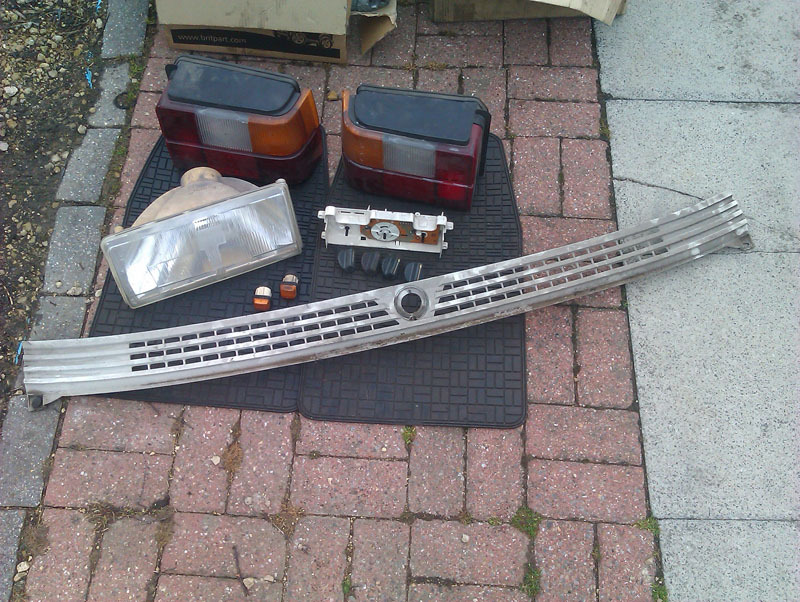 Pair of really nice rear lights (one of my originals has a little crack), a good headlight (nicer silvering than the ones on the car), a spare heater control panel, FOUR grey heater knobs, a pair of nice side repeaters, a really nice (if dirty) scuttle panel, and a pair of generic rubber mats that will look far better than what's currently in the car. This weekend this will be scrubbed a lot and installed where necessary to make those little improvements I'm so fond of doing on this car. For the Princess, I finally picked up the head today. I'd been given so many different conflicting stories about where the pipe had come from that I really didn't believe it was sorted, and while I did get a sincere apology for the owner of the shop losing his rag at me for putting too much pressure on... well. Let's just say it's a shop I shan't be using again. I'm not going to name-and-shame either, I don't believe that's necessary in this particular instance. I got the head back, I got the job done, and while it has been frustrating it's just one of those things. Everyone is human and honestly, I think I've run afoul here of someone whose personal life is causing problems with his professional life. The sincere apology was enough to convince me that he knew he crossed a line, professionally, and there's no need to go any further with that. We're only human, after all, and I can certainly empathise with where he seemed to be, I just hope he gets it all straightened out. All that said, I'm not entirely happy with the work done. I paid for the pipe that was made, that's only fair, but the pipe has no flange on it. The pipe itself is a custom turned piece and fitted to the head with weld-seal, I think that's what he called it, much like Porsche do with their coolant pipes. The lack of flange doesn't worry me too much as the radiator hose we temporarily repaired likewise has no flanges and hasn't leaked or fired off so I'm moderately certain just double-jubileeing the hose to the pipe will be sufficient. If it isn't, well, we'll have to figure out what to do about it I suppose. It was £45 for this and, honestly, I'm not sure how to feel about that. The job is technically done and £45 isn't a lot of money BUT it was a war to get it done and that's left a bit of a sour taste over the whole experience. 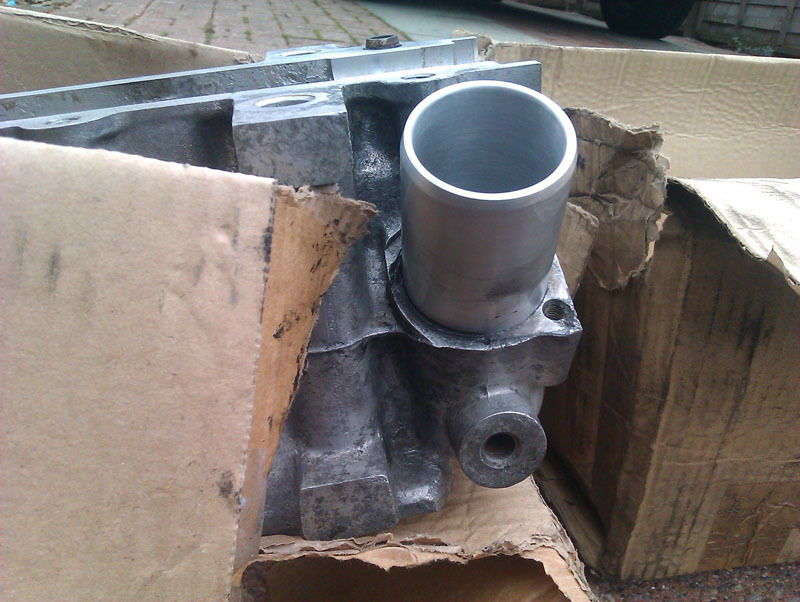 Still, at least I can move on with this now. The next challenge is finding time when my friend over in Lincolnshire is off at the same time as I am so we can rebuild the head properly. I picked up an oil filter today - local motorfactor had one on the shelf, which was really useful - and I'll be getting some fresh oil, coolant, and a flush to make sure everything is nice and clean when it's all put back together. The Princess will ride again soon. |
| |
|
|
|
|
Rich
Club Retro Rides Member
Posts: 6,317  Club RR Member Number: 160
|
|
Sept 26, 2019 21:32:48 GMT
|
|
If I still had my TZD I’d be all over those 12V bumpers like gravy on a northerners chips. But I do not. It was always my intention to fit Mk1 wings and indicators with a 16V body kit for a kind of BX sport look. Never did get round to it despite having all the parts at the time.
|
| |
|
|
vulgalour
Club Retro Rides Member
Posts: 7,256
Club RR Member Number: 146
|
|
Sept 26, 2019 21:55:32 GMT
|
|
Having a white BX I have to admit I was seriously tempted myself.
|
| |
|
|
|
|
|
Sept 27, 2019 21:48:44 GMT
|
|
that new hose stub will work great
|
| |
|
|
vulgalour
Club Retro Rides Member
Posts: 7,256
Club RR Member Number: 146
|
|
Sept 28, 2019 14:37:30 GMT
|
Hope so! Friend and I think we have our schedules aligned, so we'll find out soon enough. -- I've been cleaning the recently acquired parts and they've all come up quite well, though I was a little disappointed to find quite a few paint chips on the scuttle panel. Never mind, I have a spare now so I can paint one while it's off the car and make it nice and swap it with the less than perfect one on the car and nobody other than the fine folks reading all this will know I've done anything at all. It rained a lot again last night and, predictably, the passenger carpet was damp when pressed, so I determined to investigate and see if our theory of water ingress proved good. I undid the screws holding the sill trim on but didn't remove the trim because that meant removing the seat since it sort of hooks around the back and is held down by the seat rail, it seems. The carpet lifted out easily after that which makes drying out the car and cleaning/replacing the carpet hugely easy, good job Citroen! Under the carpet I found a soggy bit of history.  With the carpet out and the door seal lifted it was immediately obvious where the water was coming from, mostly because you could still see the path the water was taking. 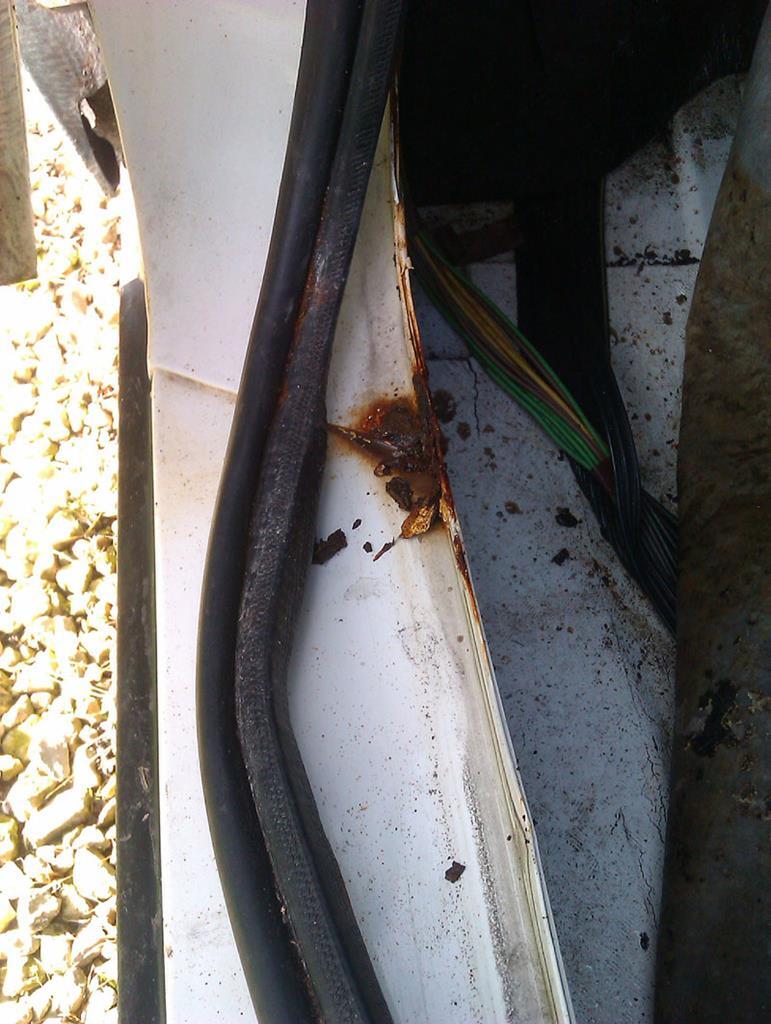 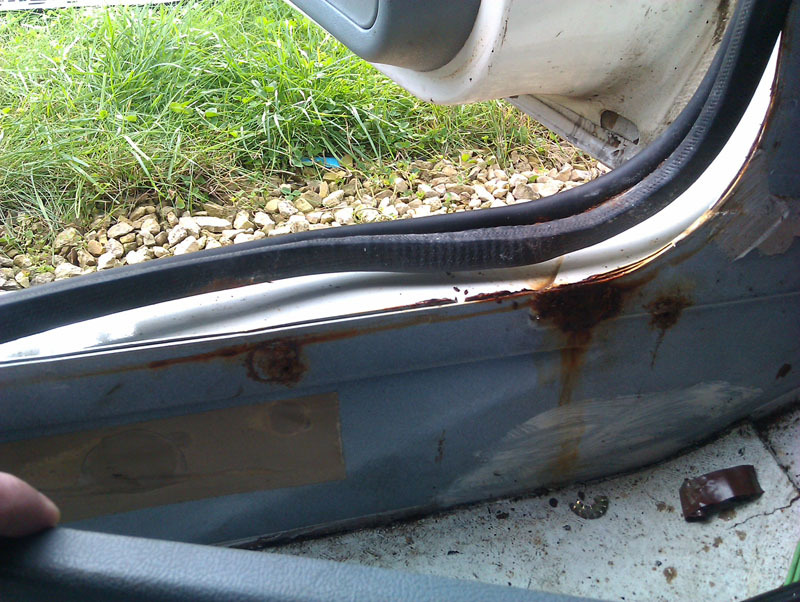 That looks far worse than it actually is most of it is just stains. A good go over with an abrasive tool will remove most of it and we might even get away with not having to weld this area. It looks like water has sat on the sill-to-a-pillar join and over time it's rusted unseen until it expanded the door seal out which, in turn, has allowed water into the car. There wasn't even enough water to make the carpet wet so I think this has been caught early enough to not be an issue and it gives me something fun to do this weekend. I left everything to dry out, which it did pretty quickly, and I've left the front carpet out until I've got this bit fixed to prevent any other issues. The rest of the floor looked in great shape. I then removed the mismatched front mats and disposed of those to replace them with the smart generic ones I picked up which fit the footwells much better. Proper Citroen ones would have been nice but I'll take these smart generic rubber ones since they don't look out of place. 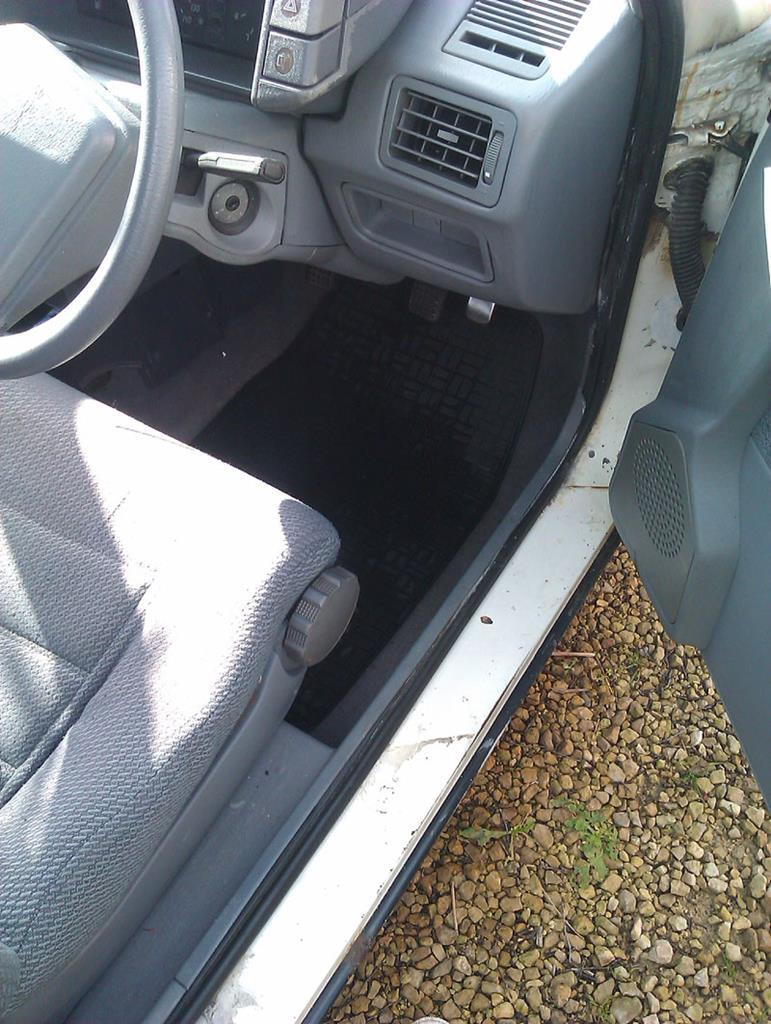 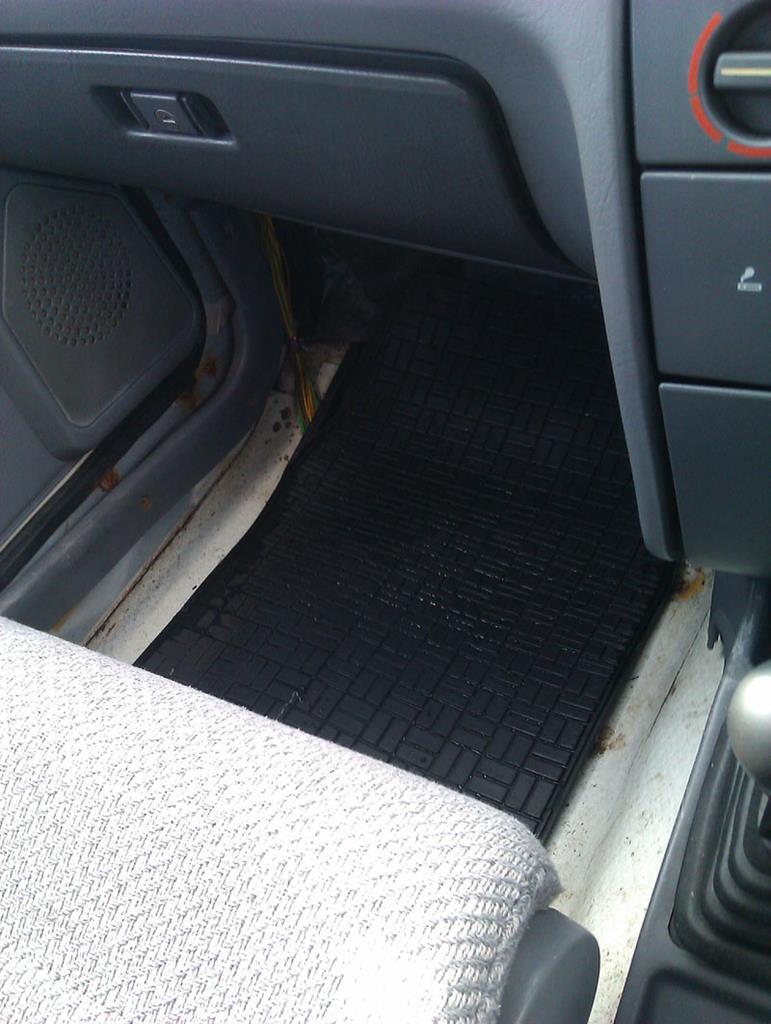 Finally, I replaced that one black dial that was really annoying me. After cleaning up the control dials I picked up recently I found them to be a perfect match so picked the best three from the six grey dials I have and I'm now much happier that everything matches. It quite literally is the little things that make all the difference.  |
| |
|
|
vulgalour
Club Retro Rides Member
Posts: 7,256
Club RR Member Number: 146
|
|
Sept 30, 2019 17:23:31 GMT
|
It was supposed to rain loads today and didn't, which was really handy for getting through a good few jobs on the BX. I cleaned back the rust and found a hole that was too small to warrant getting the welder machine out and that I could fill with some seam sealant so that's the route I went for. This might even be a better solution since I sealed it after paint which means there isn't any bare metal to rust as a result, I hope. 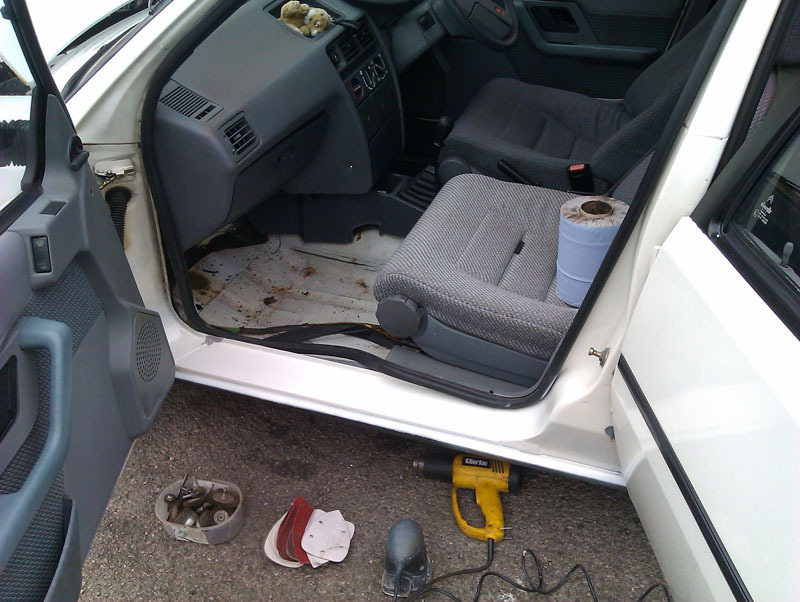 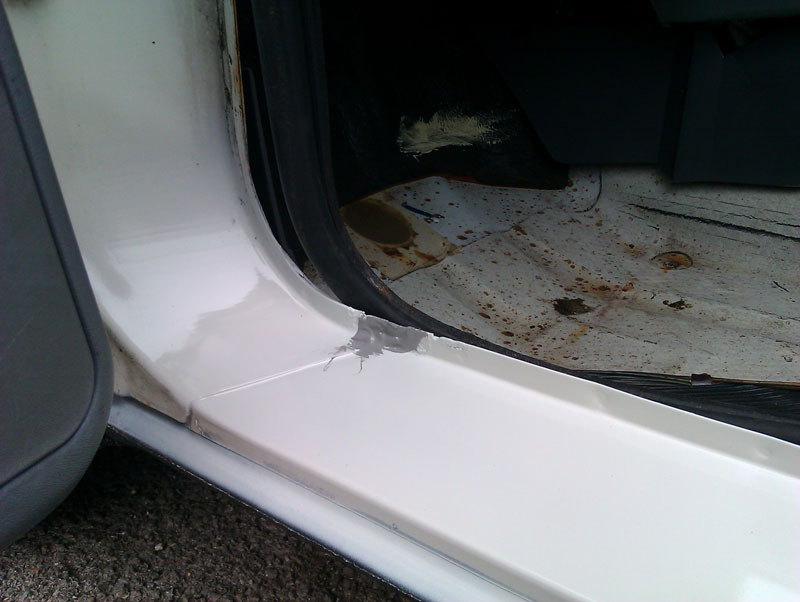 I gave the whole sill top a sand back before laying down a fresh coat of paint and lacquer which has rather dramatically improved the look of the thing and eliminated all of the tiny little grinder speckles and scuff marks from years of shoes being bashed against the sill. Got the seal slotted back on but haven't reinstalled the carpet as I want to be absolutely sure no more water is getting in before doing that. There had been more rain overnight and the water did only seem to be coming through what is no longer a rust spot so I'm cautiously optimistic that things will stay dry now. 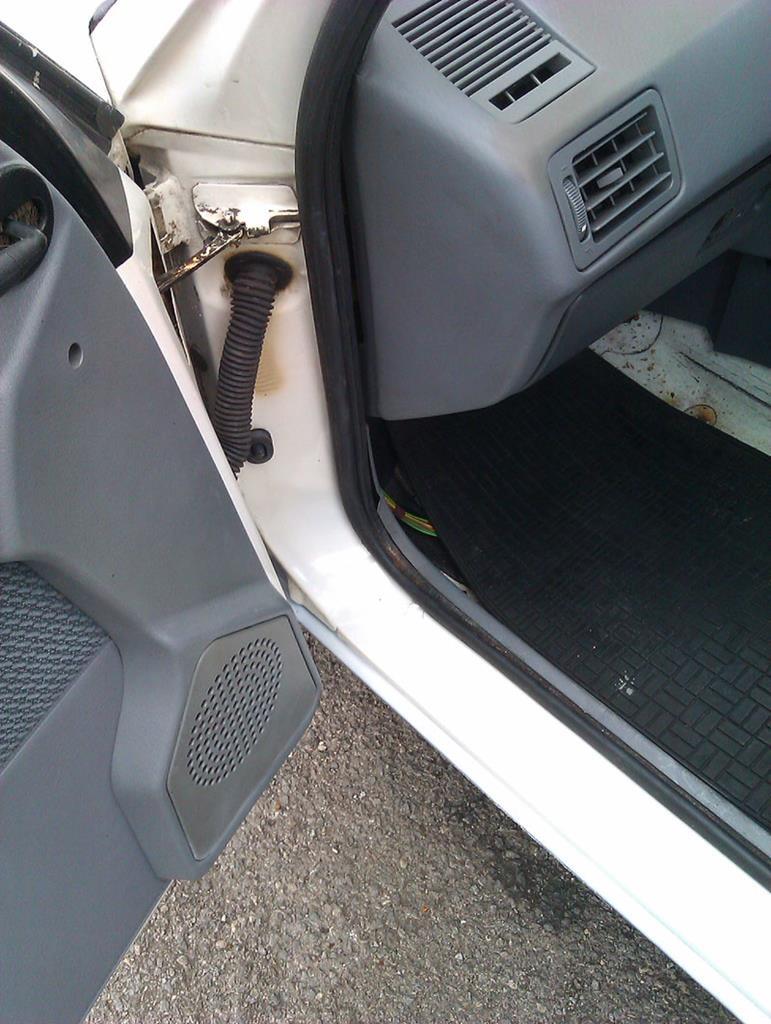 Since that took barely any time at all to sort out, I also tackled the other scruffy bits on this side that I wanted to do. Again, no welding, just a sanding off of the rust blisters, rust treat, and nice fresh paint to stop anything getting any worse than it was. Being a white car, the rust always looks more alarming than it is. I haven't used any filler because it felt a bit pointless, the areas affected simply aren't visible enough for me to faff about with the tiny amount of filler that would be required. It's much nicer to open the doors and be greeted by bright white sills without any orange-brown stains and spots. The area at the bottom of the B pillar, the bottom of the arch where it meets the sill, and the lip of the rear arch were so much more solid than I expected them to be. 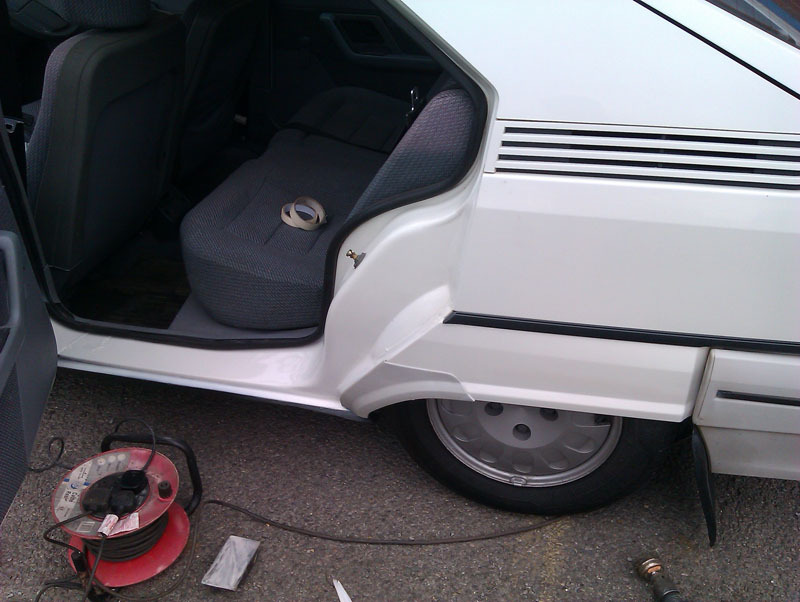  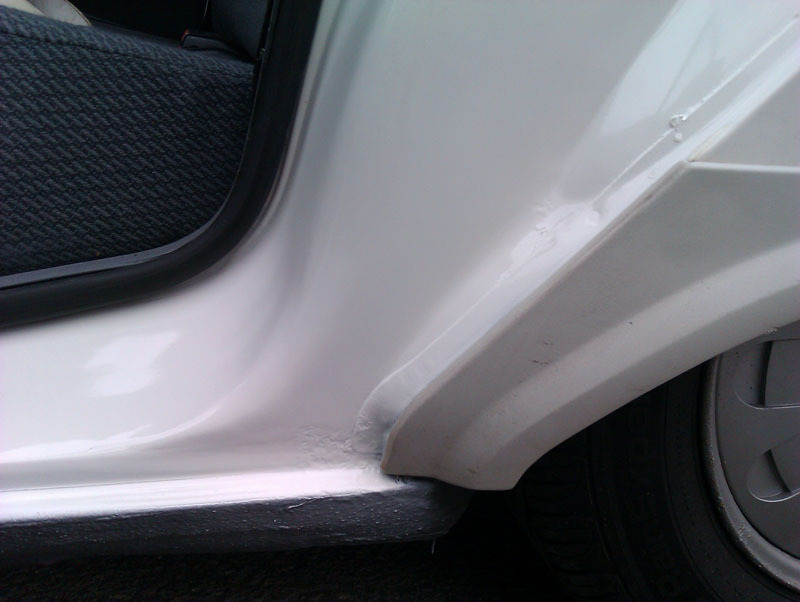 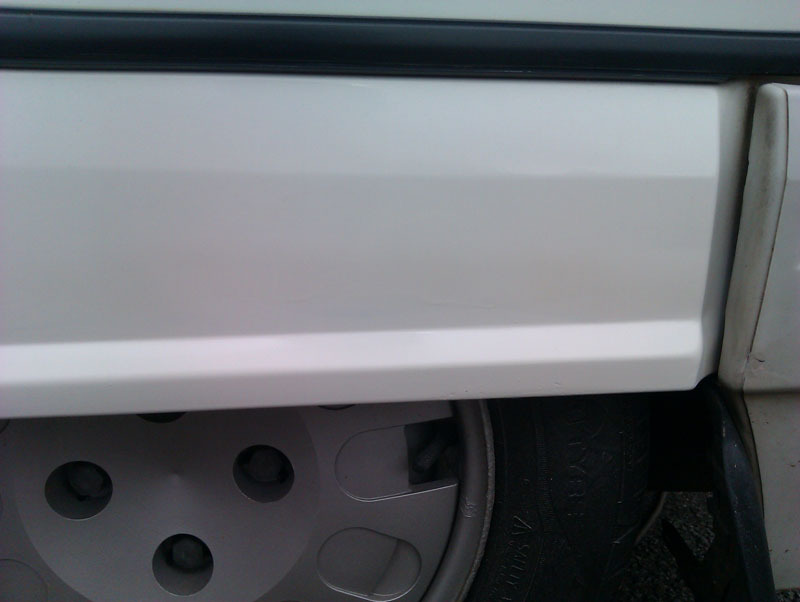 A couple of small improvements were had round the back. One number plate light rubber seal was sagging, it was easy enough to pop the unit out and reseat the seal properly before refitting it. I also replaced the driver's side rear light cluster with one of the new ones due to the old one having a star crack in it I noticed every time I washed the car. The silver on the badges is holding up much better this time around too, I'm pleased with those.   Mike spotted the other day that I had a sidelight out. That's not that unusual for a BX, the sidelight design at the front is pretty rubbish. What was unusual with mine is that a length of wire had broken and fallen off. Mike spent some considerable time faffing with recalcitrant wire to make it the correct length again and get the connector refitted and now I have a working sidelight... when it feels like it. Better than not at all. 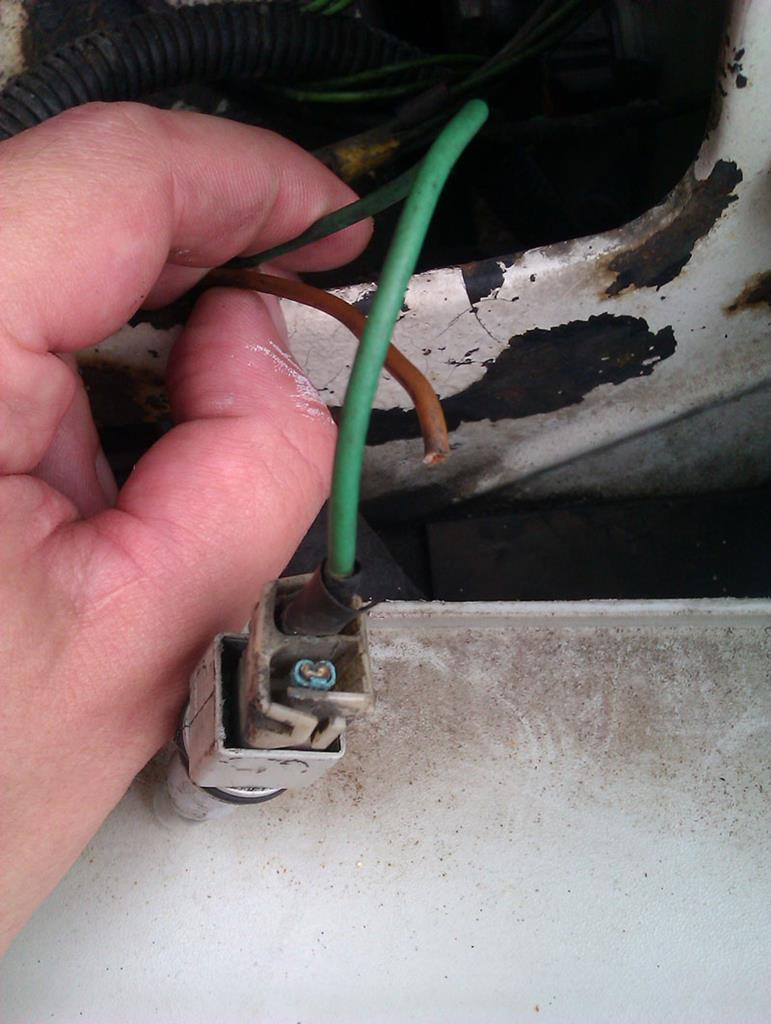 Trying to remove the plug on the back of the headlight bulb - it was easier to remove the whole headlight to repair the wire - wasn't happening either, I ended up having to unclip the bulb to remove it from the headlight to get the headlight out, and then remove the bulb... then this happened. I've never had the collar fall off a halogen bulb before. 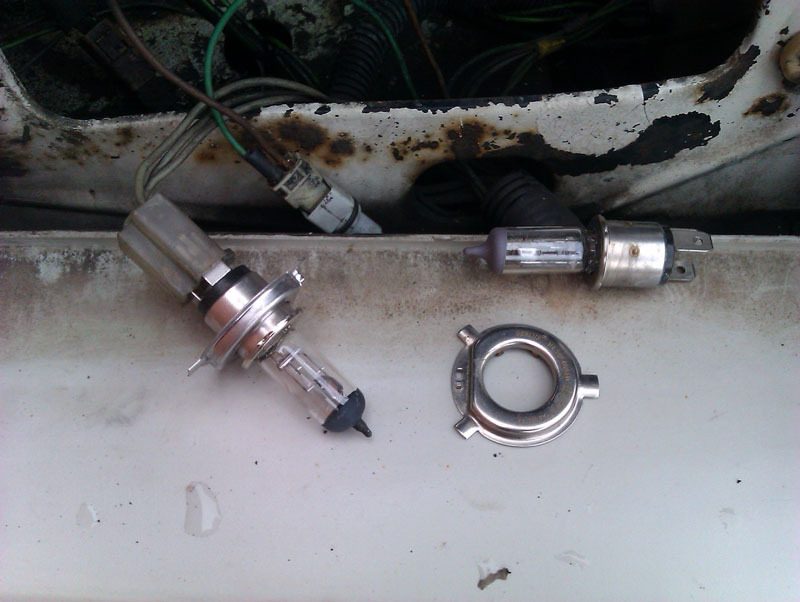 Luckily, there was a good replacement in the headlight I bought so I swapped that in and fitted the new headlight in place of the old one. The silvering is much better on the new one. I'm going to go back and grab a driver's side headlight from the stash when he's back because the silvering on mine is incredibly poor even though the lights are quite bright. Quite difficult to photograph, but here's the passenger side old and new to give you some idea, the driver's side on the car is much worse than the first picture below. 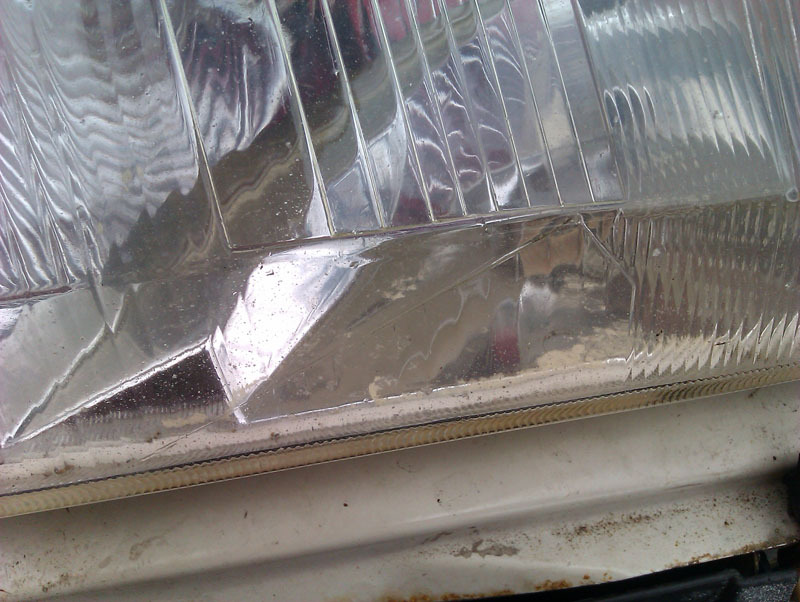 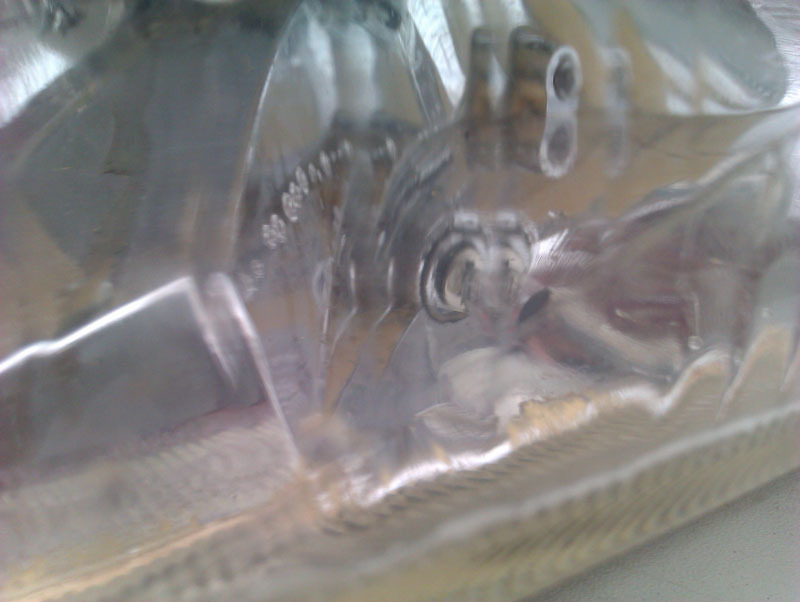 Then I wanted to tackle the loose A pillar trim... and snapped it. I didn't feel too bad, someone has had this off before and cracked it, repairing the back with some good old duct tape. The reason it wasn't sitting right is the two wires that run up the A pillar were snagged in the wrong place by the dashboard, after some finegling I got them situated correctly and the A pillar then fit perfectly fine, if in two pieces. The really irritating thing is that it took no force at all to snap this trim, it just seemed to be incredibly brittle. 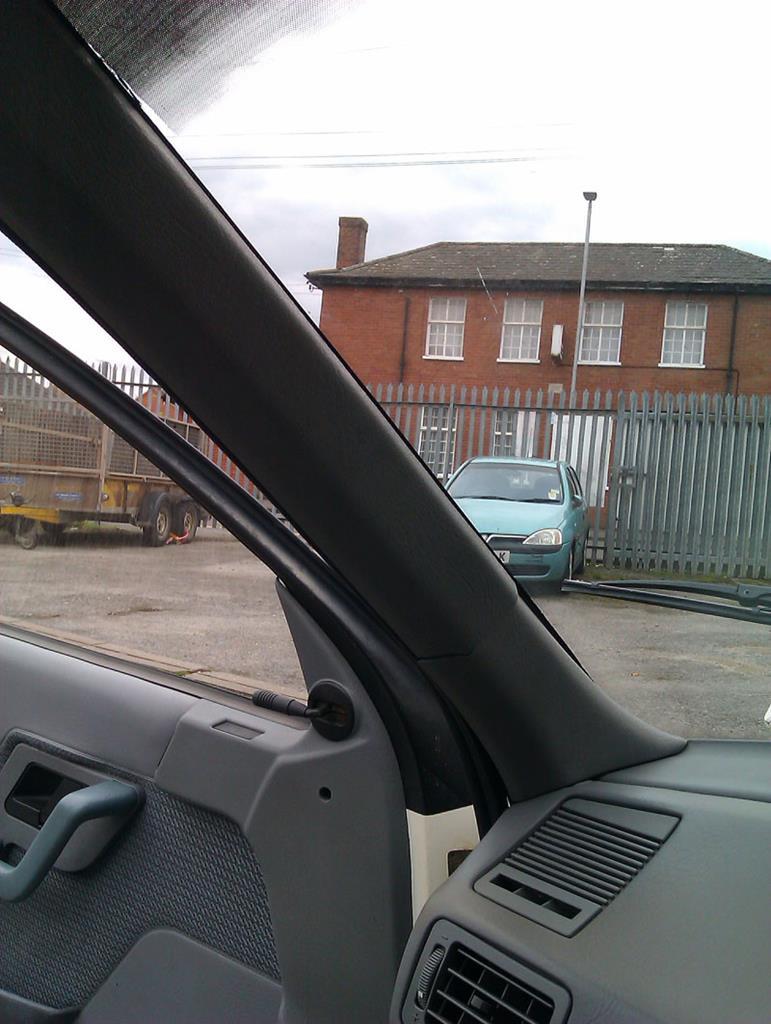 You'll notice I've got a generic sunstrip, I fitted that recently and I'm really glad I did, it helps counter some of the hideous LED streetlight glare at night, and a lot of the high level sun glare on those nice sunny days. 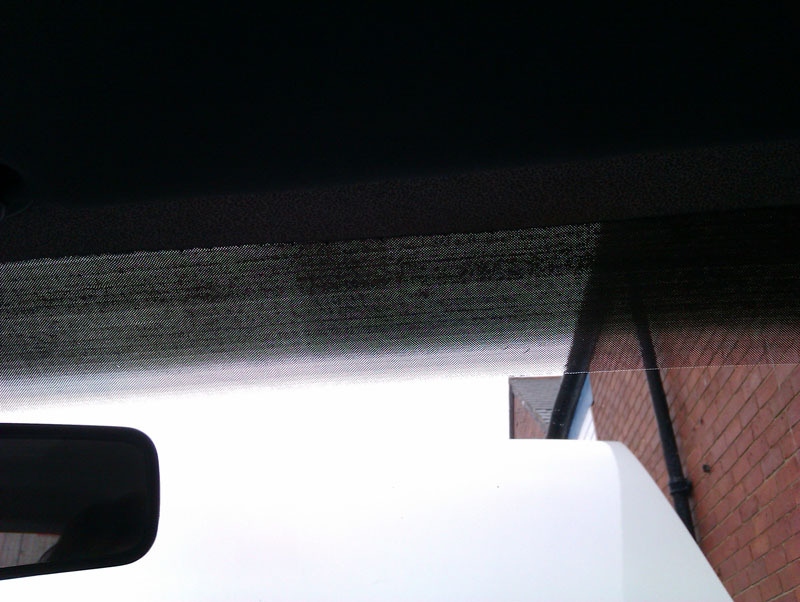 With the A pillar trim at home, I cleaned it up and got it all ready for more Gorilla epoxy. This stuff is great, I highly recommend it for repairing plastics. Luckily both breaks in the trim are clean so the repair will be near invisible. I also noticed it has stamped LUDOVIC WATTERLOT 20 MAI 1987 on the back, I assume this is the person that did the quality control, or fitted it back when the car was build since it looks like it was done with a hand paint stamp, there's REYDEL cast into the part, which I assume is the actual manufacturer.  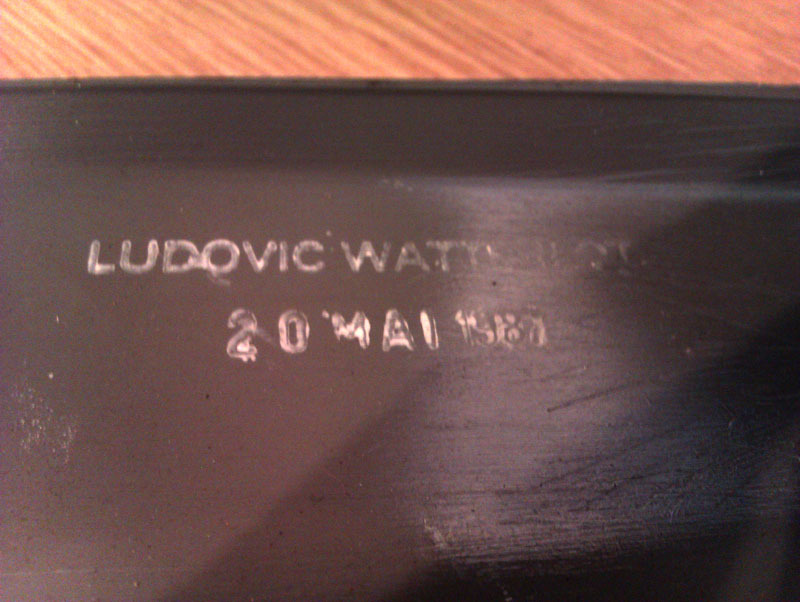 With the glue cured, I very carefully refitted the trim. The cracks are there when the light hits it just so, it can't be helped. Happily, it fits better now and doesn't stick out at the top like it used to. I'll keep an eye out for a replacement, a non-cracked one would be nice to have.  |
| |
|
|
glenanderson
Club Retro Rides Member
Posts: 4,315
Club RR Member Number: 64
|
|
Sept 30, 2019 18:19:21 GMT
|
|
I have a bit of a surplus of standard H4 bulbs here. PM me your address and I’ll pop a pair in the post.
|
| |
My worst worry about dying is my wife selling my stuff for what I told her it cost...
|
|
vulgalour
Club Retro Rides Member
Posts: 7,256
Club RR Member Number: 146
|
|
Sept 30, 2019 19:09:36 GMT
|
Very kind of you  |
| |
|
|
vulgalour
Club Retro Rides Member
Posts: 7,256
Club RR Member Number: 146
|
|
Sept 30, 2019 19:55:44 GMT
|
It started raining quite heavily here and, even though it's dark, I wanted to see if the repair I'd done had stopped the water getting in. I'm happy to report it has! However, water is still getting in. Hmm. Sat patiently in the car with a torch watching for water appearing and it became clear it was coming from behind the soundproof panel somewhere. Happily, it's not coming from high up the bulkhead, so I have to assume the items I thought were waterproof up there still are. A bit more investigation, removing the glovebox (which is a fun* job) and more poking and finally I spotted the water twinkling in the torchlight as it was running into the car through what looked like a blob of factory seam sealer. The area isn't crusty, there just seems to be a gap in the seam here and the sealant has simply failed. It's a tiny hole too and now I've poked it, water is pouring into the car rather more than I'd like. 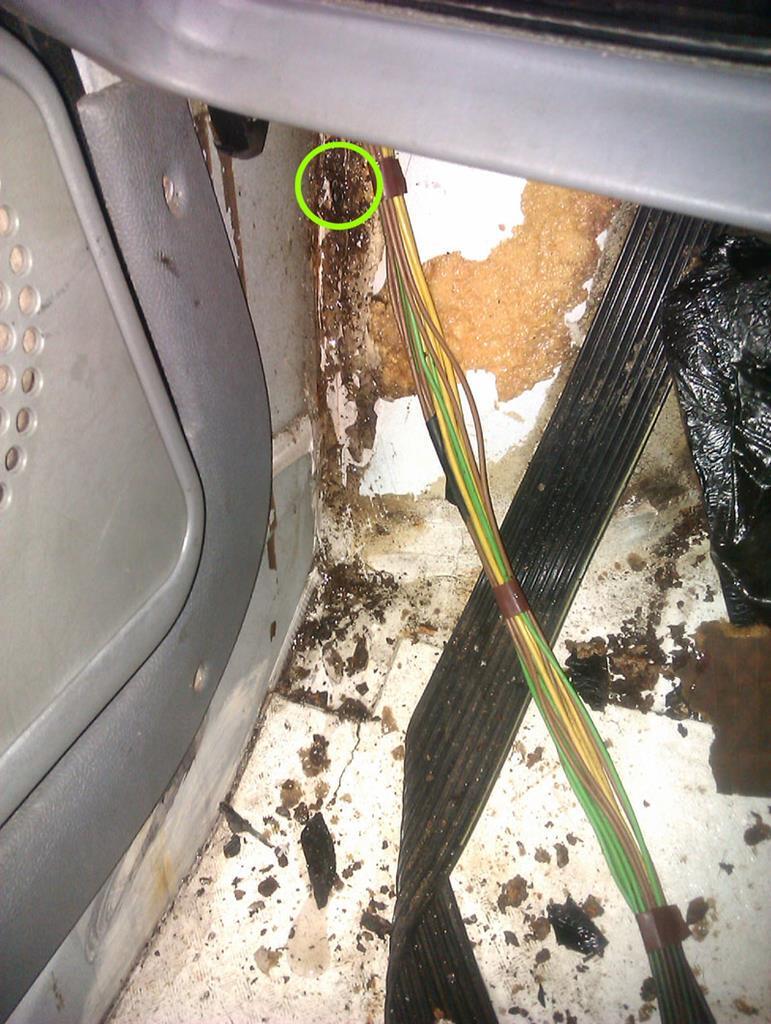 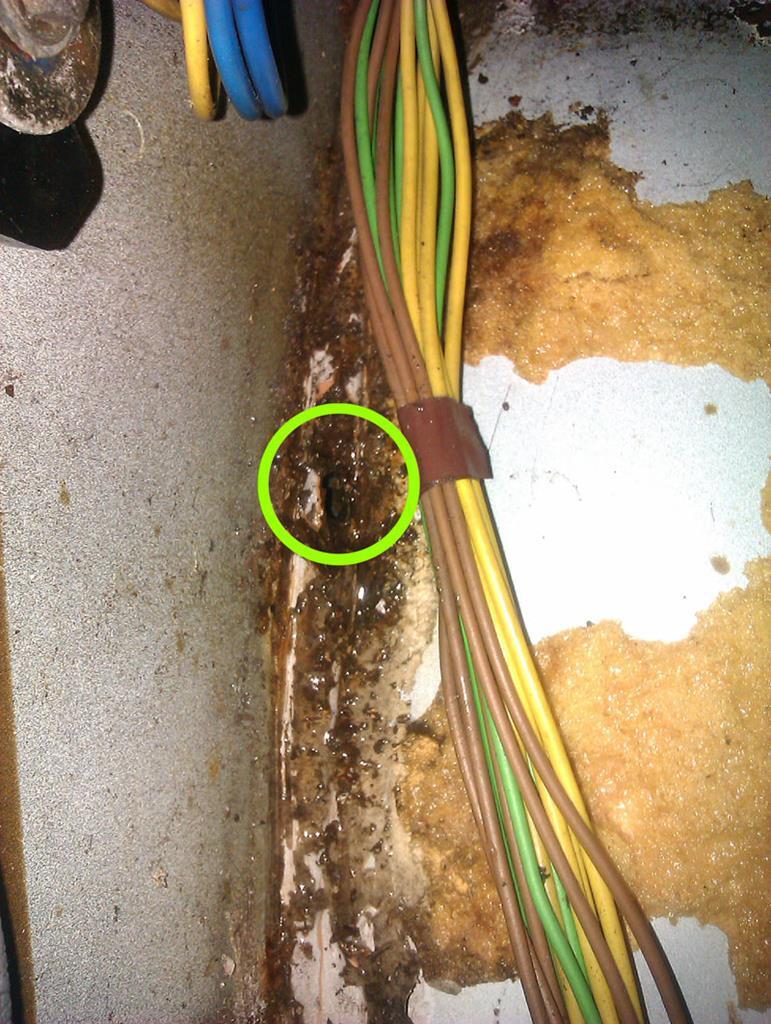 Plan is to get the wire wheel on this to clean back all the loose sealant in the area, rust treat and/or weld, depending on what's required, and apply fresh paint and sealant to keep the water on the outside. That should hopefully cure the water ingress. At least the windscreen and door seal areas that have been sealed have stayed dry, so I'm happy about that. |
| |
|
|
glenanderson
Club Retro Rides Member
Posts: 4,315
Club RR Member Number: 64
|
|
Sept 30, 2019 20:35:47 GMT
|
|
Whereabouts is it coming from on the other side of that seam? I’d be trying to find that out first. Spend time curing the problem rather than treating the symptom.
No problem on the bulbs. Glad someone can put them to use.
|
| |
My worst worry about dying is my wife selling my stuff for what I told her it cost...
|
|
vulgalour
Club Retro Rides Member
Posts: 7,256
Club RR Member Number: 146
|
|
Sept 30, 2019 21:26:29 GMT
|
|
I know exactly where it's coming from on the other side of that seam because I've had all that apart when I first got the car. Water is falling on the car, down the A pillar and behind the front wing, as it should. However, instead of just running down the body and onto the floor, it's finding this little hole and draining into the car on its way to the floor. The hole that's there is tiny, the wiring gives some idea of just how tiny, and it's between two panels that overlap. Both panels appear to be intact, just not quite butted up as well as they perhaps ought to be, normally not an issue because the sealant normally keeps the water out. Because the sealant has failed in that one tiny spot, the water has got in behind it and the more water that's come in, the more sealant has been pushed out. So the best solution is to blitz it all back and remove everything that's loose and reseal. I've a similar boot leak on the Princess where two panels overlap that I've never been able to 100% seal and it appears to have been like that from the factory. All you can really do is clean and seal as best you can and keep an eye on it going forwards. Just old car stuff.
|
| |
|
|
Rich
Club Retro Rides Member
Posts: 6,317
Club RR Member Number: 160
|
|
|
|
I know exactly where it's coming from on the other side of that seam because I've had all that apart when I first got the car. Water is falling on the car, down the A pillar and behind the front wing, as it should. However, instead of just running down the body and onto the floor, it's finding this little hole and draining into the car on its way to the floor. The hole that's there is tiny, the wiring gives some idea of just how tiny, and it's between two panels that overlap. Both panels appear to be intact, just not quite butted up as well as they perhaps ought to be, normally not an issue because the sealant normally keeps the water out. Because the sealant has failed in that one tiny spot, the water has got in behind it and the more water that's come in, the more sealant has been pushed out. So the best solution is to blitz it all back and remove everything that's loose and reseal. I've a similar boot leak on the Princess where two panels overlap that I've never been able to 100% seal and it appears to have been like that from the factory. All you can really do is clean and seal as best you can and keep an eye on it going forwards. Just old car stuff. Indeed cleaning and sealing is the best way but you want to also do it on the ‘wet’ side as the water will still be seeping into the panel joints if the sealant is blown on the other side of the seam, Causing more water ingress and more rust. |
| |
|
|
glenanderson
Club Retro Rides Member
Posts: 4,315
Club RR Member Number: 64
|
|
|
|
|
This ^^^
Anyway, leaks aside, the car is looking so very much smarter for your efforts. Well done. The colour helps; me and my mate, back in the day, always looked for white cars to “flip”, because it’s the easiest colour to blend and hides a multitude of sins. You could touch it in with tippex if you’re desperate and it’d still buff up well. 🤣
|
| |
My worst worry about dying is my wife selling my stuff for what I told her it cost...
|
|
vulgalour
Club Retro Rides Member
Posts: 7,256
Club RR Member Number: 146
|
|
|
|
It would have helped if I read that before today happened, and now, boils and ghouls, we'll find out just why Rich and Glen gave out that advice. --- There was a break in the weather today and since I couldn't do this repair indoors - clashing schedules, full workshop - I had to do it outdoors so I took my chances. Cleaning off the old sealant was hard work but the water damage was still very localised afterwards and there really was no point hauling the welder out for this so I cracked on with drying everything out while the rust converter did its thing. Weather was still holding, the water I cleared out stayed out, and I set to with the sealant and paint. Then it started raining... this was going to be one of those jobs. 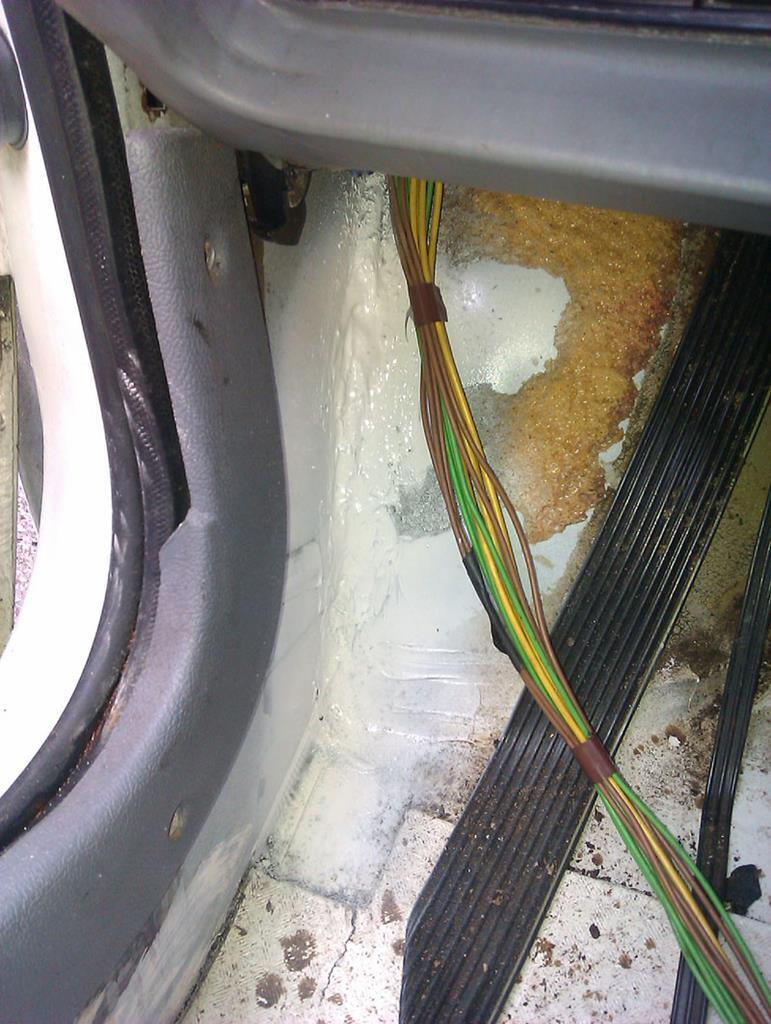 The rain just got heavier and, because of work, I didn't have a huge amount of free time so I knew I was going to have to chance it. A drive about doing what needed to be done and there was no water ingress, even as the rain got heavier. I was feeling hopeful right up until the point I got home and noticed a small spot of water that had bled through the fresh sealant. Prodded it and sure enough, water has started to get behind there so I'll be redoing this. On the positive side the ingress is drastically reduced so hopefully it's not going to be too much of a headache between now and when I can get the car indoors. I'll pull off the arch liner and seal this from both sides, smoothing it out so the water is encouraged to flow over rather than through. 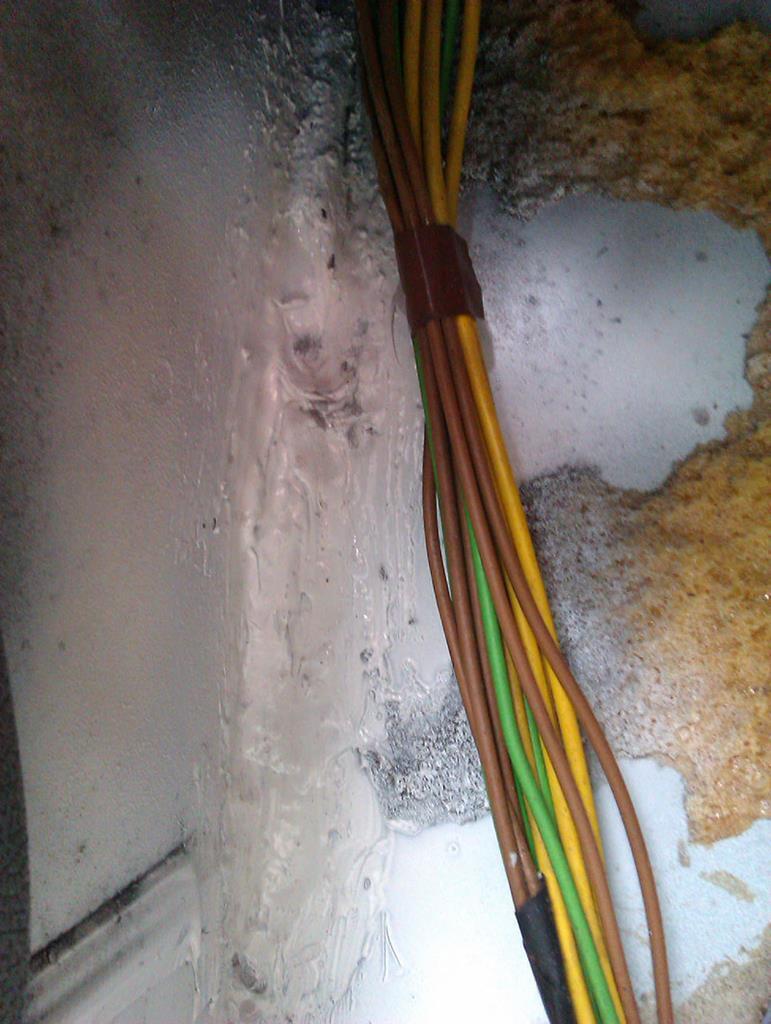 When I have my break later I'll deal with just how much water is still in the car from last night. I really shouldn't have prodded it. It's remarkable how much water has got into the car through such an insignificant little hole, and really quite annoying. 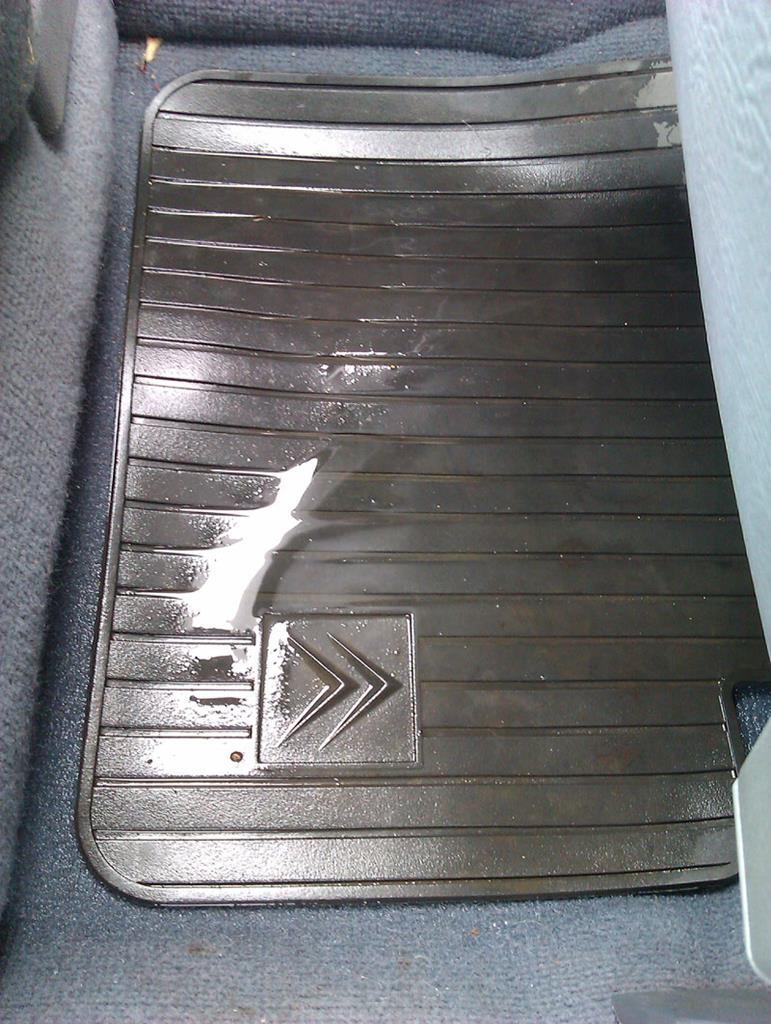 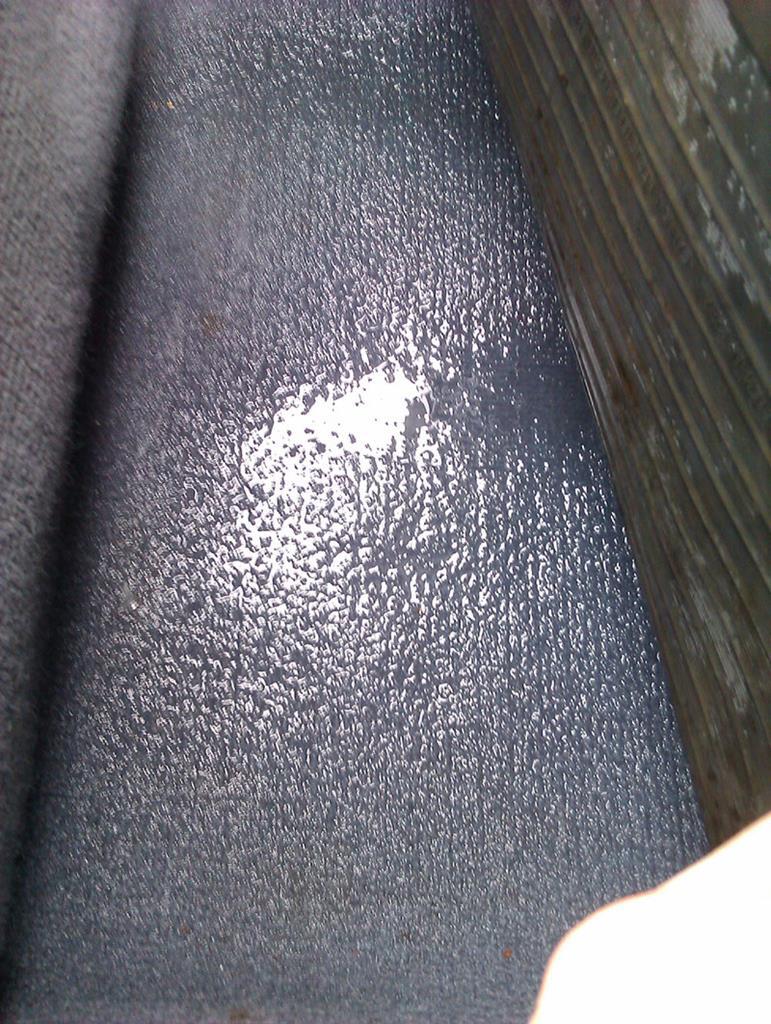 I did check for other leaks, this seems to be the only one. The door seals and the entire driver's side is bone dry. All of that water has come through from that tiny hole because it's right in the path of a drain route, it's like having a gutter directed straight into the passenger footwell. It's okay, I bought a big car sponge to deal with it. Stupid rain. Stupid leaky car. |
| |
|
|
Rich
Club Retro Rides Member
Posts: 6,317
Club RR Member Number: 160
|
|
|
|
That I can sympathise with. My workshop roof is degrading so quickly I’ve had to fit internal guttering at the storage end as it just comes in. It doesn’t help that the roof was designed by someone who only considered spoil water flow and suitability of building material after the roof was actually ‘finished’. I put my hand through part of the felted flat roof because it was made of chipboard. |
| |
|
|
vulgalour
Club Retro Rides Member
Posts: 7,256
Club RR Member Number: 146
|
|
|
|
Get you with your fancy indoor gutters  Seriously though, I feel your pain on that one, nothing worse than water getting in where you don't want it too, especially if it's the result of someone else's shoddy workmanship. --- Today I had some workshop space to monopolise and even though it wasn't raining, I knew it would as soon as I attempted to do the job outside, so I did it indoors instead and of course it then didn't rain at all. Sod's Law at work. Happily, because of the uppy-downy, I didn't need to remove the wheel from the BX or even jack it up to do this job, just stick it in high, full lock to the right and I could ease out the arch liner to find the outside of the hole that was letting water into the car. If I hadn't put the sealant on the inside I wouldn't have found the hole on the outside, it was pretty much invisible. After some clean up (not a lot mind, there wasn't much need), I smeared more than was perhaps necessary with fresh sealant.  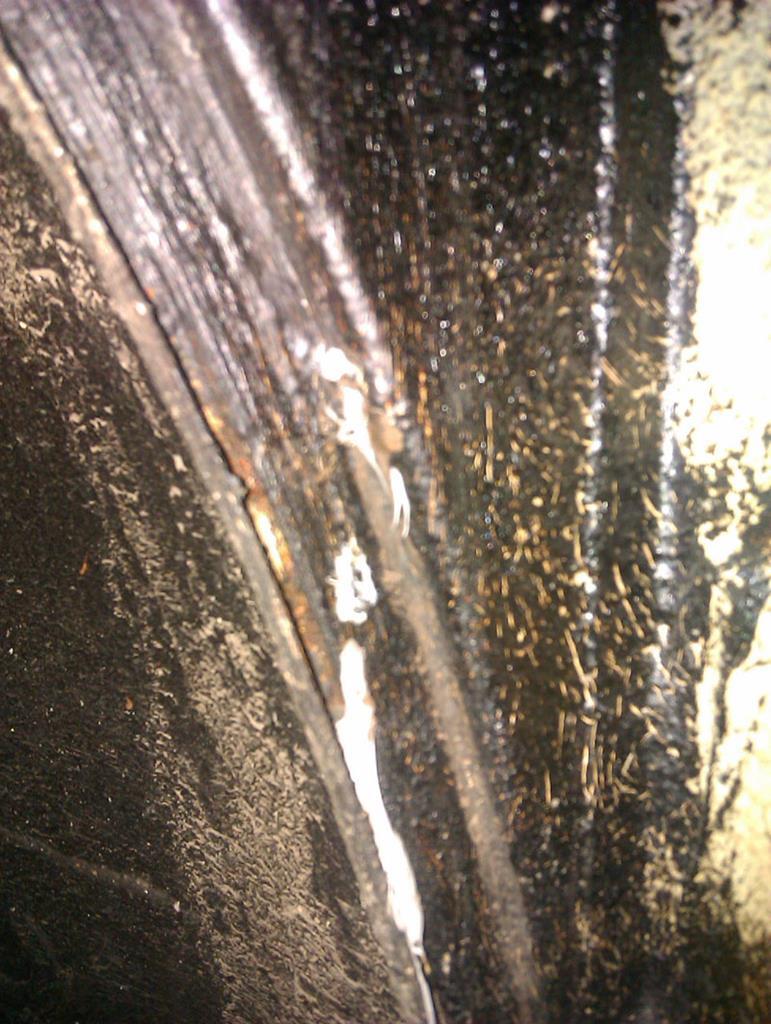 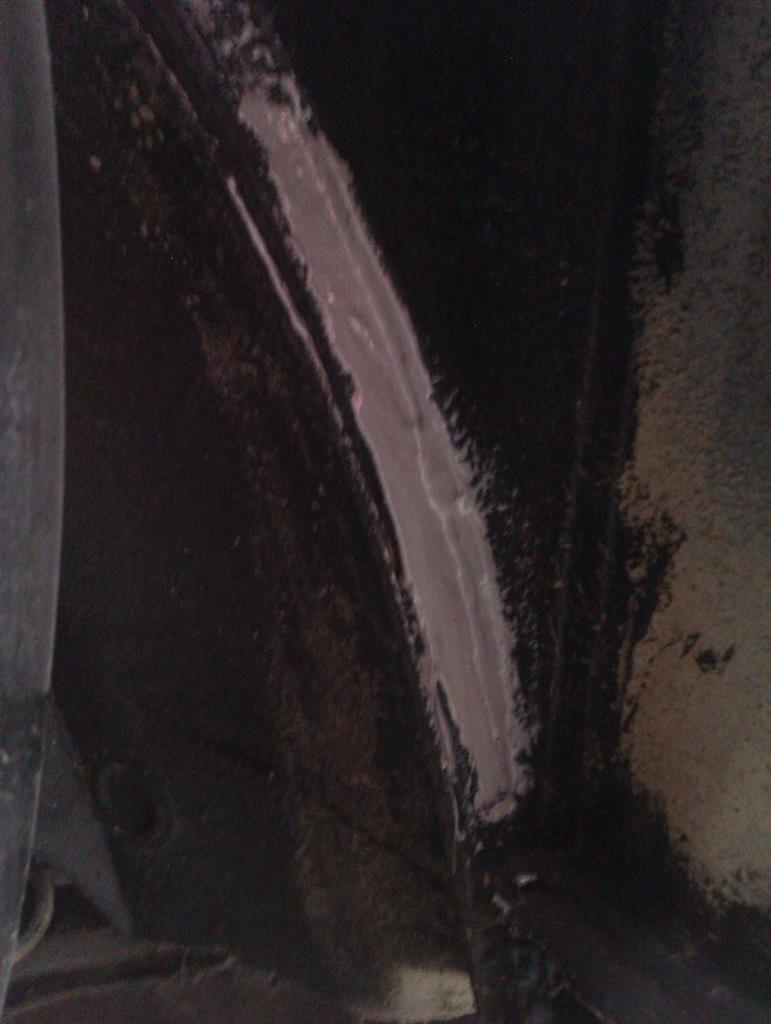 For good measure, I cleaned off the sealant on the inside of the car and dried it all out so there wasn't any water trapped in here and daubed some fresh sealant on to keep the water on the outside, where it belongs.  Let's hope that's enough to stop the water getting in and, because it's been dry since doing this job, the sealant should have plenty of time to dry and seal up the problem area nicely. The inside of the car was quite smelly because the old underlay was drenched, so the wet carpets had to come out so I could dry them and stop the car going mouldy. It's amazing how much hassle this one tiny little hole has ended up causing. 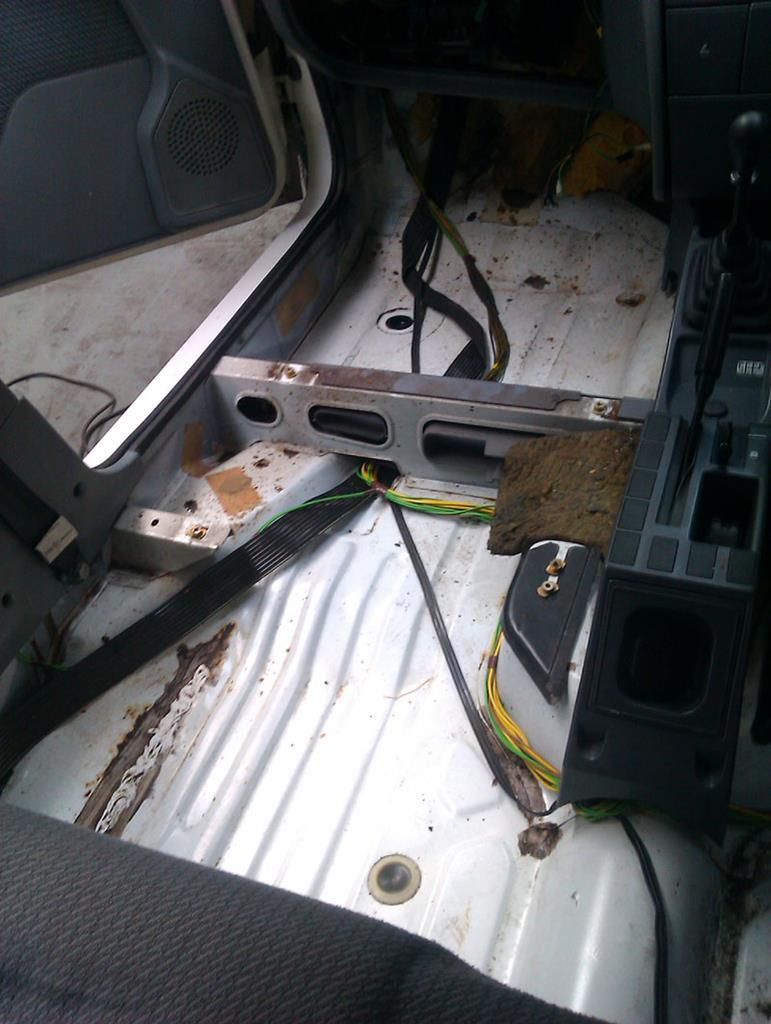 It does at least mean I can get everything clean that would otherwise be quite awkward without removing the seats. It also looks like this has been leaking for a very long time time and Dean did say he kept a cover on the car to prevent water getting in when it rained a lot. I don't really have the option of putting a cover on since I use the car every day just about, so my hand has been forced into leak chasing and fixing which is probably no bad thing. Anyway, the rear floor has a couple of spots of concern, it's the lowest point that the water settles and on both sides in the back there's some rust right on a seam, you can see a big black blob where the floor meets the under-seat panel. With everything being so wet I can't really assess it properly, but since there's no crustiness to the areas and the underside looks very good I'm hoping this is just localised and will respond well to a clean and fresh sealant. I'll deal with it once it's dry and before I reinstall the interior since now is as good a time as any. Someone has been here before me anyway, there's evidence of rust treatment there and a line of blobbed on sealant which I'm guessing is to deal with the surface rust spots the other side has in exactly the same place, just a little overkill. From memory, I think there's a strengthening piece that runs on the underside of the floor here which is probably something of a water trap in and of itself. 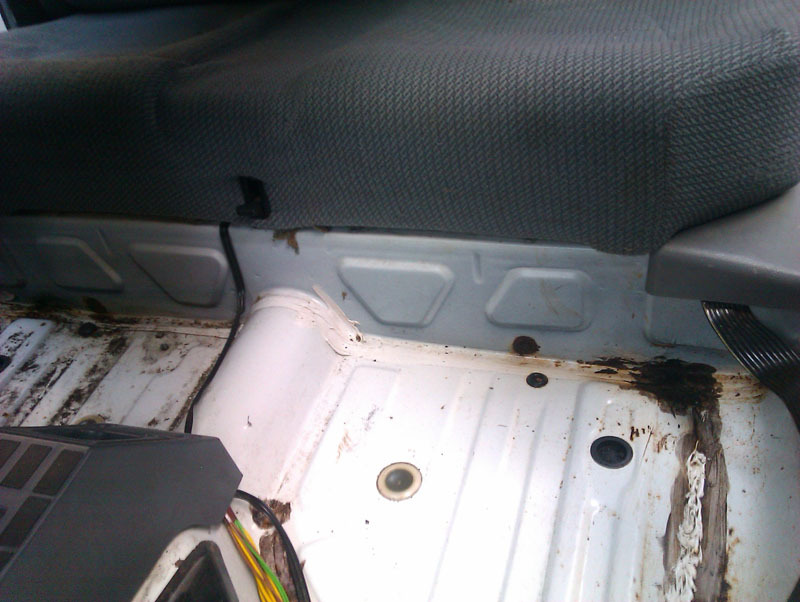 I'm hoping to tackle this over the weekend, I want to devote a proper day to finegling all of this and making it nice again before the interior goes back in. Also, it isn't half noisy and annoying without the carpet in so I want that back in asap. |
| |
|
|
vulgalour
Club Retro Rides Member
Posts: 7,256
Club RR Member Number: 146
|
|
|
|
I was going to wait until the weekend to sort this job out. Instead, things aligned so that I had free time today instead and some more BX parts arrived to fettle so Mike and I wobbled over to the unit so he could do unit stuff while I did BX stuff. First job was to clean back all the suspect areas on the floor pan, including that big line of blobby sealant. Happily, the rust that was there looks to have been from water sat on top rather than creeping through from underneath, the blobby sealant wasn't hiding anything appalling so everything got cleaned and hit with a good dose of rust treater. 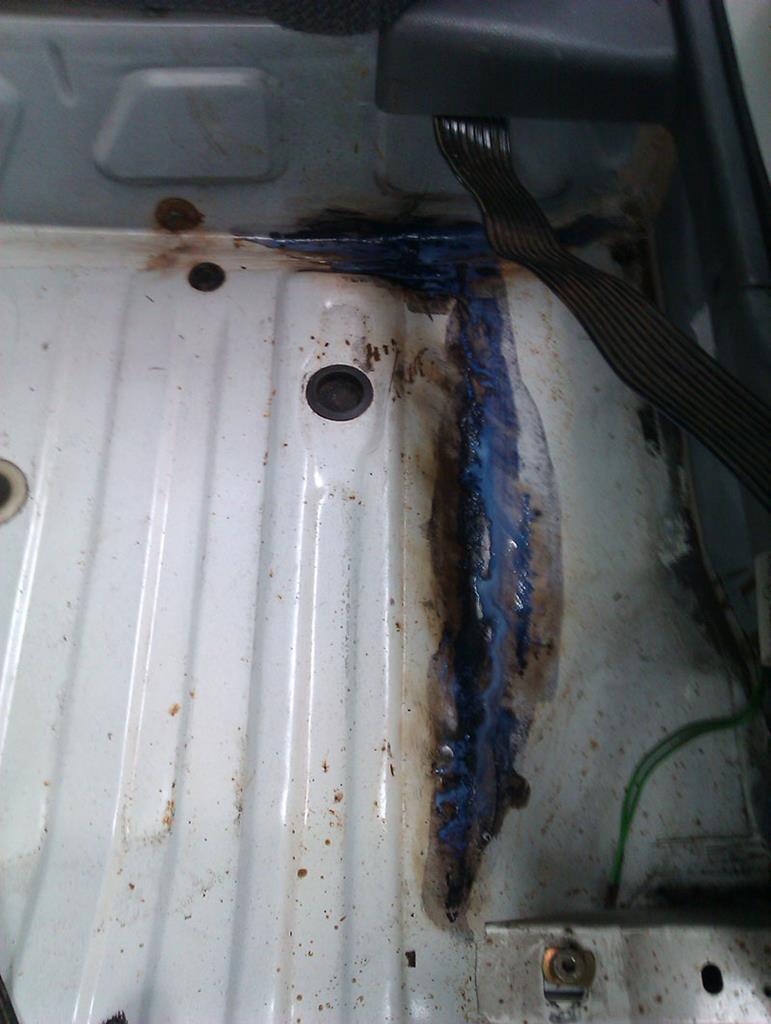 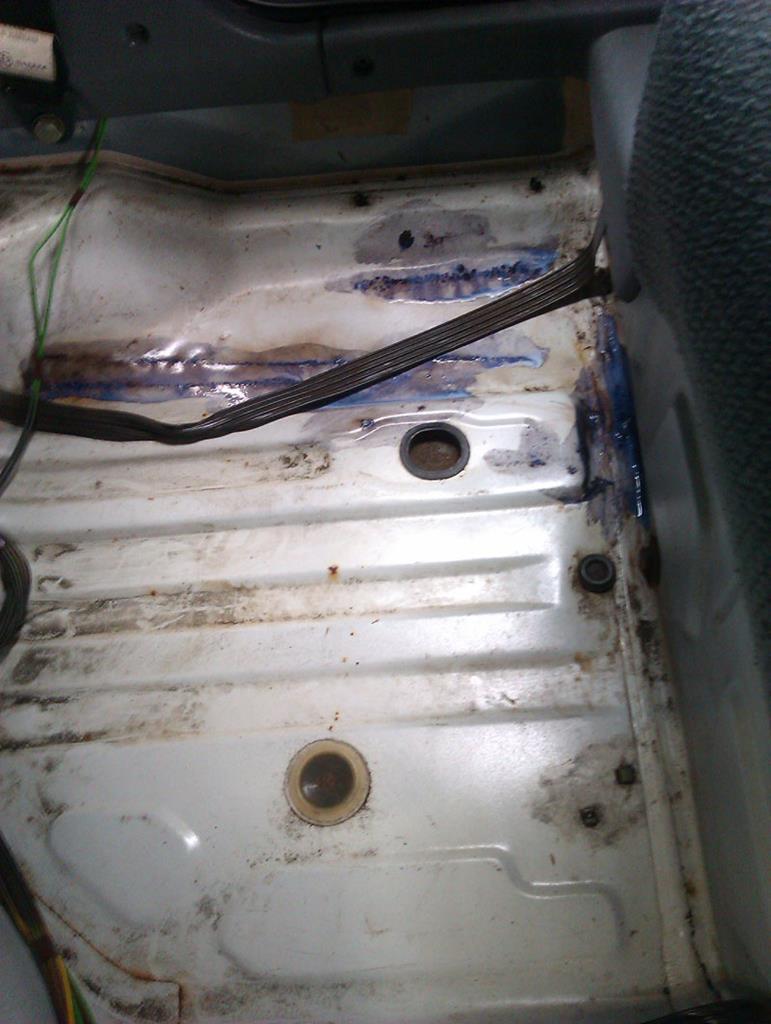 Once that was all cured, it was on with some fresh sealant to replace what had been removed to get the rust out and after that a splosh of fresh primer and paint just to make it look a bit nicer and to make sure that if anything reappears it'll be a lot easier to see. 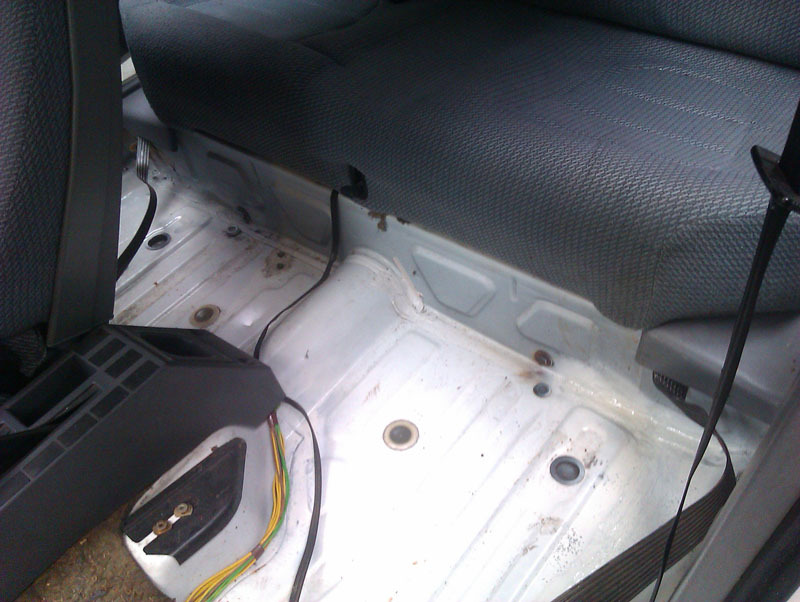 Because it had been so good on the bodywork front, it got to wear its new present today, that being some nice correct grey head restraints. First problem to address with them is that they're for the front, not the rear, and I suspected that you could just swap the stems over. If you couldn't, it was going to be a bit of a wasted purchase. 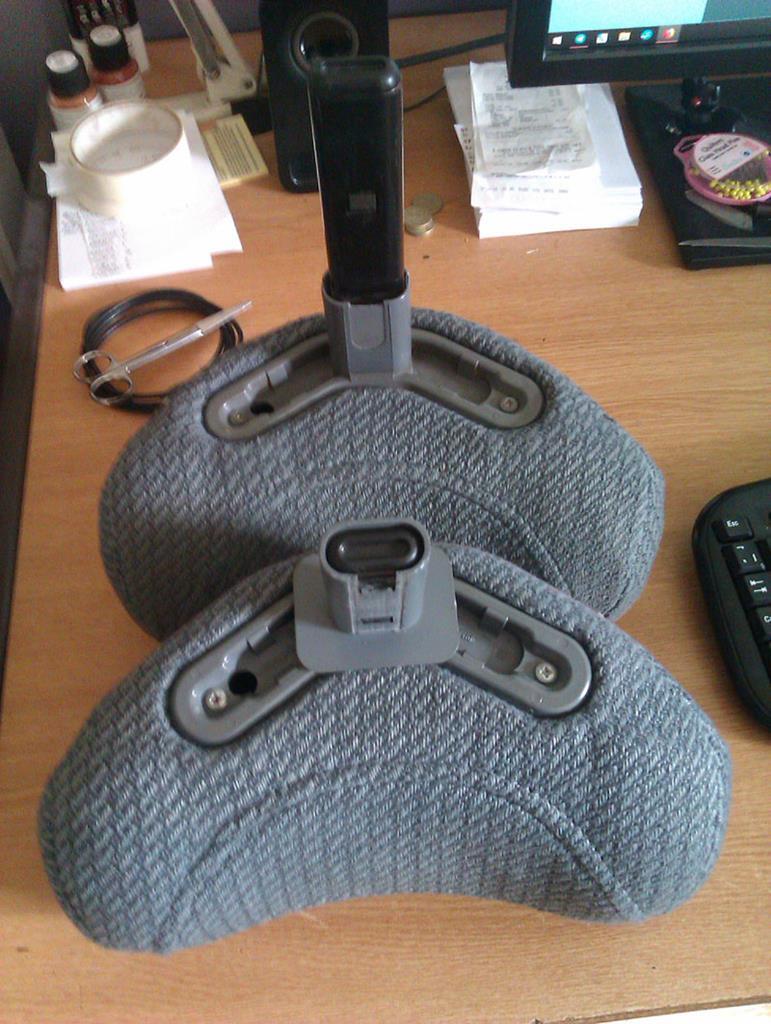 The stems on the rear head restraints are much shorter and the plastic holder is a slightly different design. I didn't know what was hiding underneath the screwed on bit since I hadn't checked before impulse buying the replacements, so let's find out what I'm dealing with. Removing the plastic trim was easy, the metal post proved a little more difficult since it's quite a tight fit. With a bit of wiggling, the post does eventually come out. 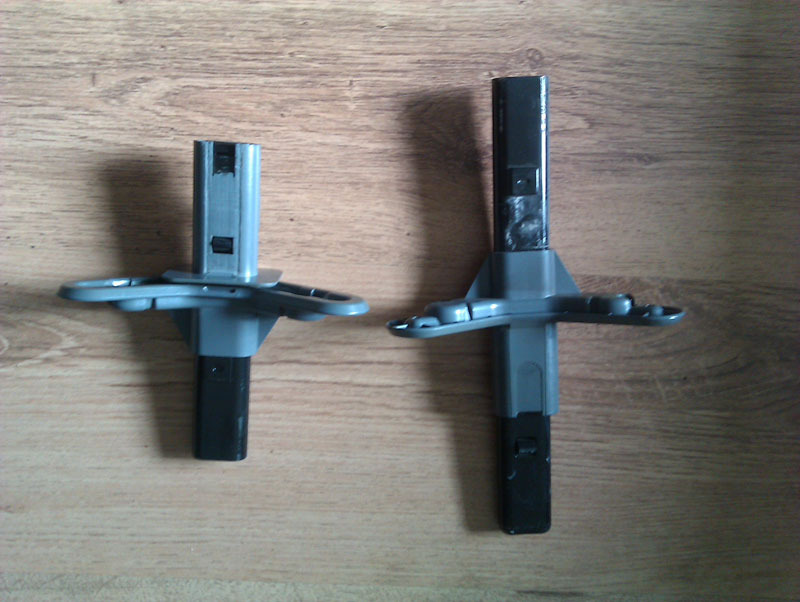 The padded part of the head restraint is identical, it's just the post length and the plastic trim that differs. Happily, you can just swap them over, which is exactly what I did. Now, it might seem a bit odd I'm replacing these, up to now the pictures make this look quite pointless. The reason is that the new ones simply aren't faded like the old ones and now I've got the new ones installed it's gone and made the fade on the top of the back seat that much more obvious. If I can't find replacement seats for the car in the same fabric I do have links to the correct fabric to retrim them myself, which is exactly what I plan to do. Fitting a different interior would be a lot easier, and likely a lot cheaper, I just want to keep this stock as I really like the grey cloth interior. 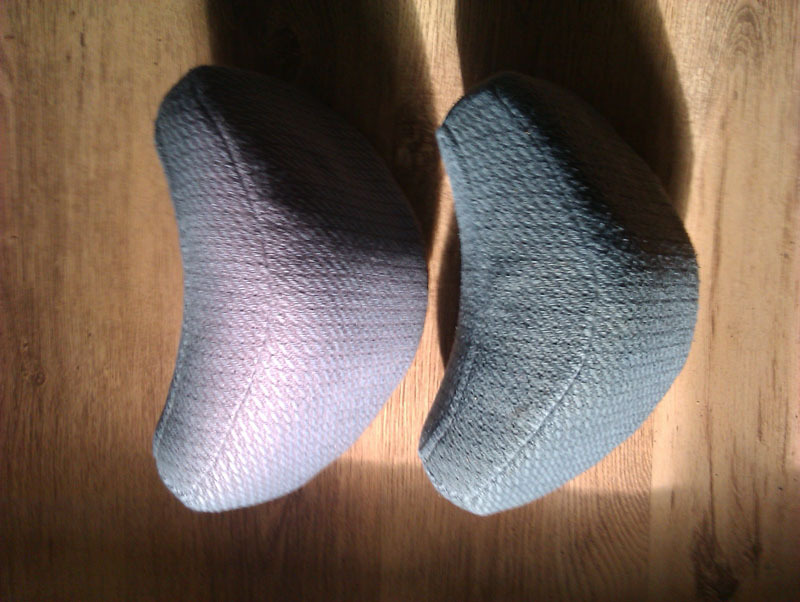 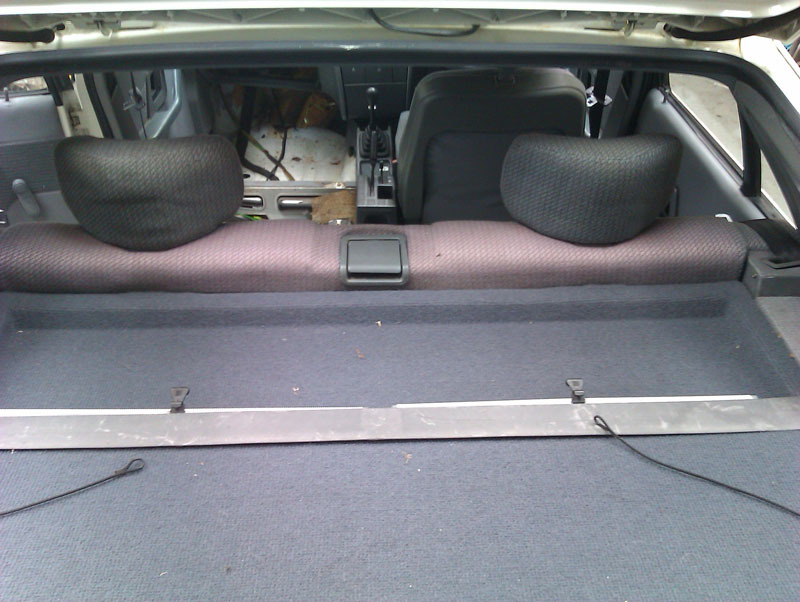 The other item I've been trying to track down is replacement carpetting. All of the modern carpets are either much too cheap, or much too plush and fancy. I'm trying to replace the original loop pile carpet in the BX with as close to an exact replacement as I can. The carpet is made from entirely flat pieces sewn together with no need to hem any edges, so if I can get the correct carpetting I can easily make a replacement myself. For the parcel shelf supports that have faded, I'm hoping to skin an unfaded parcel shelf - and I think the one in the local stash could be a good donor for this - and retrim that way so it looks factory, I just need to figure out how to unglue the original fabric without damaging it. In good news the water leak from that seam appears to now be cured. There was still a tiny bit coming through the door seal so we've added a bit of sealant there in the hope it will stop that happening until I can get hold of a proper replacement door seal. I'm also on the lookout for a carpet underlay that has similar acoustic properties to the original fibrous stuff but which doesn't need to be glued to the floor, something flexible and padded that can be glued to the carpet would be much better, even more so if it's disinclined to absorb water. |
| |
|
|
vulgalour
Club Retro Rides Member
Posts: 7,256
Club RR Member Number: 146
|
|
|
|
Is the BX watertight today? No. No it is not.  On the plus side, even though we had a lot of rain last night the amount that came into the car was vastly reduced and the leaks I had identified and sealed up had stayed sealed up so that must mean water is getting in somewhere else. The driver's side of the car is bone dry, as are the rear floor pans, so that means it's most likely coming in from the passenger side. A scout about highlighted a drop of water at the bottom of that seam I'd sealed up that isn't coming from higher up the seal so I imagine there's a bit more failed sealant here to deal with which I know won't be too difficult. 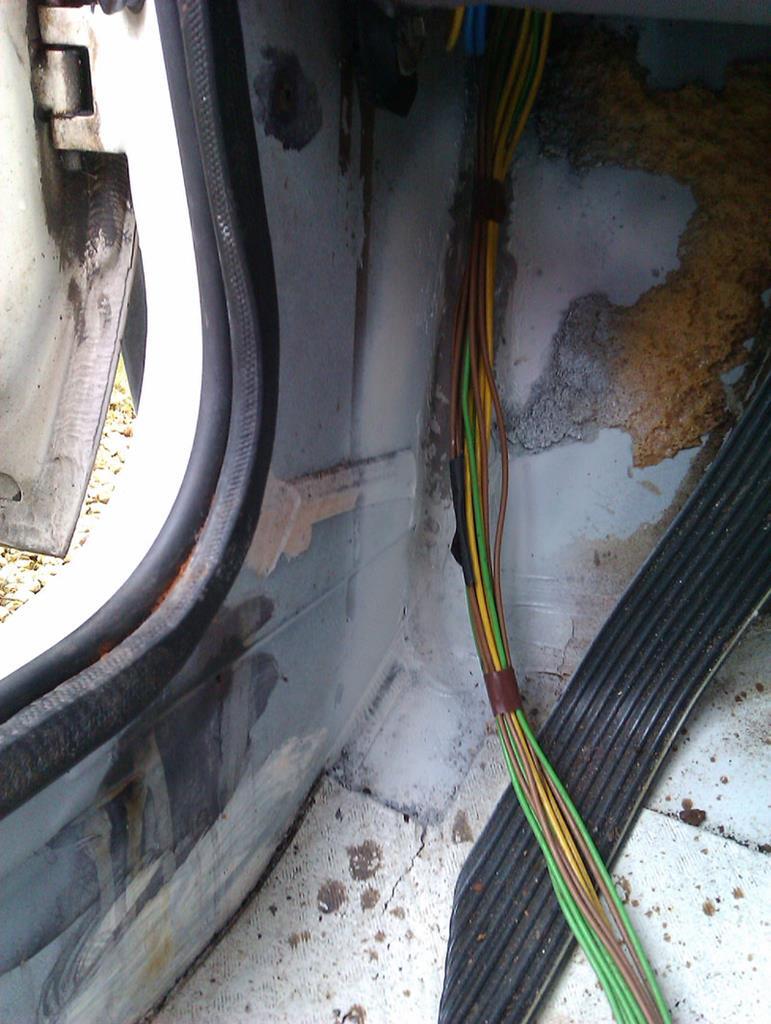 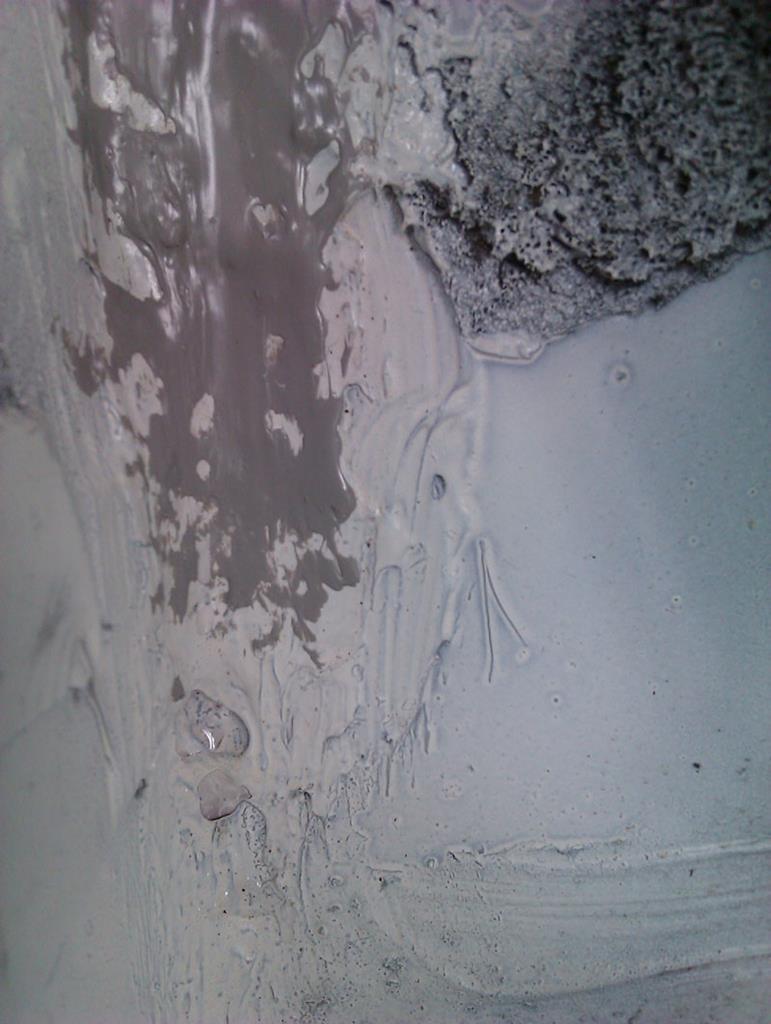 That will get the same treatment as the area above it since it's probably going to be exactly the same issue of failed sealant and I know access to both sides to sort this is very good. More of a look around highlight a damp spot on the heel board and what I'd previously dismissed as historic rust stains from when the bulkhead was repaired a couple of owners ago. Now, I'm not so sure.  If it is this area, it's not letting a lot in, it's a fairly slow weep into the car. The concern is that to sort this area out it's considerably more difficult due to access with all the other bits of car around it. This could easily end up becoming a dashboard out job to sort. Rather than diving in and stabbing randomly, I got the French chalk out and gave things a liberal dusting with it. It's a bit rainy today so any water that does come in will leave clean tracks in the dust and show where the water is appearing and then a plan of attack can be formulated. Fingers crossed it's just another tiny spot of failed sealant and nothing more serious, I'm a little concerned due to the work that's been done previously in this area and this sort of thing can easily become partial strip down territory. 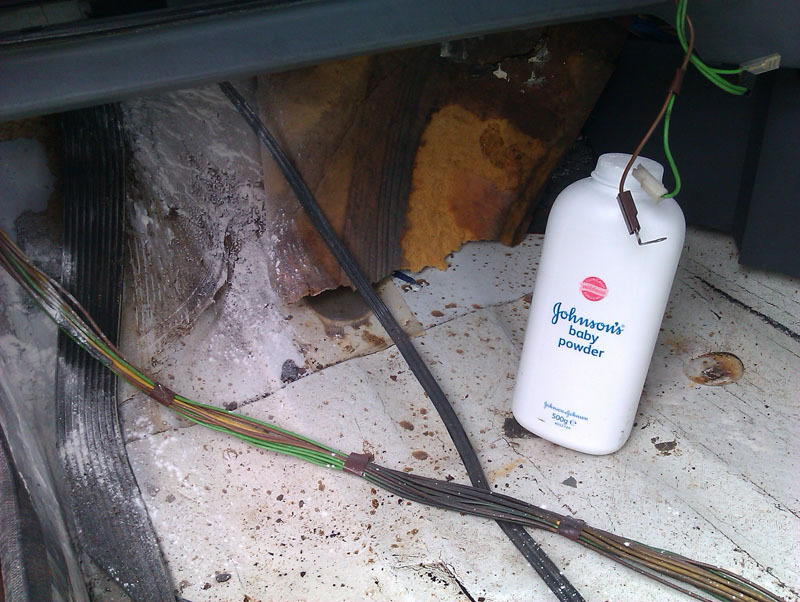 In happier news, I managed to score a full set of window switches for a reasonable sum online. They will be quite an improvement on the ones in the car which are faded so badly they look dirty.  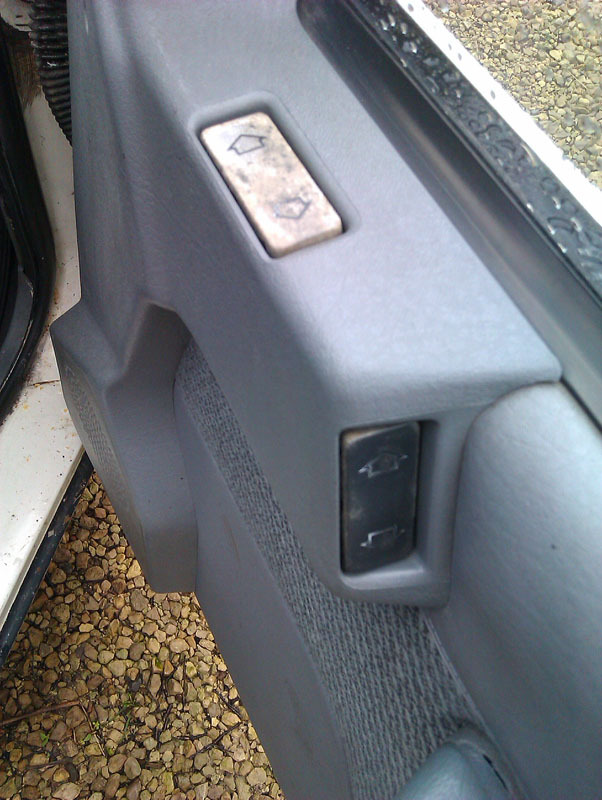 |
| |
Last Edit: Oct 4, 2019 12:36:51 GMT by vulgalour
|
|
vulgalour
Club Retro Rides Member
Posts: 7,256
Club RR Member Number: 146
|
|
|
|
Small update on this. The leak at the front actually seems limited to a tiny weep from some sealant where the heel board and bulkhead overlap. That'll be loose sealant again so it'll get the wire brush, rust treater, fresh sealant, paint, treatment from both sides. However, it's not the major point of water ingress into the car, that honour is reserved for the rear door seals on both sides that just spew water into the car quite dramatically while driving. When the car is just parked up not moving, the water goes out like it should, but when you're driving for some reason it just comes straight in through the bottom corner of the seal where it meets the B pillar. 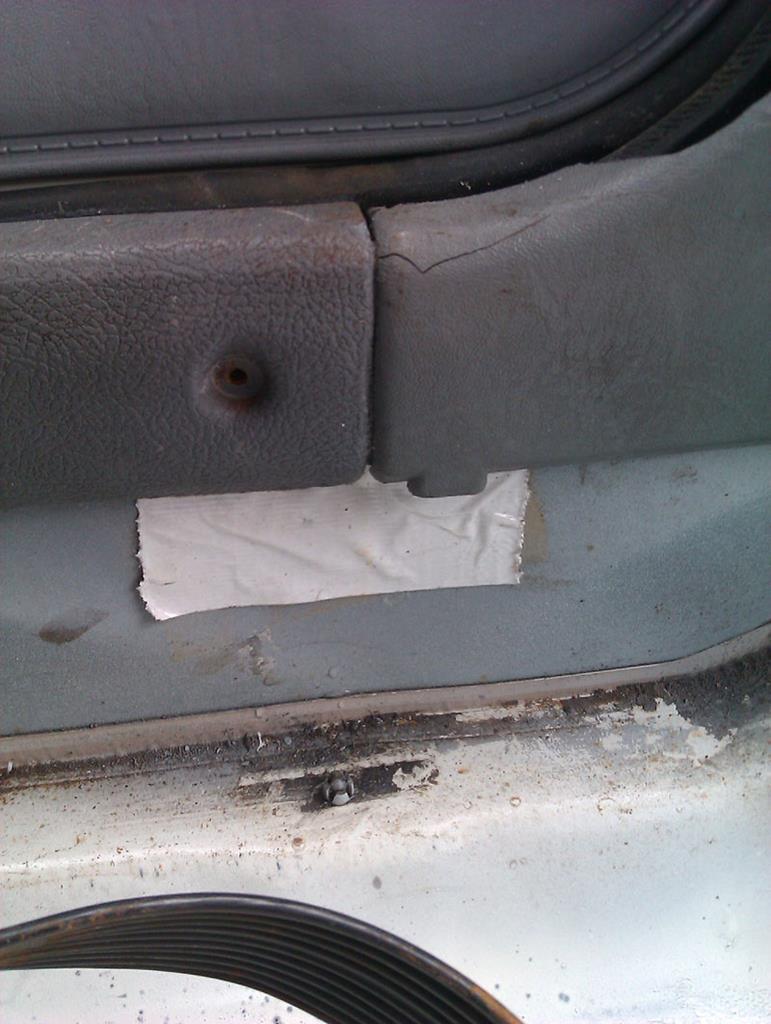 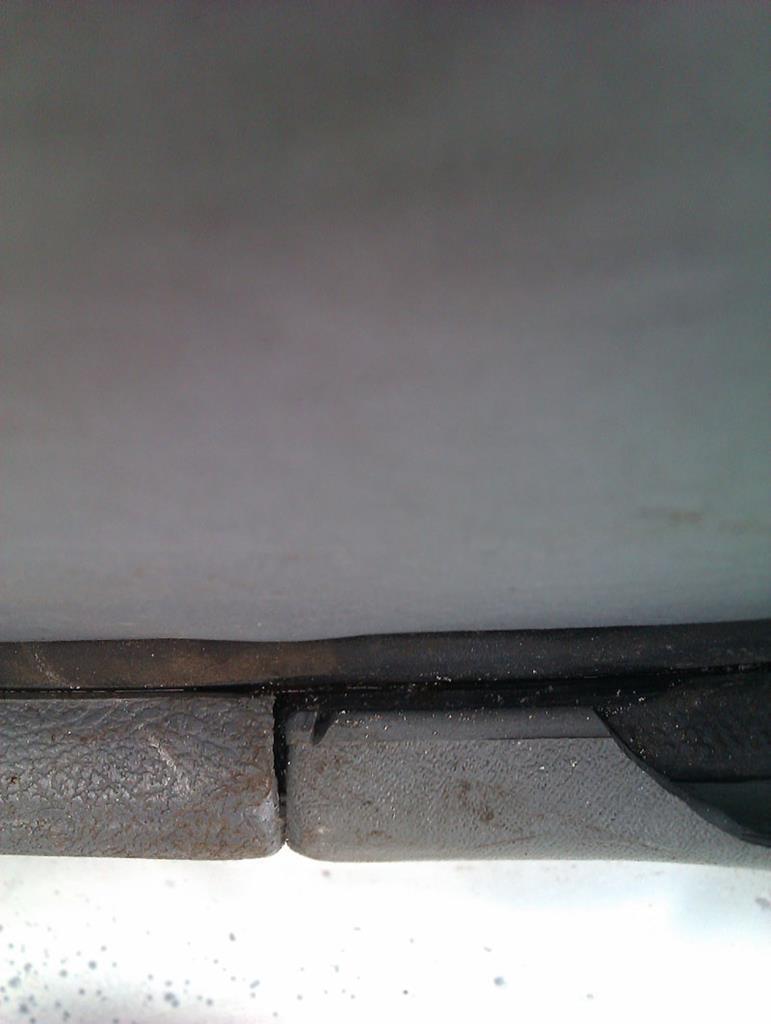 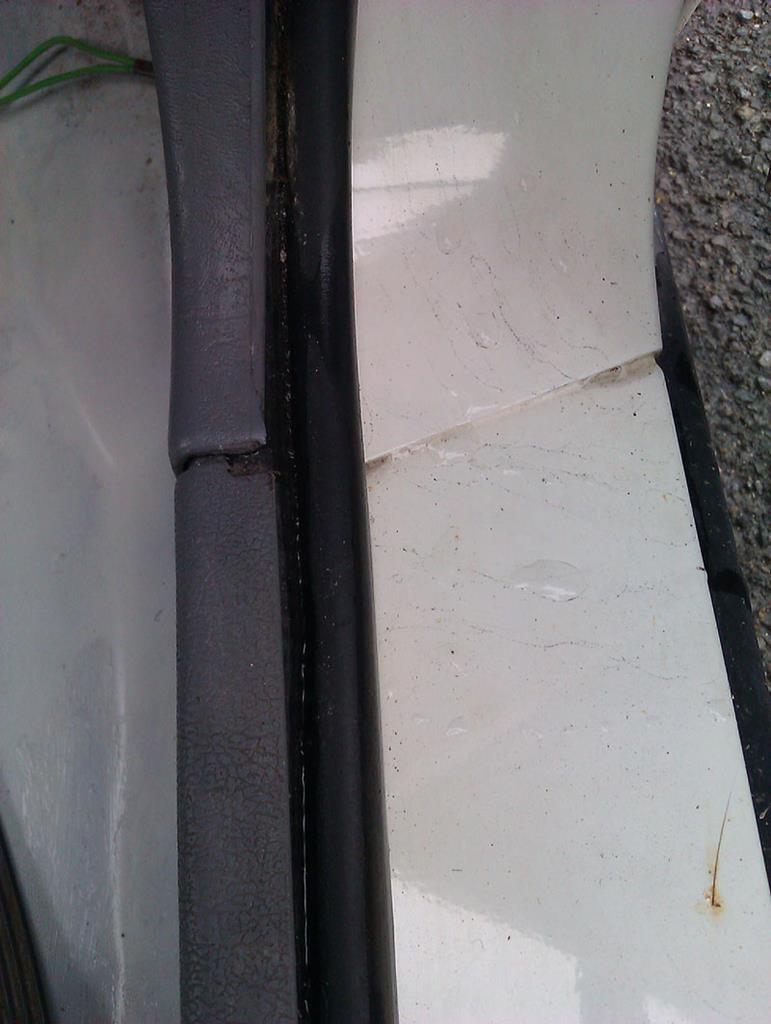 Worst of all, this isn't like on the front door seal where the rust mean the water could go underneath. On the back door seals, the water is sitting in the seal itself and then overflowing into the car and I have absolutely no idea how to stop it doing that. The rear door seals seem designed to direct water into the car, which is the exact opposite to what I want them to do. Any suggestions welcome on this one because I have no idea how to fix it. |
| |
|
|
jamesd1972
Club Retro Rides Member
Posts: 2,916
Club RR Member Number: 40
|
|
|
|
|
Non setting caravan sealant into the ‘u’ of the door seal before pushing into place ?
James
|
| |
|
|


 Seriously though, I feel your pain on that one, nothing worse than water getting in where you don't want it too, especially if it's the result of someone else's shoddy workmanship.