vulgalour
Club Retro Rides Member
Posts: 7,256
Club RR Member Number: 146
|
|
Aug 26, 2019 20:11:17 GMT
|
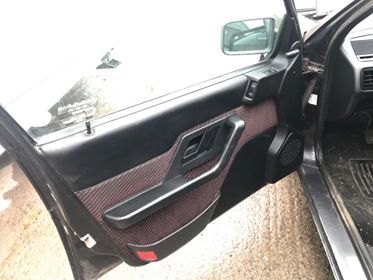
Great success! I located and fixed the issue with the blower fan flap operation, thanks to the helpful hint from Dean about having to fight for space with the pedals in the footwell. If you stick your head right in the footwell and look down the side of the centre console where Citroen didn't bother to put a trim panel, you can see a bunch of Stuff, part of which is a small black plastic peg and a short metal rod with an eye on one end. Now, it looks like someone has had this issue before and tried to resolve it with a blob of sealant but, due to the nature of the operation of this part, that's only worked for so long before popping off so I'll be using a push-fit spring clip fixing, like you use on emblem pegs, to hold this all together when I'm in the same place as the clips. I've circled the two bits that need to be connected, this was a faff because I couldn't actually see what I was taking a photo of because you get in your own way and to replace this you need to do it blind, which is just super. 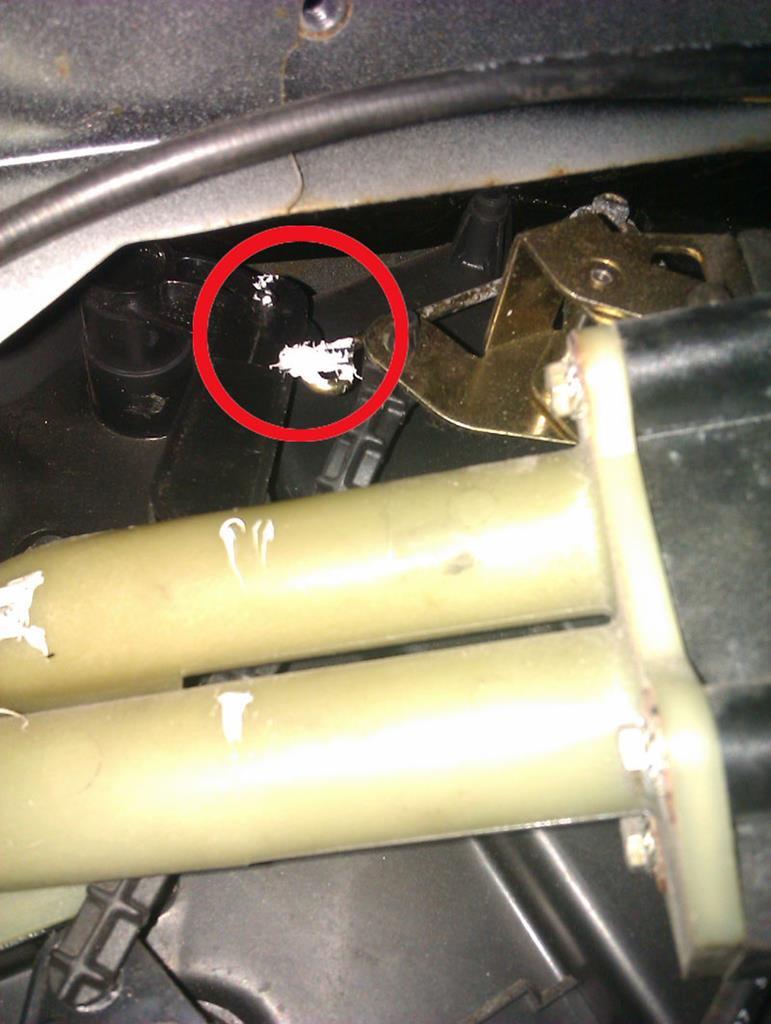 Before I got started, I manually operated the rod to see if it did what was expected and, when I found it did, after a bit of blind fumbling about, I got the peg in the hole. 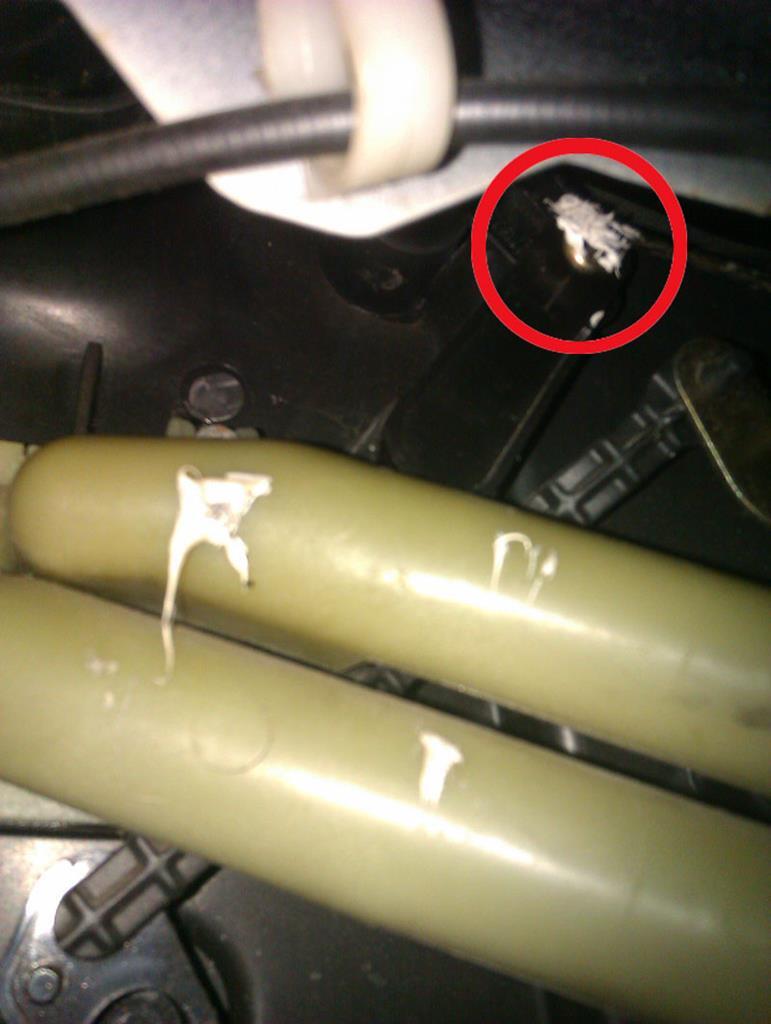 Happily, full air flow now reinstated and the blower fan can get air all the way to my face properly now. A relief that it was such a straightforward fix really and nice that I shan't need to dismantle bits of car. By the time I'd done this it was getting dark so I got to see what the centre console actually looked like for the first time since redoing all that. Looks like the cigarette lighter bulb has either blown, or the connector for it has come adrift, I'll pop the oddment tray out of the top of the dashboard and have a broggle when I've some light to work with, I bet the plug has come adrift a bit when I was putting everything back together. 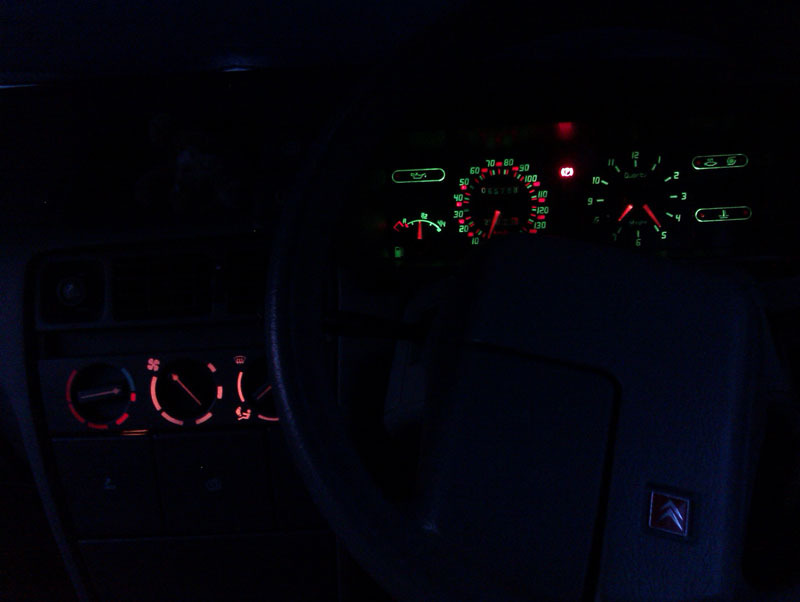 Rheostat affects the centre console as well as the instrument binnacle, which I didn't know, since I've never been in a BX where all the interior lights actually work. 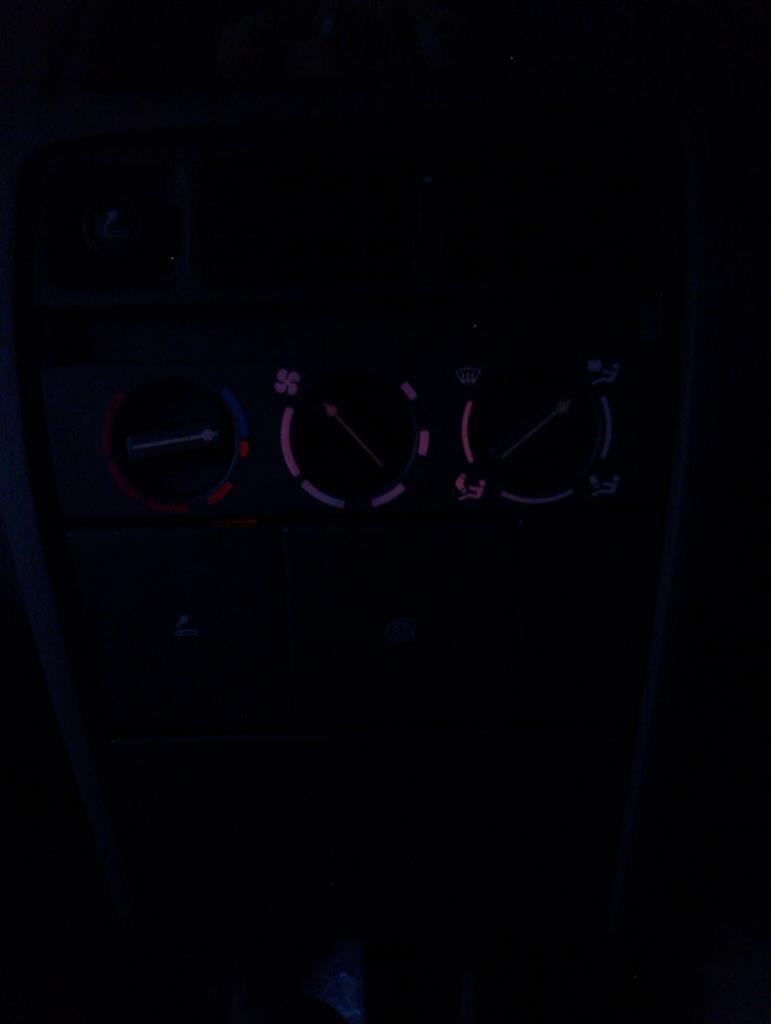 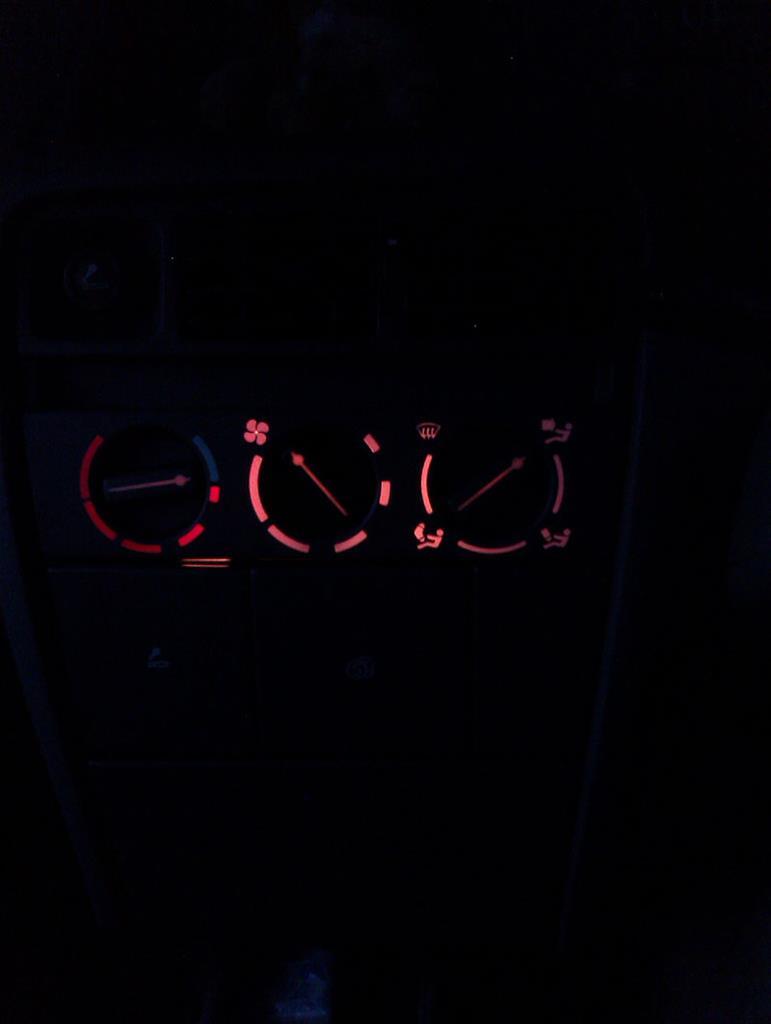 A small victory. |
| |
|
|
|
|
|
|
|
Aug 26, 2019 20:23:21 GMT
|
|
Dash looks great illuminated .
|
| |
|
|
|
|
|
Aug 28, 2019 12:41:35 GMT
|
saw this on facebook and thought of you  the john oh deere  |
| |
|
|
vulgalour
Club Retro Rides Member
Posts: 7,256
Club RR Member Number: 146
|
|
Aug 28, 2019 13:25:52 GMT
|
|
Well that's.... something.
|
| |
|
|
vulgalour
Club Retro Rides Member
Posts: 7,256
Club RR Member Number: 146
|
|
Sept 1, 2019 21:41:28 GMT
|
|
Had to move the Princess today, for the first time in five weeks, so that the drive could be cleaned. I was surprised that it started no bother and the brakes weren't stuck on, that's a far cry from how it used to be when left alone for any length of time. Sadly I wasn't going any further than the end of the drive because the engine shop still haven't sorted my head out, so I'm off to see them tomorrow and try and get some sort of time on completion so I can get it sorted.
BX has wanted for nothing, as you might expect. The cigarette lighter works, it's just the bulb in it that's blown so I'll replace that at some point which means it and the passenger side interior light are the only bulbs not working on the car at the moment.
|
| |
|
|
jamesd1972
Club Retro Rides Member
Posts: 2,916  Club RR Member Number: 40
|
|
Sept 2, 2019 20:52:02 GMT
|
|
|
| |
|
|
vulgalour
Club Retro Rides Member
Posts: 7,256
Club RR Member Number: 146
|
|
Sept 2, 2019 22:55:05 GMT
|
Steering column cowling lower half front door bins (if not faded) Glovebox lid (if not warped) B pillar lower trim, passenger side Parcel shelf clamps that go on the back of the back seat (pretty sure they're the same on hatch and estate), passenger side is the one I need though I think they're universal Mud flaps Interior grab handles if they're not faded Anything seat wise if they're darker-pale grey tweed cloth, if they're anything else even in good shape, they're no use to me Citroen floor mats Single spoke steering wheel centre pad if grey and not warped (mine's got a bit of lift on one corner) Gearknob, if not excessively worn
I can't think of anything else off the top of my head. Hopefully it's on the earlier interior, I'm looking to match and improve what mine's got at the moment. If by some fluke the carpet and dashboard shell are already removed and grey I'd be interested in those too, but please don't go to the effort of removing them if not, that's a lot to ask of anyone! I wish there were some pictures of the interior, unusually it's a FB post I can actually see, which is handy.
|
| |
Last Edit: Sept 2, 2019 22:55:59 GMT by vulgalour
|
|
vulgalour
Club Retro Rides Member
Posts: 7,256
Club RR Member Number: 146
|
|
|
|
Right, well, Princess update then I guess. Stopped in at the machine shop and he's still a man down and work is piling up, as it does, and he's not been able to do my pipe. He's asked for another two weeks and honestly, what am I going to do? I don't know anywhere else locally that I can take it to that'll do it. Now he tells me he's having to make the pipe so... okay. Two more weeks it is I suppose. That'll take us to 7 weeks on this job and I have to say I won't be surprised if I go back in two weeks time and he needs more time so... we shall see. I know I said I wasn't in a rush and I know it's curse word when you end up short staffed, especially when you're self employed, so I'm not going to get upset about it. Things happen, he does good work, sometimes good work takes a ridiculously long time for whatever reason, that's life. In better more progressy news, I got the door I was working on welded up. Not my finest work, I must have rushed it a bit because I clearly got it too hot in a couple of places. No oil-canning, thankfully, it's just not as nice a job as it could have been if I'd slowed down a bit more. Filler and paint will make it presentable enough, as will getting the better hammer and dolly on that lower edge to sharpen it up a bit, I just ran out of steam to really finish this off nicely. I'm happy it's not rusty at any rate, that was the goal after all. 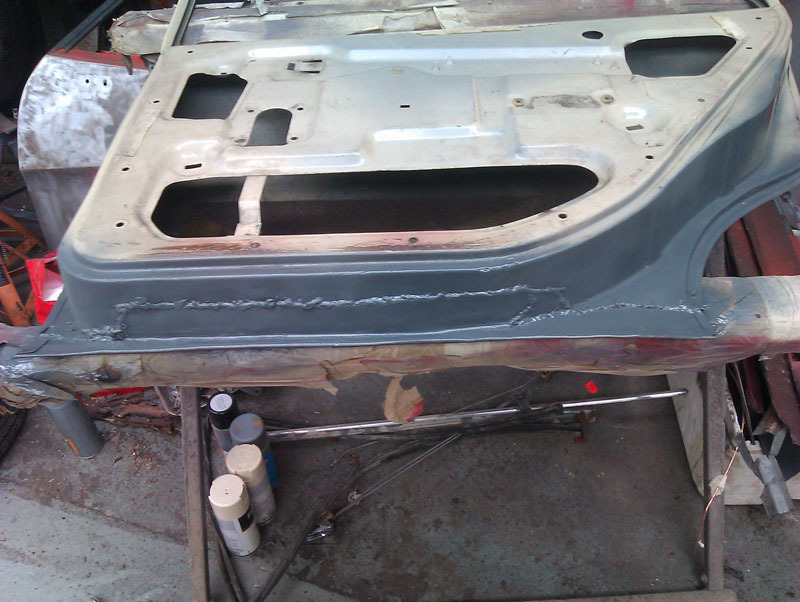 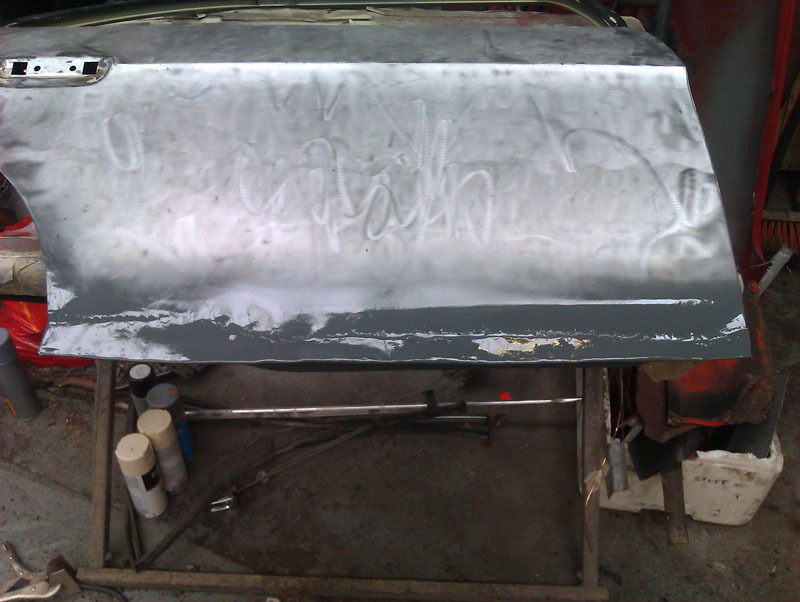 It's certainly no worse than the front door on the same side so it'll do. I was surprised at just how much I needed to replace on this door and it'll need more work once I fit it on the car because the trailing edge isn't quite the profile it should be, but I can't sort that until car and door are in the same place. It's another job off the list at any rate. |
| |
|
|
jamesd1972
Club Retro Rides Member
Posts: 2,916
Club RR Member Number: 40
|
|
|
|
Steering column cowling lower half front door bins (if not faded) Glovebox lid (if not warped) B pillar lower trim, passenger side Parcel shelf clamps that go on the back of the back seat (pretty sure they're the same on hatch and estate), passenger side is the one I need though I think they're universal Mud flaps Interior grab handles if they're not faded Anything seat wise if they're darker-pale grey tweed cloth, if they're anything else even in good shape, they're no use to me Citroen floor mats Single spoke steering wheel centre pad if grey and not warped (mine's got a bit of lift on one corner) Gearknob, if not excessively worn
I can't think of anything else off the top of my head. Hopefully it's on the earlier interior, I'm looking to match and improve what mine's got at the moment. If by some fluke the carpet and dashboard shell are already removed and grey I'd be interested in those too, but please don't go to the effort of removing them if not, that's a lot to ask of anyone! I wish there were some pictures of the interior, unusually it's a FB post I can actually see, which is handy.
I’ll give the bloke a shout and try and view get some interior shots for you / price up. If it’s LHD will all the bits be the same ? James |
| |
|
|
|
|
|
|
|
Before I got started, I manually operated the rod to see if it did what was expected and, when I found it did, after a bit of blind fumbling about, I got the peg in the hole. This was the first thing I saw when i opened the thread. Maybe I've watched too many carry on films, was this double entendre intended? |
| |
|
|
vulgalour
Club Retro Rides Member
Posts: 7,256
Club RR Member Number: 146
|
|
Sept 3, 2019 11:32:26 GMT
|
jamesd1972: Dashboard and front carpet will be, glovebox lid might be, steering column cowl might be, other bits should be universal I expect. fr€$h&m1nt¥: Ooh, you are awful! But I like you.
|
| |
|
|
jamesd1972
Club Retro Rides Member
Posts: 2,916
Club RR Member Number: 40
|
|
Sept 3, 2019 11:50:31 GMT
|
 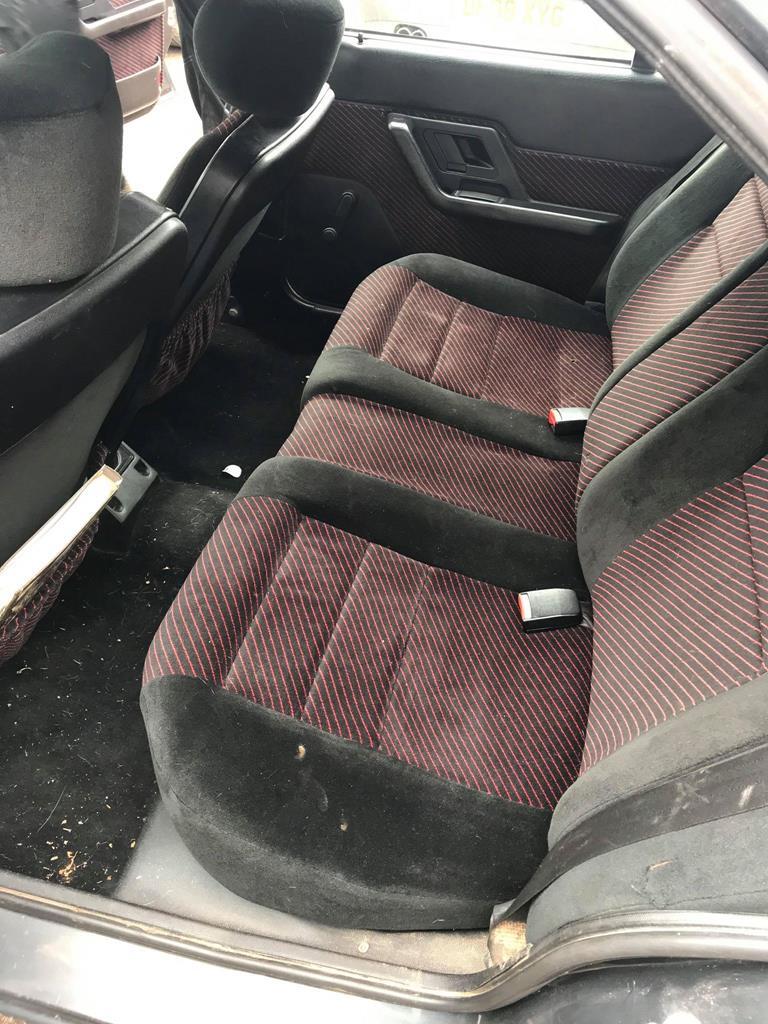  Looks like a posh interior so only limited interest other than mud flaps and clips for parcel shelf ? James |
| |
|
|
|
|
|
Sept 3, 2019 14:28:32 GMT
|
|
that machine shop is a bit like 2nd class stamps or 48 hour parcel force, how do you actually send something slowly? it must just be sitting somewhere NOT being sent ?
|
| |
|
|
vulgalour
Club Retro Rides Member
Posts: 7,256
Club RR Member Number: 146
|
|
Sept 3, 2019 17:10:51 GMT
|
jamesd1972: looks like it. That looks a like a really nice interior, what a shame it's entirely wrong for what I'm after! Mudflaps, parcel shelf clips and the gearknob please if you know how that comes off, it looks in much better shape than mine and is the same design. At least that sort of stuff will post at minimal cost, hopefully posting will be an option.
|
| |
|
|
jamesd1972
Club Retro Rides Member
Posts: 2,916
Club RR Member Number: 40
|
|
Sept 3, 2019 20:54:41 GMT
|
|
Been in touch will give him a shout with your list - how does the gear knob come off ?
James
|
| |
|
|
vulgalour
Club Retro Rides Member
Posts: 7,256
Club RR Member Number: 146
|
|
Sept 4, 2019 12:01:14 GMT
|
|
Thank you. On mine the gearknob unscrews so unless they changed it when they did the second facelift, it should on that one too. There's a spring under the gearknob, it's not under much tension at all, it's just to help the reverse lift portion of the gear selector to return. I only need the actual knob, I don't need the rest of it, the finish on mine has all come off and it looks scruffy.
|
| |
|
|
vulgalour
Club Retro Rides Member
Posts: 7,256
Club RR Member Number: 146
|
|
Sept 9, 2019 16:32:46 GMT
|
The BX is proving to be a very rewarding car to own, and I'm enjoying it very much. Cosmetic tittivation was on the cards today along with a very small mechanical fix. The exhaust had started to bang on start up and, looking under the car, the rear most rubber hanger was looking tired and overstretched (I know the feeling), so I acquired a replacement hanger and while I was messing about with paint, Mike quickly installed it. Probably the easiest exhaust rubber replacement job on any car ever because access is exceptionally good, which is not in keeping with Citroen's usual approach to these things.  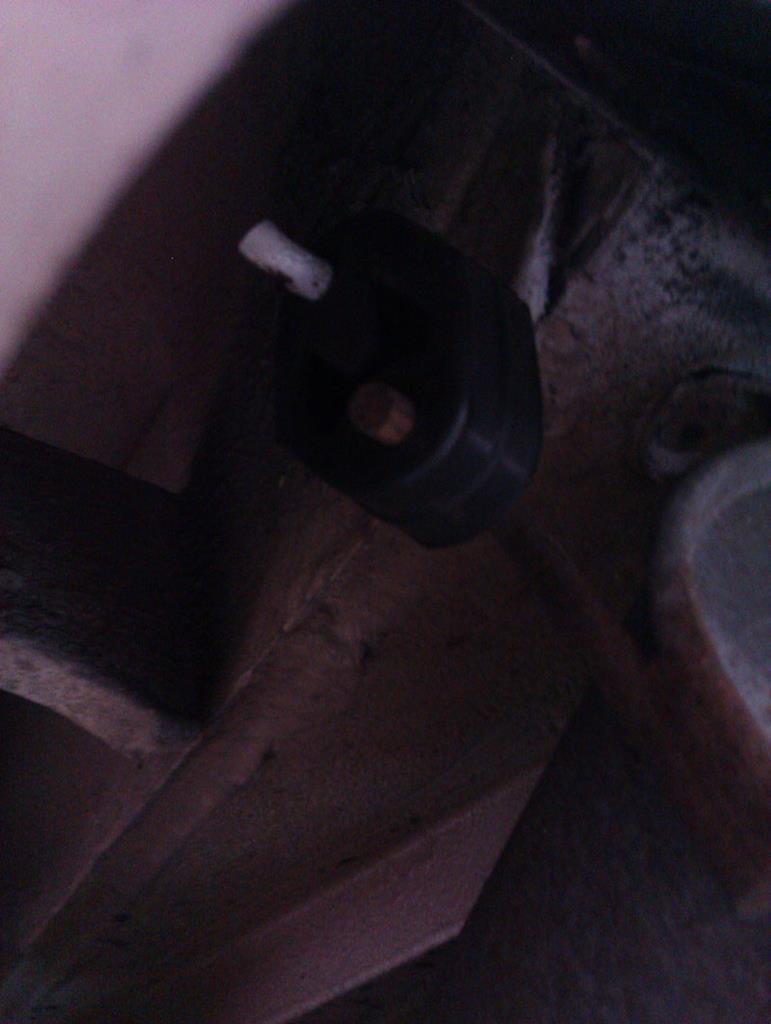 The exhaust sits slightly better, but it's still too far inboard really so I'll have to get it on the lift at some point to see if we can correct that. The important thing is the exhaust no longer bangs on start up, so that's a job jobbed. The big one today was doing the door frames which were all the usual faded mess that BX door frames seem to be. This is a job that requires a lot of time on preparing and masking the surfaces and about five minutes of actually applying paint. I keyed all the old surfaces back and masked both the door holes to keep the black paint off the door shuts, and around all the frames. I was glad of the indoor space for this one, the weather was too changable to risk doing it outside at home as I'd planned originally. 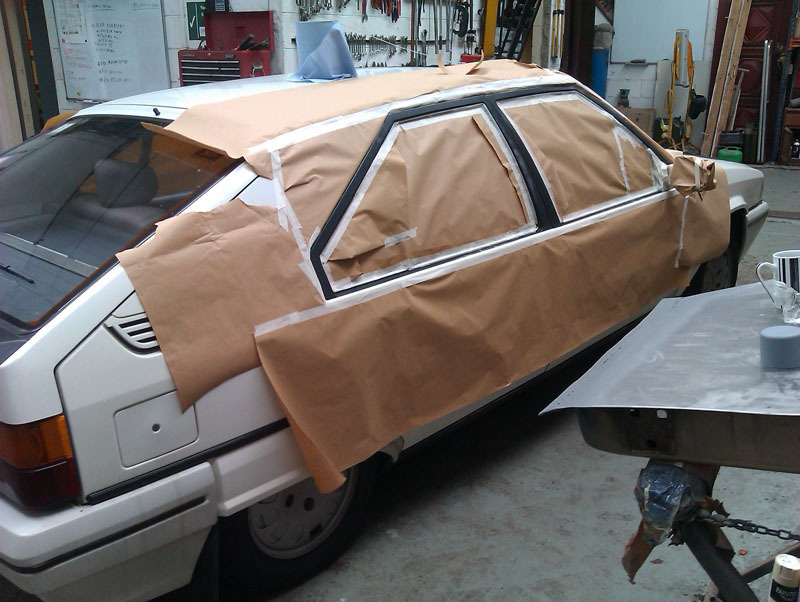 Northern skills were employed by reusing the paper that masked the roof, body sides, and windows on the other side. This also sped up the masking of the window since it meant I already had pieces the correct size. I know the proper way is new paper for both sides but, frankly, it wasn't necessary for this job and we only had so much paper available. A coat of zinc primer first to prevent any rust creeping back, and then a couple of coats of satin black over that before peeling all the paper and tape off. I was initially concerned that it might look too new because I'm so used to BXs having faded door frames. 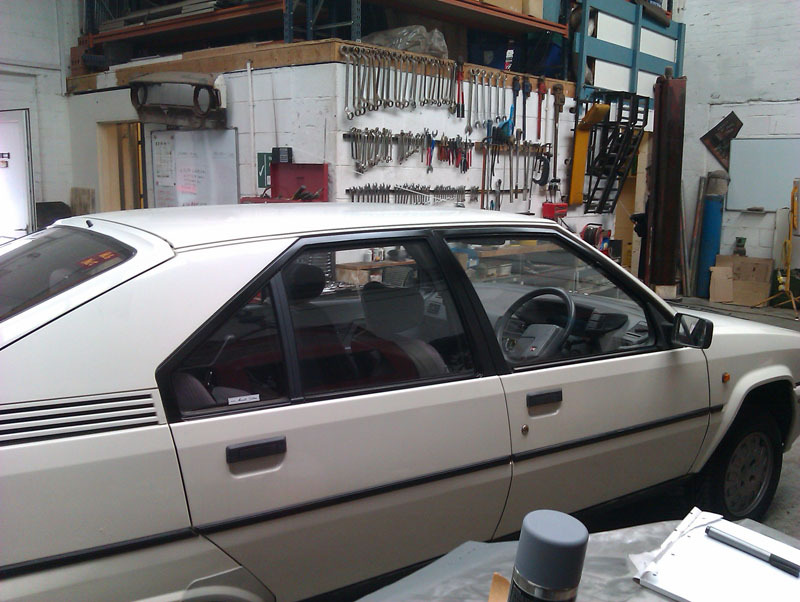 Concerns unfounded, it looks fantastic. The wind deflectors were removed before masking to make things easier and I'm seeing what the car is like without them for a bit before making up my mind about putting them back on, it looks a lot cleaner without them. We did the front wiper arm as well and as usual, applied a little bit of heat gun to it to help the paint. Trouble is, while this works exceptionally well with the Halford's satin black we normally use, this time we were trying out the Rustoleum alternative and it does not respond well to heat at all and the whole thing just blistered all over and had to be redone. That's why the repainted wiper arm is sat on my sideboard until the paint has hardened enough to handle and reassemble it. Luckily, the rain held off on the drive home. Also luckily, the wiper arm nut came off the spindle with no drama at all and the washer jet portion of the spindle is in great shape. I do need a new washer pipe, while all the clips on mine are fine, the pipe itself has certainly seen better days. Trundled the car outside to get some better shots of the repainted bits. 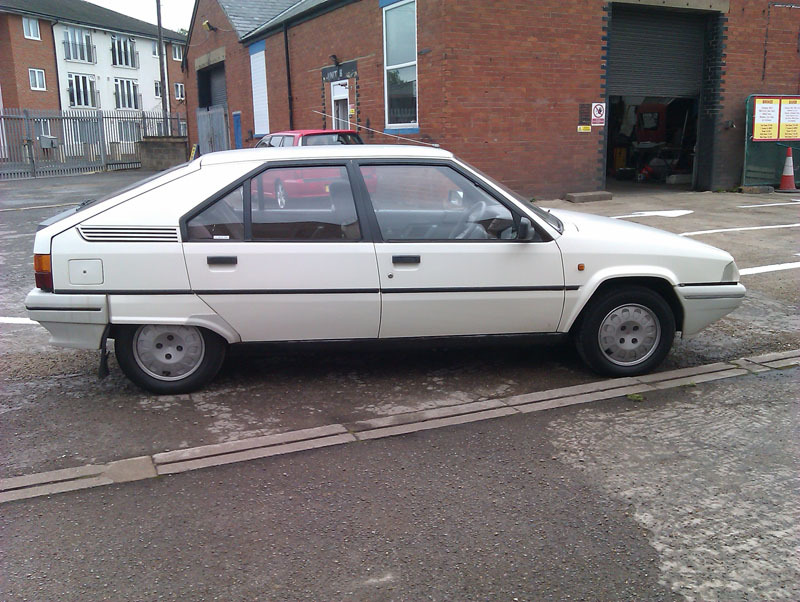 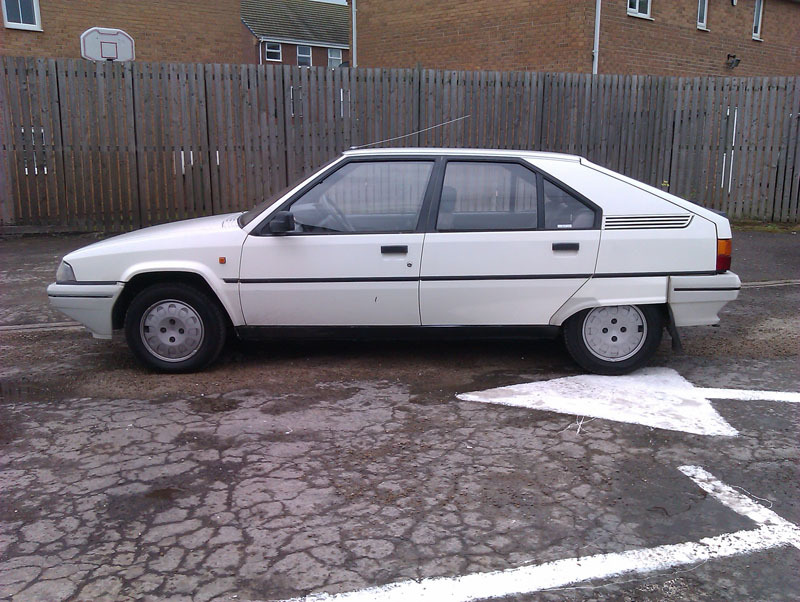 What a difference that makes. It does highlight that I need to repaint the front bumper trim since that has nearly no black paint left on it. The nice thing is that re-blacking the frames has actually made the rest of the bodywork look better, not worse, and while there are still areas I want to address, it's just nice to see the car visually slowly improving. I may be moving the rear reflector panel on too, I'm not feeling it as much as I was, I'm undecided at the moment. Might take it off and run the car without it for a bit, see how I feel. |
| |
|
|
vulgalour
Club Retro Rides Member
Posts: 7,256
Club RR Member Number: 146
|
|
Sept 9, 2019 17:36:42 GMT
|
Wiper arm was dry enough to handle properly so that went back on and there are few things more satisfying than putting freshly painted wiper arms on a car. You can see here the bit of tape that's repairing something on the washer pipe too, I haven't removed the tape since it's doing the job it needs to do, but I will need to replace that pipe anyway. Ideas one what to get and where to get it from for this job are welcome, I was considering using just a length of rubber or silicone hose and stabbing some holes in it. 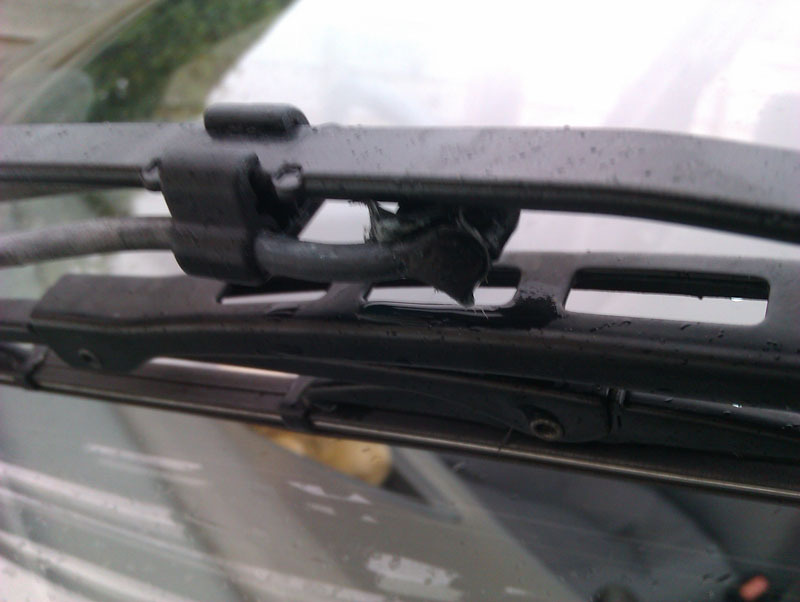 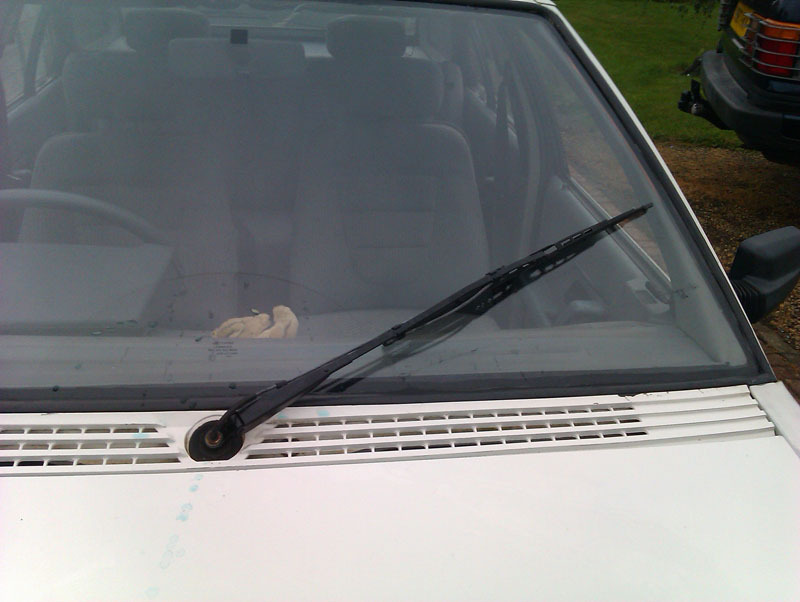 |
| |
|
|
jamesd1972
Club Retro Rides Member
Posts: 2,916
Club RR Member Number: 40
|
|
Sept 9, 2019 17:42:39 GMT
|
|
No reply from bloke on FB with spares car - sorry !
James
|
| |
|
|
vulgalour
Club Retro Rides Member
Posts: 7,256
Club RR Member Number: 146
|
|
Sept 9, 2019 18:48:55 GMT
|
|
That's okay, sometimes people get busy/forget/cba.
|
| |
|
|


