vulgalour
Club Retro Rides Member
Posts: 7,256
Club RR Member Number: 146
|
|
|
|
Yeah, the more I've thought about it and looked at what I gain by getting the stuff to do it myself, and the cost, I reckon I'm as well just getting all the gear when I'm settled in the proper new house with a workshop of my own. I'm definitely going to get my money's worth out of it and there's lots of other things compressors and spray guns can be used to create and fix and have fun with. Makes a lot of sense, really. I guess I'm just being lazy by hoping someone else will do it for me  --- Plastic update today. First up, the Princess. On a whim I bought some clear indicator lenses and amber bulbs for the front to see if I preferred it to the original amber lenses. I like both, as it happens, I don't really have a preference. The advantage of the clear lenses is that they make the units look less like they're off an MG B and a bit more like they've always been intended for this car. Now I've got both types of lens and bulb, I can swap them around easily at whim, just like I do with the wheels and trims. 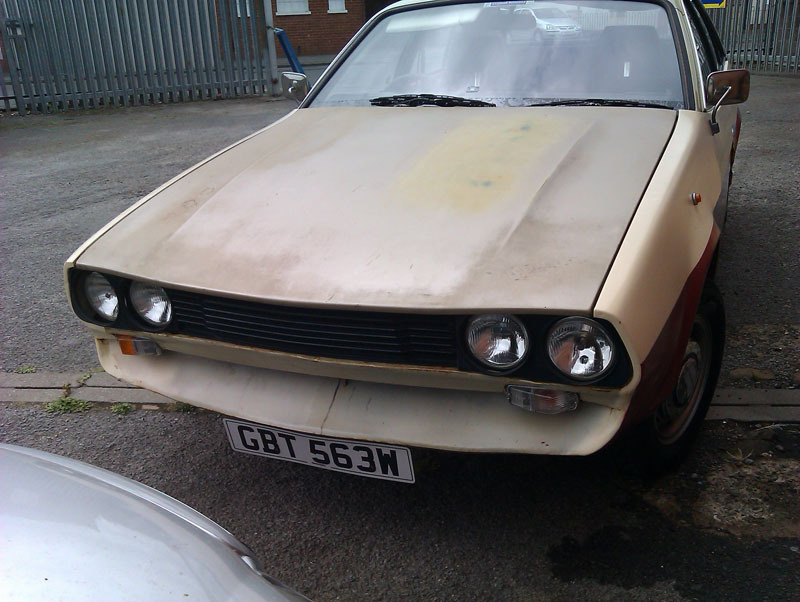   As previously mentioned, I've been trying to source the missing accessories the BX, so I've been keeping an eye out for three things; headlight protectors, door handle scratch protectors, and a tailblazer panel. I missed out on a fairly good tailblazer recently that needed one section regluing, I wasn't really prepared to pay £130 for a broken bit of plastic tat. Amazingly, another one turned up and I got it for a mere £40 and it wasn't really any more broken than the first offering. However, it needed a fair bit more cosmetic work before it could go on the car. 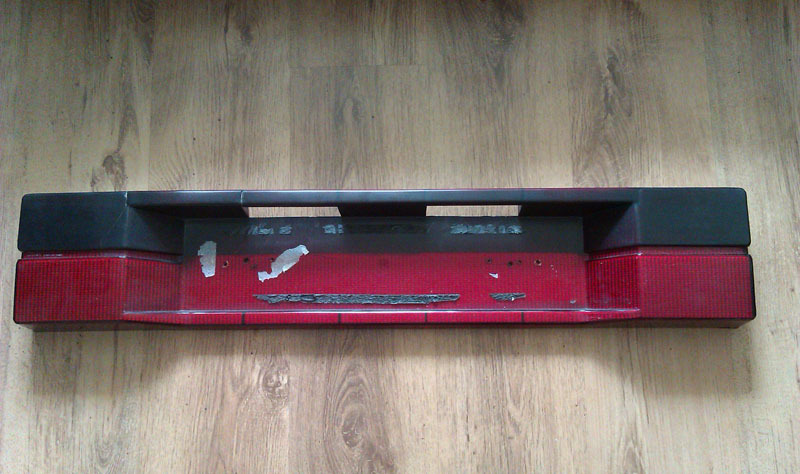 Looks dreadful, doesn't it? It's had the top half sprayed with tint spray very heavily to match the later facelift rear lights, has a crack in the left hand side and two splits on the top edge. The tint spray hides most of the damage in photographs, and none of it in person. 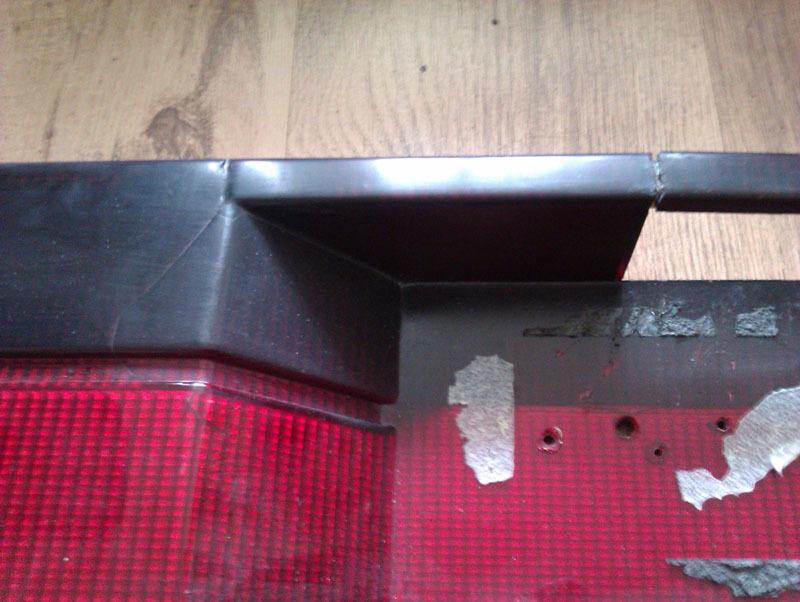 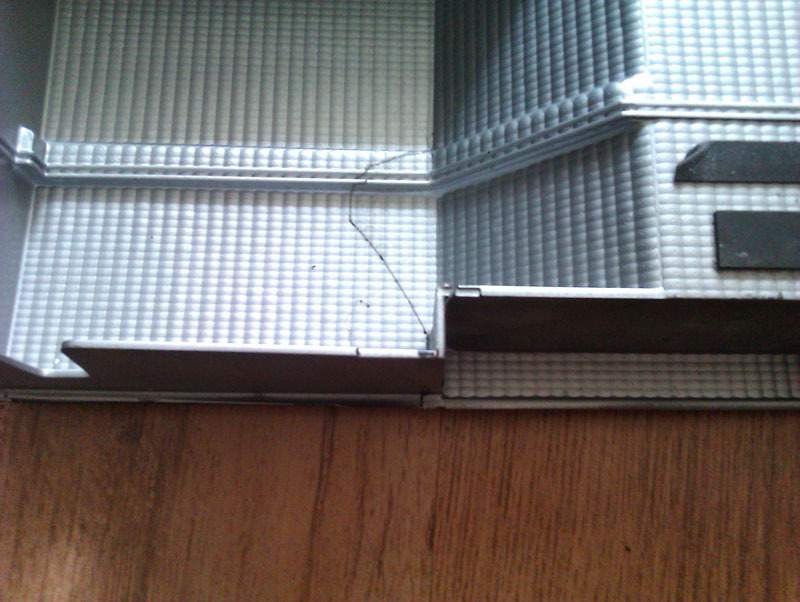 Someone also appears to have used a machine gun to put number plate holes in rather than just going with the two holes that are cast into the part. Time to get the potions out. After a bit of trial and error I found that purple methylated spirits would slowly shift the spray tint, rather too slowly really, so I risked cellulose thinners on a hidden portion and found that worked much better. The thinners worked best when put onto a square of folded paper towel (same way you put a cloth over the top of a T-cut bottle and tip the bottle up to blob a bit on the cloth to use) and worked quickly over a small area at a time. I didn't get any fogging issues or problems with the plastic under the spray tint and a bit of clean water and T-cut after the thinners brought the plastic up nice and fresh. I'd recommend this method on very hard plastics like this, with the caveat to be cautious. 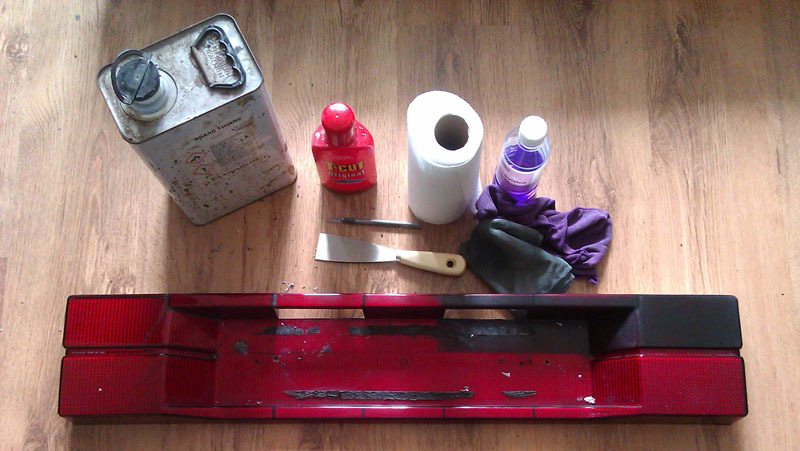 The damage is more visible with the paint removed and in some lights the crack is more visible than others and is quite visible, especially since there's a bit of polish in the crack here. 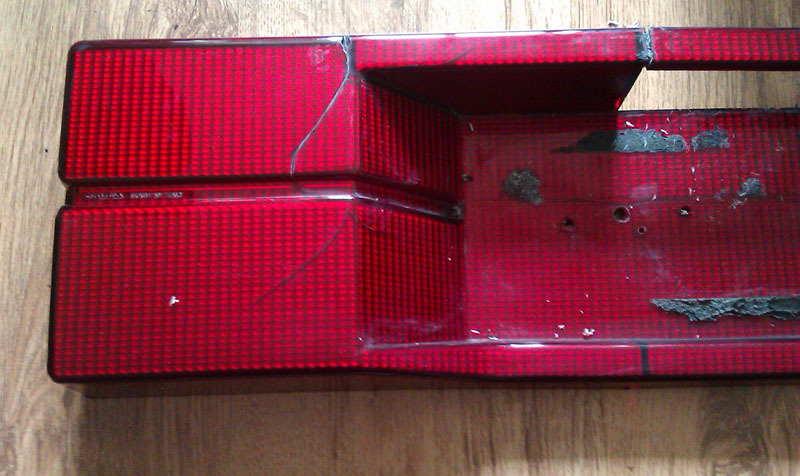 For the sticker residue I tried out WD40, as suggested elsewhere, and that worked surprising well. Spray on quite liberally, leave for a little bit, and then scrape off with a scraper. I had to carefully use a metal scraper because I'd misplaced my plastic ones, I'd recommend using plastic ones instead, there's no risk of damaging the plastic panel then. With all that cleaned up I could clean off the old glue as much as possible and tack the joints with a tiny bit of superglue and later I'll go over the cracks on the reverse of the panel with some epoxy resin glue to give it some strength back. For the front of the cracks where there's some small bits of plastic missing I'll fill with epoxy resin for strength and a better finish since it can be sanded and polished. With all that done, I'll repaint any of the filled areas that are showing clear with some clear red paint (Citadel or Tamiya, most likely) on the back before a fresh coat of bright silver. This should eliminate the visible damage almost entirely. There will still be a crack visible, there's not really anything you can do about that, but it won't be that noticable most of the time. Time spent so far is only about an hour. 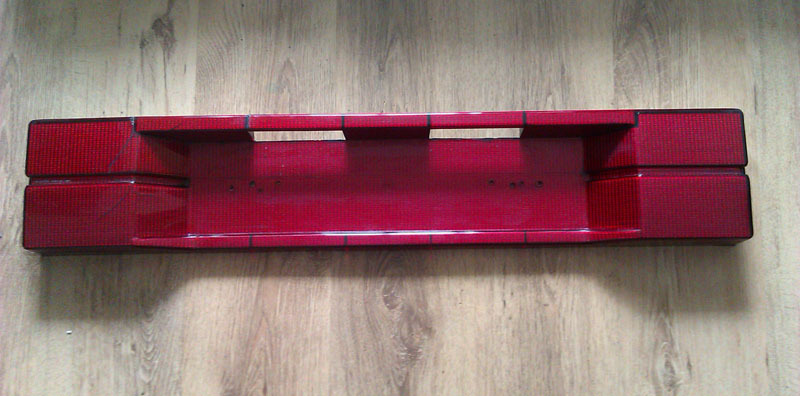 |
| |
|
|
|
|
vulgalour
Club Retro Rides Member
Posts: 7,256
Club RR Member Number: 146
|
|
|
|
Last night, I put the epoxy required on the outside of the panel with masking tape dams to prevent the epoxy running where I didn't want to. Once the epoxy was touch dry, but before it was fully hardened, I peeled the masking tape off so it didn't get trapped.  Today, with the epoxy fully hardened, I set to with small files first to take down the bulk of the material and then very fine wet and dry sand paper to remove any file marks and smooth out the joins as much as possible. Rather like body filler, you do seem to end up taking off about 90% of what you applied. The end result should be a strong and visually diminished repair, if not an invisible one. To remove the really fine scratches in the plastic I went over the whole thing with T-cut which also helped remove fine historic scratches and improve the general appearance of the piece. 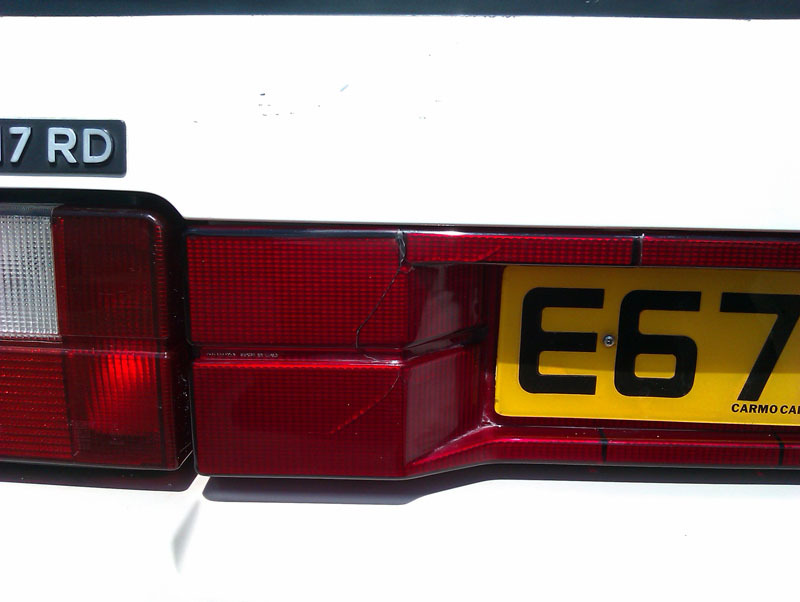 After T-cut I blobbed some Citadel clear red paint on anywhere on the back of the panel light shone through, and then a splash of Halfords' wheel silver paint which is just about a perfect match for the silver paint on the back of the panel. Once dry, it was a case of finding out which holes lined up before fitting to the car. 2 holes on the tailblazer lined up with those on my number plate and none of them lined up with the four holes drilled into the tailgate so I had to drill two more in the tailgate to screw this all together. The little aluminium France badge and the autoshite sticker didn't have to be removed as they didn't stop the tailblazer from fitting. Overall, I'd say this job was a reasonable success. Don't worry, that's not a B****t P***y sticker on the back window... well it is, but not in support of it. Trollolololol. 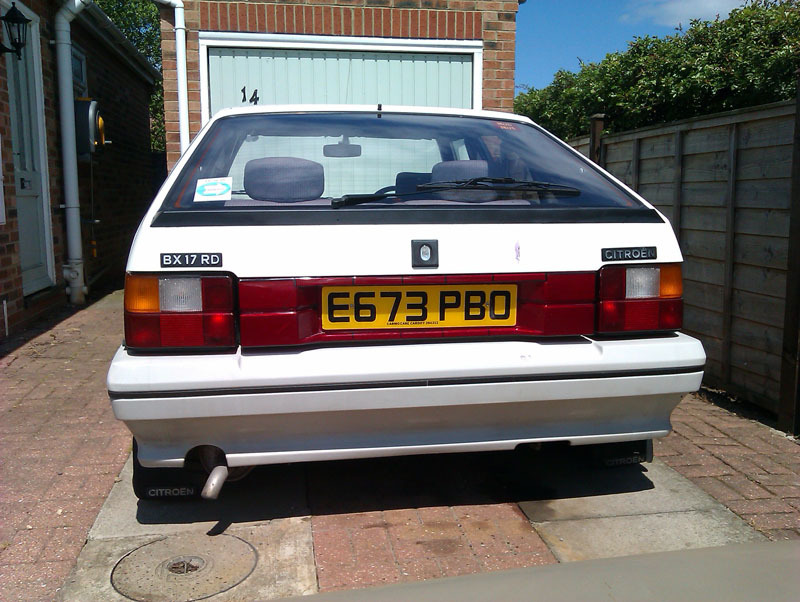 How right does that number plate look now too? Fantastic. |
| |
|
|
jamesd1972
Club Retro Rides Member
Posts: 2,916  Club RR Member Number: 40
|
|
|
|
|
Very smart !
James
|
| |
|
|
|
|
|
|
|
|
The plate doesn't look straight! D:
Nice repair, though.
|
| |
|
|
vulgalour
Club Retro Rides Member
Posts: 7,256
Club RR Member Number: 146
|
|
|
|
|
The plate is straight! At least it is in person. I reckon that's a tricky shadow making it look wonky in the photo.
|
| |
|
|
vulgalour
Club Retro Rides Member
Posts: 7,256
Club RR Member Number: 146
|
|
|
|
|
Scratch that, I double-checked and it is actually slightly wonky! I'll have to sort that.
|
| |
|
|
vulgalour
Club Retro Rides Member
Posts: 7,256
Club RR Member Number: 146
|
|
|
|
Since the rear number plate was pointed out as being slightly wonky, it's been bugging me a lot. Using the little squares that form the reflective pattern of the back panel I realigned the number plate. It required very, very minimal filing of the number plate holes, about .25mm to the top of one and the bottom of the other, and it's now straight again. This was then undone by the fact that the plate is slightly warped on the driver's side and casts a bit more shadow at the corner, making it look wonky again. 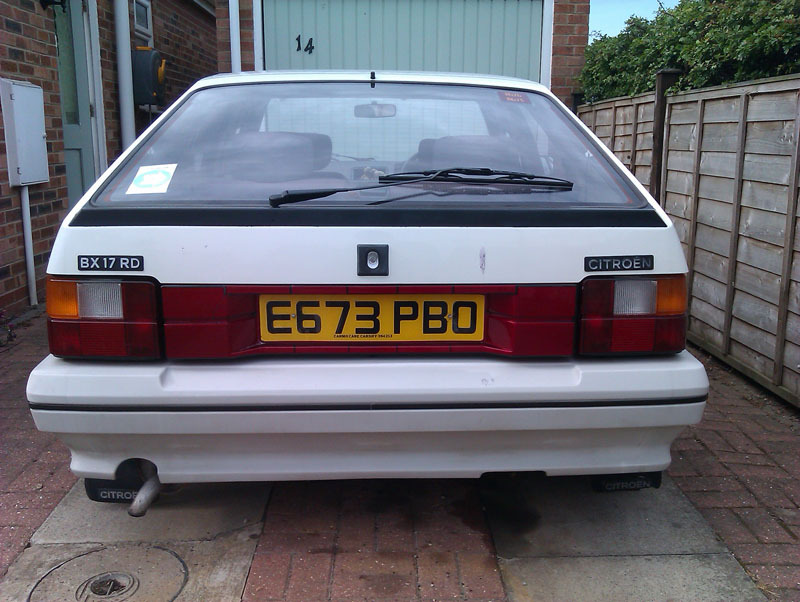 The exhaust either needs rotating or the hanger bending slightly to get the alignment improved on that, neither of which are jobs I wanted to do today. I can't remember whether or not the exhaust was wonky when I got the car, but since I've had it off and back on again it's entirely possible it wasn't and I've just refitted it slightly off. It's not difficult to sort, I imagine. The rear hanger can be got to even with the car on low, just fiddly. 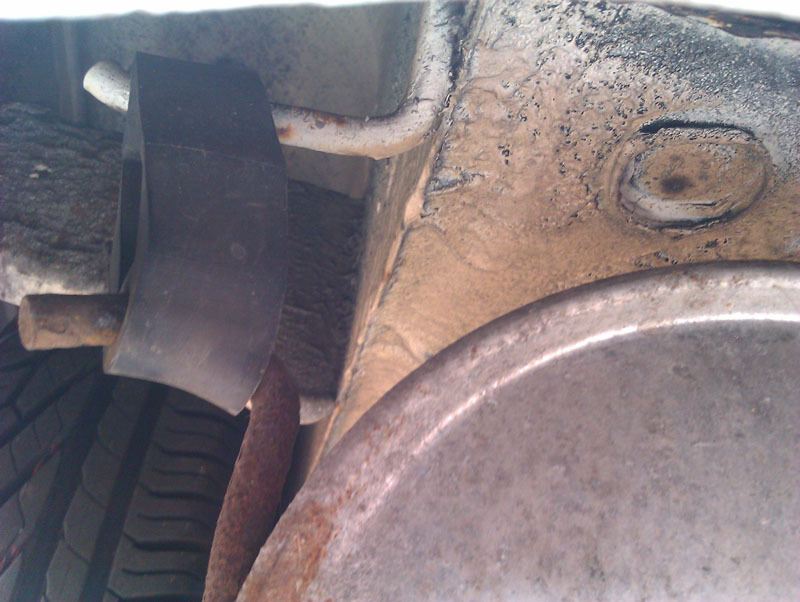 Princess has also been getting some attention since I finally had the time and motivation to get on with stripping the paint off the two doors I want to put on the car. The spare orange front door is actually in better shape than the one on the car so I'll repaint it. The front passenger door on the car has been repaired before but is good to go again so I'll be keeping that back as a spare rather than worrying about repairing it really nicely. The rear door I removed from the car was quite laborious to strip the paint off because there was so much paint on it, easily the worst of all the panels I've had to tackle. The rust isn't as bad as I expected, thankfully, what's going to make this a bigger job is that the door has a historic corner repair that's caused more rust than its cured, so I have to undo all that. The spare orange rear door on the car is comprehensively rotten so I'll be stripping off what's useful and then scrapping the remains. It could be repaired if you really wanted to rebuild the bottom 12" of it, and the top 2" of it, but I don't.  The other thing that's been bugging me for ages is the plastic trims on the front of the car have always been slightly off so I spent some time realigning those to fit more evenly. I need to make some new pegs on the bottom of the headlight trims (these always snap off) so they hold into the centre rail properly, it sticks out on the bottom outer corner of the driver's side and makes the outer headlight that side look like it's in completely the wrong place. 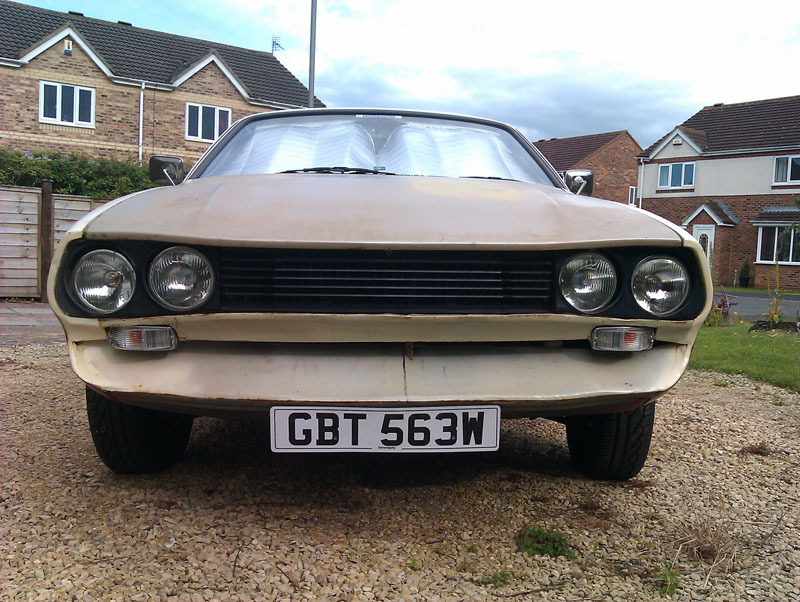 Because I'll be doing some more painting soon and remedying the bits deemed less important when I started the last round of welding repairs I took another look at the front end colour split and after some experimentation have settled on this. Black was too much and the beige has always been off and it's taken a while for me to find something I like. Keeping the thin beige outline around the grille helps balance it out better than just wrapping the side split straight around and makes use of an existing bodyline. The red (in digital sketch at least) seems to really help tone down the jutting chin and take out some of the visual height of the front of the car. Since I can't really bring the front to a lower, sharper point, this is the next best thing.  |
| |
|
|
|
|
|
|
|
Looks mre aggressive like that (which is good) kinda like a Manta Ray about to scoop you up  |
| |
|
|
jamesd1972
Club Retro Rides Member
Posts: 2,916
Club RR Member Number: 40
|
|
Jul 10, 2019 15:24:48 GMT
|
Saw this at the Haynes breakfast meeting and thought of you  Think it was a posher version ? James |
| |
|
|
vulgalour
Club Retro Rides Member
Posts: 7,256
Club RR Member Number: 146
|
|
Jul 10, 2019 16:47:49 GMT
|
|
That looks familiar, I'm sure I read a thread some time ago on that one getting restored, possibly in Ireland? Very nice example of an early facelift car at any rate, I'm guessing it's from the first year of facelift production. Windows in the C pillars hint at a higher trim level and the longer bonnet (no grille) suggests it's petrol rather than diesel. Looks a very nice example at any rate.
|
| |
|
|
|
|
|
Jul 10, 2019 19:05:31 GMT
|
|
That's a common reg it was cbx as it was a c reg. It was first of the mk 2s. I knew someone who had one at the time
|
| |
|
|
vulgalour
Club Retro Rides Member
Posts: 7,256
Club RR Member Number: 146
|
|
Jul 12, 2019 16:15:24 GMT
|
Another small Princess update. Got the two doors I'm repairing almost completely stripped down now. To get the glass out of the rear door you have to remove the quarter light, it's a bit of a faff. On inspecting the frame properly, all of the rot in this rear door seems to be caused by repairs over old rust that has simply rotted through, it won't be too terrible to repair, looking at it.  The front orange door has given me a bit of a quandary. Most of the door is in excellent condition, especially the usually rotten bottom edge which is very nearly like new. The problem is at the top. Inside the door skin there's a separate sheet of steel that I assume acts as a brace for the weather stripping since it spot welds to the door skin and the edge the weather stripping pushes on to. On this door, that brace has rotted through across the entire length and you can't get in to repair it because of they way the door is built up. What it hasn't done is rot through the outer skin except for one small spot. To repair it, I'll have to remove the door skin from the frame and the brace from the skin and then rebuild it. That's an awful lot of work. The beige door on the car is in much better shape in this area but needs attention to the bottom where they normally go again, due to historic repairs of varying quality. So do I strip the orange door down and repair it, knowing it's then going to be in excellent condition, or do I chop off the problem section of the beige door and replace it with the excellent section of the orange door? It's probably more proper to dismantle, restore, and rebuild the orange door because it's in much better condition overall and it probably won't realistically be more work to do things this way. Either way, what was going to be just a 'quick repaint' now isn't, and that's a bit annoying.   Did a fluid check and topped up the screenwash and a little bit in the brake fluid now that a few miles have been done and the system has settled. No leaks found on the braking system anywhere and now that things have bedded in they feel very good.  While doing the check I spotted a wet spot on one of the water hoses. Wiped it away and the spot reappeared, with an occasional bubble. That'll be a pinhole in the pipe then. 24mm OD heater pipe is out of stock everywhere locally it seems, so I'll have to order a length in since Mike and I don't have any in stock. 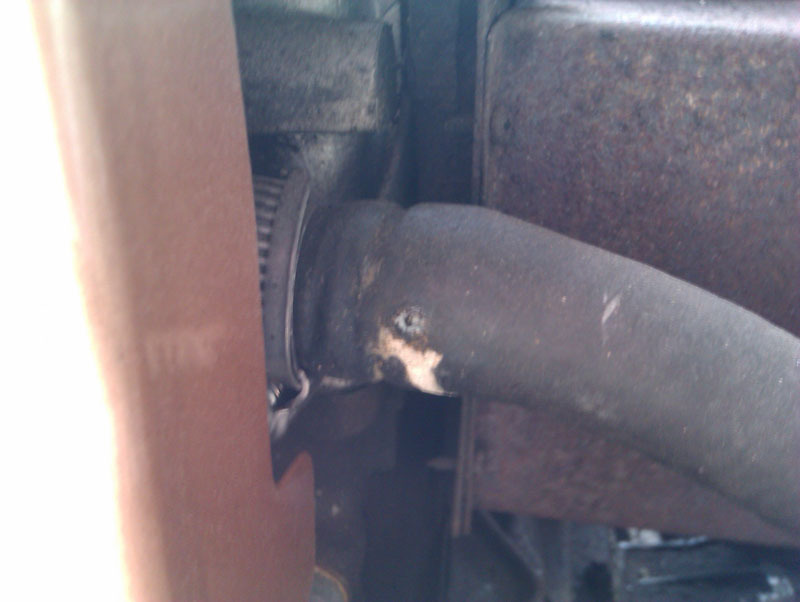 Finally, the cold idle hunting issue cause was found. The weather suddenly turned while I was driving which prompted the need for headlights and wipers. Queue all the electricity falling out. Weather cleared as quickly as it went bad so no harm done and Mike and I could check things over at the unit. Throttle cable was a bit warm, but so was everything under the bonnet, but my suspicion was a problem with the earth. Went through all the various points and nothing looked amiss until checking the main body earth. It wasn't the best connection any more so we beefed it up with a bigger bolt and cleaned the corrosion away. Instantly improved everything electrical and smoothed out the idle so hopefully that's all that problem was. Incredibly easy fix too, which is the best sort. I should have twigged it was this a few days ago when I had to use the horn in anger and it just sort of went phweeee rather than PAAAARP. 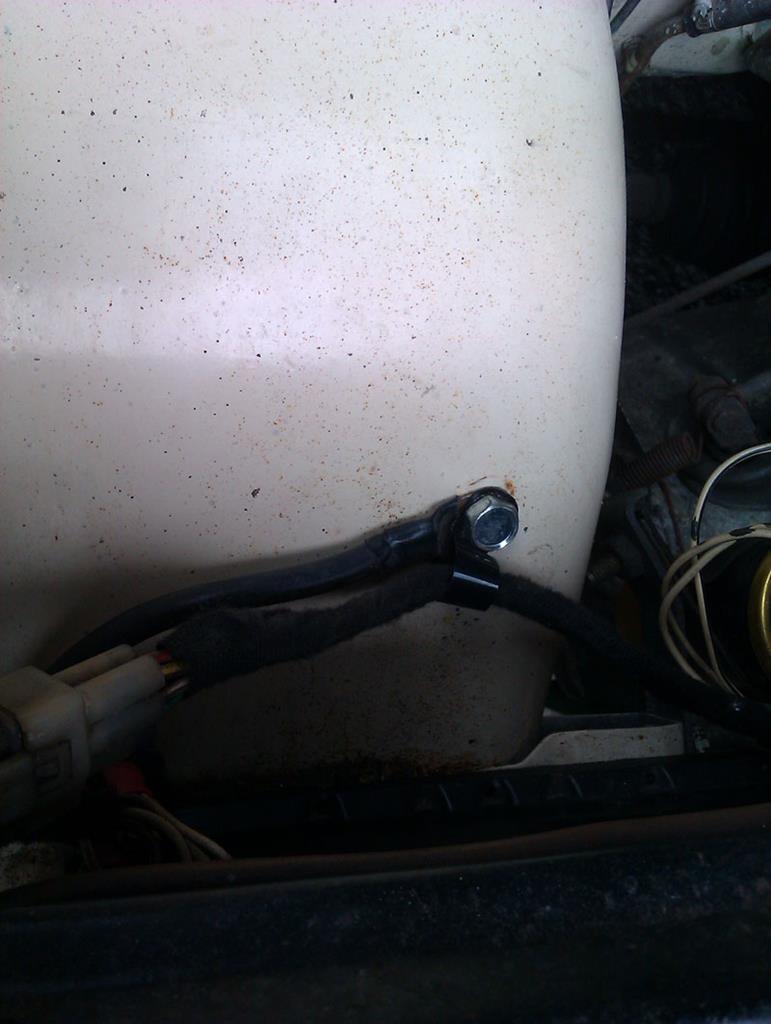 |
| |
|
|
Phil H
Posted a lot

Posts: 1,448
Club RR Member Number: 133
|
|
Jul 12, 2019 20:58:16 GMT
|
|
I’ve never known heater hose being listed by its outer diameter - only the inner (bore). You generally only have a choice of 3: 13mm/1/2”, 5/8”/16mm or 3/4”/19mm.
|
| |
|
|
vulgalour
Club Retro Rides Member
Posts: 7,256
Club RR Member Number: 146
|
|
Jul 12, 2019 21:24:52 GMT
|
|
I eventually found some. 24mm OD, 19mm ID, just about, standard size. Just seems the size I'm after is pretty popular since the usual places were all out so I've ended up ordering some from a new supplier (to me) on eBay and had to order more than I really need. Oh well, more spares for the spares pile I suppose.
|
| |
|
|
|
|
|
|
|
|
What's the likelihood of getting the red door apart without effing the outside cosmetically?
|
| |
|
|
vulgalour
Club Retro Rides Member
Posts: 7,256
Club RR Member Number: 146
|
|
Jul 13, 2019 12:47:19 GMT
|
|
In theory, it's just a case of un-folding three edges, un-welding a couple of blobs at the top corners, and drilling out some spotwelds on the top rail. It's do-able, just not much fun. I've also never done it in practice so there's probably pitfalls I'm unaware of that might cause panel damage, so I'll be slow doing it to try and mitigate any risk of that.
|
| |
|
|
|
|
|
Jul 13, 2019 23:08:21 GMT
|
|
You can buy a door skinning tool I thing that peels back the folds. I am sure I have seen one .
|
| |
|
|
vulgalour
Club Retro Rides Member
Posts: 7,256
Club RR Member Number: 146
|
|
|
|
|
I was going to use a screwdriver, a hammer, and some decent pliers. Sprinkle on quite a bit of patience and maybe a dash of sweariness when I inevitably smack/screwdriver a digit, and assumed that would be adequate. A tool, a proper tool that made the job easier, would be nice though.
|
| |
Last Edit: Jul 14, 2019 0:05:07 GMT by vulgalour
|
|
wc
Part of things
Posts: 45
|
|
|
|
Link to a skin removal tool.. TOOL
I have a vise grip pliers (somewhere) modified with wider jaws (like the tool above, but about 25mm long) welded to them and they work very well. Just have to ease the lip up a little bit at a time, work around the whole seam doing this small lift, then repeat lifting it up some more until it is up enough to slip the skin off. Do not try to do a 90deg lift straight away or you will stretch the lip, do it in small stages. Same when you hammer the lip back down, small stages...
|
| |
|
|
vulgalour
Club Retro Rides Member
Posts: 7,256
Club RR Member Number: 146
|
|
Jul 14, 2019 11:47:02 GMT
|
|
That's the approach I was going to take. Mike has some funny shaped pliers so I'll see if any of them look like that one you linked, we might already have a suitable tool for the job that would work better than the screwdrivers and hammer approach.
|
| |
|
|


