vulgalour
Club Retro Rides Member
Posts: 7,255
Club RR Member Number: 146
|
|
|
|
Today the new boots arrived. The old Michelin deathrings are now in the bin, where they belong. 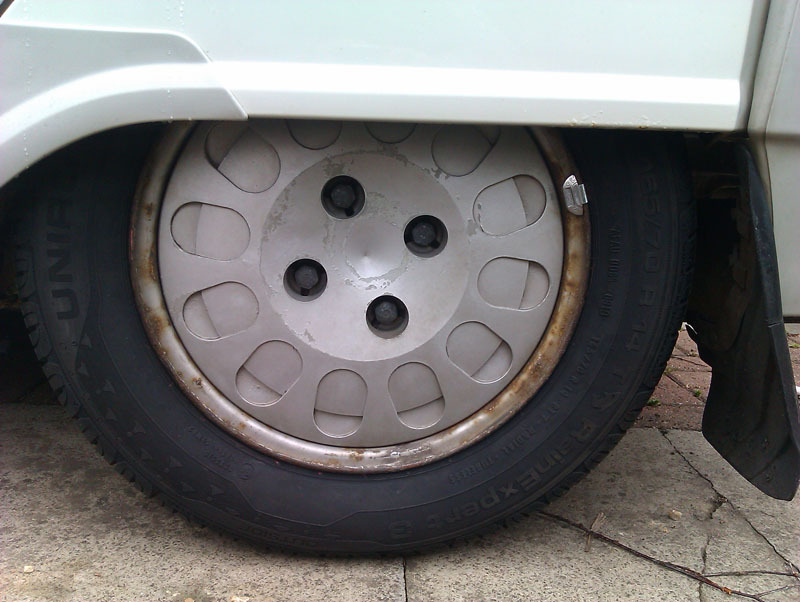 Uniroyal Rain Expert 3, which aren't cheap but are very good. They have not disappointed today, the car felt much more planted and predictable. I wanted better grip and predictability more than shiny wheels so that's why the steels still look scabby. Very welcome to be driving around on these today, especially given what the weather's been like. 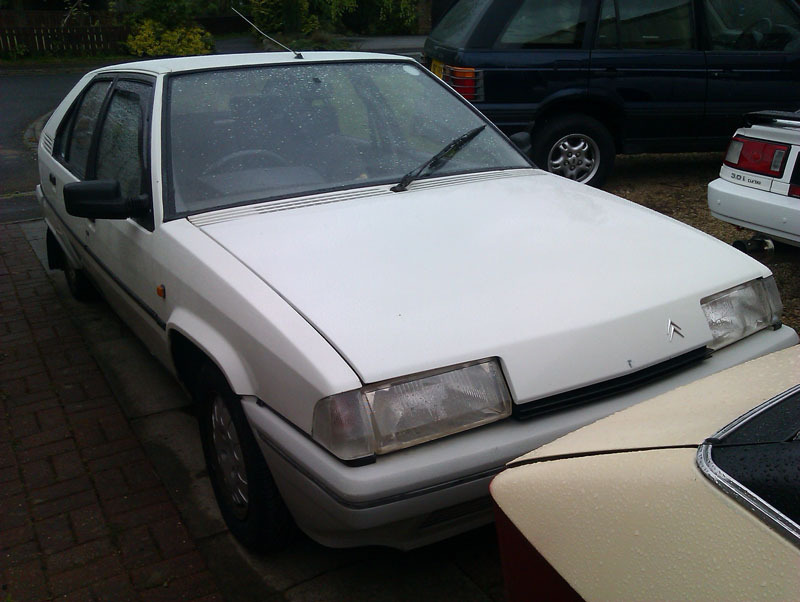 It's a super thing to waft about in, got compliments on it from the tyre fitting place and the chap that delivered the tyres today. I'm also liking the anonymity it affords because some days the Princess attracts more attention than I really want. I've also ordered some proper diffused glass festoon bulbs for the interior since one has blown, they're a bit of a nuisance to get. I have tried clear festoon bulbs in the interior lights and they're just a bit too direct and bright, the diffused ones are much nicer because of where the interior lights are located in the BX. |
| |
|
|
|
|
eternaloptimist
Posted a lot
 Too many projects, not enough time or space...
Posts: 2,578
|
|
|
|
|
Nothing more transformative than a set of good tyres replacing old/poor rubber.
|
| |
XC70, VW split screen crew cab, Standard Ten
|
|
vulgalour
Club Retro Rides Member
Posts: 7,255
Club RR Member Number: 146
|
|
|
|
Even more welcome today than yesterday. I also found out the heaters are quite good, since I actually had to use them since April and May appear to have swapped weathers this year. One big advantage the BX has over the Princess is that it's less grumpy on a damp day and as much as I love the Princess, it was nice to just cut through my errands today without having to coddle a grumpy old car while it warmed up. I'm actually calling the Princess 6 month experiment to an early close too. I'm struggling to find the free time when work, weather, and workspace are aligning to get the brakes and alternator sorted and now I have the BX to bumble around in, there isn't as much pressure on to get those jobs done. The Princess has proven itself, and highlighted the shortcomings. I'll do a proper report on the experiment once I've had time to sit down and collate the information from the past few months. Got myself a keyring for the BX since it felt a bit weird not having one. I almost bought one of those generic 'enamelled' square ones until I spotted this white plastic clippy keyring with Citroen branding. It just looked right for the BX. The Citroen logo is sort of printed on to the plastic rather than being a sticker, it has the look and feel of being OEM rather than aftermarket. 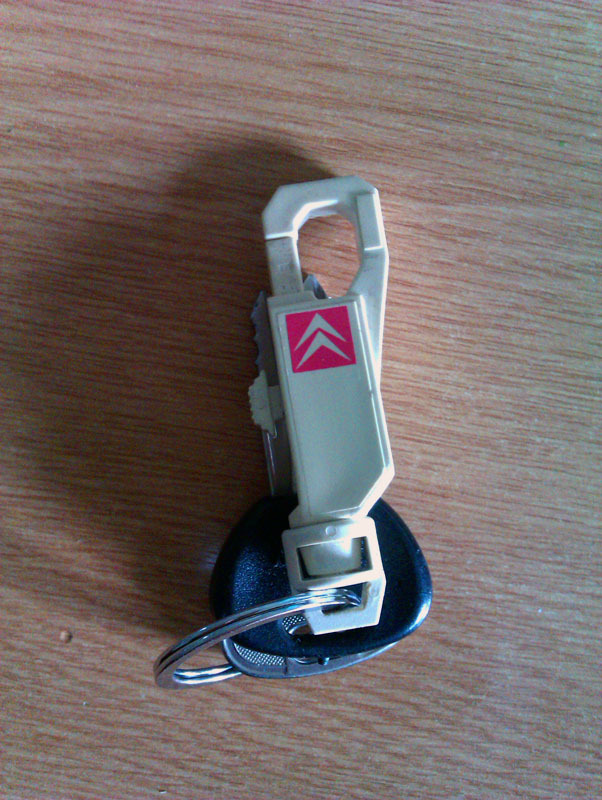 It's the little things. |
| |
|
|
|
|
|
|
|
|
Id have to assume that clip is a citroen one, i don't remember seeing one branded for anything else. Very nice.
|
| |
|
|
vulgalour
Club Retro Rides Member
Posts: 7,255
Club RR Member Number: 146
|
|
|
|
The diffused glass festoon bulbs I ordered turned out to be non-diffused. After some back and forth with the supplier, it turns out that while they list diffused glass ones, they're all actually clear. Parts shop was apologetic, and a little bit annoyed about it, so I'll be ordering those from somewhere else. I'm being picky about these bulbs, I know, but it really does make a difference to me when the interior lights have diffused glass bulbs rather than the plain ones and I've no intention of fitting LED ones since the light from those isn't right. While I was at the motorfactors, I picked up an oil filter since he had some gathering dust, and ordered a new rocker cover gasket which is cheaper now than it was many years ago when I had the estate, so that was something. I'm not going to grumble at £15 for a filter and a gasket. Today, one of the headlight bulbs went out, it did the same thing at the MoT but a wiggle of the connector woke it up again, this time the bulb was dead. Fortunately, Dean had left a spare good pair in the glovebox so I could just pop those in, just means I'm on ordinary bulbs now rather than the very bright yellow ones it did have, I'll likely get some yellow bulbs fitted in the future because I like yellow headlights on a Citroen. Other news was improvement of the horn. On the original wiring, the horn was working but it was a bit weedy on the first push of the button, not ideal considering the situation you tend to use a horn in. Mike wired in a new relay and we shortened the air feed pipe to the horns by about 6" since we found a better route for it and now the horns are instant and loud which is what I wanted. 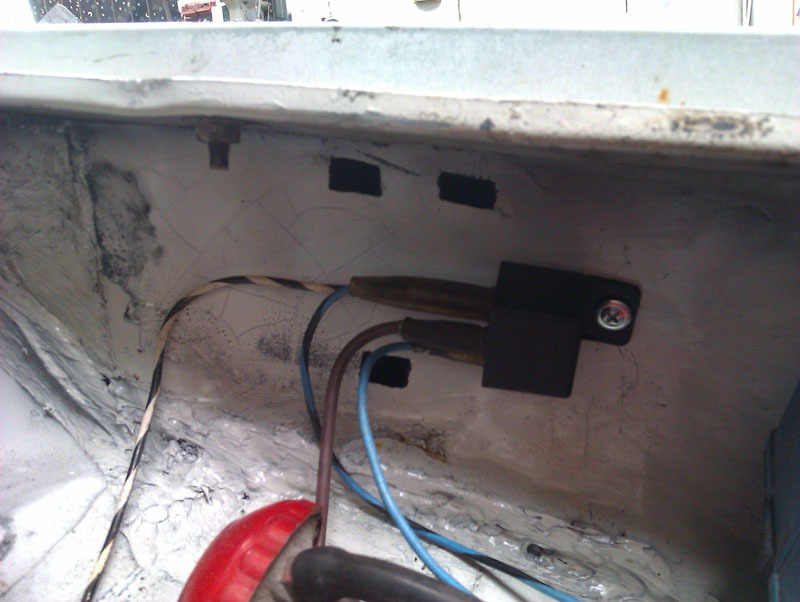 Made a small improvement to the front end alignment too. One of the headlight adjusters was a bit dicky at MoT, not enough to be a problem, but enough that it annoyed me. I had a fiddle with it and found that it could be reassembled and the adjustable part hasn't seized which was a pleasant surprise. It's still nowhere near perfect, the indicator side adjuster is all sorts of wrong and pulls the headlight skewed, I did what I could with my limited time today to try and bend things into the correct location which improved things marginally. I'll have another fiddle with it when I have a free day to play properly. 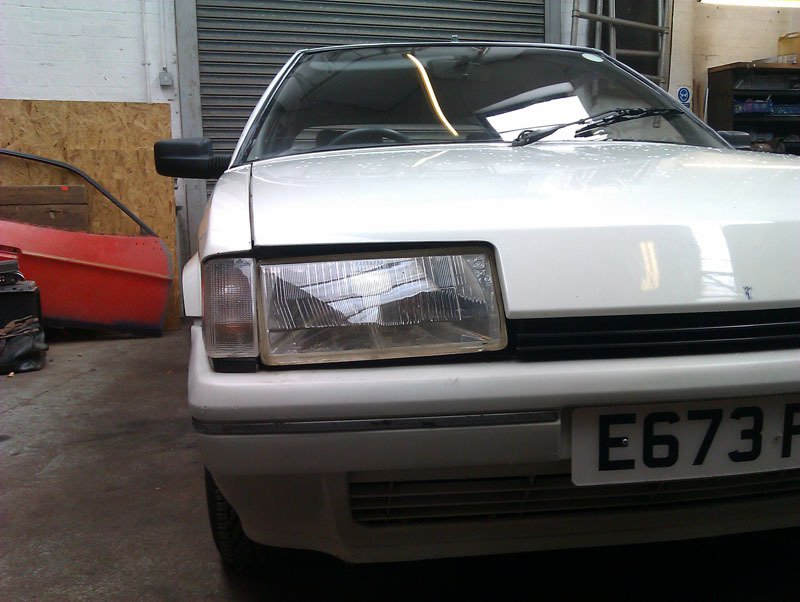 To improve the fitment of the bonnet/wing relation to one another, I slotted a couple of washers between the wing and the wing rail on the front bolt on both sides. This has improved the overall look in person and while the bonnet is still sat a little high (it is as low as it will physically go) and the driver's side headlight is still wonky, the overall appearance is an improvement. I also found that the driver's side indicator bracket was bent a little out of alignment, and correcting that has improved the fit of it, and the its relation to the headlight. 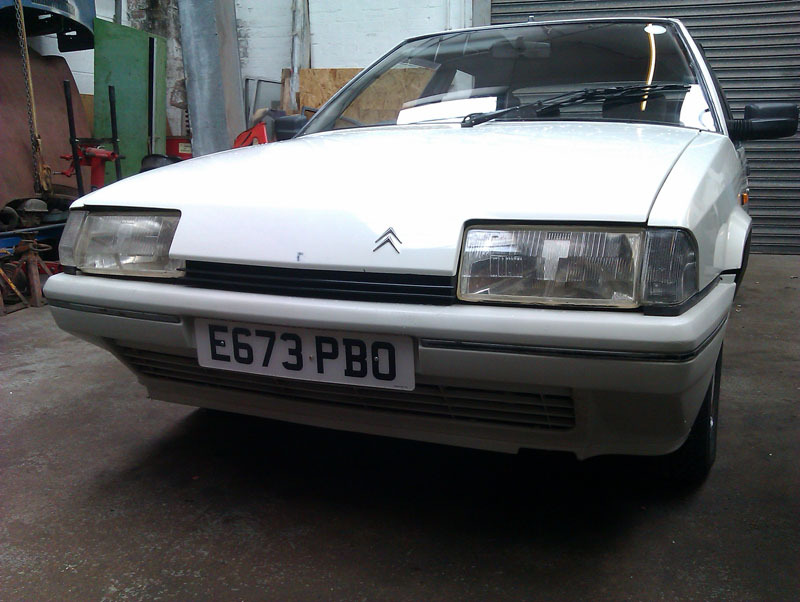 As for the root cause of the alignment issue, I'm pretty sure I know what the problem is. The main problem is the bonnet itself, which isn't straight, it has a very slight bow across its width which increases and decreases depending on how warm the engine is. In time it might sort itself out, or get worse. I'm putting this down to an idiosyncracy of the plastic it's made of, there's not a great deal I can do about that. The other main area of alignment issue is the driver's side headlight, namely the lower outer holder which is pointing the wrong way and pulling the corner of the headlight down, I can resolve this with some time and careful re-bending of the holder and/or the bracket it goes into. Another area that was causing problems is the metal bracket that holds the indicator on the driver's side, I've improved this but until I get the headlight aligned correctly, I cannot improve it further. |
| |
|
|
|
|
|
May 10, 2019 15:28:03 GMT
|
|
the groaning simplicity of mechanical indirect injection.
i often think if we can keep ontop of the bodywork these things will be clunking away for another 30.
|
| |
|
|
vulgalour
Club Retro Rides Member
Posts: 7,255
Club RR Member Number: 146
|
|
May 10, 2019 16:13:57 GMT
|
Hope so! I'd like to not have to change it again if I can help it. Slight improvement on the front panel gaps today after spending some time faffing about, wiggling the headlight, loosening and tightening bolts, and all that tiresome jazz. Before and after for comparison taken from as similar an angle as I could manage.   Driver's side headlight looks much better now. Passenger side wing-to-bonnet alignment is much better too. 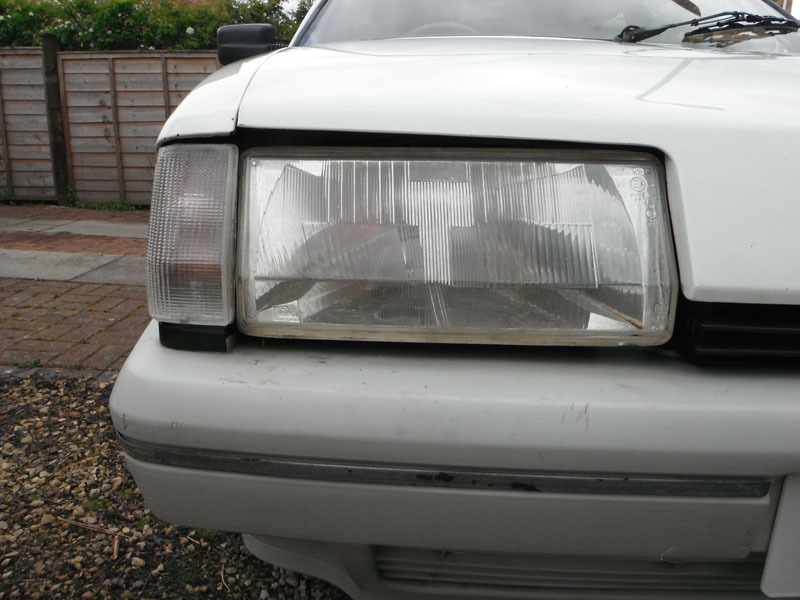 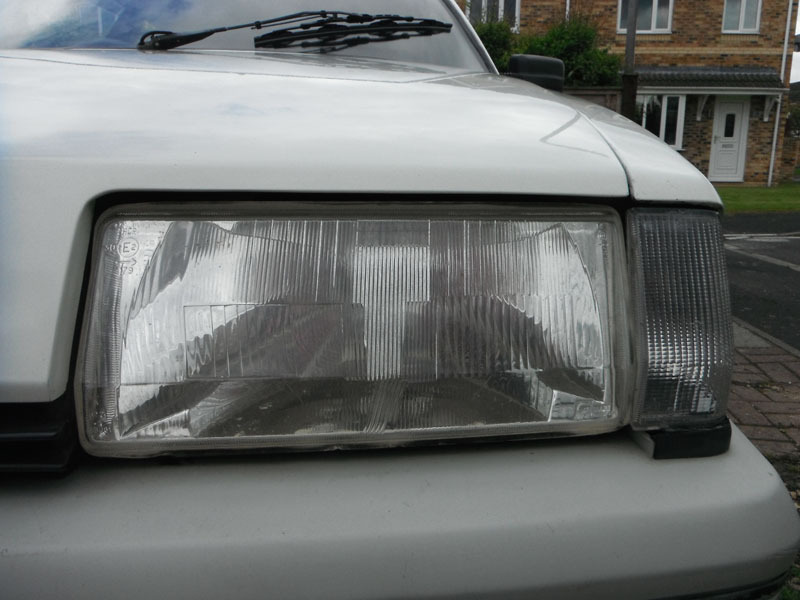 The bigger issue is the bonnet itself, now that I've got the lights straightened out, the bonnet is all kinds of the wrong shape and is definitely deformed so I'll never get a very good fit on the front end without replacing it, especially given its habit of changing shape depending on how warm or cold the engine and the day is. I need to get the bonnet to move over more to the driver's side ideally, but there simply isn't more adjustment available to get it over any further than it is. Instead, I'll tighten the gap between the driver's side wing and the bonnet by loosening the bolts and getting a helper to push on the wing to align it better while I tighten all the bolts up. This is as good as it can get working on my own on this.  |
| |
|
|
|
|
|
May 10, 2019 19:53:39 GMT
|
|
I had a silver mk1 and the bonnet had crazed. I swapped it for another silver one. It took minutes as they are so light. I will keep my eyes open for a breaker. There is a silver estate near me but is near preston.
|
| |
|
|
|
|
|
May 10, 2019 20:16:00 GMT
|
|
|
| |
|
|
vulgalour
Club Retro Rides Member
Posts: 7,255
Club RR Member Number: 146
|
|
|
|
|
That's a lot for a second-hand bonnet with stickers on and scuffed paint. I've got some other leads that may be more affordable, just have to see if they pan out. Thanks for taking the time to look, I do appreciate that. For now it's not a big problem, the bonnet does what it needs to do and looks tidy enough 95% of the time. I just try not think about how wibbly wobbly it is.
|
| |
|
|
jamesd1972
Club Retro Rides Member
Posts: 2,916  Club RR Member Number: 40
|
|
|
|
|
French holiday this year ?
Looks a lot better with the headlights squared up.
James
|
| |
|
|
|
|
|
May 11, 2019 11:40:39 GMT
|
|
I think if it were me I would have gone kamikaze with some boiling water on that drivers side corner.
You know like those bogus Facebook vids of people removing dents from abs bumpers
|
| |
|
|
vulgalour
Club Retro Rides Member
Posts: 7,255
Club RR Member Number: 146
|
|
|
|
I was tempted to heat it up and leave a weight on it for a similar effect. I don't think it'll work. The bonnet sits too high in the middle on the passenger side, and dips down too low on the driver's side, it also sticks up on the driver's side front corner. If it were metal I could just bend it back to the proper shape. Instead, I decided to tackle a job I could do before work today which was the rocker cover gasket. The car only seems to have one oil leak and it was on the timing belt side somewhere. At the MoT the rocker cover gasket looked the suspect for it. The leak is minor enough that it didn't even warrant an advisory, and I wanted to keep it that way, and with a new gasket being a mere £9 it seemed daft not to replace it. Three bolts hold the rocker cover on and while I would have liked to remove the black hose that runs over the top of it, I couldn't get it to come off the manifold, so just moved it aside as I was doing the replacement. The old gasket was leaking mostly on the timing belt side and a little in various other places too. 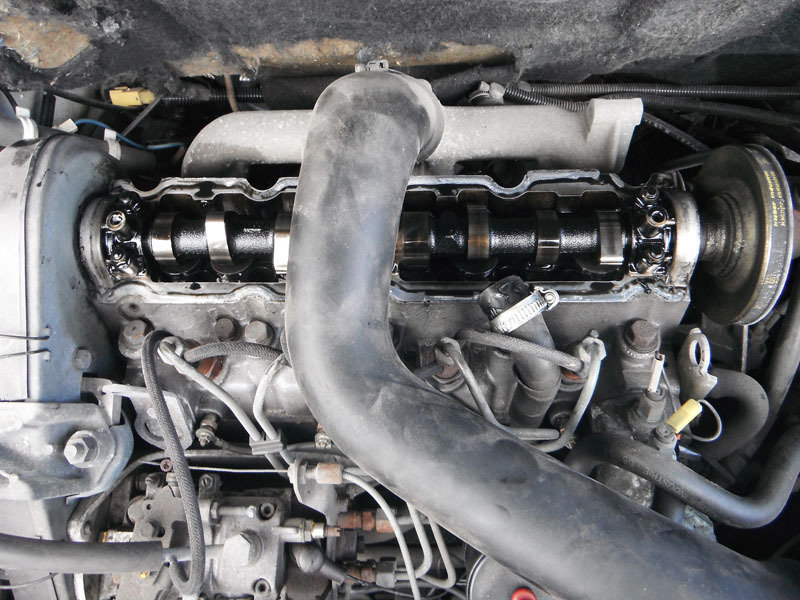 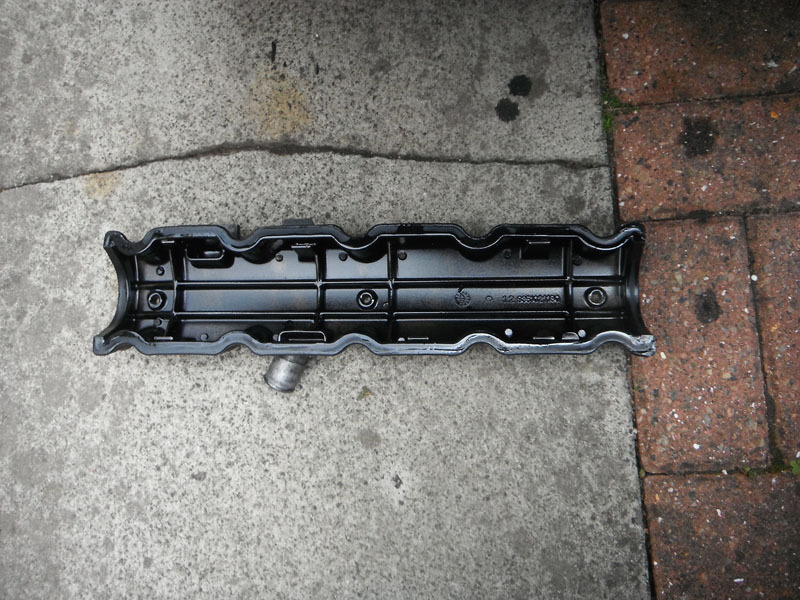 I cleaned up the rocker cover, resisted the urge to polish it - they polish really easily and look nice when done, maybe I'll do it in the future - and fitted the new seal. I also cleaned up the mating surface on the engine. 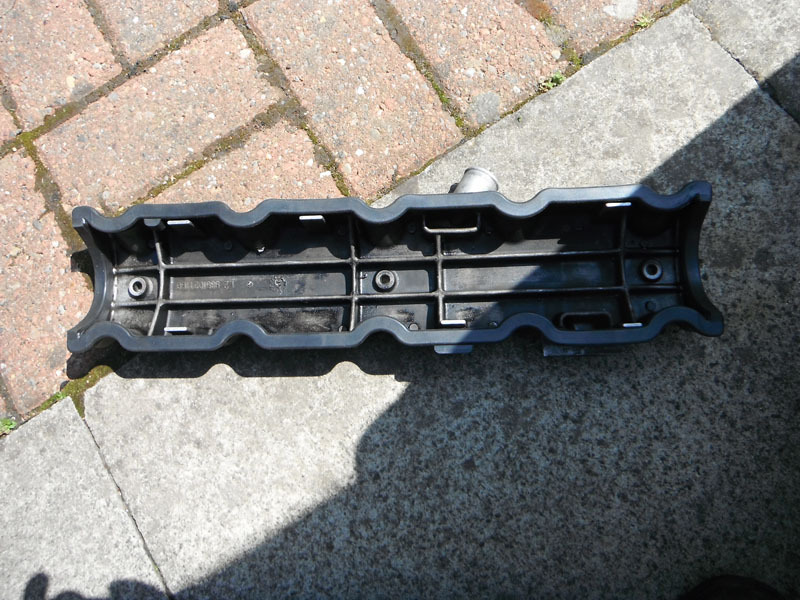 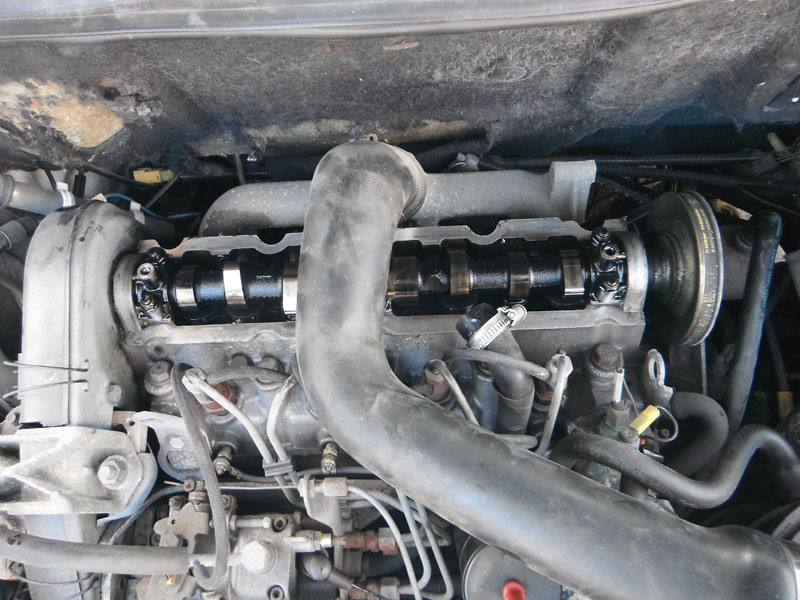 I let the car idle for a bit on the drive to see if it would leak. 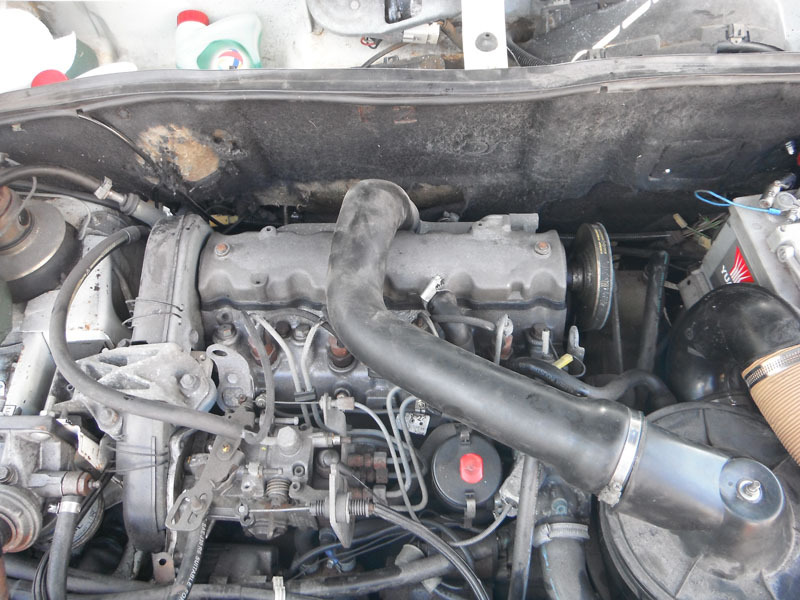 All seemed okay so I went for a drive to warm things up and see if the oil could be persuaded to leak out. Gave things a bit of a dust off too, I really need to get this engine bay cleaned up properly. Happy to report that the leak seems solved now. 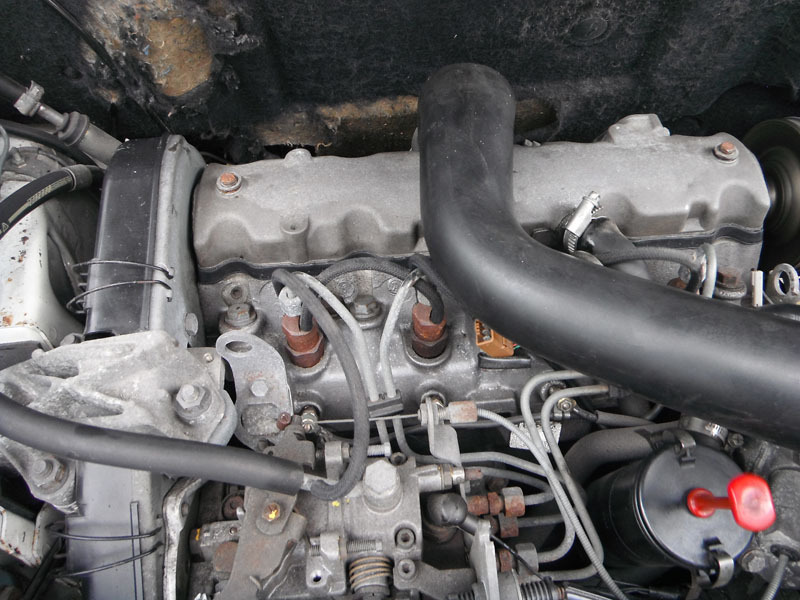 By way of celebration, I cleaned off the remnants of the old Citroen Car Club sticker and fitted the new Hubnut.org sticker that arrived today. This weekend I'm hoping the weather holds so I can get the door shuts cleaned and give the interior plastics a proper scrub because next weekend I'm hoping to head over the CCC meet at Wetherby Racecourse providing my schedule remains clear. 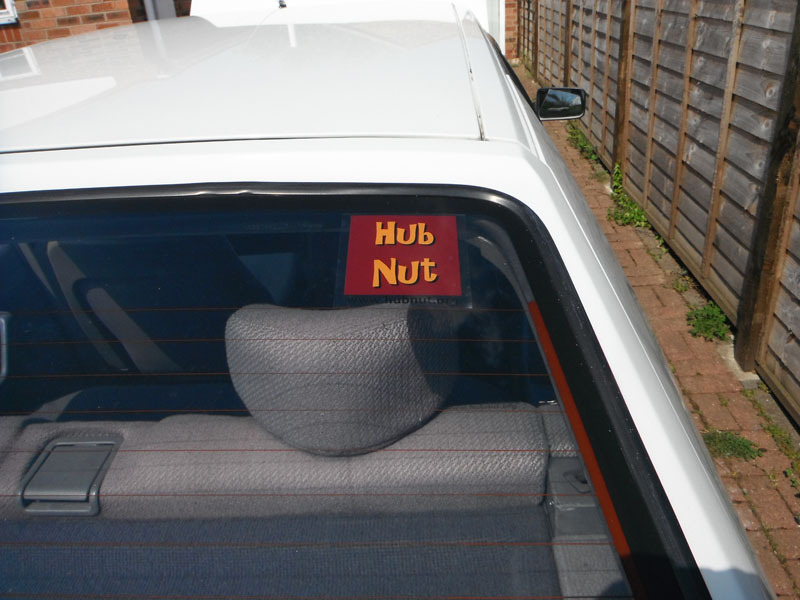 |
| |
|
|
vulgalour
Club Retro Rides Member
Posts: 7,255
Club RR Member Number: 146
|
|
May 12, 2019 17:22:46 GMT
|
It is a lovely day here and what better opportunity for more fettling? Door shuts today, since they're always neglected, and this one was no different. Didn't look too bad overall. Here's before and after on the doors, though being white it means there doesn't appear to be a lot of difference. 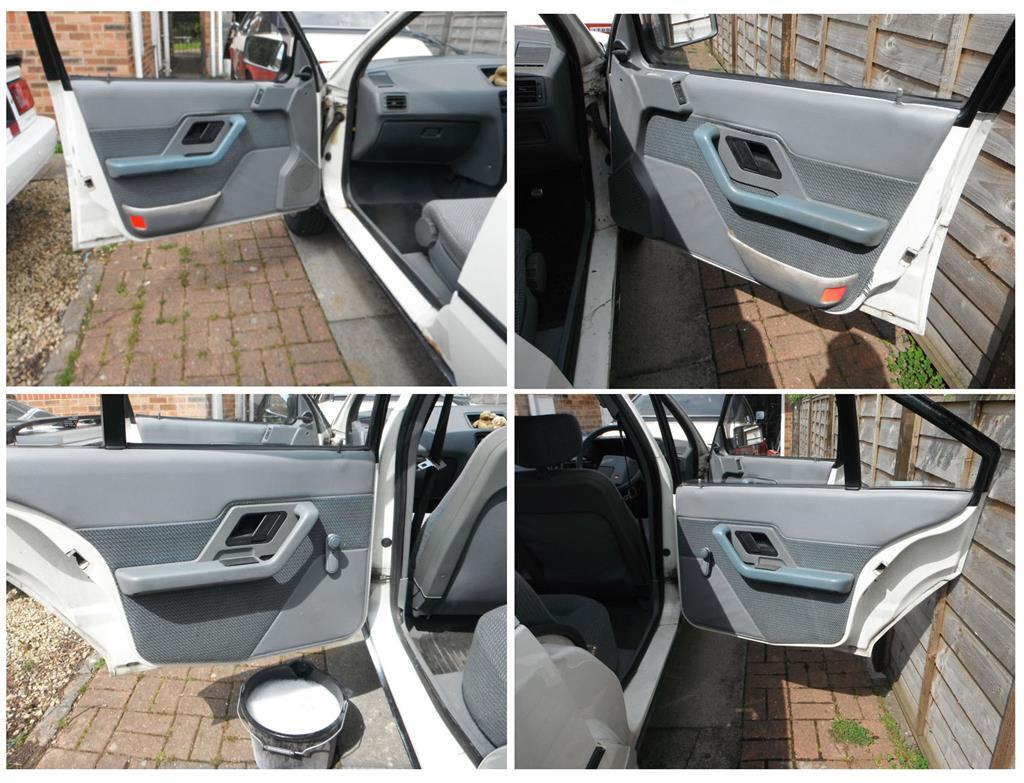 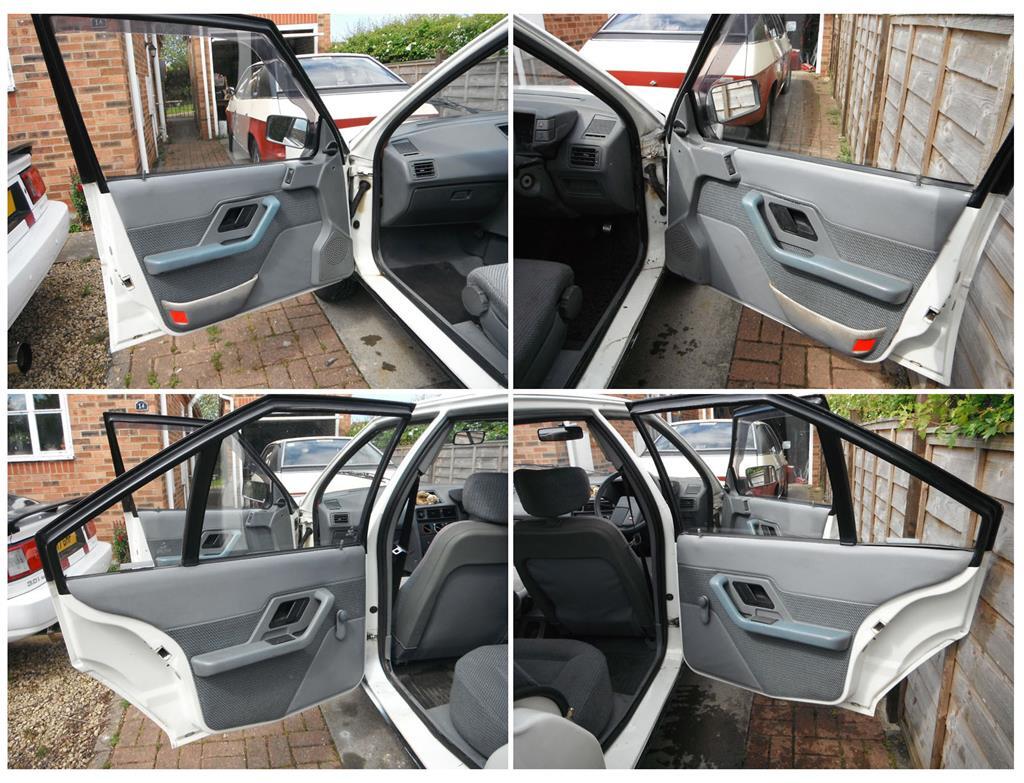 I can assure you, as this bucket shot is testament, these door shuts were quite dirty.  After that, I gave the car its second wash in my ownership because... well... I don't know why really, it's just nice to keep a white car spotless I suppose. I also gave the Princess a wash since it hadn't had one for a while and birds had done their thing. Went for a trundle in both cars afterwards, because I could, spotted quite a few other classic cars and bikes while out, and thought that one thing that was odd between the two cars was how high I sat in the BX. It made me wonder if there was a height adjustment on the BX seat. Then I remembered a post Dean made about fitting an extra foam pad under the driver's seat foam base for comfort. I removed the pad and the seating position feels more normal and there's better knee support for me, arm rest on the door feels in a better place, and the view through the rear screen feels more normal too. It's suprising how much difference such a small depth of foam made. Driving Princess and BX back-to-back was interesting for other reasons too (now there's a Hubnut video idea) since it was the first time I'd really done it. The ride in the Princess compares surprisingly favourably to the BX. The Princess is somewhat firmer ride and the steering and brakes certainly heavier, though both handle particularly well, in large part probably due to the tyres. The BX is certainly the quicker of the two cars, and acceleration is helped by the BX having a better gear change. Princess has slightly better visibility than the BX, and the seating position is more upright, you do have a slightly more commanding view of the road in the Princess than in the BX. In the BX you tend to lounge a bit, it encourages a sort of smooth, relaxed approach to driving, while the Princess feels more formal. One very odd thing is that when you get in one after the other, the BX feels very much like a French stereotype of being relaxed and comfortable and just content to do its own thing, while the Princess feels like a British stereotype of pinstripe suits, boler hats, understanding which rules to follow and which to bend, and generally being no-nonsense about the whole act of driving with the occasional harrumphing when you don't quite do something exactly in the right way. Neither of them feel generic in any way, they both have their own character. The most satisfying thing about both cars is just how well they compliment one another. What one lacks, the other has. While I could live with either as my only car, I'm glad I don't have to. |
| |
Last Edit: May 12, 2019 20:21:22 GMT by vulgalour
|
|
vulgalour
Club Retro Rides Member
Posts: 7,255
Club RR Member Number: 146
|
|
May 13, 2019 17:08:16 GMT
|
Right then, the Daily Driver Challenge got derailed somewhat by a BX but that doesn't mean I haven't used the Princess at all. I'll be collating the info and experiences from the experiment today and will have a write up on that a bit later. For now, it's alternator time. Shiter Danthecapriman very kindly sent me his old Capri alternator to use on the Princess. We were unsure as to whether or not it was correctly handed but knew it was otherwise a suitable swap. Worst case, we could always use the good bits from one to fix the bad bits on the other. This was going to be a little How To on doing the repair, my camera had other ideas unfortunately, so you'll have to use your imagination a little bit. With both alternators on the desk we could see one was left handed, and one was right handed. This is to do with where the pivot bolt and adjuster bolt holes are on the casing, they're otherwise identical. Fortunately, if you unscrew the bolts holding the casing together you can dismantle the whole distributor and swap the casings over. You also have to desolder three wires that connect the regulator to the commutator ring. The intention was to use all of the internals from the Capri alternator and just the outer casings from the Princess alternator, this changed when we inspected the various components and ended up Frankensteining one alternator out of the two to make the best of the components available. This is the Princess alternator internals, and you can see at the front the three wires with white-with-green-dots wire that are soldered to the regulator. On the Princess alternator, most of the componenents were in reasonable condition, but it was the regulator that was shot. We cleaned up the commutator surfaces, checked the bearings, and decided against splitting the commutator ring from the casing since it was in better shape than the one in the Capri alternator. The bearings in the Capri alternator weren't quite as good either, though that's not too surprising since the Princess alternator dates from about 2011, where the Capri one is from the mid-80s, so had a fair few more hours clocked on it. 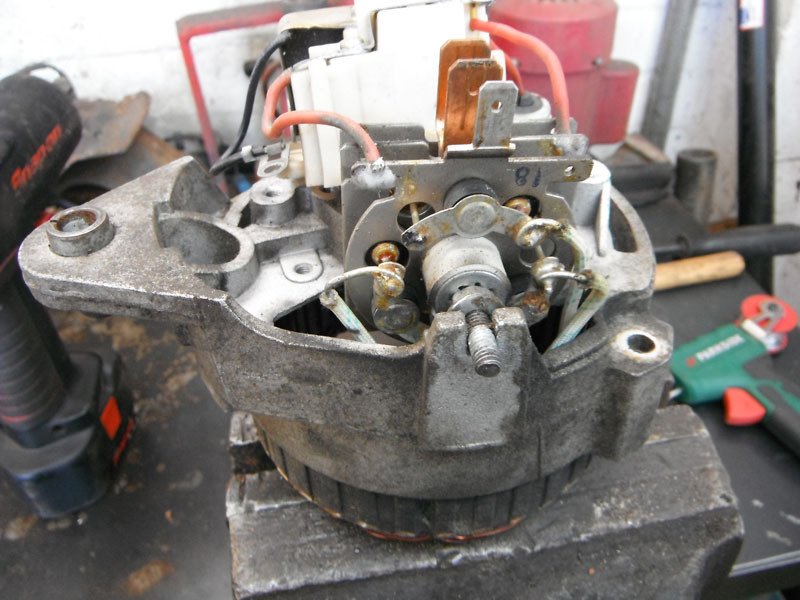 The Capri regulator design was slightly different. It was the same where it mattered, it was just the quality of parts of soldering, etc. was better overall and the regulator on the Capri didn't have a condenser added on, presumably because there was no need for it as there was on the newer Princess one. To make things extra confusing I've made sure that this part is photographed from a completely different angle to the Princess one above. 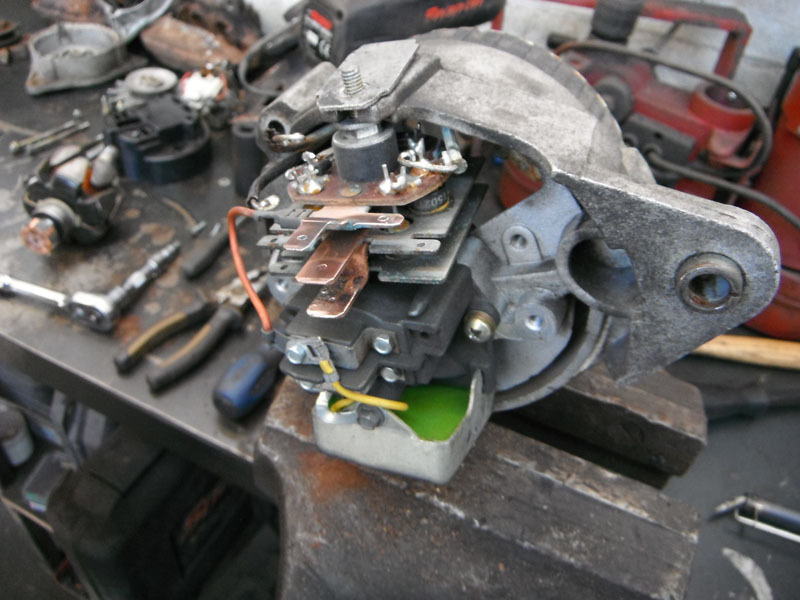 Now I have no more alternator rebuild photographs because the camera ate them all. Essentially, we used the commutator ring, the main spindle, and the metal casings from the Princess alternator, with the regulator, and Lucas branded plastic cap from the Capri alternator. We also used the best of the various bolts from both units in rebuilding the new Frankenstein. The net result is that the alternator now works properly, which is what this was all about. So a bit thank you to Danthecapriman for providing the spares, and to Mike for basically cracking on and doing the magic soldering work. With the alternator off the car, I could address a couple of jobs I'd wanted to do for a while and hadn't had a good excuse to get done. First up was the alternator bracket which has always been a bit crusty looking. Treated it to wire brush and black caliper paint, it should bake well since it does get quite hot being bolted straight to the block. Cleaned up the bolts for the bracket, and the wiring loom, while I was in there. I also cleaned down the grease that had been hiding behind the alternator. 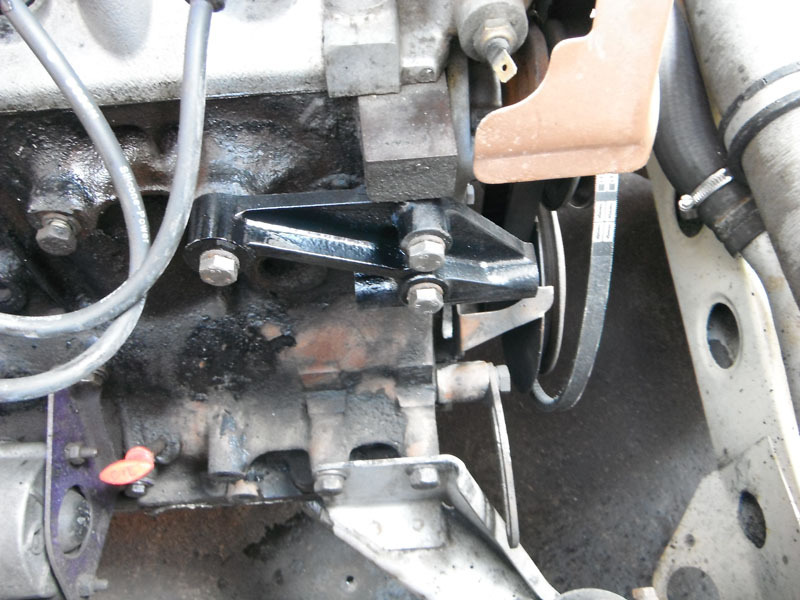 With the wiring loom removed I could unwrap the brittle old electrical tap and use a few cable ties (cheers for that idea, Project Binky!) to keep things where they needed to be for when I re-wrap it. I also degreased it so the new tape had the best chance of sticking. 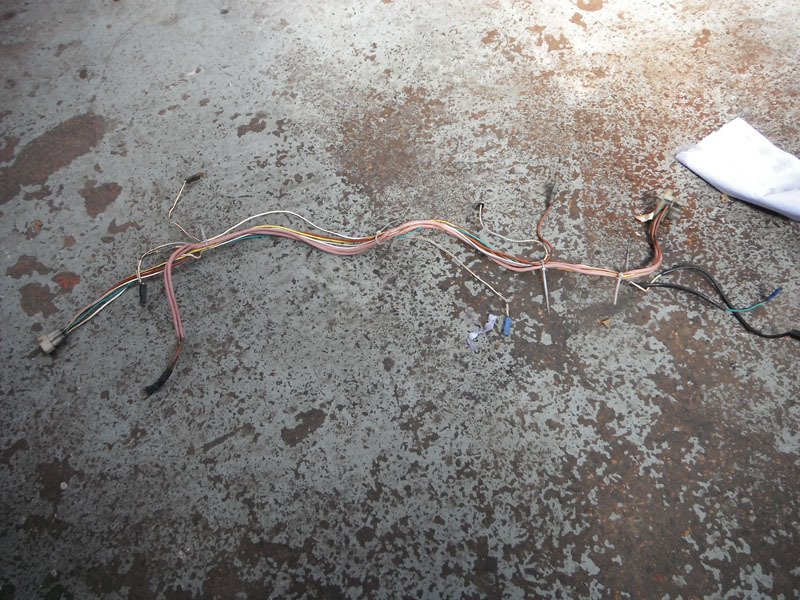 Typically, found another bodge in the form of a half-cut wire under some electrical tape that had been added after the rest of the loom was wrapped. This is the only bit of the wiring loom I've not had off the car (that I know of), so it's hardly surprising there was yet more damage to it. Mike splice the wire back together with fresh solder and new heatshrink since we didn't have suitable connectors to remake the whole wire. 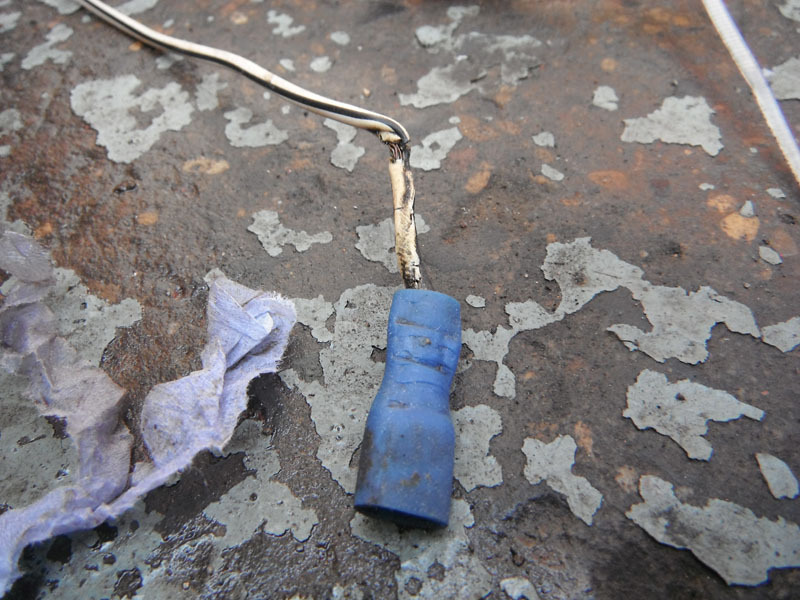 Again, I'd show you progress but the camera ate a bunch of illustrative images. Fortunately there was exactly the right amount of loom tape in the drawer to wrap this section, and not a millimetre to spare. I repainted the steel P-clips that hold the loom to the front of the block and we extended the electronic ignition wire with a new piece so that it could be more tidily incorporated into the loom. The wiring on the front of this engine needs all the help it can get when it comes to being tidy.  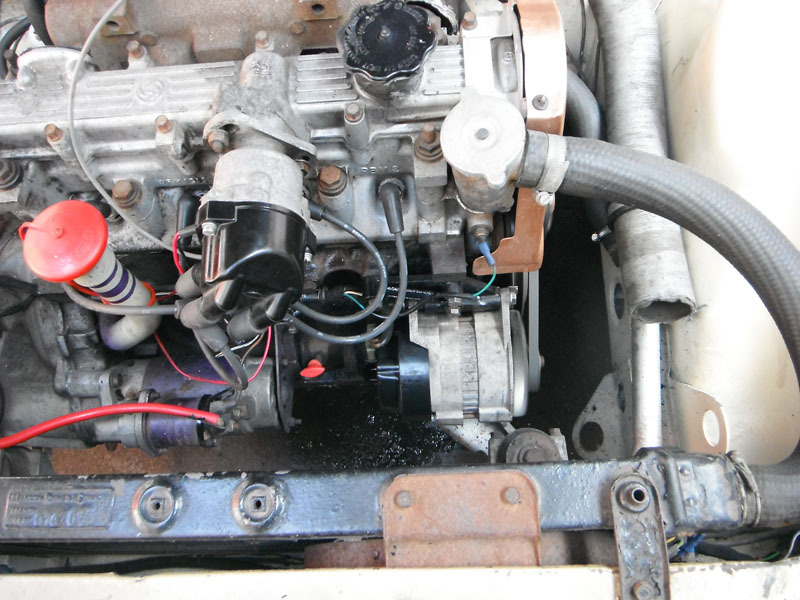 With all that reinstalled, we started the car and tested the alternator to see what it was doing. We now have a reliable, steady, predictable charge that will keep up with system demands as and when required. It was good to get everything cleaned up a bit too, removing all the historic grime really helps keep everything look much nicer and means I can see when there's a problem that much easier. The Lucas branded end cap on the alternator is quite pleasing for reasons I can't explain. 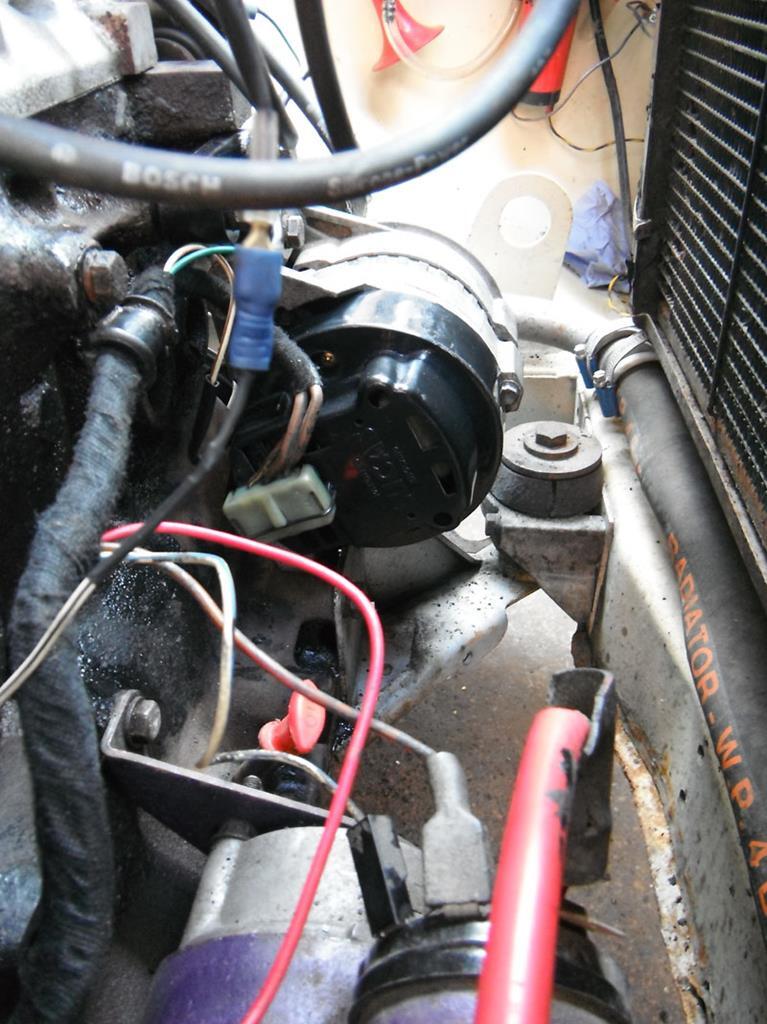 Didn't have time to crack on with the brakes today. I'm not in as much of a rush to sort those as I was since the BX can pick up the slack. Mike and I are hoping next Monday can be brakes day, providing our schedules don't get all clashy. 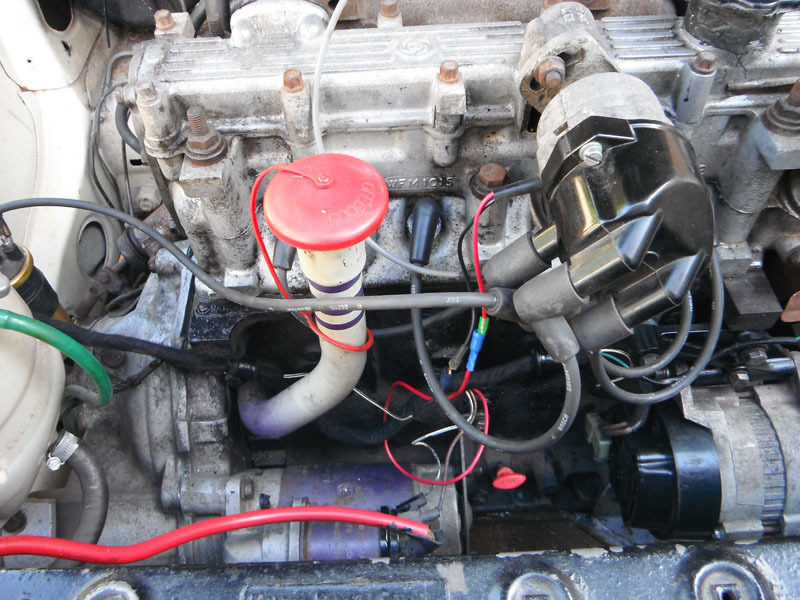 |
| |
|
|
vulgalour
Club Retro Rides Member
Posts: 7,255
Club RR Member Number: 146
|
|
May 13, 2019 18:38:01 GMT
|
|
The Daily Driver Challenge - Conclusion.
I decided to end the DDC at the point that it was clear the BX would be distracting me from using the Princess every day because it didn't seem fair to do otherwise. The DDC took place from late November 2018 until early May 2019, a time of year when most forty year old cars are bundled up safe and warm waiting for the show season to begin again. It was the least ideal time to be using a classic car and likely to be the most challenging, certainly the best way to get a fair estimation of the car's abilities and reliability over that period of time.
The short version for the 24 weeks of the DDC goes like this:
13 weeks of trouble-free boring motoring
1 failure to proceed: warped brake disc. AA less than useless and refused recovery because I'd had the temerity to break down on the road outside a garage that was closed.
1 failure to proceed that was repaired at the roadside: carburettor issues
Various servicing and minor repairs.
The long version is that overall, a car with a reputation for being incredibly unreliable and being asked to drive in all weathers, at all times of day, including in the snow at night, proved itself capable of getting me where I needed to go whenever I needed to go there. Had I needed to use the car for long distance commuting, I would have done more to prepare the car for use than I did. Instead, I was asking the car to do between 50 and 100 miles a week, and to be able to go out whenever I needed it to almost every day. The majority of the mileage was urban only, though there were some longer distance motorway runs and faster A road trips taken as well. It was used in rush hour on occasion, late night runs, and got caught up in school traffic several times, all of which it coped with perfectly fine.
Repairs were needed. Mostly this was simply down to parts wearing out, as parts do. Before the test, a new main earth wire was fitted along with brand new tyres for reliability and safety. I also used the DDC to highlight any issues I may have overlooked when the car was being used much less, and that meant quite a few small items were replaced that didn't absolutely have to be, things like the reversing light switch (which collapsed after a handful of miles and saw me refitting the original after cleaning it up), the oil pressure switch to cure a minor oil leak, an in-line fuel filter, a new carburettor gasket, a steering column upper bush, and new CV boots. More serious items required were a lower ball joint, the front wheel bearings, electronic ignition (failed condenser also saw badly burned points), a brake disc, a rebuilt alternator, and some welding to a rear inner arch. Other than that, a little oil was required since it consumes a small quantity.
Overall, I don't regard the items replaced as being that out of the ordinary for any car of this age and mileage and most of the items were quite old and had done quite a few miles. At the close of the DDC, the only outstanding issue is the brake rebuild and the reason that hasn't been done is simply a matter of finding the time to strip down and rebuild everything. I've never done anything with the front brakes in the seven years I've had the car, other than bleeding them, and I imagine previous owners were much the same, mostly because nothing needed to be done until this year.
Would I recommend using a forty year old car every day? Generally speaking, no. The problem with an old car is that it's an old car. Unless you've gone through the whole thing and replaced every consumable item with good quality new, or as good as new, items, you're going to have a bad time. Parts wear out and you need to be aware that when you press an older car into service you running a greater risk than usual of cascade failure. I took the chance with this car because I've owned it for a long time and I thought I'd ironed out all the problems I was likely to face. Many of the parts I've needed have been awkward to acquire, though rarely expensive, and some of the parts have been incorrectly described. So if I was relying on the car to get me to work and back every day rather than just run me around on my errands most days, my attitude in closing on this experiment would likely be very different.
That said, if you're of the mentality that you want to experience this sort of thing, then go for it. Just have contingencies in place. If you're going to use a classic every day for a protracted period of time, it's wise to have a back-up car or someone with a back-up car, that can help you out if you do get stuck. Also, approach pressing an older car into service like going into a really slow endurance race. Replacing things like filters and hoses, ignition components, and making sure all your electrical stuff is in good order is very sensible. Carrying tools and fluids in the boot is also very sensible and, if you can, having spares such as ignition components and belts, is very sensible. One thing I've learned is that breakdown cover does not always mean breakdown cover, so you have to give yourself a fighting chance of repairing your car yourself to a standard that will get you home.
One positive of the DDC is how much more aware of other road users it's made me. When you haven't got the driver aids of blind spot monitors and electronic ignition, parking sensors and ABS, you find your driving changes. You look for and anticipate behaviour you might not otherwise notice. It makes the act of driving somewhat more tiring as a result because you're concentrating so much more. However, there were plenty of times that I found myself able to predict bad behaviour from other road users and prevent myself getting into trouble and those are skills I'll be carrying forwards. I'm not saying driving a classic car will make you a perfect driver, it won't. What it will do is make you more aware as a driver. Older cars are less insulated from the outside world too, so I did find I was much more aware of folks on two wheels, and generally speaking people are nicer and behave respectfully towards you.
Now that I've completed the DDC it has proven that I have absolutely no desire to part with the Princess (not that there was any doubt) and that it is quite capable of doing everything I need it to do. It's proven that I don't need a newer car, that I don't even need a radio, and that it's an affordable form of transport that makes me happy. If I had to, I could use the Princess as my only car and this experiment has allowed me to get the car in really very good shape overall. It's not perfect, it's not about to win any shows, and that's fine. It's a car I can use and that I enjoy to use, and that's all that really matters.
|
| |
|
|
|
|
|
May 13, 2019 22:07:44 GMT
|
|
And its got 4 rockets on the back.... woooooooo!
|
| |
|
|
|
|
|
May 14, 2019 10:07:26 GMT
|
|
good roundup.
before getting to the last paragraph i was going to ask if popularity of the BX might put the princess "at risk". this was pure speculation as ive done 2 years now of slightly less old retro daily-ing with teutonic reliability, in favour of coddling a 70s BL product.
|
| |
|
|
vulgalour
Club Retro Rides Member
Posts: 7,255
Club RR Member Number: 146
|
|
May 14, 2019 15:50:02 GMT
|
I am having trouble finding a reliable source of diffused/frosted festoon bulbs. I don't want LED ones, I want the original fitment bobbly glass incandescent bulb, like this one. 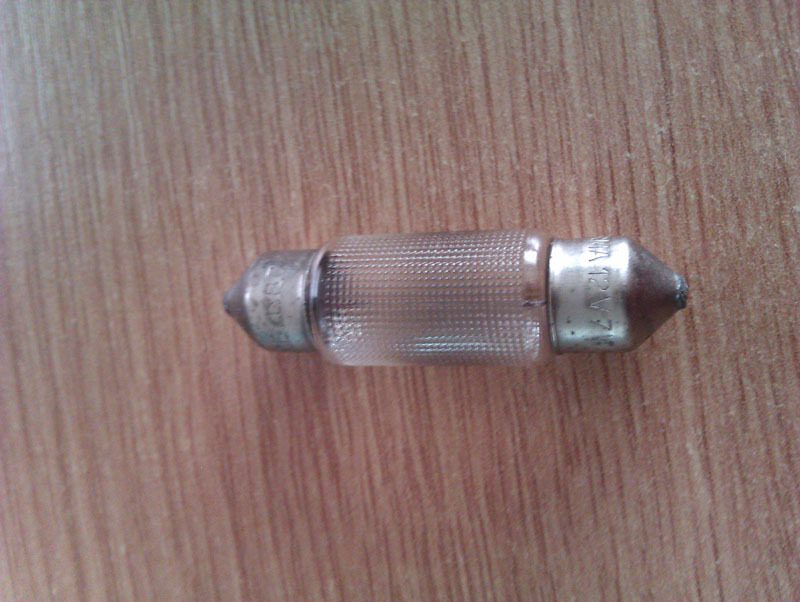 Instead, I keep getting sent these, even when the listing specifically states frosted/bobbled glass. Even when I'm ordering from an actual shop rather than online. It is very annoying. 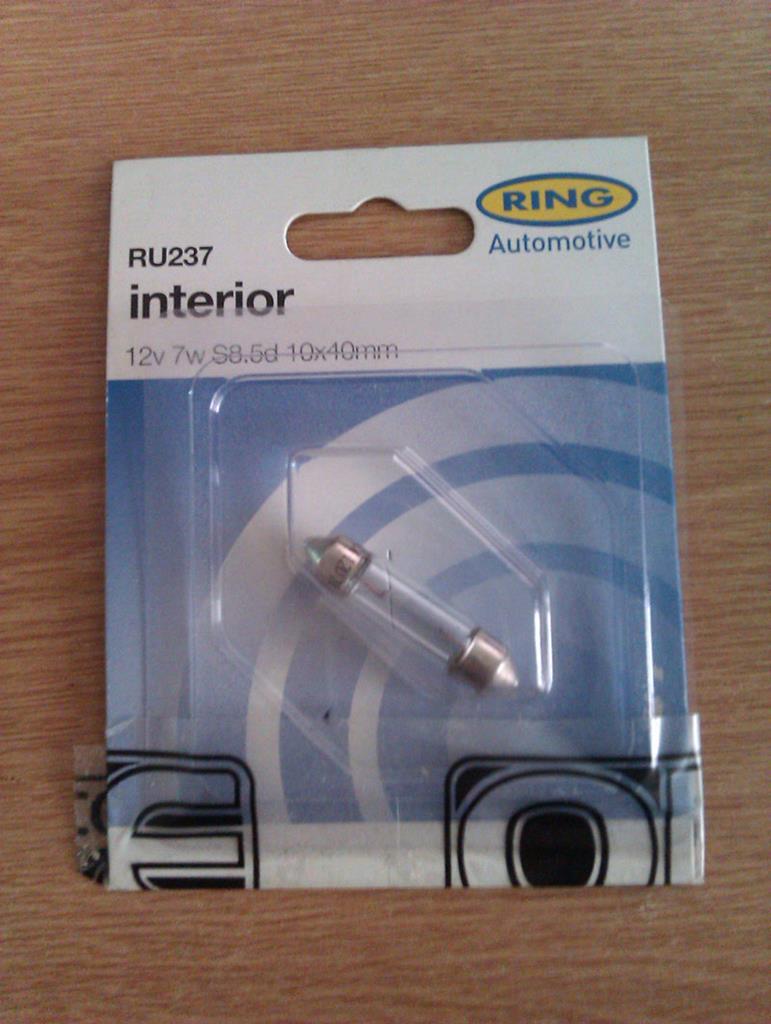 Yes I'm being very picky. In other news, I put the chrome trims I got for the Princess on the BX to tidy up the scruffy wheels. This allows me to restore a set of original wheel trims properly without the car looking dreadful in the interim. 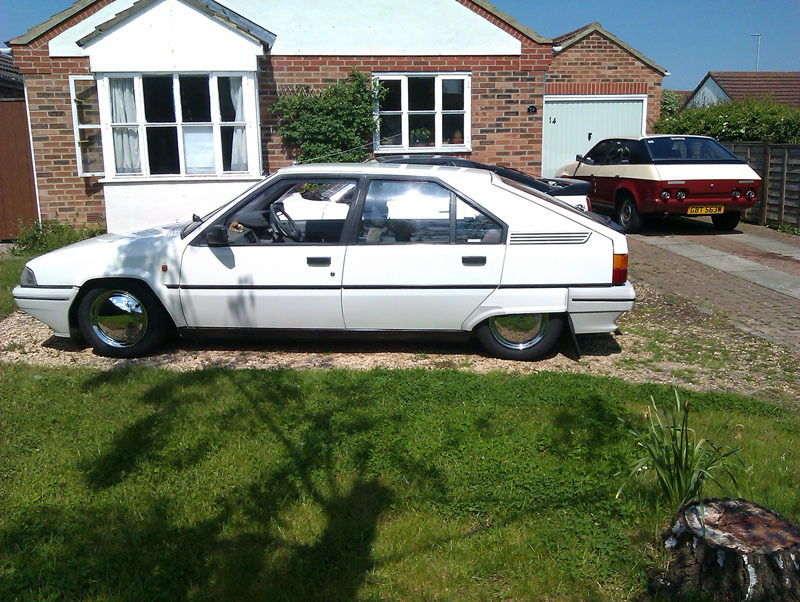 |
| |
|
|
|
|
|
May 14, 2019 21:40:51 GMT
|
|
Philips do a frosted warm white led?
|
| |
|
|