|
|
|
|
|
|
So a piece of the disk surface had come out? Ooh. I'd be very happy to have that off the car. The last thing you want is to have a disk coming apart.
It looks a little as if the piece that came out was stuck in the pad for a while, maybe causing that damaged band round the centre of the face.
Anyway, that's much better in the scrap pile than under your brake pedal.
James
|
| |
|
|
|
|
vulgalour
Club Retro Rides Member
Posts: 7,254
Club RR Member Number: 146
|
|
|
|
|
Pretty sure I know when it did it too. Ages ago I had to do an emergency stop and the brakes never felt quite right afterwards, I just couldn't pin down what the issue actually was and since it met the braking requirement at the last two MoTs I just had to wait for it to develop since I wasn't sure what to look for. At once point I wasn't even sure it *was* the brakes. I'm definitely happy to have it sorted. Since I bought the car 7 years ago, the only thing I've done at the front is brake bleeding and I suspect, given the state of the fluid when we bled them the first time, it's likely for the seven years previous it didn't even have that much maintenance attempted.
|
| |
|
|
vulgalour
Club Retro Rides Member
Posts: 7,254
Club RR Member Number: 146
|
|
|
|
|
Not only, but also.
|
| |
|
|
vulgalour
Club Retro Rides Member
Posts: 7,254
Club RR Member Number: 146
|
|
|
|
|
End of Week 19 report.
Not a lot to report, the most exciting thing I did this week was vacuum the cabin and order parts. I've got new front brake discs and pads, I'm going to rebuild the spare calipers so they're good as new, a pair of lower ball joints are on their way and a new wheel bearing kit is heading over for the driver's side which has started grumbling.
I had a trip to York to do today, about 120 mile round trip, and while I trust the Princess could do it I didn't want to tempt fate with that grumbling wheel bearing giving the distance and the higher speeds I'd be travelling at so I chickened out and got a lift in the housemate's Range Rover. This turned out to be a good idea as I wasn't feeling too well on the way home so it was nice not to have to do the driving.
The trip to York was to collect a few interior bits for the BX and if I'm feeling better tomorrow, I'll be working on that for a little bit. Princess is still doing my regular duties, I'm just avoiding any sort of 50mph+ long drives until I've done the wheel bearing.
|
| |
|
|
vulgalour
Club Retro Rides Member
Posts: 7,254
Club RR Member Number: 146
|
|
|
|
Let's have a little BX update. First thing to report is that even though the BX has been sat outside in lots of rain, the passenger footwell is bone dry. I consider the windscreen reseal a success on that one. Next up was to have a fettle with the parts I'd acquired recently to improve a few things. First, let's do the parcel shelf. My original one has really good blinds and loads of sun fade, the new one has really poor blinds and virtually no sunfade at all. Let's see if we can make one good one out of the two of them. First up, I removed the blinds which is five screws on the back of the parcel shelf, it then slides out of the slots that hold it in place easily enough. You can see here just how faded my original one had become. 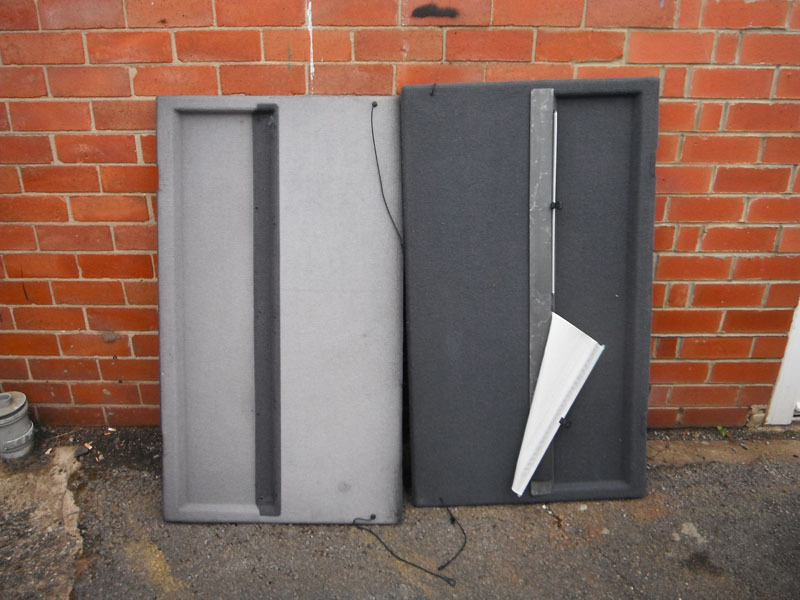 With the plastic piece out that holds the blind you can then inspect what you've got. There's no fixings in here holding the blinds in, they just sit in shaped slots. 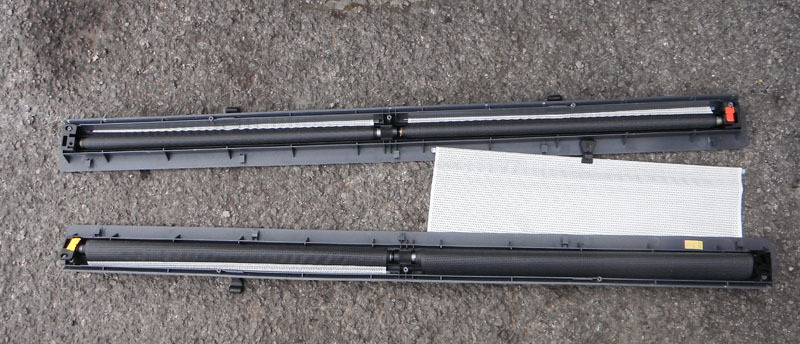 To remove, you simply lift them out. To get the pull tabs out you can flex the plastic slot just enough to get them through without breaking anything. It's then a simple, if slightly fiddly, affair of popping the relevant blinds and holder together before screwing the unit back onto the parcel shelf. 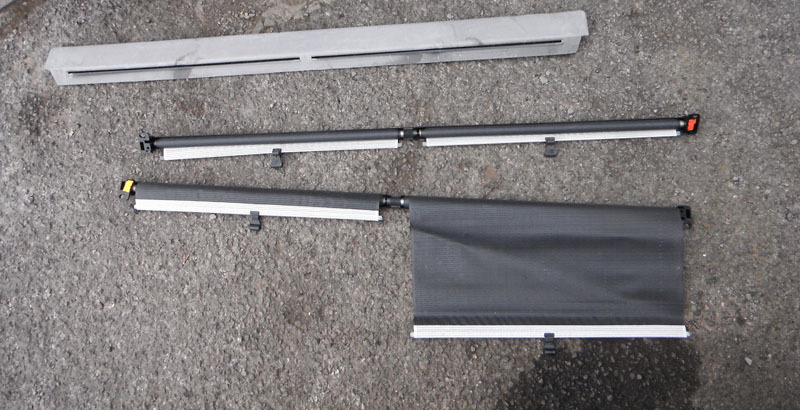 Another thing I noticed on the replacement shelf is that one of the clips for the strings was broken. I simply swapped one from the old parcel shelf. I also salvaged the other good parcel string as a spare for future use, just in case. To remove these, use a small flat blade screwdriver to push the tang in as you apply pressure to the fixing to pop it free. Be sure to keep hold of the little plastic washer this goes through to lock it all together too. Installation was very straight forward. I'm still on the look out for a replacement shelf clip that goes on the back seat to replace the one that shattered. Only problem now is the new parcel shelf highlights just how bad the sun fade is on surrounding parts. 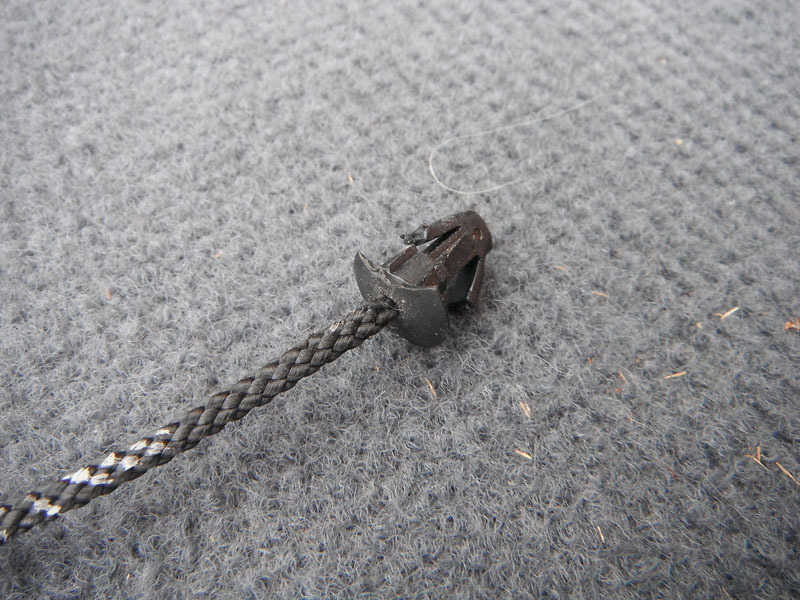 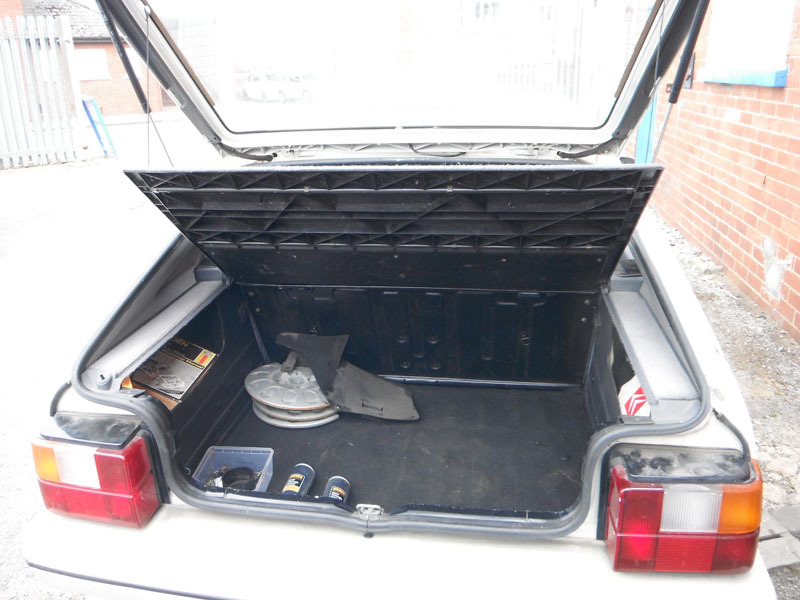 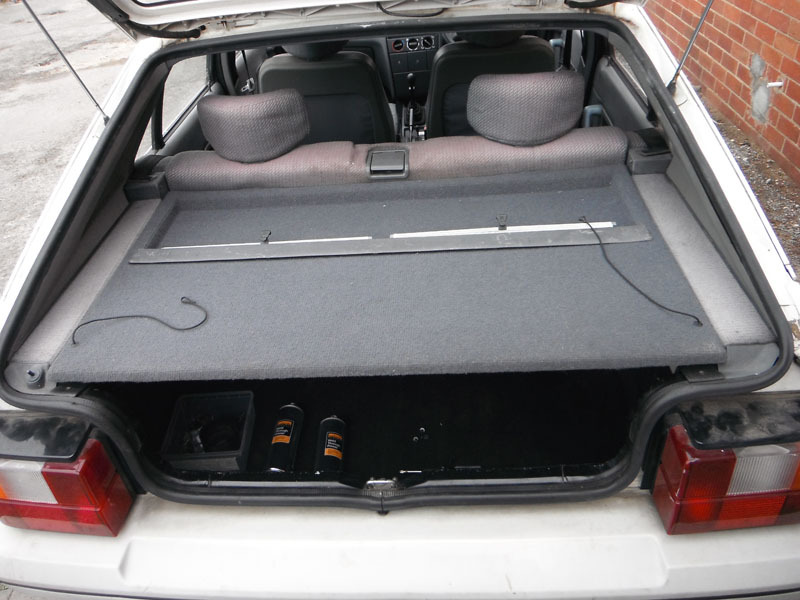  Next job was to replace this passenger seat base with the one I acquired. This is a phenominally easy job. There's two not-tight spring clips at the front just behind the front-back adjustment bar, and two rubber bands at the back that hook into the seat base to keep the seat back trim in place. Undo all of these items and the base simply lifts out.  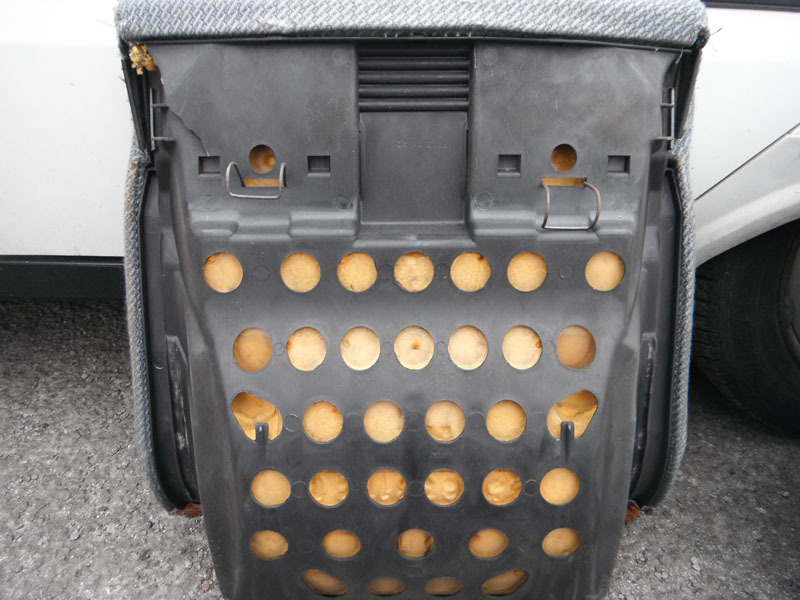 I got a little scare when I saw the bright blue version of the fabric in the car because I thought that was what the interior used to be like. Honestly, I've never seen a BX with that blue cloth for the interior and that's a shame, it looks fabulous. Mine does seem to just be the usual grey, even though the front grab handles/arm rests are blue and there's a blue tint to the interior fabrics and carpet. I digress. 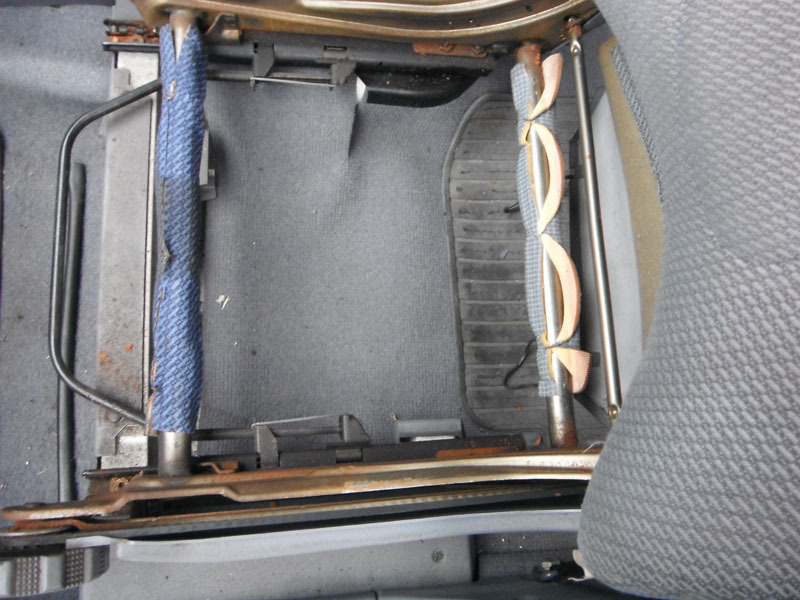 Side-by-side you can see the wear on the original darker grey base, and how nice the replacement lighter grey base is. Wait... oh bother. Same fabric, different greys. 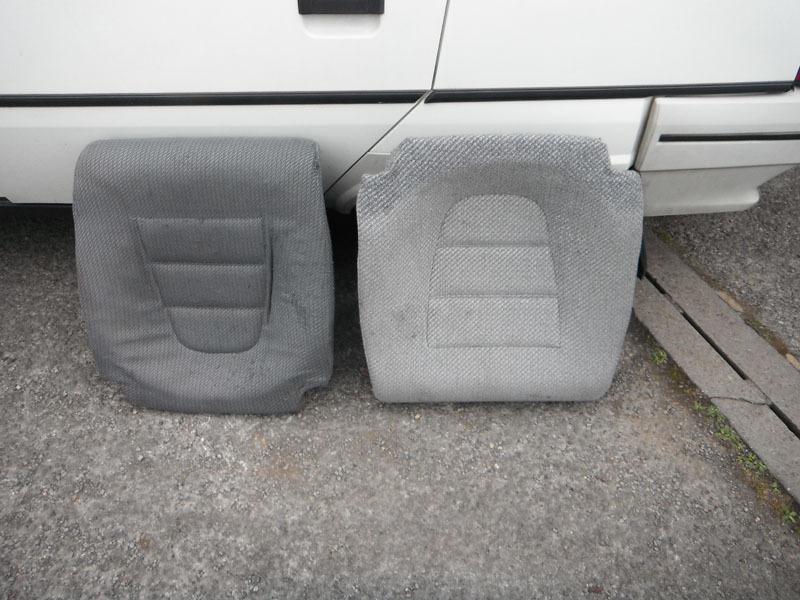 Oh well, it'll have to do. 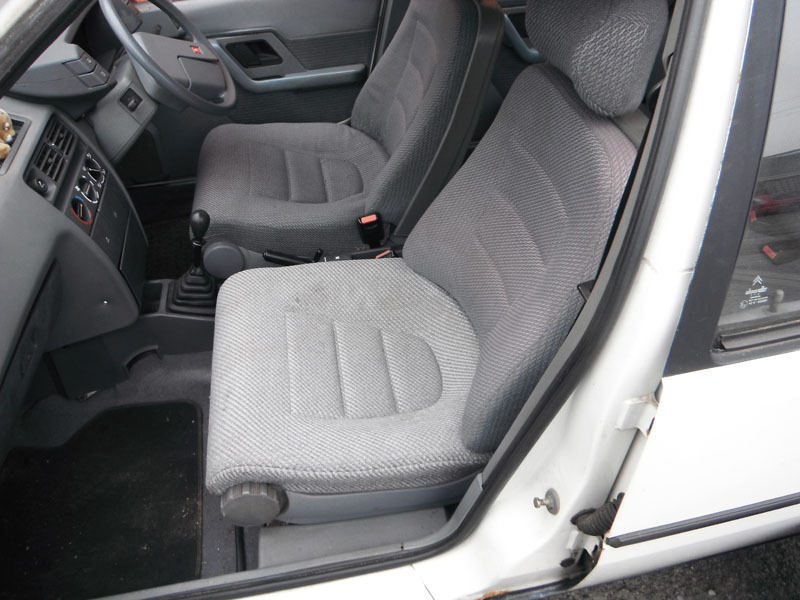 I also got a replacement fan blower dial. The one on the car (on the right here) is cracked where the replacement isn't. And yes, both have managed to lose the metal spring clip so if anyone has any of those or can point me to where to get them, I'd appreciate that. It's worth noting that the blower fan only works on max speed too, I believe this is a regulator issue and something that's common and easily fixed so it's on my list. 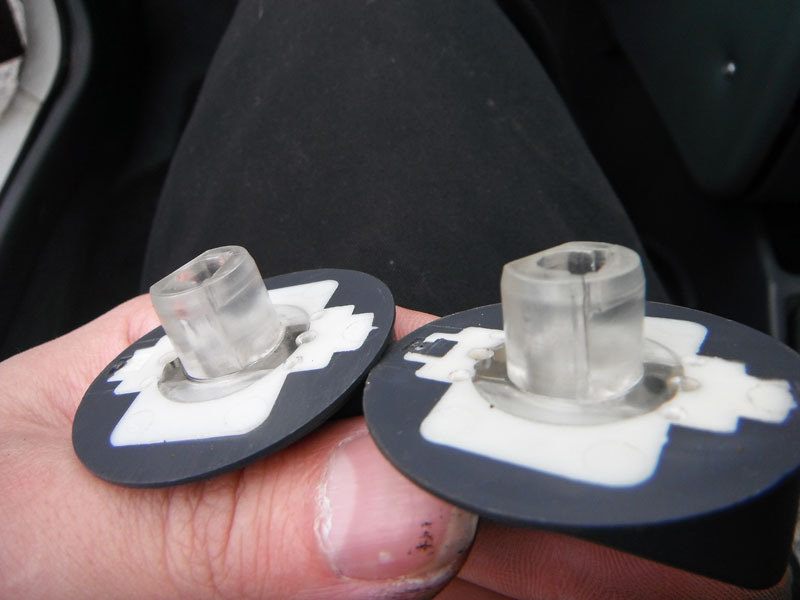 Finally, I had a bit of an experiment with the dashboard. It has a big brown sunburnt looking patch on it, which is plausible given it's life in the sun, and it felt chalky. I know usually once vinyl burns like this you can't rescue it. Nothing ventured nothing gained, I decided to see if I could scrub any kind of 'oxidisation' off, like you would T-Cutting paint, using a variety of potions. The best results came from the Autoglym Insect Remover, weirdly, and a lot of the burn is much less obvious now. I'll keep plugging away at it and give it a protective coat of Autoglym Vinyl to see if it brings it back. The dashboard was easily the worst bit of the interior because you see it all the time and it now looks much better, so I'm happy with that. Surprised too, since it didn't really seem to bring any dirt off on the cloth. 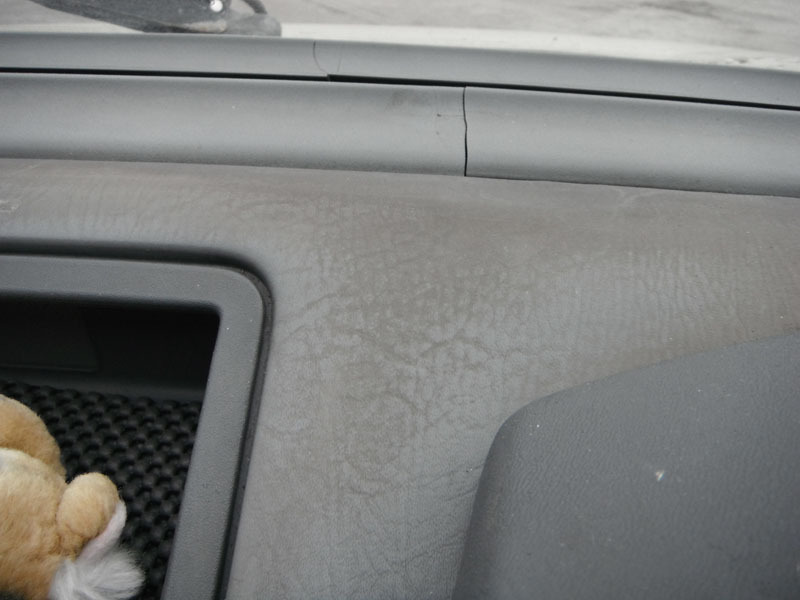 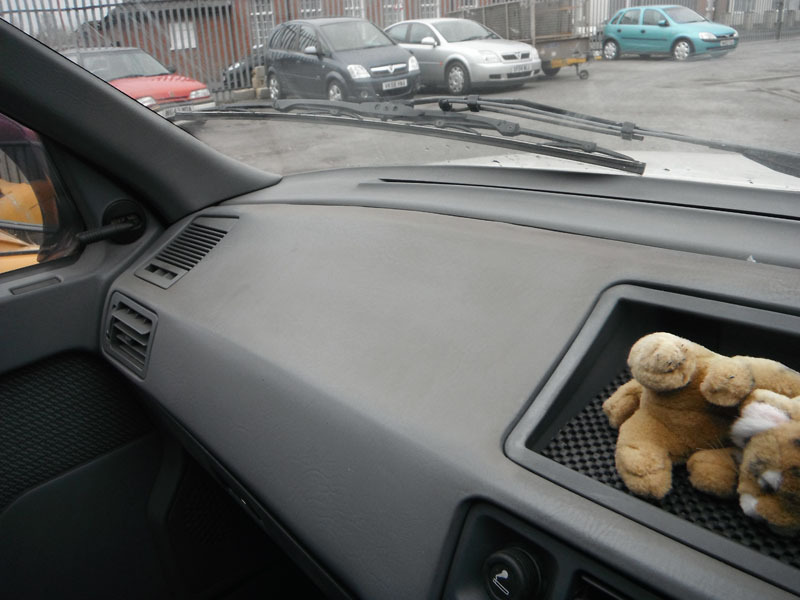 The same process is unlikely to save the door bins which have started to crumble in places where they're nearly white. This also shows how blue the grey fabric is in the BX, I'd assumed this interior was the normal grey tweed and vinyl one but perhaps there was more than one grey offered at this trim level. Perhaps it's just the effects of too much sunshine. 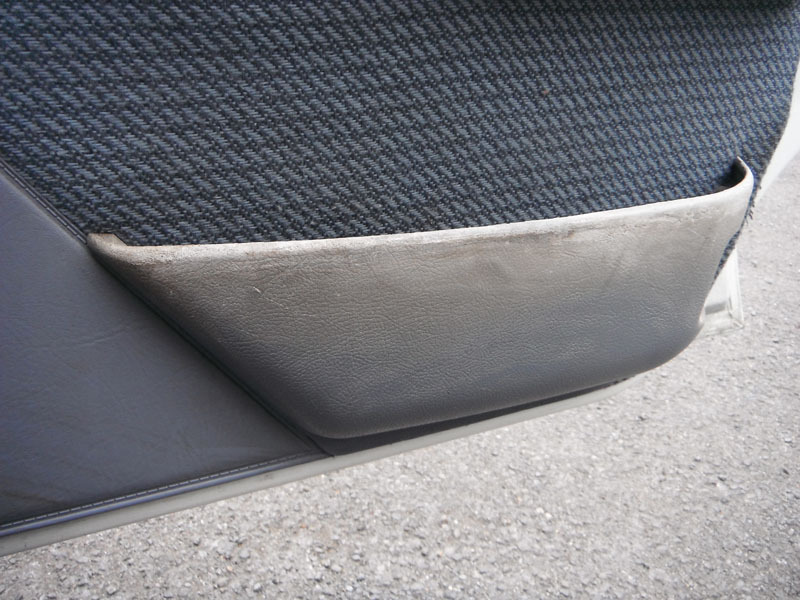 |
| |
|
|
jamesd1972
Club Retro Rides Member
Posts: 2,916  Club RR Member Number: 40
|
|
|
|
|
Can you get a spray on fabric dye to even the seat base ?
Looking good amazing how small changes add up.
James
|
| |
|
|
vulgalour
Club Retro Rides Member
Posts: 7,254
Club RR Member Number: 146
|
|
|
|
|
I could, in theory, dye it with a thinner dye to darken the existing fabric so I don't end up with a plain uniform grey. The fabric is at least two different shades of grey, so if I dye it with the same sort of stuff as I used on the Princess carpets it will just make the whole thing uniform, which I don't want. I suspect I could use acrylic inks since they're opaque and tend to be fairly UV stable which might also help get rid of the purple-y sun fade on the tops of the rest of the seats.
|
| |
|
|
glenanderson
Club Retro Rides Member
Posts: 4,314
Club RR Member Number: 64
|
|
|
|
|
Could you take the fabric cover off the original seat base and fit it to the new one?
|
| |
My worst worry about dying is my wife selling my stuff for what I told her it cost...
|
|
vulgalour
Club Retro Rides Member
Posts: 7,254
Club RR Member Number: 146
|
|
|
|
|
I could, but the main reason for replacing the seat base is that the original one the fabric has worn through to the foam in a couple of spots so I wanted one with better fabric.
|
| |
|
|
vulgalour
Club Retro Rides Member
Posts: 7,254
Club RR Member Number: 146
|
|
Apr 14, 2019 18:42:36 GMT
|
End of Week 20 Report Coolant - no noticeable usage Oil - 400ml required. This is likely down to the motorway mileage done recently, does tend to consume a bit when doing higher speeds. This week some goodies arrived. New brake pads, new discs, pair of lower ball joints, and a correct wheel bearing kit. Delivered, this was around £120, so a fairly big spend by my standards. The discs are one of the most expensive items to acquire, and one of the most needed. 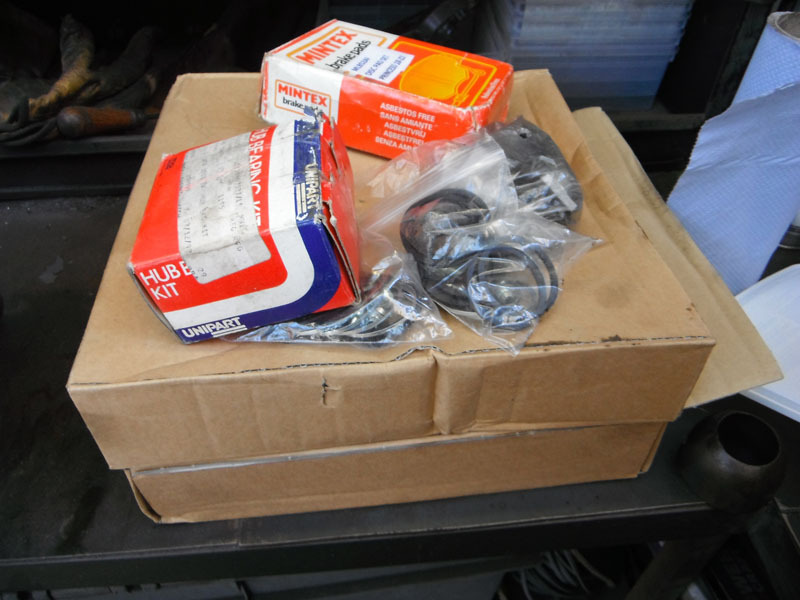 I also had a look at cleaning up my spare gear selector box. The one on the car has had a bolt in place of one of the pins all the while I've owned it and you need to periodically tighten said bolt if you want to keep gear selection. I was hoping I could simply clean down the spare and swap it over. 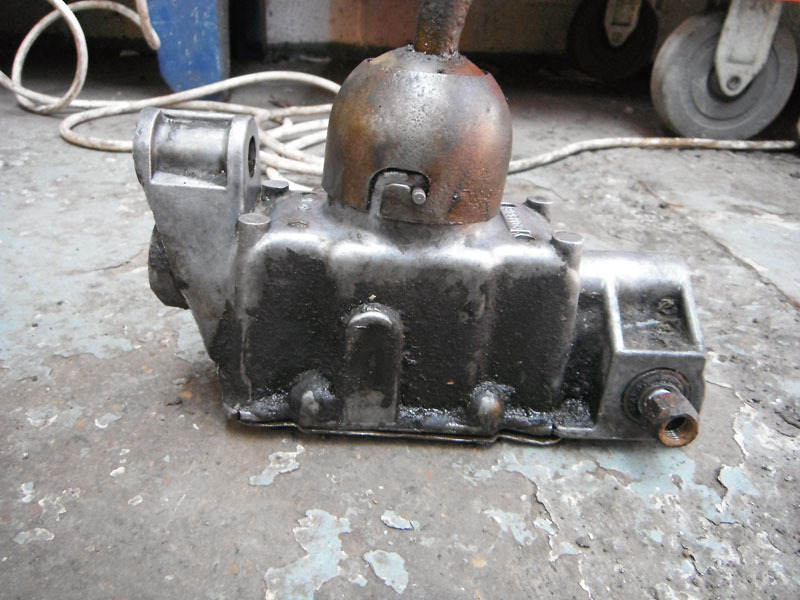 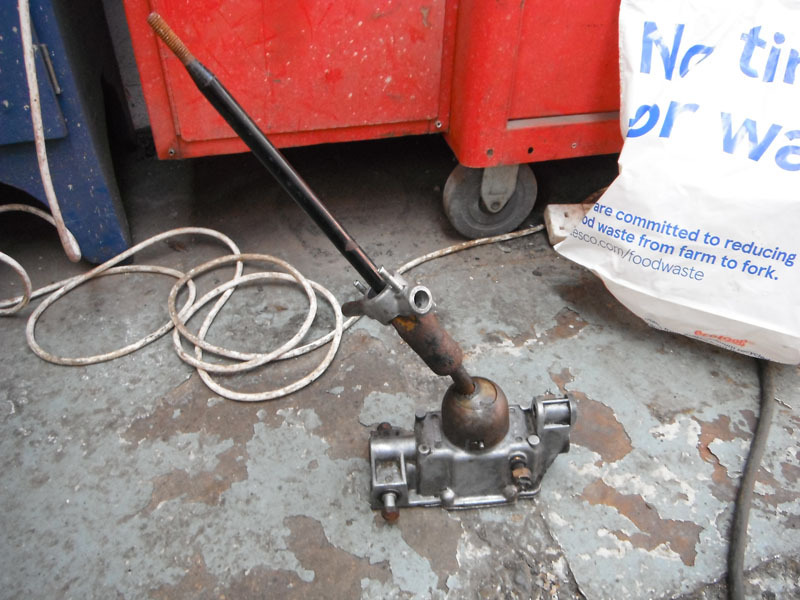 Here you can see the pins that push into the casing. These are used to locate the bayonet-slot cup that holds the gear level ball and spring in place. The pins had a reputation for snapping off and while it's not terribly difficult to put another pin in, most folks seem to have bodged whatever they had to hand in there instead. 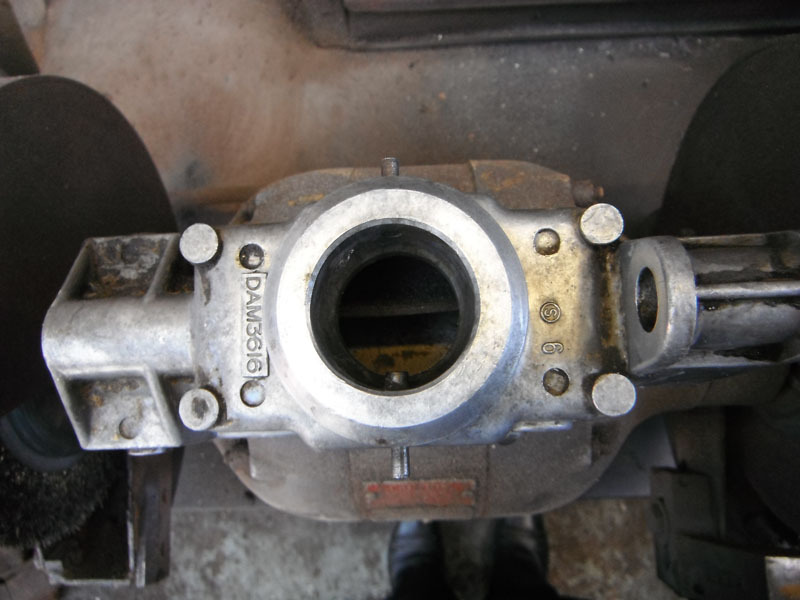 One thing I noticed on my spare was that the base plate had been whacked from the side. I'm not entirely sure how you'd manage to do this other than perhaps hitting it with forklift arms when moving the car around, so perhaps that's what happened.  Unfortunately, when I finally cut through the thick layer of gunk on the casing I found that it's very badly damaged with several cracks. It's realistically beyond repair and certainly not suitable for swapping with my original so I'll just have to look at getting the original repaired properly with a new pin when I have an opportunity to take it all apart. 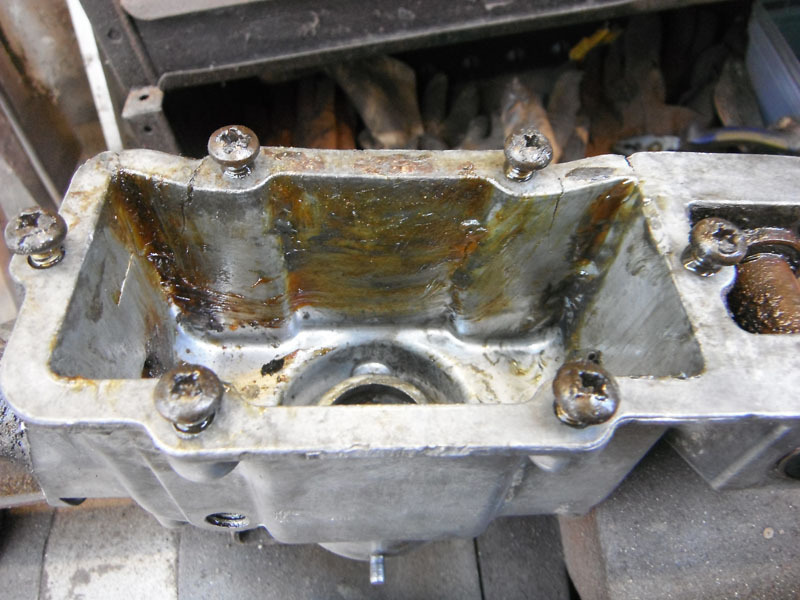 The other thing I wanted to find was a new steering column bush. Thankfully, Beiderbecke of the www.leylandprincess.co.uk club had the part number available (along with those goodies at the start of the post) and I've since learned the same bush is used on a variety of BL stuff and is still readily and cheaply available. I can get the bottom bush too. This was an advisory on the MoT and I'd like it not to be on the next one so I'll get some new replacements since they're only a couple of quid. Fortunately my spare steering column helped me see what parts I needed without taking my car apart. 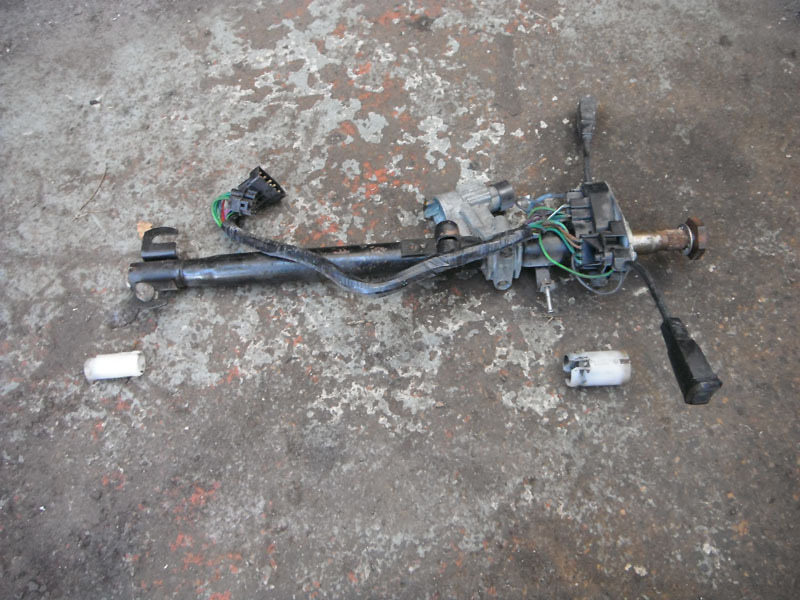 Today, I tackled the wheel bearing that couldn't be done at the garage because one of the kits I'd bought was wrong. I'd been told the job is fairly easy and it is, especially when the garage has already undone everything and put it back together again, so it was really about as pleasant as any job with your head in a wheel arch can get. 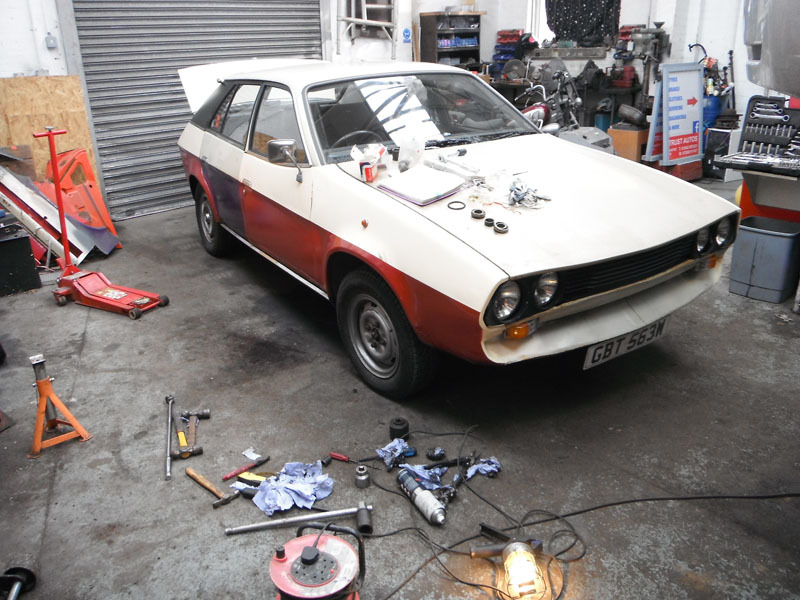 The most difficult part was getting the old oil seals out, the rest of the job was very straightforward. The old bearings felt a little bit gritty once removed and the noise it had been making made it clear it was ready to be done. 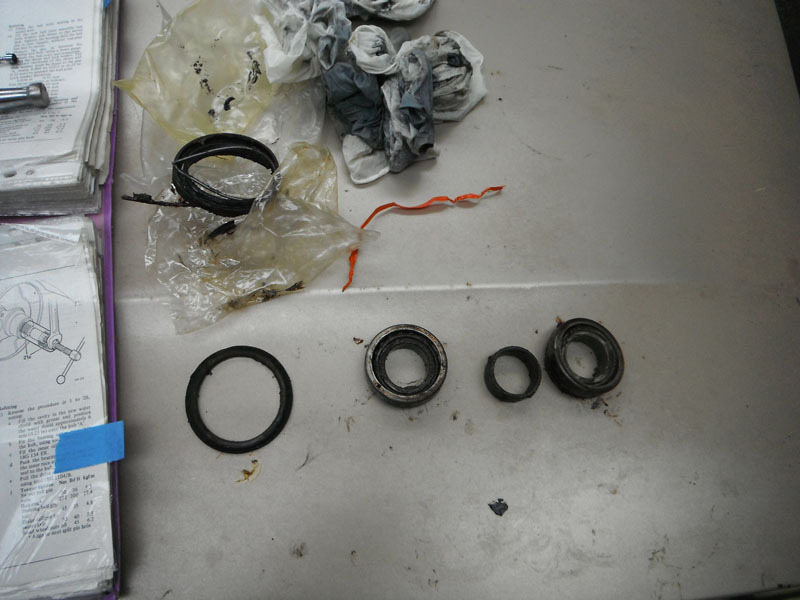 I would have liked to do the ball joints next but I didn't have a socket that was the correct size, all the imperial and metric sockets I had access to were just a little too big, or just a little too small, so I'll have to go and buy a socket just for this job. That's fine, more tools is good. Instead, I turned my attention to the spare front hubs and removed the calipers ready to rebuild them. I noticed that the caliper on the car that was on the warped disc is sticking a little as suspected, so the new brakes are going to sort that out before it becomes a bigger problem any time soon. The front flexi hoses looked in reasonable condition so I'm hoping I don't need to replace those since I'm not sure I've got a set of fronts, just rears. I noticed that one of the spare calipers looks to have barely used pads in and one caliper is much cleaner and newer looking so I wonder if the car they came off had brake work just before it came off the road in the 90s. Don't worry, I won't be re-using the old pads, it's merely an observation. 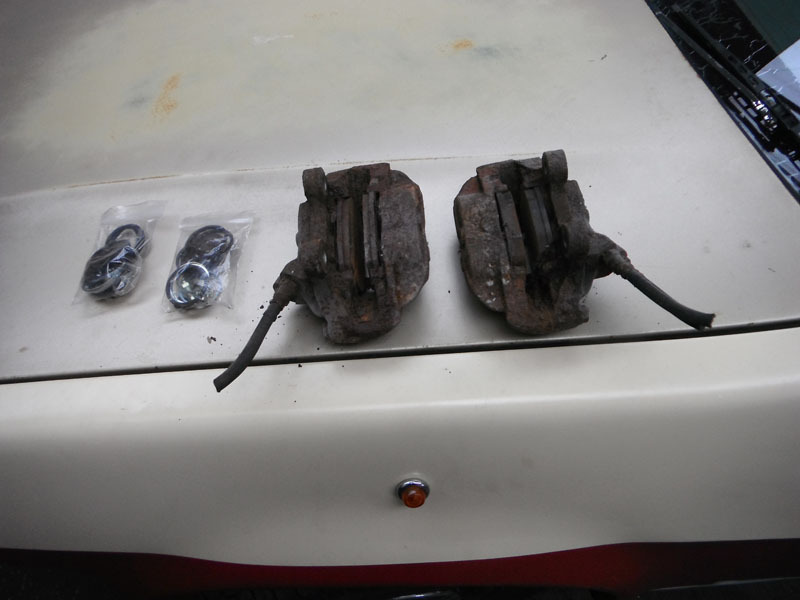 The drive home revealed all the bearing noise is now gone. Now the loudest thing is the noisy speedo cable, (I have been given a suggestion on how to improve that which I'll be trying soon), the tyres, and the wind noise from the driver's door window seal, so I'm getting down the list. I even found the reason for the tyre rubbing on the arch liner, which is that the liner had cracked around one of the fixing screws and the screw had fallen out, so the liner isn't sitting as far back in the arch as it should. There's always jobs to do, they're just not big scary jobs any more. |
| |
|
|
|
|
|
Apr 14, 2019 19:21:12 GMT
|
|
Bit late ... But the heater knobs look to have a similar fitment to mgb ones ...
|
| |
|
|
vulgalour
Club Retro Rides Member
Posts: 7,254
Club RR Member Number: 146
|
|
Apr 14, 2019 19:52:48 GMT
|
You mean the slider controls on the dash? I've never been able to get the metal clips that hold them on to actually go back on properly. They work, but they're really easy to knock off.
EDIT: I just realised, I assumed you mean the Princess, you could mean just about any car in this thread, so now I'm not sure which heater knobs you're referring to.
|
| |
Last Edit: Apr 14, 2019 19:53:27 GMT by vulgalour
|
|
|
|
|
Apr 14, 2019 19:55:25 GMT
|
You mean the slider controls on the dash? I've never been able to get the metal clips that hold them on to actually go back on properly. They work, but they're really easy to knock off. EDIT: I just realised, I assumed you mean the Princess, you could mean just about any car in this thread, so now I'm not sure which heater knobs you're referring to.
No, was thinking of the actual round knobs having a push fit on a hexagonal cross section shaft ... but ...they have a sort of spring clip holding them on ... My fault Citroen BX ...😊 |
| |
Last Edit: Apr 14, 2019 19:56:35 GMT by westbay
|
|
phil1380
East Midlands
Only the depth varies........
Posts: 52
|
|
Apr 15, 2019 12:14:23 GMT
|
|
That gear selector IS (looks) identical to a Mini one !!
You should be able to find one out there, be careful to support the centre yolk when drifting the roll-pins out as they can crack.
Phil.
|
| |
|
|
vulgalour
Club Retro Rides Member
Posts: 7,254
Club RR Member Number: 146
|
|
Apr 15, 2019 16:01:29 GMT
|
westbay: that makes more sense now! It's a D profile shaft that the knob goes onto rather than a hex type, it's actually more like 90s Rover stuff, if memory serves. I'll find a suitable spring clip eventually, I might remove the front seats and see if I can find where the one that was in fell out, it's probably gone under the carpet or something daft like that. phil1380: Would not surprise me! There's a few bits shared with the Mini here and there, same seal for the input shaft into the back of the gearbox, for example, and the steering column bush I'll be replacing once it arrives. Sometimes parts binning is very useful. I believe they used the same gear selector box on the Allegro. I've never been entirely sure if it's the selector box, or the gearbox, that gives the car a notchy gearchange and such a long throw, it would be nice if I could smooth it out and tighten it up a bit.
|
| |
|
|
phil1380
East Midlands
Only the depth varies........
Posts: 52
|
|
Apr 15, 2019 20:08:20 GMT
|
There is a replaceable bush in the housing which will tighten up some of the slop, and another quick cheat is to reverse the rod, so any wear is at the gearbox end rather than the housing end. I hate cross-posting but there is some good discussion here: www.theminiforum.co.uk/forums/topic/316884-rod-change-rattle/?hl=+rod%20+selectorPhil. Edited to add: there are short shift kits available for Minis - KAD do the original/best/most expensive one but there are lots of "copies" out there. Not sure how long the gear lever is in the Princess so a Mini length level may be too long, and therefore modification. Might be worth looking out for a secondhand one to try and modify, that way if it's nfg you're not too far out of pocket. |
| |
Last Edit: Apr 15, 2019 20:11:43 GMT by phil1380
|
|
vulgalour
Club Retro Rides Member
Posts: 7,254
Club RR Member Number: 146
|
|
Apr 15, 2019 20:37:00 GMT
|
|
The Princess gear lever is long enough that going for first you run the risk of punching your passenger in the leg. Good tip on the gear lever stuff, I'll have a read of that. I suspected there'd be a Mini thing, I just never looked into it.
|
| |
|
|
vulgalour
Club Retro Rides Member
Posts: 7,254
Club RR Member Number: 146
|
|
Apr 17, 2019 22:45:23 GMT
|
|
Ahead of the usual weekly update, just a small message here since I'm a teensy bit frustrated with the Princess eating my BX money yet again. Repairs are like busses sometimes. After forking out for the MoT, the garage work, the wheel bearings, the ball joints, the brakes... the alternator is now playing silly buggers and charging completely random amounts. We had the tester on it today and the output varies from perfectly fine, to almost nothing, to too much, entirely at random so now I'll have to order a new alternator because if I take the one off the car to get it rebuilt (usually cheaper) I'm without a daily driver. How frustrating. Fortunately, the alternator is very easy to get since it's shared with lots of other cars.
The BX, as a result, has had its pocket money stolen again so all I've been able to do there is fit the new front wiper blade I got for it.
The distributor O-ring has decided to fail again too, so I'll have to fit yet another one of those. The O-ring on the distributor that stops oil coming out of the head where it inserts is prone to failure and then it leaks oil into the plug holes and all down the front of the engine and makes a right old mess. This might also explain why I've had to put slightly more oil in recently, perhaps the motorway run killed off the O-ring and that's what was really causing the problem. Ho-hum, it's not a difficult job to replace it, just an annoying one.
|
| |
|
|
|
|
|
|
|
|
Is that testing directly off the alternator? Had a look at the voltage regulator?
|
| |
|
|
|
|
|
|
|
|
had that once with my old land rover, i just happened to be in the trunk under the passenger seat getting gloves out, and could hear a fizzing, like a freshly poured glass of coke. i thought, thats weird, put voltmeter on the battery and it said 18.2. eeek
|
| |
|
|


