vulgalour
Club Retro Rides Member
Posts: 7,279
Club RR Member Number: 146
|
|
May 24, 2020 19:41:31 GMT
|
|
I've sat down and done some maths with someone else (makes life easier) and we think I need one shim measuring 2.42mm (2.39mm to 2.45mm tolerance), one shim measuring 2.39mm (2.36mm to 2.42mm tolerance).
One of the standard Triumph TR7 size shims is 2.387mm which is ideal for one, and a tiny bit thin for the other but should keep things close enough to the .3mm gap to work.
Little bit of BX news too, apparently the injector pump it sports is 'unusual' and the supplier of the throttle shaft I ordered is contacting Bosch to find out if they have the correct one. This is pretty typical really. The pump the BX has isn't showing up on the supplier's list as being for a Citroen, and it's different to the very similar pump fitted to Peugeots of the same era and engine type. Because of course it is.
|
| |
Last Edit: May 24, 2020 19:42:05 GMT by vulgalour
|
|
|
|
vulgalour
Club Retro Rides Member
Posts: 7,279
Club RR Member Number: 146
|
|
May 24, 2020 20:52:48 GMT
|
|
Shims acquired, hooray! They'll be here when they are.
|
| |
|
|
|
|
|
|
|
|
Well you will have unique cars..
Keep on keeping on!
|
| |
|
|
|
|
|
May 25, 2020 11:23:04 GMT
|
|
|
| |
|
|
vulgalour
Club Retro Rides Member
Posts: 7,279
Club RR Member Number: 146
|
|
May 25, 2020 12:21:42 GMT
|
|
A little bit more good news in the form of a back-up plan. Managed to find an injector pump with a design and numbers that match my original pump. If the part I need is NLA, then £140ish gets me a replacement pump that doesn't look broken and should, at the very least, contain all the bits I need.
Of course, if I buy that pump as well that means I will have spent almost as much as it would have cost to get the original pump refurbished so it's the Princess brake calipers all over again.
|
| |
|
|
|
|
|
May 25, 2020 12:32:41 GMT
|
|
But you're learning about injector pumps!
|
| |
|
|
glenanderson
Club Retro Rides Member
Posts: 4,340
Club RR Member Number: 64
|
|
May 25, 2020 15:02:24 GMT
|
|
Surely if you need to source another pump it would be better to get exactly the right one to fit your car, rather than one the same as the wrong one it appears to have fitted?
|
| |
My worst worry about dying is my wife selling my stuff for what I told her it cost...
|
|
vulgalour
Club Retro Rides Member
Posts: 7,279
Club RR Member Number: 146
|
|
May 25, 2020 20:55:32 GMT
|
|
Welcome to 80s and 90s PSA parts sourcing. Of the Citroens I've owned from this period, and ones I've experienced through peers, parts sourcing of mechanical components can be a bit frustrating. While a certain car should have X,Y,Z mechanical parts, quite often it seems the approach on construction was rather to just use whatever was in stock that day.
That means that my car having an 'unusual' pump doesn't necessarily mean it's wrong. It doesn't even mean it's been replaced. It just means that it's not normally the one found on that particular model.
What I do know is my pump model number is 0 460 484 010 and as far as I'm aware that pump is normally found on the Citreon C15 and Peugeot 206. The pump I bought is a different model number (which I didn't know at the time I bought it, pricey mistake there) and, as far as I can work out, is for the Peugeot 206 and Citroen C15 but also a revision of the pump that's on my car, namely to the items that attach to the top plate and the top plate itself.
The reason I want to replace the pump on the car with one the same is that apart from the air leak, I know the pump on the car works. I do not want to get into trying to set up a different pump for my car, I just don't, and nor do I want to get into the cost of getting someone else to set it up. Basically, if I can't sort this pump situation out, the car is gone, no matter how good it is in every other regard, it can be someone else's problem. I despise working with diesel, and I really don't relish the opportunity to work on the injection pump any more than I already have.
That said, I've got the first plan of ordering the replacement part from the diesel specialist, and the back up plan of the identically numbered, and looking, pump in Poland that will have the parts inside I need to fix mine. So until we get a solution from one of those avenues we shan't speculate on the car's future.
Oh, and I'm also not expecting fixing the air leak on the pump is actually going to fix the air ingress problem. Given what's happened so far I'm anticipating more air ingress points and more replacement parts to fix it, but hopefully nothing as expensive or problematic as the injection pump.
|
| |
Last Edit: May 25, 2020 20:56:34 GMT by vulgalour
|
|
|
|
|
|
|
|
If only it was air egress, you could use aircon dye or something to find it!
|
| |
|
|
vulgalour
Club Retro Rides Member
Posts: 7,279
Club RR Member Number: 146
|
|
May 29, 2020 18:56:48 GMT
|
Today has been a good BX day. Not only has the parts I ordered for the pump now being despatched, one of our neighbours asked if I'd like some old metal ramps. I'm not a big fan of the old metal ramps for driving onto, I've had a habit once too often of driving a bit too far because I've no sense of where they are. However, they are a practical thing to jack the car up and sit on for some jobs and free is free. Neighbours were having a bit of a clearout and I'm sure I've become Old Car Guy (tm) on our street now because if people are getting rid of things, they ask if we'd like them, and I often do because it's useful stuff that we just don't have. One of the most useful things was an old Black & Decker DN54 circular saw. We've been clearing a lot of overgrown stuff out of the garden, old laminate flooring, and bits of fence and we've needed something to chop them down with. Current pandemic restrictions means getting a tool we don't have hasn't really been viable, so providing this little saw actually works it should go through what we need to clear fairly quickly. I'm guessing it's no newer than mid 90s. 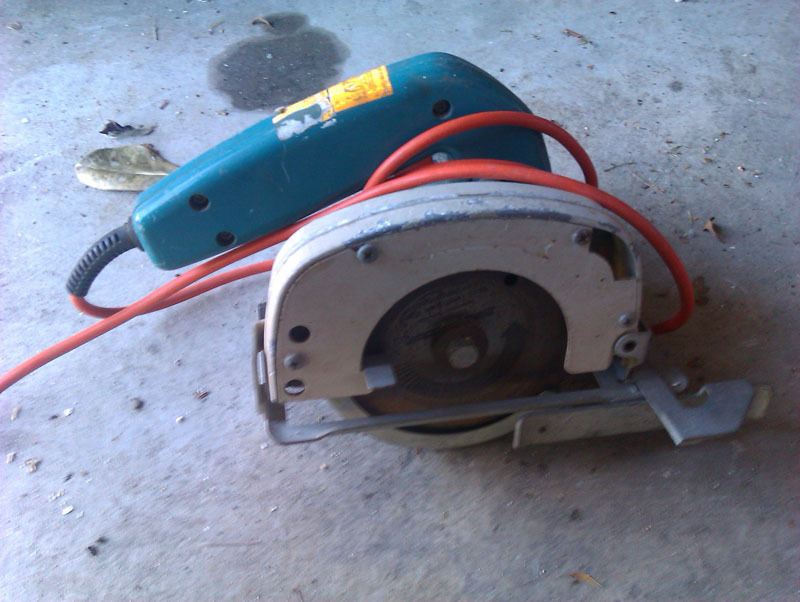 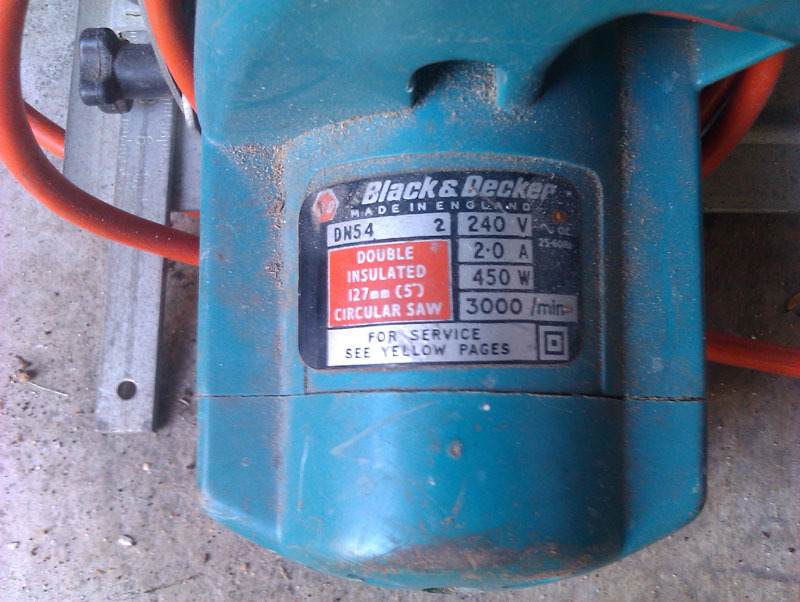 We also got a bunch of old hand saws, some with those really comfortable wooden handles. I'll clean these up and make them good again, these will be very useful dealing with garden waste that the circular saw and other tools aren't. There's also a shed to build and the garage to kit out with cupboards and shelves, so these should be a real boon, there's even a nice little tenon saw amongst this bunch. 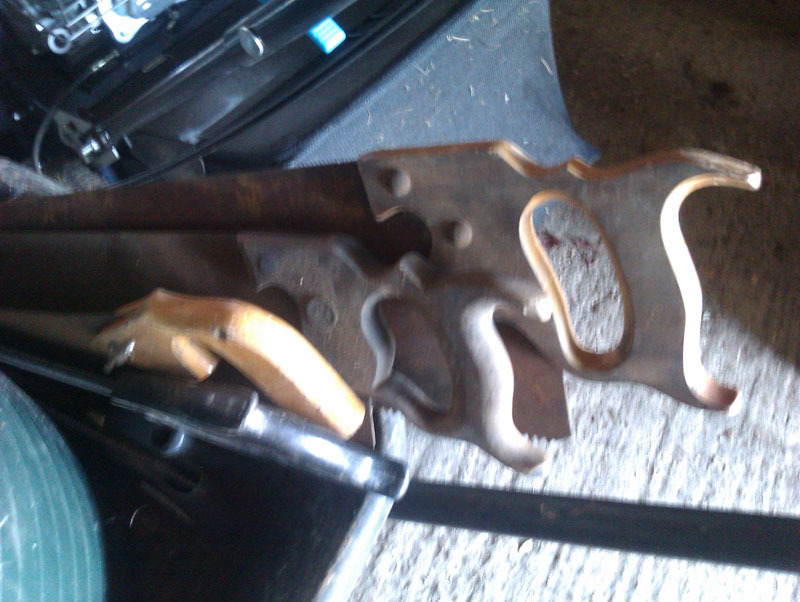 A Colortune 500 is a useful thing to have. Am I going to resist the urge to put the Colortune sticker in the back window of the Princess? Probably not. It will certainly help with setting things up providing it's all present and correct, which it looks to be. 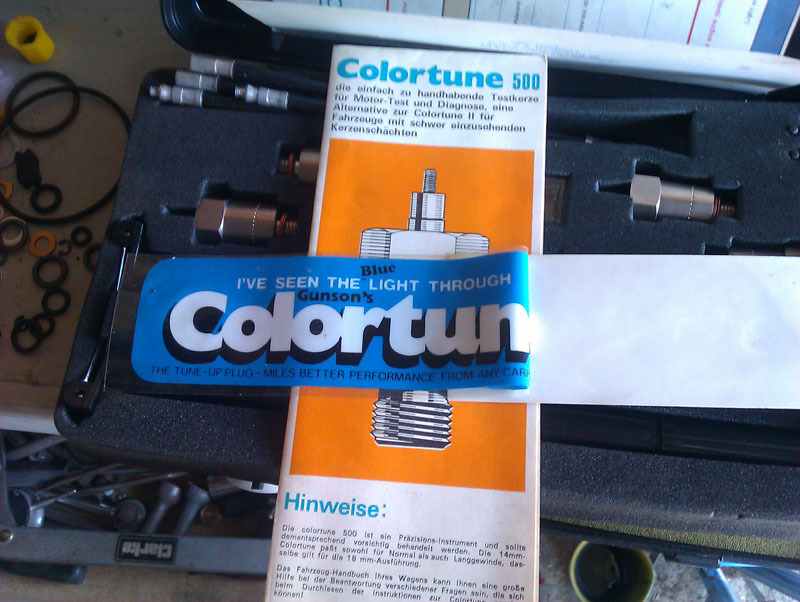 This little tool is an oddity. It has two crocodile clips that go on battery terminals and it's for cleaning up spark plugs. I thought they'd stopped making these well before this style of plastic bodied thing. I'm thinking it can probably be repurposed as a bolt thread cleaner, I doubt I'll ever use it for its intended purpose. I imagine the abrasive material inside it is full of lovely lead from old 4 star fuel. Mmmm carcinolicious! 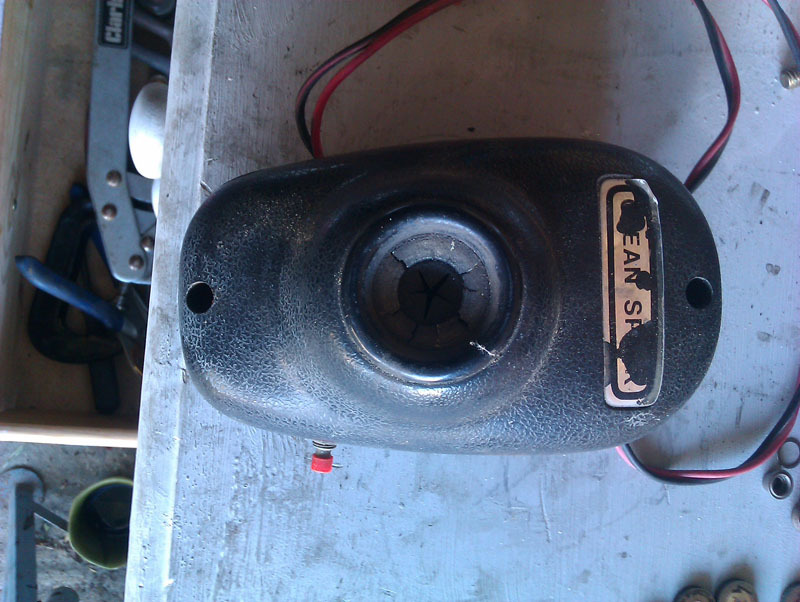 Finally, the sturdy ramps. These should make some of the jobs I have to do at home a bit easier. Jacking the BX up to get them under the front wheels was a bit of a palaver involving two jacks since without the injection pump fitted I can't actually start the car to raise the suspension, or drive the car onto the ramps. It's another weapon in the toolchest at least and it's saved me getting a new set since there's nothing wrong with these aside from maybe benefitting from a coat of paint. 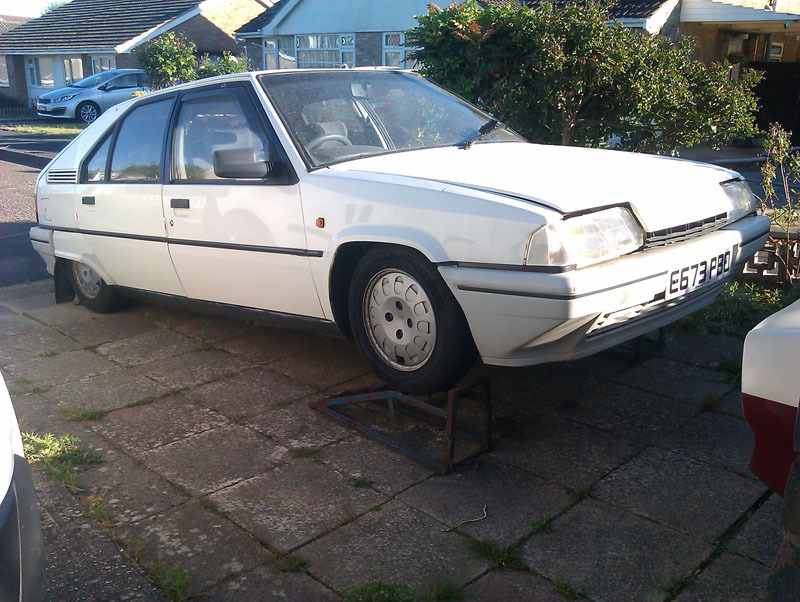 All in all, not a bad haul. On Tuesday I'm off to pick up a BX bonnet that I got for £20 and is only 30 miles away. It's not the right colour, being silver rather than white, which isn't an issue since my original needed repainting anyway. Replacement bonnet is the proper plastic type rather than a metal one and will hopefully not be twisted like my original, at £20 I can't really go wrong even if it is since it means I've a spare bonnet to use while one or the other is sent off to be painted. |
| |
|
|
vulgalour
Club Retro Rides Member
Posts: 7,279
Club RR Member Number: 146
|
|
|
|
Happy days, the new pump parts arrived! They're even correct, so that's nice. I used injectionpumps.co.uk and can't fault them. 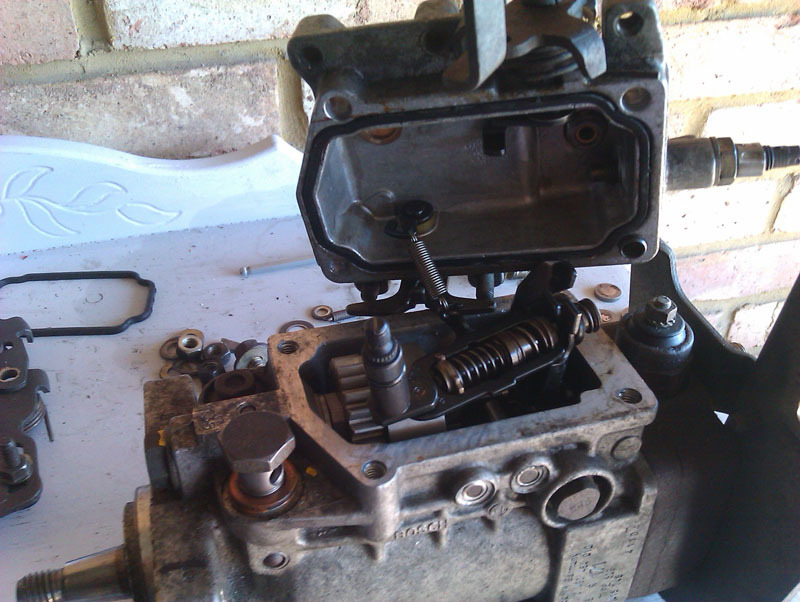 Unfortunately, I've come unstuck. To save me going from garage to house I brought the pump indoors, surprisingly it doesn't really smell of diesel now. I've got the throttle spindle, o-ring, and governer spring assembly all assembled correctly as far as I'm aware. The problem is, every time I line everything up and go to put the lid on, I can feel that something is stopping the lid lining up. I'm not forcing this for fear of breaking internal components again. 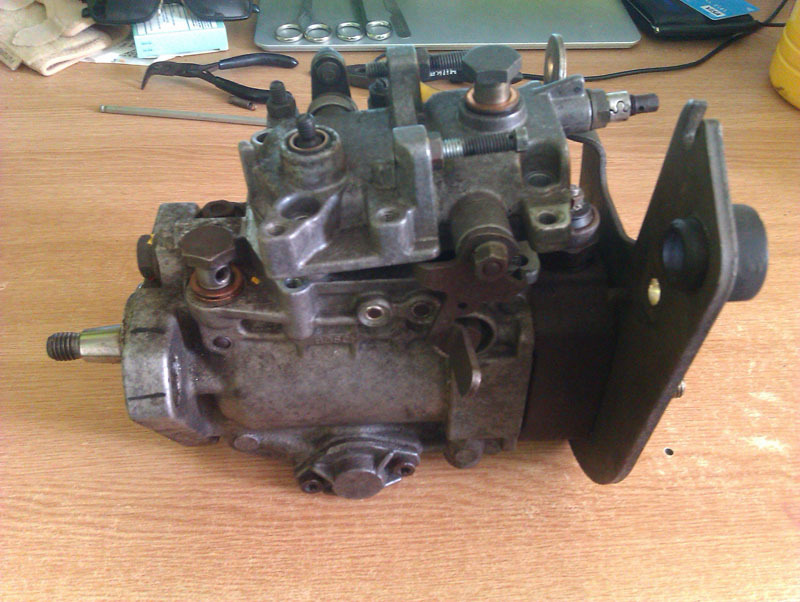 The larger black lever (for want of a better term) on the top right of the internals is I think what's stopping the lid sitting down. Of the two levers, the one the spring assembly goes into is the weaker and much easier to move, the larger lever is very difficult to move. I suspect the larger lever has sprung back against the side of the case and I need to push on it as I put the lid on somehow. 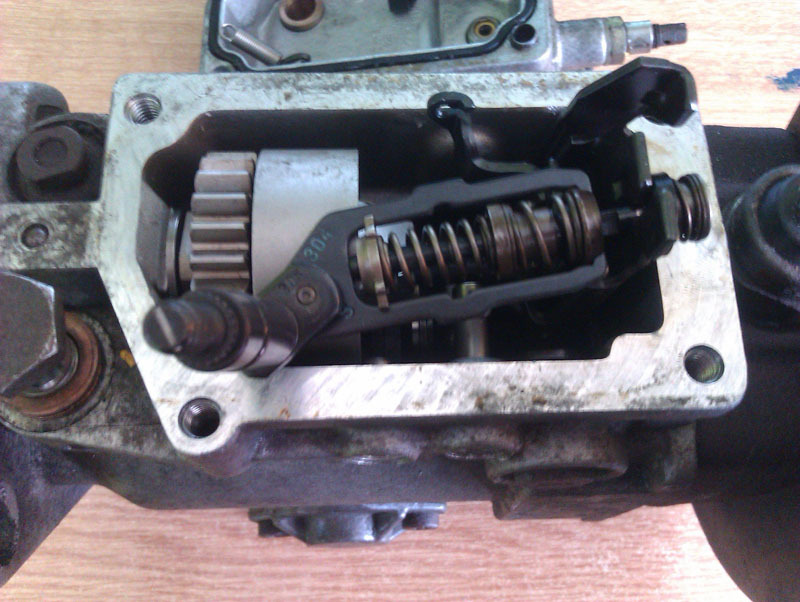 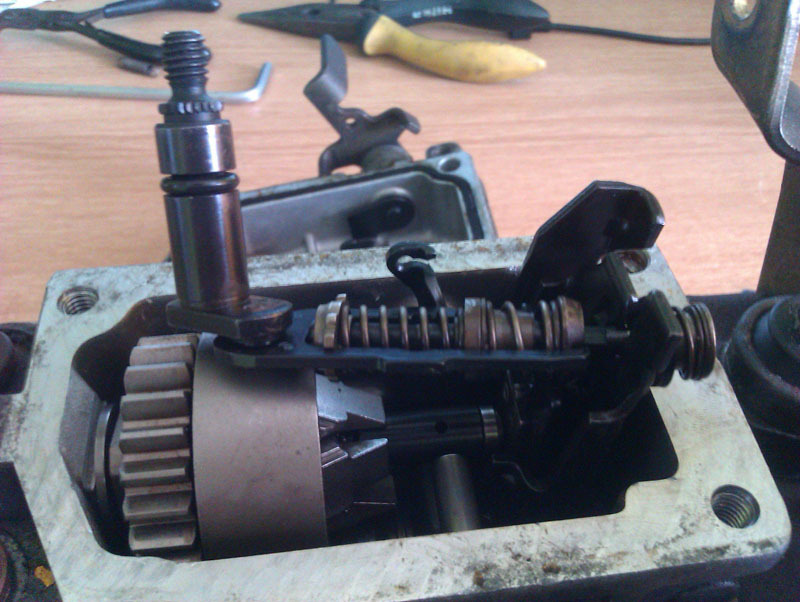 My other suspicion is that I've got the black lever that goes in the top of the case misaligned. I removed this when dismantling the pump, I probably didn't have to, and now I'm not sure which way or position it should go on reassembly. I'm concerned that if I get it wrong it will press on the throttle shaft fork and break it. 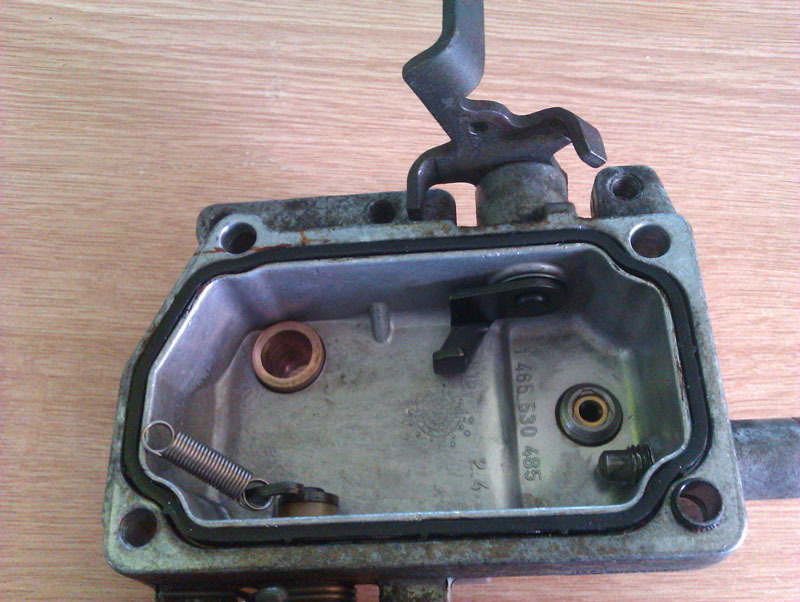 Advice sought on this one. I feel like I'm really close to having this back together and it's my trepidation on getting it wrong that's the only thing stopping me. |
| |
|
|
vulgalour
Club Retro Rides Member
Posts: 7,279
Club RR Member Number: 146
|
|
|
|
|
Had another look at this and a couple of suggestions were to unscrew the bit in the lid that pushes against the large black lever. This made no difference. I looked at what else could be interfering and removed both the throttle shaft and the black lever in the lid, this allowed the lid to close. On trying the throttle shaft and the black lever in separately, without the other component, the lid will shut.
So, there's an interference issue between the large black lever in the lid, and the throttle shaft and spring assembly. The parts are all undamaged, the new parts identical to what came out, I just can't figure out how they're all supposed to interact inside the pump. I also can't find diagrams or instructions on this and I don't have any photographs because you can't really see how these parts interact when you're taking the pump apart until you have it apart. May have to send this off for a rebuild yet, just to get the thing back in one piece.
|
| |
Last Edit: Jun 1, 2020 17:30:06 GMT by vulgalour
|
|
eurogranada
Europe
To tinker or not to tinker, that is the question...
Posts: 2,556
|
|
|
|
|
Oh dear, this pump is certainly putting up a fight! But, stay calm and collected and with the vast resources online at your disposal you'll no doubt figure it out. Has your other half had a look already, sometimes a fresh pair of eyes....
Anyway, just wanted to express my support so good luck!
|
| |
|
|
vulgalour
Club Retro Rides Member
Posts: 7,279
Club RR Member Number: 146
|
|
|
|
Other half can't figure it out either. There must be a sweet spot on assembly where everything just clicks together nicely, or you have to jiggle it about... like trying to put a gearbox back on when you've done a clutch change. Ah well. --- A no-contact collection was done today for a BX bonnet for the I got for £20. It's the wrong colour, and it's from a turbo model. At the price, all I was hoping is that it was as straight and tidy as it looked in the photographs and happily, I was not disappointed. On getting it home I first checked fit, which was good, and then set about swapping the insulation pads on the bonnet since they're different and I can't actually shut the bonnet with the turbo insulation pad fitted. Very easy to remove, you just gently ease the pad over the metal clips that hold it against the bonnet. If anyone needs this insulation pad it's yours if you can collect it from Kent, it would get destroyed if posted, I'm sure. 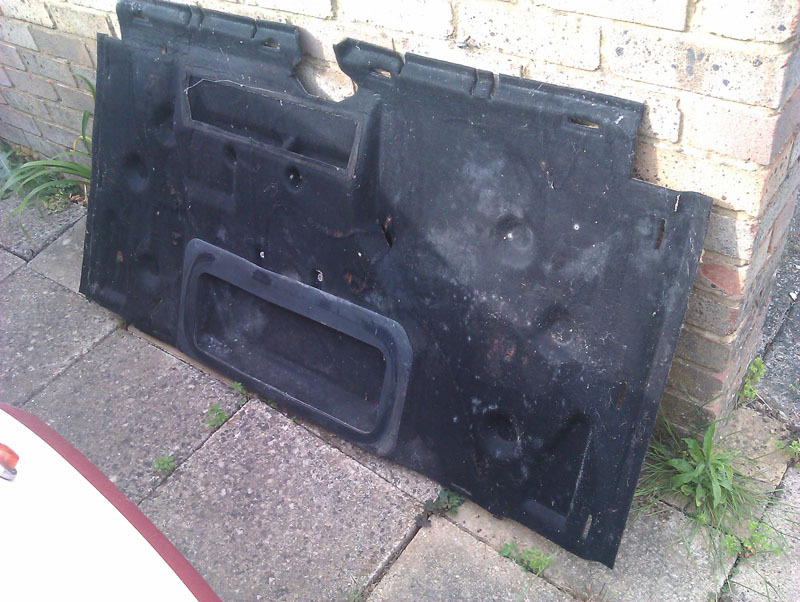 The pad from my old bonnet was transferred to the new one, which involved removing a lot of trim clips since the turbo pad needs more clips to hold it in place. 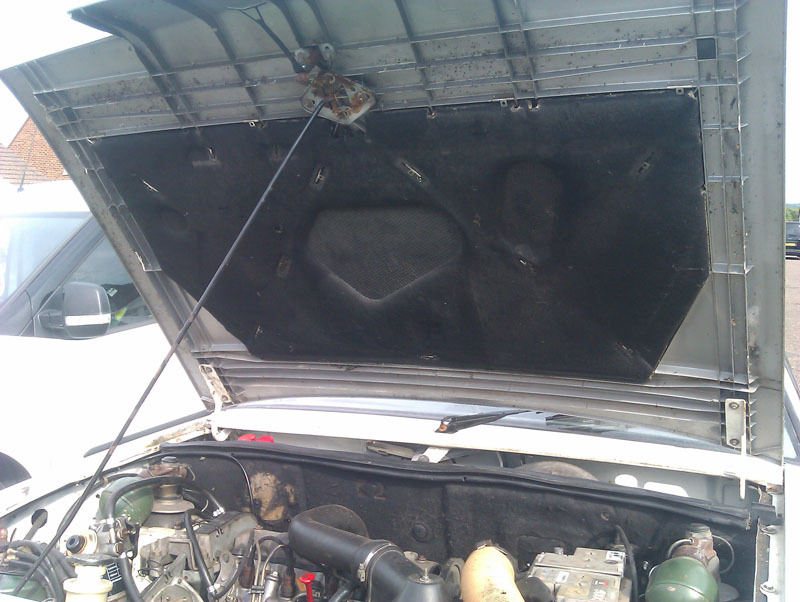 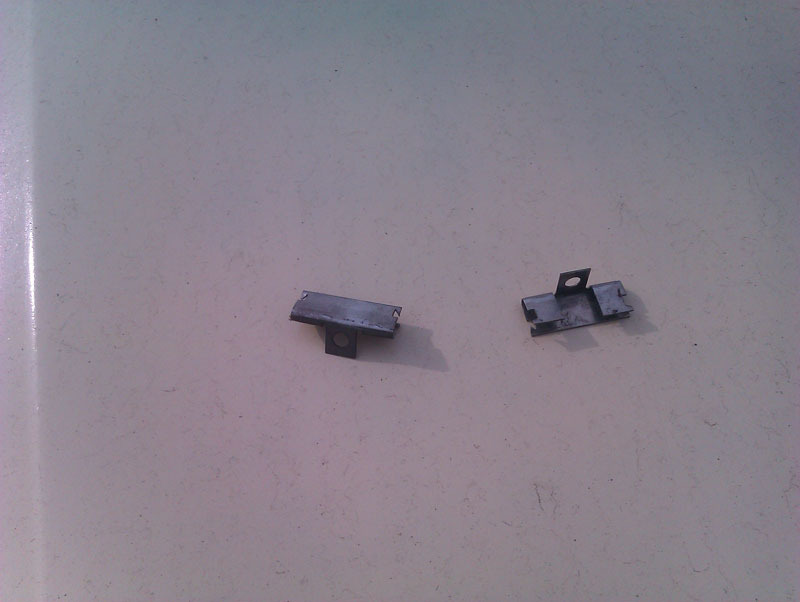 On the back of the original soundproof pad was this little hand-written sticker. I left it in place, it was fairly firmly attached. 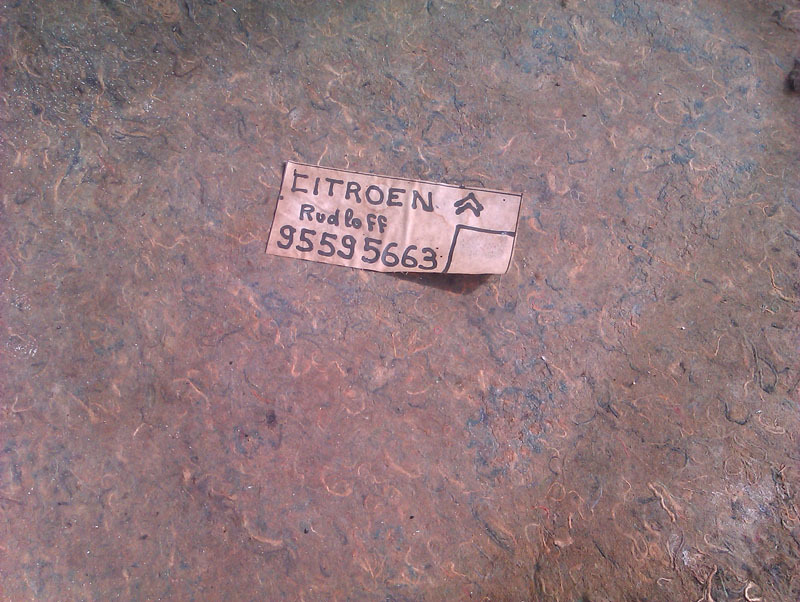 The silver bonnet does fit a lot better than the old white one, it isn't exhibiting the same signs of being twisted. There is still an issue with the passenger side headlight area, which is mostly down to the lower outer peg the headlight pushes onto being loose and bent. This also means the headlight is pushed slightly too far to the middle and just touches the bonnet, which is annoying. 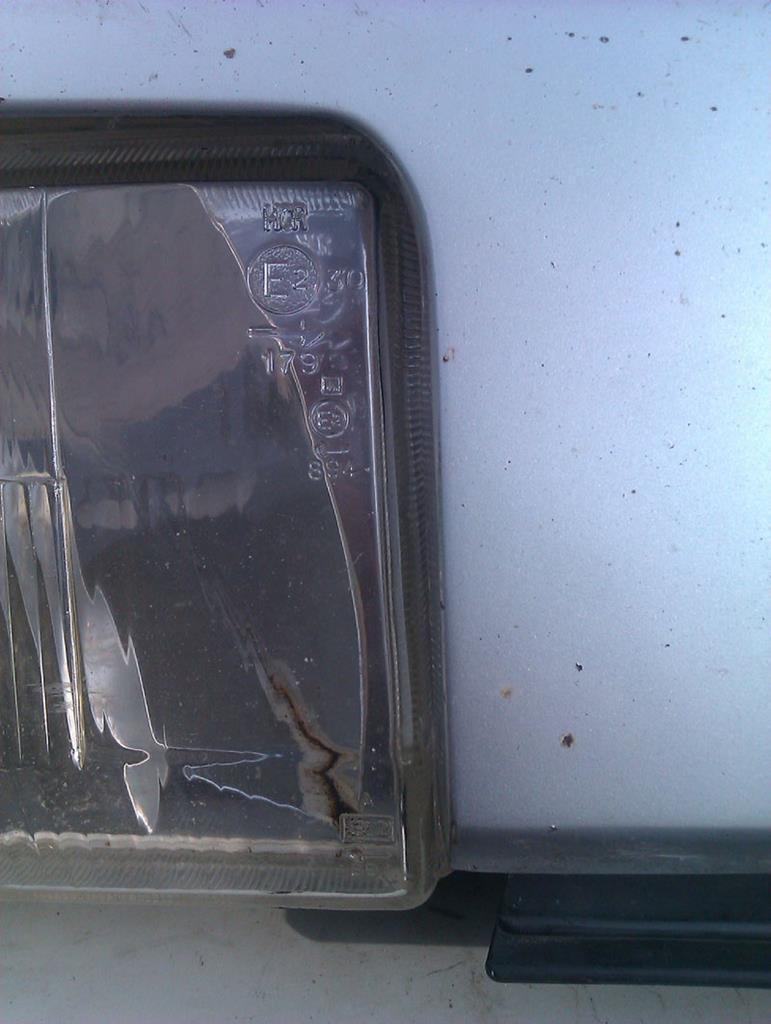 Other than that, the overall fit of the bonnet is much better and I could even get it to fit the hole evenly with the adjustment available at the bonnet latch, which I can't with the original white one. 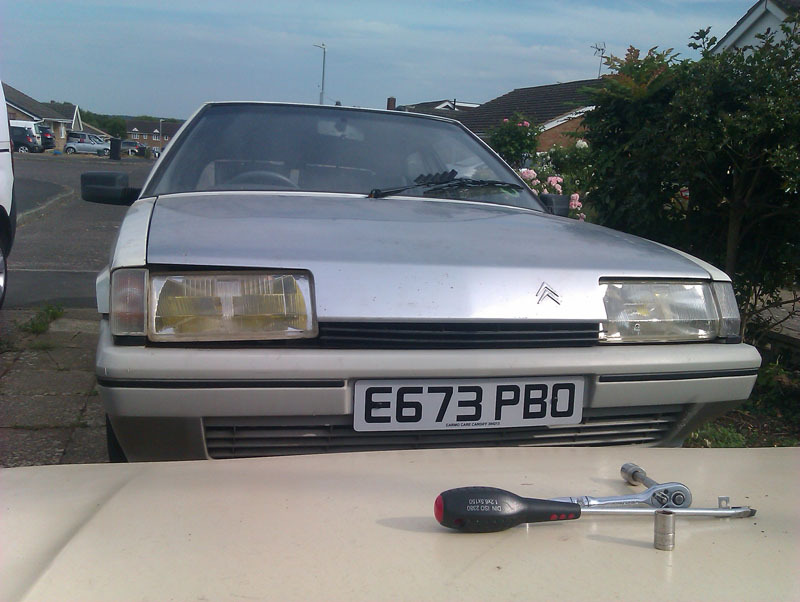 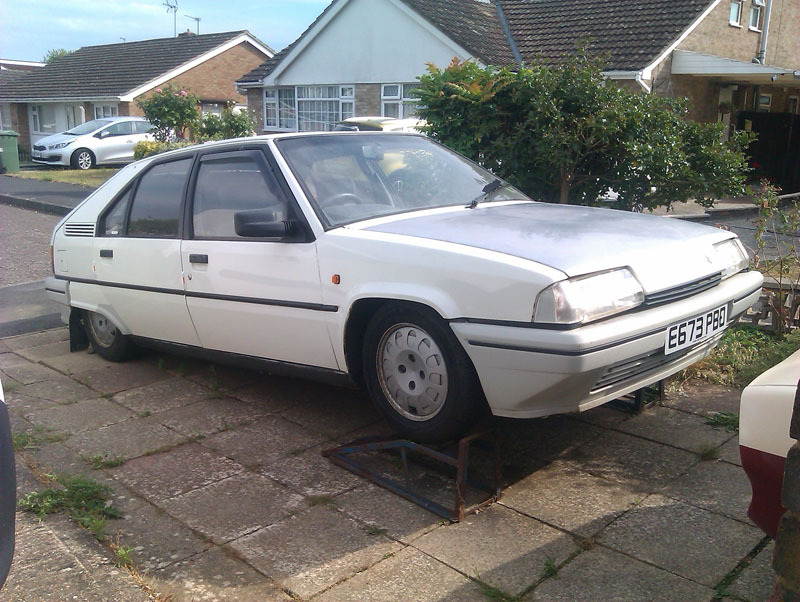 In person, it's a big improvement over the other bonnet. The main issue at the front is that wonky headlight now. Did my best to line up a shot from my previous efforts to get the alignment correct and while there does appear to be a slightly lift to the silver bonnet over the headlight in the photo, it's mostly down to the way the headlight has drooped a lot more and the angle of the photograph with the car currently being on ramps because of the injector pump issue. In person, it's quite a large improvement. Alignment along the wings is much better too, without the big rise on one side and dip on the other. 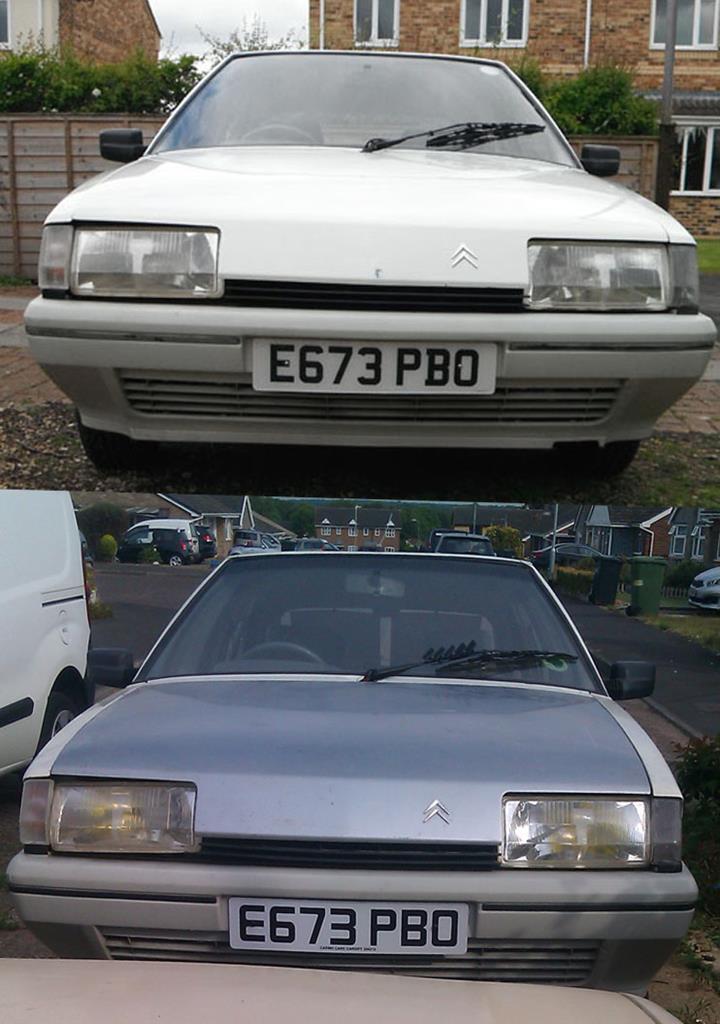 I'd say that was £20 well spent. Once I've got the car running again I'll see about getting this bonnet repainted and see if I can find some way of straightening out that headlight. |
| |
|
|
|
|
|
|
|
|
Hi, left a little info re the pump cover in your other thread.
I’ll add it here too and hope it helps.
With not a lot to do this rainy morning I was curious about this so had a look around the web.
You need to remove the stop valve to get a bit more wriggle room at that end. I’m guessing that allows you to get the throttle link in first before moving the cover back to align pin into bush.
Hope that helps, good luck.
Eta.... I’d also get that banjo bolt out of the equation. Not sure it interferes or not
|
| |
Last Edit: Jun 5, 2020 11:39:58 GMT by vincento
|
|
vulgalour
Club Retro Rides Member
Posts: 7,279
Club RR Member Number: 146
|
|
|
|
|
Yup, tried both those things and to no avail. As mentioned in the other thread, it's off to a specialist for assessment. To assuage my frustration at this I did an impulse purchase for the Princess, something I shall reveal once it arrives.
|
| |
|
|
|
|
|
|
|
|
|
|
Hopefully won’t be to much to get it back together. Fingers crossed.
|
| |
|
|
glenanderson
Club Retro Rides Member
Posts: 4,340
Club RR Member Number: 64
|
|
|
|
|
One of my mates has just bought a nice Princess. A 2.2 auto.
|
| |
My worst worry about dying is my wife selling my stuff for what I told her it cost...
|
|
|
|
|
Jun 10, 2020 10:46:49 GMT
|
its all by the by now, but i think that other black quadrant is for the idle control. i got this wrong on mine, but the lid closed ok in the wrong position, it idled high and couldnt adjust it can also see the throttle spindle has a dog leg link on it, depending which way you flip it the accelerator would work backwards  |
| |
|
|


