vulgalour
Club Retro Rides Member
Posts: 7,275
Club RR Member Number: 146
|
|
|
|
Left a little present out for the local scrap collectors since a couple of them have been really polite and professional when enquiring about potential scrap here. I'm sure one of them will be pleased to find it. 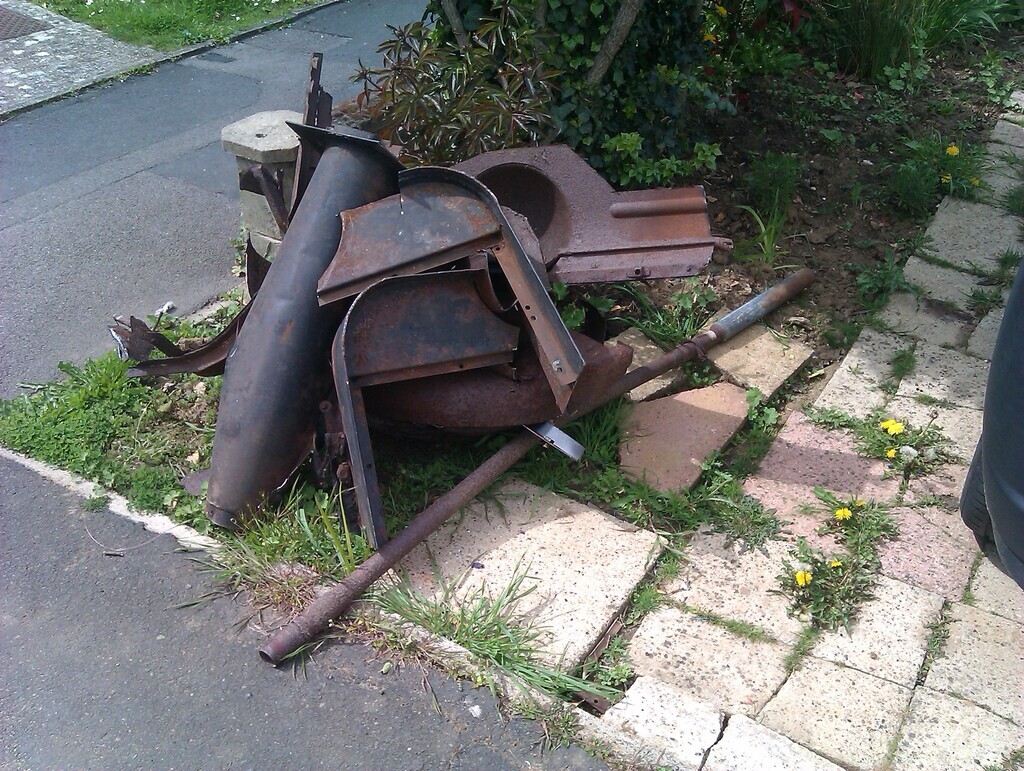 That means that the bodywork - apart from the bulkhead - is now off the chassis. It wasn't a difficult job since it was all quite rotten. For reasons of reference, I took both sills off whole since this will help me understand what shapes to make for ours when I do the considerably smaller repairs they need. Having both the sills off the donor gives me a rough sketch of how things should look and will mean I can make oversized panels and trim to suit easier on our car since I've got something that I can work with 'on the bench'. It also meant I could take the B pillars off at the same time without trying to remove them separately. The other item the sills have is the carpet edge trim weather seal pieces which our car is missing, these should also be easier to remove and retrim/remake when the time comes to doing it on our car. 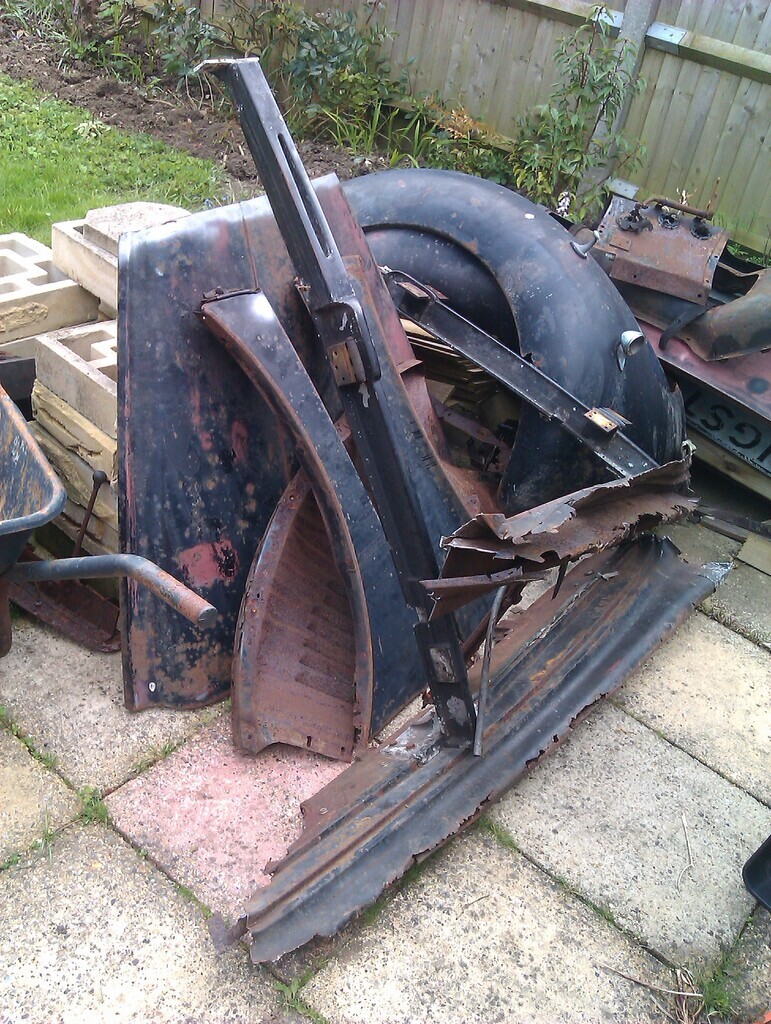 Our battery box needs some small repair so I liberated the one from the donor car since it's also very repairable. It basically needs the thin steel side panels remaking and the whole thing painting, the sturdier parts of the framework are in excellent shape still. I can also sort out a battery clamp properly a lot easier with this off the car too. 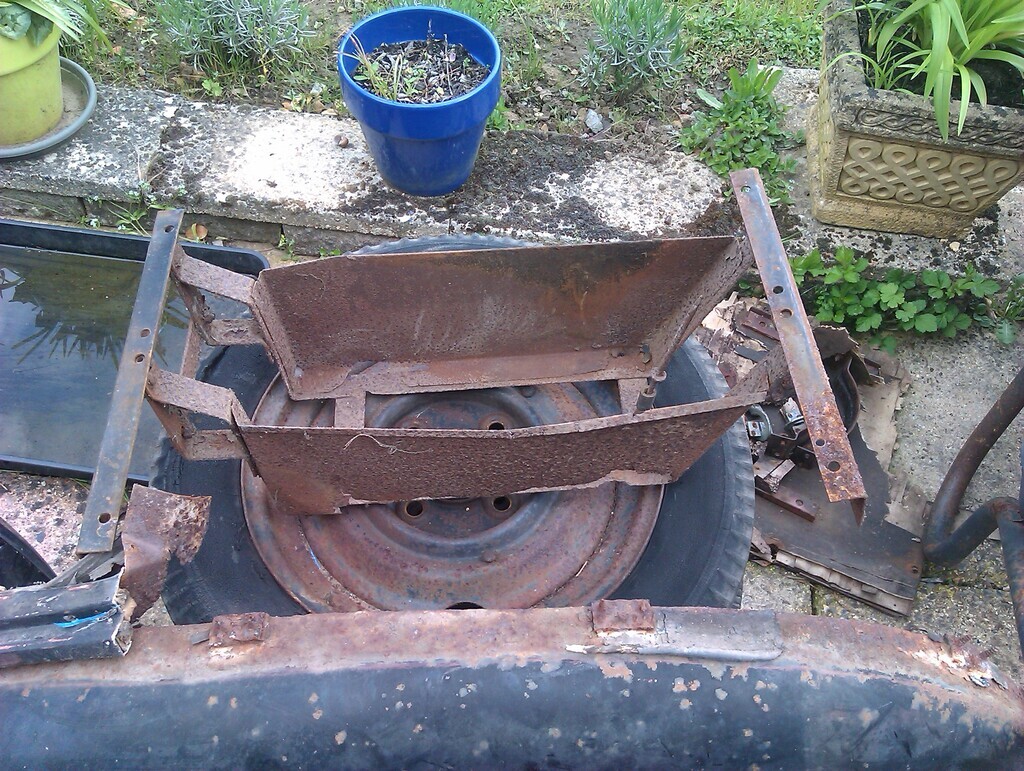 There wasn't anything else to save this round since I was focused more on dismantling the scrap to get to the next pieces I'd like to remove. Not a lot to go now, happily. I'll be happier still when the back garden looks less Steptoe & Son. 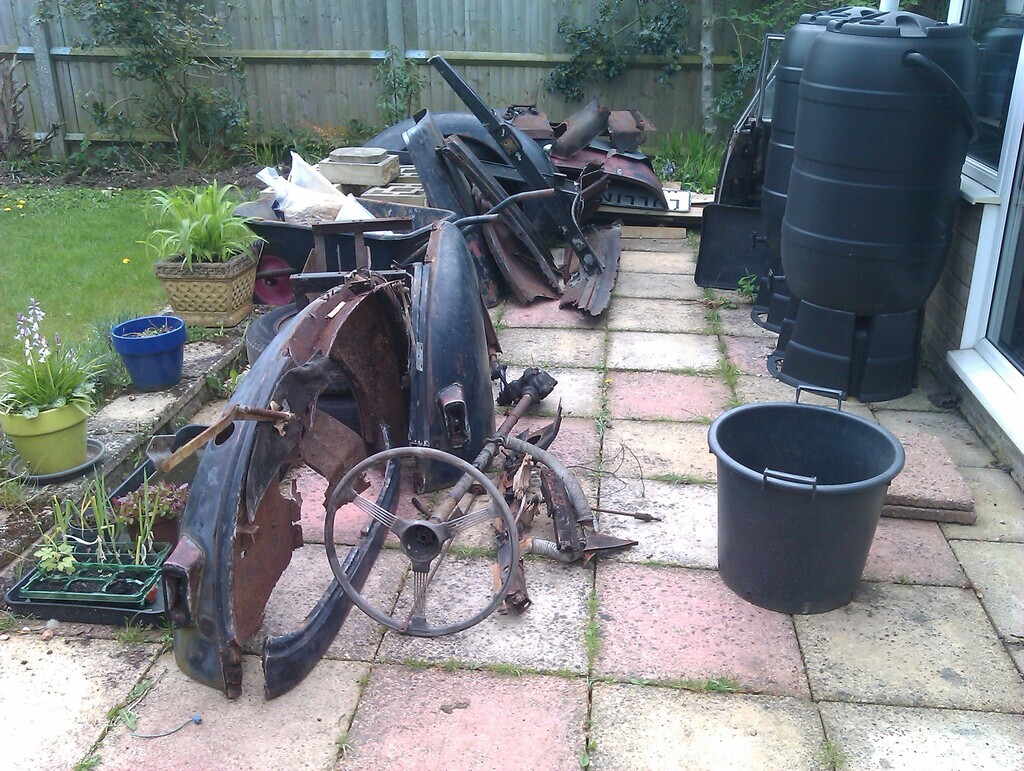 Shall we have a look at the chassis then? Overall, it's in pretty good shape at least as far as I can see at the moment. It's not perfect, understandably, and does have some localised issues. I was expecting a lot more rot and issues than there are. Obviously all the jacking points are knackered, and have had a variety of repairs over the years. I had hoped there'd be at least one whole jacking point I could use as reference but there isn't, I'll just have to figure it out from what's on our car and start from scratch with them. 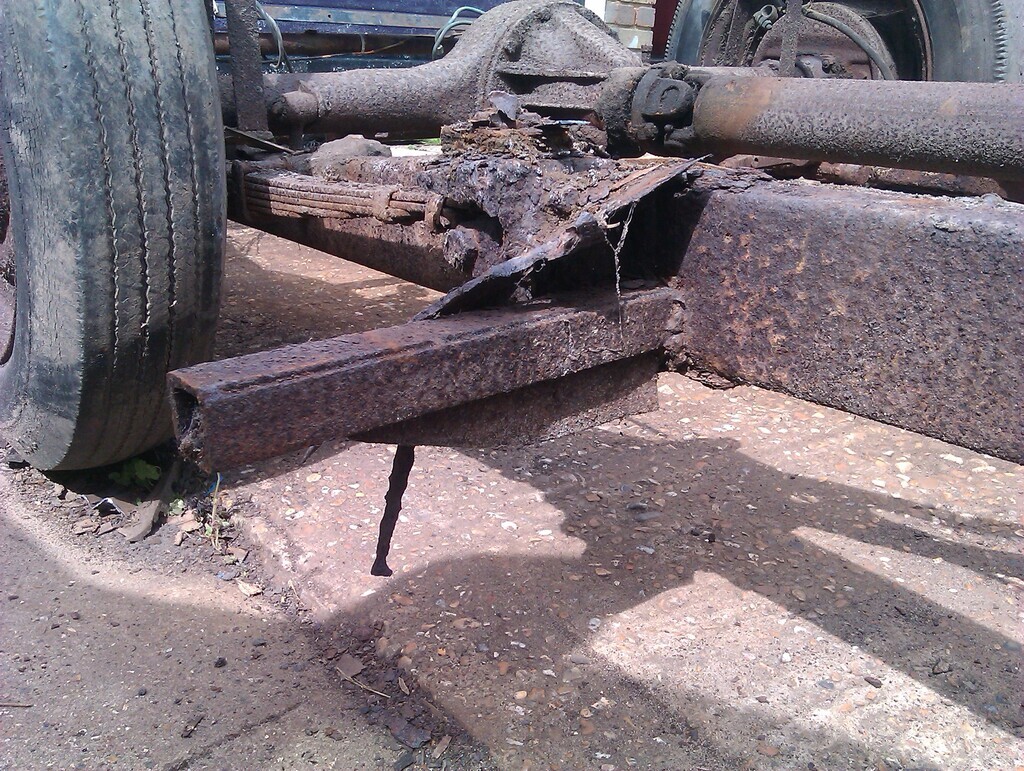 On the rot front, there's some in the front of the chassis rails ahead of the crossmember, and a little bit in the side rail under the driver's seat. These do look repairable if you can work in suitable thickness steel and do seem very localised. The rest of the chassis has some pitting as you'd expect but it doesn't appear to have any particularly thin or frilly bits. We'll see how it goes as I remove the rest of the items still attached currently. 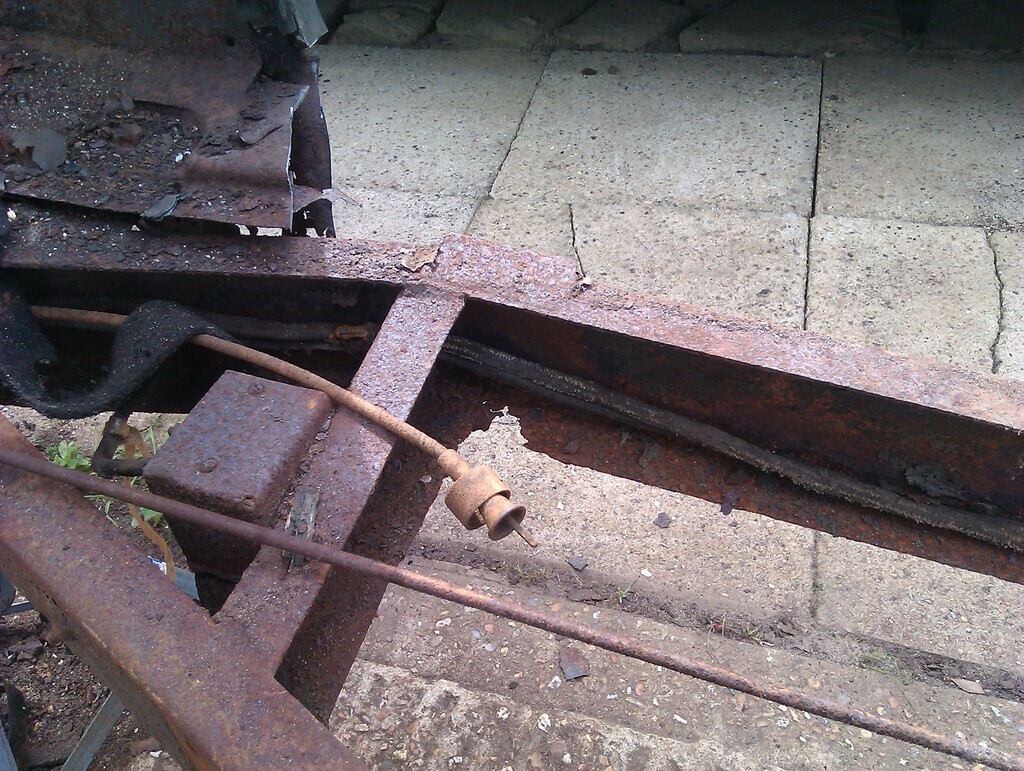 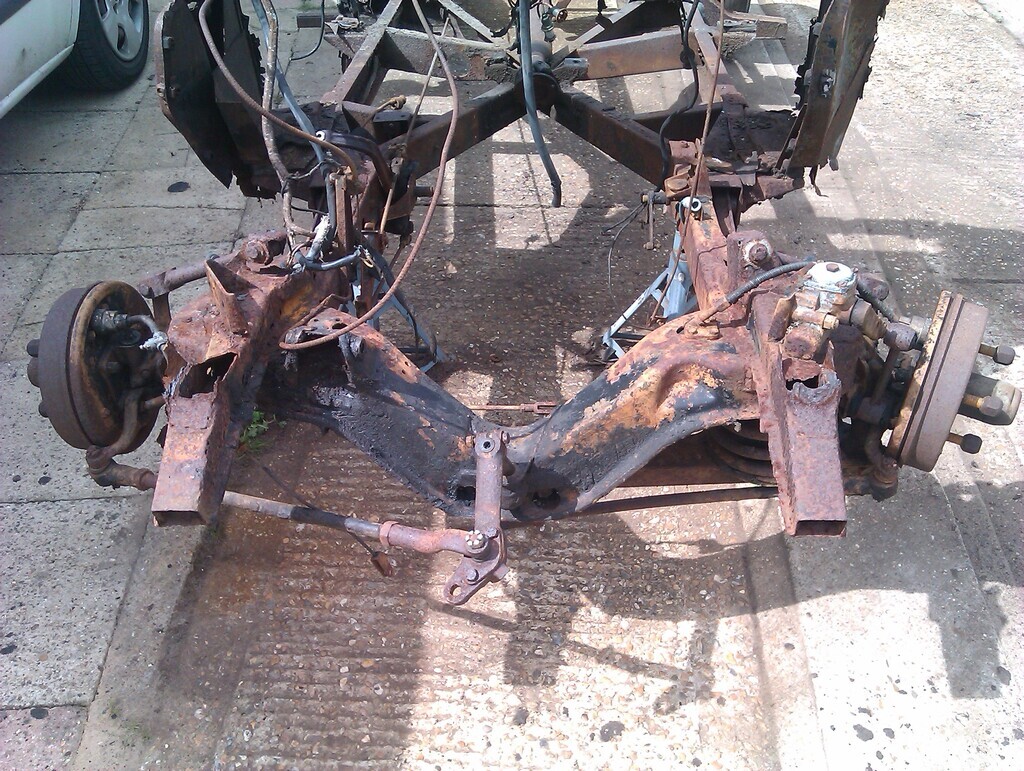 The body mounts appear to be in good shape, though the same could not be said for the bodyshell where it mounted to the chassis, in some places leaving behind good chunks of itself as the remains were lifted free. 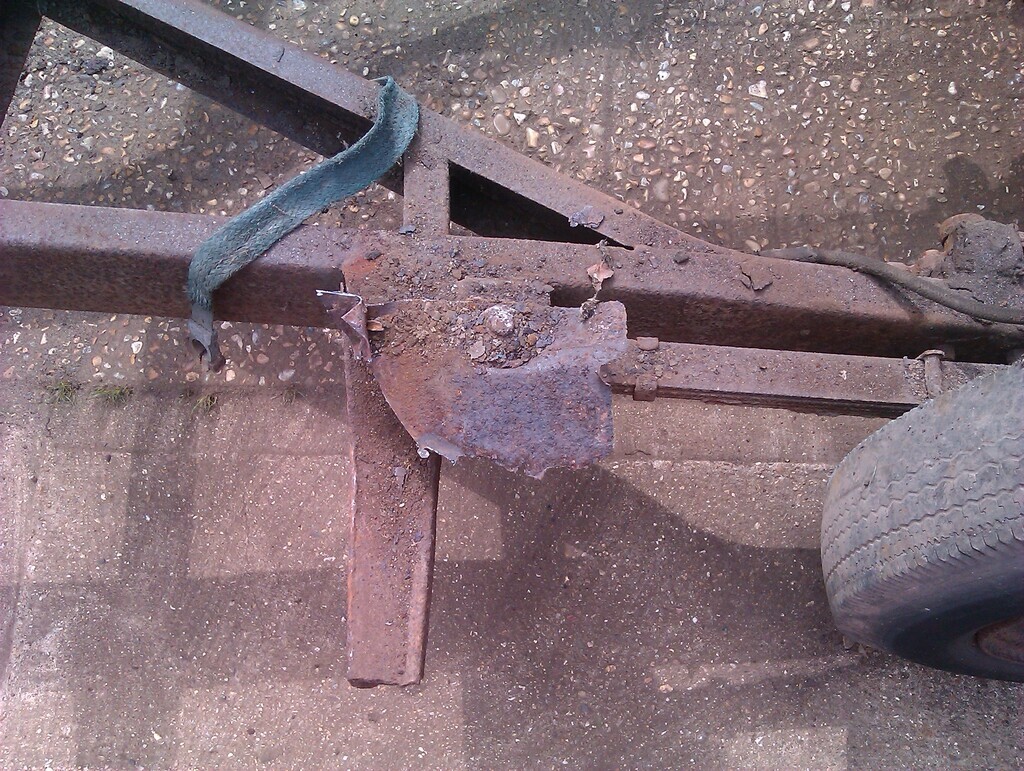 It was nice to finally be able to sweep up the massive pile of dirt under the car and have things looking tidier. Not many more things to remove now to be down to just a bare chassis. I'll be happy when I get the driveway cleared and the spares tidied up so attention can return to the other Lanchester. 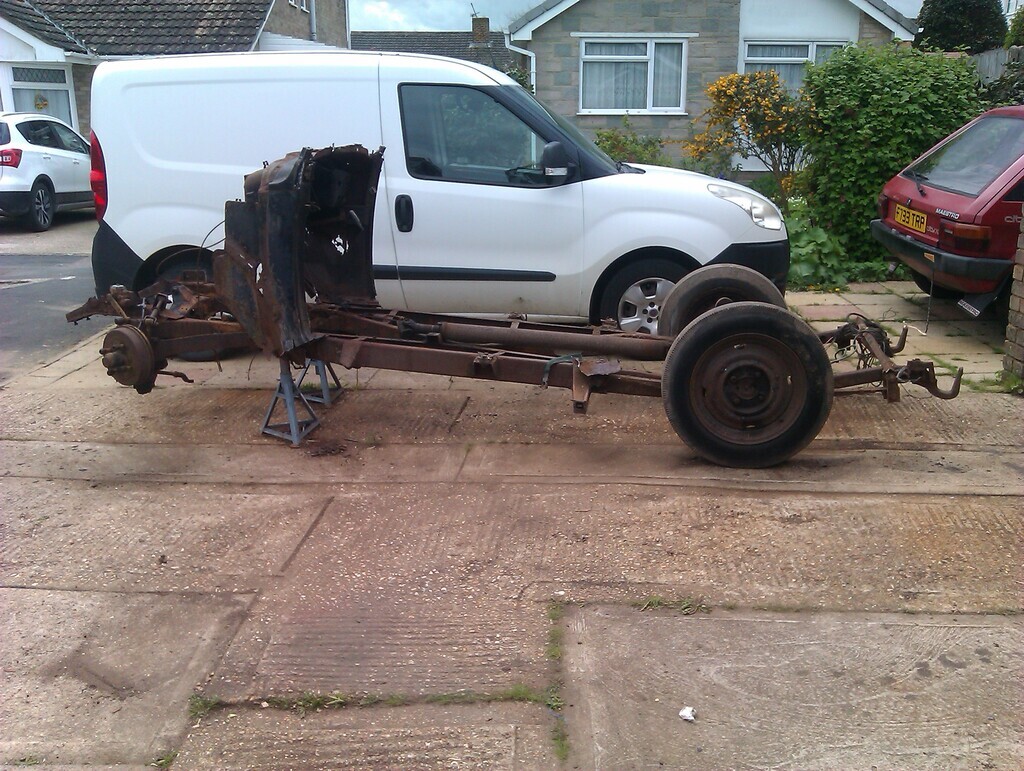 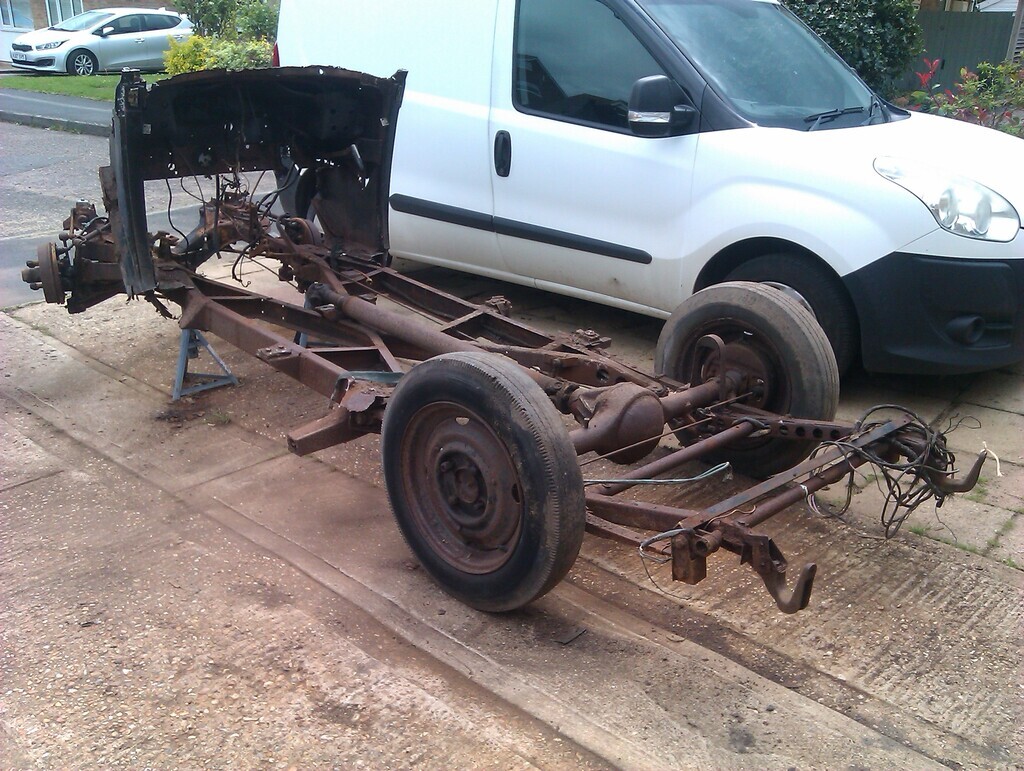 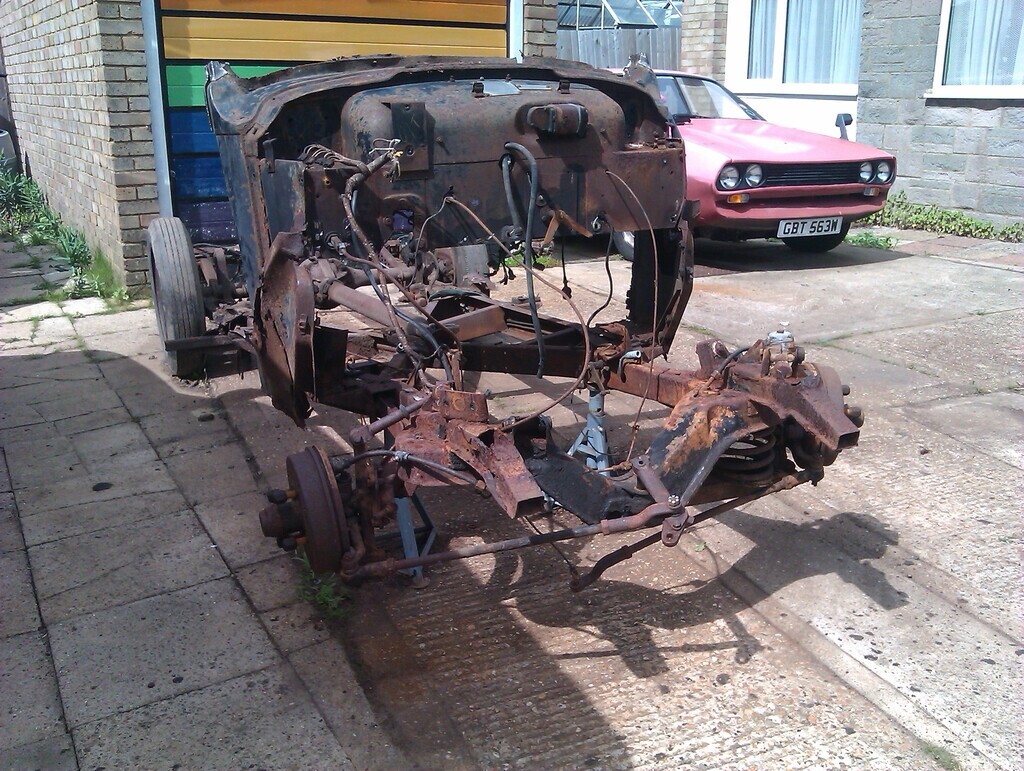 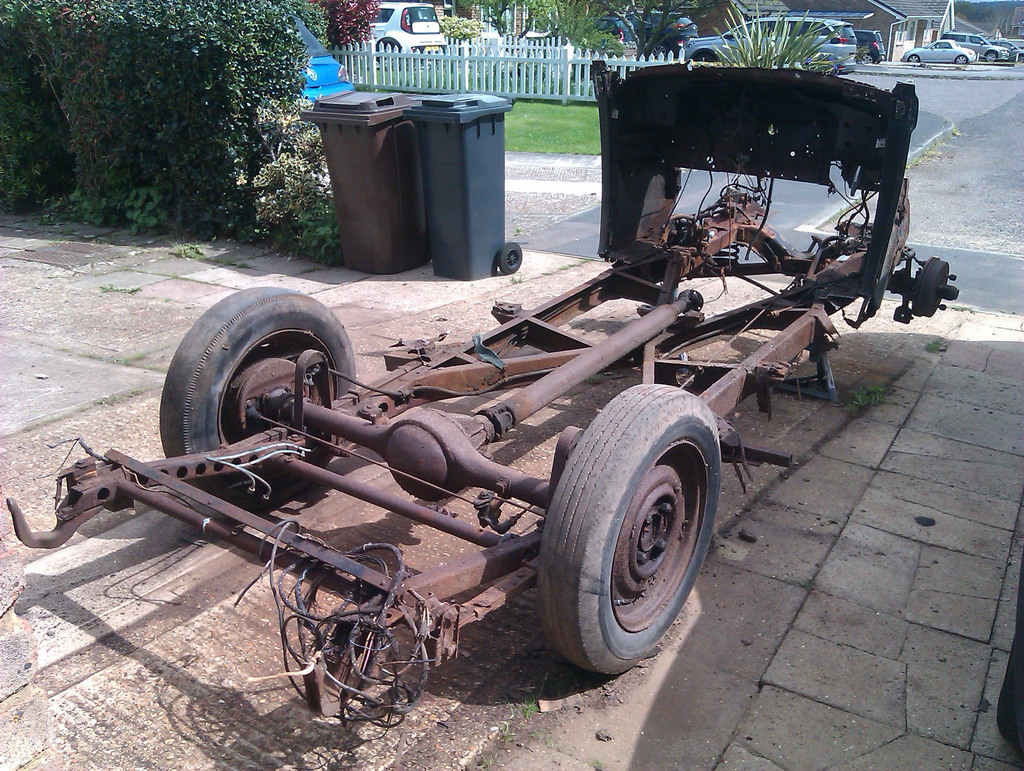 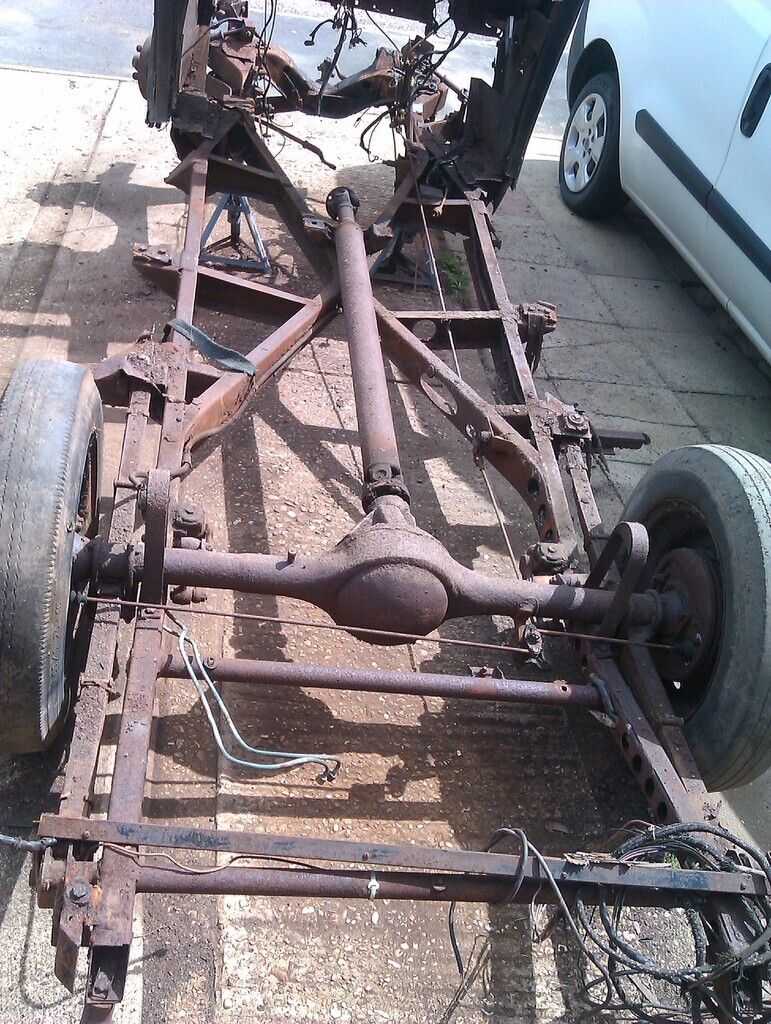 |
| |
|
|
|
|
|
|
|
|
|
|
I know you've said before that quite a few of your neighbours have stopped by for an "I remember" type chats.
How are they with the controlled disassembly of the latest acquisition?
|
| |
|
|
vulgalour
Club Retro Rides Member
Posts: 7,275
Club RR Member Number: 146
|
|
|
|
|
So far, surprisingly understanding about the whole thing. A couple of people are a little sad that the donor car is a donor car and I get that, I feel the same way. When they see just how bad it really is, that sadness is quickly tempered by how obviously useful it is as a supply of parts for the one in the garage and the few others out there that survive and how difficult it would be to restore the donor.
There's plans afoot with the projects this year anyway. The donor car has put a few things generally in perspective and definitely outlined the limitations of my working and storage space, both of which are stretched to their absolute limit right now.
I'm hoping by this time next month the remains of the donor will be processed, stored, sold, used, etc. and I can get back to work on the other cars instead. There's lots to do and plans afoot and I really need to get the Princess back into driveable condition again, it's been too long.
|
| |
|
|
|
|
|
|
|
|
That's quite an advanced design chassis for 1951.
Bears a few similarities to mine (X brace, particularly). That should be quite a mild mannered little car to drive.
|
| |
|
|
vulgalour
Club Retro Rides Member
Posts: 7,275
Club RR Member Number: 146
|
|
|
|
PhilA: remember, it's older than 1951, this is the same chassis as used from the start of LD10 production in the late '40s. It's sort of weird that it has such advanced (for the time) gearbox, chassis, and front suspension but still has cable and rod brakes. Yesterday I hosed the chassis down to get the bulk of the dirt off and make it easier to strip the few remaining items of value to us. It looks much the same as it did in the last photo. This made stripping off the next few bits somewhat easier since I could see where the fixings, or what was left of them, were. Most of the items I want off the bulkhead are now off, there's very little left to remove here. 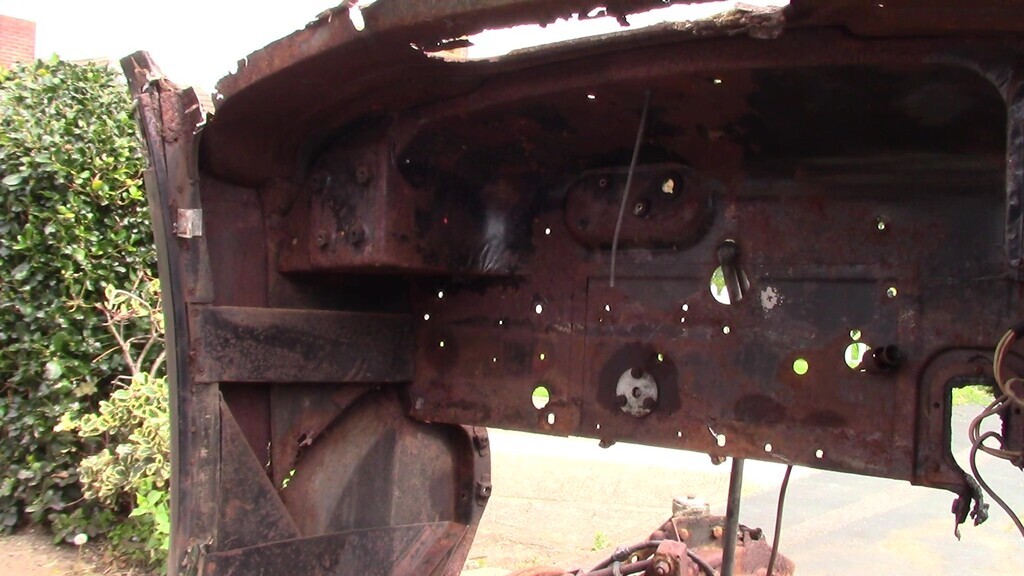 That meant today's small haul is the wiper motor, some wiring harness P clips, the copper fuel lines, the fuel reserve cable and pull, and the bulkhead trim panel. Somehow, against all logic, the bulkhead trim panel has survived with little more than some surface rust on the rivets and a bit of surface mould on one edge. Given how this car was stored and how prone an area this is to getting wet, it should be little more than mush. 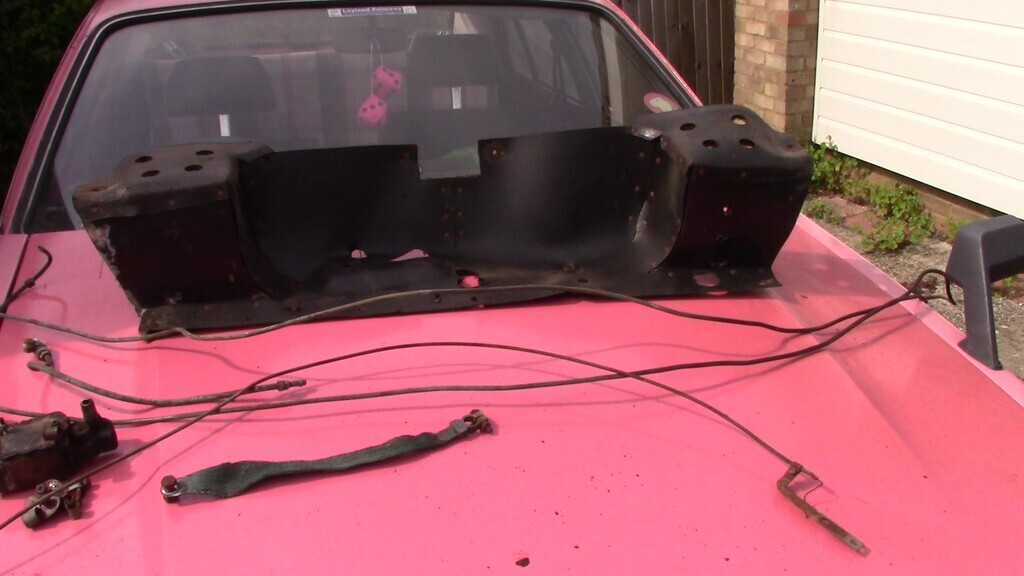 Still to remove is all the rear running gear including the leaf springs and lever shock dampers, the front suspension and hubs, the main battery cable, all of the brake mechanisms, and what's left of the wiring harness. That should then leave us with a chassis and bulkhead awaiting its fate at the hands of the DVLA. Since I'll have a spare pair of rear wings, and at least two good spare steel wheels and matching hubcaps I've been considering getting a modern lightweight box trailer and dressing it up with Lanchester parts so it looks age appropriate. I'm not really tempted to use the back half of the chassis from the donor due to the weight of it, far easier to make a modern trailer look old than build a modern trailer entirely from old parts.
|
| |
|
|
|
|
|
|
|
|
True, mine can trace roots back to the thirties. Many post-war designs are likely to have "this is a bit better based on what we did before" type engineering.
America going to eat a second time in a decade did create w number of changes though. English cars started to reflect that by the sixties, for sure.
|
| |
|
|
|
|
|
|
|
|
great progress again! good trailer idea too, possibly even become a camping trailer for the odd overnight show! its amazing how much taller the tyres look next to pats van! i did also wonder if any of the electrical gubbins from the bulkhead matched the items in your diagrams? as although they would also need a clean could help with some last troubleshooting issues so long as there functional!
|
| |
 2006 Audi A3 2003 Fusion 2 looking for a project.... |
|
vulgalour
Club Retro Rides Member
Posts: 7,275
Club RR Member Number: 146
|
|
|
|
|
The wiring on the bulkhead does help since it shows the proper routing and while someone has chopped off the ignition switch and some of the instruments before we got the car, everything else is there. On the assumption that things were correctly connected, I've got the reference of wires going to the voltage regulator too, and the proper wiring arrangement where the parts of the harness meet in the boot corner. I do think we got to the bottom of the wiring problems on ours as it happens, it'll just be good to have some extra reference from this donor to compare and see where we're at with things.
The one bit of wiring the donor doesn't have is the run from the bulkhead on the engine bay side to the headlights and horns, balanced out by having the remains of a wiring P-clip on the bottom of the radiator grille shell telling me where the harness should be secured on the front of the car which is something I wasn't sure of.
Something the donor did highlight was just why there's all the connectors on the harness in the boot and at the bulkhead. It looks like the chassis and running gear was completed as one unit, with the associated wiring for the engine and front lights while at the same time the body and wiring for things like the dash instruments, interior light, and rear lights was assembled. That gives you two fully wired units you can bolt together and just connect up rather than having to struggling feeding a non-split loom through everything once assembled. I daresay it must have saved a lot of time in construction since it's a lot easier to get to the harness in the chassis with the body off than it is with the body on.
The harness from the donor is too far gone to re-use, and complete enough to be a reference for most of the harness. I've been trying to piece together a concise little video and set of images to explain the wiring routes and how it should be, plus what we've changed from standard for ours, plus the absolute nightmare it arrived with. It's just going to take a lot of time to piece everything together and keep it cohesive so it's an easily understood nugget of media.
|
| |
|
|
|
|
|
|
|
|
That's funny. The chassis on mine has two wires (horn and gearshift illumination) and that's just because they're part of the steering column.
The body was wired up, then bolted to the frame. A couple wires for the starter motor, inhibit switch to connect and it's done.
Really set up for mass production.
|
| |
|
|
glenanderson
Club Retro Rides Member
Posts: 4,336
Club RR Member Number: 64
|
|
|
|
Since I'll have a spare pair of rear wings, and at least two good spare steel wheels and matching hubcaps I've been considering getting a modern lightweight box trailer and dressing it up with Lanchester parts so it looks age appropriate. I'm not really tempted to use the back half of the chassis from the donor due to the weight of it, far easier to make a modern trailer look old than build a modern trailer entirely from old parts. That would be a nice thing to do with the bits. I have had many trailers through the years, a lot of which were home-brewed affairs that weighed a considerable amount due to their amateur construction and use of reclaimed car axles etc. As far as I can remember, using reclaimed car running gear (ie the back of an old banger and something nailed together out of old pallets) has actually been illegal for a very long time. I currently have a little unbraked Anssems 750kg trailer that's so light and manoevrable when it's empty it's hard to believe. I'd certainly advise getting something similar as a starting point over the cheaper Erde type tinplate ones; although even one of those would be a good candidate for a "backdate". Some stud adapters to get the wheels bolted up, the Lanchester wings modified to fit, some period lights and reflectors and a quick coat of paint to match the car would be a really useful and "period" looking tool. I really need to get my backside into gear with mine, as I have been planning on fitting larger 14" rims to it, to match the ones on my big twin-axle braked trailer and give me the convenience of one spare tyre fits whatever I am towing, as well as to raise the ride height of it to sit a little better behind the Land-Rover as it's a little nose-high even with the hitch at its lowest. |
| |
My worst worry about dying is my wife selling my stuff for what I told her it cost...
|
|
vulgalour
Club Retro Rides Member
Posts: 7,275
Club RR Member Number: 146
|
|
|
|
|
I wasn't sure how to do the hubs exactly, they are the same PCD as classic Beetle so that might open up some options. For the box of the trailer, I'd clad it in suitable plywood and then paint or stain it appropriately. Perhaps some lightweight ironmongery in black for the look of it rather than anything structural. Use the rear light units in the Lanchester wings for the back, maybe even the reflectors salvaged off the donor since they're unlikely to sell.
Speaking of repurposing bits of the donor, when I've got time to do it I'll be turning the back half of the roof cut into a garden bench canopy. Need a garden bench, some timber for legs for the canopy, and a few long wood screws and it should be good to go. The front half will have the aluminium stripped off for future use and the wood disposed of/used to repair the rot in the back half of the roof. The wooden frame inside will make it easier to stick some solar powered fairy lights inside it too, for extra twee points. There's a couple of spots in the garden we've been wanting to put a small bench and we did want to find one with a canopy so this feels like a good solution to that. Who knows, I might even have a go at making a bench (I probably won't).
|
| |
|
|
vulgalour
Club Retro Rides Member
Posts: 7,275
Club RR Member Number: 146
|
|
May 10, 2023 19:05:54 GMT
|
A little bit of Princess news. Over the last however long it's been I've been keeping an eye out for and collecting panels I need for it. For the first time since buying the car I finally found a rear arch repair panel, something that is incredible difficult to find now. Best of all, even though it's a pattern piece it fits exceptionally well. 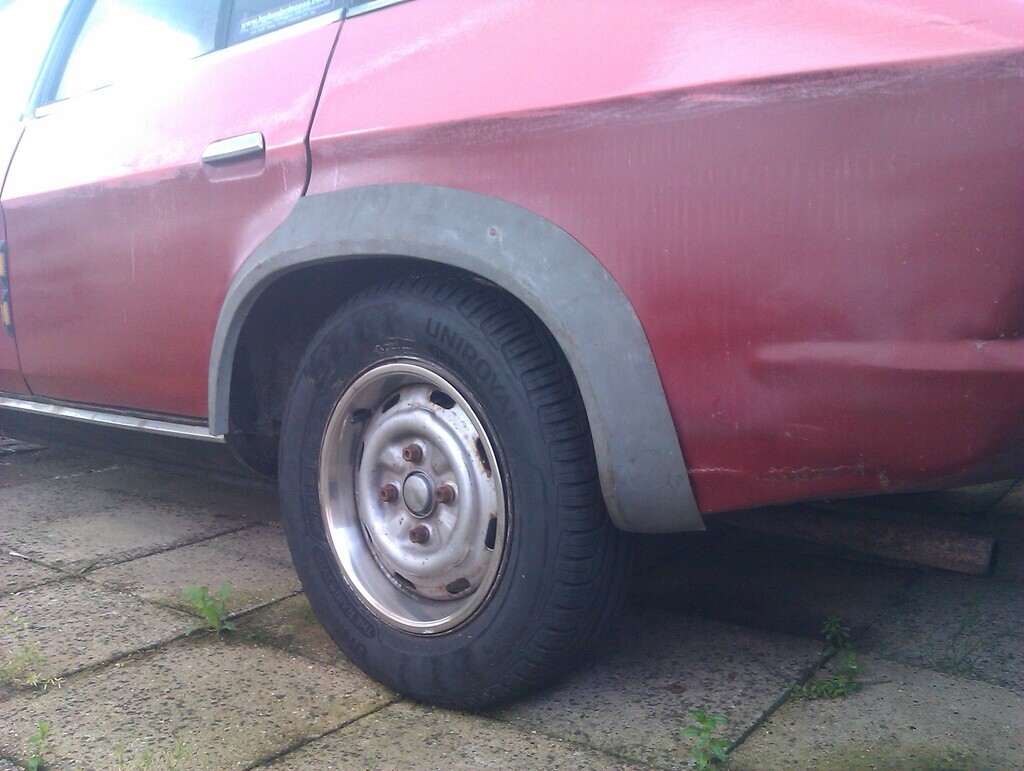 This saves me a whole world of effort and time and frustration because I don't have to make any of these complicated shapes. This, with the front arch repair panel for the passenger side (acquired in Lincolnshire), the full front wing for the driver's side (acquired in Scotland), and the full outer sill for whichever side I need it will repair all of the areas left needing attention. The Princess is far from rotten and would definitely be fine for a while longer, I just want to fix all of this while it's not so bad so it's easier to do and longer lasting. I don't know when I'll be doing the bodywork on the Princess, only that I will eventually. It's only really the rear brakes being unfinished that's keeping the car off the road at the moment, something I'm stretched too thin financially to do anything about just at the moment. It'll all come together eventually. |
| |
|
|
|
|
|
May 11, 2023 15:16:23 GMT
|
|
Are the princess rear brakes shared with anything modern ish? Or just similar aged bmc stuff?
|
| |
 2006 Audi A3 2003 Fusion 2 looking for a project.... |
|
vulgalour
Club Retro Rides Member
Posts: 7,275
Club RR Member Number: 146
|
|
May 11, 2023 16:03:41 GMT
|
|
9" Girling drums which are on other rear wheel drive cars but it seems the front wheel drive application is unique to Princess and Ambassador. It's not even shared with the Maxi.
That's not the problem. The problem is I don't have a brake flaring kit or new unions to reconnect everything and I'm completely wiped out at the moment financially so can't get a kit either. A few more weeks and I should be able to get the tools I need and get it done though, providing nothing else expensive metaphorically hurls itself off a cliff.
|
| |
|
|
|
|
|
May 11, 2023 19:51:06 GMT
|
|
The brake flaring tool I used on Phils pop is cheap and works really well when you need to buy one. I'll look up a link for you.
|
| |
|
|
|
|
|
May 12, 2023 12:03:45 GMT
|
|
|
| |
|
|
vulgalour
Club Retro Rides Member
Posts: 7,275
Club RR Member Number: 146
|
|
May 12, 2023 12:52:33 GMT
|
|
That at least confirms the ones I've been looking at are the right ones. It's not a lot, happily, just has to wait a bit, just got to save up my pocket money after the two unexpected purchases of the Lanchester donor and that Princess repair panel, both things that were too good an opportunity to pass up even though the timing was pretty bad.
In the meantime, I'll plod on with the jobs that cost nothing and make what progress I can on things. Still trying to be laser focused on finishing projects instead of starting new ones, donor car aside, so that I can reduce responsibilities and hopefully unlock some of my limited resources so I can have more fun with my toys instead of just working on them.
|
| |
|
|
vulgalour
Club Retro Rides Member
Posts: 7,275
Club RR Member Number: 146
|
|
May 13, 2023 20:59:43 GMT
|
It's been a busy day today, doing my best to get more of the donor gone through. The wiring harness that runs through the chassis was proving difficult to remove so instead I removed all the other wiring which will be hopefully useful for reference for later. The battery cable was also removed, it's not really in good enough shape to use again but is complete so like the wiring harness will be very useful for reference when ordering parts to make a new one. 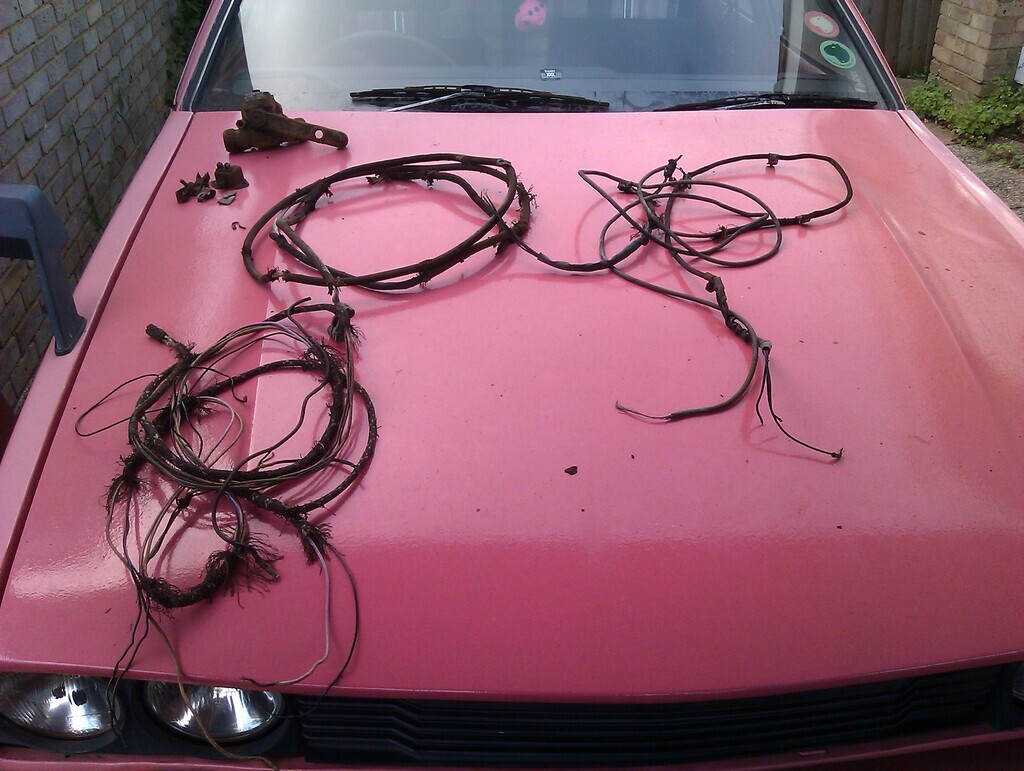 Some smaller items like clips and bits of the chassis ID tags that had self-removed were rescued, as was the brake light switch. Amazingly, the one on the donor car isn't seized and only has minor surface corrosion, even the rubber gasket is in good shape. Once I've cleaned and tested it to make sure it's good, I'll be fitting that to our main Lanchester in place of the dodgy plastic switch that doesn't seem to work. 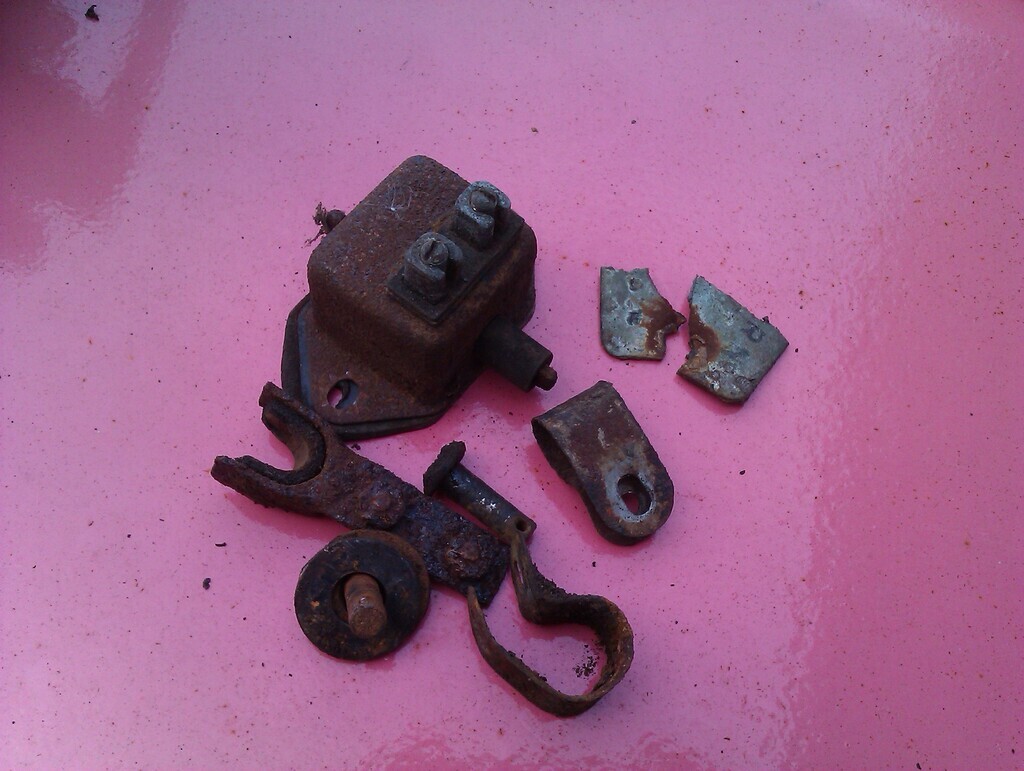 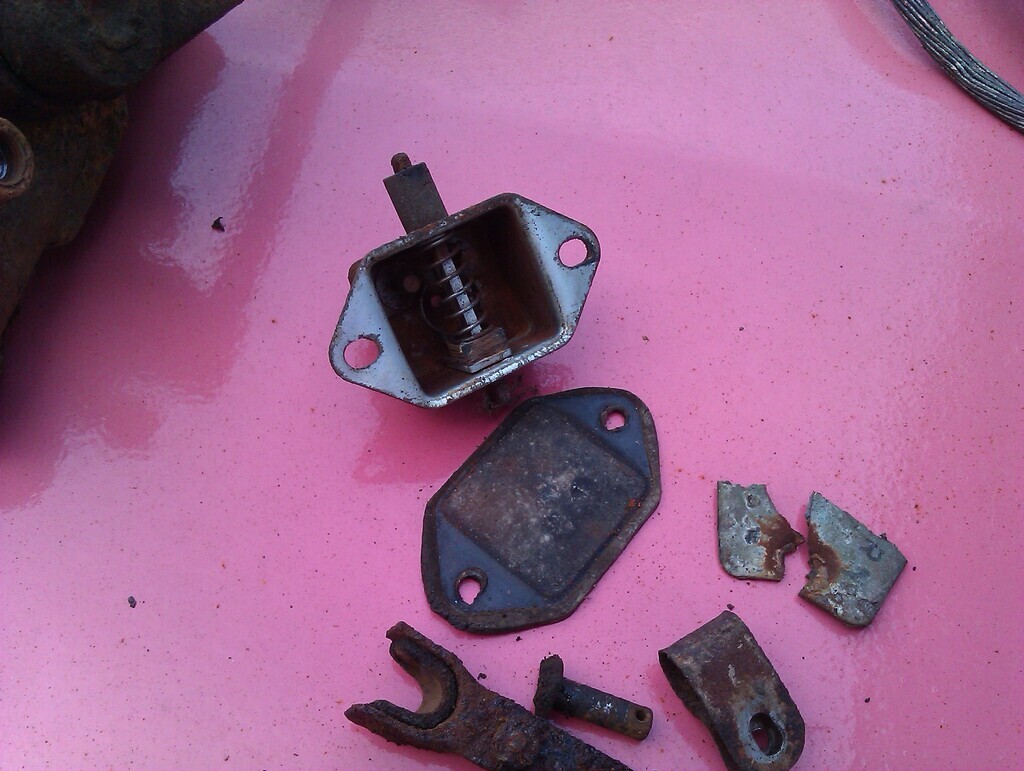 All of the front suspension has now been liberated, along with the main front-to-rear brake rod. I had intended to then remove the rear axle but I was done with fighting rusty bolts and skinning my knuckles so changed tack. 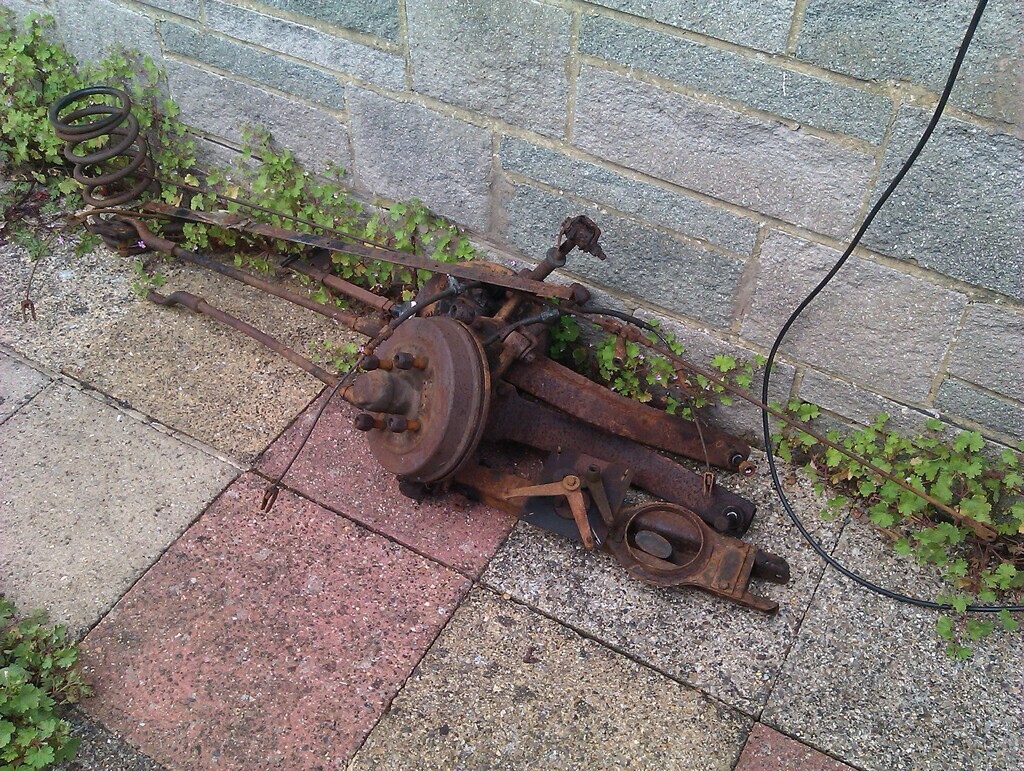 With the front suspension removed it was very easy for Pat and I to pick up the front of the chassis and just move it to the new location. The only thing that made that difficult is the rear wheels won't roll. This could be a lack of weight so it's just easier for the ancient tyres to skid than roll. It could be that because I've removed the handbrake cable and mechanism, and the front-to-back brake rod that the brakes are on, or it could be that this was the first time we'd tried to roll the car forwards and something is broken meaning the rear wheels only roll backwards. I don't know. It didn't matter anyway, because there was so little weight we could just drag the thing to the new spot to free up the garage and get the good Lanchester out. 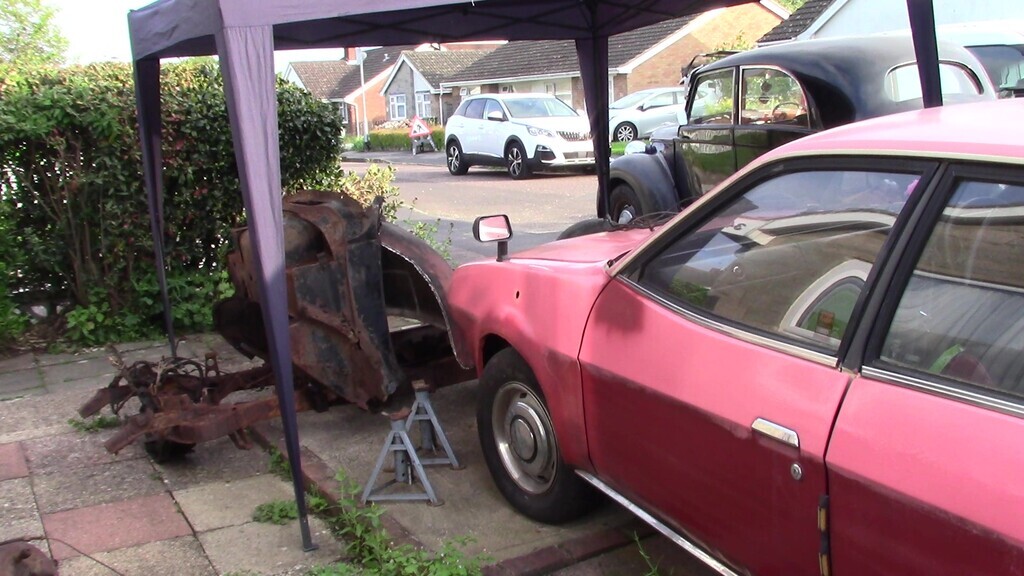 The main reason I wanted to do this was some metal drip trays I'd been keeping on a stack of wheels had fallen off without any input from anything, apparently, and I couldn't get in to sort it out without getting the Lanchester out of the garage, which of course I couldn't do with the donor blocking the way. Turns out some of my plastic storage boxes are collapsing, had shoved against the stack of tyres moving them far enough that the metal trays fell off. I suppose I better spring clean the garage then. 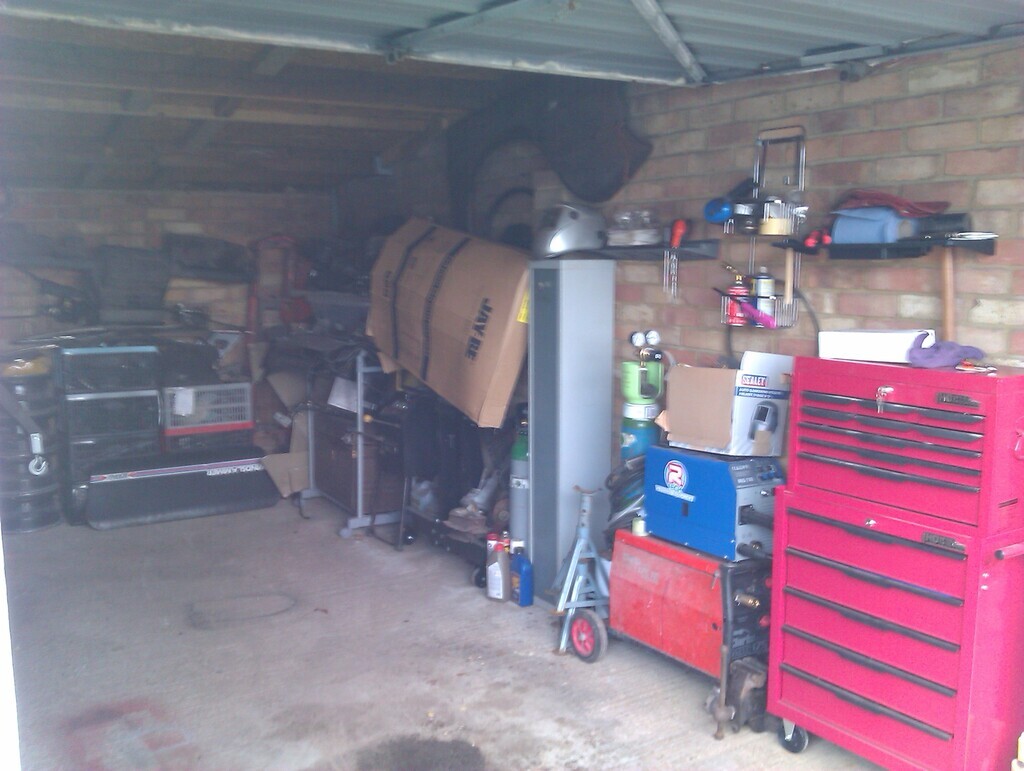 Much better! I've relocated the tyre stack, shuffled all my rubbish... er... valuable and rare spares.. about and gained a foot or so of extra width and length to the useable space in the tiny garage. That's quite an achievement. I even threw some things away! What I didn't do was go through every single box and organise things because the boxes are fragile, I only had so much time, and I can't afford the racking I want to put in the garage to solve my storage issue. The good Lanchester is way easier to get in and out of the garage now we've got that extra space to play with, and I can get to stuff easier too because there's room to walk down the side of the car at last. 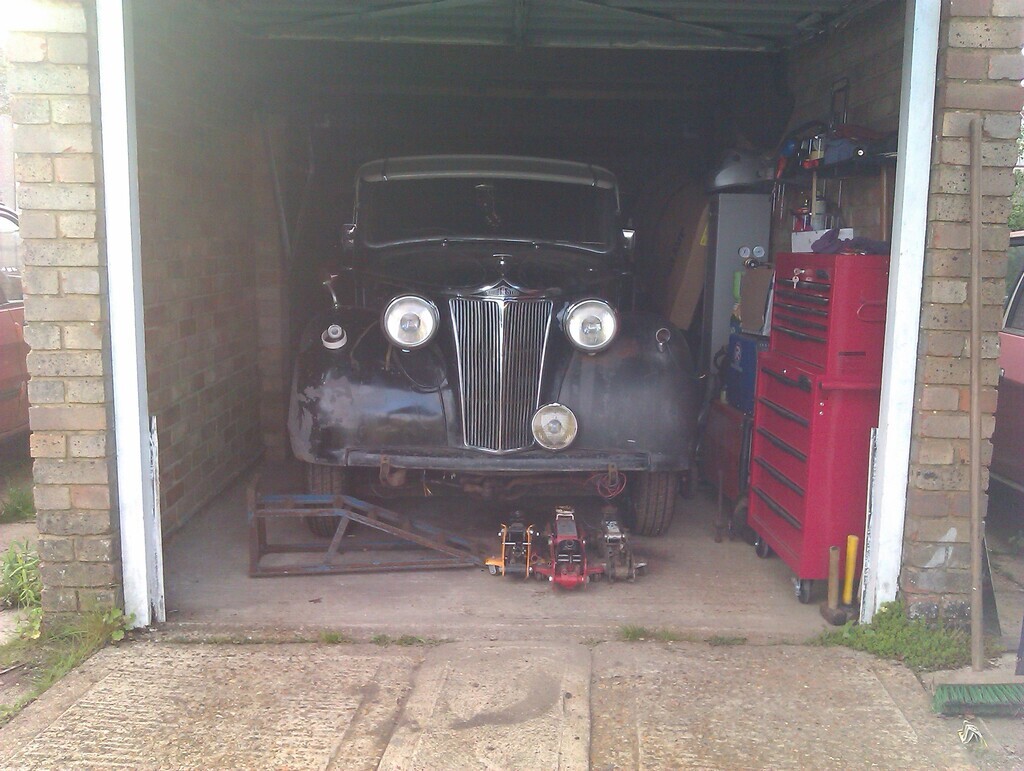 Good Lanchester out of the garage and I'm happy to report no signs of active woodworm, moths, or other pests. Aside from some dust, all looks well. As a little treat and to keep them from getting accidentally damaged, I boshed the three trim rings that came with the donor car on our car. These rings will get the oxalic acid treatment followed by a coat of lacquer or similar to keep them from completely dissolving. It would be nice to find a fourth scruffy one to match, for now these will do. 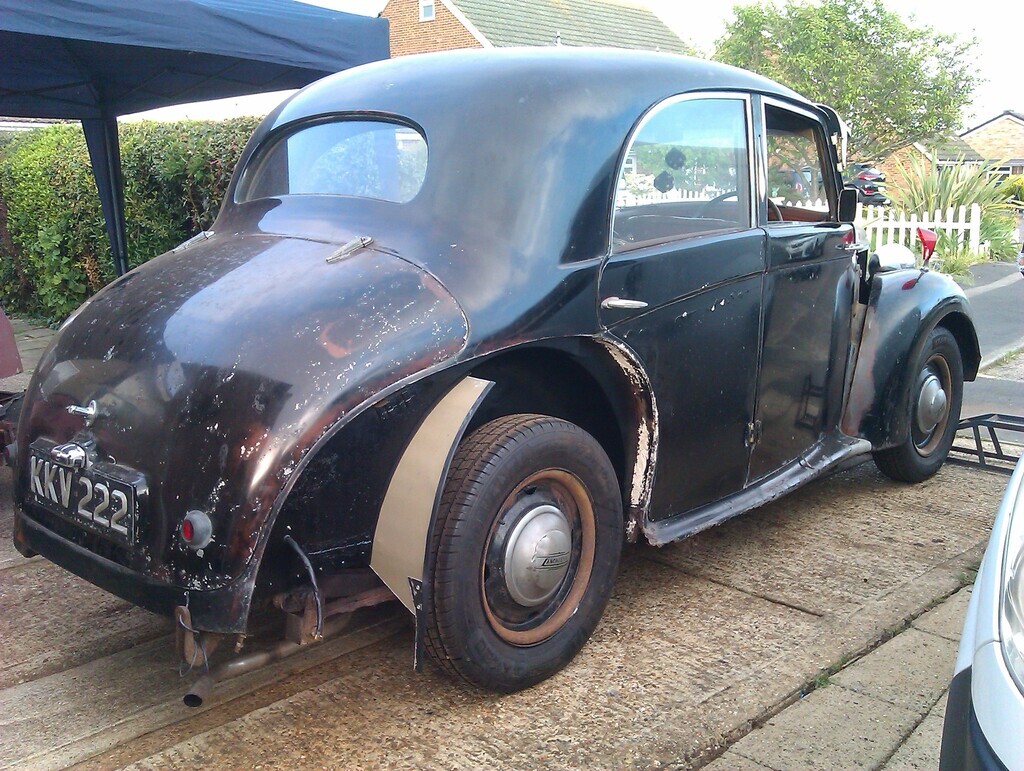 Looking forward to being able to dig into KKV again soon and get things moving once more now the donor car is properly out of the way. Still more to remove from the donor of course, there's just less pressure now since we've got to wait up to another month before we can chase the DVLA about the V5. |
| |
|
|
vulgalour
Club Retro Rides Member
Posts: 7,275
Club RR Member Number: 146
|
|
May 21, 2023 20:46:28 GMT
|
We are finally putting things back on the car instead of taking them off. The main thing to reinstall was the waterpump, to do that it needed the engine mount to be replaced which until recently has been an issue. Happily, the donor car came with what appears to be a NOS engine mount. It isn't an easy job at all to replace the engine mount, the radiator had to come out, the water pump would have had to come out had it not already been removed, and it took Pat on one tool and me on another to get everything in. You also have to jack the engine up under the sump - cast aluminium and not finned so it's strong enough for the job - so you can align everything. The old engine mount came off in three pieces, which it shouldn't do. 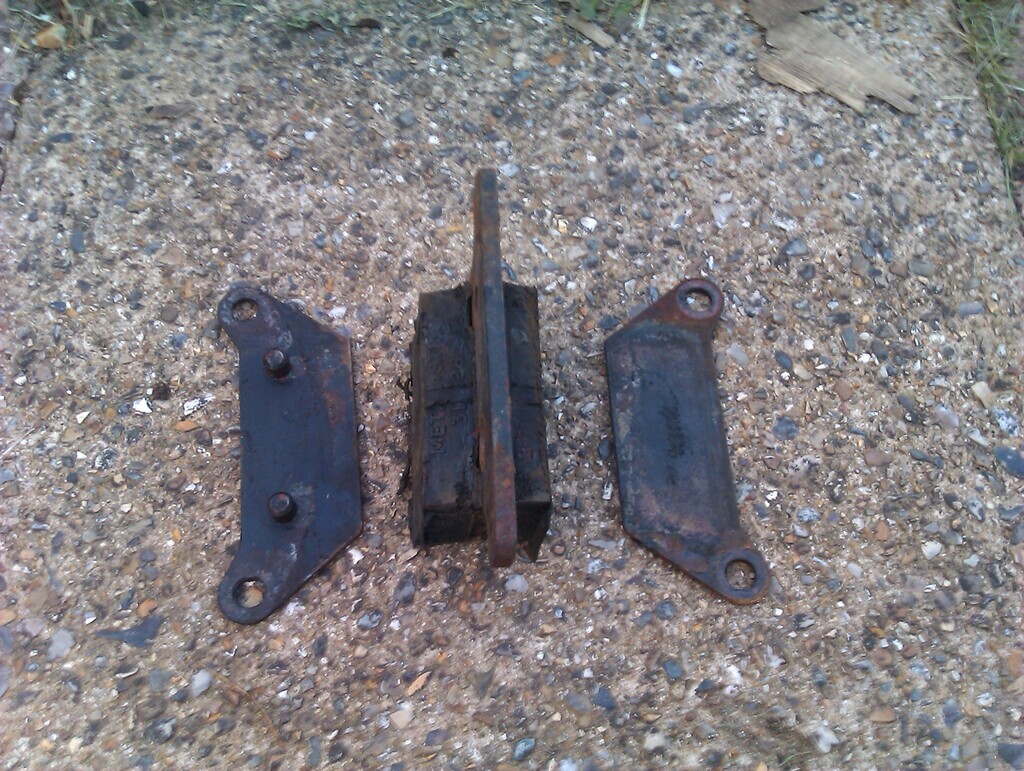 The new one slotted in quite nicely and once installed we found the engine sat a good bit higher and now had some wiggle to it where before it was completely solid, which makes sense since the rubber part of the old engine mount wasn't really doing any damping of any sort. After that, the water pump could be reinstalled, the top hose put in place so it's not floating about in a box, and the radiator slotted back into its hole. The new fan belt was also dropped on. 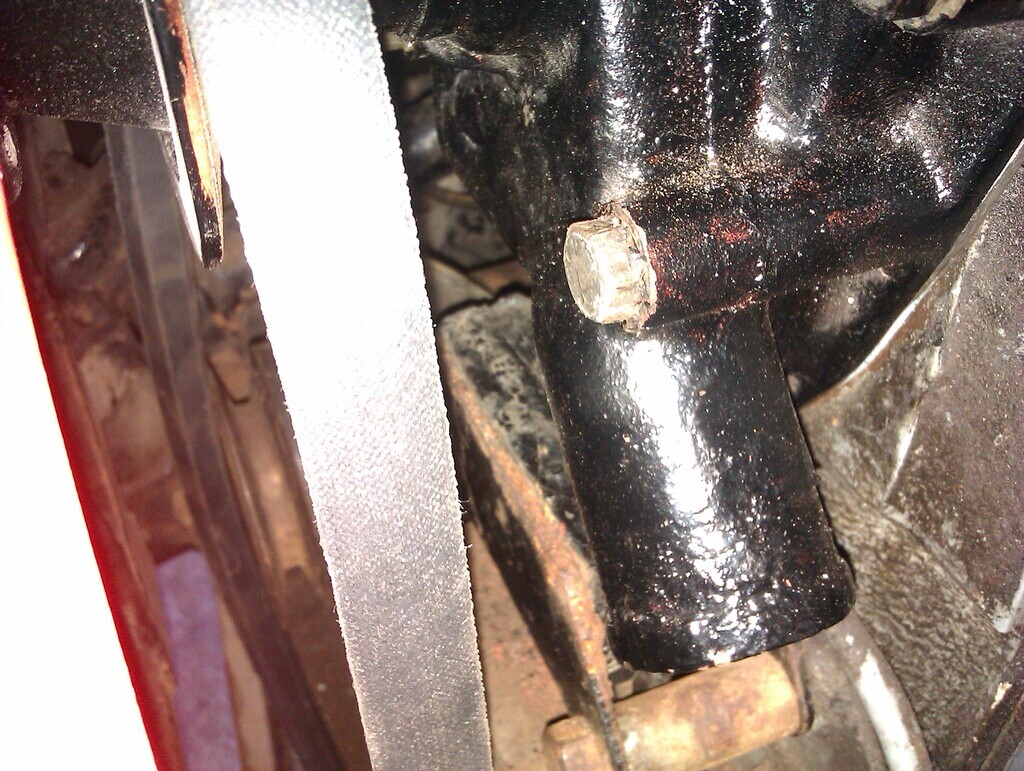 Finally, the dynamo was reinstalled loosely. The stuck nut that had caused an electrical connector to shear proved to not be stuck at all once the dynamo had a spanner taken to it and undid quite easily by hand. Not sure what that was about but since nothing else was wrong with the dynamo before it made sense to drop it in the hole today so it's another thing that's not just knocking about in the boot. At this point I'm only interested in restoring and sprucing up parts if they need repairing, if they don't need repairing they can stay scruffy until further notice. Access to fit the dynamo is appalling and I hated every minute of it, in case you were curious. 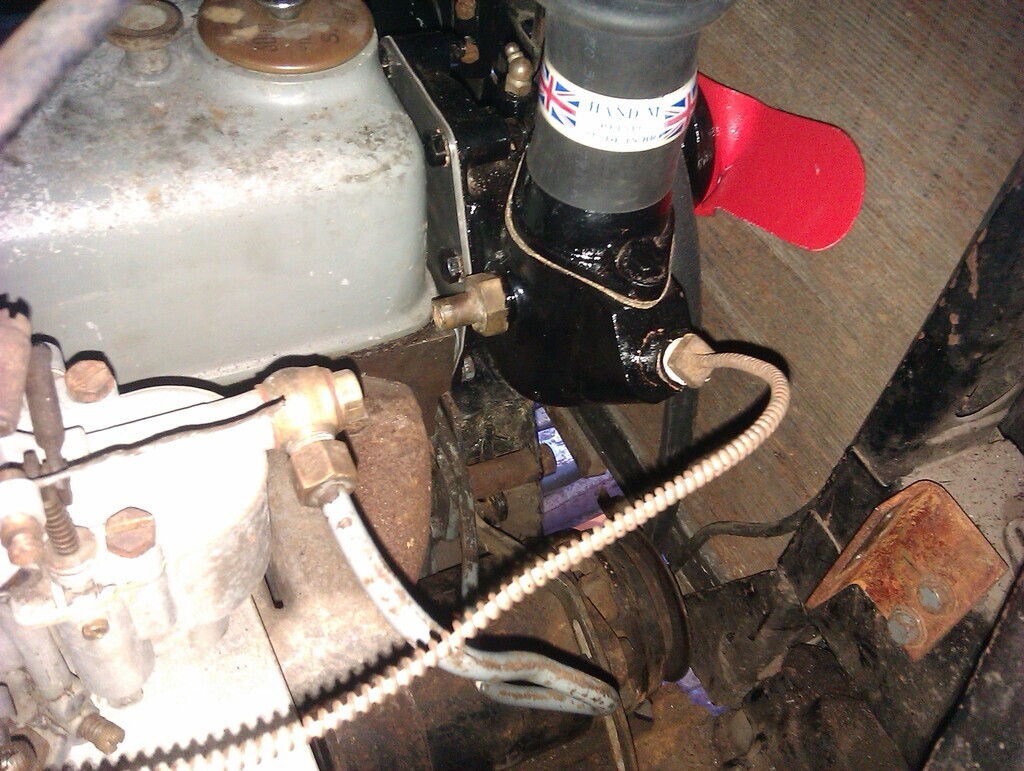 Now, if I can just find the time to get caught up with my video editing queue and absolutely trashed upload schedule, perhaps they'll get up to somewhere near where we are in real time soon. 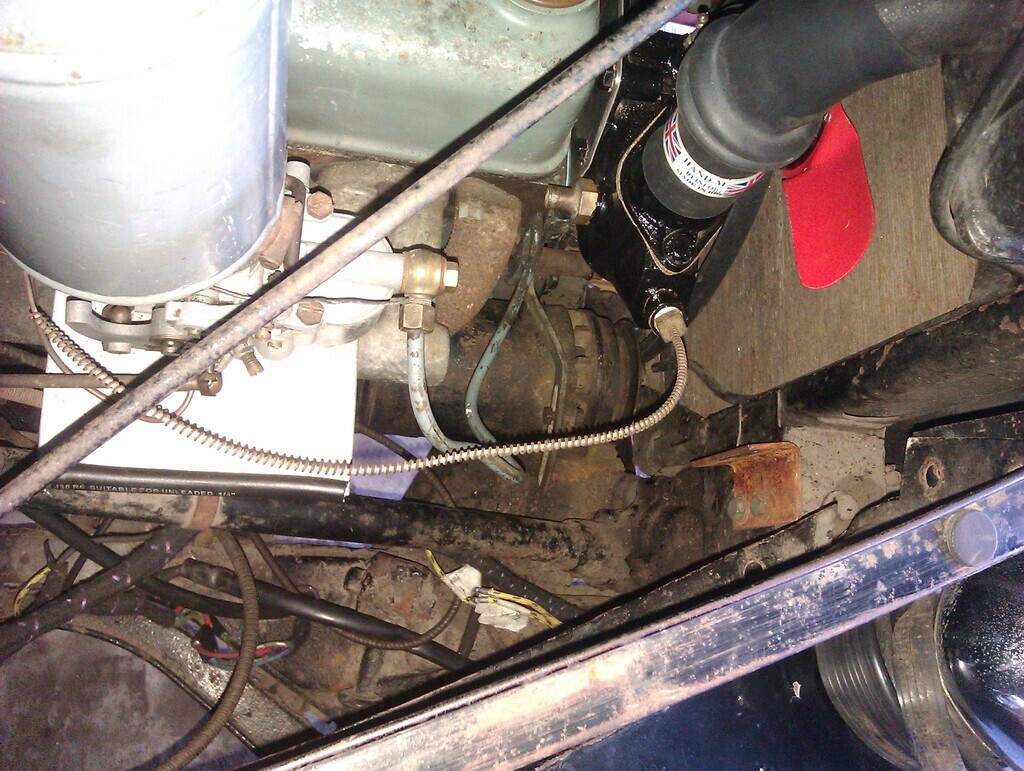 |
| |
|
|
vulgalour
Club Retro Rides Member
Posts: 7,275
Club RR Member Number: 146
|
|
May 23, 2023 11:31:48 GMT
|
|
We have news from the DVLA regarding the donor car.
The car does not exist on their system, which we already know, but since we can prove existence of the car we could get a V5C for it. We would need to contact a suitable car club - DLOC is likely the best candidate - to confirm the car is what we've said it is. Then the DVLA will issue a new V5C with a non-transferable reg marker on it. If we were restoring the car this would be ideal.
However, if the club chosen refuse the application we do have an alternative route of applying for an age related plate, also non-transferable, through the usual forms.
For us, that means the end of the road for the chassis. Unless someone out there desperately wants a bare chassis with a non-transferable reg we shall be chopping this one up and disposing of it.
|
| |
|
|


