|
|
|
Jul 30, 2022 15:44:16 GMT
|
|
Sounds like a late car will suit you best, if it's in good condition the heater is fine on these, windscreen demist is not brilliant but you can get a heated screen.
The late drum brakes are adequote but do take more maintainance than discs. Tyres is one area where the choice is not great, and some of the pattern parts are not great quality. If you plan to use it all year round an alternator conversion is worth having too.
|
| |
|
|
|
|
|
|
|
Jul 30, 2022 20:37:26 GMT
|
|
My son put MGB front seats in his Minor, very supportive & with small head rests but not too tall as many more modern seats are when fitted to an older car.
|
| |
|
|
glenanderson
Club Retro Rides Member
Posts: 4,338
Club RR Member Number: 64
|
|
Jul 30, 2022 22:10:12 GMT
|
|
The wider van rims give more choices for tyres.
Personally, if you think a Minor will keep you psychologically happy, I see no reason at all why a good one couldn’t be a better daily than the Maestro, for all the reasons you’ve already stated.
I think, in your shoes, I’d move both the Maestro and the Princess on, buy the best Minor I could afford, and put my energies into doing the Lanchester.
But, whatever you decide, I’m in for the ride. 👍
|
| |
My worst worry about dying is my wife selling my stuff for what I told her it cost...
|
|
vulgalour
Club Retro Rides Member
Posts: 7,278
Club RR Member Number: 146
Member is Online
|
|
Jul 31, 2022 19:42:47 GMT
|
The Princess will outlast everything else, I can't see myself ever getting rid of it because I know I'd always regret it. The only other car I've owned I felt like this about was my old Mk2 Polo and I do always regret having to sell that car. Another Mk2 Polo just doesn't fill the same spot, so I've never had another one, and now I don't think it would feel like the same car even if I could get it back. I don't want that to happen with the Princess so I'm probably going to be its last owner and I'm okay with that. There's a lot of my life tied up with the Princess, a lot of things good and bad that we've been through together, and it brings me a great deal of joy to drive it. I know to some it looks like a never-ending millstone of a thing but honestly, I'd be miserable if it wasn't around so I'm keeping it. The Maestro I have an end goal in sight. There's a bunch of jobs I want to complete on it and when I'm done it'll be a really well sorted (admittedly high mileage) classic with a lot of character that will hopefully make someone else very happy too. But I don't want to keep it long term. It's a car that I'm happy to move on when the time comes and I shan't be sad to see it go, I'll be happy to have had the adventure I have with it. This might be because the Maestro is my 'Covid Car', if you like so perhaps that's why I'd be happy to draw a line under it. The Lanchester is sticking around because that's Pat's car really. I might be doing most of the work on it, and doing all the filming and documenting, but it's Pat's passion not mine. Don't get me wrong, I do like it a lot and I do mostly enjoy working on it and having it around, but it doesn't light the same fire under me as it does under Pat. In a way, that takes some of the pressure of me because if I don't work on it then that's not my fault or problem. If Pat wants it done faster, he's always welcome to step up and do the work... when he can find the time outside of his own job and responsibilities that is. Speaking of the Lanchester... In real world time, rather than Youtube time, it's been a while since Pat or I have done anything on the Lanchester. There simply hasn't been time. In some ways that's been a good thing as we've been able to step back and assess possible issues that we were struggling to work out. We've come to the conclusion that the wiring issue probably is a duff ignition switch and given the fact that the kind of switch we need is available, as soon as we have some spare pennies (the other reason Lanchester progress has ground to a halt) we'll get a new one, wire it up, and see if it magically fixes things. If a new switch doesn't resolve the issues then we can be pretty certain the old switch is fine too and move on to more expensive potential failures like the voltage regulator. Process of elimination and all that. In good news, I finally managed to find a replacement rear light lens for the one I dropped and broke. The car came to us with a Lucas 464 lens on one side, and a later Lucas 464a lens on the other. 464 lenses have a thick ribbed glass and no built in reflector or focus dot. 464a has a flat face to the lens, built in reflector and a single focus dot (there are some variants with two focus dots for light units with two bulbs inside, ours has a single bulb hence the single focus dot). As far as we can work out, our car originally had 464 lenses on the back which is why it has the reflectors screwed onto the boot lid, something that wouldn't have been needed with the 464a. Both types of lens are hard to find now, and expensive when they do come up since they were used on prestige stuff and end up with the badge tax applied as a result. They're also glass, and while apparently they are being reproduced in plastic, I'm yet to find a supplier. 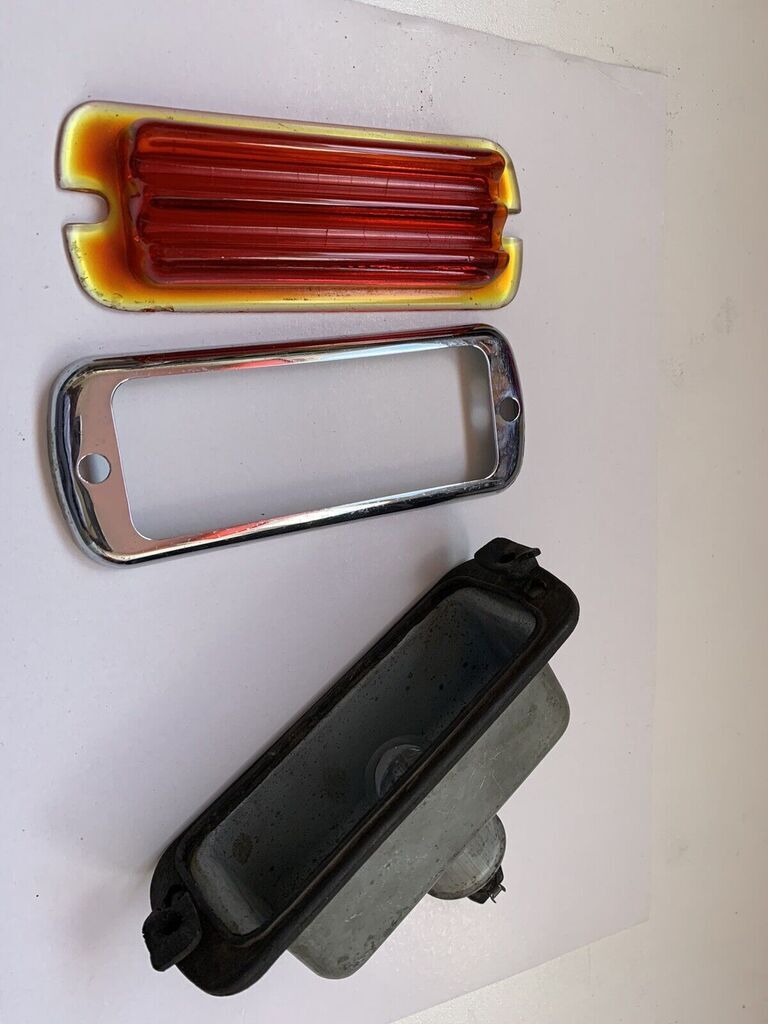 So when I found the above entire unit for about half the usual asking price of just the lense, I thought it'd be rude not to. Yes, I could have invested that money in a new ignition switch - they're £70-100, depending on seller, even though they're always the same switch - but since the lights are far harder to acquire, it seemed the more sensible purchase at the moment. For the headlights, we're actually changing tack. It turns out the Lanchester uses 7" headlights so rather than faffing about with the original weird bulbs that are quite dim, we're going to upgrade to halogens. One reason for this is cost, a halogen kit is under £100 with all the bulbs, bowls, and wiring you might need. The other is wiring, since we can move the sidelights into the headlights and have the original separate sidelights converted into indicators. This means we don't need special dual function bulbs in the sidelight units and everything remains completely reversible if for some reason we want to in the future. It also makes replacing bulbs a lot easier since we'll be using much more generic items and, where possible, LEDs to reduce the load on the wiring. There is a new Lanchester video arriving on the channel this coming Tuesday, and while it's not wiring it is wiring adjacent and you'll get to see the inner workings of the wiper motor. So really, I only actually have 2 cars to look after which is the Maestro (or later on the Minor) as my daily, and the Princess as my project car. Taking the Princess off daily duties will likely make it much easier to keep on top of its needs and be less stressful when it does throw parts problems at me. At least, that's the hope. The Lanchester can just sit in the background and be tinkered with as and when, it's safe and dry in the garage and if it takes another few years to get it sorted then that's no bother. It's paid for and it'll get done when it gets done. What I really need to do is stop worrying about getting things finished. Plenty of other people are happy to sit on their bum gazing at clouds and I need to get better at that too. |
| |
|
|
vulgalour
Club Retro Rides Member
Posts: 7,278
Club RR Member Number: 146
Member is Online
|
|
|
|
|
Fresh Lanchester video for you, this time delving into the Lucas Model SW4 wiper motor and finding out just why it struggles to work.
|
| |
|
|
vulgalour
Club Retro Rides Member
Posts: 7,278
Club RR Member Number: 146
Member is Online
|
|
|
|
|
It's payday so an additional little Lanchester update here. Because the Lanchester uses 7" headlights it does mean I can upgrade what's there. The original lights are 40/50W BPF bulbs and they're... rubbish. It also doesn't help that the silvering on the bowls is bubbling in places and while we're not likely to drive at night a lot, having your headlights on does make you more visible to other road users who might not otherwise see you so an upgrade makes sense.
Originally I was considering re-silvering the headlight bowls and getting new original style light bulbs. The cost of this for what you end up with seemed prohibitive in all honesty. Given how easy it is to acquire a good H4 upgrade kit, and how affordable, it made more sense to modernise. I've gone with the same sort of kit I used on the Princess which I've had no issues with, and while I did have to buy some extra pigtails since the Lanchester wiring hasn't got the modern three slot plug for halogen bulbs, it still came out at a meagre £35.
I also opted to go for headlight bowls that have sidelight bulbs in them. Nothing fancy, no LED rings or anything like that, just a single bulb pushed through into the bowl. There's no real need for the sidelights to be separate from the headlights on the Lanchester so it doesn't really matter where they're located and if I move them into the headlights that frees up the original sidelights completely. This then makes wiring up the front indicators a lot easier since I can reuse the original bulb holders and fit some nice bright amber single function LEDs in there. It's a really good location for the indicators since they're high up on the body and very visible and because we'd not be adding any other lights anywhere, it keeps the front of the car looking completely standard. Funnily enough, the sidelights are mistaken for indicators by younger (folks under 40) people anyway, so it makes sense to put them in there for that reason too.
What I'm not sure of is whether or not I'll need to fit a relay for the headlights. The H4s will be brighter than the original BPFs but I'm not sure if the draw on the system is going to be such that it will be an issue. I'd welcome opinions and recommendations on this one since I want it to be safe but I also don't want to be adding complexity if it's going to be perfectly fine without them.
|
| |
|
|
|
|
|
|
|
|
Relays only take the load off the switch, if you do want to fit them you can run power to the relay from the battery or regulator and then from the relay to the headlamp. And just use the original headlamp wiring to trigger the relays.
|
| |
|
|
vulgalour
Club Retro Rides Member
Posts: 7,278
Club RR Member Number: 146
Member is Online
|
|
|
|
|
I'm guessing if I were using relays I'd have to use one for the ignition switch (dip and sidelights), and one for the floor switch (main beam)? Would you bother doing it, or do you think I'd be alright without?
|
| |
|
|
glenanderson
Club Retro Rides Member
Posts: 4,338
Club RR Member Number: 64
|
|
|
|
You don’t need to worry about relays. With new wiring and connectors, there shouldn’t be any issues coping with 55w halogen lamps; as the lamp design makes more light from the same wattage. Decent modern light units and halogen lamps will be a huge improvement over the original BPF setup. You can get 35/35w halogen lamps from Paul Goff which would still be massively better than the originals, but put less strain on the system. Personally I’d try the standard (ie cheap and easily obtainable) 55/55w ones first. I doubt you’ll have a problem, but if you find that lots of short runs with the lights on puts too much of a strain on the charging system, then 35/35w ones are a cheaper option than higher output dynamos. |
| |
My worst worry about dying is my wife selling my stuff for what I told her it cost...
|
|
|
|
|
|
|
|
As above it's the switch that seems to go, I've had this happen a couple of times so always fit relays now. You need one for the headlights and one for the dip, if you bring a fused feed from the battery to the front of the car you can tuck them away in the front of the engine comparment.
|
| |
|
|
jamesd1972
Club Retro Rides Member
Posts: 2,920  Club RR Member Number: 40
|
|
|
|
|
|
| |
|
|
vulgalour
Club Retro Rides Member
Posts: 7,278
Club RR Member Number: 146
Member is Online
|
|
|
|
I've had a few folks suggest the Boomslang kit now so that's likely the route I'll go when I've got some more pocket money. New headlights arrived, new wiring arrives in a bit. I'm not up to much today, off sick at the moment (nothing serious, happily) but I needed to get some movement and fresh air so decided to have a look at these headlights and how they fit. They're a straight swap. Wiring aside, you literally take the old headlight bowl out and fit the new one in exactly the same way. Could not be easier. 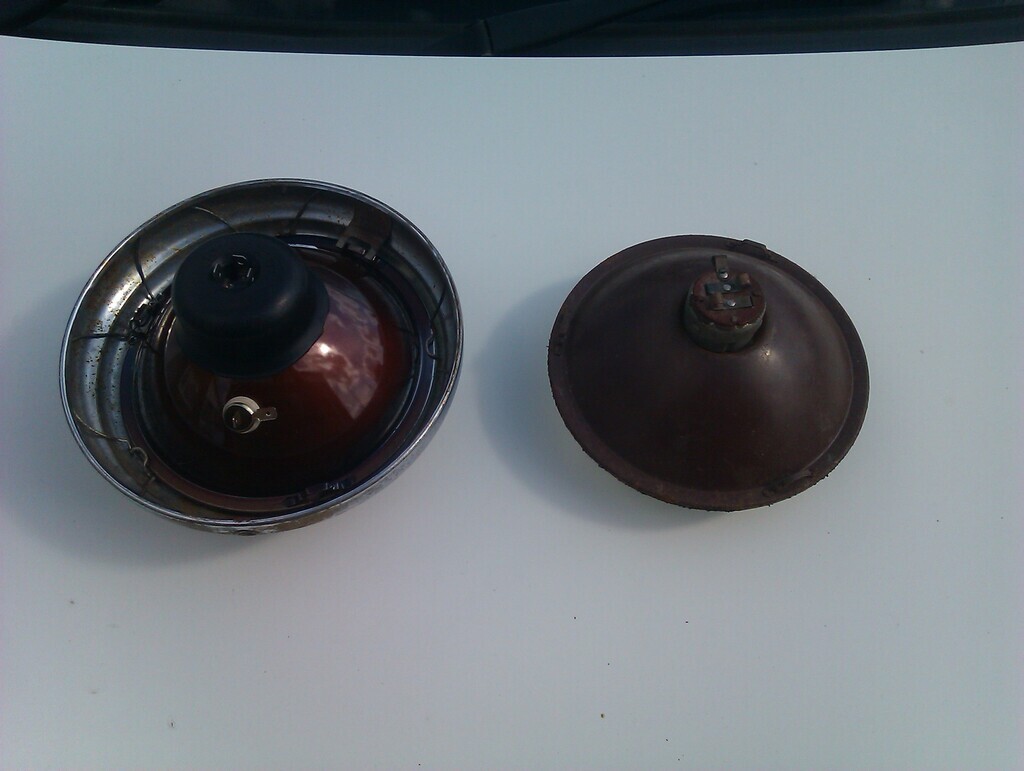 You can see the bubbling the silvering on the old bowls here, they're both like it for most of the bottom half which is hardly ideal. 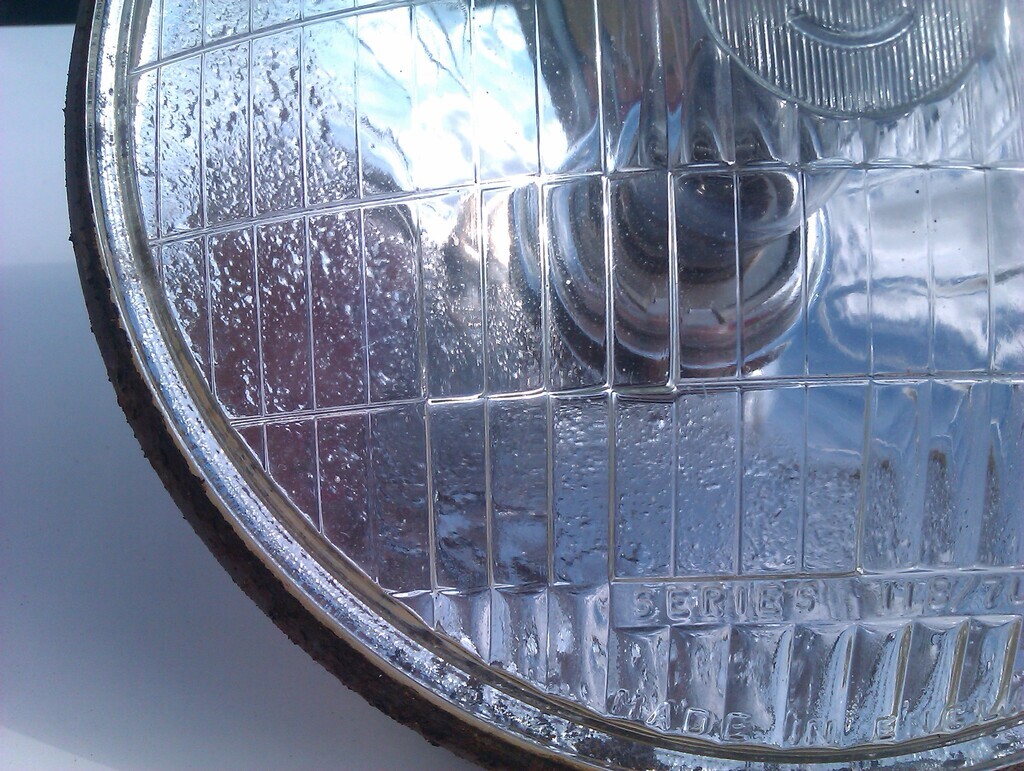 Chose domed lenses rather than flat ones so the shape would be correct, I really dislike the look of flat lenses on classics, especially when it's in the teardrop shaped headlights like these. The sidelight bulb sits in the bottom in line with the headlamp clamp and there's so much room inside the headlight bucket that wiring those up isn't going to be an issue. 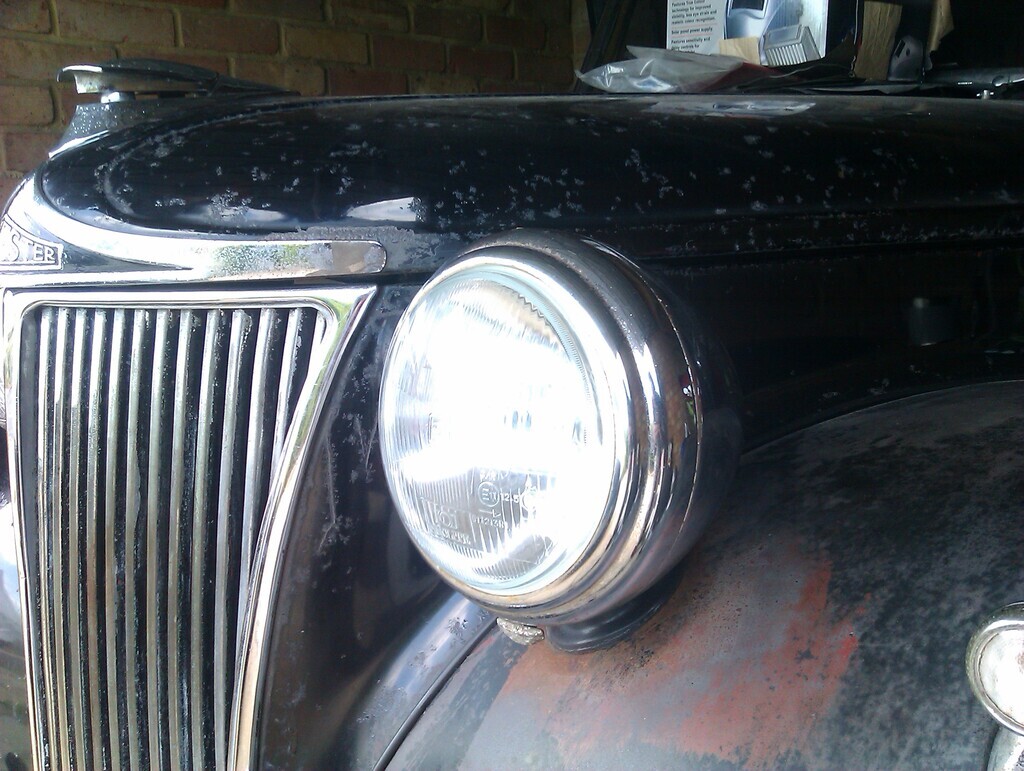 If you know what you're looking for you can tell the difference between old (on the left) and new (on the right). To the casual observer they look totally normal, only the H4 branding and the lens pattern really gives the game away from normal viewing distance. It's a pretty stealthy upgrade really. 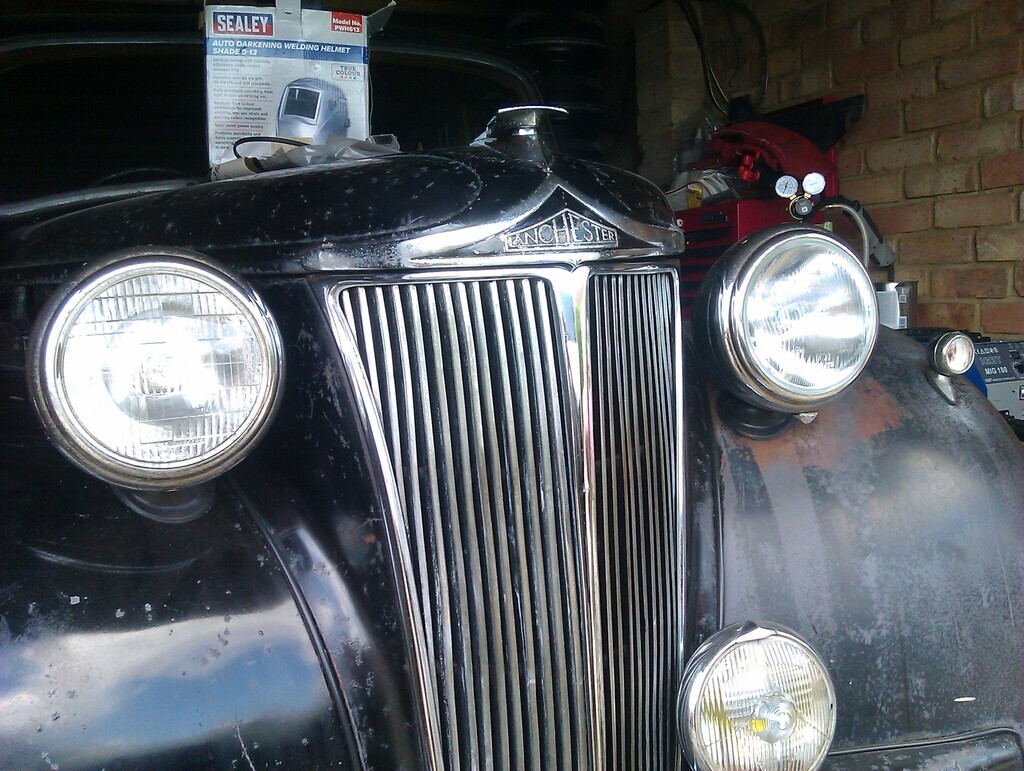 |
| |
|
|
vulgalour
Club Retro Rides Member
Posts: 7,278
Club RR Member Number: 146
Member is Online
|
|
|
|
|
Maestro rust busting mission today failed. A tiny filler worm fell off at the front when tapping the new tab for the bottom of the wing into place. Turns out there's some little perforations in the leading edge of the sill I'd not seen due to underseal so I need to clean up and repair that. The holes are barely anything and all localised to a tiny patch but I can't leave that undone now I've seen it. I'll also have to check the passenger side since it's probably the same. Well hidden bit of rot that one, mostly because it's normally covered up with the wing and the arch liner and I only saw it because I was repairing the wing bottom.
The bit of rust in the under-boot around the rear exhaust hanger has proved impossible to deal with in the conventional way because my grinder physically won't fit where I need it to so that I can cut the rust out. I'm going to have to get creative with wire wheels and files to deal with that one. It's probably not an MoT failure, I just want it sorted now I know about it. I also learned I need some more flap wheels and other consumables and right now I'm flat broke. It's a combination of factors but basically I'm out of spare cash until work picks up again, which in the current financial climate it might not for quite some time, which isn't ideal (haha, shouldn't have bought those headlight parts!).
On the plus side, the Maestro appears to have a stainless steel exhaust. I didn't know this because it's filthy, so hadn't seen it until I was under the car today. It might explain why it sounds throatier than my friend's very similar pristine Maestro. That's saved me a bob or two, which is nice.
|
| |
Last Edit: Aug 7, 2022 16:09:04 GMT by vulgalour
|
|
vulgalour
Club Retro Rides Member
Posts: 7,278
Club RR Member Number: 146
Member is Online
|
|
|
|
Right, had time to pull images from the video I took today (I'll process and edit all that for release when the job is done, it'll be a few months down the line most likely) to show you what I saw from the above. I'm going to give the exhaust a clean to see what exactly I've got, especially after learning fellow Maestro owning friend forked out £700 to have a stainless exhaust fitted to his car. 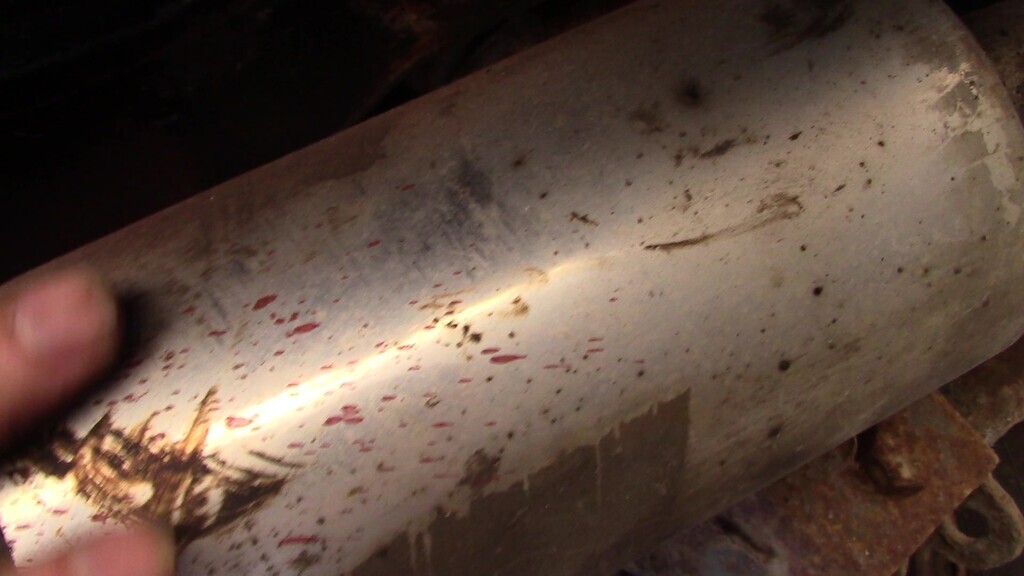 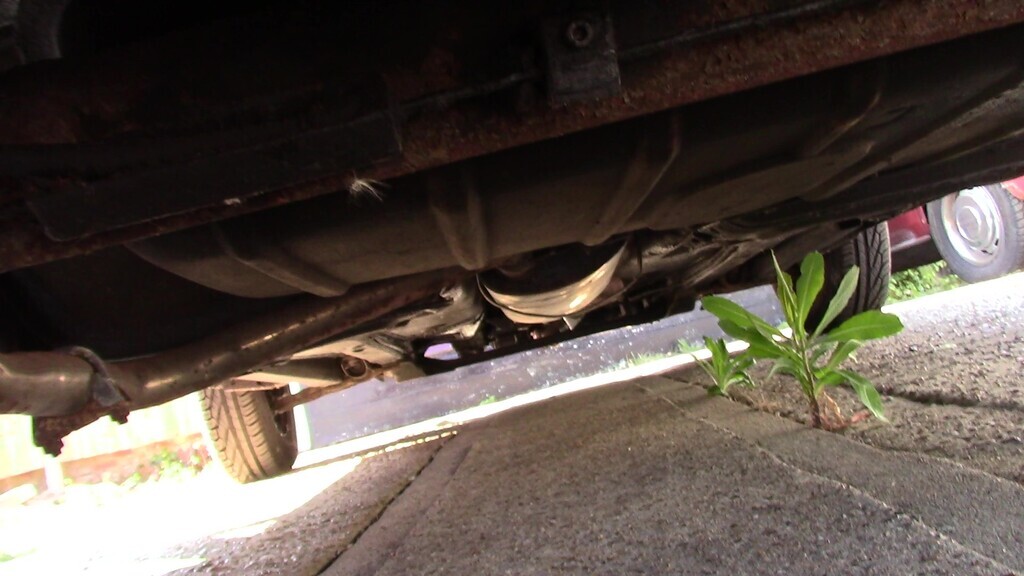 The rust at the front of the sill is quite minor, it's an easy repair happily and since it's covered up it doesn't matter if I'm not all concourse about the shapes. Frankly, it probably wouldn't have been highlighted at MoT because you can't really see it when the wing is on but now I know about it, I need to fix it. 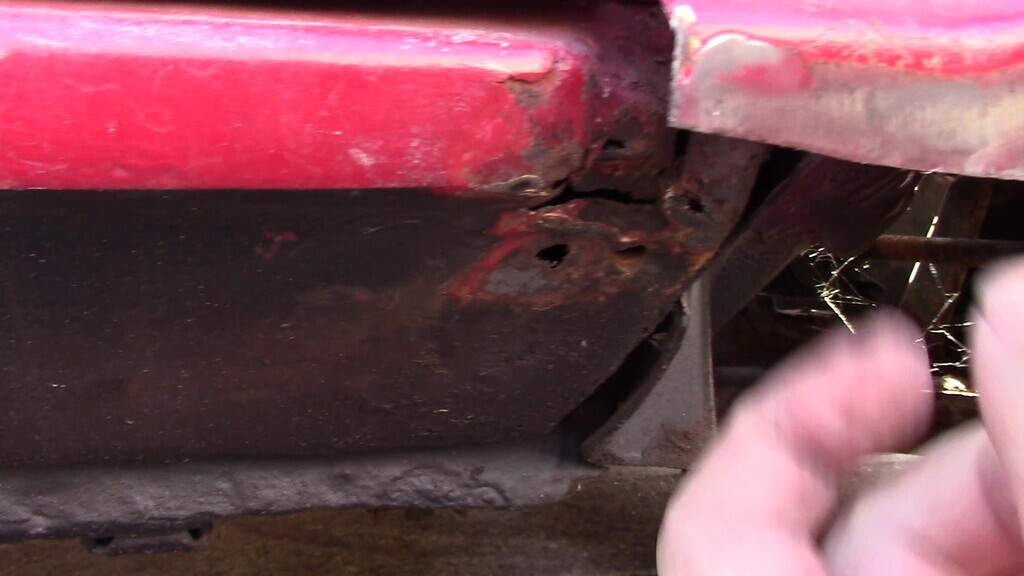 I've got some free jobs I can do on the Maestro as well which will help move it along while I wait for work to sort itself out and give me some more pocket money for treats. I'm managing, I'm not in danger financially or anything, things are just a bit tight at the moment, we're feeling the squeeze. --- And now for something completely different. I know some of the readers here are self employed, a couple of folks even in the same field as I am, and it's sort of connected to project progress. Over the years of being a full time artist I've learned a lot about what does and doesn't work and, in recent years, I'd been convinced to lean more into social media and build 'relationships' with my customers both existing and potential. This is what's known as parasocial relationships, it's a tool used by Influencers and to a degree by various companies and individuals. It's that thing where you feel like you know someone and want to support them even though your only interaction with them is through images and videos they post. You've never met them, they have no idea who you are, but you think they're your friend to some degree. Less ethical sorts use this to manipulate folks into spending money on products they don't need, more ethical sorts actually put a lot of effort in and genuinely care and try to maintain an audience. Twitch streamers, for example, use this to build and maintain an audience and income. Anyway, for me it's not been working. I don't enjoy trying to build parasocial relationships and as I started to get better at doing it I found it was just eating so much of my working day that it was leaving very little for actually producing work. Lately, with the slow down, I've been able to step back and see this properly. It's also allowed me to reassess what's actually working for my business and what isn't. Youtube has been great for keeping me on track with projects, giving me a healthy diversion from my regular work, and actually improving my modest print sales. Great stuff all round, and not entirely expected because I wasn't sure what the result of doing Youtube content was going to be, I just wanted to try something new and I'm enjoying it. So, if you've ever promoted my stuff by sharing it and interacting with it, cheers! You're genuinely helping me get my projects done and earn a little extra cash. What hasn't helped is the attempt to build 'relationships' via social media. In an effort to be more relevant to a wider age group I was looking at ways to increase my customer base with more personal interaction and building of what are effectively parasocial relationships. This has, in real terms, cost me money. That's because the more time I've spent on that the less I've had to actually create and promote my work and the harder it's squeezed my creative energy for free time when I'm doing project stuff like the cars. So i'm not doing it any more. It's not healthy and, arguably, it's not that ethical either. What this all means for what I post here and on other car places is nothing much really. I've got videos in hand to keep the content flowing for a while and although the chronology is all messed up, having you all here to help me out when I get stuck is really useful. --- Back on topic, the cars. I've been a bit all over with updates at the moment and the above is really why. I didn't understand where all my hours in the day were running off to until I had some distance from work to see it. Now I do, I can fix it. Princess - Sticking around. The seller of the brake parts I need went on holiday just before I contacted them so organising that has been a bit slow. Once they are all sorted I've got stuff arriving to get my rear brakes back together and then I can move on to some new stuff and get the Princess rolling once more. I want to get it MoT, but I also want to get it painted and lots of other things this year. There's quite a few people want to see me part with this car, and quite a few people who don't. I'm going to be settling it in to semi-retirement I think, just because of parts supply issues really. Maestro - Sticking around for now. I do want to sell this car when I'm finished though. Finished is the last few cosmetic jobs, making sure it has a full MoT, and being sure it's as good as a high mileage Maestro can realistically be before it becomes someone else's project. I fully expect it to be difficult to sell when the time comes too because of the mileage and because I'm not intending to do anything about it showing its miles. If I restore away the character not only will it cost me more than I'll ever get back, it will also become just another Maestro. I also want to try on a couple of Minors for size before putting it up for sale, I've a nagging suspicion the seating position in the Minor isn't going to agree with me and it's been so long since I sat in one (I've never driven one) that I can't remember how good or bad it really was. Lanchester - Sticking around. Pat won't let me sell it even if I wanted to and I don't want to anyway. Progress might be a bit glacial, in part because it needs a good chunk of money spending on it - radiator, heater core, etc - to get it where we want it to be but there's no real pressure to get it finished. It'll get done when it gets done, the only pressure to complete it comes from Pat and I's desire to use it and honestly, we've more important stuff to deal with than what is effectively a toy. We'll get there. I keep saying it, and it keeps being true. Every month I make a little bit more progress and that's all that really matters. |
| |
|
|
vulgalour
Club Retro Rides Member
Posts: 7,278
Club RR Member Number: 146
Member is Online
|
|
|
|
Time for the boot lid refurbishment written update. This was part of the car I was actually looking forward to investigating because it would give me a look at how the body was constructed since the boot lid is an ash frame with an aluminium skin. The first job was to remove the dozens of chrome plated flat head screws from the aluminium interior panel so that it could be removed and expose what was going on inside the boot lid. Primarily the reason for undertaking this job was to find out what was happening with the wiring since there wasn't any present for the number plate light when we got the car. 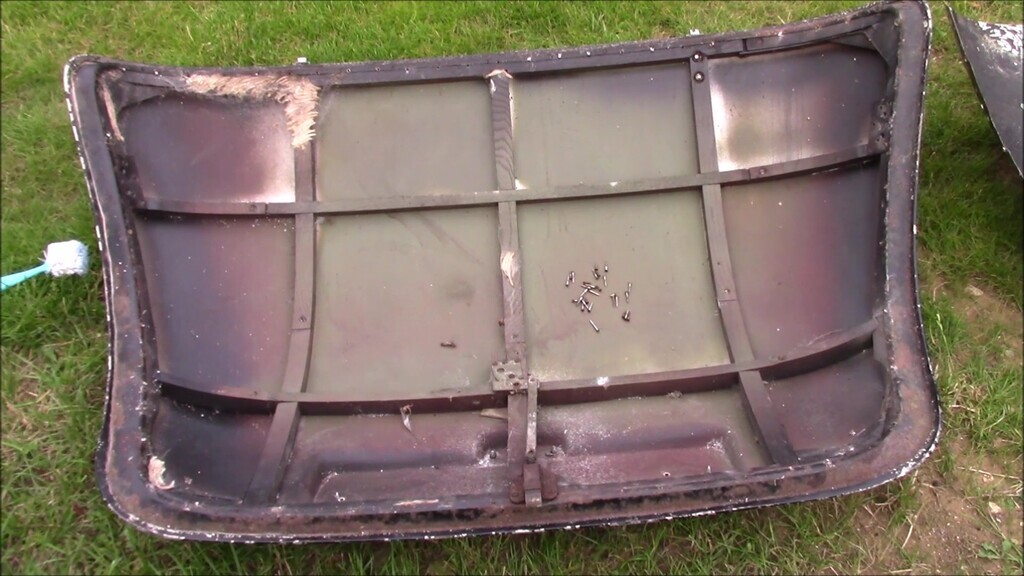 We found some weird cocoons. These are probably moth cocoons, they're on the same side as the one bit of moth damage to the wool covering the rear parcel shelf and the moths and caterpillars would have an easy route into the car between the two areas. If you know what these are for definite I'd love to know, because bugs are interesting. 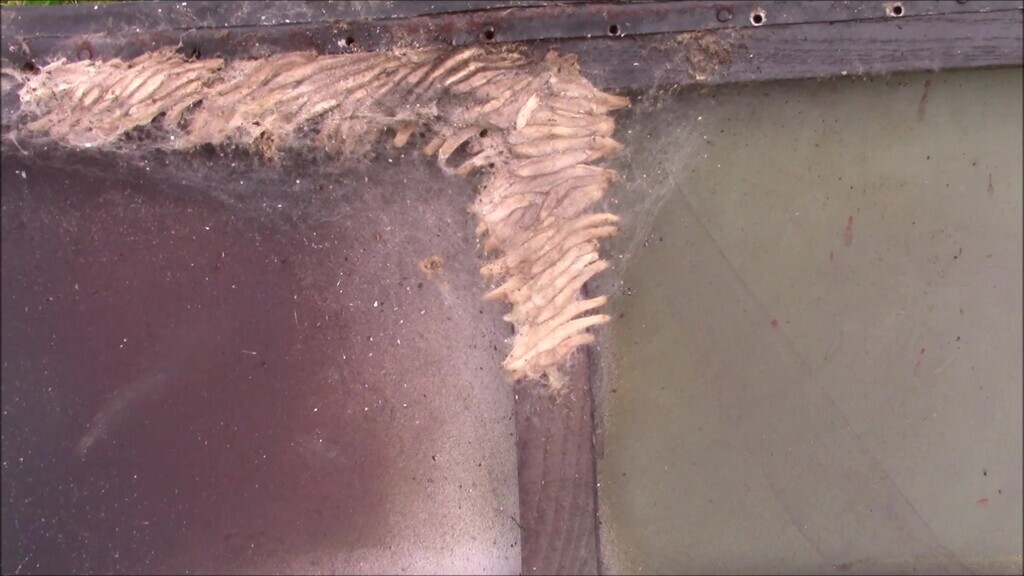 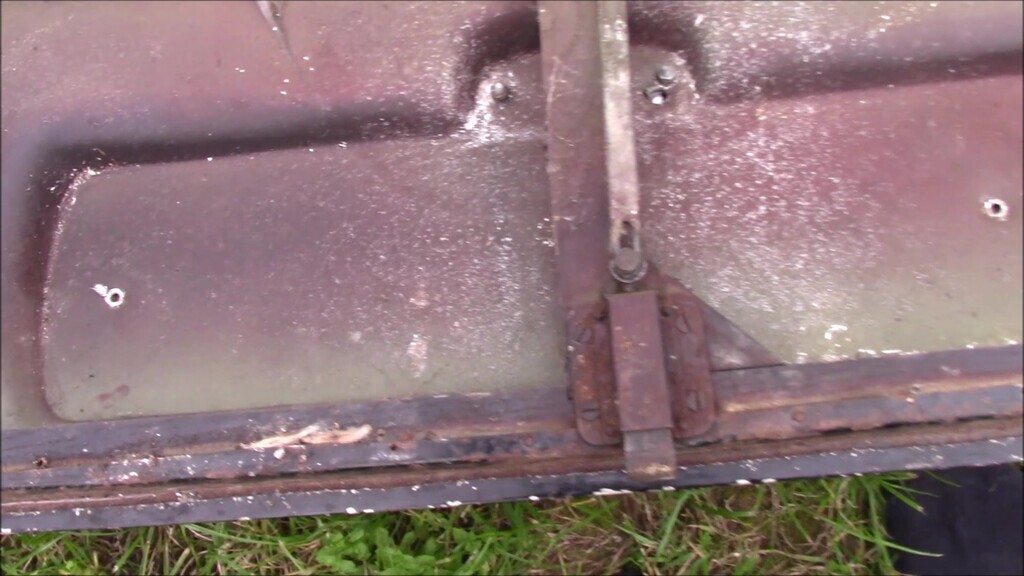 It all cleaned off very easily. There was nothing living in the cocoons any more and no signs of any moths in the car or the boot lid so they've probably vacated the premises a long time ago. No damage inside the boot lid either, the wooden frame is nice and solid and dry with no signs of insect damage, the aluminium is in excellent condition and the steel edge that runs around the wood frame and under the aluminium outer skin has little more than a bit of surface rust here and there. 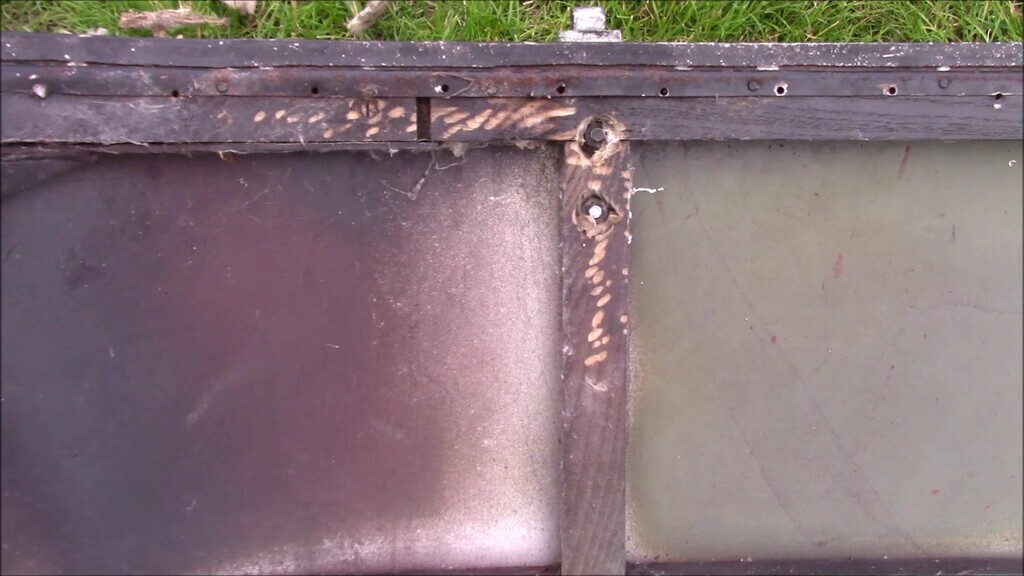 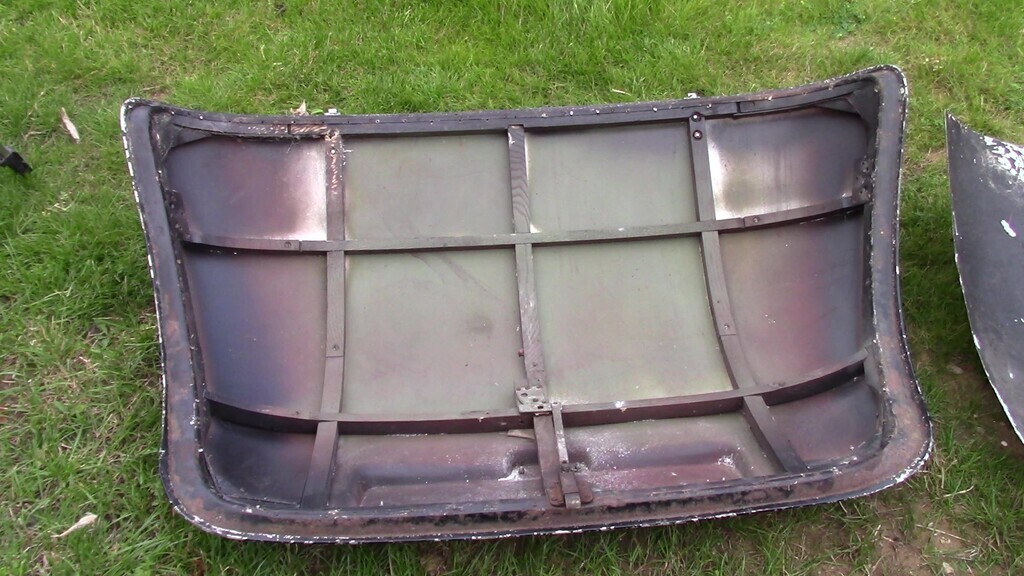 The interior aluminium panel has some damage on it, one puncture from the boot lid probably being shut on something inside the boot before we got the car, and a curved line of missing paint that seemed to correlate with the old tyres that were being kept in the boot. You can see the o-ring at the top of the panel here too, that's where the wiring should exit the boot lid. When I drilled some of the chewed up screw heads out, the drill skipped and damaged the aluminium in places. It couldn't be helped, unfortunately. 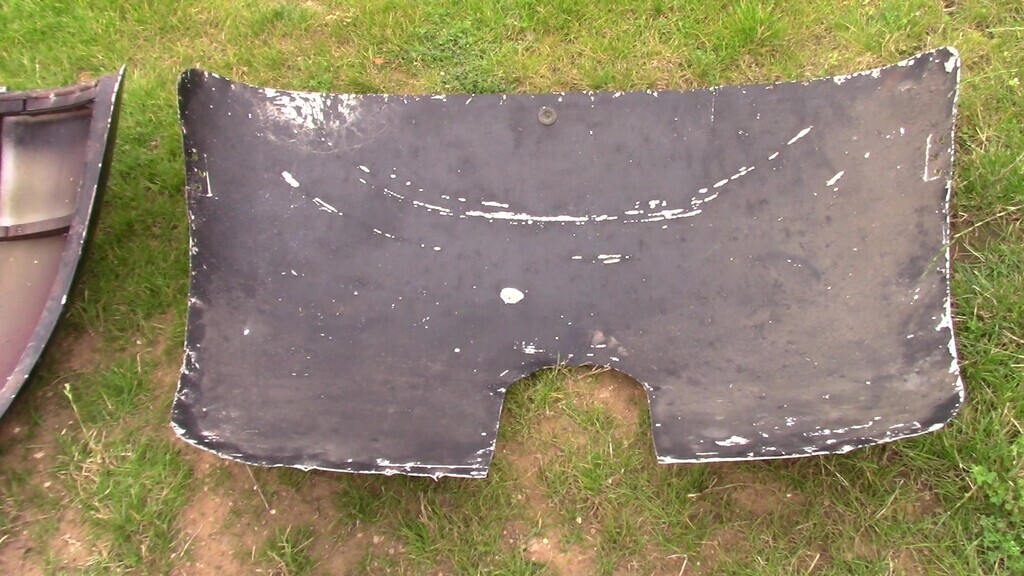 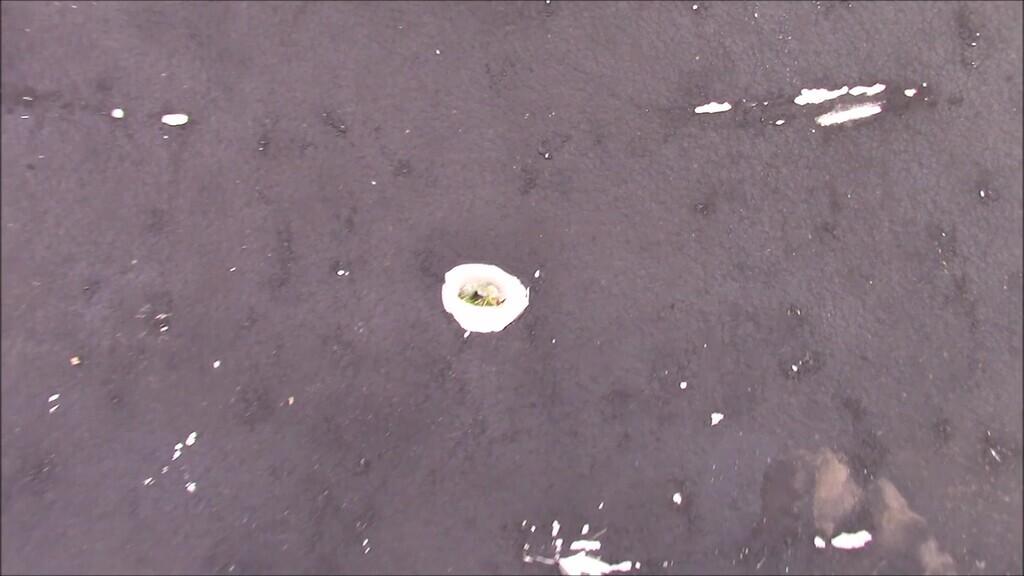 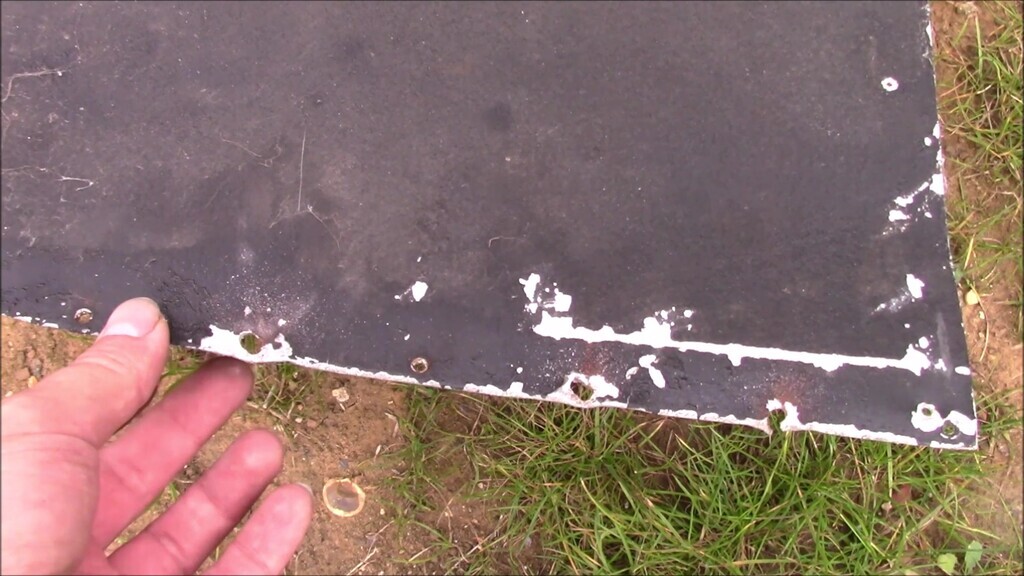 The old screws look to be flat headed chromed steel. While most of them came out, some snapped, and some the heads were too soft from rust and just chewed up. I had to drill some of them out. 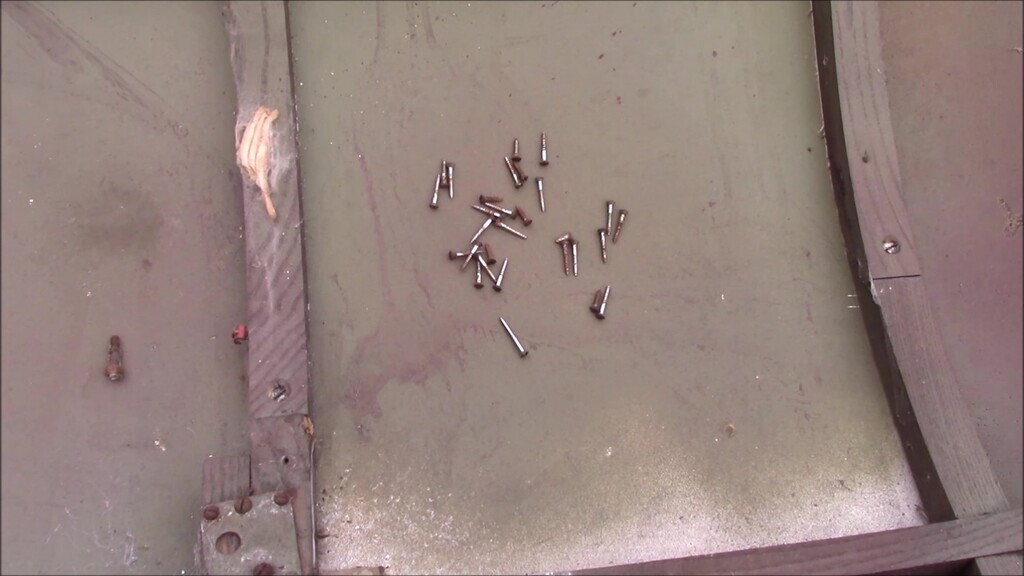 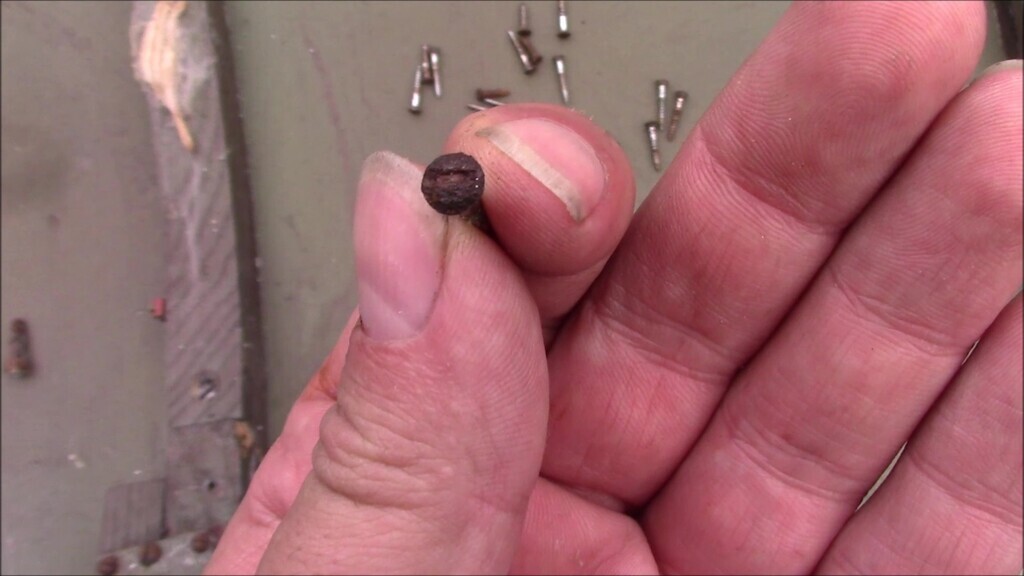 Interestingly, we were made aware of some sale advert photos from eBay in 2008 when the Lanchester was wearing a differently coloured boot and bonnet. It also sported a much nicer looking rear bumper. When I recorded this video I didn't know about this and could only speculate about the extra bolt holes for the number plate and the chopped off bolt I found inside the boot that had been rattling about. I wonder if the boot lid in the photos is actually a different one to what's on the car at present and the original number plate was swapped over. The boot lid on the car does have a dent that doesn't appear to be there in the photo below and we do know the car was possibly a parts car at one point in its life so it's entirely likely we've got slightly worse parts on the car now than it had in 2008 because the good stuff was sold off or used in another restoration. It happens. 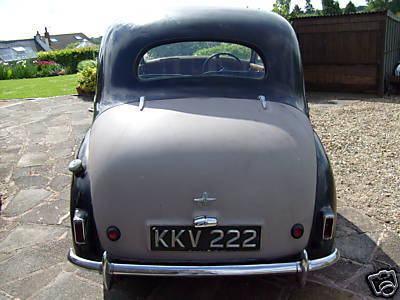 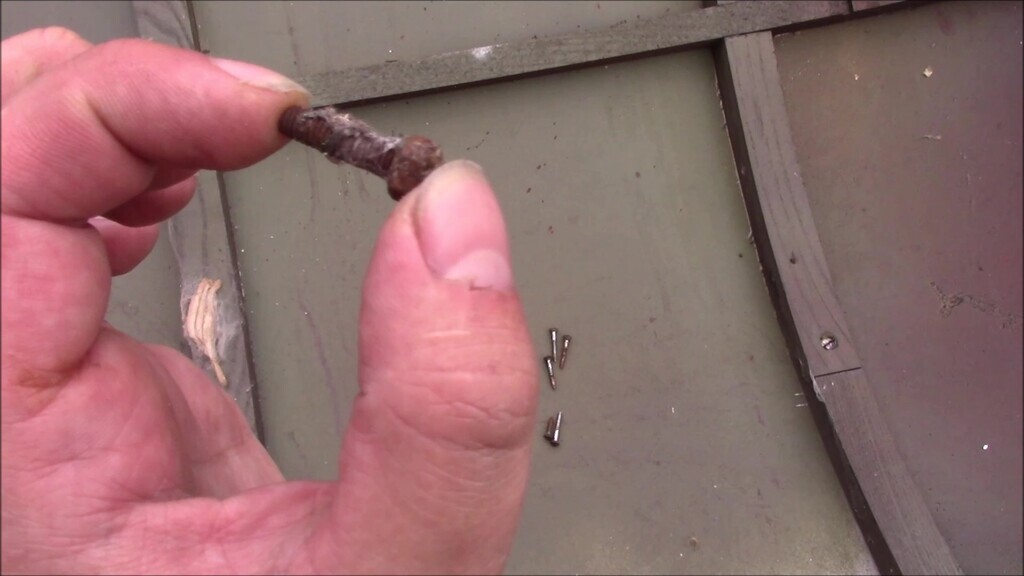 Other discoveries were where the wiring should run inside the boot. There's a guide staple on the central beam, and a couple of holes drilled in the frame for the wire to pass through. More on this in a bit. 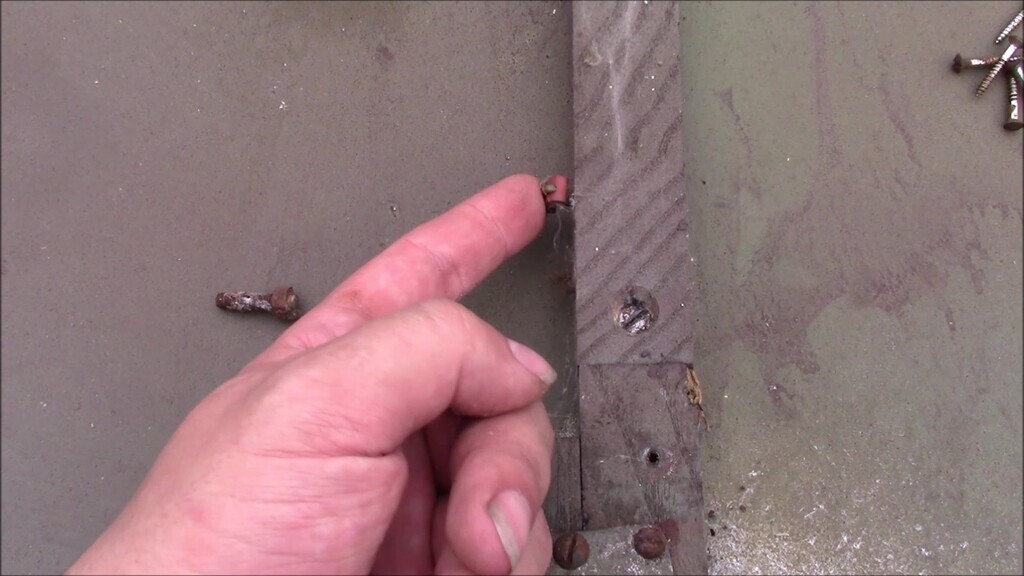 There's no grommet for the wiring to the number plate lamp which simple bolts through the outer skin. 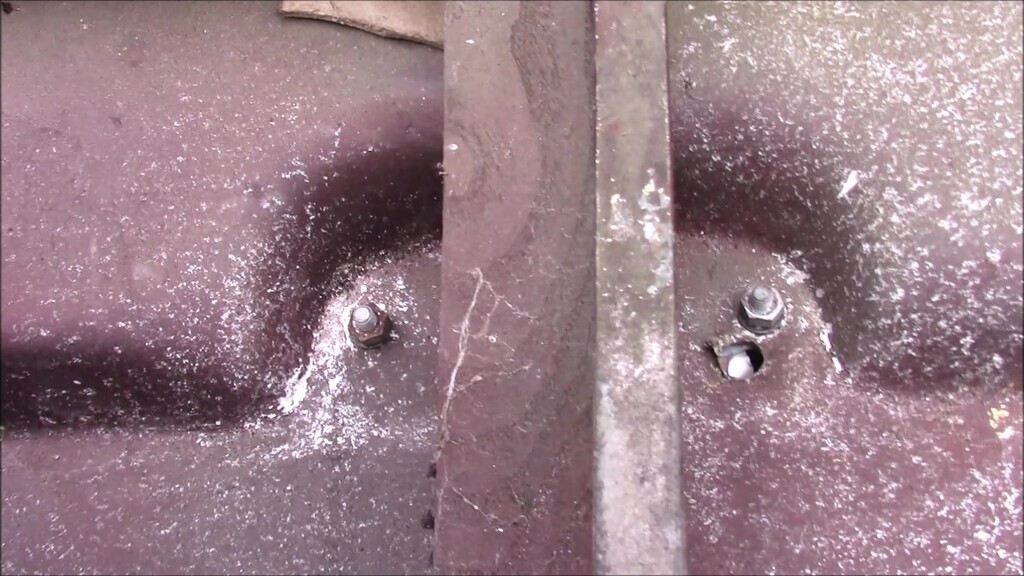 I spent some time with an improvised dolly and a hammer to dress out the puncture on the aluminium interior trim as best I could. It's not perfect, but it's not a hole, so it'll do. I have zero experience doing any sort of aluminium bodywork so it is what it is. 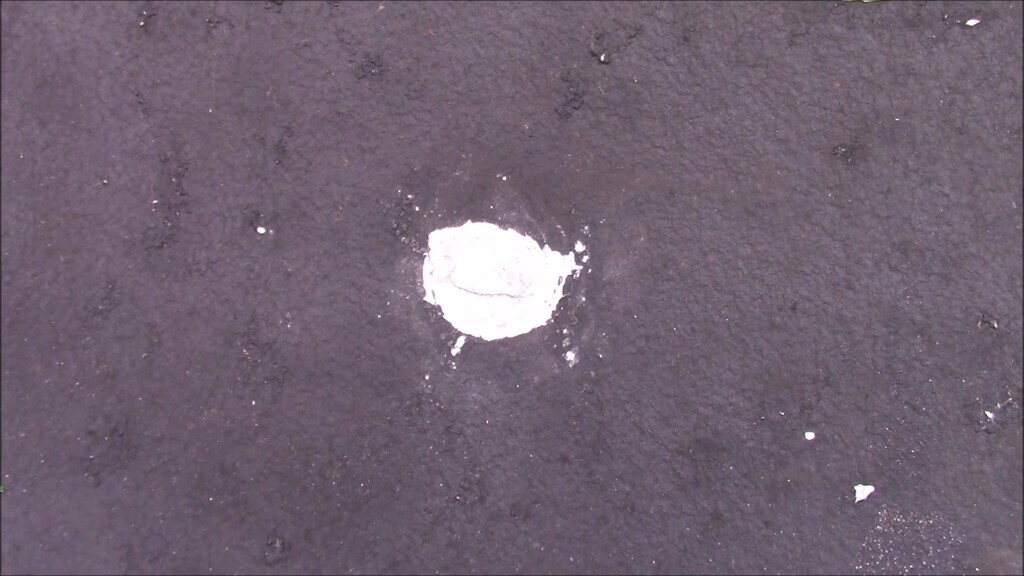 It was then time to remove the broken screws from the wooden frame before I could refit things. This took a while making use of a pair of pliers. The vast majority of the remaining screws did come out, only a couple snapped inside the frame where I couldn't get to them so that's about the best outcome you can realistically have on a job like this. 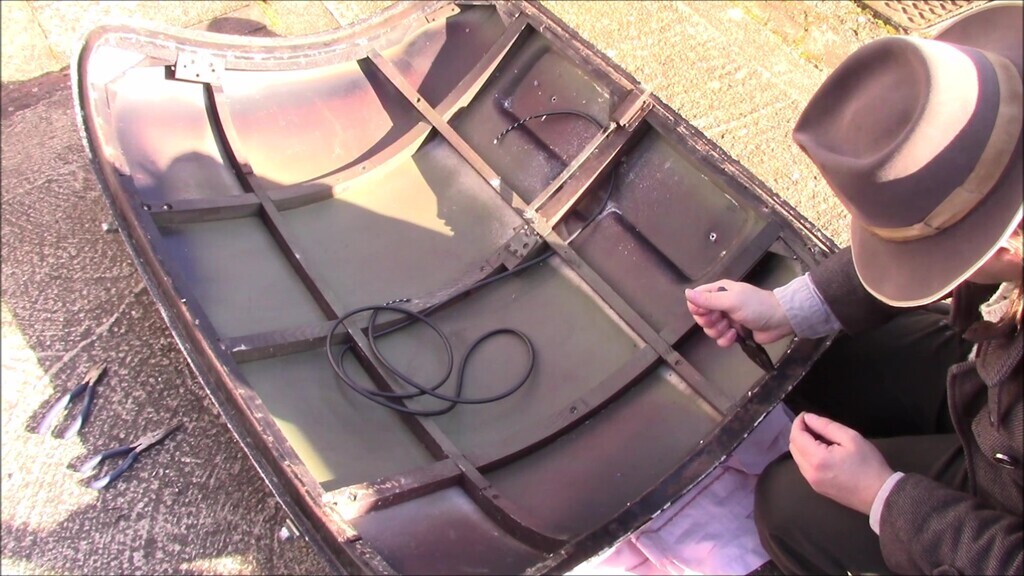 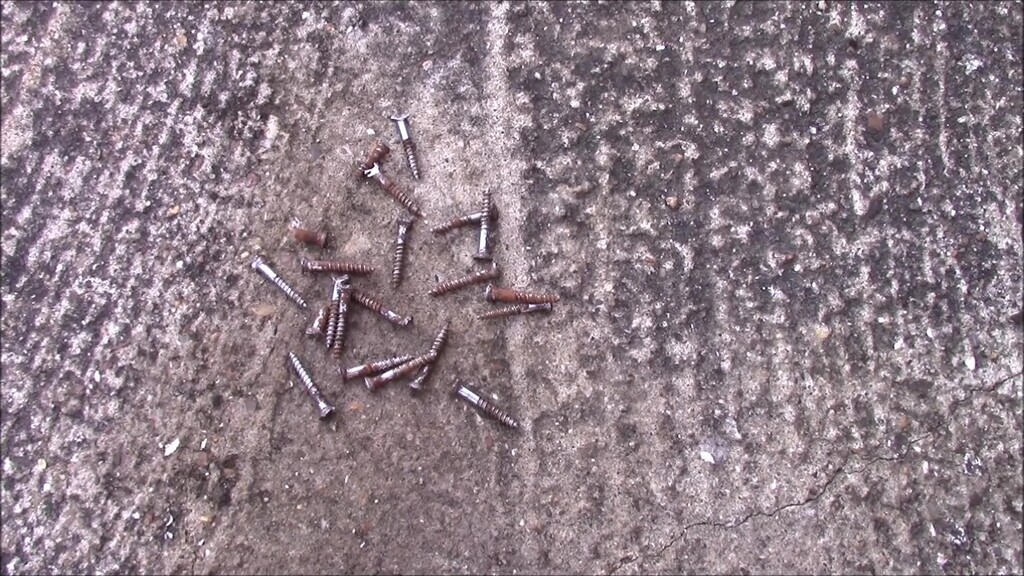 Everything now cleaned up, it was time to rewire. The wire for the number plate light isn't provided with the wiring loom so I had to buy some more. Since this wire is for the most part hidden, which just a small part visible where it exits the boot lid and hooks up behind the trim under the rear window, I opted for a black vinyl sheathed 2-core since I needed a red and a black wire with a protective covering. I ordered a couple of meters because it's a fairly long run since it goes from the bottom of the boot lid, up to the rear screen, across to the driver's side of the car, then all the way down the inner arch inside the boot to the bottom outer corner where the rest of the wiring loom enters the car. 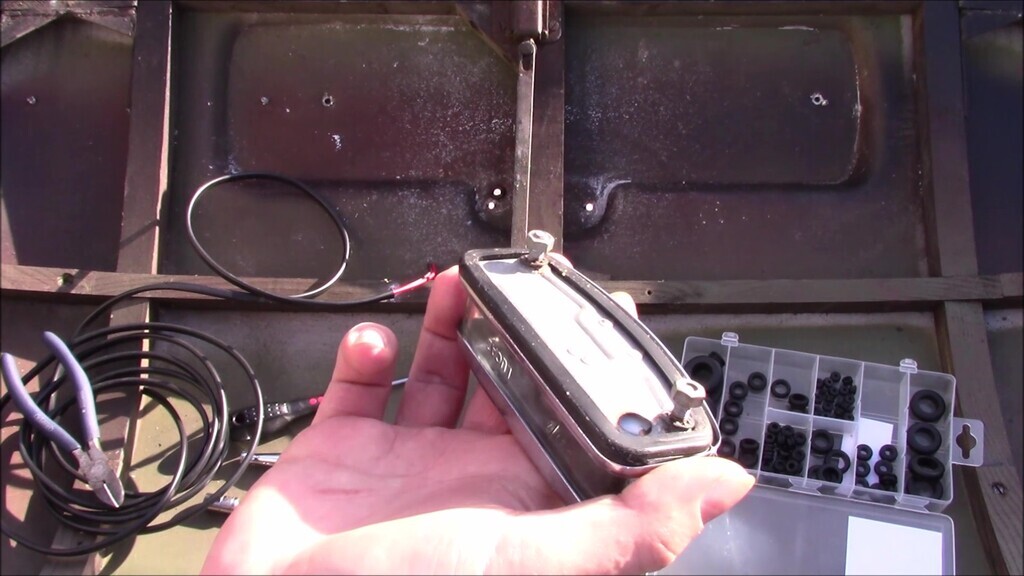 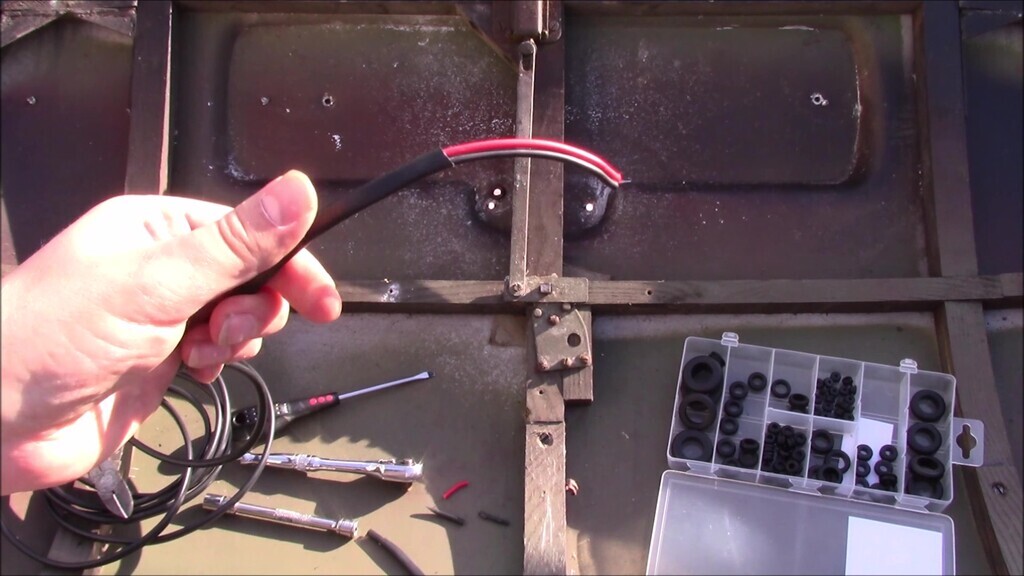 Once the wire is fed through the hole for the number plate lamp, feed it under the vertical beam to the opposite side. 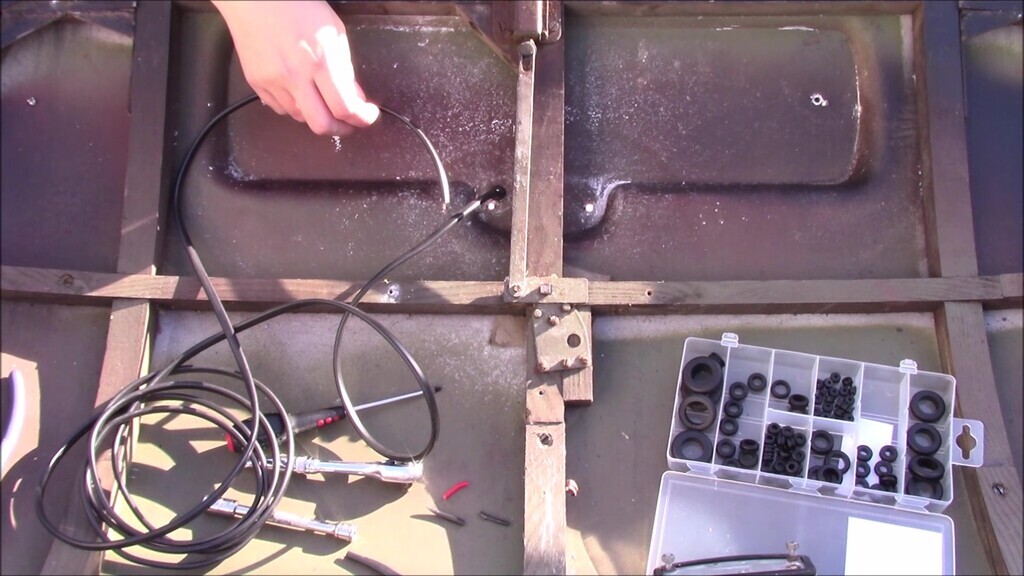 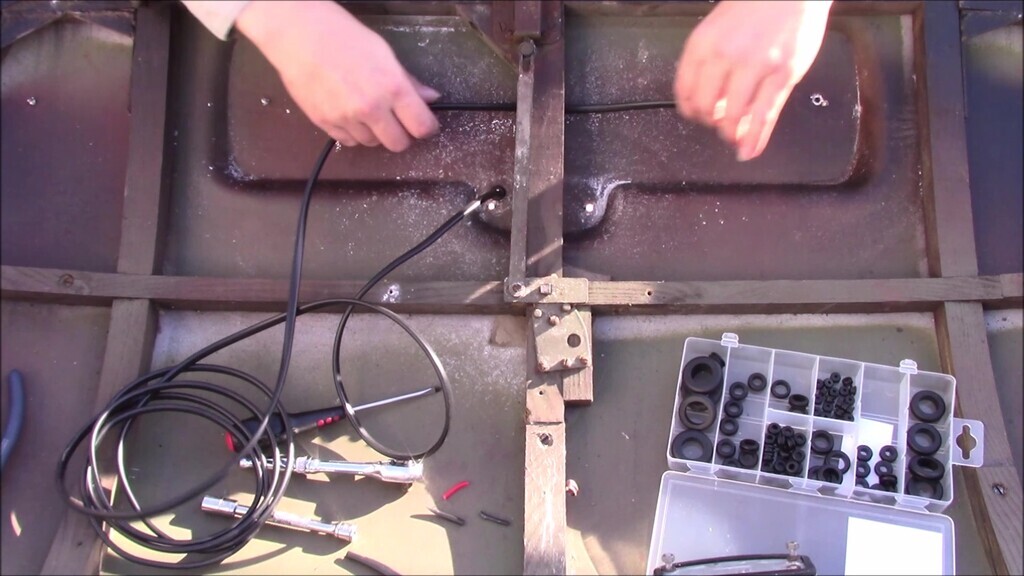 Then guide it up (boot lid is upside-down here, the shape meant I had to film it this way) through the hole drilled in the horizontal beam before tightening the bolts for the number plate lamp. 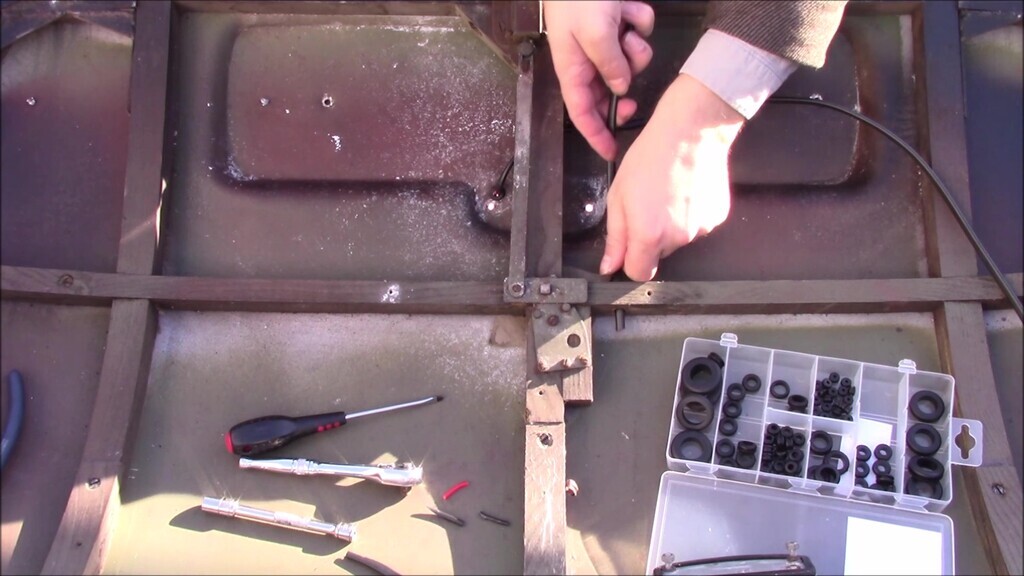 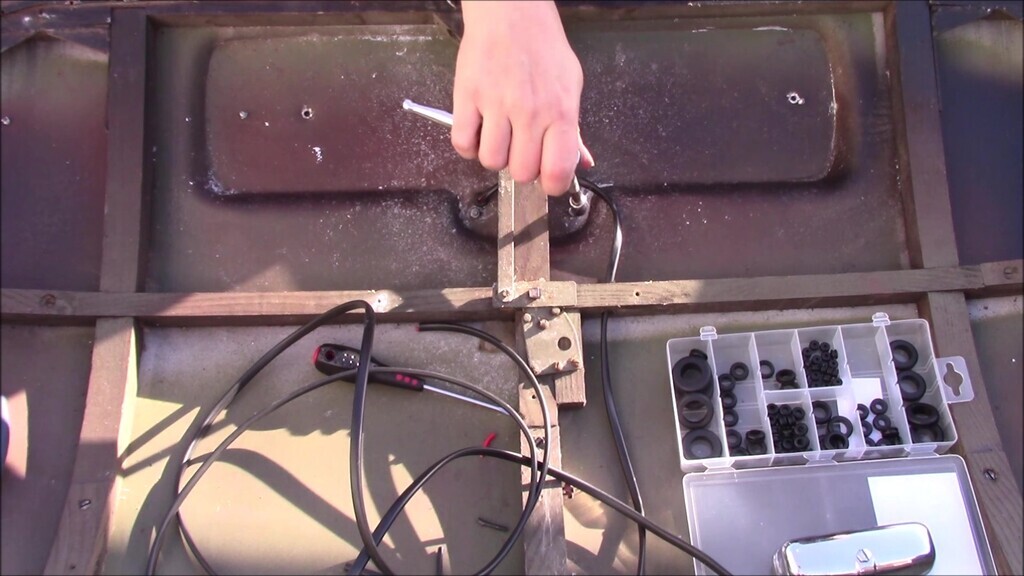 There's a staple to hold the wire down to the vertical beam, another hole in the next horizontal beam, and then the wire exits through the hole in the aluminium interior trim where the rubber grommet is in the earlier photos in this update. Once the wire is threaded through, turn the boot lid over and put the push connectors onto the end of the wires. This is very fiddly, there's not a lot of room for the wiring to go inside the lamp housing because of how it's designed. It took me a while to find out what these connectors are called, I found them as Push-in Bullet Connectors on Paul Beck Vintage Supplies www.vintagecarparts.co.uk listed as 560-push on their site search function. These are the same as used on the original headlights and semaphores. To fit, you strip back the sheath from the wire, push the wire through the hole in the connector and then bent the wires back. This gives a friction fit into the holder without need of soldering and works very well. I took a guess at which way around the wires should go and got it right, remember our car is positive earth. 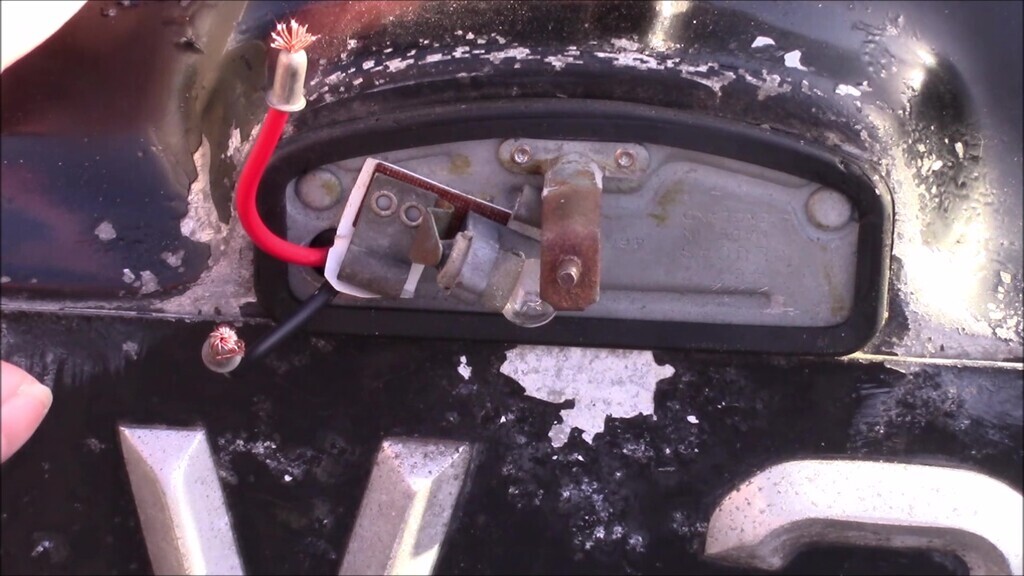 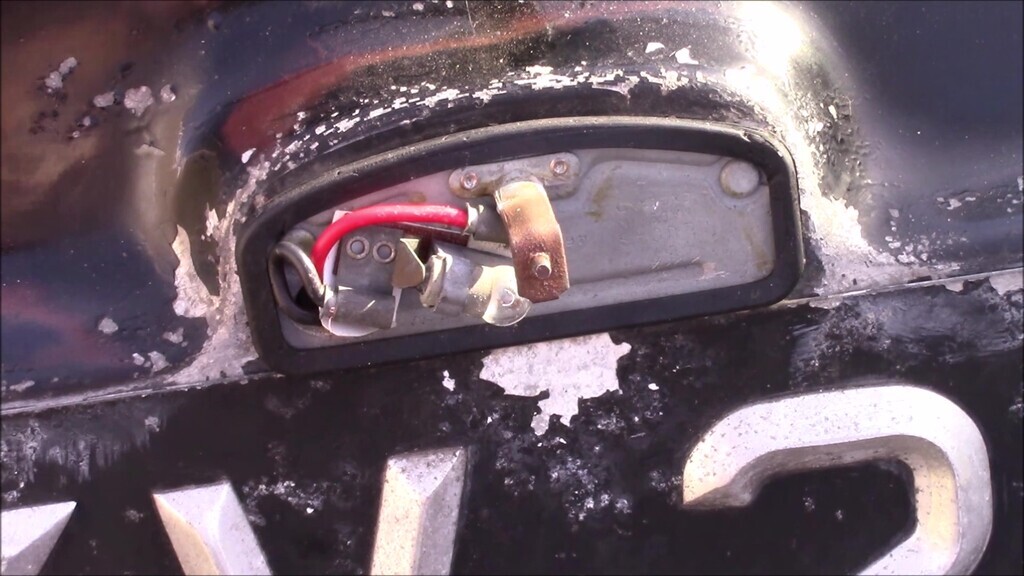 After that it was the task of screwing all the dozens of screws in to hold the interior panel in place. I decided against using any sort of sealant or adhesive in the end just in case I have to get in here again for any reason. The first screws I got were just a bit too short so I had to undo them all and redo it with slightly longer screws. I'm also using cross head wood screws rather than the original style of chromed flat head screws. This was a practical consideration since I couldn't get hold of the chromed ones at the time of recording, I may go back and correct this in the future. 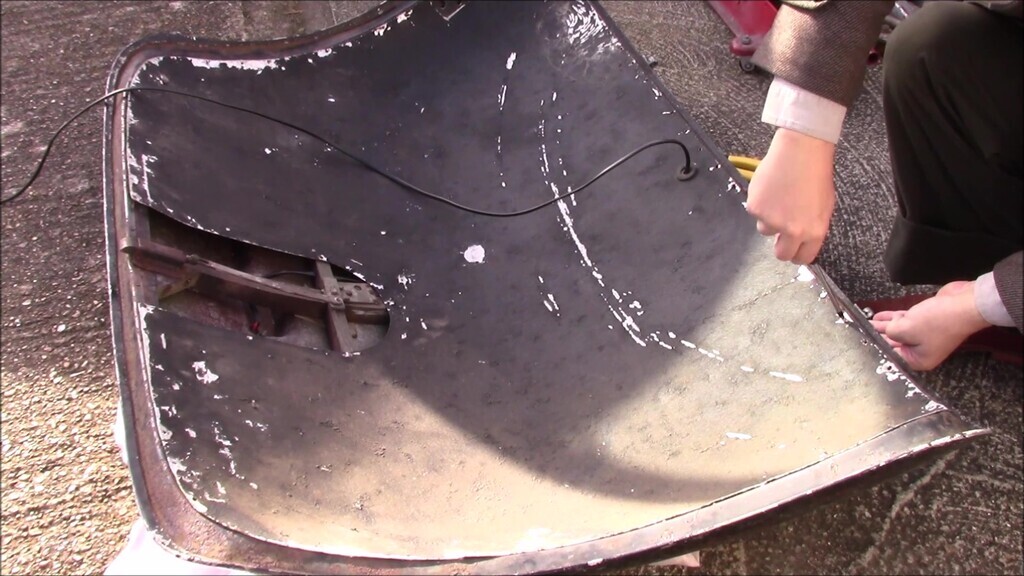 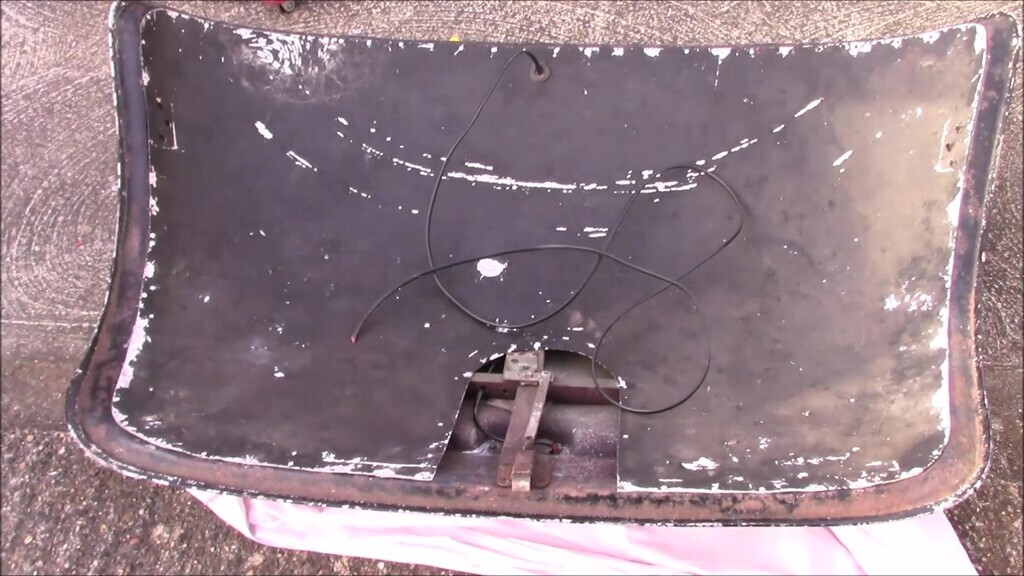 All back together and looking like none of this ever happened. Sign of a job well done is that. I opted not to repaint the interior trim to avoid project creep. Next up, to do something about the missing trim that goes over the latch mechanism. I have no reference for what this should look like and limited materials so used some hardboard. Trial and error got the shape I wanted. Eventually I'd like more of a pressed blister shaped panel, possibly in steel or aluminium, to full enclose the mechanism since what I've done is okay but I don't think is right. If anyone knows what this should look like, I'd appreciate reference images. 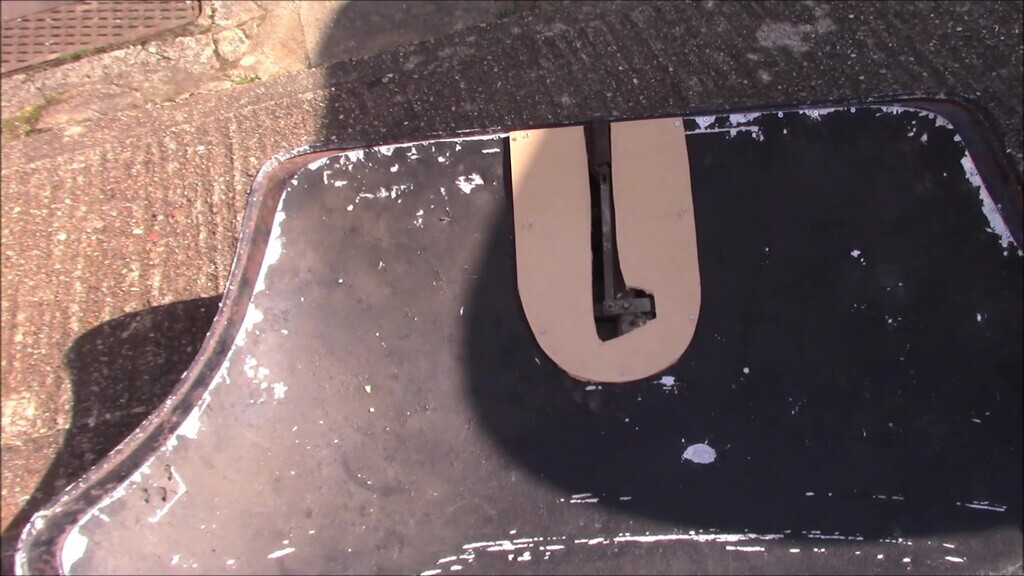 I didn't like the colour. I had wanted to use millboard to match the other original bits of trim but didn't have any and couldn't get hold of any at the time of recording, so I just used some satin black spray paint and it got me close enough. 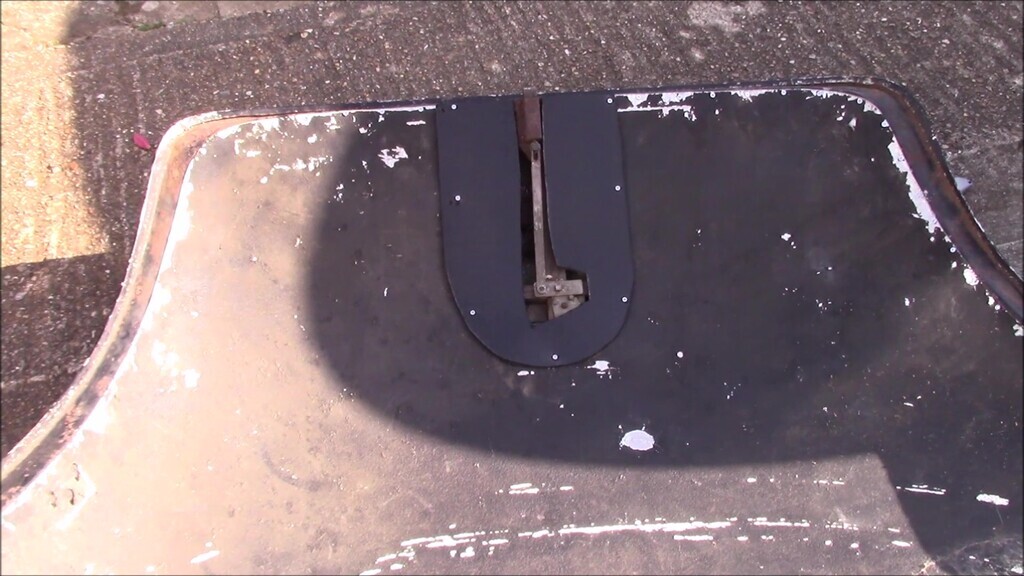 With the boot lid now ready to go back on the car, the next thing was to sort out the hinges. We'd knocked out the brass pins to remove the boot lid and found one was bent. Later we learned about the location of the hinge bolts which would have made removal a lot easier. I spent some time straightening the pins as best I could and turning the burr on one end of each into a mild chamfer using a hand file. This would aid in refitting. 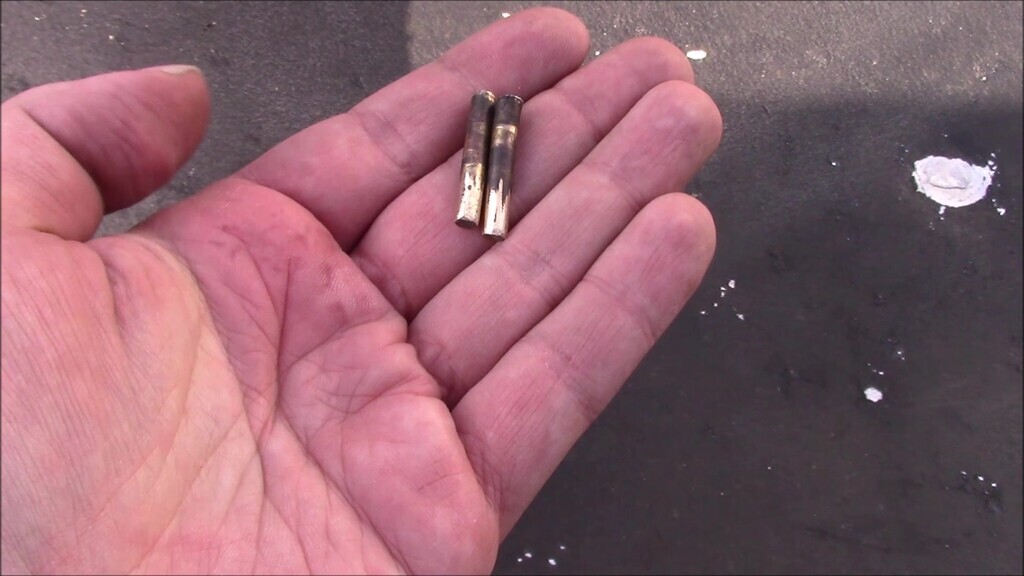 When we got the car, the hinge pins weren't flush but after some effort, Pat and I had them seated properly and looking much better. 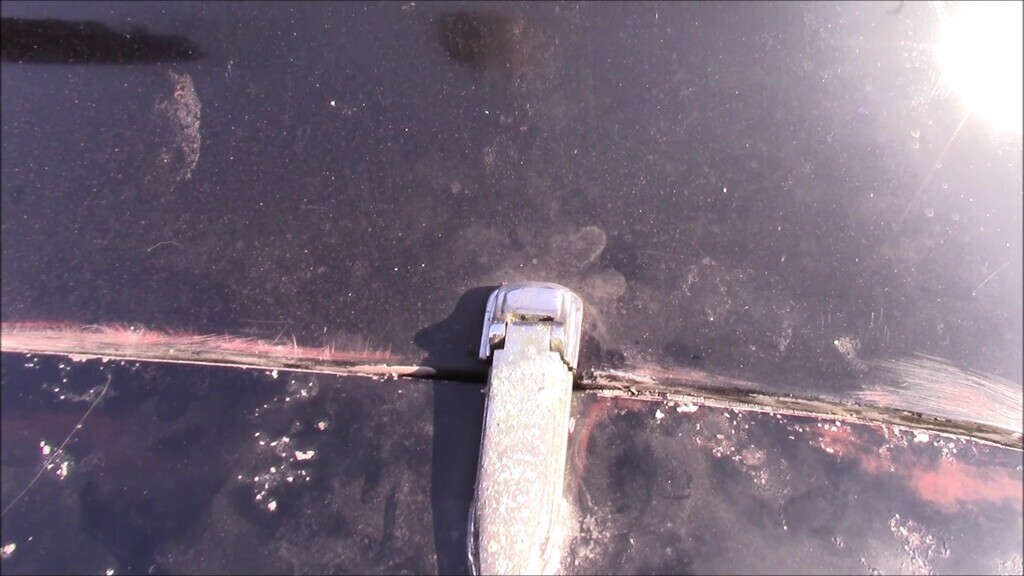 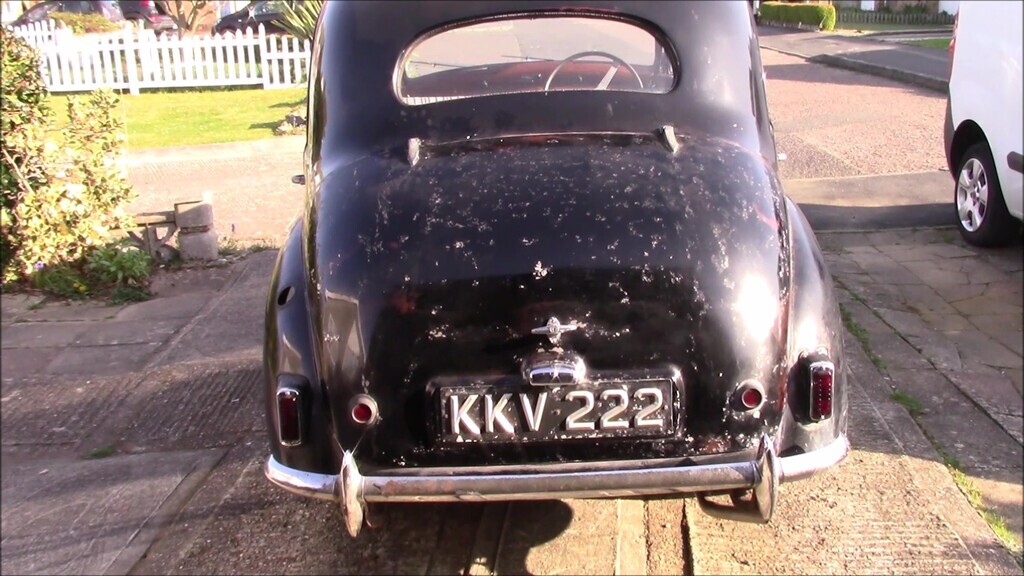 The panel I'd made for the interior was cosmetically a waste of time. Practically it should protect things from going into the boot lid a bit more so I don't feel it was a total waste. 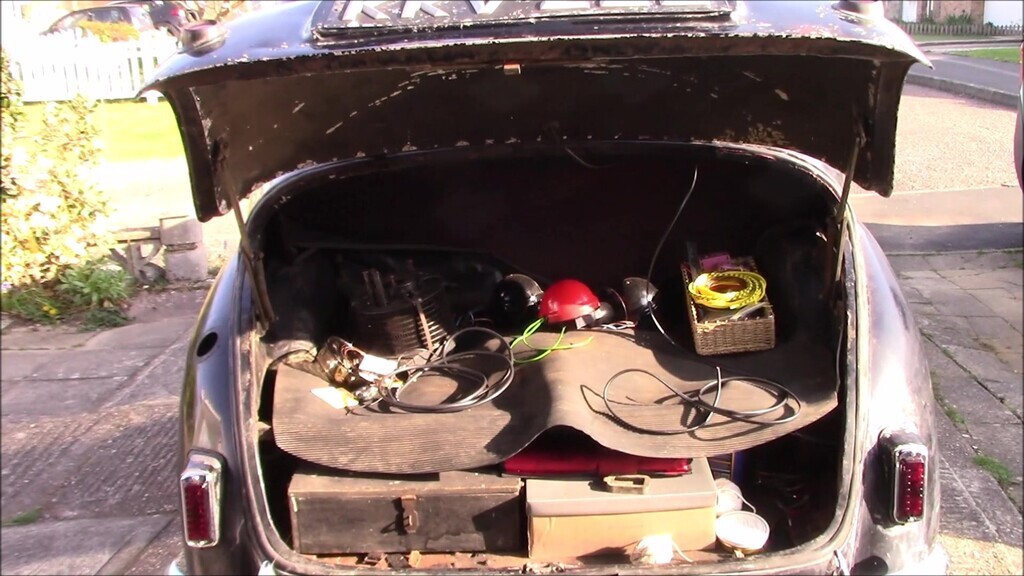 The other thing we noticed on refitting is that the bolts holding the hinges to the boot lid are incorrect. Instead of a countersunk head, they're a flat bolt head. I don't have any of the correct fixings so just put them back in. 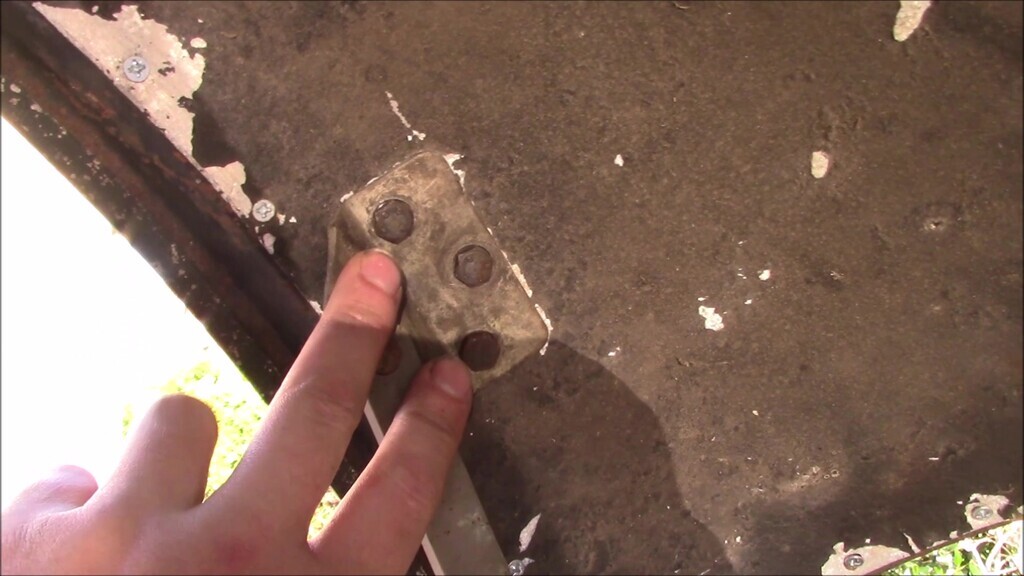 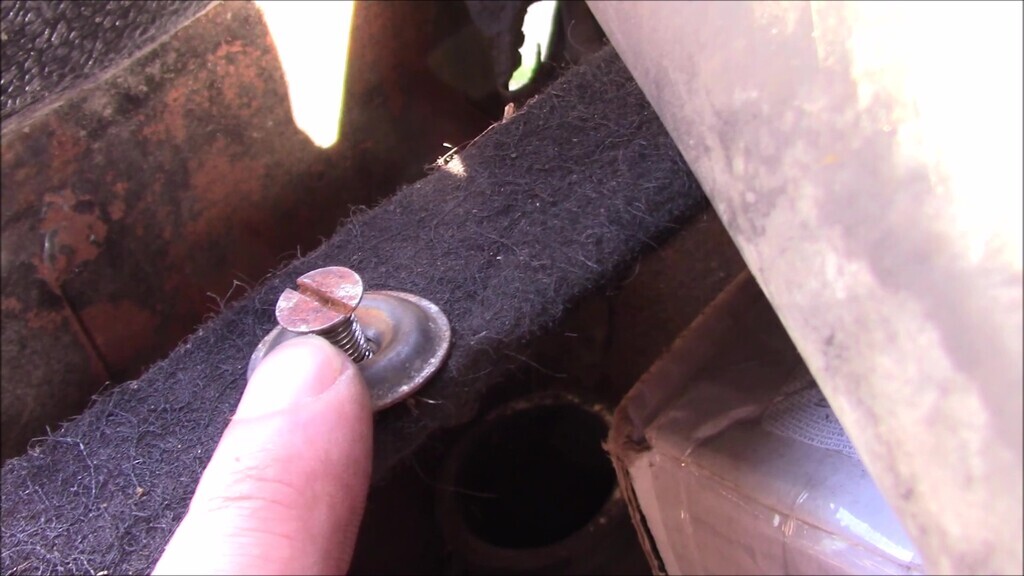 With that all finally back together and the wiring ready to be hooked up - which we now know is correct, but I didn't at the time of recording - I could demonstrate how horrible the boot is to use on this car. Lift the boot by the handle at the bottom, it is at an awkward height. Then hold the boot lid with one arm while pulling out the hinge on one side with the other to lock the boot in the open position. 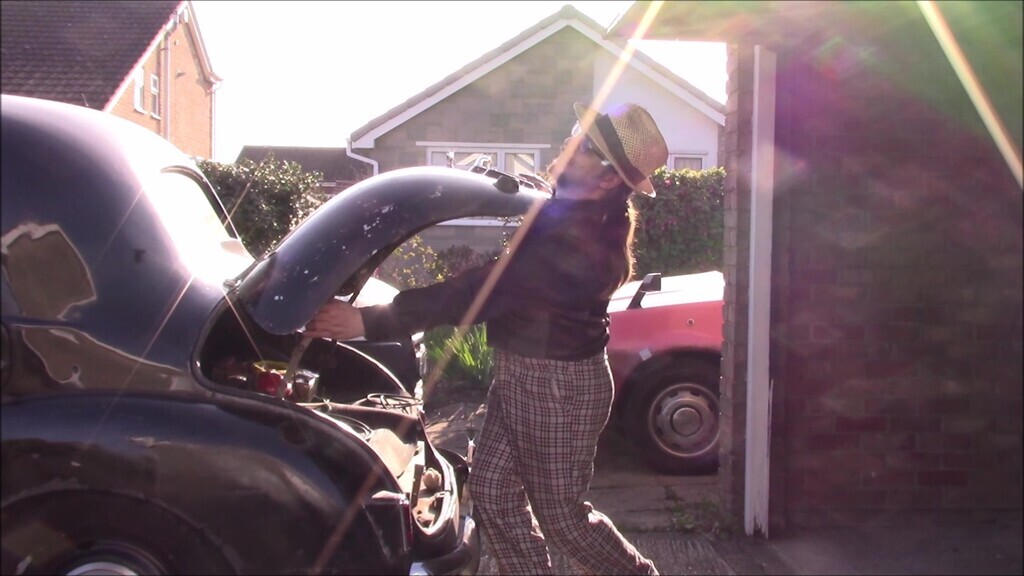 Do your very best not to hit your head on the boot lid when putting items in the boot, or removing them. Everything is at the wrong height to make this easy to do and the boot lid will usually get you on your way out. 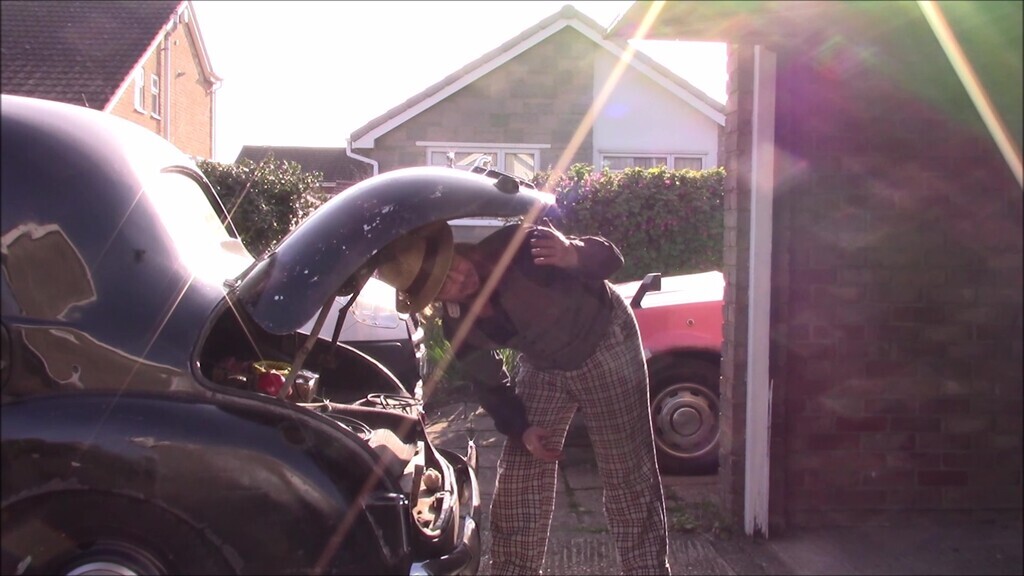 To close, merely brace the boot lid with one hand, push the hinge in without trapping parts of your hand in it, and try to gently lower it to close. You'll probably end up slamming it because you're not expecting the weight and at one point the balance of the whole thing changes and if you're not careful it will try and slam whatever you do. 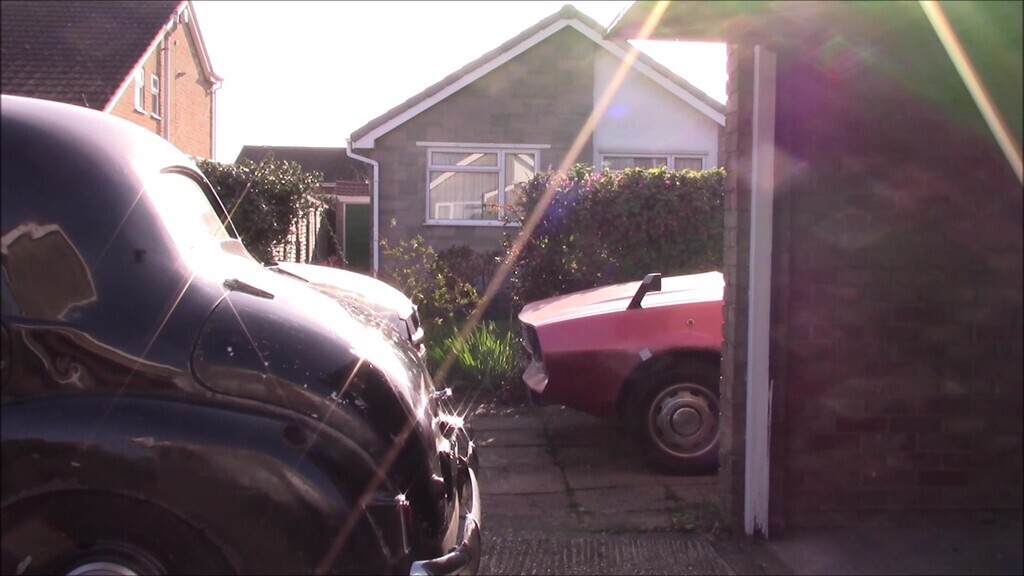 It's a terrible bit of design, both in function and appearance, definitely not one of Barker's finer moments. |
| |
|
|
glenanderson
Club Retro Rides Member
Posts: 4,338
Club RR Member Number: 64
|
|
|
|
|
A Triumph Spitfire boot stay might be worth considering. Lift fully and drop slightly and it latches open, lift again and the latch releases so you can close it.
Regardless, good work. 👍
|
| |
My worst worry about dying is my wife selling my stuff for what I told her it cost...
|
|
vulgalour
Club Retro Rides Member
Posts: 7,278
Club RR Member Number: 146
Member is Online
|
|
Aug 13, 2022 15:42:52 GMT
|
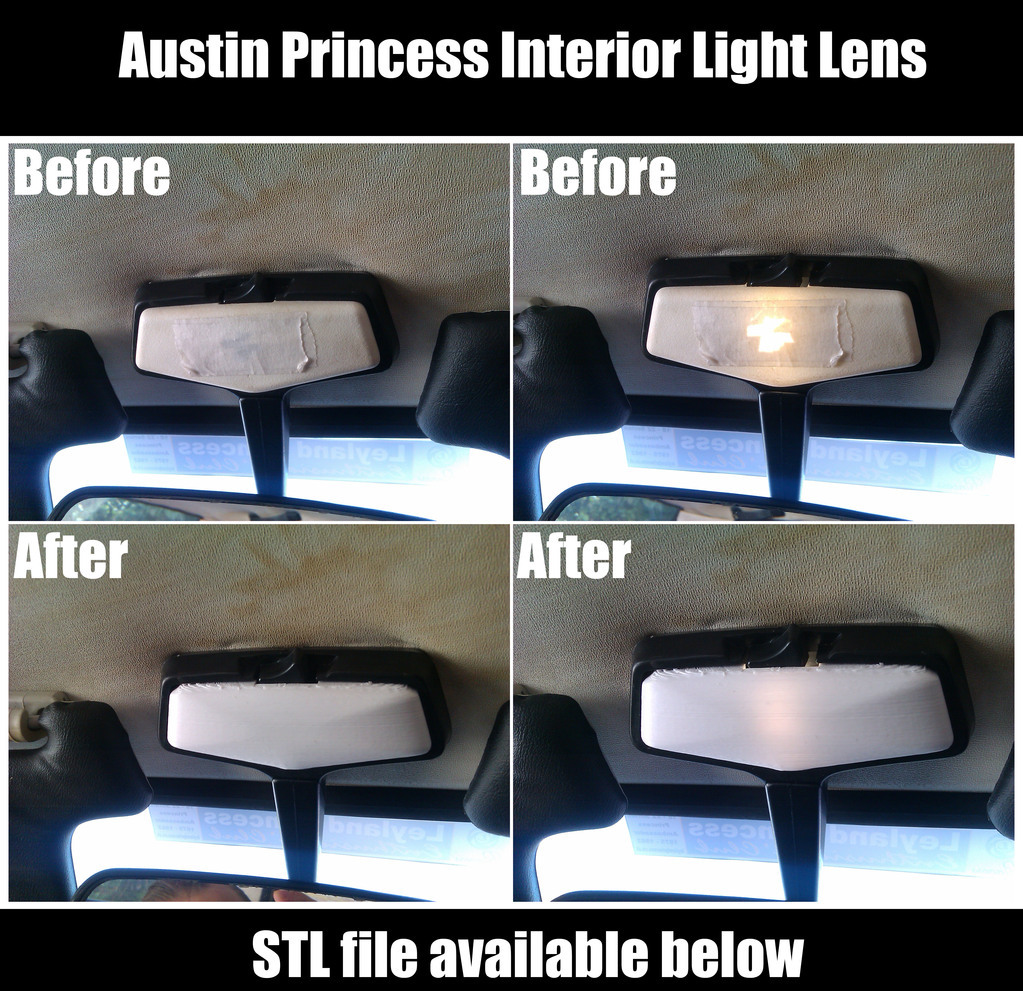 www.printables.com/model/258068-austin-princess-interior-light-cover www.printables.com/model/258068-austin-princess-interior-light-coverThe before is my literally crumbling original lens. The after is a raw print, no sanding or finishing. This is a direct replacement part and, because it's a thing you can 3d print to demand, you can make them any colour you can get the materials you use in. As far as I'm aware, this is the only replacement part out there and this is a part that's been unavailable for quite a long time. Best of all, the download is FREE, so as long as you have access to a 3D printer this part shouldn't cost you a great deal to create. |
| |
|
|
|
|
vulgalour
Club Retro Rides Member
Posts: 7,278
Club RR Member Number: 146
Member is Online
|
|
Aug 14, 2022 14:31:17 GMT
|
|
Definitely can of worms territory with that one and a good example of what I don't want to get myself into. The other red flag is the lack of MoT since 2010. There's a good number of classics reappearing that are 'ready to go' but that also haven't had an MoT since well before the exemption came in.
I don't get a good vibe from the advert. One door missing, the other roped shut, what looks like some sort of VAG expansion tank sat in the engine bay randomly, mention of the engine being from a 1.8 Marina, it being someone else's project... That doesn't look like a car I can just get in and use. Yes it's shiny and it's a colour I like but that's really all it has going for it for me.
|
| |
Last Edit: Aug 14, 2022 14:32:49 GMT by vulgalour
|
|
vulgalour
Club Retro Rides Member
Posts: 7,278
Club RR Member Number: 146
Member is Online
|
|
Aug 14, 2022 15:04:57 GMT
|
www.ebay.co.uk/itm/125463128662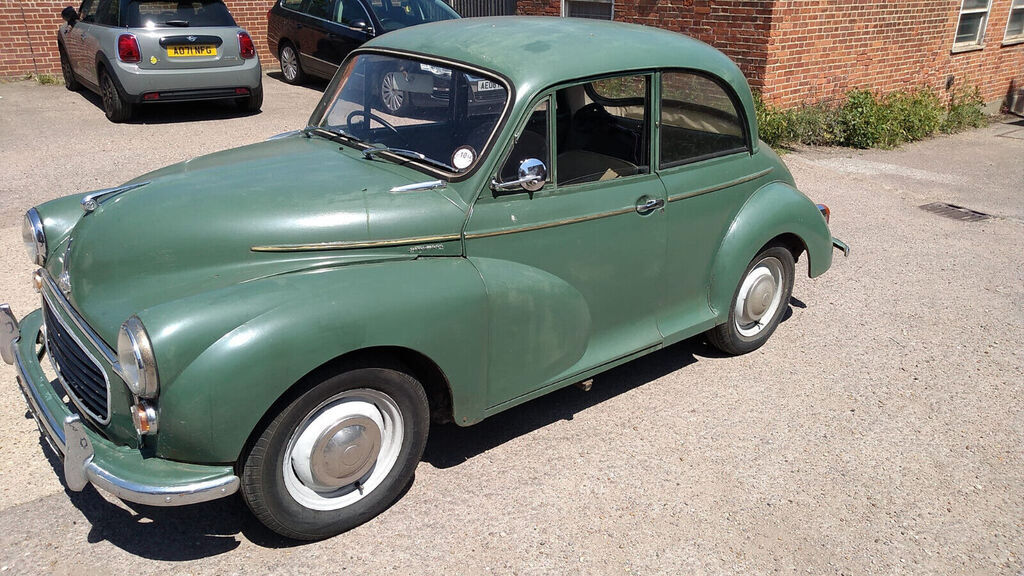 This one is a much better proposition. Last MoT in 2018 with very little of concern in its recorded MoT history. The hand painted bodywork doesn't bother me and it overall just looks right. It's not as pretty and it's not as expensive being only £2k. It will undoubtedly need some work but it probably won't need a huge amount. An in person inspection would say so either way. This is much more the starting point I have in mind. There's been a few Minors pop up on the market and sell quite similar to this in the same sort of price range so I feel comfortable waiting for the right car to come along when I'm ready to move the Maestro on.
|
| |
|
|


