|
|
|
|
|
|
Brain fart: 7/16 unf is and industry standard for seat belt fixings
I've just recovered from steel-in-aluminium thread destruction saga, come to the conclusion they just don't tolerate being undone, so go back in time and don't do that. i don't necessarily agree with the assumption there is a filter element missing from your glass fuel bowl. land rover versions do not and are just gravity sediment bowls.
Re: not many fluid leaks, gearbox is probably empty
|
| |
Last Edit: Aug 24, 2020 9:48:58 GMT by darrenh
|
|
|
|
|
|
|
|
|
|
It's fairly easy to measure the thread pitch with a pair of verniers.
Measure the distance accross a number of threads(I usually use 10 but you might not have enough) then divide by the number of threads(ie number of troughs), marking them with a sharpie helps to not lose count, repeat it a couple of times to be sure.
To convert to inch fractions I usually multiply the decimal by 64 to give me the number of 64ths, so in this case it becomes 30.08 which is as near as damn it 30/64, look for the lowest common denominator, in this case 2 which as said above gives 15/32.
|
| |
|
|
|
|
|
|
|
|
solex was a french company, I guess that would mean they favoured metric like Webber?
|
| |
|
|
vulgalour
Club Retro Rides Member
Posts: 7,283
Club RR Member Number: 146
|
|
|
|
|
Helpfully, someone on another forum found a list of general sizes for Zenith carburettors, amongst which was the banjo bolt listed as 12mm x 1.25 which is *probably* the size I've got since it does measure at 12mm width on the thread. When the thread gauge arrives I should be able to confirm that. If it is that size, a helicoil kit won't be too pricey.
It does seem odd that the carburettor is in metric on a pre-decimal British car but I think it must be the Solex connection that's caused it. I know that some branches of engineering embraced metric fairly early on and this is probably an example of that in action.
The Princess is doing an excellent job of just being a car. I get in it when I need to and I drive it where I need to go and that's fine, though admittedly at the moment I'm lucky if that's more than 20 miles a week so it's barely a hardship for it.
The really strange thing at the moment is the feeling of calm I've got about the projects. I mean, I know I buy some absolute stinkers, it's part of the fun and your entertainment, and the Lanchester should have been a terrible decision (it still might be, we've not driven it yet), but everything just feels... nice.
My main car is one I love and that does everything I personally need it to, and the project car is something I can share with the other half. We have some minor creative differences, naturally, like his desire to repaint the car that keeps cropping up, or putting an electric motor in it (which I'm not entirely averse to aside the cost), but mostly we get along fine and I just dig my heels in about the nearly 70 years of hard-earned patina. We're both excited about the Lanchester, that's something that really helps, having another person that's on your side rather than feeling like it's you versus the car all the time (see Renault 6, Austin 1100, Citroen BX at times...) really does help make any problem seem small. It's also a really good way of reigning me in a bit and not taking too much on, as I'm wont to do.
So yeah... I guess we just have everything in balance right now and I'm really not used to that. The thing we have been discussing in earnest is The Next Project, which is the garage. It's fine for now, the set up we've got is adequate, but we're going to have to improve our working space. We hadn't planned to get the Lanchester, or a car like it, until we had at least a carport built and a bigger shed for extra storage, so we've got things a bit upside down at the moment. We're still trying to work out what the best option is for building a new double garage and have been bouncing around between an exact copy of what we have, but bigger, a modular concrete 70s style one with modernised interior, and even a brick pillar and wooden walls construction of some sort. We thought it was just about cost and it turns out that because of how prominent our garage is on the street, we also have to think about appearance. We're fortunate that our neighbours seem to actually be really keen on us being 'the young lads with the old cars' rather than being upset about it which is a HUGE relief.
2020 has been a funny old year so far. As bad as a lot of things have been, and still are, we're doing okay.
|
| |
|
|
glenanderson
Club Retro Rides Member
Posts: 4,349
Club RR Member Number: 64
|
|
|
|
|
Without wishing to sound soft, it was really nice to see you both so positively fired up about the car.
And don’t worry about “priorities”. Better to tailor your garage/parking situation to your fleet than the other way around.
Your physical location is also great. The “end of the road” plot lends itself really well to doing something that won’t look out of place. You could easily have a 3-bay garage there with apron parking in front of each bay.
|
| |
My worst worry about dying is my wife selling my stuff for what I told her it cost...
|
|
eurogranada
Europe
To tinker or not to tinker, that is the question...
Posts: 2,556
|
|
|
|
|
That last post makes for a nice read and a nice change in how you seem to feel. The BX frustration was so clear and present that it's good to see you're now equally as enthused about the Lanchester as you were frustrated with the BX... And it's a good thing that the other half is also well on board!
|
| |
|
|
|
|
|
|
|
|
I think you'll find with the Princess the more you use it the better it will get, cars are designed to be used not parked, one of my dad's mates had 3 in a row as a sales car he used to do hundreds of miles a week in them. (mind you he did burn the clutch out towing a 3 ton fin keeled Yacht behind it)
Just take whatever the Lanchester throws at you as a new learning experience, it doesn't really matter how long it takes as long as you are making progress and enjoying it.
With respect to the garage yes more space is great but the trouble I've found is that as I make more space I(and my son) tend to fill it with more projects or equipment!
What you do with the garage really depends on funds, flattening it all and building a new brick built one would be great but need proper foundations etc and cost tens of thousands, I would be inclined to take the roof and one side off what you have then build a lightweight timber framed extension on the side and top it with a lightweight pitched roof, you can always pretty the front up and tie it all in with boarding some nice doors and few plants.
|
| |
Last Edit: Aug 25, 2020 8:54:14 GMT by kevins
|
|
|
|
|
Aug 25, 2020 10:20:57 GMT
|
That last post makes for a nice read and a nice change in how you seem to feel. The BX frustration was so clear and present that it's good to see you're now equally as enthused about the Lanchester as you were frustrated with the BX... And it's a good thing that the other half is also well on board! Couldn't agree more. Really enjoying the posts now, the enthusiasm comes through! |
| |
|
|
melle
South West
It'll come out in the wash.
Posts: 2,010
|
|
Aug 25, 2020 11:15:09 GMT
|
|
M12x1.25 is quite common for banjo bolts.
|
| |
www.saabv4.com'70 Saab 96 V4 "The Devil's Own V4" '77 Saab 95 V4 van conversion project '88 Saab 900i 8V
|
|
melle
South West
It'll come out in the wash.
Posts: 2,010
|
|
Aug 25, 2020 11:32:50 GMT
|
|
I agree, 1/4 BSP is more likely for v's carb.
|
| |
www.saabv4.com'70 Saab 96 V4 "The Devil's Own V4" '77 Saab 95 V4 van conversion project '88 Saab 900i 8V
|
|
|
|
|
Aug 25, 2020 11:51:39 GMT
|
M12x1.25 is quite common for banjo bolts. In the UK in the 50's ! But as it's a solex carb we may well be talking about France in the 1950's, I don't think the french have ever used anything except metric? |
| |
|
|
melle
South West
It'll come out in the wash.
Posts: 2,010
|
|
Aug 25, 2020 12:00:37 GMT
|
|
I think it's a Zenith, not a Solex? Iirc Solex acquired Zenith in the mid-late sixties?
|
| |
www.saabv4.com'70 Saab 96 V4 "The Devil's Own V4" '77 Saab 95 V4 van conversion project '88 Saab 900i 8V
|
|
vulgalour
Club Retro Rides Member
Posts: 7,283
Club RR Member Number: 146
|
|
Aug 25, 2020 15:31:46 GMT
|
You'll all (maybe not melle) be surprised to learn the thread on that banjo bolt is indeed 12mm x 1.25 I'll do a proper thread later, just snatching a moment between work e-mails here. It must be the Solex connection, I can't think of any other reason for it, it even has some metric measurements in the manual alongside the Imperial (I'll post a pic of that in the next proper post, it's interesting in its own right) so it looks like Lanchester were early adopters for decimalisation in the UK. |
| |
Last Edit: Aug 25, 2020 15:32:40 GMT by vulgalour
|
|
glenanderson
Club Retro Rides Member
Posts: 4,349
Club RR Member Number: 64
|
|
Aug 25, 2020 15:38:07 GMT
|
|
With all the proprietary components in cars like this, and with the vast amounts of surplus that was floating about at the time it was built, nothing would surprise me. Series Land-Rovers had drain plugs with a quite bizarre Unified thread form the start of production in ‘48, right into the 1980s, based on a huge amount of parts made originally for the WD.
There’s also the possibility that the carb is 1/4” BSP, and the banjo bolt is M12, and that mismatch is why the failure occurred.
It might make sense to helicoil the carb to M12 even if it was originally 1/4 BSP, as it would involve drilling out less of the parent metal in the casting.
|
| |
My worst worry about dying is my wife selling my stuff for what I told her it cost...
|
|
vulgalour
Club Retro Rides Member
Posts: 7,283
Club RR Member Number: 146
|
|
Aug 25, 2020 23:12:12 GMT
|
Today has been a busy one so I've not had any time until now to get some scribblings down, so here we go. The first thing is a little photographic evidence of the purpose of the mystery thing, courtesy of readers identifying it as the fuel reserve mechanism. I don't know what the rest of this assembly should look like having never seen one and it's slightly disappointing that its no longer there, especially since the cable does still seem to operate it. 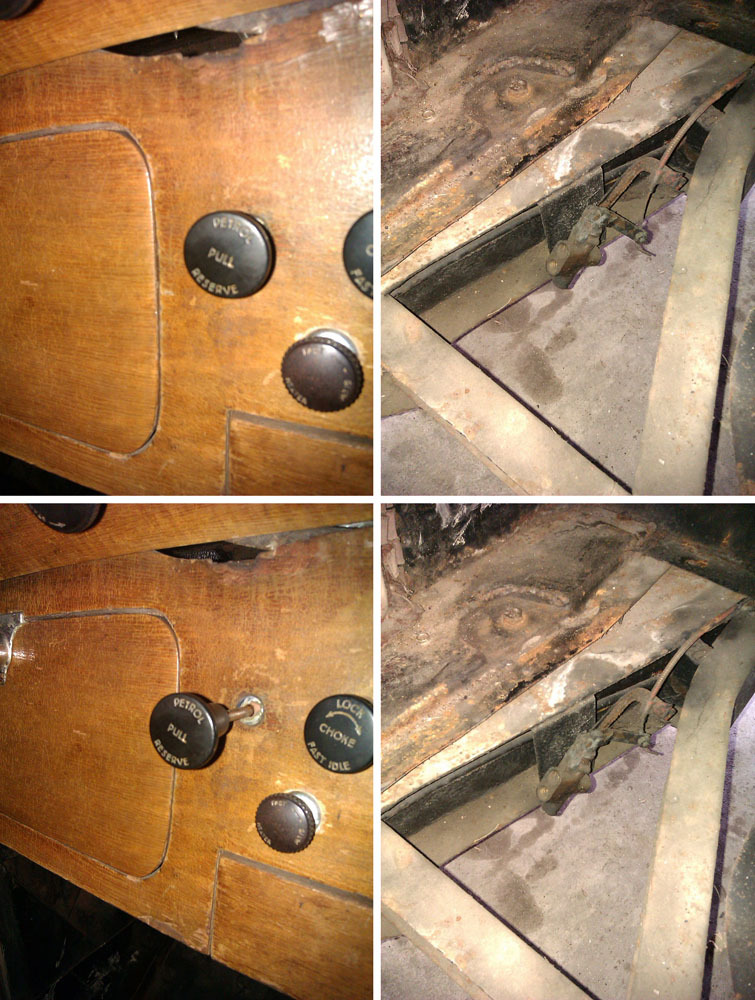 The other item is that contentious banjo bolt. The thread pitch gauges arrived today and, after a tip off from another reader about standard Zenith sizes, I just went straight for the 1.25 comb on the metric side. 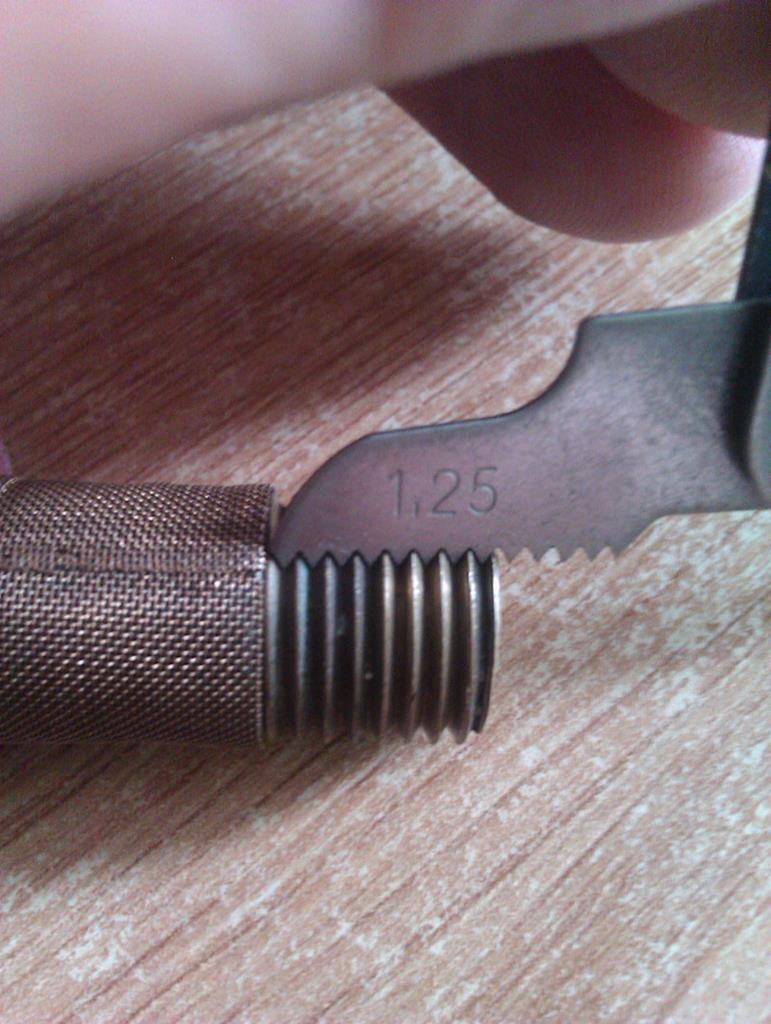 That looks like a match to me and 12x1.25 is a standard size that's easy to get a helicoil kit for so I've already ordered one of those. I used a different tool for measuring the width of the bolt threads and confirmed it is indeed 12mm so I'm reasonably confident it's going to be correct. The other thing I'm reasonably confident of is that it should be a metric fitting, not just because of the list of metric numbers given for standard Zenith carburettors, but also Zenith's connection to Solex. The third factor is the information on the carburettor in the original handbook I have for this car which lists all of the carburettor dimensions in m/m (funny how we now just go mm for the same). Hopefully that's case closed on this one. 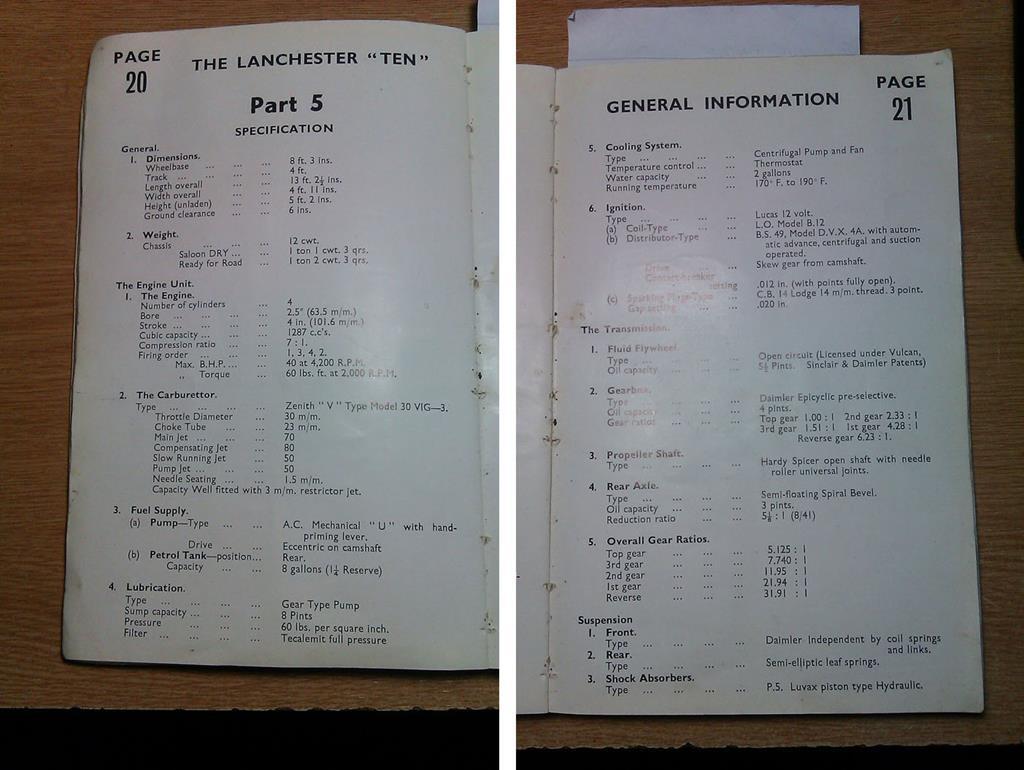 We're in that spot where we're waiting for things to arrive so it's a case of looking for busy work to tinker with throughout the week to make progress on items that make the car a little nicer when the big jobs are done. We were both somewhat disappointed that the horns are silent and, since we weren't sure if it were the horns, the wiring, or the button at fault it made sense to pull the horns and test those separately first since that's easier. The paint on the horns is very thick, we were going to leave them as is but when we realised there's so much paint it's difficult to even see the fixings in places it might be a good idea to restore these. In all, the paint stripper had to cut through four different layers of grey enamel before it got down to the original black finish. Due to the shape of the parts I opted to adopt the technique used on some diecast restoration channels I follow and switch from the initial method of blobbing the stripper on with a brush and instead just set up a stripping tub. This Bartoline stripper is very good, it's just also very slow. It's certainly better than the Nitromors equivalent. 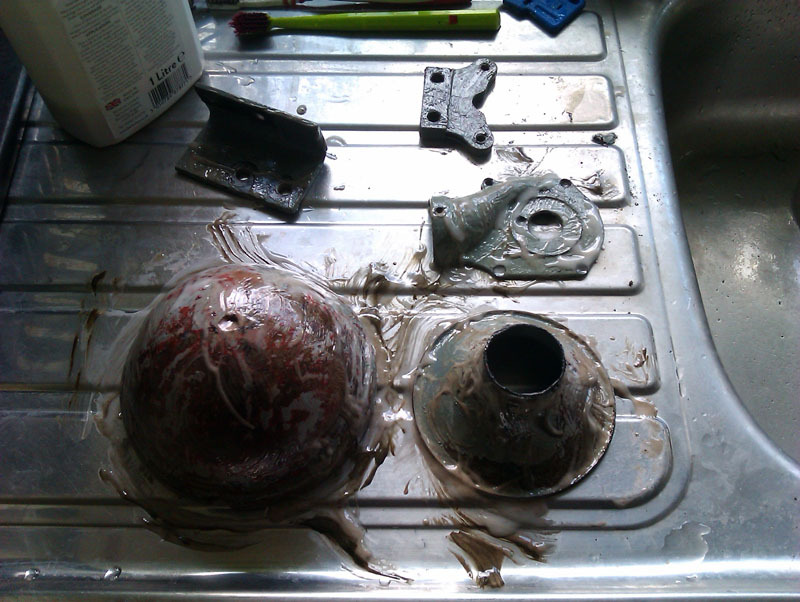 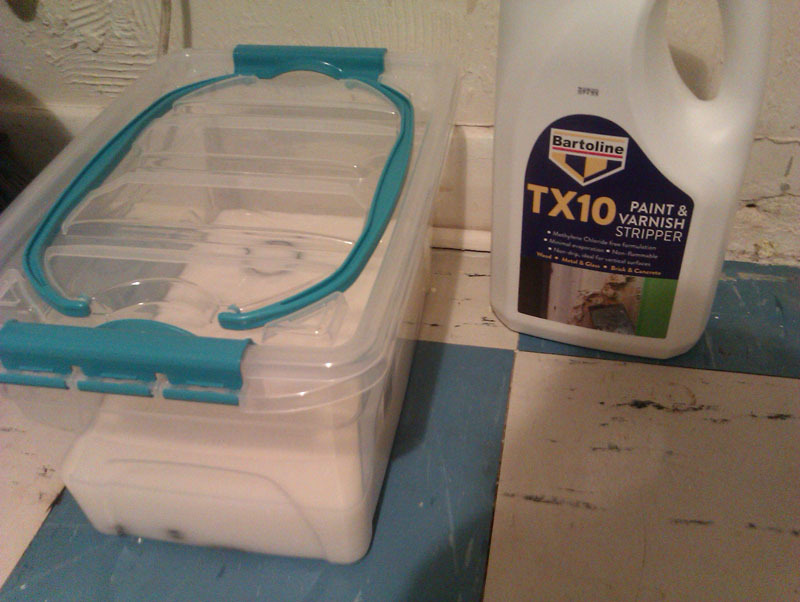 One of the horn domes has already been done and given a splash of paint. Although the horns were black originally, we're making a minor change by doing them black with red domes since the horns are fairly prominent in the engine bay and a bit of colour is always welcome. this red goes nicely against the grey of the engine and the black bodywork. 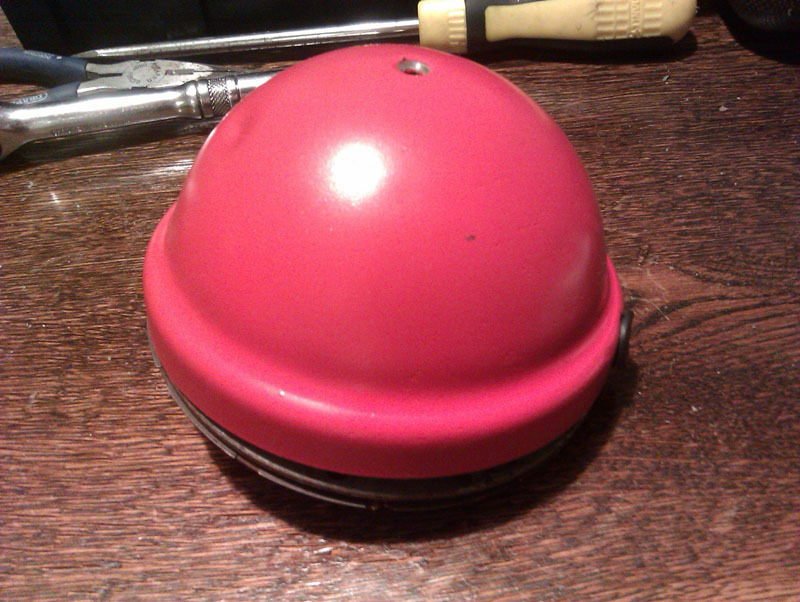 To dismantle the horns it's a variety of flat headed screws, the domes themselves have one in the top where that dimple is which goes into a bracket that slots into the plate the electromagnet is attached to. Underneath the dome is the wiring, the electromagnet, and the diaphragm. These horns are quite simple, so far as we can work out the problems they usually have is bad connections and badly adjusted diaphragms. 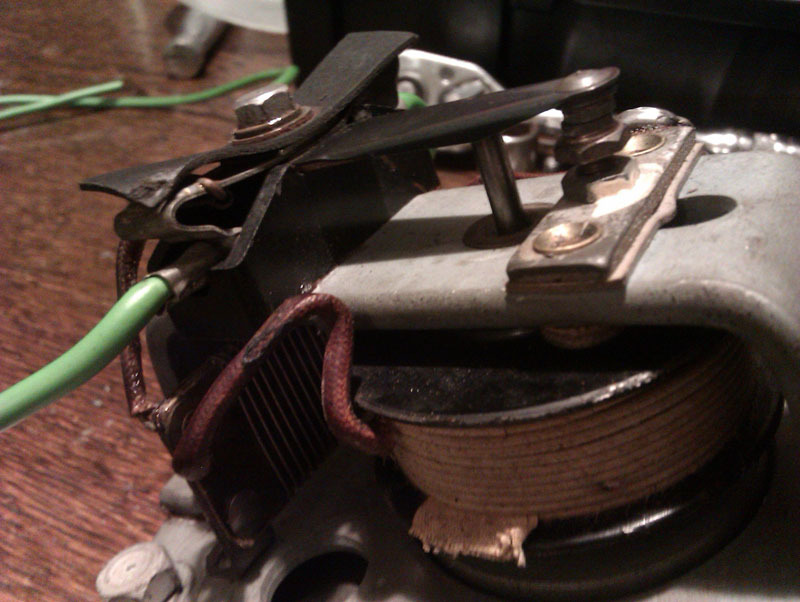 An initial physical inspection revealed nothing untoward beyond dirty contacts. The green wire is moderately new, the bullet connector on the end is well crimped and there's no obvious sign of damage so we're leaving that be for now. The connectors are just sort of clamped in place, they're not terribly secure, the design in this area isn't fantastic. First job was to dismantle, carefully, the points so we could clean them. In the above picture, simply undo the bolt and then the stack of items above the plastic isolator block can be unstacked and laid out for inspection and cleaning. 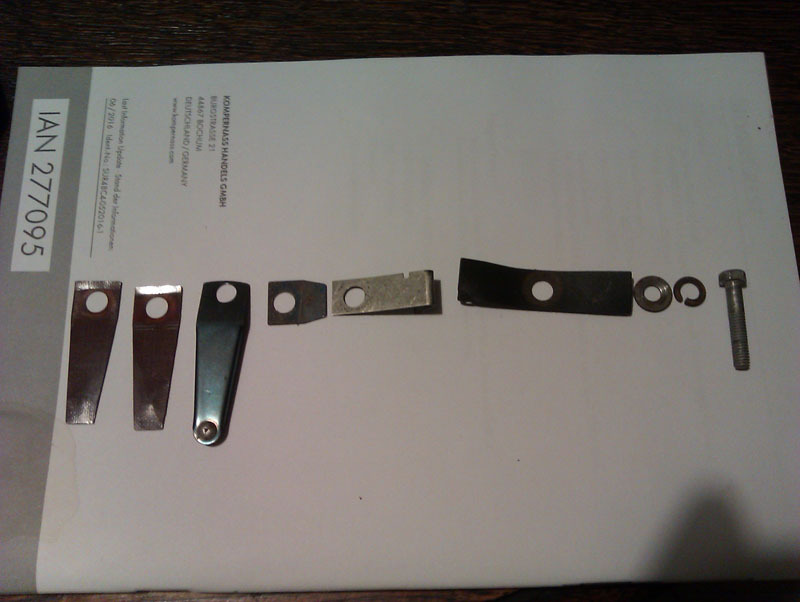 The points don't have any pitting, though they are slightly discoloured, the camera makes them look blacker and more burnt than they do in person and after a work over with some suitable abrasives we had them nice and shiny again. 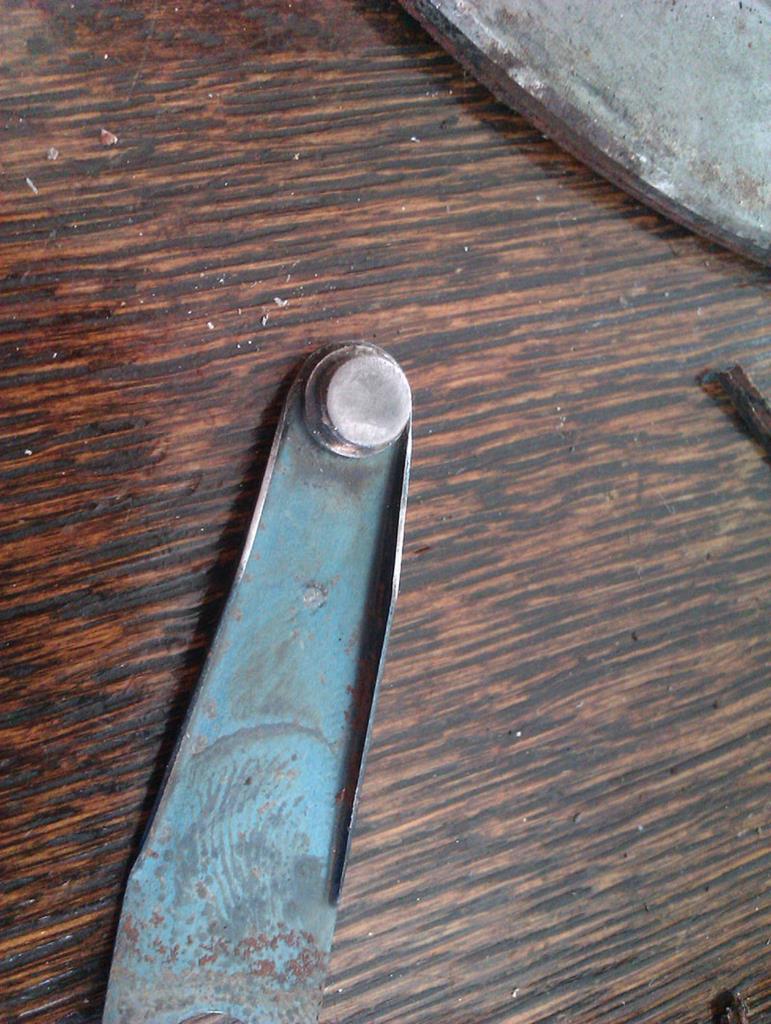 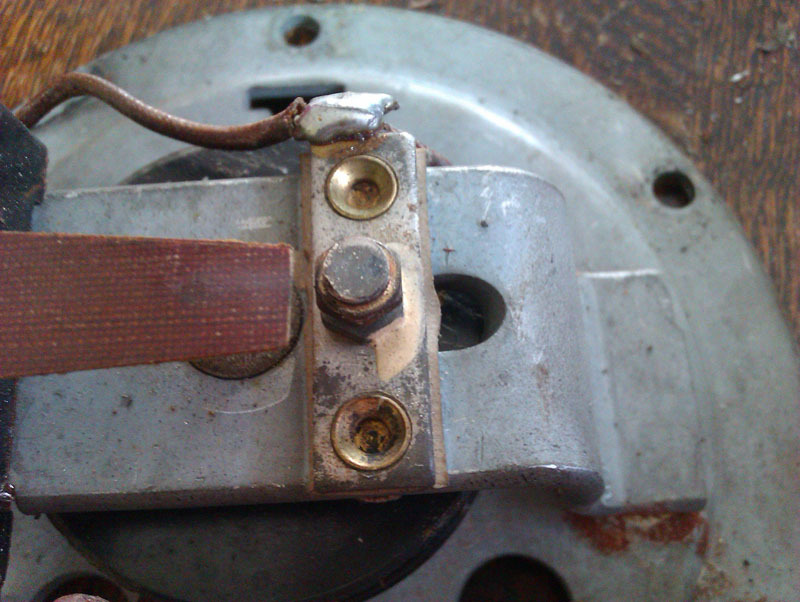 Much of this work was done by the other half, he's more comfortable with electrical things than I am and derives more enjoyment from fiddling with them. They checked the various solder points and wires for physical damage and then checked for continuity where appropriate with the multimeter. All checked out fine so it was reassembled and ready to test. 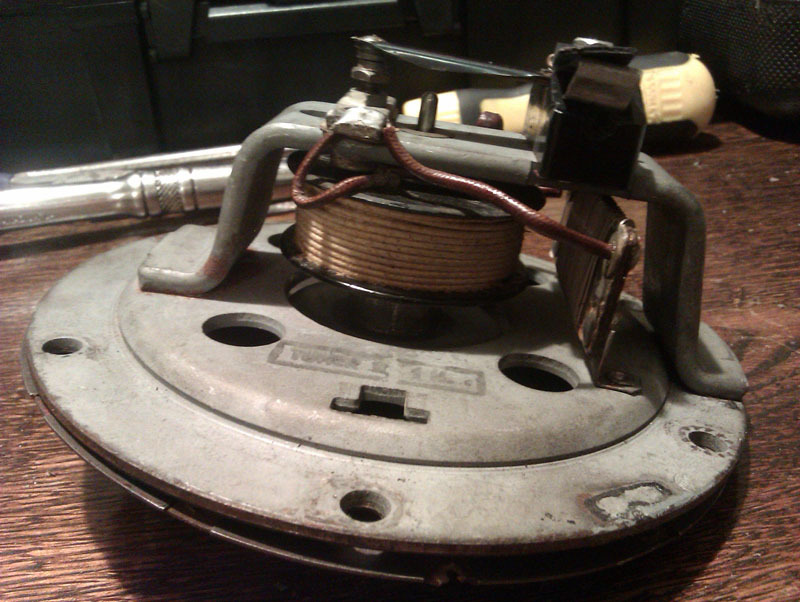 That's when we found out that while everything checks out, we couldn't get so much as a squeak out of the horn. The only other thing it could have been amiss, so far as we could tell, was the diaphragm being out of adjustment. There's a nut and a slot in the thread it goes onto that should be easy to turn to adjust the diaphragm and allow the noise the horn makes to be tuned. It was very, very stuck. For fear of damaging the slot in the thread we opted to dismantle the item down again to tackle it separately. In the following picture you can see the diaphragm on the left, a small activating rod, and the electromagnet on the right. 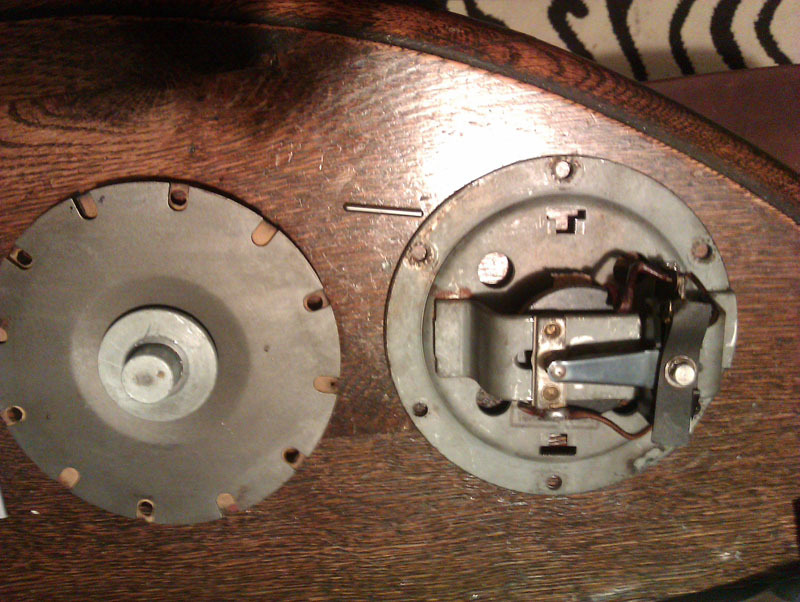 The rod sits under the arm of the points, and our understanding is that this is pushed against the diaphragm when the electromagnet is energised, which breaks the contacts, which then pulls the diaphragm back, quite rapidly in succession. The shaft and the hole it goes through are free of corrosion and it moves freely, so we're moderately confident that's not the issue. You can see the hole the shaft goes through a bit easier when we flip the parts over. 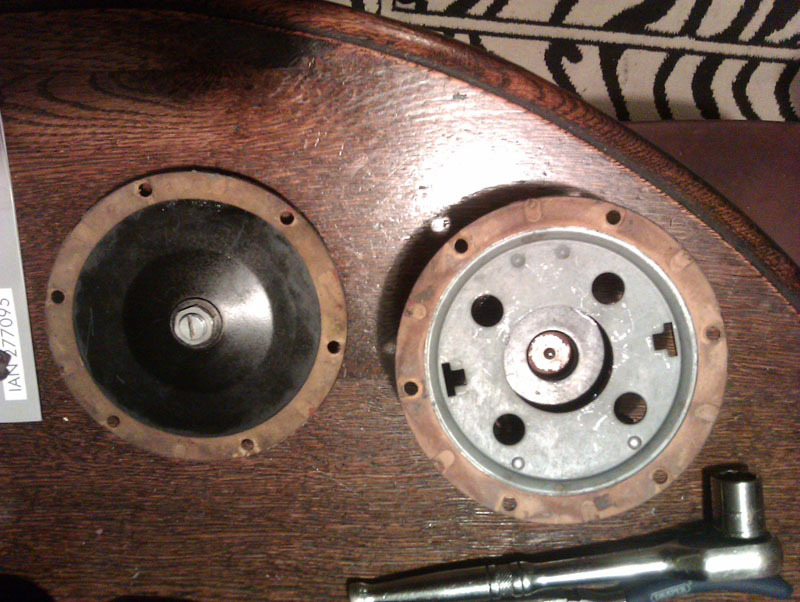 The problem item is the nut in the middle of the diaphragm. there's a threaded spindle that goes through the diaphragm, the side with the slot is accessible from the outside of the horn by prising out a rubber bung and you should, in theory, be able to just tighten or loosen this with a screwdriver. The other side of the spindle is what the little polished shaft pushes against. 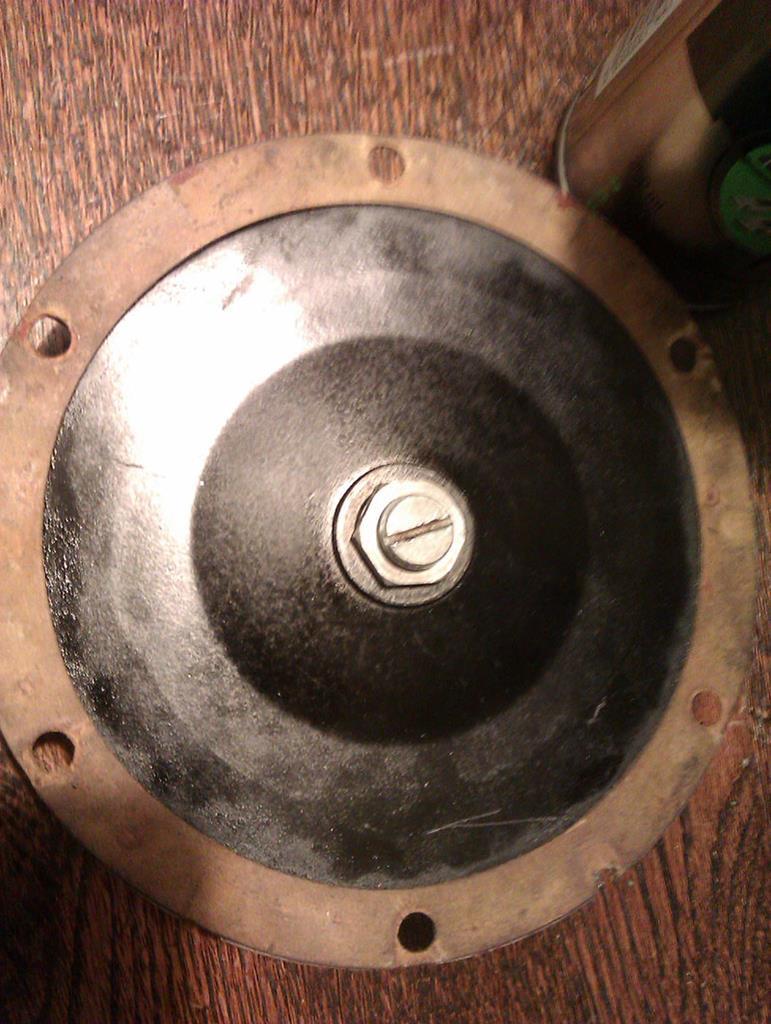 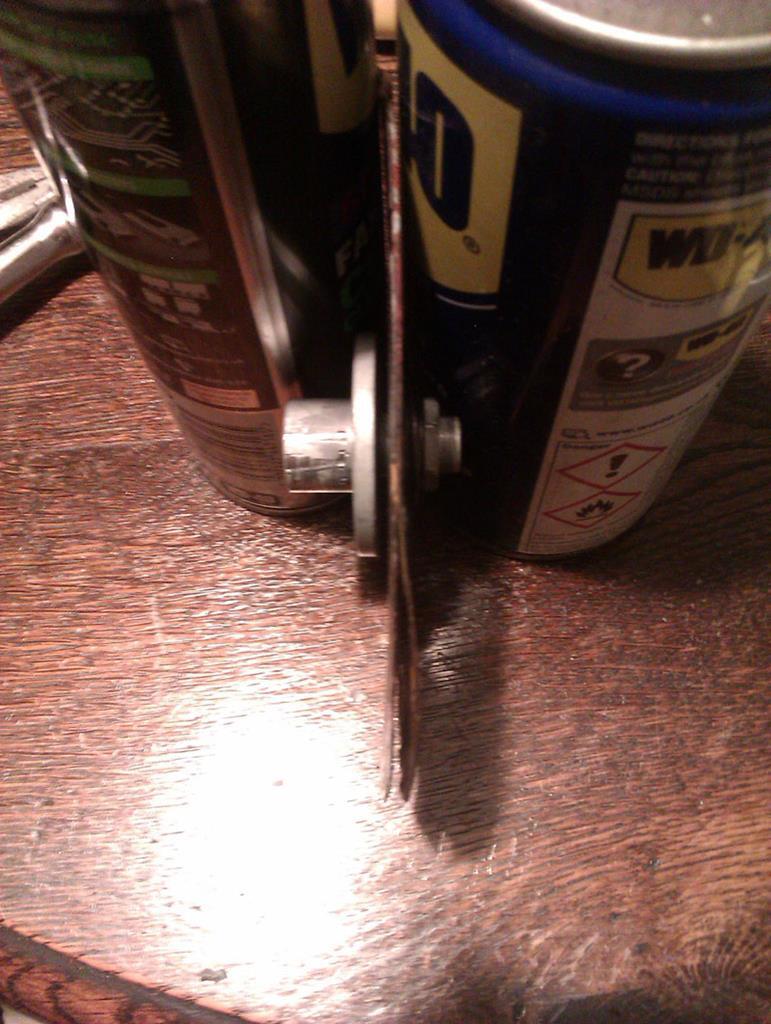 It required a lot of effort to undo the nut that holds this all together, so much so we questioned if it was even supposed to come undone at one point. Once the nut was undone it could be unwound from the thread as could the diaphragm. Some cleaning of the thread and parts later and they all move freely on the threaded portion of the spindle now and the nut can be used to lock things in place properly. Unfortunately, we ran out of time to test the horn again, the batteries are in the car and our neighbours are certainly not going to appreciate a horn toot test at gone 10pm, so this is a job for tomorrow. The paint stripper will have done its magic by then too, so providing the storm clears we should be able to get all the parts of the horn repainted and ready to be reassembled properly. |
| |
|
|
glenanderson
Club Retro Rides Member
Posts: 4,349
Club RR Member Number: 64
|
|
Aug 25, 2020 23:57:59 GMT
|
|
Excellent progress. 👍
|
| |
My worst worry about dying is my wife selling my stuff for what I told her it cost...
|
|
melle
South West
It'll come out in the wash.
Posts: 2,010
|
|
|
|
The thread pitch gauges arrived today and, after a tip off from another reader about standard Zenith sizes, I just went straight for the 1.25 comb on the metric side. Sounds like you came to the right conclusion, but now try a 20tpi thread gauge, with the naked eye it will be a perfect fit too. Your measurement at least confirms it's not 1/4 BSP, because that's 19tpi (and 1/4 NPT is 18tpi). Sometimes the best test is to try an unknown bolt in a known size nut or vice versa. |
| |
www.saabv4.com'70 Saab 96 V4 "The Devil's Own V4" '77 Saab 95 V4 van conversion project '88 Saab 900i 8V
|
|
Phil H
Posted a lot
  
Posts: 1,448
Club RR Member Number: 133
|
|
Aug 26, 2020 12:12:38 GMT
|
|
Reserve fuel valve - the tank would have 2 takeoffs, one (normal) a bit higher up (or a shorter dip tube) than the other (reserve). The onboard equivalent of a jerry can. Downside is unless it's used regularly, the "reserve" bit just fills up with rust, sediment and water and when used, you just drag all the shyte through and clog the carb..
Rover kept them as late as the P6.
|
| |
Last Edit: Aug 26, 2020 12:13:04 GMT by Phil H
|
|
|
|
|
Aug 26, 2020 12:39:20 GMT
|
|
Many years ago I helped a friend restore a mid 30s Morris Eight Saloon. The block was stripped and cleaned we then decided to run a tap in the blind holes in the block to ensure the threads were clean of any gunk or thread sealants from previous strip downs. we were confused to say the least thr bolt and nut heads were imperial ( I don't remember if they were Whitworth or AF probably a combination of both. we came across some very odd thread sizes, not sae, Whitworth but metric. Measured all the fastenings and found metric threads, WTF was the conclusion somebody must have re tapped the threads! but as we later discovered the engine / tooling was a French apparently an Anzani connection and that William Morris' engineers had decided that metric nut and bolt heads would have been rather confusing for the average British mechanic. I must add this was in pre internet days late 1980's and no Haynes manual for this car.
|
| |
|
|
vulgalour
Club Retro Rides Member
Posts: 7,283
Club RR Member Number: 146
|
|
Aug 26, 2020 12:52:09 GMT
|
|
Perhaps it's the gauges I've got but the 1.25 fits fractionally better than the 20tpi, and it really is a tiny amount. If I only had the 20tpi I could be convinced it's that size, I've gone for the 1.25 because it's just that smidge closer to a perfect match. Holding the 20tpi and 1.25 against one another does show a very tiny variance in the threads profile, it's impossible for me to photograph with my current set up so you'll have to take my word for it.
|
| |
|
|


