Jox
Part of things
 Baaag o saaand
Posts: 51
|
|
|
|
Picked this up from newcastle the other day with a knackered buttom end, surprisingly it survived the 130 mile drive home. Thanks cobblers for following me for 3 hours at 50mph haha 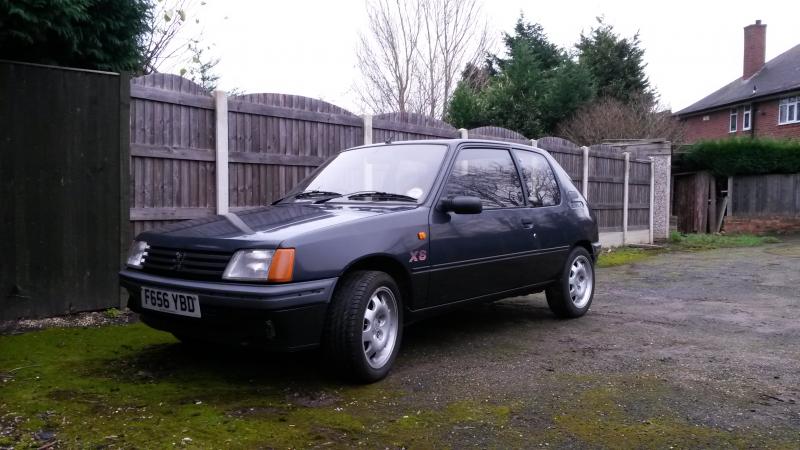 Anyway plans are to use it for road rallys and auto tests, i had the idea to make it nice and cheap, stick a saxo vtr engine in since i have one sat in the yard doing nothing. After pulling the engine out and stripping all the wiring out i went and bought a 16v engine from a 106 gti lol. I also had a trip out for a roll cage but ended up coming home with a van full of goodies.  Not the best pic but i ended up with full gti running gear, sump gaurd, dampers, fuel tank, group n exhaust and a safety devices roll cage. So basically now, my cheap quick turn around has turned in to a full strip stitch weld and respray rebuild. With lots of nice fancy bits! This will be its home for the next many months to come, its not best space to work in but its mostly dry. 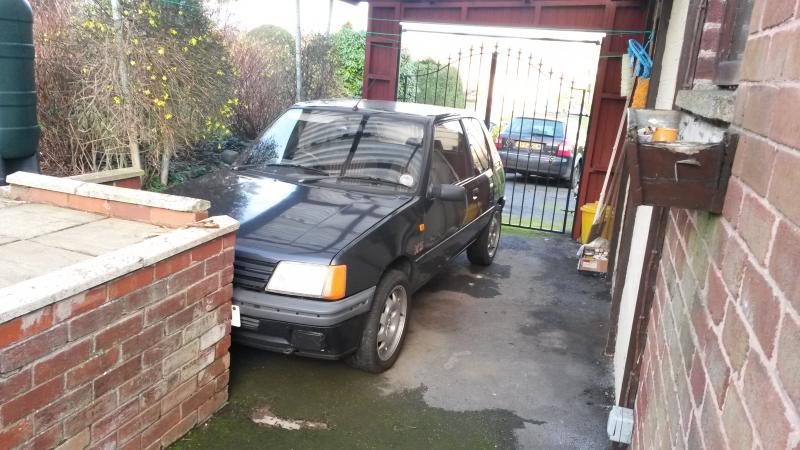 I started off stripping the 205's engine bay ready for welding and paint plus strengthening plates welded in.  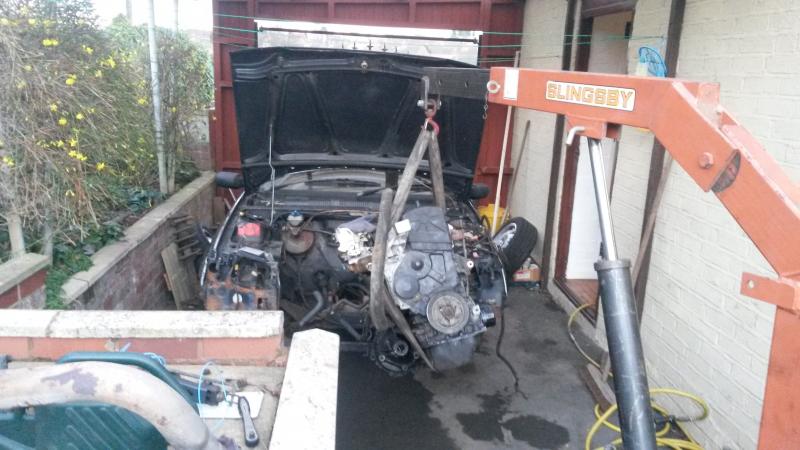 Once the panels and rad is out of the way the engine flew out, so much space in the bay, you can more or less jump in there when the engine is in! this was one of my reasons for sticking with a tu lump and not go mi16 like most other 205 owners do. I am a bit rubbish with pictures keep missing big chunks out haha I started stripping the engine tonight, its going to get a strip clean, paint and rebuild with new gaskets and seals which is a first for me! i usually just slam them straight in and hope for the best. 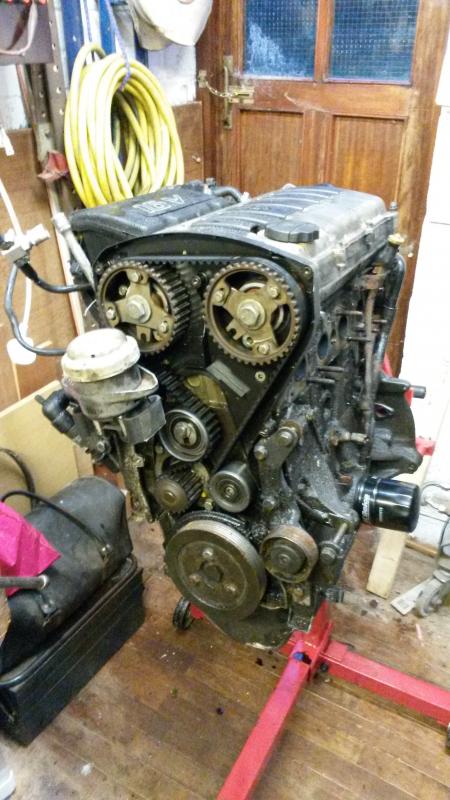 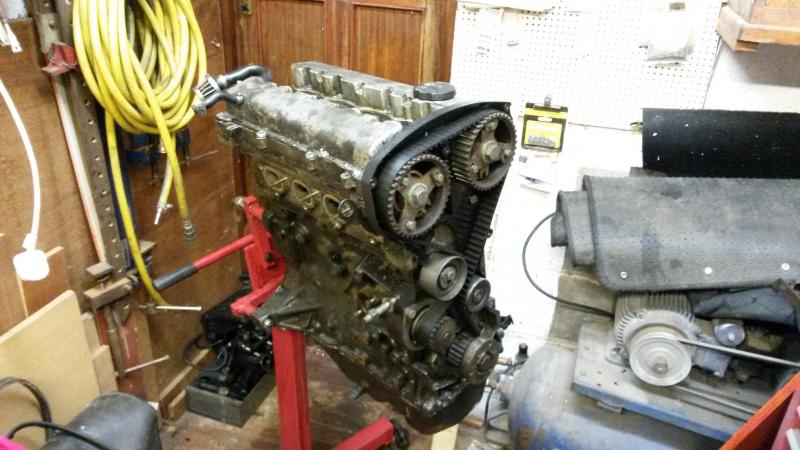 i only started stripping it tonight because the guy i bought the engine off told me it had a pair of 708 cat cams in which would be nice but i was very dubious about this and i was not shocked when i opened up the rockers it had standard cams in. cheers Jon |
| |
Last Edit: May 13, 2014 17:10:35 GMT by Jox
|
|
|
|
Mike
East Midlands
Posts: 3,387
|
|
|
|
|
Should be a hoot with that engine in, even with the standard cams.
|
| |
|
|
|
|
|
|
|
Gonna follow this, nice on mate. As above, I agree, it'll be great fun with a TU and sound wicked with the Group N exhaust too  good luck to you . |
| |
|
|
pugmyster
Part of things
Iam not old iam retro
Posts: 296 
|
|
|
|
|
How did i miss this for sale..
Well done bud will be a tidy job with the saxo lump in
|
| |
|
|
Jox
Part of things
Baaag o saaand
Posts: 51
|
|
Feb 27, 2014 20:39:41 GMT
|
cheers guys should hopefully be a nippy reliable car when its finished. Managed to get quite a lot done on the car, Engine has been fully stripped and rebuild with new gaskets and stem seals. Took ages to clean it all up i think in the future if i build another engine i will send the head off to be cleaned probably cost me the same amount in cleaning fluid and containers lol. I will let the pics do the talking. First job was strip and clean the block 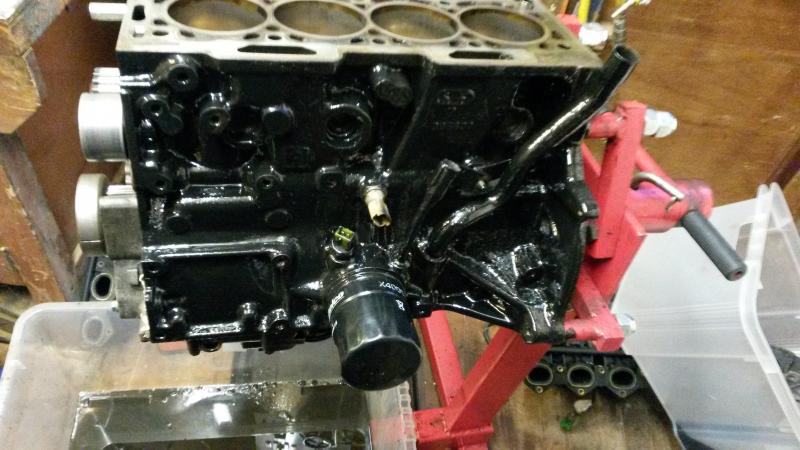 once that was done i turned attention to the head, stripped it all in its own little cup so everything goes back in the original place 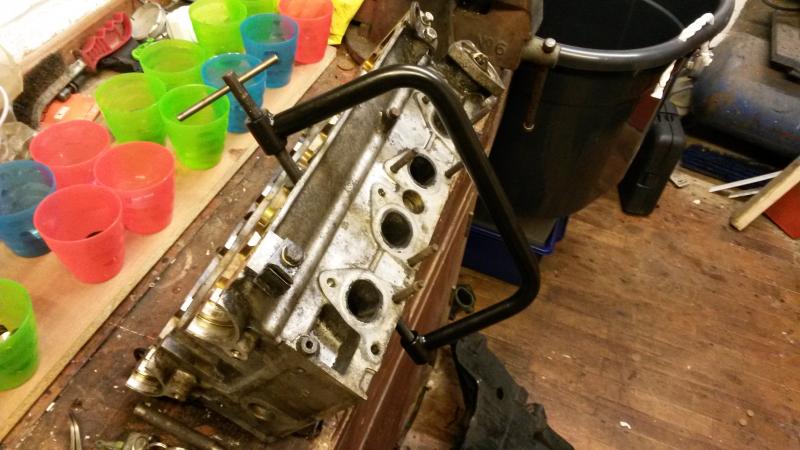 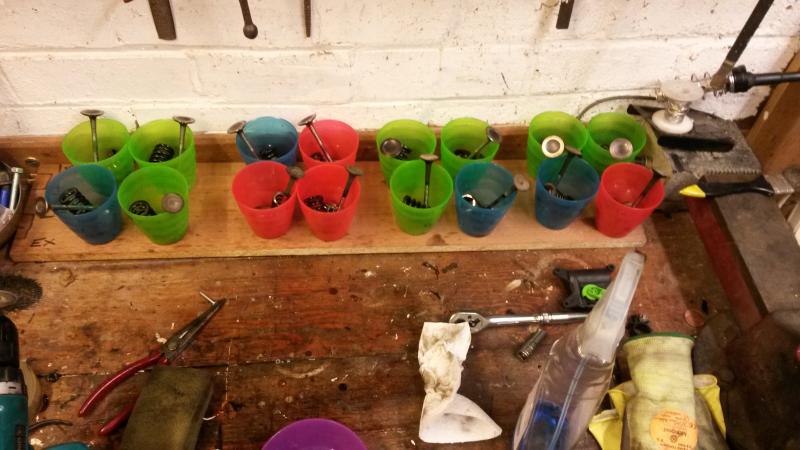 next job was to clean it all up and fit the new stem seals, i didnt do the best job of cleaning it i will be honest but its only a rally car so will be covered in mud and oil in no time haha 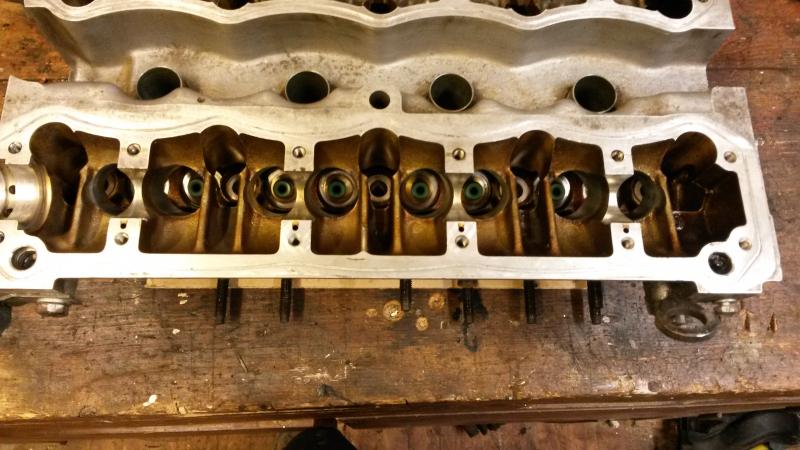 after new stem seals were in i lapped all the valves, a very satisfying job!  you can see the difference in this picture, inlets are done exhaust are still manky!  time for the build up! all valves back in and cams in place. 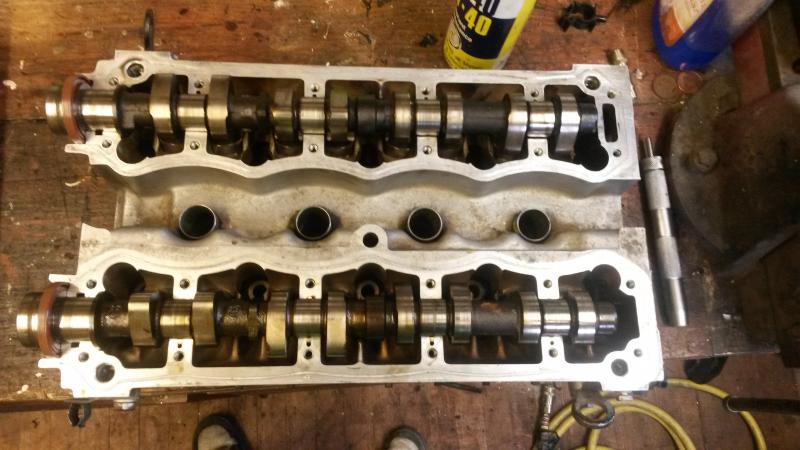 then cam ladders sealed and torqued up. 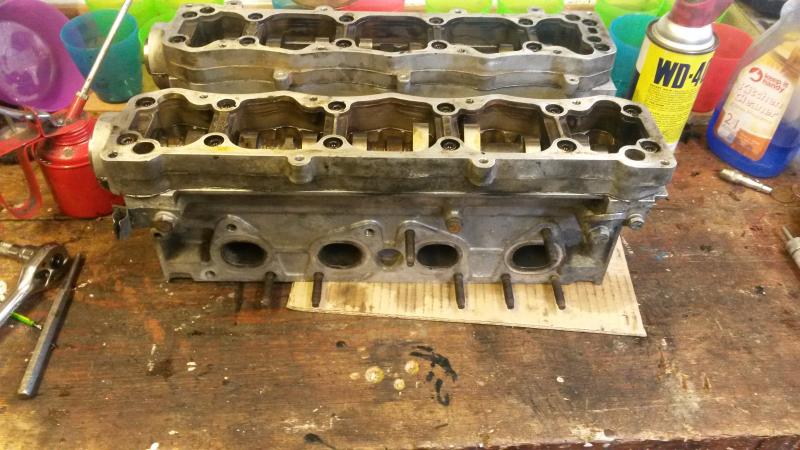 sump on and sealed, i didn't stripped the bottom end, i took the bearing caps off and they looked fine so i left it alone. 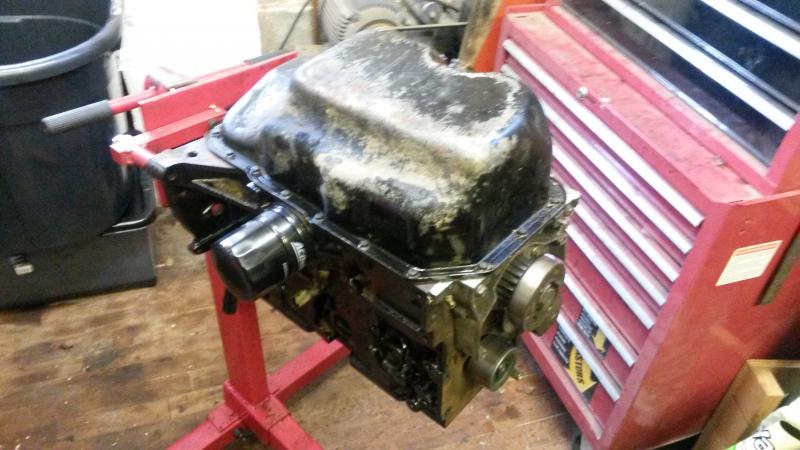 next job was the was fitting the head, not paying attention i slapped it on with new gasket and steamed in to torquing it up. Not sure why but i checked the thickness of the new gasket but couldn't find the markings. Turned out i had put the gasket on upside down!!! stupid peugeot make the gasket almost identical either way, it was a good job i checked before starting the second stage of torque.  cam belt and tensioner on all timed up. 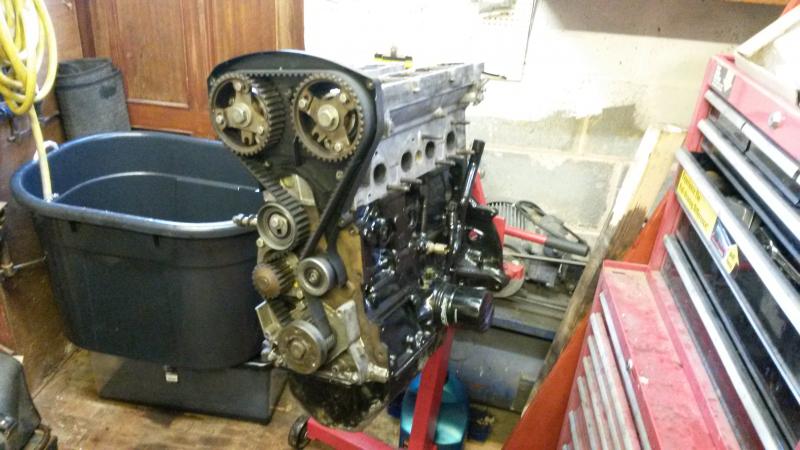 i modified the cambelt cover because it had 2 massive cracks in, just made it look neater rather than spending loads of money on a new one 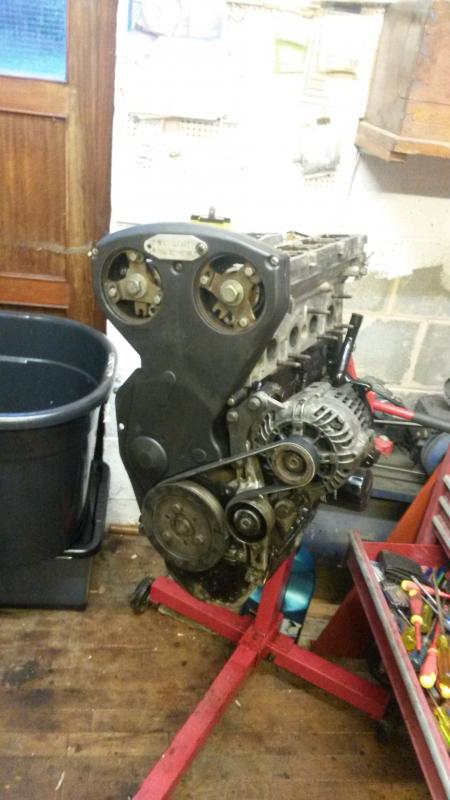 last job was to bolt back on all the ancillaries and job done! one rebuild engine. i will find out in a few months if i did a good job or not lol 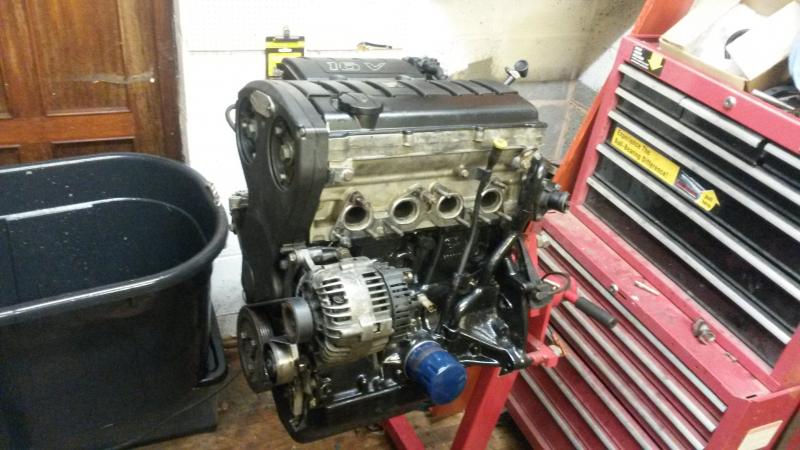 Since the engine has been done i have stripped all the interior out and engine bay to start the prep work. Managed to get the strut top mounts done tonight.  and welded up, not my best work to be honest, ive not used the welder for a year or so been on decorating duties haha 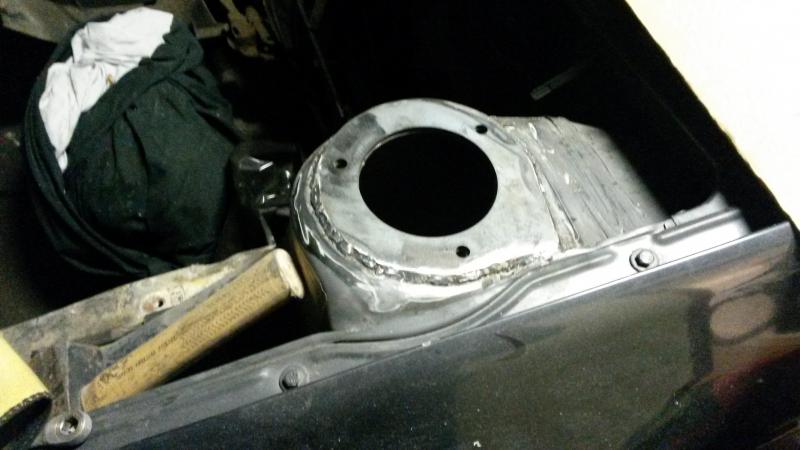 got both sides done, went in quite nice. Hopefully i will get the engine bar stitched up and inside done this weekend might even try the cage in. I want to try get a big push on it and have it painted by the end of the month so i can start rebuilding it. picked up these cheapo off ebay the other day. They are for a 206 but will fit the 205 nice. I'm going to just use the bodys and cut them about to fit some inverted bilstein gravel dampers to replicate the peugeot sport coilovers 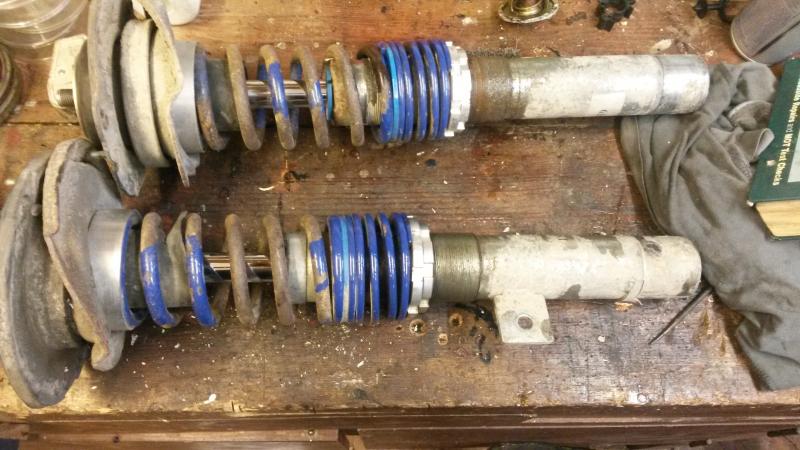 thanks for looking! Jon |
| |
|
|
Jox
Part of things
Baaag o saaand
Posts: 51
|
|
|
|
Got sidetracked today after finding a hydraulic handbrake i bought about 6 years ago in the garage! In the road rally regulations you can't have a vertical hydraulic handbrake, so i made up a mount and adapted the standard handbrake to operate the slave cylinder. For mot purposes i made it so i can disconnect it to use with the cables. I made a little bracket to lift it up to the correct height then welded it to the shell. 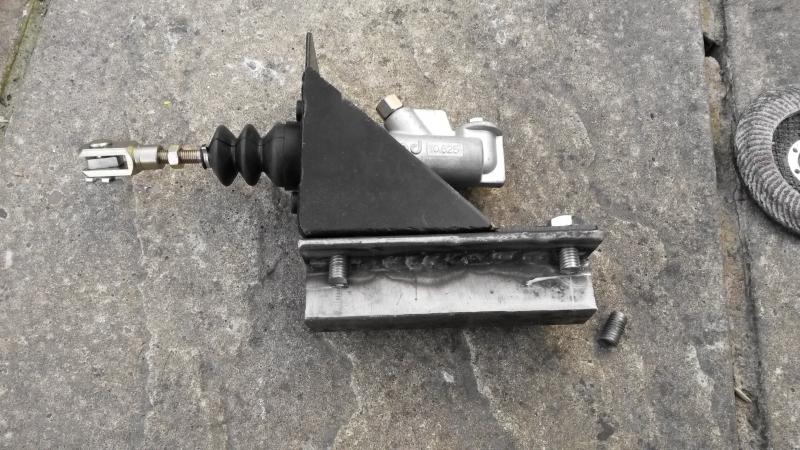 Its nice and solid and has plenty of adjustment, I'm going to put a split pin through the side of the handbrake that will disable to ratchet to make it a kind of "fly off" handbrake 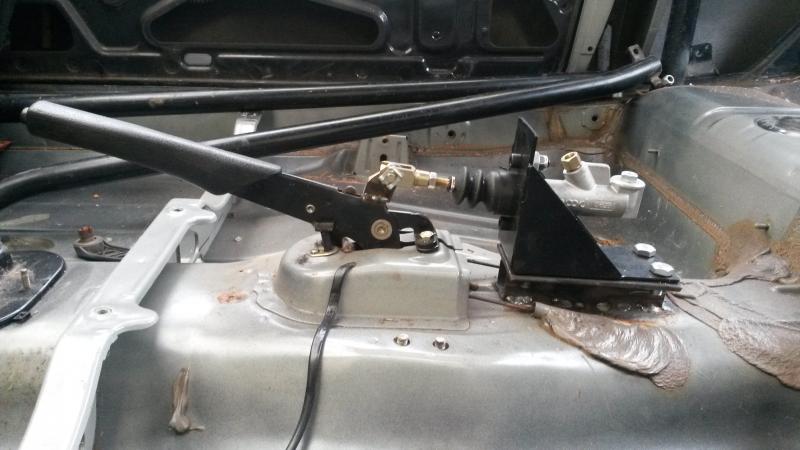 |
| |
|
|
|
|
|
|
|
|
If you don't reinforce the OE handbrake mounts there's every chance it'll turn into a surprise "fly off" handbrake like on my 106!
|
| |
|
|
Jox
Part of things
Baaag o saaand
Posts: 51
|
|
|
|
|
haha don't panic dave it will all get reinforce when i fit the seat rails
|
| |
|
|
|
|
|
|
|
looking good  a 16v 205 definitely sounds fun! the inverted coilovers sound interesting, looking forward to seeing them finished just out of interest, could you measure the bottom mounting point of the coilovers for me? looks like i might be able to make a set fit my civic.... |
| |
|
|
Jox
Part of things
Baaag o saaand
Posts: 51
|
|
|
|
|
they measure 50mm peugeot 205,206,306 are all the same. I've scrapped the bilstein idea for now due to funds really, i'm just going to run these and see how they get on with them.
|
| |
|
|
|
|
|
|
|
|
|
|
The VTS/GTi engine is awesome a friend I mine ran a turbocharged one on DTA management in a Saxo. It was a bone standard engine bar some mild piper cams, even standard head gasket, it made 234bhp on just over a bar of boost. That engine took some amazing abuse and the car went like stink. I seriously rate the TU5J4, awesome engine I'd imagine even a standard one in a 205 would be awesome fun. Good work!
|
| |
Sierra - here we go again! He has an illness, it's not his fault.
|
|
Jox
Part of things
Baaag o saaand
Posts: 51
|
|
|
|
I've had a few 16v 106s before and i do love the engine! i can't wait to get the 205 on the road with one in should be nice especially with a gearbox with nice ratios in. Its been my birthday and christmas all in one at work this week, had loads of parts delivered my favorite been the 205 european arches! 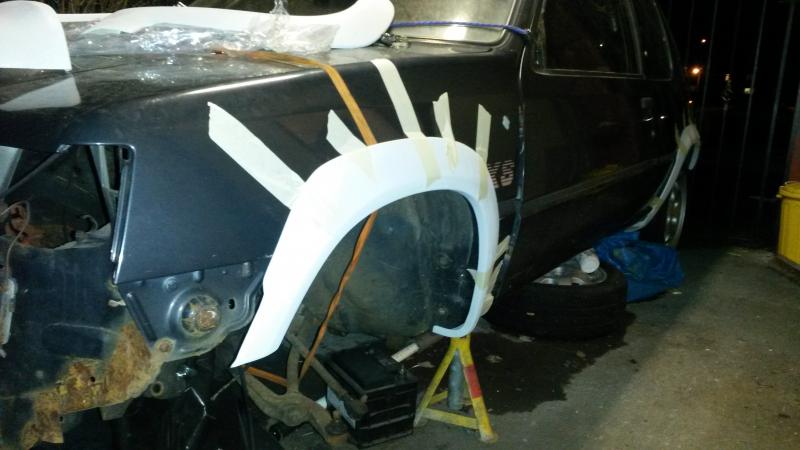 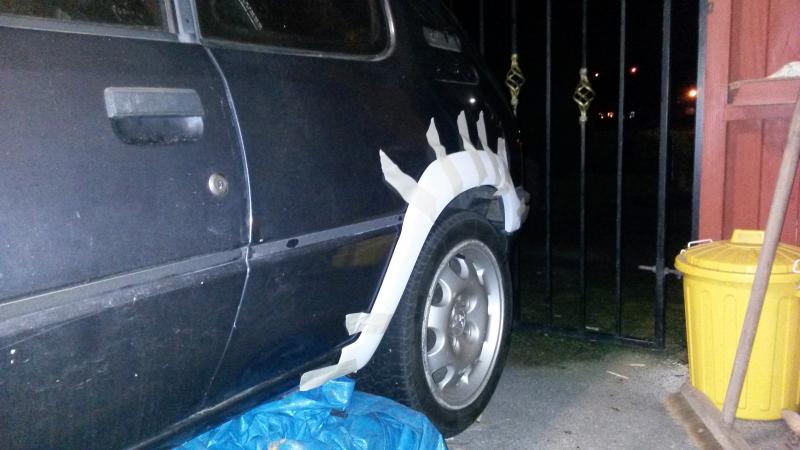 not bad for fiberglass knock offs! |
| |
|
|
pugmyster
Part of things
Iam not old iam retro
Posts: 296
|
|
|
|
|
Like the arches..just out of interest where did you get them
Iam trying to find a set of ecosse style arches for my 309.
The 205 is gonna be very tidy when its all done
A lot of hard graft makes for big rewards and fun.
|
| |
|
|
Jox
Part of things
Baaag o saaand
Posts: 51
|
|
|
|
Like the arches..just out of interest where did you get them Iam trying to find a set of ecosse style arches for my 309. The 205 is gonna be very tidy when its all done A lot of hard graft makes for big rewards and fun. Thanks mate. I got them from a guy in newark off ebay. He only seems to have them for sale now and then, by the looks of it there is one set left. ebay link for youRoll cage and seats going in this weekend! Jon |
| |
|
|
Jox
Part of things
Baaag o saaand
Posts: 51
|
|
|
|
Well i thought throw this cage in, take like ten minutes i couldn't of been more wrong! took me and my mate from 9.30 to 6.00 and its only tacked in i still need to go round and seam it all up. Must of had the bloody thing in and out of the car about 20 times, i had a problem with the front of the cage it was too high at one end and too tight up against the windscreen but as it happened once the back was all in and bolted up it all seemed to fall in to place. We set about fitting the main hoop first. I could of bought a safetey devices fitting kit for £80.... but instead i bought 3 meters of 3mmx150 mm bar for a tenner and dragged the welder out. I have gone slightly over board with the mounts, msa spec is 120mm but as my bar was 150mm it was a no brainer to do them 150, is made from recycled rola cola cans! i did not fill me with confidence when i nearly wrote the car off pulling the headliner down lol. Rear foot made up 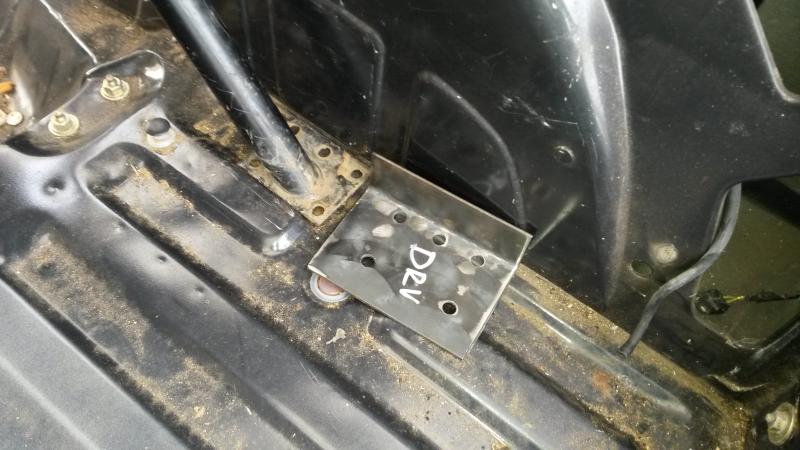 drilled and tacked in 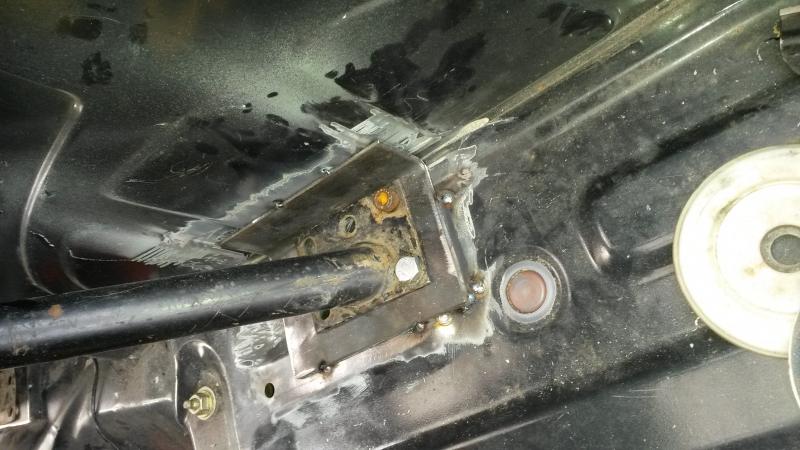 The front legs of the main hoop needed lifting about 10mm, i made these for either side 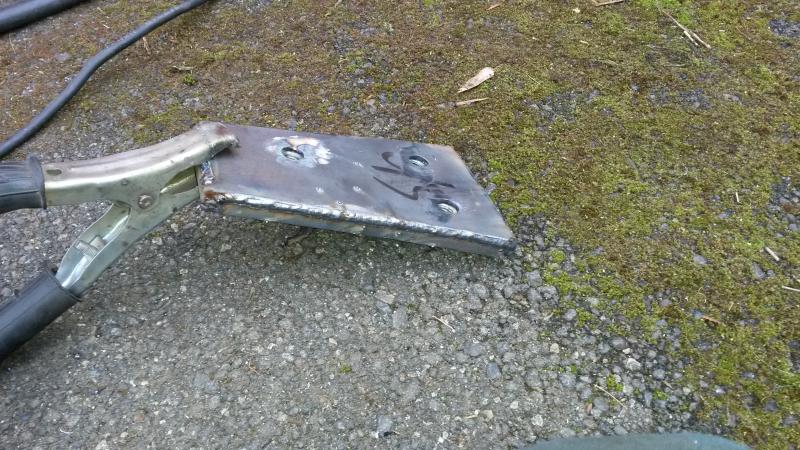 tacked in place all bolted down 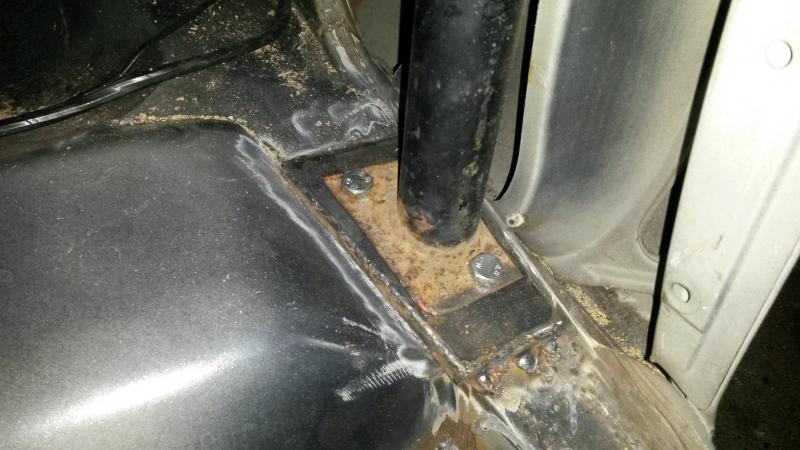 this is how the front looked 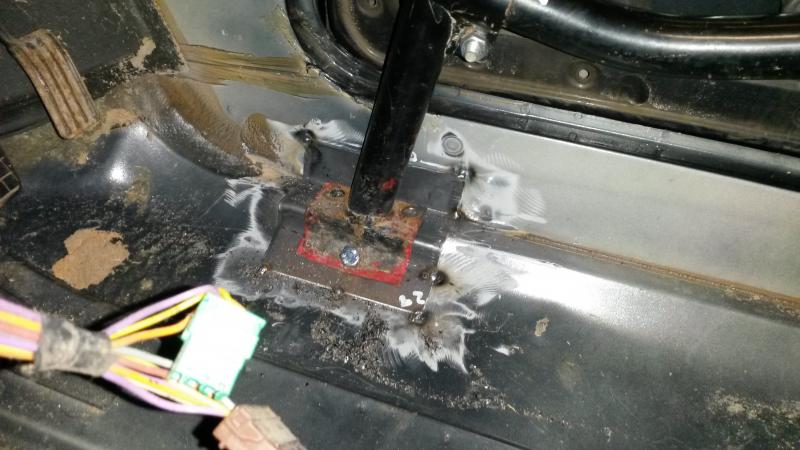 i'm going to make some tags off the front hoop that ties in the windscreen and the roof sides, i will weld it in propper this week and fit the seat mount. Cheers Jon |
| |
|
|
|
|
|
|
|
Excellent work so far  |
| |
72 Pontiac Firebird Formula 400. 95 BMW E34 525i Manual. 80 Lotus Elite, sold  86 Mk4 Escort RWD V8, sold |
|
Jox
Part of things
Baaag o saaand
Posts: 51
|
|
May 13, 2014 17:07:52 GMT
|
not updated this for a while. I have been chipping away at little bits on the odd hour i get free to tinker! managed to get the inside of the shell 98% stitch welded installed seat rails and finished off the cage mounts, heres a few pictures 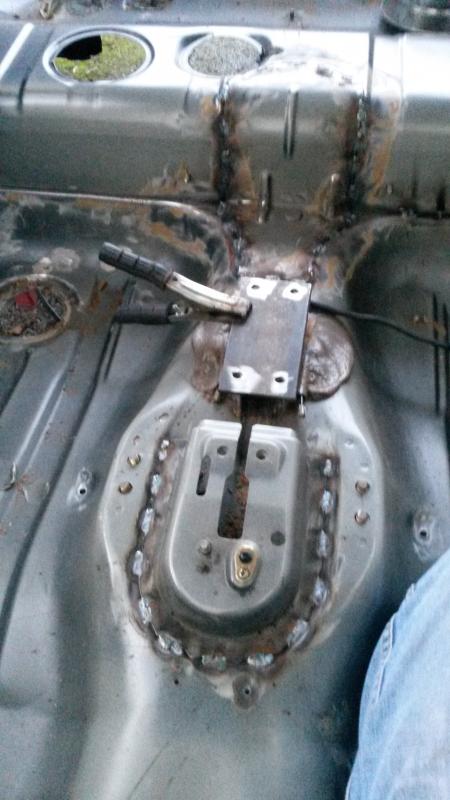 I had to cut the floor and exhaust tunnel out to fit the seats in otherwise my head was higher than the rollcage, not really ideal... 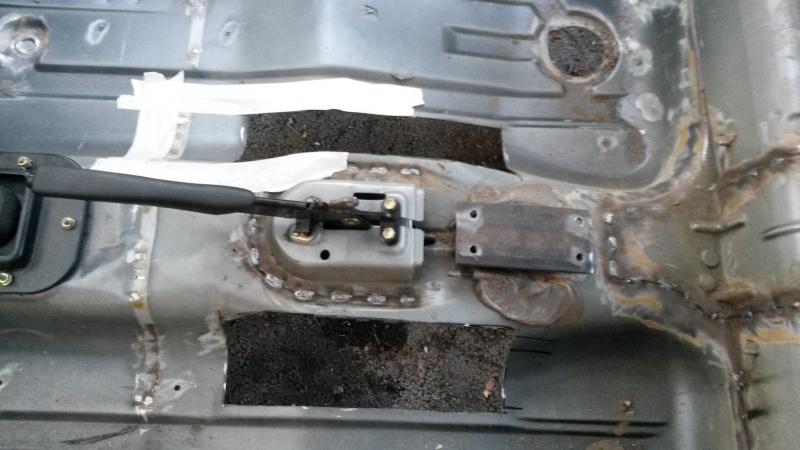 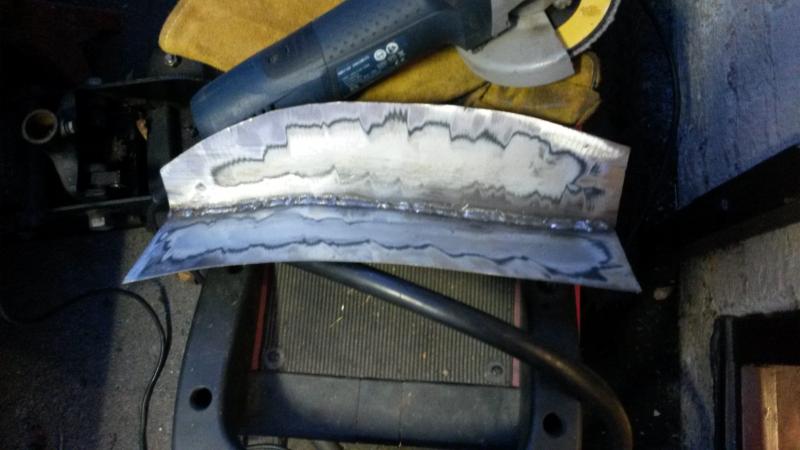 so i cut quite a bit out then made some panels up to fill the hole. 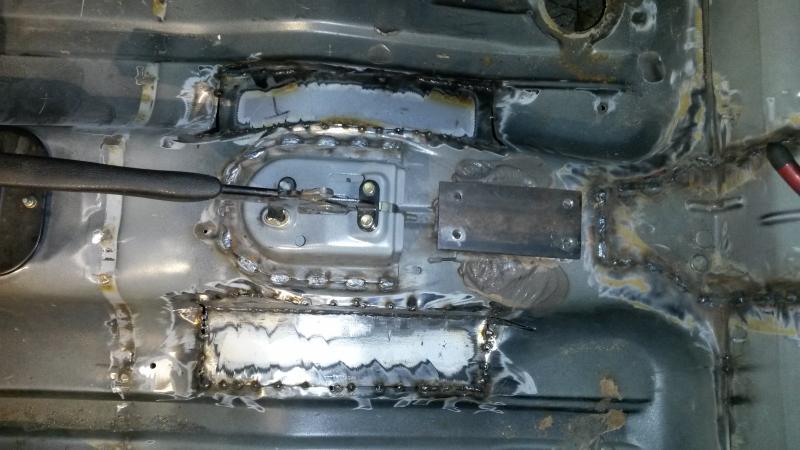 they are still not as low as i wanted them but its the best i could do with what i had laying around! 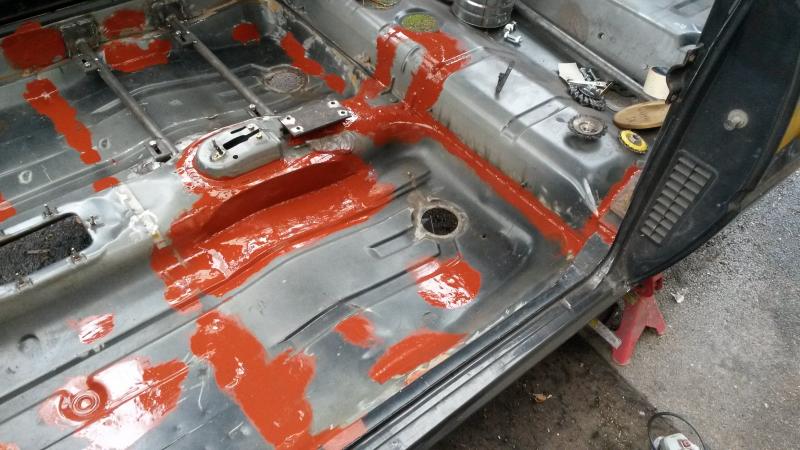 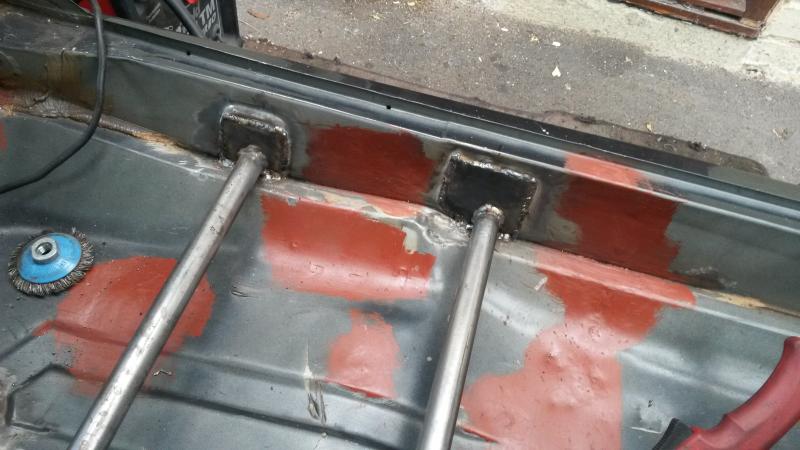 i got side tracked and had a look at going about fitting the rallye arches i bought, turns out the flat arched 205s have a lot lower wheel arch than the gti . Really it turned out ok as i will be running 14inch gravel tyres and 20mm wider rear beam so i need all the room i can get. so i marked it out and cut away! 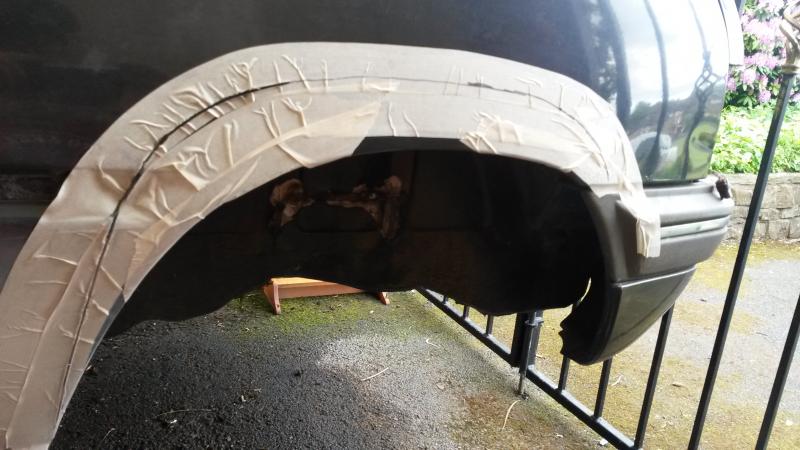 turned out to be rusty behind, so a bonus really haha 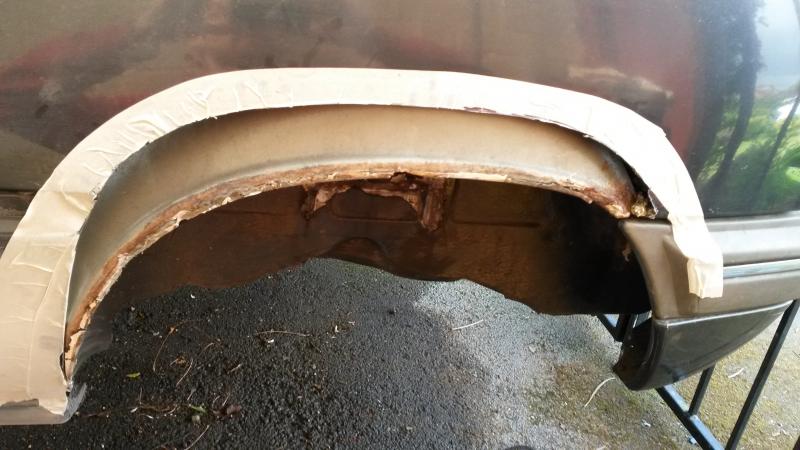 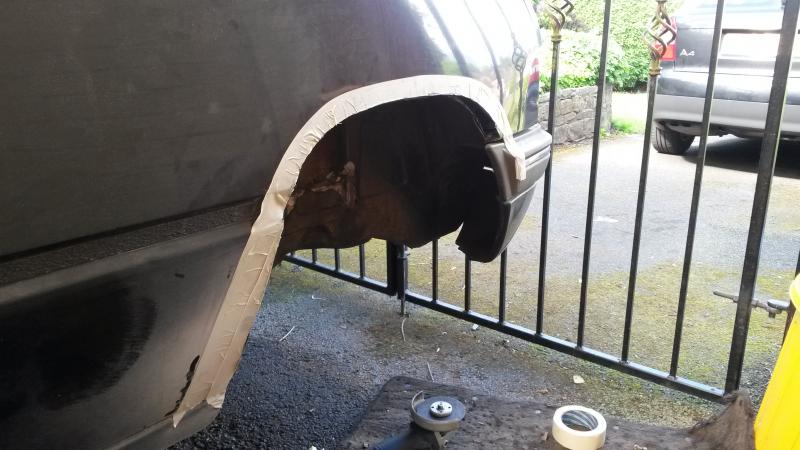 once i had cut it out i made a template of the inner arch shape and left the out edge long so i could weld it a bit easier. peugeot metal seems to be very thin at the best of times! 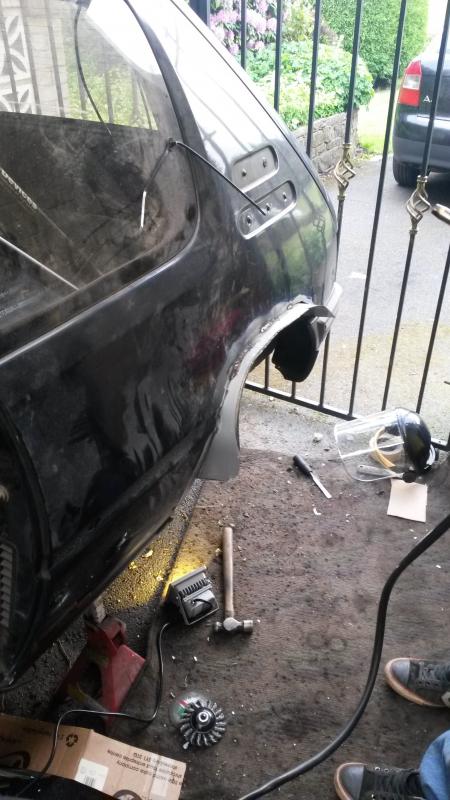 this is the finished article all trimmed off and ground back. arch fits on nice and i have looads of room for big tyres. 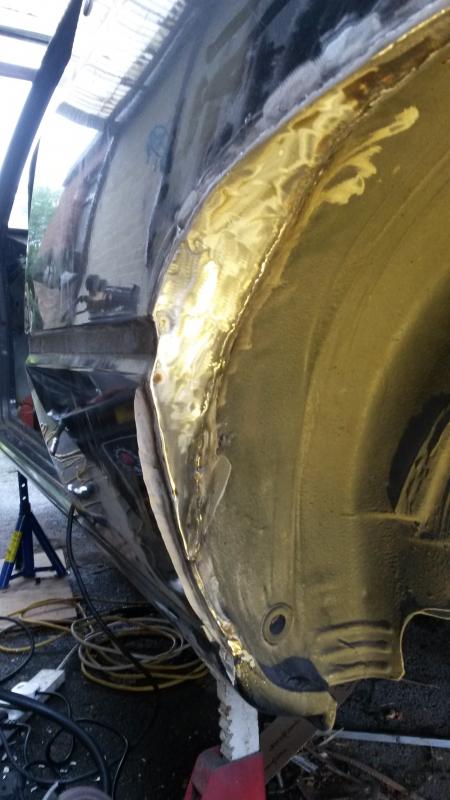 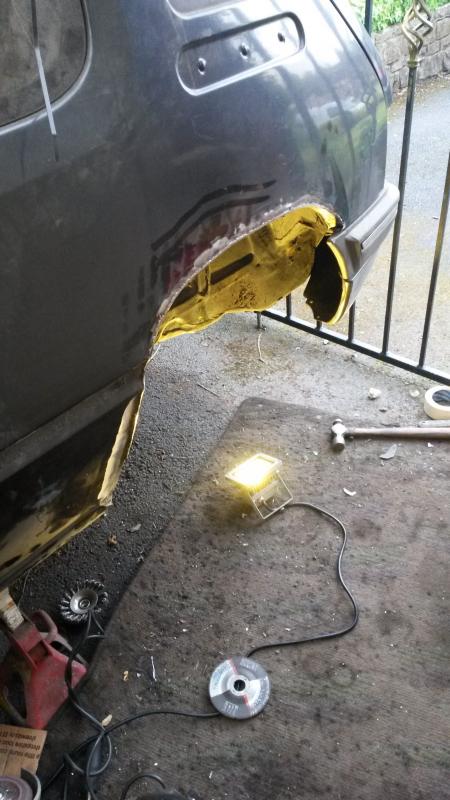 Just need to do the other side now. Not far of painting stage i think... though the next job is to design and fab up some sill stands. thanks for looking! |
| |
|
|


 good luck to you .


 a 16v 205 definitely sounds fun!


