Scott
Part of things
 
Posts: 51 
|
|
Oct 23, 2017 14:33:03 GMT
|
|
I like the first pic with the curved intake as it matches the lines of the car.
Can I ask why you needed to replace the original glass?
Its not as if you were changing the roofline or anything else that would require a change in the glass size or shape.
(I'm sorry of this is an obvious thing, but I'm not up on modding and the various rules of it)
|
| |
What looks right is not necessarily right,
but what looks wrong is definitely not right!
|
|
|
|
Phil H
Posted a lot
  
Posts: 1,448
Club RR Member Number: 133
|
1972 Firenza "chassis swap" Phil H
@philhoward
Club Retro Rides Member 133
|
Oct 23, 2017 15:18:21 GMT
|
|
IVA...glass has to have the correct markings.
|
| |
|
|
jonomisfit
Club Retro Rides Member
Posts: 1,788
Club RR Member Number: 49
|
1972 Firenza "chassis swap" jonomisfit
@jonomisfit
Club Retro Rides Member 49
|
Oct 23, 2017 20:34:59 GMT
|
|
personally I prefer the non blended scoops that you originally mocked up.
I always think that blended scoops just look like someone forgot to fill the gap, unless they are like Quattro S1's and the whole height.
|
| |
|
|
|
|
|
Oct 23, 2017 21:09:57 GMT
|
I like the first pic with the curved intake as it matches the lines of the car. Can I ask why you needed to replace the original glass? Its not as if you were changing the roofline or anything else that would require a change in the glass size or shape. (I'm sorry of this is an obvious thing, but I'm not up on modding and the various rules of it) No probs on the question; just see here if you want to find out what Phil meant by an IVA |
| |
|
|
|
|
|
Oct 28, 2017 14:07:05 GMT
|
Thanks for all the thoughts/input on the side scoops. I don't think they'd ruin the look of the car, but I couldn't stop thinking how much I prefer the car without them. In addition, the more I worked out the details, the more negatives became apparent (loss of boot, loss of easy exhaust routing, cost, weight, heat transfer into cabin etc). I was chatting to my old man in the week, when a simple alternative materialised. In this instance my dad was an accidental genius; when he sarcastically said that I could put the rad where the intercooler is going, I quickly realised that the joke was actually the solution... Intercoolers don't (usually) have fans, and (with my extensions to the Impreza inner wings) there's loads of space where the top mount intercooler is meant to go....the solution; reverese the original Impreza setup by putting the rad on top of the engine, being fed by the scoop...why we didn't think of it first I've not a clue. Having done some google based sanity checking, I'm convinced it'll work fine; I did actually find a few examples where others have done the same (modified off roaders). Yesterday I measured up for the custom radiator and intercooler; to do this I had to put the engine back in:  Here's the original problem...no room for a conventional radiator/fan arrangement, but an intercooler will slot in nicely:  Look at all the lovely room here though (the gearbox sits here, but is low in the car):  The plan is to cut into the rear bulkhead a little (tapered back into the engine bay under the rad); by doing this, I'll actually have slightly more radiator capacity than the uprated one that came with the donor. In this pic the red box represents the radiator:  So, the side scoops are off the table, and we can crack on (getting quotes on the radiator/intercooler next week)! |
| |
|
|
|
|
|
Oct 28, 2017 14:39:40 GMT
|
Great when a bit of logical rethinking finds a better solution - just for comparison here is a picture of an early production Jowett boxer engine in a Jowett Javelin 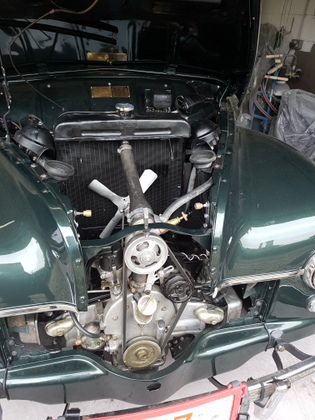 Much like your predicament the rad cannot sit forward of the engine but due to the streamline design at the front of the car - so they dropped fluted air vents into the inner wings, extended the mechanical drive from the water pump to the fan and sat the rad above the bell housing at the rear of the engine just forward of the bulkhead (Has a coincidence Subaru took quite a few design idea's from Jowett on their early boxer designs) |
| |
Last Edit: Oct 28, 2017 17:51:29 GMT by Deleted
|
|
Stiff
Posted a lot
   'kin 'ell
Posts: 3,021
|
|
Oct 28, 2017 16:44:31 GMT
|
|
|
| |
|
|
scimjim
Club Retro Rides Member
Posts: 1,503
Club RR Member Number: 8
|
1972 Firenza "chassis swap" scimjim
@scimjim
Club Retro Rides Member 8
|
Oct 28, 2017 21:41:42 GMT
|
What about recessing the door so the scoop isn’t so obvious? 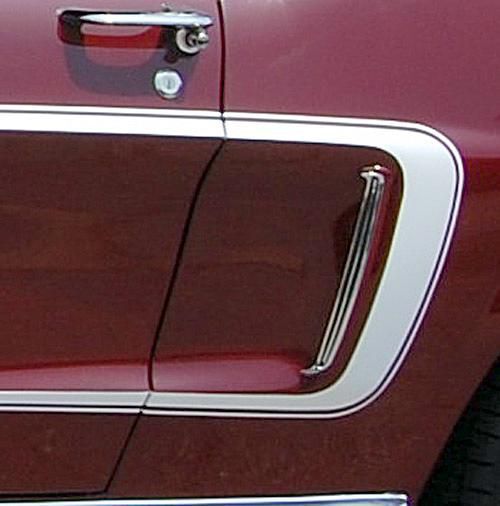 Rad intake/exit area needs careful calculation (in the boot or on top of the engine - you can get away with a lot more in a conventional front mounted position). |
| |
Last Edit: Oct 28, 2017 21:44:45 GMT by scimjim
|
|
|
|
|
|
|
Long overdue update.. Stuff has been done (all seat mounting done for example), to a point where we need to start getting ready for sand blasting prior to paint. We needed to access the underside (welding, repair, strip, and paint), but we initially couldn’t figure out how to do it. Simply rolling it onto its side was a no go (due to the arches and sills sticking out), and the design of the front and rear meant that rotisserie attachment was difficult. The solution was a custom roll-over jig/frame; the frame picks up the crossmember mounting points, but provides a fantastic amount of access: 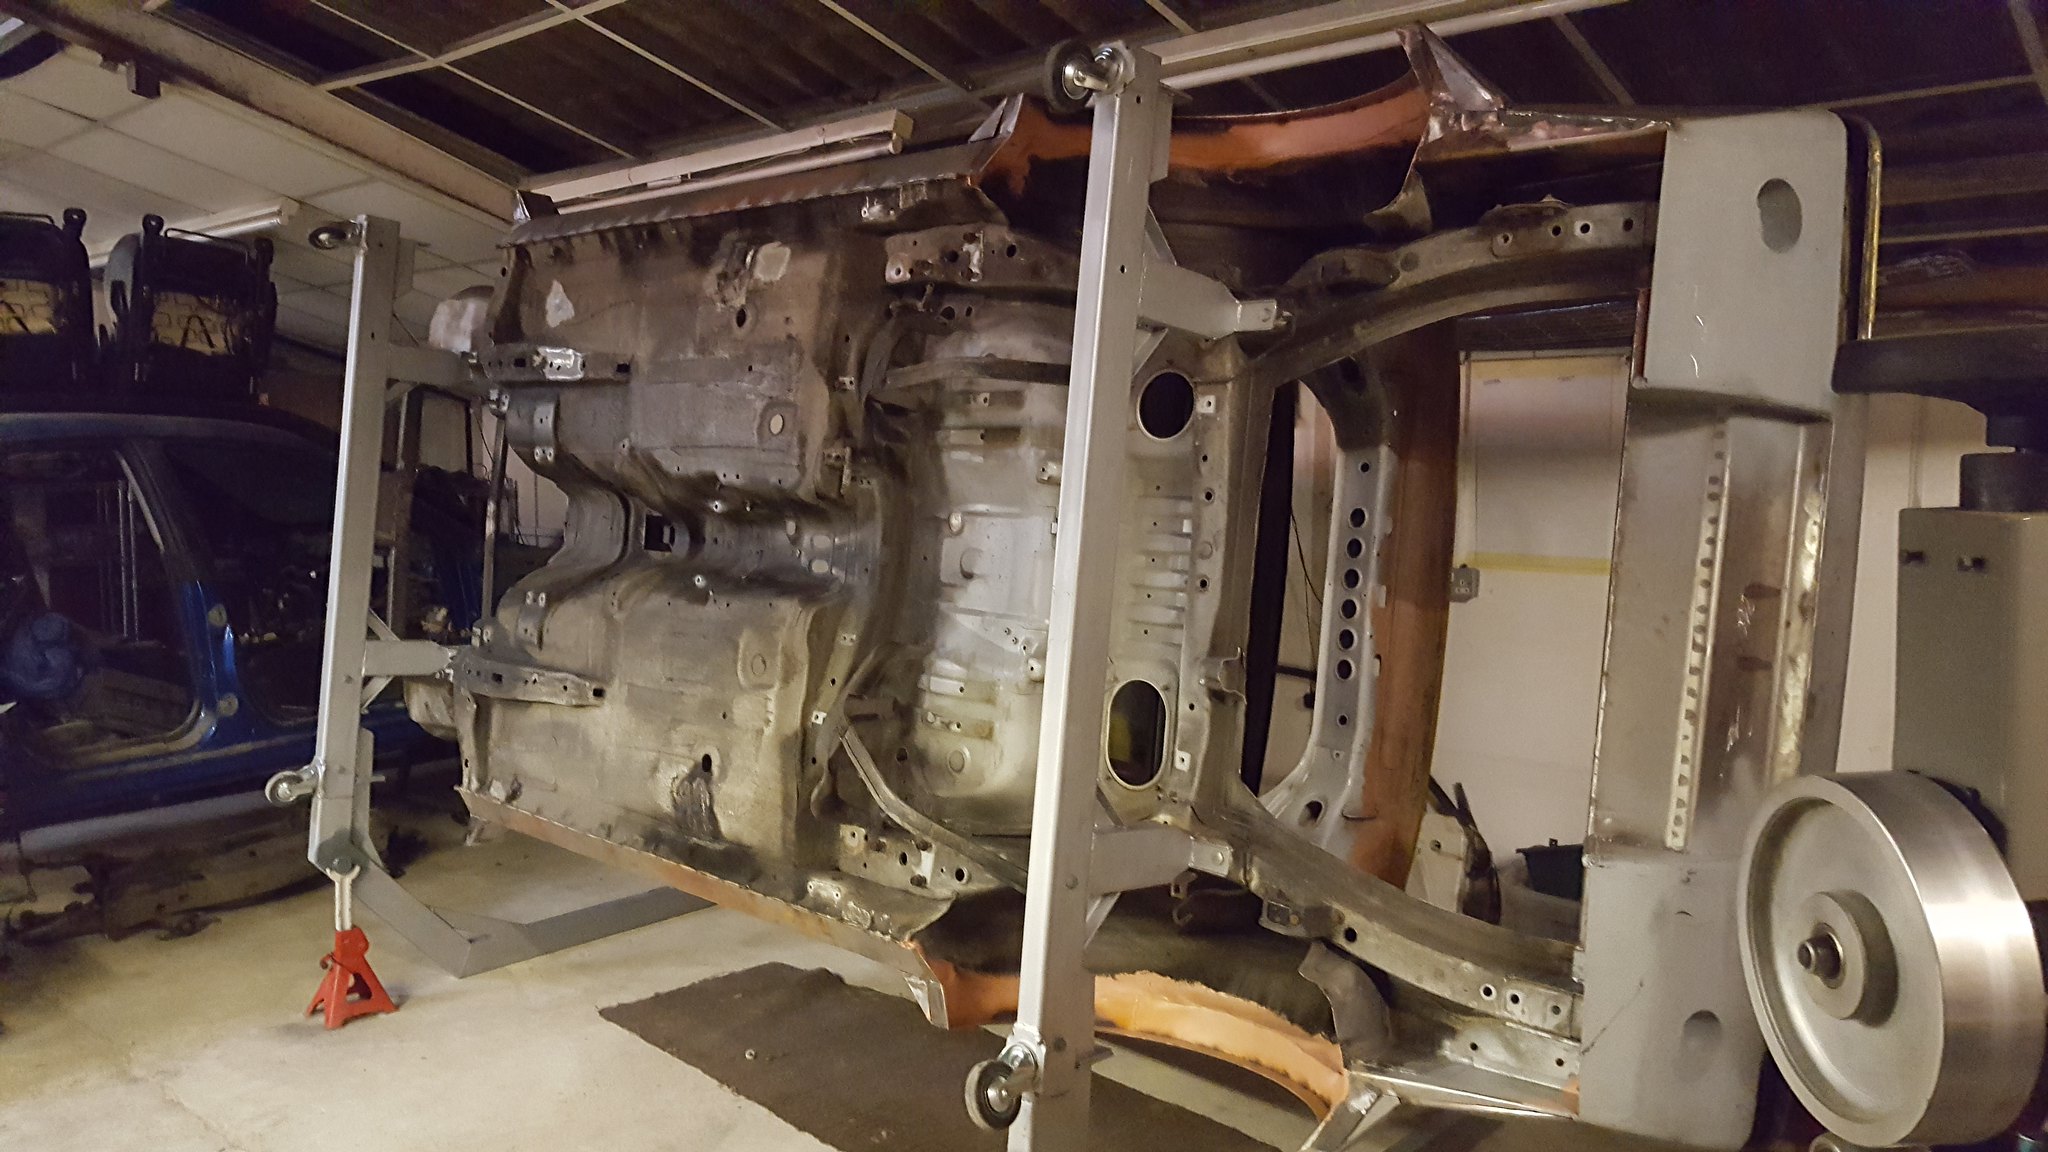 85CDC6AB-1F0A-4F44-8625-1F13DE5FD8FB 85CDC6AB-1F0A-4F44-8625-1F13DE5FD8FB by firenza boxer, on Flickr 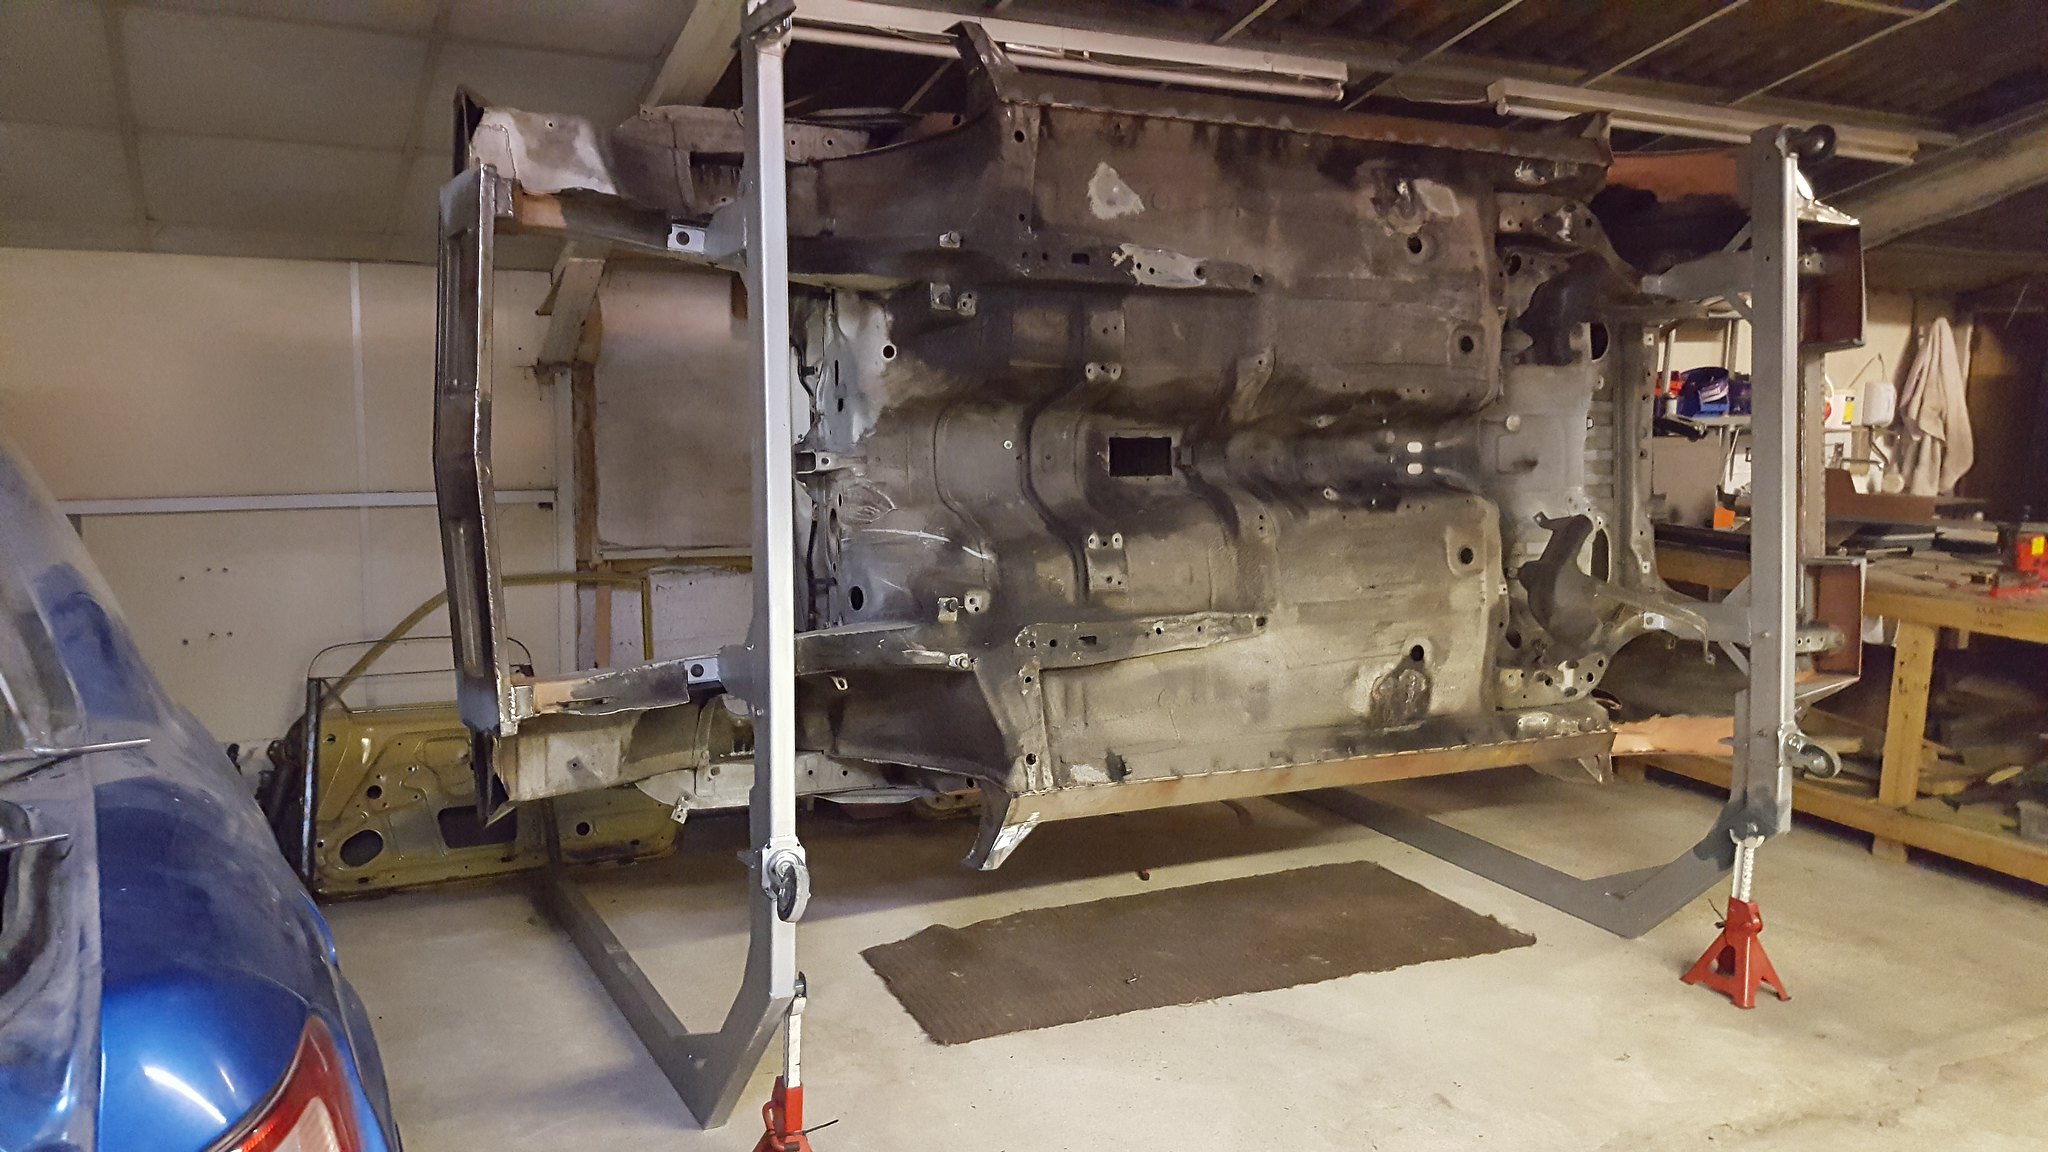 048FE583-4006-4D0D-9601-9B8B428EBA3E 048FE583-4006-4D0D-9601-9B8B428EBA3E by firenza boxer, on Flickr 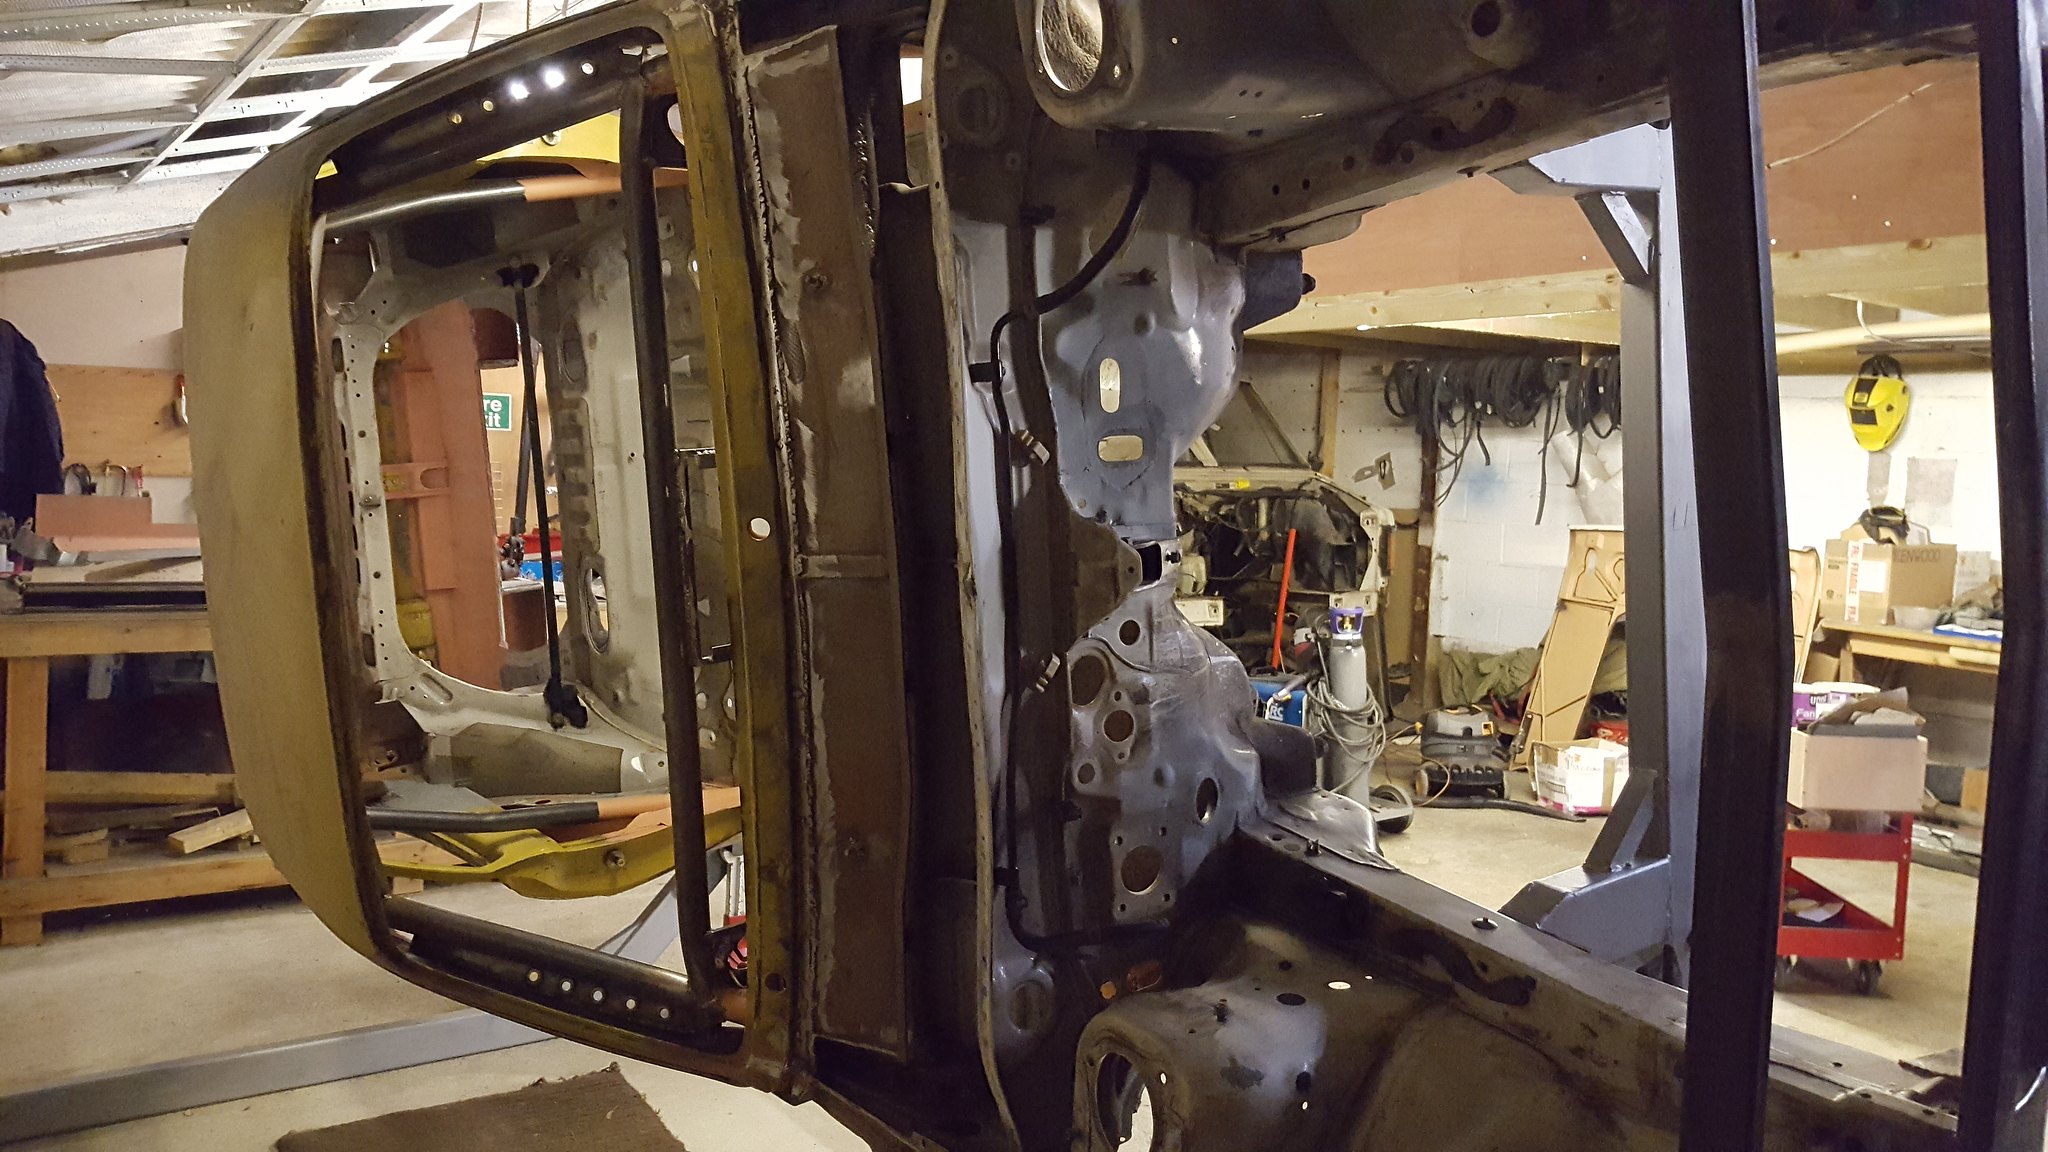 430C805D-B02D-4E3E-A46C-AF7FE76DF10F 430C805D-B02D-4E3E-A46C-AF7FE76DF10F by firenza boxer, on Flickr Things to do underneath before sand blasting: - seam weld bottom lip of the sills - finish welding around arches (now we can access it) - repair the crushed chassis legs (visible in pics), caused by some dopey previous owner who should have stepped away from the trolley jack - strip off factory rubbery undercoating (that blasting wouldn’t touch) |
| |
|
|
|
|
|
|
|
|
|
Mar 30, 2018 21:17:28 GMT
|
Nothing too interesting, but a quick update to the build log... I’ve eventually managed to remove all of the rubberised undercoat (the best meathod was using a knotted wire angle grinder ‘disk’); no nasty surprises were lurking underneath. I’ve actually been shocked at the total lack of rust on the impreza; the shell was a sti, therefore an early J import. Fixing the damage caused (not by us) from incorrect jacking has been done; I didn’t take pictures of the process, but you can tell what I did in the picture below with the un-dressed welds (I remove the crushed floor stiffeners, beat them straight off the car, then plug welded them back on):   One of the seat brackets (on each side) was welded straight to the floor. The impreza floor pan is made from reasonably thin steel, therefore I decided to plate the area around the mounting point. Thick steel plates were hammered to fit before being fully welded on; the plug welds in the plate pick up on the bracket welds for extra strength:   And finally, the bottom flange of the sills were carefully seam welded:  There’s a little more welding to do inside the rear wheel arches, but it’s not far from being ready for the sand blaster. |
| |
|
|
|
|
|
May 25, 2018 22:08:35 GMT
|
|
|
| |
|
|
|
|
|
|
|
May 26, 2018 13:50:13 GMT
|
Wouldn't it be easier to have two rads and a link pipe? Probably, but two additional end tanks would take up valuable space that would otherwise be radiator core. This thing will need all the cooling capacity I can give it. |
| |
|
|
|
|
|
|
|
Small update on a few bits: Boot floor done (with mounting points in the top-hat for the two exhausts:  Mounting for the iPad sorted (had to devise a way that wouldn’t put too much pressure on it). The real iPad that will be going in has a black surround not white; for building the dash, buying a fake (display) iPad, has been invaluable though:   And worked out how to secure the dash vents; these are modified AUDI A1 dash vents, that interestingly work in the same way as the original viva fresh-air vents:  |
| |
|
|
|
|
|
Jun 30, 2018 19:34:34 GMT
|
|
Mad looking machine thats gonna be so much fun!
Glad to see this pop back up.
|
| |
|
|
pathnx
Part of things
 
Posts: 19 
|
|
Sept 25, 2018 6:45:24 GMT
|
|
Nice Project - any progress since June?
|
| |
|
|
|
|
|
Sept 25, 2018 23:25:53 GMT
|
Nice Project - any progress since June? Not much worth photographing.. A fair bit of final welding has been done (still a bit to do), and I’ve finished the dash (probably worth a photo next time I’m with the car). I got distracted for a few weekends stripping down then scrapping off the blue (GD) donor impreza; we needed to make some space in the work shop for other projects. Other ‘progress’ is that the gearbox has gone in for a full rebuild (and upgrade), the seats are with the trimmer (I decided that light cream nappa leather with diamond stitched Alcentara centres would really lift the finished car), and I settled on the paint colour (non-metallic grey, with off white steelies). |
| |
|
|
|
|
|
|
|
Picture of the finished dash (hole for the dials will be cut once I’ve got the bezel machined)  |
| |
|
|
|
|
|
|
|
|
love this.
if you clamp a radiator between 2 sheets of MDF you can put it through rollers it'll curve the finned area, be careful of the end tanks obviously. I've seen a mini with a metro turbo rad in the front where it matched the curve and gave much more room.
|
| |
|
|
|
|


