|
|
|
|
|
|
you can get sets of only the wheels or even the wheels with the mechanism to raise and lower the wheel
not cheap but still cheaper than a kendrick
all you need to do is make your own frame
regards
mitch
|
| |
|
|
|
|
|
|
|
Dec 17, 2013 18:29:01 GMT
|
The front fenders Cutting into yet another new sheet after creating a template of the general shape required.. The electric shear can create wavy edges while cutting the metal if pushed too fast so I usually, try to lay out/cut the sheet in a way that the wavy edges remain on the drops. However, at times the good piece may still end up with these distorted areas. The slapper and a flat dollie are used to even them out. Also, putting the perimeter through the wheel with some light pressure will take care of this issue as well.  Left and right pieces both start out nice and flat. However, 2 reverse curves in one panel will take care of that very quickly. 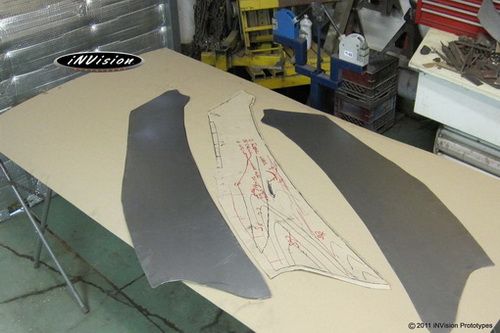 I started with rolling the piece though the wheel with the rubber wheel installed to give the panel some rigidity while working it. 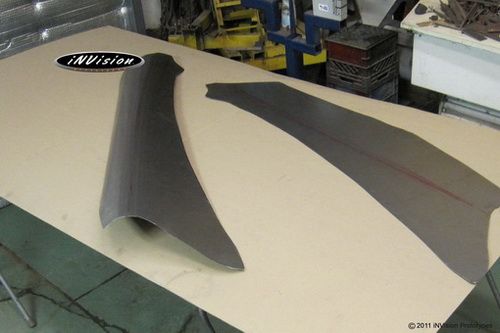 Witness marks were made to indicate areas that I need to stay away from as they cannot be rolled...yet. The panel was then flipped over, having only the centre rolled to create the concave area. At this point the steel upper wheel is installed and after a few minutes of alternately rolling one side and then the other with some pressure...the fender is starting to take shape and fit the buck. However, there's still a long way to go. Areas to push and pull are highlighted. 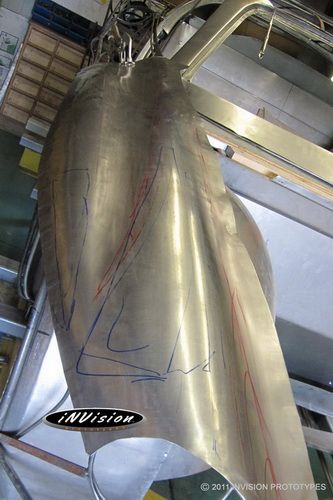 Almost there...smoothing out and preparing to tip the body line features and edges into the panel. The wire frame's features are traced onto the underside of the panel. Also a bit of excess to trim away.  At this point this was far enough for the passenger side... the driver's side needed to be caught up. |
| |
|
|
|
|
|
Dec 17, 2013 18:30:48 GMT
|
Cutting out some more pieces...this time for the sides of the hood.  Welcome to the hood! Sorry, didn't have the camera out while these were being shaped. Both my Dad and I were busy getting these sides wheeled. Now the work begins...to fit, scribe, cut, weld, grind, planish, and hem this thing. 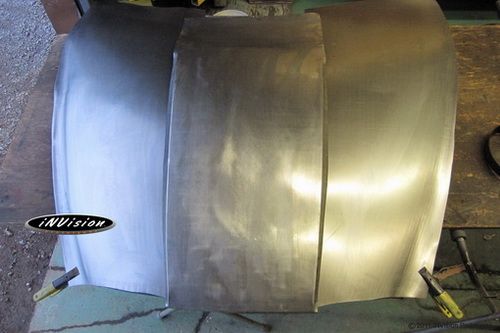 While creating this first hood(yes you read that correctly) may appear like 'metal shaping black magic'... that is, 'ahhh yeah...how'd he get from flat sheets to the final curved pieces" - I'll get some more comprehensive pictures up in the next while of the next hood that was made to replace this one. |
| |
|
|
|
|
|
Dec 17, 2013 18:36:21 GMT
|
Topping off the build with the roof panel. I was getting a bit anxious as the time was approaching to create the roof panel as I've never shaped a panel this large. The shape is simple enough...it's just managing the size. Normally, some would approach fabricating this in 4 pieces - the sides and front curvature pieces, followed by the main area panel...which would be welded to the 3 perimeter pieces. As you guys have seen, I've got a few marble loose up there ... so figured why not try it as one piece. The other thing is that I didn't really want to do all that welding/finishing. The same shaping principles used to create smaller pieces also apply large ones...except for handling the size of the sheet. The throat on our wheel is large enough to accommodate over 1/2 the panel so 'washing out'/smoothing the panel wouldn't be an issue... The roof panel was started by creating a flexible template on a fresh 4'x8' sheet.  The piece was cut out and preliminary wheeling pattern marked out.  After about 1/2 an hour of shaping the roof panel marks the 68th and final major panel being shaped... It's easy to over shoot the shape, therefore I like to take my time and sneak up on the curvature. Overshooting isn't really that much of an issue since you can wheel the perimeter to get the centre back down...but that means more time spent wheeling.  Later, after final shape tweaking, the edges will be trimmed and feature lines will be created. 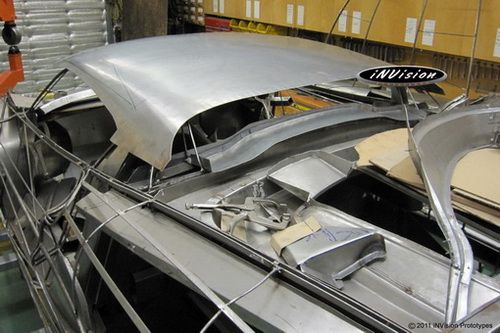 So back to the wheel with my dad...pushing the areas over the doors up to attain the prescribed curvature. 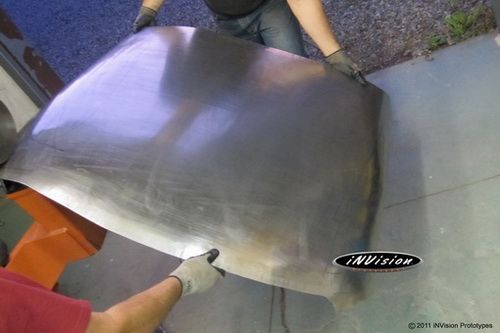 Dropped the roof skin on again and marking areas to be adjusted...  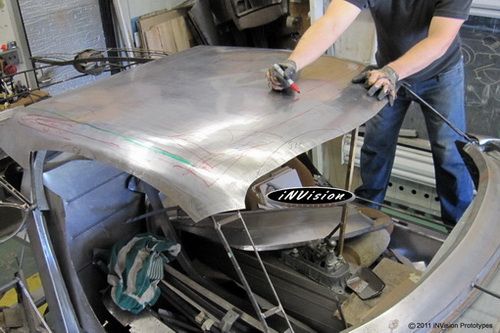 A shot from the underside if the roof and the wire frame buck. The skin needs to conform to the this buck precisely. It's close, but has a long way to go yet...  Bringing up the centre section of the roof some more by starting to wheel it again...1/2" at a time. 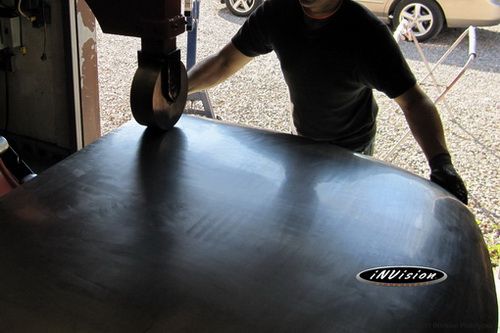 Rolling on....  ... and on...  ...and on... It's getting close...and shiny. The upper wheel and lower anvil are transferring their mirror smooth surfaces onto the material being rolled.  Trial fitting the panel...again. A few more adjustments before the features are put in and edges tipped. 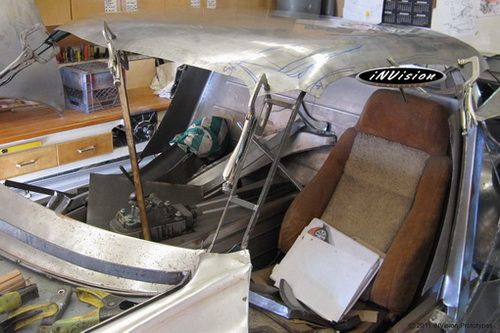 Perimeter edges need to have excess material trimmed.  Edges trimmed away and prepped for tipping.  Pheu! Thanks for looking!  |
| |
|
|
remmoc
Part of things
 
Posts: 931
|
|
Dec 17, 2013 19:30:43 GMT
|
|
WOW
|
| |
|
|
DMS
Part of things
 
Posts: 57 
|
|
|
|
|
Love it!
|
| |
|
|
|
|
|
Dec 18, 2013 12:56:34 GMT
|
|
Thanks!
|
| |
|
|
Frankenhealey
Club Retro Rides Member
And I looked, and behold, a pale horse! And its rider's name was Death
Posts: 3,885
Club RR Member Number: 15
|
|
Dec 18, 2013 13:45:44 GMT
|
|
SIMPLY AWESOME - I can't even think in 3D let alone work in it.
|
| |
Tales of the Volcano Lair hereFrankenBug - Vulcan Power hereThe Frankenhealey here |
|
|
|
|
Dec 18, 2013 14:18:22 GMT
|
|
Really Amazing work, enjoying watch it evolve
|
| |
|
|
|
|
|
Dec 18, 2013 18:49:59 GMT
|
|
Still makes my jaw drop.... and i'm not jealous at all ..........
Whats the legalities like with regard putting a 'home made' car on the rd over there?
|
| |
|
|
|
|
|
|
|
Dec 18, 2013 22:02:32 GMT
|
|
With respect to making a one-off ride street legal, one must have a VIN# assigned as well as pass a full safety inspection by a certified shop. There are other options out there as well for custom built vehicles whereas one can work with a donor vehicle and use the VIN# associated with that.
|
| |
|
|
|
|
|
Dec 19, 2013 13:35:23 GMT
|
Pieces for the rear hatch are laid out and being prepped for assembly.  Fitting the pieces to the buck and scribing the underside of the dovetail panel so that the vent holes can be cut out.  After cutting out the vent holes, the panel was run though the tipping wheel to brake a starting bend. These bends can now be formed over the buck for a true fit.  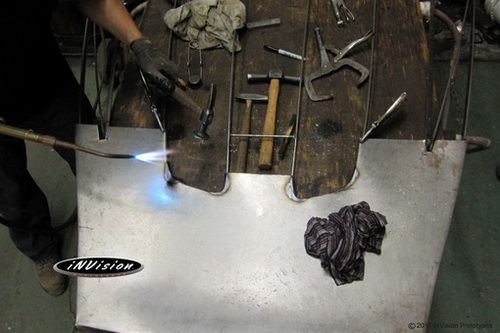 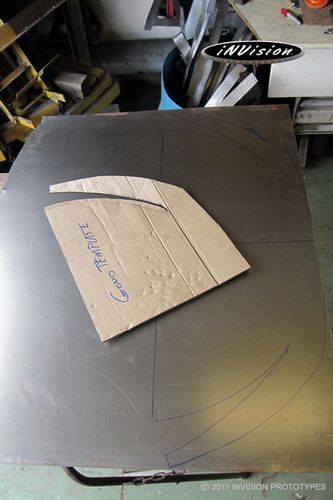 Guess it was a few days later when these panels for the front compartment were shaped...didn't have the camera around to get some shots. Now they need to be welded and finished. Next thing to tackle are those big holes in the hood...  |
| |
Last Edit: Jan 7, 2014 16:07:08 GMT by invision
|
|
|
|
|
Dec 19, 2013 13:37:07 GMT
|
With the metal shaping for the front compartment coming to an end and the troughs along the side redone(wasn't happy with the first go of narrow troughs) it was time to start fitting all the body pieces together. I started by fitting the tops of the rear 1/4's to the buck. A few areas were in need of a massage until it felt relaxed in place. 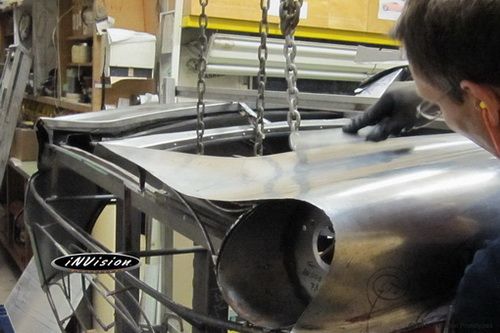 Our Body Caliper was set up to measure and compare both sides for symmetry. 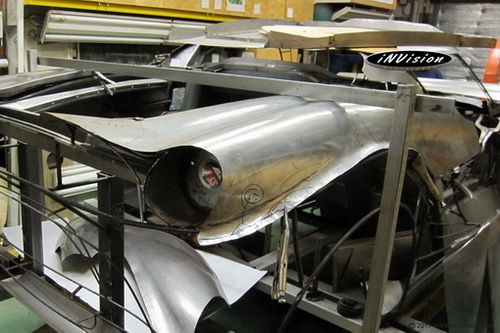 I was quite pleased to see that the consistency of the panel curvature came out this well. That includes the outer curvature. The curvature was checked in relation to each other on both sides at 5" increments.  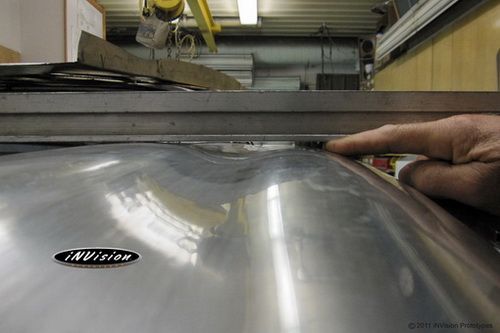 |
| |
|
|
|
|
|
Dec 19, 2013 13:43:03 GMT
|
Here's a little progress that was made on R2's rear end. The rear fascia pieces were already clamped in place and scribed and with most of the major shaping coming to an end it was time to start trimming and welding things together. 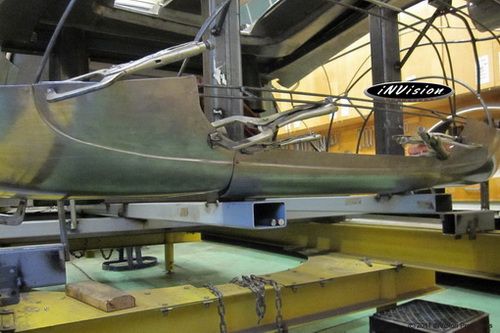 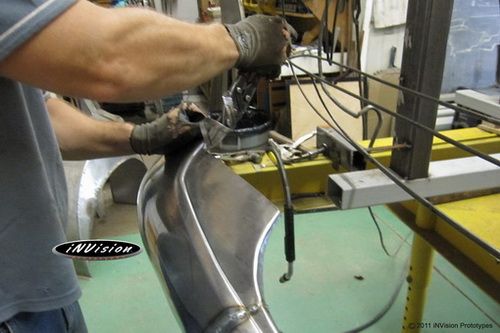 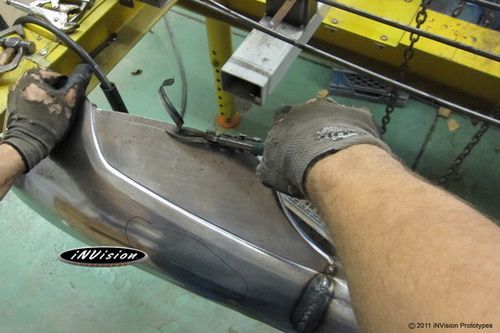 Lower fascia being fitted to the wire frame buck. 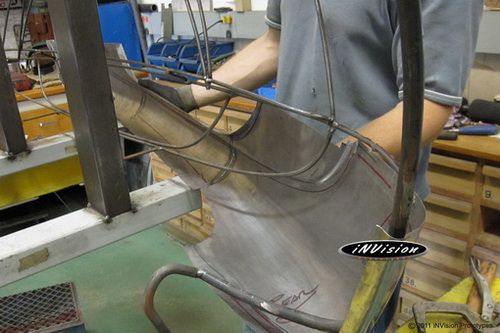 Lower and upper pieces are clamped and ready for welding. 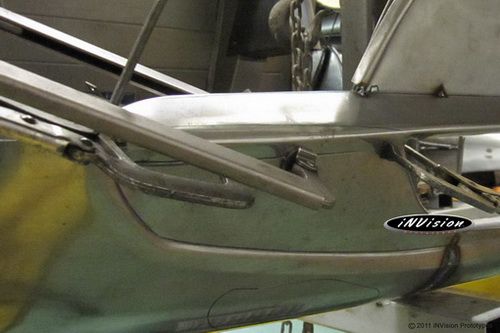 |
| |
|
|
eurogranada
Europe
To tinker or not to tinker, that is the question...
Posts: 2,556
|
|
Dec 19, 2013 13:43:42 GMT
|
|
simply incredible!
|
| |
|
|
|
|
|
Dec 19, 2013 13:46:51 GMT
|
Some pictures of the pieces that make up the front fenders coming together as well as detail work around the headlight areas. Top section of the driver's side finder 'clipped' into place on the buck in preparation for ... 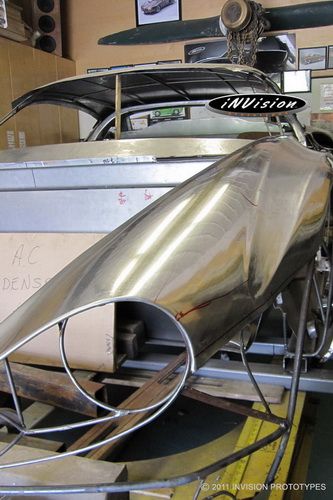 ... the two lower front and rear pieces to be lined up and tacked into place. Final welding will take place off the buck. You may notice that the piece being tacked is on a slight angle at the moment. As you guys know, it's crucial to precisely align the surfaces being welded. Once tacked, I flexed the panel into position and adjusted the joint with a hammer and dollie. I was aware that there would be some springback of the panel when removed from the buck but that would be addressed by relaxing the lower feature. 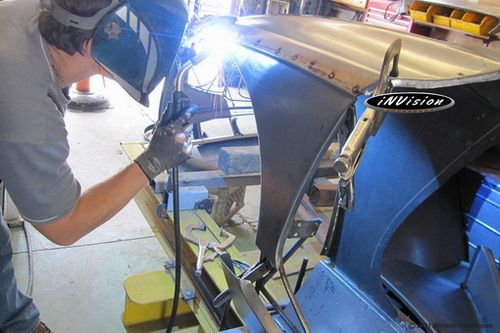 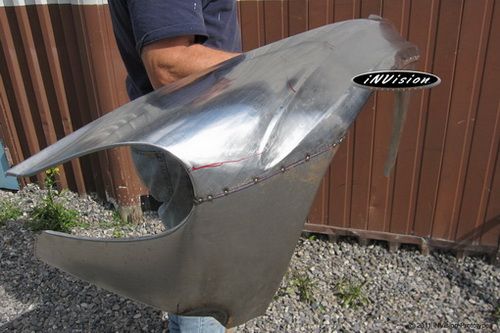 The main body feature was sharpened up using our tipping wheel after the convex/concave surfaces were created with the english wheel. Getting the initial lines straight was one of the bigger challenges since the guide marks were on the underside of the panel while it was being pushed though the wheel. Aside from working the metal at the seam during tacking/welding and rolling the front lips these pieces weren't touched with a hammer or slapper. Now onto the other side to hem the lip around the headlight area. After the first pass the feature is still a little bumpy. The trick for a nice result is to take your time during this procedure otherwise it will require a little more finessing to smooth out. At the time I was working on this ... I was in a hurry...  A bit smoother, but not great as there are some flat spots that need to be worked out.   During final welding of the panels I'll go over that touch up the small inconsistencies. Thanks for looking fellas.  |
| |
|
|
ulver
Part of things
 
Posts: 67 
|
|
Dec 19, 2013 19:26:36 GMT
|
|
Amazing. Totally mind blowing skills.
|
| |
'99 Alfa Romeo 156 2.5 V6  |
|
Midas
Part of things
 
Posts: 515
Club RR Member Number: 14
|
|
Dec 19, 2013 22:40:08 GMT
|
|
This is so far beyond awesome there are no adequate words. Thank you for sharing.
|
| |
|
|
|
|
|
Dec 19, 2013 23:16:10 GMT
|
|
^^^^ looks like you're going to have to go get your touch back from inVision!
|
| |
Last Edit: Dec 19, 2013 23:16:22 GMT by wheeler
|
|
|
|
|
|
|
I hope the new year finds everyone well.  Continuing on with R2's build photos... Creating a hammer-form for the gas filler housing. An adjustable compass bracket was fabricated to create various sizes of circles with the router. 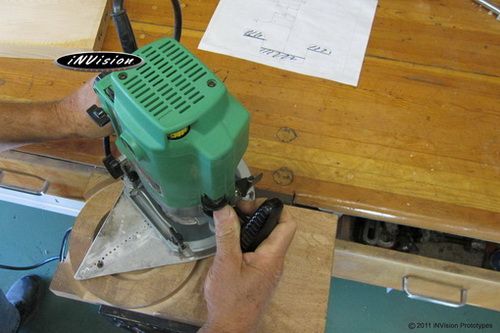 Centre area plunged through.  Creating another piece with a slightly different size and profile.  Starting with flat circular blanks of sheet metal cut from scraps and centred over the form the edges are slowly rolled over the hammer form. The inset was then created later.  Hammer form works great and the top/bottom pieces came out very well.  Next step will be to create a sleeve and join the upper and lower pieces together. |
| |
|
|
|
|


