|
|
|
May 14, 2014 22:15:13 GMT
|
|
Thanks very much Gents!
Hey Kev, when I started on this journey of handcrafting custom cars... I started simple. It's been through many many hours of hard work and practice that I've developed this particular skill set. If you have any questions about anything feel free to ask. On my facebook page I also share tricks and tips for creating tools and shaping parts.
|
| |
|
|
|
|
|
|
|
May 15, 2014 12:08:29 GMT
|
|
Would you mind doing a little pictorial of how to grind off the welds on a joint?
I often find that you (I) can grind a lot of the parent metal off either side of the weld and thus creating tin foil body panels in places! How do you grind only the weld (apart from carefully) as body files wont touch mig weld due to the high carbon in them. I've never got invisible welds (or even flat visible ones - having to knock the weld down a little to allow for a filler skim over the top.
|
| |
|
|
|
|
|
May 15, 2014 15:14:47 GMT
|
Would you mind doing a little pictorial of how to grind off the welds on a joint? I often find that you (I) can grind a lot of the parent metal off either side of the weld and thus creating tin foil body panels in places! How do you grind only the weld (apart from carefully) as body files wont touch mig weld due to the high carbon in them. I've never got invisible welds (or even flat visible ones - having to knock the weld down a little to allow for a filler skim over the top. Sure! I can do something like that. As a matter of fact, if you give me about a week or so I can show you the whole process when welding the rear panels up on the iNVision roadster we're building. I have a few photos of the rear quarters being welded ... and almost finished posted in the roadster album on my facebook page. However, I didn't include the grinding process. You know how it is when you get into something that requires your full attention. Some more finishing work is still required, but they're close. Here's a brief run down of what I usually do. I start by tacking the panels, then slightly grinding those tacks with the edge of the wheel(easier to see the place your grinding), planish, and repeat till the panel is welded up from end to end. Once cooled, I take the grinder and knock down the weld proud, again with the edge, until it's just above the surrounding metal. At this point I'll switch over to a new disk and run the abrasive disk on the flat until the weld proud is level with the parent metal on either side. You may touch that parent metal here and there... just don't gouge into it. It's a SLOW process. finally, I'll grab a course file, remove the handle(can be quite dangerous as the sharp handle end can jab into your wrist/arm) and lightly pass it over the joint. This will show all the highs and lows... more planishing... followed by more filing till the joint is invisible... ALWAYS attentive to keeping the file on the welded area. Hope this helps for now. |
| |
|
|
|
|
|
May 16, 2014 12:12:09 GMT
|
|
Thanks for that Nick, no dark arts secrets then!
With the final disc, is this a grinding disc or a grit disc?
For the planishing, would my slapper be correct or a planishing hammer? Are you knocking the weld into the panel? (leaving slight lumps on the rear).
Good tip on the body file for the high spots - that's a new idea for me (grind the sharp edges off the file point to save your wrists).
|
| |
|
|
|
|
|
May 16, 2014 12:57:52 GMT
|
|
The disk before filing is a grinding disk and when planishing.. you don't need to move mountains... just stretch the HAZ a bit to bring the panels into alignment so a slapper is just fine.
No lumps on the rear... my inside seam is just as nice as the outside seam when it's all said and done.
By the way, your Anglia is turning out great! Love what you've done. Have you had an opportunity to see the not so stock Anglia sketch I did for a friend before he got into his build.
Cheers!
|
| |
Last Edit: May 16, 2014 13:02:56 GMT by invision
|
|
|
|
|
|
|
After a brief mock up of all the panels mounted on the buck I noticed that the top curvature of the doors was too straight. I thought I allowed enough, but my guesstimate at the onset of creating this panel wasn't enough and now that the features have been locked in determined it would be a little tough to move the area around. So, rather than fab a new panel, out came the zip blade. The thought of cutting into a 'finished' panel wasn't an issue. If something isn't right at this raw metal stage...it definitely won't look right by splashing a little paint on it. The cut line was marked. 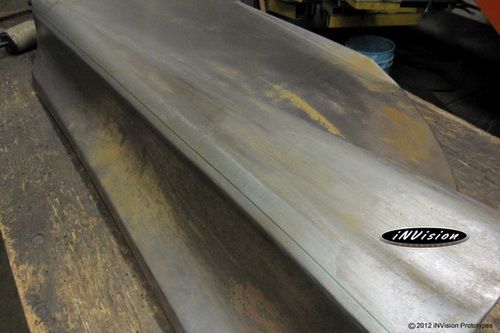 Eyeballing about 5/16" of excess material to be removed at the centre and tapering to nothing at the ends...another cut was made, surfaces re-aligned and tacked.  followed by some more tacks...  and some more... 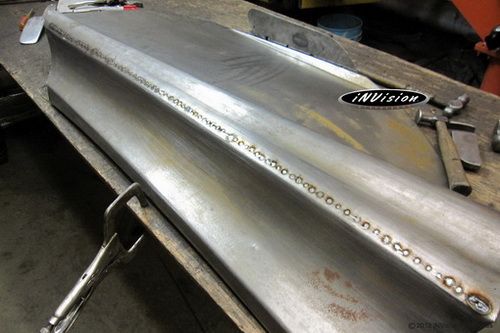 Connecting the tacks with welds about 5/8" long, grinding the weld, planishing the area to control warpage and repeating.  a view from the inside.  Transition piece made to join the upper and lower rear fascia together and tacked in place. 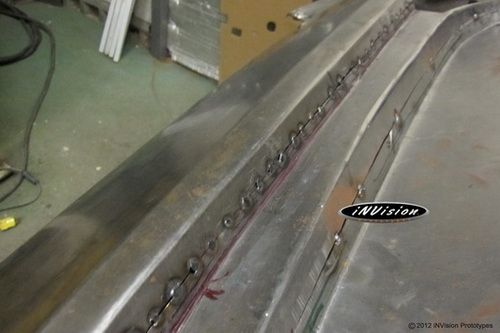 Top joint welded and finished. 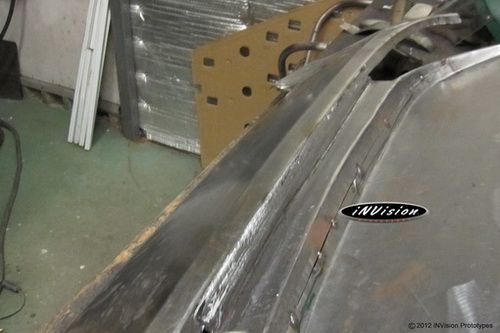 Starting to tack the lower piece together. 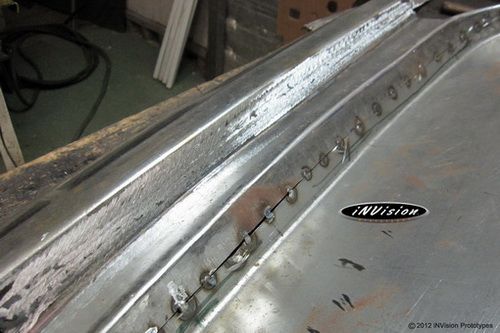 Letting the bottom joint welds cool before starting to clean them up with the grinder.  All the joints finished with the grinder, filed and planished. Next stop will be to create the mount of the license plate light. 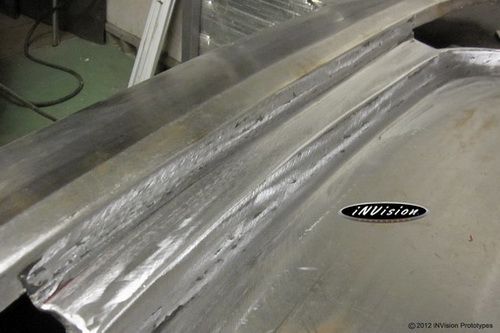 |
| |
Last Edit: Jun 4, 2014 11:31:57 GMT by invision
|
|
|
|
|
|
|
Moving onto the rear tubs. My bother-in-law, Steve, jumps right in and creates the inner panels for the rear tubs. This was his first "time at the wheel" of the bead roller and tipping machine. 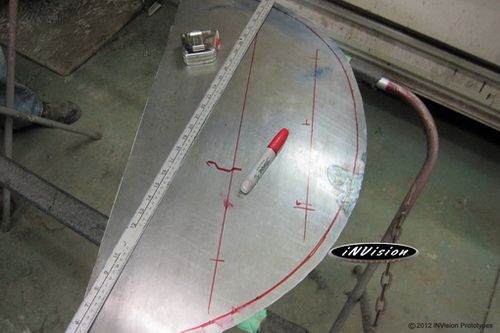 Tipping the offset around the panel's perimeter after running in the centre beads. 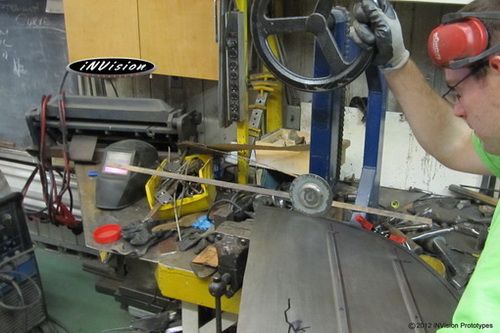  Inner wheel tub panels installed.  Inner wheel tub panels installed. Now time to re-radius and clean up the outer return lip.  Thanks for taking the time to check out these updates. |
| |
Last Edit: Jun 4, 2014 11:32:13 GMT by invision
|
|
dw1603
Part of things
 
Posts: 591
|
|
|
|
|
Thanks for taking the time to give us these updates to check out. Stunning!
|
| |
|
|
|
|
|
Jun 18, 2014 15:06:54 GMT
|
Creating the pieces that will form the hood's sub-structure...that is, the framework that supports the hood skin and hinges.   Holding the initial prototype profile created from a scrap strip of sheet metal to get a sense of surface heights. This is a quick way to wrap your head around how to form the required parts. 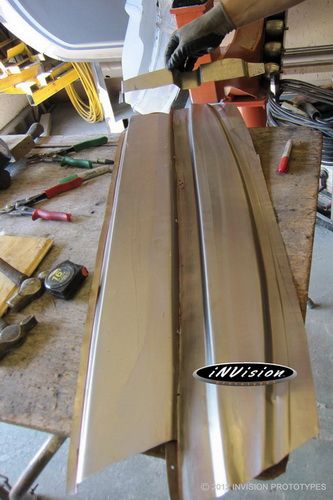 After a template for one side of the hood structure was created the overall shape was transposed onto sheet metal for both sides.  One side cut out and ready for shaping....  Surprise surprise!! Something as simple as a cereal box...in this case two of them were used to create the 'formed' template. 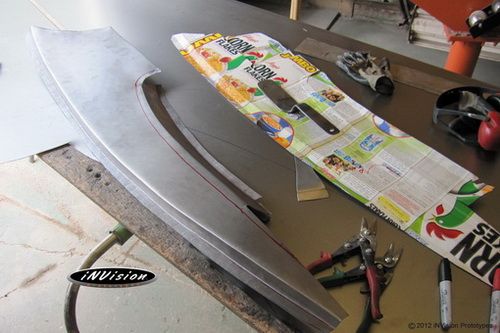 One side of the hood's structure completed...now onto the other side. 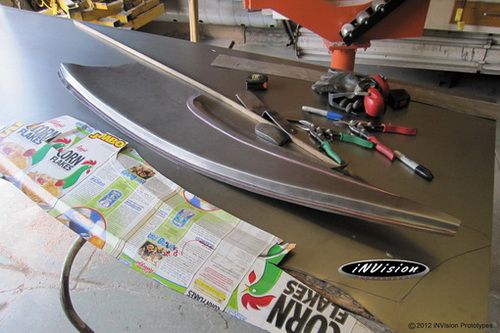 Once the second side and rear area of the structure have been completed, assembly can begin. 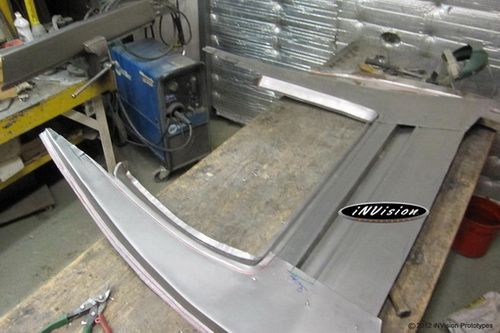 To ensure the structure correctly fits the body it's located and clamped for final welding. 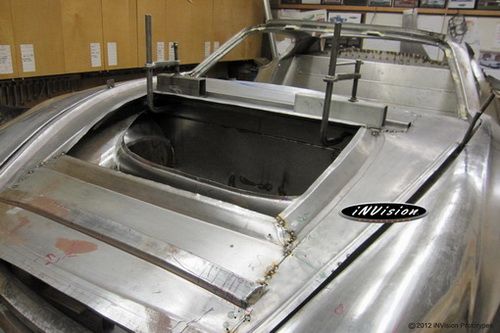 Dressing up the welds... 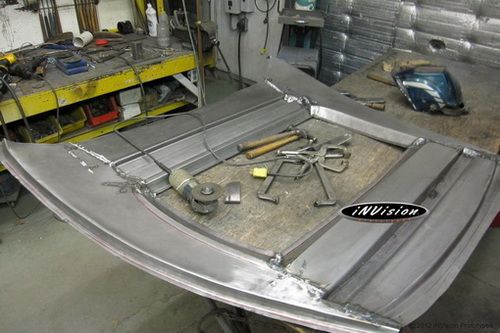 |
| |
|
|
eurogranada
Europe
To tinker or not to tinker, that is the question...
Posts: 2,556
|
|
Jun 18, 2014 15:21:39 GMT
|
|
Amazing, as ever...
|
| |
|
|
|
|
|
|
|
Jun 19, 2014 10:41:39 GMT
|
|
A pleasure to see more amazing progress.
|
| |
|
|
|
|
|
Jun 19, 2014 11:51:53 GMT
|
|
Thanks Eurogranada and Dansktaff!
|
| |
|
|
|
|
|
Jun 19, 2014 13:37:06 GMT
|
|
amazing
sorry if this has being asked before, but how would you go abut getting this road legal?
would you have to go dwn the SVA like a kit car?
|
| |
|
|
VIP
South East
Posts: 8,302
|
|
Jun 19, 2014 13:59:29 GMT
|
amazing sorry if this has being asked before, but how would you go abut getting this road legal? would you have to go dwn the SVA like a kit car? Location: Niagara Falls, ON Canada |
| |
|
|
|
|
|
Jun 19, 2014 15:30:45 GMT
|
amazing sorry if this has being asked before, but how would you go abut getting this road legal? would you have to go dwn the SVA like a kit car? Location: Niagara Falls, ON Canada cheers , where did yu find that? my browser doesnt show locatins |
| |
|
|
|
|
|
Jun 20, 2014 12:17:55 GMT
|
amazing sorry if this has being asked before, but how would you go abut getting this road legal? would you have to go dwn the SVA like a kit car? "Go dwn the SVA"? Not familiar with that term. |
| |
Last Edit: Jun 20, 2014 12:18:11 GMT by invision
|
|
Onne
Part of things
 
Posts: 822
|
|
Jun 20, 2014 12:20:07 GMT
|
|
It's Single Vehicle Approval, so to register a one off, like your project.
|
| |
1990 Mercedes W126 300SE
1997 Mercedes W140 S320L
|
|
|
|
|
|
|
Well this may be a strange sight to you guys....an empty bay where R2's construction has been going on...and boy, at the time it did feel strange. No worries, with all the body panels removed from the wire buck and the buck moved out - the final body panel assembly can begin! 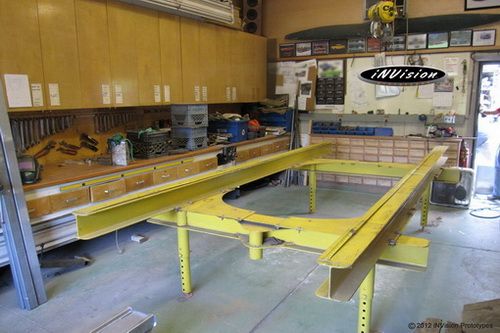 Lengths of box tubing placed across the table to help in supporting/clamping the structural panels. 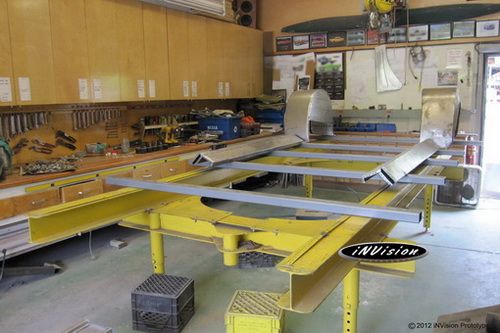 Final assembly begins... 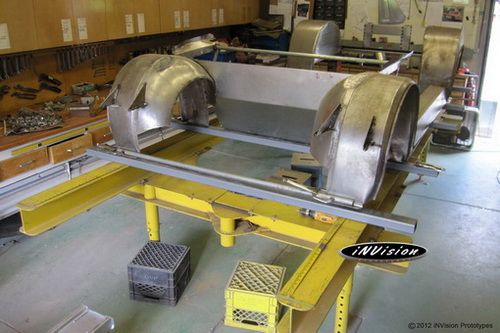 Front and rear wheel wells, firewall, and rockers placed and clamped together. 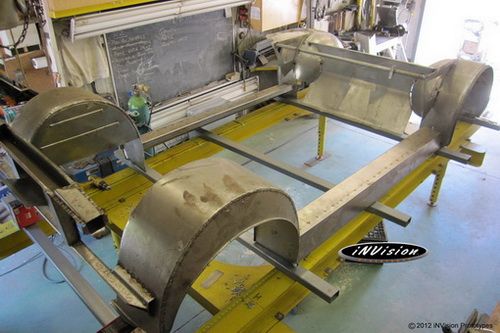 A few screws temporarily hold the panels together ... allowing more panels to be added. Stay tuned, more to come.  |
| |
|
|
fogey
Posted a lot
  
Posts: 1,623
|
|
|
|
|
Good to see it's not only us amateurs that use CornFlake Packets for making templates!!!
|
| |
|
|
|
|
|
Jul 18, 2014 18:09:02 GMT
|
Good to see it's not only us amateurs that use CornFlake Packets for making templates!!! Basically, any pressed paper with one side glossy works well in the Lancaster Shrinker/Strecher. It doesn't tear as easily as the 'uncoated' stuff. Also, in the tutorial I posted a while back, to a degree it can be wheeled... giving it some shape. Thanks for looking Fogey. |
| |
Last Edit: Jul 18, 2014 18:09:41 GMT by invision
|
|
|
|


