|
|
|
Sept 8, 2015 14:55:08 GMT
|
|
That fiddly work of a corner here and a hole there is very bloody tedious.
Bet its great to be mostly finished it now.
Are you sticking with the original colour??
|
| |
|
|
|
|
drdick
Part of things
 
Posts: 359
|
|
Sept 9, 2015 15:00:59 GMT
|
That fiddly work of a corner here and a hole there is very bloody tedious. Bet its great to be mostly finished it now. Are you sticking with the original colour?? Yeah, that was fiddly but also satisfying to create the patch pieces and get it looking as smart as I could. The original colour? White when it left the factory and now a vile pastel blue, so, er, no! I was being kind to them  do i start advertising for a new unit buddy now or would you prefer me to focus my energies into sourcing a new project for you  Clearly if this goes to paint at Christmas I will need moar projects........ The criterion is; if Dez would buy it then that's good enough for me. |
| |
|
|
hairymel
Club Retro Rides Member
avatar by volksangyl
Posts: 1,081
Club RR Member Number: 207
|
|
Sept 10, 2015 18:22:34 GMT
|
... I will need moar projects........ The criterion is; if Dez would buy it then that's good enough for me. ahh - that makes it a bit trickier - fancy a part built flying standard 10? i can get the guys no. if you want  |
| |
whats that burning smell?
oh curse word :-(
|
|
drdick
Part of things
 
Posts: 359
|
|
|
|
I am working on this I promise...... Still not welded in the new rear quarter as have been considering the problem putting it on has highlighted: New side: 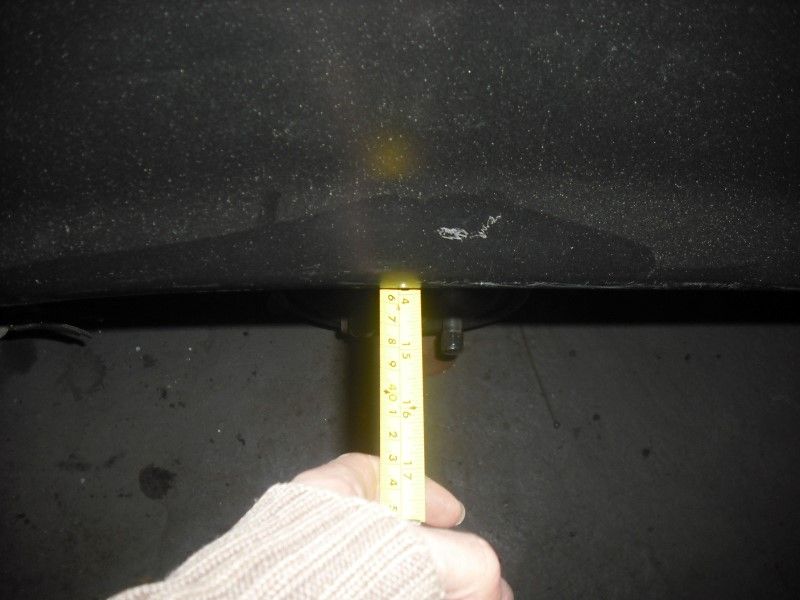 Old side (admittedly I'd already removed a tiny sliver of the edge here): 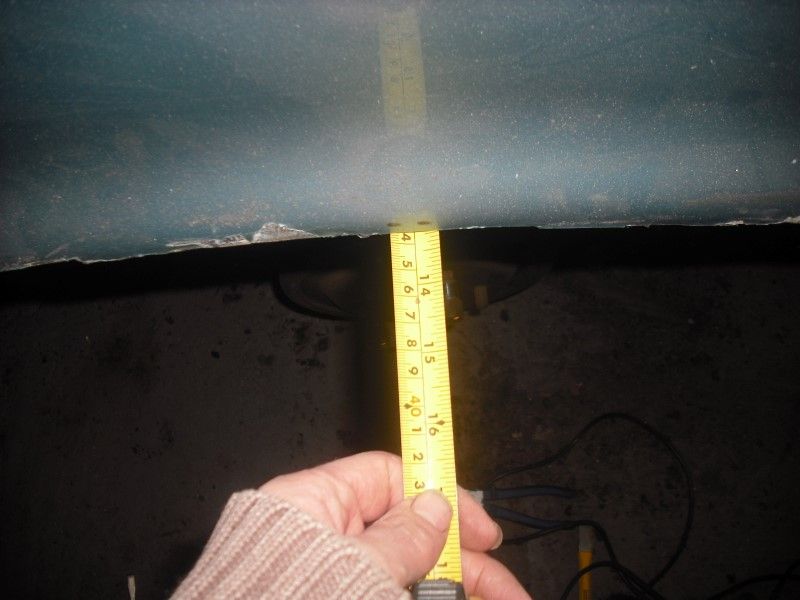 By comparing with another 69 I know that the dimension should be nearer the 14" rather than the 13". Now I don't really want to solve this by doing another rear quarter, especially as this side has already been repaired by gluing on a piece cut from another car as evidenced by this delight that I found under a serious pile of filler: 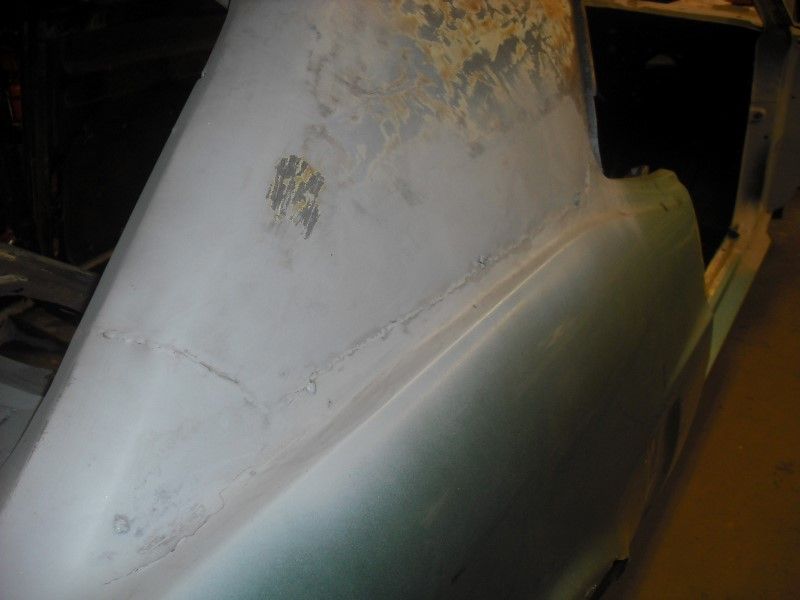 So my plan is to use this panel that I already own coupled with a new inner wheel tub to a) push the quarter into a better position and b) solve the crusty lip at the top of the wheel arch. 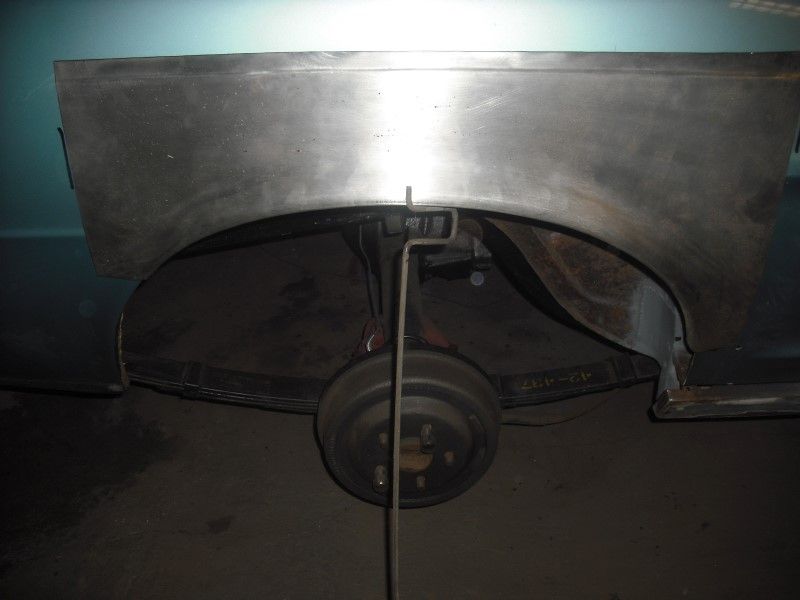 Obviously I intend to use the welder to hold the panel on rather than a piece of steel rod  Better get busy with chopping out the inner wheel well. This turned out to be a pain and what with all the grinding took the best part of a morning. It also involved several sessions of having to clean all the rust and grot out of my eyes. It's a good job I did go for this solution though, most of the inner housing was made of rust, seam sealer, braze and old patches. It also had the obligatory double-skinned section where someone had just brazed in a patch over the rust. Grim: 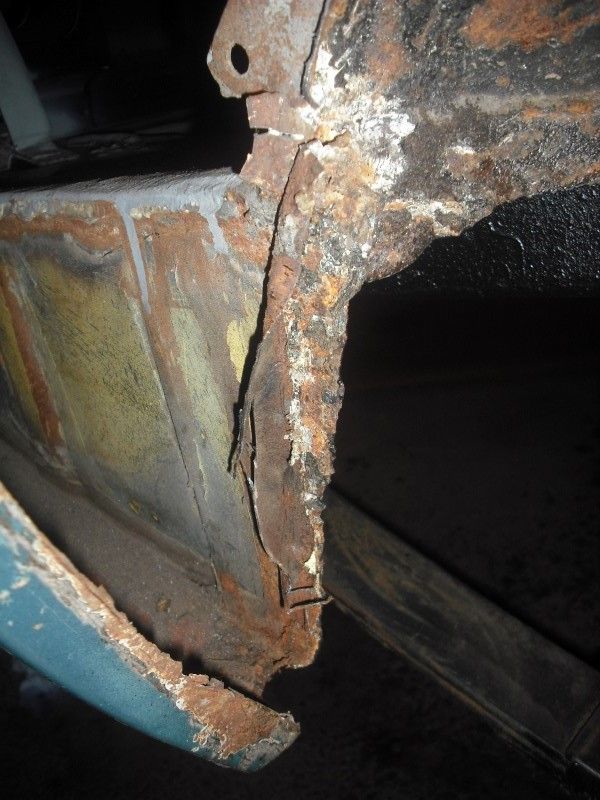 But now gone: 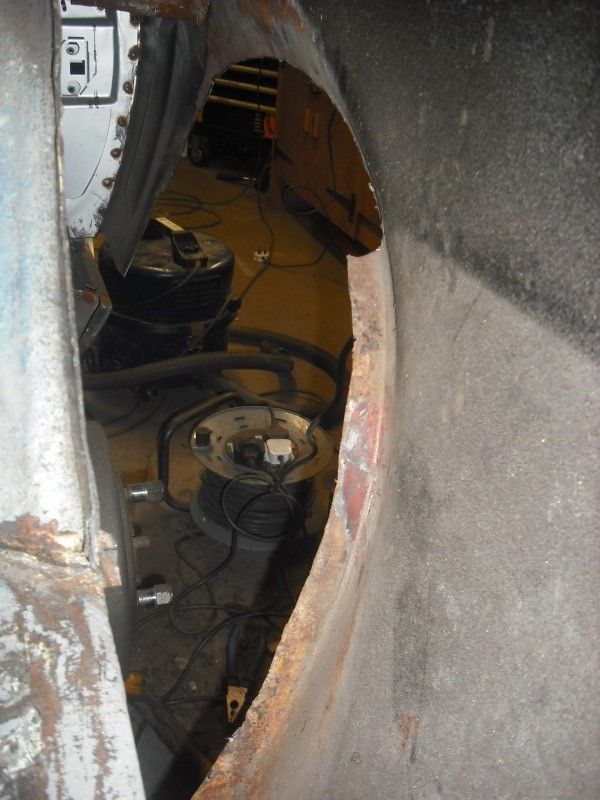 Got to wait for the wheeltub to arrive now  I've also been repairing the front wings: 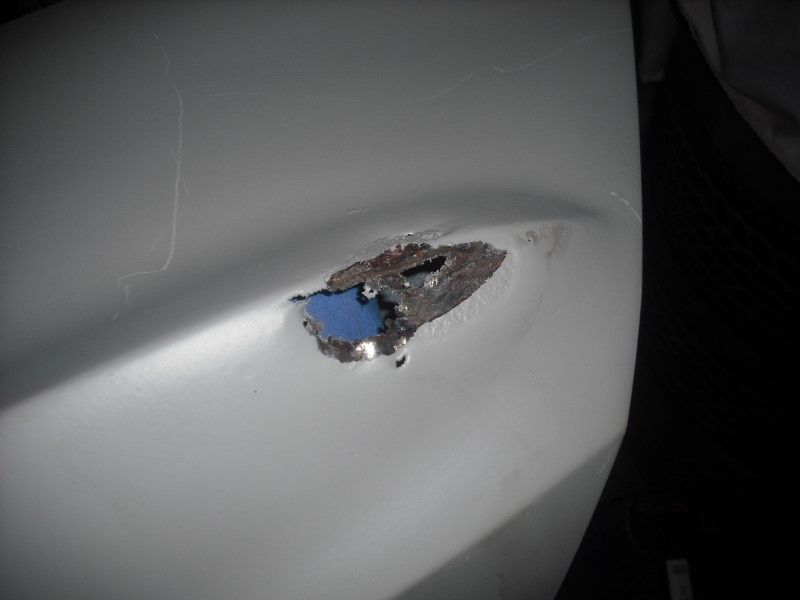 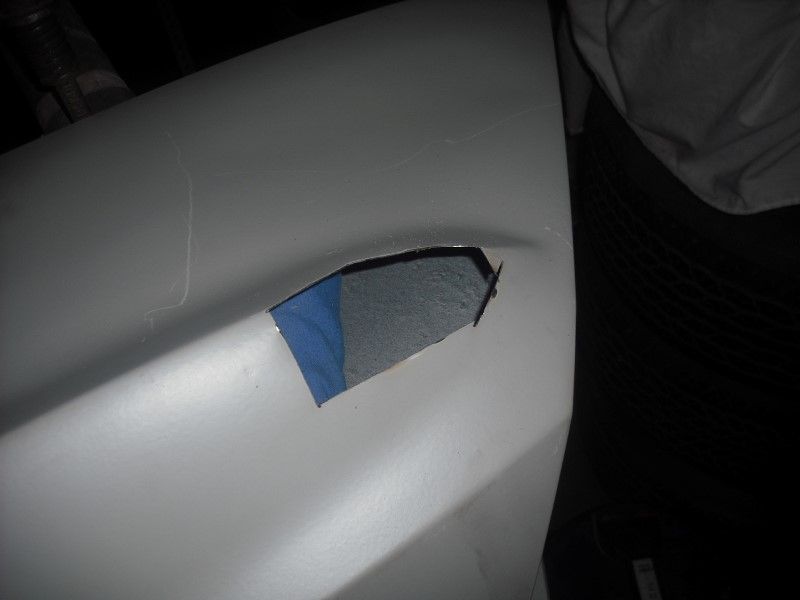 Shrink-stretch-hit with hammer then finally blob it in cos it looks about right: 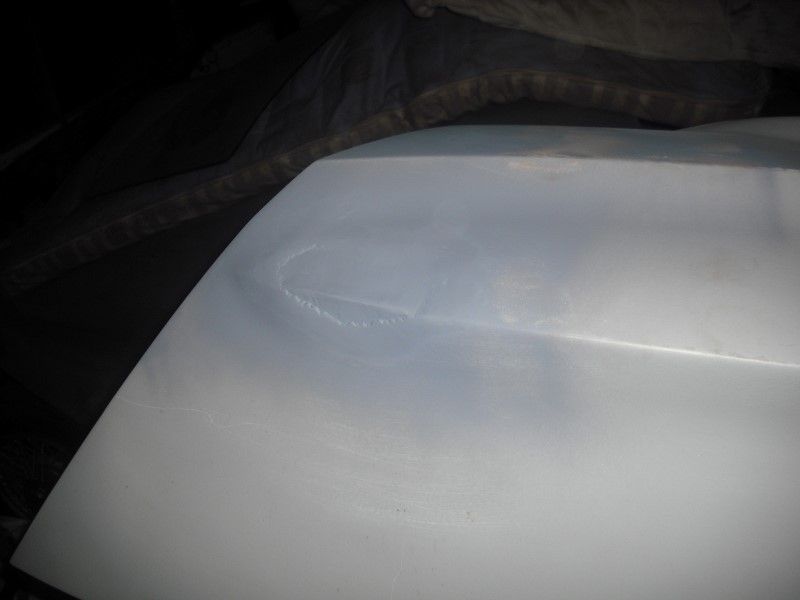 Hide with filler: 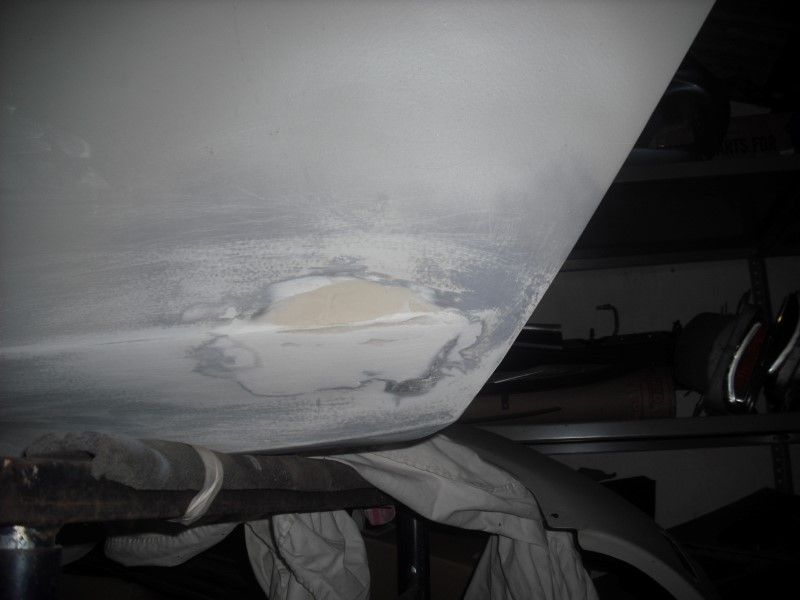 Should be ok  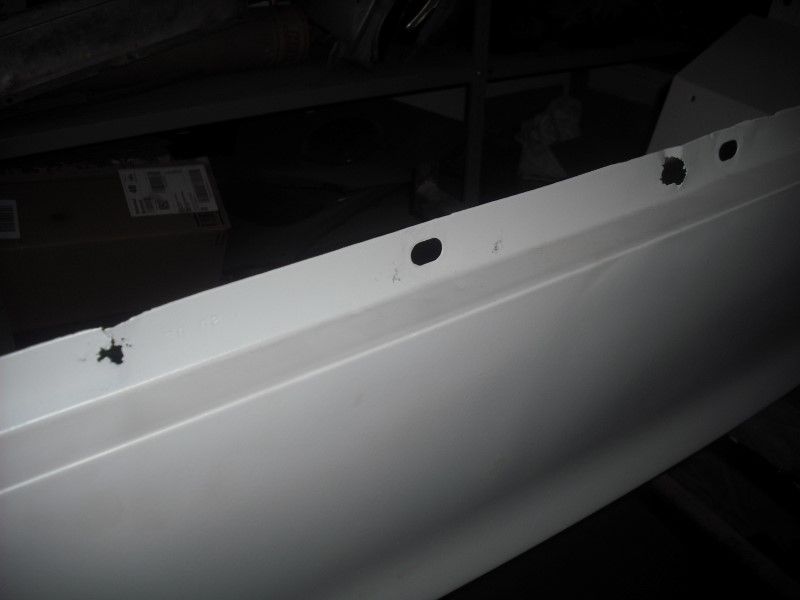 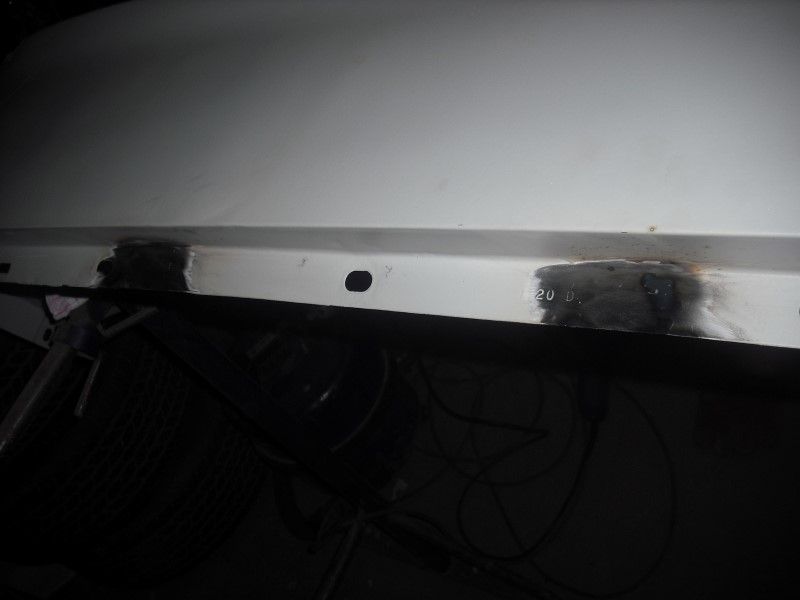 Someone also rolled the arches so I unrolled them which caused them to mostly snap off... 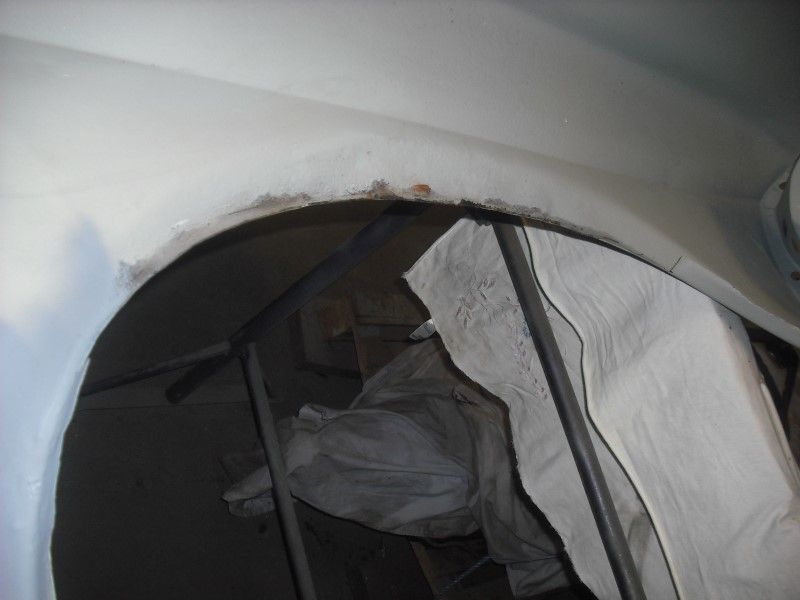 Will cut some strips on the guillotine at work and repair that, hopefully that will work... Started on this bit too but then ran out of time... 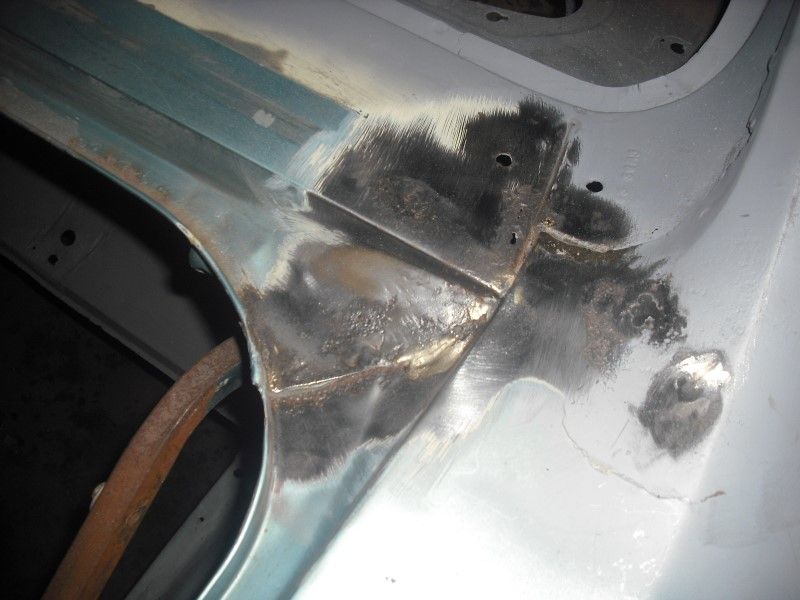 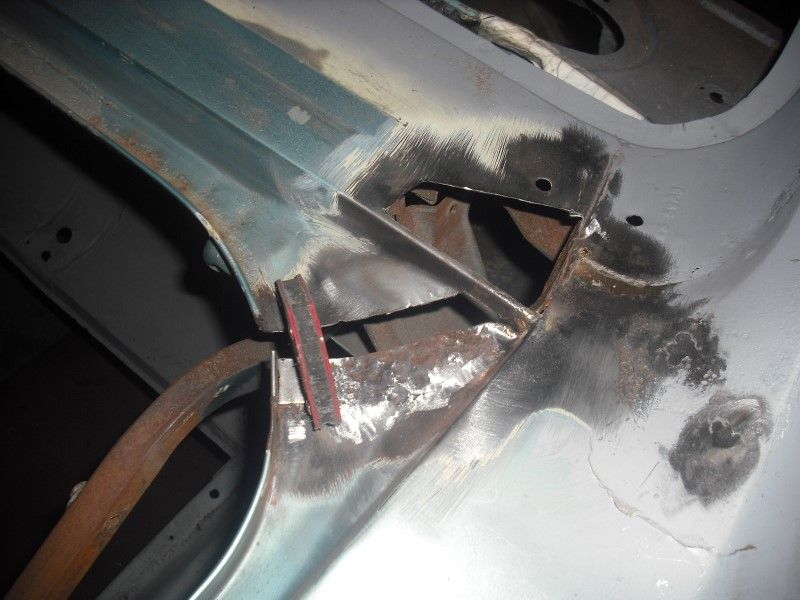 Threw some more bits on the front to enable movement.. 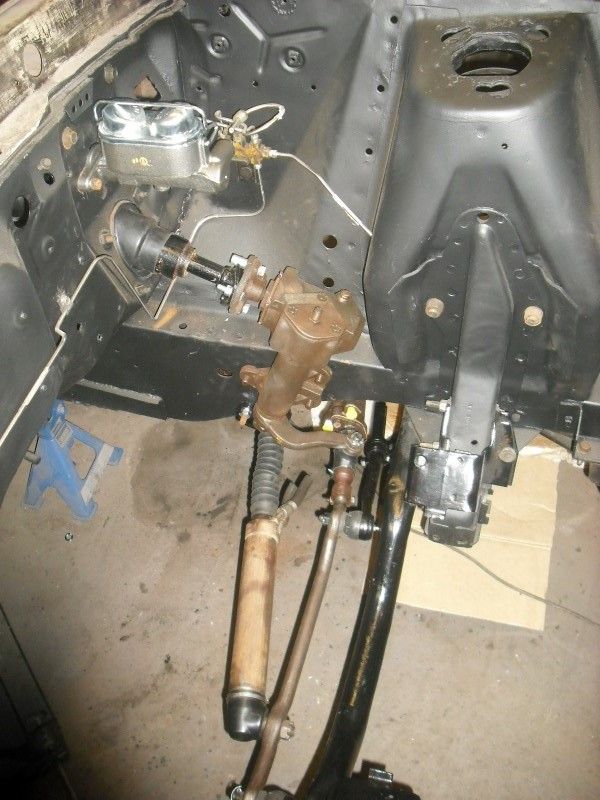 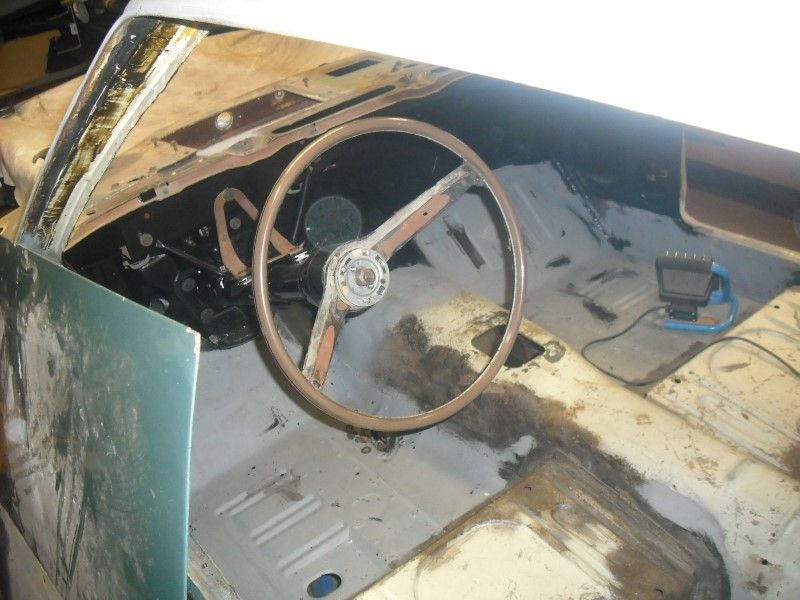 Obviously at this point I spent some time sitting there and going "broom, broom". And finally, since its within his skill set, my Dad got busy with seam sealer and chassis paint. 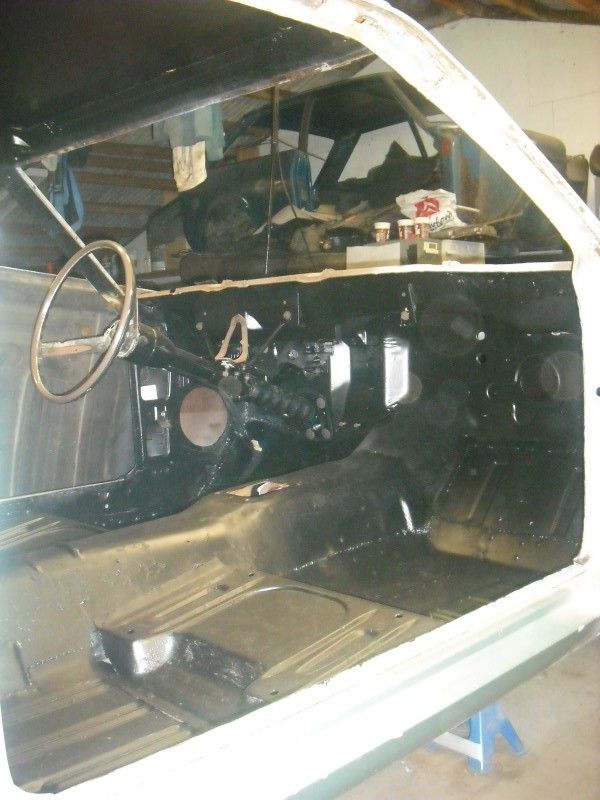 This thing is slowly creeping towards being done....... |
| |
|
|
bstardchild
Club Retro Rides Member
Posts: 14,975
Club RR Member Number: 71
|
|
Oct 19, 2015 23:05:08 GMT
|
Good lord - it was nearly and inch out and not obvious Good on you for fixing it properly PS may have to steal the rod prop idea instead of welding - looks a fine solution  |
| |
|
|
drdick
Part of things
 
Posts: 359
|
|
Nov 29, 2015 11:28:32 GMT
|
Good lord, recent visits to the unit have resulted in progress that makes glaciers look positively dynamic but progress is progress right? Let's contemplate the incorrectly sized rear quarters first. I received my new inner wheeltub and via the magic of rubber hammer, swearing and general brute force and ignorance it was wedged into place. 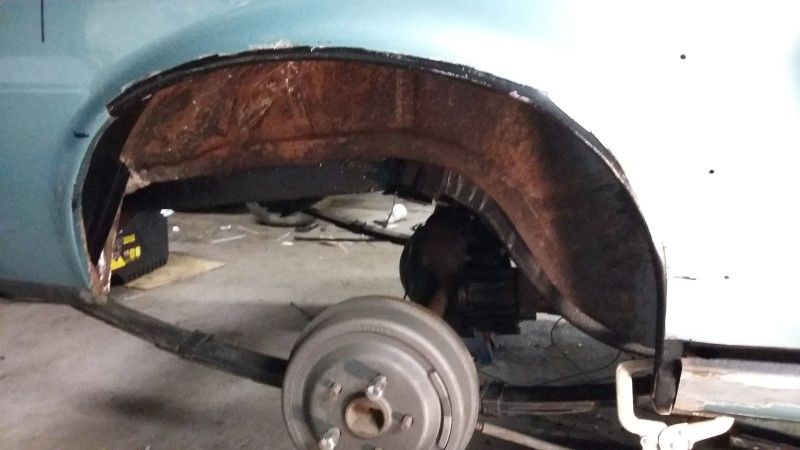 With the outer patch panel clamped into place we are now at almost 14" which, since that's what I have on the other side I'll call a win! I didn't take a picture of this minor victory of course so you'll all have to take my word for it... So, pull the tub back out and then enlarge the hole for better access. 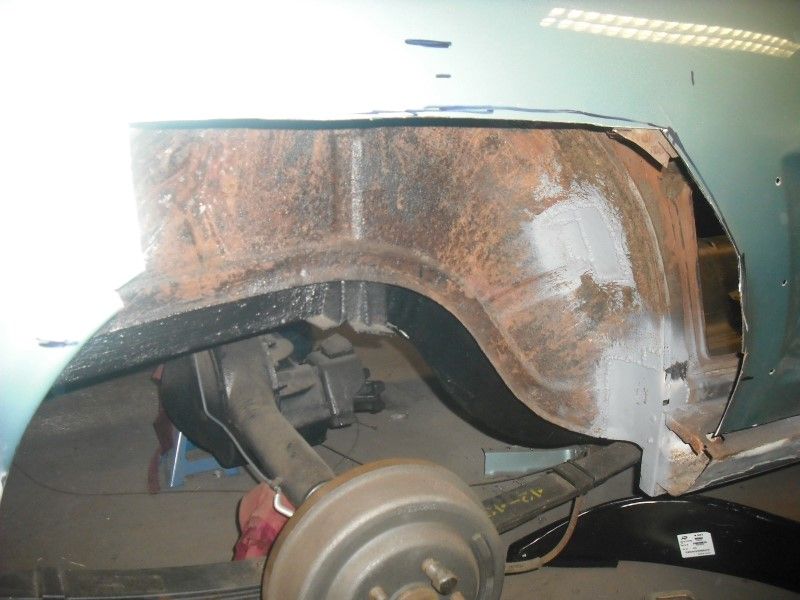 My plan is to trim my patch panel right down and use the edge setter to joggled a recess for it to sit into, exactly as I have done on the other side with the full quarter. This also allows me to miss the scallop in the panel just visible on the right of the above photo. But I can't do any of that until the wheeltub is in, so I have to repair this grot first: 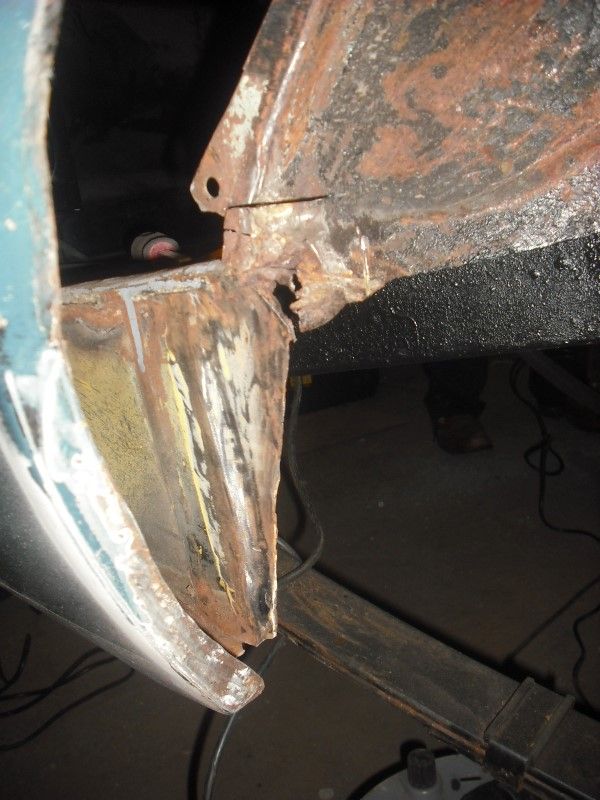 That's a bit of a hole on the inner inner wheeltub but a bit of CAD and hot spanner later and we have an acceptable repair: 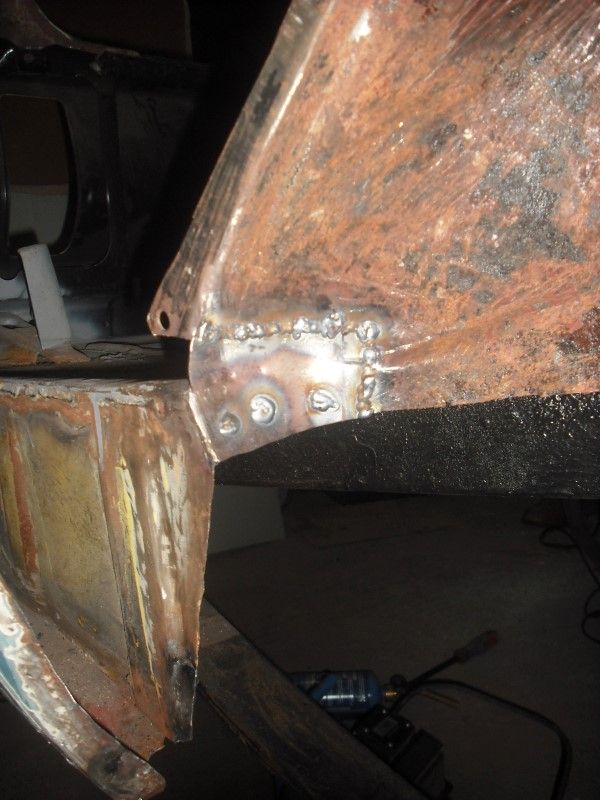 Because all this had been repaired before I then spent, literally, hours scraping off seam sealant mountains, grinding off blobs of braze and generally cursing whoever had applied all this stuff. In the recesses behind various lips I resorted to burning the sealant off with my blowtorch because I couldn't even reach it with a scraper. Feeling suitably angry I then went home! |
| |
|
|
drdick
Part of things
 
Posts: 359
|
|
Nov 29, 2015 11:41:27 GMT
|
But of course I soon got a bit of mojo back and returned! Next up, finish this bit: 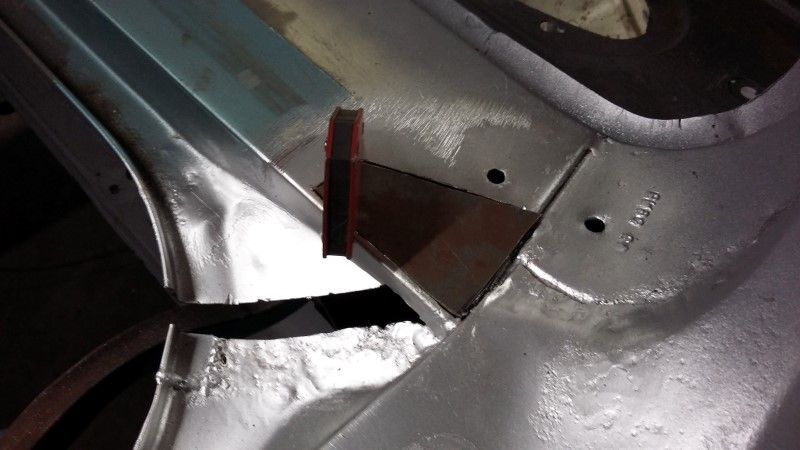 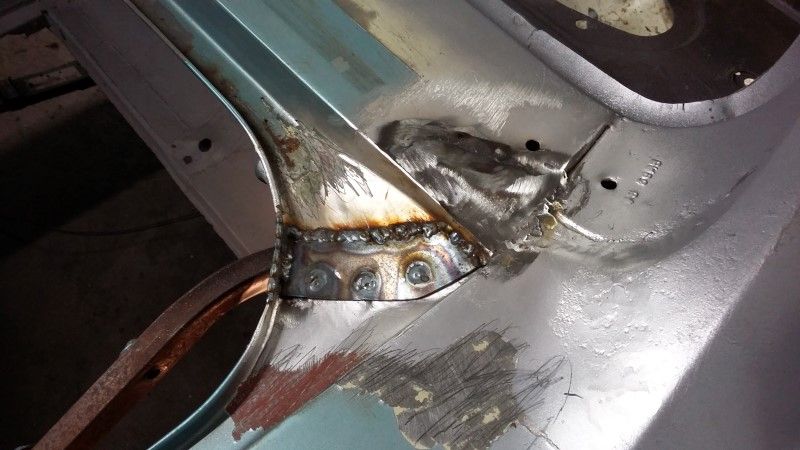 Sadly after doing that I noticed a bit more rust running up the side of the rear windscreen pillar so I'll be back in there at some point. You may have noticed that I haven't welded either my full rear quarter on the drivers side or my wheeltub/patch on the passenger side. I'd mainly been avoiding that because I wanted to attach the doors to check alignment. This in turn was being hampered by my forgetting to repair the hinges which had been kicking around in my office at work for months. I finally remembered to do that, cleaned them all up, ran some beads of weld round the enlarged holes, reamed them back out and then put new pins and bushes in. This allows this to happen: 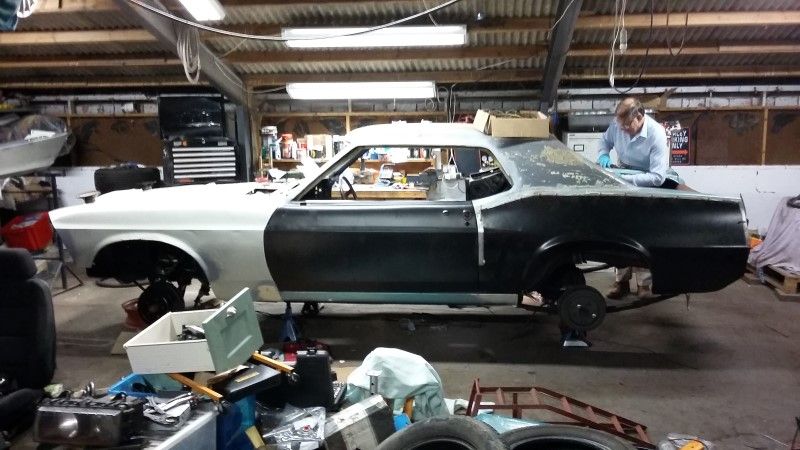 Curse word me! From over here it almost looks like a car again. Even better all the swage lines appear to be lining up nicely so welding can commence. I'm hoping to have a couple of days off work in two weeks so my aim is to do all that welding. The shell will then be done and all I have to do is repair the loose panels and strip paint. Talking of which............ 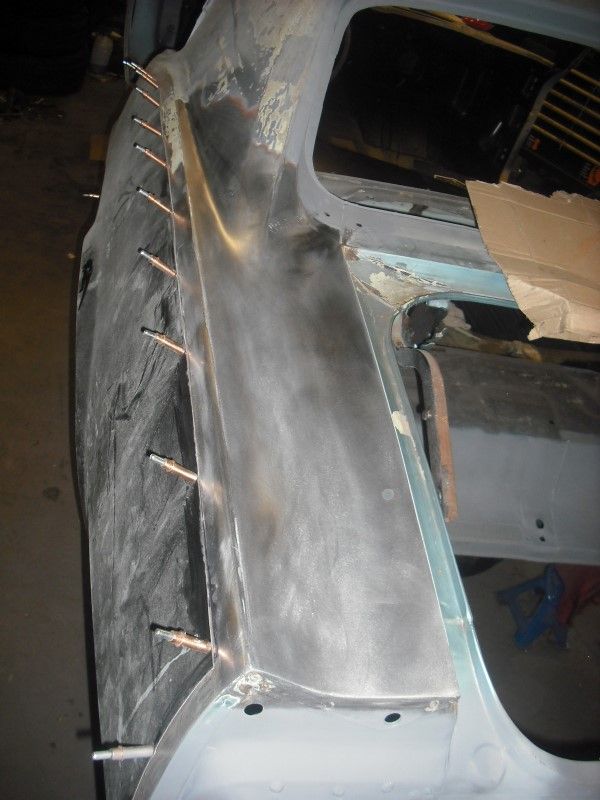 My Dad made a start on the stripping. That piece is about 10" wide and just over 2 feet long and it took ages with the orbital sander. Main problem is the car has been painted a couple of times, there are seven layers including the original factory primer. One of those layers is a skim of filler over the entire car and this is what is making the progress slow. Still, given the amount of repairs and welding done there is not a huge surface area left. Still aiming to have this out to paint after Christmas! |
| |
Last Edit: Nov 29, 2015 11:43:17 GMT by drdick
|
|
Paul Y
Posted a lot
  
Posts: 1,951
|
|
Nov 29, 2015 11:44:14 GMT
|
I take it that in between sessions in the shed you are a full time Monk? Only explanation I can come up with for the levels of patience.... Carry on, Santa is warming up the Reindeer.... P.  |
| |
|
|
drdick
Part of things
 
Posts: 359
|
|
Nov 29, 2015 11:54:35 GMT
|
.......Only explanation I can come up with for the levels of patience.... I won't lie, I am very, very close to the "attach all the loose panels and take it to the body guy now" stage but a few solid days on it over the Christmas period should finish off the welding and paint stripping and then at least I can say I did all the body work that was within my skill set. Final fit and massaging will have to be done by someone who knows what they are doing although I've learnt a lot over the course of this project. |
| |
|
|
fer4l
Posted a lot
   Testing
Posts: 1,497
Club RR Member Number: 73
|
|
Nov 29, 2015 12:06:55 GMT
|
|
Top work - seconded on the patienceometer front!
|
| |
|
|
|
|
Clement
Europe
ambitious but rubbish
Posts: 2,095
|
|
Nov 29, 2015 12:07:20 GMT
|
|
OH YES!! Much sexyness in this car. Keep at it!
|
| |
|
|
|
|
|
Nov 29, 2015 12:50:33 GMT
|
Just killed an hour going through the whole thread. That is one lucky car to have run into a nutter like you! Care to point me in the direction of the backstory of the previous shop and car? Also, please tell me that none of this rust really caught you unaware? You seem to know the Mustang anatomy very well and I would think you had a good prod before buying? Looking forward to seeing this come out of paint. You area a lucky man to have a father that you can spend time with on a project. Interesting names you seem to assign to those you care about! If you should ever decide that you have had a enough rust repair for a lifetime, I will leave you with this picture an an alternate form of entertaining yourself with a vintage Mustang. It is a 1969 with a Coyote engine and six speed gearbox. Friend of mine has been doing this swap for about a year and a half. Few other neat touches like a dash out of a 2006 and an independent rear end and Wilwood brakes all around. Time to go back into the shop and play with my own flavor of craziness! 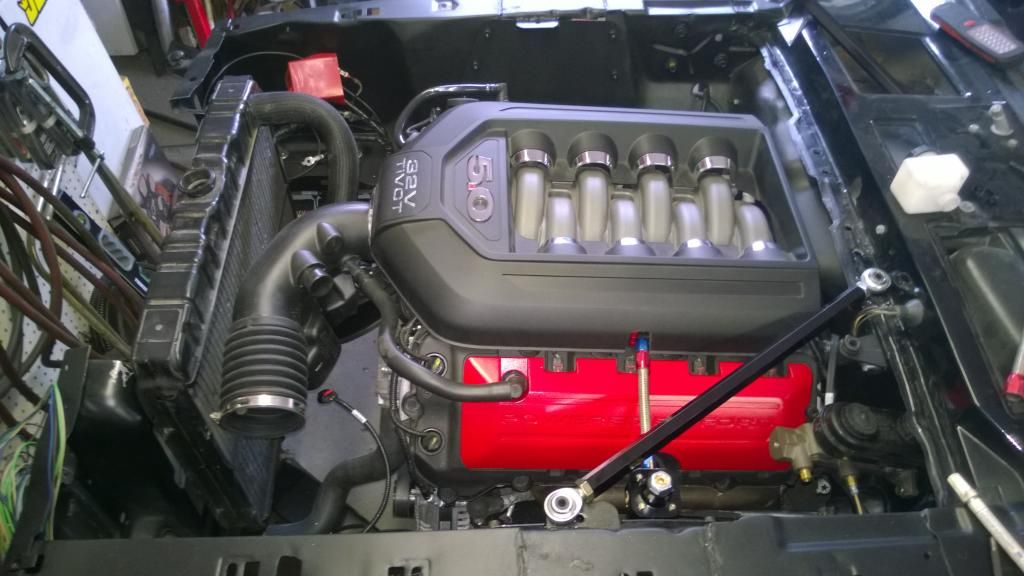 |
| |
|
|
hairymel
Club Retro Rides Member
avatar by volksangyl
Posts: 1,081
Club RR Member Number: 207
|
|
Nov 29, 2015 12:52:26 GMT
|
|
|
| |
Last Edit: Nov 29, 2015 12:53:12 GMT by hairymel
whats that burning smell?
oh curse word :-(
|
|
drdick
Part of things
 
Posts: 359
|
|
Nov 30, 2015 20:55:40 GMT
|
Just killed an hour going through the whole thread. That is one lucky car to have run into a nutter like you! Care to point me in the direction of the backstory of the previous shop and car? Also, please tell me that none of this rust really caught you unaware? You seem to know the Mustang anatomy very well and I would think you had a good prod before buying? If you should ever decide that you have had a enough rust repair for a lifetime, I will leave you with this picture an an alternate form of entertaining yourself with a vintage Mustang. It is a 1969 with a Coyote engine and six speed gearbox. Friend of mine has been doing this swap for about a year and a half. Few other neat touches like a dash out of a 2006 and an independent rear end and Wilwood brakes all around. There was a thread on the other car but in a fit of panic I deleted it. Short version is that I was given it, I owned it for 10 years, spent a vast amount of money on it and never drove it. Then it got incinerated. The rust on the current one didn't surprise me really, if the b pillars are rusty you know its bad underneath. What drew me was the completeness and the price, Mustangs are expensive and if you have bits missing, yeah its available, but it adds up really fast. This one was reasonable money. The Coyote engine is something I already considered as a future plan as it's really popular right now, will have to wait for the cost of the engine to come down a lot though! |
| |
|
|
drdick
Part of things
 
Posts: 359
|
|
Nov 30, 2015 20:57:28 GMT
|
worth reposting again - just have a quick scroll through your whole thread and pat yourself on the back for how far you have come   I have done quite a bit, impatience is my thing though! |
| |
|
|
|
|
|
|
|
|
FYI, the Coyote swap is not a trivial one. It requires a new front suspension and resulting clearances to a lot of bits are in single digit mm readings.
|
| |
|
|
drdick
Part of things
 
Posts: 359
|
|
Dec 13, 2015 16:32:40 GMT
|
OK, had a day off work Friday so resolved to finish something. The drivers rear quarter had been clamped and held with Clecos and other assorted things for weeks if not months so I thought it was finally time to weld that on. Spent an entire morning taking the wheel tub and skin off, making some measurements, drilling holes for plug welds, putting it back on again, clamping, taking it off........... you get the idea. Finally I was happy so I welded in the wheel tub, took no photos so here it is finished... 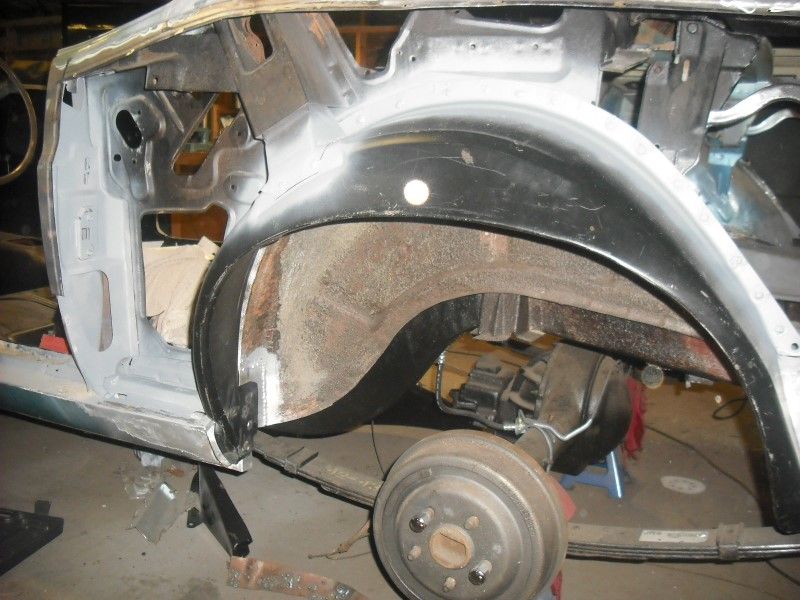 Repeat the whole fitting, checking, clamping process for the outer skin until finally happy with the position: 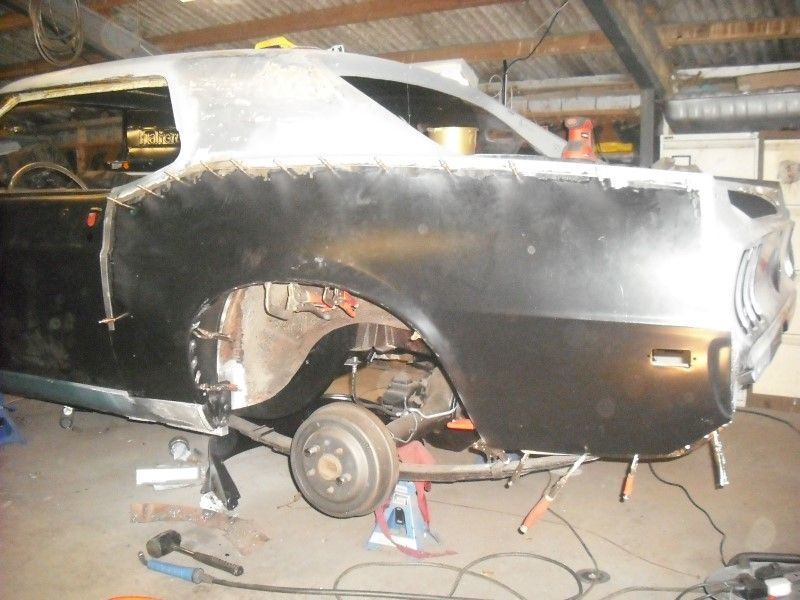 Welded along the top and side in 1" runs to try and minimise any distortion: 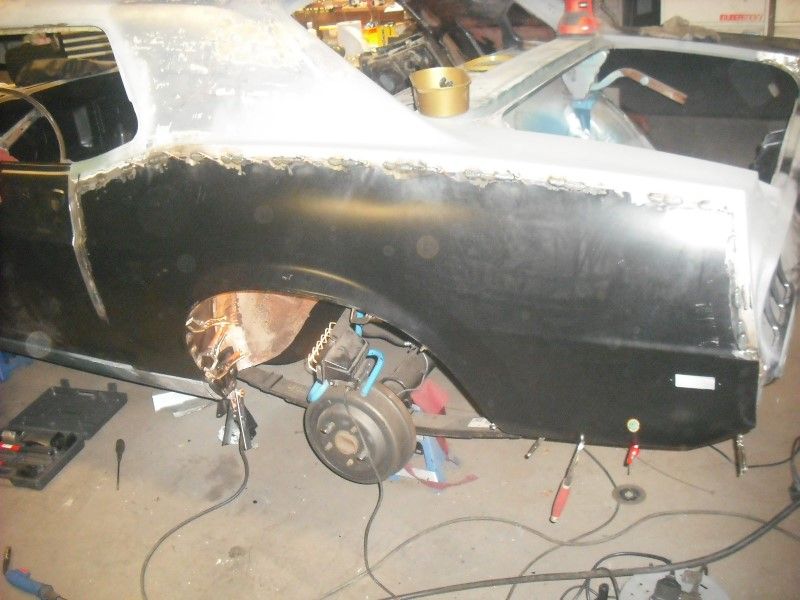 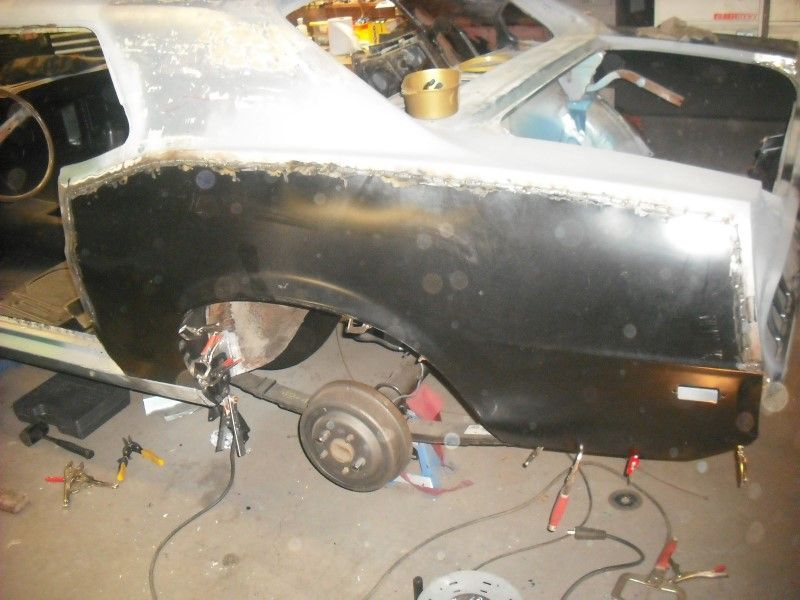 Finally it was done and it's really rippled  Can't really see it in the photos but all along that top seam goes in and out like a donkey's hind leg. Ah well, not much I can do, I guess I don't have the technique for thin sheets yet. My thoughts are that the last Mustang had some far worse body wobbles and the guy who sprayed it made it look great so hopefully the same magic can be applied here. Shoving this minor fail to the back of my mind I finished up a little closing piece at the end of the sill, knocked the welds down fairly flush and slapped a bit of etch primer over the top. Looks a lot better in this photo than in real life that's for sure. 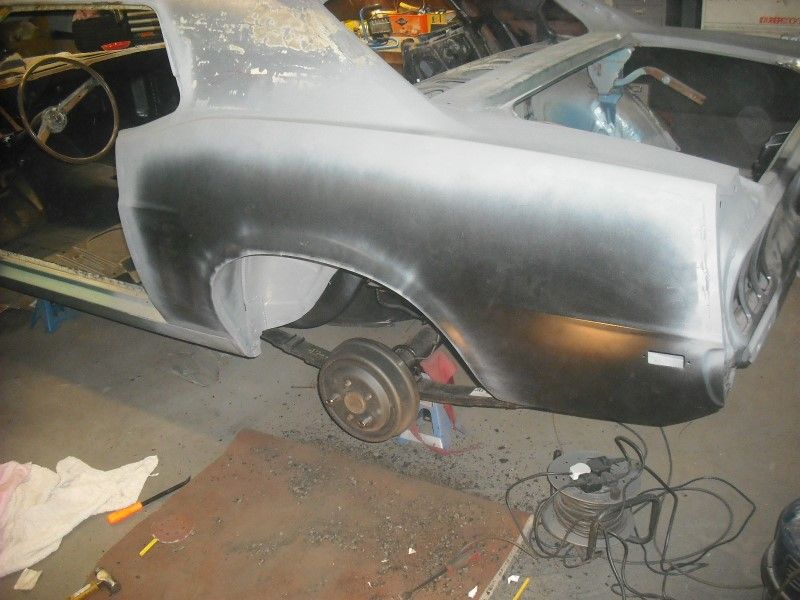 A good hour of scraping crusty old underseal and the inner wheel housing gets a bit of etch primer too: 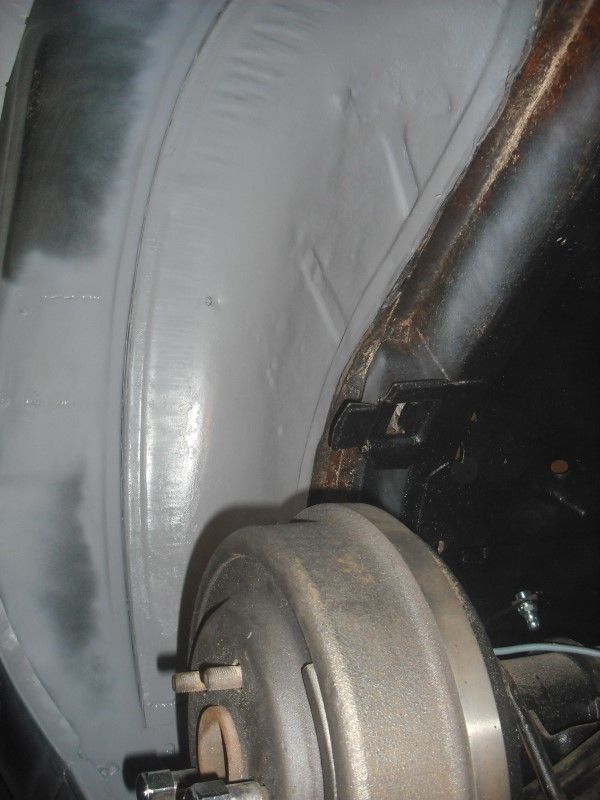 On to the other side and using a good deal of force and an even larger portion of ignorance I forced the wheel tub in: 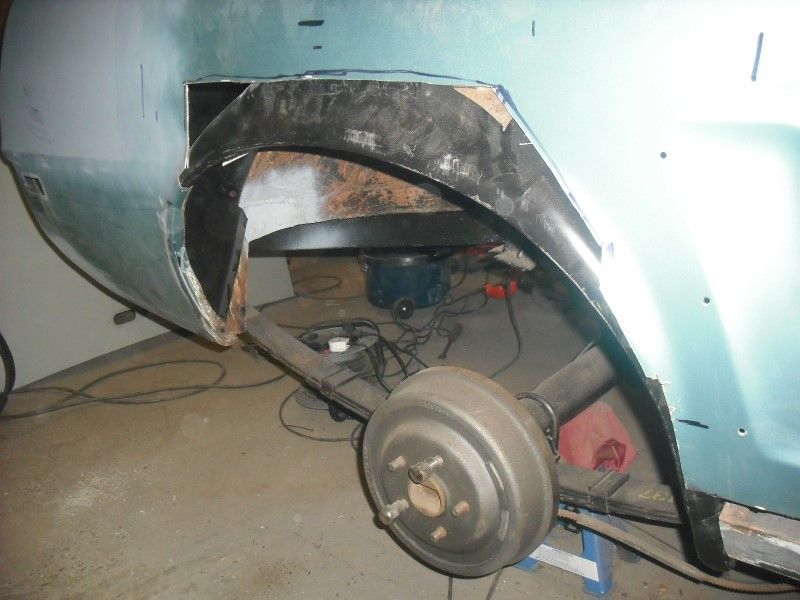 It's close but this can't be right: 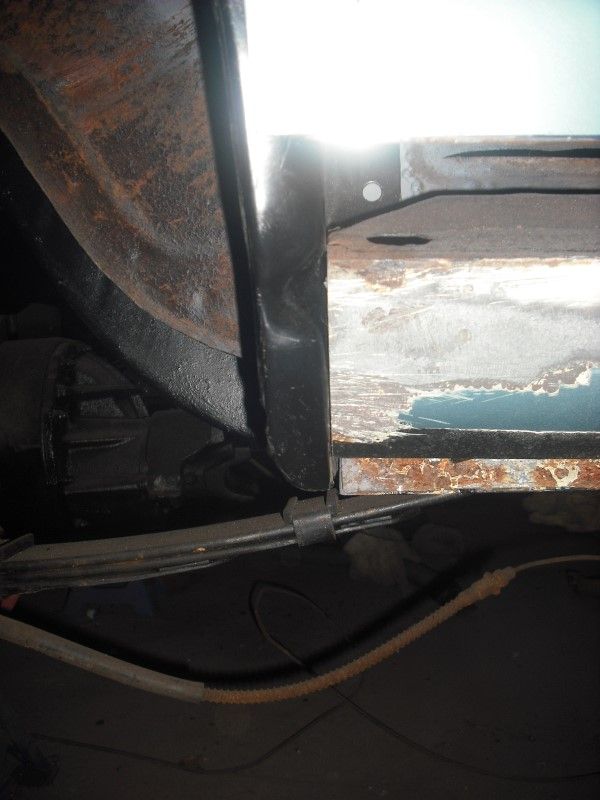 I finally work out that the whole tub need to rotate anti-clockwise a bit but this is being impeded by a really badly formed flange on the rear of the tub, will drag it back out and redo that in the correct position. Hopefully I can then slot the thing back into the right place. In other areas the amount of original flaky paint on the car is slowly reducing: 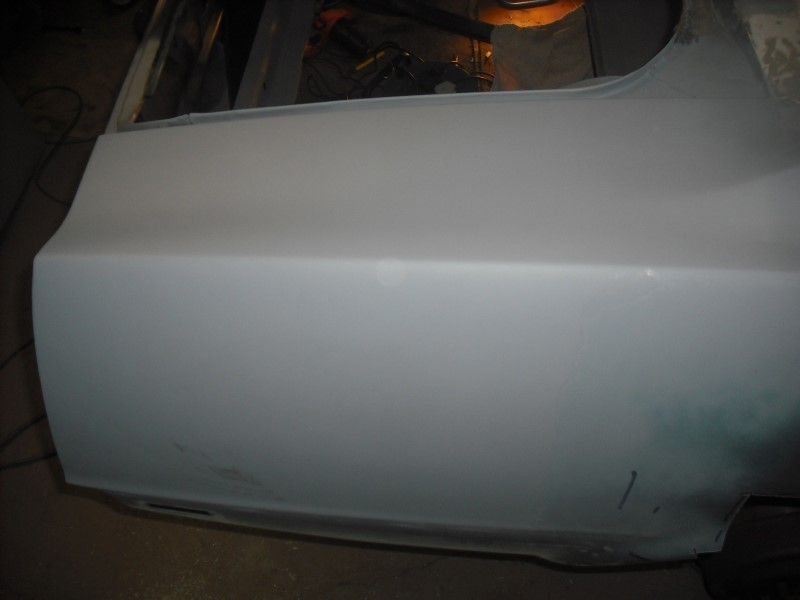 Given the amount of surgery the car has had and that I had all the loose panels blasted (pictures of the holey mess to follow at some point), there is not a massive amount of paint to strip off, it's slow going though! I am hoping to get more time after the coming weekend, so close to finishing the welding on the shell that I can taste it! |
| |
|
|
fer4l
Posted a lot
   Testing
Posts: 1,497
Club RR Member Number: 73
|
|
Dec 13, 2015 16:43:39 GMT
|
Keep on feller - it's looking good!  Cheers Matt |
| |
|
|
drdick
Part of things
 
Posts: 359
|
|
Dec 24, 2015 11:41:25 GMT
|
Spent most of Tuesday and all of yesterday on this and decided I should take more photos. Once I got home I realised a couple of things: 1. I never take the photos at the right time 2. Half of the photos come out terrible despite the fact that cameras are nominally automatic and should therefore compensate for my inability to point it in the right direction or have bright lights in shot. Anyway, here is the first of Tuesday's two(!) photos: 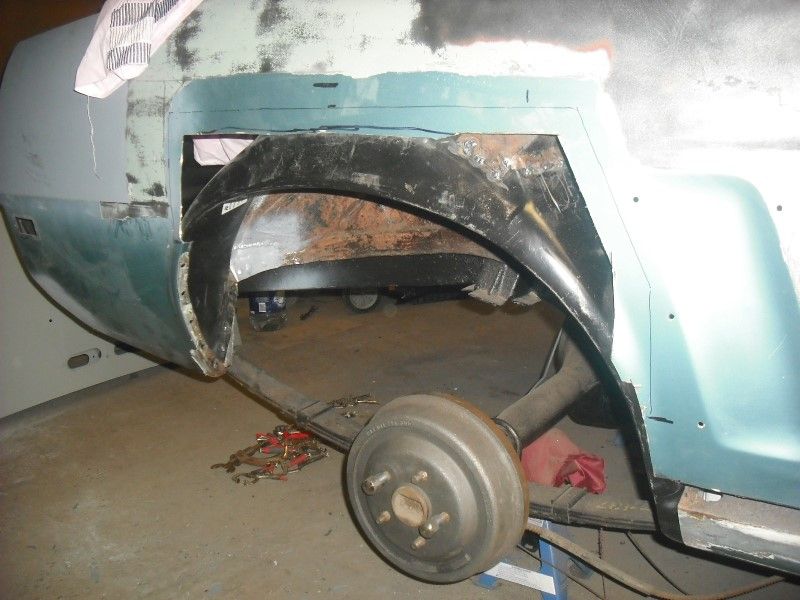 This basically looks the same as the photo in the post above except: a) it is welded in b) it is roughly in the right place This picture represents six hours of work which mainly involved reshaping the entire wheeltub with hammers, jacks, snips, files etc along with squeezing it in and out of the hole about 40 times. Anyway, eventually it was in place so I applied as many clamps as I could: 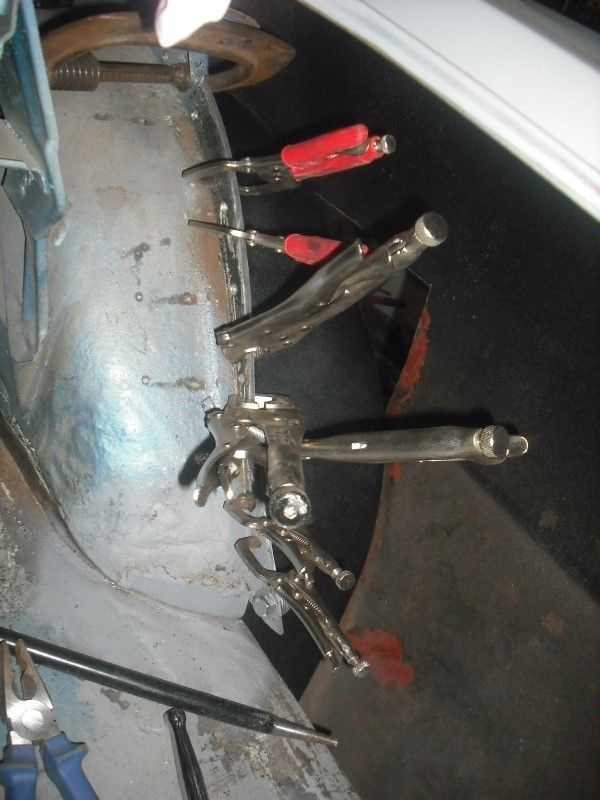 The fourth one up from the bottom was a Christmas present from hairymel so thanks mate! This many clamps (plus bolts and screws) were needed to force the whole thing into place probably because this rear quarter has taken a whack some time in the past and is a bit out of shape. I then plug welded the whole thing in which had to be done from inside the boot as there was no access from the front side. So that was Tuesday done........ |
| |
Last Edit: Dec 24, 2015 11:42:41 GMT by drdick
|
|
drdick
Part of things
 
Posts: 359
|
|
Dec 24, 2015 12:03:40 GMT
|
Got more time in on Wednesday, avoided the customary two hour lunch break, equipped myself with a sausage sandwich (plus brown sauce of course) and cracked on. So to finish the rear quarter the plan was to trim panel and car to match, joggle a step into the car and then attach the panel as per the other side. The first thing I noticed was a problem with joggling: 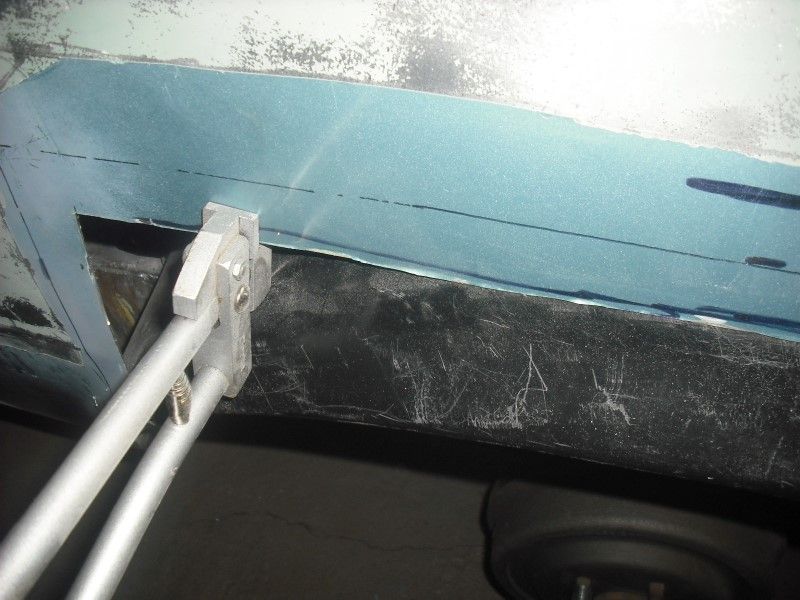 Yes, brains here should have joggled the step before welding in the wheeltub because I could no longer get the tool into the gap. Plan B said joggle what I could and butt weld the bits I couldn't joggle so that's what I did. Here is the bit where I forgot to take photos but the long and the short of it was that if I pushed the patch panel flush at the top then there was a 2" gap along the wheel arch at the bottom or, if I clamped the panel to the wheel arch there was a 2" gap at the top. I decided metal is stretchy and springy so I went for attach it at the top and force it into place along the wheel arch: 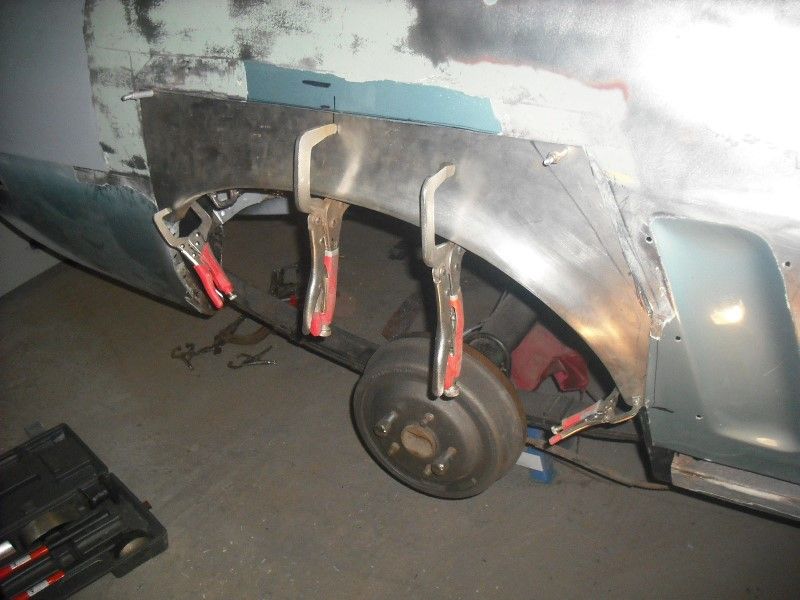 It might work: 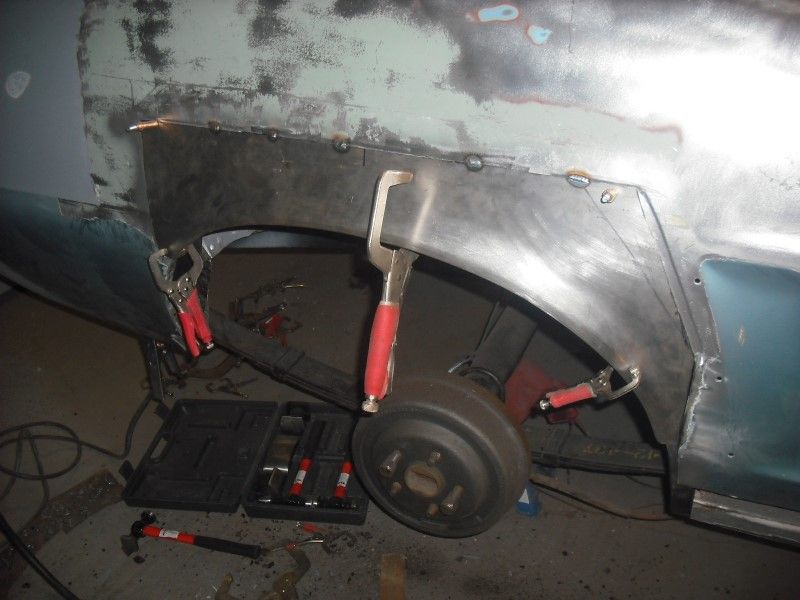 Bit of a mismatch in contour at the rear of the panel though: 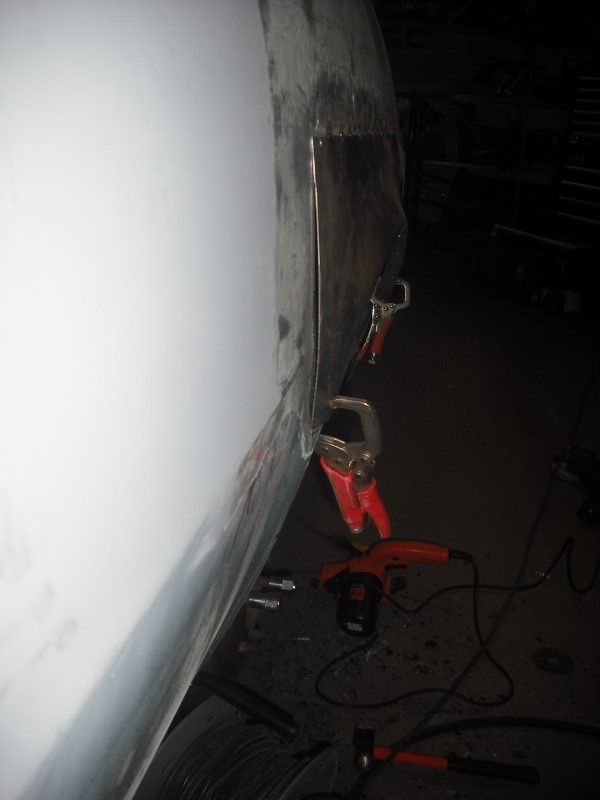 That looked worse in real life but I solved it using something I found lying on the floor, a standard jack from a Fiesta and some blocks of wood: 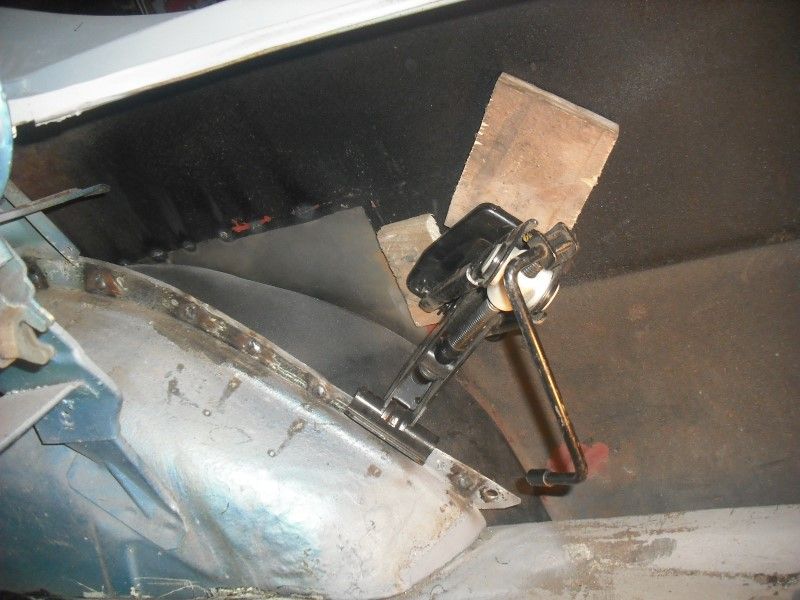 To my eye the patch panel looked like it had the right contour and the car did not so I used the jack to force the existing wing outwards until it all matched and then I welded it all up. 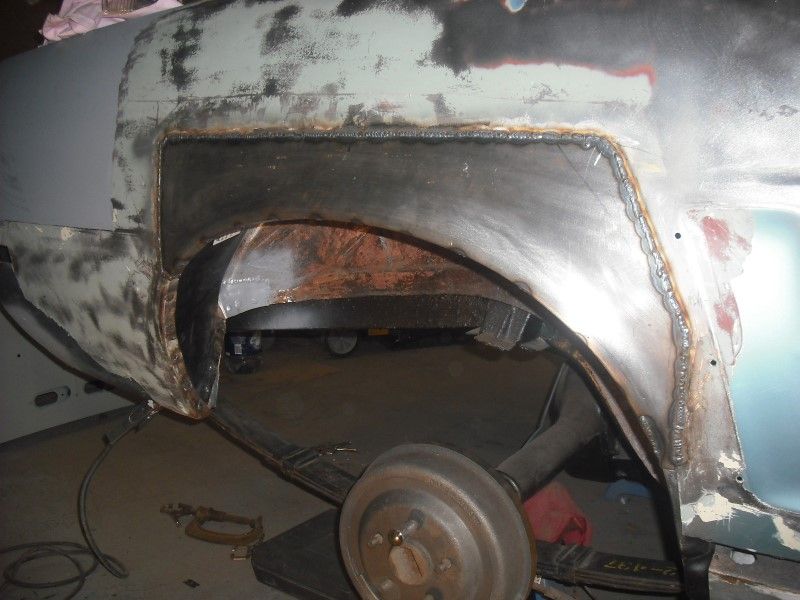 Looks ok, or at least it will with a mountain of filler over the top. Just the bits around the bottom at the front to go. Reprofiled the patch panel to match the inner arch: 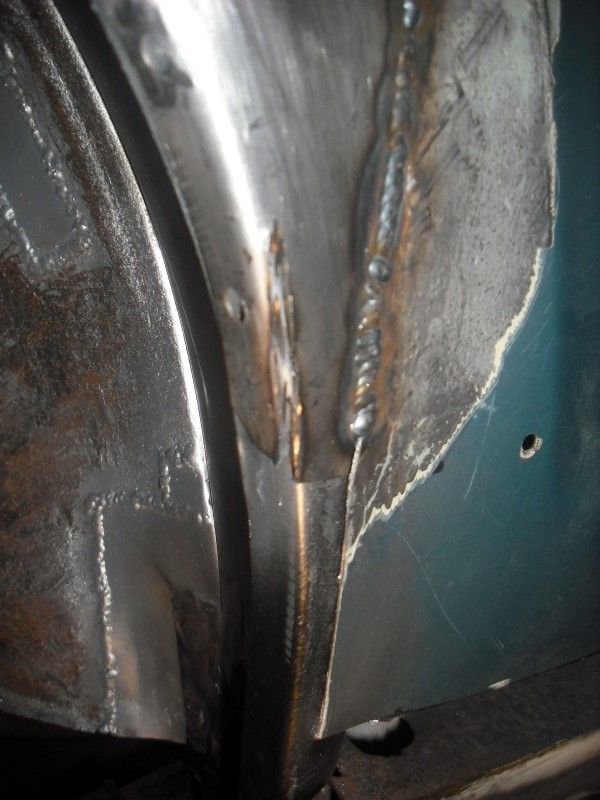 Capped the end of the sill using the original piece I had cut off earlier: 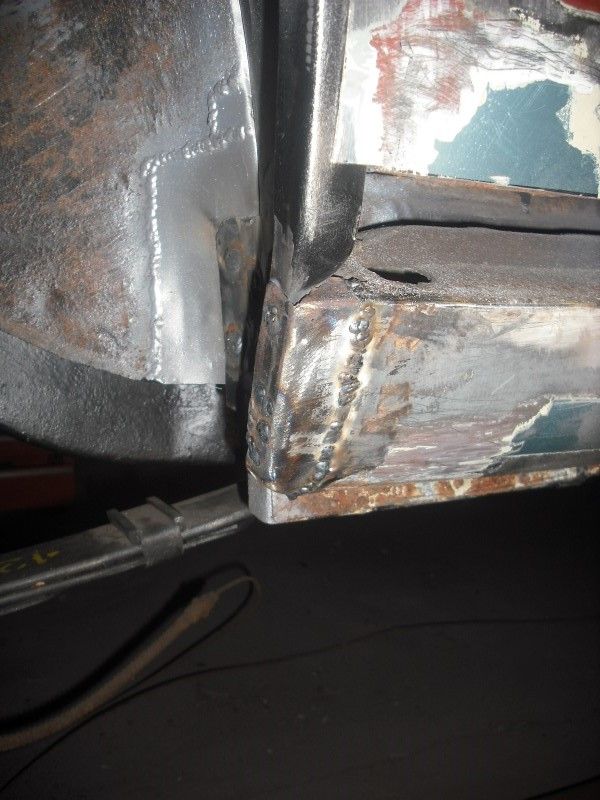 Removed a mountain of filler and got busy with CAD and a bender: 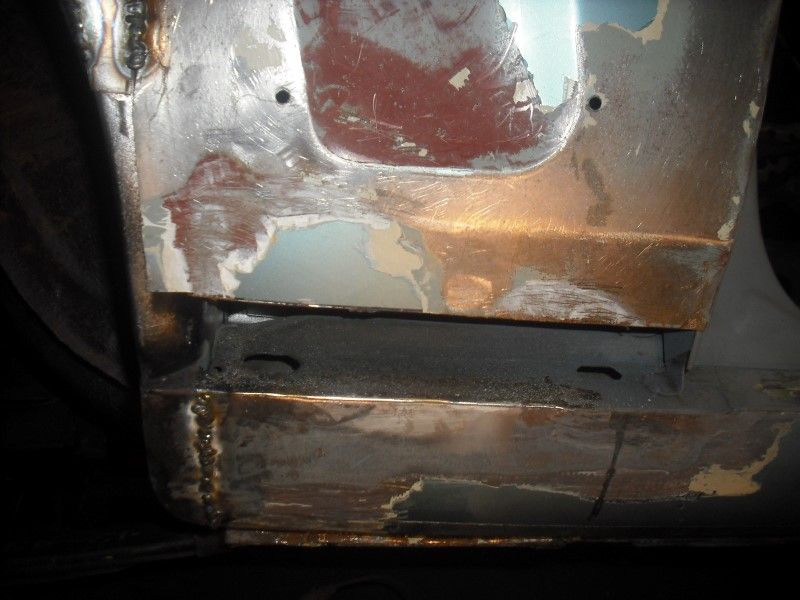 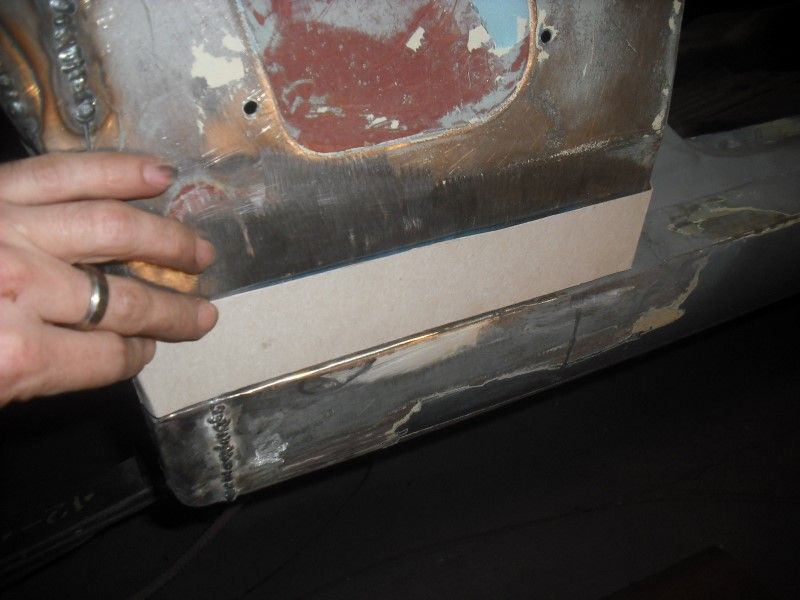 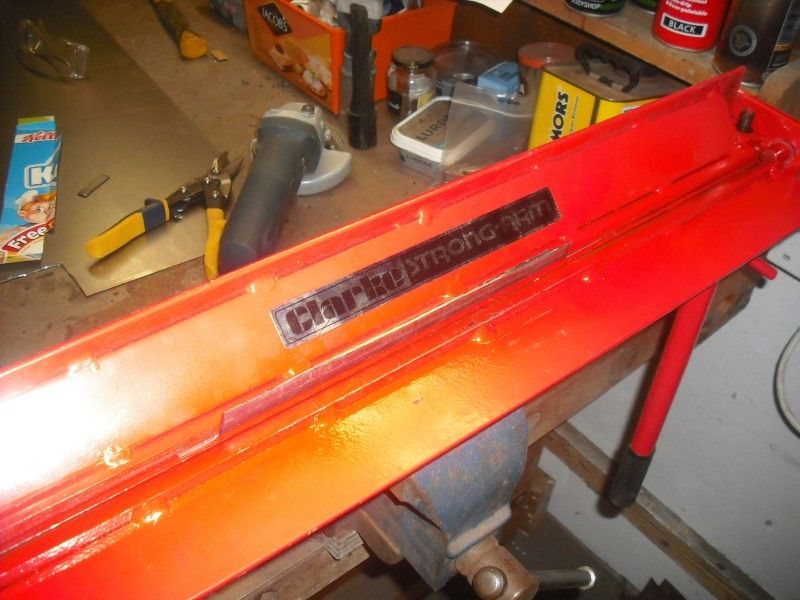 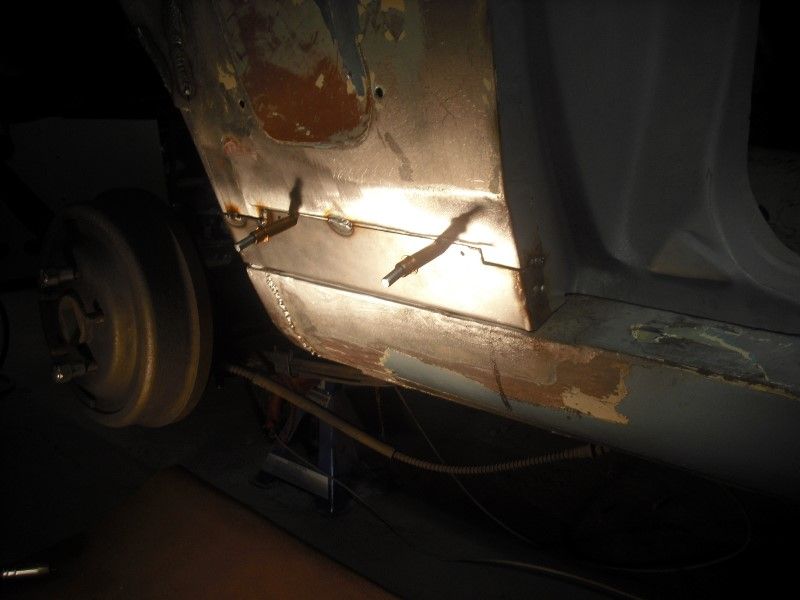 There may have been a work light pointing at it when I took that last picture! Anyway, welded that in: 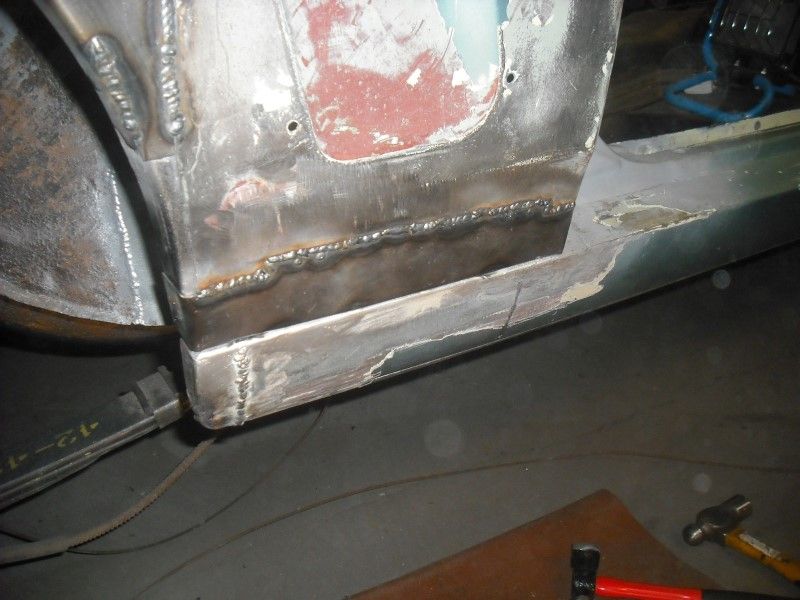 Attached to the sill on the inside as well of course. So, just a little piece of the arch to finish the patchwork. I need my shrinker for this so that will have to wait as I did not have it with me. At this point I realised time was getting on so I finished removing all the paint on the quarter panel. This was mostly done with a razor blade as the paint was that flaky! No time for grinding welds down right now so gave them a clean with the knotwheel, whizzed over the whole panel with the sander and gave it all a coat of etch primer. 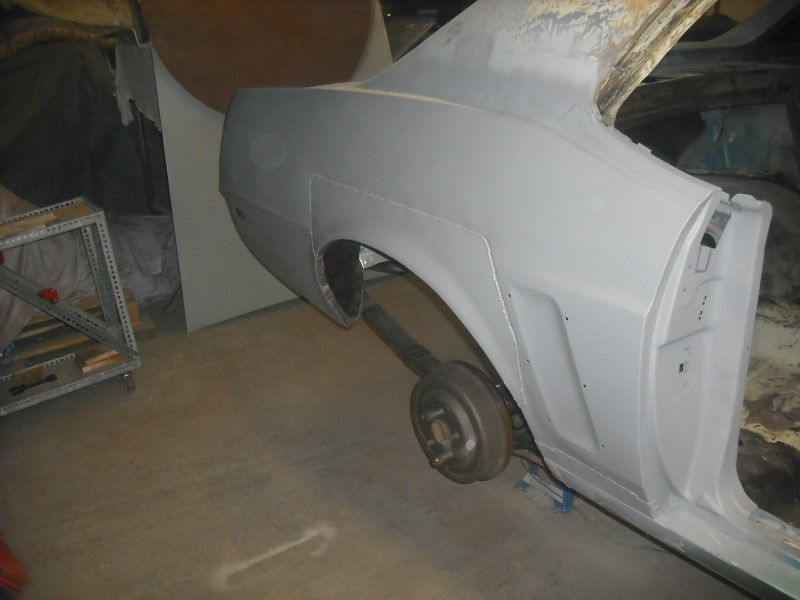 So, nearly there, just the pile of loose panels to tackle..... |
| |
Last Edit: Dec 24, 2015 12:06:54 GMT by drdick
|
|
|
|


 Better get busy with chopping out the inner wheel well. This turned out to be a pain and what with all the grinding took the best part of a morning. It also involved several sessions of having to clean all the rust and grot out of my eyes. It's a good job I did go for this solution though, most of the inner housing was made of rust, seam sealer, braze and old patches. It also had the obligatory double-skinned section where someone had just brazed in a patch over the rust.


