drdick
Part of things
 
Posts: 359
|
|
|
|
Still hugely avoiding the windscreen frame and still have no gas so limited possibilities for work. I borrowed a squirt of gas from another unit dweller in order to finish this: 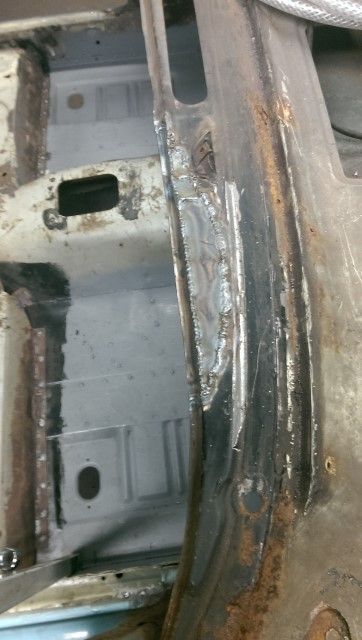 Still got to grind it down but I'm calling that done. Then I recycled my bit of bracing and gave the gas bottle back.... 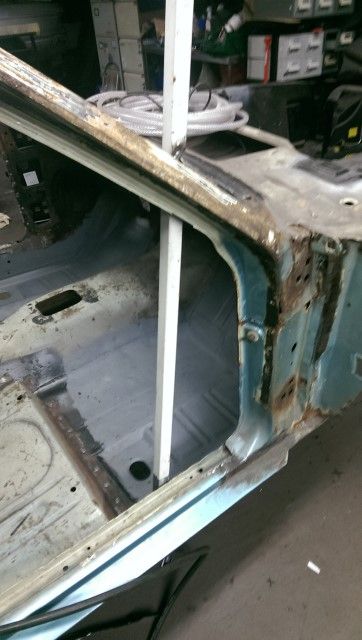 which just left the fun of chopping a lot of stuff out. Going, 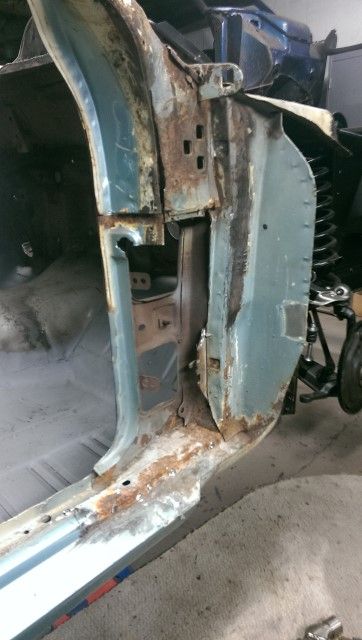 going, 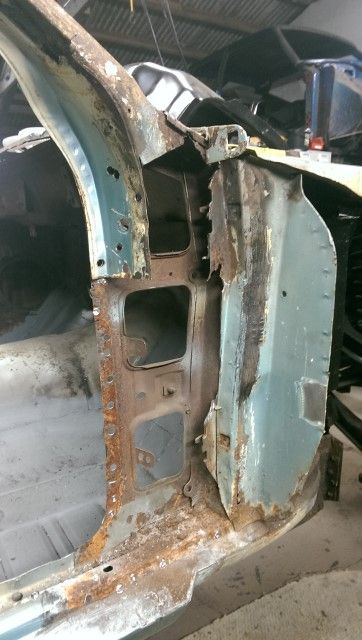 gone 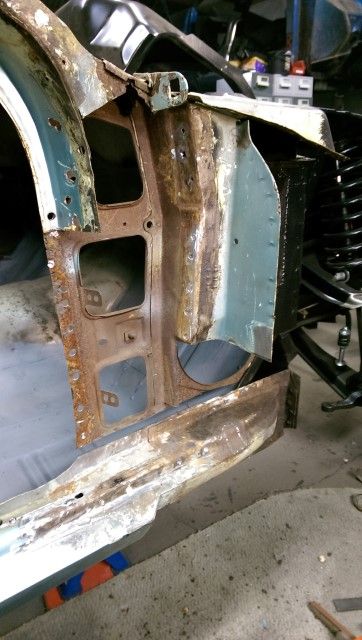 The bottom of the inner panel was rusty so that's been removed and in order to properly repair the lower portion of the panel that sticks out I decided it was easiest to cut that off as well. I'll repair the inner, then reattach the sticky out bit before putting in the new a pillar. Slapped some rust converter about.... 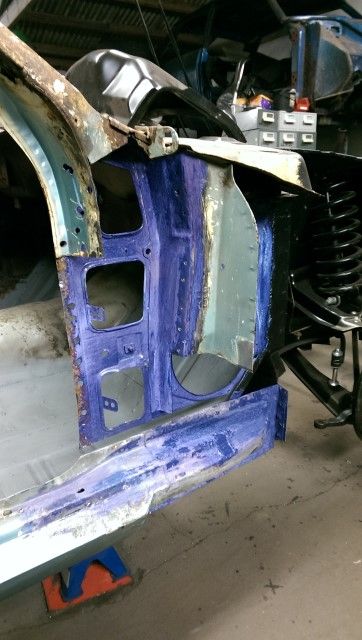 will crack on when I a) get some welding gas and b) the finger I smashed with a hammer repairs itself.... |
| |
|
|
|
|
hairymel
Club Retro Rides Member
avatar by volksangyl
Posts: 1,081
Club RR Member Number: 207
|
|
|
|
you can swap out the gas bottle in town - hope your finger is better soon  |
| |
whats that burning smell?
oh curse word :-(
|
|
eurogranada
Europe
To tinker or not to tinker, that is the question...
Posts: 2,556
|
|
|
|
|
Keep it up! You're making good progress! So nice that almost every panel is available...
|
| |
|
|
drdick
Part of things
 
Posts: 359
|
|
|
|
So after nearly a week of throbbing agony I finally took my smashed finger to hospital where they punched a hole in the nail to release the pressure, felt good  Then the nail fell off, so now it just looks gross. I have managed to do some stuff on the car, been very careful with the hammers though! I discovered that rust converter really hates the cold, when I got back to the car it was all curse word brown rather than nice rust-converted black. I ignored that and carried on with the reconstruction of the frilly bits. Inner panel reattached to sill: 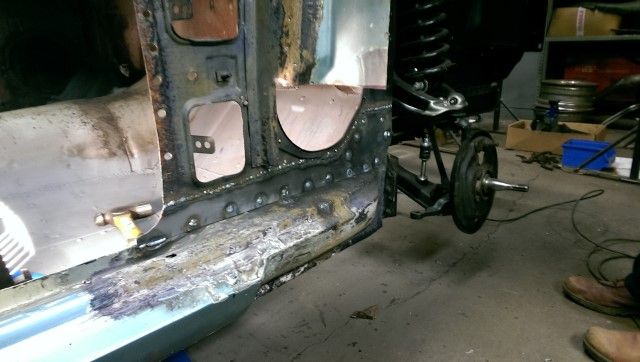 Remainder of a-pillar "bit" rebuilt: 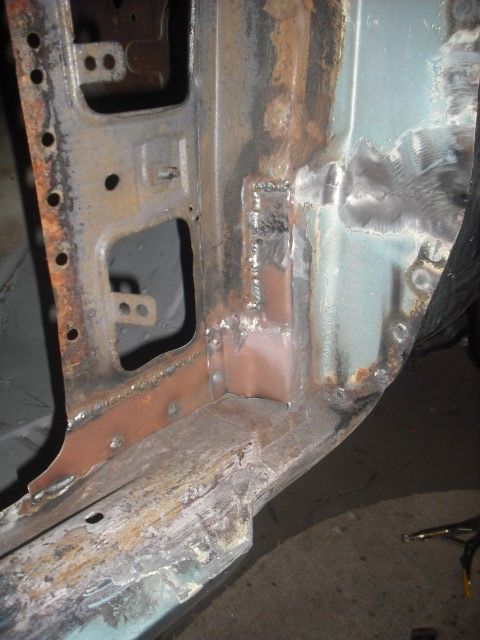 Outer cowl panel kidney bowl shaped doodah replaced: 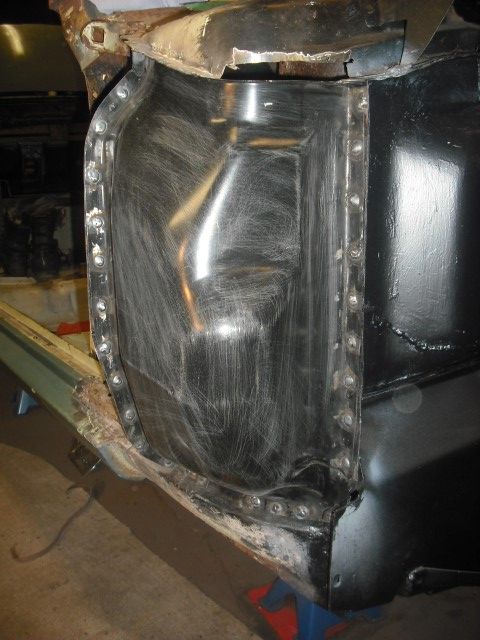 That just leaves this little section to close off. 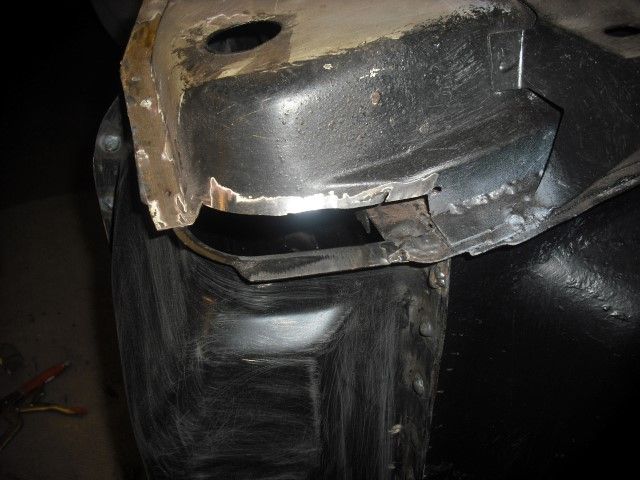 I have bought myself a Clarke sheet metal bender that goes in your vice and an EBay Metz shrinker/stretcher. This seemed like a perfect chance to try them out so after making a bracket to mount the shrinker/stretcher in my vice I cut a roughly correct size piece, folded it into an "L" and then tried the stretcher: 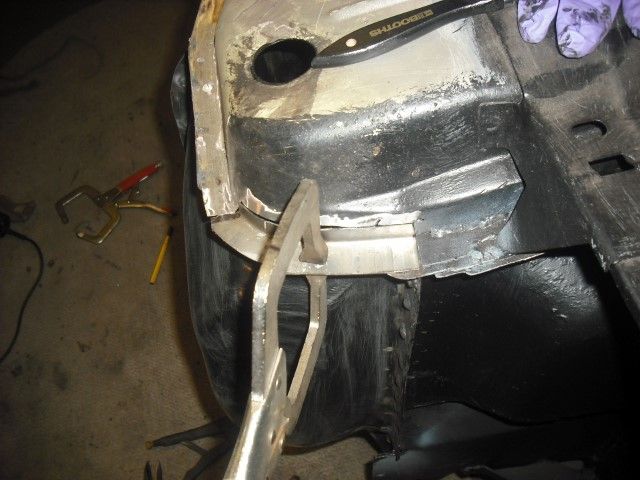 Success! This was surprisingly easy to get right, just keep cranking the handle and offering the piece up to the car until it fits. So I welded it in: 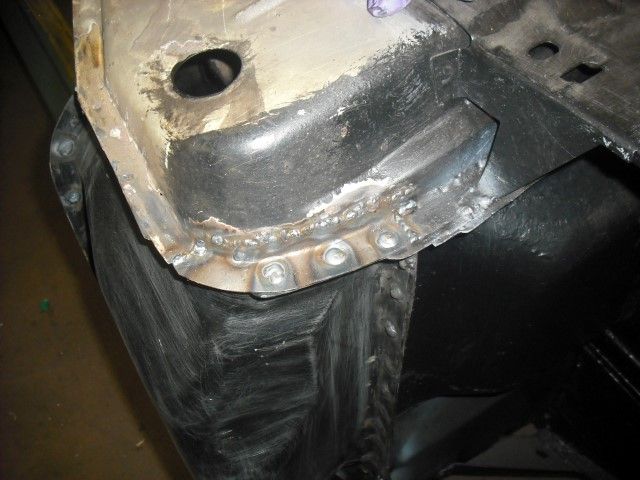 And that was as far as I got for now. I'm aiming for the Gathering (this year......  ) but that will depend on how quickly the guy I want to use can get it painted, how much time I can get off work/clear with SWMBO and whether the motor is any good. It isn't seized which is normally good enough for Yank V8s. I've also been thinking about how far I have got. I bought 21 repair panels for this car including two door skins that someone else fit for me. Of the remaining 19, 1 is the rear valence which bolts on, 1 is still in transit from Florida and 2 are sitting in the car. That means I have fitted 14 of them which isn't too bad. Most of what is left welding wise is stuff I will need to fabricate myself but that is just a time thing. If I could get the welding done by end of April then I reckon it's possible. |
| |
|
|
v8
Part of things
 
Posts: 312
|
|
|
|
Great job on saving the Mustang  Bet you can't wait for the first drive! |
| |
|
|
fer4l
Posted a lot
   Testing
Posts: 1,497
Club RR Member Number: 73
|
|
|
|
Top work! If my experience last year is anything to go by if you aim for the end of May you'll make the gathering by the skin of your teeth! See you there  Cheers Matt |
| |
|
|
bstardchild
Club Retro Rides Member
Posts: 14,975
Club RR Member Number: 71
|
|
|
|
And that was as far as I got for now. I'm aiming for the Gathering (this year......  ) but that will depend on how quickly the guy I want to use can get it painted, how much time I can get off work/clear with SWMBO and whether the motor is any good. It isn't seized which is normally good enough for Yank V8s. I've also been thinking about how far I have got. I bought 21 repair panels for this car including two door skins that someone else fit for me. Of the remaining 19, 1 is the rear valence which bolts on, 1 is still in transit from Florida and 2 are sitting in the car. That means I have fitted 14 of them which isn't too bad. Most of what is left welding wise is stuff I will need to fabricate myself but that is just a time thing. If I could get the welding done by end of April then I reckon it's possible. Oh good nothing like a deadline to focus the mind _ same deadline for me RRG15 although painting might have to take a back seat |
| |
|
|
drdick
Part of things
 
Posts: 359
|
|
|
|
Oh good nothing like a deadline to focus the mind _ same deadline for me RRG15 although painting might have to take a back seat Yeah, I suppose I could not paint it depending on the progress but can I be bothered to put it together, go to the Gathering and then pull it apart again for paint?? |
| |
|
|
bstardchild
Club Retro Rides Member
Posts: 14,975
Club RR Member Number: 71
|
|
|
|
Oh good nothing like a deadline to focus the mind _ same deadline for me RRG15 although painting might have to take a back seat Yeah, I suppose I could not paint it depending on the progress but can I be bothered to put it together, go to the Gathering and then pull it apart again for paint?? Well my reason for not painting is because I haven't made up my mind on colour (and I don't think I'll have the time) |
| |
|
|
hairymel
Club Retro Rides Member
avatar by volksangyl
Posts: 1,081
Club RR Member Number: 207
|
|
|
|
can I be bothered to put it together, go to the Gathering and then pull it apart again for paint?? you need to put it together before paint to make sure everything fits anyway ... |
| |
Last Edit: Feb 8, 2015 23:42:49 GMT by hairymel
whats that burning smell?
oh curse word :-(
|
|
|
|
drdick
Part of things
 
Posts: 359
|
|
|
|
Quick update - got a little time yesterday on the car. Managed to finish repairing the inner part of the cowl: 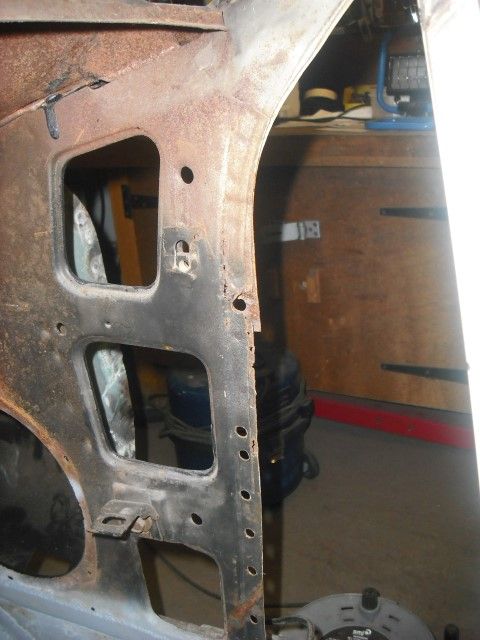 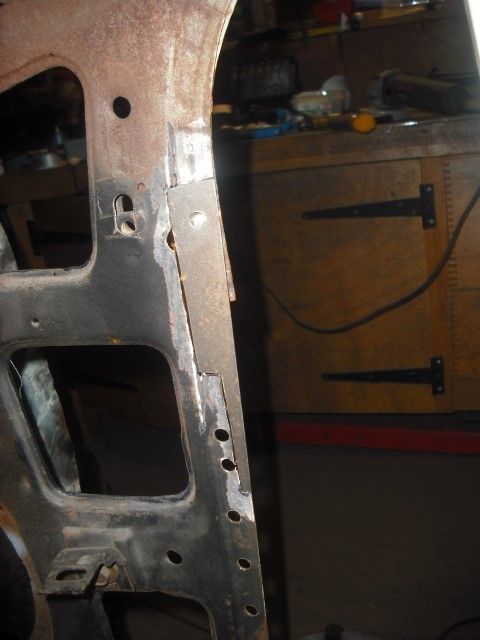 Then I trimmed and cleaned up enough to get the a pillar in: 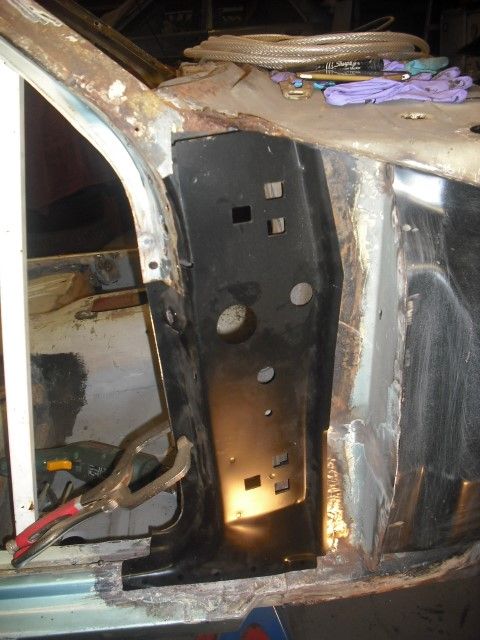 Looked good so I attached it with hot metal: 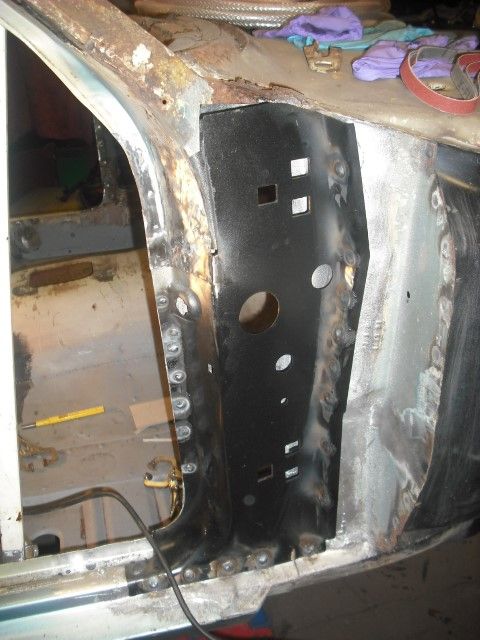 Spent a long time sorting out where the bracket that holds the back of the wing goes as well as closing off all the little gaps. Forgot to take pictures of that though so here's what it looked like at the end: 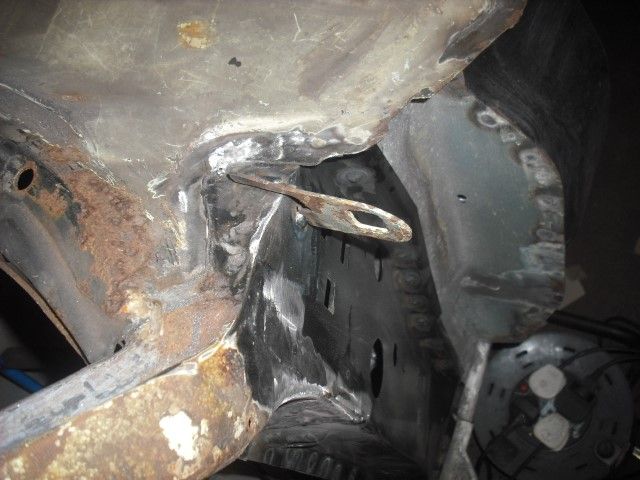 I then removed the piece of bracing box section so I am calling that bit finished. Did a lot of grinding and powerfiling. My extensive research of eBay powerfile belts leads me to believe that, even though they are a bit loose, the Silverline ones are best. My latest batch of German brand ones are exactly the right size but wear out in seconds. Finally, started to remove the tail panel. Surprise, surprise it's full of filler and braze so glad I am cutting it off. 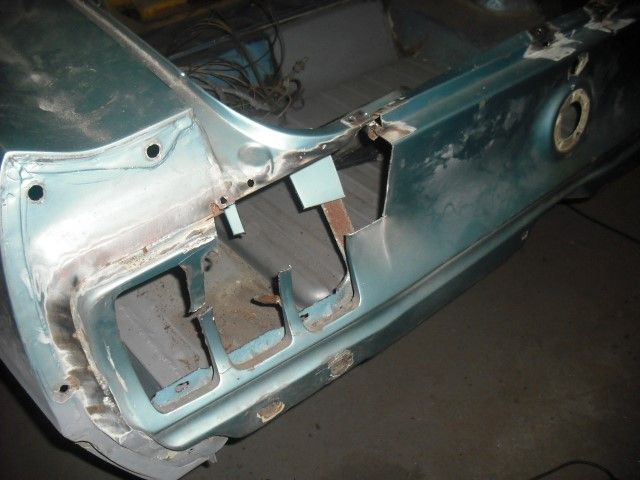 That's it till next weekend, some reasonable progress again. Day only marred by someone hitting my Merc on the M11. No serious damage but no witnesses either so there goes my no claims  |
| |
|
|
|
|
|
Feb 23, 2015 13:31:49 GMT
|
|
Good progress - it's hard slog repairing panels and mojo killing, but you will get there in the end.
|
| |
|
|
drdick
Part of things
 
Posts: 359
|
|
|
|
Spent a day on the car, feels like I am getting nowhere really, every time I prod or scrap something I find either filler, braze or thick black goop under which there is always a rusty hole  My camera is also knackered or at least the battery is, 10 minutes in the cold and it won't hold it's charge so I have out of focus HTC shots for you today. Cut all the brackets and things from the rear so that they can be recycled. These hold on the boot lock and bumper. 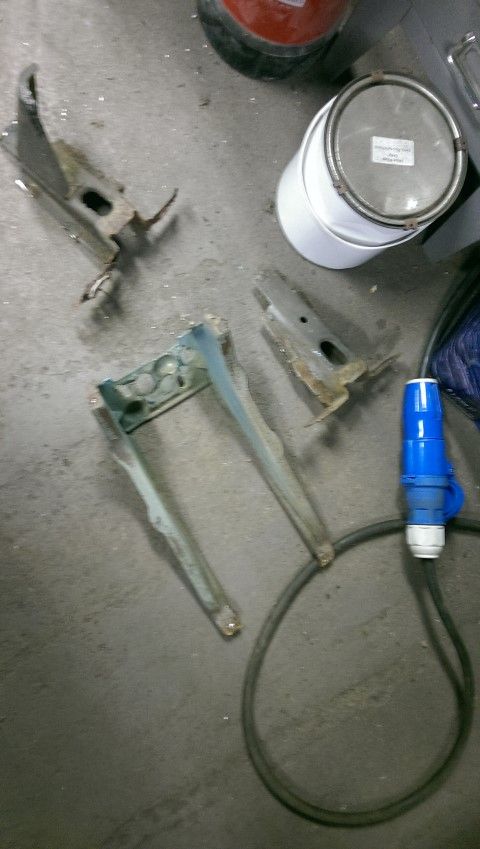 Then go ape curse word and chop everything out. You will note that it's very important to leave two sharp bits on the top left and top right of the opening you have created, if you forget to leave these then you'll have nothing to cut your head on when you stand up  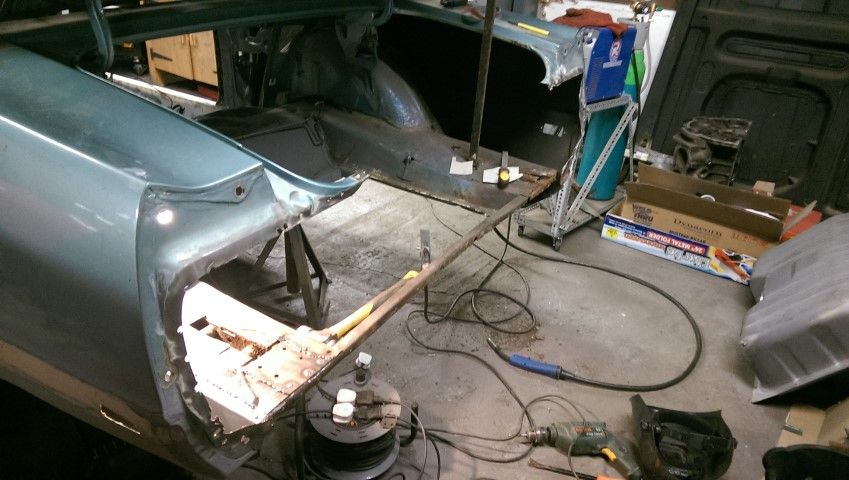 There is of course rust under the rear bumper brackets. On the drivers side I found most of the rust after I'd already cut and made a patch for what I initially thought was the rusty bit.... 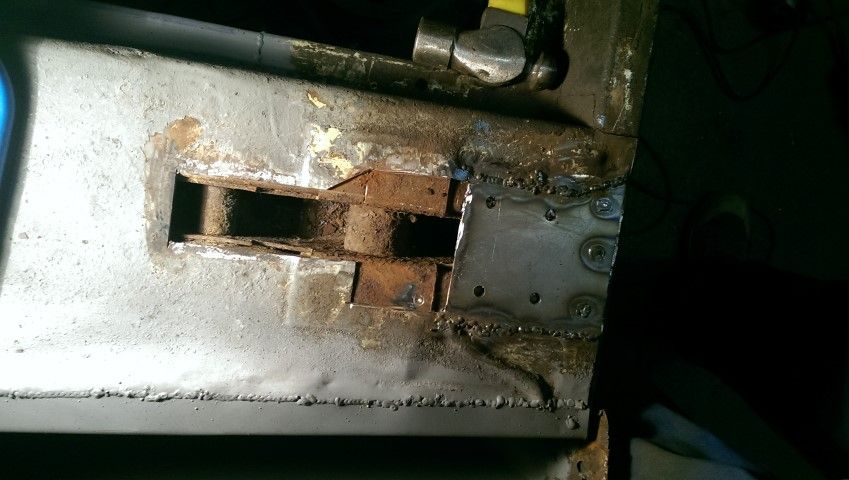 At the top of the bit I've cut out there should be a recessed drain hole of some sort. I was going to just forget about it but Hairymel was determined to have a bash at making a replacement using a hole saw, some sockets and a big hammer. I left him to it because I was hungry but when I returned the next day...... 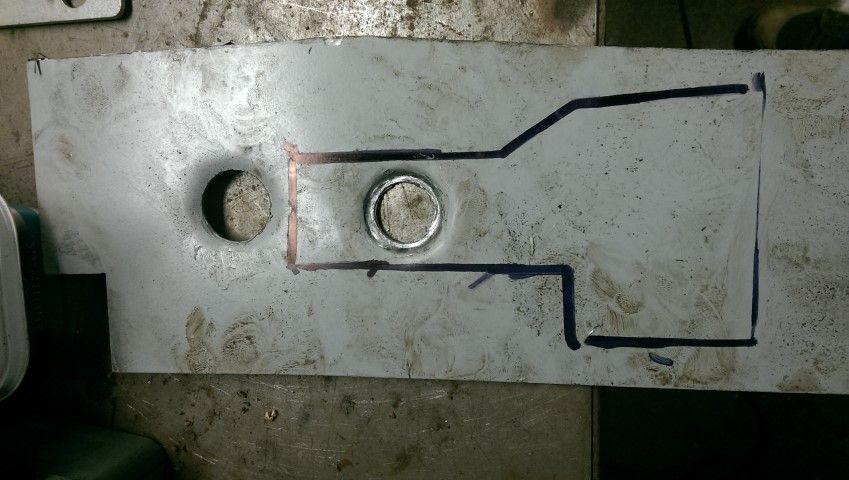 I guess the left hand hole was practice  Since the Hairy one had so kindly made this it would have been downright rude not to use it... 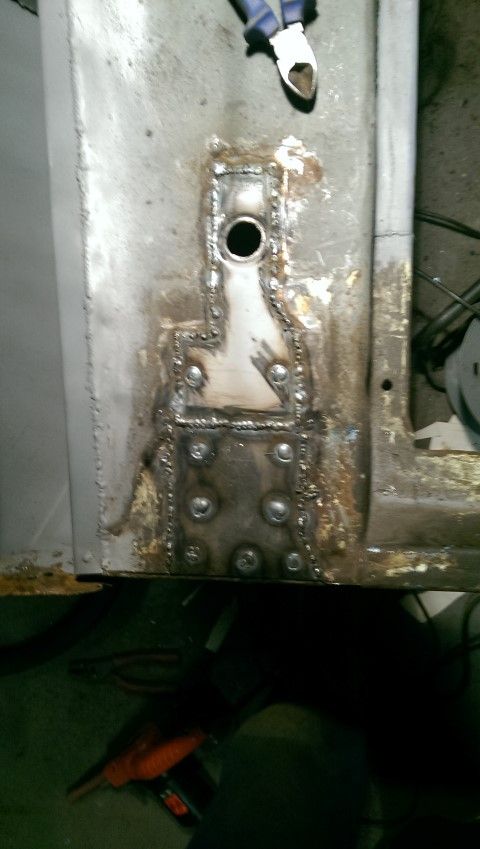 The other side is equally grotty, although for some reason the hole on this side does not have a recess... 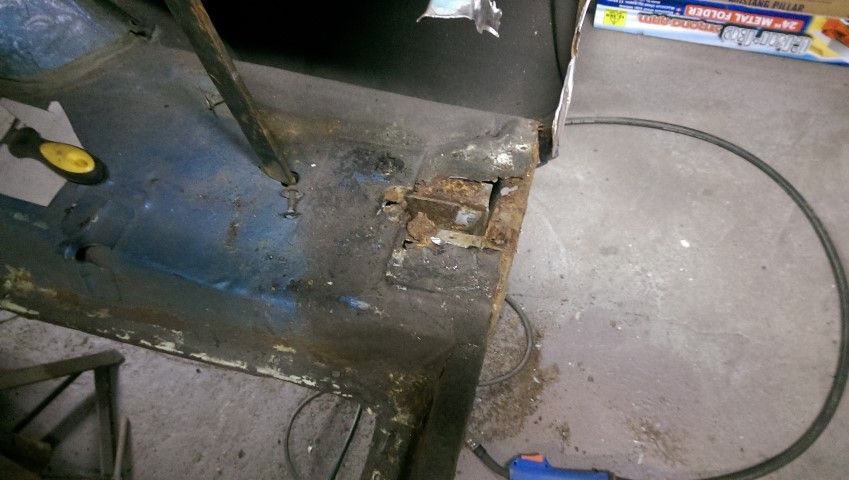 Once again, chop out the rust, patch it (including the bit that drops vertically for the tail panel to attach to) and then scrap all the goop away ready for a slap of primer. 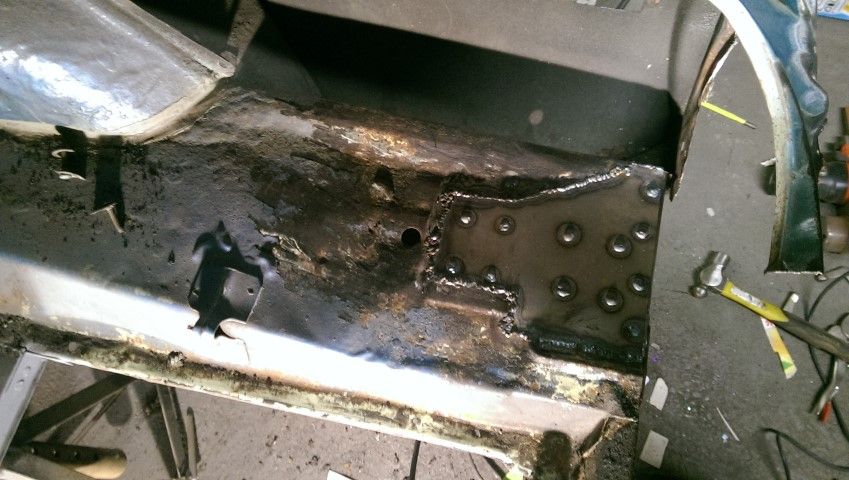 The sharp-eyed will notice that there is a rusty bit to the left of the drain hole. This is when I really started to get miffed with the whole thing. I know I should have scraped all the goop before making a patch, that's what makes it annoying as hell. I chopped it out and patched it of course. I did manage quite a bit more but I didn't take any photos of course. I've straightened the rear cross member with one lucky blow of a rubber mallet (clearly the car has been shunted from the rear before, that's why it's 90% filler). I've done a trial fit of the boot lid and tail panel. Once I had used a mini portapak thing to push one of the rear wings into place it all seems to fit nicely. Had to whip it all out again to drill holes for welding etc but hoping to get that in next time I go up there. I might try and buy a new battery for my camera as well, very annoying taking it there and finding it won't hold it's charge! |
| |
Last Edit: Mar 3, 2015 8:47:54 GMT by drdick
|
|
Ian
Part of things
 
Posts: 977
|
|
|
|
You will note that it's very important to leave two sharp bits on the top left and top right of the opening you have created, if you forget to leave these then you'll have nothing to cut your head on when you stand up  Sorry but this really did make me laugh! Looks like you really do have your work cut out with this one |
| |
|
|
|
|
|
|
|
|
It looks like you've got lots to do to get this Mustang back to its solid best but it also seems like you're making really good progress even though it might not always feel that way!!!
Keep at it and the end result will be more than worth it as you've got one heck of a cool car there...
Keep on keeping on sir!
|
| |
***GARAGE CURRENTLY EMPTY***
|
|
|
|
|
|
|
|
Looks like hard work but will be well worth it in the long run.
|
| |
|
|
|
|
|
|
|
|
Excellent build and thanks for keeping us up to date, especially when it involves sarcasm, it is very entertaining. Your car reminds me why fibreglass cars started to appeal to me! You've been grafting so hard on the metalwork, I hope you allow yourself to think about how you want it to end up to keep motivated. Wheels, colour, interior?
|
| |
|
|
bstardchild
Club Retro Rides Member
Posts: 14,975
Club RR Member Number: 71
|
|
|
|
I know how you feel sometimes they just keep fighting you and you wonder if you'll ever finish it....... You will I am absolutely sure  |
| |
|
|
Dez
Club Retro Rides Member
And I won't sit down. And I won't shut up. And most of all I will not grow up.
Posts: 11,790
Club RR Member Number: 34
|
|
|
|
|
at least you can console yourself with the fact the car you're putting all this effort into is worth a fair whack at the end of it, rather then spending all that time on something thats still only worth 1500 quid when its done. it kinda makes your 'hourly rate' a better figure, if that makes sense.
|
| |
|
|
drdick
Part of things
 
Posts: 359
|
|
|
|
Thanks for the comments, I don't really hate it that much, it's just rather never-ending and I'm a very impatient sort of person. You will note that it's very important to leave two sharp bits on the top left and top right of the opening you have created, if you forget to leave these then you'll have nothing to cut your head on when you stand up  Sorry but this really did make me laugh! Looks like you really do have your work cut out with this one The worst thing about this is that I did exactly the same thing when I replaced the tail panel on my last Mustang..... at least you can console yourself with the fact the car you're putting all this effort into is worth a fair whack at the end of it, rather then spending all that time on something thats still only worth 1500 quid when its done. it kinda makes your 'hourly rate' a better figure, if that makes sense. I hadn't really thought of it this way. The prices on these things are getting ludicrous, both here and in the States. I know that recently a 69 Coupe was sold in the UK for what I paid for mine 18 months ago and it was totally rotten, with missing parts and a seized engine. Admittedly I don't know if my engine runs but it turns over which is probably good enough! Another mad weekend of this thing planned in 2 weeks, eBay has furnished me with a new camera battery for 3 quid delivered so maybe more photos next time! |
| |
|
|
|
|


 Then the nail fell off, so now it just looks gross. I have managed to do some stuff on the car, been very careful with the hammers though!


 ) but that will depend on how quickly the guy I want to use can get it painted, how much time I can get off work/clear with SWMBO and whether the motor is any good. It isn't seized which is normally good enough for Yank V8s. I've also been thinking about how far I have got. I bought 21 repair panels for this car including two door skins that someone else fit for me. Of the remaining 19, 1 is the rear valence which bolts on, 1 is still in transit from Florida and 2 are sitting in the car. That means I have fitted 14 of them which isn't too bad. Most of what is left welding wise is stuff I will need to fabricate myself but that is just a time thing. If I could get the welding done by end of April then I reckon it's possible.


