|
|
|
Oct 28, 2020 20:22:08 GMT
|
A few years ago I read an article (can’t remember where) about a guy restoring a car with a dented roof (can’t remember what car). He made a device very similar to yours to get the dents out of the roof. He did use proper dies though and it worked a treat. I do remember he was a pilot for some reason (though I may have imagined that bit). Glad I'm not the only strange person making random tools! I did wonder about buying the rollers and that's probably the way forward if it looks like working. Did the replacement wing come off a T-Bar? Perhaps the extra metal was to strengthen the car after MrT cut off the roof. As you say , might as well use it.. I don't know to be honest. I suspect that it was. It's well known that the MK1b cars had extra strength in the sills but nobody had ever noticed this bit in the B pillar that I'm aware of. So it's an interesting question of whether only the MK1b T bar cars had the extra stiffening in them. Short answer is that I don't know. But I'm curious now! I was just surfing the MR2 MK1 forum 'cos I knew there were photos of another car that had the rear wing removed. It was a T bar car and it does show that strengthening piece running up the B pillar. But then a surprise... It doesn't go all the way to the roof. It actually ends where the seatbelt mount is. Only a few inches above where mine was cut off. This is making me wonder if, when they removed the roof rail between the A and B pillars for the T bar, in a serious accident the upper seat belt mount was being pulled forwards. This vertical rail would certainly resist that. Another possibility along a similar vain is that, in an accident the top seat belt mount does move forwards on all the cars. Its in the middle of the B pillar which would bend. But on the T bar cars there is less to stop the A pillar coming into the cockpit so they compensated by holding the passengers back a little more firmly. Be interesting to know. toast00 has me thinking more about my long term plans for painting the car. I'm still not happy with spraying isocyanate paints. I'm on my drive in the middle of a town, I just don't want to go there. But I am wondering about the non-isocyanate stuff now. I probably need to talk to a paint supplier about it. I know GN recommended Jawel at one point. I need some cans to do the wing and front bumper anyway. James |
| |
|
|
|
|
|
|
|
Oct 28, 2020 20:47:10 GMT
|
It's well known that the MK1b cars had extra strength in the sills but nobody had ever noticed this bit in the B pillar that I'm aware of. So it's an interesting question of whether only the MK1b T bar cars had the extra stiffening in them. Short answer is that I don't know. But I'm curious now! Quoting myself now... I've just found some photos on the net of a MK1b sunroof car being restored. It looks like the middle sill piece and the vertical strengthener were only fitted to the T bar cars. Interesting. Well it is to me! |
| |
|
|
jimi
Club Retro Rides Member
Posts: 2,240  Member is Online
|
|
Oct 28, 2020 20:55:04 GMT
|
|
|
| |
Last Edit: Oct 28, 2020 20:56:52 GMT by jimi
Black is not a colour ! .... Its the absence of colour
|
|
|
|
|
Oct 28, 2020 21:40:28 GMT
|
|
I didn't know he'd done that. It does look god without the roof.
Did he ever finish it?
|
| |
|
|
|
|
|
Oct 28, 2020 21:42:55 GMT
|
Making the English Sprocket was an interesting diversion but didn’t solve my problem of getting the patch to fit in the hole. What to do? Make a different tool.  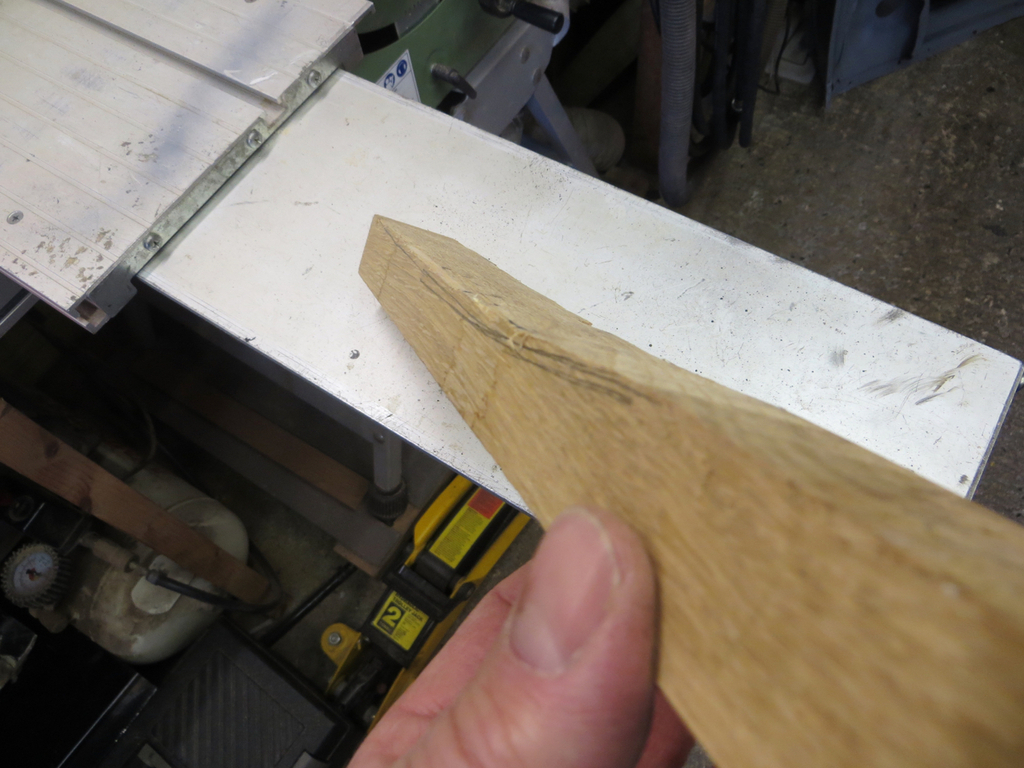 Just a bit of oak with a slight bend hacked into it. I can use it as a dolly and tap the patch into it.  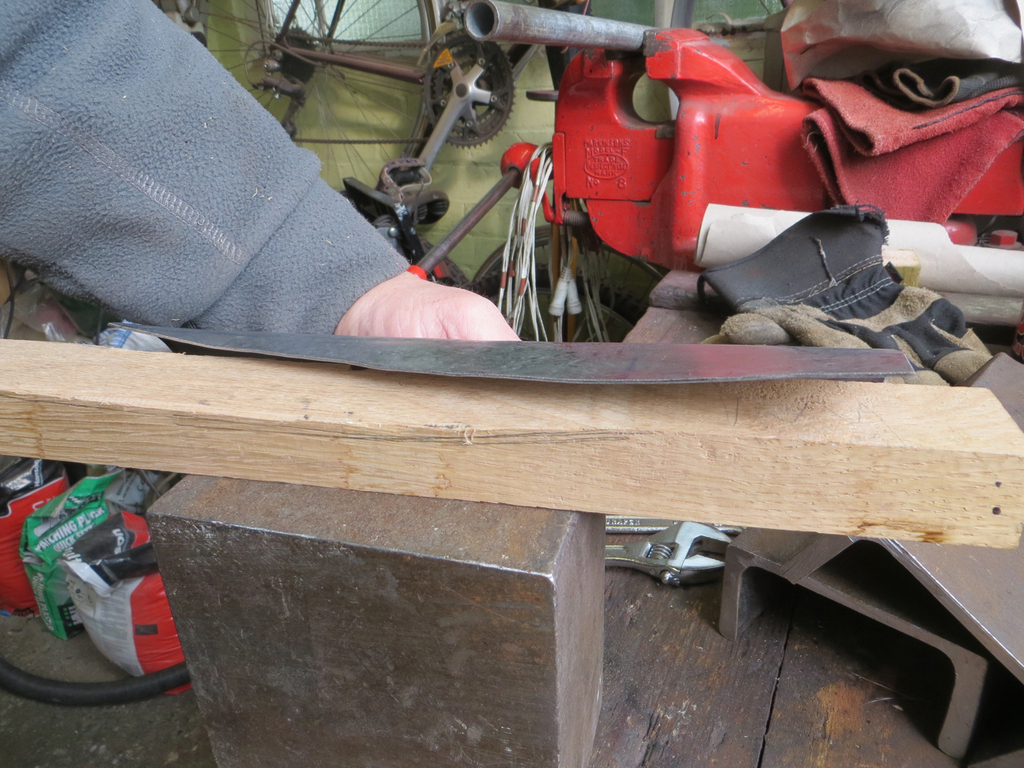 I didn’t make it the exact shape, just a nice curve that I could use an appropriate bit of. Seems to have worked.  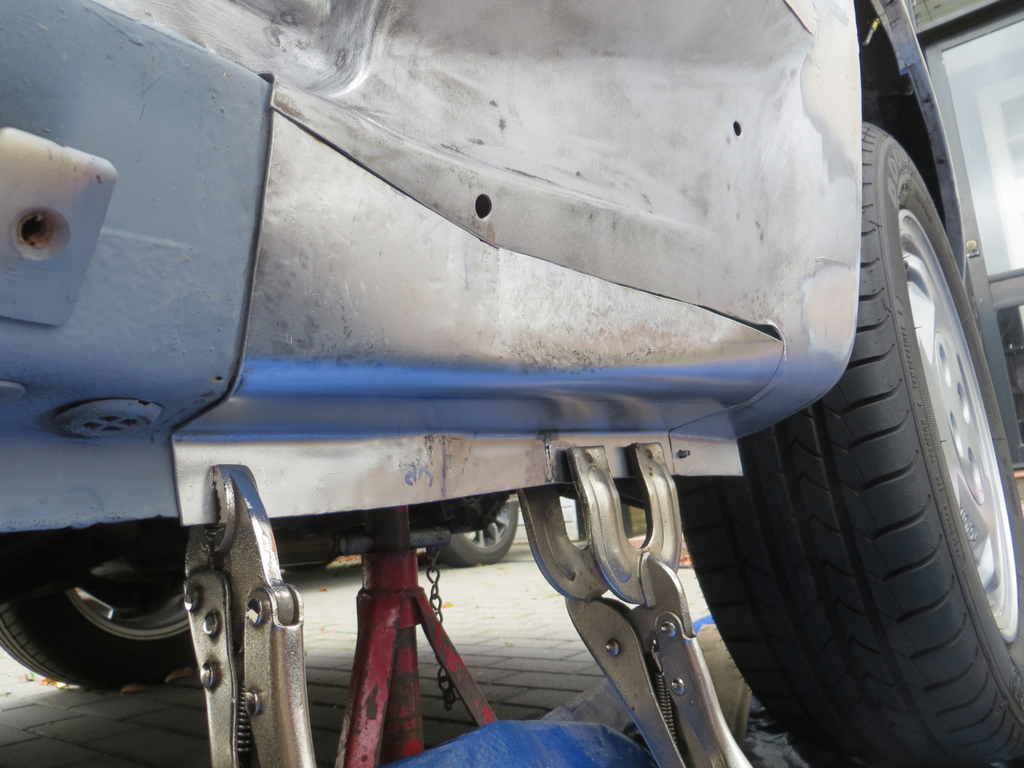 I’ll draw attention to the error at the trailing edge where I miss cut the joint. I was a bit miffed about that. Still, I can blob it in with weld. I just didn’t want to have to. So I tacked it on.  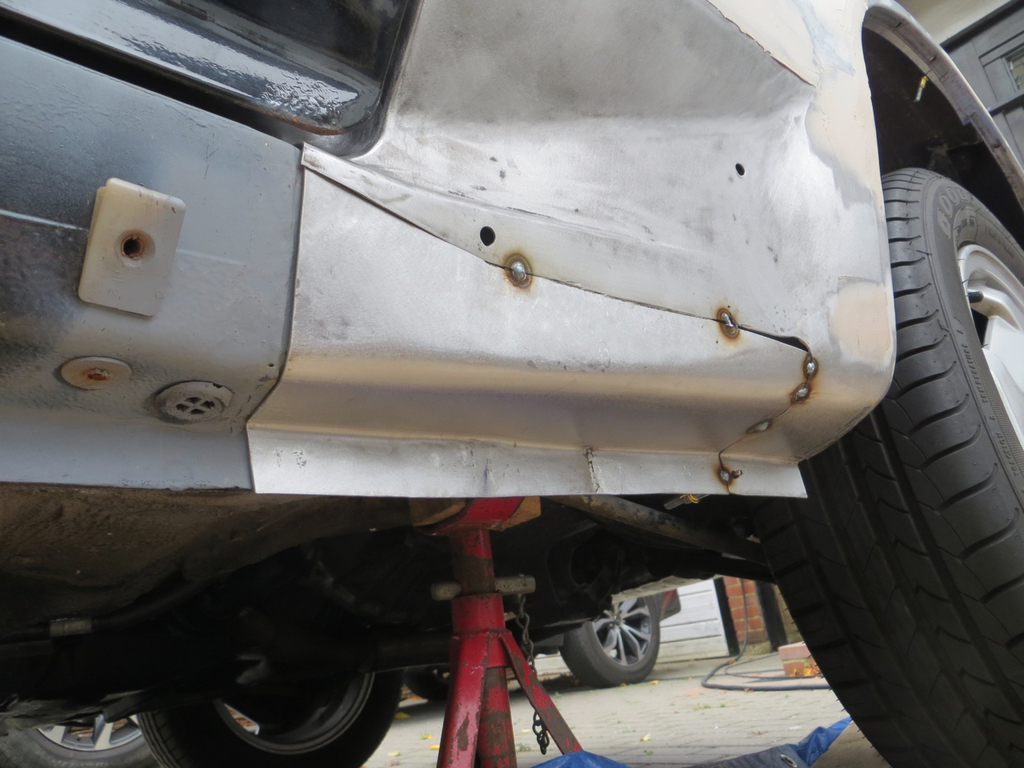 Getting there! |
| |
|
|
|
|
|
Oct 28, 2020 22:46:51 GMT
|
|
You’re mastering some fine skills along the way. It’s going to look like mr.T had designed it all at this rate.
|
| |
|
|
|
|
|
Oct 29, 2020 15:49:02 GMT
|
|
That panel fit looks great.
I couldn't make a bendy bit like that.
|
| |
|
|
|
|
|
Oct 30, 2020 19:33:18 GMT
|
You’re mastering some fine skills along the way. It’s going to look like mr.T had designed it all at this rate. Thank you! I've started watching a chap called Trev on PooTube and he's inspired me to try some new ideas. That and my new English Sprocket... I'll be doing Rollers and Ferraris next. Not! I couldn't make a bendy bit like that. You probably could. It's curved but not stretched very much. But you raise an interesting question. I don't think of myself as being particularly skilled or talented. I've just practiced a bit. So I don't see why anybody couldn't do what I do, and probably better. But maybe I'm wrong and I do have some God given skills and I should appreciate them more. I have a hard time thinking that I'm anything other than very ordinary though. Best get that patch welded in. |
| |
|
|
|
|
|
Oct 30, 2020 20:18:09 GMT
|
The weather outside was a bit variable last weekend and I knew I would do a better job welding on the bench so the wing came off again and I retreated to the garage. I had an idea… Welding the patch while it’s off the car means I can weld the back side.  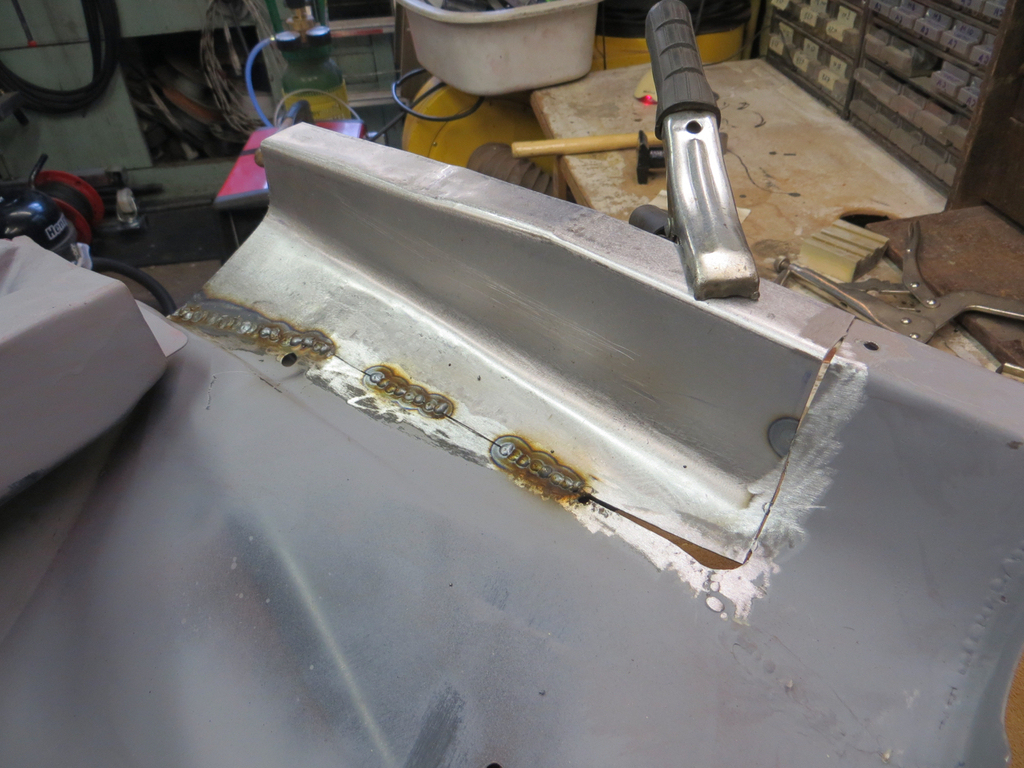 This has a couple of advantages to me. I always have a bigger blob on the weld side and (hopefully, if I got it right) a smaller penetration blob on the other side. By welding the back side I have less to grind off on the face side. And… And!!! I can leave the weld bead on the back of the panel so it’s even less grinding and the joint is likely to be stronger. I will admit that I ran the finger sander over the back just to neaten it up (even though it can’t be seen). I just can’t help myself. The only disadvantage is that I had to touch in a couple of spots on the face side where I hadn’t got quite enough penetration to make it look neat. The obvious hole (above), where I made a total muck up cutting the edge, I just held a piece of flattened copper pipe on the back side and welded onto that.  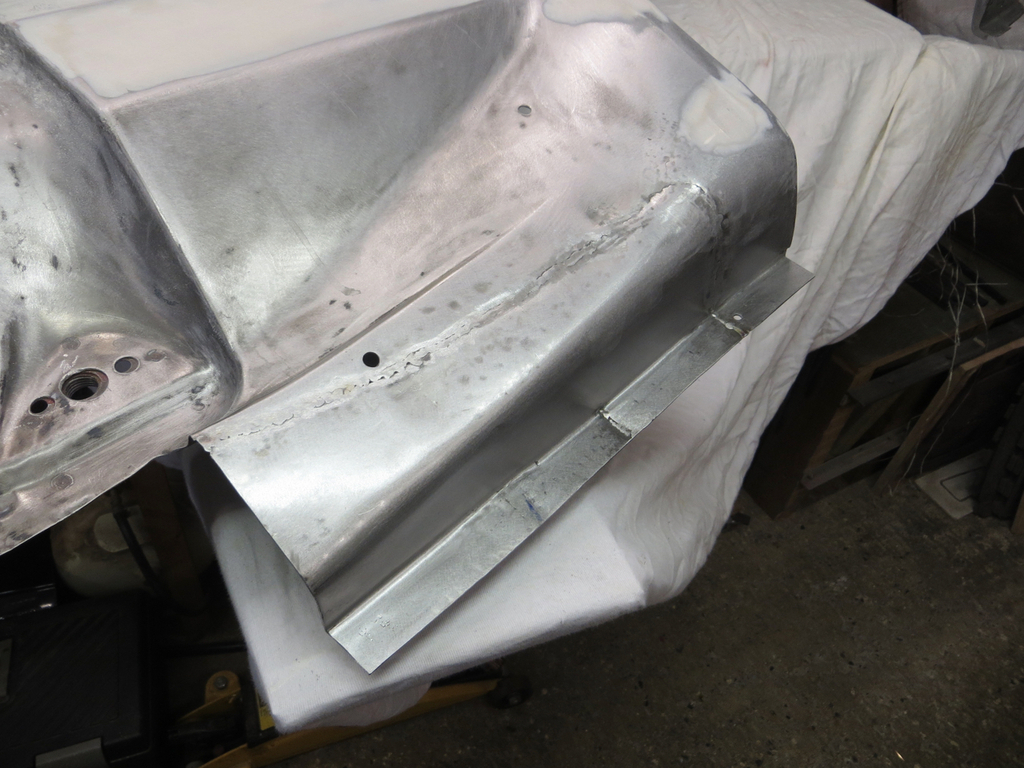 There is more heat distortion than I wanted because I’m a TOTAL PRAT and can’t SLOW DOWN! Anyway, it’s reasonably close to my ‘thin skim of filler’ test. Not as close as I’d like, but it’s ok. I’ll keep trying. 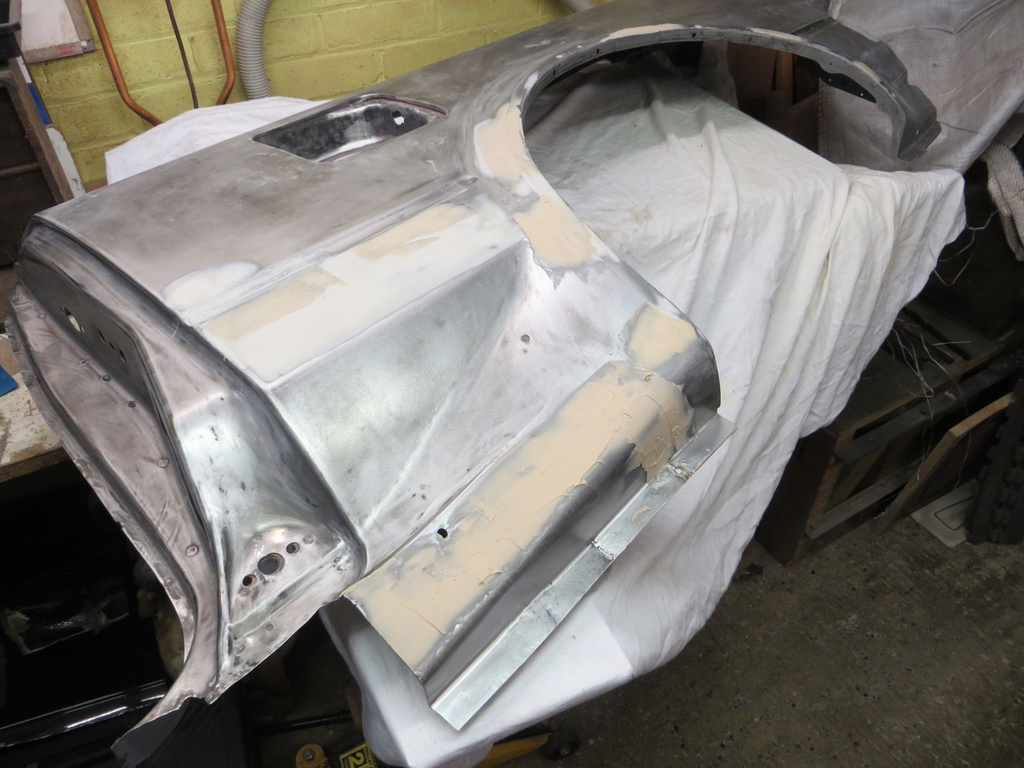 I’m getting closer with filling the leading edge of the arch. Just filling it with thin coats and building it up. It’s a place where I’d let in a patch and it wasn’t quite as good as I’d have liked. So I’m trying to get the profile right. I keep skimming it over and, probability, sanding too much out. I’m sure if I knew what I was doing it’d get it in one coat. Or two at the most. Anyway, the filler went off and got sanded again. As I was running my hand over I was trying to pick up low spots. They got marked and another layer skimmed on.  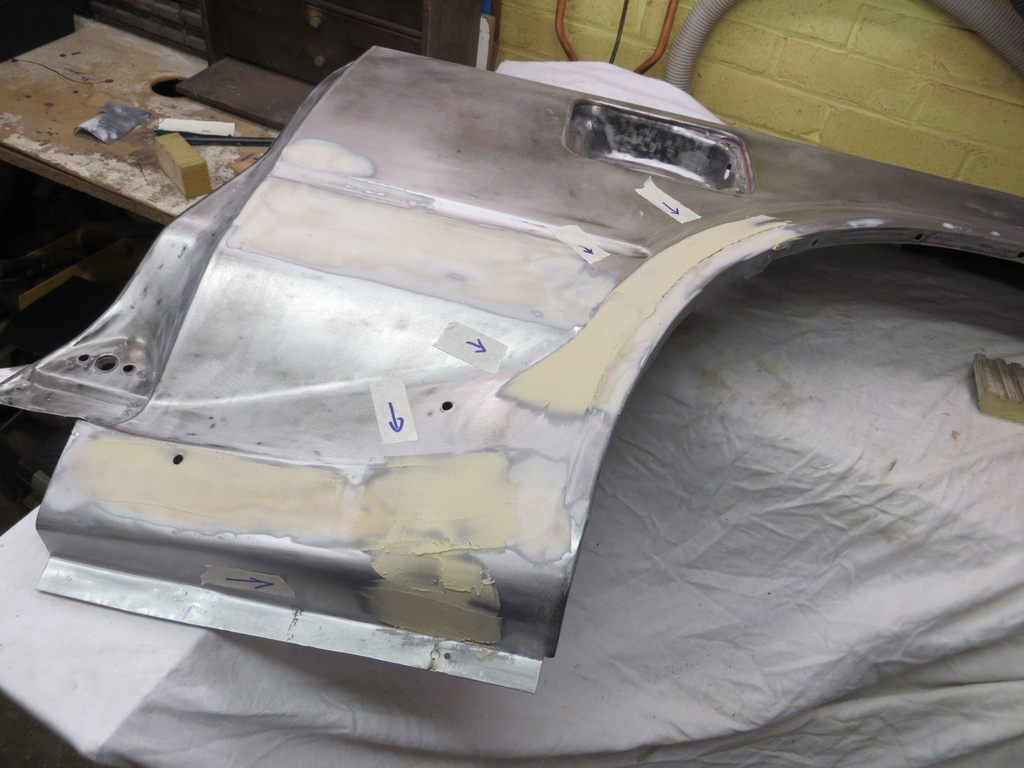 I get worried that I’m adding loads of filler but the reality is that I keep sanding most of it out again. I’ll get there but it’s going to get boring for you lot! James |
| |
|
|
|
|
|
Oct 30, 2020 21:08:03 GMT
|
The weather outside was a bit variable last weekend and I knew I would do a better job welding on the bench so the wing came off again and I retreated to the garage. I had an idea… Welding the patch while it’s off the car means I can weld the back side.   This has a couple of advantages to me. I always have a bigger blob on the weld side and (hopefully, if I got it right) a smaller penetration blob on the other side. By welding the back side I have less to grind off on the face side. And… And!!! I can leave the weld bead on the back of the panel so it’s even less grinding and the joint is likely to be stronger. I will admit that I ran the finger sander over the back just to neaten it up (even though it can’t be seen). I just can’t help myself. The only disadvantage is that I had to touch in a couple of spots on the face side where I hadn’t got quite enough penetration to make it look neat. The obvious hole (above), where I made a total muck up cutting the edge, I just held a piece of flattened copper pipe on the back side and welded onto that.   There is more heat distortion than I wanted because I’m a TOTAL PRAT and can’t SLOW DOWN! Anyway, it’s reasonably close to my ‘thin skim of filler’ test. Not as close as I’d like, but it’s ok. I’ll keep trying.  I’m getting closer with filling the leading edge of the arch. Just filling it with thin coats and building it up. It’s a place where I’d let in a patch and it wasn’t quite as good as I’d have liked. So I’m trying to get the profile right. I keep skimming it over and, probability, sanding too much out. I’m sure if I knew what I was doing it’d get it in one coat. Or two at the most. Anyway, the filler went off and got sanded again. As I was running my hand over I was trying to pick up low spots. They got marked and another layer skimmed on.   I get worried that I’m adding loads of filler but the reality is that I keep sanding most of it out again. I’ll get there but it’s going to get boring for you lot! James That's not a huge amount of filler, have a look at my MK2 Jag roof on the econojag thread, I used a whole big tin on that😁 I'm loving your work on this, I always liked the MR2, very stylish and of its time. |
| |
|
|
|
|
|
Oct 30, 2020 23:46:22 GMT
|
That's not a huge amount of filler, have a look at my MK2 Jag roof on the econojag thread, I used a whole big tin on that😁 I apologise unreservedly. I'd totally missed that thread. And I thought I was crazy. I'm sure you are certifiable and would be locked up if only the wheel barrow you carry your cahoonas in would go through the asylum door. Thankfully it's piddling down here tomorrow so I'll have plenty of time to enjoy the rest of your thread! James PS, Thank you! |
| |
Last Edit: Oct 30, 2020 23:47:45 GMT by Sweetpea
|
|
|
|
|
|
|
|
Homer's rebuild is an epic story of daring-do (derring-do?) and amazing accomplishment.
Although we're all disgusted by sills fixed with old Daily Mails, road signs and inches thick of Plastic Padding, I still see others trying so hard to minimize its use that they don't keep enough after sanding. No shame in using a bit more bog!
Thanks for your continued updates, always to be savored.
John
|
| |
|
|
|
|
|
|
|
|
"Homer's Rebuild"?
Did he write that before or after "The Odyssey"?
OK, not my best joke but, I assure you, literary professors all over the world are in hysterics right now.
|
| |
|
|
|
|
|
Oct 31, 2020 10:53:00 GMT
|
Looking good, better too little than too much pudding ! err, you do realise that the standard you're working to in that corner you're going to have to apply to the rest of it ...  |
| |
Last Edit: Oct 31, 2020 10:57:39 GMT by westbay
|
|
|
|
|
Oct 31, 2020 13:50:28 GMT
|
Homer's rebuild is an epic story of daring-do (derring-do?) and amazing accomplishment. Although we're all disgusted by sills fixed with old Daily Mails, road signs and inches thick of Plastic Padding, I still see others trying so hard to minimize its use that they don't keep enough after sanding. No shame in using a bit more bog! Thanks for your continued updates, always to be savored. John The problem will body filler is its just so good at what it does and has developed a reputation as a bodgers tool but in reality if used properly its a brilliant product. The roof on my MK2 Jag looked like the Malverns but now its almost presentable!
Always use as much filler as you need to get it to look right, no one is going to say at the end well it looks dreadful but at least there isn't much filler in it! If you need too much thickness to get it to look right then you need to go back and look at how you can improve the metalwork you are filling over (i.e. panel beat it out a bit or even as I did on my roof chop out the worst section and replace).
Although patches over chicken wire and newspaper are clearly a bodge they were usually done at a time when the car wasn't worth anything and people needed to get to work and back and couldn't afford the cost of welding. I remember my dad being charged £20 per plate for welding on his old cortina around 1990 and it was a lot of money back then compaired to what he earnt with a wife, mortgage and two children to pay for.
|
| |
|
|
|
|
|
|
|
err, you do realise that the standard you're working to in that corner you're going to have to apply to the rest of it ...  This is the third time I've made that patch (one on each side and then replacing the left side again). So I should be getting the hang of it by now. The thought did cross my mind that I should redo the early stuff now I'm getting better at it. The thought was quickly put to bed! ...with a wife, mortgage and two children to pay for. Did you have to buy children in those days? Like from a catalogue? I bet in those days, before gender equality, you got more Green Shield stamps if you bought a baby boy. I'll get back to the car. Oh, by the way... I spent ages thinking about paint again. I'd been reading homersimpson 's thread and I thought I'd finally got the whole thing right in my head and I had a plan. Turns out I was wrong on both counts! |
| |
|
|
|
|
|
|
|
Where the foot of the B post curves into the sill it had been cut short. Probably only a centimetre or so. I wasn’t going to worry about this. I was just going to run a weld across the foot of the wing and tidy it up when I blend the filler in. But the side was a bit ugly so I thought I’d do the job properly.  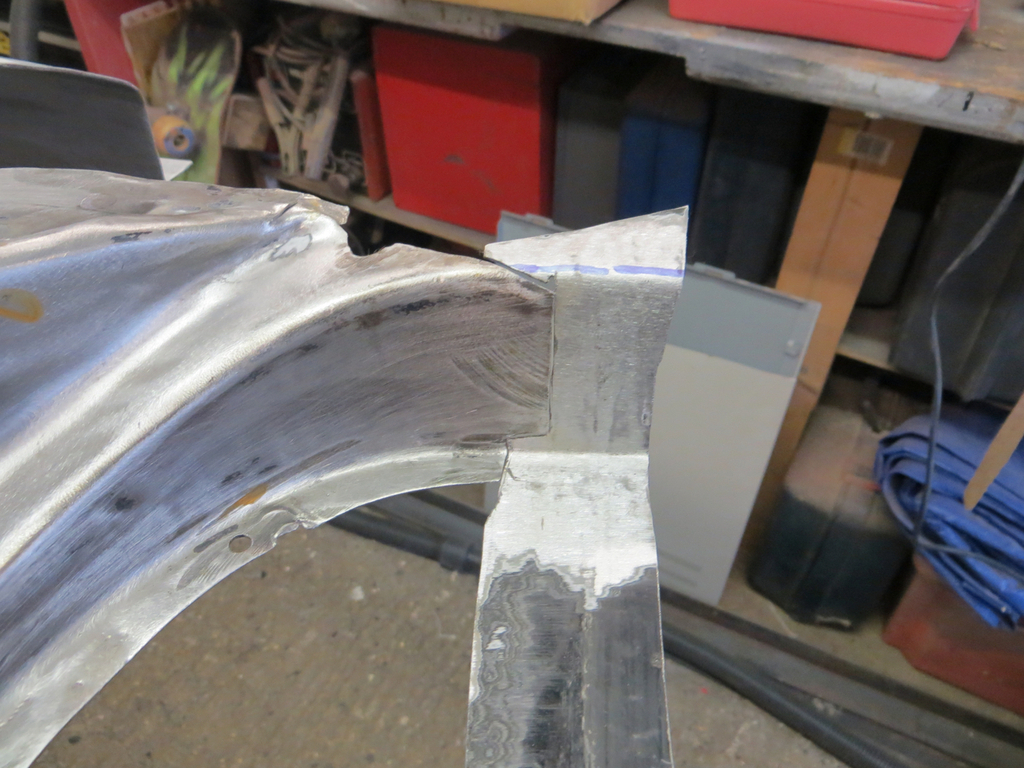 The new bit is just a piece off the old wing. Normally I make patches out of 1.2mm thick metal. It’s a bit harder to work but easier to weld. However it looked too thick here so I used a bit of the old wing which I think is about 0.8mm. Buzzy buzz buzz.  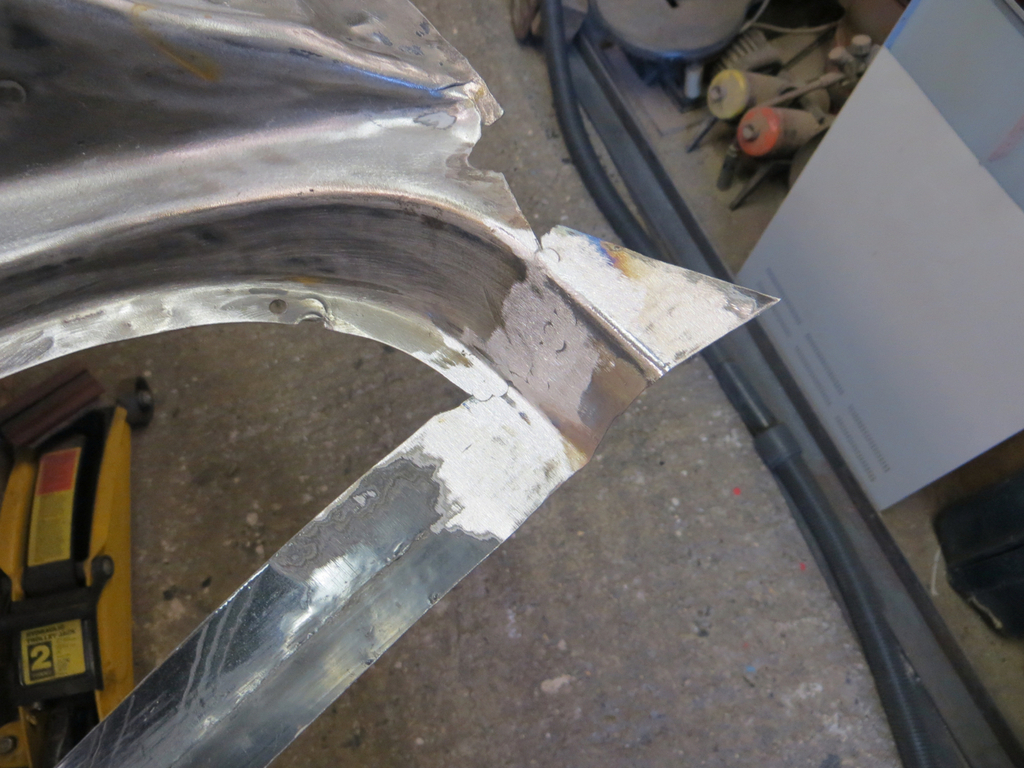 You can see the side profile looks more like a Halloween pumpkin’s teeth than a bit of car so that’s the next bit to deal with. I could have made both bits in one with an L shaped bit of metal. But the short saving in weld wasn’t worth the messing about trimming it. Need to cut the flange to size. I thought I’d try a new trick I’d seen for marking the width of the flange. You use a suitable washer…  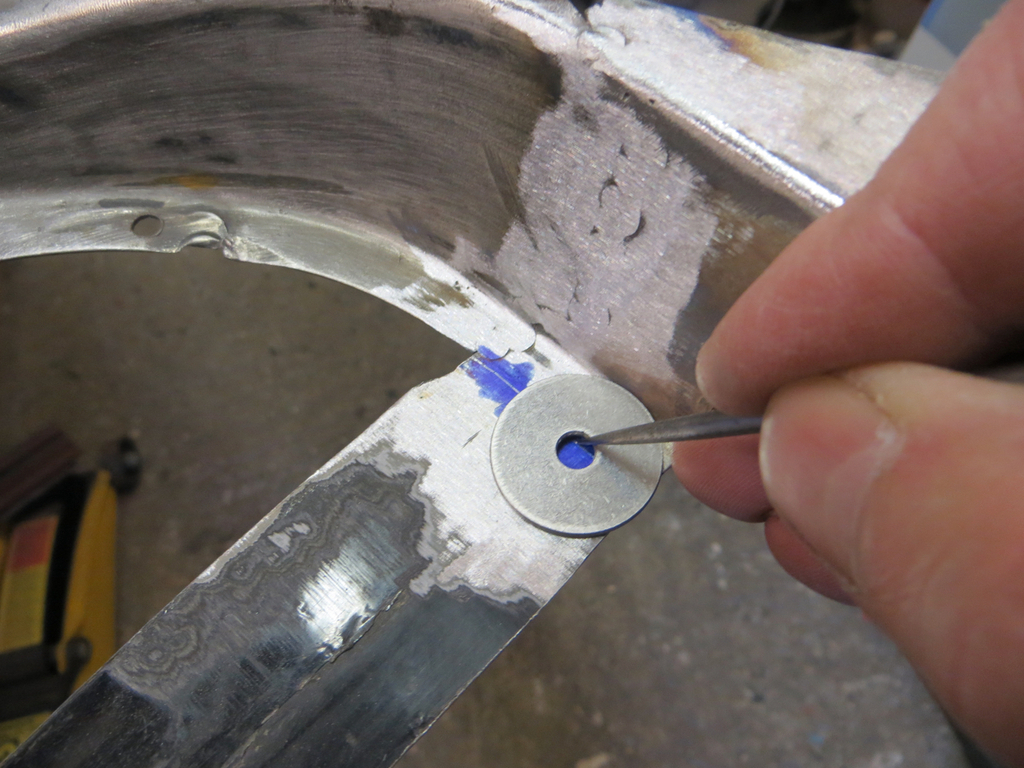 Bit pointless here. It’d be more useful on a longer length. But the technique is now installed in my brain for another day. The Engineers Blue is just a sharpie pen scribbled on the panel. Next I did pumpkin teeth.  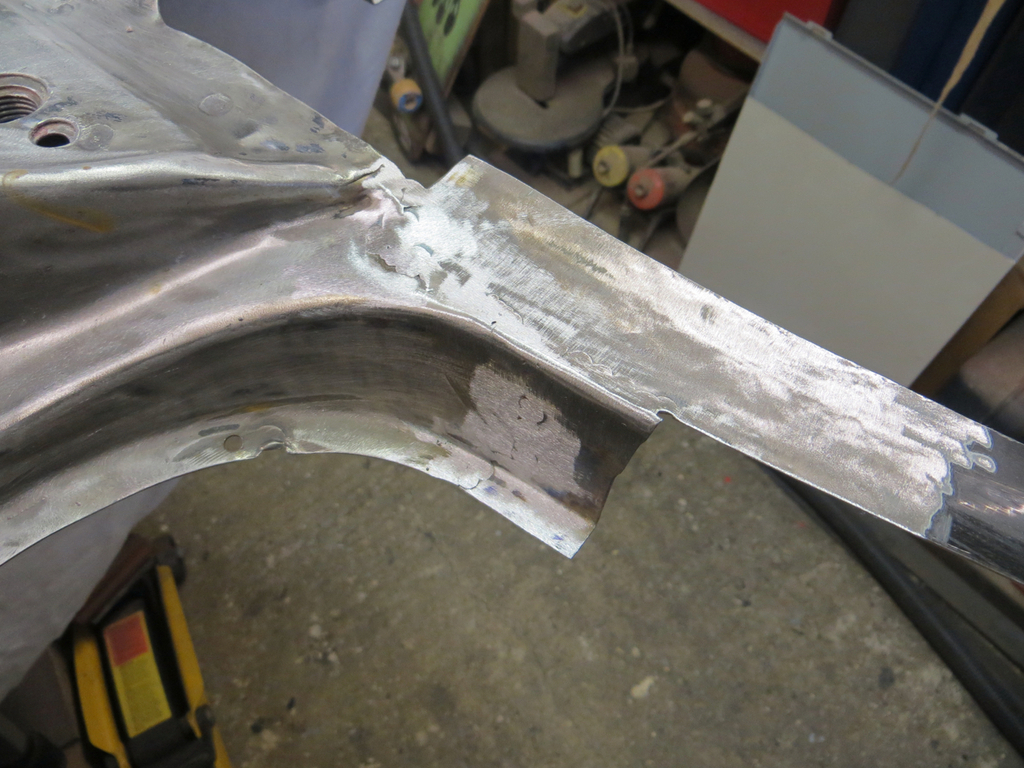 And trimmed that to size.  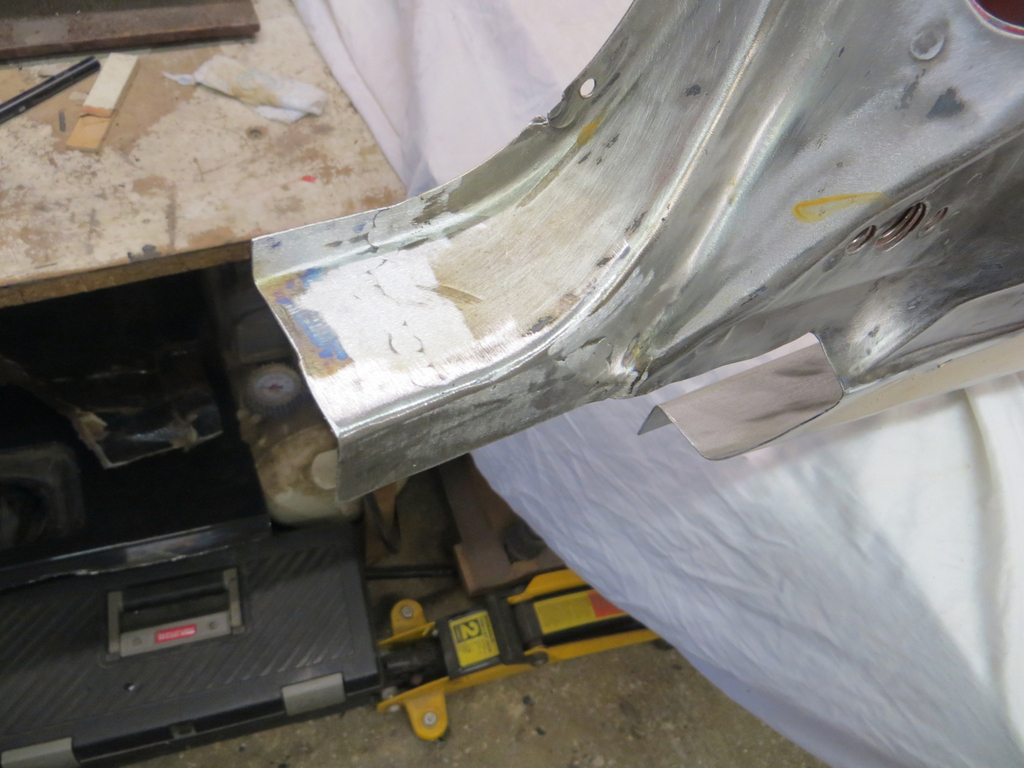 With a bit of luck I’ve made that a little long. When it next gets offered against the car I’ll mark it and trim it to the correct length. You know… I think that’s all the repairs and patches made now (apart from a tiny one under the boot lid seal). Probably, I should start putting the old car back together? |
| |
|
|
jamesd1972
Club Retro Rides Member
Posts: 2,922  Club RR Member Number: 40
|
|
|
|
You know… I think that’s all the repairs and patches made now (apart from a tiny one under the boot lid seal). Probably, I should start putting the old car back together? Whoa there boy, don't go rushing into things ! Nice progress (and write up as always) James (the younger) |
| |
|
|
|
|
|
|
|
Whoa there boy, don't go rushing into things ! James (the younger) Already did! There aint no stoppin' me now. Read on... James (The only marginally older) |
| |
|
|
|
|
|
|
|
This weekend… The weather wasn’t looking promising to be honest. I don’t normally pay much attention to the weather people. They don’t seem to pay much attention to the weather judging by the forecasts. Anyway, for once I looked at the forecast and it suggested that Friday was my best chance to get outside. My best chance to get outside and start putting the car back together. My first job was to prep the seams that would get welded together. There were holes where I didn’t want them (where the spot welds had been cut) that needed filling.  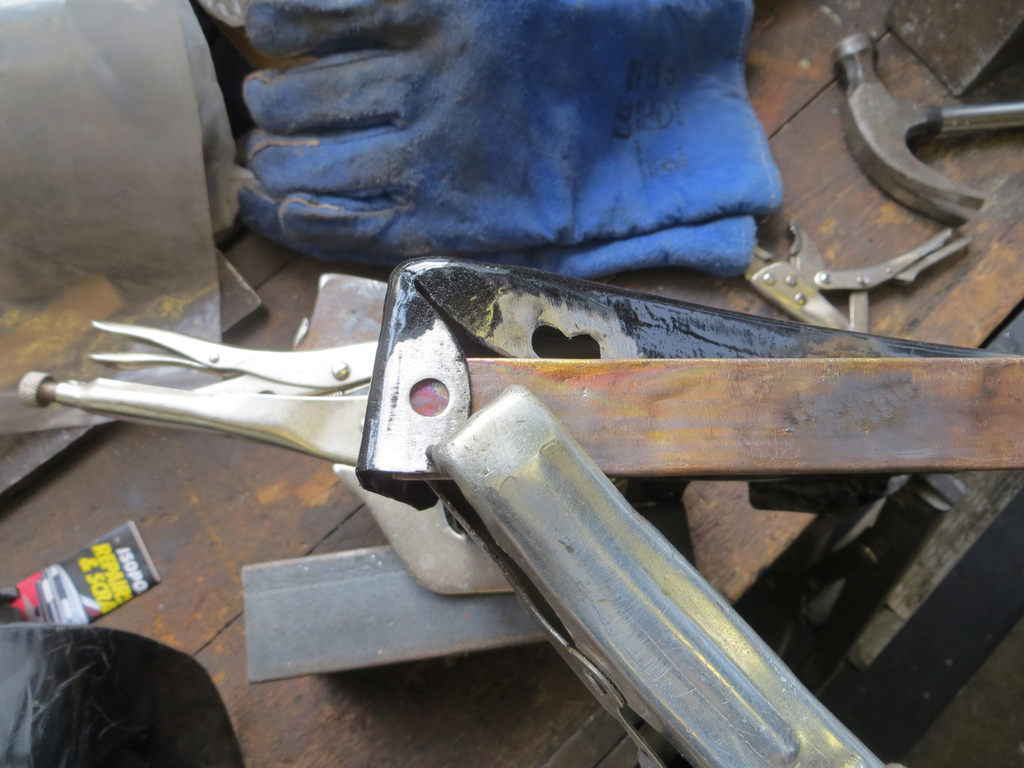 That was done by welding onto a piece of copper pipe. Once I had filled the holes where I didn’t want them and drilled holes where I did want them all the seams had the primer and paint ground off and a coat of weld through applied.  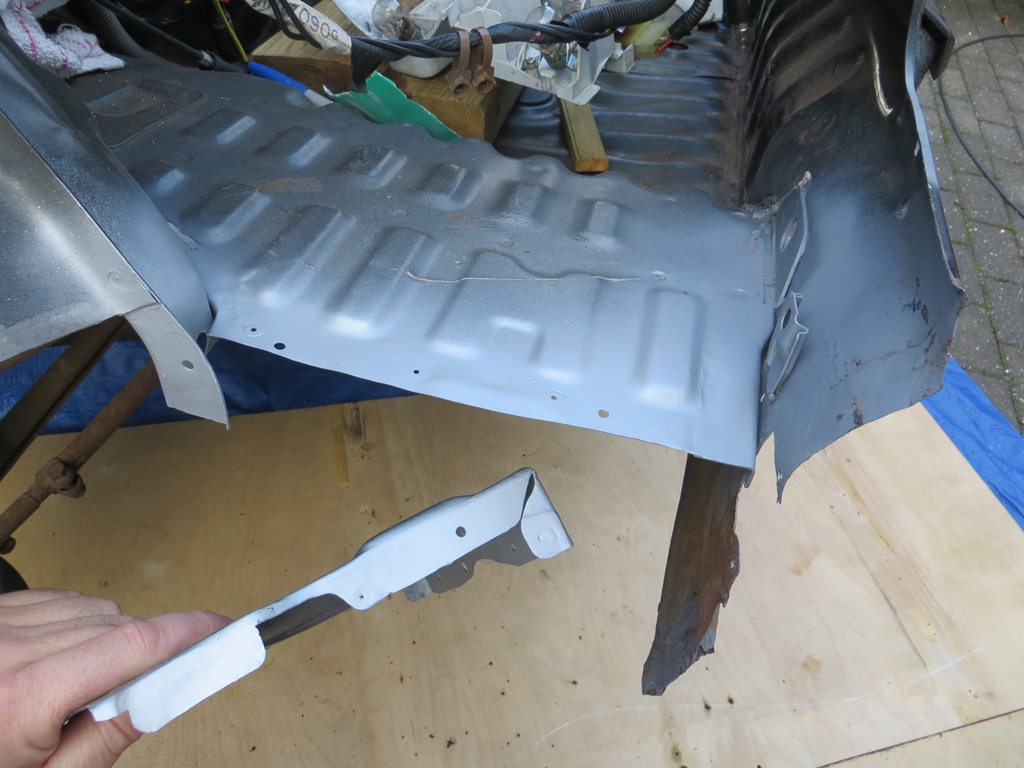 All of which took a surprisingly long time. You have to think through the whole process. Thoughts like, “I’m not going to have to weld this seam for ages but I’m not going to have access to it after today so I need to prep it now.” And then, after a shaky start, I started welding it together.  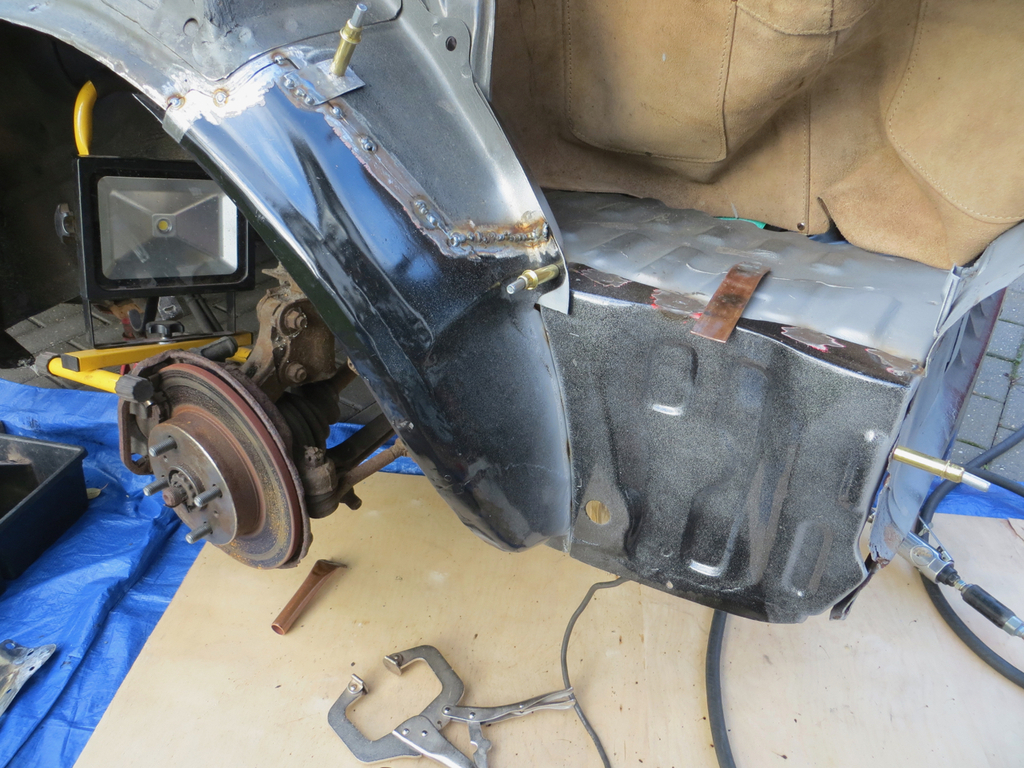 The shaky start? Well it was windy and the first plug weld was horribly porous. I assumed the gas was being blown away and hunkered round it even more. Didn’t help. Then I realised that I’d forgotten to turn the gas bottle on. I always listen to the hiss before I start welding - I use the sound to judge the amount of gas flowing. And sure enough there was a hiss but it was only the residual pressure in the pipe. Oops. Dimwit. Then I started zipping up the inner wheel arch.  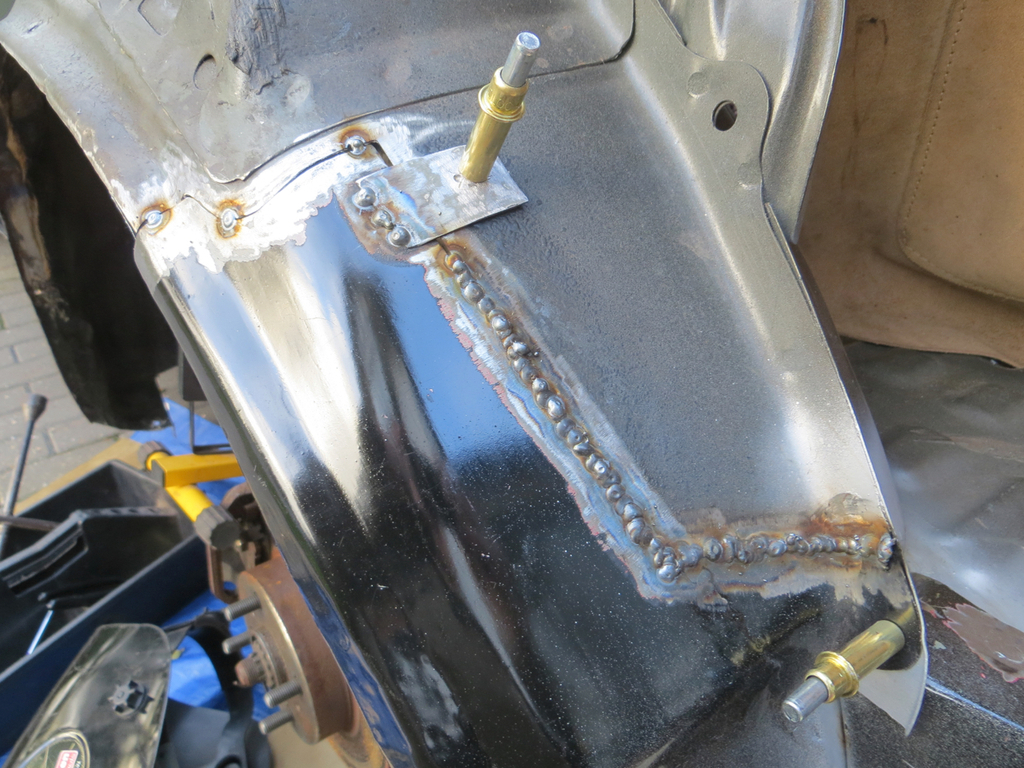 I was worried about this as it’s really thin and the gaps between panels weren’t as close as I’d have liked. But I used a piece of copper behind the weld and it seems to have worked nicely. And I seem to have achieved outstanding penetration in the back side which always gives me a contented feeling.  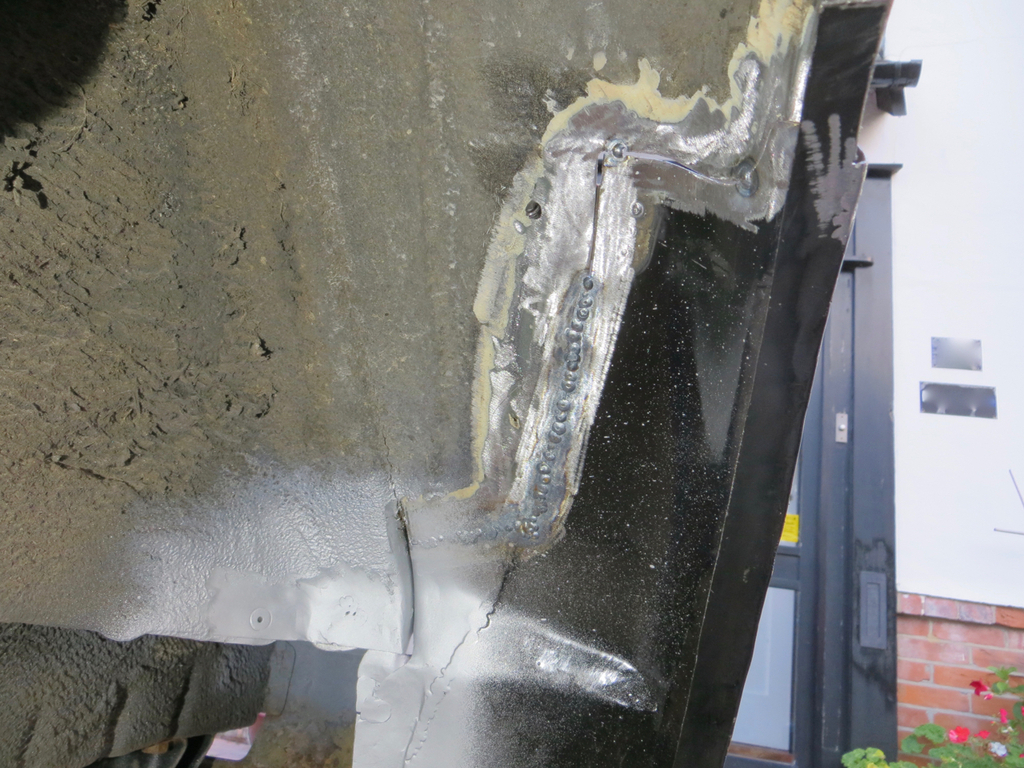 STOP GIGGLING AT THE BACK! You’re like a load of bloody children. Next I spent a bit of time with the finger sander and tidied it all up. 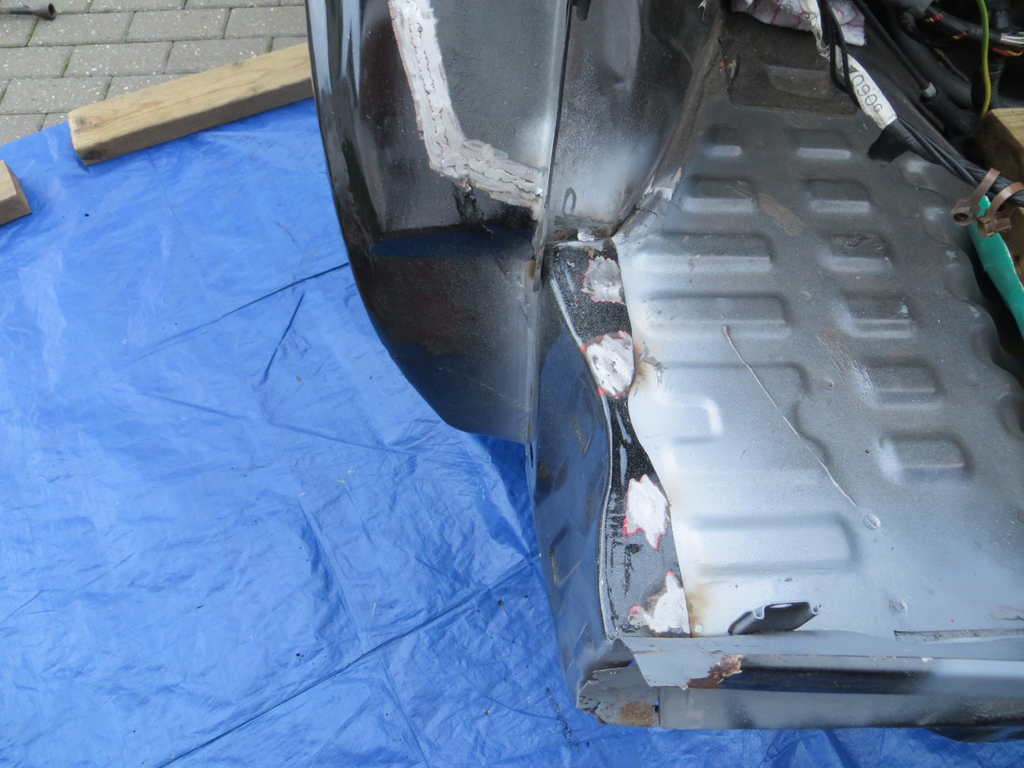 I’m not going too mad grinding back the inner arch,  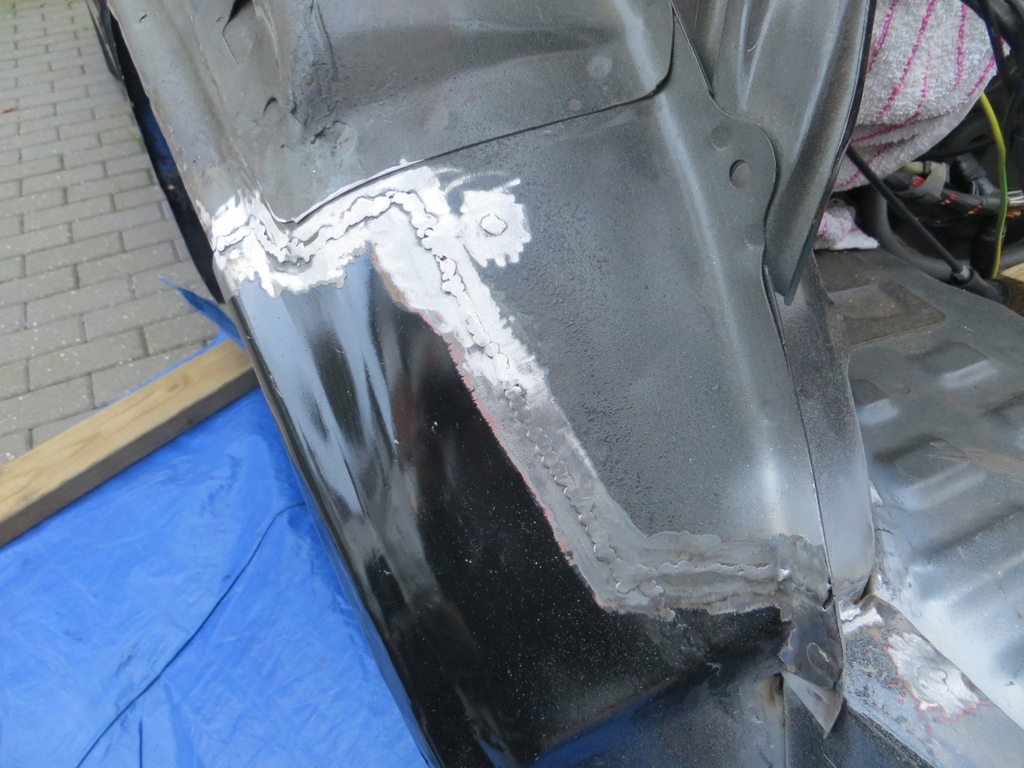 It’s not easy to see once it’s all back together. I’m also planning to wave a bit of black paint around the repairs in the boot which’ll probably hide it a bit more. There was also this bit to fit in the wheel well.  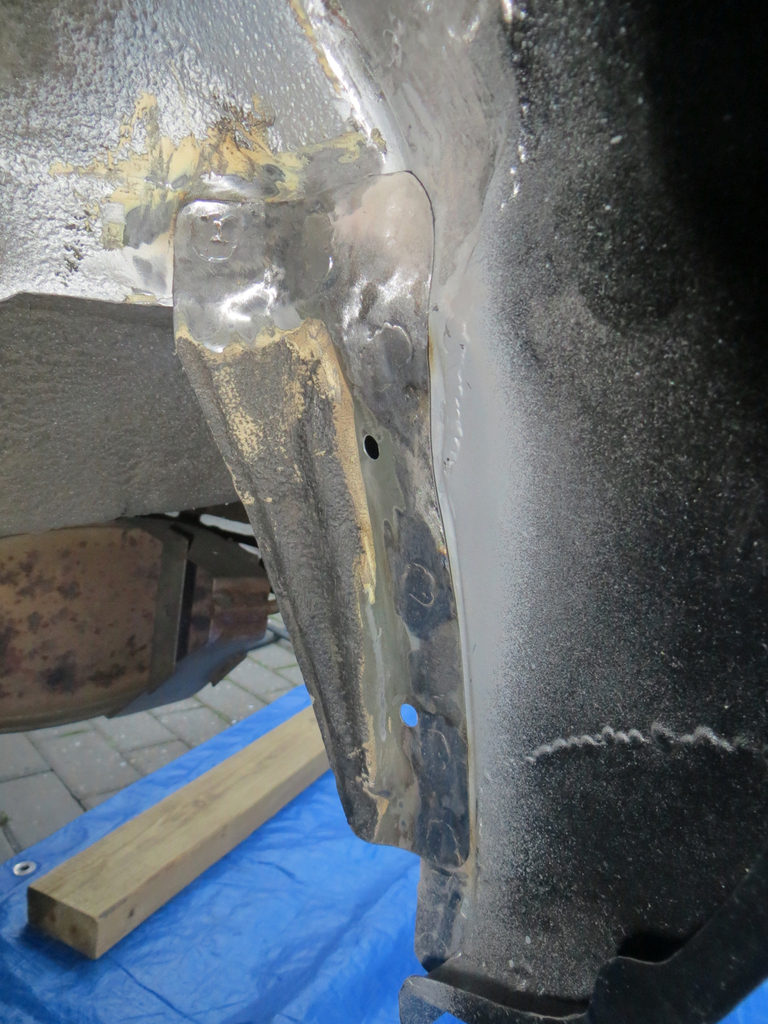 Surprisingly the one off the car was in perfect condition. There had to be one bit of the car that didn’t need fixing. This is it. By this point I was running short of light and weather so it got a good coating of primer to keep the rust off (yes I know primer isn’t waterproof but it’s better than bare metal) and the car was tucked up under its sheeting again.  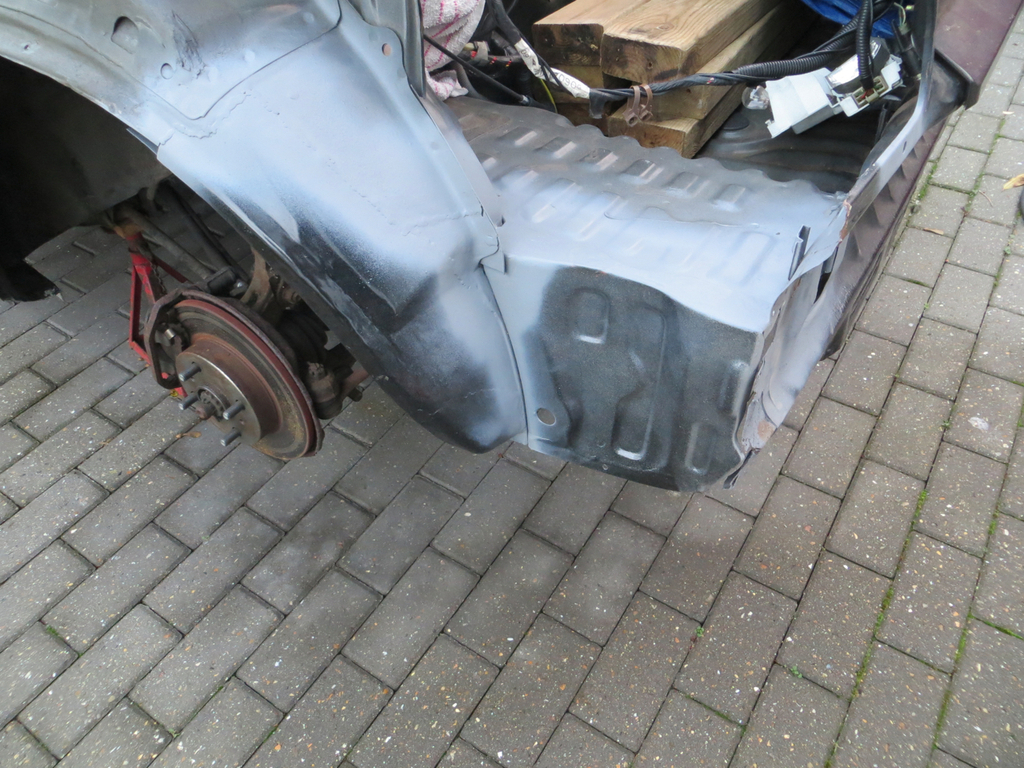 Two bits off my bench and on the car. Lovely! |
| |
Last Edit: Nov 2, 2020 21:11:21 GMT by Sweetpea
|
|


