|
|
|
Feb 17, 2024 13:50:30 GMT
|
I found the same with Hydrate 80 Darkspeed on here found it peeled off in sheets using brown tape the next day, but I did some tests and found if left to cure for a week or so it becomes almost impossible to remove (as you found out). I figured if it's that difficult to remove then it should be fine to paint over it. We have had no issues with the car I painted with it under the paint. Sprayguns are so superior to rattle cans - they deposit so much more paint as rattle cans are thinned excessively to spray out of the small nozzles. Also you can mix up such small amounts of paint. I rinse the gun out by tipping any excess paint out of the top first, then running some thinners through it (Spraying into a plastic gallon container to catch the thinners). Then strip it down and wash in thinners to clean out the rest. It is a paint to clean the gun, but the end results on the car are worth the effort - also far cheaper than spray cans. |
| |
|
|
|
|
Darkspeed
Club Retro Rides Member
Posts: 4,878
Club RR Member Number: 39
|
|
Feb 17, 2024 14:43:24 GMT
|
|
The main issue I found is that H80 just did not live to the massive amount of hype it was getting from some quarters on this board.
I can confirm that left a week the bond strength did increase but found no problem removing it with a sander apart from it having a tendency to clog. The sanding off also highlighting just how pointlessly thin any layer of "converted" rust was.
Best result have I found is removing visible rust as well as possible, followed by a 2 part epoxy paint containing corrosion inhibitors.
|
| |
|
|
|
|
|
Feb 17, 2024 17:25:18 GMT
|
|
We have a 2010 fiesta where the back half is just e coat and begining to rust in a few spots, I also have not found h80 up to much so am thinking about using buzzweld rust encapulisation paint, no idea how it will work but the theory of a waterproof paint paint that chemicaly bonds to the rust seems good.
|
| |
Last Edit: Feb 17, 2024 17:45:28 GMT by kevins
|
|
|
|
|
Feb 17, 2024 22:27:10 GMT
|
The sanding off also highlighting just how pointlessly thin any layer of "converted" rust was. Best result have I found is removing visible rust as well as possible, followed by a 2 part epoxy paint containing corrosion inhibitors. That is exactly my worry with 'converting' rust; unless it's very thin then all you're doing is making a nice looking black layer on top of the brown stuff so it can reappear afterwards. I only feel confident if all rust is removed, whether that be mechanically or chemically, with ideally a rust converter afterwards to deal with any microscopic levels rust (not yet visible) which may have been missed or form after the removal process. |
| |
Sometimes, others may not understand why you like a car so much. Sometimes, you may not even understand why you like a car so much. But none of that matters; all that matters is that you like the car, and having it makes you happy.
|
|
|
|
|
|
|
It's disappointing when products don't meet expectations. My experience with H80 echoed similar sentiments. Opting for a 2-part epoxy paint with corrosion inhibitors yielded better results after removing visible rust thoroughly.You might find useful insights on paint application techniques at toyotamanuals.org.Wish u luck with that! |
| |
Last Edit: Mar 4, 2024 7:57:46 GMT by klester
|
|
|
|
|
|
|
I'm not sure any rust treatment will kill rust reliably. I've not found one that does. But I reckon, for the tank, I've got as much rust off as humanly possible and then I just need to keep water and oxygen away from it. The paint pretty much does that but I doubt if a coat of Hydrate 80 is going to hamper that. With a bit of luck it'll slow things down so that I'll not have to worry about it again. It's an interesting topic though. I've been using rust killers for years and none of them kill rust dead. But I think the bigger problem was that, in the olden days, I had no way to remove the rust properly or to get a paint coating that would protect it in the long term. Those were the days of bunging the hole up with body filler and slapping some paint over the top. My techniques have moved on a bit since then. I hope. Anyway... I suppose I just need a nice day and I can get it back on the car. Except… Except? Except what? Apart from the weather what’s stopping you putting the tank back in the car? Well, er… Here’s a photo of the tank taken the first time I removed it. What’s that I’ve circled in red? 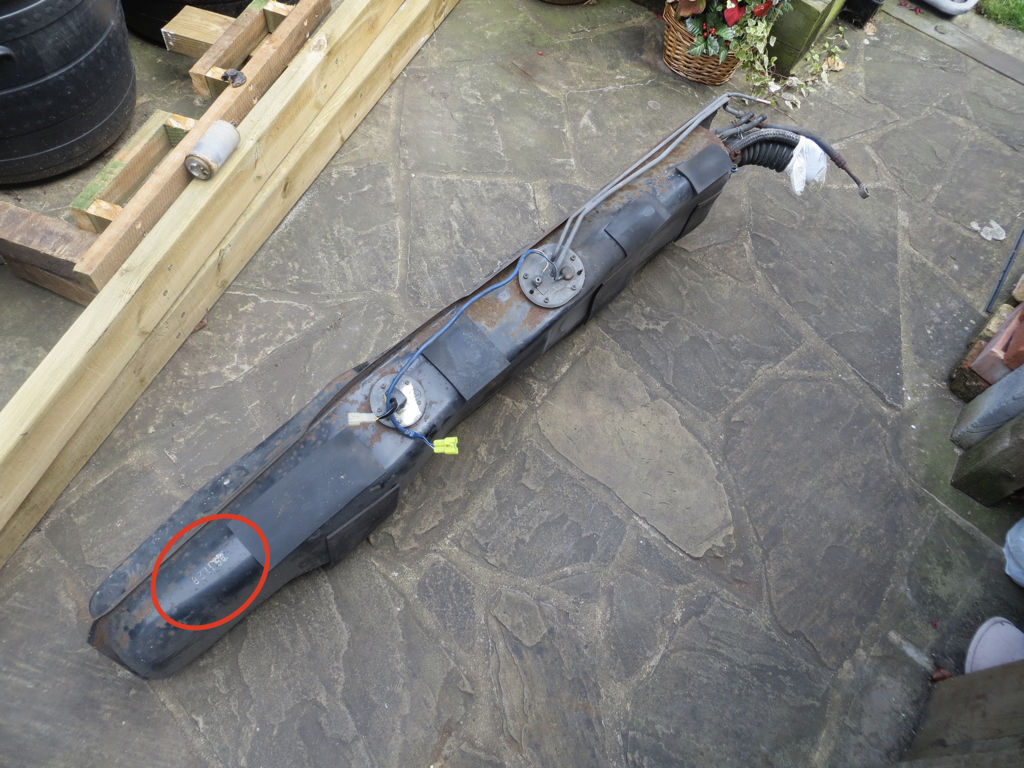 Some numbers printed on the top? Let’s take a closer look. 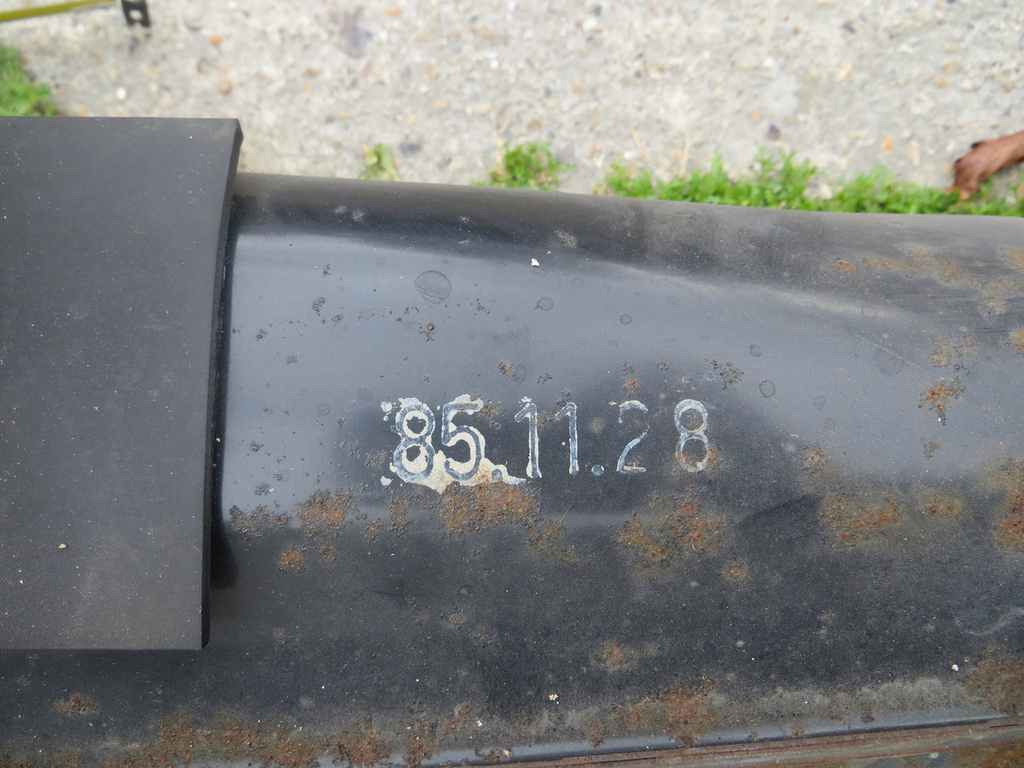 Oh, ok. It’s the date the tank was made. The 28th of November, 1985. Well it’s gone now. I scrubbed it off and painted it a shiny black colour. No… Don’t tell me… You’re not going to fit the tank because you want to stamp the bloody date back on the top!? I mean, it’s on top of the tank! Nobody can see it. Even if it was on the bottom it’s behind splash shields and nobody could ever see it… You are, aren’t you? You are going to stamp the date on the top again. Oh man, this bloke’s got issues. Well, a man doesn’t always need a good reason to do something and I’m going to prove that now. The original date was stamped on. Not brilliantly accurately either. I don’t have a stamp, I’m not going to buy one, and I can’t work out how to make one with reasonable accuracy. So we are going to do something slightly different that pays homage to the original. Something that they might have done if they hadn’t used the stamp. A few years ago I’d played with stencil fonts so I wondered if I could print the date on stiff paper, cut out the black bits with a craft knife and spray through it. I messed about with this idea for a while but the problem was going to be accurately cutting the black bits away. Then I realised that Helix, the people who make plastic rulers, also make plastic stencils. You can buy a set of 3 in different sizes. I know this because I bought a set of 3 in different sizes. All I had to do was to stick the stencil on the tank and mask off the appropriate digit. 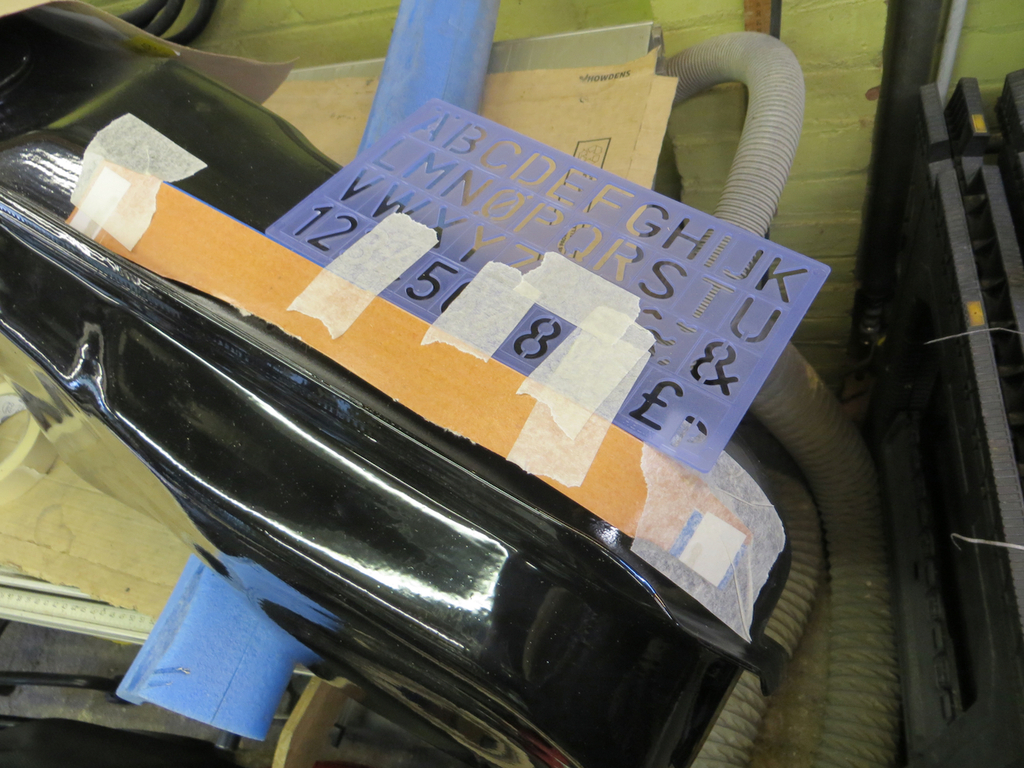 I had a piece of card with a digit sized hole cut in it to finish the masking. 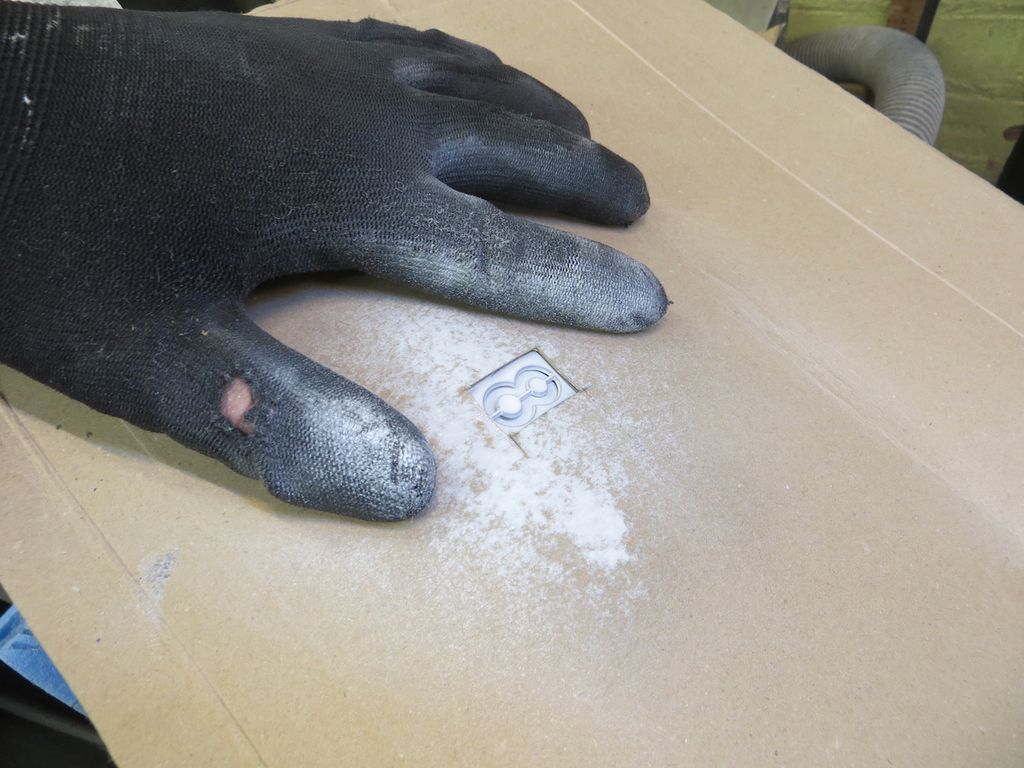 And a glove to avoid painting my hand white. The only problem with this method was that I had to spray a digit and wait for it to dry before spraying the next one. The whole process took about a week. So how did this pointless exercise turn out? It turned out like this. 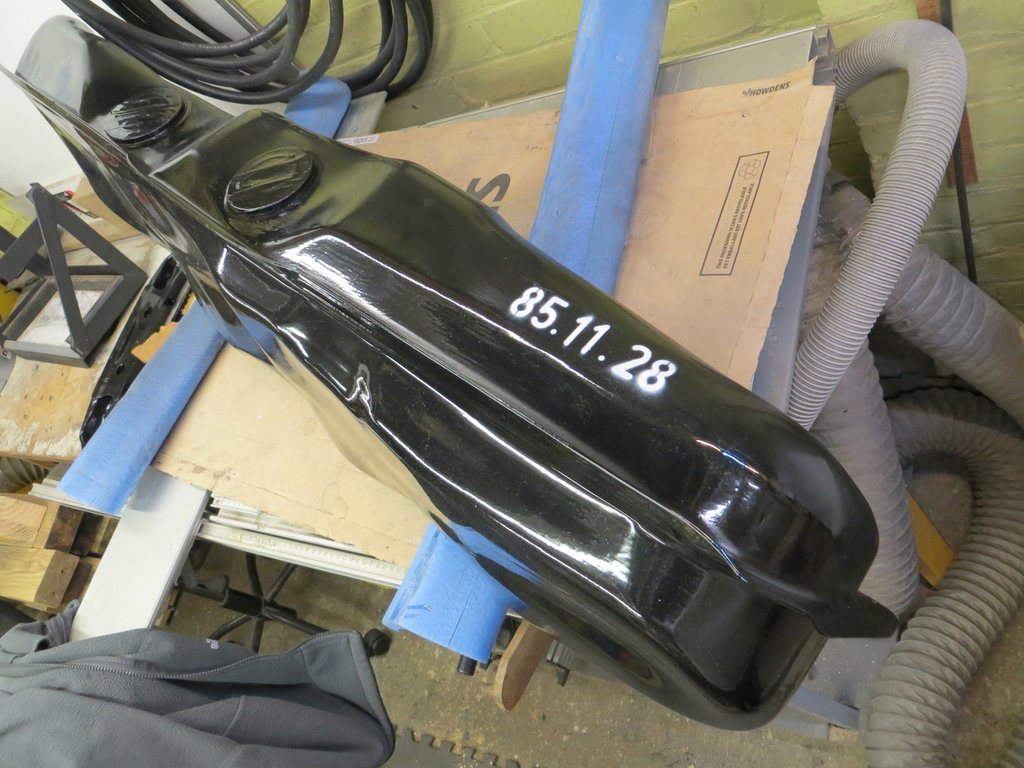 There is a bit of blow under the stencil but that sort of reflects the feel of the original stamp so I’m happy with it. I could have wiped the paint off and done it again if I’d really wanted to. And let’s face it, nobody will ever see this again. But I’ll know it’s there and so will you so that makes it worth it. Please tell me we can put the tank in now? James |
| |
|
|
teaboy
Posted a lot
   Make tea, not war.
Posts: 2,125
Member is Online
|
|
|
|
You are a complete nutcase, Sweetie.  |
| |
|
|
|
|
|
|
|
You are a complete nutcase, Sweetie.  Thank you teaboy, from you that is a wonderful compliment! |
| |
|
|
teaboy
Posted a lot
   Make tea, not war.
Posts: 2,125
Member is Online
|
|
|
|
You are a complete nutcase, Sweetie.  Thank you teaboy , from you that is a wonderful compliment! You are most welcome. I do like that you have put the date back on, despite the fact that it is still back to front.  |
| |
|
|
|
|
|
|
|
Maybe you could also stencil your name & date on it as well, should put off putting it back in the car for several weeks  |
| |
|
|
|
|
|
|
|
Maybe you could also stencil your name & date on it as well, should put off putting it back in the car for several weeks  Oh, that's a shame... I put it in the car at the weekend. (See note below.) (Note below)  |
| |
|
|
|
|
|
|
|
|
Ah, almost too late................but you know you want to..........
|
| |
|
|
|
|
|
Mar 15, 2024 22:24:27 GMT
|
I’ve got wood. All over the house. Behind the sofa, on the bedroom floor. All over. “Got wood” means what? You’re joking right? Nah, I don’t believe you. It’s white oak. What’s that a euphemism for then? So anyway, there are bits of oak around house stabilising the moisture content. I need to turn it into architrave and a reveal for the front door. This means I need to empty the garage so I can get the big woodworking tools out some time soon. What’s cluttering up the garage then? 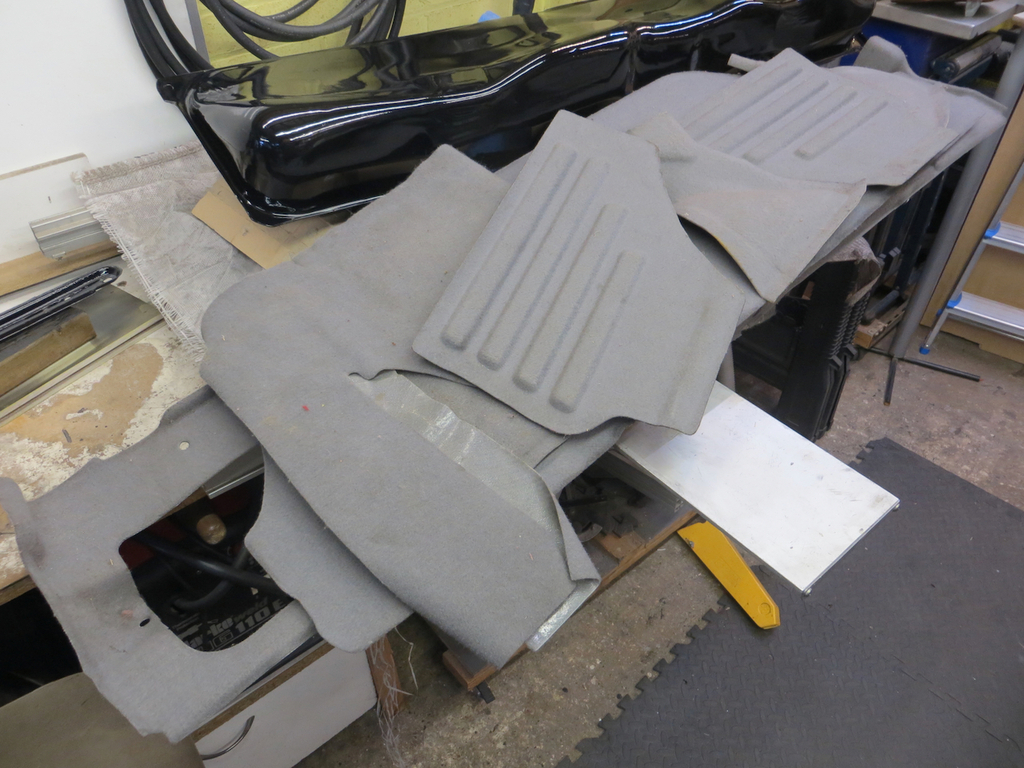 Ah yes, that’s the trim from the boot. That could go back in but it needs a clean first. We aren’t putting dirty trim back in the boot are we? Strangely it was cleaner than the car headlining. Still it’s getting shampooed. 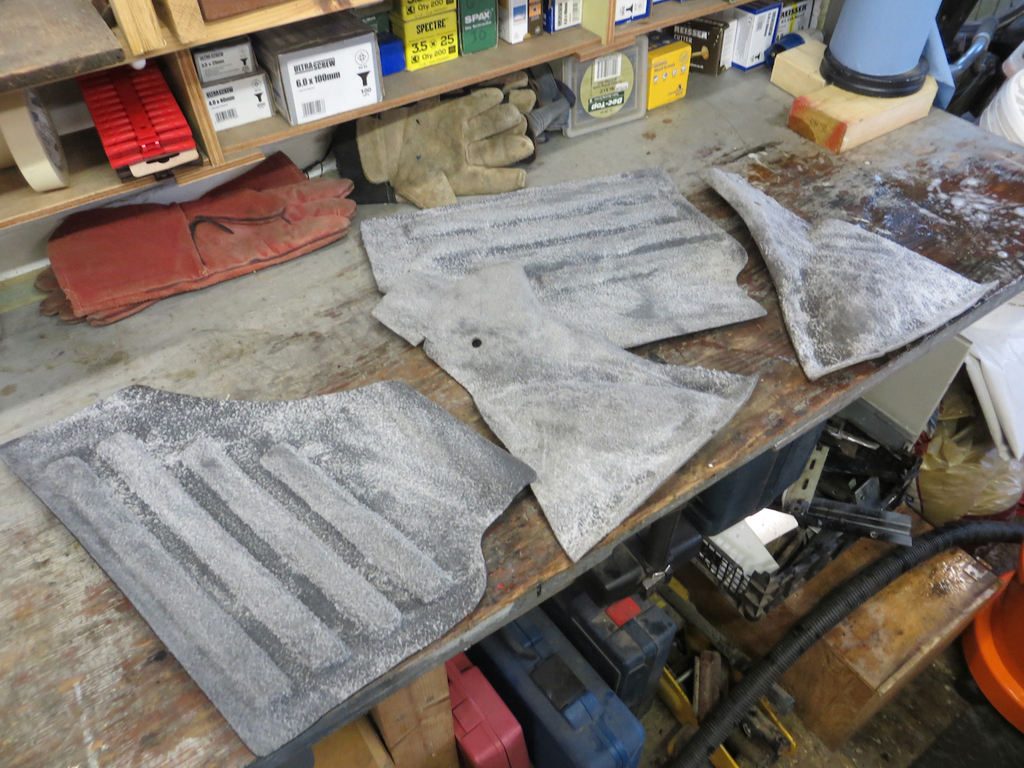 Mr Toyota used a fair variety of substrates for this stuff. Some of it is on a thin foam type stuff, some on fibre board, plastic backed carpet, harder moulded plastic… It all looks the same. 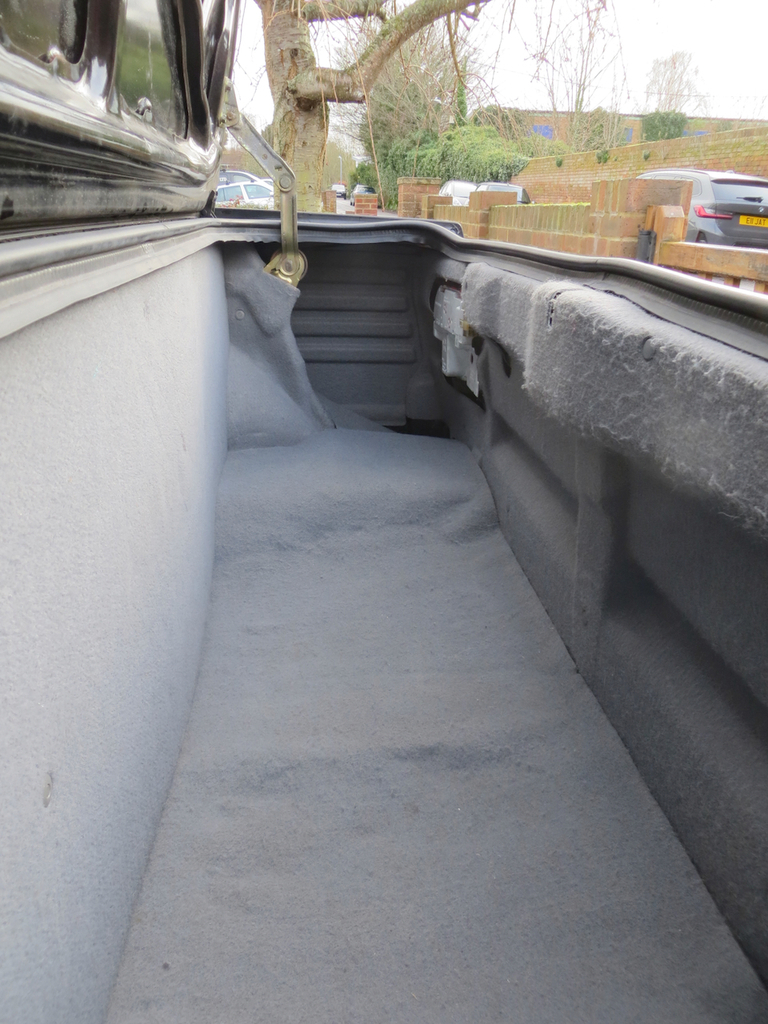 I need to get some trim clips if I can find them. I have some from Amazon but I think they’ll be too big and / or the wrong colour when I get round to trying them. At each side of the boot is a well, you know, the bit that collects water when the boot leaks and then drains it on the floor when the bit behind the rear wheels rots away? The boot carpet just falls down the hole. It really needs a bit of fibre board to hold the carpet up. And to stop stuff getting lost down into the well. As luck would have it old Mr Toyota also thought this and had the same idea. 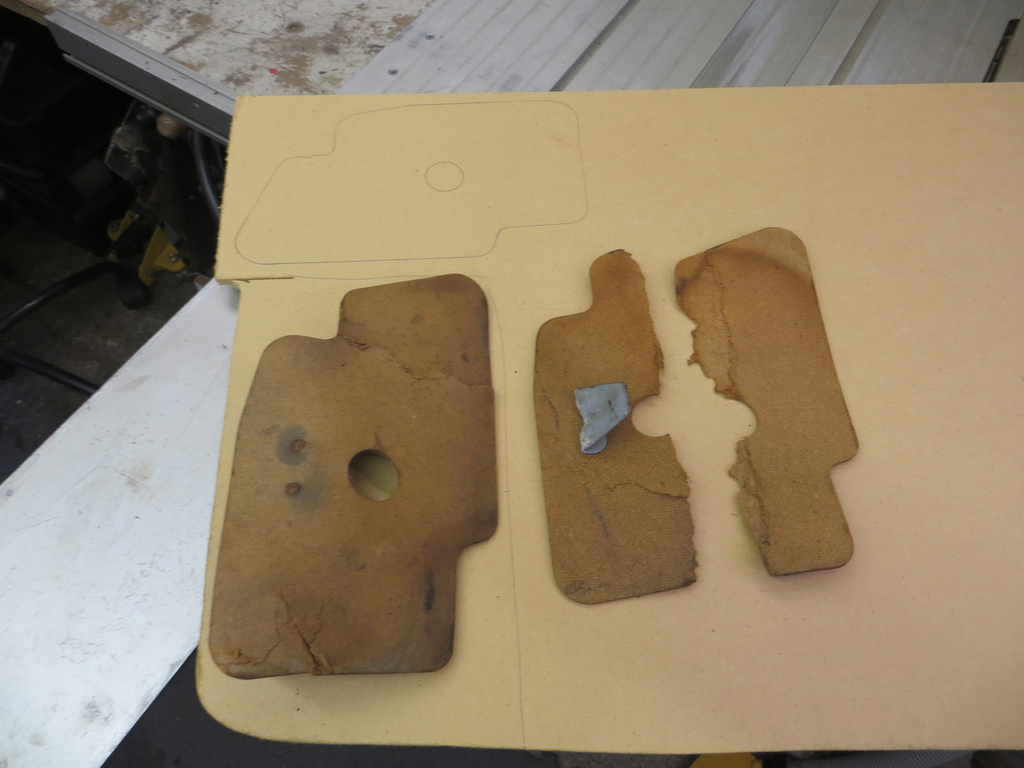 The newness has worn off mine. The one from the drivers side is a bit crinkled and the one from the passenger side got broken in two when the car’s previous owner smashed the rear quarter into a post. I suppose that the well it used to cover ceased to exist and the bit of fibre board automatically re-dimensioned itself. I don’t have any fibre board but I do have some MDF that’s a few millimetres thicker. Let’s make some new ones. I cut two rough shapes and stuck them together back to back. Then I could sand both to the final size at the same time. 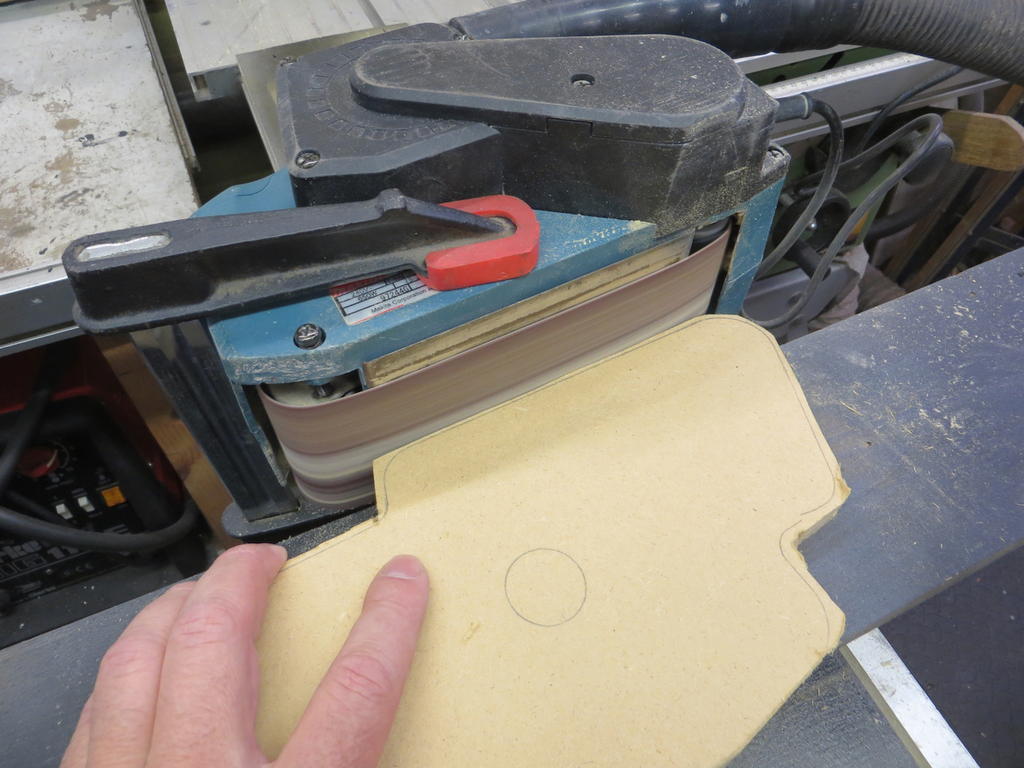 Once done I drilled the finger holes and the mount holes for the metal brackets. Then I could split the pieces apart and screw the brackets on. 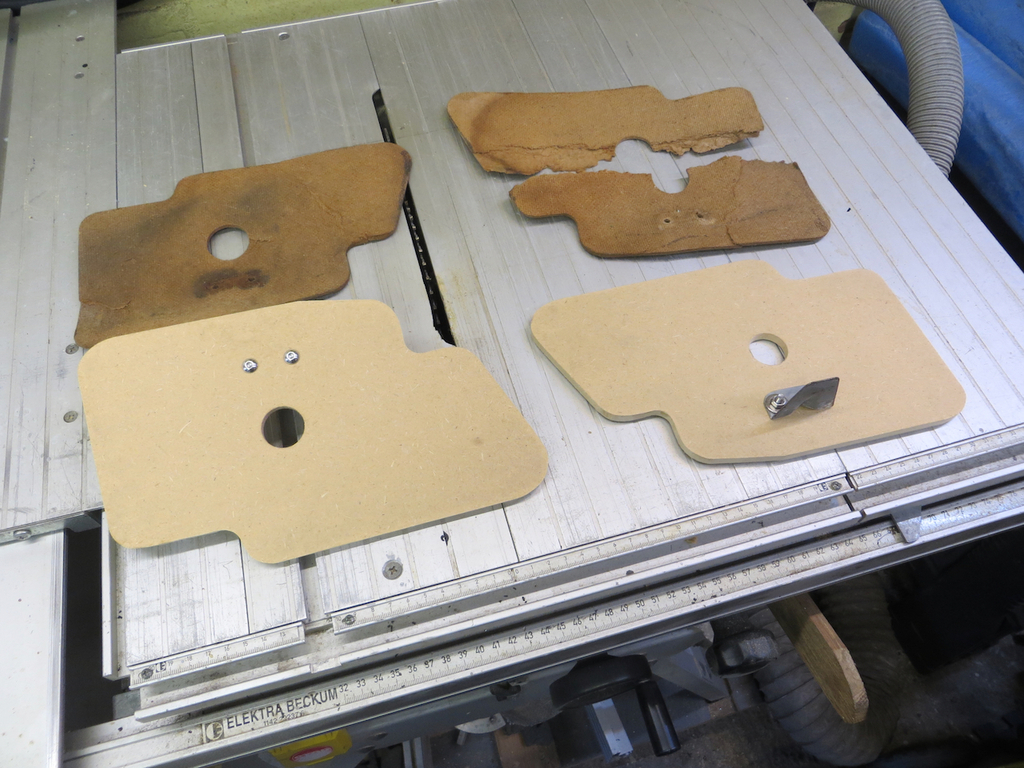 I’m not done with these. I want to zinc plate the brackets and I think I’ll paint them black and use a bit of cloth tape round the edges. For the moment they’ll do and they get some more bits out of the garage. 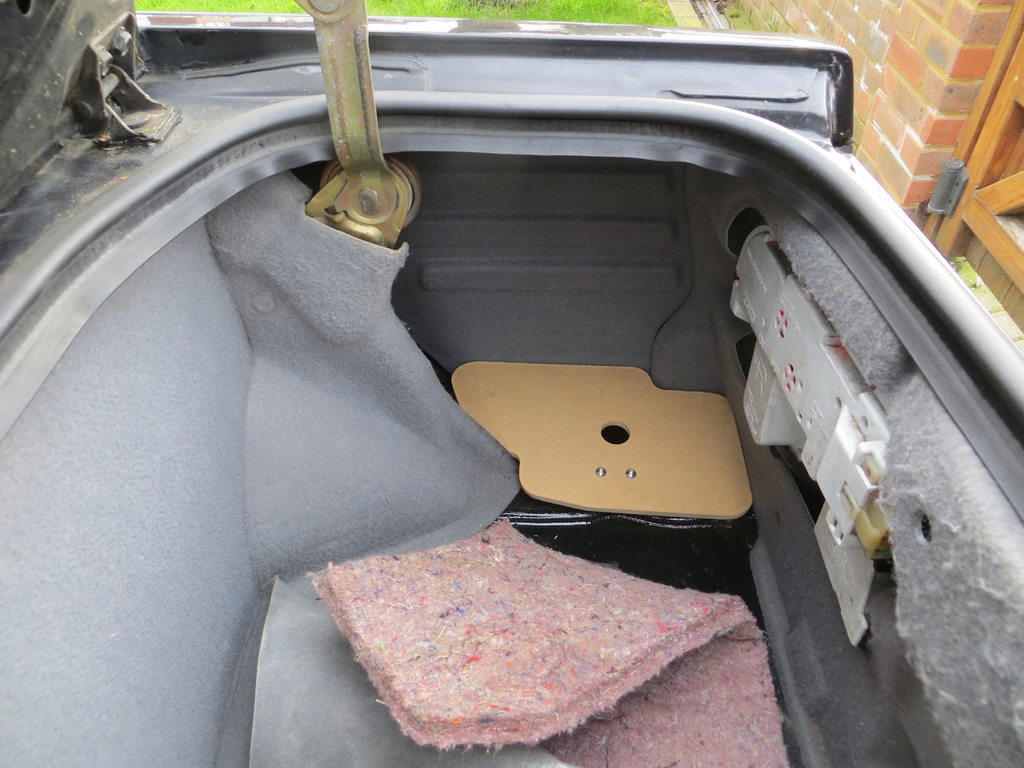 That looks ok to me. What da ya think? Smashed it out of the park I reckon. Well, tapped it across the garden and landed it in the pond maybe. James |
| |
|
|
jimi
Club Retro Rides Member
Posts: 2,221 
|
|
Mar 15, 2024 22:31:24 GMT
|
Interesting, the side trims are different on the 1b  are you going to paint them (mdf tends to swell if it gets damp) |
| |
Last Edit: Mar 15, 2024 22:49:25 GMT by jimi
Black is not a colour ! .... Its the absence of colour
|
|
|
|
|
|
|
Interesting, the side trims are different on the 1b  are you going to paint them (mdf tends to swell if it gets damp) You mean the bits stuck to the inside of the wings? They seem to have done a lot of detail changes between the early and late cars. Yes, one day I plan to paint the mdf. Or possibly get a piece of fibre board and recreate the originals. But mostly I'm hoping that I've actually fixed all the leaks and the damn boot will stay dry now (apart form atmospheric moisture of course). James |
| |
|
|
jimi
Club Retro Rides Member
Posts: 2,221 
|
|
Mar 16, 2024 11:15:41 GMT
|
No bits stuck to the wing on a 1b  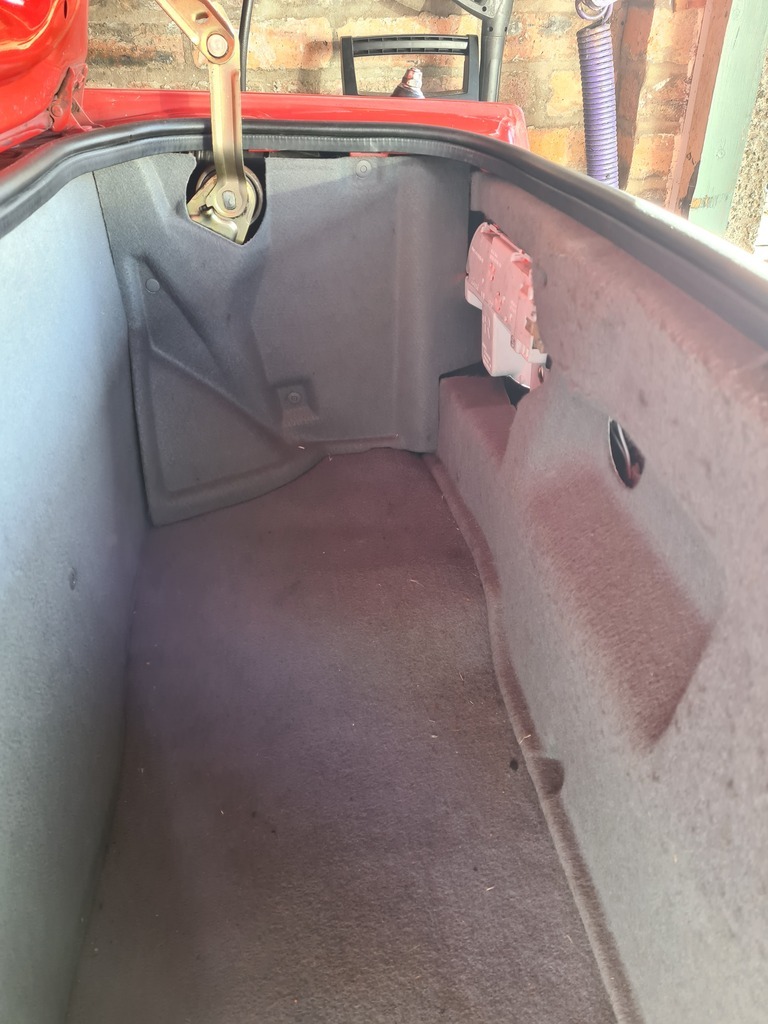 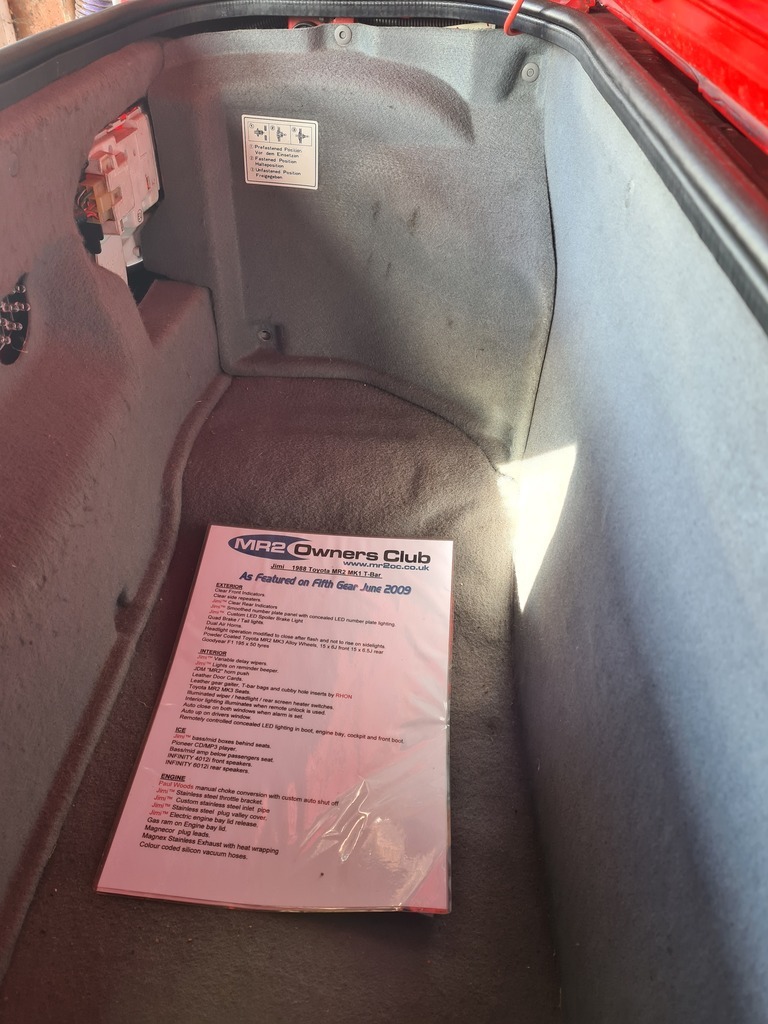 The side trims are different because the 1b's had a electric aerial on the drivers side in that space and the space on the opposite side has the air filter, there's also a plastic duct that runs from the side vent round the boot to the air filter behind the trims. The ECU is also in a different position yours is on the RHS of the engine bulkhead behind the trim, later cars it was in the middle. There's a list of variations between 1a/1b thats as long as your arm, I won't clutter your thread by list by posting it, you can read it here LINKY I believe the fibreboard used for trimming is called "millboard" places Woolies sell it but it's not cheap 😉 |
| |
Last Edit: Mar 17, 2024 1:52:18 GMT by jimi
Black is not a colour ! .... Its the absence of colour
|
|
|
|
|
Mar 18, 2024 20:18:22 GMT
|
|
Oh of course. I'd temporarily forgotten that the air intake runs right round the boot. It must take a fair bit of space out of what's already not that big of a space.
It's interesting that Mr T felt it was better to get cold air from the opposite side of the car than to take warm air from the engine compartment. I guess you might get a bit of air ram effect from the side scoop on the later cars to help things along.
I know there is low pressure on top of the engine cover and air is drawn up through the vents. I wonder if there is lower pressure under the cover too. Can't imagine why unless the design of the under tray sucks air out of the engine bay.
Hmmmm. Need a manometer (and a working car).
I'm also wondering what would happen if you took a tube from the just behind the fan on the drivers side vent across to the air filter on a MK1a. I think the only way to route that would be across the top of the exhaust manifold so it may defeat the object of the exercise.
James
|
| |
|
|
jimi
Club Retro Rides Member
Posts: 2,221 
|
|
Mar 18, 2024 23:17:13 GMT
|
I'll measure my boot front to back when I get a chance, I know the later cars still meet one of the original design criteria i.e. the boot had to take a golf bag & clubs  Air flow in the engine bay is from under the car upwards, I doubt ducting the engine bay fan would help much, you'd have to modify the wiring as only runs when the bay temperature is above 80deg C and the road speed is below 8 mph (not sure of the exact speed might be lower) I'm not convinced that the engine air temp is particularly warm unless the car is stationary so not sure that's why Mr T changed the air filter position & added the ducting. What I will say is the later position keeps the filter a lot cleaner and drier, air from under the car cand be pretty wet & mucky especially in the winter. |
| |
Last Edit: Mar 18, 2024 23:18:18 GMT by jimi
Black is not a colour ! .... Its the absence of colour
|
|
|
|
|
Jul 13, 2024 21:51:10 GMT
|
I’ll do a proper update another day but I’ve been working on the car today. I thought I’d fit the petrol tank. It’s an absolute git of a job. I’ve had the tank out before and got it back in so I know it’s possible but it’s very unpleasant. The problem is that anything running from the back of the car to the front (apart from the wiring loom) runs along side the tank and it all goes through a hole in the bulkhead just behind the tank. 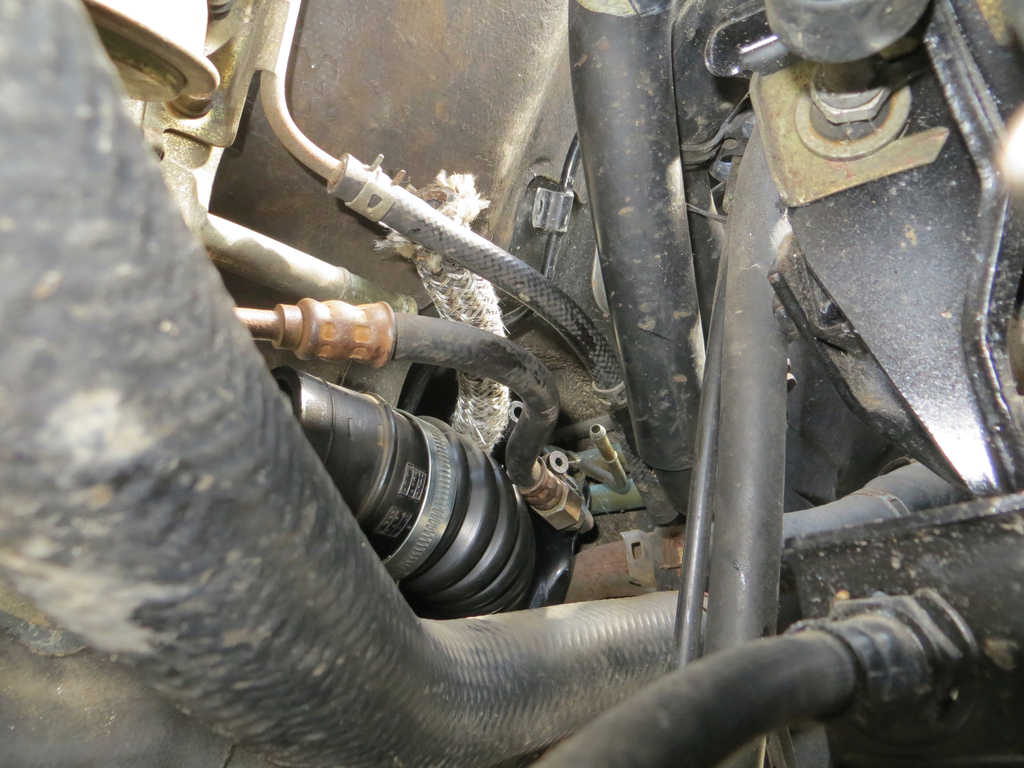 The problem is that all the pipes come through the hole and then swing off to wherever they need to go. That means you get a massive tangle of pipes and connections all in a sight spot just behind the tank. The fuel filler pipe is there along with the fuel neck vent. Plus another 3 hoses that are part of the fuel evap & vent system. The fuel flow and return pipes are there. The cooling pipes to the radiator. Another pair to cabin heater. The speedo cable. The clutch pipe. Brake lines. Vacuum hose to the brake servo. You get the idea? You can see the connection you need to make. You can touch it. Good luck getting hold of it or getting a tool on it. And if you can get a tool on it you’d be lucky to use that tool. 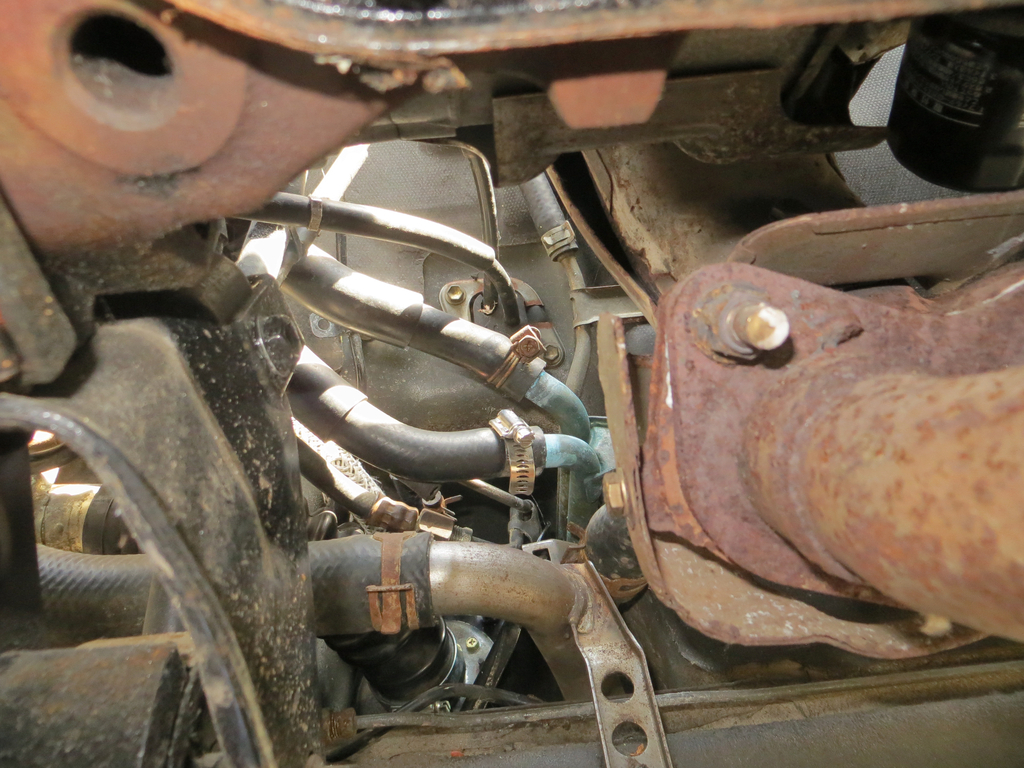 So I got the tank in position in about half an hour and then spent the next 3 or 4 hours trying to get all the pipes connected and all the pipe clamps done up. It’s all done now except for one pipe clamp that I just can’t get a tool onto. I know I’ve done it once but I have no idea how. I’m also baffled as to how they built this thing in the factory. Some of it must have been built off the car and then fed through the hole some how. If anybody suggests I replace those spring clamps on the radiator hoses… No. No, I really don’t. Not now. Not never. Besides, if I can’t get that last hose clamp on in less than 2 hours tomorrow I’m burning the car where it stands and the radiator hose won’t be a problem ever! James |
| |
|
|
|
|
|
|
|
|
I always think they should force the designers of cars to work on them - many bits would be altered pretty fast then!
|
| |
|
|


