|
|
|
Aug 22, 2018 22:54:54 GMT
|
Over-long so you can trim it back to suit once welded in? Brave to show a close-up of your welding, I daren't risk that because of all the help people tend to offer. Looks good to me, all the same.  I don't mind people offering advice so long as they aren't offended if I ignore them! I have the following thoughts on advice... Listen to advice. Consider it. Make your own decisions. Make your own mistakes. Just learn from them. I'm more than happy to balls things up from ignoring good advice, so long as I learn as a result. That's the most important thing. Anyway, no, there is something missing from the template... James |
| |
|
|
|
|
jamesd1972
Club Retro Rides Member
Posts: 2,917  Club RR Member Number: 40
|
|
|
|
|
No lip ?
|
| |
|
|
|
|
|
|
|
|
i don't even grind my welds, anarchist
|
| |
|
|
bstardchild
Club Retro Rides Member
Posts: 14,962
Club RR Member Number: 71
|
|
Aug 23, 2018 22:09:43 GMT
|
i don't even grind my welds, anarchist If they can't be seen under underbody coating I'm with you - but a patch on a door or wing I'd grind it back as it will look wibblepoo painted  |
| |
|
|
bstardchild
Club Retro Rides Member
Posts: 14,962
Club RR Member Number: 71
|
|
Aug 23, 2018 22:10:29 GMT
|
i don't even grind my welds, anarchist If they can't be seen under underbody coating I'm with you - but a patch on a door or wing I'd grind it back as it will look wibblepoo painted  Hmmm HoTWire has been playing with the swearword filter it seems |
| |
|
|
CaptainSlog
Part of things
 
Posts: 510
Club RR Member Number: 180
|
|
|
|
If they can't be seen under underbody coating I'm with you - but a patch on a door or wing I'd grind it back as it will look wibblepoo painted  Hmmm HoTWire has been playing with the swearword filter it seems Test it |
| |
|
|
ToolsnTrack
Posted a lot
   Homebrew Raconteur
Posts: 4,127
Club RR Member Number: 134
|
|
|
|
|
curse word
Bah, only some of them. I should send him a list of Scottish greetings and see what he can do with them...
So whats missing on the template then?
|
| |
|
|
|
|
|
Aug 24, 2018 21:40:26 GMT
|
I may have to write a post full of bad language to satisfy my curiosity now. But it seems strangely wrong... The template is missing the bit that curves round to pick up the outer wheel arch edge where the spot welds should be. The welds that should fasten the inner and outer arches. I think that's what jamesd1972 was meaning. I've made a drawing that makes it clear... You see I've had an idea...  I'll write it all up when I get a moment... |
| |
|
|
|
|
|
Aug 26, 2018 17:16:42 GMT
|
I need to show you my new tool. You aren’t going to believe this, it’s just so cool! Anyway… The template is missing the bit that curves round to form the seam of spot welds in the wheel arch. Here’s a drawing of a section through the inner and outer arch as it should be… 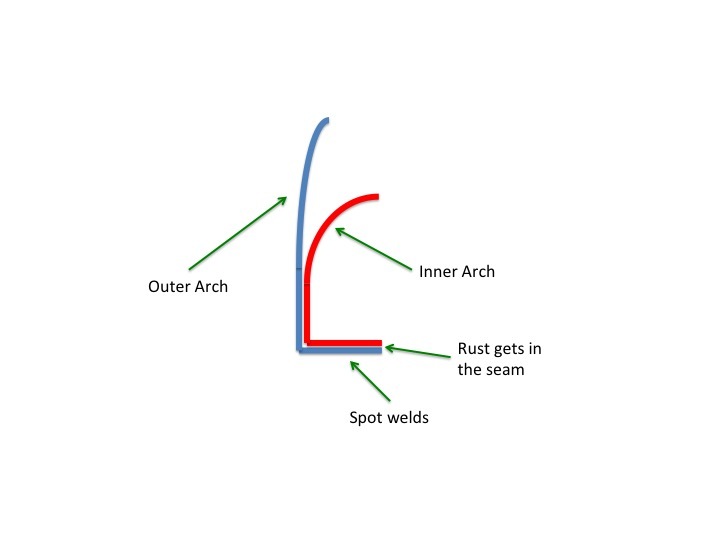 So why is it built like that? Well as far as I can work out it’s just to create a seam to run the spot weld machine around. It probably adds a little stiffness too. The down side is that it creates a double skin that lets water in and rusts, blowing the arch apart. For a portion of my arch the inner is missing anyway. So why put it back and create myself the problems that caused it to rust away in the first place? Why not just seam weld it to the outer arch where the two meet up? 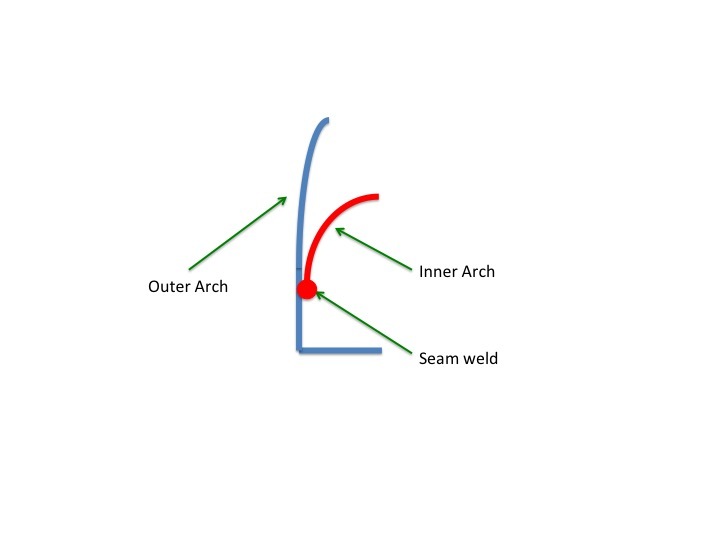 Like so. Ok so it’ll burn the paint on the face of the panel when I weld it but, so what? We’ll I think it’s a good idea so here goes! 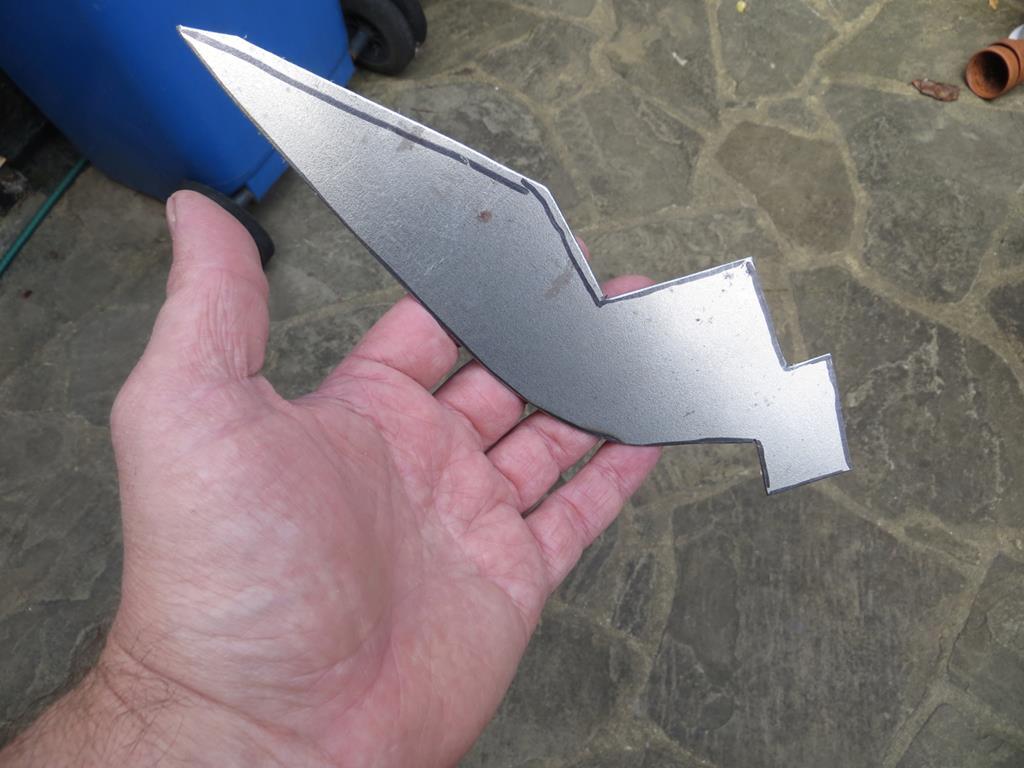 Before we move on, here’s another photo showing the overlapping pile of ironmongery behind the rear wheel. 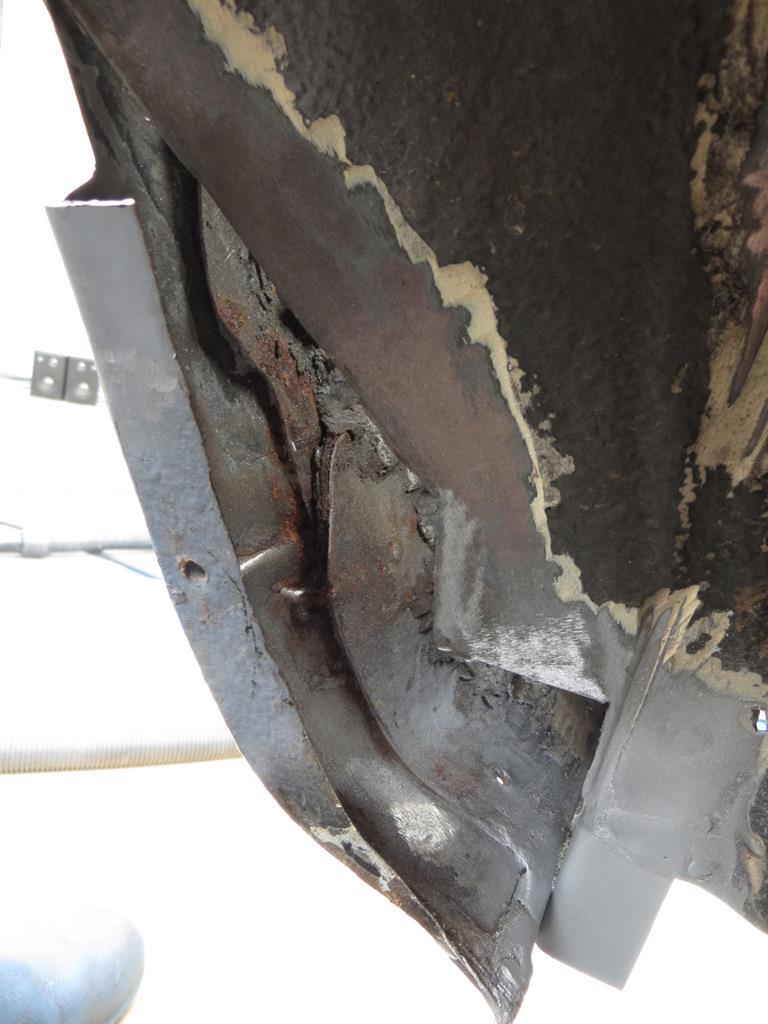 The new bit got trimmed so it meets the outer wing and is a slight overlap on the existing inner wing. 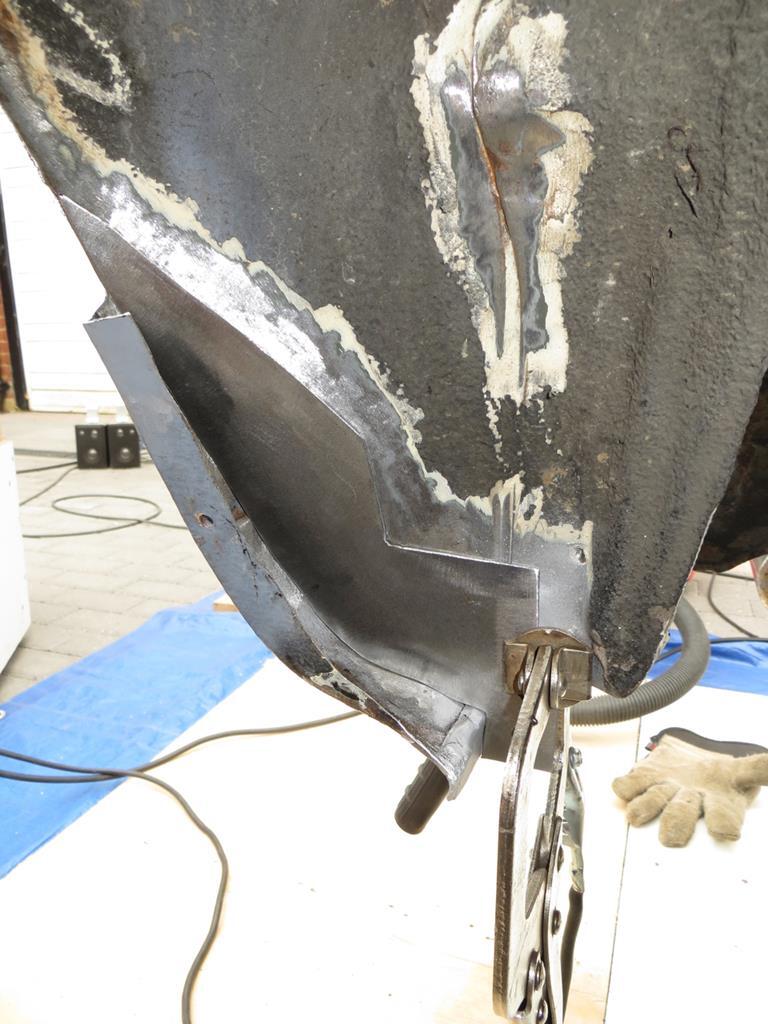 Now, that new tool. You’re not going to believe this, it’s so brilliant. You know how it is when you are welding… You need to push the panels together while you tack them together. Even if they were perfect before, the heat moves them occasionally. So you hold them together with a screwdriver. Then, in your other hand you have the welding torch. But now you have run out of hands… How are you going to rub your chin in a contemplative manner? Or scratch your bum. Or, most importantly, extinguish the fizzing ear wax when a bit of splatter drops down your lug ‘ole. It’s a serious problem. What you really need is some sort of tool where you push the panels together and then let go of it and it all stays exactly where you positioned it. No messing about. You press with the tool and let go and the tool and everything stays where it should be. Well I have one. No really. Here it is in this photo… 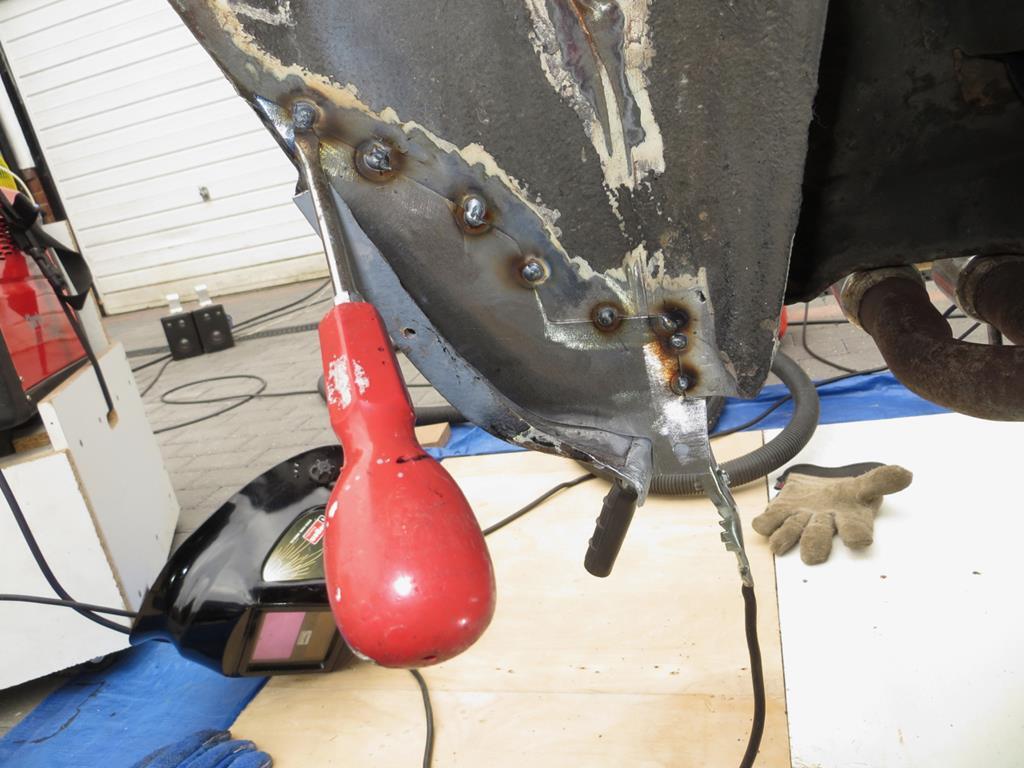 It just looks like an ordinary screwdriver with a red handle except, look, I’m not having to hold it. It’s just sitting in free space holding the panels exactly where I want them. Astonishing isn’t it!? And what do you think I paid for this minor miracle of automotive engineering? Eh, what? You don’t believe me? Why ever not? Would I tell you fibs? Oh fair enough. You are right to be doubtful. I accidentally welded the screwdriver to the car. Hmmph. 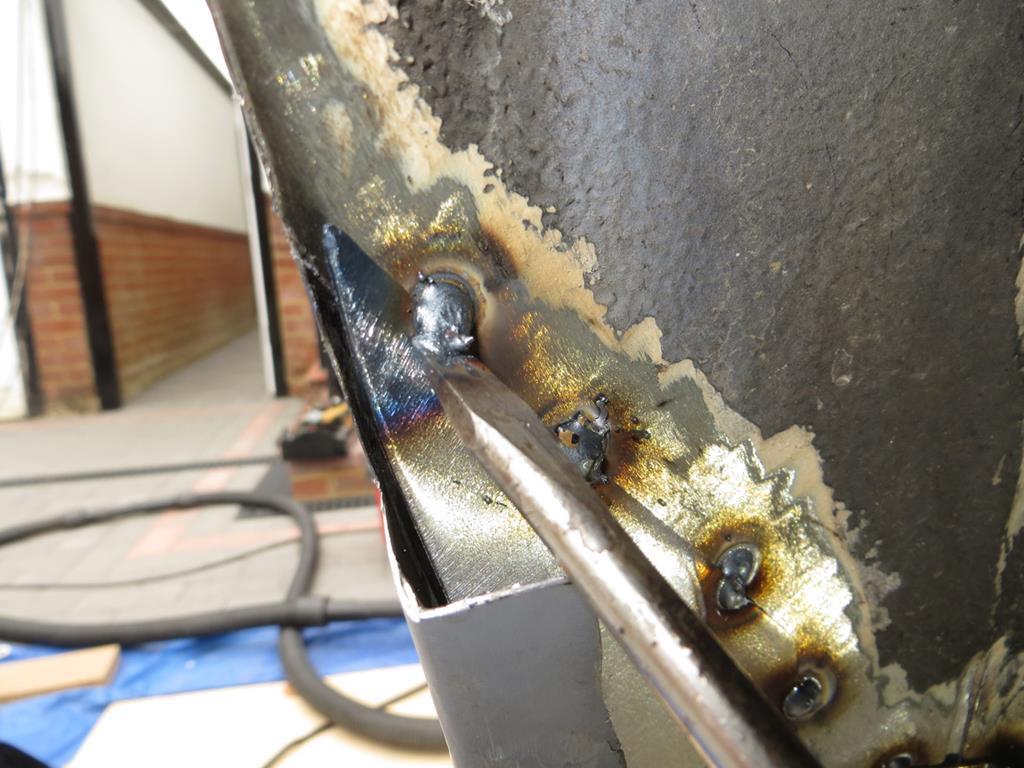 Probably ruined a good screwdriver… James |
| |
Last Edit: Feb 2, 2019 22:08:25 GMT by Sweetpea
|
|
|
|
|
Aug 26, 2018 17:37:10 GMT
|
|
What a tool! (Had to be said). On my mk1 Escort I rubbed the whole of the rear arches like this. I cut the outer wheel house out completely and welded in a new one straight out to the quarter panel and welded it on. Not for rust issues, but more wheel space
On the mk2 Cortina I'm restoring I did the same as you on all 4 bottom corners of the rear arches to avoid rust traps - and also it's a lot easier too😁
|
| |
|
|
|
|
|
Aug 26, 2018 23:09:42 GMT
|
Oh fair enough. You are right to be doubtful. I accidentally welded the screwdriver to the car. Hmmph. James Many years ago, I was buying an old stick set off a mate of mine. I knew it worked, but he insisted on demonstrating it to me. Piece of scrap in the vice, sizzle, sizzle and produced a lovely weld. Unfortunately, he hadn't put his specs on first, so welded diagonally across one jaw, over the scrap and neatly over the other jaw, thus beautifully making it all of a piece. "Fancy a straight swap for a grinder?"  |
| |
Last Edit: Aug 26, 2018 23:10:26 GMT by georgeb
|
|
|
|
|
Aug 27, 2018 20:56:00 GMT
|
|
Tell you what, my welding is getting better. It wouldn't come off. Had to cut it off with the air tool.
PS... More to come when I get round to writing it up. Need to tell you all about the car's hedgehog impression.
|
| |
Last Edit: Aug 27, 2018 20:57:56 GMT by Sweetpea
|
|
|
|
|
Aug 29, 2018 21:20:26 GMT
|
Having cut my good screwdriver off the car I welded the patch to the inner arch. No problems there apart from setting fire to the gloop on the inside of the arch (in the boot) a few times. Then it started to go properly wrong… I had a lovely view of where the patch butted up against the outer arch. That is until I put my welding helmet on and found I couldn’t get my head into the arch quite as far. There were parts of the weld path that I couldn’t see at all. So the only thing I could do was to gaffer tape a small mirror to my work light and weld using that. Ever tried welding in a mirror? Don’t. It’s more or less impossible. Well I can’t do it anyway. 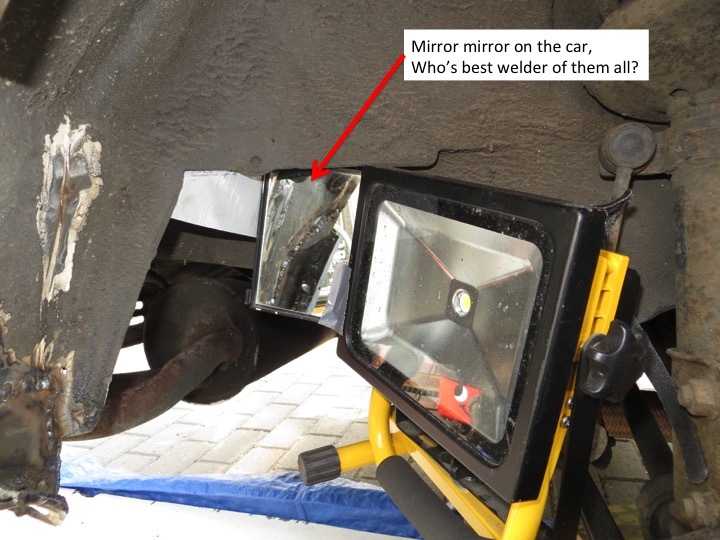 Still had to have my head stuffed in the arch to see what I was doing and had to try and reverse my hand gestures. Which were mostly obscene. What was moderately obvious, even in the mirror, is that I was getting massive contamination of the weld from somewhere. I assumed it was from stuff running down on the boot side, but I’d cleaned that back, so surely it couldn’t be? So I backed my head out of the wheel arch to consider the problem. And saw the problem… There were several strands of welding wire sticking out through the filler on the outside of the wing! Zarking Fardwarks! Sadly I was so taken aback that I forgot to take a snap. Remember this… is that the same fizzling as welding new sills to P40 ? I'll tell you what that sounds like tomorrow 'cos I suspect I'll be trying it. I wasn’t serious but it seems that’s what I was trying to do. So I took the finger sander to the filler to see what was going on. The wing is a teabag. There were actually little holes under the filler. 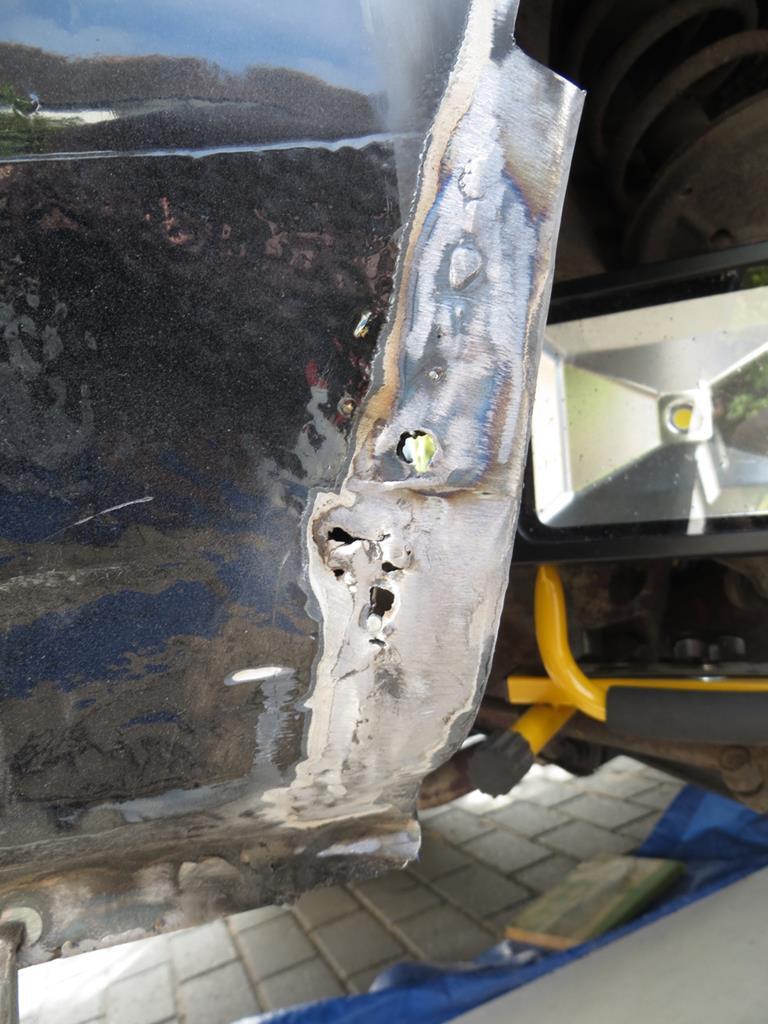 I think where I was trying to weld to there was still a wafer thin skin of steel (it cleaned up ok) but as soon as the welder hit it the metal just evaporated leaving the filler to weld to. Yes, I know. I need to cut it out and do it properly. But I also need to chose my battles and this isn’t one I have time to do just now. I can chase rust around the car until the moo cows come home. I just have to stop somewhere. Another reason for doing it another day is this. The shape of that part of the car is, essentially, what somebody invented using filler. I’ve no idea how accurate it is. However I have a replacement wing for the other side which has the correct shape. When I get that on the car I can use it as a pattern. So I apologise unreservedly, but it’s staying for the moment. I welded in the holes from the outside to patch it up. 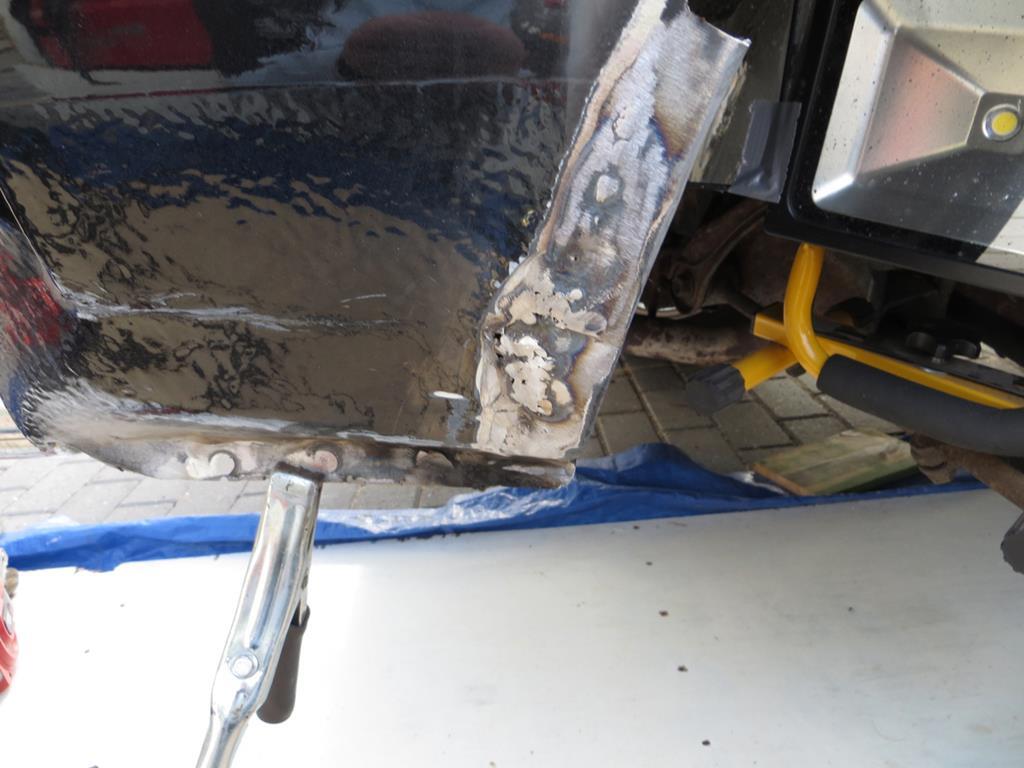 What of the weld between inner and outer wing? Well, again I didn’t get a photo. Sorry. I think I’d gone from blogging mode to WTF mode and stopped thinking about writing it up. The weld looks awful. Truly horrible. But at least the inner and outer wings are now connected together which is a significant improvement on before. Lastly I chucked some POR15 on the bits I’d finished with for a bit of protection. 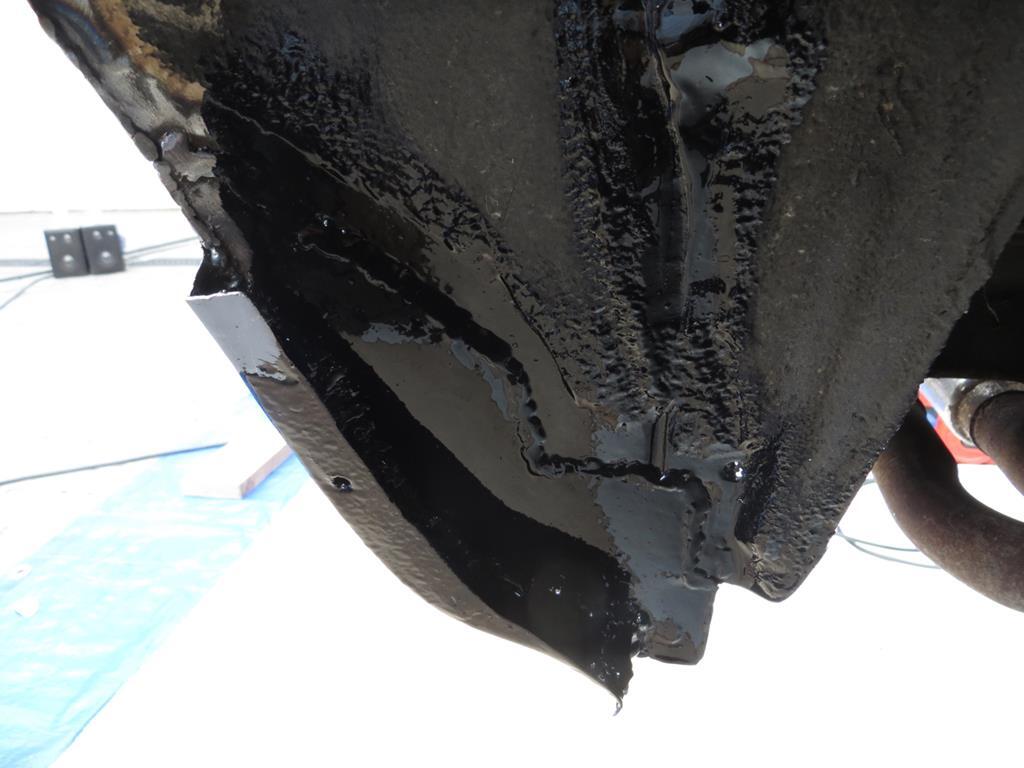 James |
| |
Last Edit: Feb 2, 2019 22:16:17 GMT by Sweetpea
|
|
ToolsnTrack
Posted a lot
   Homebrew Raconteur
Posts: 4,127
Club RR Member Number: 134
|
|
Aug 30, 2018 11:16:49 GMT
|
|
Its better than what it was. Thats the important thing.
|
| |
|
|
jamesd1972
Club Retro Rides Member
Posts: 2,917  Club RR Member Number: 40
|
|
Aug 30, 2018 12:30:50 GMT
|
Its better than what it was. That's the important thing. And knowing people admit to less than perfect jobs (That'll do - for now) is cathartic for those of us who have OD'ed on perfect threads and have growing insecurity about what they have done ! James |
| |
|
|
|
|
|
Aug 30, 2018 18:22:06 GMT
|
|
I know someone who couldn't get into a footwell when welding up a car, he taped a welding lense to a baseball cap and cracked on, got the job done and a fair bit of a suntan at the same time.
|
| |
|
|
vulgalour
Club Retro Rides Member
Posts: 7,271
Club RR Member Number: 146
|
|
Aug 30, 2018 18:32:19 GMT
|
|
That's a fairly rational solution to the problem given the circumstances.
|
| |
|
|
|
|
|
Aug 30, 2018 18:42:06 GMT
|
I know someone who couldn't get into a footwell when welding up a car, he taped a welding lense to a baseball cap and cracked on, got the job done and a fair bit of a suntan at the same time. I used to have to wear whats called a monkey mask when industrial welding sometimes - little more than a scary leather like gimp mask with a welding lens in . Not pleasant but if you have to get in to see .... Sometimes i could not even get my head in so had to weld by looking in a mirror ! |
| |
|
|
|
|
|
Aug 31, 2018 19:09:18 GMT
|
|
Somewhere I have one of those hand held mask things which I thought might do the job. And given that I never chuck anything away...
I just can't remember where I stored it.
|
| |
|
|
|
|
|
Aug 31, 2018 19:33:56 GMT
|
So, having sorted out all the incidental rust holes… I’ll start again. So, having sorted out some of the incidental rust holes - the ones I could be bothered to do - I suppose I should crack on with the bits that caused me to start this job. Chopped out the cratered bit. 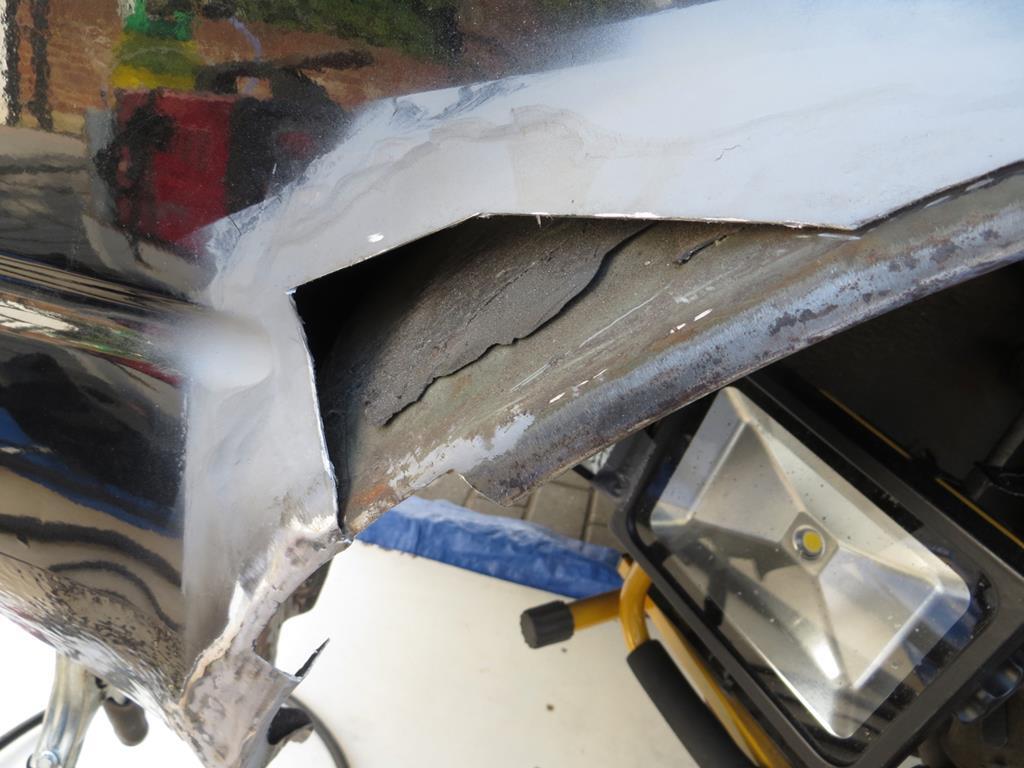 And trimmed the patch so it goes in the hole. 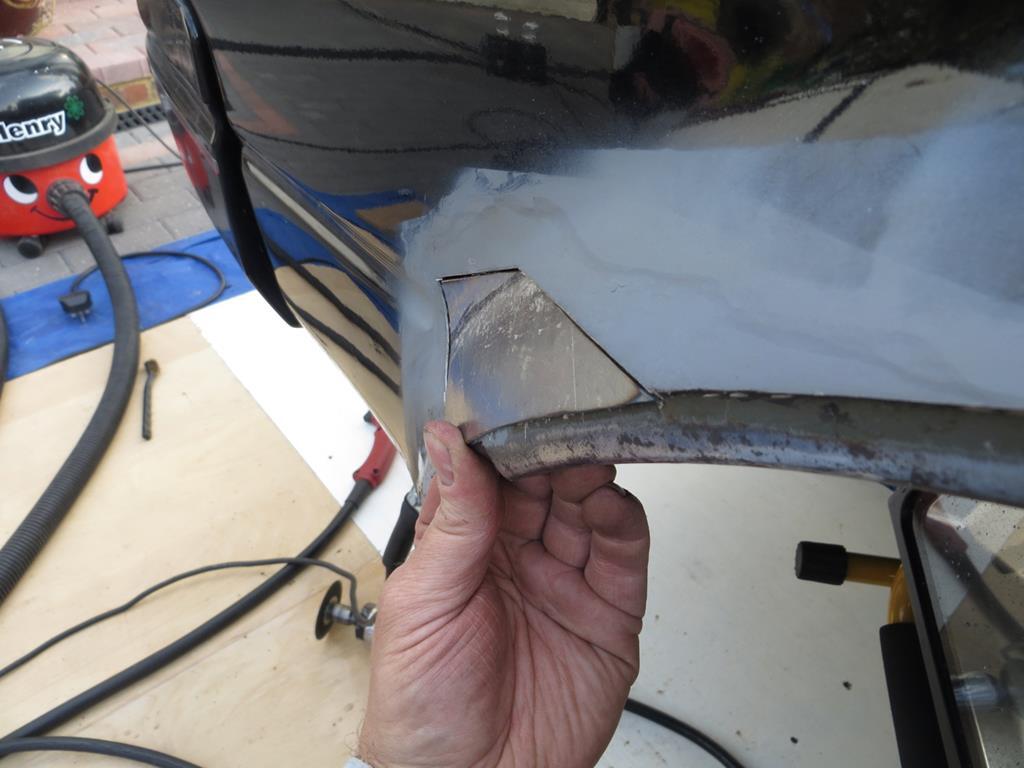 Welded and ground back. 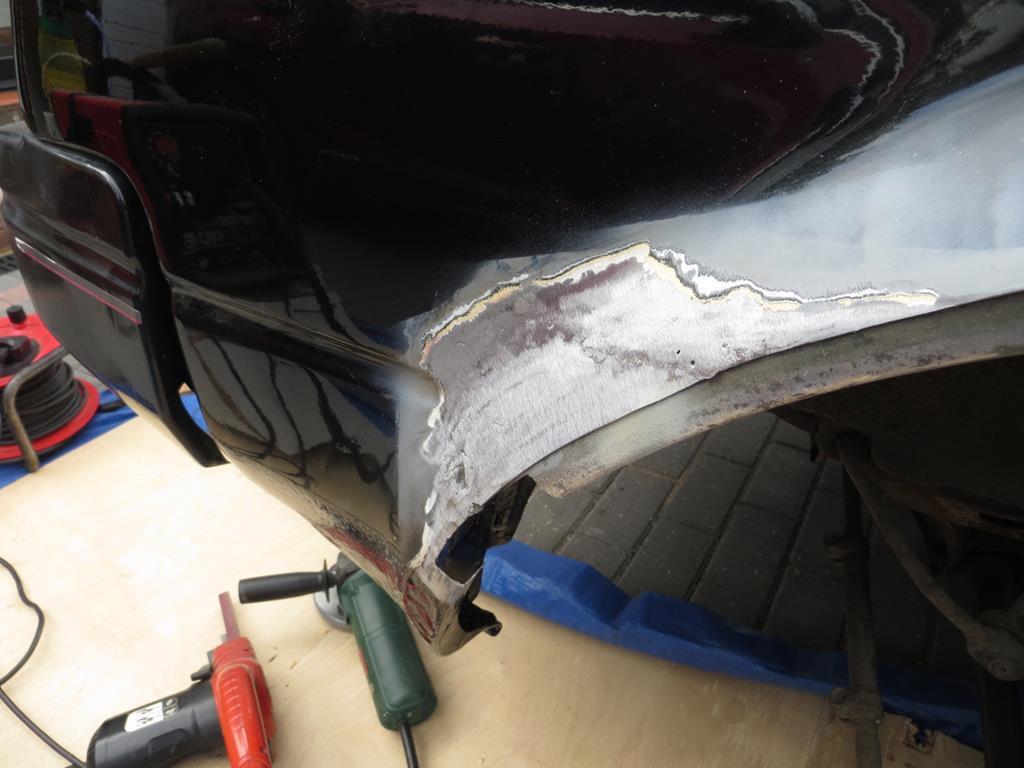 This was all last week as it happens. I’ve been away you see. I’d never been to the Great Dorset Steam Fair. Have now! So to give it some protection until I can finish the job it got a coat of weld through primer to keep some of the rain off it. 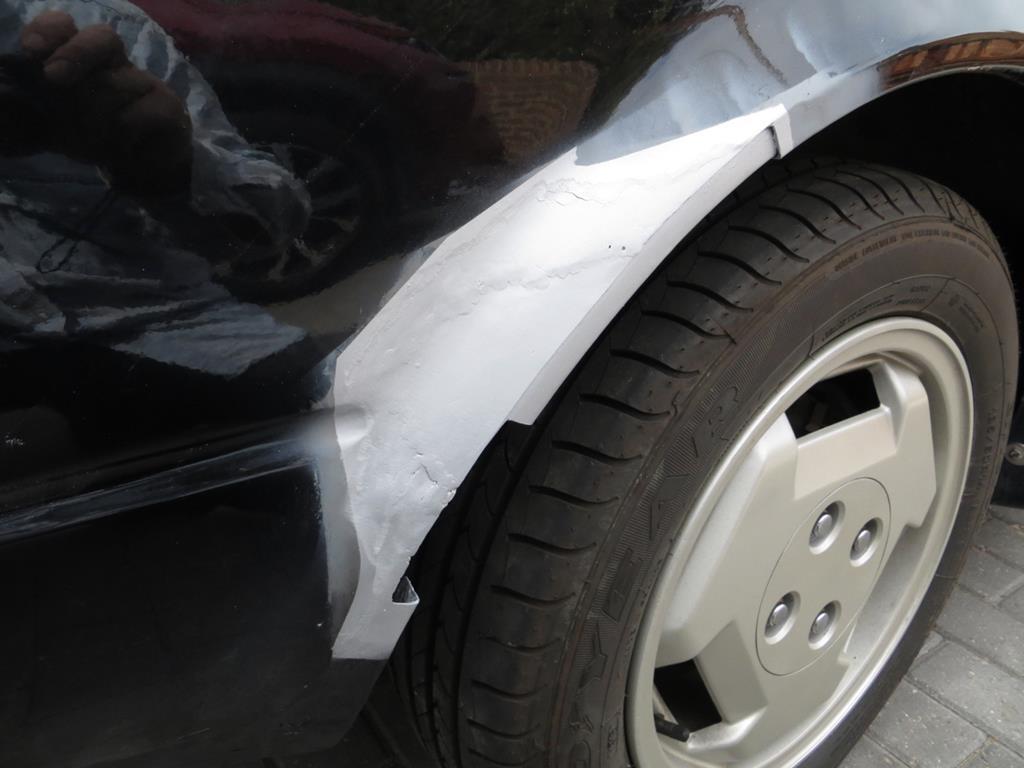 So next on the agenda is to put the arch back. It needs a bit of fettling though. It looked good against the original but needs a little more work with the shrinker / stretcher to get it in. That’s us up to date then. |
| |
Last Edit: Feb 2, 2019 22:21:49 GMT by Sweetpea
|
|


