|
|
|
Aug 17, 2018 19:14:18 GMT
|
|
The spanner was forceful yet gentle, irresistible. Each of the fastenings surrendered unconditionally to its will with a small shudder and groan. Soon the engines sump slid silently to the ground revealing the lubricated wonders within...
Sorry, just practicing...
|
| |
Last Edit: Aug 17, 2018 19:15:10 GMT by Sweetpea
|
|
|
|
|
|
|
Aug 17, 2018 19:25:22 GMT
|
|
You've turned into a media whore...😳
50 shades of dirty oil 😂😂
|
| |
Last Edit: Aug 17, 2018 19:26:29 GMT by Deleted
|
|
|
|
|
Aug 17, 2018 19:52:00 GMT
|
50 shades of dirty oil 😂😂    |
| |
|
|
|
|
|
Aug 17, 2018 20:01:14 GMT
|
Yeah, them's the puppies. If you want some of those, pm me your address, I should have several going spare. That's jolly kind of you, thank you. I won't pester you at the moment as I haven't got any mud flaps to bolt on. I will however, leave enough meat in the arch return to fit them. |
| |
|
|
|
|
|
Aug 17, 2018 20:15:27 GMT
|
I thought your car was an early one? I do have the later mk1b skirts if thats any use... You bring up an interesting question. There's this idea that early MK1s didn't have side skirts. (True enough.) Sometimes that's extended to be MK1a cars. However I think the skirts went on as a standard fitment really early, long before the MK1b came about. I'm pretty certain mine came out of the factory with side skirts fitted and it was manufactured in late '85. I think it was November or December. What I've never found is exactly when they started fitting them. |
| |
|
|
tristanh
Part of things
  Routinely bewildered
Posts: 990 
|
|
|
|
|
No problem James.
|
| |
Whether you believe you can, or you cannot, you're probably right.
|
|
|
|
|
Aug 19, 2018 22:27:22 GMT
|
So, after cleaning the cooker this morning (I really am domesticated ain’t I), I spent a little time with some steel and a few hammers. After cleaning up the rusted area on the wing I’d blown it over with primer to keep any rain off it. This, I realised, meant I can draw the cut lines straight on the car. 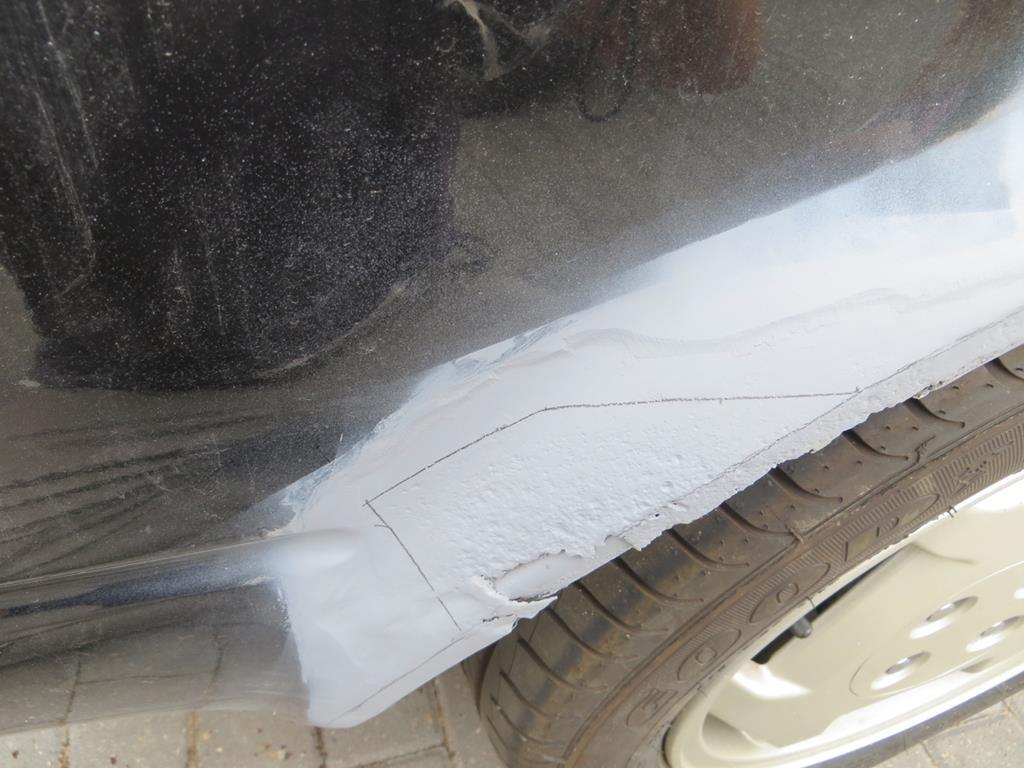 Why have I never thought of doing this before I’ll never know. Next cover the area with masking tape. 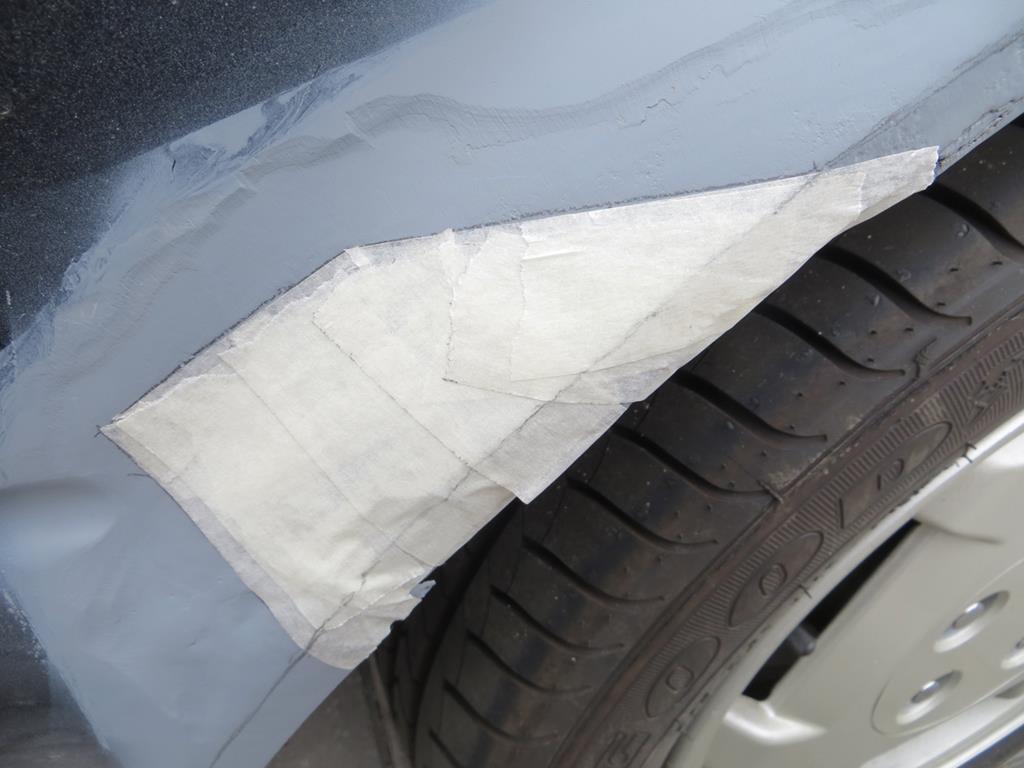 What I want to know it this… Why has nobody invented masking tape made of steel? If somebody invented steel masking tape I could just peel this off and weld it in. As it is I have to use this as a pattern which is terribly inconvenient. 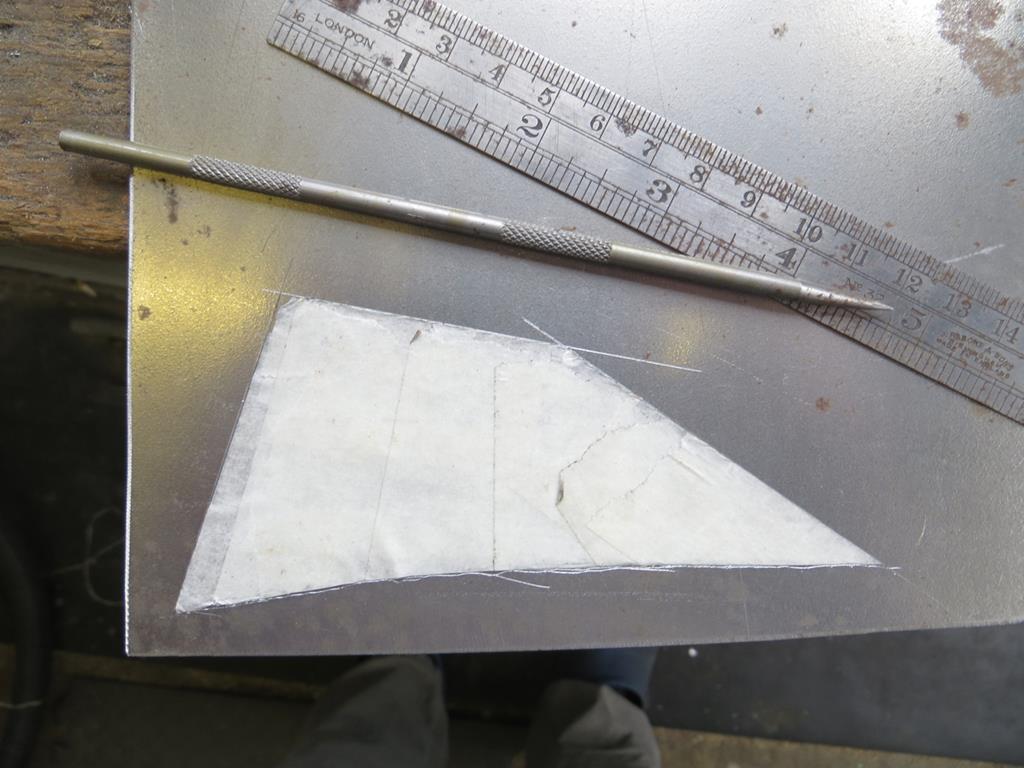 So I scored it onto a handy piece of metal and chopped it out. Then started tapping it with various hammers on various dollies and bits of wood, like so… 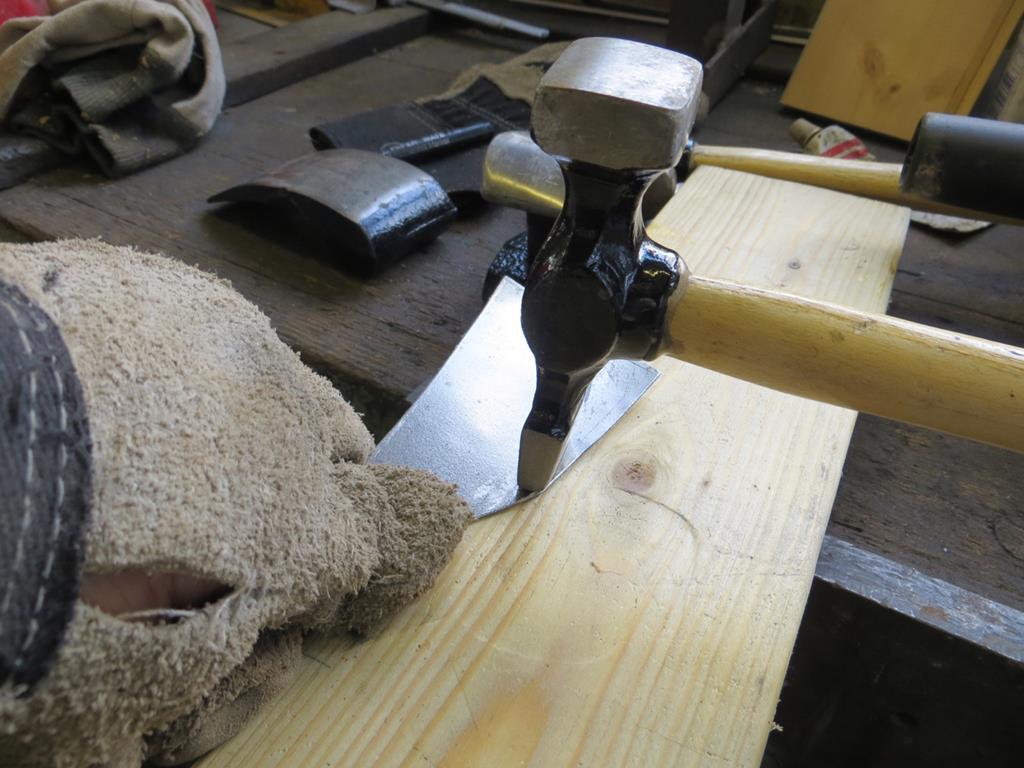 And also like this… 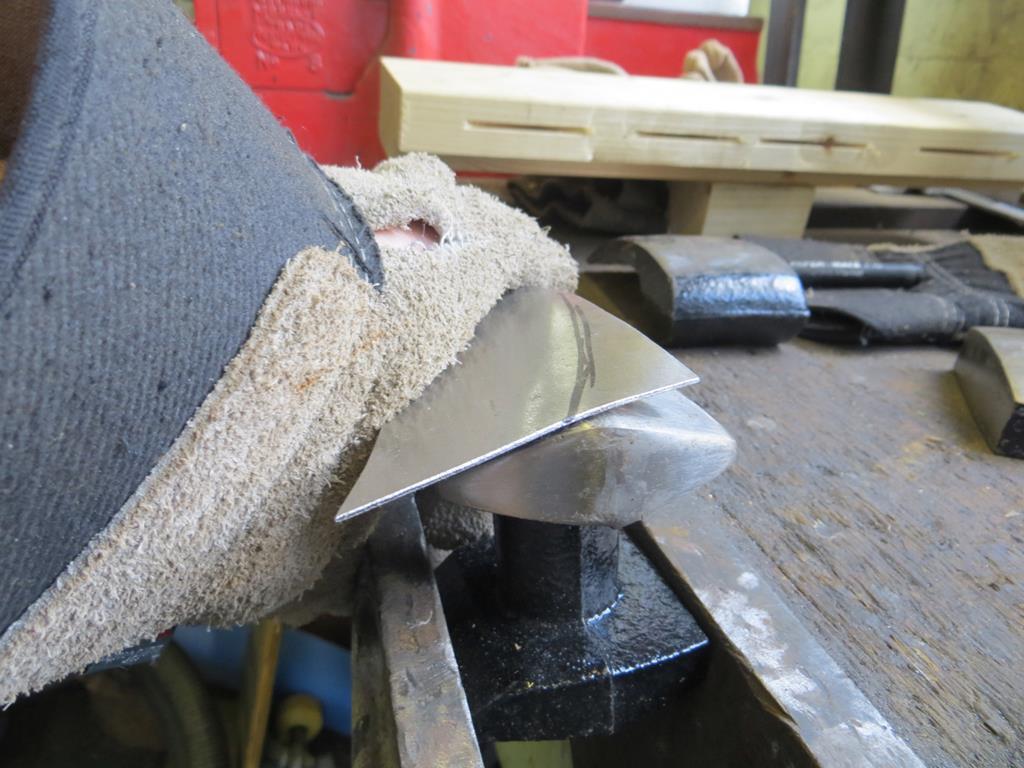 Eventually, by pretending to know what I’m doing, and by refusing to admit that actually I had no clue I wound up with this. 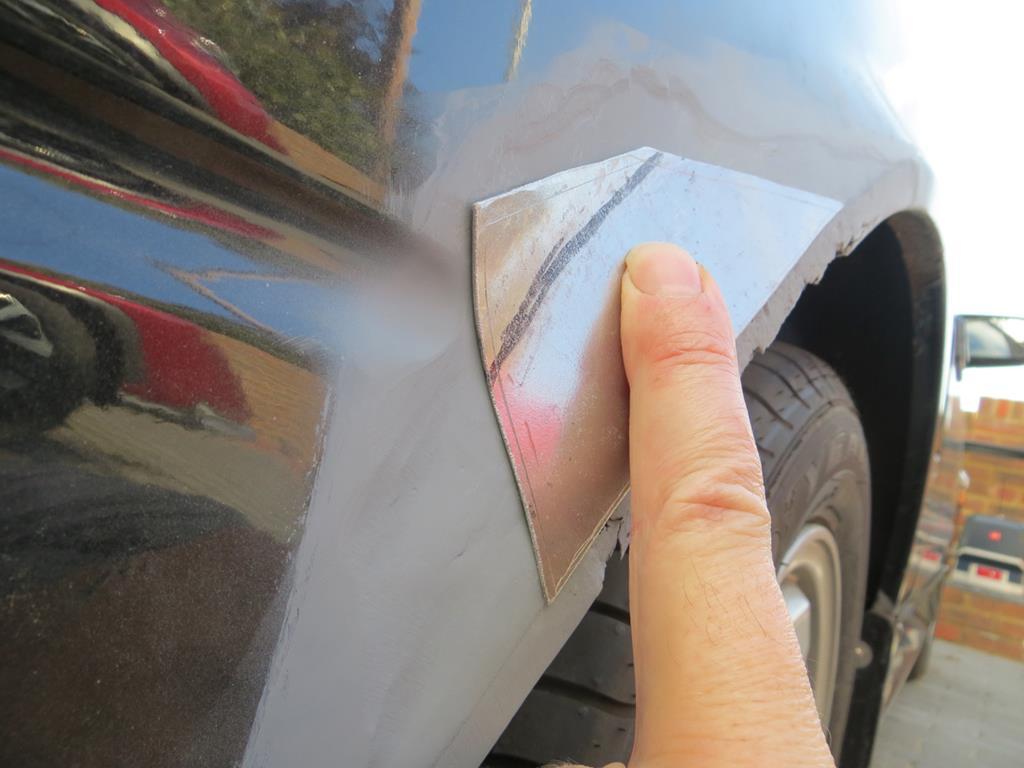 And, by some strange magical accident it seems to fit! 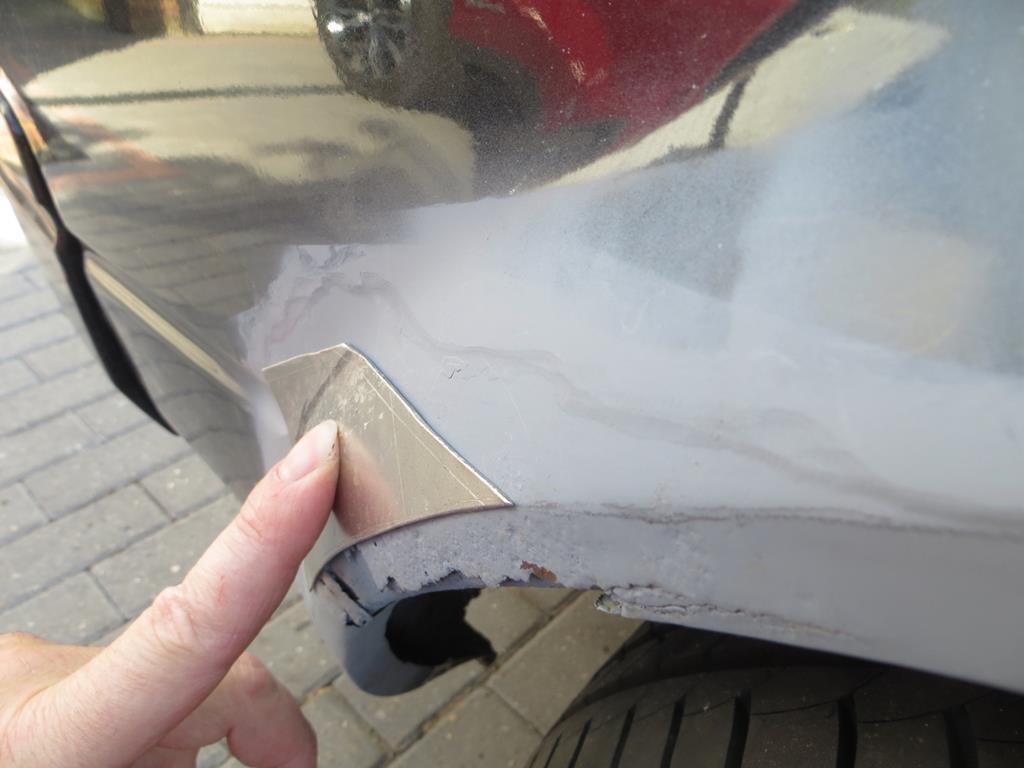 Well, as near as makes any odds anyway. 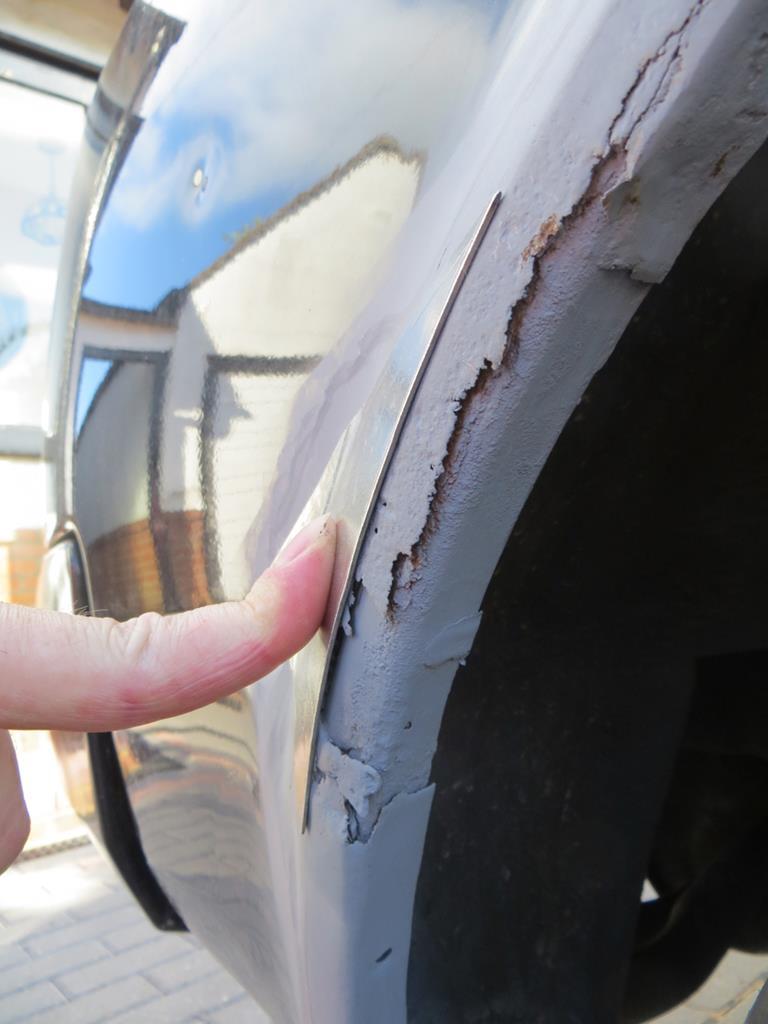 I might try and radius the corners a little as sharp corners just melt when you try and weld them. Next is to trim the arch piece I made the other day. So mark it up… 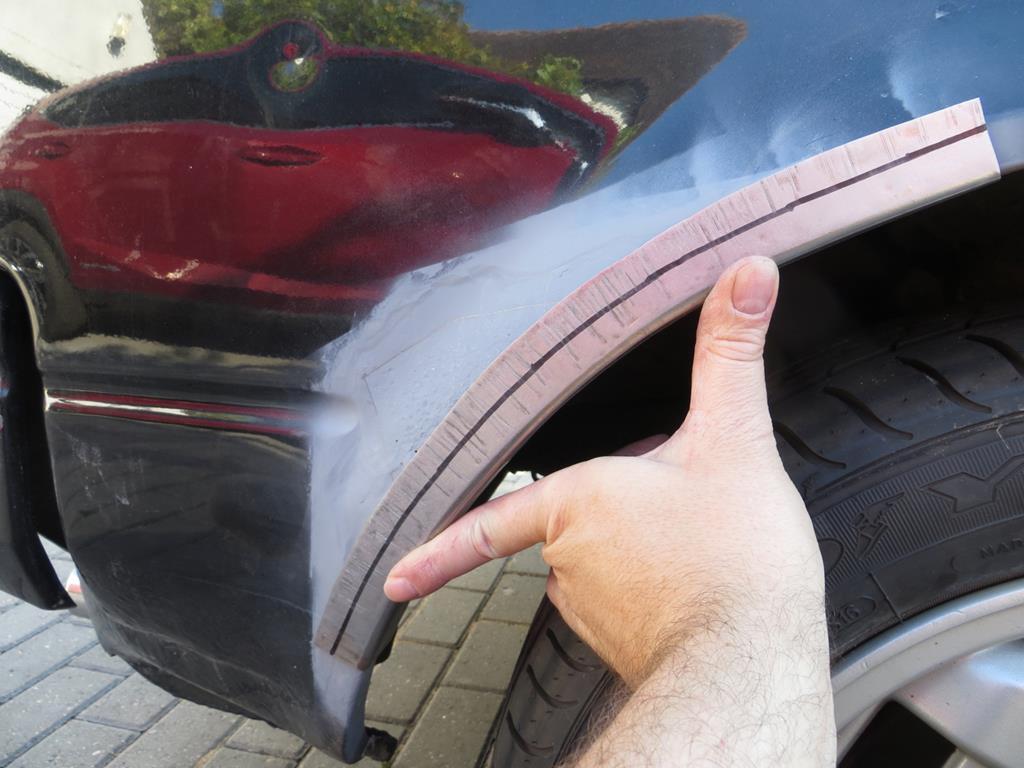 And trim it off. I’m going to cut it in along the corner as I reckon the panel will be stronger there. Less likely to distort. So the two bits should look something like this when they are in position. 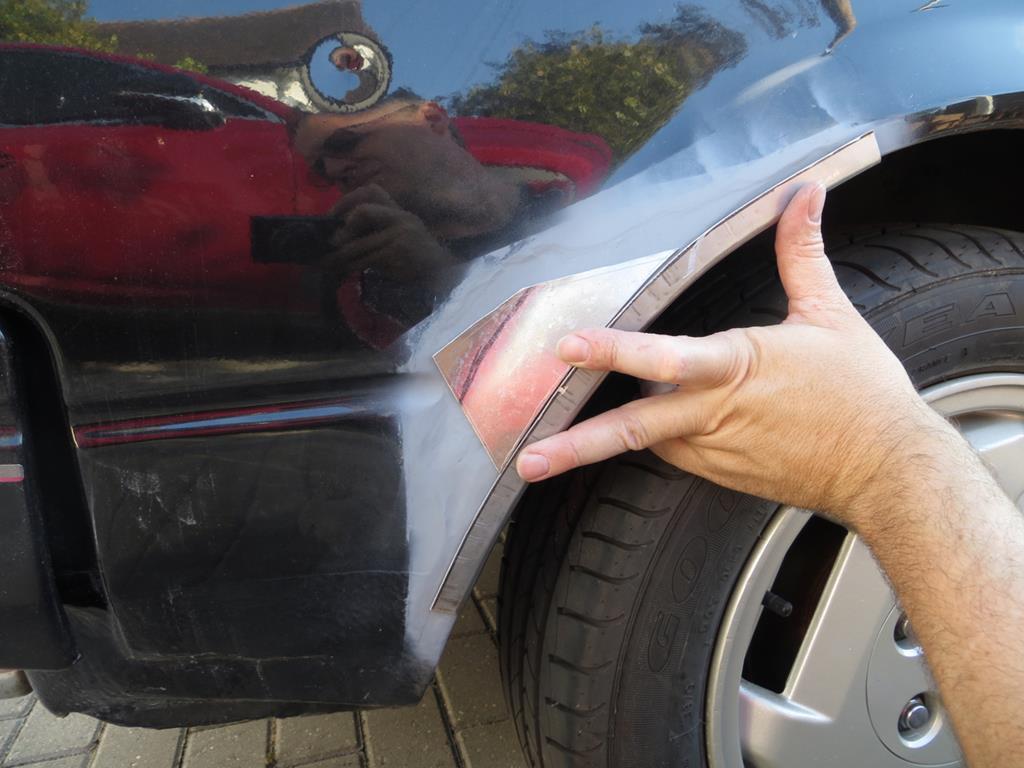 What I’m really not sure is whether to put the patch in first or the arch. Or tack both in and fully weld when I’m happy. Or what. Thinking about it, I’m going to need to cut the arch out to investigate the inner arch and fix that. So maybe I do that and get the new arch tacked in before cutting out the patch. I’m thinking it’ll hold the shape better with less metal cut out. But probably there’s not enough for it to be a problem. Remember this is the first bit I’ve done that really shows so we are breaking new ground here. Anyhoo. See that dint in the top of the above photo? 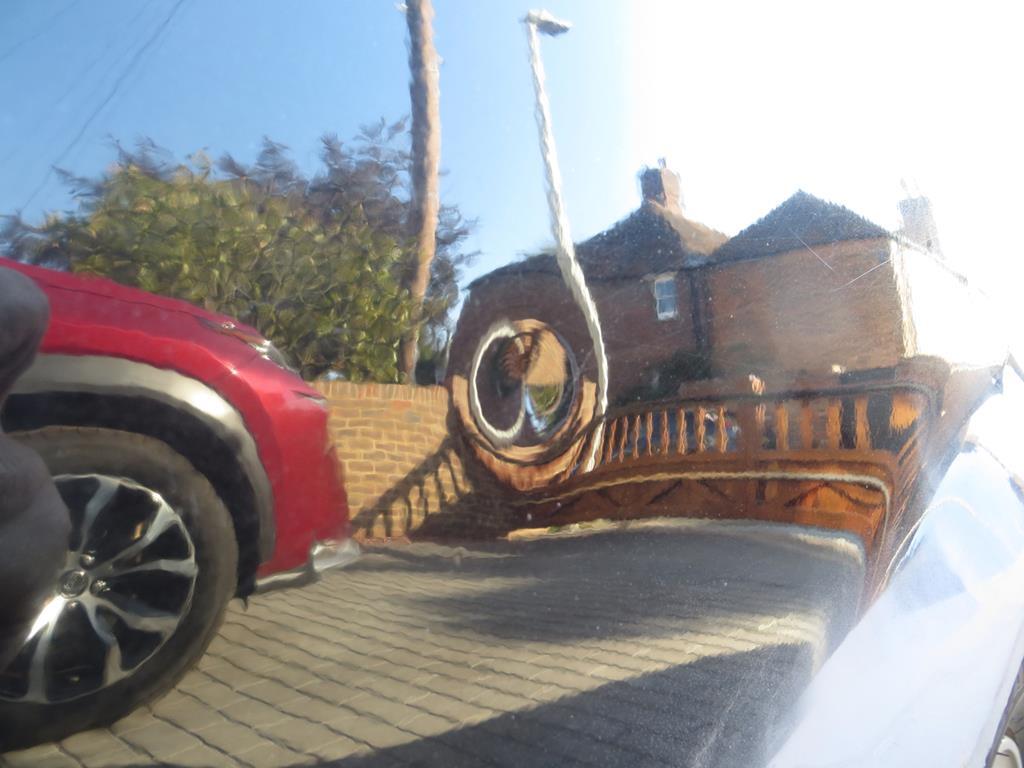 Well as I’ve been staring at it all afternoon it’s really beginning to grind my gears. I’ve never tried tapping a dent out. Looks like a good one to start on. Dolly on the outside and tap with a hammer on the inside. 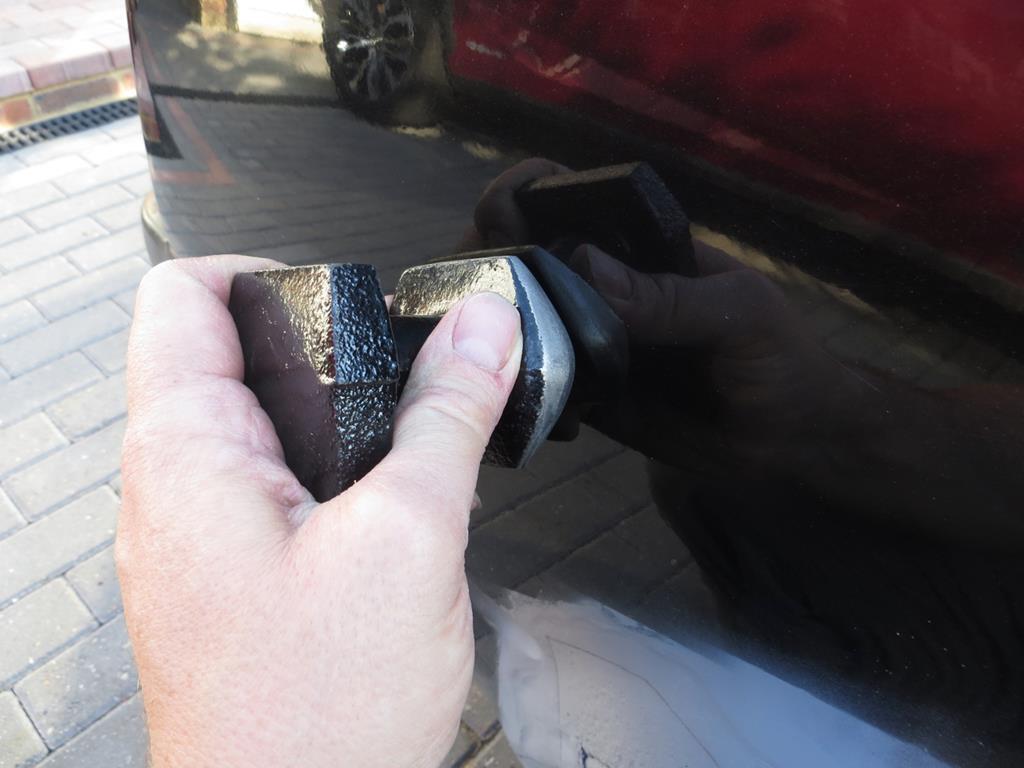 And now, after a little polish to remove the scuff marks from the dolly, it looks like this. 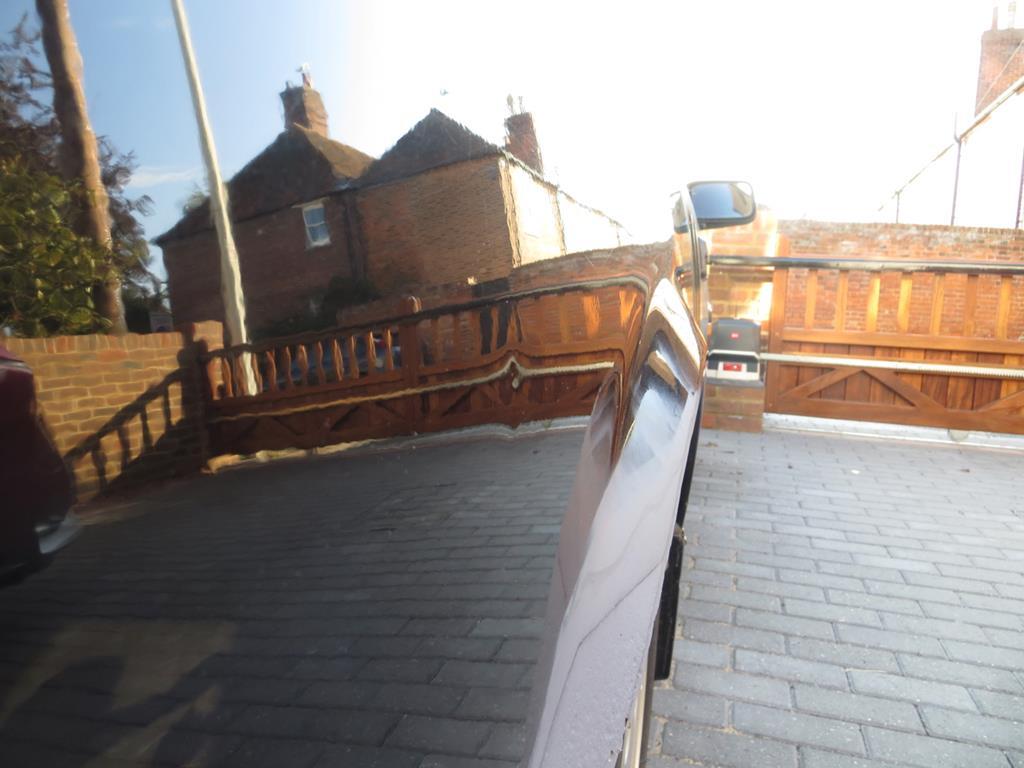 Basically I got to the point where I ran out of confidence. I’d rather it looks like this than keep hitting it and start making it worse. Not bad though. Reasonable for a first attempt. James |
| |
Last Edit: Jan 26, 2019 22:13:55 GMT by Sweetpea
|
|
vulgalour
Club Retro Rides Member
Posts: 7,285
Club RR Member Number: 146
|
|
|
|
|
If you want to avoid scuffs you can use a microfibre cloth or even good quality masking tape. I wouldn't try knocking that last dimple out, youv'e got the worst of it so it just needs a tiny blob of filler now which you can do when that new arch repair goes in. You may find it easier to tape the pieces in place on the wing and then tack the two pieces together rather than trying to juggle them in place on the car too.
Shows promise does this, and you're very brave tackling black bodywork in highly visible areas, it's about the least forgiving thing you could be working with.
|
| |
|
|
|
|
|
Aug 20, 2018 20:20:47 GMT
|
|
I did wonder about having a cloth under the dolly, but, er, I didn't. Next time!
You're right, it's a tiny blob of filler. And it's now barely noticeable to somebody wandering past. Even somebody mesmerised by my historic classic sports car would be doing well to spot it. I'm going to have to spray the car at some point so I'll sort it then.
|
| |
|
|
|
|
|
Aug 20, 2018 22:04:54 GMT
|
I had a problem with the old car yesterday. (Oh really, just one!?) I have a battery cut off switch. It’s handy when welding and stops the battery going flat when the car is standing for a while. Yesterday I turned the battery on, all the lights came on, but when I turned the key to start it there was a click and everything went dead. Very similar to a very flat battery. Now, it’s done something like this before when the battery was indeed flat. But I’ve not been convinced the battery switch has been behaving recently so I thought I’d check it through. Sure enough the voltage across the battery was 12.5 volts but down stream of the switch there was about 2 volts. The switch was, indeed, toast. So I took it off to inspect the contacts. 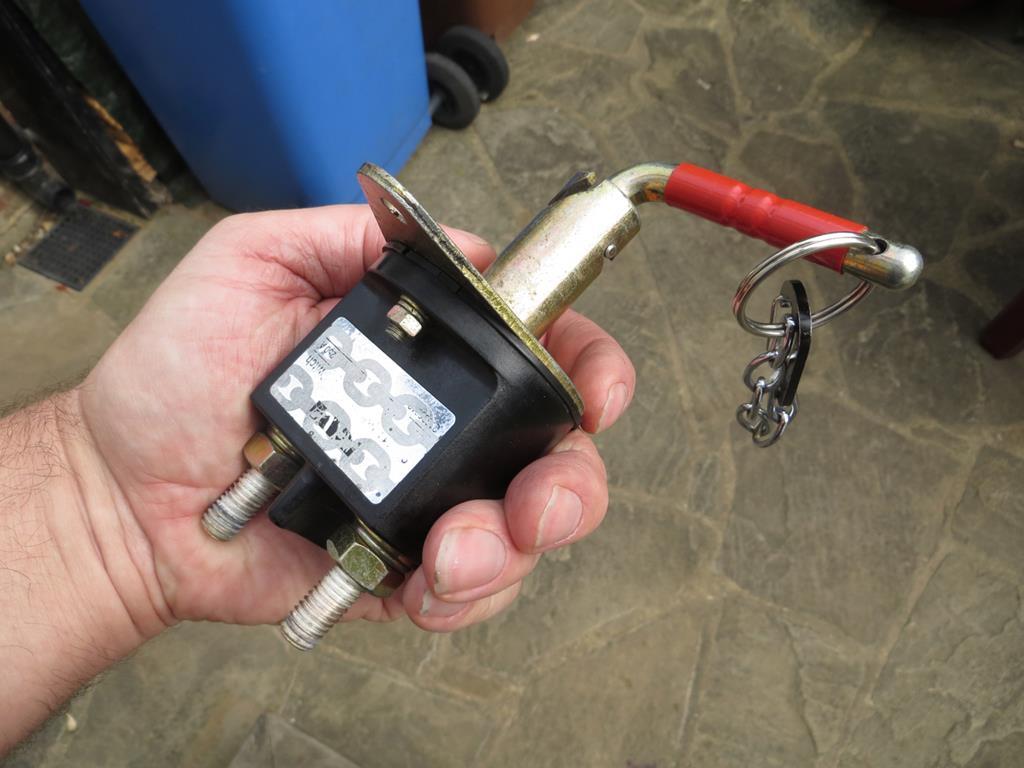 Surprisingly they didn’t look too terrible. I’d expected them to be copper but they didn’t seem to be. 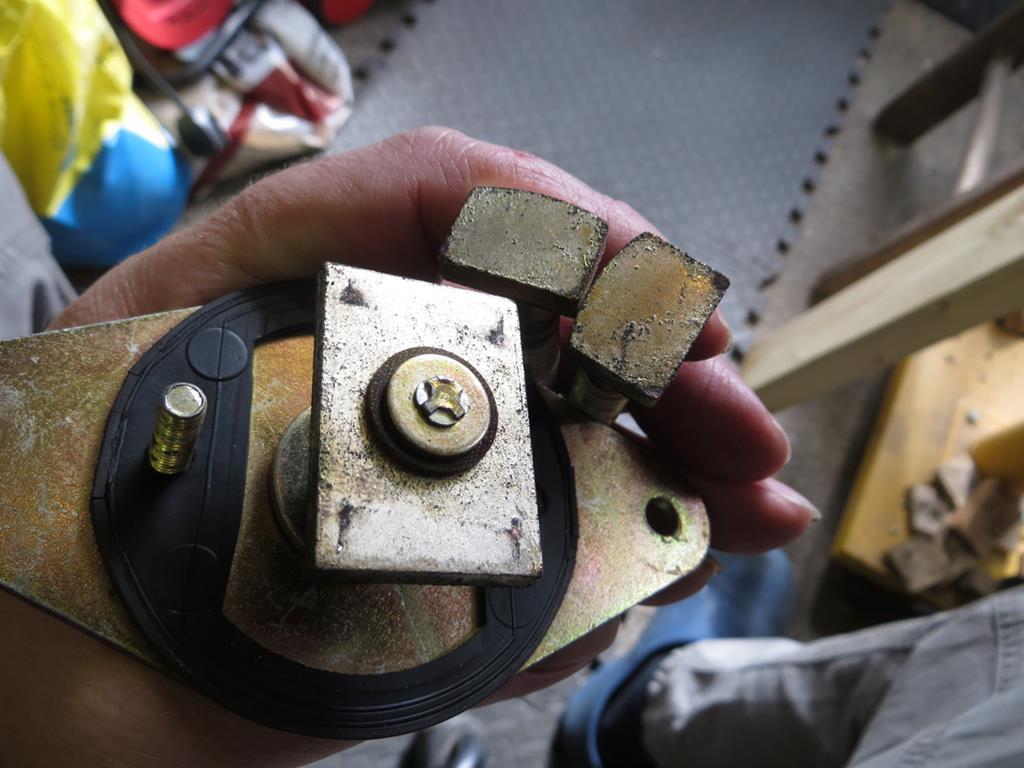 Gave them a polish with a wire brush in the drill. 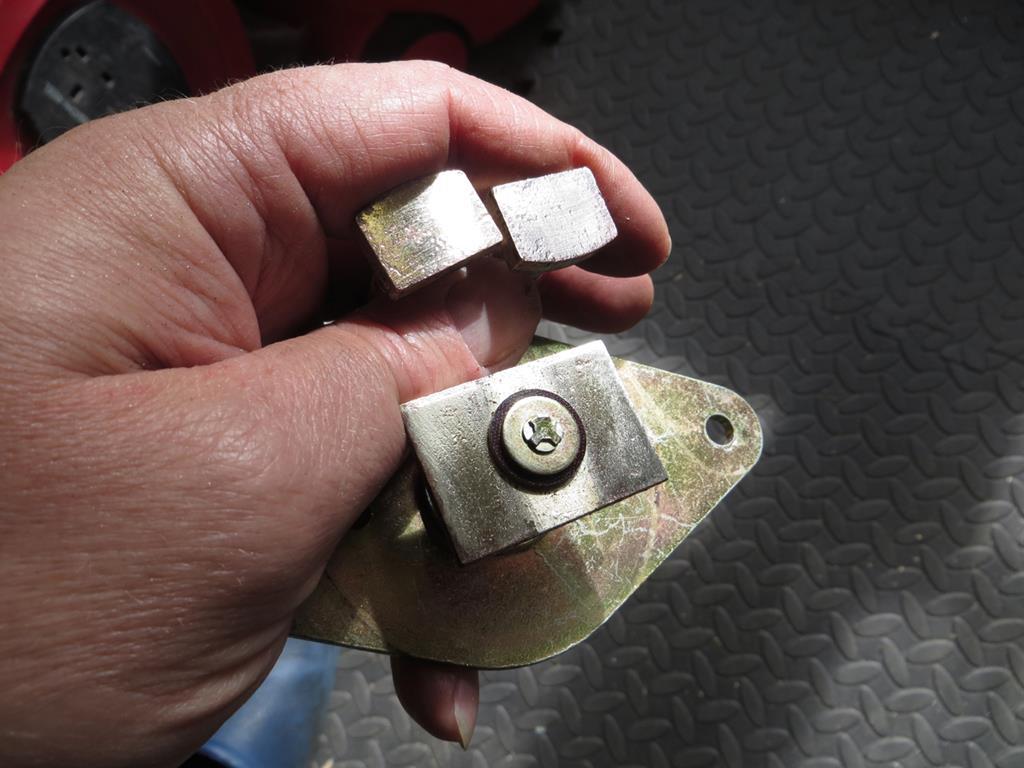 Another minor problem was the bracket that I made to fasten it to the car. 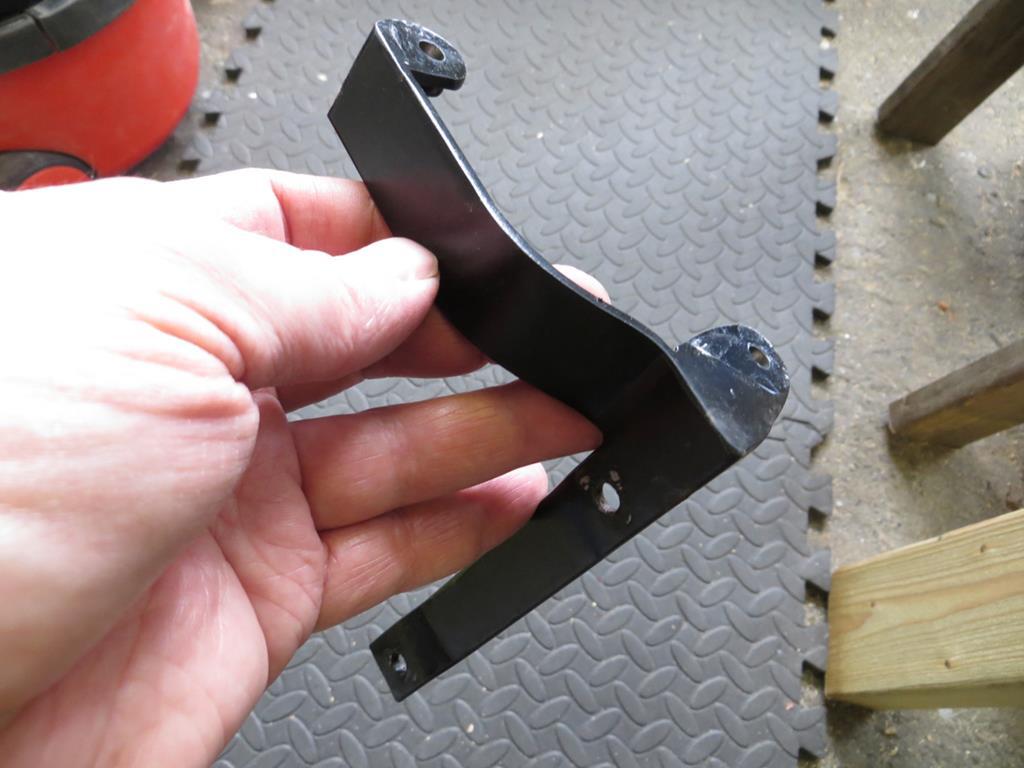 It works great but it put the switch in a slightly awkward position, half under the side panel in the engine bay. So I re-imagined it with the bolty on bit in a different position. 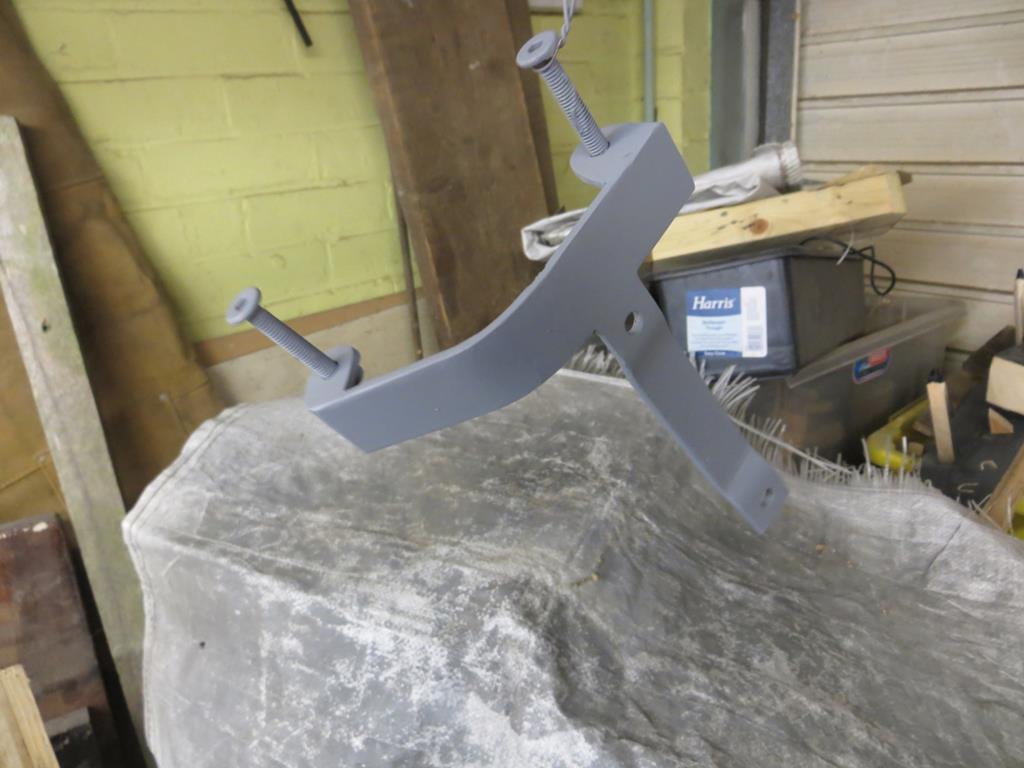 That should move it round into the engine bay a little more. Obviously, in the middle of all that the gas bottle on the welder finally ran out so I had to pootle off to the Hobby Weld place to get another. The gauge had been reading empty for ages so it was hardly a surprise. I’ll bung it back together tomorrow. In other news I thought I’d grasp the nettle with a firm hand. Yup, I cut out the wheel arch and started chasing rust around. 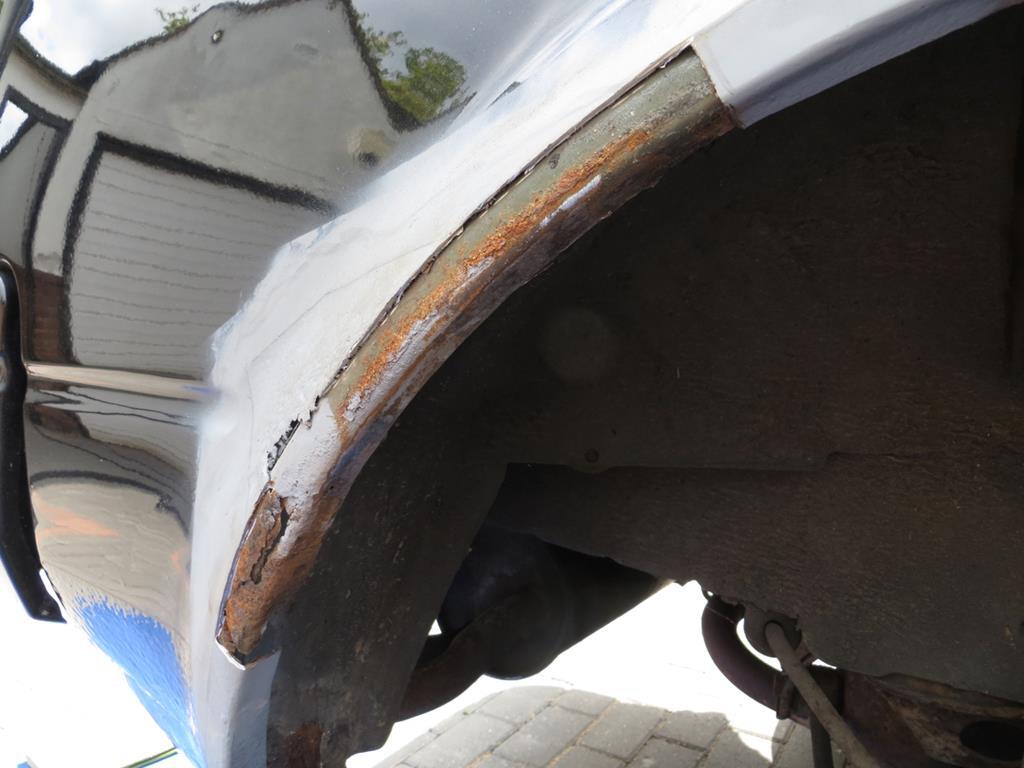 Actually most of the arch is remarkably good. The green is presumably the E coat when the car was dipped all those years ago. For a lot of the length I think the outer skin was rusting and the inner one was largely ok. I think I said that the lower wing behind the wheel had already been replaced. I could check to see if I said that but it’d mean reading my own thread and, well, frankly there are limits… Anyway, the lower wing behind the wheel has been replaced. What I didn’t realise is that it’s an overlapping patchwork covered with filler. 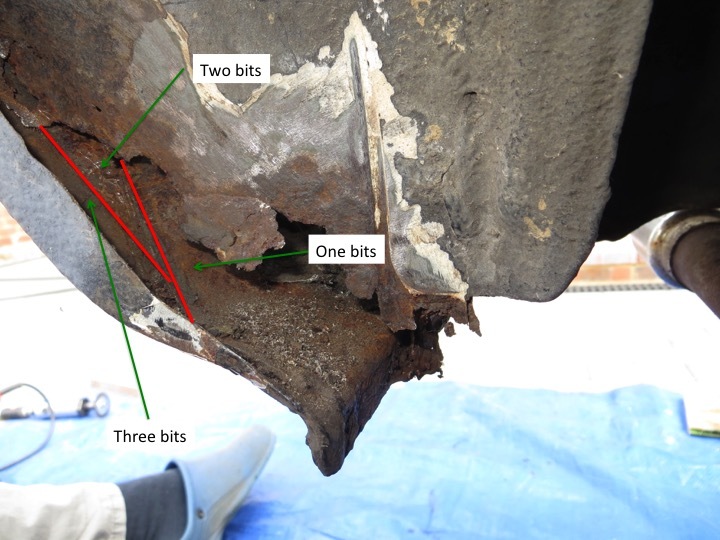 Also you can see the inner wheel arch had rusted away and hadn’t been replaced in the previous repair. The hole had just been filled with tonnes if rubbery clag which, dear reader, was a total pain in the fingers to remove. Here, have a photo of rust coloured rubbery clag. 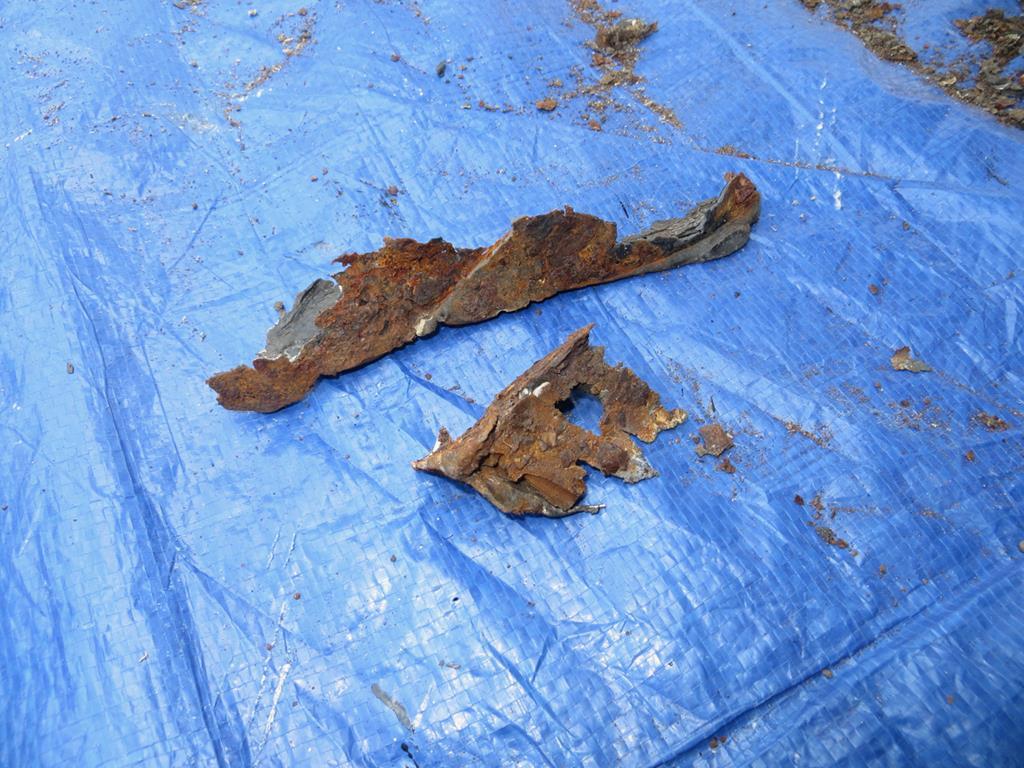 Just to compound the duff workmanship they didn’t even manage to get the outer panel close the inner one when they welded the lower seam together. Look there is a gap down the middle! 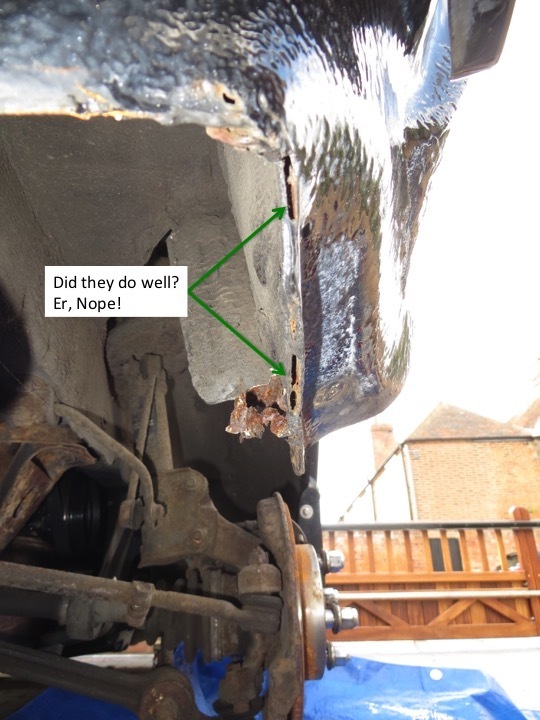 I mean, dear God, all it needed was a pair of mole grips. And it was probably harder to weld with a gap between the panels. So, broadly speaking, that all needs cutting off and redoing. But it’s stable at the moment and I have to stop somewhere so it can stay where it is. So long as I can get it watertight I’ll be happy. So that leaves me with a few patches to make to fill the holes again. 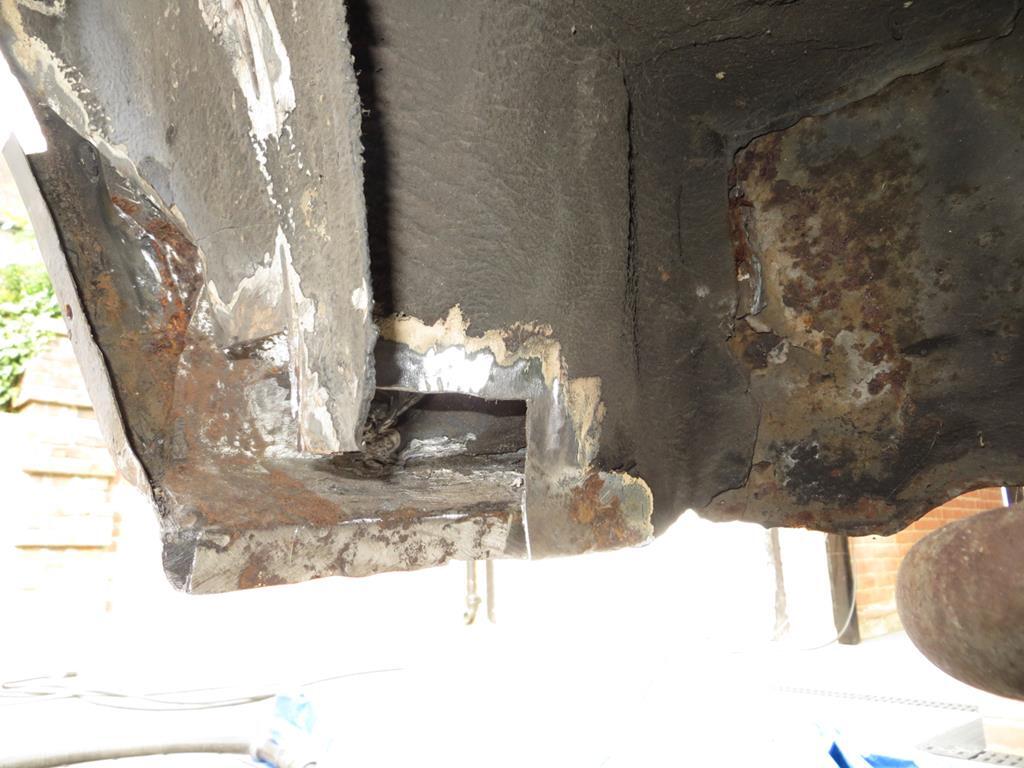 Although… I think I might have a tube of rubbery clag in the garage… James |
| |
Last Edit: Jan 26, 2019 22:44:04 GMT by Sweetpea
|
|
|
|
|
|
|
'Although… I think I might have a tube of rubbery clag in the garage…' James - If I could just utter a word of warning 'Don't ever come within 5 miles of my workshop with such a product or a vehicle within which such a product is fitted' - unless you want it torched that is  |
| |
Last Edit: Aug 21, 2018 7:46:39 GMT by Deleted
|
|
|
|
|
|
|
|
Lotto tickets and clag glue makes the most structural patch panel, though!
|
| |
|
|
vulgalour
Club Retro Rides Member
Posts: 7,285
Club RR Member Number: 146
|
|
Aug 21, 2018 11:55:59 GMT
|
|
The thing is with these modern composites is you don't get that lovely gently fizzing noise that steel produces on delicate sports cars like this. That fizzing is of course the sound of your power:weight ratio improving.
|
| |
|
|
|
|
|
Aug 21, 2018 13:13:27 GMT
|
The thing is with these modern composites is you don't get that lovely gently fizzing noise that steel produces on delicate sports cars like this. That fizzing is of course the sound of your power:weight ratio improving. is that the same fizzling as welding new sills to P40 ? |
| |
Last Edit: Aug 21, 2018 13:13:40 GMT by darrenh
|
|
|
|
|
Aug 21, 2018 17:24:50 GMT
|
'Although… I think I might have a tube of rubbery clag in the garage…' James - If I could just utter a word of warning 'Don't ever come within 5 miles of my workshop with such a product or a vehicle within which such a product is fitted' - unless you want it torched that is  I don't know... You old traditionalist stick in the mud folks. Some cars make use of bonding techniques these days, but no, it's got to be done "properly". Clearly, what had been done to my car was a cutting edge breakthrough technology making full use of an automotive, er, sanitary sealant I think... But no, it's not good enough for you! Get with modern times! That's what I say! Er, hmm, terribly sorry, I seem to have spent too much time reading @quatermass 's thread and came over a little ranty there... I must control myself or I'll start venting about Jeremy Bleeding' Vine on Radio 2 whose (current affairs) program today consisted of "writing the program on a white board". I've always found visual things work well on the radio. I thought he was scraping the bottom of the barrel months ago when he suggested that the only reason for owning an axe was if you were an axe murderer. I own a scythe. What does that make me? The Grim Bleeding' Reaper? God, that man is such a bell end he makes Big Ben look like a cow bell. Oh, I did it again didn't I? Terribly terribly sorry.... I'll stop reading @quatermass I promise... Terribly sorry... |
| |
|
|
|
|
|
Aug 21, 2018 17:27:02 GMT
|
is that the same fizzling as welding new sills to P40 ? I'll tell you what that sounds like tomorrow 'cos I suspect I'll be trying it. |
| |
|
|
vulgalour
Club Retro Rides Member
Posts: 7,285
Club RR Member Number: 146
|
|
Aug 21, 2018 17:54:09 GMT
|
|
If they're a top grade bodger, they'll have put iron filings in the P40 to fool the magnet test, at least you'll have some metal to work with then.
|
| |
|
|
jamesd1972
Club Retro Rides Member
Posts: 2,921  Club RR Member Number: 40
|
|
Aug 21, 2018 20:29:45 GMT
|
|
I think the p40 I (may) have used on the mini’s inner arches was stronger than the metal itself. Well better than a hole anyway. Kind of matched the cover sills.
Different times...
Nice job on the arch so far !
James
|
| |
|
|
|
|
|
Aug 22, 2018 22:25:26 GMT
|
Didn’t get a lot done yesterday. Refitted the battery master switch, now in a slightly more convenient place. 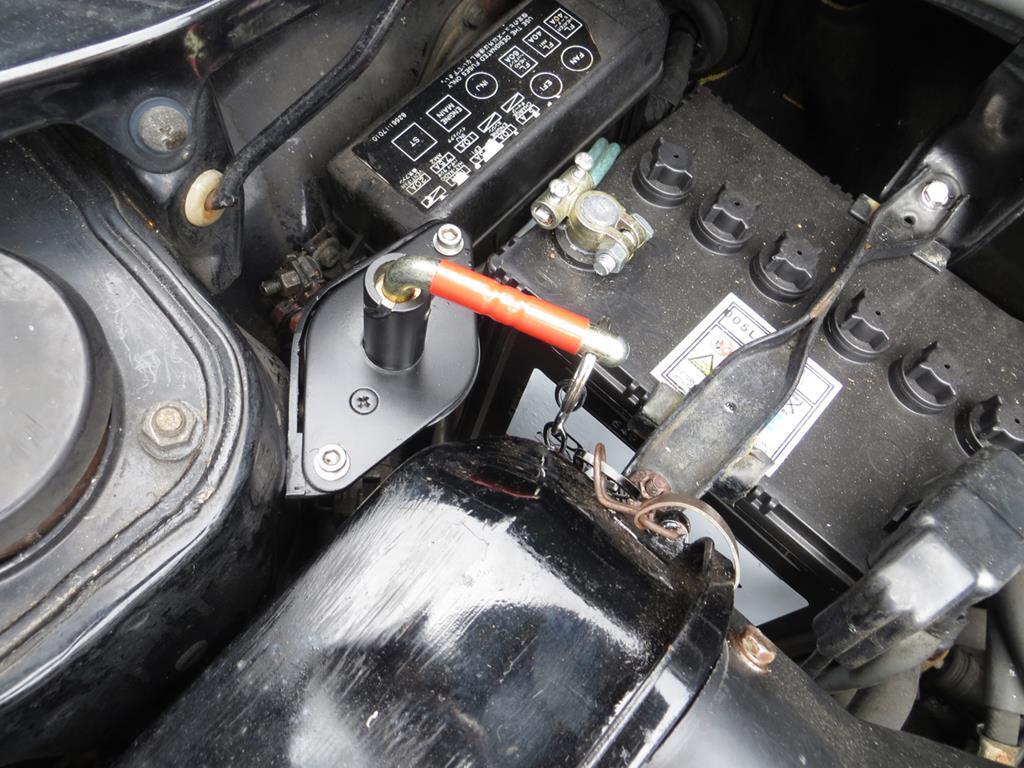 I haven’t tried starting the car yet, it’s still on the axle stand, so I don’t know it I’ve fixed it. And I started making one of the patches. 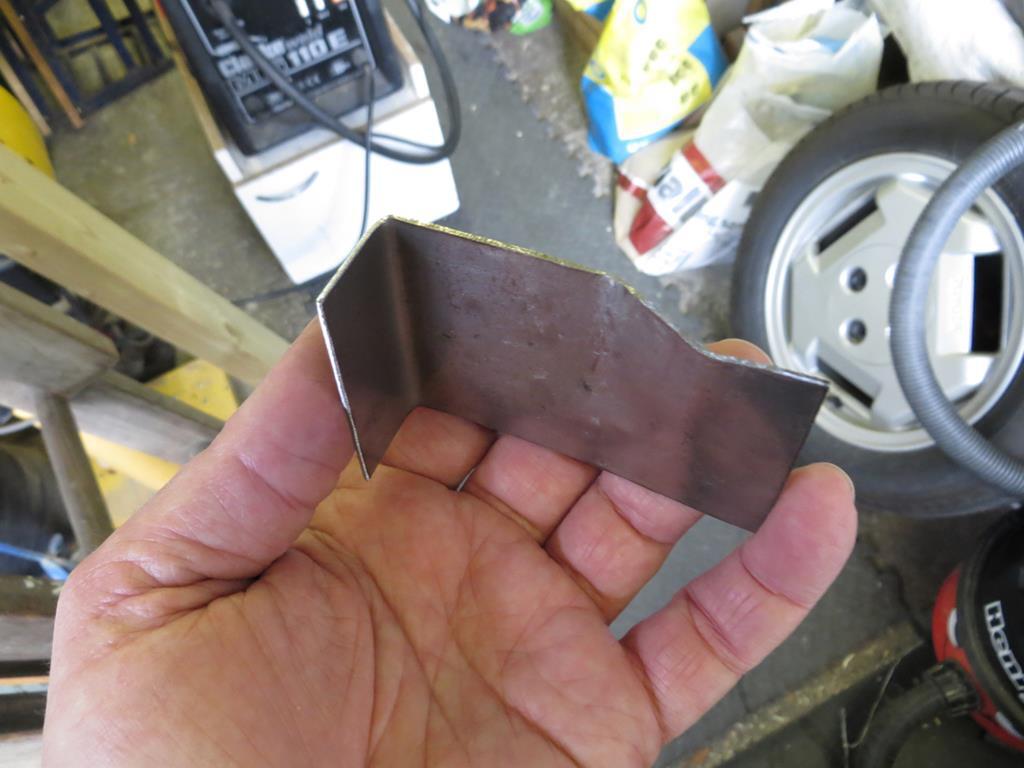 Pretty simple one really. Then I had to go out for the afternoon… This morning I finished the patch and got it tacked in… 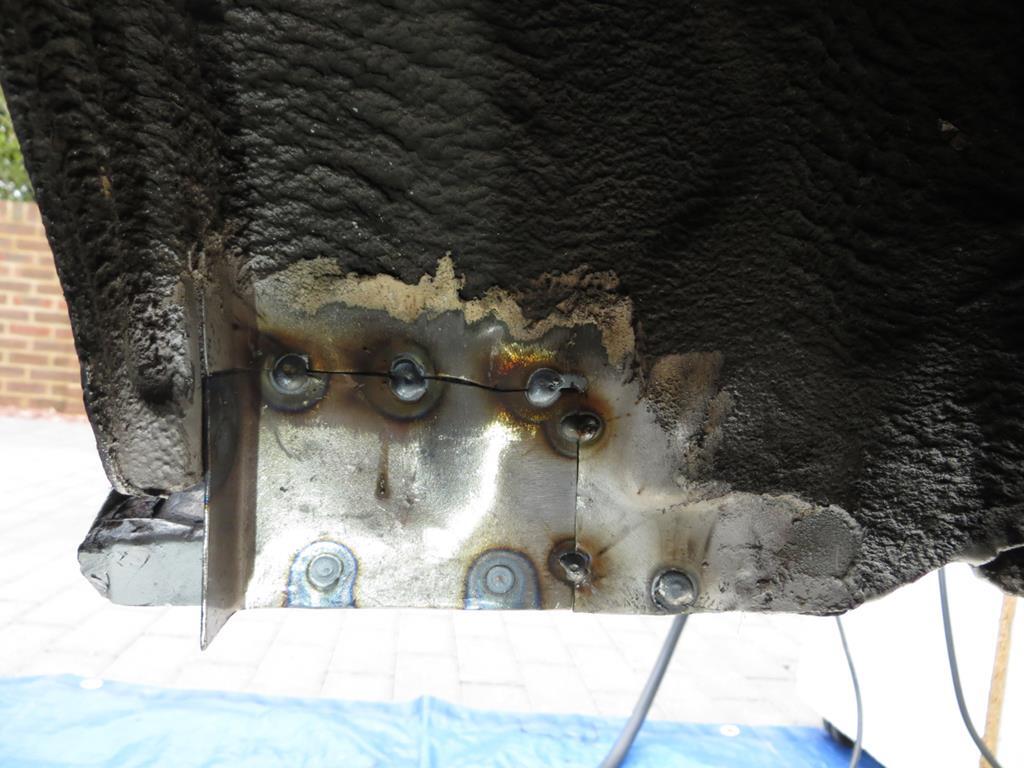 …And properly welded and ground back. 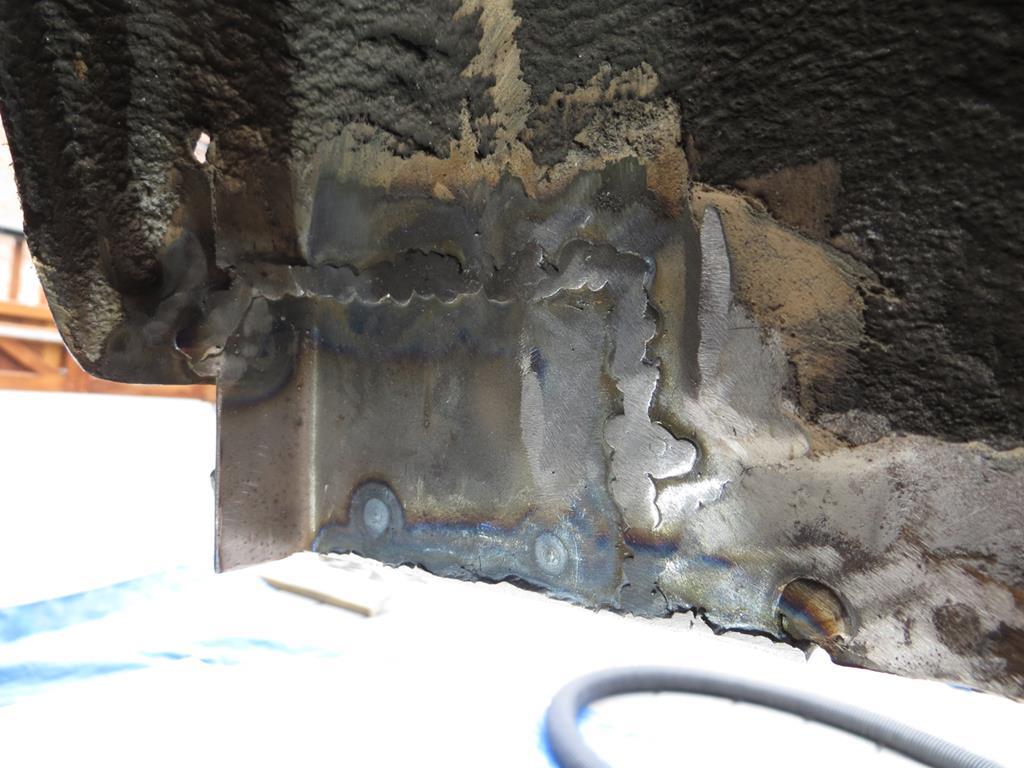 Had a couple of problems where I blew through but I’m getting better at sorting them out. Remember the gap in the seam at the bottom? Well that’s not only tight now, but I seam welded it too. 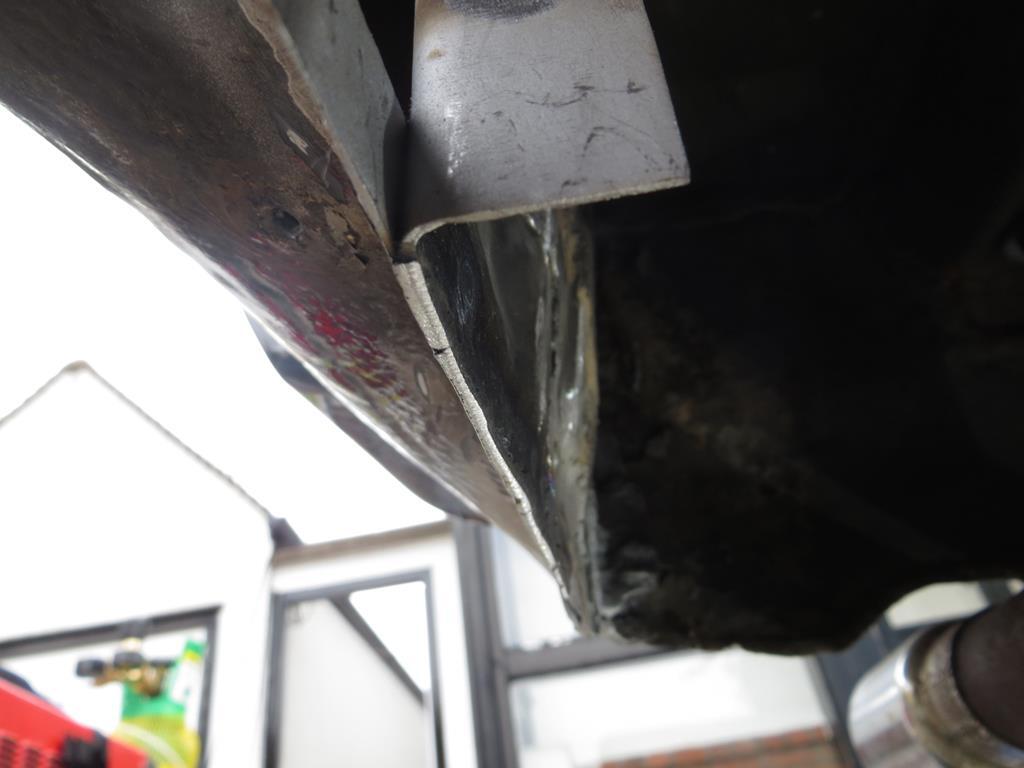 From the looks of that photo I may have over ground it. Oh well. The reasons for doing it are to keep the MOT man happy if he spots it and to try and stop water getting back into the seam again. Then, another hole - the one in the inner wing. 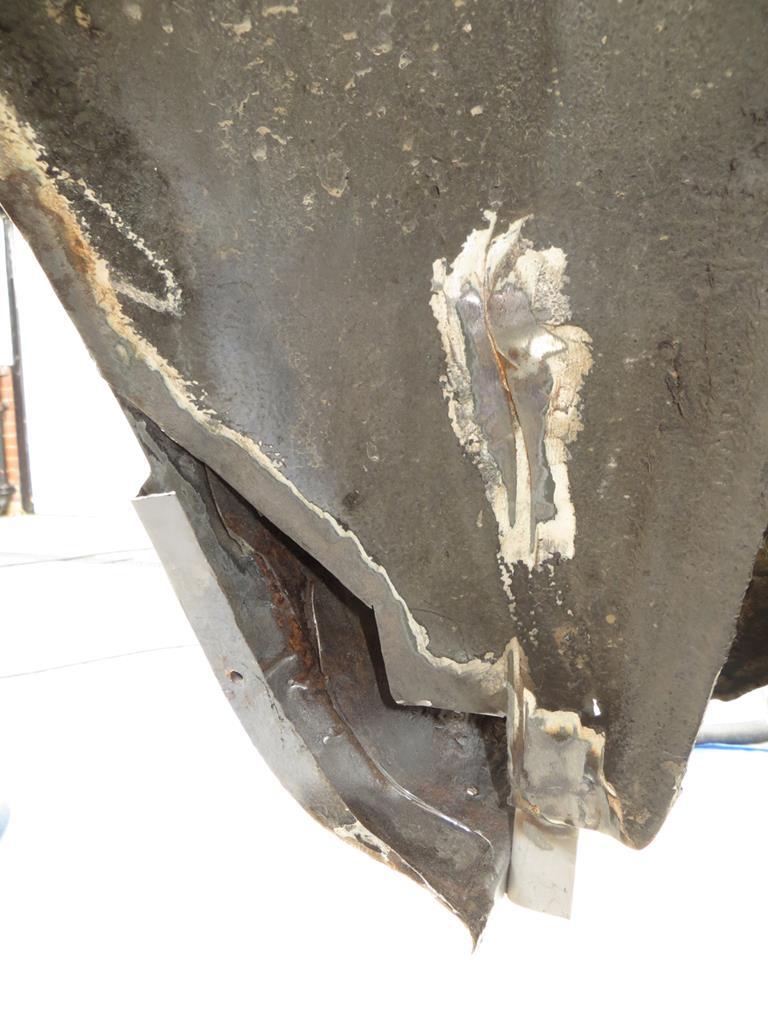 Started by making a card template. Speaking of which, I’m running out of my stock of cardboard. How am I going to explain to the missus that we need to eat more frozen pizzas? Answers on a post card please… Because then I’ll be able to use the post cards for templates too. 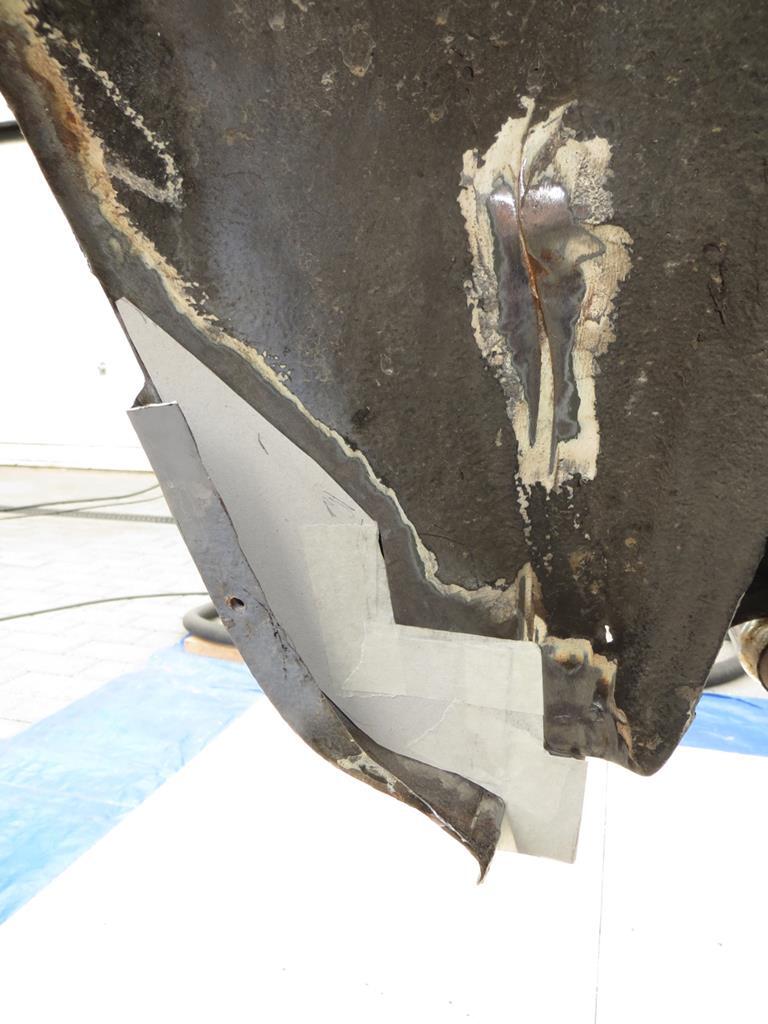 So, who can spot the intentional error with that template then? |
| |
Last Edit: Feb 2, 2019 21:53:52 GMT by Sweetpea
|
|
vulgalour
Club Retro Rides Member
Posts: 7,285
Club RR Member Number: 146
|
|
Aug 22, 2018 22:37:50 GMT
|
|
Over-long so you can trim it back to suit once welded in? Brave to show a close-up of your welding, I daren't risk that because of all the help people tend to offer. Looks good to me, all the same.
|
| |
|
|


