|
|
|
Oct 15, 2023 11:20:24 GMT
|
I was going to tell you how well we did with the paint job. Unfortunately life got in the way. And then we had to go on a humanitarian mission to the subarctic to help rescue Iceland’s ailing economy by giving them truck loads of cash in return for food and lodgings. To be fair the lodgings were very comfortable and the food was excellent but as countries go, Iceland just isn’t cheap. We are now living on gruel while our finances recover. On our return I’ve had to fix minor leak in the heated moat at Sweetpea Towers and the dish washer went on the blink so I’ve had that to deal with too. I gave her a stern talking to. “I say young lass, pull yourself together.” I said, “Forget your family, you work for us now and those dishes need more scrubbing!” You’d think young people would be more independent wouldn’t you? And why am I having to deal with the staff anyway? That’s the damn Butler’s damn job damn it! Sorry, where were we? Oh yes, how did we do with the paint? Well it’s far from perfect. To start with, and despite my best efforts I’ve missed a couple of bits. The bottom corner of the fuel flap to start with.  When the door is shut you don’t see that so I’m not going to repaint it. And I missed the inside lip of the wheel arch. 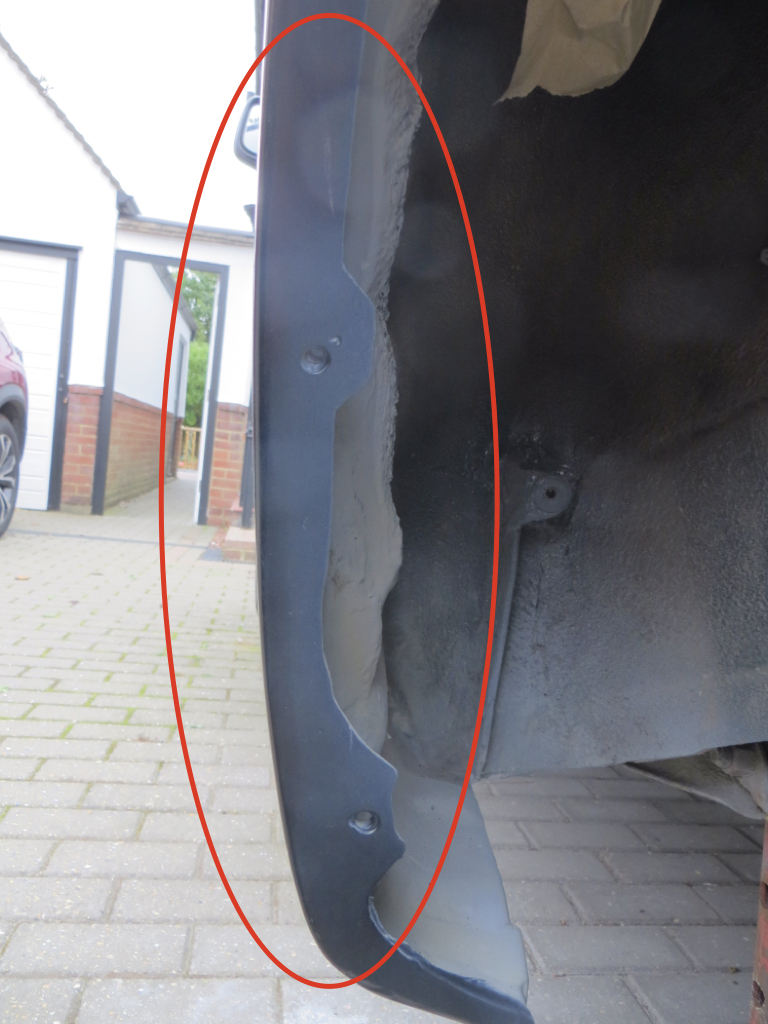 Now I truly don’t understand that because I distinctly remember painting it. Not a massive problem, I might touch it in when I ‘do something’ with the inside of the wheel well. I’m not quite sure what ‘do something’ means exactly because I haven’t thought about it. Stone chip I guess. Any recommendations for stone chip inside wheel wells? The next two problems aren’t so easy to see in the photos but I’ve managed to get a sag in the clear coat above the wheel arch. 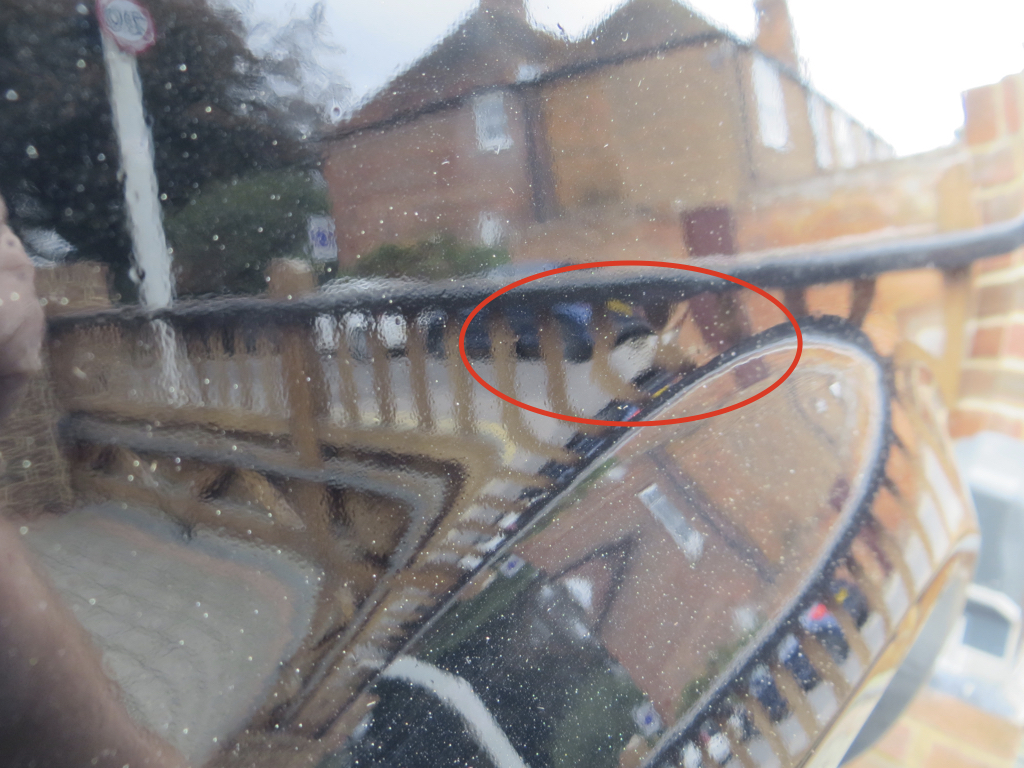 Again, you don’t see it unless you look properly but I might consider flatting that out and polishing it. I’m not doing that until next year though so it can stay as it is for the moment. Lastly, and not surprisingly, I’ve got some dust in the paint. I guess that’s what happens when you try and paint in a tent. Most of what looks like dust in the photo above is just dust that landed on the panel in the days after I painted it. But these bits are really in the paint… 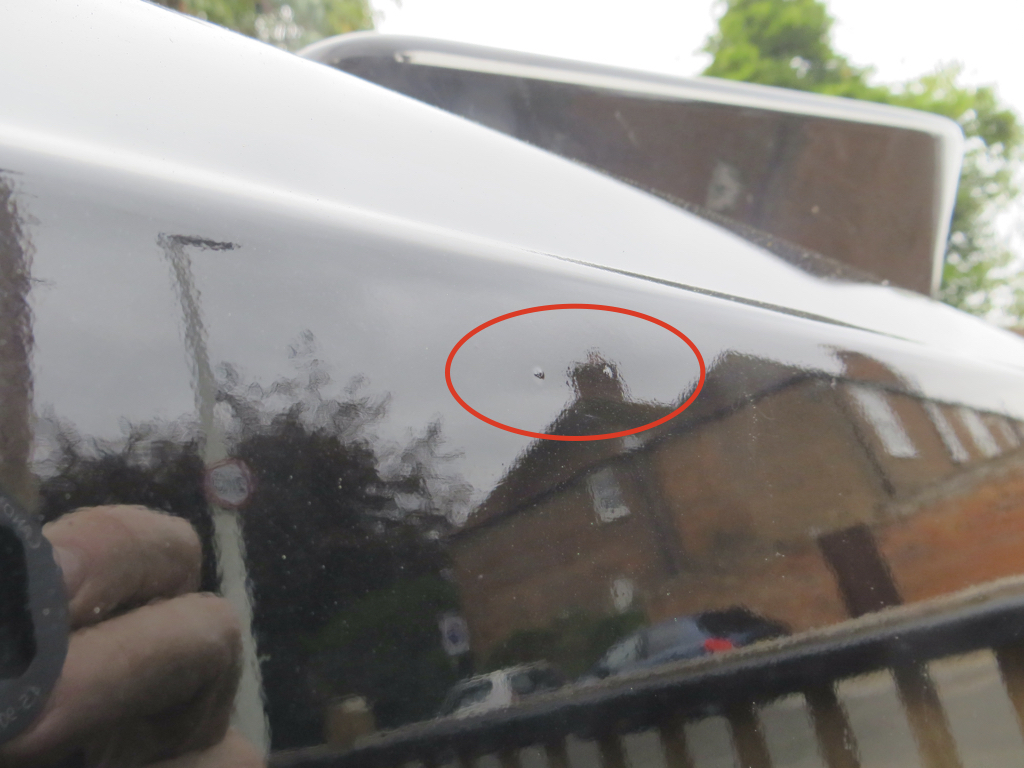 Those are the worst bits but there is a fair amount of small dust spots stuck in the paint. I keep thinking that there is more dust in the paint than there is in my hoover bag but that’s being a little unfair. I could flat it out but that’ll be next year if I bother. I’m a bit annoyed about the dust and the run. And I suppose about missing bits. I think I’m going to have to do a lot more to keep the dust down. That might be easier in future because when I get the car running I can park it on a ground sheet which I couldn’t do this time. Anyway, for my first go at serious paint work I’m fairly chuffed. Compare it against the rest of the car… 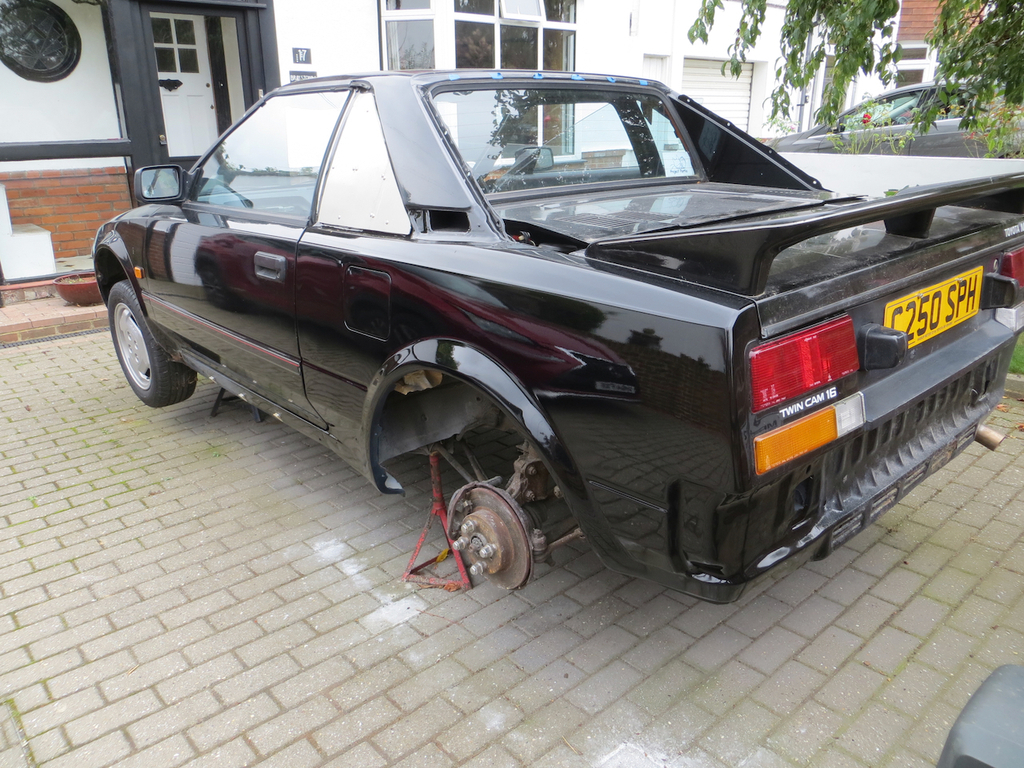 It’s the best panel on the car by a country mile. It’s blacker than the rest of the car and it’s shinier than the rest of the car. Yeah, I really am going to have to paint the rest of the car. But that will happen steadily as I work round fixing the rust (over the next several decades). James |
| |
|
|
|
|
|
|
|
Oct 15, 2023 12:50:11 GMT
|
|
Personally speaking, I think you've done a stunning job there considering your location etc,
Most of that will, almost certainly, "buff out" when you mop it,
(Love your threads and writing style by the way,)
Nigel
|
| |
BMW E39 525i Sport
BMW E46 320d Sport Touring (now sold on.)
BMW E30 325 Touring (now sold on.)
BMW E30 320 Cabriolet (Project car - currently for sale.)
|
|
jimi
Club Retro Rides Member
Posts: 2,228 
|
|
Oct 15, 2023 16:09:47 GMT
|
Looks great James, nice job  |
| |
Black is not a colour ! .... Its the absence of colour
|
|
|
|
|
Oct 15, 2023 16:37:38 GMT
|
|
I've seen worse from pro's before they polish it, If you choose to it will polish up very nicely. for the wheelarch and edge of filler flap I'd just mix a bit up and brush it on.
|
| |
|
|
|
|
|
Oct 15, 2023 17:59:31 GMT
|
|
Totally agree with Kevins, brush paint the missed bits and flat & polish the panel to get the proper finish.
|
| |
|
|
glenanderson
Club Retro Rides Member
Posts: 4,355
Club RR Member Number: 64
Member is Online
|
|
Oct 15, 2023 21:53:27 GMT
|
Totally agree with Kevins, brush paint the missed bits and flat & polish the panel to get the proper finish. The king of shiny black has spoken. 😃👍 |
| |
My worst worry about dying is my wife selling my stuff for what I told her it cost...
|
|
|
|
|
Oct 16, 2023 17:23:43 GMT
|
|
You see, the problem I have with flatting and polishing is that I'll have to learn how to do it. But I do agree it's the best way to go.
I didn't write it up (I don't think) but I did 2000 grit the centre section of the bonnet and polish it a bit.
There were two reasons for doing that. One was that there were water marks in it from the car cover and I wanted to see if they'd come out. They are a little better but didn't come out.
The second was that the paint feels very 'gritty' and whatever it is won't wash off. It could be grinding fall out stuck in the paint to be honest. Anyway, it looks ok and feels smoother now but there are some scratches which show up under strong light. I wonder if whatever was stuck in the paint came out, got stuck in the 2000 grit and caused the scratches.
Anyway, I have a lot to learn about polishing if / when I go down that route.
James
|
| |
|
|
|
|
|
Oct 16, 2023 17:25:35 GMT
|
|
|
| |
|
|
jimi
Club Retro Rides Member
Posts: 2,228 
|
|
Oct 16, 2023 20:57:25 GMT
|
|
Have you tried a clay bar the bonnet ?
|
| |
Black is not a colour ! .... Its the absence of colour
|
|
|
|
|
|
|
|
flatting and polishing is not that difficult it just takes for ever and you really need a power polisher. Basically you go over it with fine (2000 grit though you can start with 1200 if its really rough) wet and dry with plenty of water until you have a smooth surface, then you polish it up with a compound. The pitfalls are polishing through on corners and feature lines (either go very carefully or do them by hand) or not having enough paint/ clear and going through it. keeping the polisher moving and don't hold it on one spot is imporant too.
|
| |
|
|
spacekadett
Part of things
  F*cking take that Hans Brrix!!
Posts: 838
|
|
Oct 17, 2023 12:58:40 GMT
|
flatting and polishing is not that difficult it just takes for ever and you really need a power polisher. Basically you go over it with fine (2000 grit though you can start with 1200 if its really rough) wet and dry with plenty of water until you have a smooth surface, then you polish it up with a compound. The pitfalls are polishing through on corners and feature lines (either go very carefully or do them by hand) or not having enough paint/ clear and going through it. keeping the polisher moving and don't hold it on one spot is imporant too. I can vouch for this method as I did similar a couple of weekends back to get rid of some dirt nibs and sanding marks that reappeared when the paint dried. A mop / polisher, even a small one would be a must as I did mine by hand as my Brother has failed to return my mop, and I just got impatient and gave it a go. Paintwork came up a treat, but by god I had arms like a 15 year old that had found a new underwear catalogue 😂 |
| |
Mechanic's rule #1... If the car works, anything left on the floor after you finished wasn't needed in the first place  |
|
|
|
|
Oct 22, 2023 22:04:37 GMT
|
Thanks chaps, I'll look at flatting and polishing but it won't be until next year. Or maybe the one after. You know how things go with me. Have you tried a clay bar the bonnet ? I did but rather than the clay taking the bits out of the paint the bits in the paint took the clay out of the bar. They are well stuck. |
| |
|
|
|
|
|
Oct 22, 2023 22:10:54 GMT
|
To jump back a bit… Because… Reasons. When I was pondering how much sanding to do on that wing I needed a distraction for a while. I decided to do something about the radio wiring and made a start. You see it looked like this… 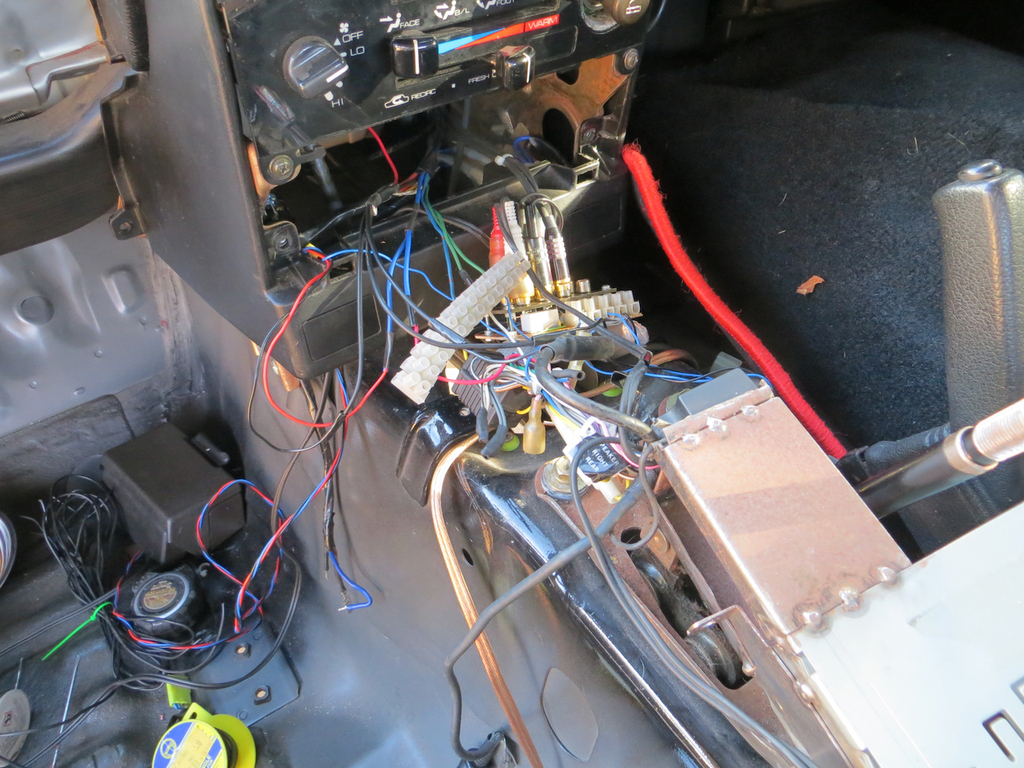 Literally an embarrassment. Especially when you know that I trained as a professional audio engineer. Best take a closer look at this eh? 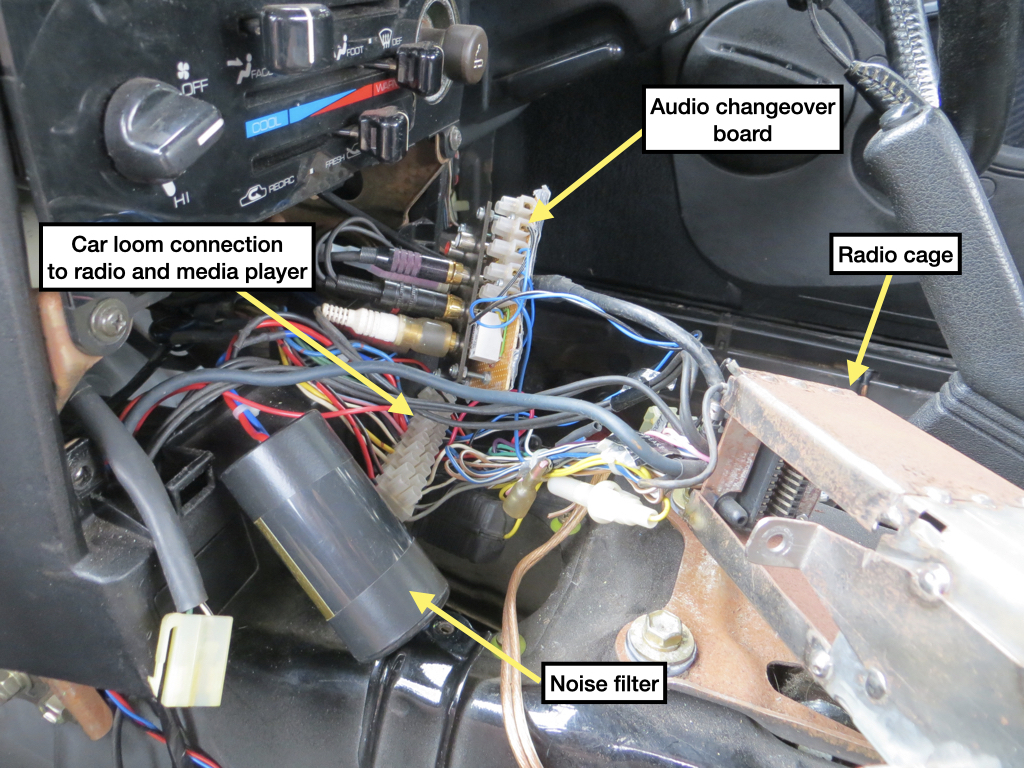 Good grief Penfold! The chunky noise filter sits in the power line to the radio. I think it’s a big inductor and capacitor in a plastic cylinder. It’s there because the Alpine radio was picking up noise from the car. This thing wasn’t fastened down and was rolling around on the tunnel behind the radio. I have a little media player hidden in the ash tray. The audio changeover board takes sound from the Alpine and media player and switches one of them to the power amp under the drivers seat. It was also rolling around behind the radio, but to make sure it didn’t short anything out I’d put some gaffer tape on it. See, gaffer tape, I said I was a professional. The interface between the car wiring and all this junk was a long length of terminal block. It’s good isn’t it!? OK. Let’s finish sorting it out. I bought some pipe clips and bolted the noise filter to a convenient hole behind the radio. 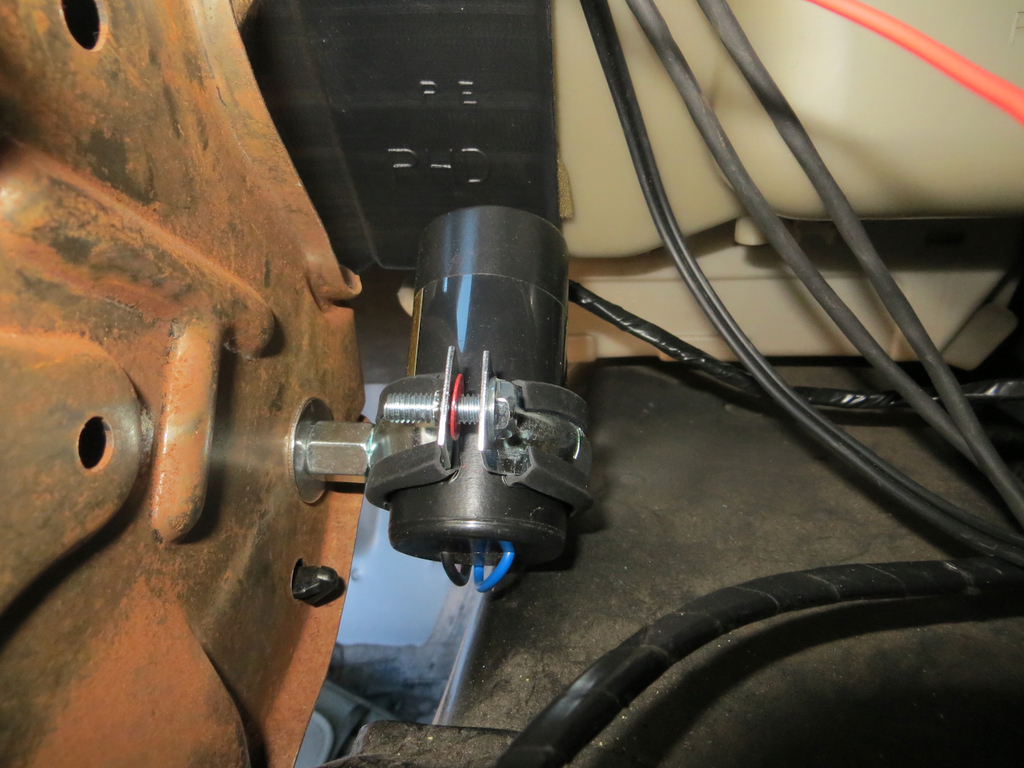 Not exactly factory looking but I’m not entering this for a concours d’elegance event any time soon. The audio change over board started life looking like this… 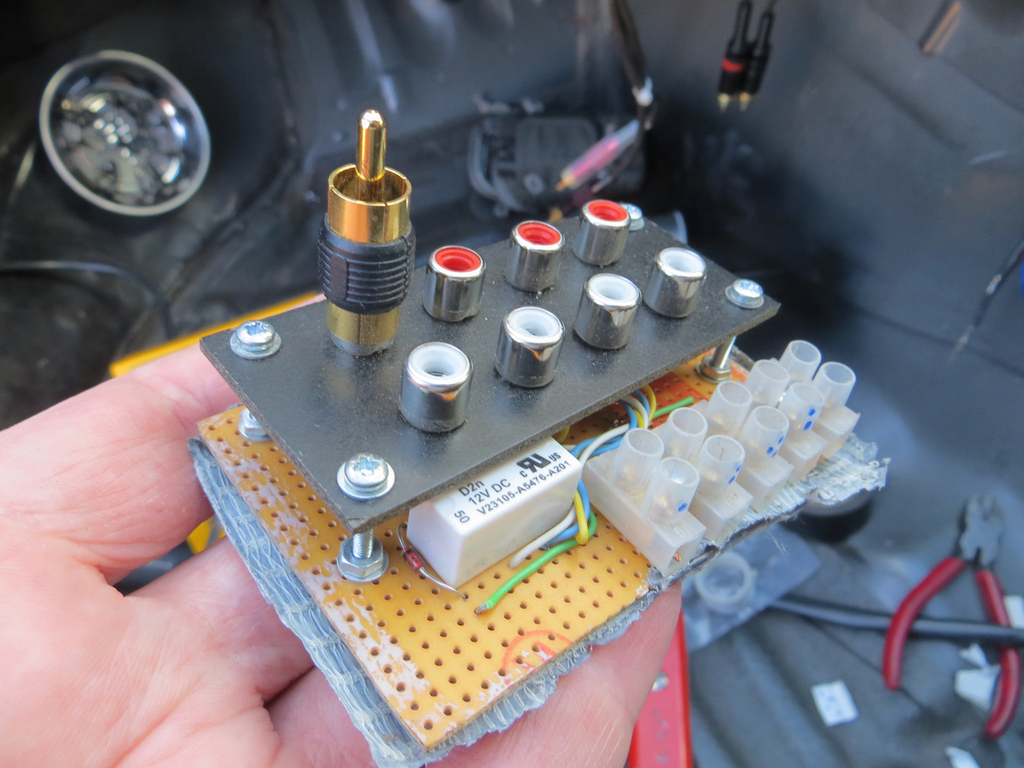 It’s just a relay and a few diodes on a bit of Vero board. It got reimagined as something smaller and with ears to bolt it down.  There is a space on the firewall behind the glove box that has two unused studs. The studs are probably used on the cars with air conditioning. Anyway, by pure coincidence, the holes in the ears matched up with the studs so it got bolted on and the cables tie wrapped to the dash bar. 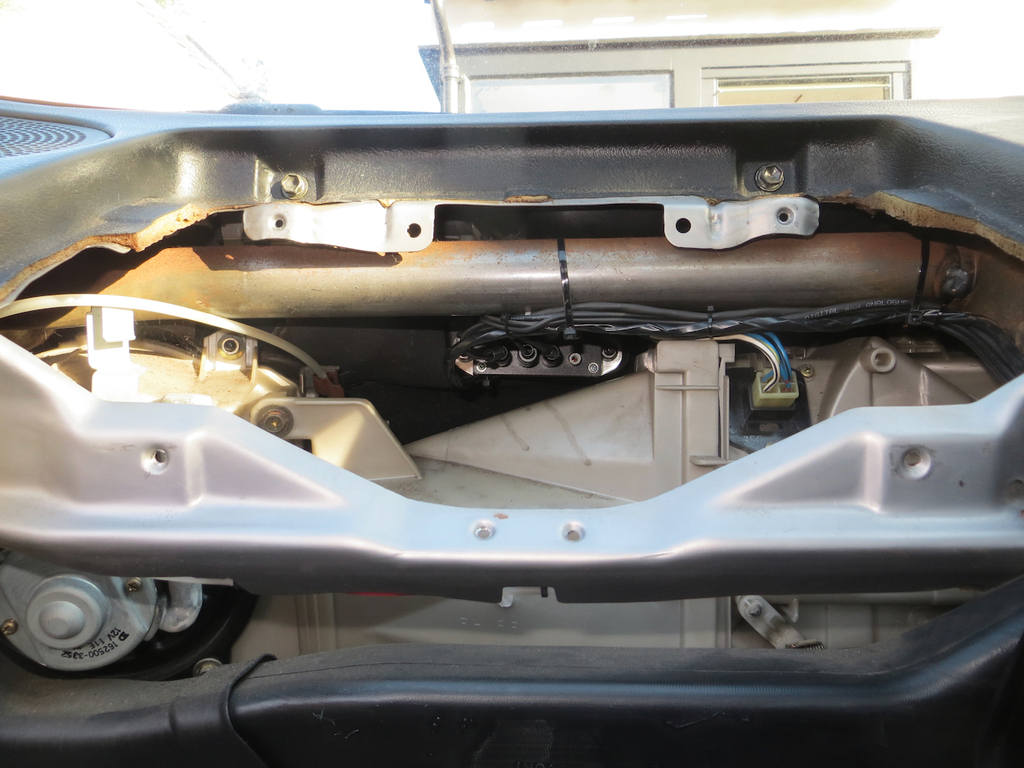 I bought some multiway connectors to hang all this together.  Looks a bit better don’t you think. Here’s the finished job with the glovebox, radio, and media player all back in.  Unfortunately… The Alpine has packed up. The radio works fine but I don’t really use it because there are no radio stations that I fancy listening to. I would definitely use the cassette player but it doesn’t play anymore. I think it needs belts and / or idlers. I’ll have it apart and work out what’s wrong another day. It’s worth fixing because it’s period, it looks great in the car, and the cassette machine sounds stunning when it’s working. It’s right up there with a decent hifi machine let alone a car player. James |
| |
|
|
|
|
|
Oct 30, 2023 20:09:54 GMT
|
Some time ago (about 2 months if we are being accurate) I’d found a small leak into the boot through the rear light seal. Toyota used a foam gasket but, 30 years later, those have failed. So I made a new gasket some time ago from neutral cure silicone. That worked quite well but I think I’d made it a little thin so I’d deepened the mould and tried again. Unfortunately, 3 or 4 weeks later the neutral core silicone hadn’t done the neutral curing bit. 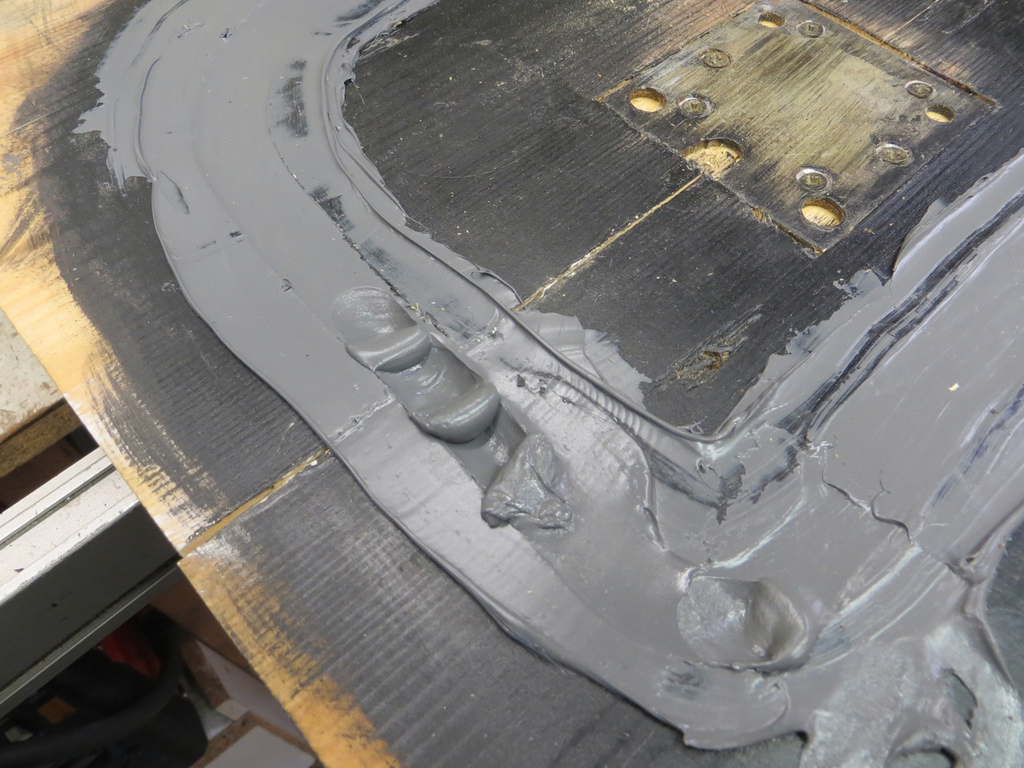 I guess the tube has gone off. It’s been open for years. Bought a new tube and tried again. 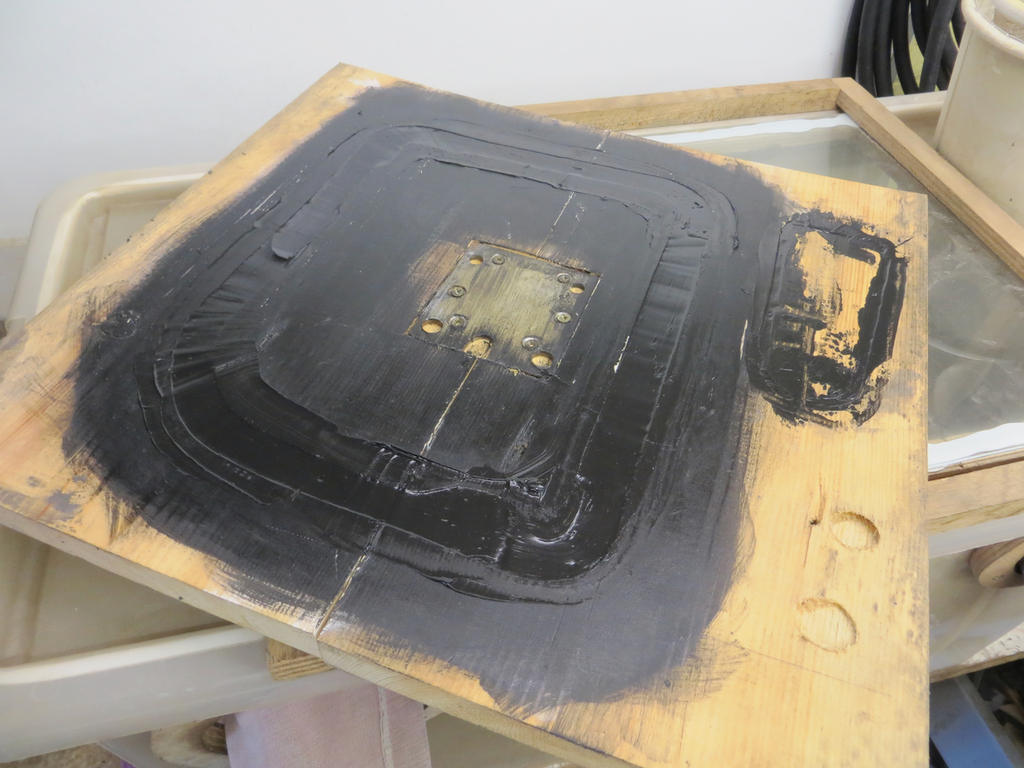 A few days later I have 2 new gaskets to fit so I fitted them. 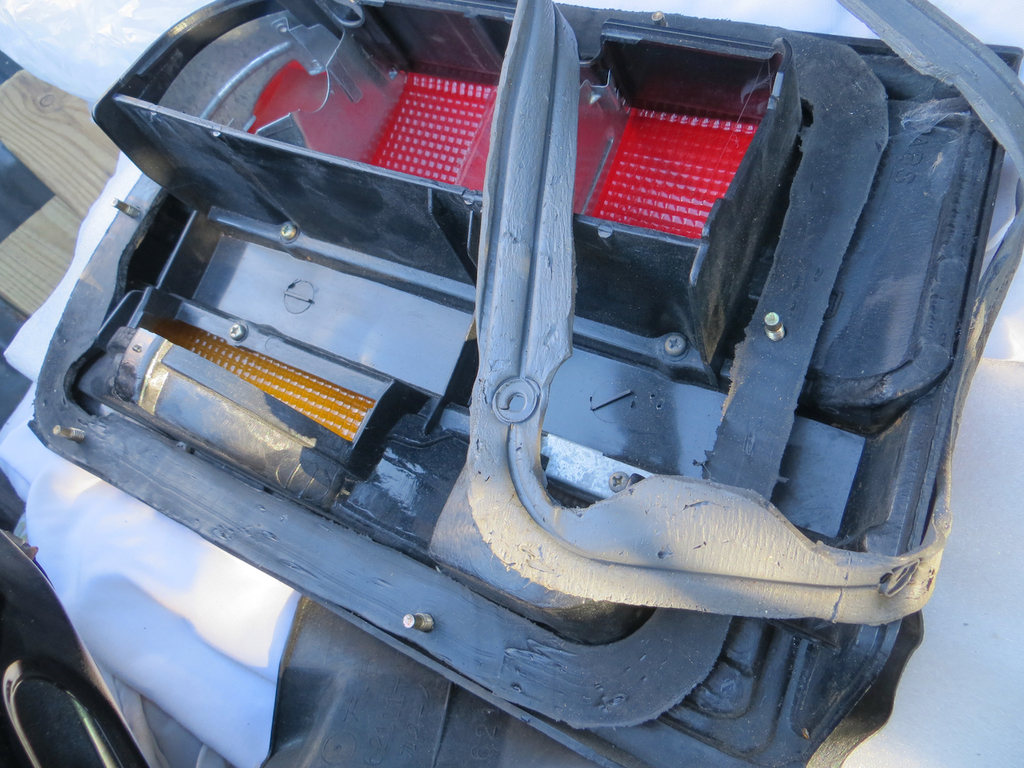 You can see how the ribs on the back of the light block has cut into the back of the old grey gasket. Now I can start putting the interior back in. Except… Some time ago (I can’t be accurate ‘cos I can’t remember when) I’d found a hole in the floor by the throttle pedal where a seam has failed. On the outside it was behind the wheel arch liner so you didn’t see it and on the inside it was under the carpet so you didn’t see it. Being a man of outstanding diligence I found the hole anyway. Being a man of outstanding laziness I decided not to bother fixing it but implemented a temporary solution to keep the water out. Broadly speaking I glued a piece of plastic milk bottle over the hole. 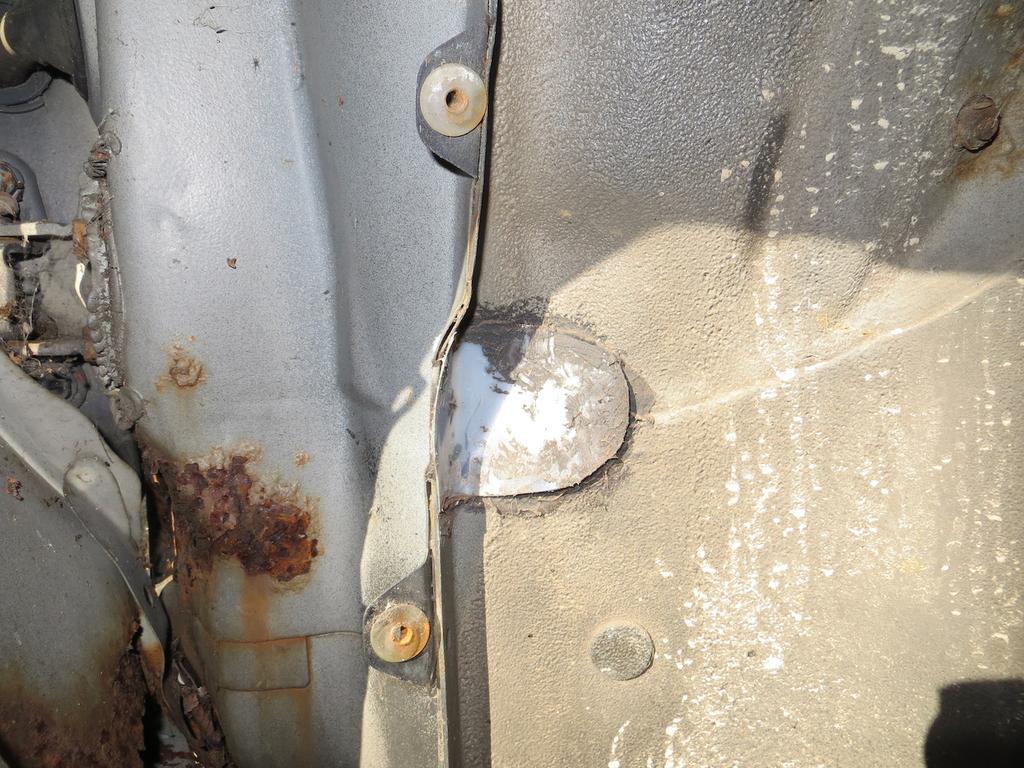 I say temporary but it’s been there for a number of years and was still fine. “Only temporary unless it works.” Anyway, it would seem silly to fix all the other holes in the floor and then leave this one. I’d only have to take the carpets out again to fix it. Ok then. I’ve persuaded myself. I’ll fix it. Job one - chop out the rusty bit and make a pattern. 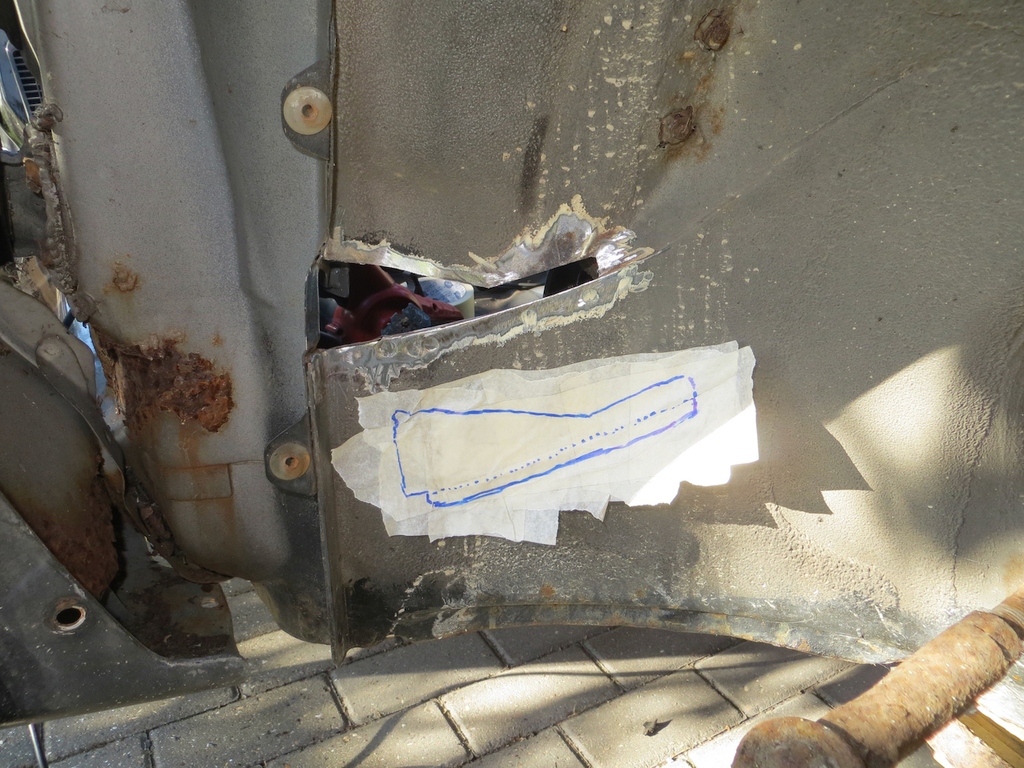 Job two - cut out a bit of metal and run over it a few times with the other car. 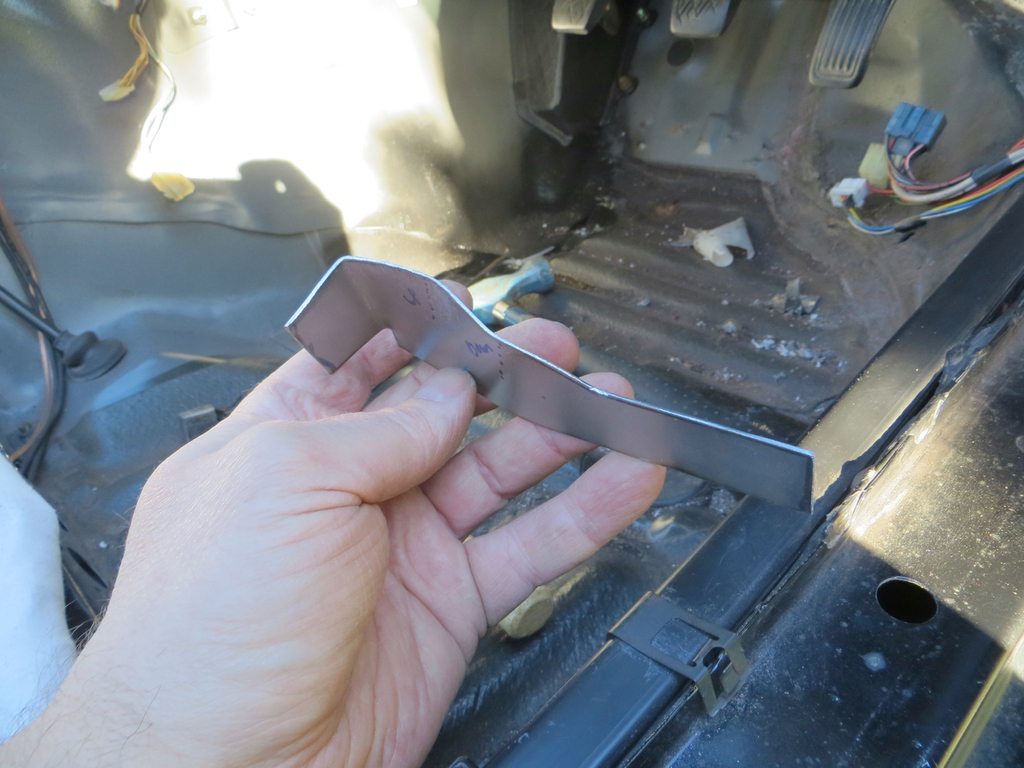 It doesn’t look like much does it? But it does fit in the hole. 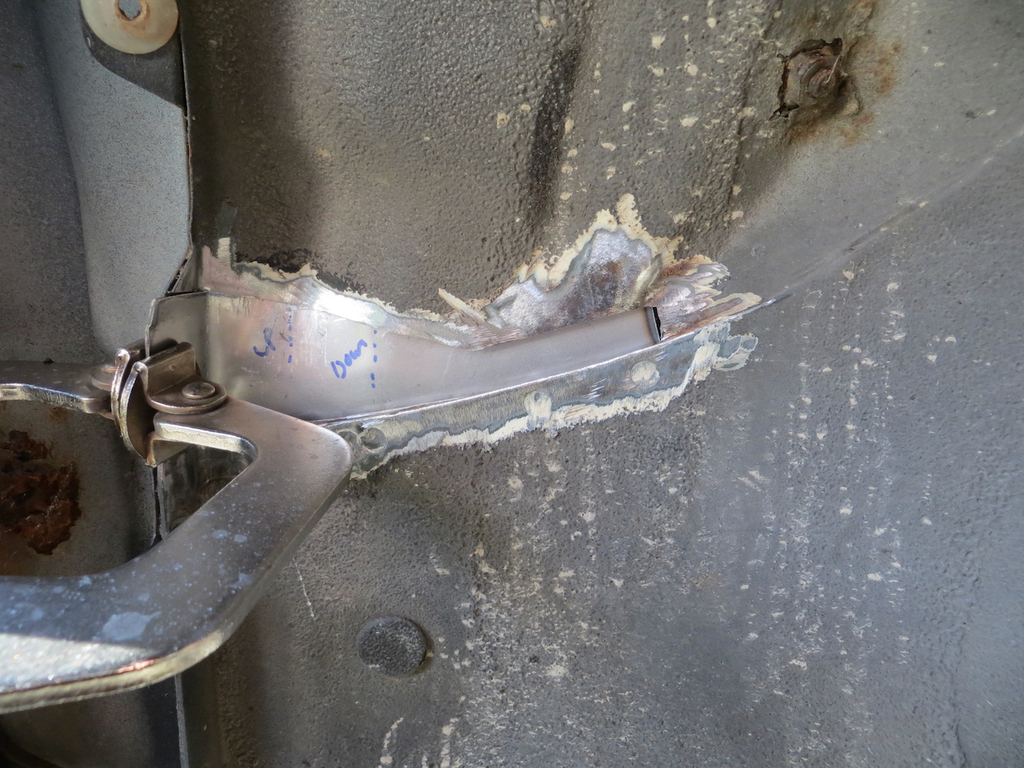 Now, you see, this bit of the car is built like this… 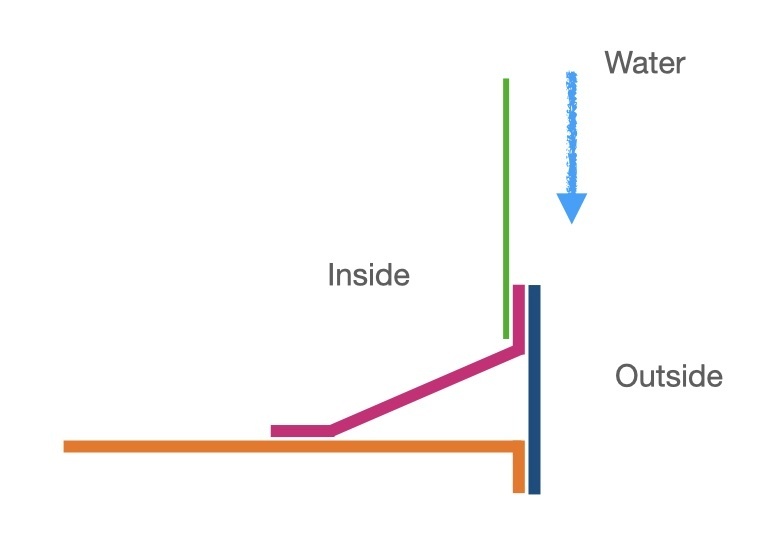 The bit that suffered is the green bit which is about a millimetre thick. The rest of it is pretty thick because it forms a box section that joins the front chassis legs to the sills. The problem is that the thin bit is on the inside of the car so if the seam sealer fails water can run into the seam. I assume this is what went wrong here. To stop that happening again I can change the way it’s welded in. Instead of spot welding it I seam welded it to the top of the box section. 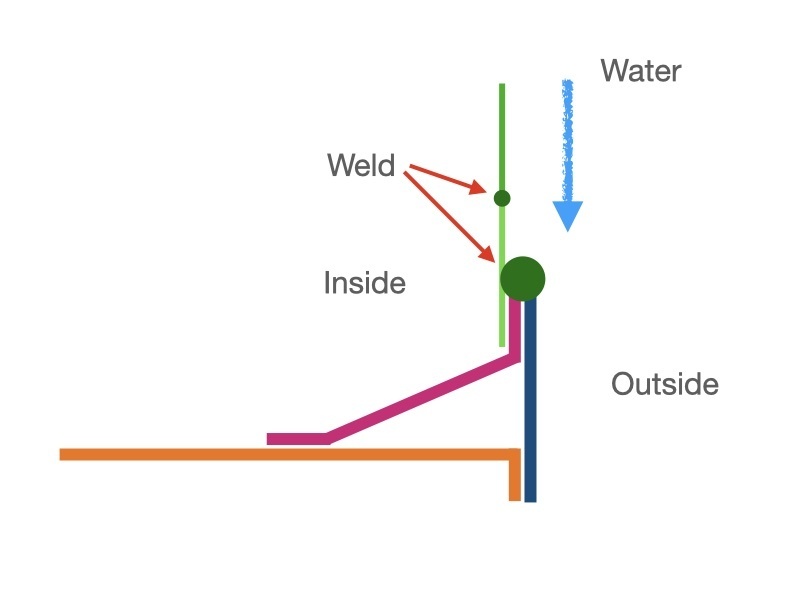 Hopefully if the sealer does fail again the weld bead will shed the water off anyway. Job three - weld. It in. 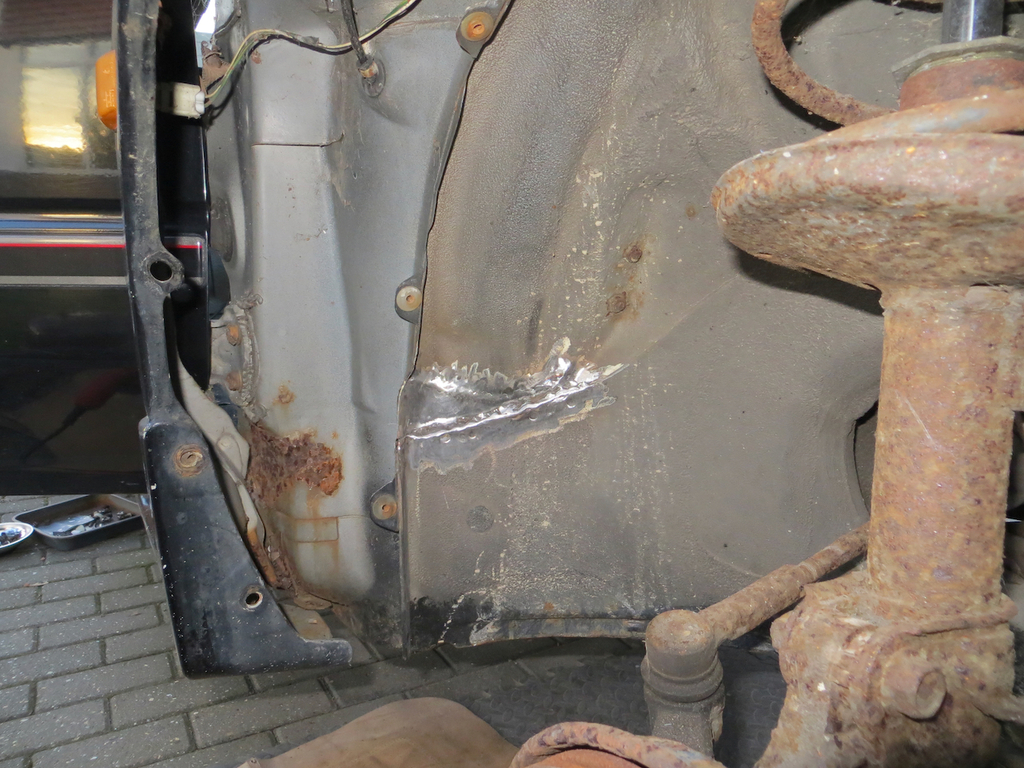 That got epoxy primer and seam sealer on both sides. Don’t worry about that nasty looking rust spot to the left. That doesn’t go through to the interior and will get fixed another day when I take the wing off. For now it just needs some milk bottle glued over it… I reckon we should get the quarter light glass back in eh? There are some clips that attach to the bottom of the surround. They catch the bottom of the glass. 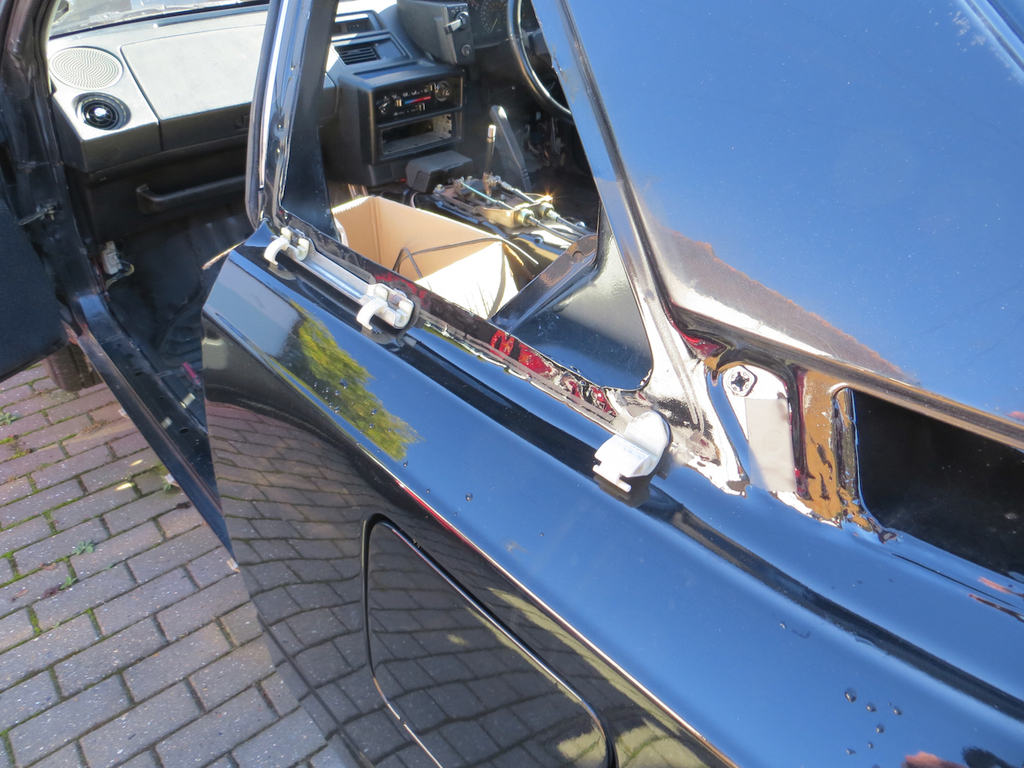 The glass itself is glued into the hole using a butyl tape and held down with the trim. 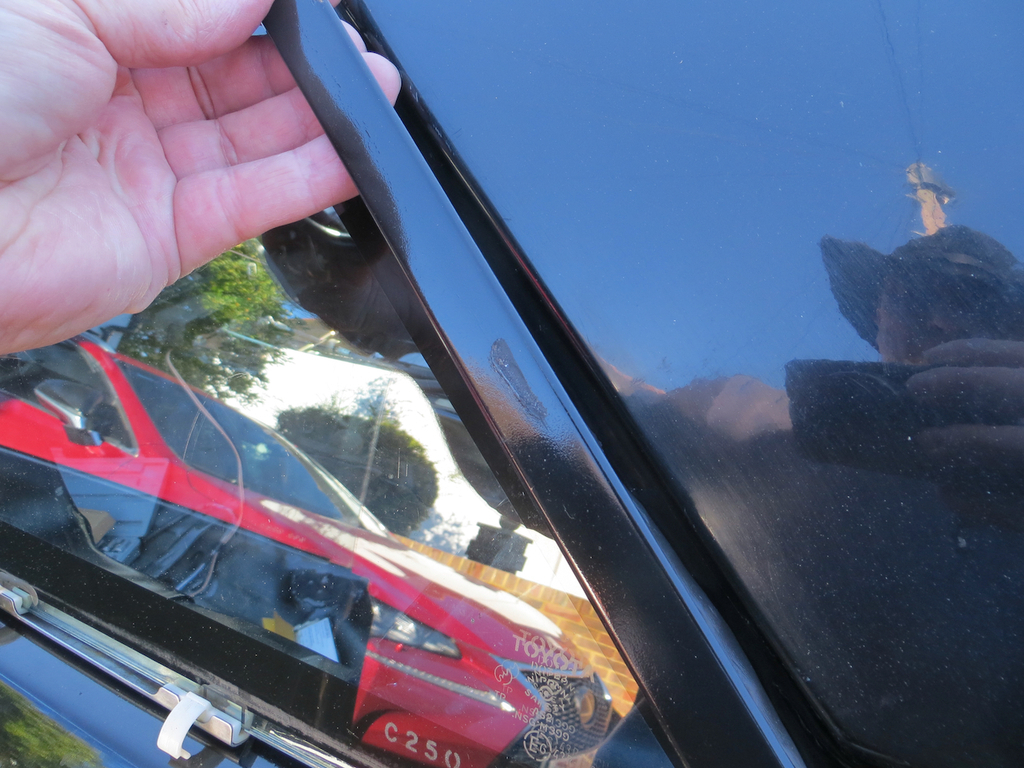 Humph. The trim that I repainted some time ago has got damaged. That’s quite rubbish. After a bit of refinishing it got attached to the car. 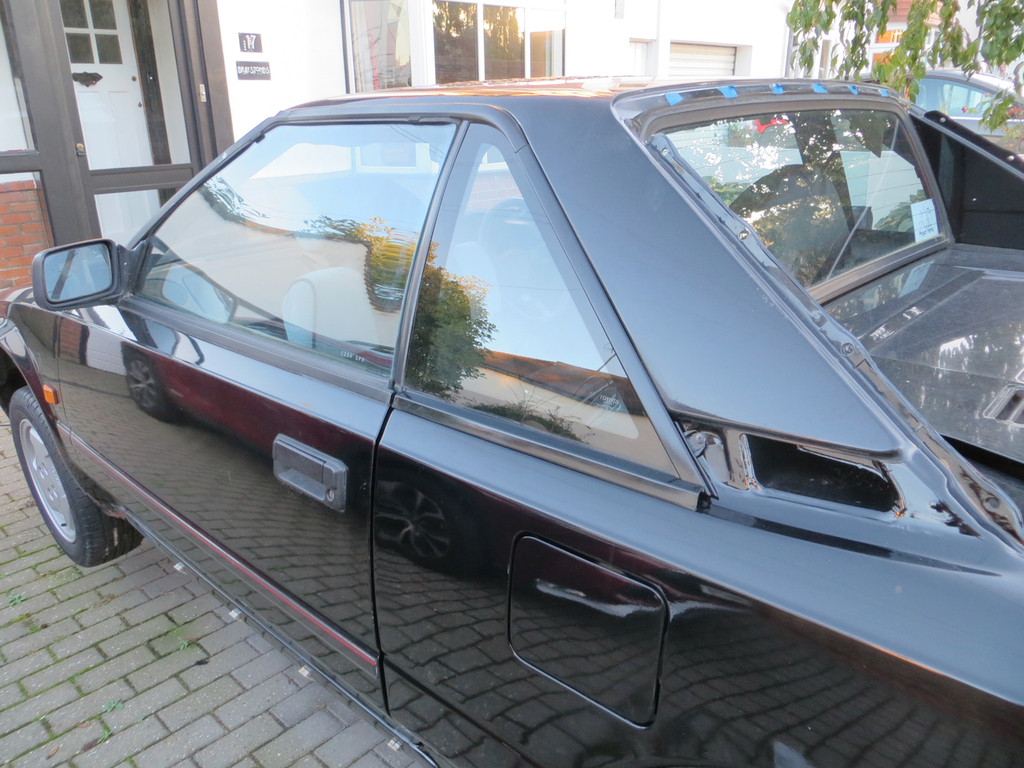 Well that’s the glass in. I still need to fit the trim round the rear pillars but I’ll do that another day. For now I can start getting the interior back in. 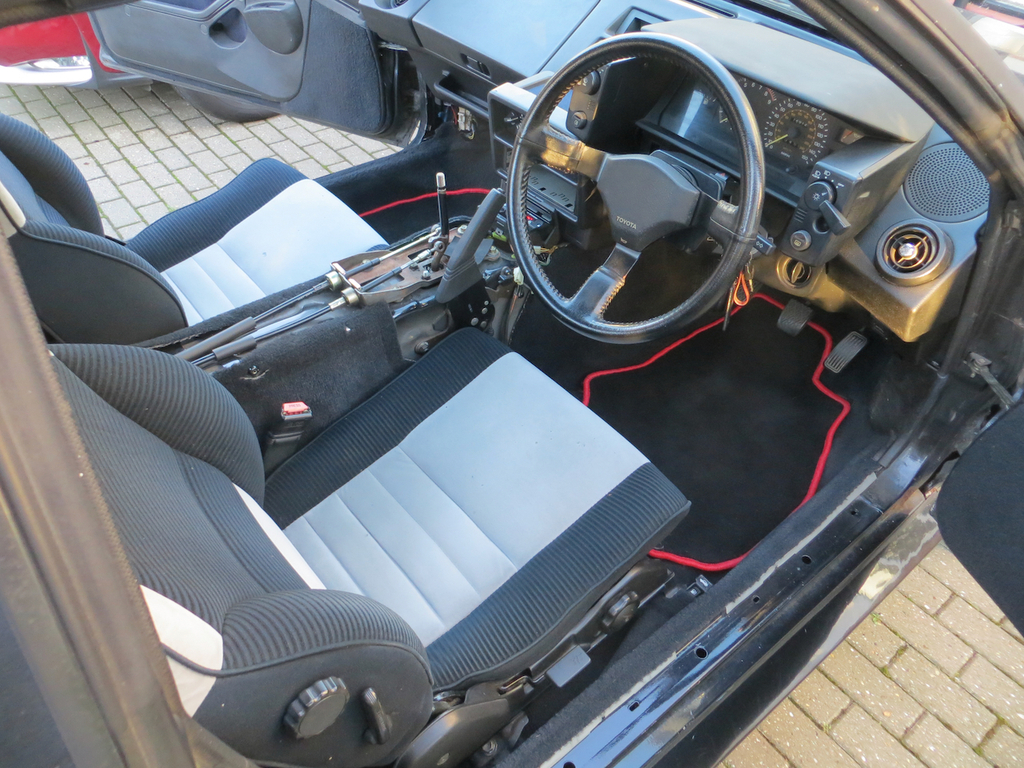 And you know what that means don’t you? Oh yes… It means that I can sit in the car, listen to the radio and make ‘Brum Brum’ noises. 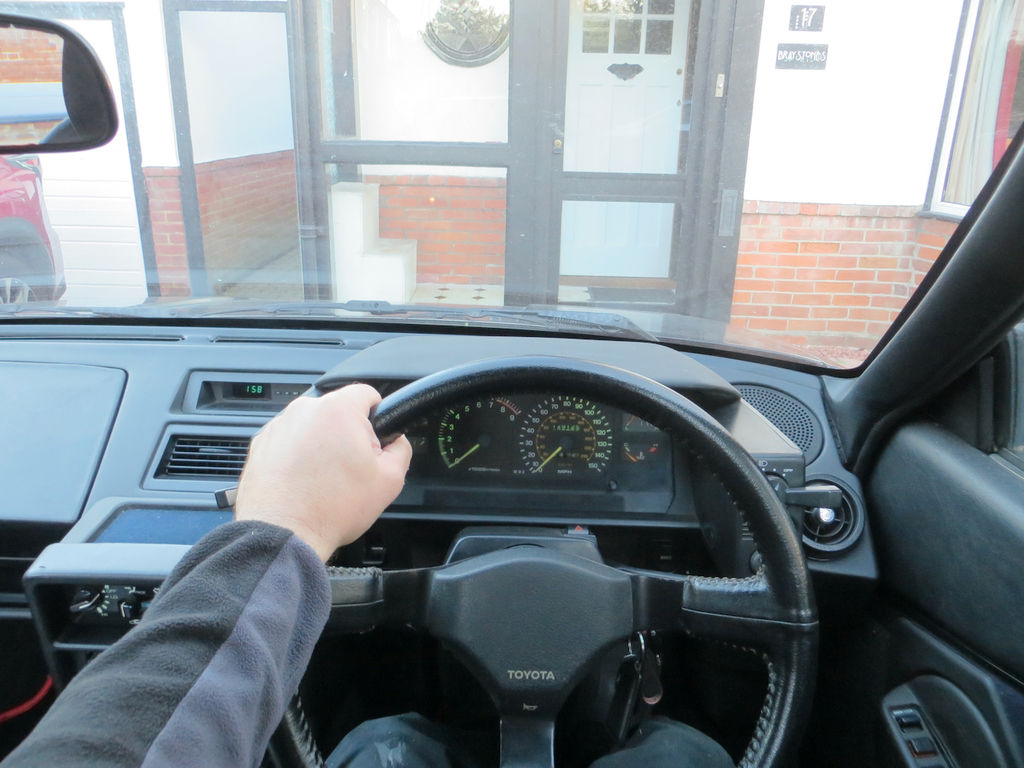 For the first time in as long as I can remember it feels like I’m making progress. James |
| |
|
|
teaboy
Posted a lot
   Make tea, not war.
Posts: 2,125
|
|
Oct 30, 2023 23:14:31 GMT
|
Broadly speaking I glued a piece of plastic milk bottle over the hole.  Up t'north where I live, the milkman brings milk in glass bottles so I don't have that option.  |
| |
|
|
|
|
|
|
|
|
Lovely work. Those seats sure look good; were they recovered in an earlier post? And other question: does this example have factory A/C fitted?
For me, this was a good era for car interior design. I had an ‘83 Celica GT and, not surprisingly of course, it looked not dissimilar to you Mister2. It may have been plastic-rich, but Japanese plastics were quite appealing and held up well.
Best, John
|
| |
|
|
jimi
Club Retro Rides Member
Posts: 2,228 
|
|
Oct 31, 2023 11:53:16 GMT
|
Coming along very nicely James, looking better with every update  Lovely work. Those seats sure look good; were they recovered in an earlier post? And other question: does this example have factory A/C fitted? Two tone seats were standard/option on 1a's, weren't an option on 1b's. Factory A/C wasn't an option on any UK MK1's AFAIK there was one UK dealer (Pinewood?) that offered it as a dealer fitted option. They all had the A/C buttons on the heater controls but they had no function, I modified mine to make them available for other uses, I use one for the electric aerial. LINKY 😎 |
| |
Last Edit: Oct 31, 2023 11:56:28 GMT by jimi
Black is not a colour ! .... Its the absence of colour
|
|
|
|
|
Oct 31, 2023 18:20:16 GMT
|
Any rust like in your photo above I always cover with Hydrate 80 or Kurust. It's not a fix, but it will stop the rust for a year or two while you plan how to fix it prevaricate  Good progress though. |
| |
|
|
|
|
|
Oct 31, 2023 19:25:24 GMT
|
Up t'north where I live, the milkman brings milk in glass bottles so I don't have that option.  Oh man, I never realised. Is that why you have to do stuff properly with a welder and stuff? Send me your address and I'll post you a few plastic milk bottles. You can just glue them to your Beemer and crack on driving it. Lovely work. Those seats sure look good; were they recovered in an earlier post? And other question: does this example have factory A/C fitted? For me, this was a good era for car interior design. I had an ‘83 Celica GT and, not surprisingly of course, it looked not dissimilar to you Mister2. It may have been plastic-rich, but Japanese plastics were quite appealing and held up well. Best, John Hey John, It's definitely got an '80s thing going. Toyota did a blue interior at the time. I had one in a Corolla. It was God awful even back then but I'l love to have one now. The seats are original. The only thing I've done is to Vax them. The interior needs another proper clean to be honest. There are a couple of cigarette burns on them but in general they are in lovely condition. One of the reasons I took the car on is because the interior is in really good condition. Just the odd knick here and there but really it's pretty immaculate. Especially when you consider the state of the rest of the car. Air con? Yeah, chance'd be a nice thing. Like Jimi says it wasn't an option back then on the UK cars. You could retro fit it if you were mad enough. I think the dealers advertised retro fitting it for a while. I asked my dealer about fitting it to the previously mentioned blue Corolla but it would have cost a very significant proportion of the value of the car. I don't think anybody bothered. That said I also have heard of some dealers offering it from new on the MR2. There was a 'Sherwood' version in a dual tone green which I believe had it fitted. But I think that car was only available from one or two dealers. They may have specially imported it but if so I don't know how they would have sidestepped Toyota UK. jimi do you know much about the Sherwood cars? My car is older than Jimi's and has cable operated heating controls rather than the motor driven version on his car. There is still a knock out where the buttons would go. 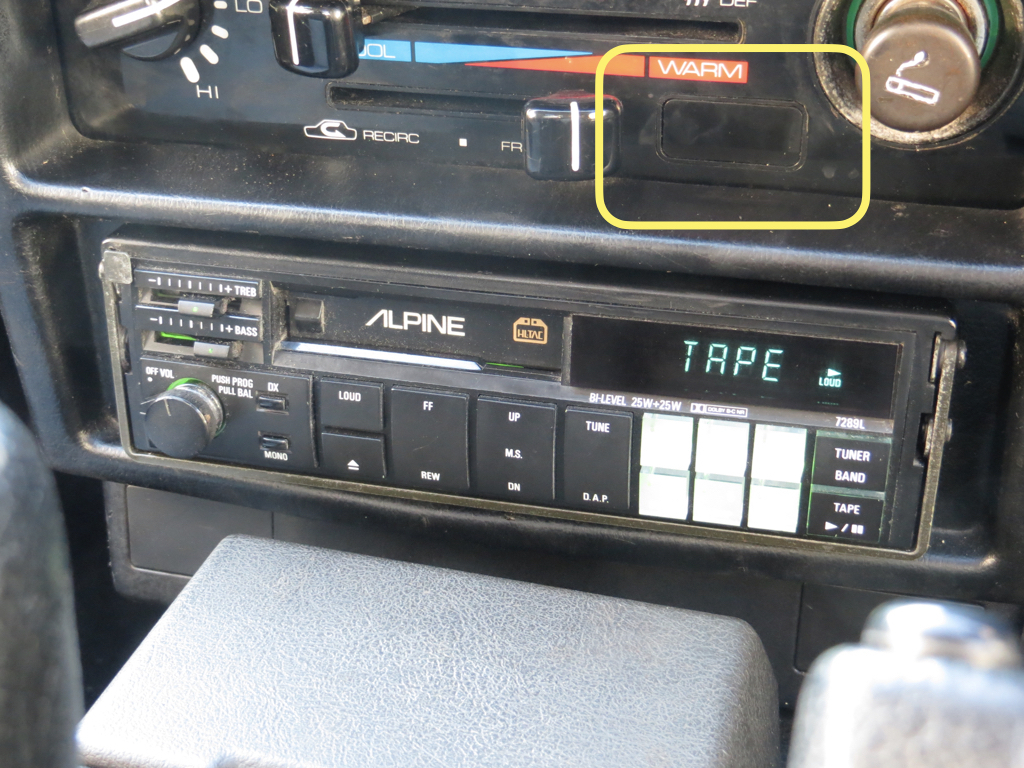 I have no idea if there are switches behind the knockout. James |
| |
Last Edit: Oct 31, 2023 19:27:44 GMT by Sweetpea
|
|
|
|
|
Oct 31, 2023 19:36:16 GMT
|
Any rust like in your photo above I always cover with Hydrate 80 or Kurust. It's not a fix, but it will stop the rust for a year or two while you plan how to fix it prevaricate  Good progress though. Actually that's not a bad idea. Don't know why I didn't think of that, especially as I've done that elsewhere on the car. I feel silly now! That rust is a part of a problem with the outer skin at the bottom of the A pillars. To fix it I'd need to take the front wings and doors off but the bottom of the front wings also have holes in them. I don't want to take the wings off the car until I've got the patches made and tacked in for fear pf losing the positioning and shape. So I have a sequence of repairs carefully thought out and planned. The only thing that that's going to stuff my plans up is if the MOT man disagrees.  James |
| |
|
|


