|
|
|
May 12, 2020 17:07:00 GMT
|
Well it’s not going to fix its self is it? So I popped the knotted wire brush thing in the grinder and started cleaning up the crusty area on the front edge of the arch. After a few moments I started digging into…. Da da dah… Filler! Nooooooo! Really? Filler?  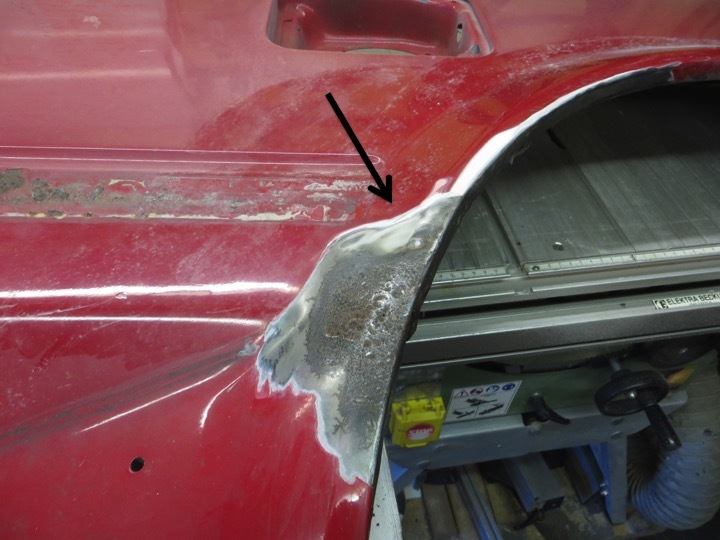 I can assure you that I used my entire supply of naughty words within a few moments. And at this time of lock down I’m not sure where I’m going to get some more. Terribly afraid that I was going to turn the garage into an Icelandic snow scape I continued. It’s not too bad. There are a few small dents in the leading edge of the arch…  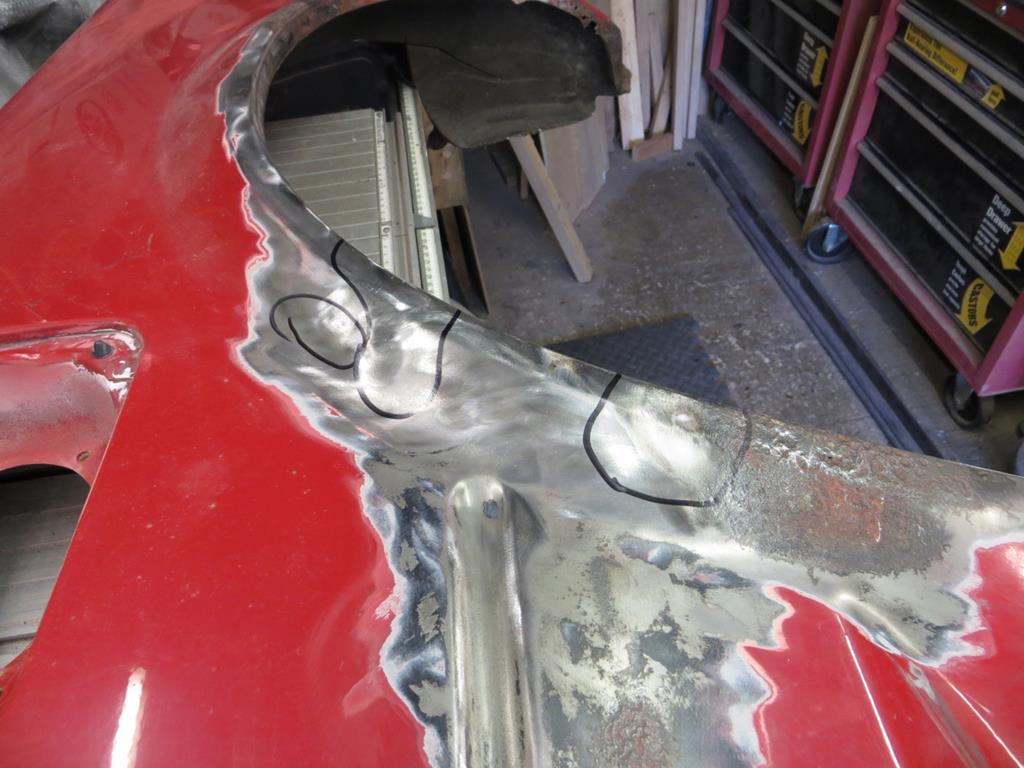 And another at the same height on the trailing edge.  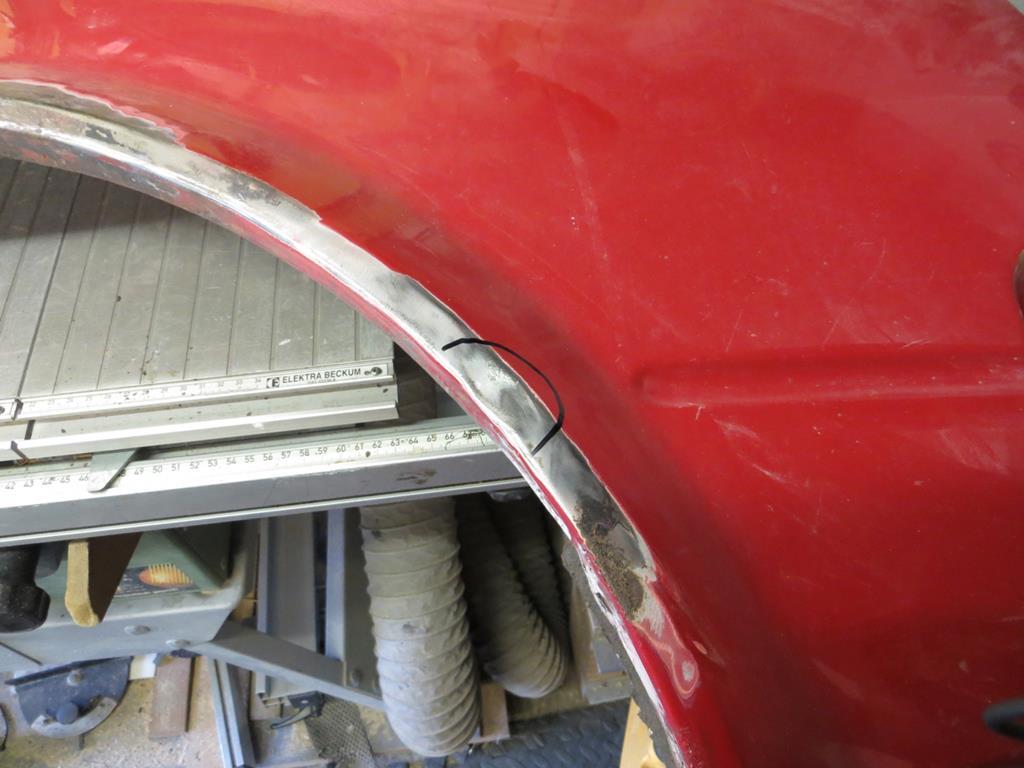 So that could have been worse. There is a God after all. I guess somebody scraped the arch one unfortunate day. The inner wing stops you getting behind to tap them out so they were just filled. When I take the remains of the inner wing out I’ll have access for Mr Hammer and Mrs Dolly to get to work. I guess this also explains why the wing got resprayed. So there you go, another question has been answered in this weeks edition of “ Mystery at Installation #651”   Probably should clean the glass in the garage door. It’s filthy. |
| |
|
|
|
|
|
|
|
May 14, 2020 21:15:26 GMT
|
Post 222. I’ll explain that… I write these on the computer off line and then copy them up to the forum. I’ve got them all saved and this is number 222. Ask any MR2 fan and they’ll tell you that 222 is an important number in the MR2 world. What? You don’t know? Ok, look at this… blog.toyota.co.uk/toyota-222d-secret-wrc-carPost 222 is important for me too. It’s the post where I start repair work on the replacement rear wing. Lets start with the really annoying bit.   This wouldn’t be so bad if it was just the flat panel that was damaged but, as you can see it’s crept into the swaged curvy bit. I’ve no intention of leaving that because I don’t like doing half a job and it’d be harder to weld to the pitted contaminated bit. Take one card template which is transferred onto a bit of metal.  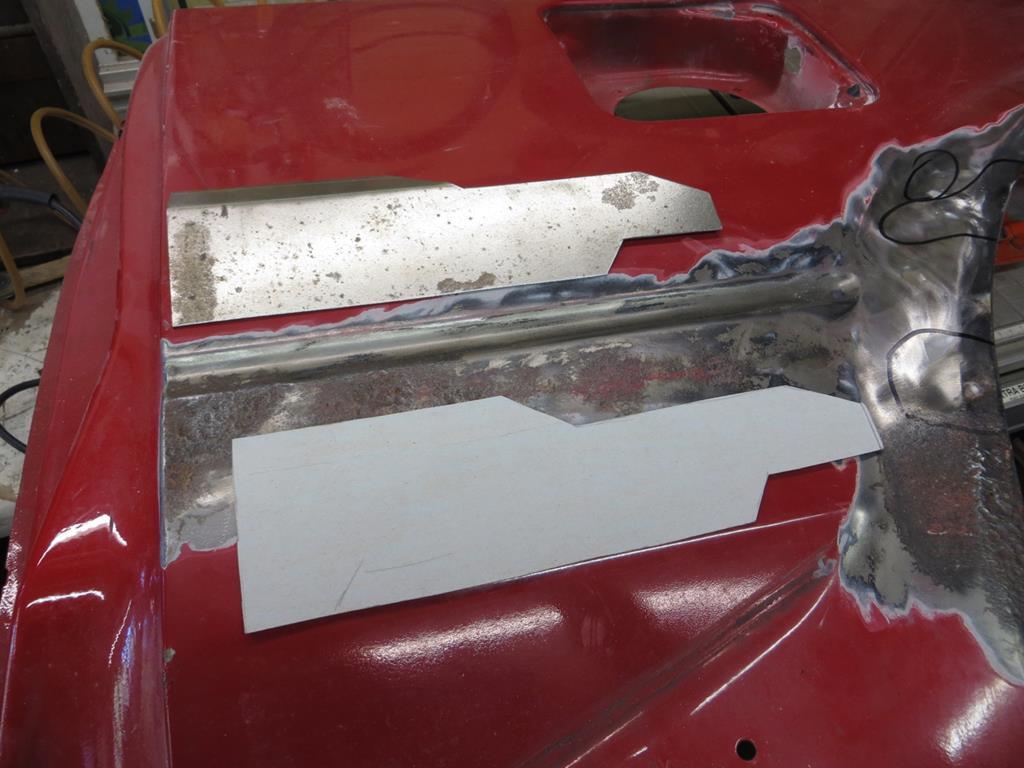 You can see the fold on the metal bit where it dips into the curvy bit. I just need a bit of pipe of an appropriate size. On the floor, in my random pipe pile, I found this.   Which looks about right. That gets clamped in the vice and is used as a dolly.   That appears to be roughly in the ball park.  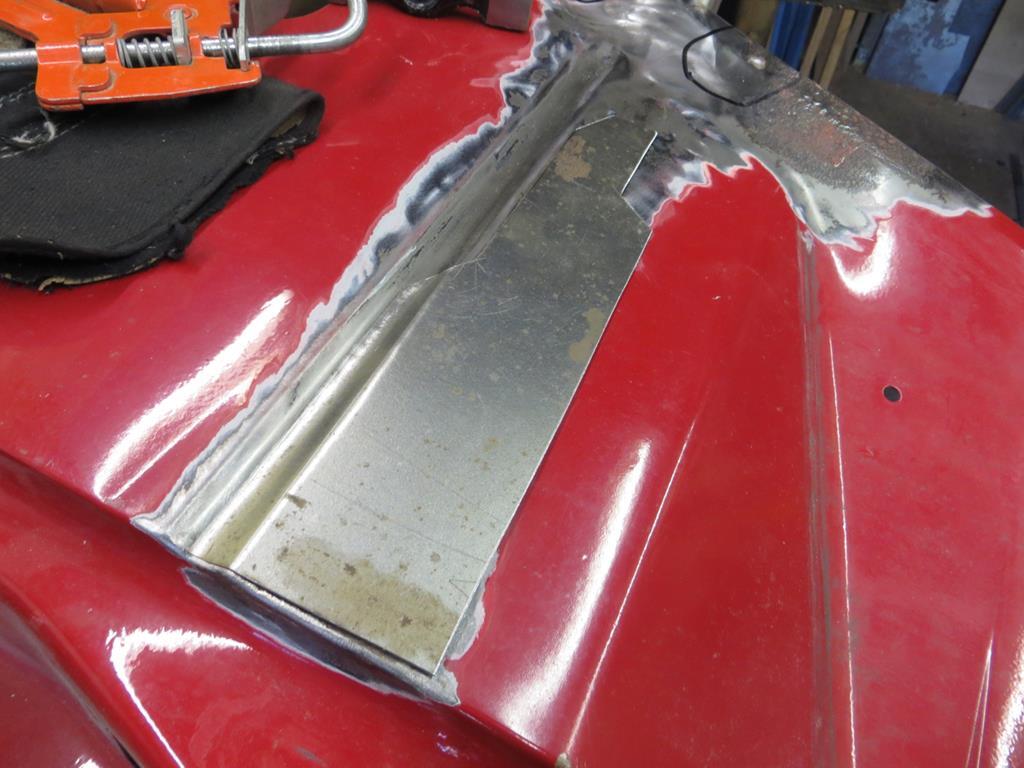 Time to take the grinder to my precious wing. <Gulp>  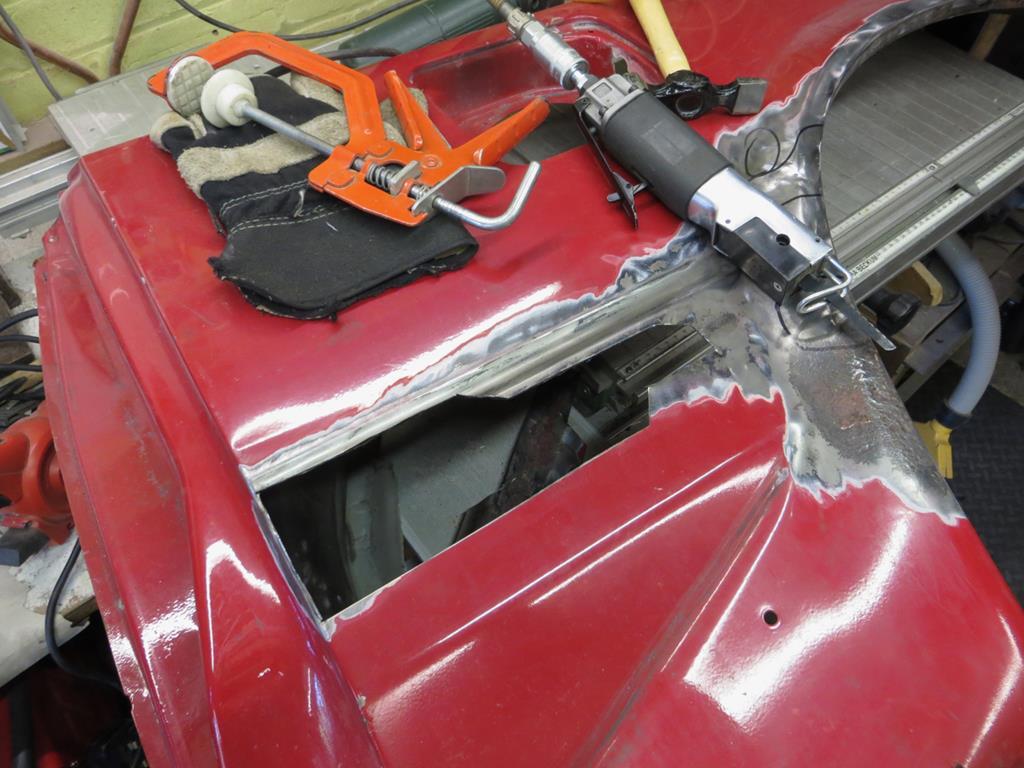 Too late now! After a bit of fettling and trimming the new bit fits in the hole.   Blob it in with Mr Sparky the welder.  At this point I think it’s traditional to get carried away and forget to take photos. And being a traditionalist that’s exactly what I did. So, sometime later… After a bit of welding action…. And a bit of sanding…  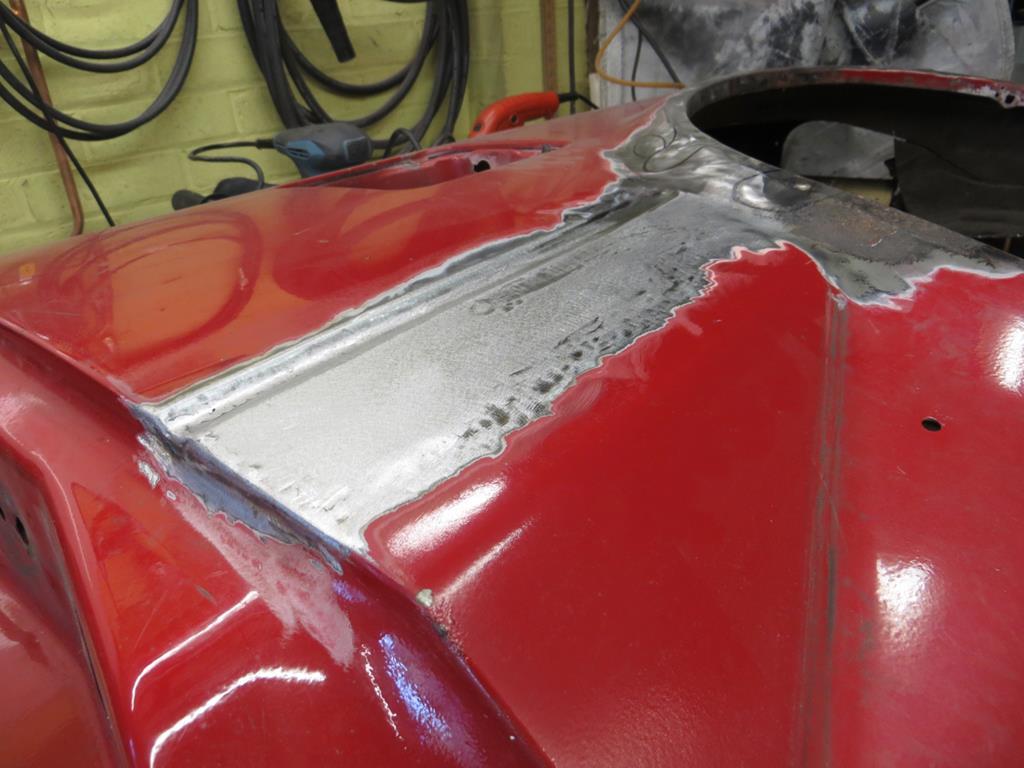 Well that’s not too shabby. Running my hand over it there were a few high and low spots at the far end. I couldn’t see them but they were definitely there.  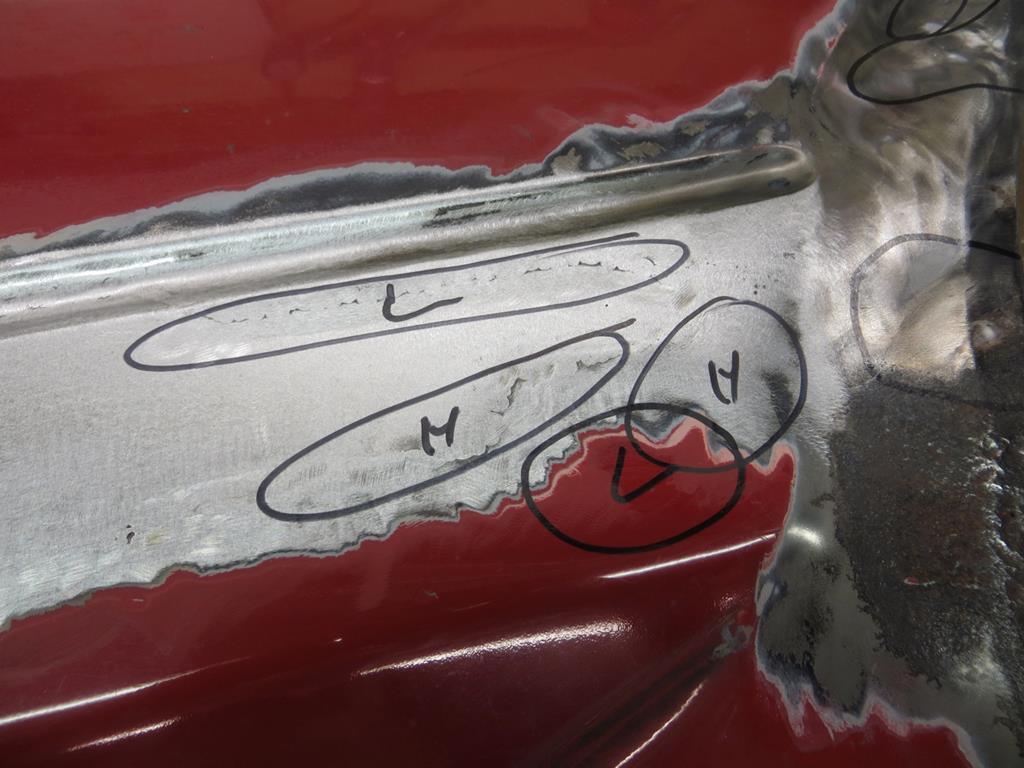 Except, this time I have access to the back of the panel so a bit of hammer and dolly work gets it reasonably flat. It’s not spot on but it’s within my “thin skim of filler” target. To stop it flash rusting it got a coat of etch primer.  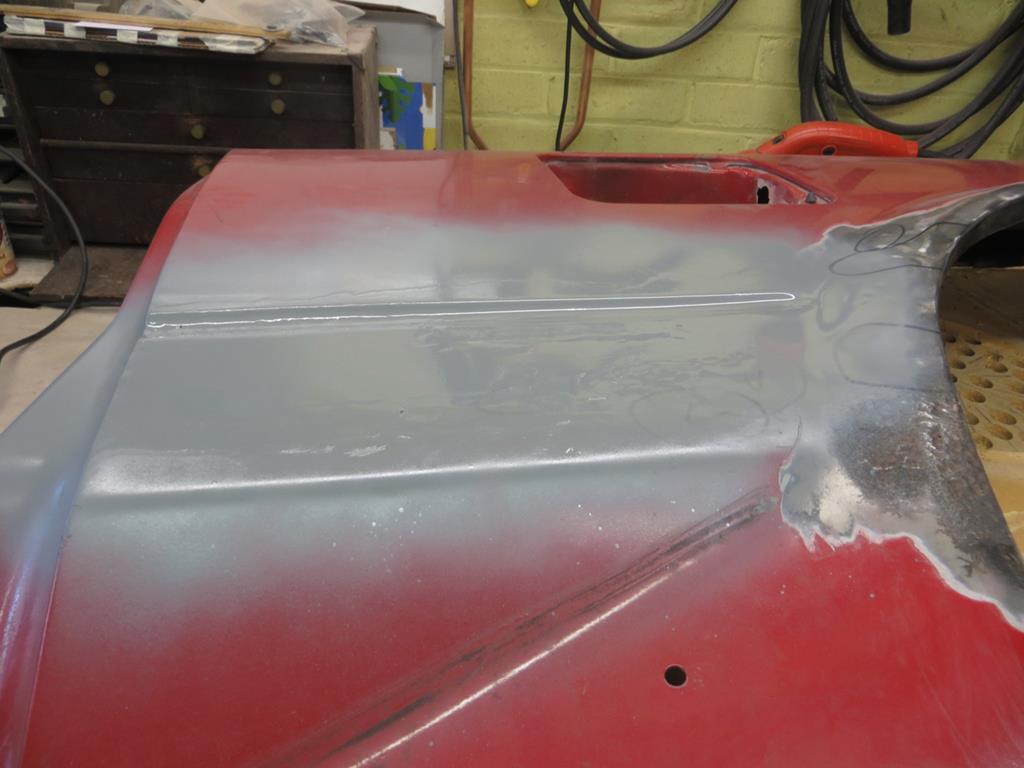 Which also lets me take a better look. I hearby pronounce that ‘it’ll do’. What next? |
| |
|
|
|
|
|
May 14, 2020 22:40:01 GMT
|
|
Nice work!
One reason I want COVID to be over: so you can get back to the double-decker bus and telling us all about it.
John
|
| |
|
|
|
|
|
May 14, 2020 23:15:19 GMT
|
Which also lets me take a better look. I hearby pronounce that ‘it’ll do’. What next? One of the better, "it'll do's" I've seen for a good while. |
| |
|
|
|
|
|
|
|
Thanks georgeb ! Nice work! One reason I want COVID to be over: so you can get back to the double-decker bus and telling us all about it. John Yeah, not sure what's going to happen there. I last worked on it when I had rotten back problem just before I went to Iceland. A few days after I got back the country locked down. I live a few minutes walk from South East Coachworks where it's kept at the moment. They've been shut down since it all kicked off. I haven't been passed to see if they've opened up now lock down has eased. It's a big shed with a few people in it so they should be able to keep social distancing reasonably well. They'd have a problem with their office and crew room but it's not inconceivable that they can get back to work. That leaves Ian and I. First of all SEC may not want strangers in the shed until things have settled down a little more. You can't really social distance with a bus wheel in your arms. Now Ian and I are both at home so are at low risk of catching it. I thought I'd have to go into London regularly but my colleagues are coping very well with out me. So we could be pragmatic and say we are both very unlikely to get it so it'd be ok to work together. However Ian has an elderly family member he looks after occasionally and that's where the real risk is, however small. I don't think we'll be back with the old bus for a while yet. That said there is another story I can write up when I get a moment. It's a bit of social history and it's pretty tragic but it's an important part of the history. James |
| |
|
|
|
|
|
|
|
|
Thanks James - that's another thing to read when I really should be working on the car/house/garden/conversation...finding your other threads has just set back all deadlines! :-P
|
| |
Sometimes, others may not understand why you like a car so much. Sometimes, you may not even understand why you like a car so much. But none of that matters; all that matters is that you like the car, and having it makes you happy.
|
|
|
|
|
|
|
Thanks James - that's another thing to read when I really should be working on the car/house/garden/conversation...finding your other threads has just set back all deadlines! :-P Sorry mate! |
| |
|
|
|
|
|
May 16, 2020 17:03:01 GMT
|
What next? This next.   A patch of pitting on the arch. I’ll make this out of two pieces.  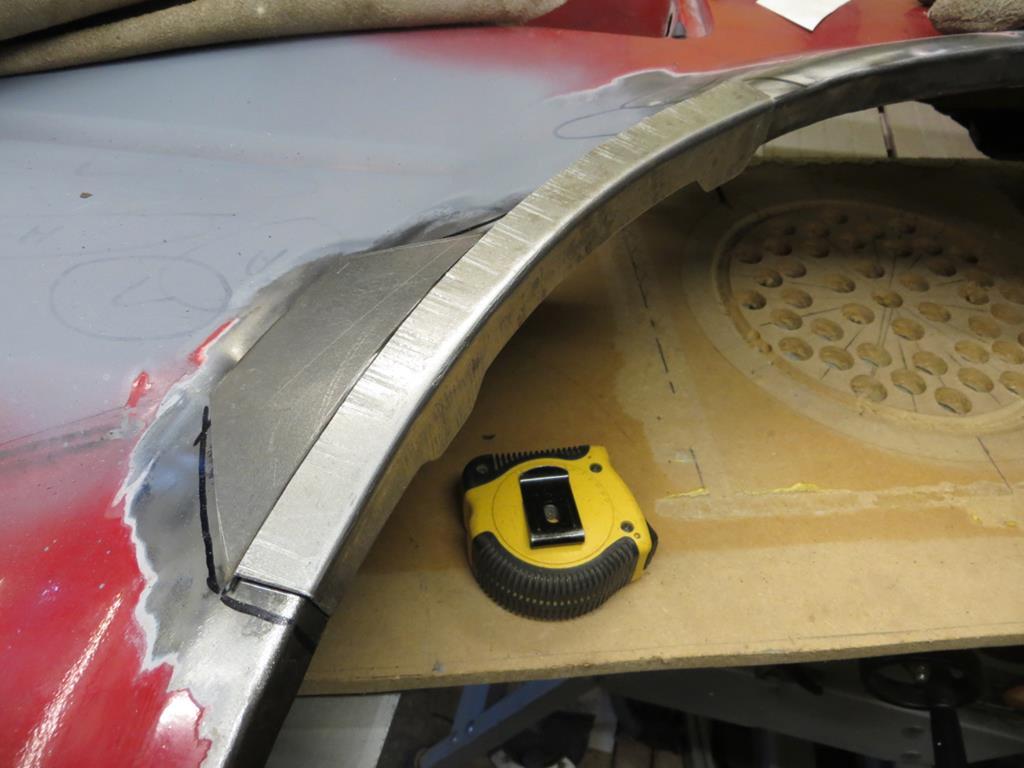 The arch lip was a piece of steel bent into an angle and then run through the shrinker / stretcher to get the same profile as the arch. The other bit is just tapped with.a hammer against a piece of soft wood to create the slight compound curve. It was finished with a hammer and dolly later.  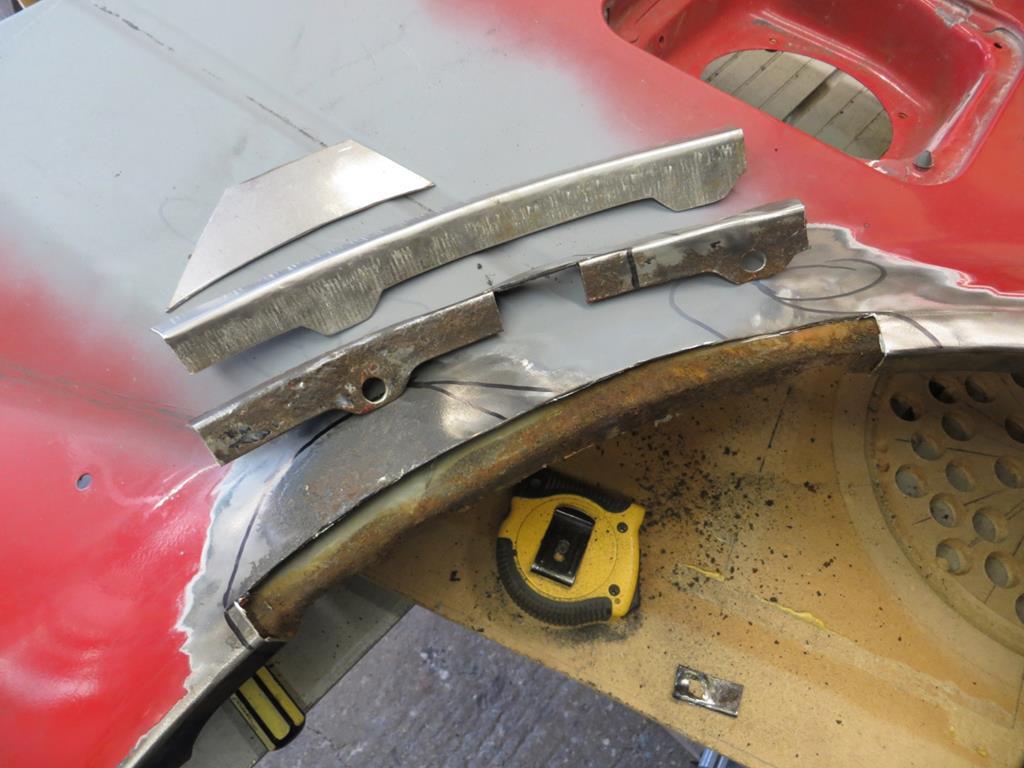 There you go. Two new bits and the old arch edge cut from the wing. Looks like the very edge of the old inner arch has some rust problems. Bits of it might still be handy when I replace the crushed section of arch on the car though. Next we can deal with a couple of the dints where somebody clouted the wing slightly.   With the arch edge removed I can slip a dolly in and tap it into a better shape so it meets the new edge.   Good. A bit more cutting and prepping and then buzz it all together.   I had started grinding back the weld line in that photo.   Eventually it was done. I was left with a couple of low and high spots which were tapped back into shape with the hammer and dolly. Good. Happy with that. Well. No. Not really very happy as it happens. It looks fine in that photo above. The line of the arch as it follows the wheel is good. But from the other angle I’m not pleased.   I’ve drawn lines on which exaggerate the problem but roughly speaking the curve of the arch has a low spot at the red arrow (where the new and old meet) and then the new bit looks like it humps up and over along its length. If I’m honest I saw this coming when I was making the pieces but I thought the problem was that the bit at the red arrow was low as a result of the wing being hit. But now I’ve got it all together I’m fairly certain I’ve got too much curvature in the new bit. It should be flatter than it is between the red and blue arrows and it should start to curve more as it passes the blue arrow. Bumhats. The only real way to fix this is to cut it out again and put it in the stretcher to flatten it out. But that involves more potential heat distortion and a pile more work. If I leave it nobody will notice. But I’ll know and that will wind me up. I may have to think about this before I do something rash. One of the things I find difficult about bodywork is knowing when to put the tools down and walk away. There is a time when you just have to let your subconscious mull things over and find the answer for you. Like I said. Bumhats. |
| |
|
|
|
|
|
May 16, 2020 19:09:41 GMT
|
Happy with that. Well. No. Not really very happy as it happens. It looks fine in that photo above. The line of the arch as it follows the wheel is good. But from the other angle I’m not pleased.   I’ve drawn lines on which exaggerate the problem but roughly speaking the curve of the arch has a low spot at the red arrow (where the new and old meet) and then the new bit looks like it humps up and over along its length. If I’m honest I saw this coming when I was making the pieces but I thought the problem was that the bit at the red arrow was low as a result of the wing being hit. But now I’ve got it all together I’m fairly certain I’ve got too much curvature in the new bit. It should be flatter than it is between the red and blue arrows and it should start to curve more as it passes the blue arrow. Bumhats. The only real way to fix this is to cut it out again and put it in the stretcher to flatten it out. But that involves more potential heat distortion and a pile more work. If I leave it nobody will notice. But I’ll know and that will wind me up. I may have to think about this before I do something rash. One of the things I find difficult about bodywork is knowing when to put the tools down and walk away. There is a time when you just have to let your subconscious mull things over and find the answer for you. Like I said. Bumhats. James - You would fit in very well in a vehicle restoration workshop - the above attributes are exactly what's required - not accepting second best and knowing when to walk away and have a think about the problem rather than continuing and making a hash of it - they are rare talents that are few & far between  |
| |
|
|
|
|
|
May 16, 2020 20:19:08 GMT
|
Don't do a Father Ted, walk away! 
|
| |
|
|
|
|
|
May 17, 2020 19:39:08 GMT
|
James - You would fit in very well in a vehicle restoration workshop - the above attributes are exactly what's required - not accepting second best and knowing when to walk away and have a think about the problem rather than continuing and making a hash of it - they are rare talents that are few & far between  That's very good of you to say so but I feel I'd get thrown out for being way too slow! quaggers, now I'm going to have to find the Father Ted DVDs and watch them all again. Ya will, ya will, ya will... |
| |
Last Edit: May 17, 2020 19:39:51 GMT by Sweetpea
|
|
|
|
|
May 17, 2020 22:08:05 GMT
|
So, having sodded up the first repair on the arch up I thought I’d leave it well alone and do some other bits, First I changed the handles on the double glazing in the bedroom. One had broken and the replacement had a different key so they all got changed. And then I fixed the output connector on the compressor. It seemed to be highly restrictive and when you popped the hose out air kept coming out so I concluded that an O ring had come adrift inside. Didn’t find any such problem but it’s working now. Funny, I only read yesterday on here that PCL connectors could be a bit troublesome. Right, a little bit of rust on the arch edge. Cut it out and made a new bit.  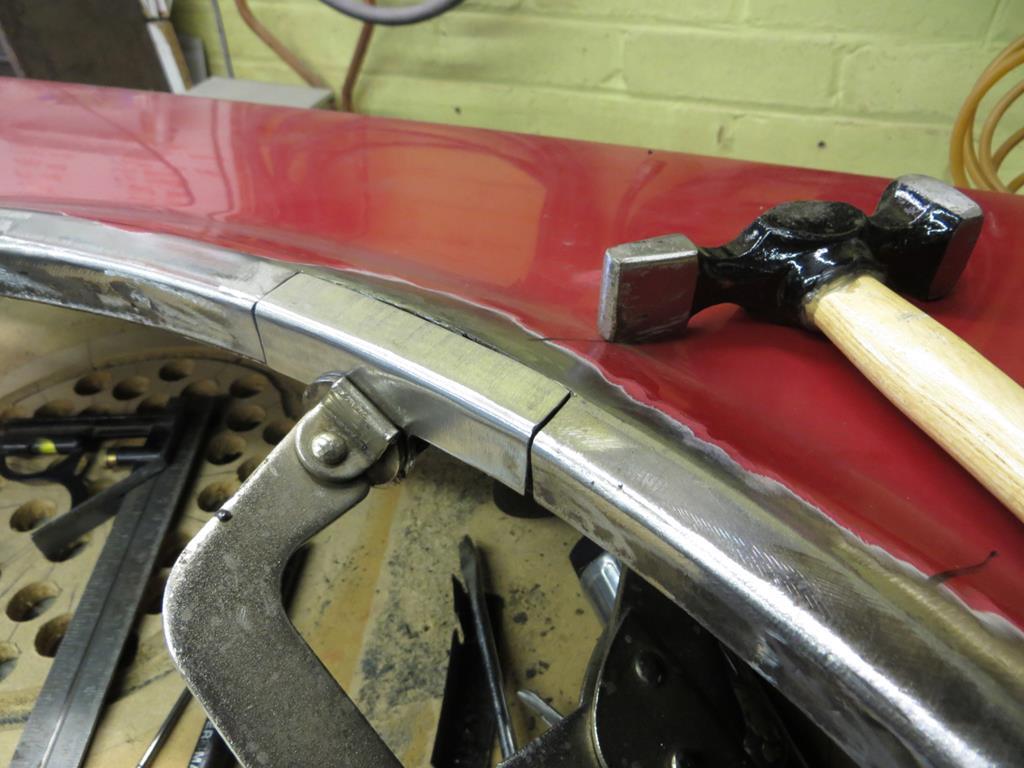 I knocked it up in the shrinker / stretcher.  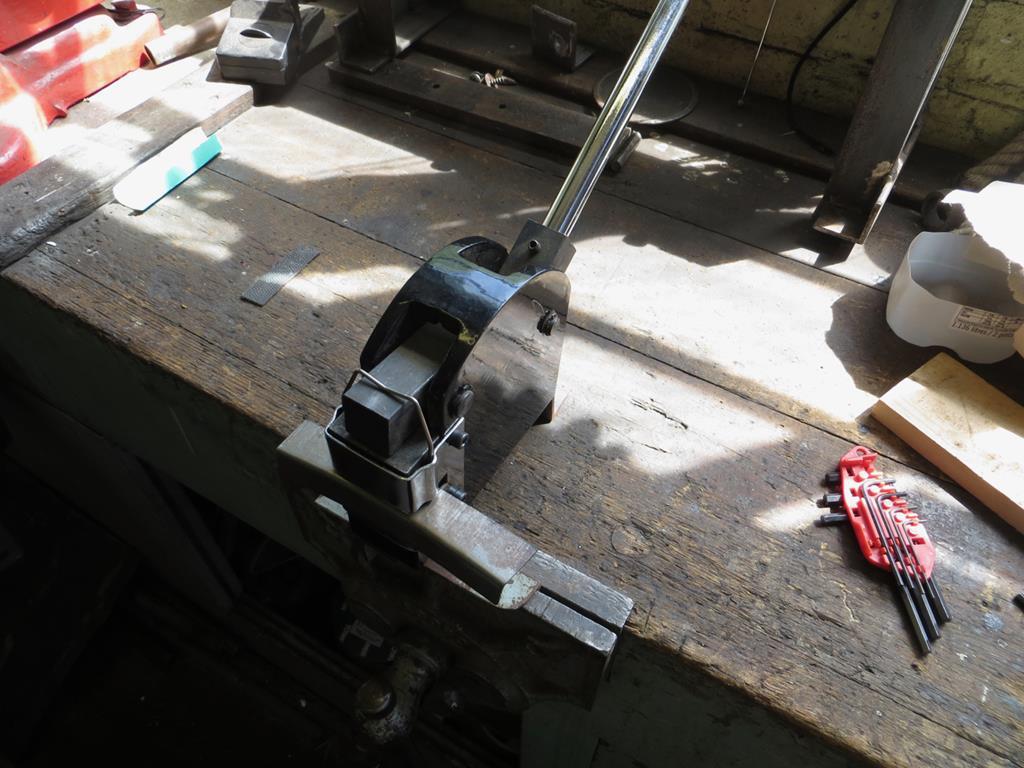 I’m sure it’s possible to do this stuff without one of these but I’m sure it’s much easier if you have one. 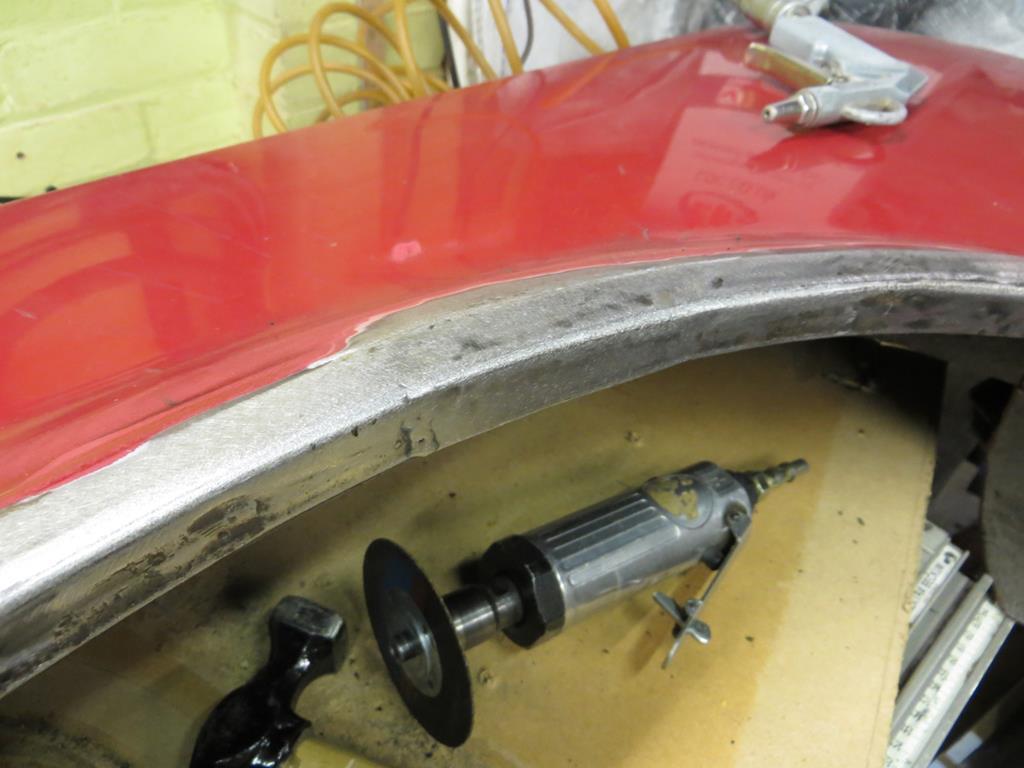  Unlike yesterdays attempt I can live with that. Mind you, it’s only about 2 inches long so it’d be a challenge to mess it up. Next the rear edge where Flappy McMudflap was screwed on and the bottom where I’ve marked it. Be prepared for a rubbish blurred photo… 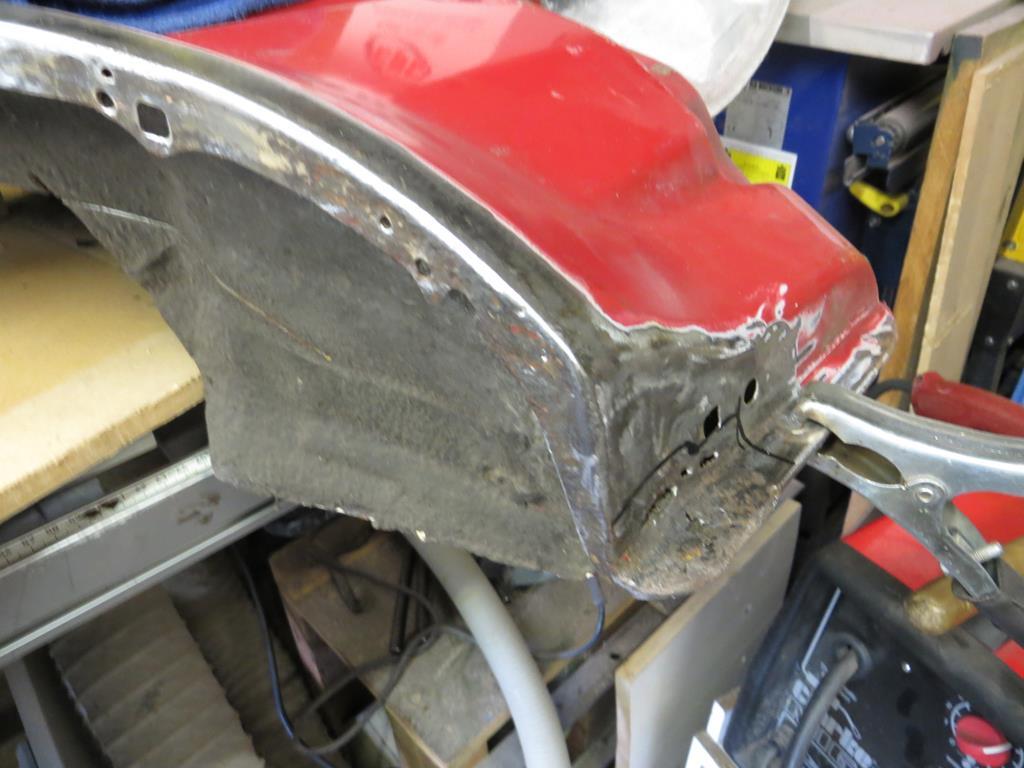 Start at the bottom with another rubbish blurred photo.  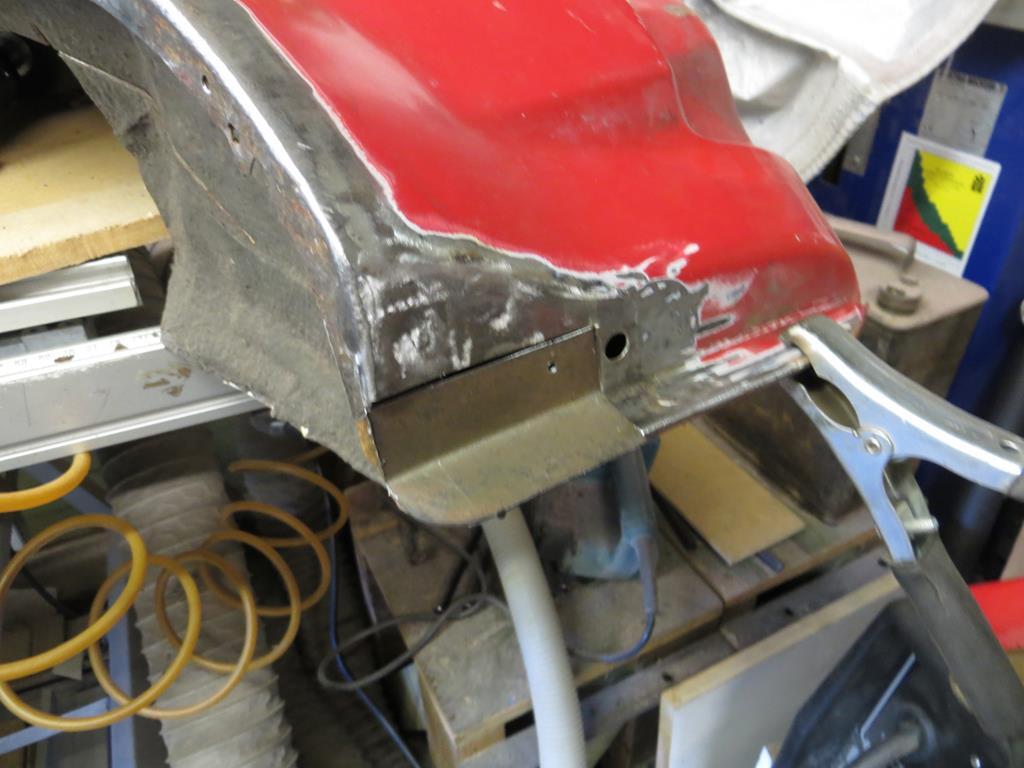 I’ve left the bottom edge slightly large and will trim it back when it’s on the car.   The big hole is, well, I’ve no idea to be honest. The little hole in the new bit is where there should be a square hole to take the back mount of the mud flap. |
| |
|
|
|
|
|
May 17, 2020 22:53:00 GMT
|
|
Cavity wax hole? Oh wait, Japan, nevermind...
Neat repairs. I think I'm going to get a shrinker, even though I don't actually need one at the moment.
|
| |
|
|
|
|
|
|
|
|
No but it could have been a drain hole from the E coat tank.
|
| |
|
|
|
|
|
May 18, 2020 19:59:04 GMT
|
Soooo. Endless metal bashing going on… In the last unexciting episode I’d patched the very bottom of the wing. I need to do the bit that the mud flap was screwed to.   Fortunately the rust didn’t get on the face of the wing so it was a relatively easy piece to make and fit. I’m really liking having the bench grinder and other tools really close by. I can grind, test, tweak test and so on really quickly.   I’m also finding that I want half a step of adjustment in the power settings on the welder. My welding is getting to the point where I can see the difference. Maybe need an inverter machine one day. Not now though. Anyway, while you were reading that I, of course, was welding it in fully and sanding it back off.   See, you weren’t paying attention there and I finished that bit while you weren’t looking! Next is a bit of pitting on the leading edge of the arch where the side skirt screws on. I could probably get away with this (  ) but it’s going to be easier to fix on the bench now than on the car in a couple of years.  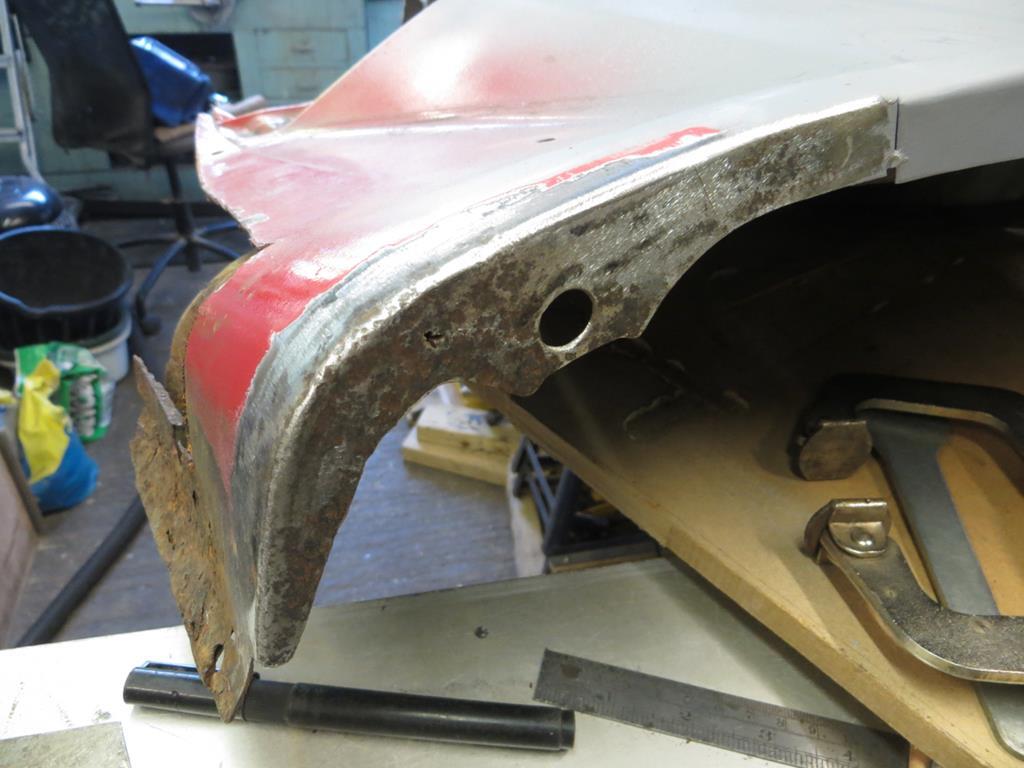 Now this is interesting because it goes just round the edge onto the face side. And it’s a hell of a curve as the arch rolls under the car so I don’t think the shrinker will do it. If a larger part of the face side was rusty I’d either make it in 2 bits and weld it along the corner or fold it and slit and weld round the bend (which is what I’ve done before). But this allows me to try a new technique. Make it in one piece and fold it round the corner. Basically hammer it to the right shape.  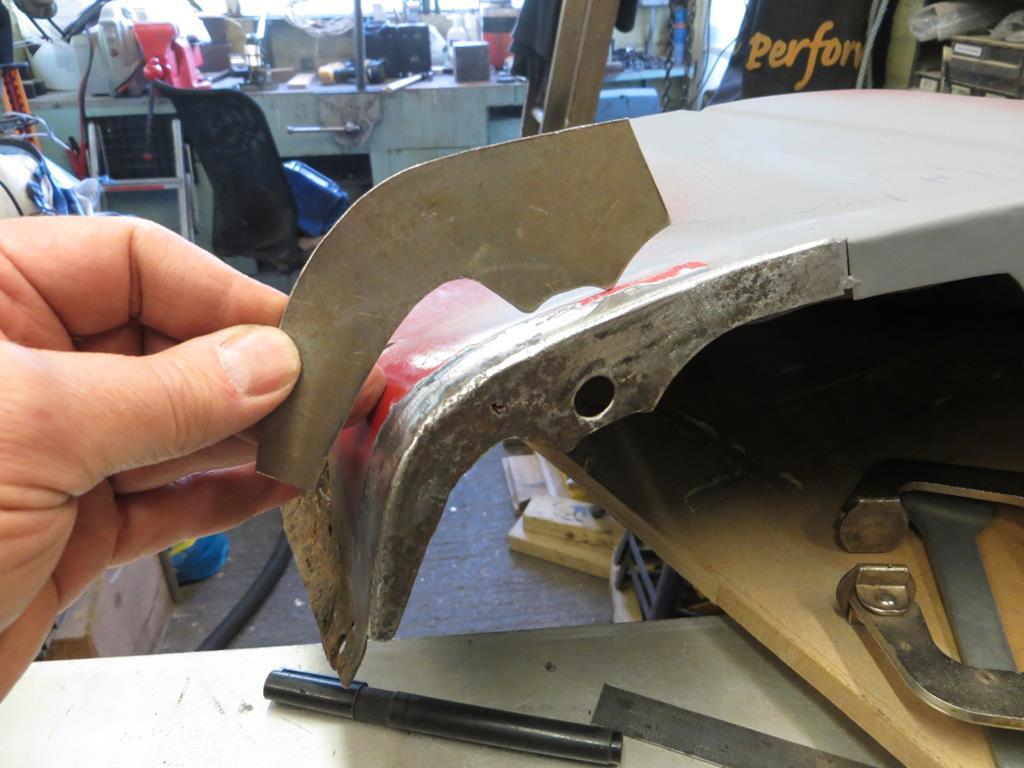 So here is the blank and you can see I’ve started to curl the edge round at the bottom.   I tried a few methods of forming it round. Hammering it on a pipe sort of worked but, actually, putting it in the vice worked better. Just needed a lot of moving, shifting and tapping. Getting there.  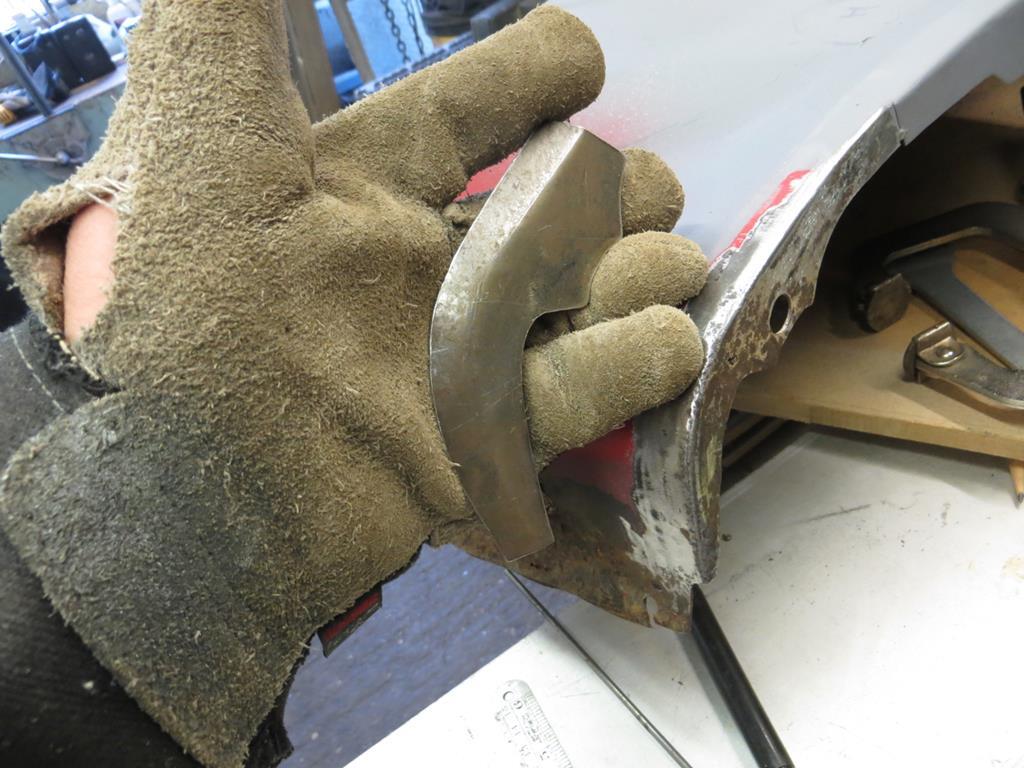 I’m not going to fib. It took bloody ages. But it’s the first time I’ve done this so it was a bit of a learning experience. Eventually… Some considerable time later…  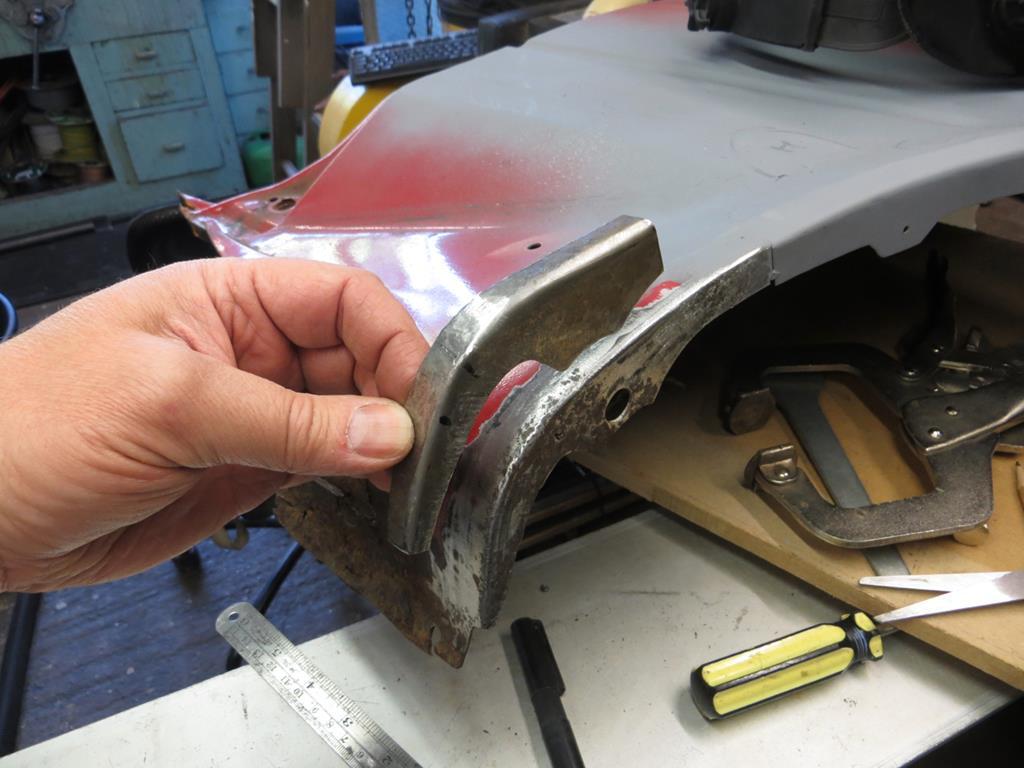 Well, lets fit it then!  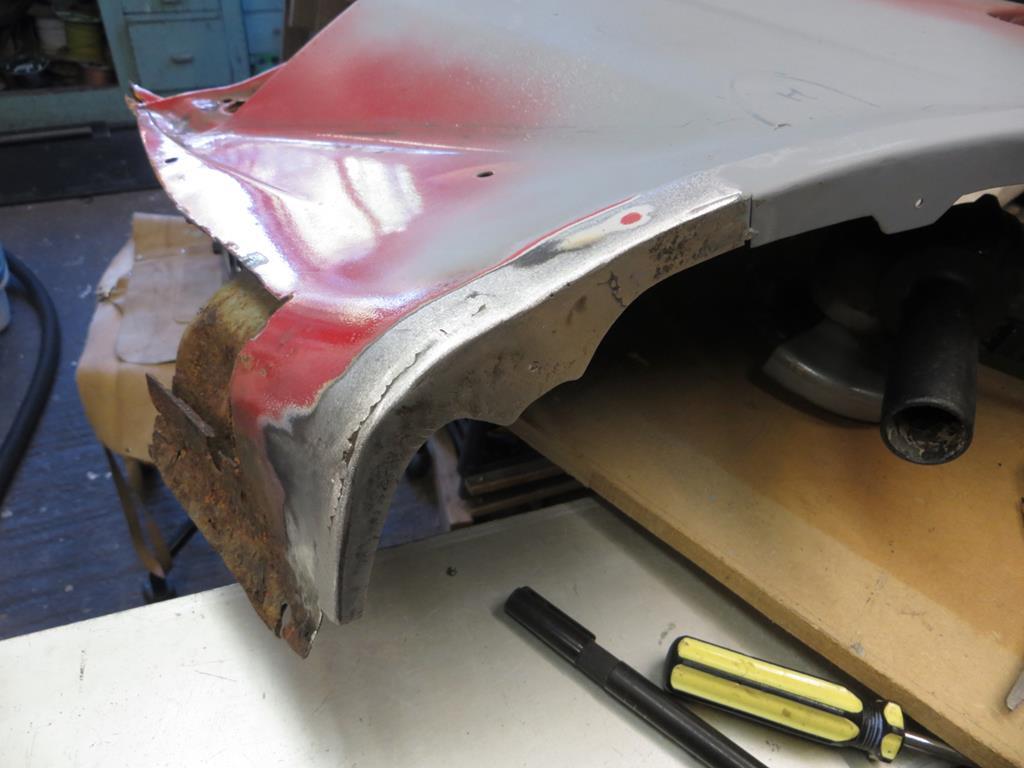 You can see from the weld that the curve wasn’t quite right. Probably about a mil low. But it’s not bad for a first attempt and it’s all behind the skirt anyway. So, what am I going to do with that bit I mucked up? Cut it out and try again? Leave it and put up with it? Oooh, the suspense! James |
| |
|
|
|
|
|
|
|
|
Make a couple of radial cuts, heat it up, biff it with a hammer and dolly, quench it.
Bob's your uncle, etc.
John
|
| |
|
|
ToolsnTrack
Posted a lot
   Homebrew Raconteur
Posts: 4,128
Club RR Member Number: 134
|
|
May 19, 2020 20:57:55 GMT
|
|
I am so glad this wing is finally getting seen to, and further glad that its getting seen to right.
As you were.
|
| |
|
|
|
|
|
May 22, 2020 21:03:42 GMT
|
A week ago I made an error on the arch of the wing. I got a bit of a hump in it. There is a photo a few posts back explaining the dilemma. I genuinely didn’t know what to do. It wasn’t terrible and wouldn’t be noticed. The proper way to fix it would be to cut it out, adjust it, and weld it back. But that might distort the panel. There was a suggestion of slitting the edge to adjust it but that tends to create steps in the curve so I didn’t want to do that. I wondered about trying to put the whole wing in the shrinker after I’d removed the remans of the inner wing. But I’d have lost the support of the inner wing at that point and I’m not even sure I could handle the wing and stretchers. So I sat on it and thought about it. Well I decided that it’s not terrible. There are risks to trying to correct it. And nobody will ever notice it. I decided that I should leave it alone.  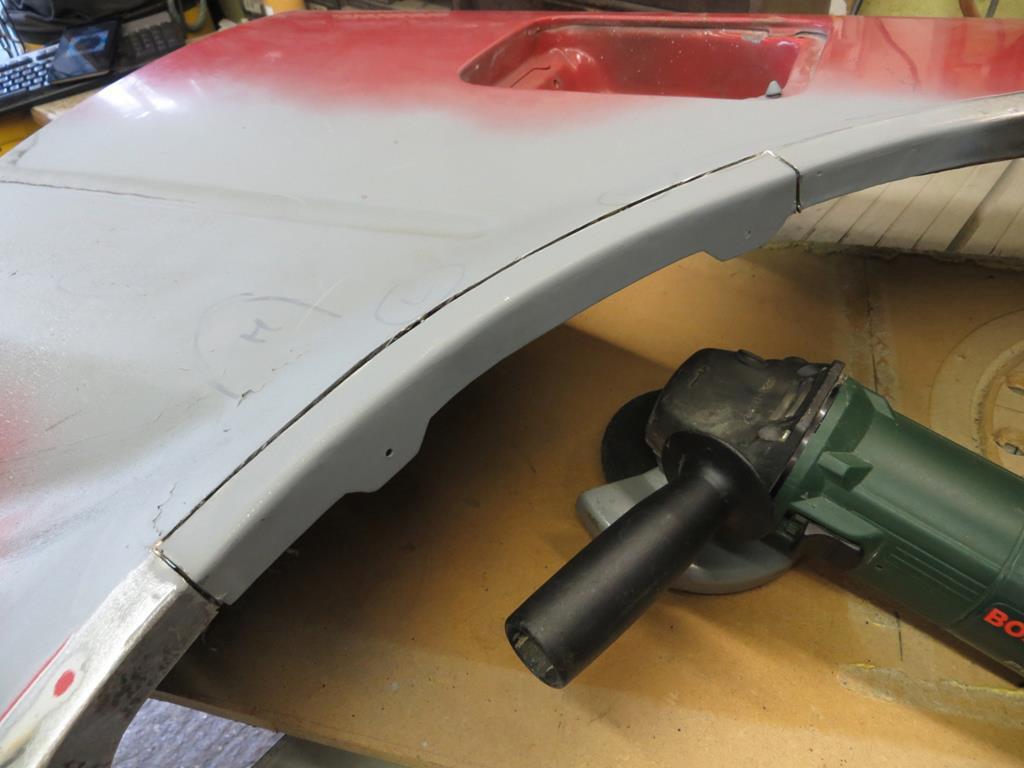 And then I got the grinder out and cut it to bits. You see the problem is that it’s not my best work. I don’t mind trying something and making a mess of it. So long as it’s the best I’m capable of at that moment I’m happy. That’s how you learn. But I know can do better so I can’t leave it. You can see the problem in this next photo. Holding it against a flat edge you can see the curve. I think it should have been flatter than this.  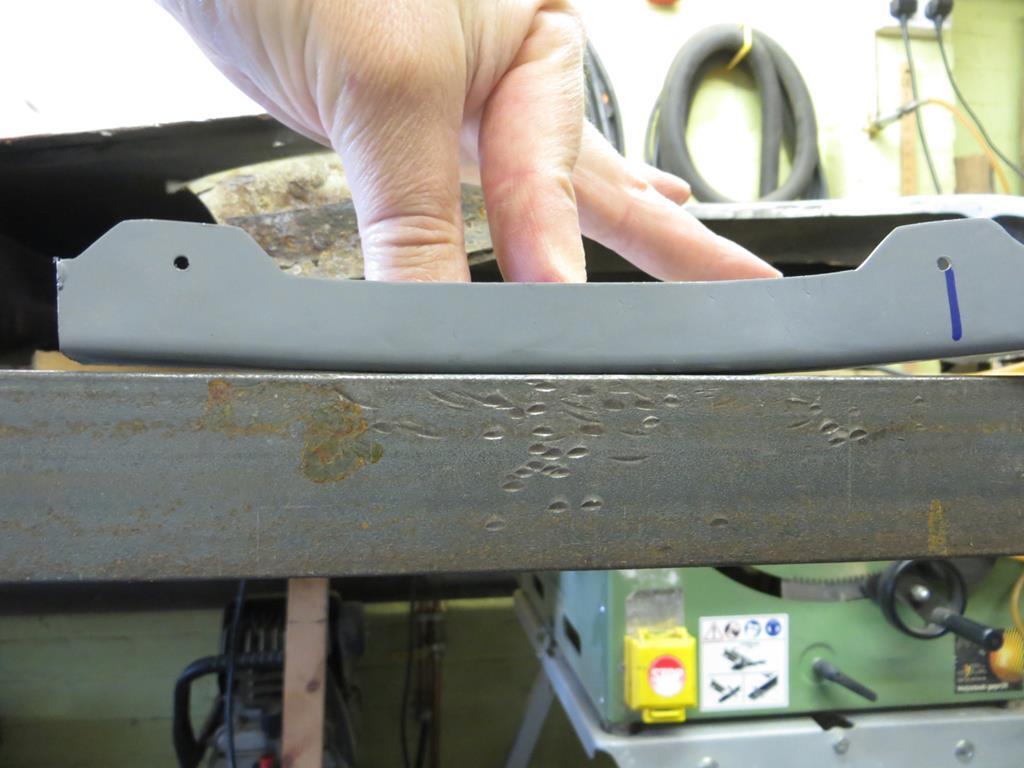 So it went in the shrinker / stretcher and was adjusted.   And, when I was happy, it was welded back into the panel.  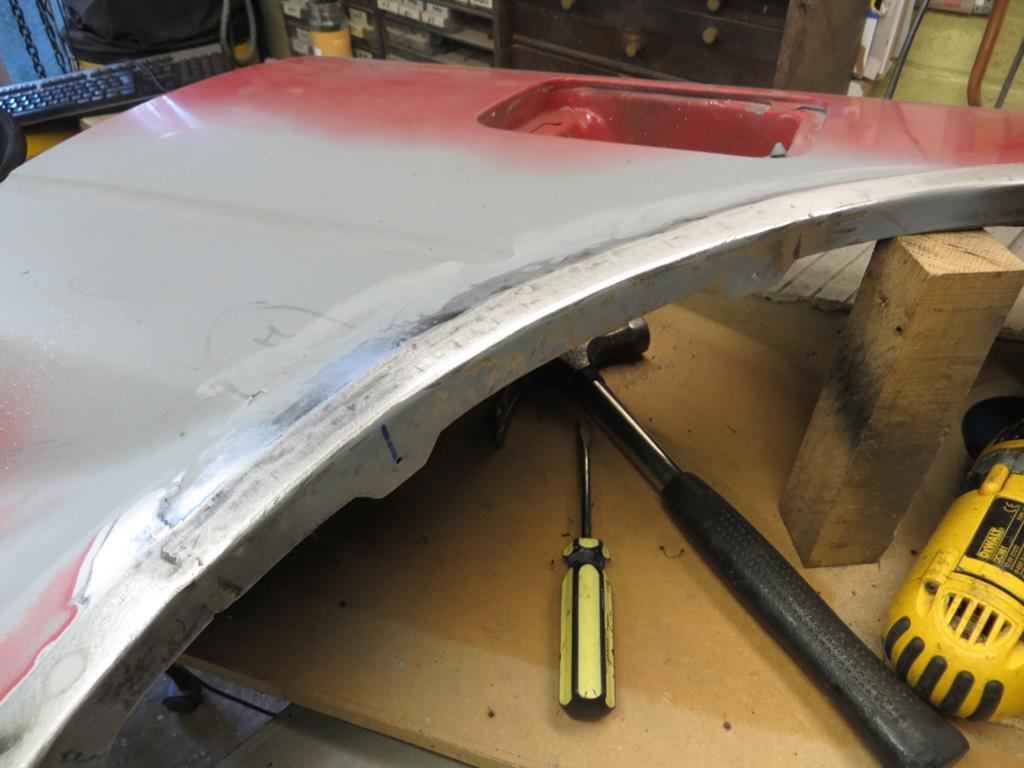 The big question is… Am I happy now? Yeah, I’m happy now. Look across the line of this photo.  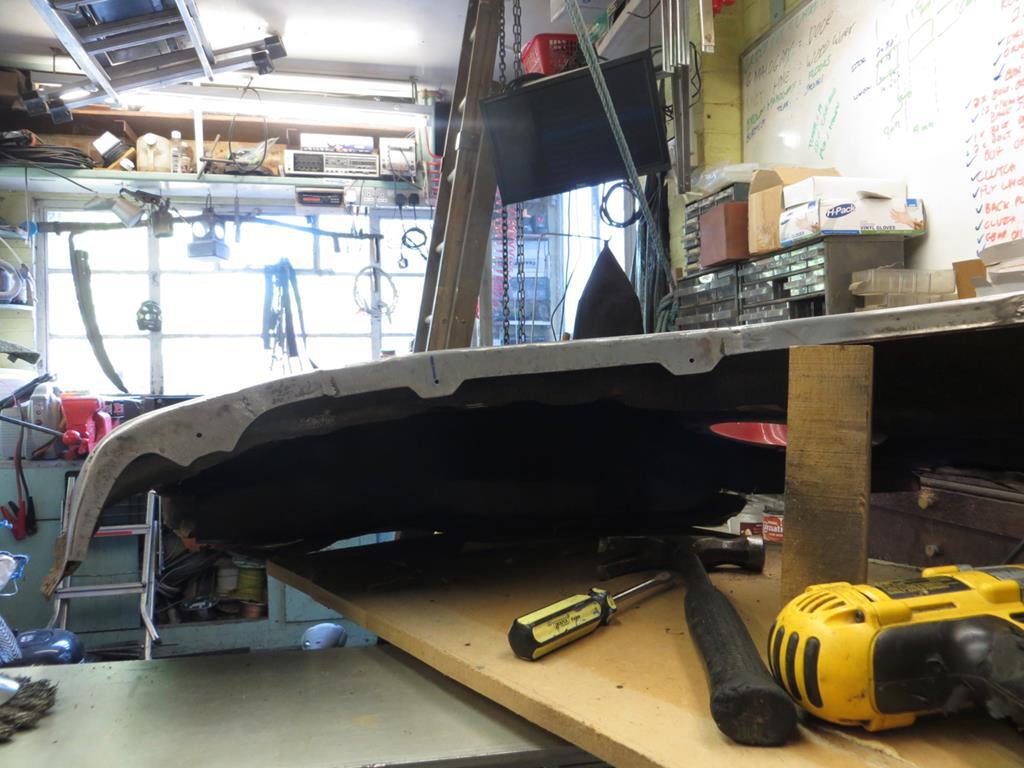 I’ll admit that it still looks to have a dip just to the left of the wood block but I think some of that is light shining off the edge of the panel in odd ways. When I run my hand over the arch it is now much better and doesn’t feel like there is a massive hill in the middle of it. Job done. Finally. James |
| |
|
|
|
|
|
May 22, 2020 22:16:33 GMT
|
|
That's nice work James.
|
| |
|
|
|
|
|
May 22, 2020 23:20:57 GMT
|
|
Great work, I think you did the right thing in fixing it.
Warren
|
| |
|
|


 ) but it’s going to be easier to fix on the bench now than on the car in a couple of years.


