|
|
|
Sept 1, 2021 16:24:27 GMT
|
Look what turned up…  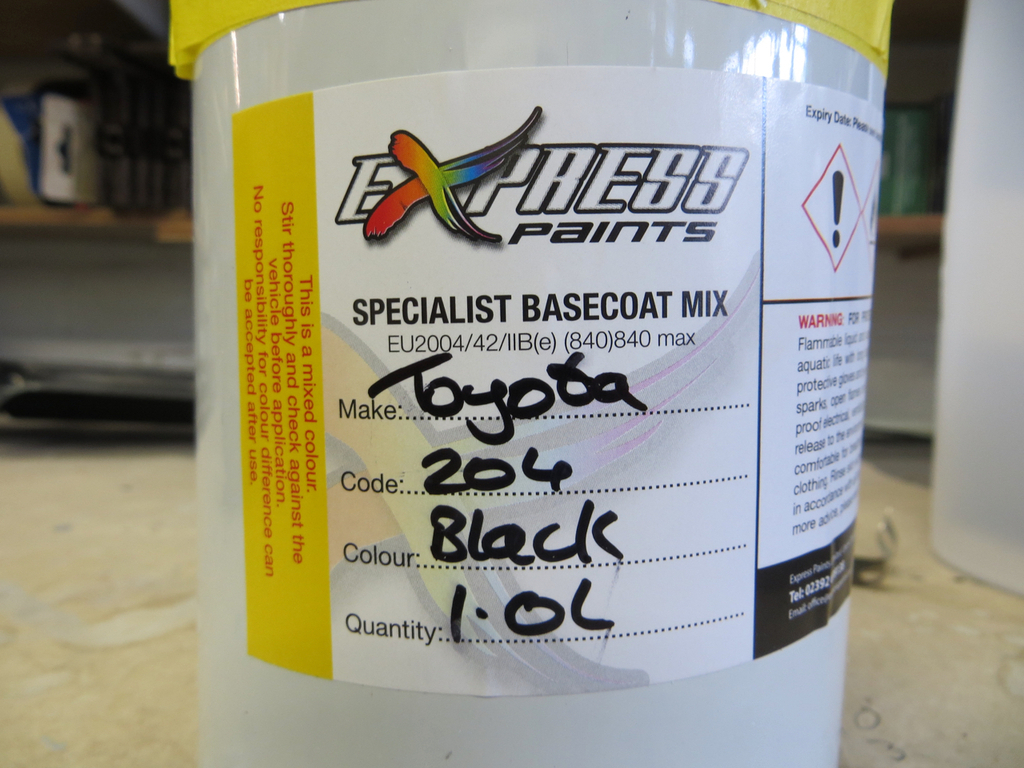 So I imagined myself shooting (as we professional automotive painters say) a coat of primer on the outside of the wing and on the side skirts, flatting it off and then shooting some black on the skirts. Sadly I was getting ahead of myself by quite a margin. Not so much ‘professional’, a bit more ‘bumblef&*k’… Let’s get the covers of the old girl and let the sun get to her.  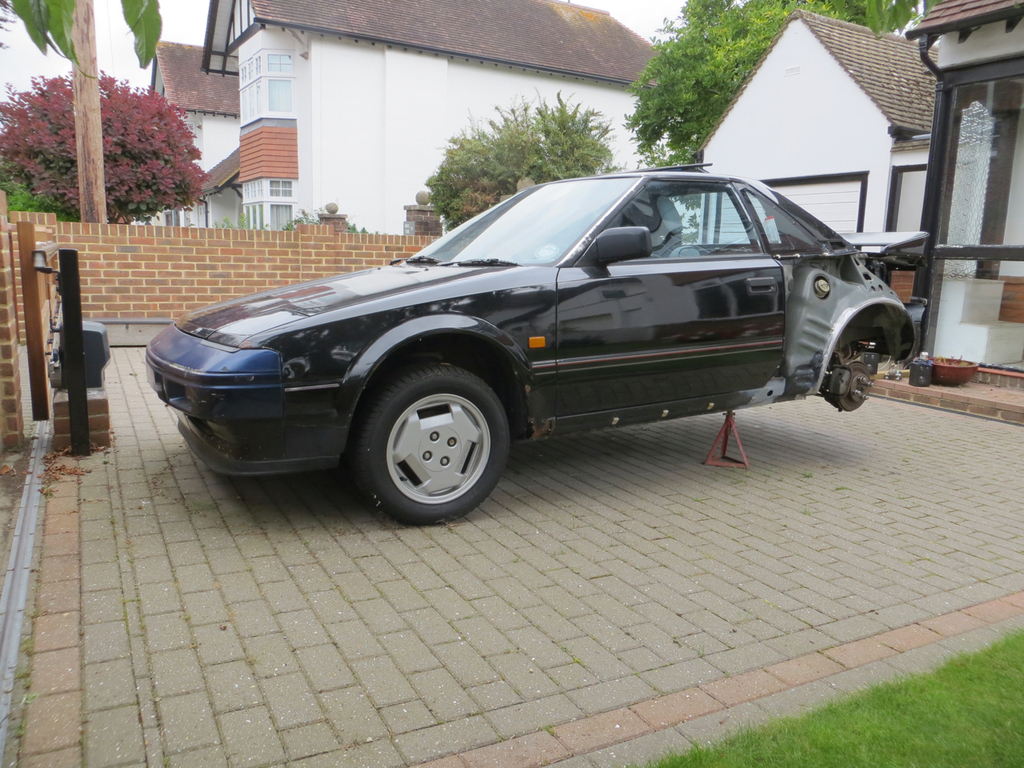 Sun? Overly optimistic there I think. Oh my. I think it actually looked better with the covers on. First job was to get the tin of thinners out and wipe off the spray that had been protecting it over the winter rains. (And the summer rains too.) And then the proper epoxy went on for decent protection.  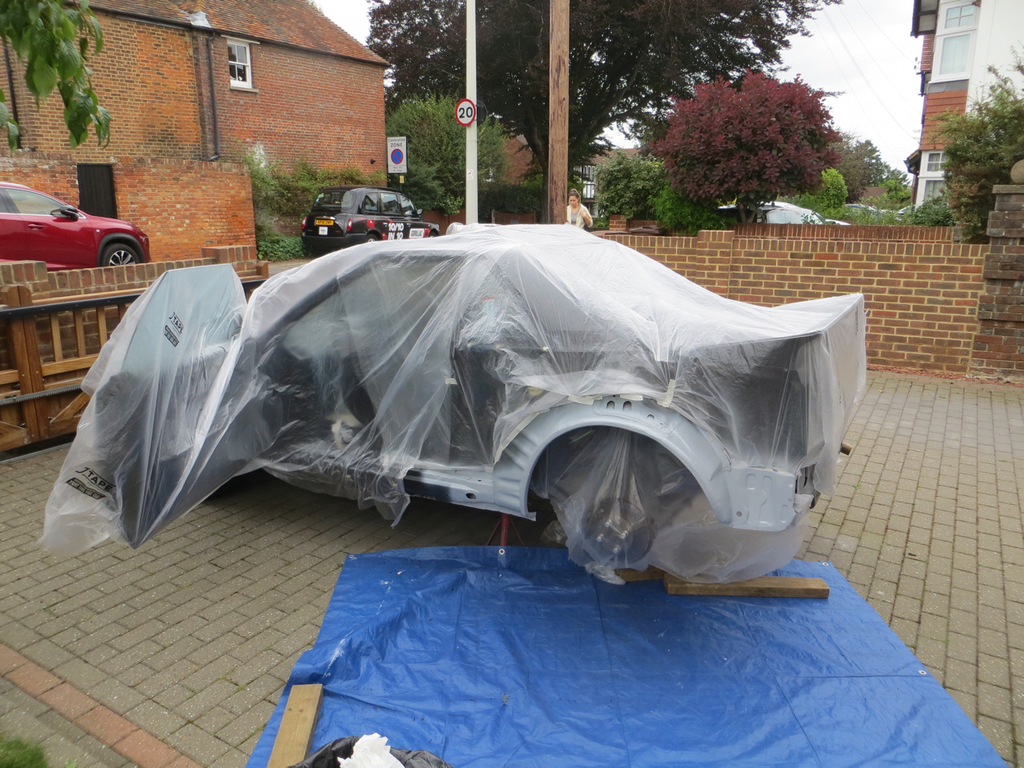 Then I did a test fit of the wing and skirt and realised just how far ahead of myself I was. Firstly I realised I hadn’t fitted the mounting nuts for the shirts or the mud flaps. So with the skirts in place I marked the nut positions.  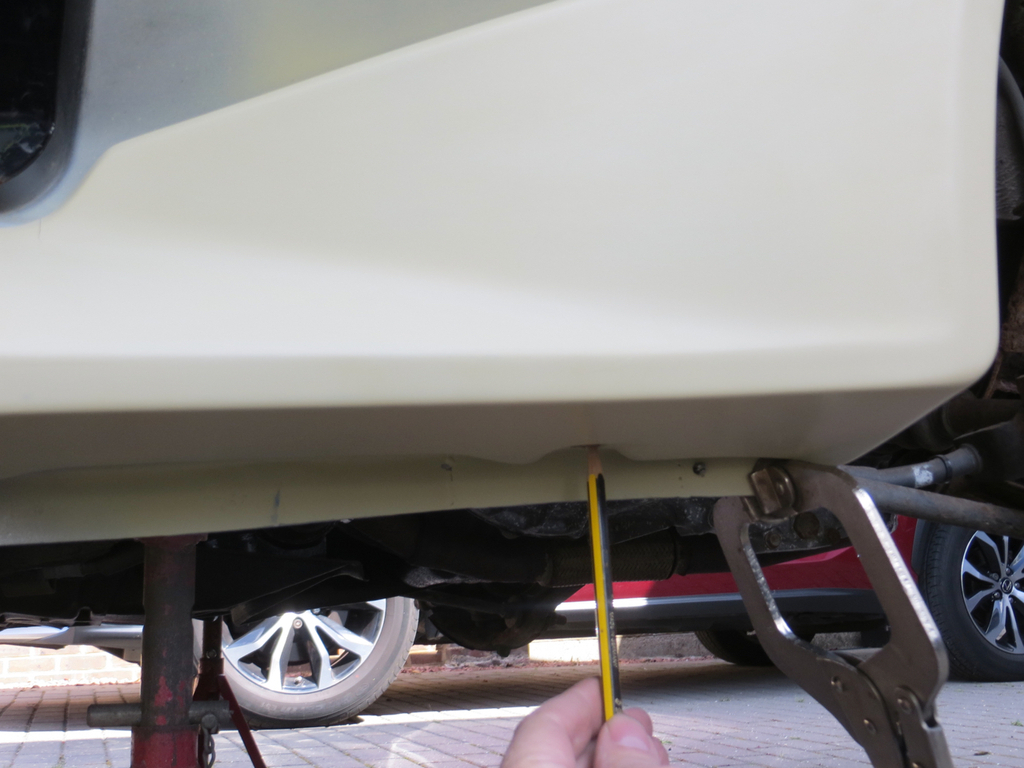 And then welded some stainless nuts on.  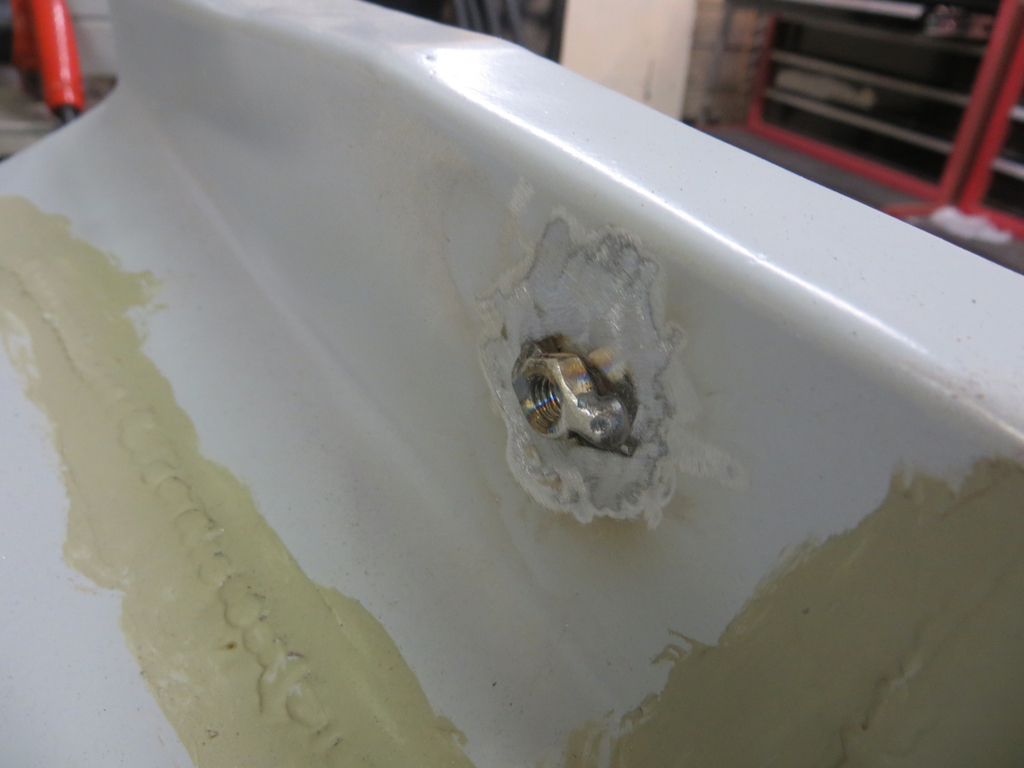 Five of them in all. Three for the skirt and two for the mud flap. Now I’m thinking about this I think I’ve missed one for the mudflap. These wouldn’t have been captive nuts originally. They would have been square holes in the panel with a plastic insert and a self tapping screw. But all that went missing years ago. I could probably buy new inserts but I’ve not yet found a drill that drills square holes. The all seem to do round holes. Ready for some black paint then? Nah. So what else have I missed? Well, to start with there is a bit missing from the boot seal lip.  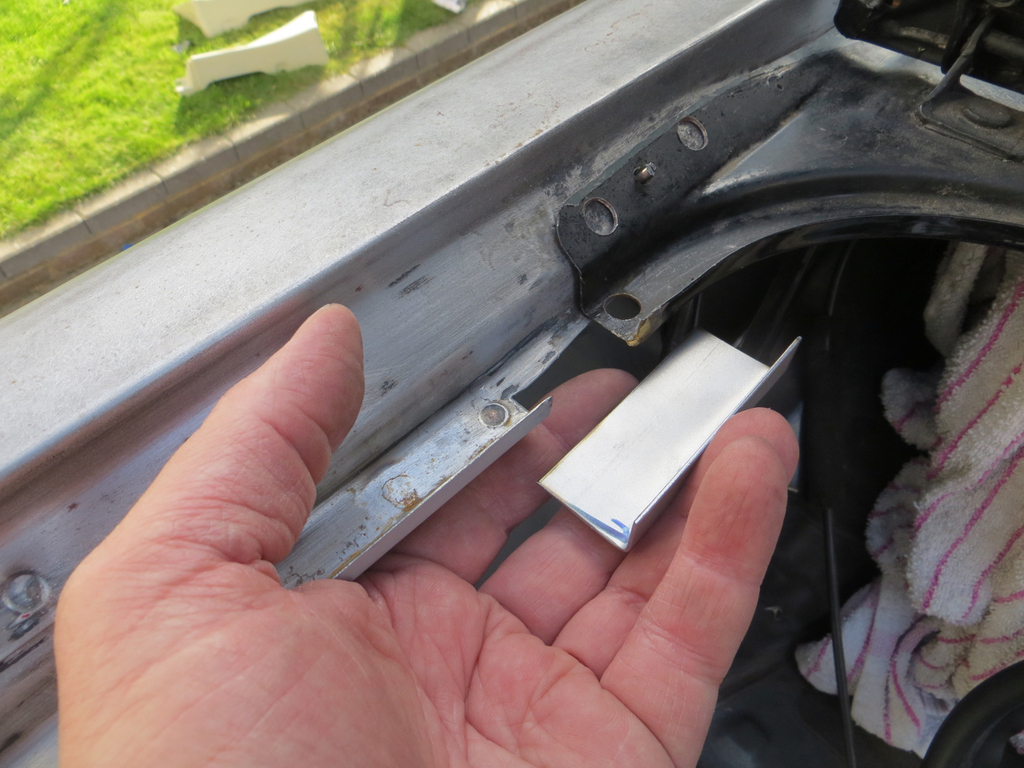 An easy win even for a man of my dubious skills.  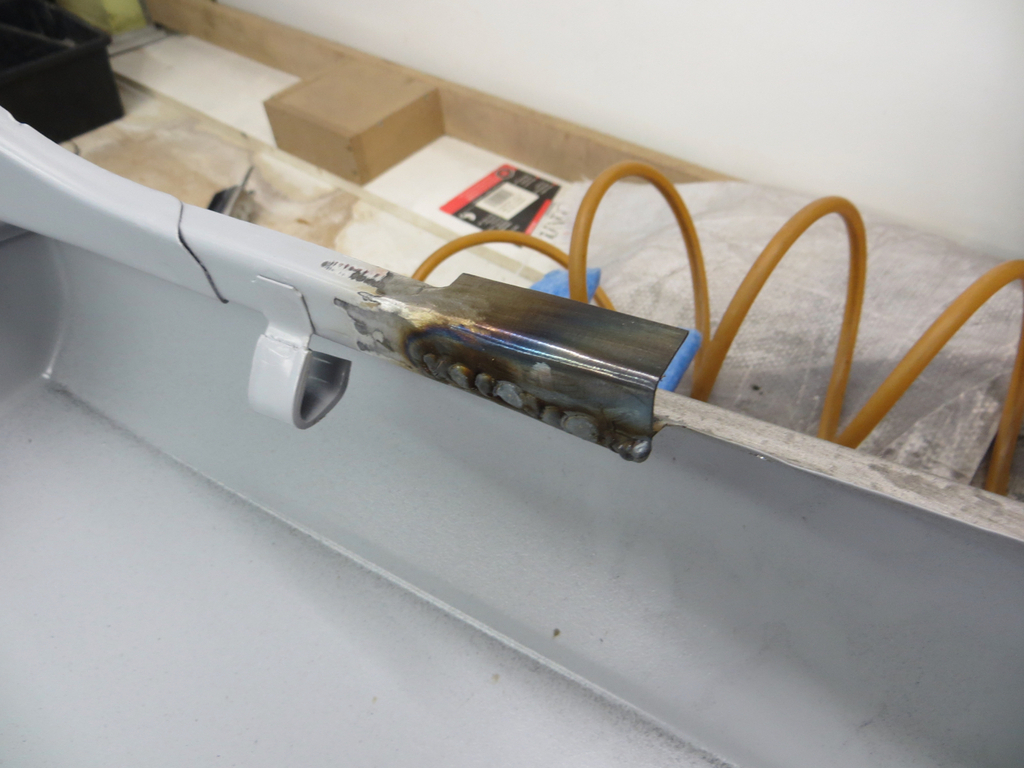 Blobbed in and then trimmed to look like it had never been missing.  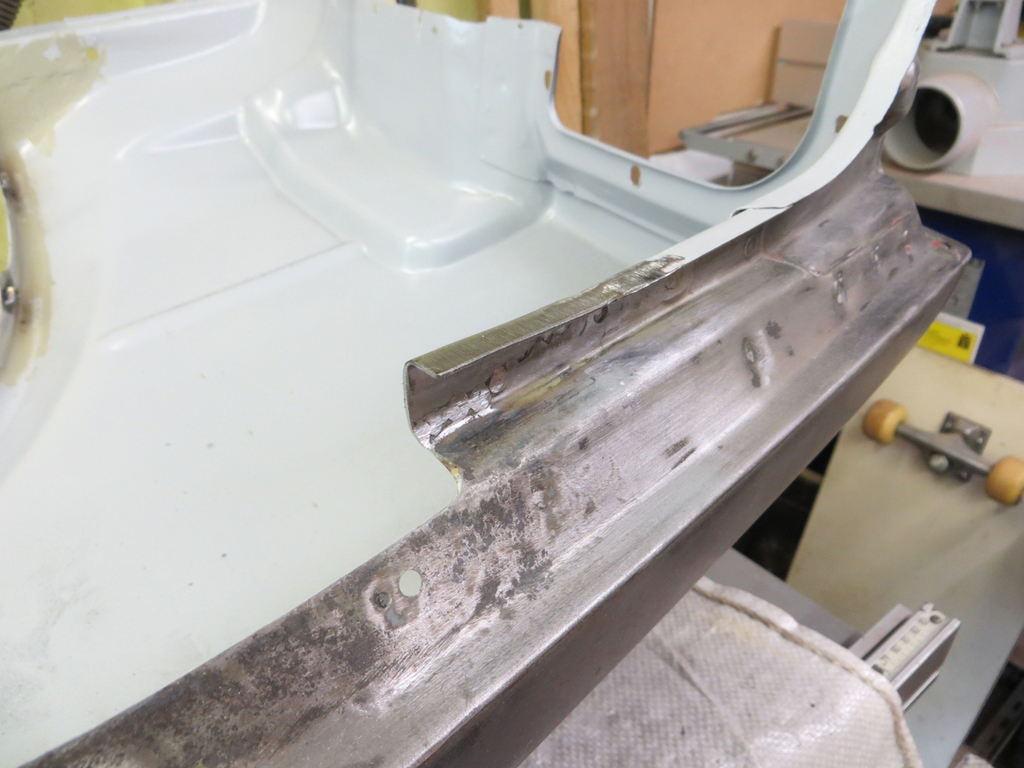 It’ll look ok when it’s painted. Painted?! Time for some black paint then. Nah. More things to do. The wing isn’t sitting nicely at the top because the bottom of the C post needs trimming back.  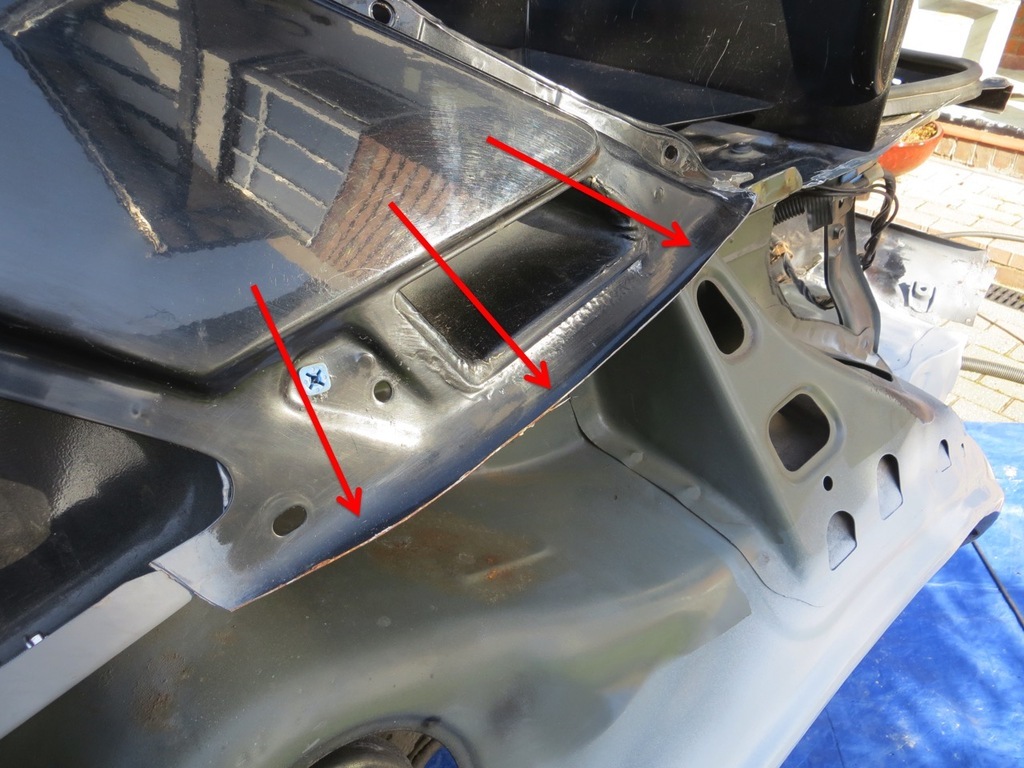 The new wing was sitting on the top of this. So I trimmed it and now it looks much better.  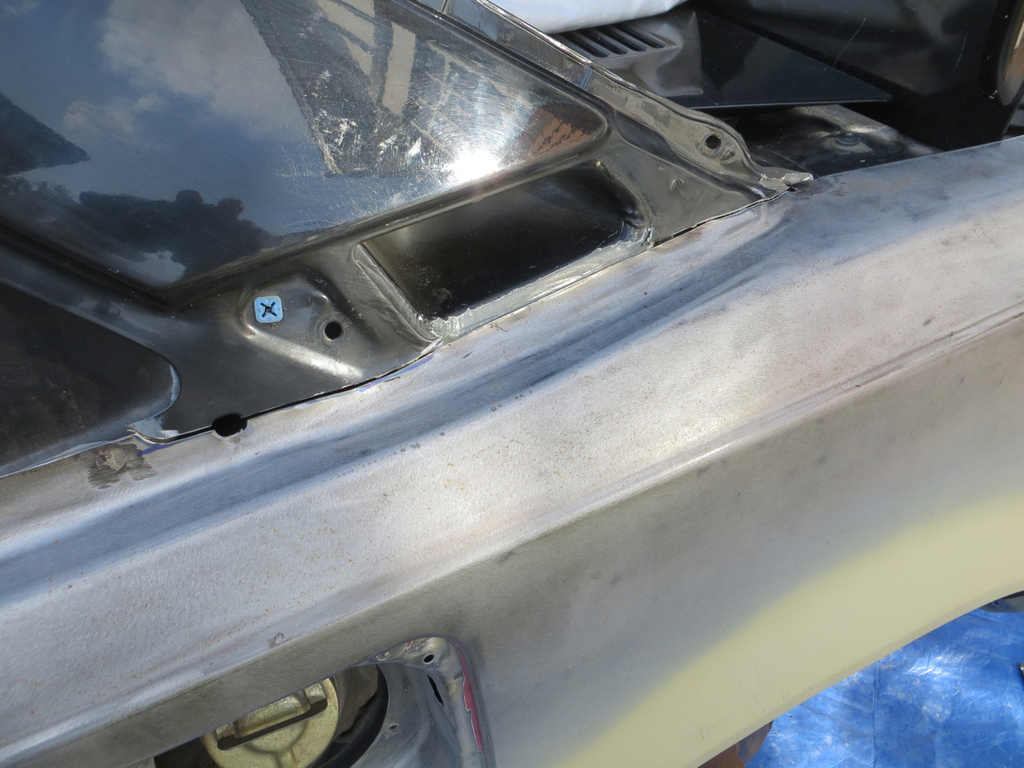 Now paint? No. Because… |
| |
|
|
|
|
mk2cossie
Club Retro Rides Member
Posts: 3,058  Club RR Member Number: 77
|
|
Sept 1, 2021 16:34:54 GMT
|
I shall have to ask either Snap-On or the Mac man next week if they do drill bits for square holes  Nice looking bit of progress tho sweetpea  (And I'm helping add to your 2M views  ) |
| |
|
|
jimi
Club Retro Rides Member
Posts: 2,198 
|
|
|
|
|
|
| |
Black is not a colour ! .... Its the absence of colour
|
|
|
|
|
Sept 2, 2021 11:23:32 GMT
|
|
Try Googling 'QMax cutter' for square holes, like in the pic above.
|
| |
1993 Rover 220 Coupe
1972 MG Midget
|
|
|
|
|
|
|
|
The holes are only about 10mm square. I've never seen a QMax that small.
At the end of the day I could just file them out but as I don't have the plastic inserts anyway...
|
| |
|
|
jimi
Club Retro Rides Member
Posts: 2,198 
|
|
Sept 3, 2021 13:44:37 GMT
|
At the end of the day I could just file them out ... Thats how mine were done when my sills were replaced, the old inserts were reused as they were OK. Your method should work just as well (use stainless bolts)  |
| |
Black is not a colour ! .... Its the absence of colour
|
|
|
|
|
Sept 3, 2021 16:29:22 GMT
|
|
I'd avoid stainless bolts unless you know they are a different grade to the nuts. Stainless has a way of galling threads on itself.
|
| |
|
|
jimi
Club Retro Rides Member
Posts: 2,198 
|
|
Sept 3, 2021 19:27:17 GMT
|
|
Galling can be a problem, but use of a proper stainless thread lubricant should prevent it.
If you use mild steel bolts with stainless nuts, you won't get them off in a year or so's time, you'll get galvanic corrosion and the bolts will come of worst. Had deal with these kind of things many times offshore, water/humidity makes it worse, the side skirts are a good place for moisture.
|
| |
Last Edit: Sept 3, 2021 19:29:30 GMT by jimi
Black is not a colour ! .... Its the absence of colour
|
|
|
|
|
Sept 3, 2021 19:53:13 GMT
|
|
After welding them I have found it's wise to run a tap through the nut, clears out any residue and distortion which seem to make galling worse.
|
| |
|
|
|
|
|
Sept 4, 2021 16:16:29 GMT
|
|
I agree completely! Although I'm not totally sure who I'm agreeing with or on what topics.
Anyway, yes, galling is a problem. I usually have a problem if I use a stainless bolt to hold the stainless nut to the panel while I weld it on. That appears to be a bad plan so I generally use a mild bolt these days. Another reason for that is that I recovered some mild bolts from something or another that have a slight taper on the seat side (like a wheel nut but not as sharp an angle) that centralises the nut in the hole which is dead handy.
On assembly I use a stainless bolt but use a load of grease on the threads. So far it's worked ok. Oh and I'm only using them for holding trim and stuff on 'cos I understand stainless bolts are more brittle. So nothing structural. I probably should look that up though.
I did wonder for a long time if welding stainless fasteners to the car was a good idea. It's kind of like using zinc anodes on your boat but the other way round so I promote rust in the car. I could come back in 5 years and find all the stainless nuts are welded to nothing. But then I thought that it's an 80's Toyota so it's probably going to do that anyway.
PS, when I say 'bolt' I probably mean 'set screw' if I'm being picky.
James
|
| |
Last Edit: Sept 4, 2021 16:19:46 GMT by Sweetpea
|
|
jimi
Club Retro Rides Member
Posts: 2,198 
|
|
Sept 4, 2021 16:48:55 GMT
|
|
Seemingly heat promotes galling in stainless, our welder puts a mild steel bolt in while he's welding stainless nuts on, also grinding dust/metal particles on the threads.
|
| |
Black is not a colour ! .... Its the absence of colour
|
|
jonomisfit
Club Retro Rides Member
Posts: 1,787
Club RR Member Number: 49
|
|
Sept 4, 2021 17:04:21 GMT
|
|
Probably a two-fold effect.
The weld bead shrinks the nut out of round meaning thread force goes up. Contact force is a key factor of galling.
The weld heat Probably affects the temper on the bolt softening it. Assuming bolts will be harder than the nut normally.
If you don't have enough difference in hardness between sliding pieces of stainless they gall.
In terms of will welding a stainless nut onto mild steel cause it to corrode at the join yes, if it gets wet. It's not likely to be a significant issue if its suitably painted. Although if they do get wet it'll likely corrode in the crevis between the nut and panel. But so will mild on mild.
Mr2 is looking great.
|
| |
|
|
jimi
Club Retro Rides Member
Posts: 2,198 
|
|
|
|
The holes are only about 10mm square. I've never seen a QMax that small. QMax range goes from 10-80mm in 2 or 3mm increments IIRC |
| |
Black is not a colour ! .... Its the absence of colour
|
|
|
|
|
Sept 5, 2021 19:17:33 GMT
|
No. Because… The B pillar doesn’t fit either. But this is a bit more complicated so pay attention, I’ll be asking questions later. Probably along the lines of “What was I thinking?” The B pillar in this area is made of an inner and outer skin (green arrows) and a centre strengthening piece (blue arrow). As I write this I’m not actually sure how far up the b pillar the strengthener goes but given the top seatbelt mount is in there somewhere it’s likely to be a fair way.  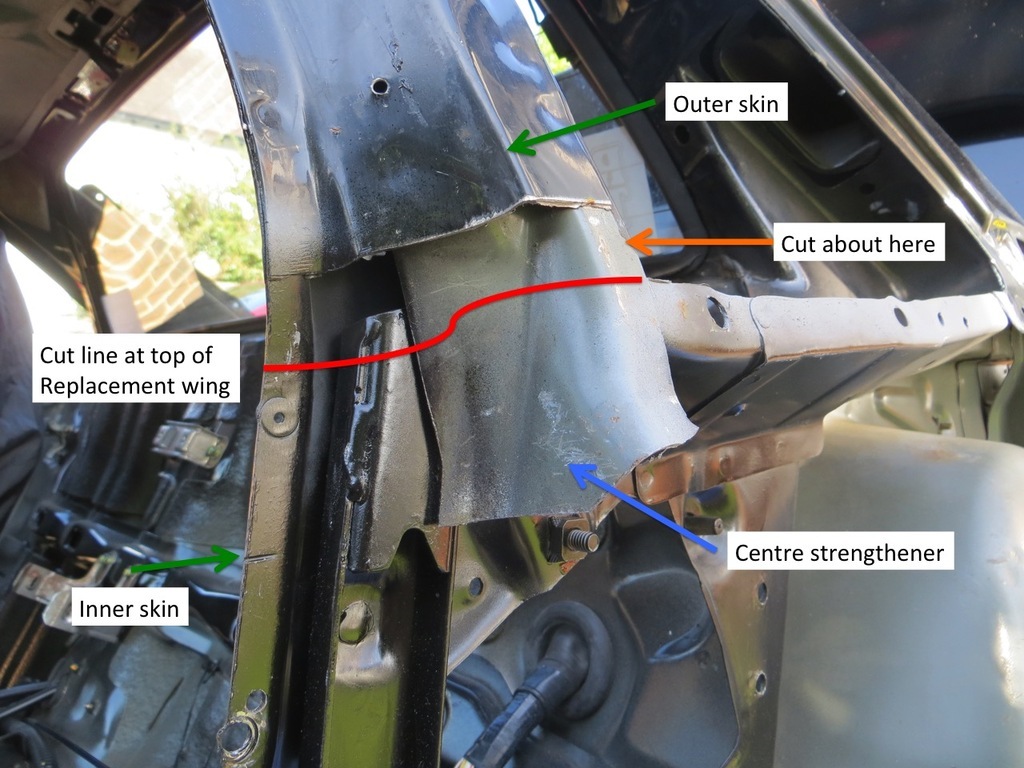 The centre strengthener is the problem. It runs down to the floor doubling up the door striker plate so probably adds a fair bit of strength to the B post. It’s this bottom of it - green arrow in the photo below.  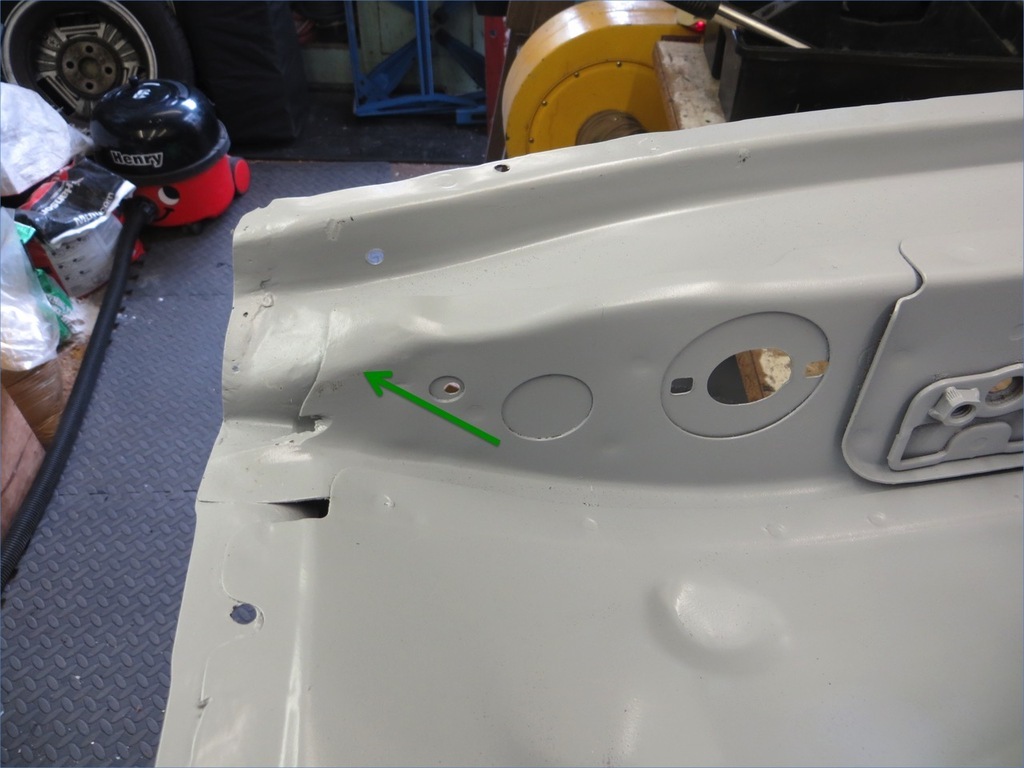 Just at the moment the strengthener on the car is too long and lying over the bit on the new wing. An original replacement wing panel goes all the way to the roof on the B and C pillars (including this strengthener). If you bent the wing they’d normally cut it at the bottom of the glass and join it there. You wouldn’t bother unpicking the B and C pillars if you didn’t have to. The other advantage is that you can hide the joins behind trim panels. On the B pillar the weld is hidden behind the door rubbers and glass trim and on the C pillar it’s behind a plastic vent panel so you wouldn’t even have to fill it if you didn’t want to. But that leaves a problem reconnecting the inner strengthener which is not accessible from either side. So what did they do? Looking at the old photos I have of the replacement wing I strongly suspect that they didn’t bother. They just seam welded the outer and used a few handy spot welds but, largely, I suspect the inner strengthener wasn’t reconnected. Well that’s no good. And I have two problems. Firstly that I want it connected and there is no access and secondly that the old and new bits are interfering with each other and stopping the panel sitting flat. What to do??? Well, after a bit of careful measuring I chopped the protruding bit off the car so that it can be welded to the wing roughly here.  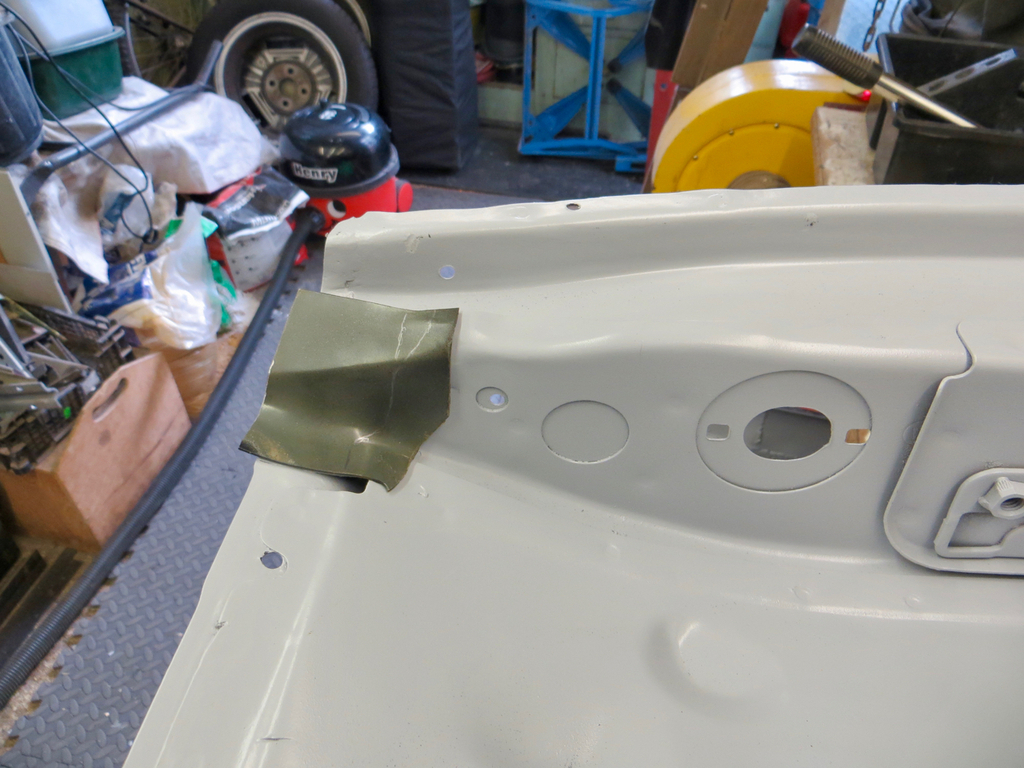 Notice how it protrudes above the top of the wing a little? Well, cleverly (See note 1), I’ve cut the door pillar too high (the red line in that first picture shows roughly where the top of the new wing is) leaving me a 15 to 20mm gap in the panel to weld the inner structure together. I’ve also kept the bit I need to fill the outer panel. There is no real way to clamp this bit to the wing in the right place so there was just some careful measurement and weld it in.  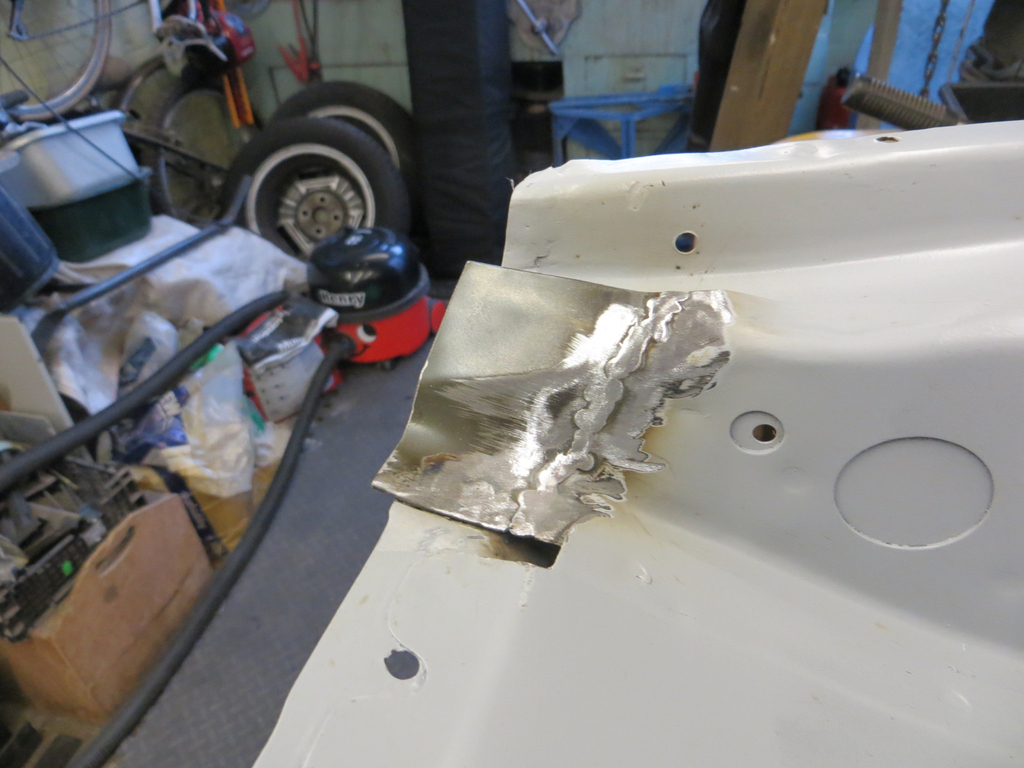 Too late now. Let’s hope it’s in the right place. Note 1…
It’ll be a clever plans if -
1, I’ve welded that bit in exactly the right place so it exactly meets where I cut it off the car.
2, The bit of outer skin I kept actually fits in the hole and seamlessly bridges the wing to the car.
3, The God of car bodgery is smiling upon my pathetic soul.
Otherwise it’ll be a dumb plan.As normal I ran out of weather and didn’t have enough time to make it worth putting the tent up. So I sorted out another little problem. The spray gun can’t be put down. You have to hang it from somewhere. In my tent or outdoors there isn’t a somewhere to hang it from. I have the wreckage of an old metal bed though. I can make something.  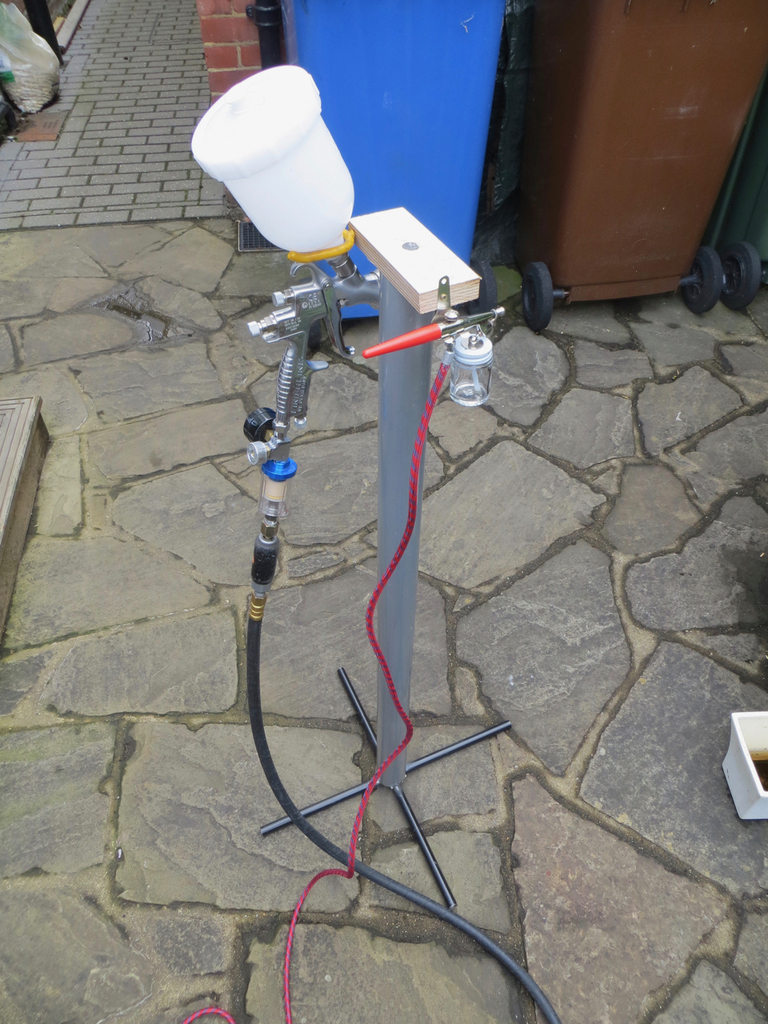 There, I’ve made a somewhere. Better yet, when I don’t need it I can take it to pieces.  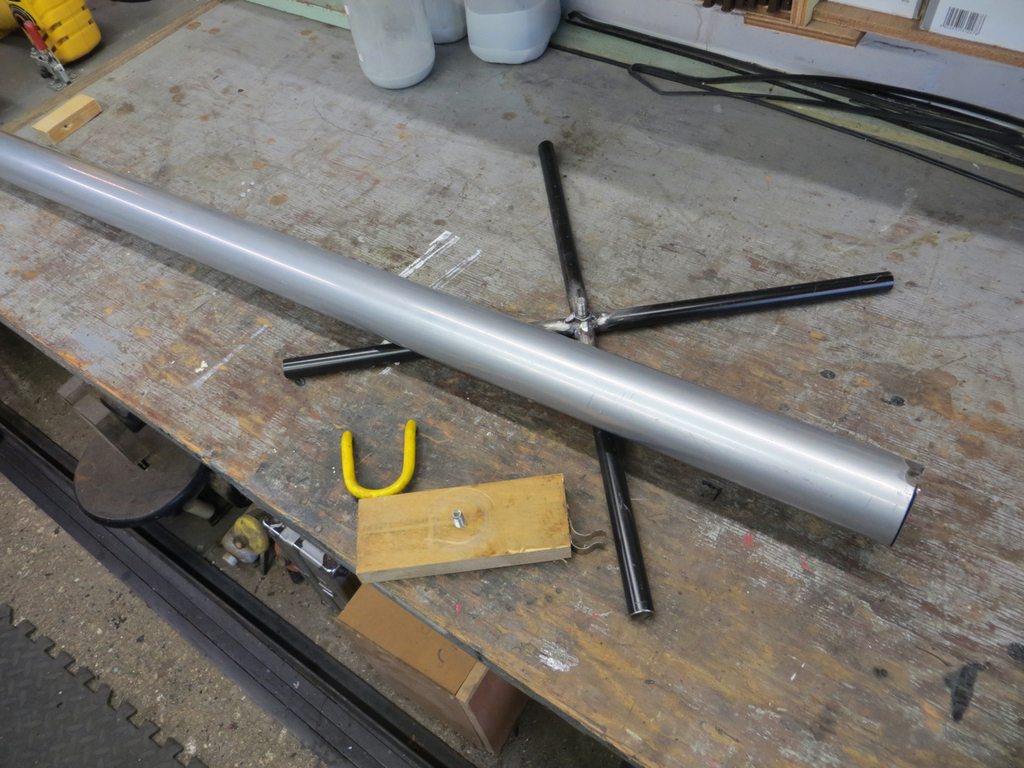 Or I could make a different top and use it as a stand for something else. The world is your shellfish when you can just about use a welder and don’t throw things away. James |
| |
|
|
|
|
|
Sept 5, 2021 19:48:44 GMT
|
|
That's a lot of bits on the end of your gun. Makes it heavy and more difficult to control.
Better if you can move the filter and regulator to the other end of the hose.
|
| |
|
|
|
|
|
Sept 5, 2021 21:12:56 GMT
|
That's a lot of bits on the end of your gun. Makes it heavy and more difficult to control. Better if you can move the filter and regulator to the other end of the hose. There speaks the voice of experience! You are not wrong. It's made worse but the fact that the hose is heavy. Flexible but heavy. It's also the one that comes from the garage so moving the bits to the other end isn't really an option. I have a lightweight coiled hose I could use as a fly pipe but they are really annoying on the air tools so no doubt it would also be annoying on the gun. And I also have a lighter length of hose which I'll likely use in future. The only problem is that it's knackered and keeps leaking. Need a new light weight hose. |
| |
|
|
|
|
|
Sept 12, 2021 19:09:13 GMT
|
When I took the old wing off I noticed this… And this…  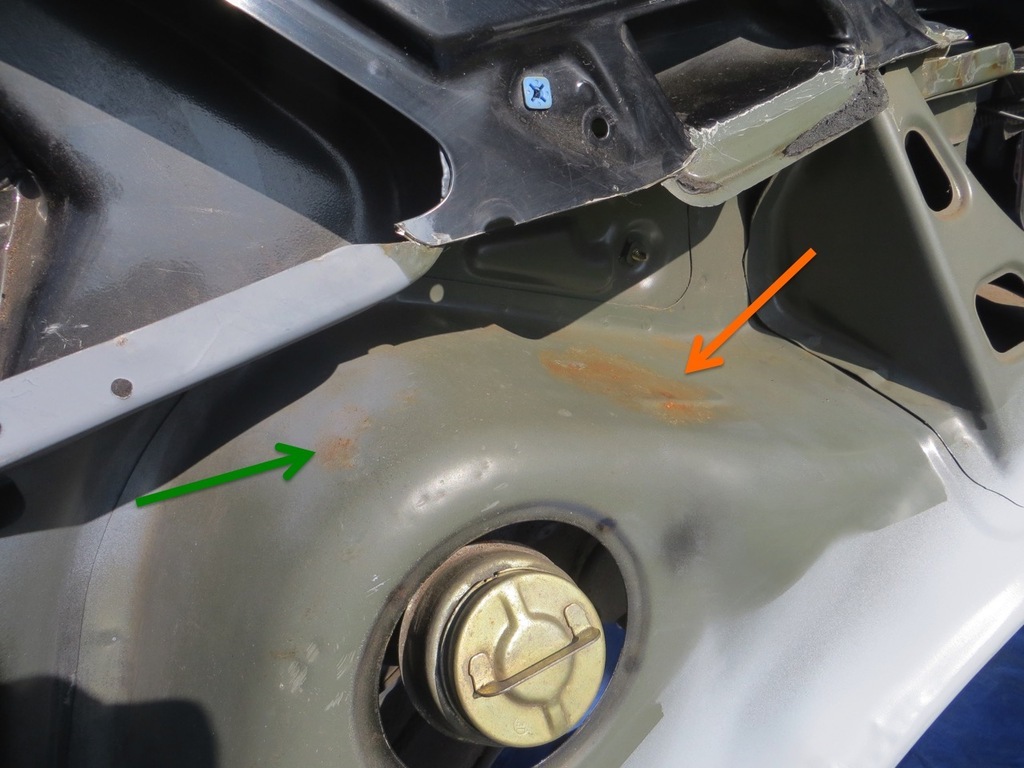 I’ve been wondering about it ever since. The worst patch (orange arrow) looks like something was dripping down the C pillar. But that doesn’t explain the other bit. Anyway it’s only surface rust so no big deal. Then I took the rear wheel off and took a proper look in the wheel arch.  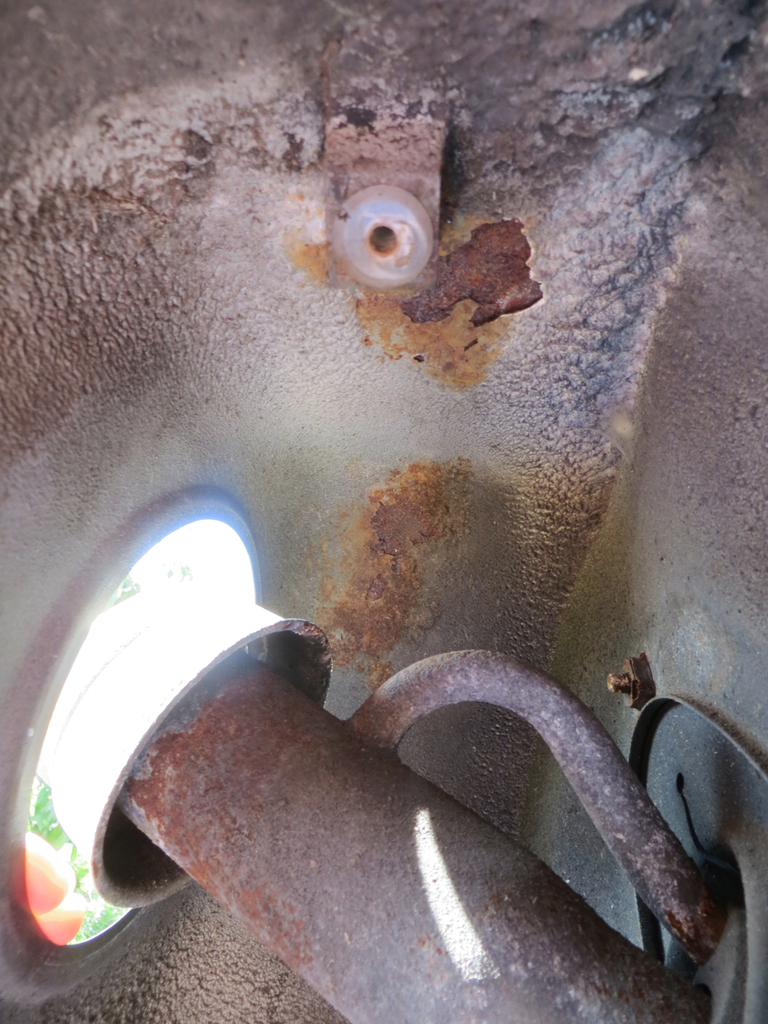 Well of course it was rusting from underneath. How else would it be rusting? It’s still a bit of a mystery though. This is all hidden behind a plastic liner that protects the filler pipe so it’s not as if it could have been chipped by a stone. Well it’s going to be a good deal easier to fix while the wing is off. Best get on with it. First job is to get the fuel filler pipe off the car and out of the way. Guess what? It won’t come off. I’ve undone it and pushed it out of the way but I think I’d have to remove the front engine mount to actually get it off the car. Next a bit of clean up to see how bad things are.  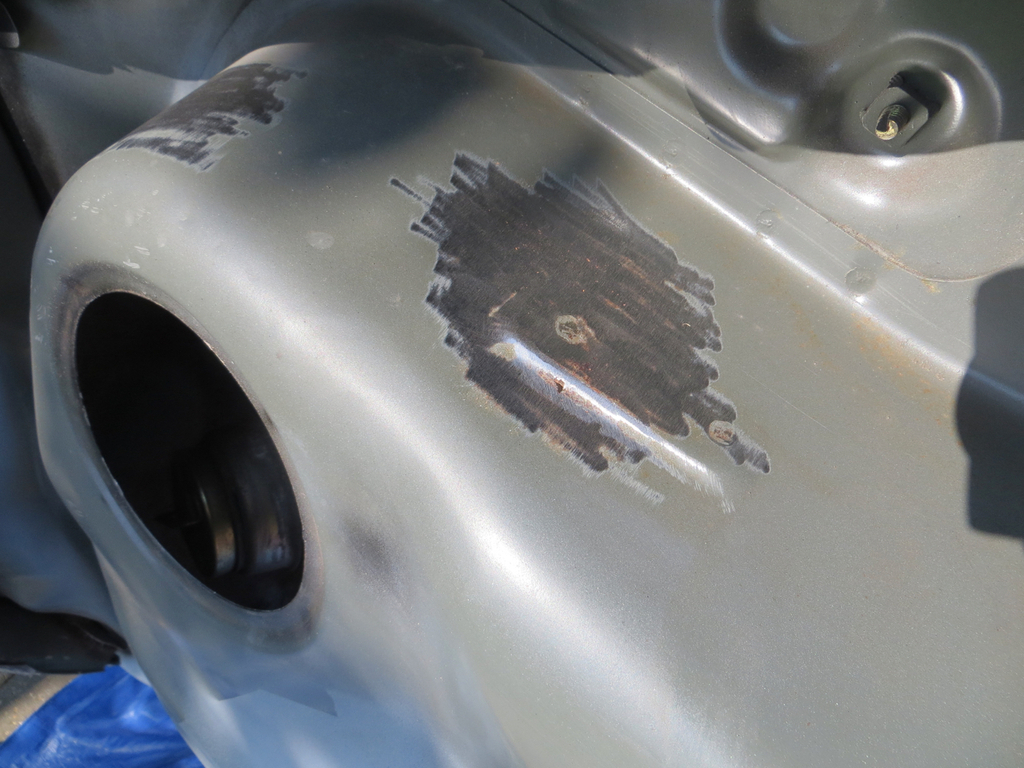 From the top neither look bad. The lesser one at the front needs a good coat of Hydrate 80 and epoxy primer and it’ll be cushty.  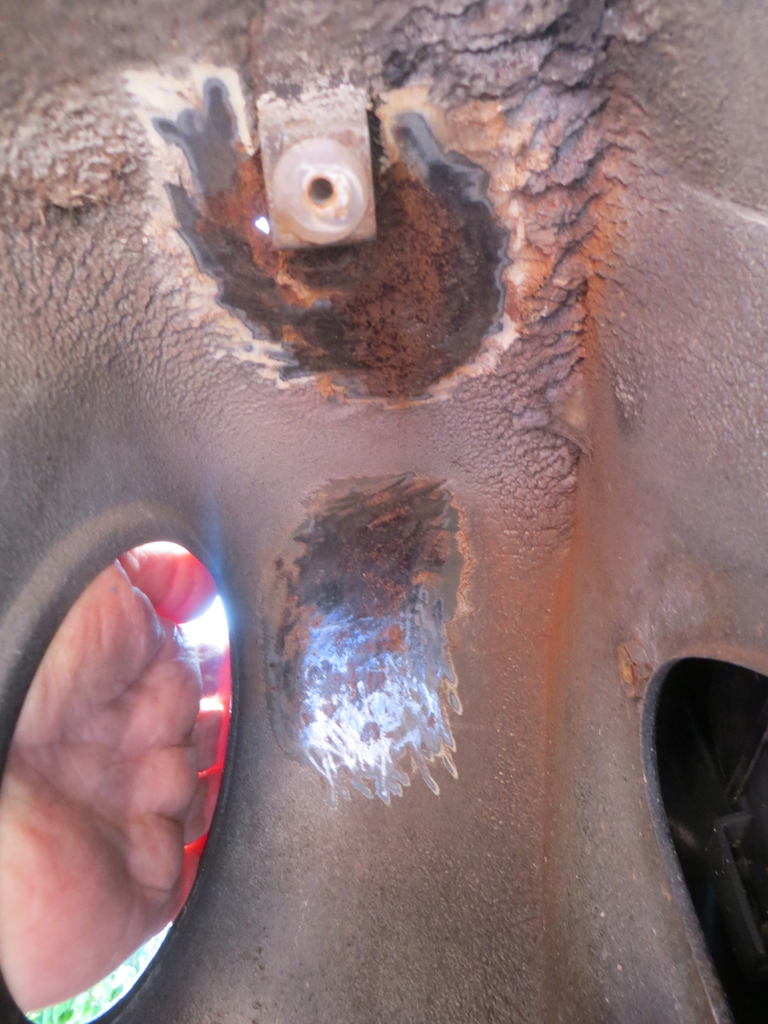 The other one (where the mounting bush on the bracket is has deeper pits and has holed in a couple places co it needs to be cut out. The mounting bush is for the plastic liner that protects the whole area. Or didn’t in this case. Chopety chop chop.  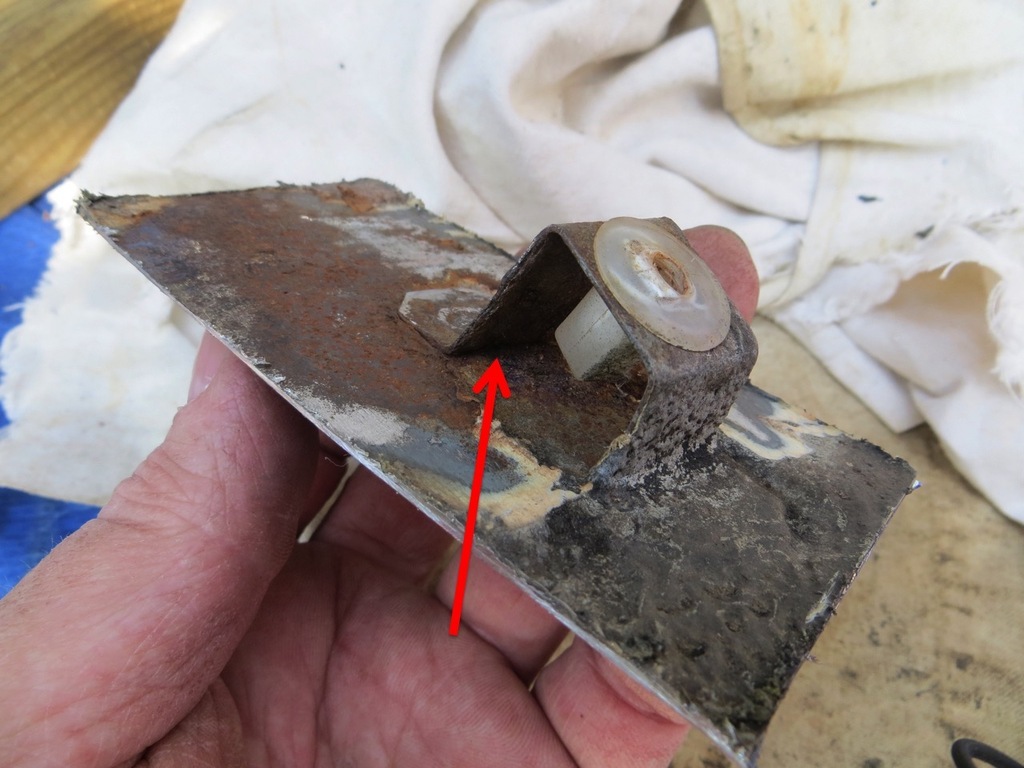 I suspect this might have failed because the seam sealer didn’t get under the bracket to stop water getting between the bracket and the panel (where I’ve stuck the convenient and informative red arrow (so called because it is convenient, informative and, indeed, red)). Once in there it ran under the sealer and rusted merrily away. That still doesn’t explain the other patch. Anyhoo, I guess I should make a new bit. There is actually a small indentation where the bracket is welded on. This delicate and intricate feature is made by thumping it with a chisel.  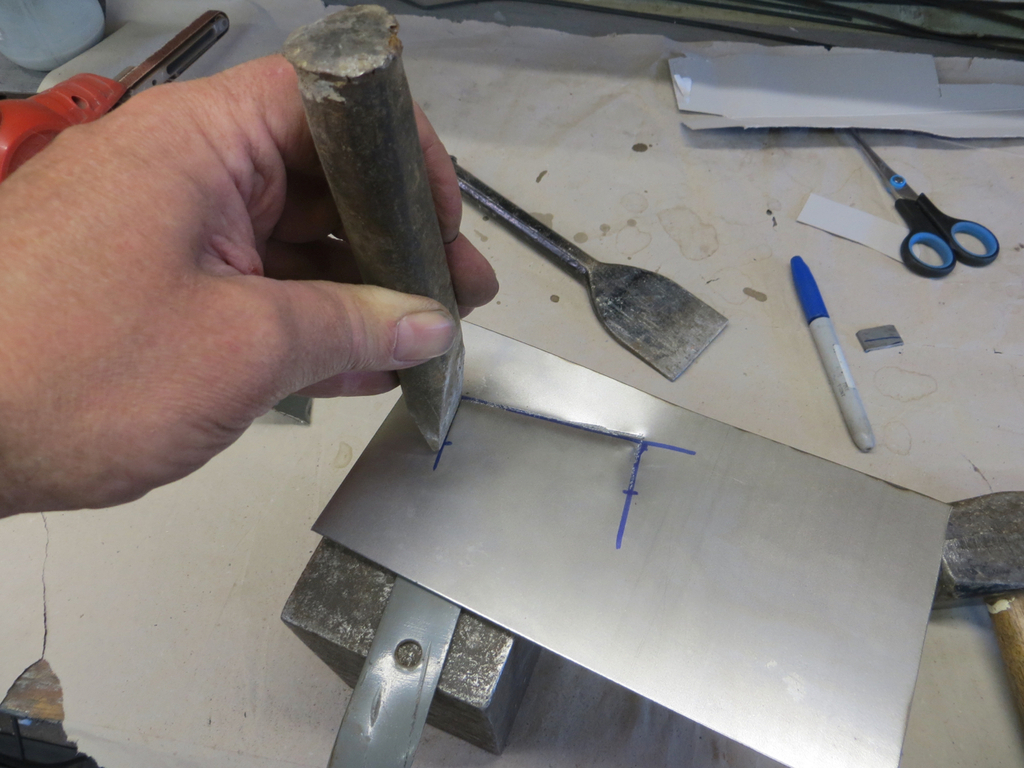 Next I need to make the bracket.  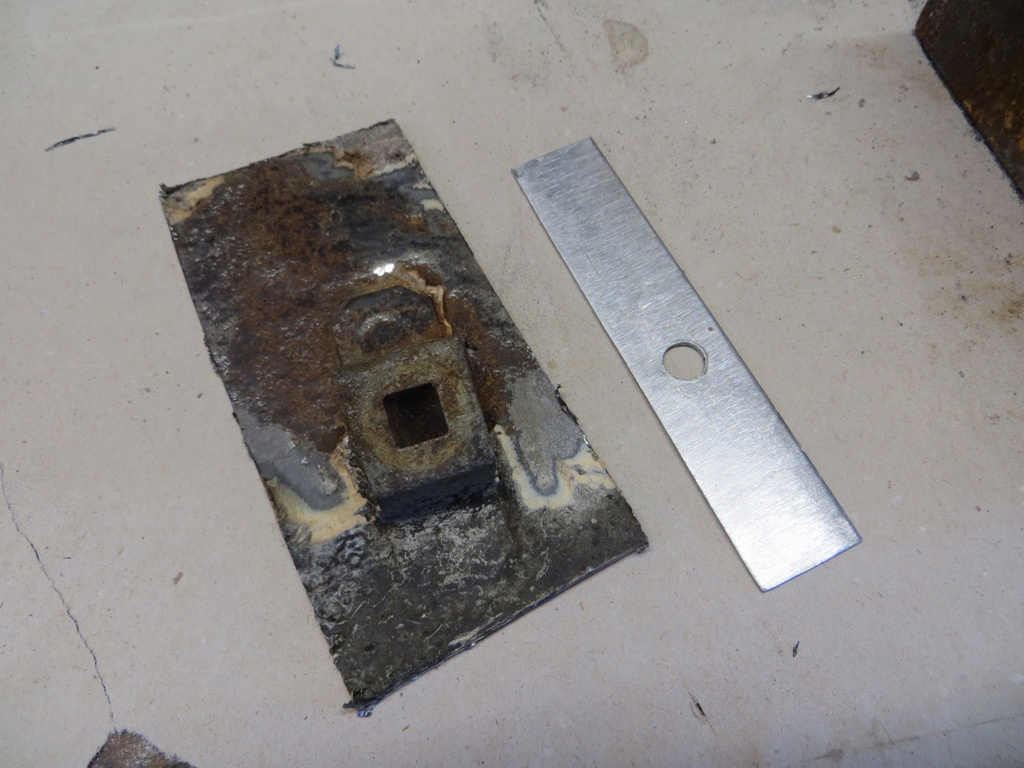 It’s a square hole! A chuffin’ square hole! And I still don’t have a square hole drill. I had to file it with a file. But some time later…  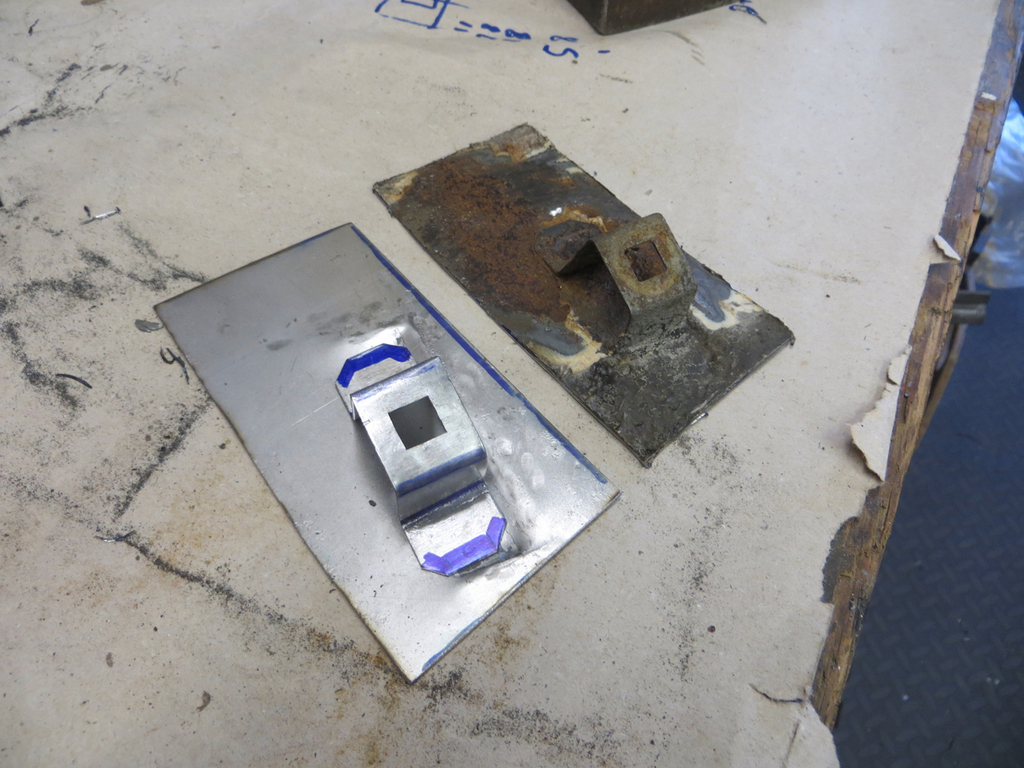 Just needs a couple of plug welds to attach the bracket to the panel. Wonder if the plastic doofer will actually fit in the square hole?  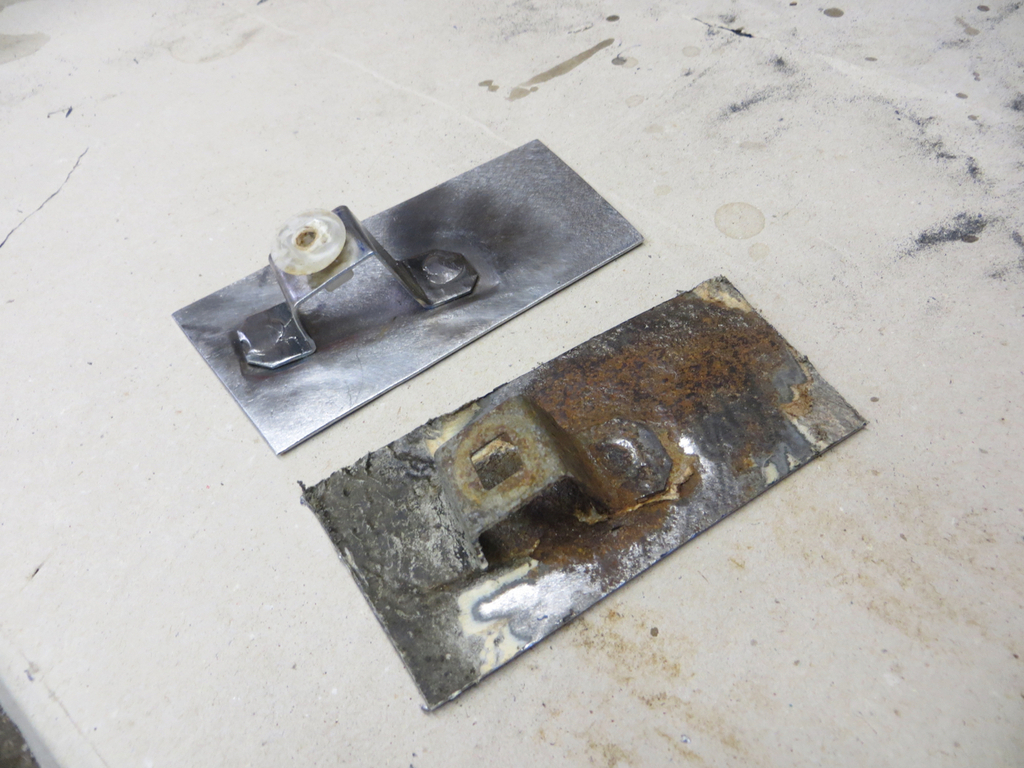 You didn’t actually doubt it did you? James |
| |
|
|
|
|
|
Sept 12, 2021 20:57:49 GMT
|
|
|
| |
|
|
|
|
|
Sept 13, 2021 19:01:44 GMT
|
Thanks for that. I had a play at the weekend and I'm going to need some fittings no matter what I do. James |
| |
|
|
|
|
|
Sept 13, 2021 19:03:15 GMT
|
I know this is slightly off topic. Well not even slightly. It’s very off topic… I have come to the conclusion that outdoor solar lights have one purpose in life. To fill with water and die. Another one of ours was filling up so it went to the garage for a stern telling off. Anyway, while I was doing this I noticed that I’d cut one of my fingers and couldn’t work out why. Then, later, I sliced another open and worked out how I’d done the first one. Out with the plasters for the weekend. And today the poxy MR2 did another finger which is now under a sticky plaster. I’m rapidly running out of usable digits. Any road up, the choppy chop chop session seems to have left a hole in the inner wing.  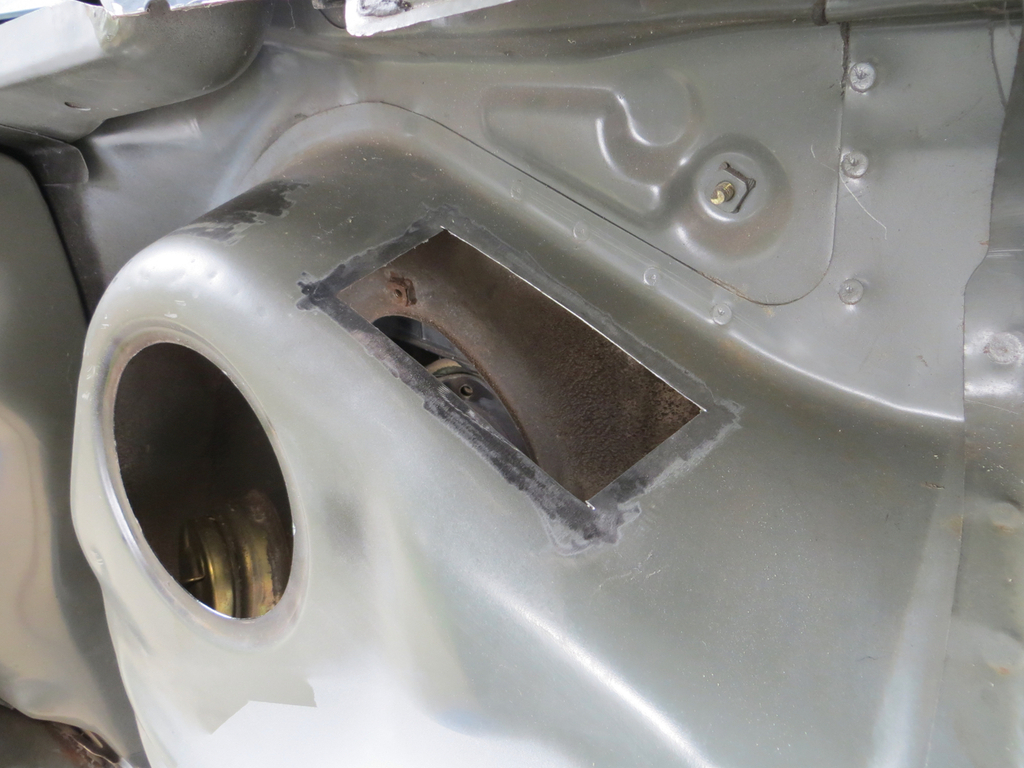 So I thought I should blob the new bit in. I did it by tacking the new bit over the top at each end and then slitting the sides, pushing it down flush and tacking into the slits. Then slitting the ends and tacking into the slit. That way I cut it in as I welded it.  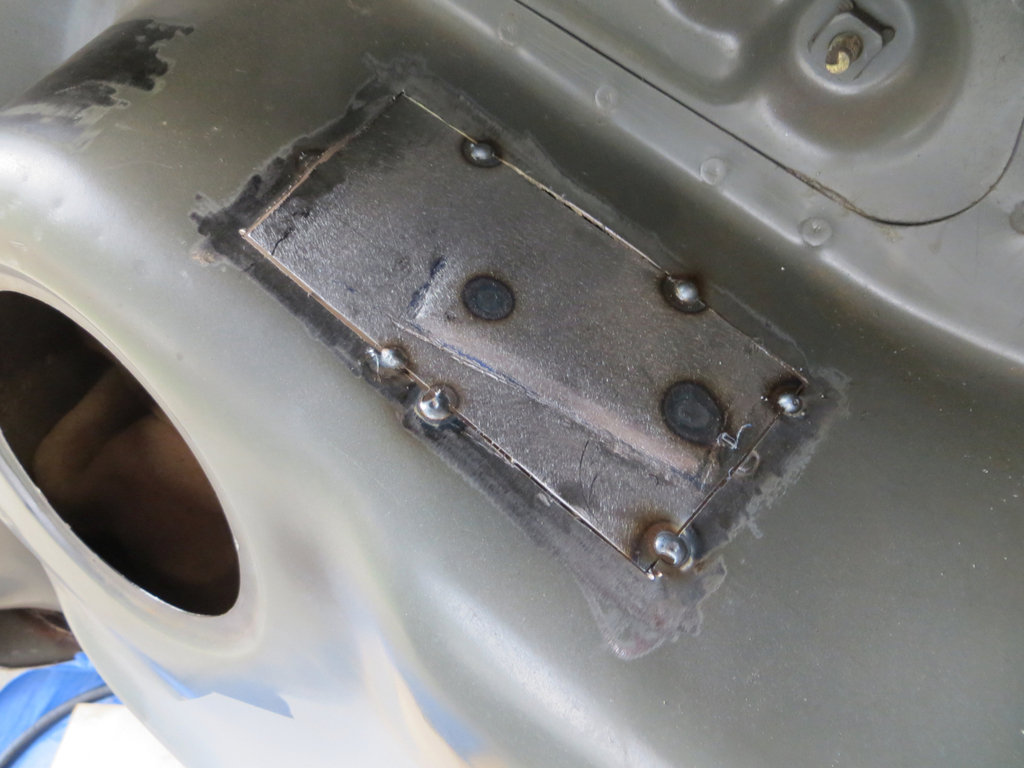 It’s a great plan but it seems that I’ve forgotten how to weld. I really struggled with this. Instead of the ideal ‘frying bacon’ sound I was getting Pop Pop Bang. Then it’d get its act together and weld for a moment. But even then, because of the metal laid down then it was popping and banging, I was struggling to get penetration. I was just getting weld building on the surface and not lying down into the panel. Hard to believe I was struggling to get penetration when welding into a gap. In the next episode we’ll be doing a bit of welder maintenance. Some time later and I’ve dobbed some epoxy on it with a brush.  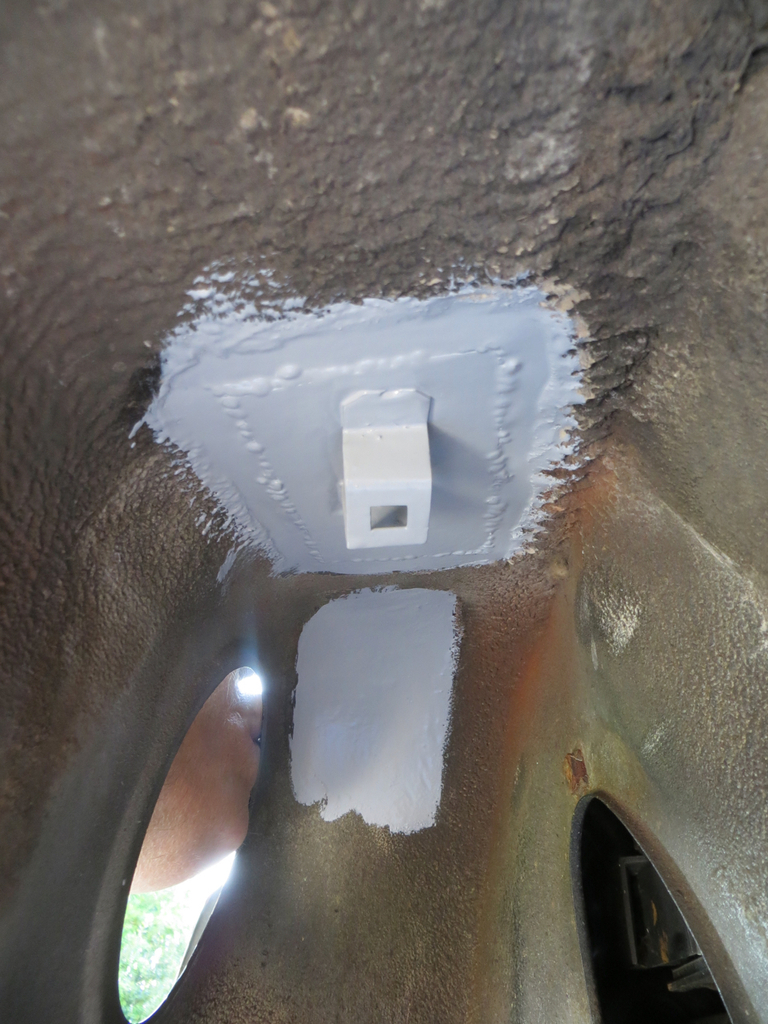 It’s now got a coat of Dynax Gloopy Schmoo on the wheel arch side. It needs a dusting of black paint, just to tone it down a little, and the filler pipe can go back in. Right, what’s wrong with my welder then? James |
| |
|
|


 )
)


