|
|
|
|
|
Thank you maybachman . There is another patch to do on the other side so we'll find out if it was just a fluke! I have to say I'm impressed with how stiff this car is. I've been jacking it at the rear jacking point and the front has been lifting off the floor as well. Even with a lump cut out of the middle of the sill and the car supported at one end there is no twist at all. Dear old dad had a Metro back in the day. If you jacked just one wheel off the floor you couldn't shut the doors. And that was with both sills in one piece. Thank God I never had an accident in that car. Anyway, I have it on good authority that driving around with a bit of the sill missing is frowned upon no matter how stiff the rest of the car is. Best bite the bullet and fill it up then. 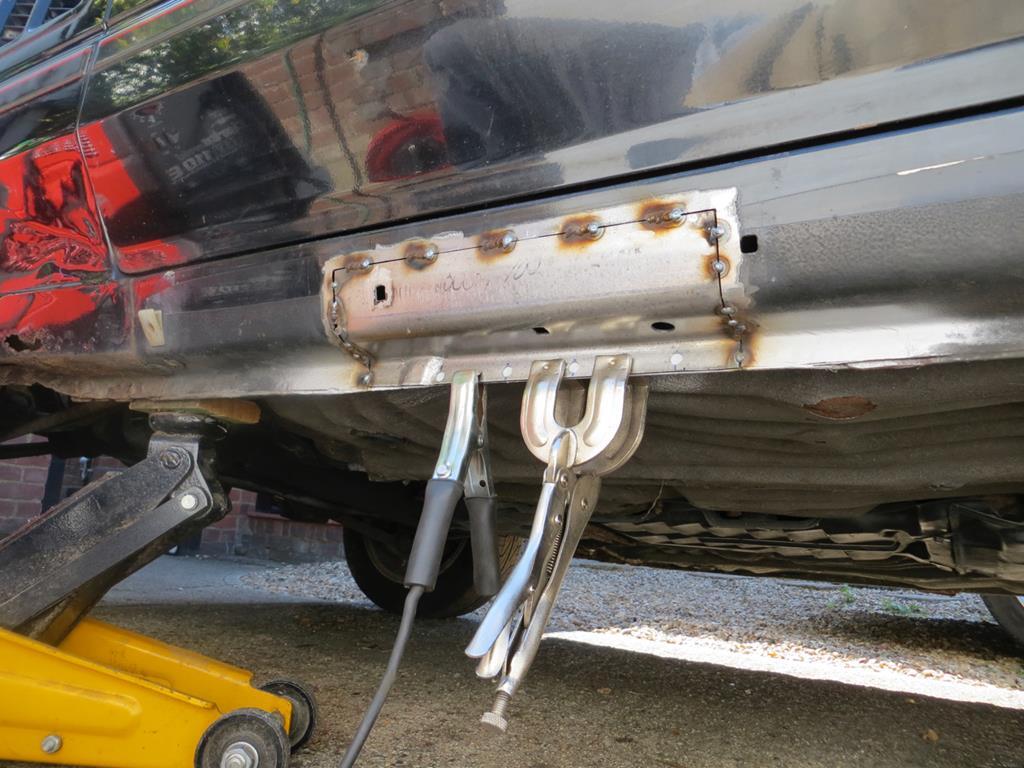 I had deliberately cut the patch a gnats chuff small so I could weld on low power in little blobs but still get all the penetration I needed. 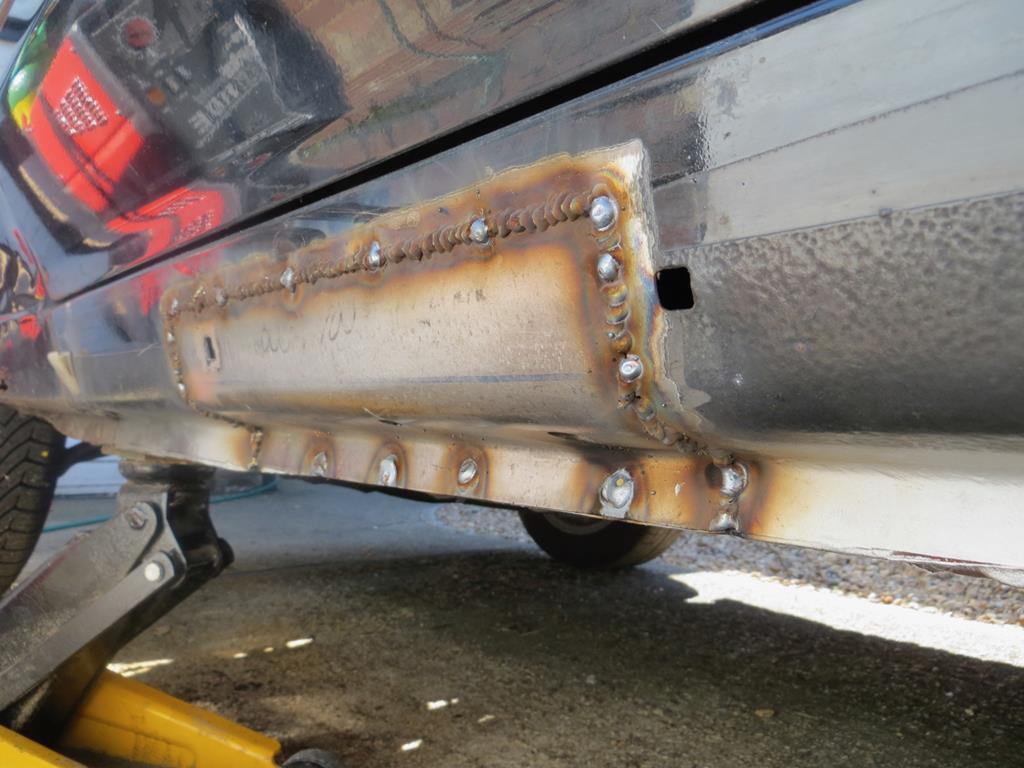 Done. More or less. When I grind it back there'll be an odd pin hole to tidy up. In fact I can see a spot I missed in the photo. I live in a quiet spot with nice neighbours so grinding can happen on a day that's not a Sunday! Quick coat of weld through to keep it protected until I tidy it up. Which might be after the MOT to be honest. 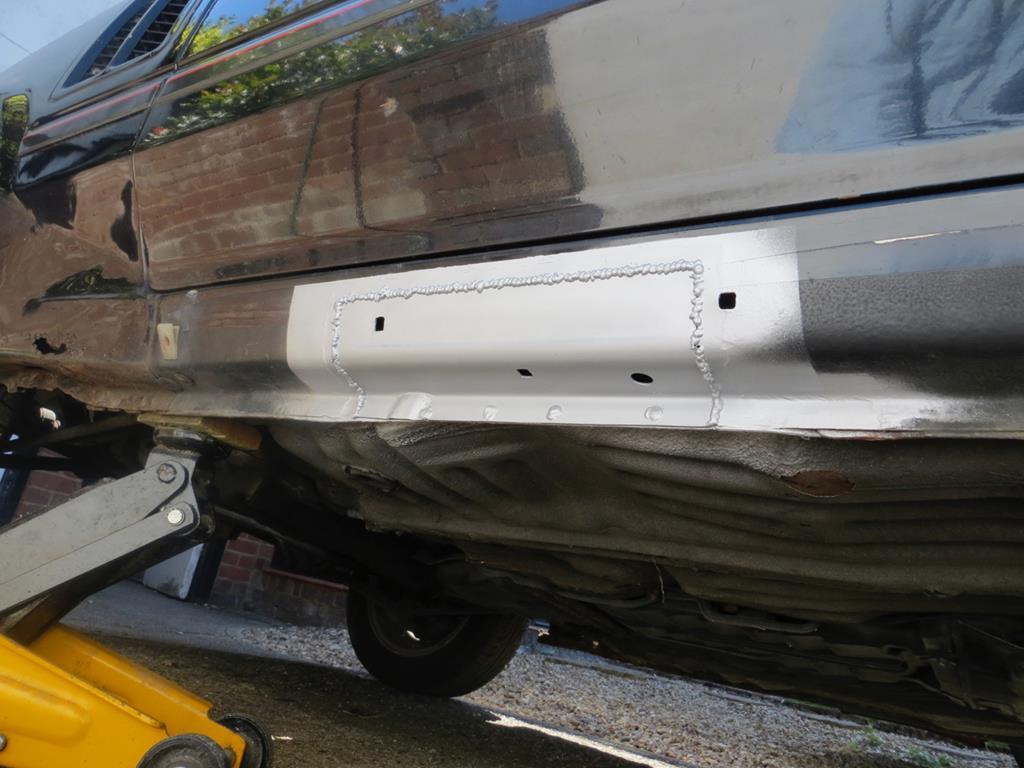 I'll go and play with the engine instead. The alternator is back on. which means I now have an extra warning light on the dash. 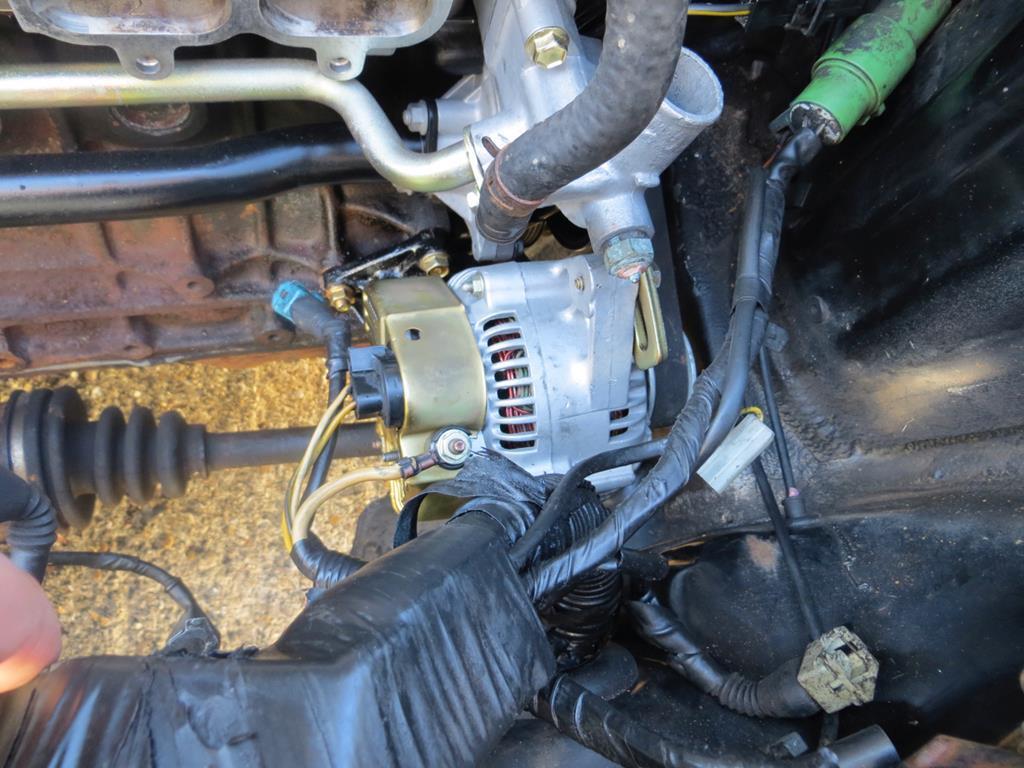 Then this lot. 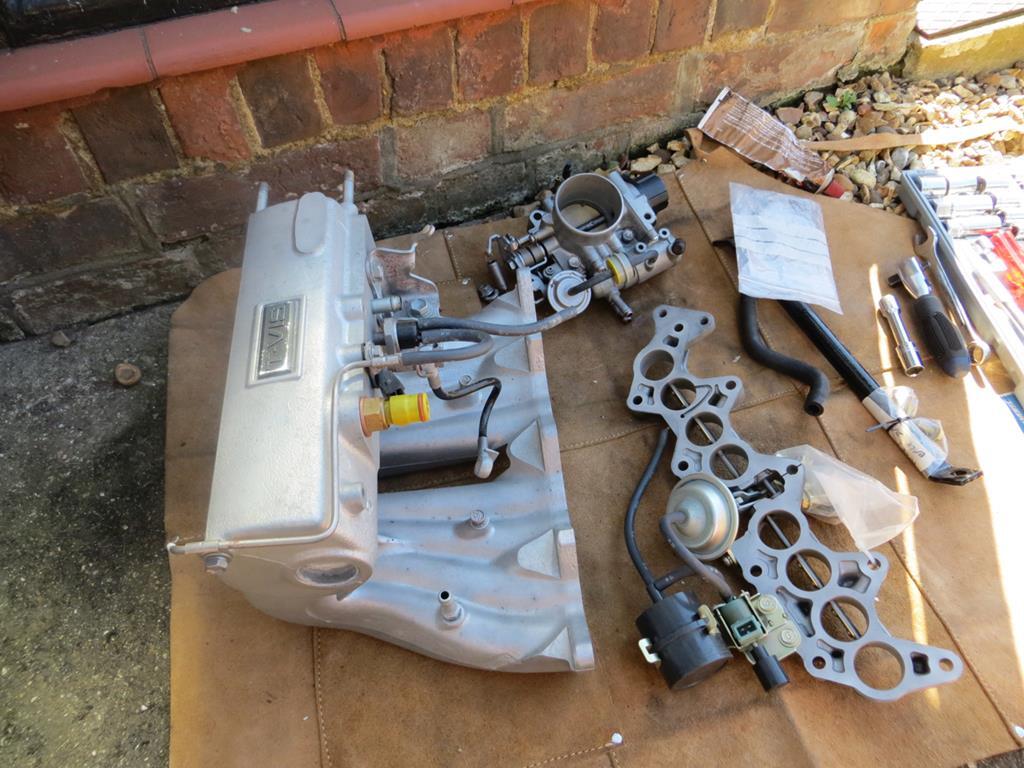 I have to say I'm not fond of front wheel drive cars. They tend to be a bit cramped to work on. So what possessed me to buy a front wheel drive car where the engine got plonked in the back is a mystery. Tightening the 4 bolts on the bottom of the induction system was a complete ball ache. But it's on now. 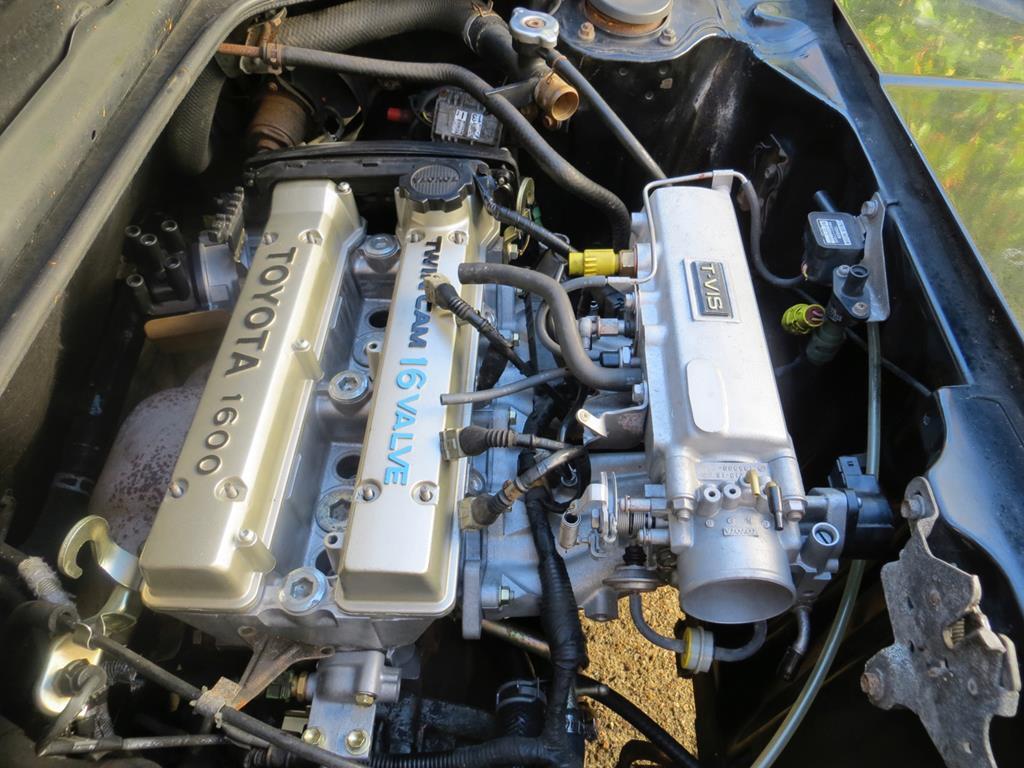 The throttle plate bit needs tightening up, it's just hanging on there for convenience. Starting to look like an engine again. James |
| |
Last Edit: Dec 7, 2018 20:03:35 GMT by Sweetpea
|
|
|
|
|
|
|
Aug 10, 2015 20:38:42 GMT
|
It's been an exhausting day. 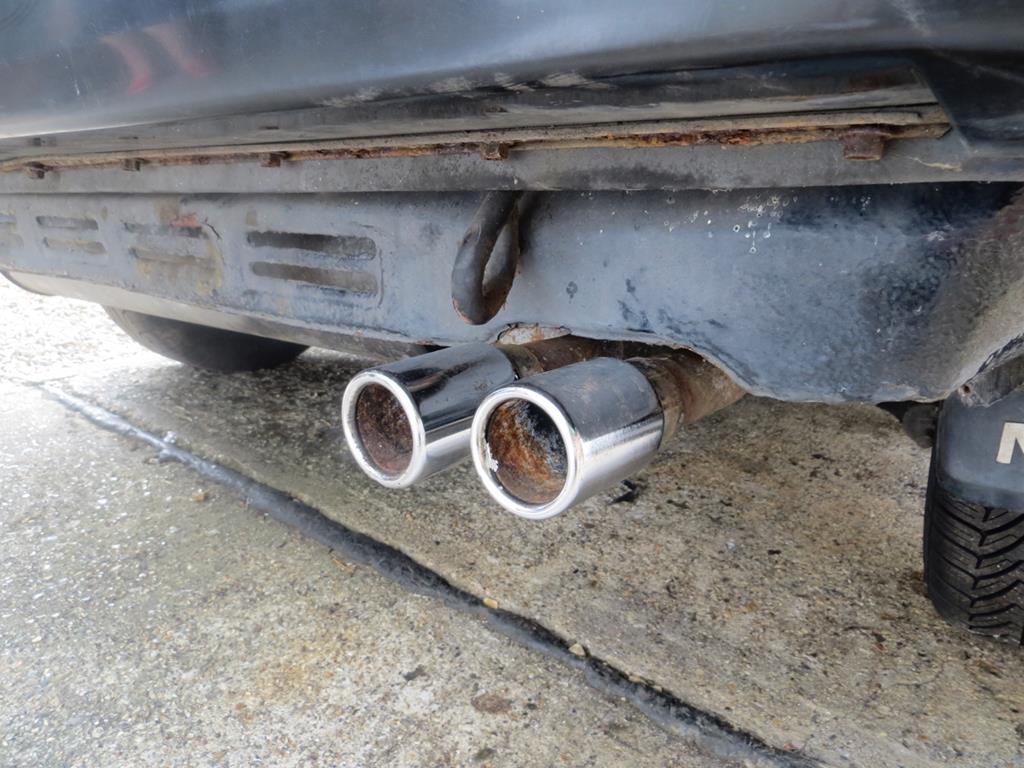    Blimey I'm so funny. Anyway the car hasn't had an exhaust for some time so it's nice to see some chrome under the bumper again. Fuel rail went back on. 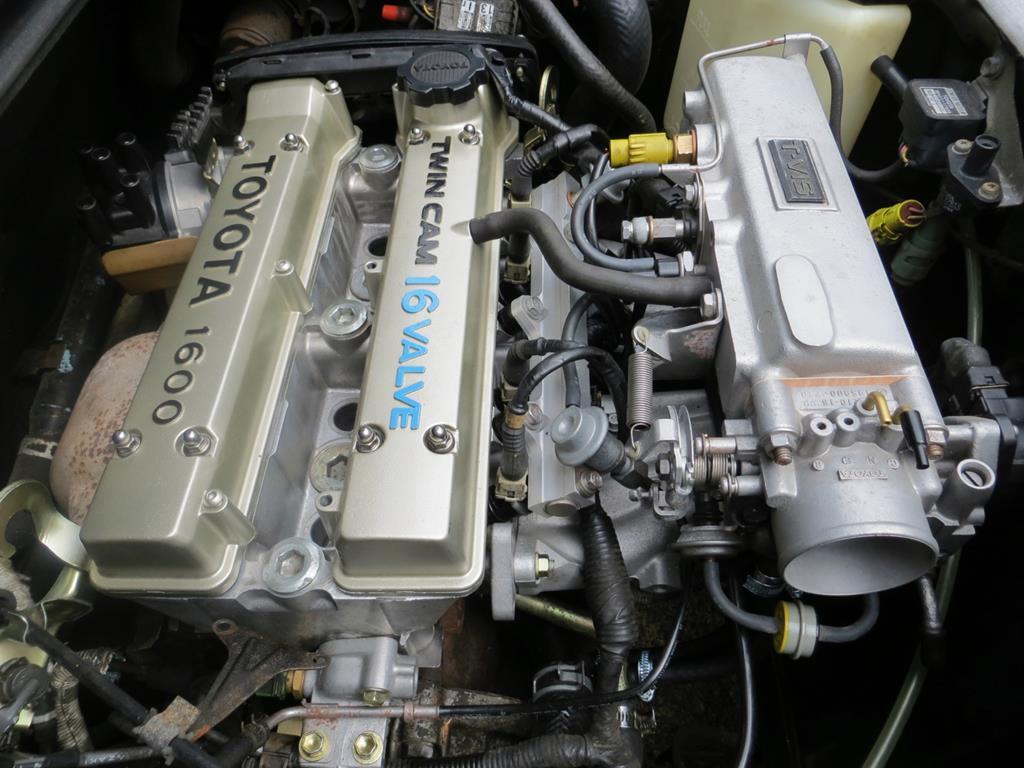 And I bolted the cam covers back down. 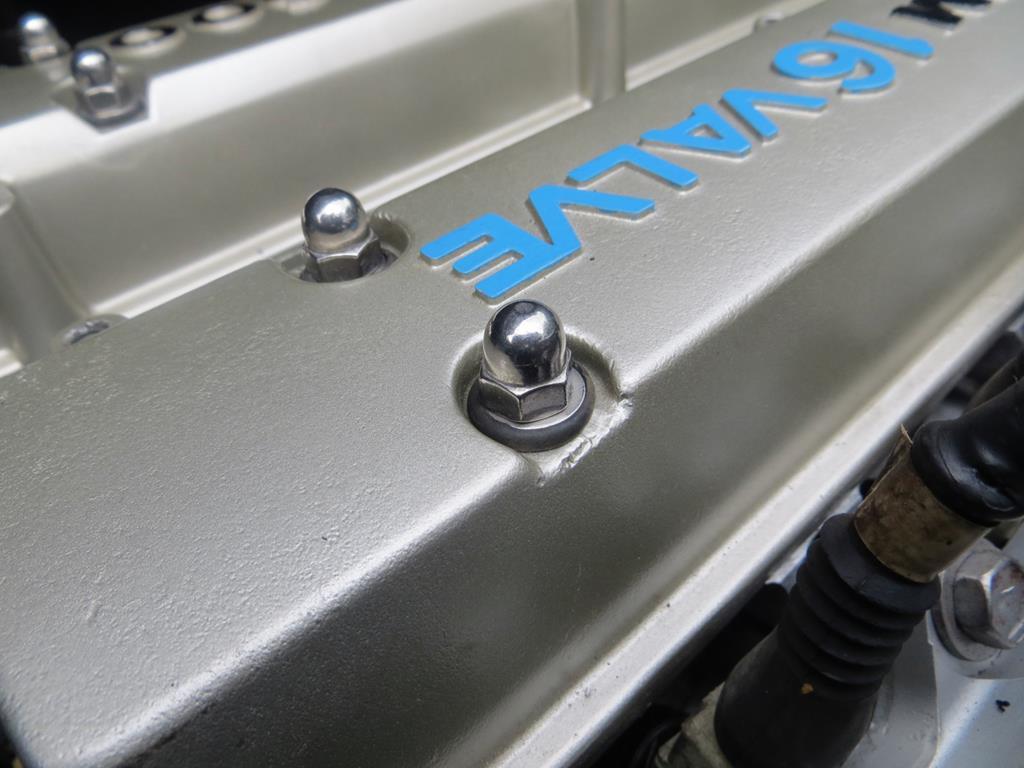 Under the dome nut doofers is a washer with a rubber side. The rubber goes crispy and they leak oil. Of course new ones are in the head gasket set. Er, no they aren't. They send you the gasket that goes under the cover but not the ones under the nuts. Until I get some real ones I've made some from slivers of an old hose. It'll do to get it running. So I kept bolting bits on until, eventually, finally, all the boxes were empty. The engine is back in one piece. Forgive the bigger photos but when I first saw the car back in 2011 (good grief, was it really that long ago!?) the engine looked like this… 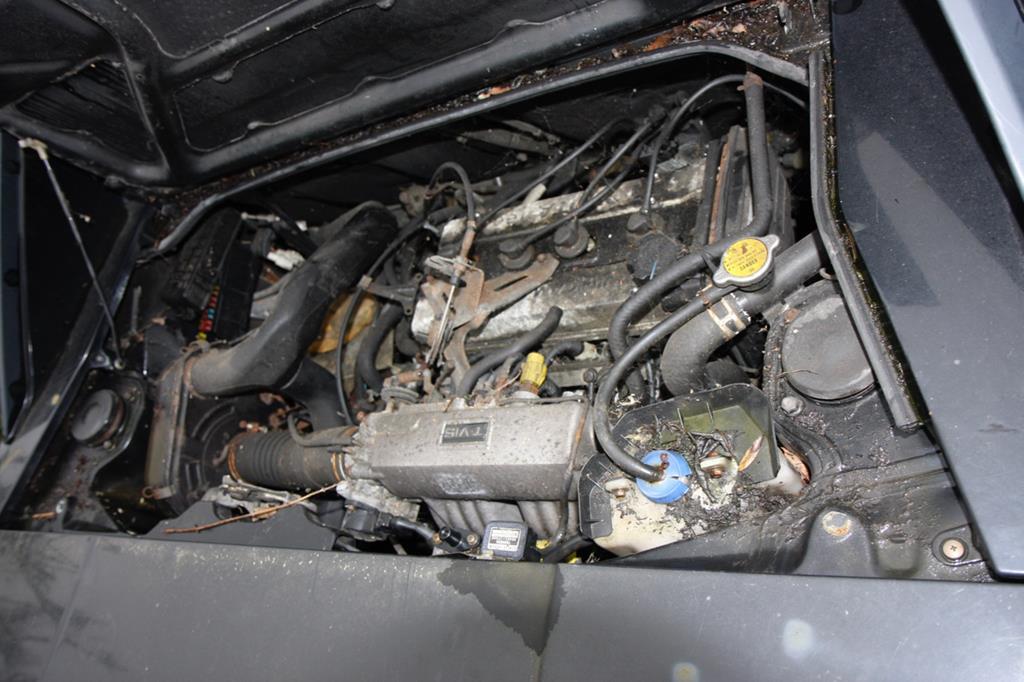 Now it looks like this… 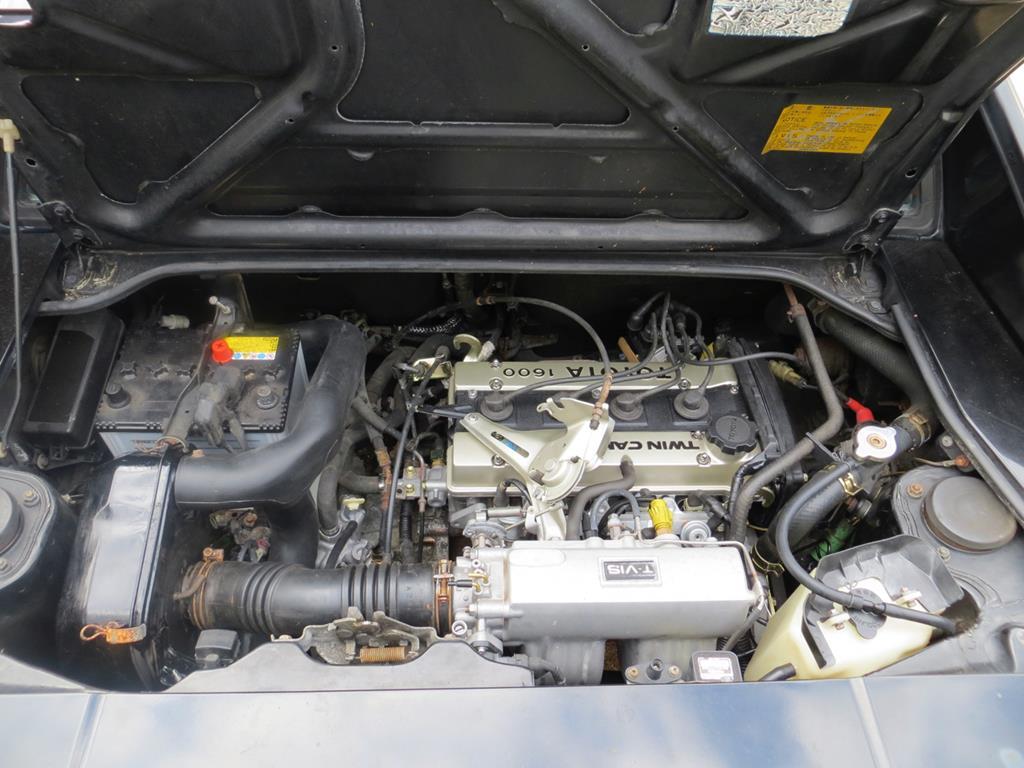 Good eh? So fuel, coolant and spark plugs and it'll start. Can't wait! Sadly it looks like I'll have to. I think the fuel pump has seized. B@£!$&%S? James |
| |
Last Edit: Dec 7, 2018 20:12:37 GMT by Sweetpea
|
|
bstardchild
Club Retro Rides Member
Posts: 14,975
Club RR Member Number: 71
|
|
Aug 10, 2015 20:50:33 GMT
|
So fuel, coolant and spark plugs and it'll start. Can't wait! Sadly it looks like I'll have to. I think the fuel pump has seized. B@£!$&%S? James If it's a bosch type pump sometimes you can get em free by buzzing them with 12V in reverse, got me out of trouble on a track day once when a bit of rubbish jammed mine up |
| |
|
|
|
|
|
Aug 10, 2015 22:22:27 GMT
|
If it's a bosch type pump sometimes you can get em free by buzzing them with 12V in reverse, got me out of trouble on a track day once when a bit of rubbish jammed mine up Thanks for that, I'll give it a try. I believe you can take the gauge sender out with the tank on the car (but not the pump). So I wondered if I could give it a beating with a bit of stick through the sender hole. First I need to get a properly charged battery on the car and check through the electrics. I've had the engine main relay out amongst other things so it's possible I've not got it back in properly or something equally silly. The fuel pumps are notorious though so there is a fair chance it's died. |
| |
|
|
ToolsnTrack
Posted a lot
   Homebrew Raconteur
Posts: 4,128
Club RR Member Number: 134
|
|
|
|
You will have fun with that... its a tank out world of pain  |
| |
|
|
Speedle
Posted a lot
   Need a Country Rock band in the Hampshire Area? https://www.facebook.com/DirtRoadDiaryUK
Posts: 2,221
|
|
|
|
top work chap! that's looking awesome! Excellent colour choice on the detailing too  |
| |
|
|
oukie
Part of things
 
Posts: 307 
|
|
Aug 11, 2015 14:37:27 GMT
|
You will have fun with that... its a tank out world of pain  No it's not a tank out world of pain. You need the whole car up in the air, on axle stands is fine, remove the centre console, remove sender unit attachment etc under the centre console, I can't remember what/if any other bolts are here, but other that the sender I'm sure the tank is actually held on under the car, you can undo the strap type things, do this by pulling the pins on the hinges, way easier than undoing the strap bolts totally as I suspect some bolts will shear. Then the tank will dip (read fall) down at the front of the car enough to gain access to the pump bolts and pump, DO NOT disconnect the plethora of pipework at the rear of the tank (engine end) as basically this is what's stopping the tank coming out, but they are a real PAIN in the curse word, to disconnect and even harder to reconnect. I've done it more than once, that's the best way I can describe it lol. |
| |
Last Edit: Aug 11, 2015 14:38:46 GMT by oukie
Mr2 mk1 x4
Honda Accord 2.4 Executive (luxo barge)
|
|
|
|
|
Aug 11, 2015 19:30:20 GMT
|
Thank you Speedle. oukie that's a good idea. Shame I didn't read it earlier! |
| |
|
|
|
|
|
Aug 11, 2015 20:51:40 GMT
|
The MR2s fuel tank and I would like to announce that we are 'expecting'. You see I was under the car this afternoon. Arms and legs wrapped round the tank, trying to wrestle the filler pipe off, and, well, things got pretty intimate. We are going to have a little jerry can together. 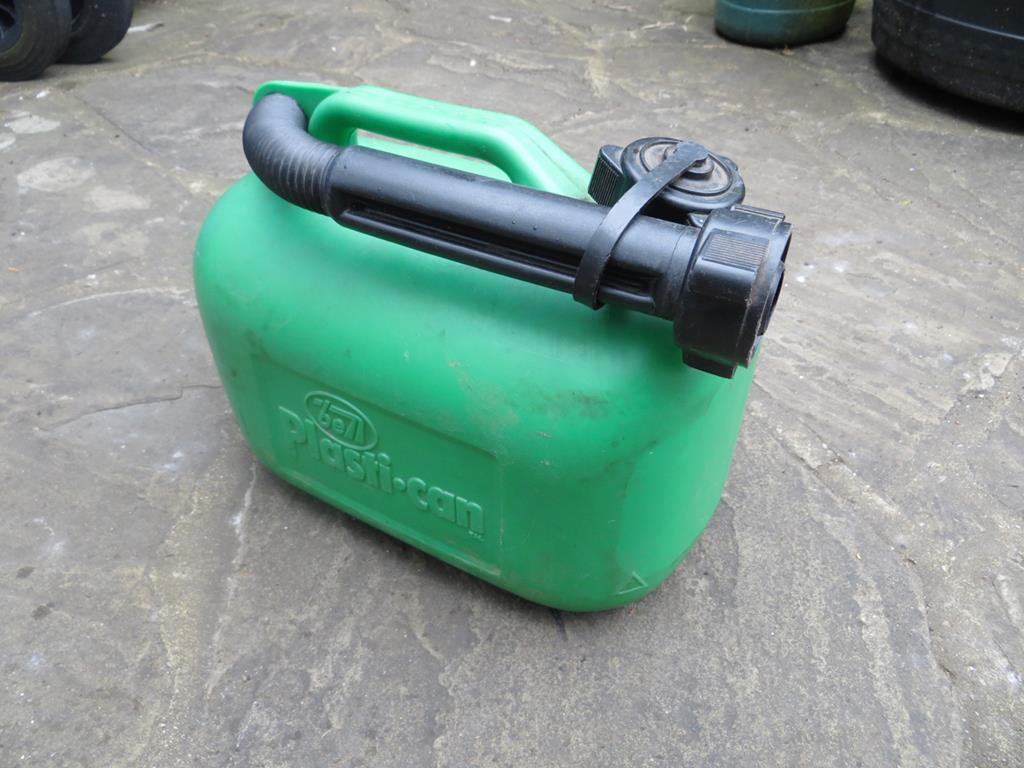 Like this one but we are hoping for a red one. What is the gestation period for a fuel tank anyway? Back to earlier this afternoon... I took some of the interior trim out so I could get access to the pump connector and then powered it from my jump start pack. Nothing. Apart from drawing 17 Amps. So then I did what bstardchild suggested and reversed the polarity to see if it'd free off. There was a bit of a thump from the tank and then nothing. Just the 17 Amp current. I flicked back and forth a few times. There was a thunk each time but it wouldn't run. The fact that you get a thunk means the motor must be free but the rotors must be well jammed. Call to the nice man at Toyota and I've got one on order. With the usual exclamations of 'HOW MUCH!?' when it turned out to be twice as much as I thought. Toyota parts people must become deaf to the phrase 'How much!?'. Pump is in the tank. Tank needs to be on the floor. (I hadn't seen oukie 's suggestion that you can do it partly dismantled.) I'm not going to give a blow by blow account. Suffice to say that the two pipes from the tank to this thing… 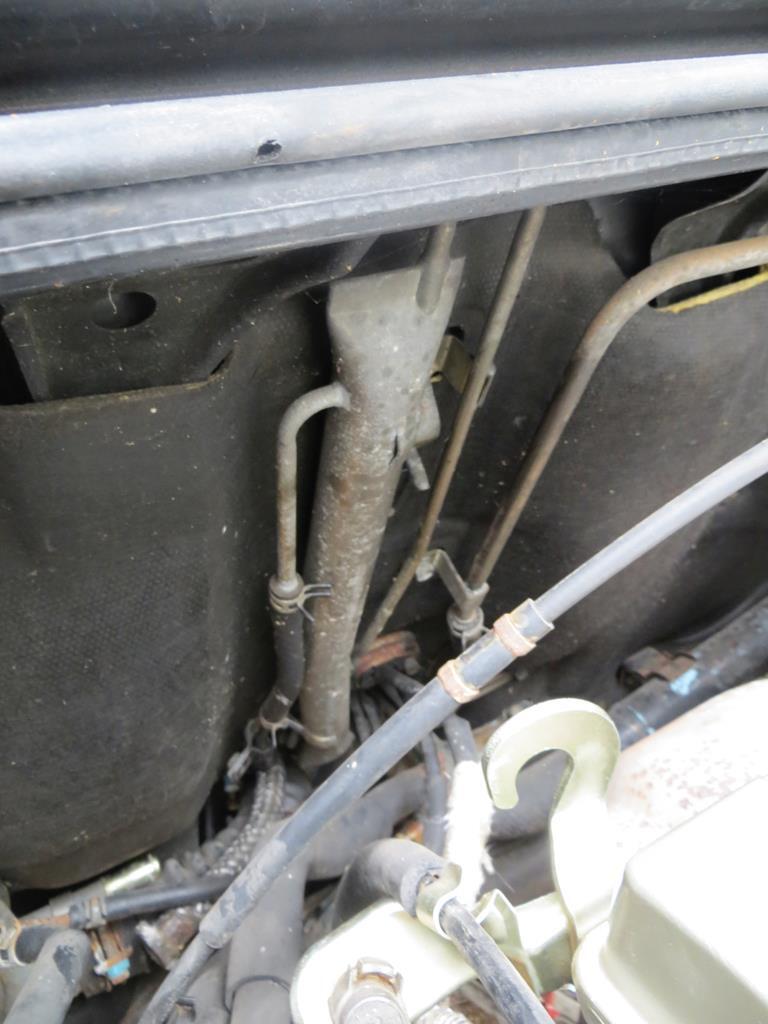 …were the biggest nightmare I've had in ages! It's a vapour separator thingy (I believe) and the two pipes are these… 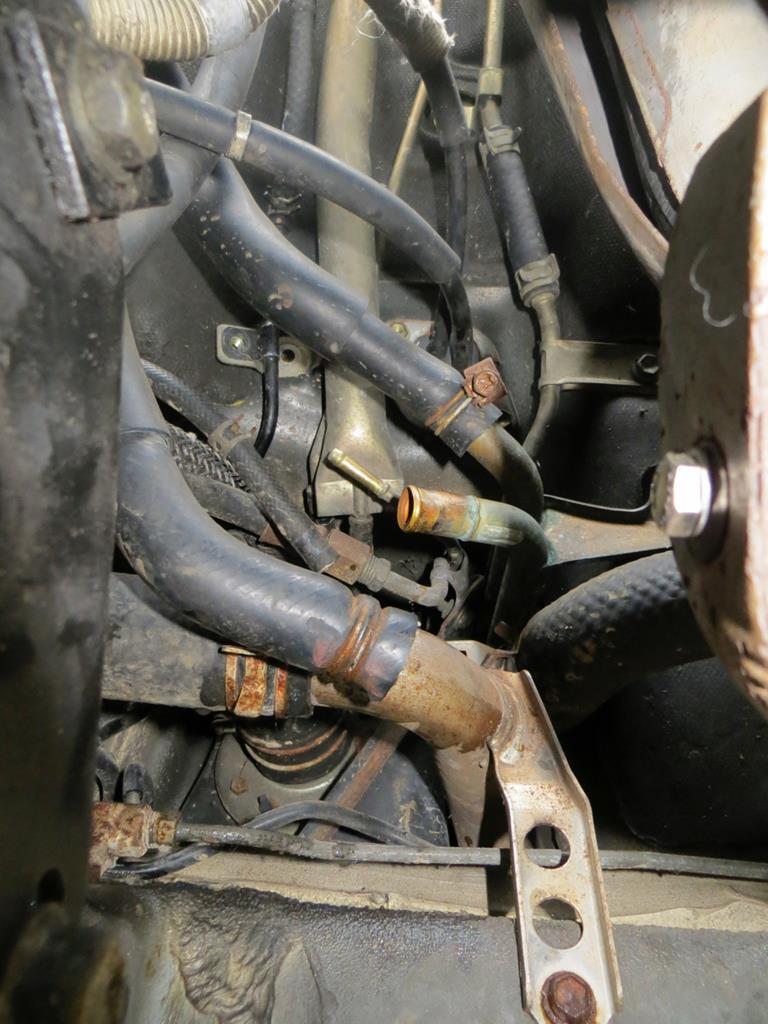 No not that one, behind that one. No no, to the left and above. Ah come off it, did I say that pipe? Look to the right a bit and three pipes back. Might help if you stand on your head with your left ankle behind your neck and your right arm up your bum. Can you see it now? This lot is the hand brake. It's got to go. 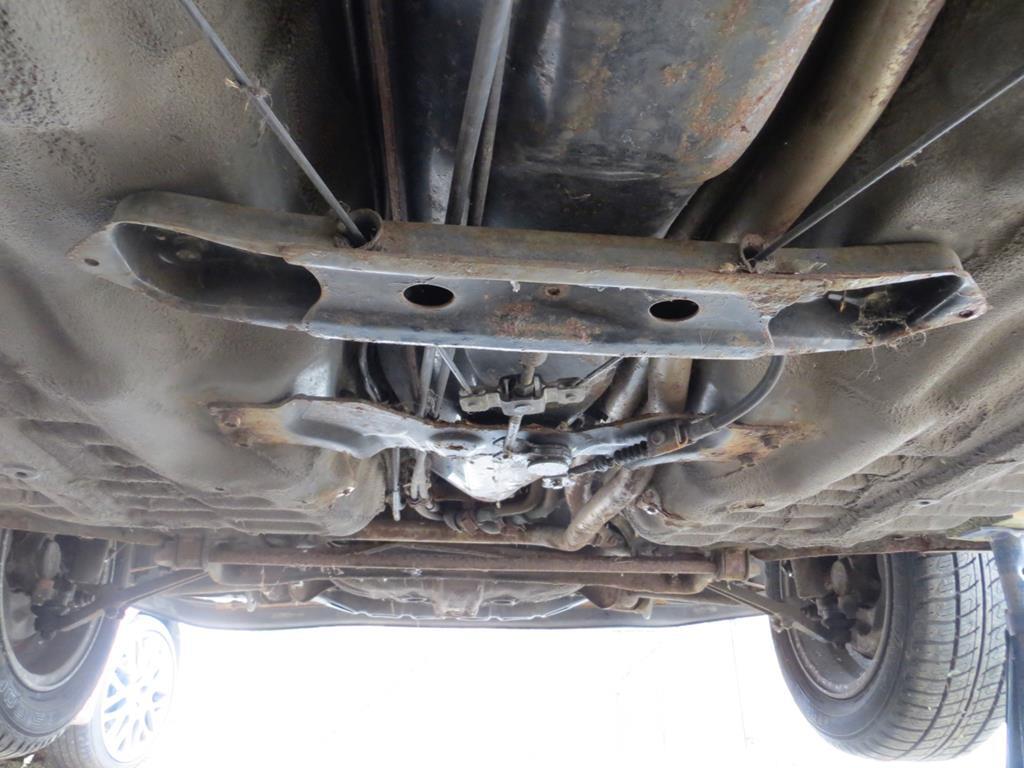 I have to say I'm lucky enough to own this. 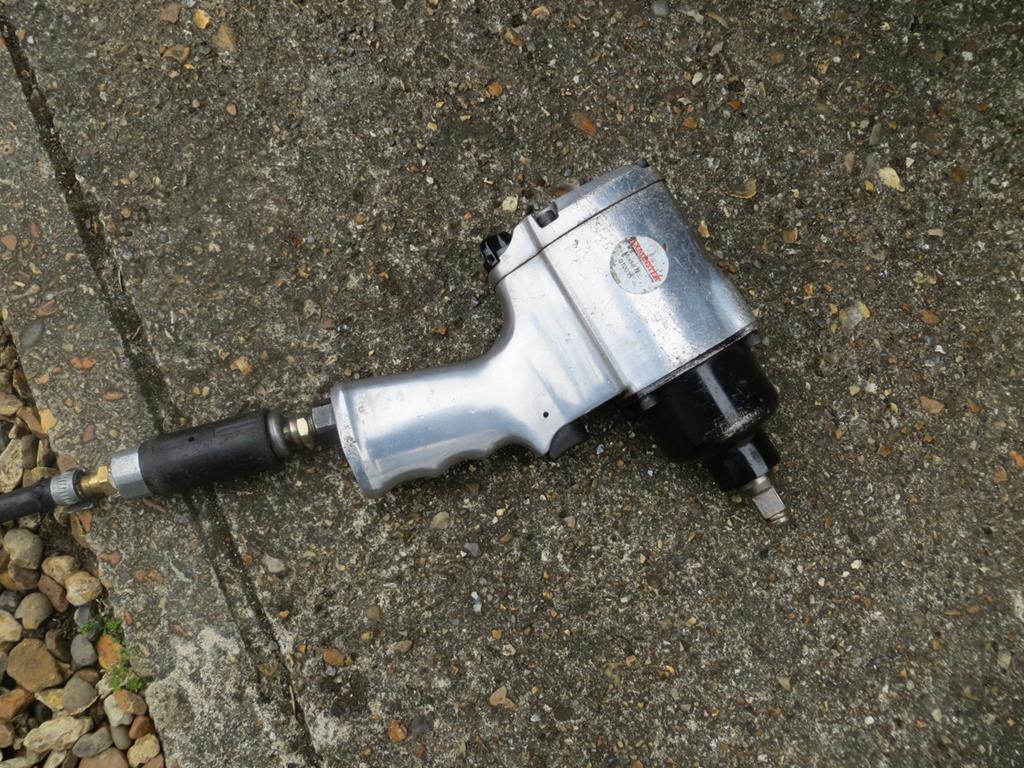 Which makes taking things apart a doddle. It rarely breaks bolts - unless they are totally stuffed - and things come apart so quickly. 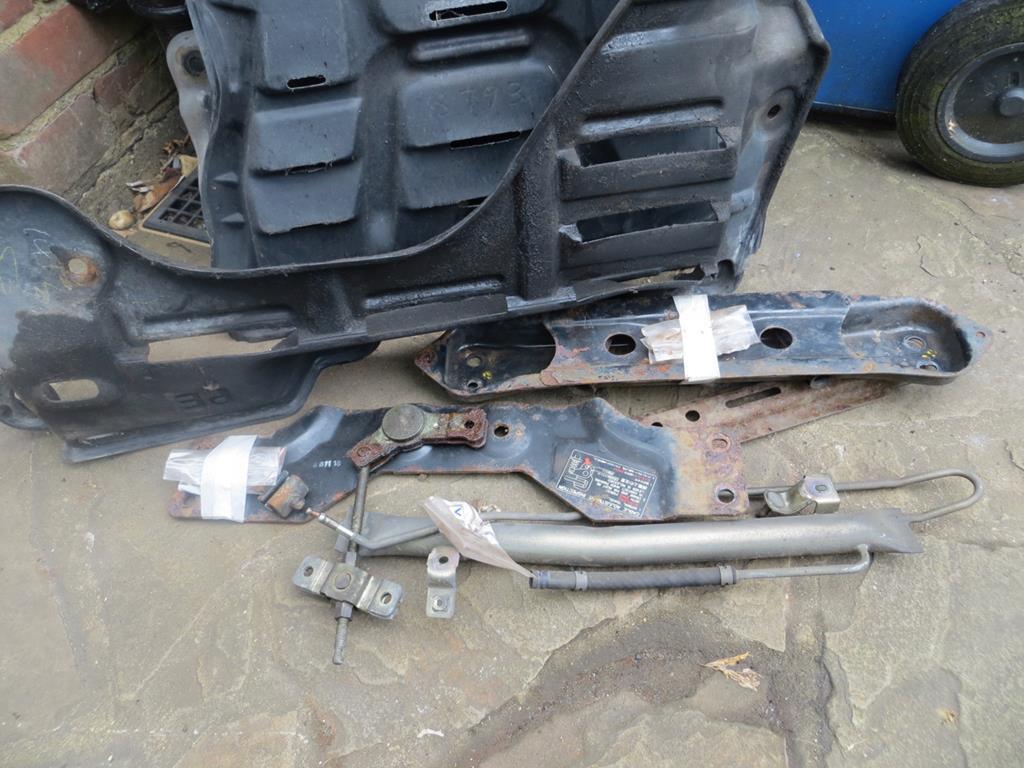 My pile of bits grows larger and I'm thoroughly doused in petrol from the filter. It's about at this moment that Mrs Sweetpea comes out and says 'What the hell is that terrible smell?' 'It's probably me my darling!' says I. So there it is. 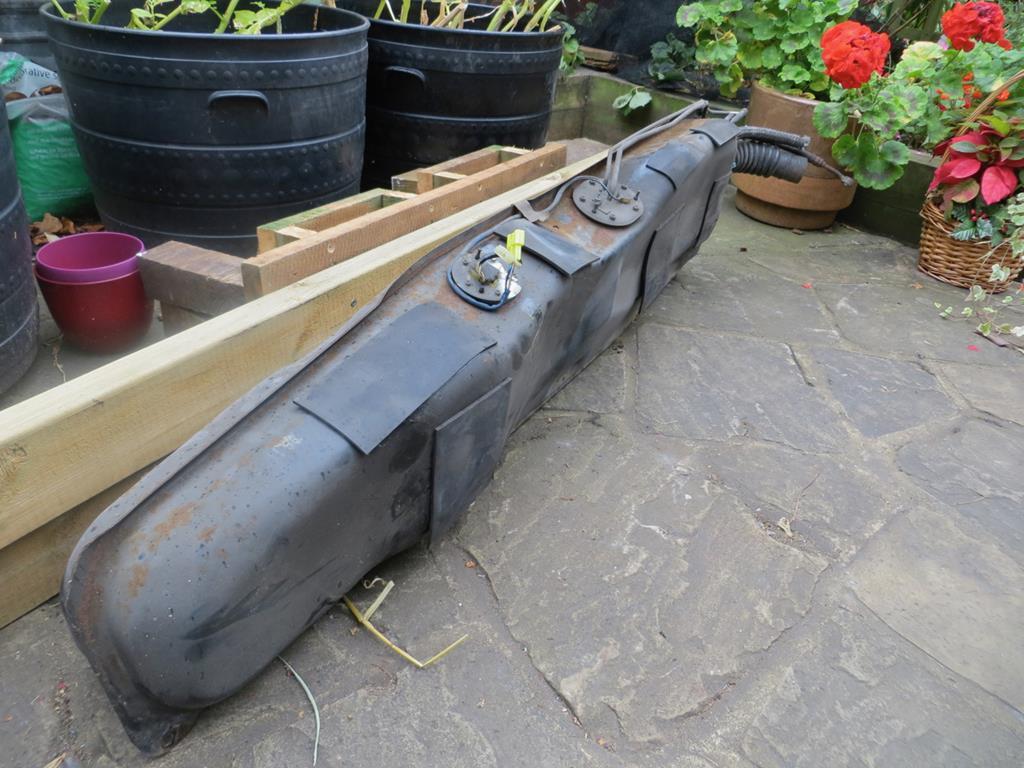 Only broke couple of bolts that hold under tray on, And a few that had broken in the past need sorting out while it's in bits. James |
| |
Last Edit: Dec 7, 2018 20:31:20 GMT by Sweetpea
|
|
oukie
Part of things
 
Posts: 307 
|
|
Aug 12, 2015 19:43:44 GMT
|
|
Forgot about the handbrake mechanisms, cause I had mine off to fit New cable's, sorry. Have you looked in the tank yet? I had one car which was a genuine barn find gunmetal gray uk car, which had sat in a barn for eight years, the petrol stank to high heaven when I got the pump out it was all crystallized. Weird.
|
| |
Mr2 mk1 x4
Honda Accord 2.4 Executive (luxo barge)
|
|
|
|
|
Aug 13, 2015 21:30:01 GMT
|
Have you looked in the tank yet? No, not yet. Tomorrow maybe. |
| |
|
|
|
|
|
Aug 13, 2015 21:33:23 GMT
|
There is an elephant in the room. The bumper. It's been dragging on for years and it needs to come to a conclusion. Frankly it needs to be on the car. It's a long standing problem. Not just the 3 years I've been talking about it. Famously Thomas Beckett, Archbishop of Canterbury, prattled on about frontal crash protection for so long that it got right up King Henry II's nose. Eventually, in a fit of anger, the King exclaimed "Who will rid me of this troublesome bumper" and accidentally unleashed four scrap metal dealers upon the Archbishop. They traveled to Canterbury in 1170 and found the Archbish in the Cathedral whereupon they informed him that they would crush his favourite horseless carriage on the instructions of the King. The Archbish politely replied that the horseless carriage wasn't due to be invented until 1769 and that the scrap metal dealers should return in 600 years. They were so enraged by their foolish error that they cut poor Thomas Becket’s head off causing him to be sainted, martyred, and fairly dead. Actually, being strictly accurate, they only cut the top of his head off. But since the Archbishop’s brains fell on the floor of Canterbury Cathedral the end result was much the same. I like my threads to be accurate… As we left it the crash bar from behind the nose cone was split in two along its join, the mounting brackets were removed and the ends had been replaced with bits I'd lovingly made. First job is to tack the mounts back on and do some trial fits. Slowly rebuild it and make sure everything lines up despite my dicky welding. 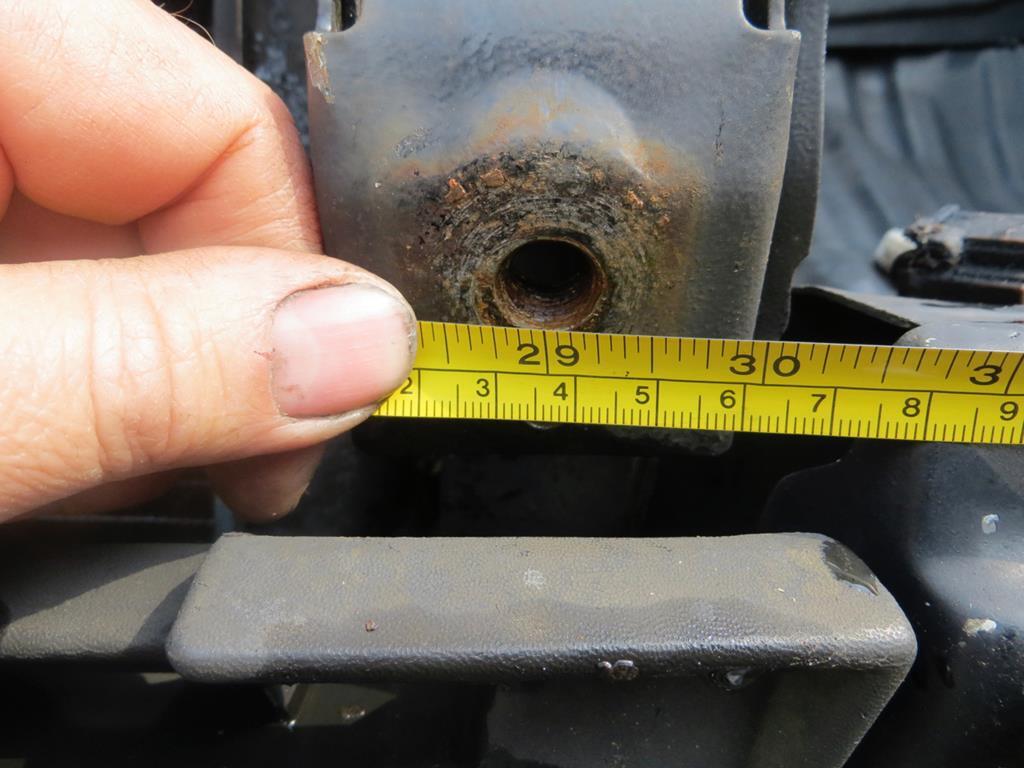 Turns out the mounting centres on the car are 29 inches apart. Yes, inches. Nuts and bolts are in Metric, the body was obviously designed in imperial. Interesting. They must have been in the process of changing over when the MK1 was designed. Tack the mounts on to the back half… 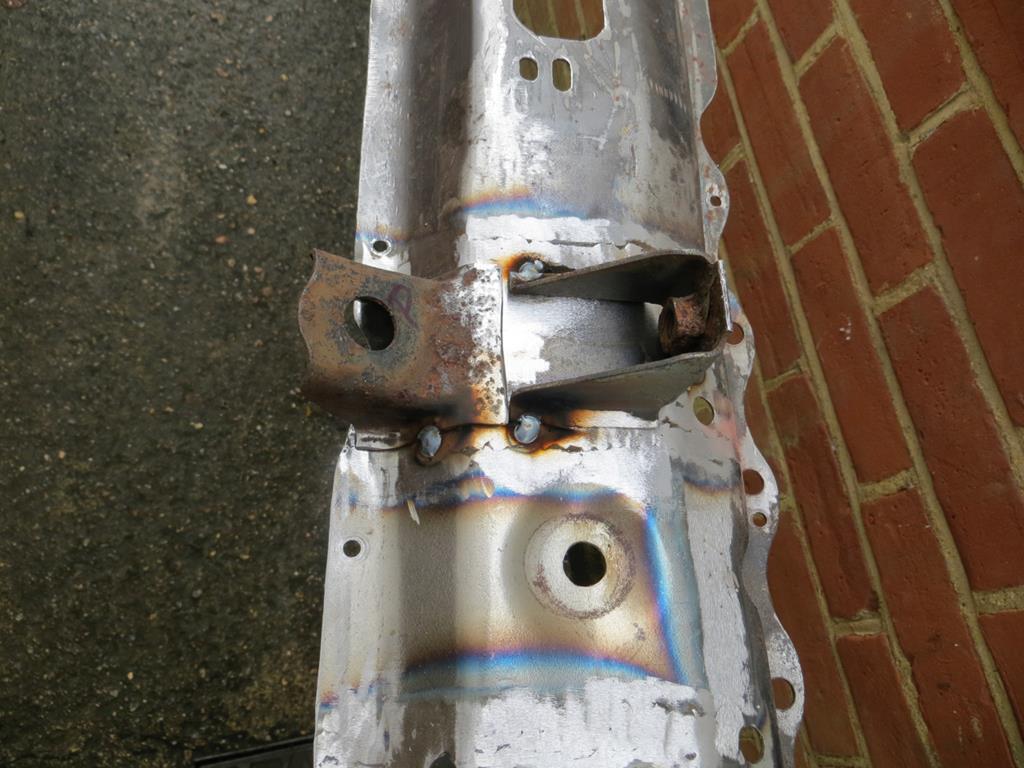 …and hope it fits. Oh look, it does! thank God for that. 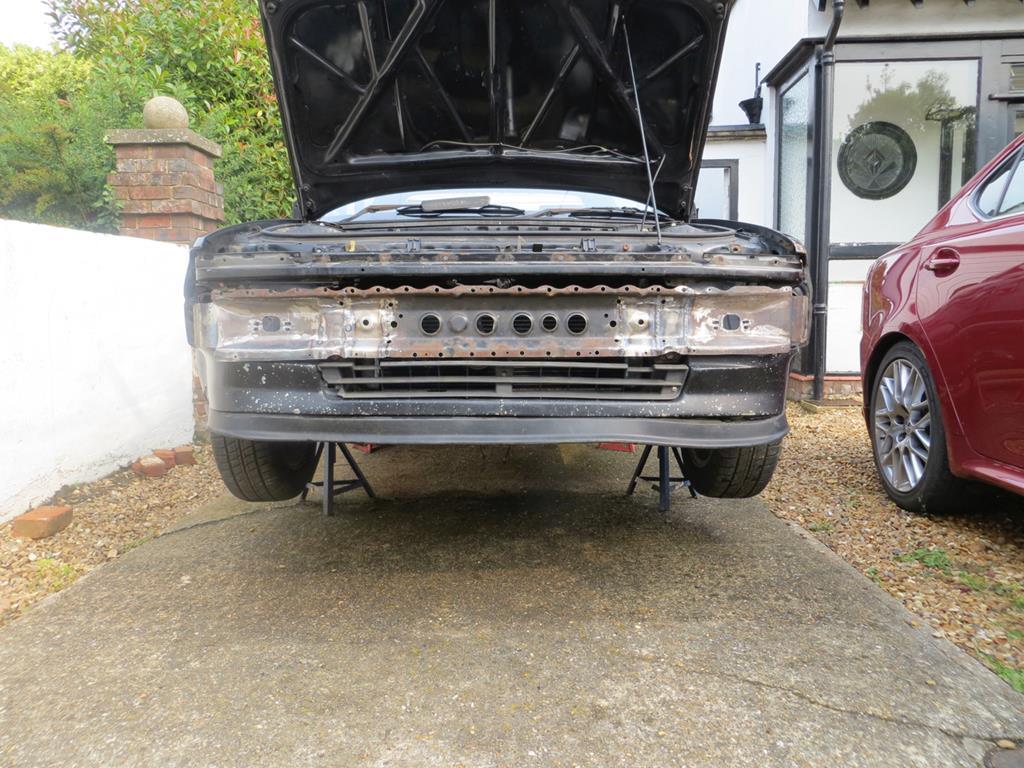 When I made the new end pieces and cut the mounting holes for the indicators did I get them in the right place? First a little job. When the old bumper was ripped off it 'unplugged' the indicator on the passenger side but 'unpinned' the drivers side. 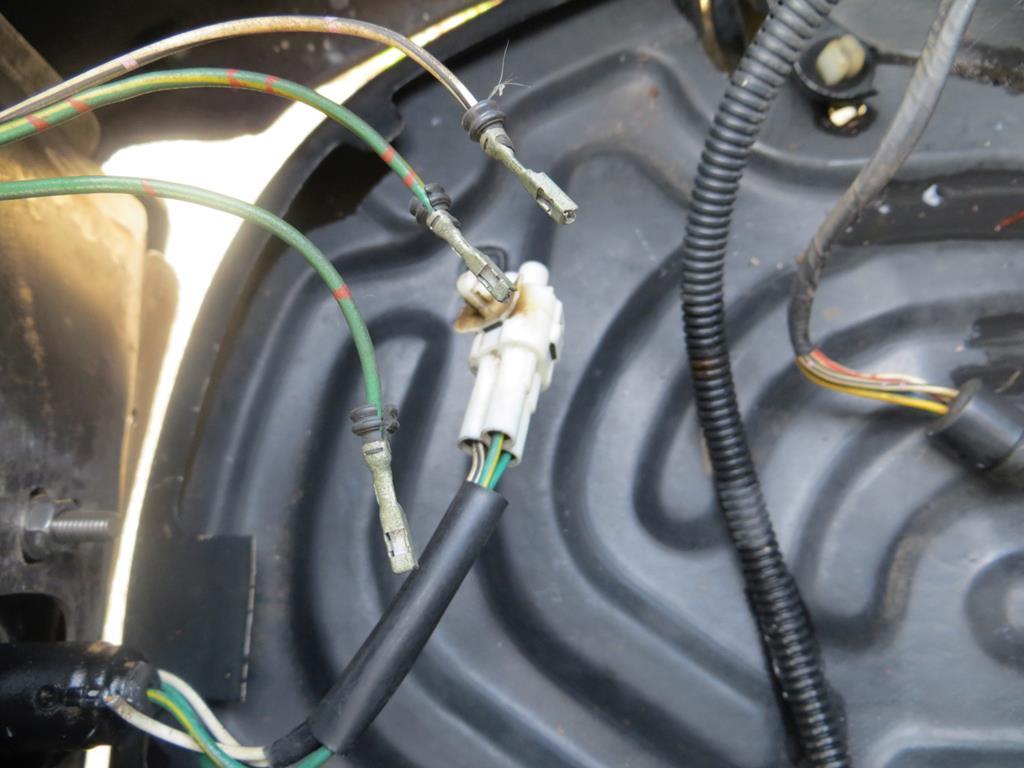 As luck would have it no damage was done so I just repined it. 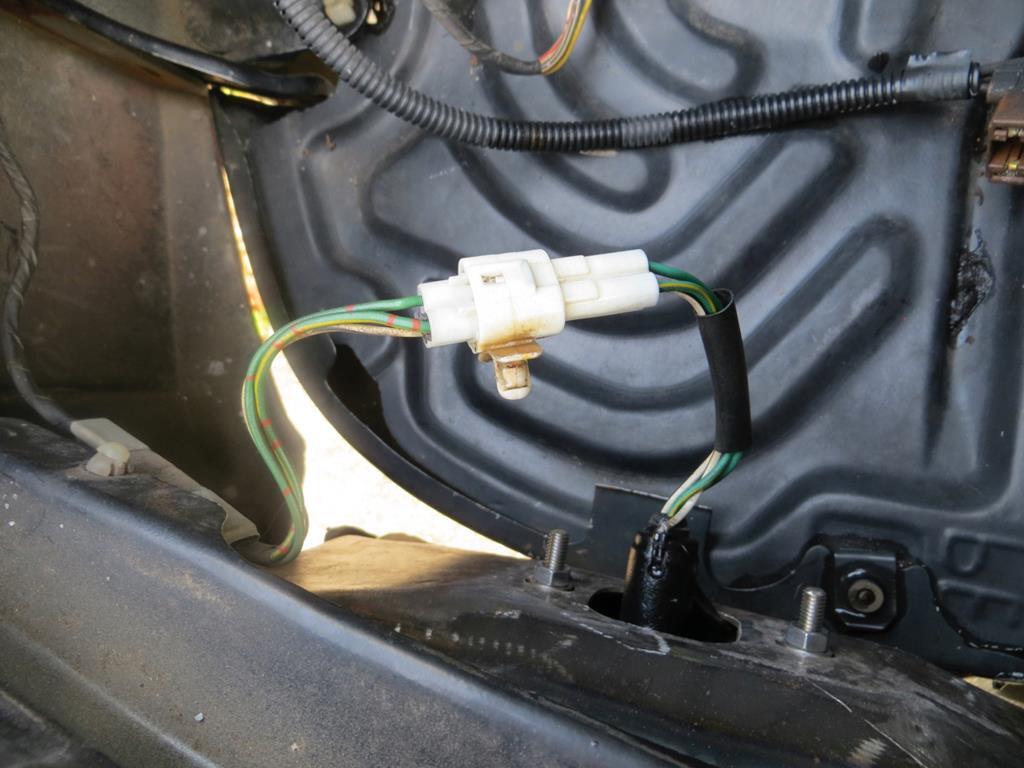 So anyway, are the mounting holes in the right place??? 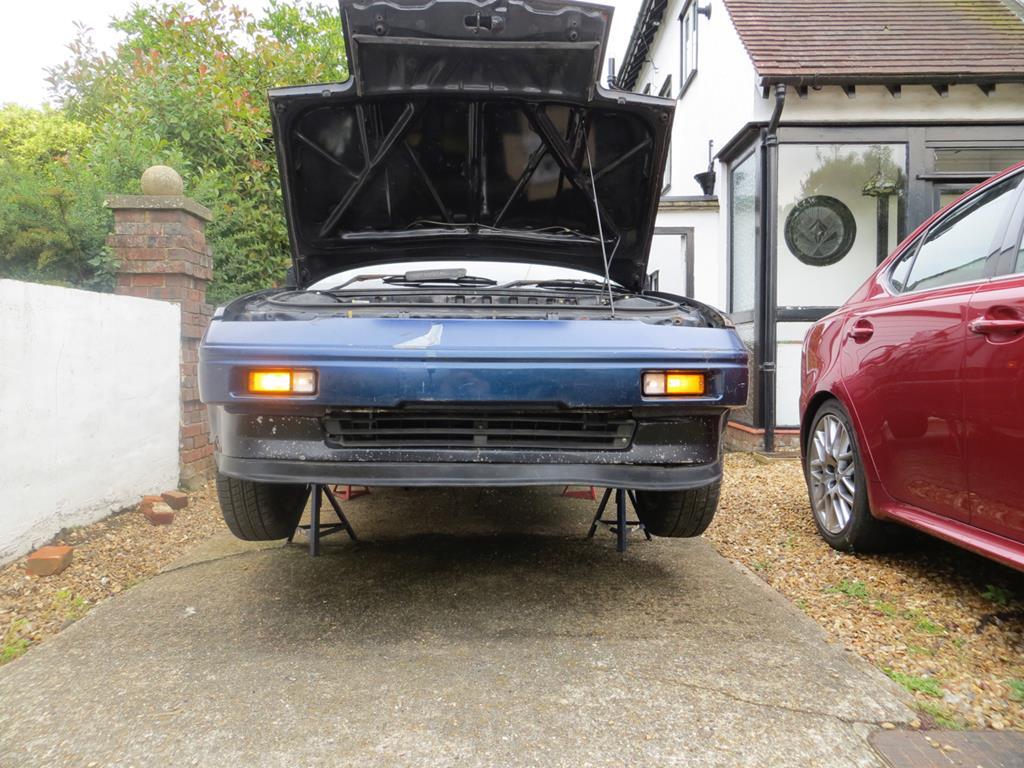 gggggggg Yes they are! Woo hoo! And the lights work. So, back to the front half of the crash bar (if you'll pardon the dodgy English). The bottom edge of the nose cone bolts on to it via a load of captive nuts. 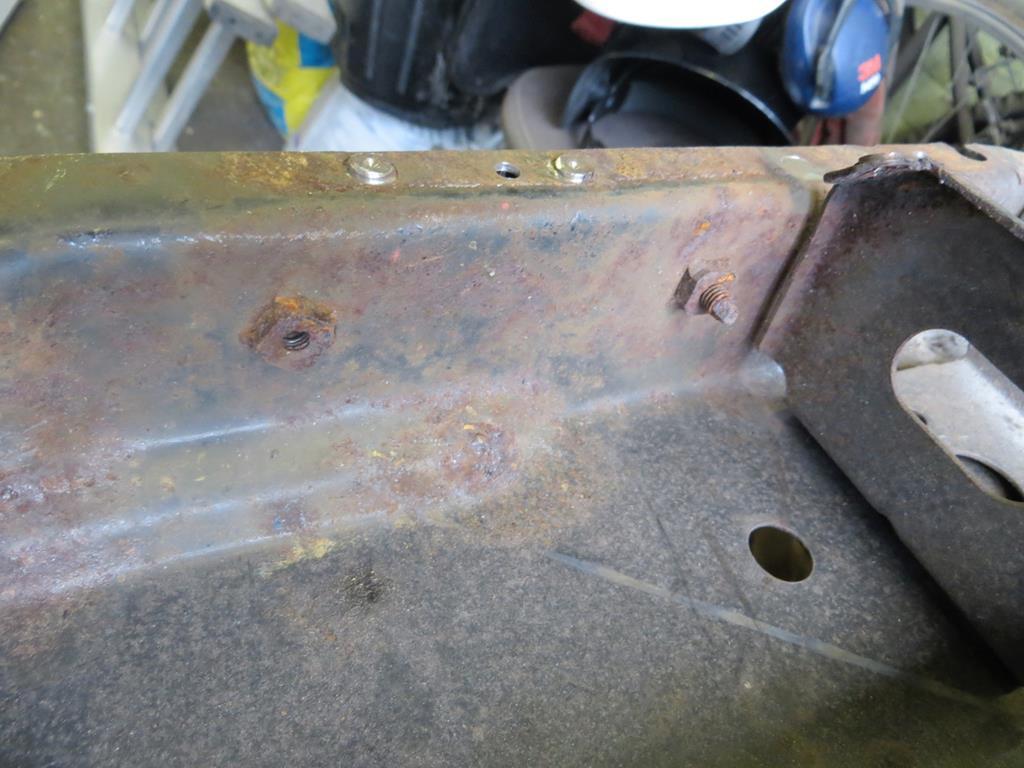 Most of which had broken bolts in them or were missing because the metal had been replaced. So I welded a load of stainless ones on. Now the bottom mounting rail fits. 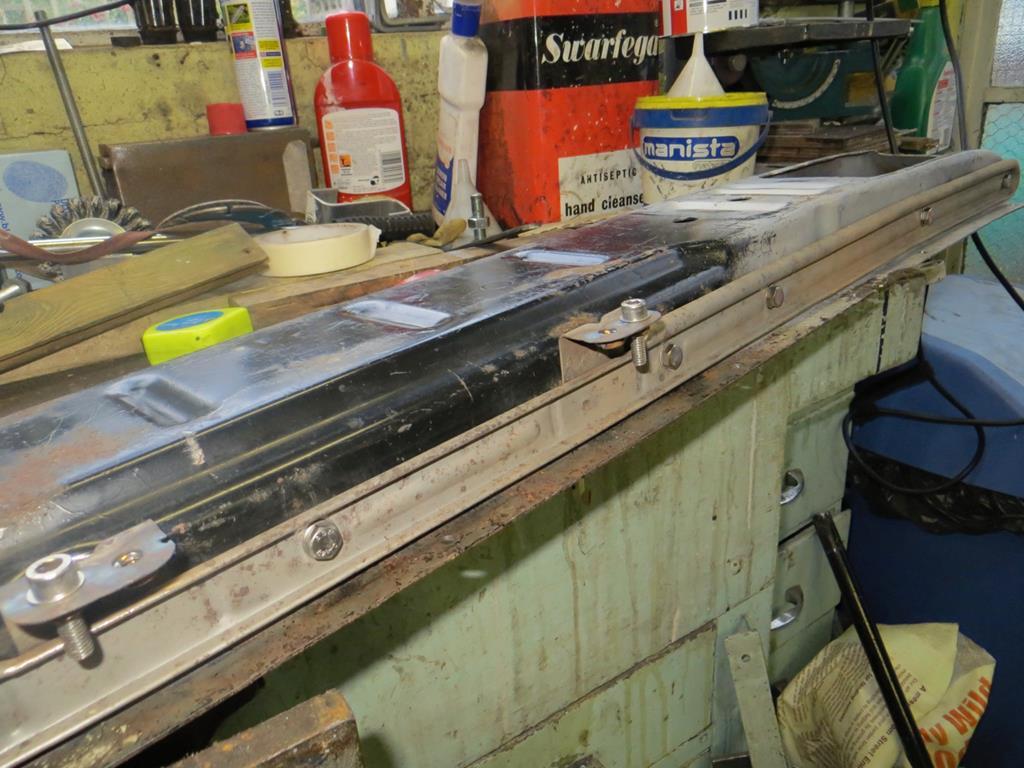 There is more work to do to it before it can be reunited with the other half. But that's where we are at the moment. In other news I wiped a cloth over the under trays spent hours cleaning and polishing the under trays. No idea why. I just wanted to. 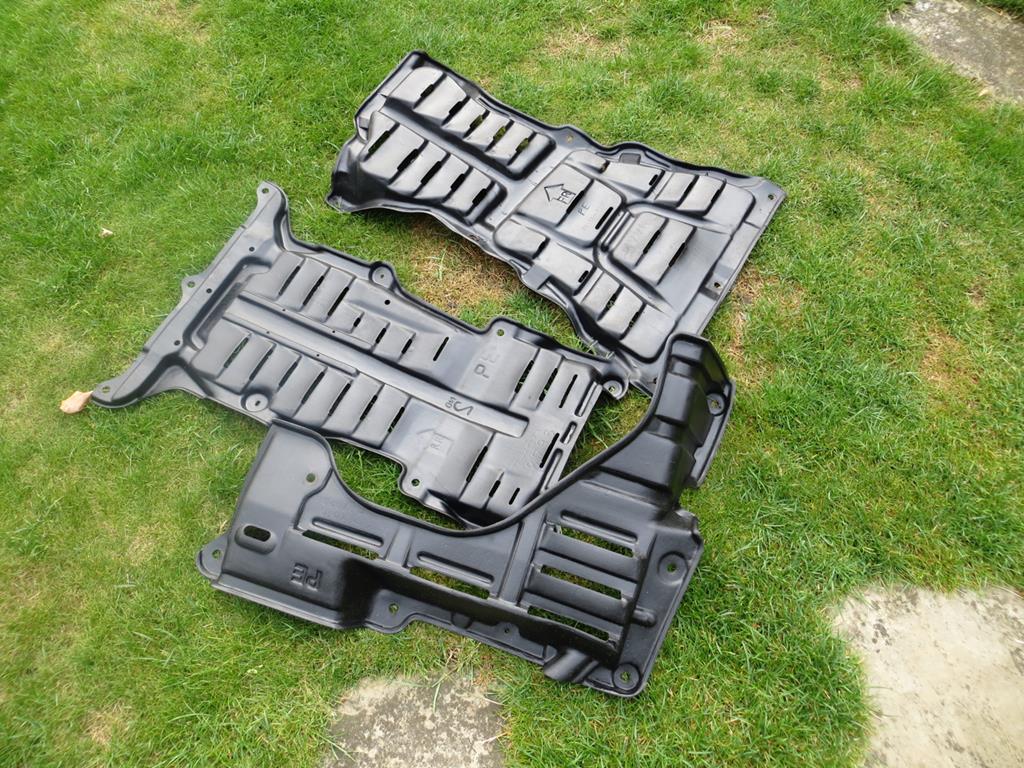 James |
| |
Last Edit: Dec 7, 2018 21:02:20 GMT by Sweetpea
|
|
|
|
|
Aug 13, 2015 21:50:25 GMT
|
|
Nice work sir. You stay committed and that's a feat in itself.
|
| |
|
|
|
|
|
Aug 13, 2015 22:00:57 GMT
|
|
By heck lad, that's some progress. 11 pages and all of a sudden the bumper's done in one post!
|
| |
|
|
bstardchild
Club Retro Rides Member
Posts: 14,975
Club RR Member Number: 71
|
|
Aug 13, 2015 22:16:07 GMT
|
By heck lad, that's some progress. 11 pages and all of a sudden the bumper's done in one post! I'm almost disappointed the journey is over  Cracking along now |
| |
|
|
|
|
|
Aug 13, 2015 22:23:19 GMT
|
By heck lad, that's some progress. 11 pages and all of a sudden the bumper's done in one post! I'm almost disappointed the journey is over  Cracking along now Fear not. It's not done yet. Only half of it is fitted to the car. I reckon I can get another 2 years out of it along with a plot twist or two. |
| |
|
|
Phil H
Posted a lot
  
Posts: 1,448
Club RR Member Number: 133
|
|
|
|
Actually, being strictly accurate, they only cut the top of his head off. But since the Archbishop’s brains fell on the floor of Canterbury Cathedral the end result was much the same. I like my threads to be accurate… OK - what's your preferred method of coffee removal from a laptop keyboard as that's what I now have to contemplate (with visions of scrap metal inspired brains going through my mind which has certainly put the marker on today's activities)? |
| |
|
|
tenman
Part of things
  m00000000000
Posts: 899
|
|
Aug 14, 2015 11:20:56 GMT
|
Actually, being strictly accurate, they only cut the top of his head off. But since the Archbishop’s brains fell on the floor of Canterbury Cathedral the end result was much the same. I like my threads to be accurate… OK - what's your preferred method of coffee removal from a laptop keyboard as that's what I now have to contemplate (with visions of scrap metal inspired brains going through my mind which has certainly put the marker on today's activities)? swap it with someone else's keyboard while they are at lunch... if they don't touch type, swap the 'm' and 'n' keys round before you do... |
| |
RWD Fanatic...
2003 BMW 320d Wagon (getting old and boring)
1996 Mini Kensington (SWMBO's)
|
|
|
|
|
Aug 14, 2015 21:45:03 GMT
|
OK - what's your preferred method of coffee removal from a laptop keyboard as that's what I now have to contemplate (with visions of scrap metal inspired brains going through my mind which has certainly put the marker on today's activities)? swap it with someone else's keyboard while they are at lunch... if they don't touch type, swap the 'm' and 'n' keys round before you do... Sorry about the keyboard! Anyway, you should worry, poor old Tommy the Archbish suffered a worse fate. Swapping keys - that's cruel. But amusing. Back when push button phones first appeared at work the night shift dismantled one of the manager's phones and swapped the 3 and the 6 buttons (or something like that). Easy enough to work round the buttons being labeled wrongly though. What took him a lot longer to work out was that they'd also rewired the buttons so you actually had to press '3' to dial a 3 even though it was in the wrong place on the keyboard. |
| |
|
|
|
|
|
Aug 14, 2015 21:47:34 GMT
|
In my last post it may have appeared that the car was more complete than it actually is. I'd hate to unintentionally mislead you all. Intentionally misleading you is just fine but I don't want to do it by accident. The truth is that behind the nose cone is this… 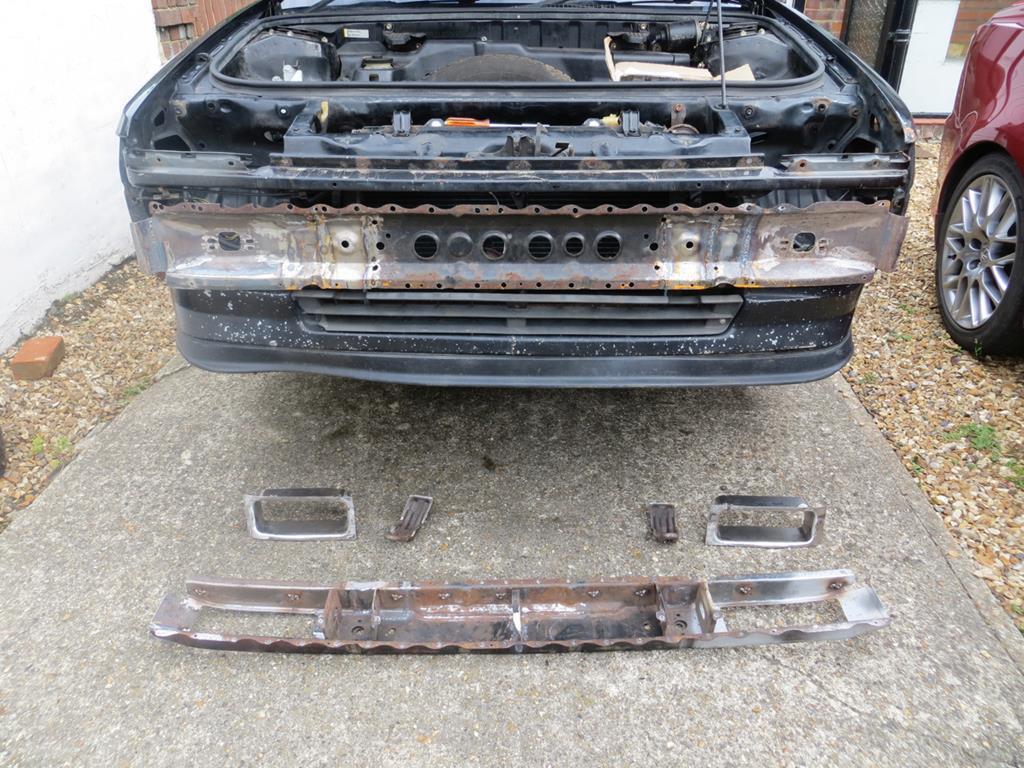 All the bits on the floor still need to be attached. And preferably in the right places. First though there is a rusty brace piece that needs attention. 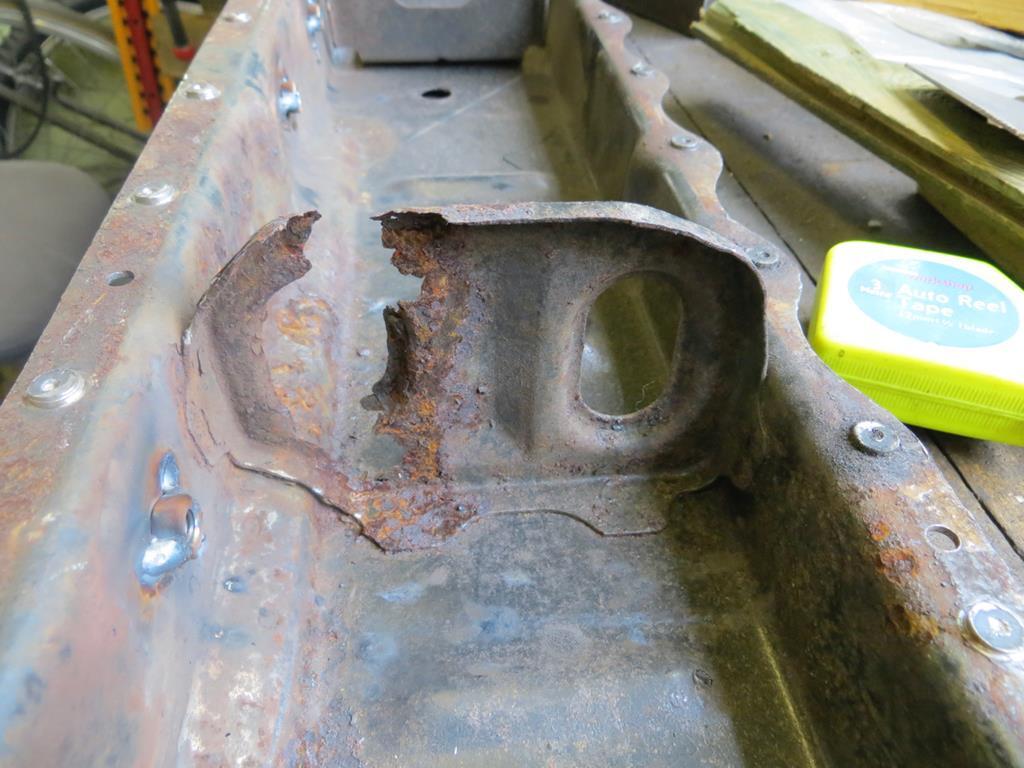 In the past I'd have kept as much of this as I could and manufactured an identical bit to splice into it. But just at the moment I can't be bothered with that and I haven't time. It's inside the bumper for goodness sake. Apart from my lack of will to do it properly I think I can do better. I'm suspicious that water running up and down the inside is getting trapped in the seams here and causing some of the rot. So I'll design it a little differently to allow water to pass by. First a cardboard template. 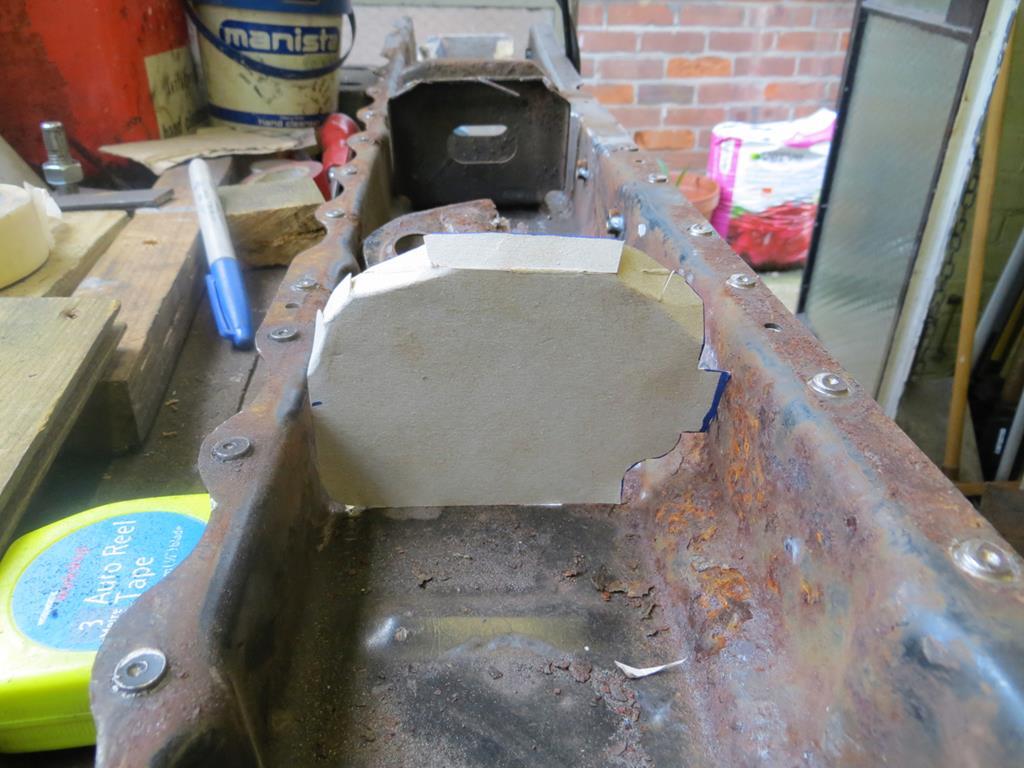 Then a steel version. 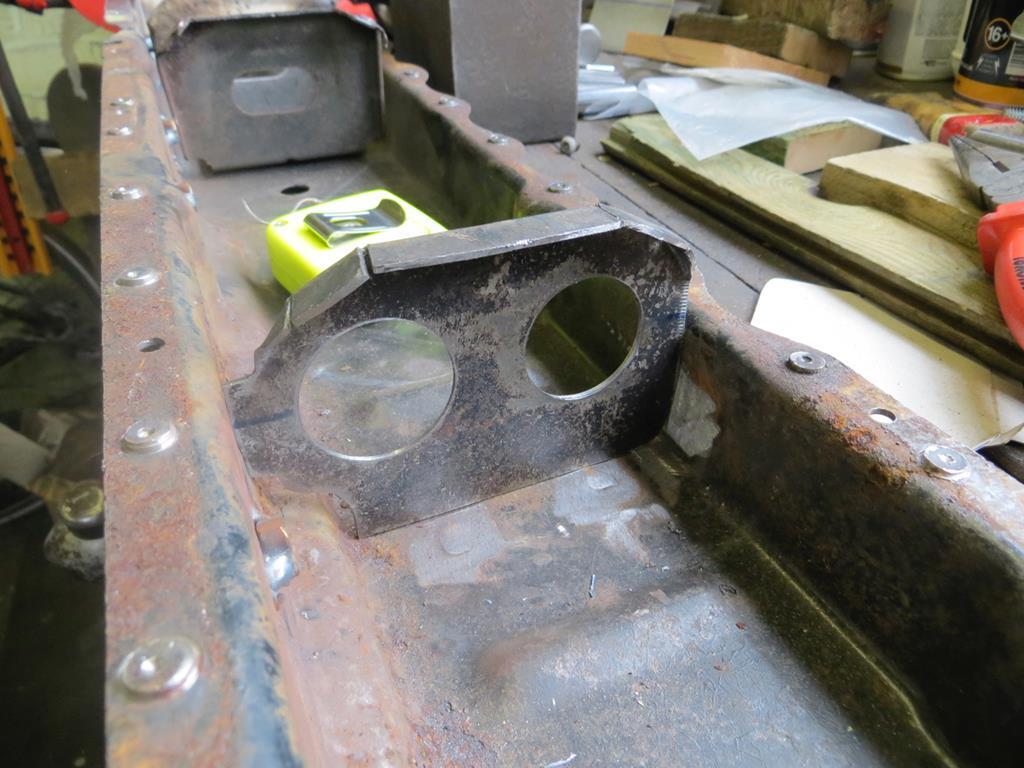 Which gets the fold welded up and buzzed into place. 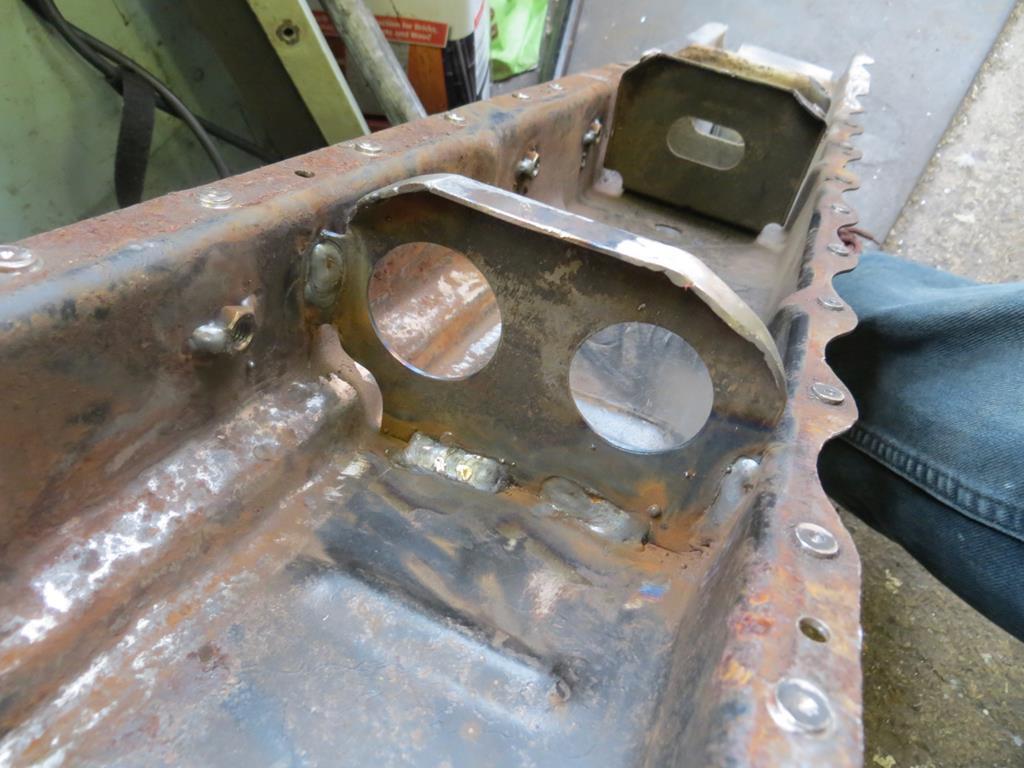 Next the indicator buckets need fitting. I've temporarily screwed the front and back parts together to position the buckets and welded them to the back part. 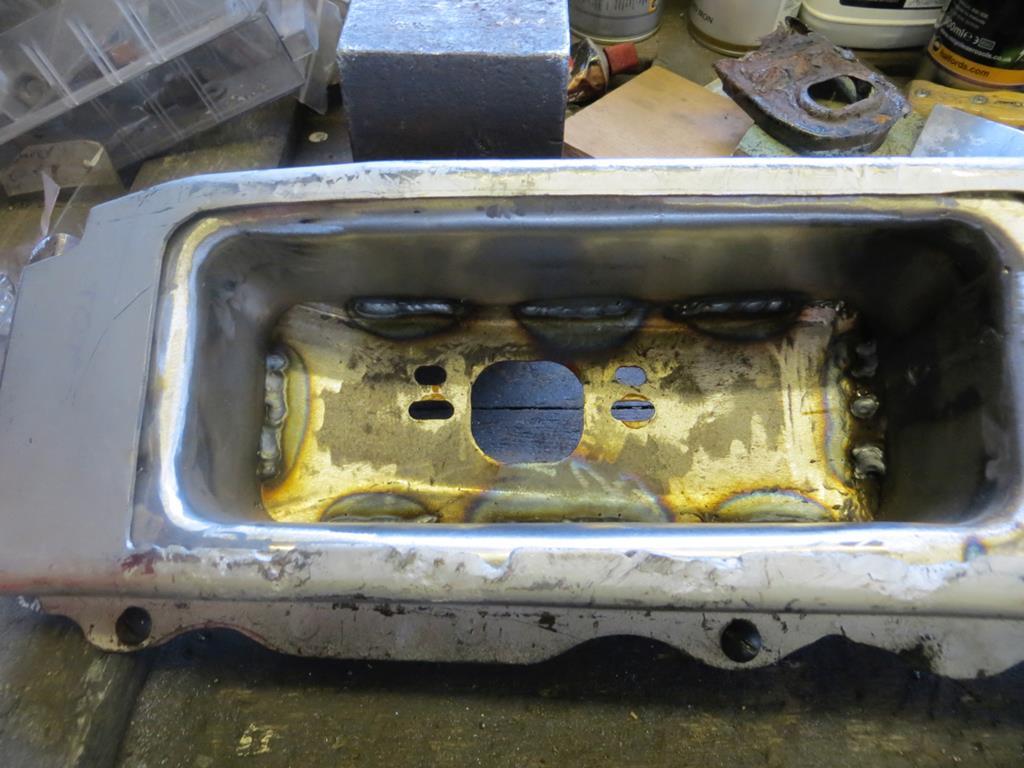 Had some bother with blowing through the thinner metal of the buckets which was a pain in the bum. Ah well. I'm a grown up (or so keep being told) so I can cope with it. James |
| |
Last Edit: Dec 7, 2018 21:58:19 GMT by Sweetpea
|
|


