flyingphil
Posted a lot
  
Posts: 2,486
Member is Online
|
|
Oct 15, 2013 18:23:59 GMT
|
Picked up the narrowed driveshafts and lower links from Wayne (Nobody) and the fabrication and welding is great so - Many Thanks Wayne.  I thought about chroming, but they will not be on show under the B, so a paint job is in order. I suppose that I really should change the thread heading again as there is no Rover now! |
| |
Last Edit: Oct 15, 2013 18:25:11 GMT by flyingphil
|
|
|
|
79cord
Posted a lot
  
Posts: 2,617
|
|
Oct 16, 2013 11:23:34 GMT
|
|
Wow, haven't spotted this thread since its V8, great to see that big engine fitting under the bonnet. Expecting a clear Acrylic bonnet bulge/scoop to show off those trumpets! (did Ferrari GTO do that?)
|
| |
|
|
Clement
Europe
ambitious but rubbish
Posts: 2,095
|
|
Oct 16, 2013 13:43:59 GMT
|
The GTO didn't have one, although several (often older models) did: 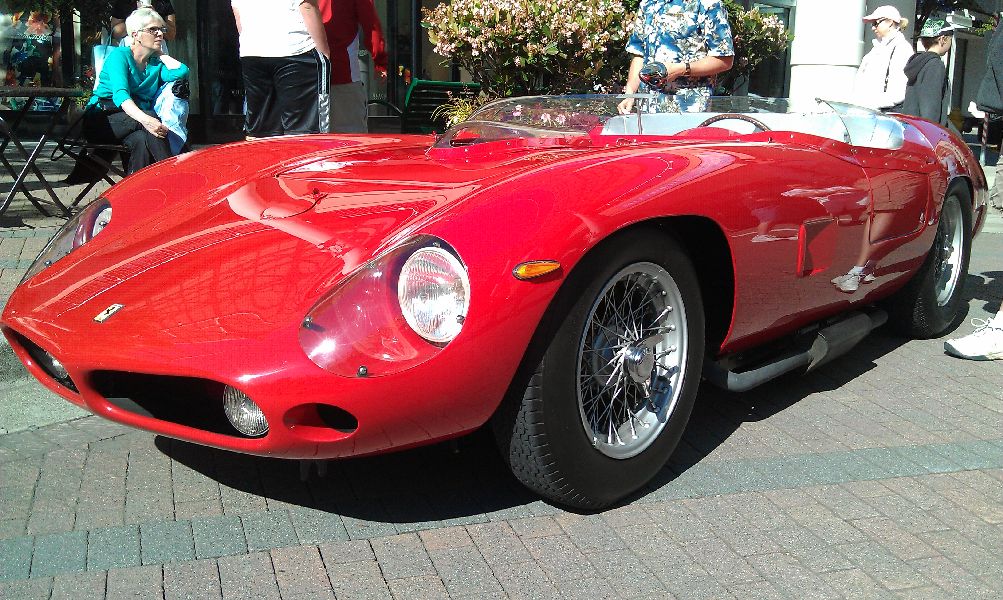 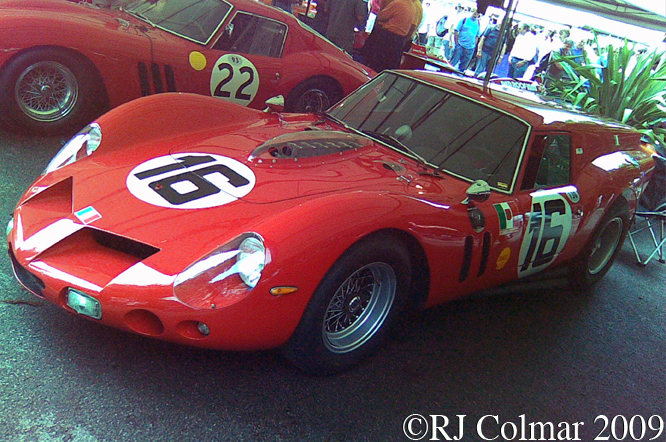 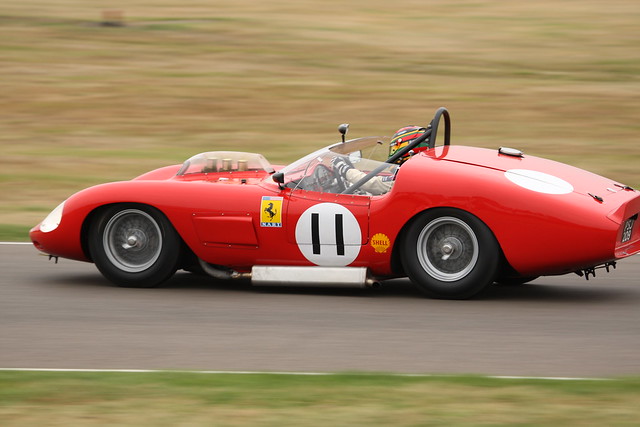 Could be a fun feature but I'm clueless as to how to make it. |
| |
|
|
flyingphil
Posted a lot
  
Posts: 2,486
Member is Online
|
|
Oct 17, 2013 16:41:29 GMT
|
|
Thanks for those pics - I had thought of a perspex scoop/cover but I'll wait to see how the ram pipes look before deciding how to do that. I'm hoping to get a bit more done tomorrow on the roll cage/chassis.
|
| |
|
|
flyingphil
Posted a lot
  
Posts: 2,486
Member is Online
|
|
Oct 18, 2013 16:16:42 GMT
|
|
Unfortunately the Tube bender had not been returned to the hire shop, so, no work on the BGT.........Grrr
|
| |
|
|
flyingphil
Posted a lot
  
Posts: 2,486
Member is Online
|
|
Oct 26, 2013 22:08:01 GMT
|
After a lot of too-ing and fro-ing I was able to hire a tube bender on Friday. I used some old copper tube to get the shape that I wanted and started to bend the back hoop - simple I thought....  The first 10 degree bend went well but the next 80 degree bend resulted in a severely flattened tube! I tried again with the same result........Obviously the tube wall was too thin for this type of bender and I could not attempt the sand packing method so I had to try and get some thicker wall tube. AH Allen in Northampton came up trumps with a 5m length of 4mm wall 42mm dia CDS which they cut in half so that it fitted in my car. Anyway back to the workshop and the rear hoop was bent  I then tacked it in place and began bending the front hoop. Quite tricky as it is a 3 dimensional shape but I just about got it right. Tacked it in place on the chassis then put in one of the straight roof bars. So progress made again but I had to return the bender before 5.30.....  All the other bars are straight so I will be able to crack on over the next couple of weeks. |
| |
Last Edit: Oct 26, 2013 22:09:59 GMT by flyingphil
|
|
flyingphil
Posted a lot
  
Posts: 2,486
Member is Online
|
|
Oct 28, 2013 12:48:29 GMT
|
Another bar was put into the top of the roll cage to link the two hoop sections.  The two sheet steel sections are tacked in between the main frame rails at the back. The rear piece is also welded to the IRS sub-frame. |
| |
|
|
|
|
|
Oct 28, 2013 15:22:43 GMT
|
|
Looks ace, love the concept, look forward to seeing it done!
|
| |
|
|
Em
Part of things
  Fuel Injected? Carb Infested!
Posts: 601 
|
|
Oct 28, 2013 16:38:39 GMT
|
|
Nice work Phil!
Between this and your Ronnart, there can't be much you don't know about Jag IRSs now!
|
| |
|
|
flyingphil
Posted a lot
  
Posts: 2,486
Member is Online
|
|
Oct 31, 2013 17:15:42 GMT
|
Thanks House and Em. Meanwhile Man with hacksaw and Mig welder in action again First I put a bar from the front hoop to the front cross member  And also on the other side. Then I cut a tube to go across the back - diagonally to withstand the torque forces as well as the beam bending load.  Then another two half tubes to provide symetrical load distribution. The top of the tubes meets the other hoop linking tubes, the bottom is on the subframe where the coil over shock absorbers are mounted.  Turn it all over to weld all round the various joints and central rear "floor" sections  and a quick spray to stop surface rust.  Now to see if the rear suspension fits  And it all does! Well three wheels as I ran out of time.  |
| |
Last Edit: Oct 31, 2013 17:17:57 GMT by flyingphil
|
|
|
|
omega
Posted a lot
  
Posts: 1,060
|
|
Oct 31, 2013 18:31:38 GMT
|
|
good work
wish I had your skill
|
| |
|
|
Frankenhealey
Club Retro Rides Member
And I looked, and behold, a pale horse! And its rider's name was Death
Posts: 3,888
Club RR Member Number: 15
|
Pro Jag "MeGa B" GT V12Frankenhealey
@frankenhealey
Club Retro Rides Member 15
|
Oct 31, 2013 20:25:40 GMT
|
good work wish I had your skill I wish I had his skill and his workshop space as well  |
| |
Tales of the Volcano Lair hereFrankenBug - Vulcan Power hereThe Frankenhealey here |
|
|
|
flyingphil
Posted a lot
  
Posts: 2,486
Member is Online
|
|
|
|
Thanks Guys - it certainly is very nice to have a large workshop to do these jobs - it makes up for the forty years working in a driveway or 1 car garage! Now got four wheels on and it rolls nicely! I also cut a tube to go across the front hoop, but it will need the engine in before I actually weld it in place - in the meantime masking tape works well!  |
| |
|
|
flyingphil
Posted a lot
  
Posts: 2,486
Member is Online
|
|
|
|
A bit more progress - a trial fit of the engine and gearbox.  Carefully!  That side is OK  But the oil filter - as expected is the limiting factor here - but I have a plan.......I will put an additional Box section on the outside then notch the main tube. A tube will run vertically from there to the cross tube. I then did a rough positioning of the body side panels.  The engine will sit 2" lower and a bit further back once the chassis has been modified. |
| |
|
|
|
|
|
|
|
|
an old school trick to bend tube without mandrel/insert is to weld a steel cap on one end of the tube length, fill the tube with fine sand then weld another cap on the other end, then bend.
|
| |
|
|
flyingphil
Posted a lot
  
Posts: 2,486
Member is Online
|
|
|
|
an old school trick to bend tube without mandrel/insert is to weld a steel cap on one end of the tube length, fill the tube with fine sand then weld another cap on the other end, then bend. Hi Darren - I did consider this but had no sand in the workshop and no big heat source. (- also if the tube is long enough you can use a wooden plug rather than weld ends) I went to thicker wall as it makes for a stronger cage as well. |
| |
|
|
flyingphil
Posted a lot
  
Posts: 2,486
Member is Online
|
|
|
|
Spent a happy couple of hours putting the UJs back in the driveshafts  . These were then bolted back onto the diff, which was put back into the subframe. I also had the engine in and out to get it closer to its proper position - cutting out a section of the middle floor panel to allow the gearbox to be lower - there will also need to be clearance for the starter motor mounting flange.   |
| |
|
|
|
|
|
|
|
|
Could you use a sandwich plate and a remote oil filter to save cutting the chassis ??
Shame to cut it about now
|
| |
|
|
flyingphil
Posted a lot
  
Posts: 2,486
Member is Online
|
|
|
|
Could you use a sandwich plate and a remote oil filter to save cutting the chassis ?? Shame to cut it about now Yes I have now ordered a remote filter which could go in place of the (Huge) oil cooler, however I still need a short filter or dummy to maintain the oil circuit. The XJS has an odd size 1" 12tpi filter so not much choice. |
| |
|
|
|
|





 . These were then bolted back onto the diff, which was put back into the subframe.
