|
|
|
May 24, 2017 19:31:50 GMT
|
|
I can absolutely gaurantee you it failed because of the crush washer. You cannot re-use them. You have now learned this so don't stress over any other reason.
If the pinion pre load is incorrect then the gears do not mesh properly resulting in early failure (as you have found out).
I have rebuilt only one diff in my life, but got a specialist to do the pinion pre load as I did not have the right tools to do it (new crush washer used though).
I have replaced a few diffs in my time from abuse and I've only had catastrophic failure from abuse - broken teeth on pinion/CROWNwheel or exploded planetary gears.
|
| |
|
|
|
|
gess
Part of things
 
Posts: 220 
|
|
May 27, 2017 20:07:07 GMT
|
|
I don't think the main driveshaft is to blame for the diff breaking down. The main driveshaft is connected to a short piece on th "inlet" side of the differential, and is as you know connected via a small tube. I donæt think that you can damage the internals this way.
The crush tube may be the culprit, but I have exchanged several seals on the pinjong axle thus dismantling the big nut and retighttening it without any of those differentials failing afterwards. My only diff failure was due to a badly worn connection tube and spline grooves on the pinjong axle.
Anyway, I really hope the new diff is in order and that you can enjoy your ride. and again, the interior is really nice!
|
| |
|
|
|
|
|
May 27, 2017 21:08:12 GMT
|
|
If the crush tube collapses or is not firmly clamped between the bearings the nut takes cyclic loads it is not supposed to see and they can come undone,(assuming it is they nyloc type) the bearings then go, if it has been driven any time like this the pinion also starts to wear and will be noisy even when re-assembled with new bearings (but they can go on forever like it).
|
| |
|
|
eurogranada
Europe
To tinker or not to tinker, that is the question...
Posts: 2,556
|
|
May 29, 2017 10:20:46 GMT
|
|
Over here in Holland we had a bank holiday I believe you'd call it. Thursday off and Friday consumed as a collective day off. Never a bad thing!
Thursday morning I went for a 166km drive in the daily van. A very nice trip starting out in the fog and slowly opening up to a very beautiful sunny morning as I was cruising down the motorway that I love. It's surrounded by trees of all colours and feels nice an wide. Also it reminds me of my youth, as my mother was born two villages over from where I needed to be and we used to drive the (back then) two hours and 200km trip almost every three weeks and on special occasions. So I have many a memory of that route. Later my first oldtimer (mustang) was bought in this same village and asif by devine intervention, my Granada was also bought in that exact village. Not to mention the load of parts I have acquired from there... Anyway I felt really good on my way there. I parked on the farm an hour early so stayed in the van until invited out by the occupants. They had known I was coming and we sat in the garden in the sun enjoying a cup of coffee waiting for my actual ontact to show. Talking Granada's and bangers while we did.
A little while later my contact showed up as well and we searched for my missing parts and the diff. Upon quick inspection the diff was questionable. The play in the planetary gears was less than mine had, but the input shaft was fooked for one. The bearing wasn't smooth and therefore the shaft movement felt off. Also the bush connecting the input shaft to the pinion shaft was beyond any function, clunking away nicely upon succesive forwards/backwards motion. But that did not have to mean the diff centre section was bad...
Only one thing to do: take it home and assess the diff by taking it apart. Meanwhile we searched for some nice sun visors for me to be able to paint and use. Unfortunately, better hand grip caps that I'm still looking for were not available. I'll need to rethink how to deal with them... An hour or so later I was on my way home. Another good journey with no traffic jams or anything.
At home I unloaded the diff and set about it's destruction in minutes. The bolts were a lot tighter than on mine, but they came off when shocked with a hammer. Took the snout (by lack of a better word for the front section af the Granada diff housing the primary inputshaft) of the diff off and confirmed a few things... First a very worn connecting bush (this takes drive from the input shaft in the snout over to the pinion shaft). It was so worn it hardly had any splines left, they had just flattened a lot. And the same could be said for the input shaft splines. Putting on my new bush reveiled even that still had a lot of play on that shaft. Also the bearing was indeed toast. So that snout part was mainly rubbish! With that determined, I set about checking the diff centre section where the real magic happens. Where before the quality had been questionable, I could now quickly determine that there was at least no play in any direction on the pinion shaft. Also the amount of play before the pinion started turning the other gears was also less than mine had ever been. So that was good I guess. That play seemed to be at least within the margins of the manual, as far as I could actually check. The one bad thing was the splines on the pinion shaft were worn a bit as well. A bit less than the input shaft splines though as was also confirmed in that side of the connecting bush. They were not as flat at that end. Still using my new bush as a test, showed that there was room for the splines to move within the bush. It was even slightly audible.
Apart from being a rusty hulk where my casing was nicely powder coated, there was a final issue yet. The front oil seal seemed to have a very slight slight weep, the internals of the snout and front diff area were not bone dry as on my diff where I had replaced the seal. Fortunately it's just a very very very small bit. The good thing is that it is easily monitored, as any leakage will show up in the form of a drip out of a hole in the snout. The bad thing is as the oil filler plug is rusted in place there is no way to check the oil level.
This put a halt to my plan to just quickly slap the thing under the car. It needed cleaning up, it needed the snout changed over, it needed the splines addressed and it needed an oil change to confirm there was still (enough) oil in there.
Changing the front oil seal is a bit of a conundrum... To effect that repair, one would have to undo the nut on the pinion shaft. That would mean that has to be refitted and that in turn would mean restressing the crush tube on the pinion or replacement of that and not knowing how tight to set the nut anyway. Probably resulting in the same damage I've done to my Original diff. So I chose to let that be for now. I do hope there is plenty of oil left in the diff. If it's nearly empty, I may have to reconsider. Or possibly even find another differential. The deal was if this one is unsuitable it can be returned no issue.
Bush and spline wear are well known on the Granada differential and a solution that had been effected for years when the cars were actually in daily use was to sort of glue the splines and bush together. So I researched that and found that loctite make a product for just that application (loctite 660). Fixing splined but worn parts that are either hard or impossible to replace or to keep them going while replacements are sought. So I ordered that. Sorry to say it's expensive at slightly less than a euro a ml. but apparently it works great. It fills the voids in the splines with a glue that dries to be a metal replacement. It dries under the condition that oxygen is deprived of the joint which in tight splined application will be the case. It cures pretty fast but I hope to be able to let it rest for a couple of days as I'll be on a course for work anyway for two days. Hopefully this works.
With the weather being what it was, 32-35 degrees where I live, I did not get to do anything more. Just way too hot in my shed to throw diff chunks around. So no cleanup or paint. I hope to do all that later this week so I can refit the thing on Friday. Assuming my gaskets and glue stuff arrive in time. I did clean up my sun visors for paint, but was out of vinyl paint.
|
| |
|
|
eurogranada
Europe
To tinker or not to tinker, that is the question...
Posts: 2,556
|
|
May 29, 2017 10:26:30 GMT
|
I don't think the main driveshaft is to blame for the diff breaking down. The main driveshaft is connected to a short piece on th "inlet" side of the differential, and is as you know connected via a small tube. I donæt think that you can damage the internals this way. The crush tube may be the culprit, but I have exchanged several seals on the pinjong axle thus dismantling the big nut and retighttening it without any of those differentials failing afterwards. My only diff failure was due to a badly worn connection tube and spline grooves on the pinjong axle. Anyway, I really hope the new diff is in order and that you can enjoy your ride. and again, the interior is really nice! In theory it shouldn't be possible. As I said, all driveline components sit at a fixed location relative to eachother. And I do believe the input shaft connector bush has some room inside as well. At least that seems to be suggested by the wear visible in the old connecting bush. I guess it's just my mind that starts thinking of all these what-ifs. I guess that is because I'm no professional mechanic, I just learn as I do and sometimes by making mistakes. Thanks for you comments on my interior, I'm really really happy with it! |
| |
|
|
eurogranada
Europe
To tinker or not to tinker, that is the question...
Posts: 2,556
|
|
May 29, 2017 10:28:30 GMT
|
If the crush tube collapses or is not firmly clamped between the bearings the nut takes cyclic loads it is not supposed to see and they can come undone,(assuming it is they nyloc type) the bearings then go, if it has been driven any time like this the pinion also starts to wear and will be noisy even when re-assembled with new bearings (but they can go on forever like it). I'm itching to see what actually went wrong, but the type of play suggests the crush tube, the nut undoing itself or a spacer that has been eaten away... The diff cover was filled with metal shavings... |
| |
|
|
gess
Part of things
 
Posts: 220 
|
|
|
|
|
I was looking in an old Granada manual I have laying in my garage. It say the connecting tube in the "snout" shall be glued to one axle and greased in the other end. So I guess you will be all right if you use Loctite, I have used that earlier, seems to work. It is a poor design on the Granada differential, they should have been made as they did on the Sierra and Scorpio.
|
| |
|
|
Phil H
Posted a lot
  
Posts: 1,448
Club RR Member Number: 133
|
|
|
|
|
A trick done on the Salisbury 4HA diff (also with a crush spacer) to change the nose seal with relative safety is to dot punch (mark) the nut and shaft, then remove the nut holding the flange on. Replace seal as necessary then do the nut up until the marks meet (it becomes obvious as the torque required suddenly rises as you approach it) and then a tiny amount past it - maybe just 1-1.5mm. This adds a tiny bit of extra pre-load on the spacer which is probably what it's lost over time anyway.
Worked fine as a method on mine.
|
| |
|
|
|
|
|
|
|
A trick done on the Salisbury 4HA diff (also with a crush spacer) to change the nose seal with relative safety is to dot punch (mark) the nut and shaft, then remove the nut holding the flange on. Replace seal as necessary then do the nut up until the marks meet (it becomes obvious as the torque required suddenly rises as you approach it) and then a tiny amount past it - maybe just 1-1.5mm. This adds a tiny bit of extra pre-load on the spacer which is probably what it's lost over time anyway. Worked fine as a method on mine. I have used the same method on Ford english diffs many times with no problems as well. |
| |
|
|
eurogranada
Europe
To tinker or not to tinker, that is the question...
Posts: 2,556
|
|
|
|
She rides again!Well let's just get that out of the way shall we? There's a bit of a story behind it still, but that is the important bit! So let's get into the story then! I left you with the news that the car was broken and then with the story of me having a good day acquiring a new diff that turned out to have some problems of its own but presumably a decent important bit: the centre section with the gears. I then got some tips and advice on the matter as well. So the story picks up again with me having stripped the replacement diff and ordered some parts. Well due to a company course I was away from home a couple of days so progress was agonisingly slow. But the good thing about that was that when I arrived home, all my parts had arrived. Last friday afternoon I set to work. It took ages to clean the rust/underseal off the diff to a standard I was happy with. The new diff section would never look right in comparison to the other bits anyway so perfection was not required. Still 40+ years of corrosion takes some time to get rid off. With the diff a lot cleaner I was ready to drop the rear cover. I took care to collect all oil and compare the level to the workshop manual entry. The diff was a little short but not nearly as much as I had expected. If that was the loss over so many years, I'd chance it for now. As despite the advice and even the availability of two new crush tubes, I was not ready to chance the destruction of yet another diff because I just had to meddle with it. With the rear cover off and the oil out I was a little more worried. Suddenly the gears were a bit more noisy and metallic sounding. Still the teeth looked ok on all gears. The wear patterns seemed to be in the right spots etc. And there was at least less play than my diff had had. So I cleaned it all out. At that point I had still wanted to use my own stub axles as they were powder coated, but though they all came out of both diffs pretty easily, one just would not go in right. Not in the new one but also not back in the old one. It required too much force and then binds up the gears somewhat. Visually there is no hint of any problem, but I guess it may be out of true. So to be sure I cleaned the stubs of the new diff and visited the car in its garage. Trial fitted the stub to the CV joint and it would seem to fit (stuff being powdercoated this could have become an issue). With them out of the way I replaced both seals that looked past their best but were not really showing signs of leakage. Putting the stubs back in the diff without any effort at all, locking them back in place I was ready to refill with fresh new oil. New seal to the cover and close it all up. Somewhere during the process I also primed and painted the thing, not expecting too much of a result. At that point it was time to address the final issue: re-attaching the snout while glueing the splines from the centre section to the connecting bush. I had bought loctite 660 for that as it is advertised as just for this sort of thing. After cleaning all parts I applied the loctite product to both the splines in the bush as well as to the splines on the pinion. Choosing the right place to put that stuff is key to a succesful application. It needs to draw the stuff into the splines. A small test fit showed exactly how the product spread so I adjusted my method to that. I was convinced I's get a good result from this. I tightened the snout bolts and let it sit for 18-24 hours before touching the whole thing again. The next day mid afternoon I set to getting the diff mounted onto the car. By now it had sat for almost a full day. I was hesitant to touch the input shaft flange, but I needed to know what it had done... I wass well releived to find that any movement on the input shaft flange translated directly to movement of the axle stubs!! No noise, no clonking, just direct movement in both directions. This felt promising!! And a little exhilarating actually. Would this little drama finally come to a happy end? I gathered my stuff in the daily and went off to the garage. It took me a little over two hours to clean stuff up and get it all buttoned up again. It was never a difficult job to begin with, it was simply just awkward! Being alone, on the floor of a one car storage unit, with the car only just high enough to work underneath all were not helping to create the best of circumstances. The hardest bit was getting the heavy diff back onto the main beam and supported at the back. Upon removal I had used the jack to lower it down, but I'd noticed the instability already. I tried the standard "refitting is the reversal of removal" as Haynes manuals like to say at certain points, but the heavy diff was just not stable enough. So with slight trepidation thinking of what could go wrong I went underneath the car on my back and put the diff on my belly to heave it up into place. Thankfully that went rather smoothly and as much trouble as the long bolts securing the diff to the beam had been upon removal as little trouble did they give me now. A little wiggling was needed but nothing major. And with the diff now not going anywhere it was far easier lifting the rear in place and putting the support bracket underneath that as well. The bolt for the rear mount that is stuck through the trunc didn't even turn upon fastening so even that went smooth. Now it was just a matter of systematically doing everything up. I chose to do the drive shafts first. They were not that hard to do but lacking a decent tool and a tight fit meant that I had to go round them both at least four times before they were fully seated and tight. Remind me to get a ratchet set of allen keys and torx bits upt to those larger sizes! Anyway they were done and my hand got to recover from the effort. I decided to recheck the wheel sides as well, but those were mostly still tight. One or two could do with a very slight nip up. I moved my attention to the rear beam itself and had that quickly in the exact place I had marked before undoing the bolts. Next up the drive shaft which was also a quick thing to do, as was the rear brake distribution block thingy. So far so good. It was all going well just taking time, me being on my own. At that point I realised I was down to the exhaust and had forgotten my exhaust sealant. So I called it time for a brake, went home to eat and returned an hour later. Armed with both a replacement exhaust (as I had slightly hammered a dent into the other one, not that it would impede function) and the sealant I set about finishing the job! Transferring the exhaust clamps and the rear hanger to the new rear box was a little fidly yet not very hard at all. I was dreading shoving the axhaust back on as I had had to hammer it off with quite a lot of doing. I had scotched all the exhaust parts where surfaces would meet and gave it a go. Much to my surprise it just slid on in one single almost effortles go! I needed a little secundary push to fully seat it on both sides but no biggie... I was amazed. And whit that the clamps were done up in no time and the rear hanger positioned for a nice fit of the end pipe. Out with the tools, a quick cleanup and putting stuff back in the daily and I was ready to drop the car to its wheels. Even that was far less effort than it had been before and the car was quickly on the ground. And then it was time for those great expectations... How would the car behave? Well, it started in one go and quickly settled to a nice idle. I put it in gear and hardly noticed doing so and then drove it out and into the parking area where a space had become available. I added 8 liters of fuel (remember this) and set off to get my wifey and see how the car would behave. The diff had had a full 24 hour drying time now. Without issue I picked up the wife. Car ran fine. Car sounded quiet, shifted way smoother, no clunking noises upon acceleration or deceleration or even upon changing gears manually from park to drive or reverse. So onto the highway we went for some high speed tests. All still went well and noise was negligable. From 120-130km/h on I believe I hear the diff a little bit but only barely with no radio on. And then all power was lost!! I could just pull into one of those safe spots created for broken down vehicles. The car started up but died immediately. I suspected fuel to be the issue. It felt just like it had all those months ago just after MOT. I had a spare 6 liters and threw them in. The car was hesitant to start but it did. It ran a little roughish but it ran so we chanced it home. Nearly home she did it again, surging, just not dying etc. So I put it away for the night. It ran and the diff seemed fine. This would either be down to low fuel (the thank had been emptied to replace the sender remember) or a filter that is clogged. I suspect the new float has a pickup tube that is slightly higher up in the tank... I know I bent mine to be as low as was possible. But maybe this one is a little higher up in the tank. Anyway the next day adding 18 liters of fuel the car started up and ran normally. I had no time for a drive but I hope it will now prove reliable again. And there you have it, the full (probably boring) recount of my diff installation and testing woes... Now for the good stuff! Some pics of the diff issues: My original diff oil in cover: metallic grey! 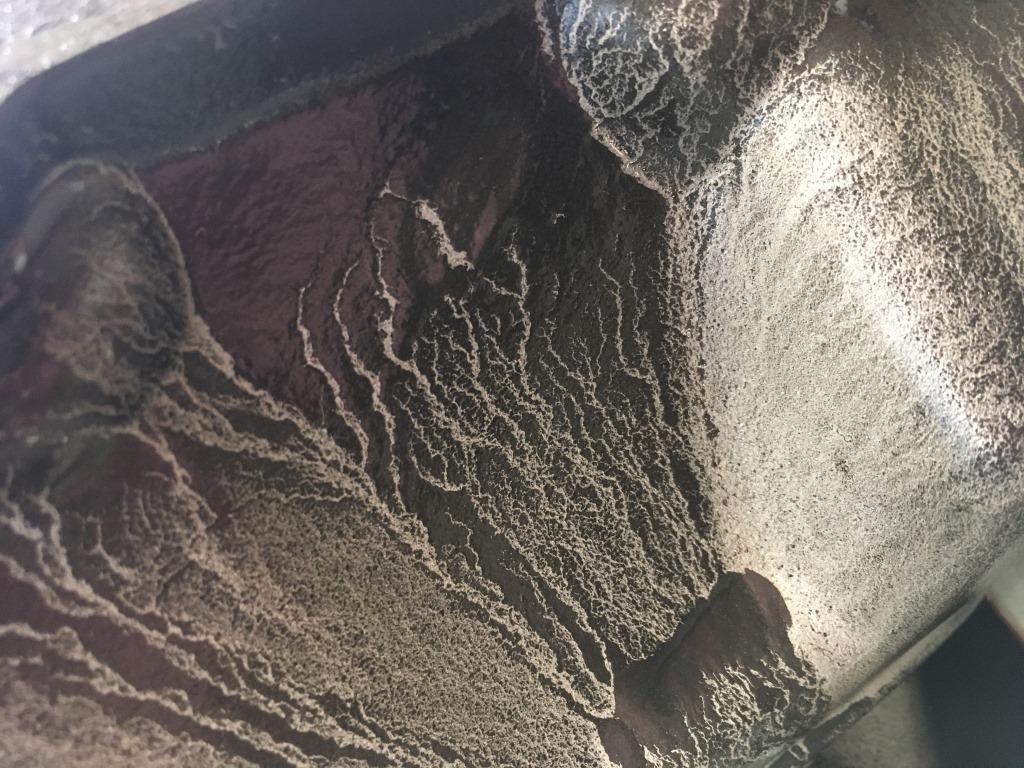 "new" diff 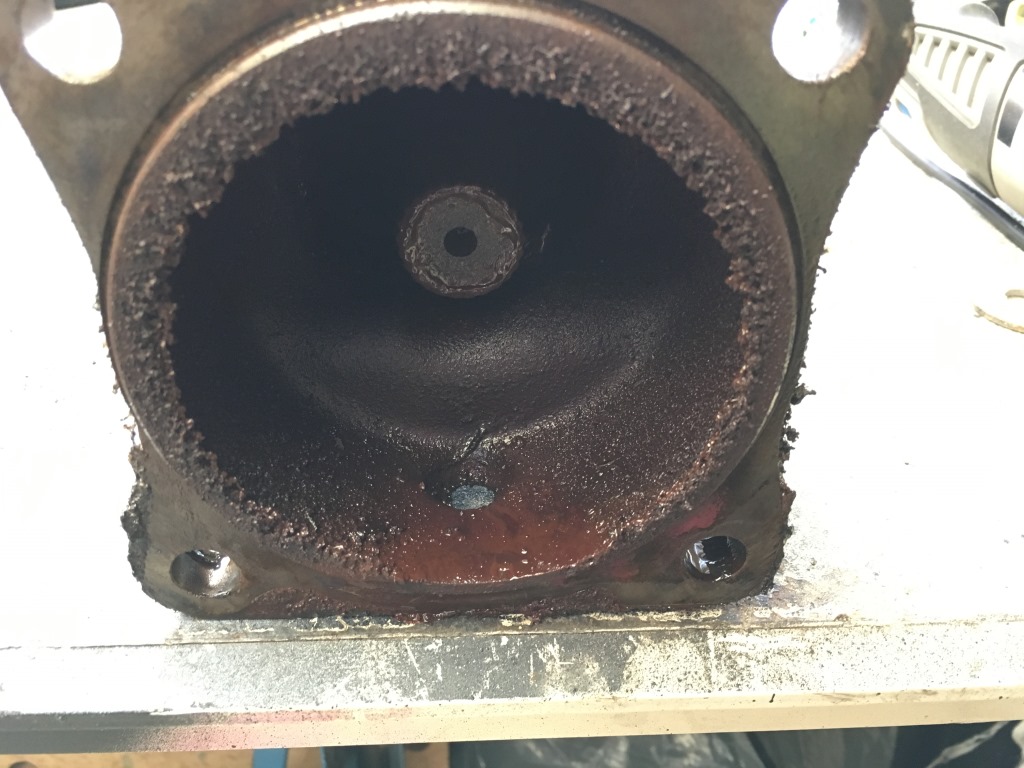  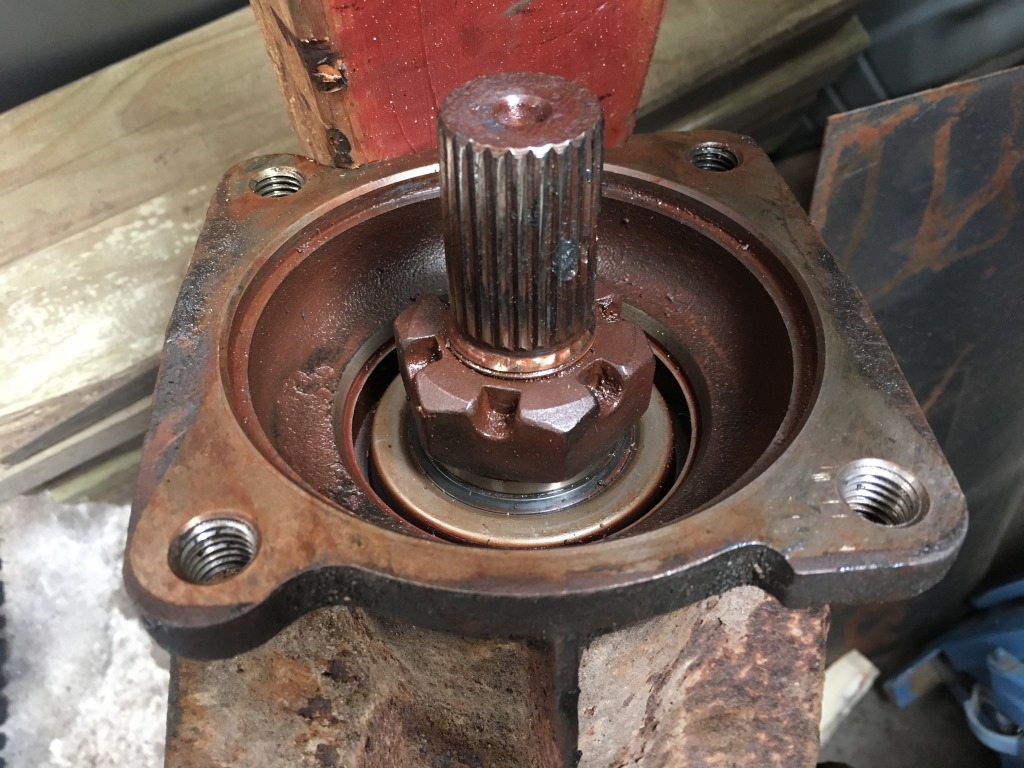 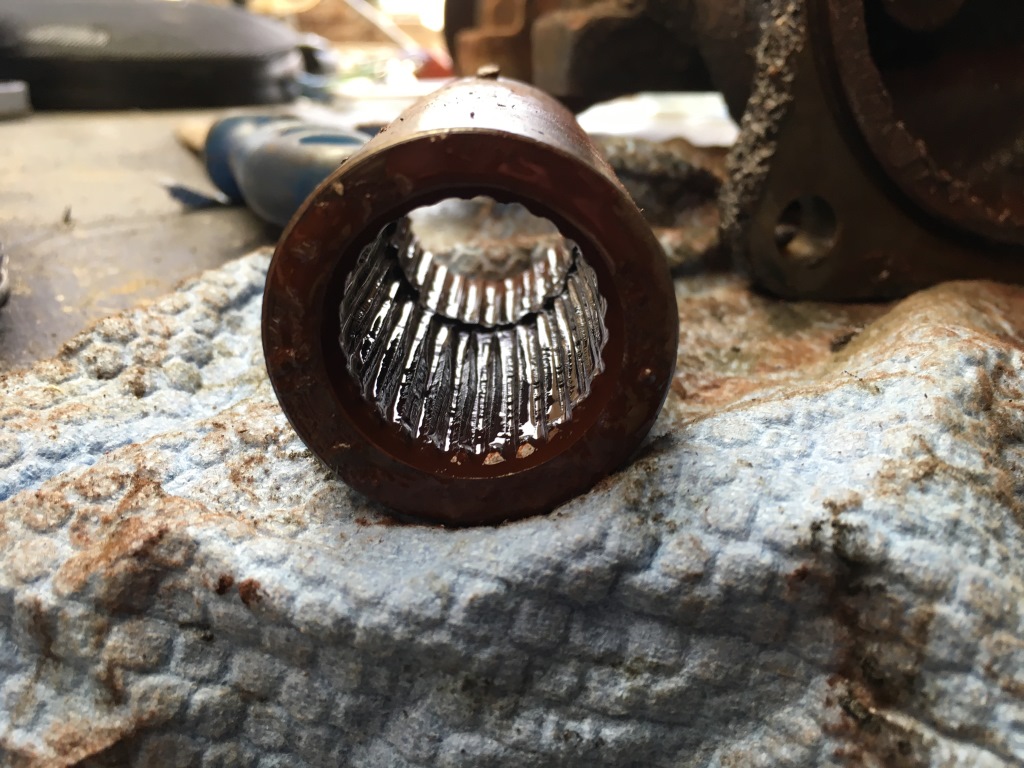   And the "new" diff back together with my old parts and some new:  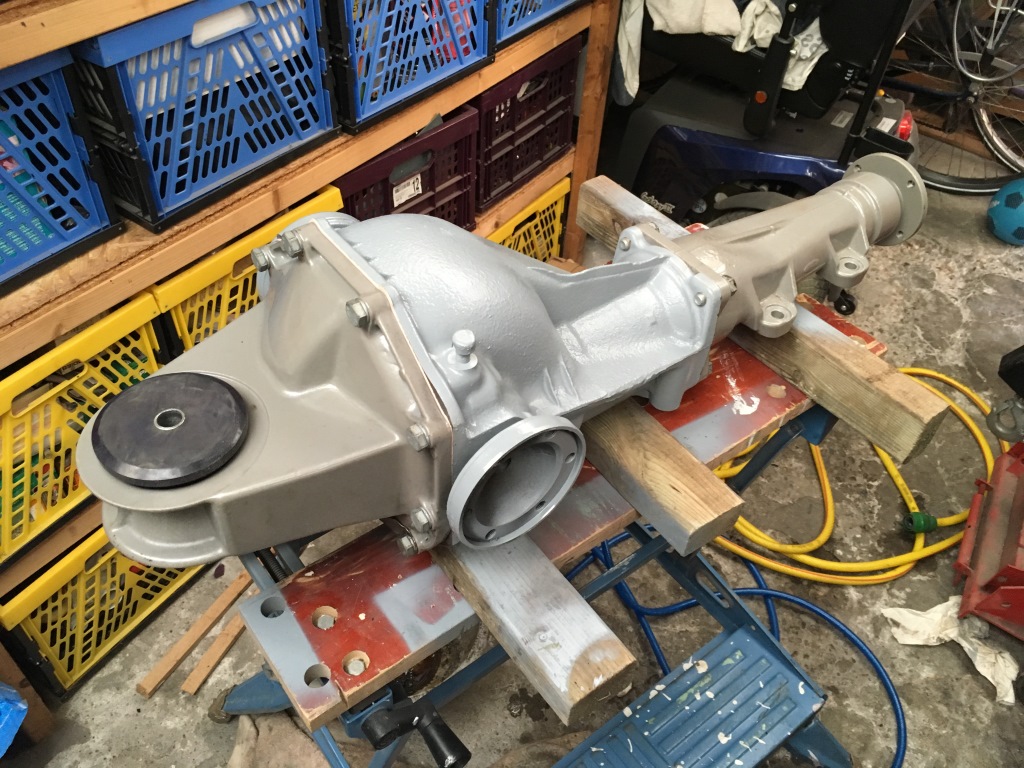 And the car out and about:  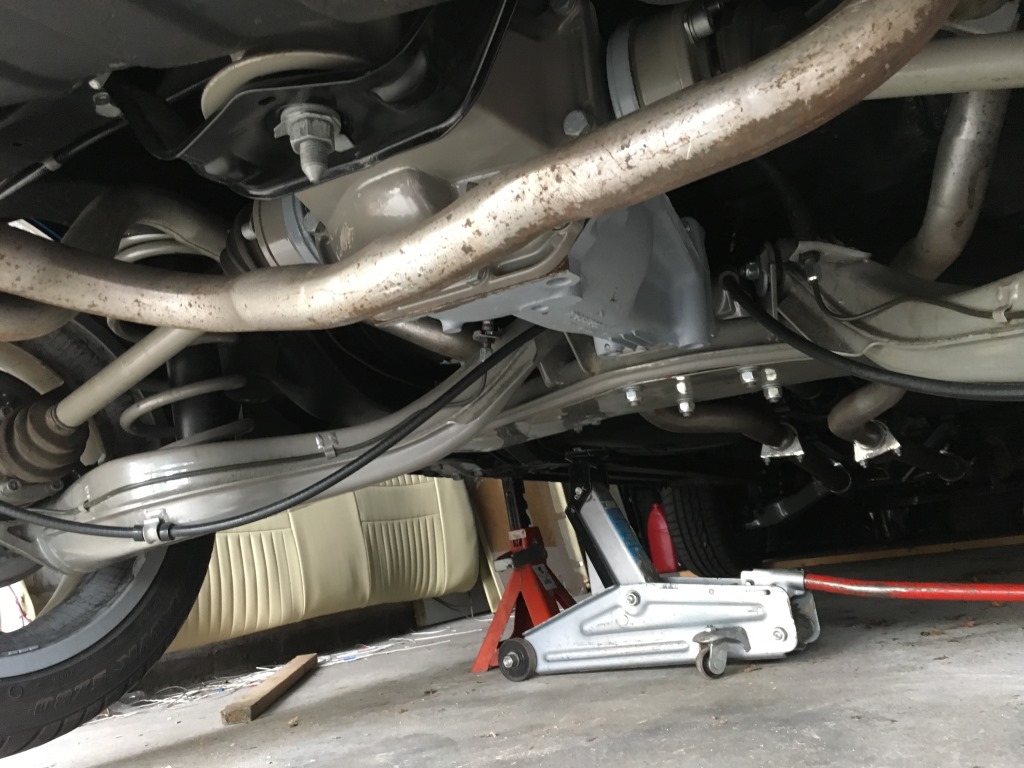   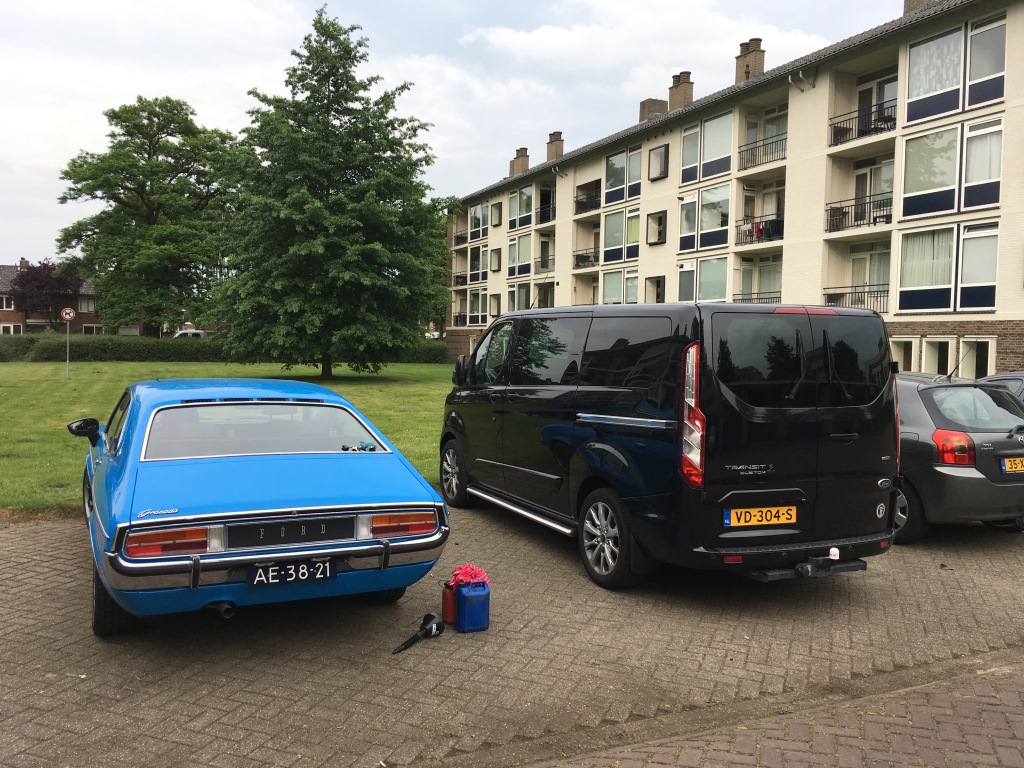 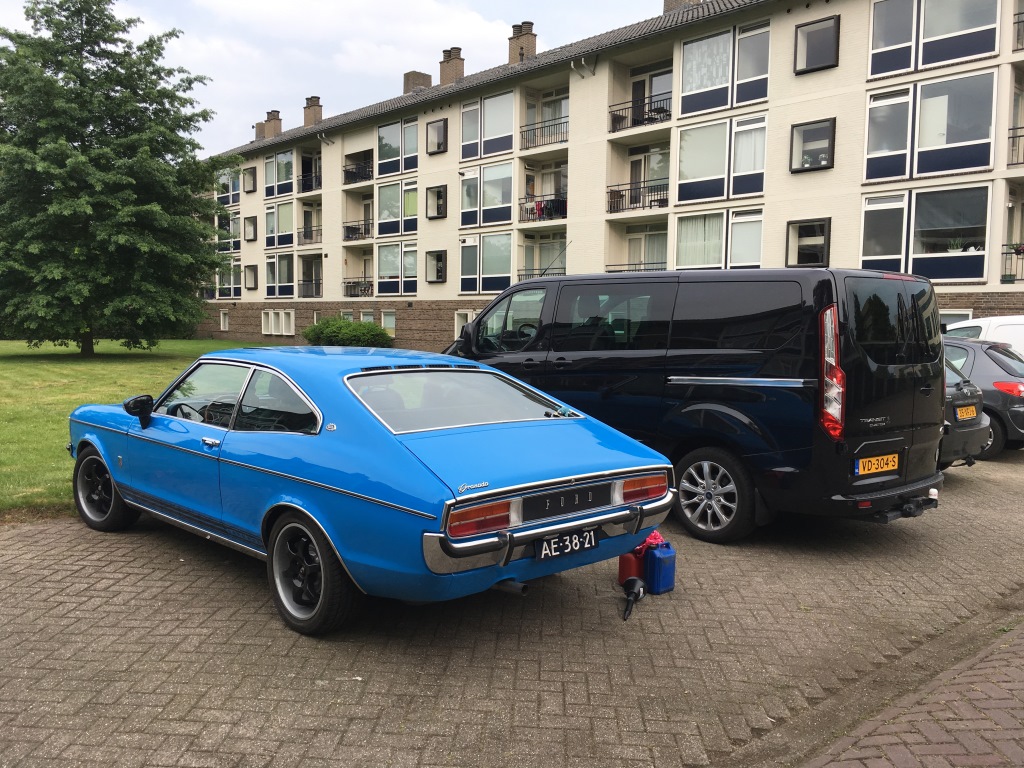
|
| |
|
|
eurogranada
Europe
To tinker or not to tinker, that is the question...
Posts: 2,556
|
|
|
|
|
Had a little go in the Granada yesterday. Had to walk the dog anyway so took the dog and wife and had a nice walk to the garage. Funny though, the dog doesn't want to go to the garage out of his own free will. I guess I scared him a bit firing up the Granada. To put that into context you have to know: our dog once had an encounter with fireworks as a pup, like a fireworks show unexpectedly being started about 20 meters from where he was anchored when we were camping. We'd had no warning at all. Ever since he's been avoiding loud noises and quick to scare. But still he's really a great animal hahaha.
Anyway, I got into the car and primed the fuel system twice, having put the car away not running great probably because of a lack of fuel. The car fired up instantly but wasn't happy on tickover. After revving the engine a few times things settled to a normal idle. I drove the car out of the garage for a short run as the wife was waiting with the dog. I drove off and it all felt really natural, really normal, I'd almost say really modern...
The car had no noises or clunkings or anything under shifting from P to D and R. It just seems to immediately engage the differential. Upon driving there were no noises from the rear and shifts were incredibly smooth. This really gives the car a new feel. It restores some of the comfort that had gone missing, despite adding a smooth and powerful engine, great seats and even a lot more sound padding (although eliminating some of the original material). And, again, although just a very short run around the block the car picked up when I put my foot in it and never even stumbled or hesitated. Idling fine and still being responsive to the throttle after parking in it's unit again.
So all in all I feel really good about the car. The confidence has to grow somewhat, but I think I'm worrying more than the car gives me reason to. After all, it did the previous 320km's without any issue even on a broken diff. I'll just make sure to have another 12 liters of fuel in the boot for my first journeys!
With a bit of luck Saturday some family will see the car for the first time, and after that I'll be on my way to a Ford Granada meetup. Probably spending the night in the car...
Still, plenty to do: top prio's are interior lighting, finishing the centre console inlays and washing and waxing the car.
|
| |
|
|
gess
Part of things
 
Posts: 220 
|
|
|
|
|
Good to see that the car is up and running again. I believe it was a wise choise to not start fiddeling with crush tubes etc. If it aint broken, don't fix it :-)
Your trust in the cars reliability will come gradually as you use it. I had a lot of hickups on my car after it was put back together again. I had to retighten a wheelbearing, change head gaskets and fix electicl issues, but eventually it was a reliable car I could travel on summer holiday in.
Thumbs up!
|
| |
|
|
|
|
|
|
|
great to hear its back on the road and (fingers crossed) fixed. Lets hope for some good cruising weather  |
| |
|
|
eurogranada
Europe
To tinker or not to tinker, that is the question...
Posts: 2,556
|
|
Jun 12, 2017 10:13:59 GMT
|
Well if you don't mind I'll spill my post weekend beans now. I'm a bit miffed really. Thinking of selling or torching the car... Nah not really but I am curse word... Bit of a mojo rollercoaster these past few days... Let me explain. So what has my week been like since our last communiqué? Well busy. Busy at work and at home. With loads of completely different things and also working toward the FIRST EVER event to be attended by the "finished" Granada: Ford Freaks NieuwLeusen 2017. Having had a great time there in 2006 and 2007 this would commemorate the 10 year absence with my own car. Although in 2015 I did get to meet a fellow RR member from the UK there. This meeting would start Friday the 9th and would last untill Sunday the 11th. Due to obligations like a 10 year anniversary party, I would be attending at best from Saturday evening. But That would mean sleeping in the car and would mean taking it to the party on what can be considered a maiden run after the diff swap and fuel issue. In the end we decided it would be wiser to not risk the full family getting stuck by the roadside, missing the party, so it was decided I should go Sunday morning for the day. But of course, to attend a meeting with a car, especially the first one (and having high standards for oneself) there was a lot of prep to still do. Lots of niggly tasks that I had been either dreading or have only very recently acquired the parts for. So let's start the prep part here by saying I did some small stuff in the evenings. I cleaned up shop, took a trip to the city dump and prepped for doing some Granada stuff. So as a first item of business, I painted the sun visors I had just gotten black with vinyl paint as well as the little clips holding them to the roof. Looked great but needed quite a few layers to cover as they were brown. I also measured how to trim the plastic gear shift surround to fit in it's new custom place. That was a bit of a risk as I have only one and I had 4 diffferent measurements at each corner. But I got it done and it lay flat so that felt like a win. It's supposed to fit great now but will have to see in situ. 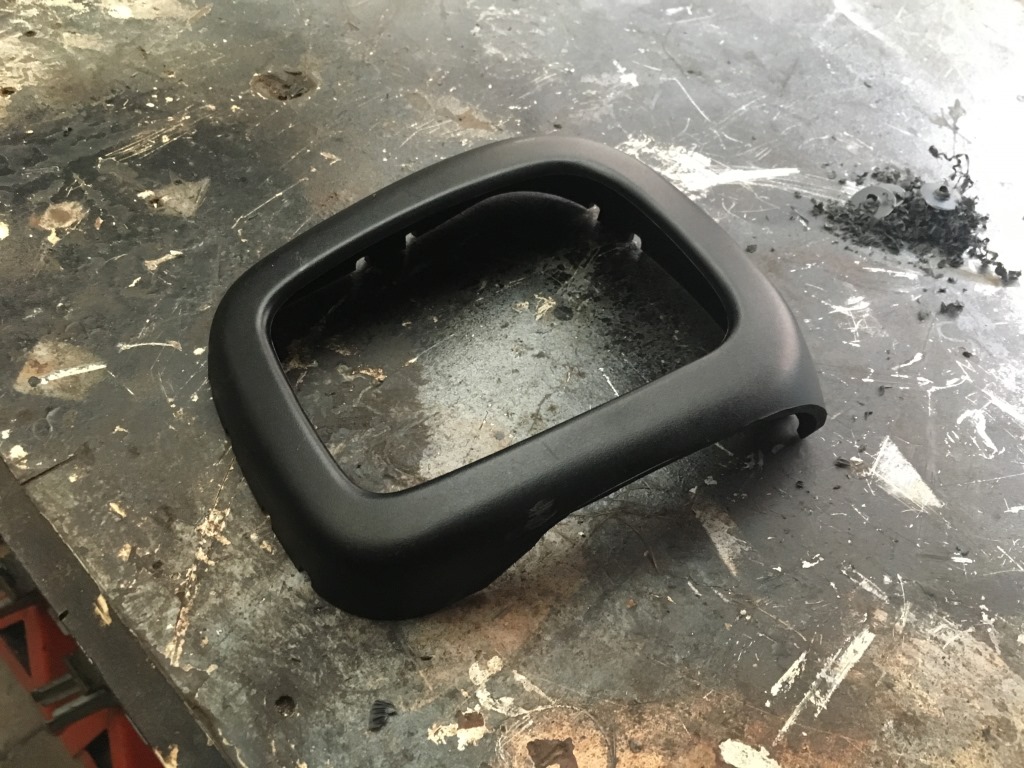  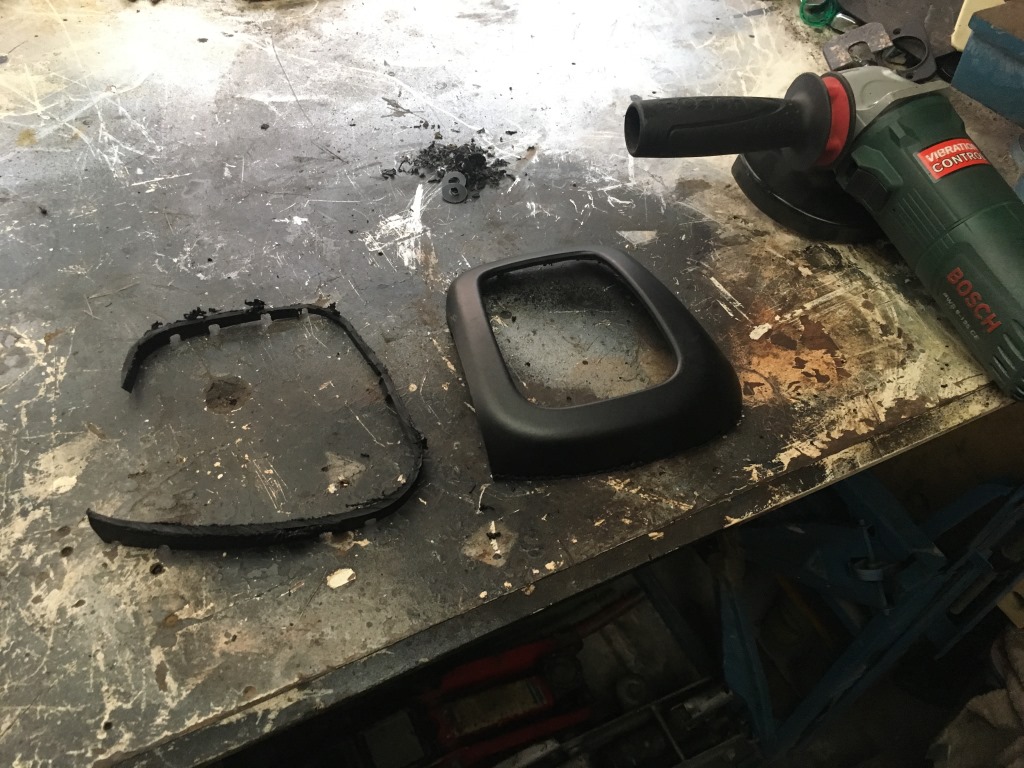  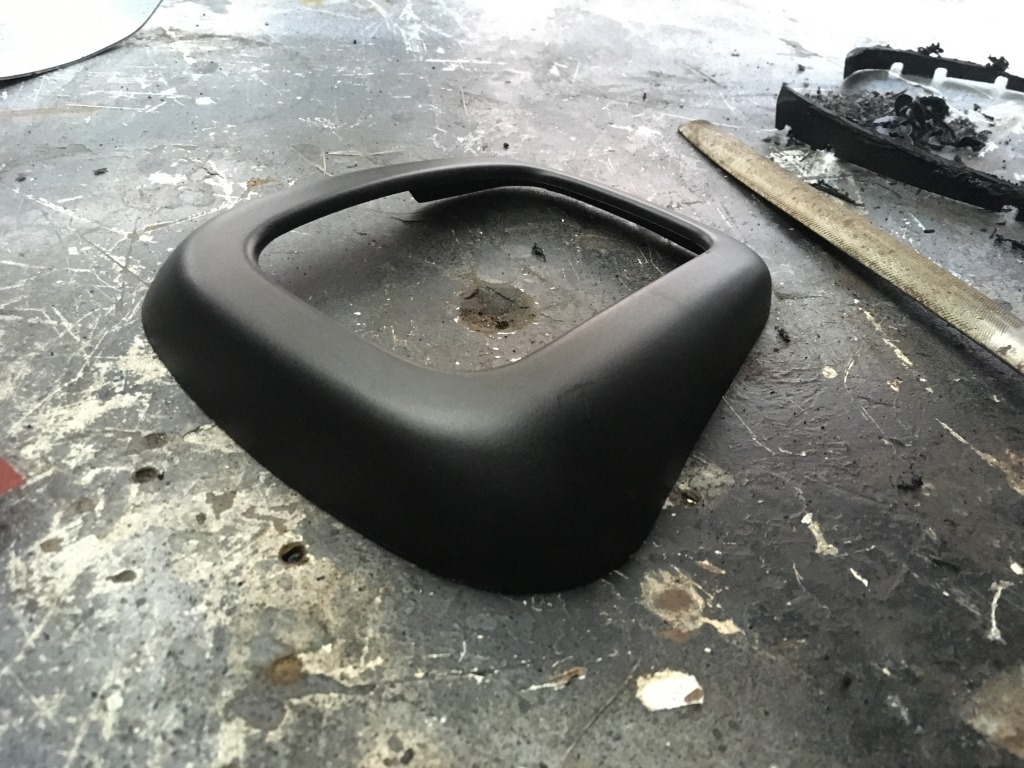 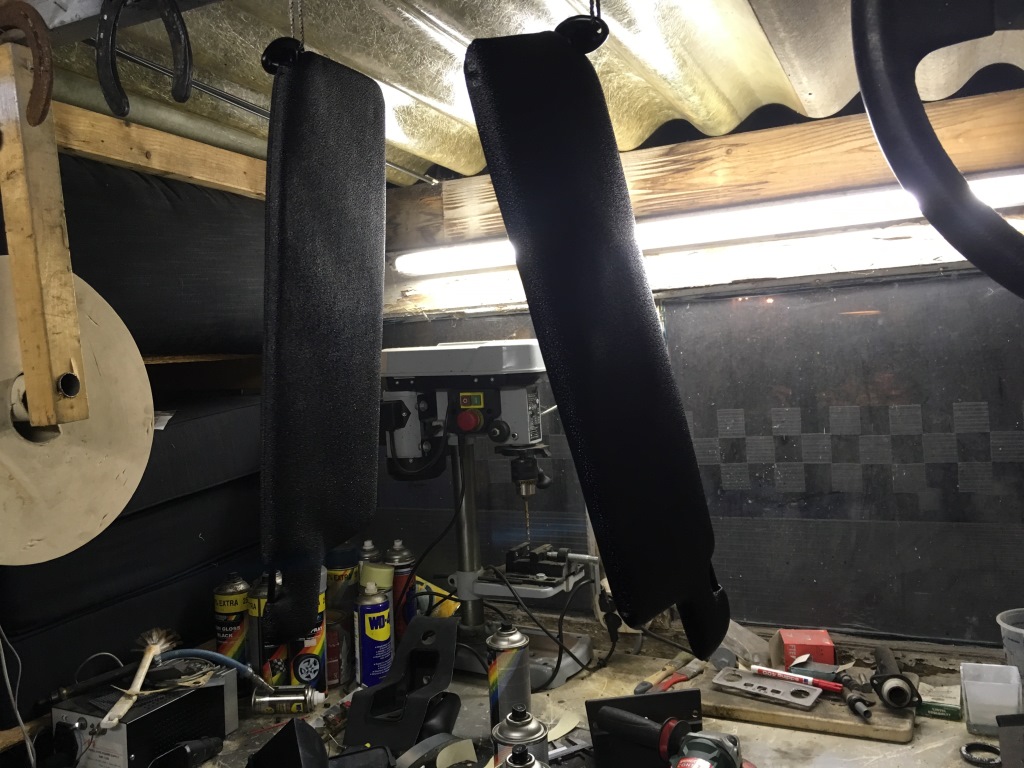 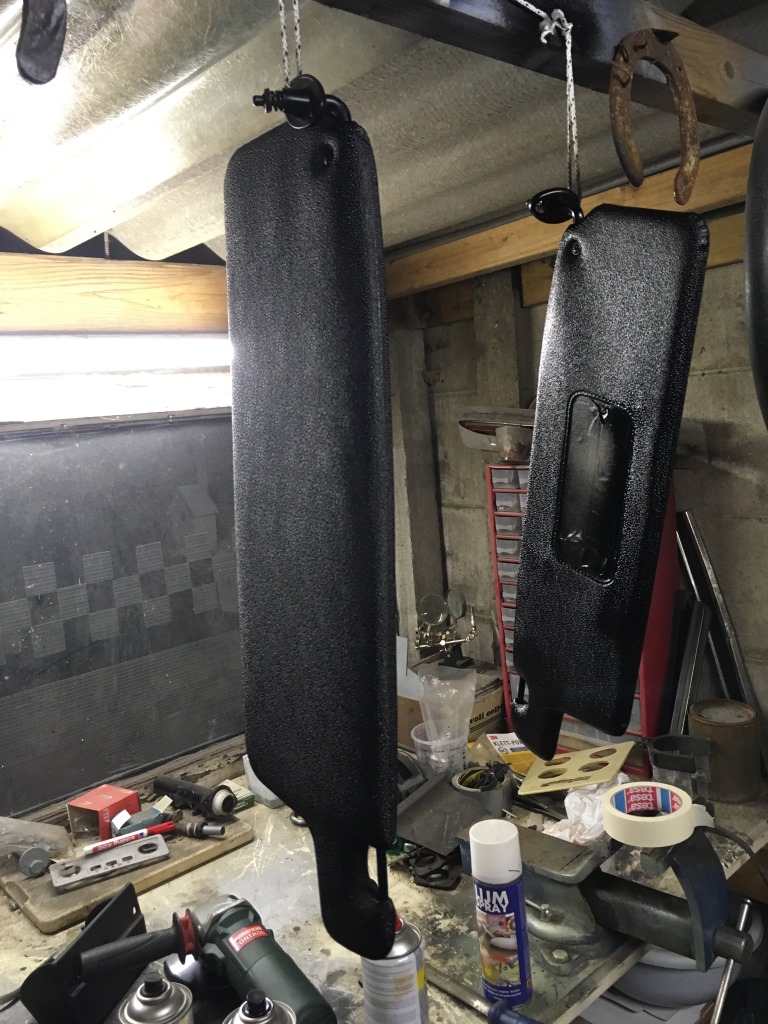 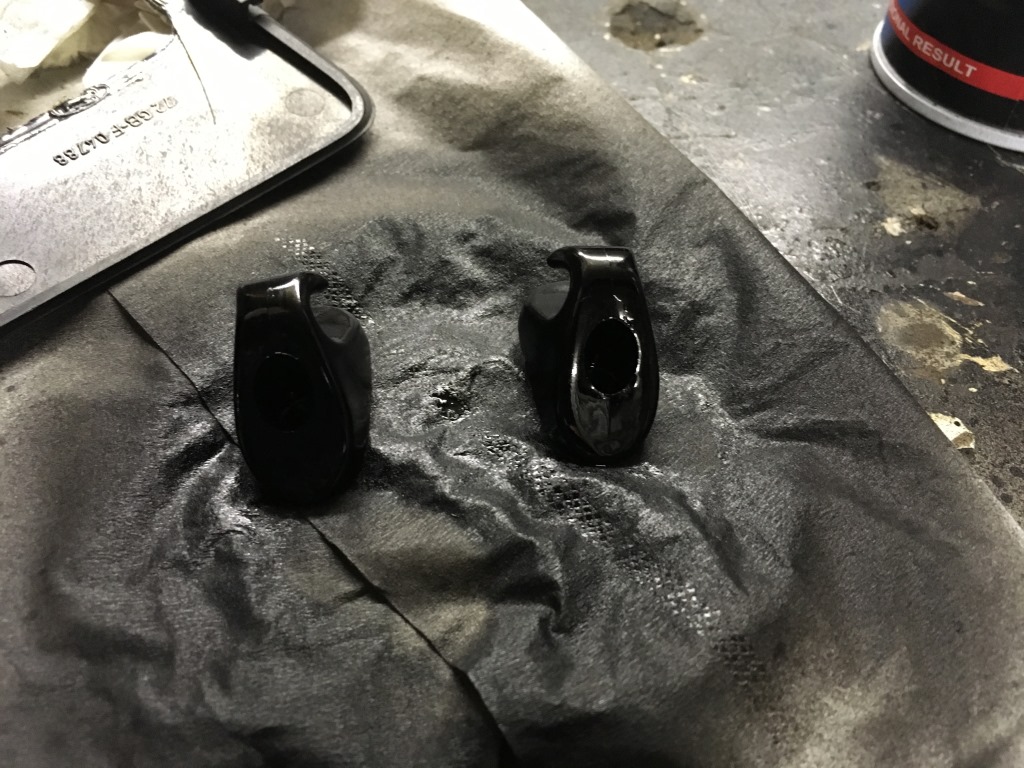 I then used my Friday afternoon off work to wash, clay, polish and wax the Granada for the first time in history since it being painted. But as much as I enjoyed doing this, it also frustrated me. Although the pics look stunning...    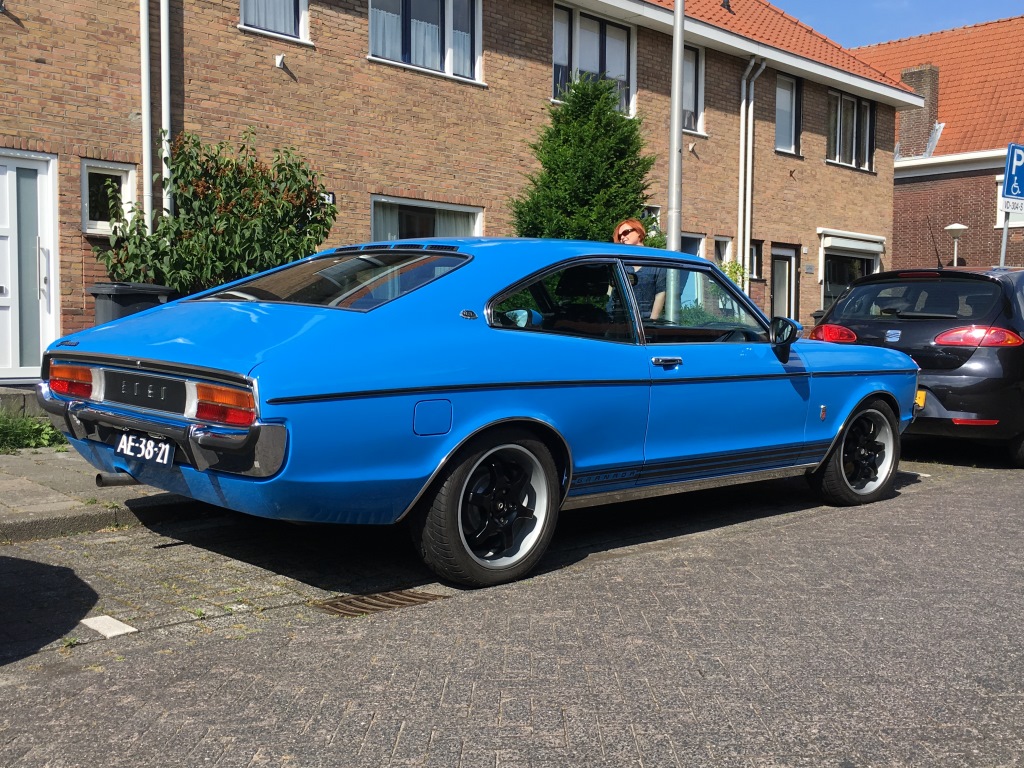 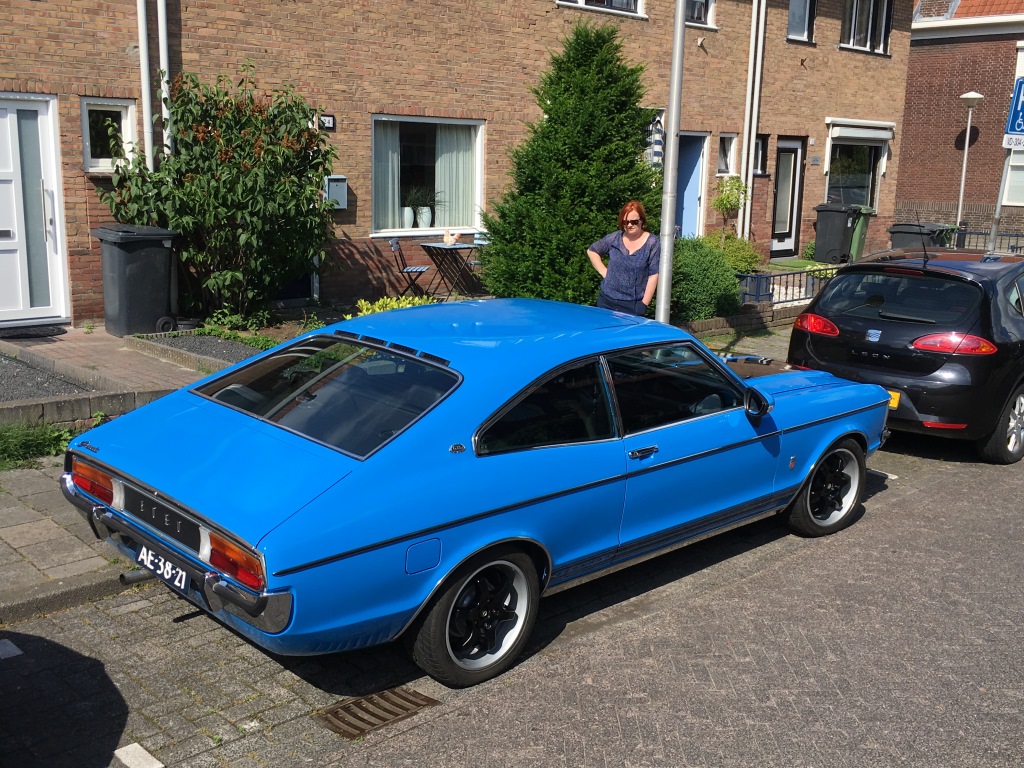 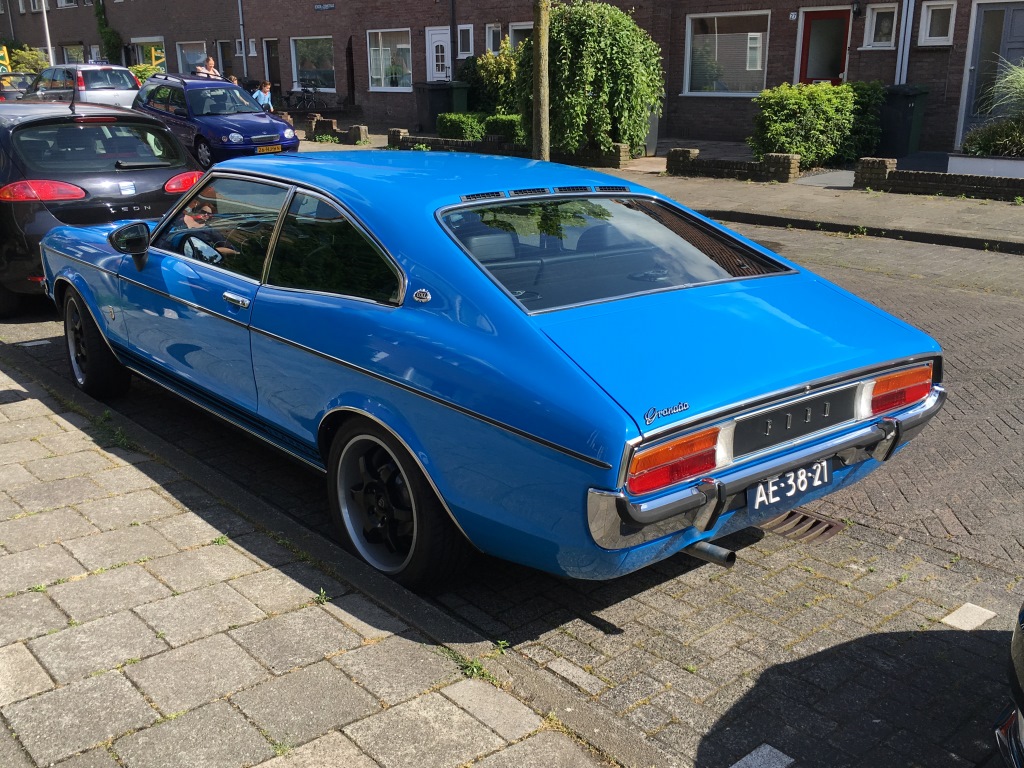 The clear coat is "damaged" bu watermarks that with a light polish go down to invisble to the naked eye, but still showing edges in the paint. So to get rid of those will require a more agressive (machine) polish. It seems contained to mostly the flat surfaces. So this is not for now to fix and probably not a huge deal. But, asif that wasn't enough...being so close to the paint I saw many a defect never seen before. Some of which really got me down. Like the fact that the seems on my doors are opening up with rust, and that on the front edge, some bubbling is present same as discovered before on the lower door edges. Right on the edges themselves, so no directly visible. So I will be in NEED op two new/better doors for sure now. DAMNED, I don't have the money for that as they are hugely expensive and this also means paint and restriping. I didn't really have the money for the diff either...but needs must or something like that. A drawback of medical bills I guess. So this frustrates the living sh#t out of me. Both because I'd like to be done for a while and because I spent a million to prevent things like this from happening...and STILL they happen! This to be honest got me very very down. And toughest about that is.... I couldn't show or tell my wife how I felt. She'd probably be supportive yet she'd also have my same sentiments: "you've already spent a million and we don't have the money...". So I feel pretty bad right now, despite what is yet to be reveiled... Saterday morning I set about vacuuming the interior and cleaning it a bit before fitting some of the parts I had painted. I lost a lot of time there. But as I was driving the car to my house I noticed the cd-changer in the back being inoperable. A quick diagnose says power is getting to it. So either my HU doesn't see it due to a problem with the modified wiring connecting them or the unit is broken. No time to look into that now. Back to my painted parts: I could feel where the sun visor would have to sit. I could find one screw hole, but not the other. I only found a void where the screw in my opinion should be located. After way to much fiddling and searching for a lost hole, I decided to fit the other side one. I quickly found both screw holes there. I mounted it and it's clip and went back to the other side. I could now confirm I had the orientation right and the screw should be where I expected it but there was nothing to screw into. And then I just went inside and got me one of those slide over clips with a screw hole in them. And as I slid that into place it hit me that my solution for the problem was probably exactly what ford had done themselves, only in blasting and welding and other work the clip had probably just gotten lost. Anyway with that clip thingy in place in 3 seconds the visor was fitted. But this had taken me ages to realise. Stupid me... I'll for now owe you the pics of them in place, making the entire interior look more completed as I just simply forgot to take them. Next up the simple task of putting a bulb in the original front interior light and sticking that into position. Only to find that it doesn't light properly. When I have the switch to permanent power it lights, when I have the switch set to door ajar power, it doesn't.... Until I SHUT the door(s)... Now the obvious cause will be the circuit wired in to power the seats. As they are on a 12v switched relay but also on a 12v door ajar relay. So now to find the fix. I could either cut the original wire and hook that up to the relay as well or find the real issue. Just cutting and adding to the relay would sort of feel like a bodge... Anyway another thing added to the electrics list (besides the gauge feeds and the cd-changer thingy). From there I went on to the centre console. I figured the car at least visually needed to be finished for once and for all (hm, bad choice of words now). I needed to close that up and upholster that. I had some choices to make there. Initially I had made and covered in vinyl a simple multiplex panel to house 4 extra gauges. But in struggling with placing those due to senders and signals I decided that the only one really interesting could be a volt meter. It was at that time that I came across my spare console during cleanup and I saw that had an ash tray and someone had incorporated a clock in the upper section. With a nice official ford recess. So I looked into placing the volt meter there but the fit was off. And that would have necessitated going to more modern ford Scorpio switches for the windows in order to look good in visually. They would have had the advantage of being lit, but the disadvantage of having to redo a lot of wiring to get them to work and light only in the right situation. So for ease I would like to use the existing switch block I had in the car. Also as it houses the audio master switch that would otherwise have to be relocated. So I set about cleaning up the ashtray and its surround. Of course just as my spare console was broken in 20 places, this insert was also not in one piece. Missing the areas to actually hinge the ashtray. Also it was at that time I found out the clock was not an original feature. I took that out and was left with a gap. For ease and speed I just cut a 1,5mm sheet of steel to fit and then cut the slot for my switches. It wasn't my nicest work but it was done in haste and after upholstery no one would know. Anyway, I glued the stuff in place and the next day after the aforementioned party I upholstered them. I also glued in place an eyelet for the hinge part of the ash tray. For an accent I painted the opening grip black. I have to say this all looks great. 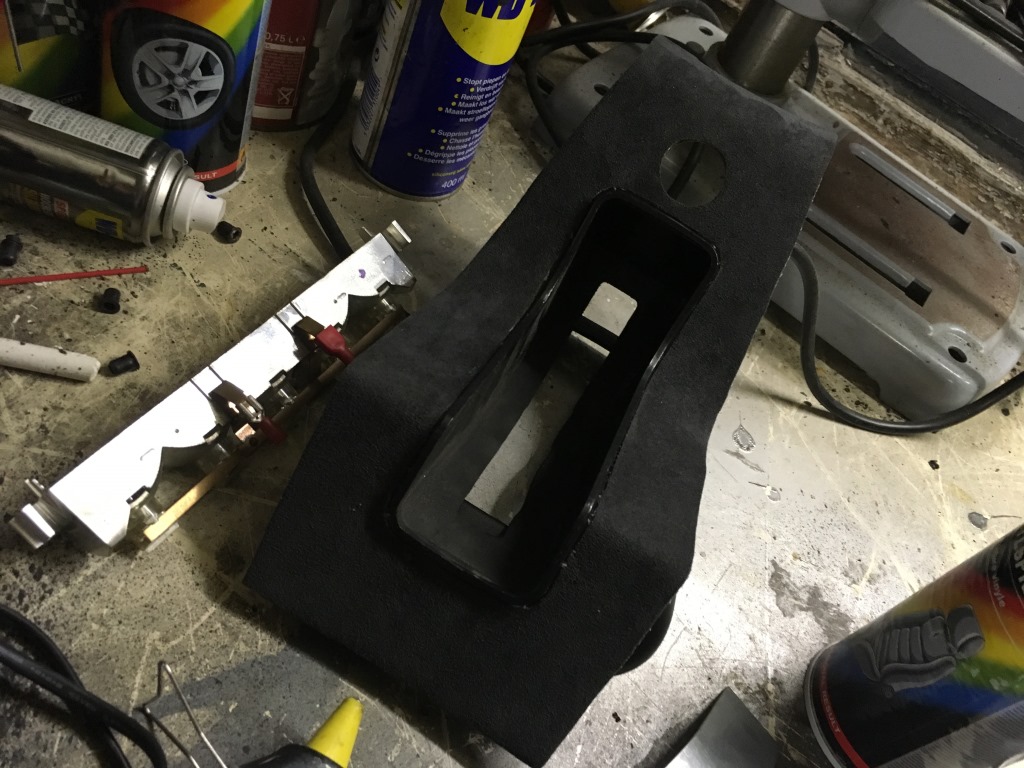 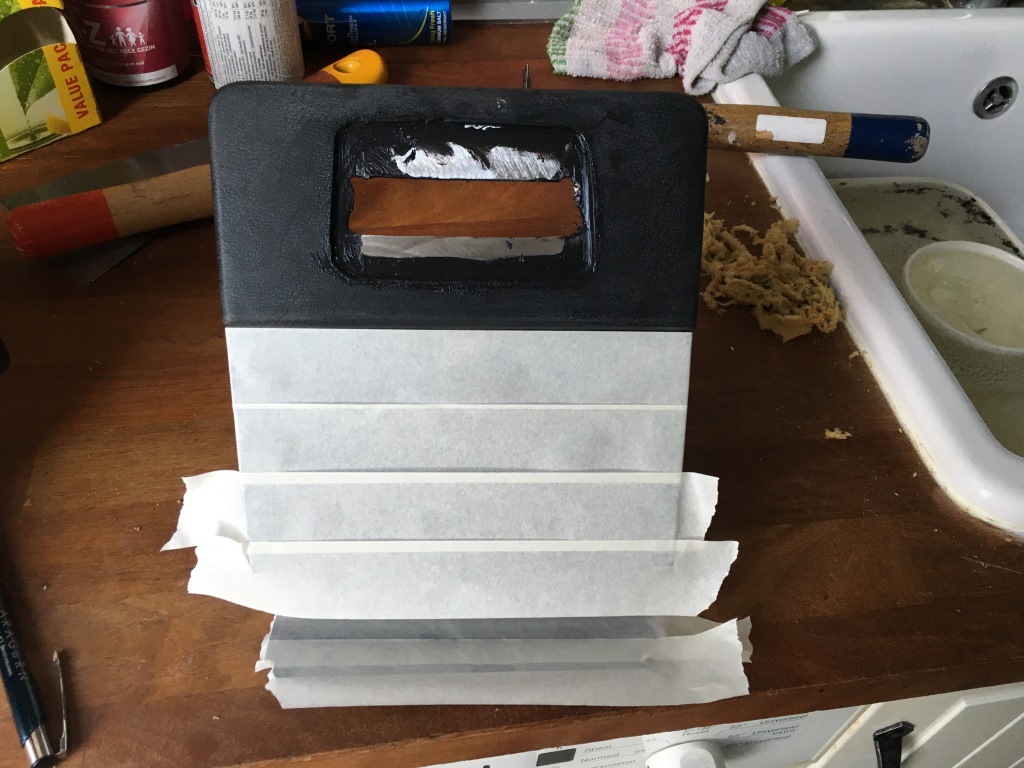 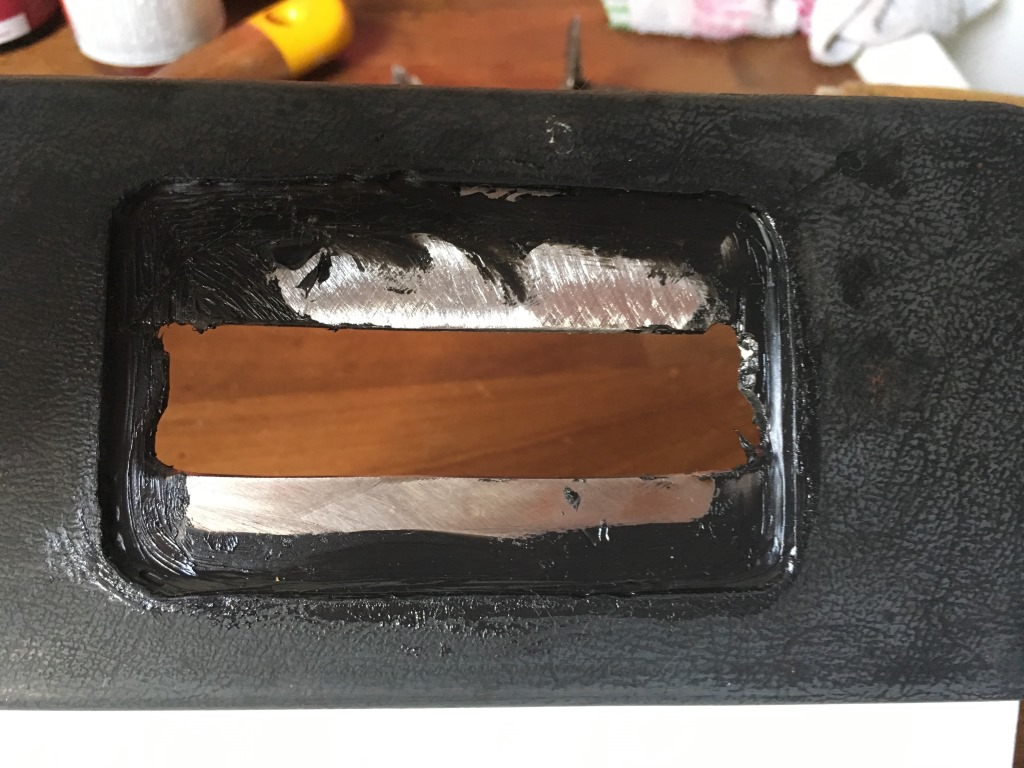 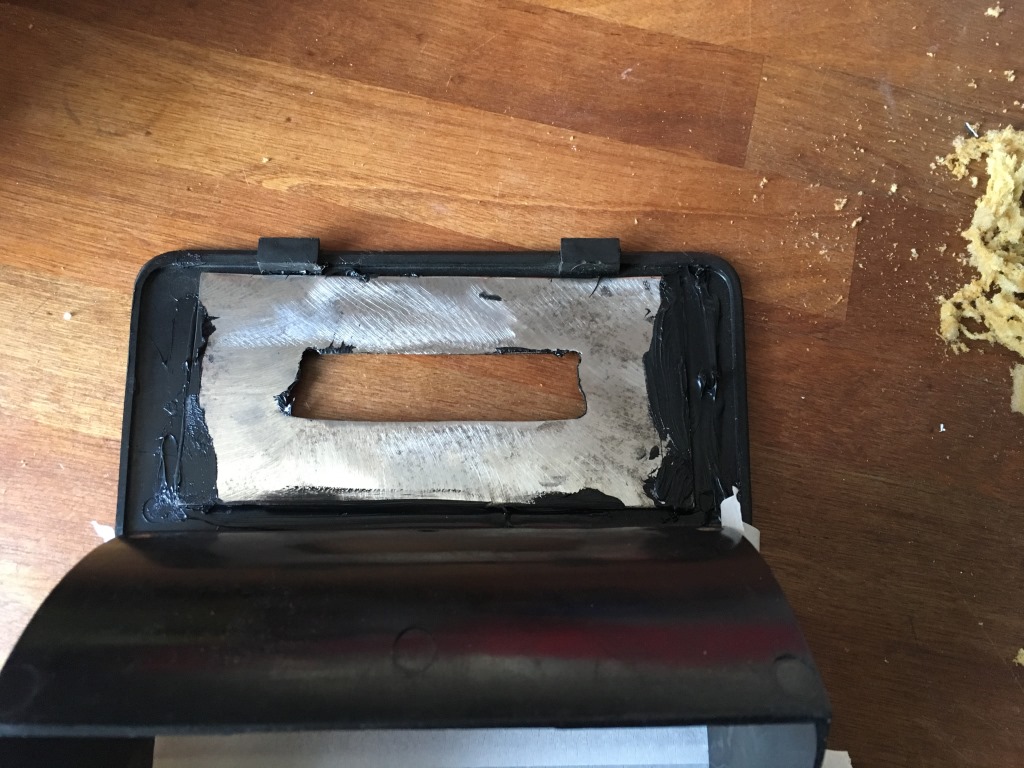 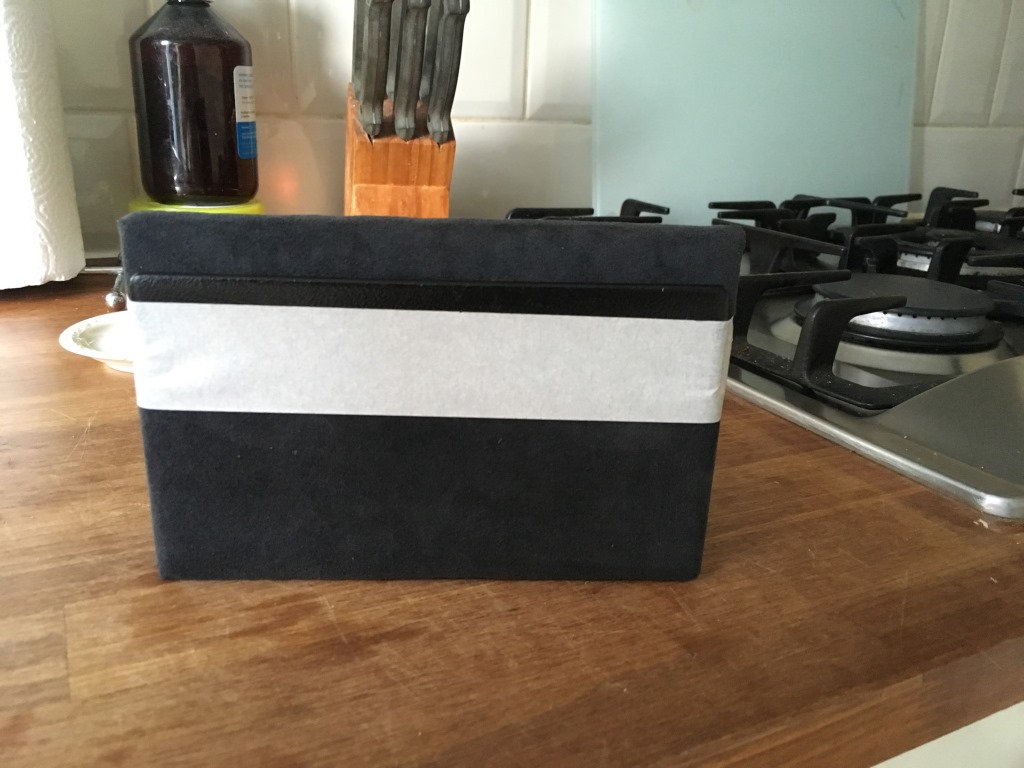 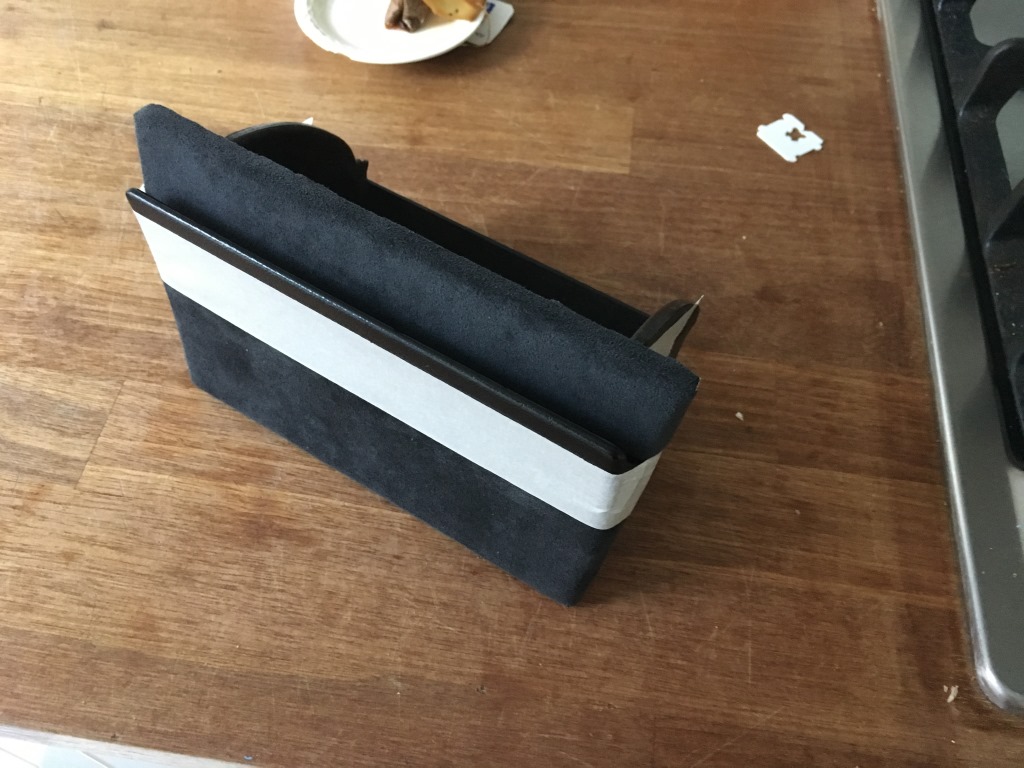  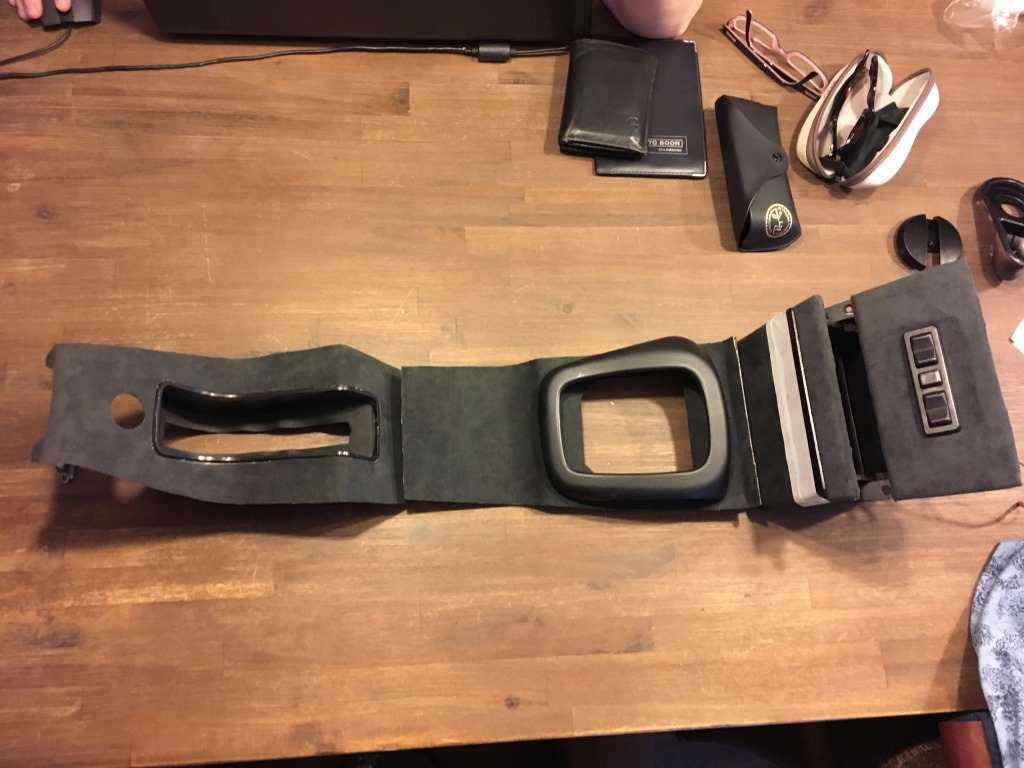 And with that two days and some evening work had lead to the morning of the meeting. I was awake by 6 from a restless night, thinking about the testrun. By 7:15 I was getting the car to put the now upholstered console bits in. 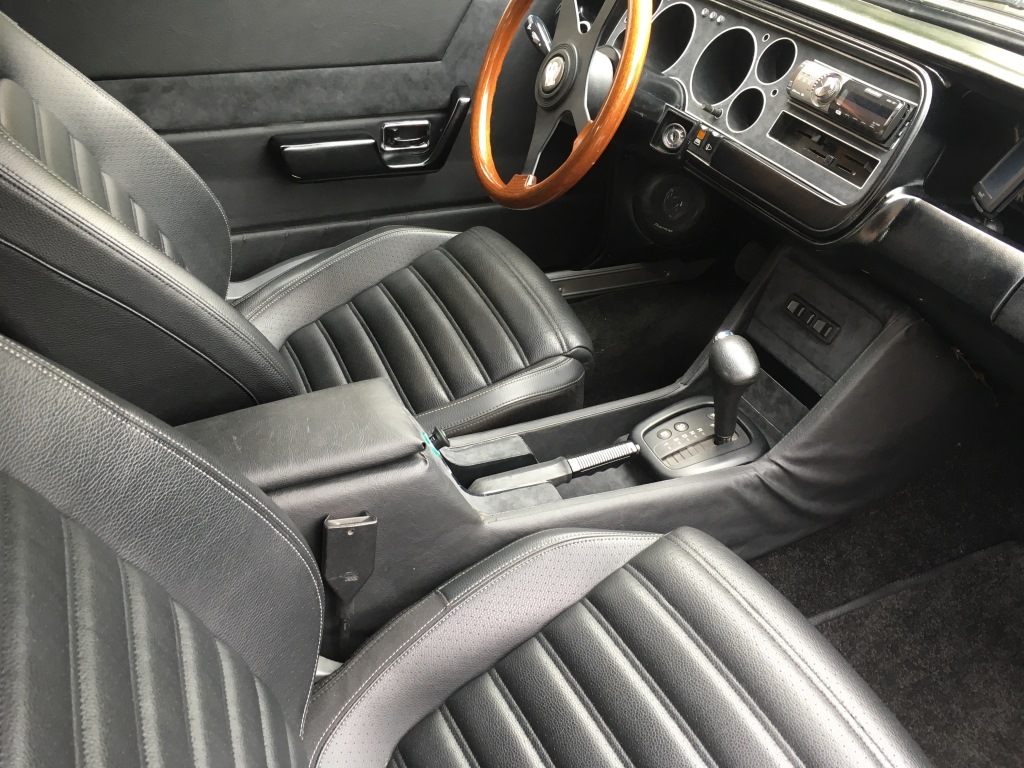 Quite fiddly with the extra material all over. But in it went. Looking AWESOME in my humble opinion. And just as I was happy and had said goodbye to the wife I put the car in gear only to find..... nothing! Nothing at all, an engine running, but with the stick in drive, no forward motion!!! What the F?? Then I noticed that the cover plate to the shifting mechanism wasn't seated right. As me fiddling in that area to fit the panel was the last thing done before succesfully driving the car home, I just ripped it out and that restored function.... Phhew... My trimmed panel would need a light trimming to get it all to sit right but I was out of time. I headed off to the meeting and although not really relaxed, the car behaved fine. I still think drive shaft balance would help with comfort a bit but it doesn't hinder driving. It's not flopping around or anything. There's just a vibe there. Anyway just as I was relaxing some more, after 70 km's, the car started spluttering and coughing. I immediately recognised fuel starvation. I'd had plenty of experience now so I knew instantly what it was. I also suspected the cause. So on to the hard shoulder of the motorway and out with the hazard lights on and a hazard trangle 30m behind the car for added visibility. I Looked under the car at the inline fuel filter and it had gone vacuum and was red with rust. Very very fine rust dust blocking the filter pores. I thought I'd seen the last of that after my tank cleaning action a while ago, but I guess not. Having maxed the tank (not leaking anymore) which is a good thing had apparently disturbed the muck that had again accumulated. With a boot full of tools, fluids and what not, I............called the AAA (ANWB over here) for roadside assistence. I have two spare filters, but both were still in the toolbox in my other car. So I couldn't help myself or at least I didn't see how at the time. The AAA guy was well impressed by what he saw but did not have a filter for me to replace mine. So he cleaned it out with compressed air as well as was possible and refitted it, the car fired up and we headed off the motorway to the safety of the AAA local base of operatons to see if a better filter was available there. Unfortunately there wasn't and on a Sunday I had no chance of buying one anywhere. So with a heavy heart I set about driving home. The AAA man had his doubts I would make it, but having seen him blow it out I would now at least have a "solution" should I get stuck again. I'd just blow on it as hard as I could lol (guess I should have taken the wife with me after all, sorry bad joke).  And No, the rear lights work fine, this is just the parking light function I accidentally activated when indicating going off the road and then switching off the engine. 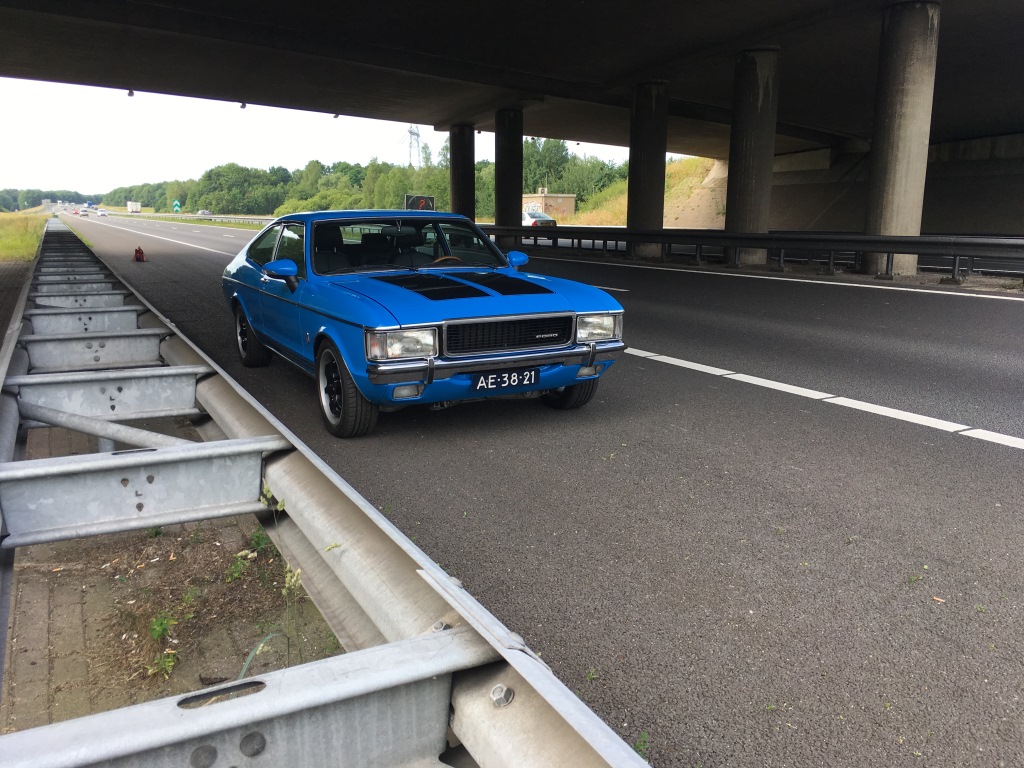 And a funny selfie to mock the situation a bit 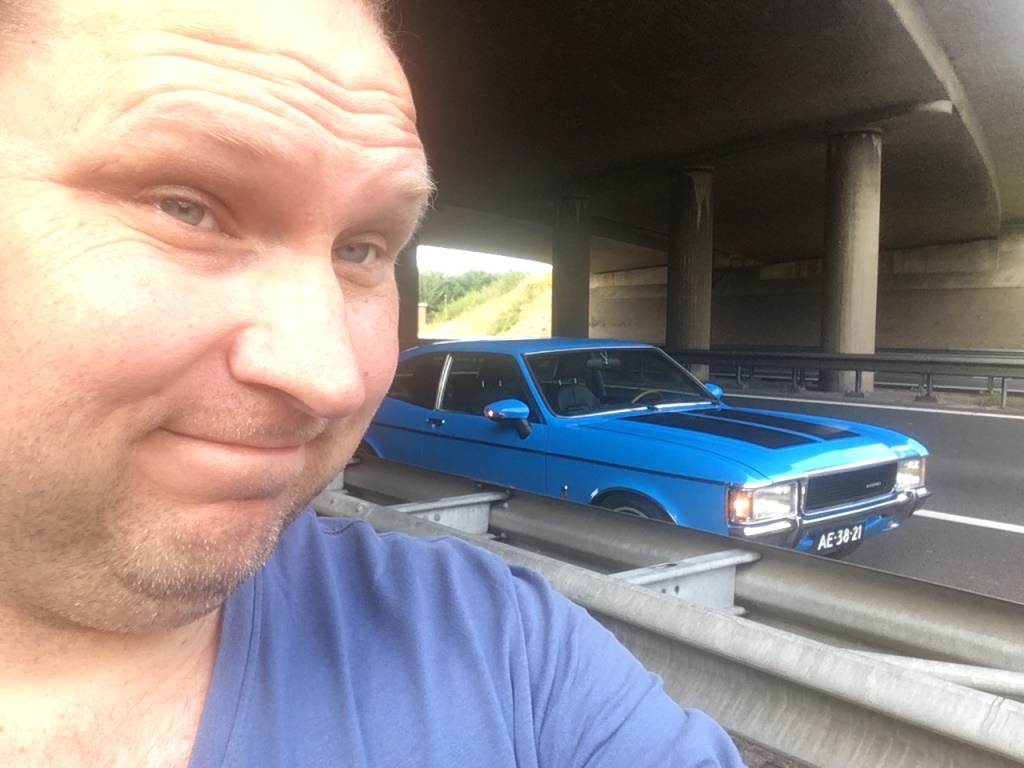 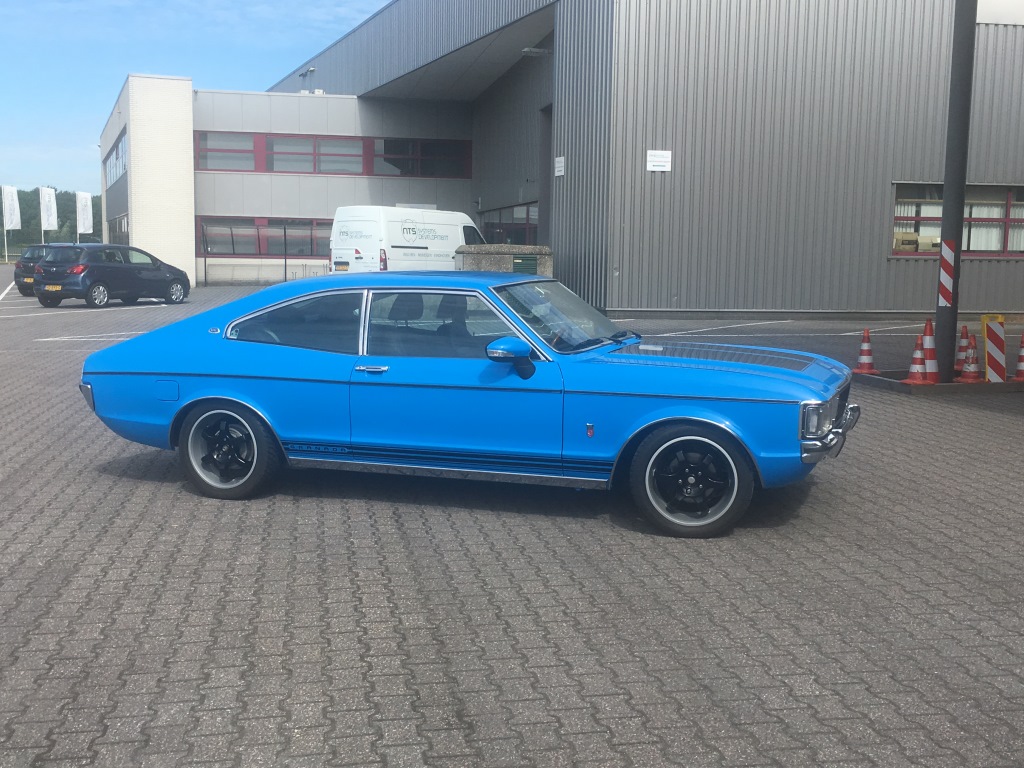 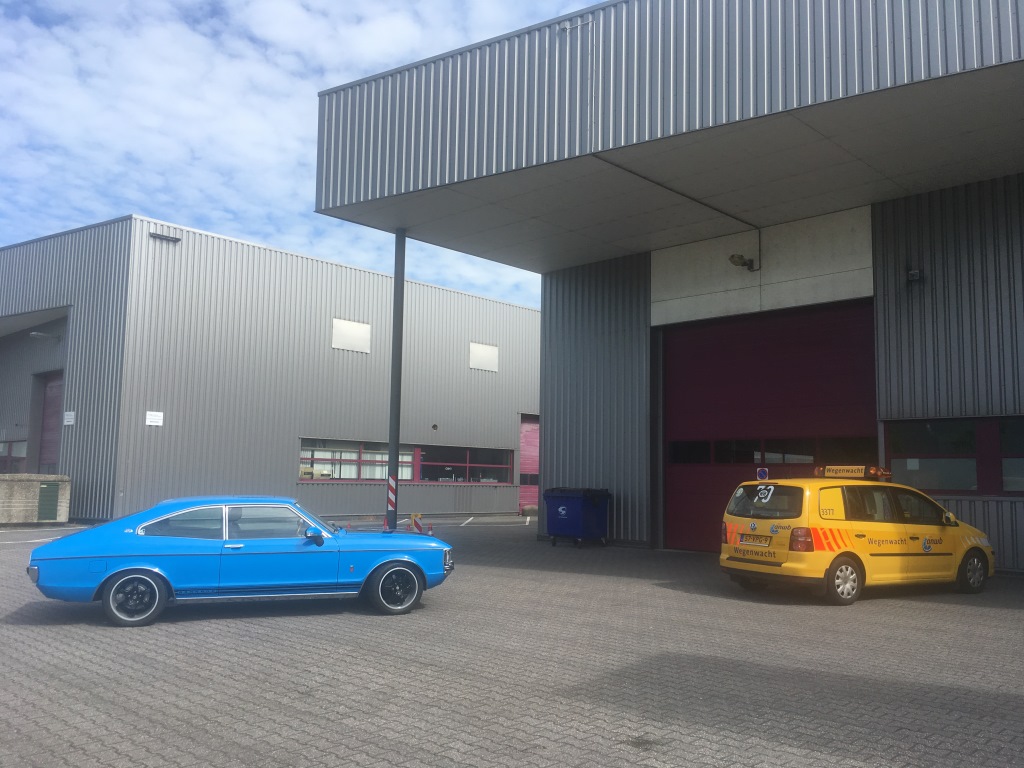 One thing I was a little proud of was that the car did not drain its battery from standing there blinking... The car ran fine again and the great weather made it a nice enough drive, but my mojo was damaged from the discoveries of the days before and now this again. As well as missing its debut at the meeting after a 10 year abscense. I was actually considering selling up. Getting out of the hobby. As money is too tight now to finish the last few niggles properly. That was getting me down a lot. But I did feel the joy of driving the thing. Of seeing people honk their horns or hanging out of the window to give the thumbs up or the admiration of a pro like the AAA man. I even got a lot of honking from other classic owners as I stood roadside. Although not one stopped... So I'm not selling, but I am struggling a bit with the mojo. The car looks better than ever! And that interior is just an amazing place to be.... But I've seen the things to come (set of very expensive doors for one), the tank cleaning and or sealing and the drive shaft balance bit....and the taking apart of the dash for the gauge feed stuff, again.... So close, so so so close and it feels a million miles away. Sorry for this not so happy installment my retro friends. |
| |
|
|
|
|
|
Jun 12, 2017 11:10:02 GMT
|
|
Tja, daar krijg je de schijt van!!
But these doors are not falling of your car any time soon and can wait, the other jobs are a matter of saving a bit.
Besides the doors the other jobs to do are not a major thing.
You have come so far, don't let it go mate.
Just take a step back.
What worked for me when I was out of cash to fix the gearbox on my 535i was to keep it clean, did lots of small detail jobs, bit of cleaning, polishing etc. It took me about 6 months before I got the box fixed but by the time I had the money I was 100% in love again and loved the moment I drove it out the workshop.
Are you sure these doors are not repairable? There are some very clever people out there in Holand.
Kop op!
|
| |
|
|
eurogranada
Europe
To tinker or not to tinker, that is the question...
Posts: 2,556
|
|
Jun 12, 2017 11:30:08 GMT
|
Tja, daar krijg je de schijt van!! But these doors are not falling of your car any time soon and can wait, the other jobs are a matter of saving a bit. Besides the doors the other jobs to do are not a major thing. You have come so far, don't let it go mate. Just take a step back. What worked for me when I was out of cash to fix the gearbox on my 535i was to keep it clean, did lots of small detail jobs, bit of cleaning, polishing etc. It took me about 6 months before I got the box fixed but by the time I had the money I was 100% in love again and loved the moment I drove it out the workshop. Are you sure these doors are not repairable? There are some very clever people out there in Holand. Kop op! Yes, it's simply tiring... it's just one thing after another. But surely I'll work through them! The car's not going anywhere (yet) haha. No the doors are not falling off the car, but I'm trying to maintain a very high standard and I'd like to get a decent insurance agreement as well from an appraiser. So it bugs me personally. But the point is more that I went through a lot of trouble to prevent this from happening at quite some cost!! Surely they are repairable: just dril any spotwelds, fold the edges over and take off the skin. Fix any rust and put back together...It can be done. But I'd like to stay mobile for a change. But yes they can probably be fixed with a bit of effort and money. It's all just a bit of a worry that I don't need right now. I love the car to bits, but I hate going back in time. Still anything tackled is one less thing on the list and I know they're not really big issues. They just feel like that at the moment. But I'll be starting tomorrow changing out the filter. Work my way from there and possibly ask a friend from here for some help in the electrics. |
| |
|
|
|
|
|
Jun 12, 2017 11:57:16 GMT
|
If it makes you feel any better I have tiny rust bubbles in my doors too & I had mine mediablasted inside & out......the only bit I did not repair as fully as I should have done. Cars.....you give them all this love and what do they do? they fail anyway  how ungrateful!! |
| |
|
|
eurogranada
Europe
To tinker or not to tinker, that is the question...
Posts: 2,556
|
|
Jun 12, 2017 12:06:54 GMT
|
If it makes you feel any better I have tiny rust bubbles in my doors too & I had mine mediablasted inside & out......the only bit I did not repair as fully as I should have done. Cars.....you give them all this love and what do they do? they fail anyway  how ungrateful!! Exactly the same here... Saw you had a bad day as well in your thread. A worse day I might add! |
| |
|
|
simonh
Part of things
 
Posts: 77 
|
|
Jun 12, 2017 12:20:15 GMT
|
|
The higher you aim and the closer you get to perfect the more 'faults' your car will have. Sometimes you just need to step back and view the overall picture. Anyone who is ever truly satisfied with their car just isn't fussy enough!
|
| |
|
|
|
|
|
Jun 12, 2017 13:58:54 GMT
|
ah curse word, that sucks, or rather doesn't in the case of your fuel filter. Is it worth dropping the tank and using some sealer on it? Something like the POR-15 stuff, just for peace of mind in the future? www.frost.co.uk/por15-car-bike-motorcyle-fuel-tank-repair-sealer.htmlWith the doors, can you touch in the areas where rust is starting to show, if only for the appraisal? Then keep an eye out for some second hand doors that you can repair and paint at leisure whilst keeping the car on the road with the current ones? |
| |
|
|


 how ungrateful!!