eurogranada
Europe
To tinker or not to tinker, that is the question...
Posts: 2,556
|
|
|
|
So it's been a while since I updated this thread. The car's probably forgotten by now given all the other projects going on here! What...?! None of us will forget this car sir, it's just not possible!!! Things are looking good and I can see this hitting the road very soon indeed... Please do keep us posted, we can all see the light at the end of the tunnel! Rest assured, I'll Always keep this thread updated. But there are so many projects going on, one even better than the next... I just sort of assumed given the silence for such a long time that most would have forgotten about this one... I have not, however, and am working my butt off to get it mechanically finished asap. Then it's off to my personal garage to finish the ice and interior. Somewhere in the middle of all that I'll need to get it aligned so I can drive it (all bolts now hand tight for easy adjustment) and get it checked over by the RDW (DMV/DVLA?) so the changes can be put on it's legal documents: engine change and colour change and gearbox change... By the way, I''m truely very happy how well this swap is going. How well things line up etc. |
| |
|
|
|
|
mk2cossie
Club Retro Rides Member
Posts: 3,057  Club RR Member Number: 77
|
|
|
|
Nice bit of progress there Eurogranada  With regards to the gearbox mount, I used the original C3 autobox cradle, but with some pieces of angle iron bolted to the original mounting holes with new captive nuts in the respective position further back  Can get some pics up of them on my thread or on here if you like? |
| |
|
|
eurogranada
Europe
To tinker or not to tinker, that is the question...
Posts: 2,556
|
|
|
|
Nice bit of progress there Eurogranada  With regards to the gearbox mount, I used the original C3 autobox cradle, but with some pieces of angle iron bolted to the original mounting holes with new captive nuts in the respective position further back  Can get some pics up of them on my thread or on here if you like? Sounds like you've done the same thing I'm about to do or at least similar. I'm making 10mm thick 225mm long extensions with 4 holes in them. Two regular round holes and two slotted ones. The regular ones will be tapped and used to bolt the Original support to, the slotted ones will align with the original mounting holes with the captive nuts. Because of the thickness, I think it will all be strong enough. |
| |
|
|
eurogranada
Europe
To tinker or not to tinker, that is the question...
Posts: 2,556
|
|
|
|
|
Well, sometimes theory and practise don't match. My driveshaft turns out to be 22mm short if I want it to fully engage the splines. Everyone says that having the stubb stick out 25mm is no problem for drive purposes, but I don't like that idea as in the Original vehicle it is also fully engaged and it also means a support under the Granada suddenly is in the way. So I'll have to have one made up/lengthened.
Also the gearbox shift lever that seemed to come out in exactly the right place actually didn't. The gear lever was in park, but the selector rod was in drive. So there's a mismatch of about 9mm that I'll fix by cutting out 15mm from the rod. Then I can use the Original fine adjustment to set to the desired 9 mm.
A well, at least now I know... So in that respect I did get further...
Oh and I have to say, I hope more people are reading this, the few comments received although very nice feel sort of dissapointing given the amount of effort put in the detailed posts (and teh amount of progress made on the car). And yes, your comments help me stay motivated and also help me enjoy the process...
|
| |
|
|
|
|
|
Mar 10, 2015 11:32:46 GMT
|
I'm here, and I'm reading  it's looking really good, bet you can't wait to get it out on the road. Sounds like you can't be far off now? Sorry I don't respond more often, I tend to end up reading on my phone and trying to write replies is a PITA  |
| |
|
|
mk2cossie
Club Retro Rides Member
Posts: 3,057  Club RR Member Number: 77
|
|
Mar 10, 2015 13:44:54 GMT
|
don't let the lack of replies get you down, I go by the amount of views for my thread on my ole bus  I don't know how much there is different in the transmission tunnel between the mk1 and 2, but I know my friend uses mk2 and 3 propshaft sections to make a bolt in hybrid propshaft for the A4LD box  And a pic of my grubby mounting if for your viewing pleasure  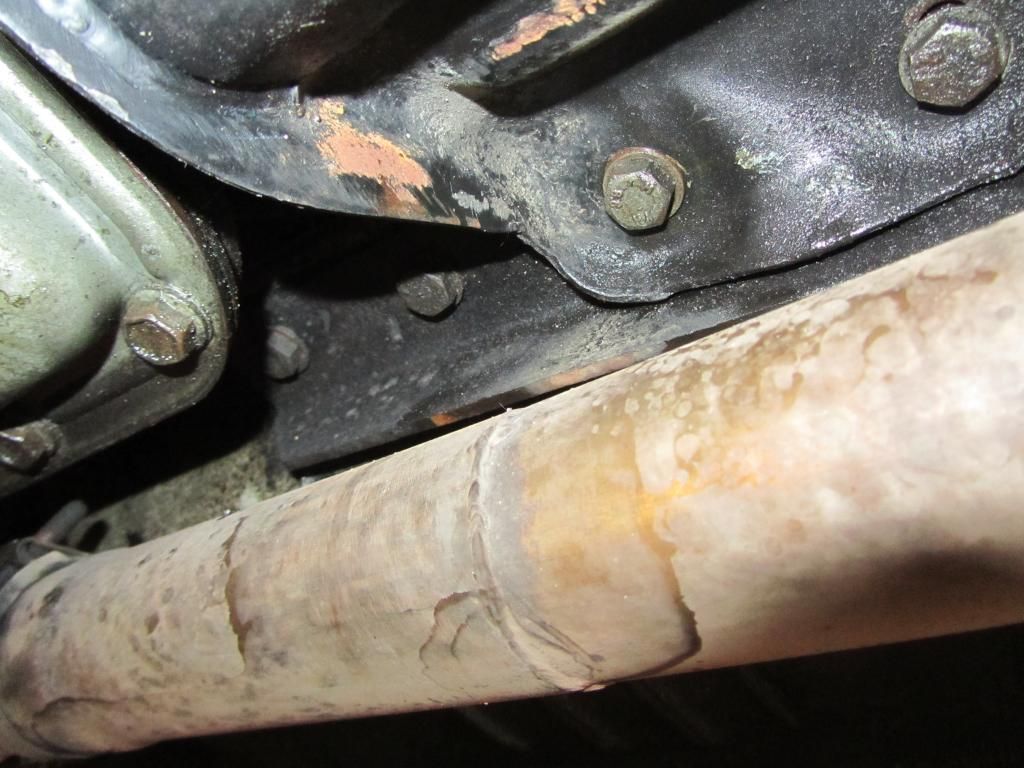 |
| |
|
|
eurogranada
Europe
To tinker or not to tinker, that is the question...
Posts: 2,556
|
|
Mar 10, 2015 18:05:29 GMT
|
don't let the lack of replies get you down, I go by the amount of views for my thread on my ole bus  I don't know how much there is different in the transmission tunnel between the mk1 and 2, but I know my friend uses mk2 and 3 propshaft sections to make a bolt in hybrid propshaft for the A4LD box  And a pic of my grubby mounting if for your viewing pleasure   My mount will be flat bar 10mm thick. It will not be angle iron as there is not too much room. But the thickness makes up for that. Otherwise it will look the same, 4 bolts from beneath just as yours. On the replies... I'm building the car for me and to my liking, but the replies help me feel like the work I do is appreciated, it just adds to the experience... |
| |
|
|
|
|
|
Mar 10, 2015 22:46:05 GMT
|
|
It's always great to see a new update to this thread. I've been following from the start, just not commented before.
|
| |
|
|
spot
Part of things
 
Posts: 105
|
|
Mar 14, 2015 17:36:15 GMT
|
Hello Alex. Since you left the thread with the promise of having the engine in by late February, and no updates since then, I'd guessed you had abandoned the car altogether  Was tempted to 'give you a nudge' for an update but thought that I'd appear pushy if I did that! Great to see I was wrong!  Could you please tell me which size of rivets did you use for the headlight brackets? Perhaps you will also know what glue(kit) was used to secure the window hinges? Are you using different front callipers: I seem to have missed that bit... Have you managed to wax the box sections yet - if not: why not; before sinking an engine in the way:) what product did you choose? I'm sooo out of touch with 'car things' now that I had no idea you could coat you car - All my cars get a dose of shampoo & wax in a bucket if they look grubby  I must say I do like the black contrast to the engine bay. If is was body colour I think the engine would look lost in a sea of blue. Although I do have one little niggle  The black wiper arms. I just think it detracts from the chrome surround breaking the flow _OCD or it could be that they look very shiny in the picture  Glad to see you didn't go for the aircon, but stuck with the inefficient matrix that I can never seem to get any hot air out of in winter!! What is great being so far behind you in my build is I get to ask you loads of questions  Here's another. Did you get your tanks strap screws from motomobil? All I could find were the 'button' type and not the 'hook' ones. Oh and just for the record I think you're bonkers lifting the car up like that - wouldn't see me within 50ft of that - I would have used the four poster  But nice result, and mad looking pictures! - as said: "It looks proper with the engine in place". Best wishes |
| |
|
|
eurogranada
Europe
To tinker or not to tinker, that is the question...
Posts: 2,556
|
|
Mar 14, 2015 18:52:58 GMT
|
Thanks for your reply. Let me try and answer some of your questions... I don't know exactly what size rivets I used. It was something I had laying around and that fit the holes. The glue for the rear window hinges (still on today!) was specialty glue from the glassman. As far as I know it is the same stuff that is used to bond car windows to the car when they are replaced. I know a primer used in the trade was applied first after degreasing and slightly roughing up the surface. It was the stuff the pro's use as it was a pro who was conveniently on site at the time! Yes I replaced my Original (rebuilt) calipers with brand new ones. They had the benefit of added surface area on the pads. They were Original to the Granada though, just not my version of it. That is also why with later backplates they suddenly fit like a glove. I did this to take into account that there are now 207 eager horses under the bonnet instead of 125-145. No, the box sections and with them a good wash have not yet happened. :-( I have to get a move on with regard to the owner of the place I'm working at. So getting driveline done took priority. Although slightly less comfortable, the box sections are still pretty accesable so when the car can move under its own power I'll move it onto the lift for treatment and then outside for a good wash! There are tons of treatments out there for cars. Mine will receive a yearly teflon coating. That helps keep it nice. It alos makes it easier to keep clean! I love the black and blue contrast. I get what you are saying on the wiper arms. But they are the same shine as the grill and other features like the wheels will be. Also you have to imagine the black striping accents on the hood that help tie that look together. Also striping for the sides has been designed. I do have to admit that as good as the arms look as parts, on the car I had to get used to them as well. Although I now have... Well, the aircon is still a wish, but there is just no easy way to get all components in the car. The aircon radiator is a difficult one and off course the combined heater/cooling unit for the dash as well. So for now I'll use the Original system, revised that is to have no air going where it shouldn't go etc... I may be looking for smaller components later on this year. Haha you make me laugh with the lagging behind comment! I seem to be taking ages to finish this thing... The hardware for the tank is all Original as well. The straps blasted and coated, the attaching hardware blasted and coated with a different process. Motomobil might have them even though it's not clear from the catalogue. Just e-mail and ask is what I've found to be most effective! With regards to the engine install. I considered the four post, but I didn't really see any way of being able to lower the body on the engine and frame with the crossbars etc that make up the four post. A two post would have been a no brainer! however, I made sure it was a safe process. the back wheels were locked in place. The balance of the car was constantly monitored (you've read me raising the back wheels to relocate the center of gravity) as well. Axle stands were used throughout, even during lowering, there was always support nearby. The car could not go anywhere or crush anyone. As closer to the frame it got the safer it got as well. But by taking very good care (protecting thousands of euro's of specialist work) I never felt unsafe or that I was taking unnecessary risks. And to my defense/tribute, it worked like a dream! Yes the pics look mad, but I'd done something like it before... 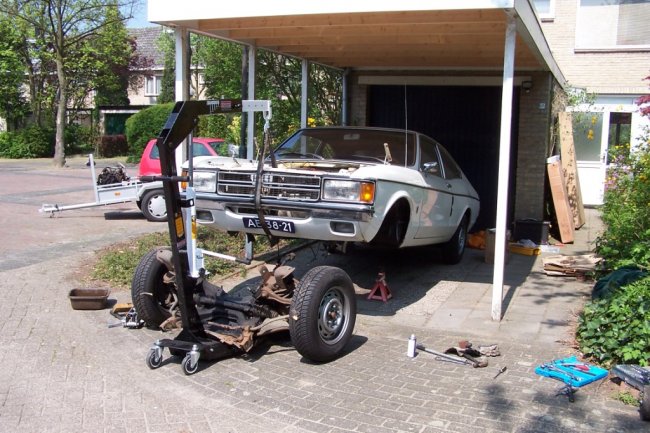 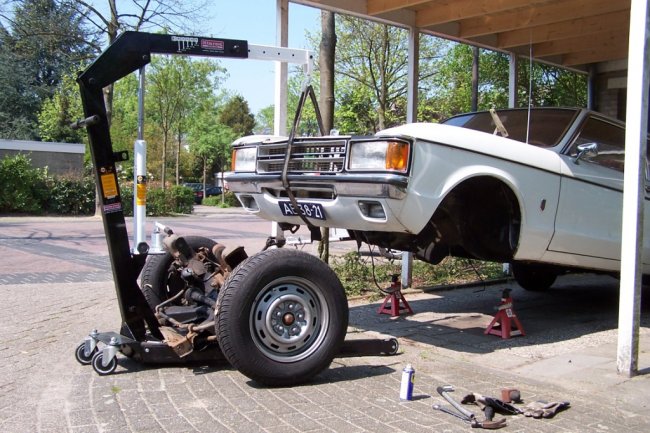 |
| |
|
|
spot
Part of things
 
Posts: 105
|
|
Mar 15, 2015 18:55:53 GMT
|
What!!!! No that cannot be right. I was expecting you to quote a rivet specification and part number, not just what you had laying around  This thread really has gone done in my estimation...LOL Those tank bits cleaned up nice - I did consider uprating mine to stainless but to be honest they look just fine as they are. Snapped one of my bolts when I removed it though, but I have loads of time to find another  I'm sure you'll find a suitable aircon unit given time. Did the loom you hacked have any provision for 'climate' and have you still retained it? Also, are you installing electric front windows? Ah those last pictures are less scary! Best wishes |
| |
|
|
eurogranada
Europe
To tinker or not to tinker, that is the question...
Posts: 2,556
|
|
|
|
|
Haha sorry to disappoint you...
You'd be surprised what a good blast in a media blaster can do to old parts. Most clean up pretty nicely. Hardware especially!
The aircon is a back burner kind of thing for now so not to focussed on that. The new wiring loom and ecu have provisions for aircon. I have left a dual pressure switch and the ac clutch wiring connected. When the time comes a friend has said he'd make me a loom or at least a schematic to follow.
I also have the cruise control system figured out, so I can fit that later on as well!
My car was fitted with electric windows in 2005/6. I have the mechanisms from an early ford. They are really big. Funny thing is that my new set of doors that looked the same turned out to be different on that point. One door accepted the mechanism asif it was factory correct, the other door missed a hole that I had to drill. Not a big deal really. These old motors do require a bit of juice so I will add sufficient protection to the system when wiring it all up.
My car also will have central locking, aftermarket generic system. It's intended to be a luxo barge cruiser hahaha...
Oh and actually though they may look less scary, those old pictures were scarier, the strap is looped around bodywork that could have damaged. But at that time I wasn't too worried about that as the Valance still had to be replaced...
|
| |
|
|
spot
Part of things
 
Posts: 105
|
|
Mar 18, 2015 13:06:18 GMT
|
Ah you seem to have thought about the luxury's then  But I haven't read about a 'drinks dispenser'  Just recalled that many moons ago (before fridge boxes) I hooked up a window washer pump into a container that sat in the boot- pull the centre arm rest down and lovely (warm) orange squash for all  When you say "early Ford": Is that MK2 Granny mechanisms? As you say I always found 'em to be bolt in, then run a live with no relays!! _ not right_ but worked for me  On another topic: Did you modify your sunroof drain points so they drain externally? |
| |
|
|
|
|
|
Mar 20, 2015 19:11:05 GMT
|
Thanks for the inspiration ... My father has a Ford Consul (MK1 1973) , 4 door , that hasn't moved in many years ..... I will now get it on the road again  Not too sure how I would post the pictures here .... I for see big challenges sadly getting the parts in Kenya |
| |
|
|
eurogranada
Europe
To tinker or not to tinker, that is the question...
Posts: 2,556
|
|
Mar 23, 2015 13:51:00 GMT
|
Ah you seem to have thought about the luxury's then  But I haven't read about a 'drinks dispenser'  Just recalled that many moons ago (before fridge boxes) I hooked up a window washer pump into a container that sat in the boot- pull the centre arm rest down and lovely (warm) orange squash for all  When you say "early Ford": Is that MK2 Granny mechanisms? As you say I always found 'em to be bolt in, then run a live with no relays!! _ not right_ but worked for me  On another topic: Did you modify your sunroof drain points so they drain externally? The mechanisms seem to be MK1 items. They are impressively bulky in the motor area. Later ones are more compact. I presume a sedan yielded them. They are bolt in in some doors, others needed one or two holes drilled. I had one of each so to speak. I will fuse them though!! As they draw a lot of current. My sunroof drains externally in the front and in the back. In the back I put in T pieces. The hoses aren't all the same sizes I found. I believe one is 18mm inner and the rest 15mm inner. The 18mm inner nicely fills the hole through the sill so it ends under the car instead of in the sill. Downside is, there is only one such holes in the bottom of the sill, whereas there are two in the inner sill area. So I'm using only one of these and join the hoses inside the car with a T or Y piece before only one exits the sill. |
| |
|
|
eurogranada
Europe
To tinker or not to tinker, that is the question...
Posts: 2,556
|
|
Mar 23, 2015 13:54:51 GMT
|
Thanks for the inspiration ... My father has a Ford Consul (MK1 1973) , 4 door , that hasn't moved in many years ..... I will now get it on the road again  Not too sure how I would post the pictures here .... I for see big challenges sadly getting the parts in Kenya Always good to motivate another person to get their car on the road, Granada or any other! So go ahead. I don't know how popular the Granada was in Kenya. But in the UK and Germany many parts are still available to order. Anyway, doing a decent rstoration is never cheap... Good luck! PS. Pictures are best uploaded to a picture site or private web space and then linked to in these posts. |
| |
|
|
eurogranada
Europe
To tinker or not to tinker, that is the question...
Posts: 2,556
|
|
Mar 30, 2015 10:24:32 GMT
|
So here I am with another update. I have to admit that things are moving way to slow for my liking at the moment. I thought getting the engine in the car was a big hurdle and therefore a big achievement and step towards the end. Yet it seems to have mostly been just a doorway to another s-load of work. Tedious work at that! I guess I feel like this mostly because I’ve been ill on and off for the past 7 weeks. Meaning I could not always put in as much time and effort as I’d liked. And this in turn leads to not being able to take a day off as work has piled up and off course my employer would also see me coming… So I’m currently on a few hours here a few hours there schedule. I've been working on a couple of things though. The gearbox mount for instance had to be modified as it sits way further back with the auto box. That turned out to be the easiest of all. I just had some lengthening plates with the appropriate holes made and fitted that. After that I found the driveshaft that I'd hoped would work was too short to mount the way I wanted it to. And to have it sit as I liked, I had to modify a brace under the car so the hardy disc would not foul on it. I didn’t want to remove the support altogether. Then I went to connect the gear lever rod, which I had shortened 25mm and then rewelded so it would come close to fitting the gear lever in the location I put it in. Combining that with flipping over the adjustable connector to the gear lever and I had a working shifter. But, the shape of the rod is such that when selecting first manually (probably hardly ever will but still) it is hard to get it there. Some more adjustment or a slight bending of the lever may be required. But for now it'll do. It's good enough to see if the car can move under it's own power as soon as that power is arranged. With the car on a lift someday I'll rework the shift rod. 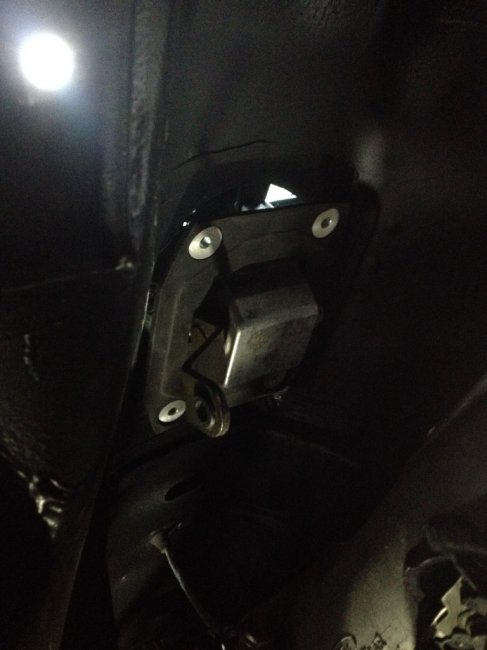 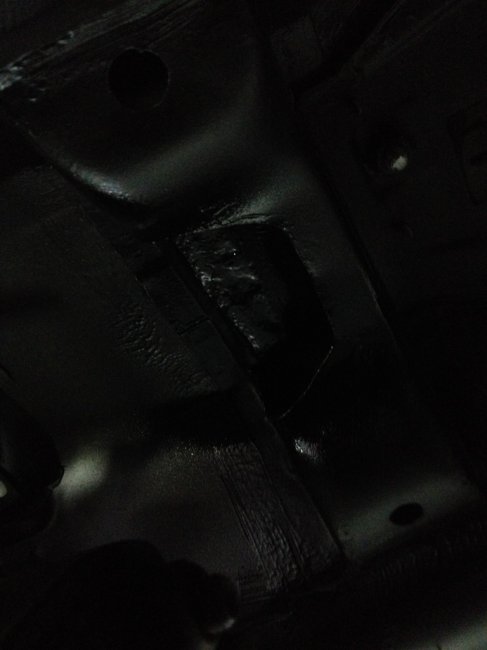 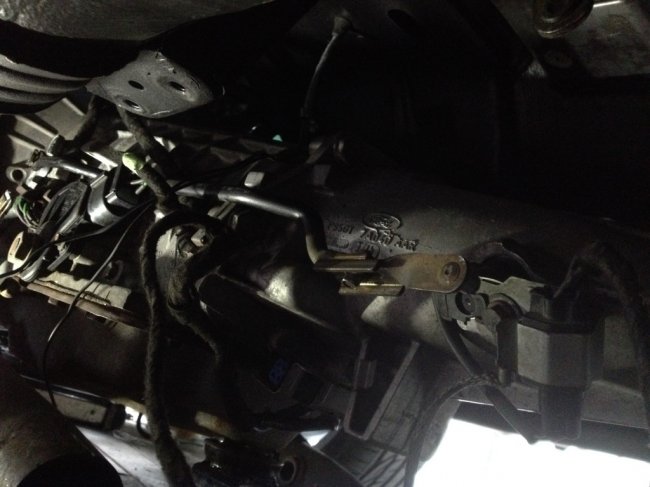 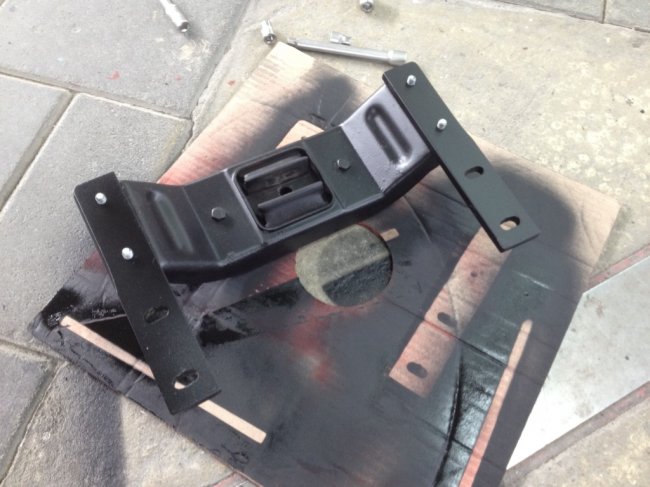 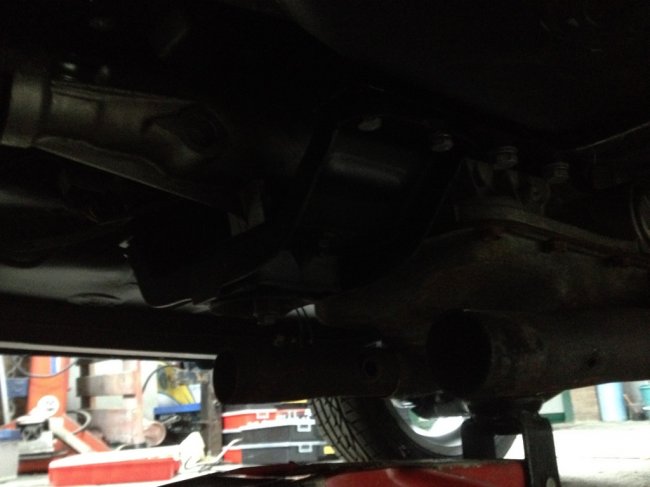 With the gearbox and gear lever now mounted mostly to my satisfaction I turned to the wiring loom. I had to get working on that as that was the biggest hurdle in the engine bay. The oil cooler, radiator and other stuff is relatively easy. But making brackets, changing the lines around, adapting them to this car and their new locations, still takes a lot of time. However, most components find a pretty natural spot using the original hoses, pipes etc. The coolant reservoir finds a good place for instance in the front right corner. So without further delay I set to work. The wiring loom is made pretty nicely, though had I done it myself I would have done it differently. That would make it easier to mount. I started by laying out the loom and seeing how far sensor wires would or would not reach. This in relation to the vacuum lines and components the engine needs. Most were ok, one was way to short to get the sensor mounted in a decent place. The thing is, to do this right you have to do and undo your work several times. Next I had a puzzle to complete: where to put the ecu. It looked like I was not going to get the ecu in the interior. I had no convenient access point, so I played around with the ecu besides the battery. But that didn't sit right in my mind. I'd have to create a way of mounting the ecu there that would not bea easy and well, it would be under the hood, a harsher environment than the safe insides of the car. In the end I chose to cut an access hole in the right scuttle as high up under the heater platform as I could get it. However there is a mount there for an engine "shock absorber" that meant I couldn't go as high as I'd liked. I hope the loom won't be (too) visible when all is said and done. But hey, it is now in the interior under dash area. 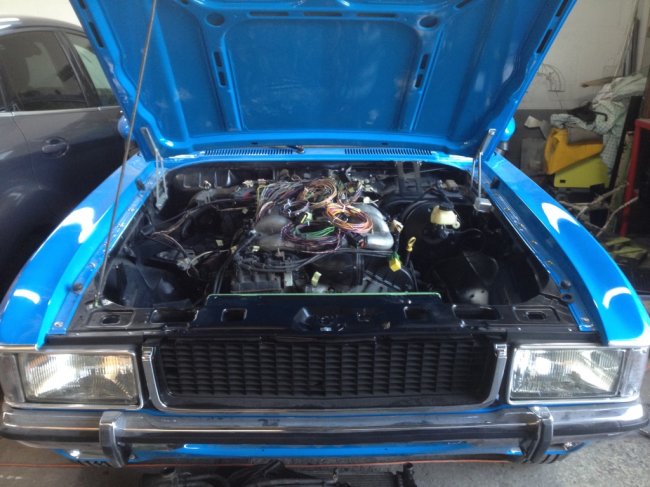 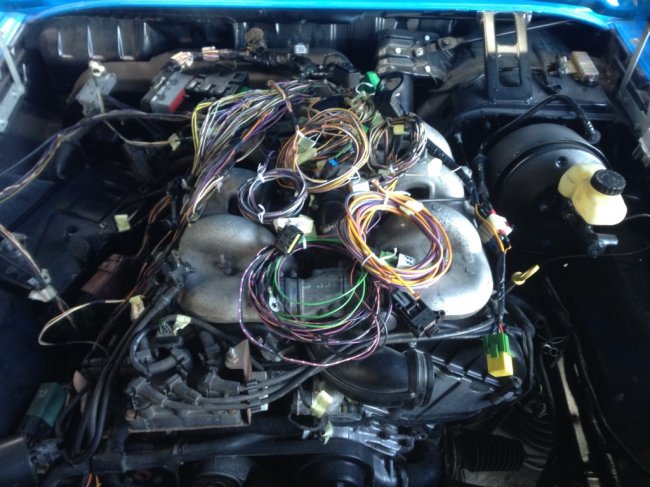 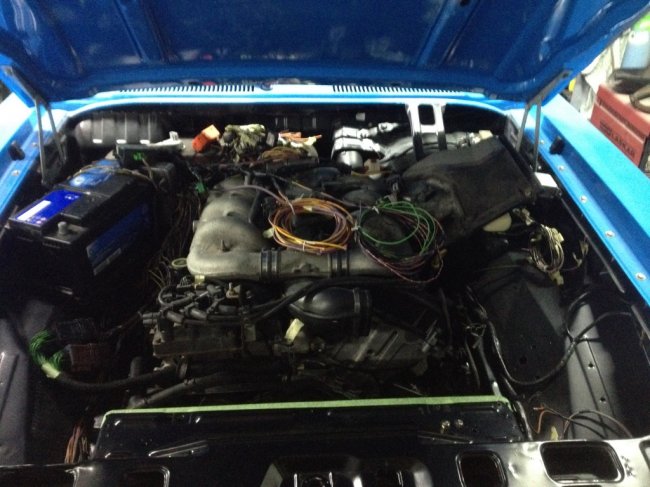 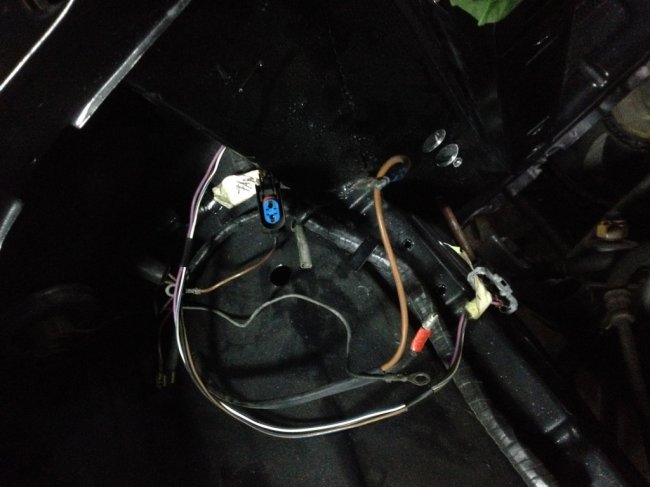 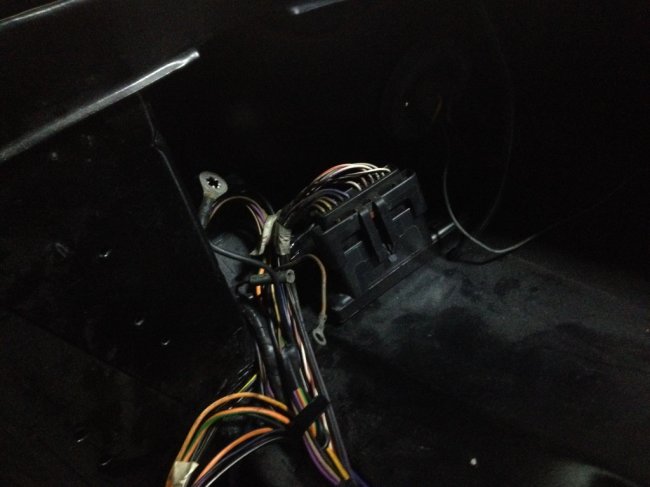 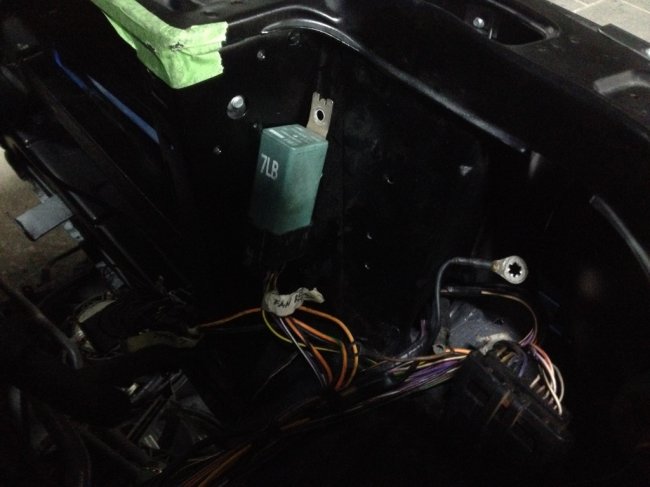 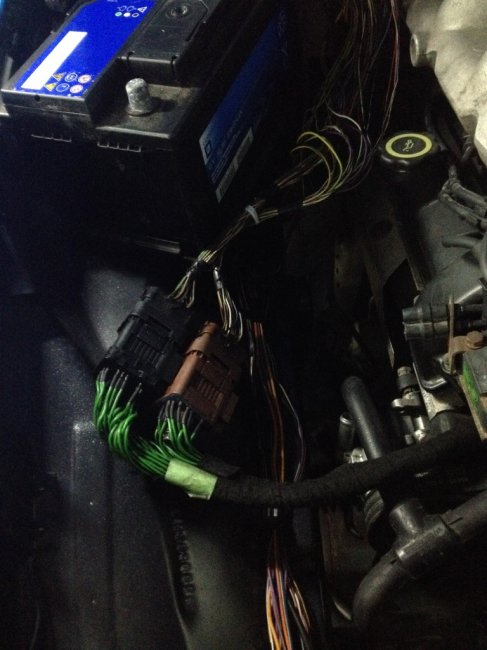 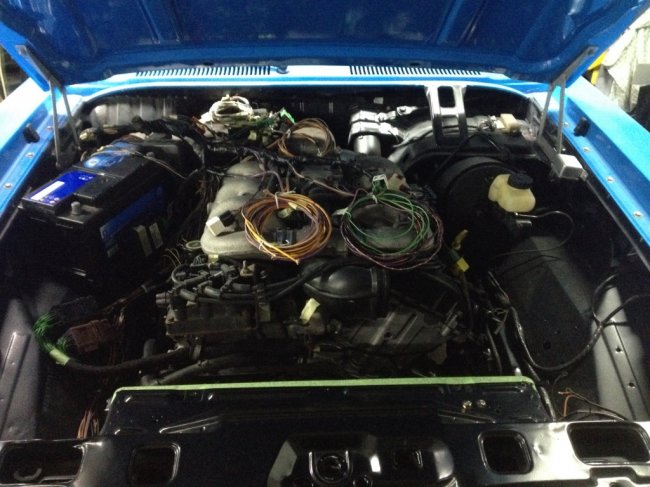 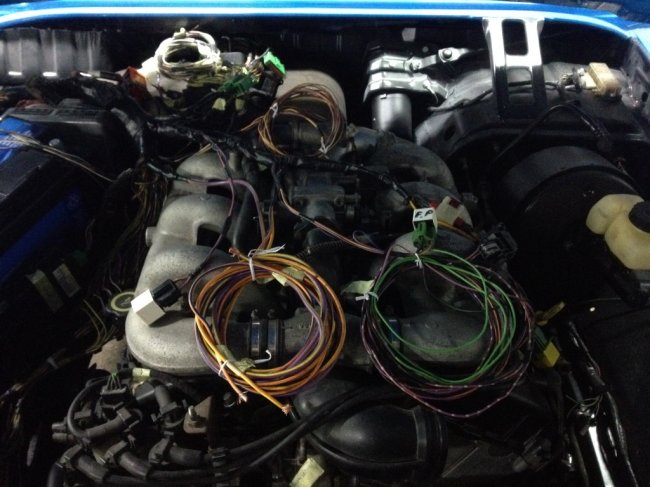 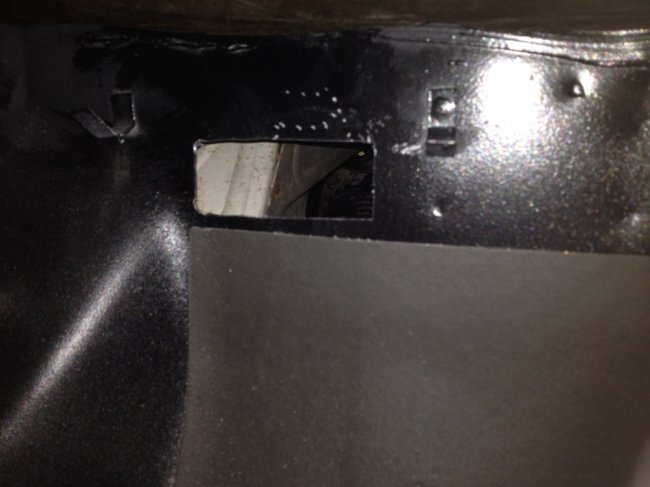 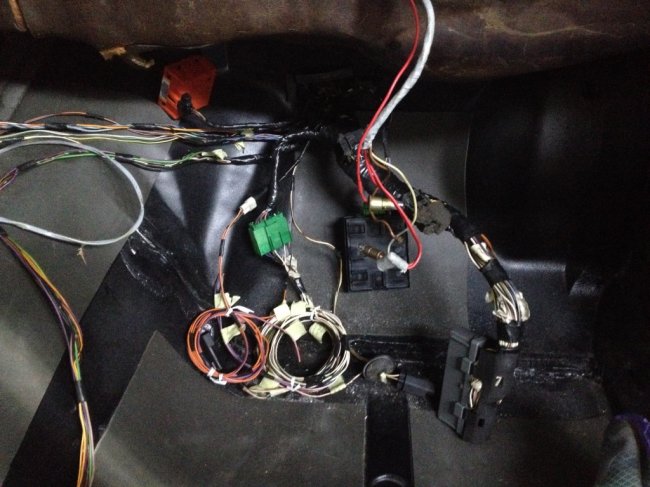 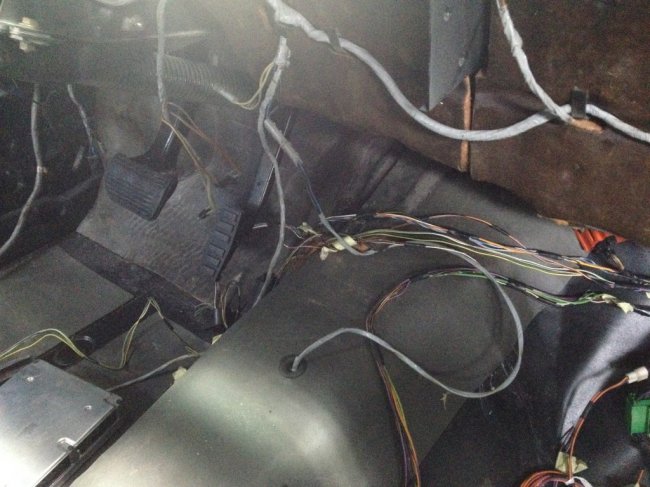 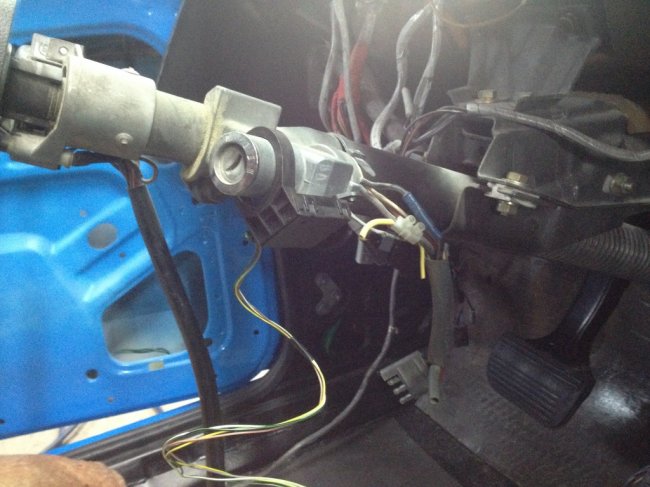 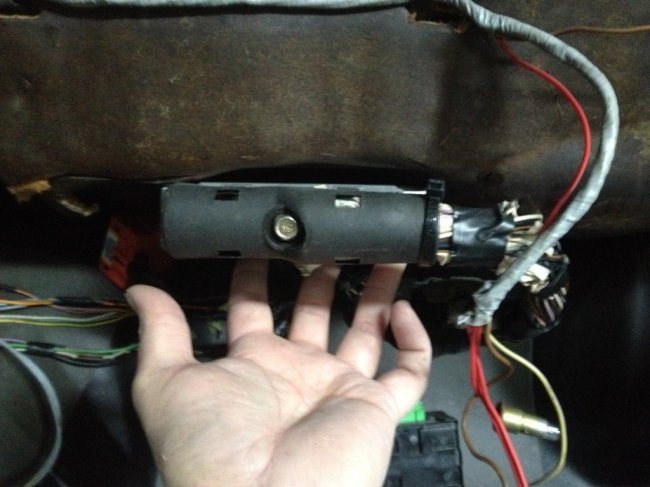 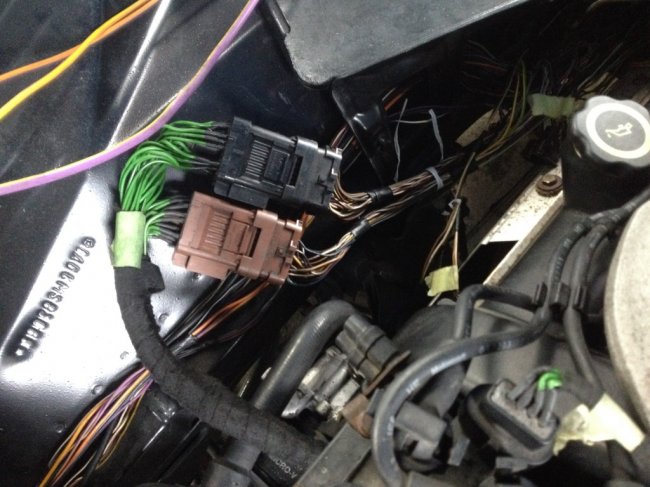 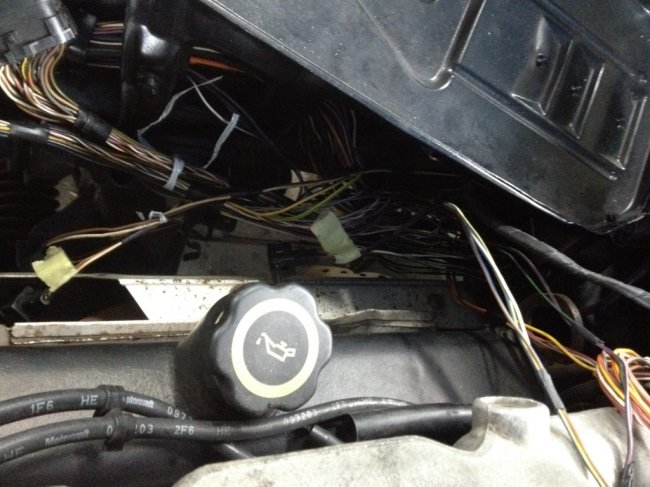 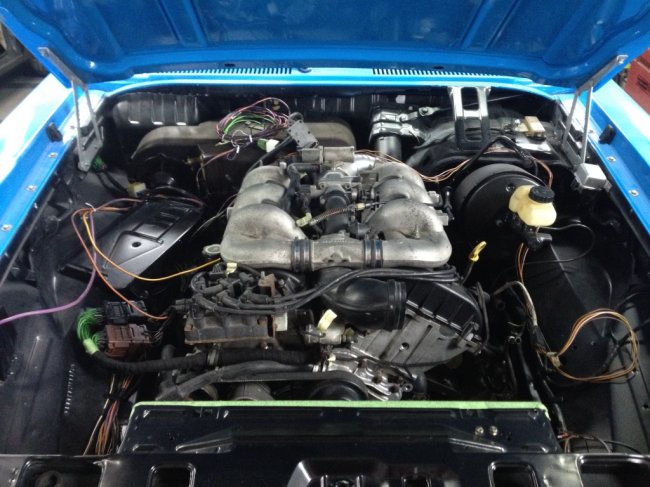 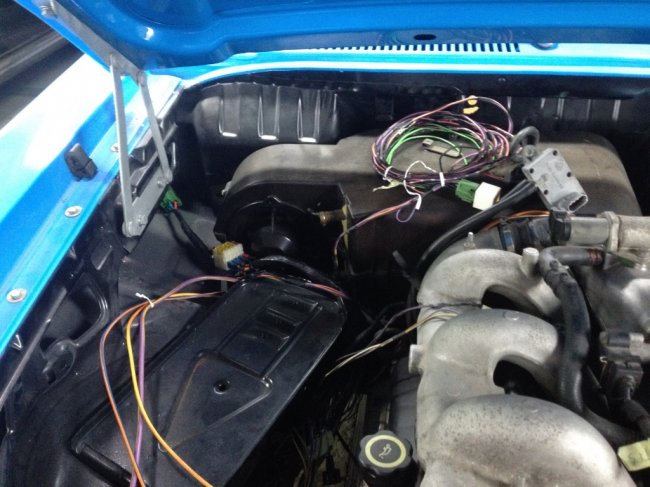 Having found spaces for most sensors and a routing for all wiring components I set to wrapping the bloody thing. Not easy with the loom in the car. But I'm fine with what I have done so far! Just the hardest 20cm to go between the interior and the frame the wiring goes alongside of. 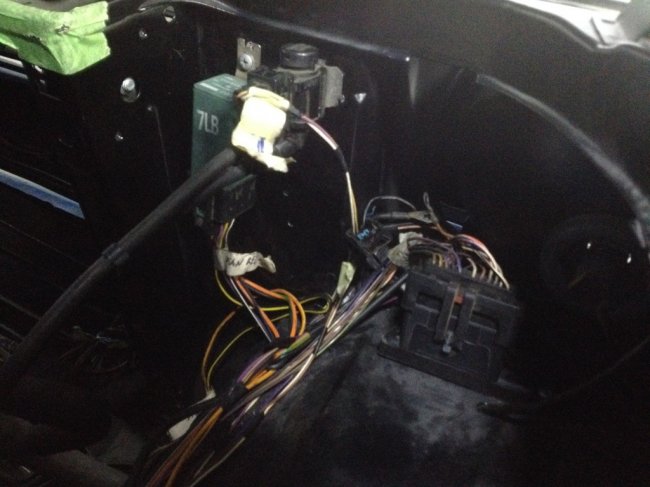 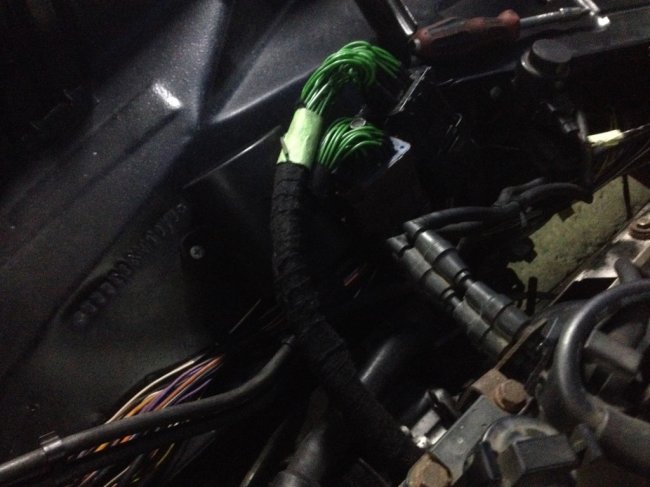 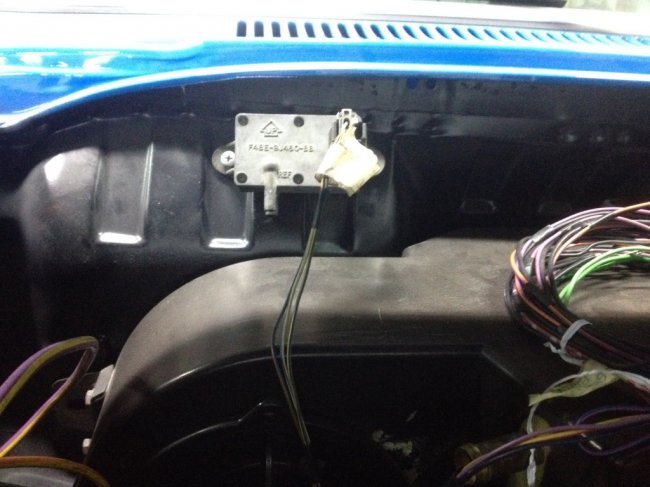 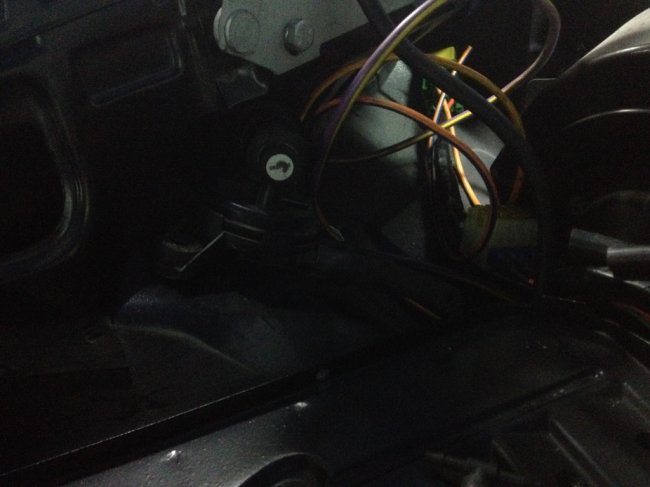 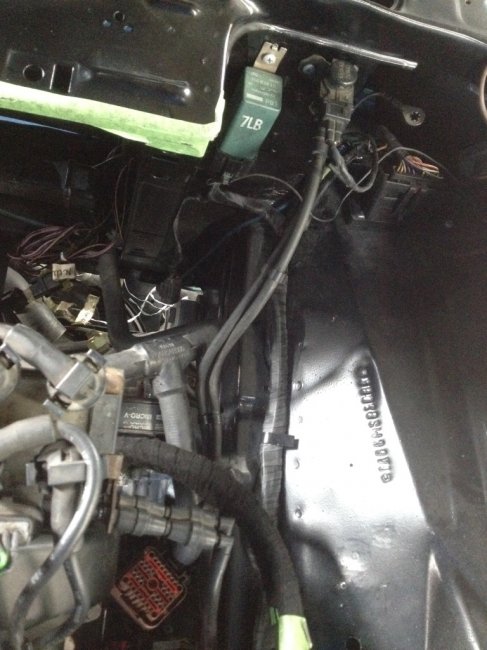 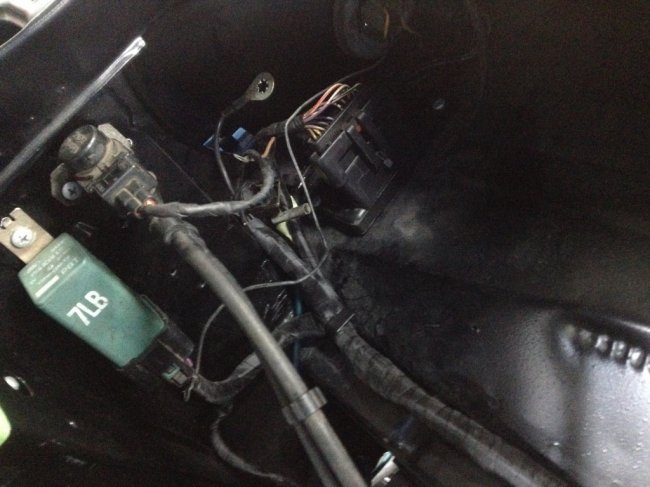 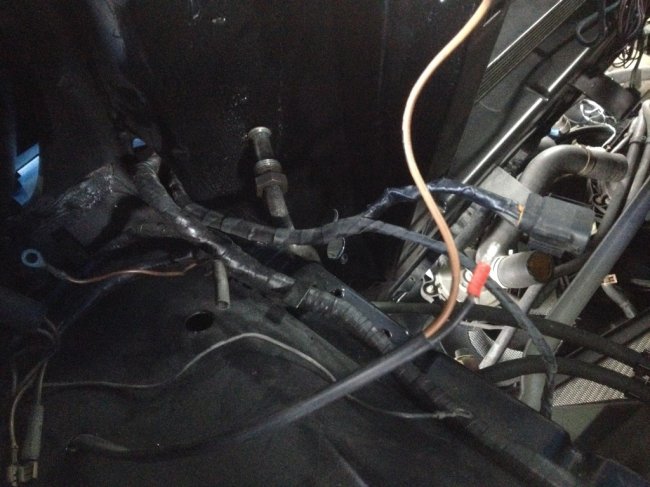 While I was at home I found some time to recover my parcel shelf. It was originally a consul one, painted black with no padding or anything. This replaced my rather worn original that had some padding but was water damaged after so many years. During the first restoration of this car I had added padding and recovered the shelf in creme. Now I took off the creme cover and fine tuned the padding by cutting some edges that proved to be under too much pressure with the c-pillar trim mounted. The extra thickness of the shelf was just a tad to much in those areas. I then set to reglueing the now black vinyl cover. Taking my time with the contact glue meant good adhesion. This was a must for all those pesky vent holes. There is no material there to pull through to the back, so the glue is all you have to get a nice result. The speaker holes in that regard are far easier. 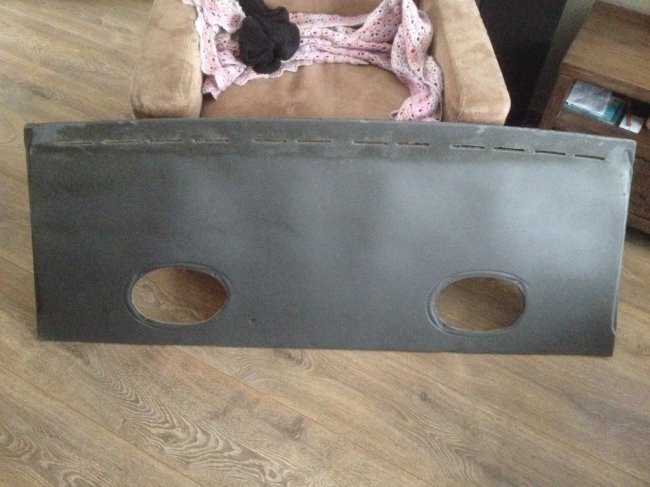 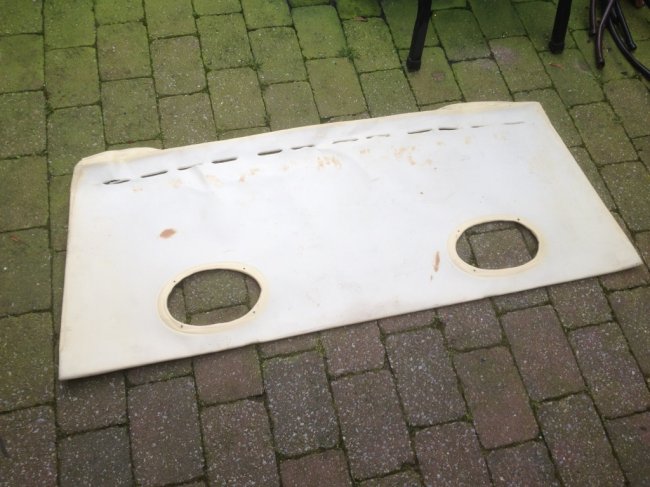 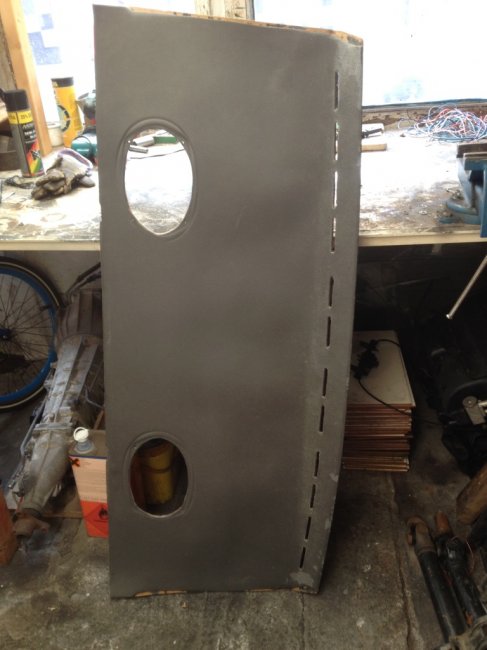 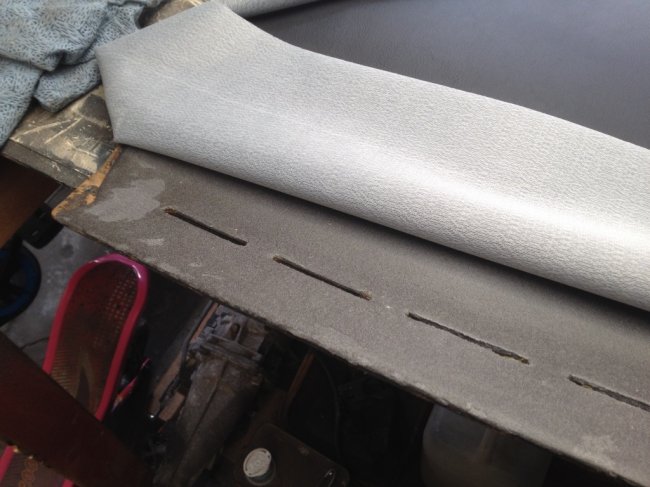 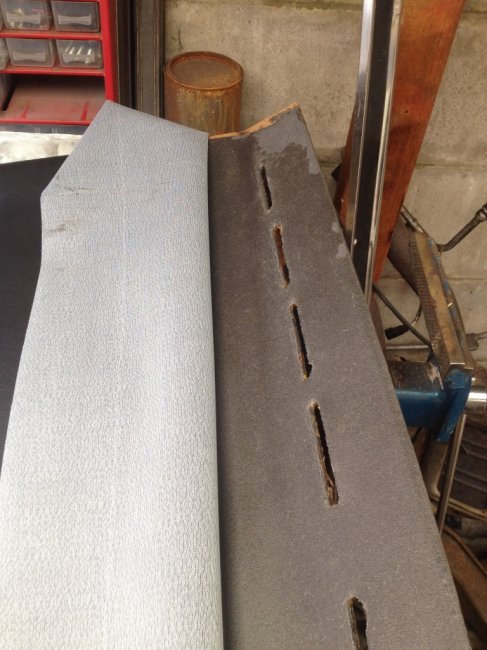 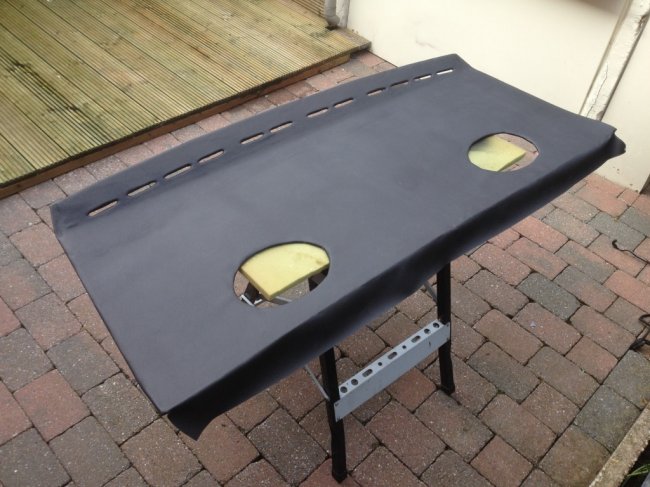 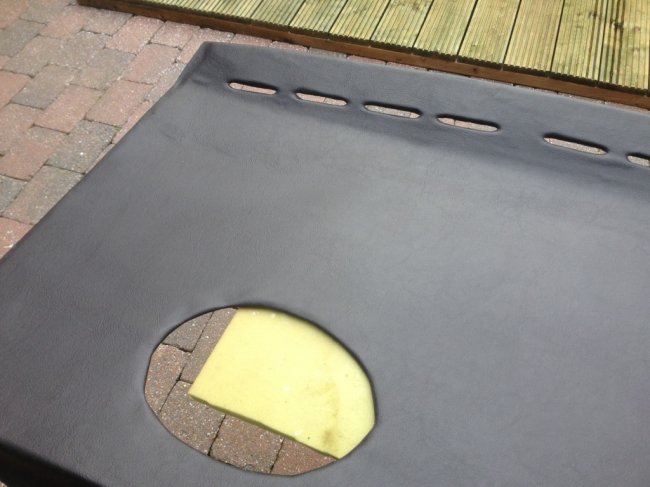 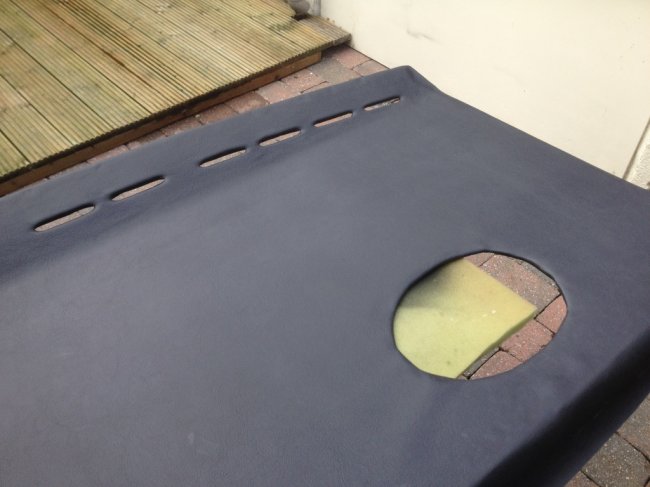 As slow as it may go, every job done gets me slightly closer to firing the engine. Still, an awful lot of work is left to do. For instance: I have to finish the wiring of the full car. The original loom is in, but all earths are to be connected, some grommets are to be replaced, all the new additional connections need to be found and made etc. That is a days work in itself. I have to mount the radiator and finish up the cooling system. Most time here will be spent making a bracket or two to hold the reservoir. I have to create (or have created) some powersteering hoses. I’ll have to take this one as it comes, but here the cost of having hoses crimped will hopefully be acceptable. I have to get the drive shaft lengthened. This is a bring in and pick up type of job, unfortunately the shop to do this is not around the corner and there is also the cost to consider. I have to build a fuel system. All pumps, swirl pots and connectors are now in, it’s just doing the actial work and as with most things… making a suitable bracket or two to get everything mounted safely. 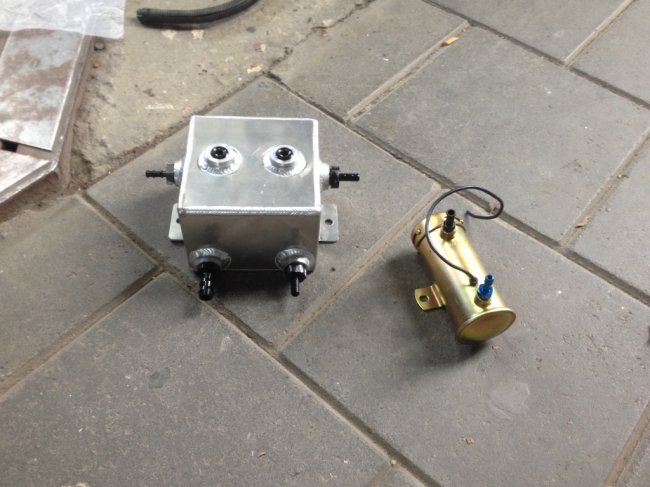 Well one thing at a time I guess. As much as I love actually working on the car, I just hate how slow progress actually is. And that while I’m in a sense soooo close… |
| |
|
|
eternaloptimist
Posted a lot
   Too many projects, not enough time or space...
Posts: 2,578
|
|
Mar 30, 2015 18:50:53 GMT
|
|
Just keep at it, knock the jobs off one at a time and stay patient. You're working to a great standard, if you cut corners and rush things you'll only regret it.
|
| |
XC70, VW split screen crew cab, Standard Ten
|
|
|
|
|
|
|
Hi Alex, looking good. Just keep chipping away, and at least we have a couple of long weekends this month. Last time I needed a power steering hose I had it made up by Slangen Service in Someren. Maybe not the cheapest, but on a saturday morning there are few options when you are in a rush... There may be someone closer to you, I would just say avoid Pirtek they seemed very expensive the one time I needed some parts in a rush. |
| |
|
|
eurogranada
Europe
To tinker or not to tinker, that is the question...
Posts: 2,556
|
|
|
|
Just keep at it, knock the jobs off one at a time and stay patient. You're working to a great standard, if you cut corners and rush things you'll only regret it. Thanks, you really honor your screenname! I don't and won't cut corners, that's just not me. And I do move along. It's just I'd like it to go faster sometimes. But all this "pre" work means that someday soon many things will fall into place at once... |
| |
|
|


 it's looking really good, bet you can't wait to get it out on the road. Sounds like you can't be far off now?


 The black wiper arms. I just think it detracts from the chrome surround breaking the flow _OCD or it could be that they look very shiny in the picture


