eurogranada
Europe
To tinker or not to tinker, that is the question...
Posts: 2,556
|
|
|
|
2 thoughts, but its been a while since ive helicoiled anything. It sounds like you will need a tap that will cut a full thread right to the bottom of a blind hole. Are helicoil taps like this, or do the threads start gradually? You may need two taps. Secondly, if you helicoil you need to snap the tang off, how easy would it be for that tang to fall inside the rack? Ive not used timeserts, i assume the tap situation will be the same, but no tang issues? Edit, i see petervdv had the same thought at the same time! Haha, yes, so see my reply to him for most of your answers. Regarding the tang snapping off. They are specifically weakened to do so. My plan was to have the rack upside down so gravity is on my side when breaking the tang. I also hope to be able to use thin long nosed pliers I have instead of the drift normally used. As it's a good sized hole at almost 16mm I have some hope of success. Also, speaking of gravity. I don't like drilling and tapping so close to an open hole so I will be seeing what I can come up with to plug it. I'll also be using the hoover (is that word still used, lol) on max power and with the thin suction attachment to help evacuate swarf as well. All will be done slow and steady. |
| |
|
|
|
|
|
|
|
|
|
|
The other thing which will be critical will be tapping the thread parallel to the hole, with such a large diameter to depth it would be very easy to get it a couple of degrees off then it would be very difficult to get a good seal, If you have access, a drill press can be used to keep it in alignment. clamp the work piece to the table then either use a lathe type tap holder or put a centre in the chuck and press it in the back of the tap (really need 2 people for this).
|
| |
|
|
Darkspeed
Club Retro Rides Member
Posts: 4,882
Club RR Member Number: 39
|
|
|
|
|
I cannot see if it has been mentioned above at all but the little diamond cuts in the flats of the fittings typically provide an indication of particular characteristics.
Plenty of 16.25's on UK ebay - but I guess you will need a blacksmiths drill rather than a taper. No idea what you would call them in NL. but .25mm should be easy enough to find if not particularly cheap.
|
| |
|
|
eurogranada
Europe
To tinker or not to tinker, that is the question...
Posts: 2,556
|
|
|
|
I cannot see if it has been mentioned above at all but the little diamond cuts in the flats of the fittings typically provide an indication of particular characteristics. Plenty of 16.25's on UK ebay - but I guess you will need a blacksmiths drill rather than a taper. No idea what you would call them in NL. but .25mm should be easy enough to find if not particularly cheap. The difficulty is in finding one for a normal drill. I find them for the huge industrial drills that have those weird chucks, but I have no use for that. Now work offers a metal workshop so I will have a rummage in 15 minutes when they leave for the day. If we have what we need here, I'll see who's willing to help out... But I'm working on the basis of having to do this at home by myself for now. |
| |
|
|
eurogranada
Europe
To tinker or not to tinker, that is the question...
Posts: 2,556
|
|
|
|
The other thing which will be critical will be tapping the thread parallel to the hole, with such a large diameter to depth it would be very easy to get it a couple of degrees off then it would be very difficult to get a good seal, If you have access, a drill press can be used to keep it in alignment. clamp the work piece to the table then either use a lathe type tap holder or put a centre in the chuck and press it in the back of the tap (really need 2 people for this). Yes, that is a concern. A drillpress is available to me if need be. And I was thinking about finding or turning a tube to the right ID cut at a right angle so the tap has a guide... |
| |
|
|
|
|
eurogranada
Europe
To tinker or not to tinker, that is the question...
Posts: 2,556
|
|
|
|
|
Thanks for all the help guys...
I think I have a plan in place. I think I've found what I need (although at a cost) as well. I'll hold off on ordering until I've had the rack out and seen the threads.
Maybe I'll get lucky (yeah right) and restoring the thread with the tap I have will suffice... Nah, not counting on that one. But as visit to the local hydro place is easily made so that I'll do for sure as well. If this does not help I'll effect my plan.
|
| |
|
|
Darkspeed
Club Retro Rides Member
Posts: 4,882
Club RR Member Number: 39
|
|
|
|
|
|
| |
|
|
|
|
|
|
|
I still very much like your recommendation of going to a hydraulic shop. Maybe they can be of help in ways I couldn't even have thought of. Although sometimes you're met with the attitude that these things are more hassle than they are worth to them and they just send you off. We'll see, we have two nearby so... I thought this when i needed the spindle in my lathe fixing. Its a tiny lathe made in 1902. I went to loads of local engineers expecting them to be completely disinterested. They were all very helpfull! They thought my 'small lathe' spindle would have been 2 foot long, not the 10" long spindle i turned up with. I think it intreagued everyone. They couldnt help and kept recomending other shops, all of which were used to much larger jobs. All wished they could help. Then one shop sent me to a specialist grinders, they were amazed at my tiny old lathe. They ground the spindle, sent it off for hard chroming then reground it to fit the headstock. Made an excellent job of it and charged me the minimum charge. They were all so helpful as the job interested them even though they all normally do big industrial jobs. I guess what I'm saying is they may be very helpful. Show them pics of the car, tell them what you are doing, they may well be MORE helpful with these small jobs than they would be for their bread and butter work. |
| |
|
|
|
|
|
|
|
|
Another vote for Span in Someren, they made up new lines for the power steering on my Oldsmobile when one blew, took a few minutes on a saturday morning.
If you need it, I have a drill press with a Morse Taper (MC3), so can handle the larger industrial style drills. Unf I only have 14mm, no 14,25 mm. A 9/16" is 14,285 mm, so close also.
As for thread locking - loctite 542 is a medium strength designed for sealing hydraulic and pneumatic fine thread fittings.
|
| |
Last Edit: Aug 8, 2019 16:25:27 GMT by SamJ
|
|
|
|
|
|
|
|
Just a thought... the steering rack has been giving you fits for quite some time now; so, if it were me, I would take the rack to the hydraulic shop that has been recommended and have them do the work as it's their field of expertise.
The last thing you want is to attempt the repair yourself and have it go sideways - best to let the guys with the right tools and experience do the job. I'm not saying that you can't do the job as you have done such great work on the car already - I just think it might be money well spent.
Good luck either way.
|
| |
|
|
eurogranada
Europe
To tinker or not to tinker, that is the question...
Posts: 2,556
|
|
|
|
|
Well I'll be damned!!
I spent the evening working on the rack and not only is it back in, but it's also dry!! Both after waiting for gravity to do its thing and under pressure from the engine running the pump.
There's no leaks at the feed and return fittings as well as no drips from the sides where the gaiters go.
Ok, as the steering wheel wasn't connected and the wheels not yet attached to the steering, I've not been able to fully bleed the air. Under the gravity feed I did a few quick lock to locks directly on the steering rod but I don't consider it bled.
Anyway this feels like good news!!
So what did I do?? Well with the rack out and accessible I could see that only the top two threads were fubar. So I carefully aligned my tap and tapped the threads. This went surprisingly easy with only a little resistance in the beginning. That meant my new threads lined up perfectly with the old. Very little swarf and easily cleaned out. Both fittings I had now would have worked, but the one original to this rack is now used of course.
Who'd have thought I'd get away with this. Although I'll keep my expectations low for now...
Oh and then the rack itself has to prove it works well also...
Looks like the car will be driving by the weekend.
Also I will swap the wheel studs. There's only 7 to 8 mm max thread engagement.
Some pics tomorrow...
|
| |
|
|
eurogranada
Europe
To tinker or not to tinker, that is the question...
Posts: 2,556
|
|
|
|
So this morning one of the first things I did was check the fluid level in the reservoir of the PAS and it's still at the same level as yesterday!! A promising sign I think. Then, before I'd forget I measured the split ball joint boot and put it in a rag to take to the shop this afternoon immediately after work. Plan is to then jack up the front once more and take the hubs off again to get the studs swapped. I don't know how many times I've jacked the front of the car up lately, but it's getting to be annoying, lol. Although admittedly it's mainly annoying due to the lack of room to work. And for yesterday evenings work I made two choices that bit me later: one, I didn't push the car back far enough to comfortably set up the hoist and two, I'd left the wheel on on the passenger side thinking I'd be ok, but to remove the rack I needed the space provided when the wheel was off. Proves that shortcuts are often not really worthwhile in the end. So I promised the pics from yesterday...So next up some detail to yesterdays short update. I didn't take many, because 90% of the work was of the "rinse and repeat" type and has been shown in enough detail before. So with the rack out and in decent daylight I could examine the damage to the thread. I knew at least part of a thread had come out upon undoing the union. I was therefore expecting basically the full threads to have been lost. This is what I found: 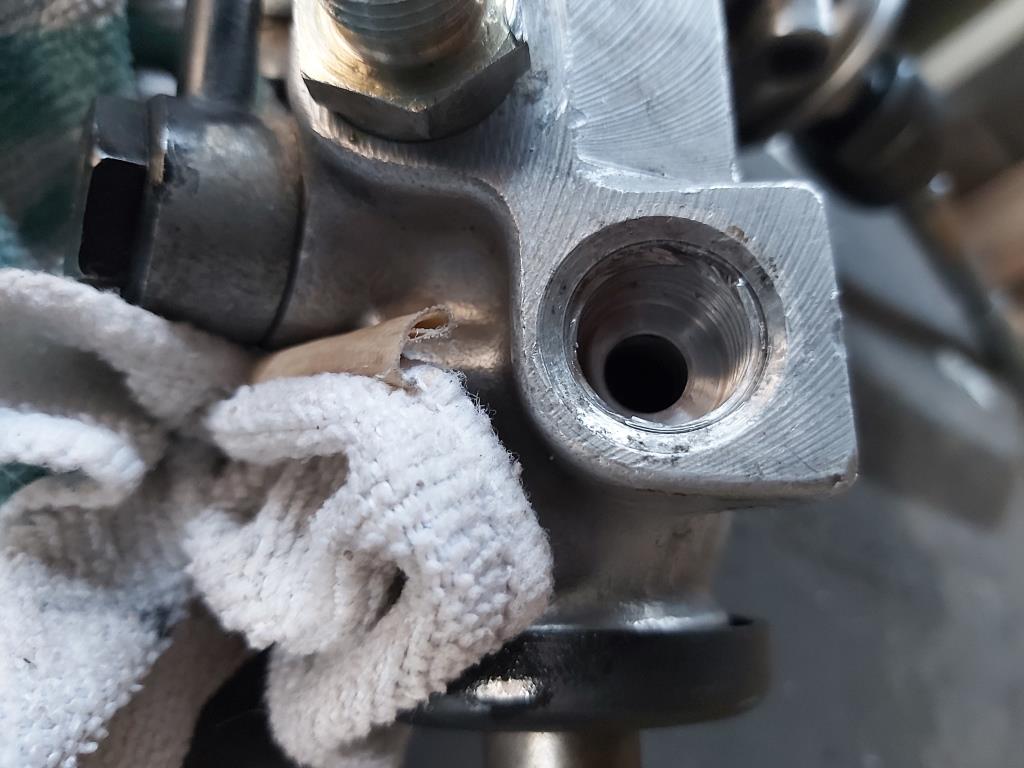 You can see that the top two threads are basically destroyed. There's parts missing and parts looking like it was all compressed. But the bulk of the thread still looked ok. At that point I felt I had nothing to loose and a lot to gain so I thought I'd try and rescue the threads. I had a suitable tap so I ran it through. Upon trying out, it was clear that left to its own, the tap would not go in straight. So I knew I had to be careful. I positively set the tap at a right angle to the surface (checked) and with just enough force to keep it from slipping, I started tapping. As the metal is soft and the top was damaged there was friction from the cutting, but not very much. And after a few turns I could just wind it in one fingered, to me proving the angle had been correct. Ran the tap out and checked the threads out. Looked quite ok. There was new thread all around, but the top ones obviously weren't as thick as fresh original thread. Still there was meat there and the unions/fittings I had both went in easily. 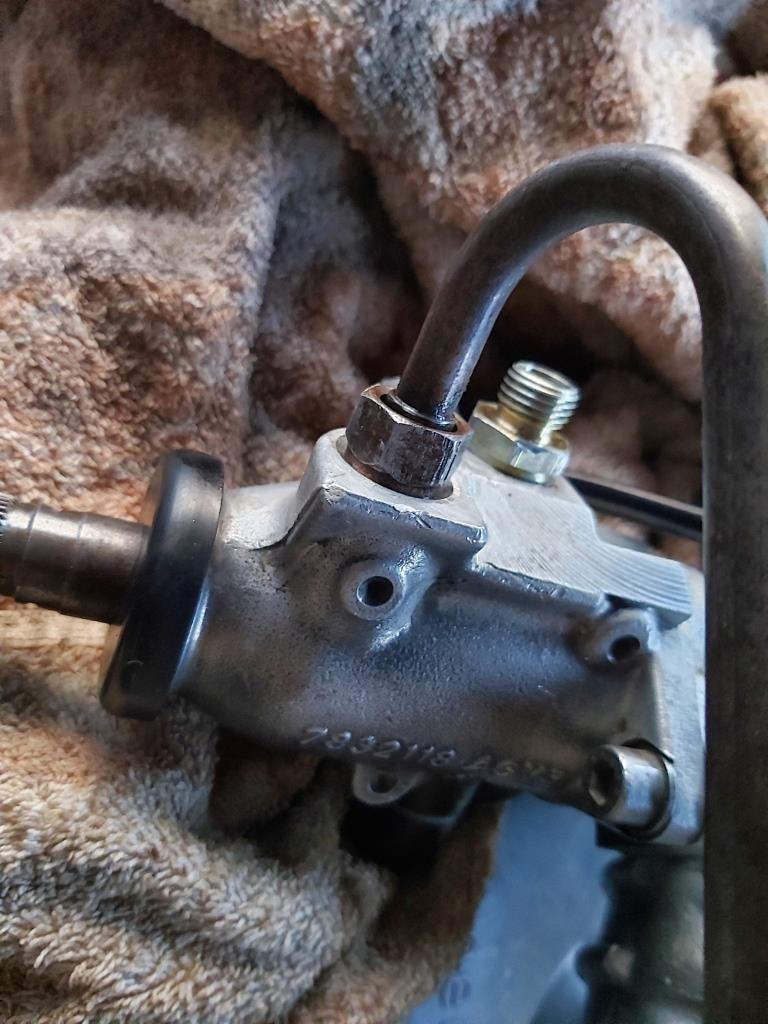 At that point I wasn't sure what I'd do. Put the rack back in only to be disappointed again? Remount the test setup and test? I decided to do a very basic check: I blew on the feed fitting first with the line open to confirm how easily air passed through and then while holding the retun line closed. I felt the pressure in my cheeks and heard no hissing sounds on the threads that I had put some fluid on. This being promising I thought I have to get the car on it's wheels anyway to close the garage door, the engine is still hanging from the hoist, it's easier to put it back now rather than having to reset to this point at a later time. Ready to go back in. 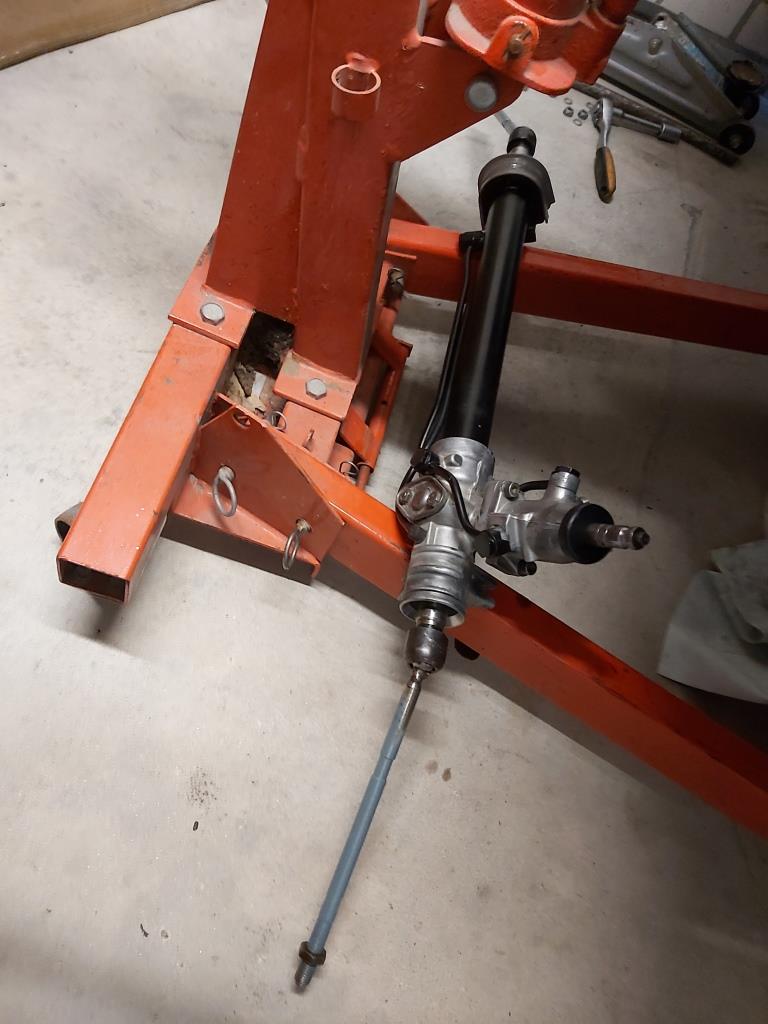 Putting it in was easy enough although as I have to be on the left for a bit then on the right I did swear at the lack of room to easily swap sides. It was in in a minute or two and next I connected up the feeds. With the rack free to move a bit still it was easy to get everything lined up and threaded without incident. I mated the hardline to the rubber line and put in some fluid in the reservoir. A little less then the first time around. I left it to clean my hands and have a quick sip as I'd been at it for a while now. When I next viewed the reservoir and the unions it was all good. I added some more, actuated the steering manually a few times and left it again. 15 minutes on it was still all good. Now I HAD to know... would it leak under pressure?  ? Put the car on it's wheels and rolled it forward so I could enter the car. Ignition on, cylce fuel pump once...ok, cycle fuel pump twice...hm that doesn't sound right. Turn key to start...nothing. Well I guess not running a car for 6 weeks on an older battery does that for ya. Hooked up a spare, but it didn't even spark when connecting the leads so I had little hope. But, on second try I guess enough electrons had moved around to provide starting power. It fired right up!! And I shut it right down... Quick check: fluid down to almost empty, but none under the car. Topped up to normal mark. Start again and let it run. Another quick glance under the car and nothing yet. Reservoir nice and steady as well...confidence growing, but in the back of my head still thinking that I couldn't be that lucky... Still after 5 minutes of running (although not having moved the steering), still A-OK... |
| |
|
|
eurogranada
Europe
To tinker or not to tinker, that is the question...
Posts: 2,556
|
|
Aug 12, 2019 10:05:33 GMT
|
Well the weekend has passed.... Time for some more news. I was pleasantly surprised the other day that the thread repair was substantial enough to secure the union and keep it leek free. Two days later there were still no drips or drops on or under the car. Again, promising. Friday was spent shopping for school supplies for the kids who will start the new school year next week and Saturday was spent on DIY, hanging the other two aircon units in preperation for the external unit and painting most of the stuff in the attic. This was frustrating as despite keying and degreasing, the new (good quality) paint just did not want to stick well. So a second layer will be necessary. Not what I would have liked, but still, doable some evening this week. As I promised my girl the room would be ready when she got back from vacation. This left Sunday to do the Granada. I thought this should be easy enough so I started early in the afternoon. First job, taking the driver side hub and spindle of to change the ball joint boot. Easy peasy. Put spindle and hub back in and do up the nuts by hand as far as they'll go to finish later with the weight of the car on them. It was a good thing that I had kept all decent boots from a spare suspension set I once had as the motor factors couldn't supply me a fitting boot. So I transferred all the greas and used an older one that was still supple. 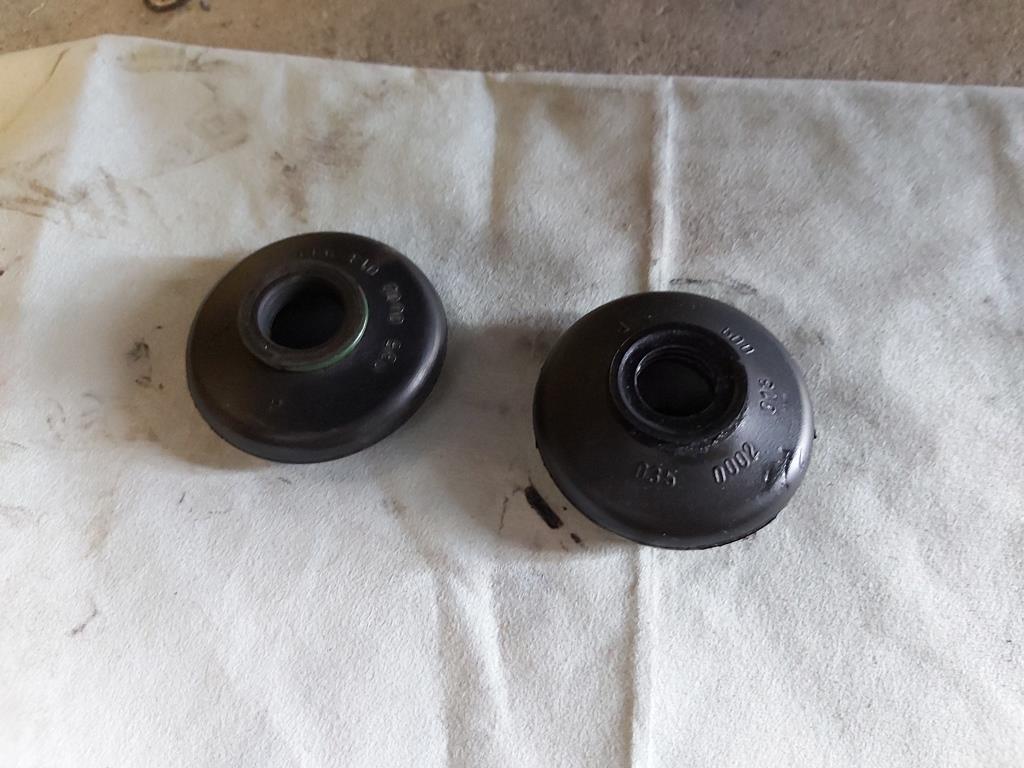 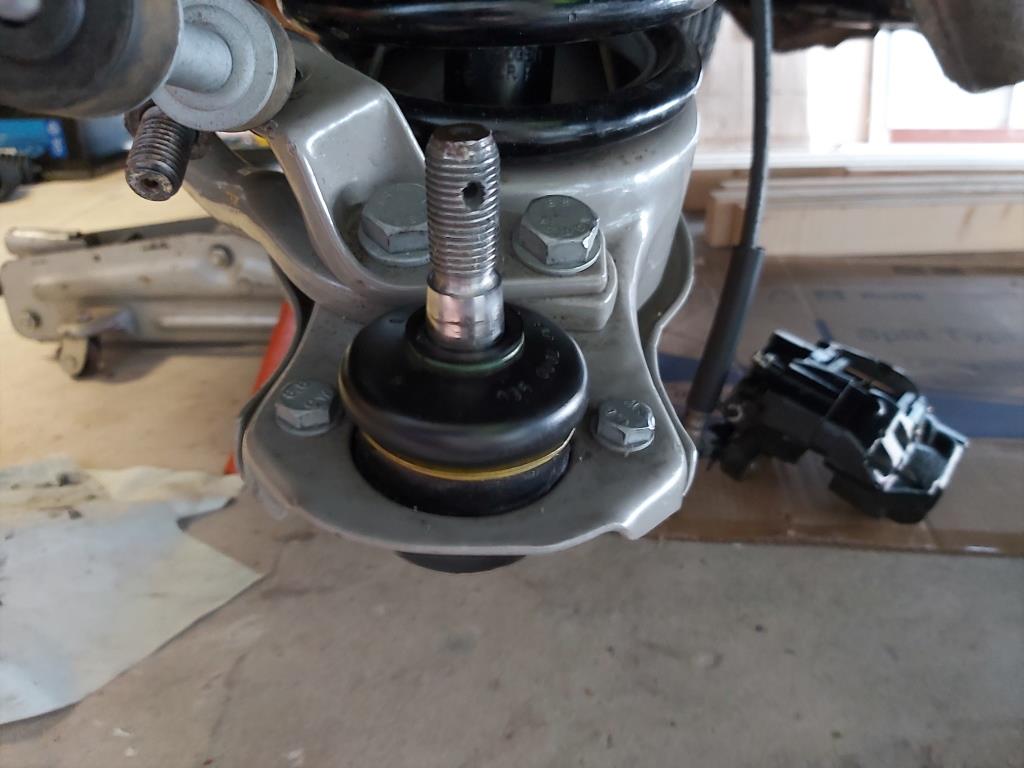 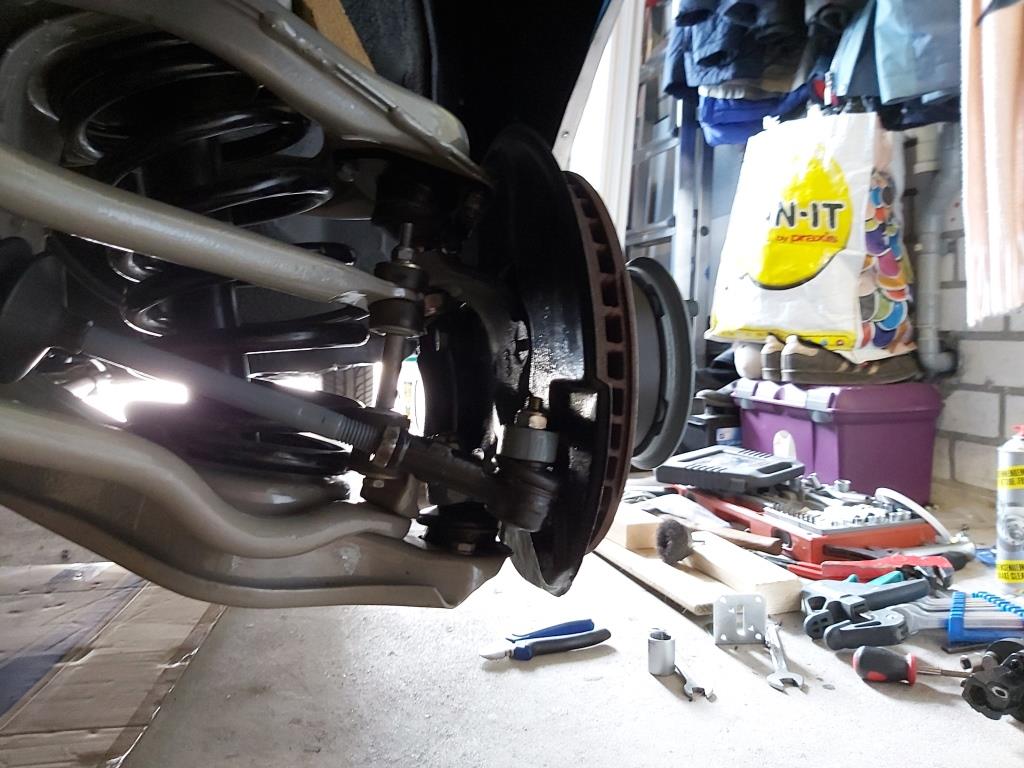 I got a bit lost in doing the job so forgot about pictures for a bit. Also because many of it would have been sort of a repeat of before. Next up, steering rack details. The boots needed to be put on and the steering joints as well. I hit an unexpected and unfortunate snag here. Putting on the first gaiter on the drivers side was easy and went without a hitch. I put in the lock nut and then the steering joint. I had noted the amount of threads and mm's so I could be pretty sure that with the rack centered the alignment should be close though not by definition spot on. I'll probably get that checked in the near future. Going to the other side of the car turns out the rack has a different size gaiter...that I obviously didn's have as I hadn't ever noticed this. I thought it was an optical illusion. Like the one with the rack centered: the tape measure says equal amount protruding each side, but the mind says one side protruding much more as you have a longer view of the shaft. But no this turned out to be real. The difference was so big I could not overcome it by tightening it as hard as I could. I left it on for now as some protection is better than no protection. I repeated the exercise with the nut and joint. With the joints both on, I mounted them to the spindles. I then moved to the next item on the list. This would be securing the shaft between steering wheel and steering rack. This went very easy. So easy actually that the shaft could just turn around the steering rack splines. Damned, another part that looked the same, had the same length, but turns out to be slightly different still. Thankfully I had the matching shaft but this needed some cleanup. So some time went into that to clean and paint it. It was at this time I found three drops hanging from the car now. I still could not feel anything on the joins or out the sides, so my conclusion was that this is fluid that has leaked into the subframe and is now coming out as the angle of the vehicle was changed due to the front being raised. I cleaned it up and even at the end of the job I did not see any new drops. With that part drying, I turned to the wheel bearings once more. I had spun the wheels for a while and wanted to double check my grease amount. I repacked the bearings to be sure. As expected, the grease I put in on the one side came pushing out on the other side. That's good then! Still I checked them all both sides just to satify my need. I reattached the hubs and put the wheels on to be able to rotate and adjust. Did the same I did before and taking care to do the check that Blackpop put forward. I am now confident they are ok. There's only the slightest hint of play, the washer under the nut can be moved with a screwdriver without force. I had also checked that before taking the hubs off by the way and it was good before as well, inspiring some more confidence. I put the calipers back on to finish the job. 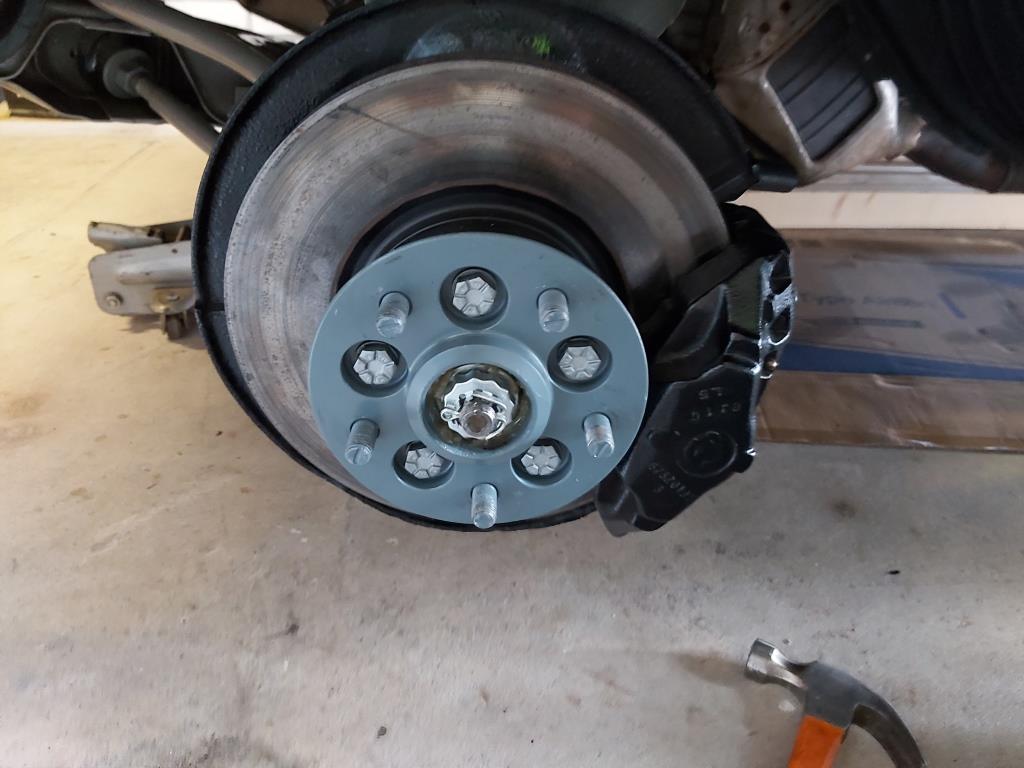 I then tried installing the replacement steering shaft, but in the only way it would fit, my steering wheel was now way out of centre. To the extent of about 90 degrees. I guess it's just another small difference. Once I was sure there was no way the wheel would align with the rack and I had resigned myself to resetting the steering wheel, I had it bolted on in a minute. With that done it was time to het the car on it's wheels. I put the passenger side on and lowered it to the ground. On the driver side I put my block of wood in the subframe and a jack under the ball joint. I then lowered that side as well and upping the jack under the ball joint to create enough friction to get the nuts tightened. Put the wheel back on, verified the bearing adjustment now all moving parts were tight and I was still satisfied so lowered it down. And then I started the car. I this time tried bleeding the system by steering lock to lock a couple of times. The level went a little down but not by much. Also checked no drips under the car, still. Drove the car out of the garage for the first time since putting it there on June 17th!! I took it around the block three times to test the system but also to determine how far the steering wheel was off centre. 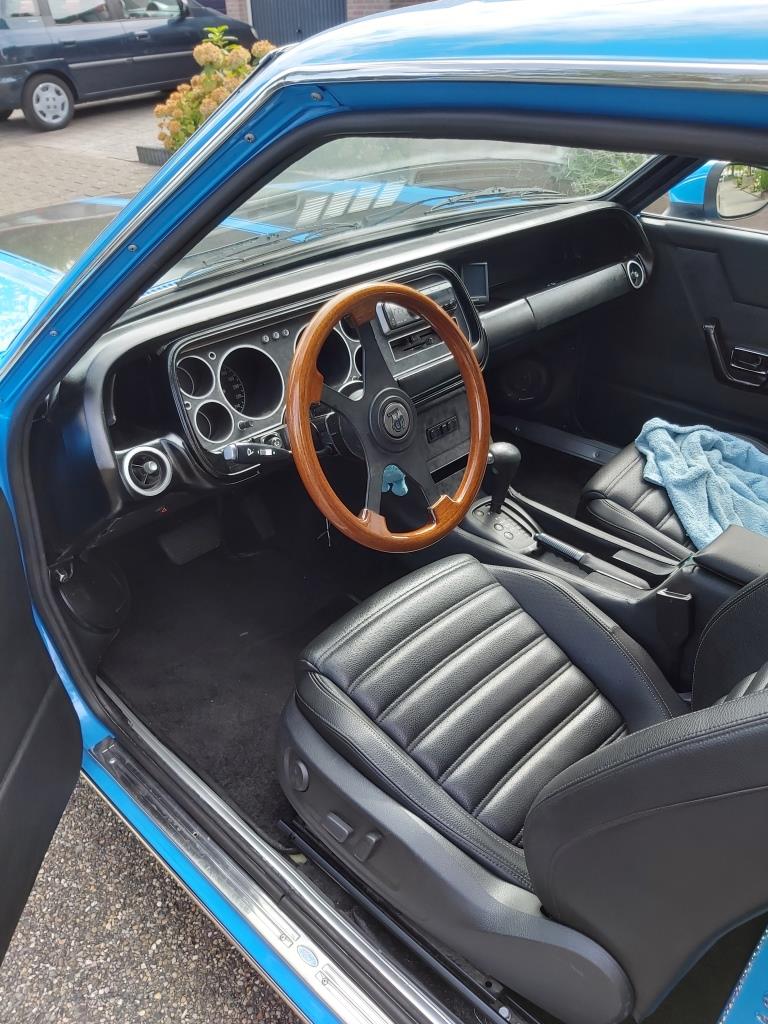 Took the battery off as not to cause any shorts while undoing the horn mechanism and then undid the steering wheel nut partially. Steering wheel took a light bump to pop loose and with the nut off far enough I could reposition and tighten again. Another quick test drive to be sure it was pointing dead ahead and it was fine. Battery off again, horn put back in and battery connected up again. I have some things to do still" - split pins in lower spindle nuts. The abuse one nut took means I have to clean up one edge before the spilt pin will fit freely. Pretty simple really. - new gaiter to order and replace on the right side - lock in place the steering joints after gaiter replacement - verify steering shaft still nice and tight With the car now mobile though not yet 100% ready for the road, I spent the last hour clearing away tools and stuff used on the car and diy projects. Then it was time for dinner which always sort of feels like the end of the weekend. Not a bad one, just a tiring one! I woke up from the alarm ringing this morning, something quite out of the oridinary for me! |
| |
|
|
|
|
|
|
|
|
Goed nieuws allemaal, Dat heb je ook wel verdient!!
What a great car and it looks you are getting it all ready to enjoy now.
|
| |
|
|
|
|
|
|
|
|
Nice to hear that it is working again!
I know your feeling about lifting and lowering the car all the time...I had that feeling last summer when I had the gearbox down 4 or 5 times. The QuickJack lift was a blessing though.
Gustaf
|
| |
|
|
|
|
|
|
|
|
Good news for a dry rack.😊
|
| |
|
|
eurogranada
Europe
To tinker or not to tinker, that is the question...
Posts: 2,556
|
|
|
|
Good news for a dry rack.😊 Jep, still not a single drop found since! Turns out that finding the right gaiters is an issue. The suppliers list my rack as needing two identical gaiters, where in reality one is 44-45mm and the other 57-58 ish. Working on that though. |
| |
|
|
eurogranada
Europe
To tinker or not to tinker, that is the question...
Posts: 2,556
|
|
Aug 20, 2019 11:22:02 GMT
|
|
So a quick update as there's really not that much to tell...
Had the car up on the jacks once more... Needed to check my previous work and finish some things off.
I started by finishing off the split pins in the ball joints. This was not trouble free as I'd deformed the castlelations on the nut to the point that a split pin would not get past. So undo the nut, trim the notches back to a decent shape, redo the nut and put the pin through. Other side was easy. Slight adjustment of the nut (tightening it) to get the castlelastions to mate with the hole and in the pin went.
With new gaiters on hand I finalised that as well. On the driver side I had the correct one in place and was now sure of that so I locked the steering joint in place and secured the gaiter. On the other side I swapped the gaiter for the right one. It seemed a little short, but steering to lock confirmed it did not pop off. So secured in place and locked the joint.
Checked the steering shaft to rack bolt for tightness and gave boths sides a general check over. All seemed fine so the wheels went back on.
Two quick laps of the housing block I live in and all seemed fine. So far still not a drop under the car. I think it's the first time in my ownership it hasn't leaked somewhere, lol.
Didn't take pics, but hopefully I'll have the balls to drive the car to work tomorrow. First real trip since the epic failure!
|
| |
|
|
|
|
|
Aug 20, 2019 11:41:24 GMT
|
|
Lets just hope that you are home with this one now Alex and that you can start to enjoy the car a little more - Chris
|
| |
|
|


 ?
?


