eurogranada
Europe
To tinker or not to tinker, that is the question...
Posts: 2,556
|
|
Jun 12, 2017 14:18:11 GMT
|
ah curse word, that sucks, or rather doesn't in the case of your fuel filter. Is it worth dropping the tank and using some sealer on it? Something like the POR-15 stuff, just for peace of mind in the future? www.frost.co.uk/por15-car-bike-motorcyle-fuel-tank-repair-sealer.htmlWith the doors, can you touch in the areas where rust is starting to show, if only for the appraisal? Then keep an eye out for some second hand doors that you can repair and paint at leisure whilst keeping the car on the road with the current ones? Hi Sam, Yes the sealer way is what I'm now considering. Only thing holding me back is having read stories of it not holding and causing problems instead of fixing them. But I guess that is down to prep maybe? Still looking for a product so I'll check out your link. Por-15 stuff is hit and miss. You either love it or hate it it seems form online communities. The obvious rust that is starting to show is only on the inside of the doors where the skin is folded over. I could hide that with a nice bead of black caulking. But that would just be that, hiding it. Admittedly I don't think the rust moves so quickly that I need to buy doors now, but they are so hard to find, I'd better get on in soon...repairing these may also be an option as the fold is the only place with rust, so opening that up, cleaning that up and refolding should work as well. Things to ponder... It's just the frustration of the added expense proving to be in vain... |
| |
|
|
|
|
|
|
|
Jun 12, 2017 21:59:04 GMT
|
|
if it is from the seams I have found spraying the area with a cavity wax which penetrates well, leave it for an hour or so to soak in then wipe the surface off works well
|
| |
|
|
gess
Part of things
 
Posts: 220 
|
|
|
|
|
Two steps forward, and one step back. Sorry to read about your misfortune.
One should think that the fuel issues would stop eventually, and they probably will, but in the meantime...
The interior bits you put together matches very well and blends in to the rest of the car, thumbs up. I guess that is a small victory and something positive to keep in mind when contemplating whether to torch your car or not, and I really hope you don't.
My humble opinion is that you should ignore the rust on the doors for as long as you can. Spend quality time in your car, get it to work properly, go to meetings, shows etc and show off your ride. Few will notice the rust and fewer will care.
In time, you fix the rust by opening up the folded area, it is a rust trap, and will most likely be a problem on any high-price doors you can get your hand on. Remove all rust, use a good primer fold it in place and use penetrating oil on the inside to seal it off after you have painted the doors again.
Sometimes you have to accept that good enough, is good enough, or you will never get to use the car.
I also spent quite some time and money on a total paint job on my former Granada, and it was a pain to see the rust protruding from areas I thought had been well taken care of, but I still used the car and had a few vacations in it and used it as a daily for several years.
|
| |
|
|
eurogranada
Europe
To tinker or not to tinker, that is the question...
Posts: 2,556
|
|
|
|
if it is from the seams I have found spraying the area with a cavity wax which penetrates well, leave it for an hour or so to soak in then wipe the surface off works well The doors and especially these folded seams have been waxed. They were done not too long after paint. We even used a special one that penetrates extremely well. I even had traces of the stuff come out the other end so I thought we were good. But what I'm seeing now really is rust...that colour is unmistakeable But I agree with others, though frustrating, it's not a fix it now issue. |
| |
|
|
eurogranada
Europe
To tinker or not to tinker, that is the question...
Posts: 2,556
|
|
|
|
Two steps forward, and one step back. Sorry to read about your misfortune. One should think that the fuel issues would stop eventually, and they probably will, but in the meantime... The interior bits you put together matches very well and blends in to the rest of the car, thumbs up. I guess that is a small victory and something positive to keep in mind when contemplating whether to torch your car or not, and I really hope you don't. My humble opinion is that you should ignore the rust on the doors for as long as you can. Spend quality time in your car, get it to work properly, go to meetings, shows etc and show off your ride. Few will notice the rust and fewer will care. In time, you fix the rust by opening up the folded area, it is a rust trap, and will most likely be a problem on any high-price doors you can get your hand on. Remove all rust, use a good primer fold it in place and use penetrating oil on the inside to seal it off after you have painted the doors again. Sometimes you have to accept that good enough, is good enough, or you will never get to use the car. I also spent quite some time and money on a total paint job on my former Granada, and it was a pain to see the rust protruding from areas I thought had been well taken care of, but I still used the car and had a few vacations in it and used it as a daily for several years. That's how it goes I guess. It'll just take me a while to get over the frustration of this happening. And I mostly mean the rust. As I am on a tight budget, I did everything as best as I could and I did not spare a dime on the body and bodywork/paint side of the restoration. Thinking doing it right once is economically sound thinking as opposed to having to redo things because I took a shortcut. That is the thing that bothers me. The fuel issues are not too much of a worry. A new tank is not a viable option at about 475 euro's. I found that the coating process is not cheap either but at least a lot cheaper than a new tank. For now I'll just monitor the filter and keep a few spares. When timing is more convenient I'll probably coat it. Thanks for the compliment on the interior. I'm pretty proud of and also very happy with it. It's a cool place to be. The only thing I'd do differently now is use better glue on the centre console outer shell. But hey I have an idea for something even more spectacular in the future. But I'm in no hurry to do that. Yeah, the doors will have to wait and I'll think about how to tackle them. Maybe just take the skins off these and fix as needed. Saves the expense of additional doors, but also means there will be no doors on the car for a while. Although this job should not need to take weeks. The expensive bit is the custom paint that is on it...and the striping wich will have to be remade and reapplied. I agree though. First I'm going to get the car 100% finished and niggle free. Just enjoy it as much as possible. Cause every time the engine fires up, I get a big smile on my face. I'll make a small list of niggles to fix and just work through them one by one. Possibly asking for some help here or there. |
| |
|
|
|
|
|
|
|
this happened to my kadett paint over the entire car, when i considered the project "finished". it was resprayed and it happened again the next year. then resprayed a third time. absolute kick in the teeth, but i guess this is the life we chose owning/restoring retro cars, instead of a mk7 golf or whatever  |
| |
Last Edit: Jun 13, 2017 9:00:08 GMT by darrenh
|
|
eurogranada
Europe
To tinker or not to tinker, that is the question...
Posts: 2,556
|
|
|
|
this happened to my kadett paint over the entire car, when i considered the project "finished". it was resprayed and it happened again the next year. then resprayed a third time. absolute kick in the teeth, but i guess this is the life we chose owning/restoring retro cars, instead of a mk7 golf or whatever  I guess we must be at least somewhat of a masochist, lol. The exact thing you are showing is why I actually started my restoration in 2010. My 3 year old paint looked very similar. I too will persevere, came too far to quit now. The worst of the frustration is already subsiding. But it's one of those things that for me will never fully go away until it is all dealt with. I'm going to focus on the good stuff fixing the less good stuff one by one. |
| |
|
|
eurogranada
Europe
To tinker or not to tinker, that is the question...
Posts: 2,556
|
|
|
|
|
Well a short update is in order. Now most of the frustration has subsided things are clearer in my head. Thanks to all who helped calm me down! I'm simply going to get on with it. Fix all those last little issues as and when I can and hold off on the doors for as long as I feel I can (which translates to when it becomes externally visible or funds become available).
Even made a start yesterday...
First I looked into products for sealing a tank. There's the POR-15 product SamJ linked at 100 euro's including shipping and the accompanying prep stuff. There's also a cheaper product called tank cure. That works out at 75 euro. But somehow I have a better feeling about the POR-15 product. Not ordered yet though as the tank is full anyway and short term I can change the filter as needed. Besides, it's a process that takes about a week to do including prep and drying times. So it's more of a job for when I have some more time. Ideally I'll combine it with the drive shaft balance. Those seem to be the most pressing technical issues.
I then took the wife and dog with me on the short walk to the garage. Just seeing the car helps restore some mojo as it is still beautiful and that interior just gets my blood pumping. I was in decent work clothes so I wasn't about to crawl under the car and exchange the fuel filter yet, but instead I got my multimeter from the boot and the cd-changer I had removed in the weekend but deemed not important enough to actually fix at that time.
Back at home I opened it up first just to check for any obvious signs of damage to the electronics and the power board. With no damage found I part assembled it so it could be tested. I verified ground and 12v prongs first. On my bench power supply (one of those pretty heavy duty audio display units) it immediately came to life, inventorying its disk contents as it should. Great! At least the unit is working. I have a sentimental attachment to it as it was the most expensive (paid a fortune for it) and new one at the time in 1996 and the very first voice controlled one. Ok, the voice control was nothing like Apple's now, but it worked. Not good enough to actually connect the required mic and controller in the Granada though.
But that leaves for now the question why it wasn't working in the car. There was absolutely no power to it as even the eject button did nothing. I had already verified that 12v+ was reaching the unit. So the only thing I can think of but hardly imagine is a bad ground. As it's nice and tight to the body and when checking for the 12v+ signal I used that same ground point. I'll look into the ground next time I'm at the car. But this sounds like it shouldn't be too difficult to fix.
Next I decided to start looking into the electrical issue of the fuel and temp gauge over-reading. As I was in my shed and I have a spare cluster there and I had my multimeter and power supply out anyway I thought I'd try and verify my suspicion of the cause for this: did I perhaps bypass the voltage regulator feeding too much power to the gauges?
The two gauges share their power feed and both then get a signal from a sensor (i.e. the float and the temp sensor) of which the other end is grounded. The gauges sharing this feed is what makes me look this way. The power feed comes from the regulated side of the regulator. In measuring I first thought I was a measuring wrong. As I had 12 volts at the gauges one second, 0 the next. Apparently the regulator cycles regularly but slowly (or it is broken). Anyhow, the steady 13,69 volts my power supply gives off is indeed brought back to 12 volts max it seems. Now I should verify in the car how much power the gauges get now. If that is over 12v then I must have accidentally bypassed the regulater with my led wiring.
So a small start was made. And that actually feels good.
|
| |
|
|
|
|
|
|
|
Great to hear that the mojo is coming back and progress is being made. Let me know if you need any help with the wiring. As for the tank - I don't know if they are any better or worse than POR-15, but there are some other products offered by rust.co.uk www.rust.co.uk/fuel-ethanol-proof-tank-sealers/c28114/I am going to order some of their epoxy-mastic chassis paint for the buggy, so if you want to try their tank sealer I can add it to the order, save on shipping for you. |
| |
|
|
eurogranada
Europe
To tinker or not to tinker, that is the question...
Posts: 2,556
|
|
Jun 14, 2017 12:04:31 GMT
|
Hi SamJ, You run the risk of me taking you up on that yet again. I'll try and do my preliminary checks before I do though... Hm, pricewise their large tank sealing kit works out about 45 euro's, which is pretty good compared to the others. It works the same and they advise the same approach. They don't show a finished product anywhere and they also don't do the seperate rust killing treatment. They do a caustic clean thjat leaves an inhibitor behind. Moneywise it's hard to beat. So let me know when you order and I'll make a decision. |
| |
|
|
eurogranada
Europe
To tinker or not to tinker, that is the question...
Posts: 2,556
|
|
|
|
|
Helping one kid with her math homework and the other with practising cycling for his traffic exam has kept me from doing very much to the Granada this week. It's a good thing the dog needs a daily walk in the evening anyway as this is a great excuse to visit the garage for a bit. Last night I took the cd-changer and the multimeter with me...
I quickly confirmed that the ground wire was well connected to ground and that the connector was tight on the prongs. A bit of wiggling and still all good. The same was done with the 12v side and that also kept showing power whatever I did. I plugged in the unit and it immediately came to life. Switched on the head unit and now the cd-changer was once again selectable as a source. One less thing on the list!
It bothers me a bit that I didn't really do anything to fix this problem though. We'll see if this becomes a recurring thing...
On with the next job(s)!
|
| |
|
|
mk2cossie
Club Retro Rides Member
Posts: 3,063  Club RR Member Number: 77
Member is Online
|
|
Jun 16, 2017 12:39:20 GMT
|
You may find it was purely a dickie connection on one end of the lead somewhere that won't come back again...or will rear it's head after vibrating loose on a journey  After a few hours travelling in mine, there is a rotational noise from the back end somewhere. Try as I might I can never find the cause of it when I get it on the ramp at work to look  Car is looking good though, and I'm pleased for you that it makes you feel better/lifts your mojo when you see it  |
| |
|
|
eurogranada
Europe
To tinker or not to tinker, that is the question...
Posts: 2,556
|
|
|
|
So another weekend has passed. It was a busy one, but I found some hours for the Granada as well. I had hoped to get further, but things just took more time then expected and really I just wanted to do it all right! I had to stop myself from accepting 95% ok as acceptable... So what did I do? Well for one I chose some simple jobs or at least they were deemed simple before attempting them. Installing the cd-changer would be a nice simple start I thought. And it was. Power and function quickly seemed restored. It wasn't until much later when I wanted to store the car away for the day that I found out the unit still would not work from the HU. A bit puzzled I thought what the hell, but it was quickly reveiled that I myself had simply forgotten to also plug in the signal wire. Ooops. Well this job is now on the list for next time as unfortunately plugging this in with the unit bolted down is a no go. Next I swapped the fuel filter for a clean one, which was probably the easiest job I tackled. Next as I was under there anyway, I put new connectors on the ground and signal wires as the new float had spade terminals where the original had female bullet style ones. As I was there I noticed that the fuel pump was a bit loose and I tightened the bolt holding it on. But I need to revisit that in the future. I need to slot a hole in the bracket so number two bolt will fit and the pump is still far enough from the exhaust. Ideally I'd like to fit a little shield at the same time. I'm still pondering how to keep the bolts tight though, as there is about 6mm of rubber between the bracket and the chassis it's bolted to. So there is always a bit of flex there and at the moment this is causing the bolt to vibrate undone. I think I'll try a little locktite on there. I also tackled another simple job, running two wires from the centre console to the back seat for power. One that is powered upon "lights on" and one upon "ignition on". It started with me pulling the freshly installed ashtray/window operating switch panel part from the centre console so I could find the wires to connect to. That was the easy part. I quickly located what I wanted to use so it would be safe and correctly fused etc. But running the actual wire under the carpet up the console with it mounted turned out to be a real bear. That took me some time but I managed and the wires are nicely hidden from view. With that latest and final bit of wiring in the car I could once again close up the console. Putting the ashtray back it just didn't want to sit right anymore. So a bit of faffin' about got it how I wanted it again. Now last time I'd had to pull the freshly installed middle insert from the console as it prevented shifting gears as it sat. Just wouldn't engage drive anymore. Well now was the time for trimming back the plastic (without damaging the upholstered part). This took 10 or more retrims as I was very careful not to trim too much. The trimming had to be done right on the edge of what would be visible. Trouble is installing this section is a right pain requring undoing the facia of the gear lever and moving this about as you position the insert. Anyway I got it 95% there. And as I had spend quite a bit of time I was amost ready to accept that as a result. But it kept nagging me in the head so spending some more time I made it fit 100%. Now my gear shifter cover plate I'd shown before also fitted as intended, nice and flat! Felt much happier about it all, even though visually I was no further with this than I was last week. But as a result of things fighting me a little, I by now was running pretty much on reserves. (careful trimming section 1 of 10) 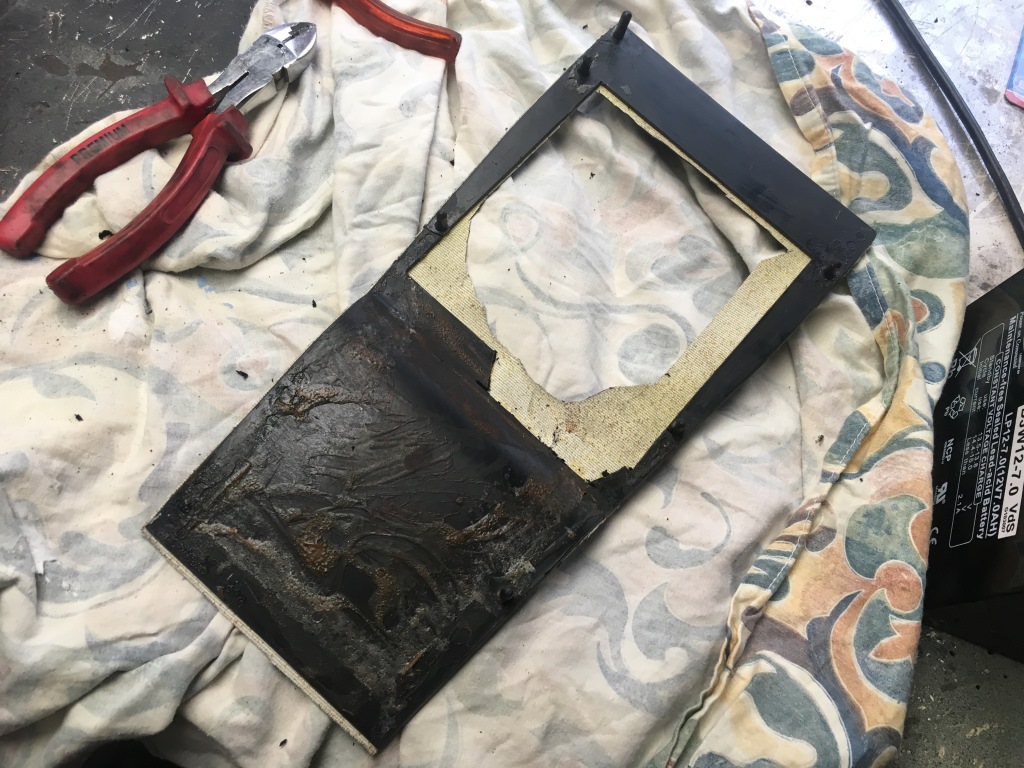 (result) 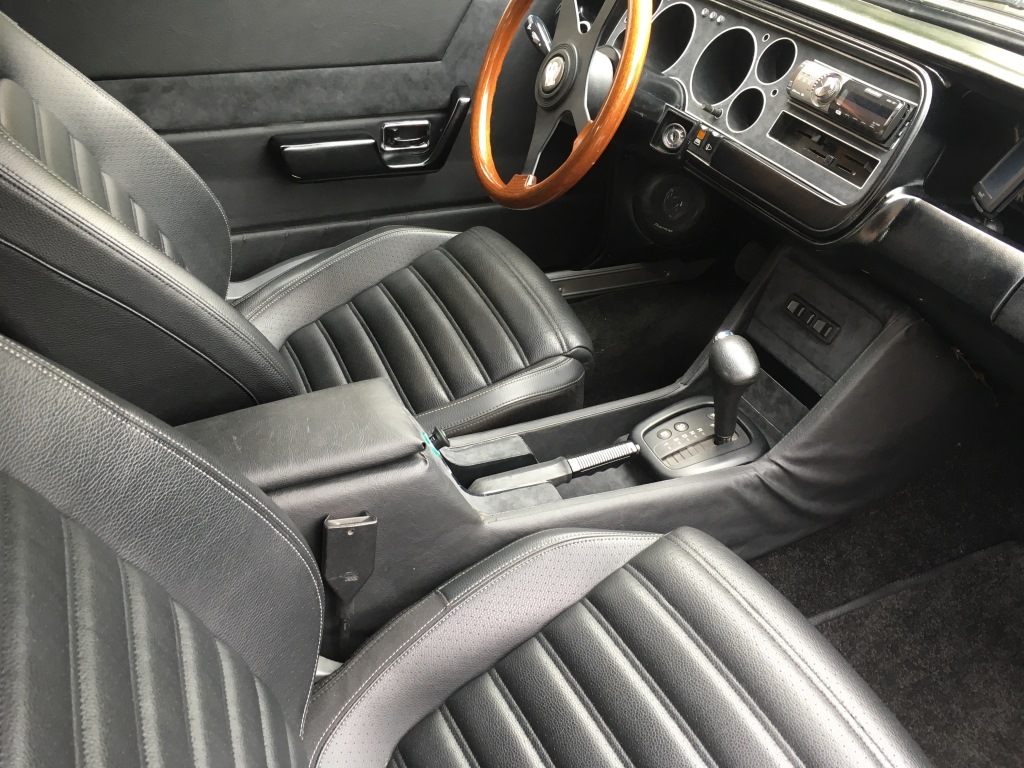 I tried my hand at a little CAD design (cardboard not computer) to finally make use of the little space remaining besides the rear seat, between it and the lower side panels. This so I could work on those at home with the car not neccessarily at home. I want to try and fit the power sockets into the small upright between the seat belt reel and the seat. Nice and out of the way. But I'm not really sure what to do with the top part. As those sockets extend quite a bit into the area, I can't use the full upper surface for whatever I will end up doing. Also as the space is quite narrow it limits teh options even more. Now the rear seat has buitl in cup holders so I'm not looking to add those, but I'm thinking of making a small pocket. They can put some stuff in. Their charger cables or a DVD or anything really. I'd like to also make it "covered" so when not in use they aren't visible. This mostly to keep dust out as cleaning such a narrow pocket is Always a hassle. Besides it would look tidy. 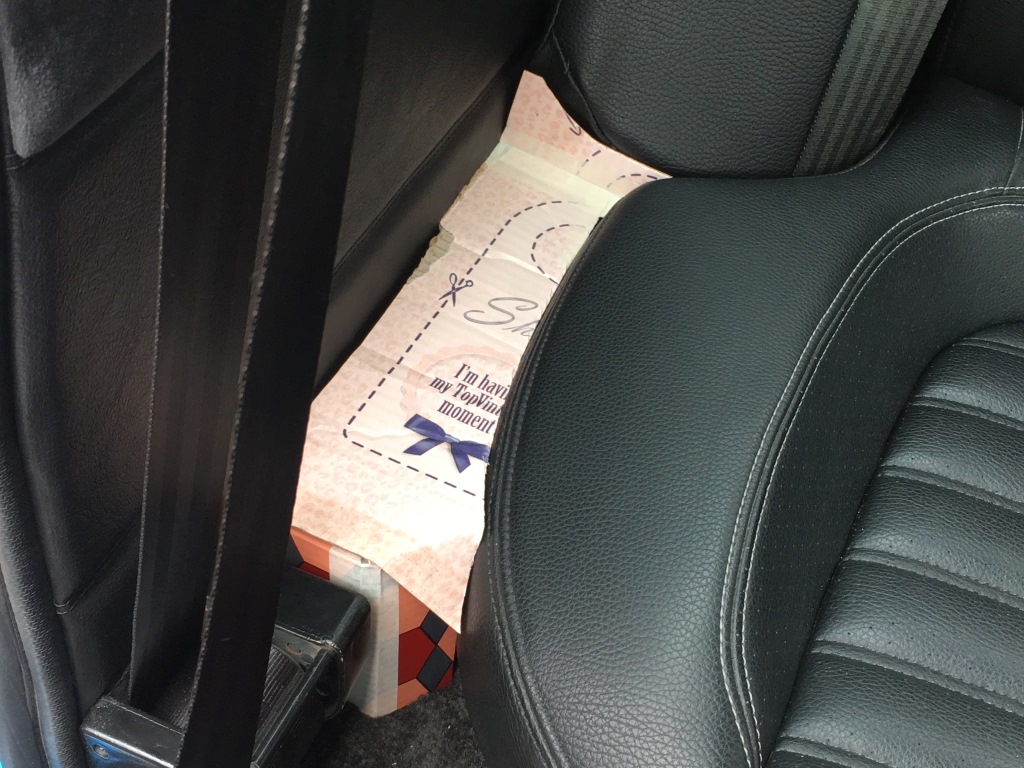 Finally I tried getting my rear interior lighting system and third brake light to work. The brake ligth was easy. The rear lighting doesn't want to do what I want it to. I can get either the "door open" circuit to perform as desired or the "12v permanent" circuit, but not both. Problem is the original circuit I'm trying to mimic used two seperate reading lights and a central interior light. I want the reading lights to function as that centre light instead of adding it. 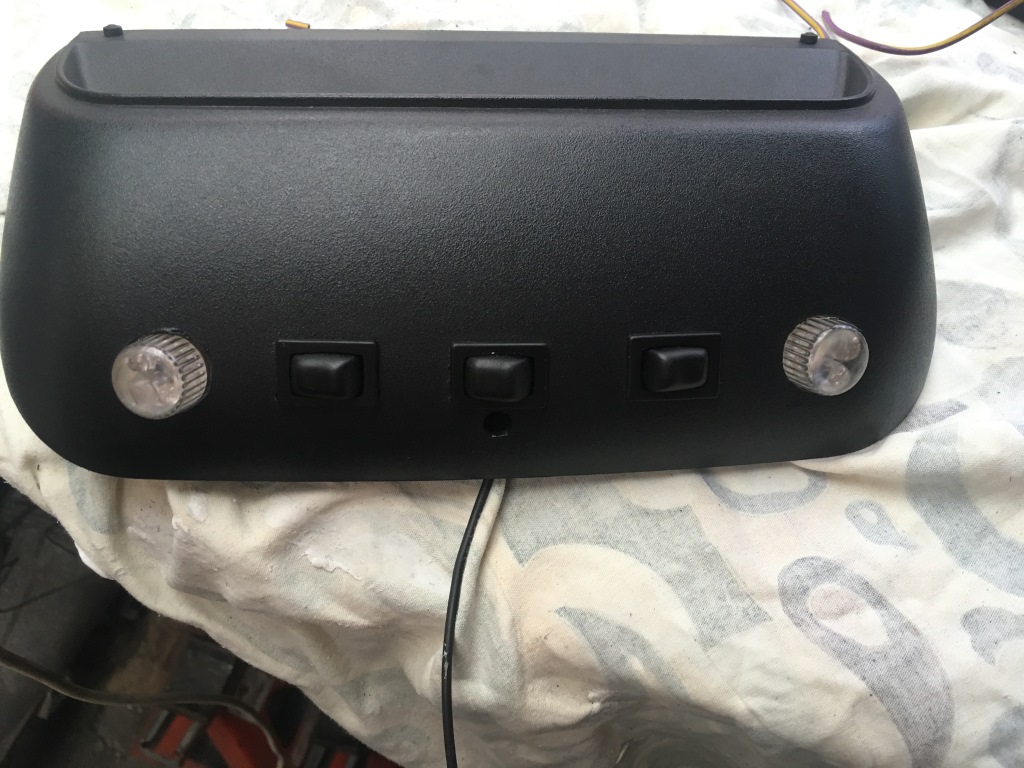 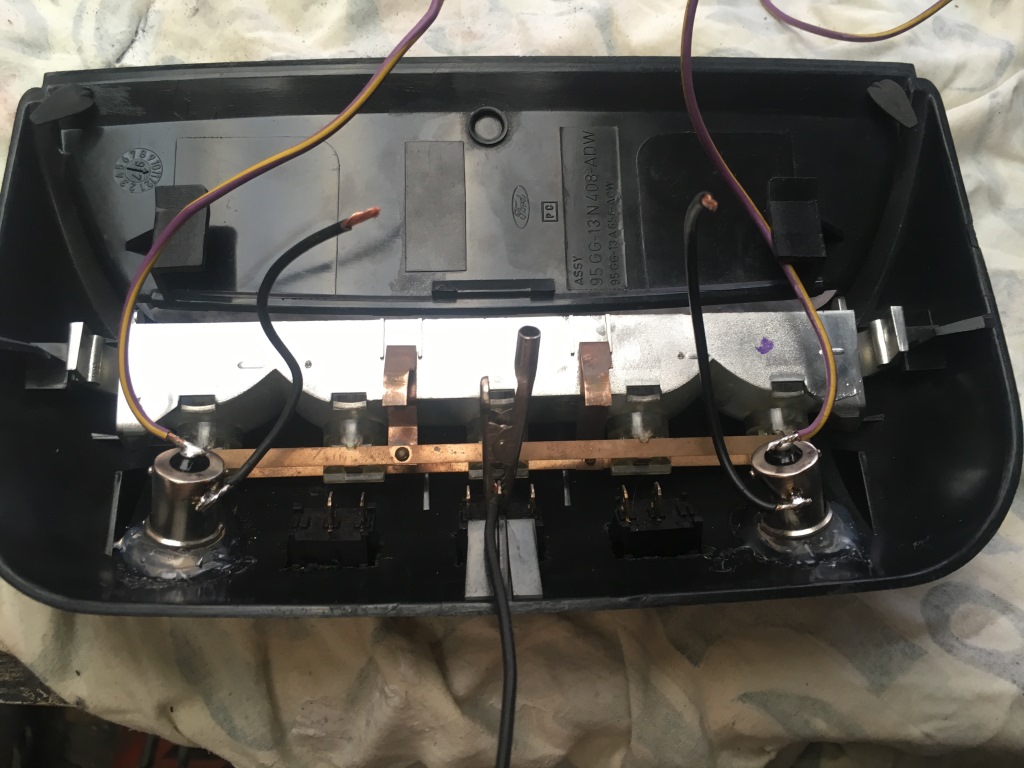 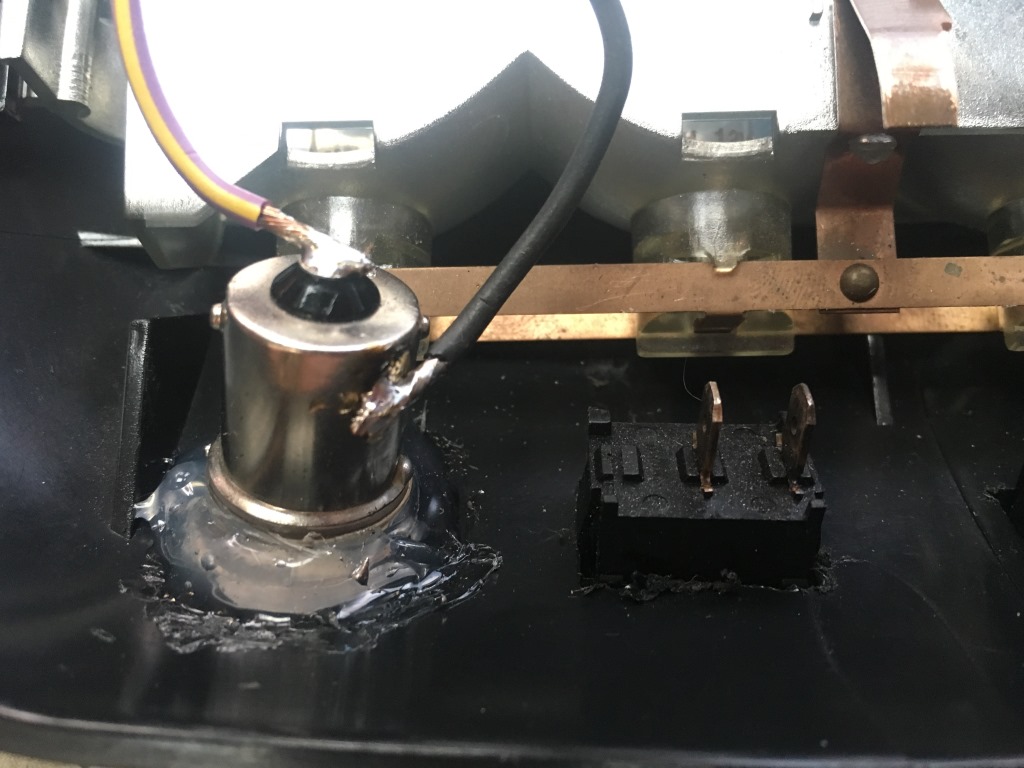  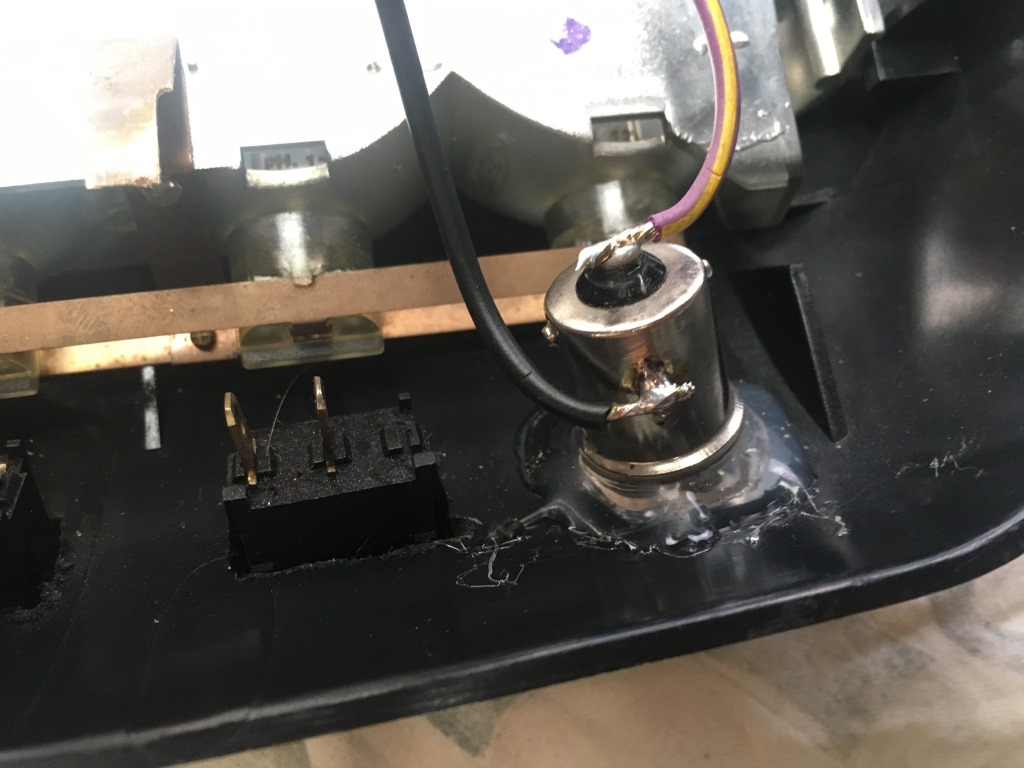 And with that my power level had dropped to zero and I called it all a day. I had wanted to hook up the mic and the carkit and check the gauge voltage on the cluster, but that would just have been too much of a job to start with such little energy. I think that is something I need to tackle as a job for the day, without much else on the agenda... Still, another few jobs progressed or permanently finished. |
| |
|
|
gess
Part of things
 
Posts: 220 
|
|
|
|
|
Building some storage compartments next to the seats seems like a good idea. Just be sure to not make them so narrow that it is impossible to get small items up and out.
I had a glimpse at the light cluster conundrum, but I failed. I thought I had a solution, but finally discovered that both reading lights would turn on if you operated either switch. It also took some time before I realized that the middle switch had three connectors.
|
| |
|
|
|
|
|
|
|
|
is the "door open" a switched live or a switched ground? On the cars I have had power is fed from the fuse box to the lights, and then the ground from the lights is switched by the door switches.
If it works that way you should be able to have a permanent 12v feed to the lights, and then use a SPDT switch to switch the ground from the lights either directly to ground (turning the lights on as reading lights), or to the door switches.
|
| |
|
|
eurogranada
Europe
To tinker or not to tinker, that is the question...
Posts: 2,556
|
|
|
|
is the "door open" a switched live or a switched ground? On the cars I have had power is fed from the fuse box to the lights, and then the ground from the lights is switched by the door switches. If it works that way you should be able to have a permanent 12v feed to the lights, and then use a SPDT switch to switch the ground from the lights either directly to ground (turning the lights on as reading lights), or to the door switches. Good question. I don't really know what to answer. The original light in the front has a ground wire attached to the bulb outer part, then the positive side of the bulb is fed through a switch. One side of that switch has 12v constant the other has 12v when the door switch completes the circuit. I believe the ground is switched as the contact on the door is screwed into the metalwork to complete the circuit when the door is open. But that puzzles me as The light could never light with 2 grounds on the bulb. Argh, sometimes this electrickery gets my blood to boil as in frustration it makes my head go round and round. The original light however is not behaving as it should right now (see before: the light lights on door closed instead of on door open and I guess the culprit can only be the added seat wiring as it uses the door open circuit as well). I'll try and test the gauges as soon as I have a bit of time. After that I'll know if I need to bother you to help me correct the signals to the gauges or if that is solved. I can then meet up with you and work trough all the issues at the same time. Not really looking forward to again stripping the console to get to the wiring and taking the cluster out, but needs must! |
| |
|
|
eurogranada
Europe
To tinker or not to tinker, that is the question...
Posts: 2,556
|
|
|
|
Building some storage compartments next to the seats seems like a good idea. Just be sure to not make them so narrow that it is impossible to get small items up and out. I had a glimpse at the light cluster conundrum, but I failed. I thought I had a solution, but finally discovered that both reading lights would turn on if you operated either switch. It also took some time before I realized that the middle switch had three connectors. You raise a point that was in my mind the whole time as well. If the cubby gets too narrow it will be hard to get things out of and keep clean as well. Also don't know how valuable a cubby would be that barely fits a pair of sunglasses... As I think that is about the size I will end up with. |
| |
|
|
|
|
|
|
|
I think this is going to be along the same lines as yours...  Which would suggest that you have a permanent live from the fuse box to the switches in the lights, which is then fed through the interior lamps, and either directly to ground, or to the headlight warning buzzer which is in turn grounded through each of the door switches, depending on which way the interior light switch is positioned. With the doors closed you should have three wires at the light switch, one wire showing +12v, one shorted to ground, and one with no connection at all on it. |
| |
|
|
gess
Part of things
 
Posts: 220 
|
|
Jun 20, 2017 11:03:07 GMT
|
|
The original lights in the Granada are working the way SamJ explains. You have a permanent live leading to the bulb, and the switch dictates which ground you use, either directly to the chassis close to the lamp or via the door switches which again are interconnected.
I tried looking into this SPDT switch, but I was unable to work out a solution where both lamp will work independently and also together with the door switch.
|
| |
|
|
eurogranada
Europe
To tinker or not to tinker, that is the question...
Posts: 2,556
|
|
Jun 20, 2017 11:21:04 GMT
|
The original lights in the Granada are working the way SamJ explains. You have a permanent live leading to the bulb, and the switch dictates which ground you use, either directly to the chassis close to the lamp or via the door switches which again are interconnected. I tried looking into this SPDT switch, but I was unable to work out a solution where both lamp will work independently and also together with the door switch. Oh, so if I understand correctly that could explain why my light is now working the wrong way round. I think I have the wires on the wrong prongs: I have the light bulb outside to ground and the power to the switch (which in turn is feeding the bottom contact of the bulb). So on the three prongs on the light it should be: - 12v constant to the prong that is connected to the outside of the bulb (what normally I would consider ground) - ground wire to prong 1 on switch - door ground wire to prong 2 on switch Is that correct? I don't get the SPDT switch thing either. I need the middle switch to have three prongs so you can mimic the original 12v permanent on and the door open choice. My difficulty is in using the same lamps both individually switched and combined on door open/perm 12v. Edit: I read the wrong description, an SPDT switch is I think exactly what I have in the middle if I read the descriprion right the second time round. Doesn't really change the part about the two ways of using the lights. |
| |
|
|


