|
|
|
Jun 20, 2017 11:47:51 GMT
|
Building some storage compartments next to the seats seems like a good idea. Just be sure to not make them so narrow that it is impossible to get small items up and out. I had a glimpse at the light cluster conundrum, but I failed. I thought I had a solution, but finally discovered that both reading lights would turn on if you operated either switch. It also took some time before I realized that the middle switch had three connectors. You raise a point that was in my mind the whole time as well. If the cubby gets too narrow it will be hard to get things out of and keep clean as well. Also don't know how valuable a cubby would be that barely fits a pair of sunglasses... As I think that is about the size I will end up with. The ones in my range rover are only around 30mm deep and next to useless, difficult to clean and difficult to get things out of, how about elasticated pockets, they used them on early MX5's and you can but ready made ones. |
| |
|
|
|
|
|
|
|
Jun 20, 2017 12:10:33 GMT
|
do you need the middle switch? if you replace the other two single pole switches with double pole ones it will be easy I think.  |
| |
|
|
eurogranada
Europe
To tinker or not to tinker, that is the question...
Posts: 2,556
|
|
Jun 20, 2017 13:26:21 GMT
|
do you need the middle switch? if you replace the other two single pole switches with double pole ones it will be easy I think.  I'll build your setup if I can (I think I have the right stuff) to see the workings. Do I need the middle switch? Euh well, it's built into the unit now so I was planning to do so. But if your setup works and it works as desired I may just leave it in without function. What to me is a bit weird, is that these switches were taken form a unit that does exactly what I want but uses a third light for the door open and 12v permanent. Only I'm trying to put it in another housing and using the same two lamps as that third light (without actually having tot fit a third light). I would have thought it would be easier, lol. |
| |
|
|
eurogranada
Europe
To tinker or not to tinker, that is the question...
Posts: 2,556
|
|
Jun 20, 2017 13:28:03 GMT
|
You raise a point that was in my mind the whole time as well. If the cubby gets too narrow it will be hard to get things out of and keep clean as well. Also don't know how valuable a cubby would be that barely fits a pair of sunglasses... As I think that is about the size I will end up with. The ones in my range rover are only around 30mm deep and next to useless, difficult to clean and difficult to get things out of, how about elasticated pockets, they used them on early MX5's and you can but ready made ones. Something to consider. I'll try and work out a little better what the actual sizes of any pocket could be and go from there. I do like the suggestion. |
| |
|
|
gess
Part of things
 
Posts: 220 
|
|
Jun 20, 2017 18:09:35 GMT
|
|
My problem when trying to solve this light issue was that if you only use two lamps, they will both be lit if you turn on either one. It had to do with the third switch and both lamps using the same grounding point. That will be fine if you open the door and want both lamps it, but not if you want only one lit as a reading light. Adding a third light only for the door switch eliminates that problem.
|
| |
|
|
|
|
|
Jun 20, 2017 18:17:18 GMT
|
|
If you look at the sketch I did above, using 2 SPDT switches should mean that the two lights can be switched on independently, and with both switches in the 'off' position, the lights should switch on with the door open. There is no need for a 3rd switch (and if anything it makes it a lot more complex)
|
| |
|
|
eurogranada
Europe
To tinker or not to tinker, that is the question...
Posts: 2,556
|
|
Jun 20, 2017 18:46:36 GMT
|
If you look at the sketch I did above, using 2 SPDT switches should mean that the two lights can be switched on independently, and with both switches in the 'off' position, the lights should switch on with the door open. There is no need for a 3rd switch (and if anything it makes it a lot more complex) I think I got it to work as desired using the switches as put in the housing. I had to use 2 diodes but now it does what I needed it to. Big mistake on my part is seeing both the 12v + and the door open as power sources. Where in fact there is one source and two routes to ground.... Couldn't have done it without both gess and you Sam! On the bench I'm happy. Will upload small video later. |
| |
|
|
eurogranada
Europe
To tinker or not to tinker, that is the question...
Posts: 2,556
|
|
Jun 26, 2017 13:17:40 GMT
|
|
So just a short update this week. I have to say after all that has been going on in my life lately that culminated in part in a great party for my parents 50th wedding anniversary in the middle of last week, I was basically just tired. Very very tired. So not a lot got done as I took some time for myself.
So I've started thinking about the cubbies I want to make besides the rear seat. I'd like to do a canoe sort of shape for lack of a better description. I mean like a pocket that has smooth curves all around. So not a box shape, but a box shape with the inside corners rounded as well as the transitions to the bottom. But I'm not quite sure how to approach this. At the moment I'm looking at finding a ready made plastic thing to cut up and mate to the wooden covers. Possibly something like those inserts you can put cutlery in. Making something myself out of glass fibre or wood seems not so simple. But I may yet decide to go that route.
Fitting my third brakelight and custom interior lights in the rear was delayed by not having a light bulb of the right type. One of the bulbs of the brake light had apparently blown and I didn't have a spare. Nor did the shops I had to be in for other items anyway.
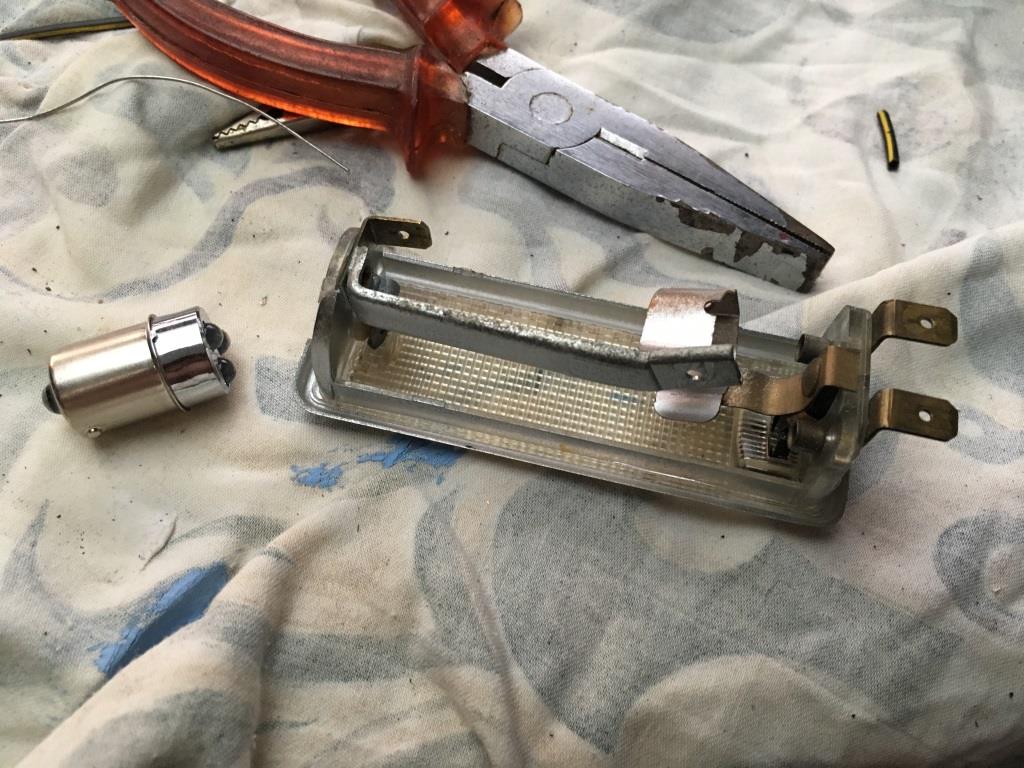
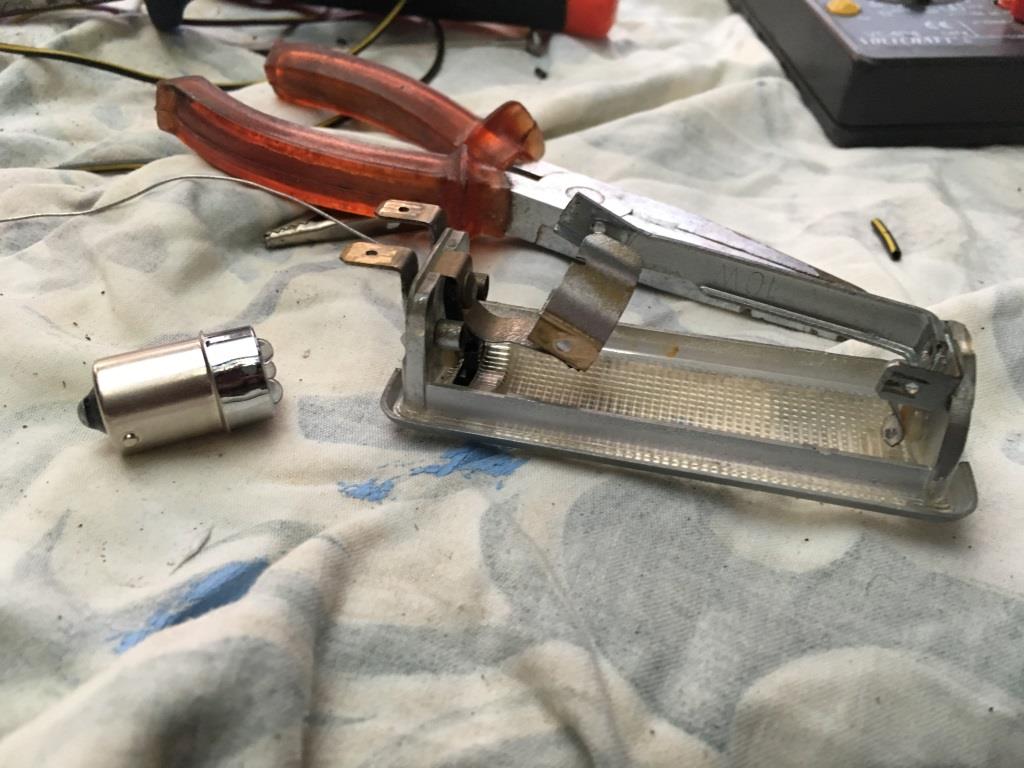
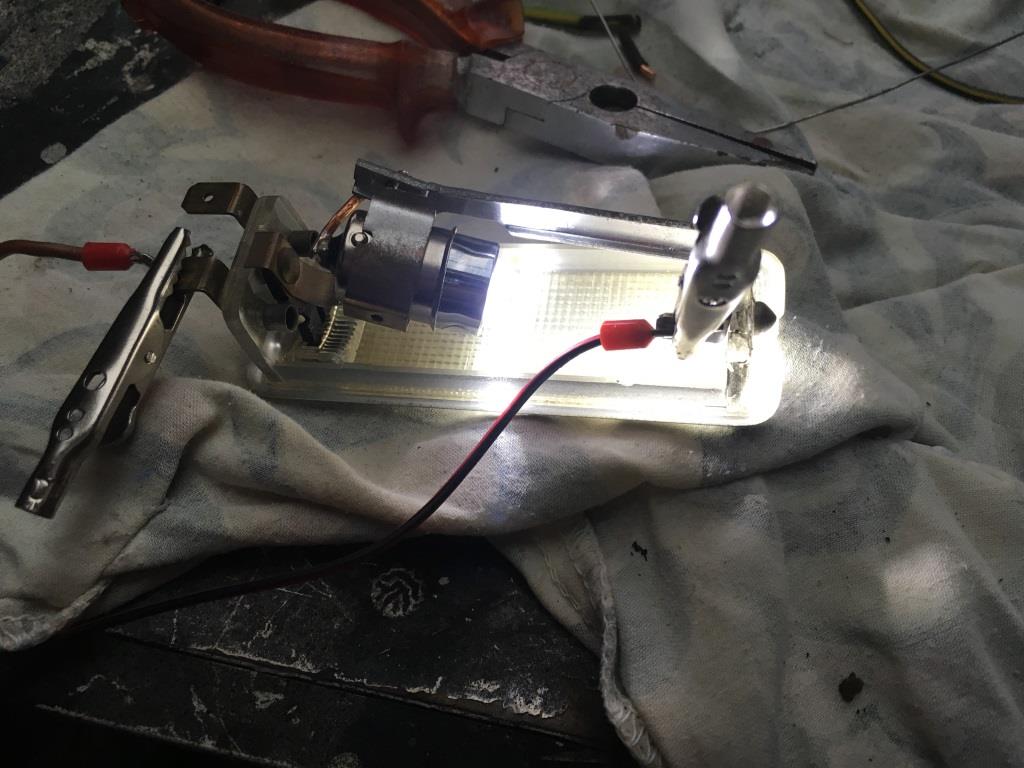
I did however test the theory above about me not hooking up the original front light correctly. And I can confirm I indeed hadn't!! But I have an excuse, lol. The reason I hooked it up wrong was that I had used a LED replacement bulb. These only accept power in one direction. And the original correct way of hooking the light up puts power to the wrong side of the bulb. So when it didn't come on I changed the wires over so it did come on, creating my error. So now I know this, I have to modify the fitting to get the right inputs to the right contacts. A nice little job for tonight!
I'll also start work on the cubby covers and hopefully friday I will have the will and the weather to open up the dash binnacle once more to see if my hunch regarding the gauges is correct or not.
|
| |
|
|
tristanh
Part of things
  Routinely bewildered
Posts: 990 
|
|
Jun 27, 2017 12:12:51 GMT
|
|
Thank you Alex.
Thanks for making me sad with your disappointments, but also
Thanks for making me smile with your triumphs.
Thanks for sharing, and caring.
I've read all 60 something pages, and I'm not even a Granada fanboy, but I love the spirit in which you kept the faith.
I hope when I get my mk1 long-term project finished it will be even half as good.
I hope you're proud of yourself.
One technical question, where the rear interior bulbs are glued, any danger of the heat melting the glue or housing? Perhaps LED replacement ones would be safer?
|
| |
Whether you believe you can, or you cannot, you're probably right.
|
|
eurogranada
Europe
To tinker or not to tinker, that is the question...
Posts: 2,556
|
|
Jun 27, 2017 13:38:35 GMT
|
Thank you Alex. Thanks for making me sad with your disappointments, but also Thanks for making me smile with your triumphs. Thanks for sharing, and caring. I've read all 60 something pages, and I'm not even a Granada fanboy, but I love the spirit in which you kept the faith. I hope when I get my mk1 long-term project finished it will be even half as good. I hope you're proud of yourself. One technical question, where the rear interior bulbs are glued, any danger of the heat melting the glue or housing? Perhaps LED replacement ones would be safer? Why thank you tristanh! Wow, you must have spent quite some time reading all of 60 pages with me being never shy of words. That shows serious commitment! And it pleases me to find that even after having this thread go for 5+ years people are still discovering it and even bother to read the full story. And what a story it has been! Yes, throughout the build I've struggled with ups and downs. And as fits my persona, ups are usually high ups and downs are always deep downs. Although I often quite quickly know with the head that it can all be overcome, the heart doesn't always agree and needs a bit more time. This forum and friends have always been instrumental in getting back on the proverbial horse and not giving up. Although that is another of my personal traits as well. I love how my car turned out and I'm proud to have been the one to have had the vision, the courage to start the restoration and see it through. I'm proud of what I've achived personally and what I've learned in the process. I'm also proud and appreciative of the people who helped me get here. People like the welder, body worker, painter and the upholsterer who helped me with the final details on some tougher parts for sure, but also people like SamJ who's been there to offer a helping hand in the flesh more than once and the barn members who took me in when I needed a place to work. Even the RR forum members who supported the build by reading and commenting. As for the car, I love its factory 1972 styling, its colour, its engine and its interior. No single thing makes me love the car, it really is a combination of all. But the general body style is very appealing to me being low and wide and relatively long. The engine is soo much fun in this car although I sometimes worry it might blow as they are not the most reliable. But the interior as I've said before really completes the package I envisioned. I so love how this turned out. The panels, headliner, alcantara inserts here and there and of course those sporty, yet in design of the stich patterns also hinting period correctness, seats. The interior is really a lovely place to be. It feels practical and comfortable. Practicality has only suffered in access to the rear seats as these seats have to be slid forward electrically. That takes a little while longer than flip backed seats, but is something I can live with. Most of the time I'm in the thing by myself anyway. So yes I'm proud an boy do I love my car! I hate though, that I already know that the future will have work to the doors in store for me, but I've been able to let that go a little and cross that bridge when I get to it. I also loved sharing this story and it feels good that it is inspiring to others. Before answering your question, I'll just ask: as you're not a fanboy but you do mention a Mk1 long term project are we talking Granada Mk1 project or another type of car? Is there a build somewhere? Now to (finally) answer your question: it's not actually the lights that are glued. It's the plastic covers that came with them that I glued to the housing. This means those covers can take the heat of the light (as they belong on them) so there should be no worries of stuff melting. It also enables me to exchange the lights if needed. Although soldering the wires to the bulbs means it's a unit out kind of job. The actual lights I used are LED's. It's a replacement for the original bulbs only using 4 LED's. It seemed clever at the time to go LED as they are not hugely expensive and last long and use little power and develop less heat. The only thing is, I had wanted them in blue. To add a blue hue to the interior in the dark. But they were not available back then (had them for a while, lol). The good thing about that is that blue lights would not have been so suitable as reading lights so the white works out in the end. I hope to be able to see how it looks later this week. |
| |
|
|
tristanh
Part of things
  Routinely bewildered
Posts: 990 
|
|
Jun 27, 2017 14:32:59 GMT
|
|
Ah very good, you're a step ahead, again!
Mk1 is an early vw Golf, getting a lot of modernisation in the suspension, braking and drivetrain.
I have to finish my rally car first! I let my M5 and getting my mk2 GTI ready for NCT/MOT distract me from that...
|
| |
Whether you believe you can, or you cannot, you're probably right.
|
|
tristanh
Part of things
  Routinely bewildered
Posts: 990 
|
|
Jun 27, 2017 14:35:08 GMT
|
|
Oh and how are the brakes after some hundred kms of driving?
|
| |
Whether you believe you can, or you cannot, you're probably right.
|
|
eurogranada
Europe
To tinker or not to tinker, that is the question...
Posts: 2,556
|
|
Jun 27, 2017 15:01:33 GMT
|
Oh and how are the brakes after some hundred kms of driving? Well funny you should ask as last time when I drove the Granada I noticed me thinking to myself that the brakes actually feel very normal now. They do what they need to do and they inspire confidence while doing so. You can brake softly and hard. Brake fluid stays at the same level also. In the several longer journeys I made, I never ever had any thoughts about the brakes. I did traffic jams and fast driving even heavy braking due to idiot drivers but when used the brakes performed as expected. Maybe they have settled some?! But, personally I think this is really due to me getting used to them. The pedal has a very different feel to the other cars I drive regularly, but I think it may just be how it always was. But after 6,5 years of not driving the car the reference is gone. So I may have been trying to achieve something that just was not possible. The important thing is that they tested 100% and feel good in use. |
| |
|
|
tristanh
Part of things
  Routinely bewildered
Posts: 990 
|
|
Jun 27, 2017 15:27:16 GMT
|
|
I asked as I'm a mechanic by trade, and it's amazing how curse word brakes feel til they're bedded in.
And in my experience, so called self adjusting brakes barely ever adjust! I've had vans in work that I've put 20-30 clicks on the adjusters.
|
| |
Whether you believe you can, or you cannot, you're probably right.
|
|
eurogranada
Europe
To tinker or not to tinker, that is the question...
Posts: 2,556
|
|
Jun 29, 2017 11:32:33 GMT
|
|
|
| |
|
|
tristanh
Part of things
  Routinely bewildered
Posts: 990 
|
|
Jun 29, 2017 12:19:23 GMT
|
|
I use led festoon bulbs for that reason. Or a short piece of led strip.
|
| |
Whether you believe you can, or you cannot, you're probably right.
|
|
eurogranada
Europe
To tinker or not to tinker, that is the question...
Posts: 2,556
|
|
|
|
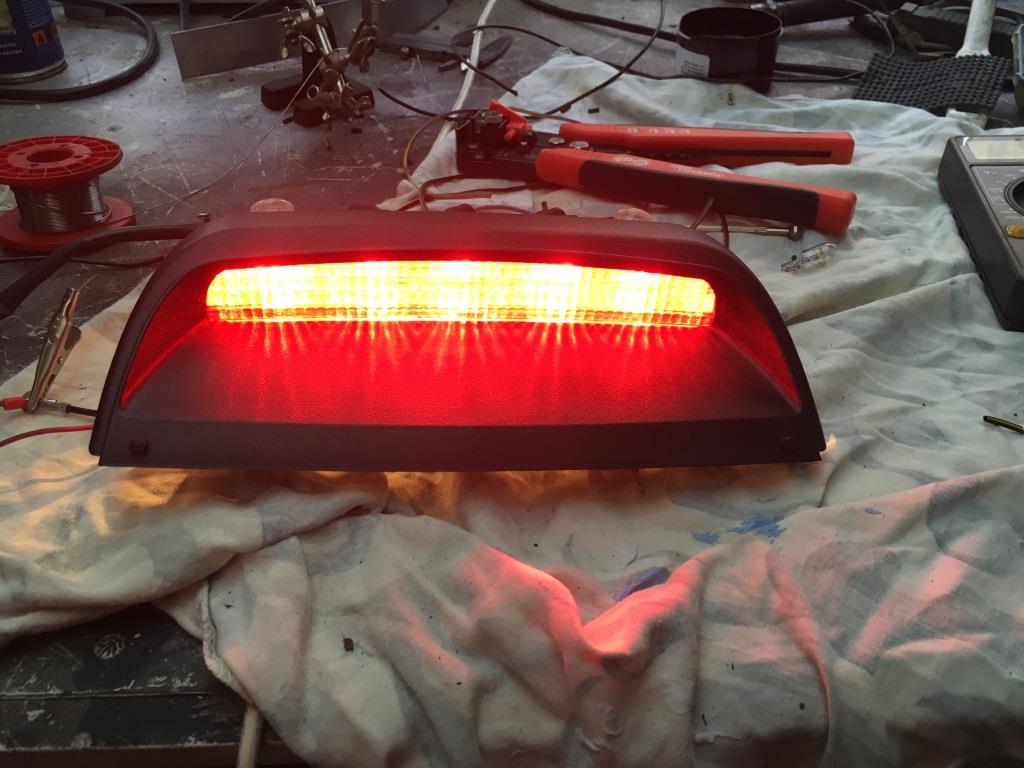
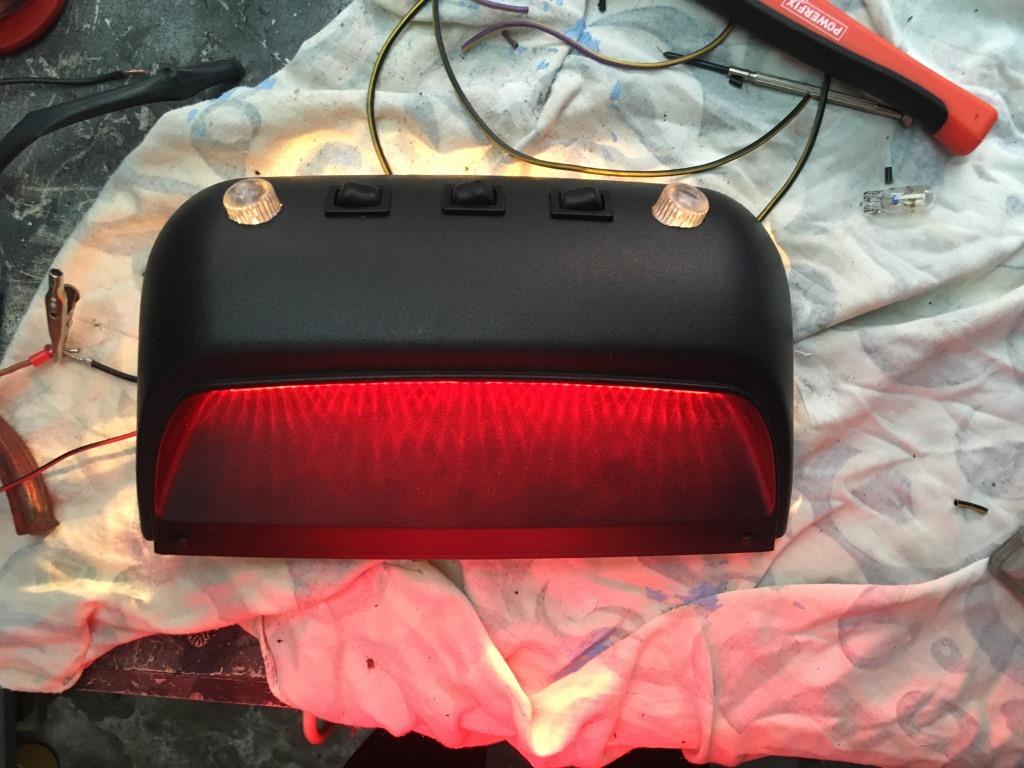
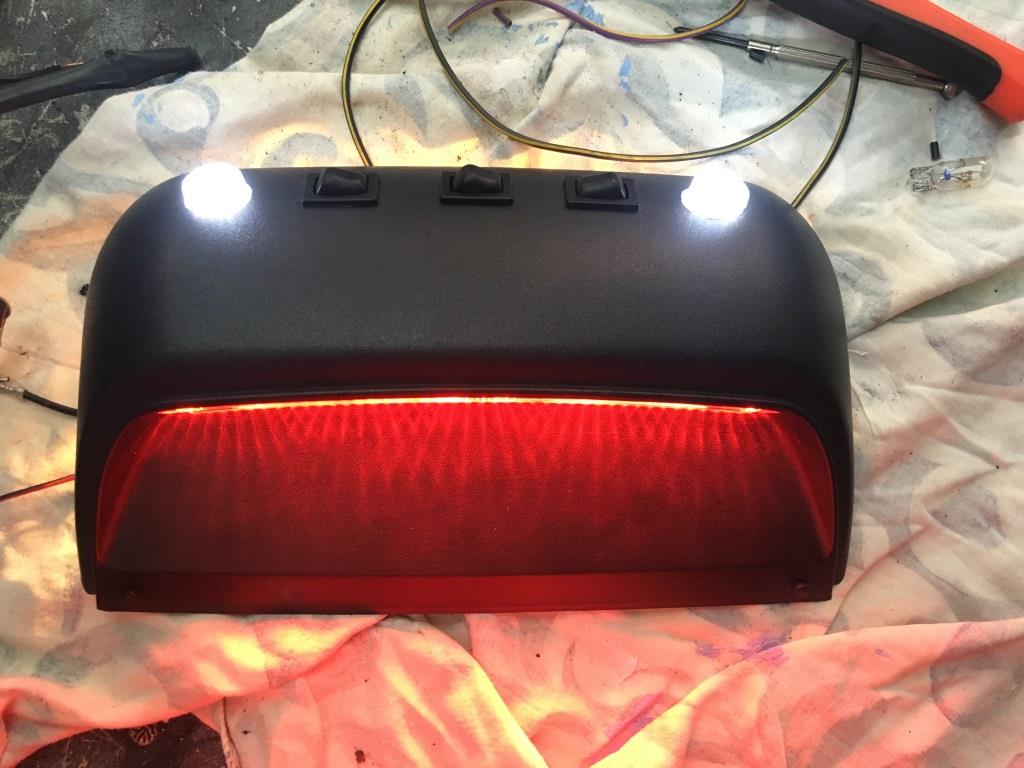
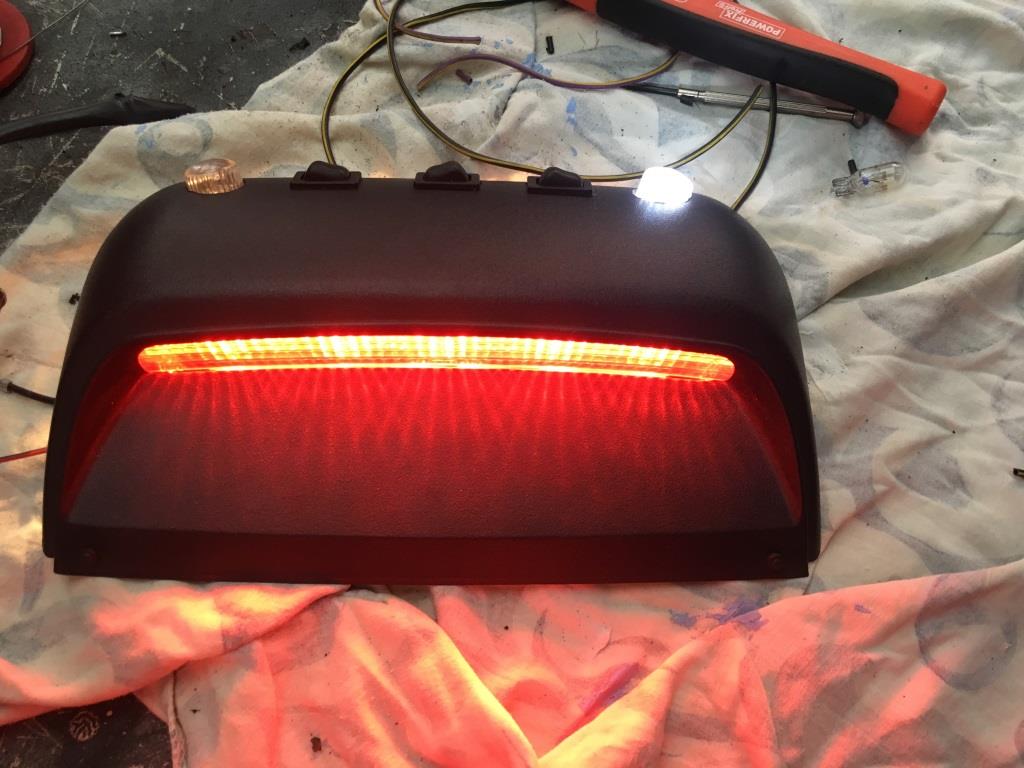
Well with my daughter in a week of tests at school my time on the Granada was limited. But after all the work done, I was now very eager to see how my interior lights would look in situ and how the 3rd brake light would look. Now both lights and 3rd brake light are in and working. There's room for improvement though. With the rear unit now in place, I can see when the 3rd brake light is on through the clear caps of the interior lights. Although nice to see the light working, it's not intentional so I should at the minimum black out the pieces of the clear caps on the inside of the unit. Also pictures showed that for the same reason when the interior lights are on, light escapes into the headliner area lighting up the roof looking a bit weird. So another reason for the blackout. 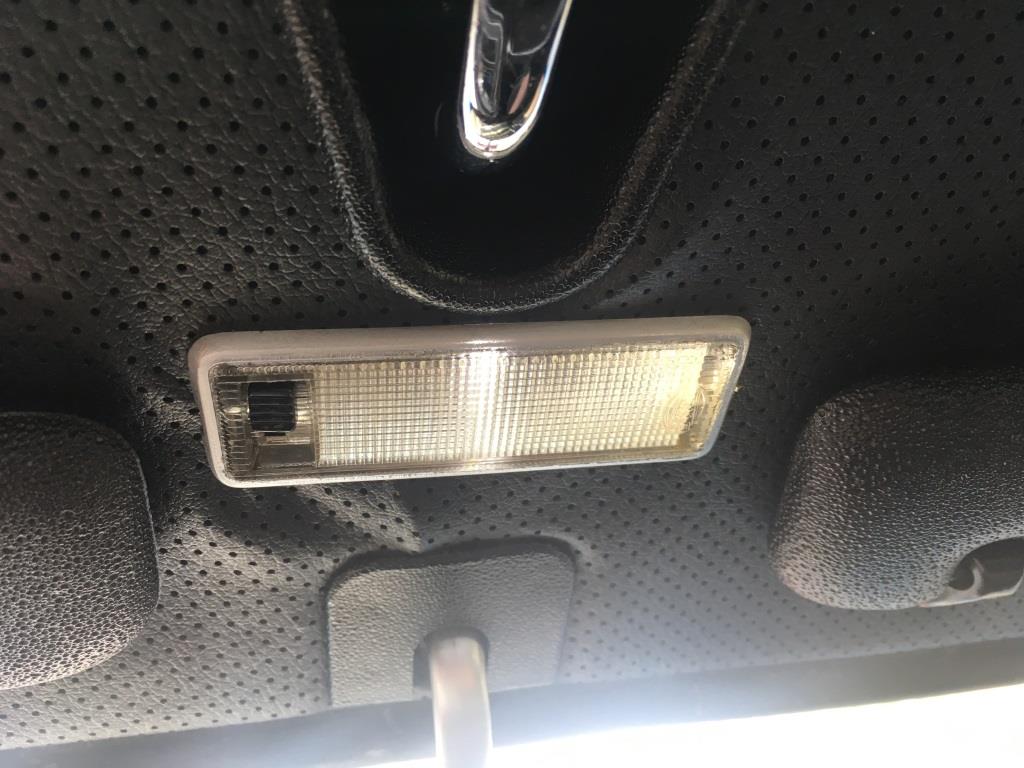 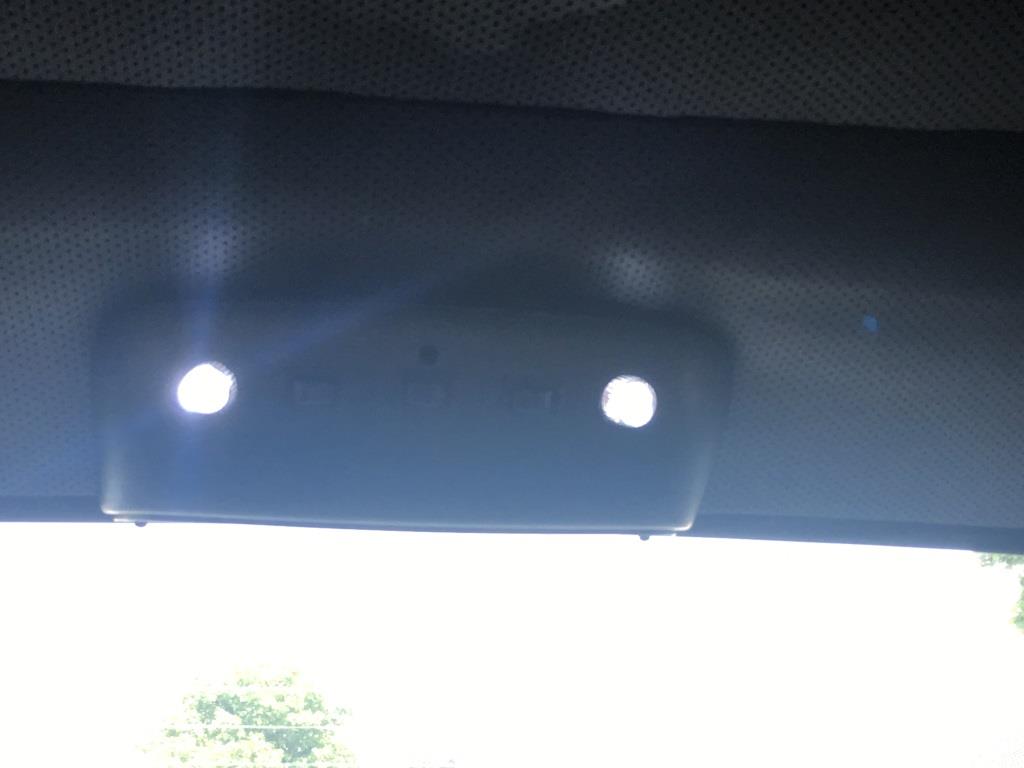  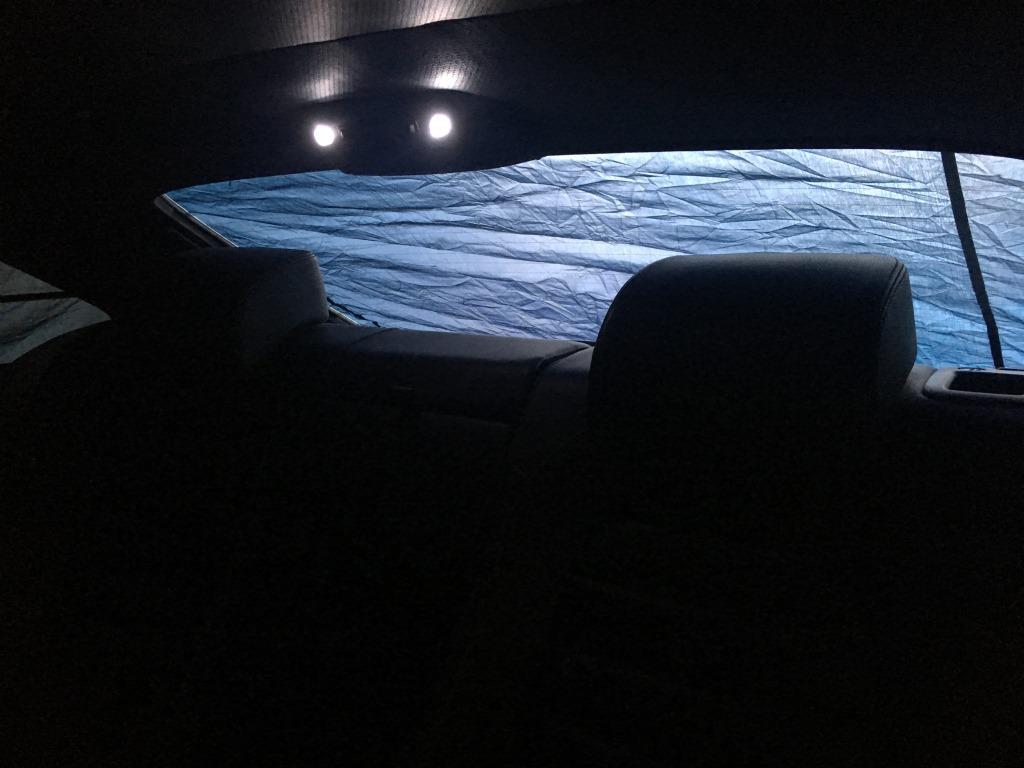 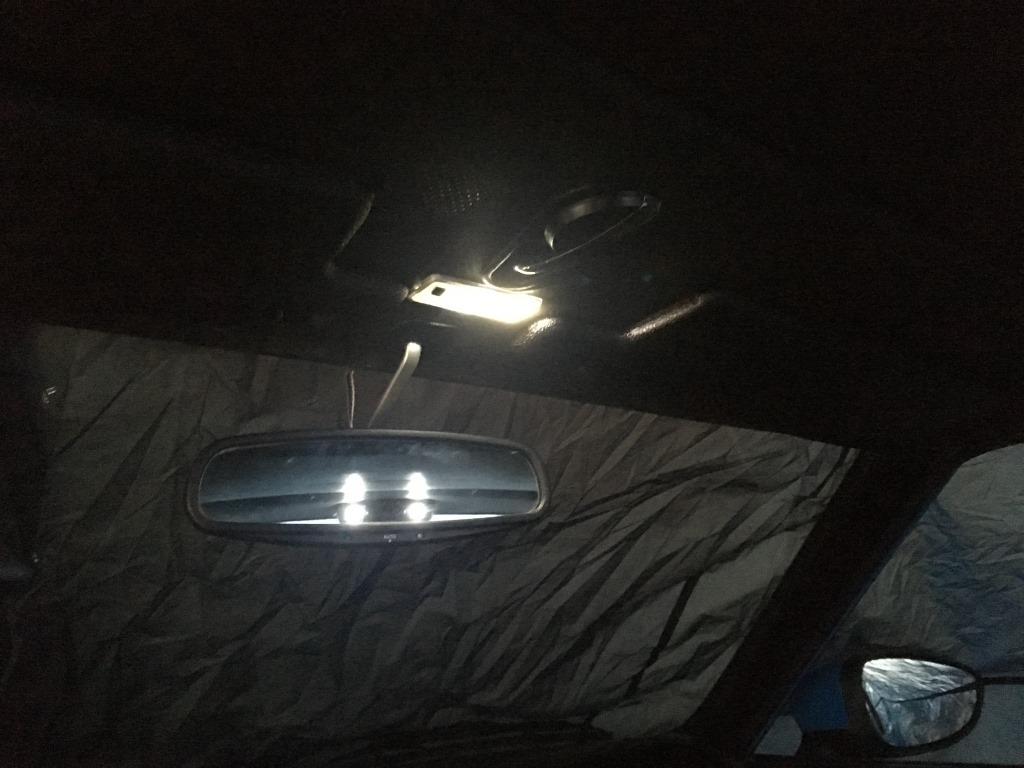 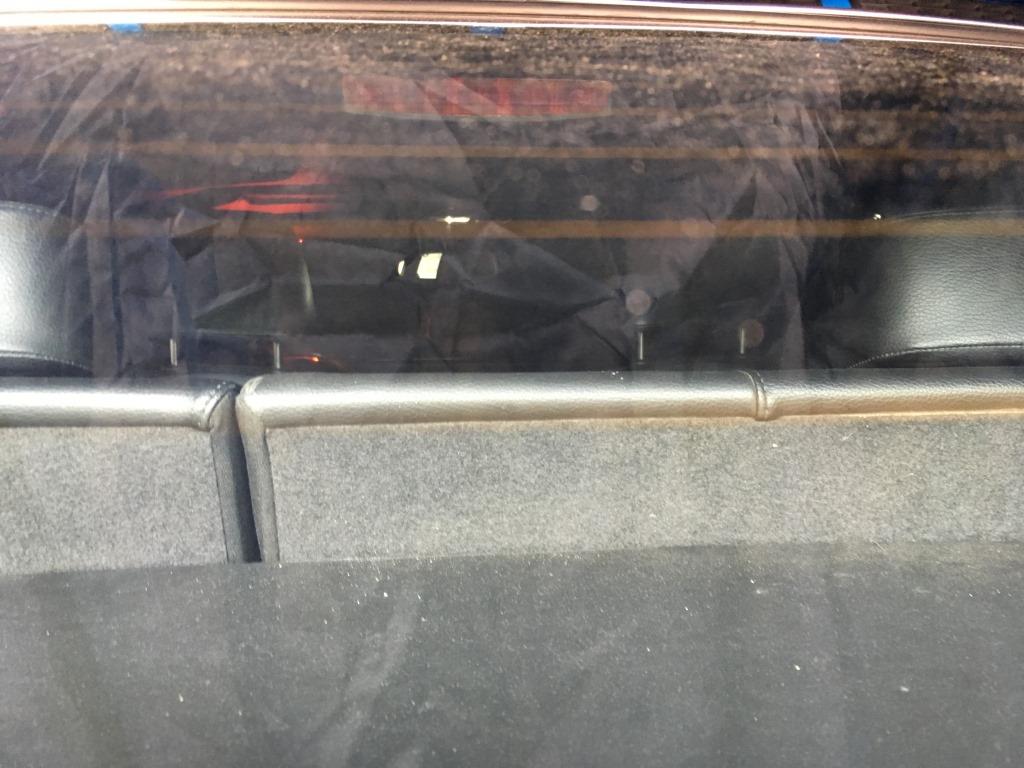 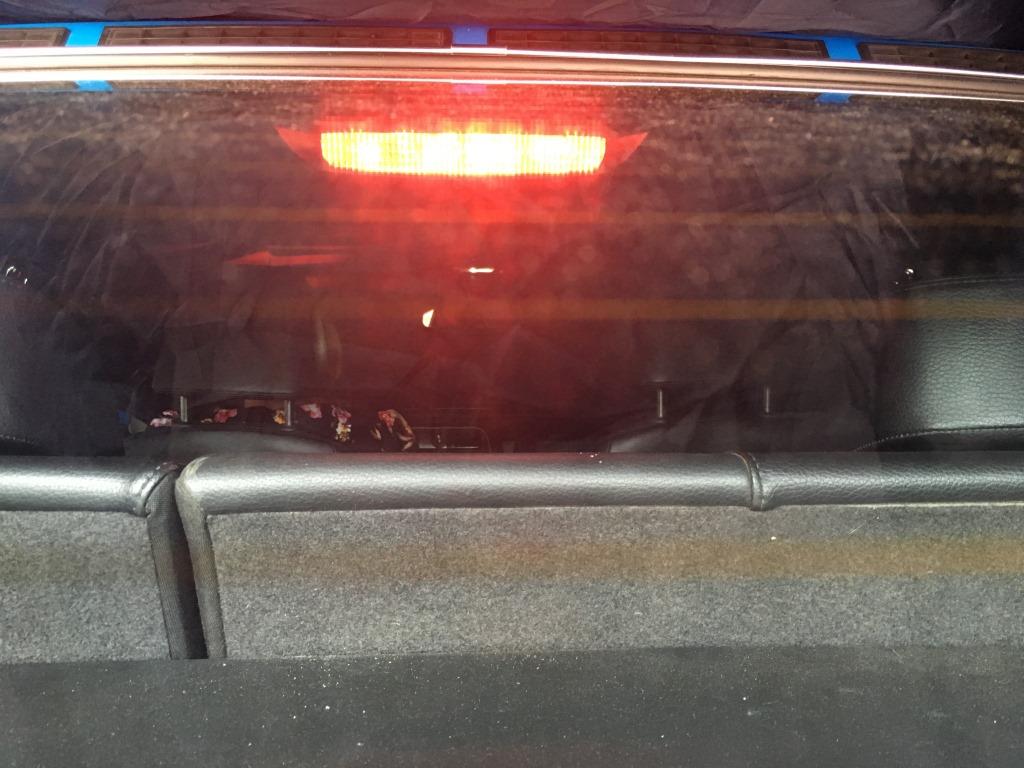 I made a start on the seat side cubbies! But this turned into a frustrating event. Though the gap is sizeable as is, for any cubby it is pretty narrow. I can maximally fit a 5 x 15 cubby hole that can be either 5 or 8 cm deep. I'm afraid 8 will be to deep for convenience so leaning towards 5cm deep as well as wide. I had wanted to do rounded corners but have no clue how to and though more beautiful it's also less economical for actual space and it's harder to upholster also. Still had I known a relatively easy way to achieve the canoe like shape I would have made it like that. Next up was the problem of me wanting a cover for them when not in use. To keep dust etc. out. But this creates a new problem. I want that cover to line up to the panel. But any type of hinge needs room top operate and the hinge I have are piano hinges and they open up to the side. Meaning if placed on the edge of the panel it would open INTO the panel where there is no room. The solution is to move the hinge in a little but that also means from the top view there will be a gap. Another drawback of the piano hinge is that it itself is 12mm deep and has to be at least 5mm from the panel edge. This means my 5x15 becomes a max of 4x15. I like the hinge idea because the cover is firmly attached to the cubby. I dislike the gap needed to make it work and the possible implications on size. Alternatively I have a magnetic idea: as I work for a magnet wholesaler I can easily find magnets to use in the cover system. Pro is no hinges to contend with and no gap, con is that the cover is not attached to anything so where do you keep it when the cubby is used in such a way that the cover needs to be open? In the end I did not get much more made than 4 equal panels, 2 for each side. The cover panels will need to be shortened as the full panels are meant to extend under the rear seat side bolsters a bit to show no gaps. Typically the panels seemed to fit better on the right than on the left while the seat should be centred. So may have to adjust a little still. But I need to see this in full light situations, not in a dark garage with nothing more than interior lighting and the seat bottom not tightened down. 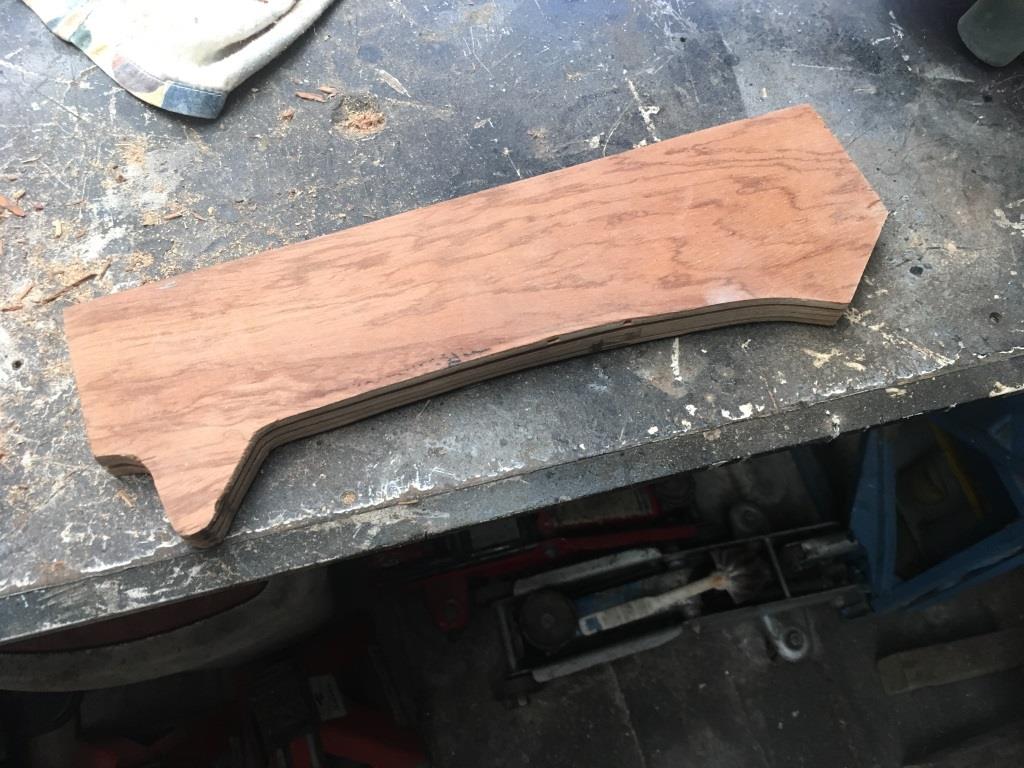 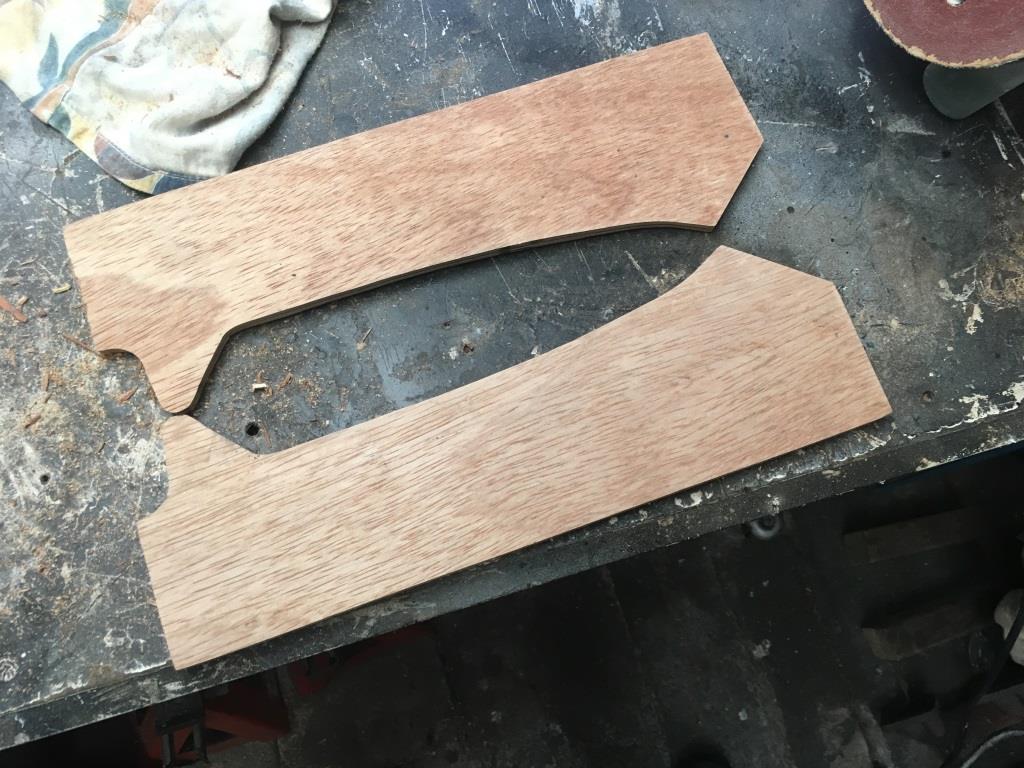 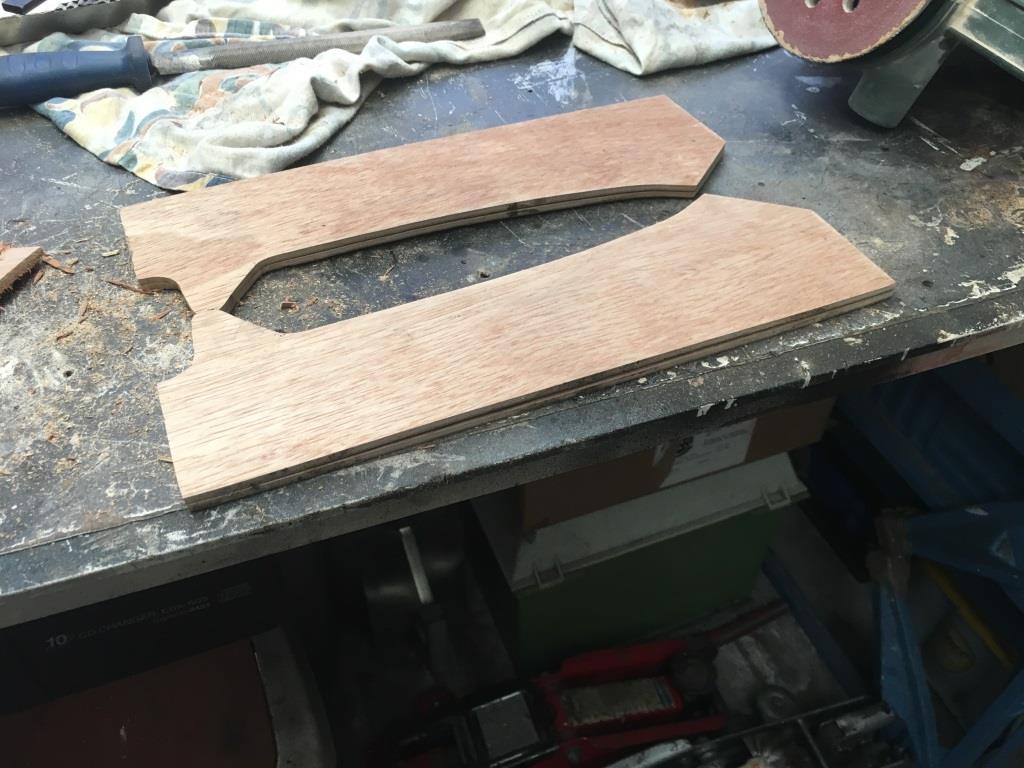 I had wanted to do so much more: - Fit the bluetooth to the stereo - Hook up the signal wire to the cd-changer - Measure wheel hubs for centre rings etc. - Finally check those gauge feeds... Basically work through the list. But weather was good when I was not able to spend time on the car and bad when I was. At those times I miss not having a garage with a driveway at home. I'm always first seeing if the weather is well enough and then if there's a convenient parking space available as well. Anyway onwards we shall go! I do feel that the fuel tank issue is stopping me from enjoying the car. I'm now way too worried about grinding to a halt. And I'm expecting my engine to blow at any time for some reason. Maybe I just need to get it out more... It does seem to work well at the moment when I do, with the new diff etc. |
| |
|
|
vulgalour
Club Retro Rides Member
Posts: 7,281
Club RR Member Number: 146
|
|
|
|
|
High level brake lights are a brilliant thing, they make a surprising difference to how other road users treat you. As frustrating as that install was, it looks like you've done a really good job and it's another item that doesn't look out of place inside the car even though it's from something much newer.
|
| |
|
|
eurogranada
Europe
To tinker or not to tinker, that is the question...
Posts: 2,556
|
|
|
|
High level brake lights are a brilliant thing, they make a surprising difference to how other road users treat you. As frustrating as that install was, it looks like you've done a really good job and it's another item that doesn't look out of place inside the car even though it's from something much newer. I fitted the 3rd brake light just for that reason: it gave me a safer feeling knowing that there would be another light a bit higher up and therefore possibly more noticable. It's just a bit more in your face, almost literally. Also with that light there is never the confusion you can have with the regular lights: is it the normal rear light you see or the brighter brake lights? If that high up light is on it's always the brakes! It's one of my pet pieves with the modern day light sensor triggered "auto" lights. Going underneath a slightly longer overpass for example the system decides to switch on the regular lights. But as they come on so suddenly they at that moment sort of impersonate the brake lights. Led lights are even worse in this case as they come on ultra fast. I've since adjusted to this but it can be confusing or even invoke unneccessary braking! I see that happening nearly daily on my commute. Well that as a side step... I did enjoy this little project a lot. I was just baffled why it wouldn't work right on the bench, I thought I knew enough of the basics of power to make this work. But that all was down to one wrong conclusion from using a LED bulb instead of an original filament type. When the collective knowledge of this board set me straight it made it all a lot clearer and easier to get to work. I too like how the unit as a whole does not seem to look out of place. I'll soon address the blackening of the inner cap edges to eliminate the bleeding of light and then it will be done. I've said it before, but the interior of this car is a lovely place to be! |
| |
|
|
|
|
|
|
|
|
could you use small kitchen cupboard style hinges to lift the lid of the storage boxes up and out of the way?
|
| |
|
|


