jonomisfit
Club Retro Rides Member
Posts: 1,787
Club RR Member Number: 49
|
|
|
|
I wasnt full of much enthusiasm for going outside today.... 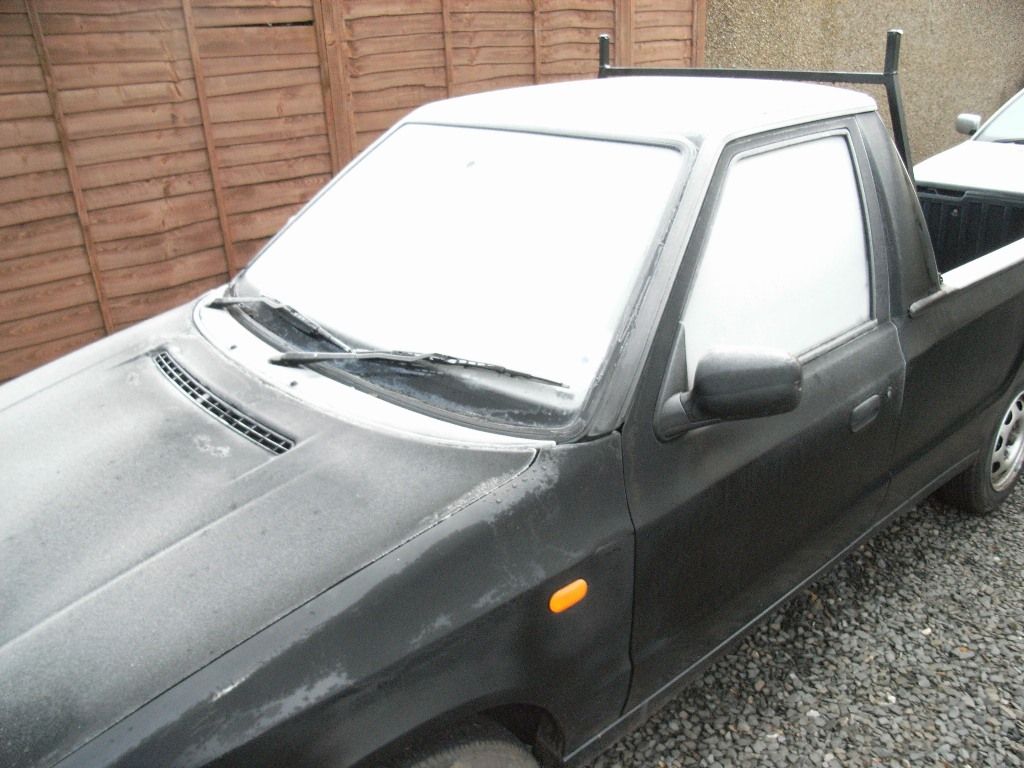 But eventually got my backside in gear and ventured out. After 5 mins of hacksawing I was a lot warmer. Base of the central section of the chassis complete 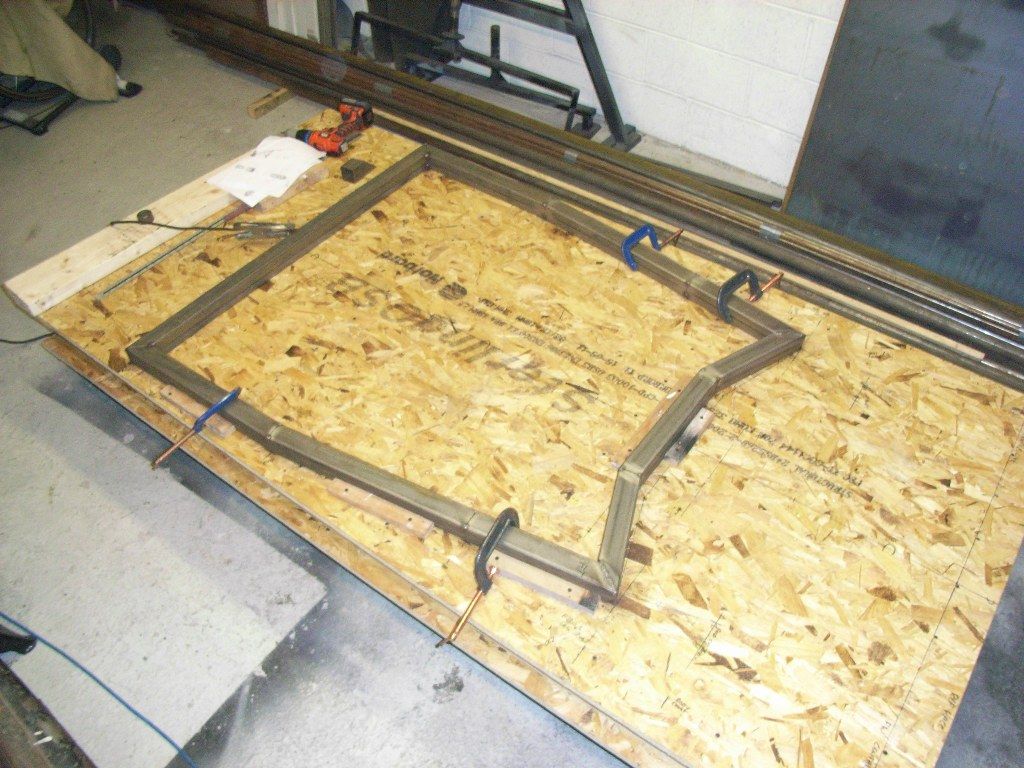 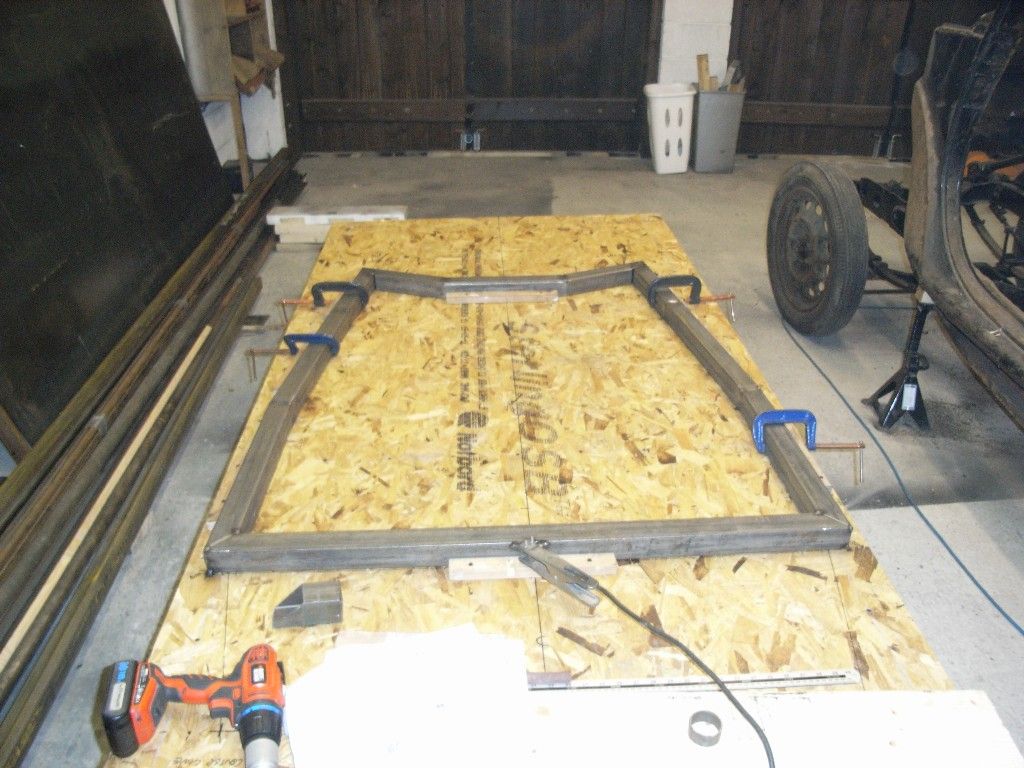 And made a start on the front suspension box 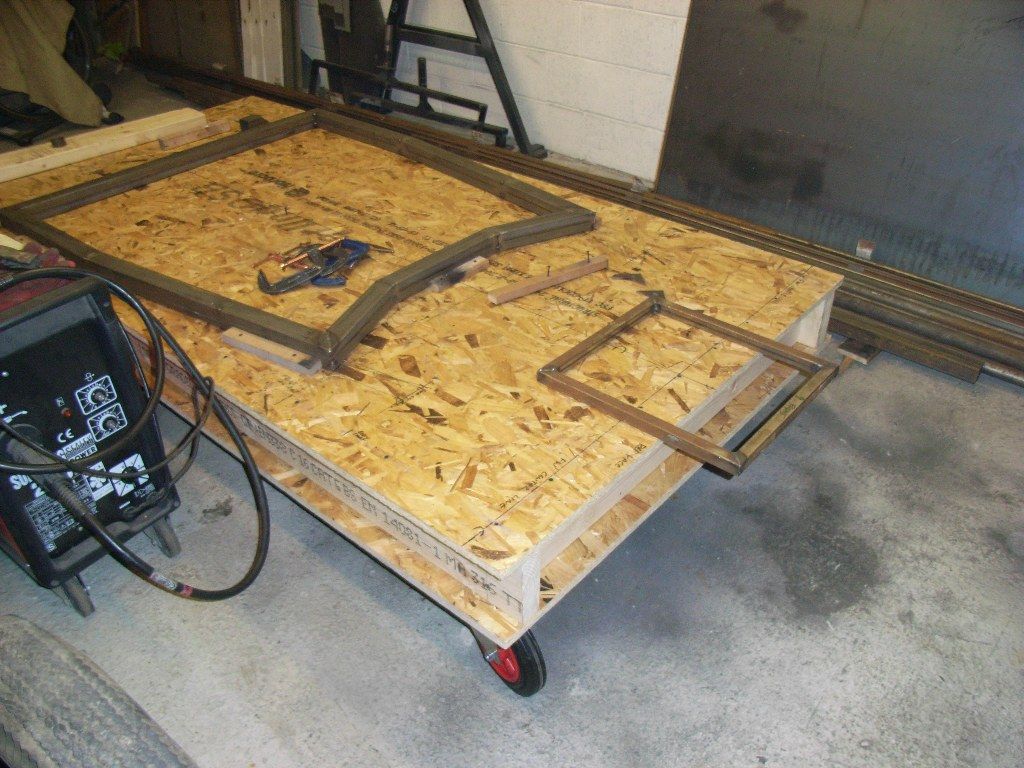 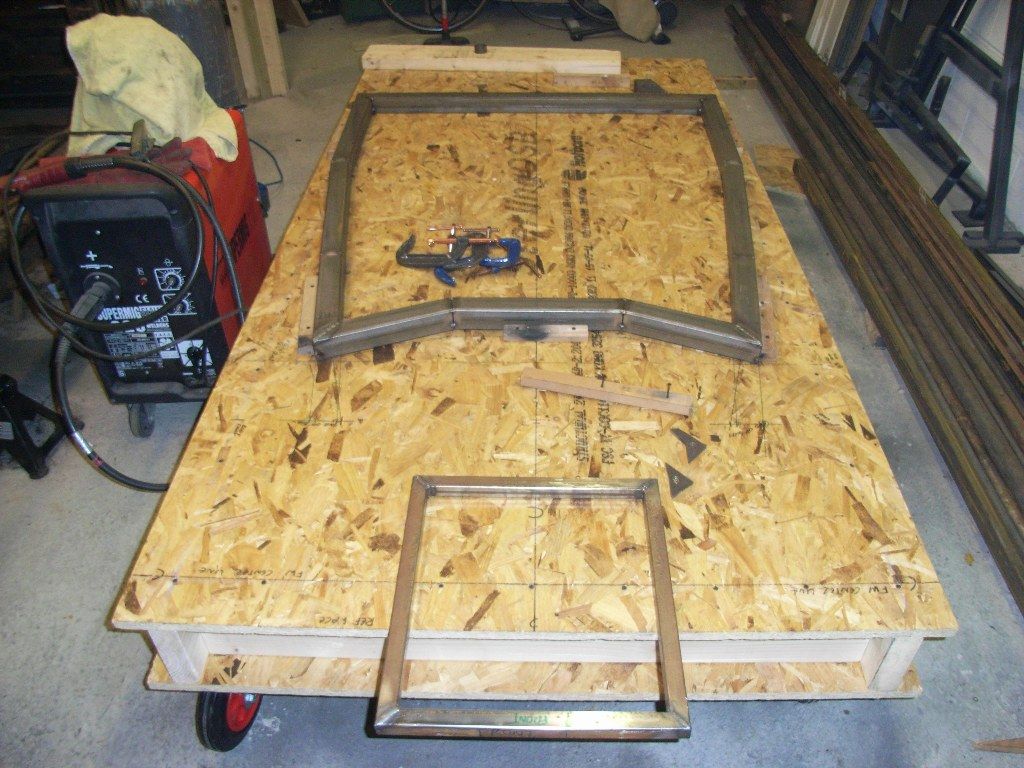 Not amazingly exciting yet, but starting to get some progress. |
| |
|
|
|
|
jonomisfit
Club Retro Rides Member
Posts: 1,787
Club RR Member Number: 49
|
|
|
|
I was hoping to make a fair bit of progress this weekend, but got distracted by some Christmas nights out and was "un-well" on Saturday.... Still got some work done on the front suspension box. 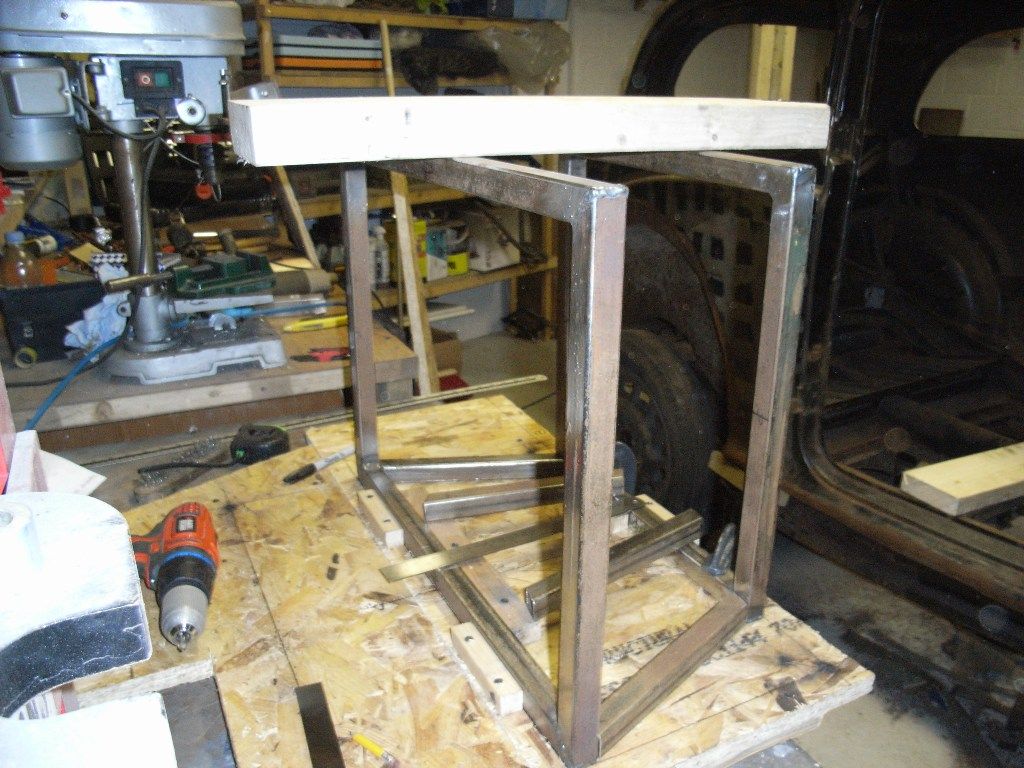 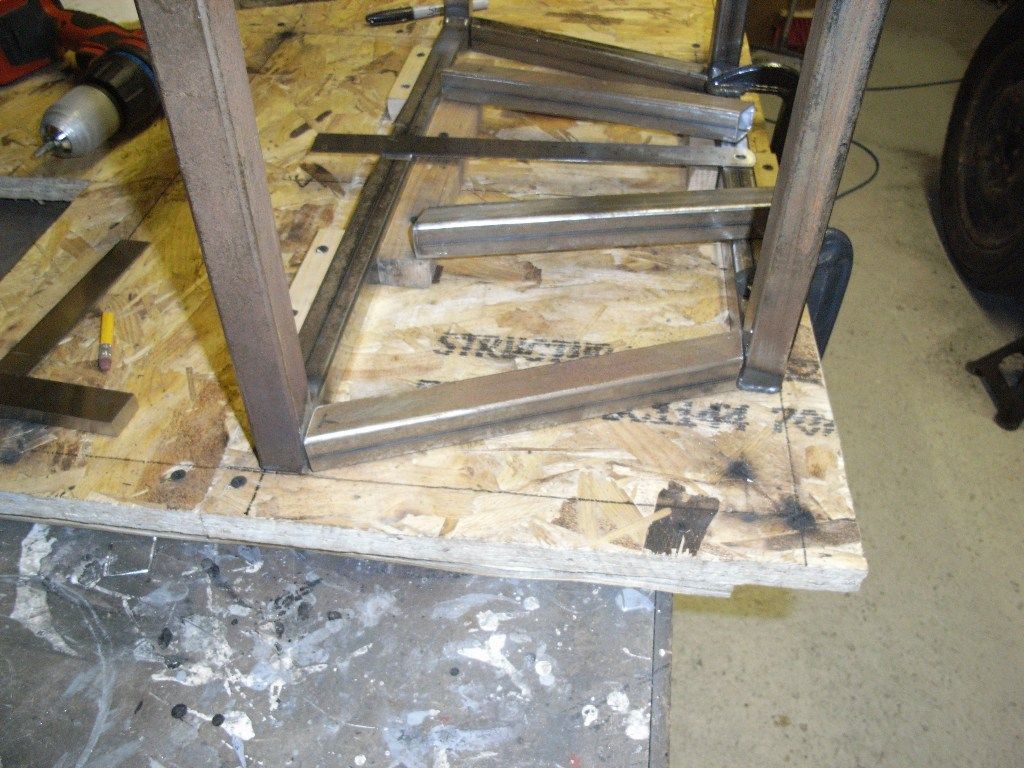 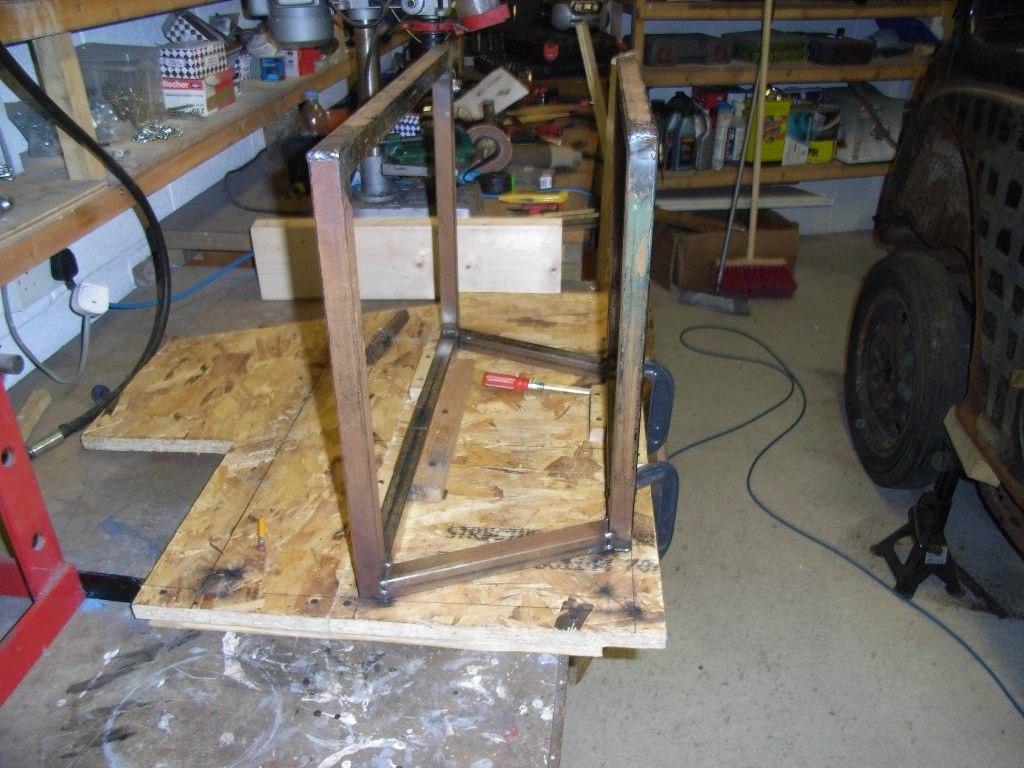 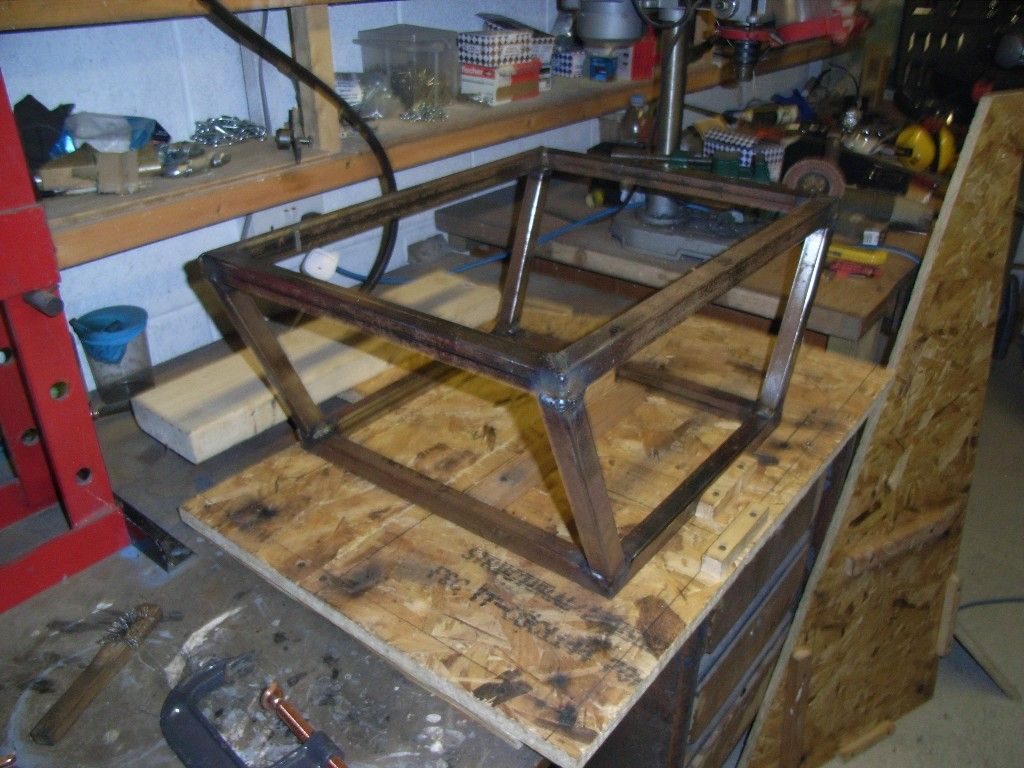 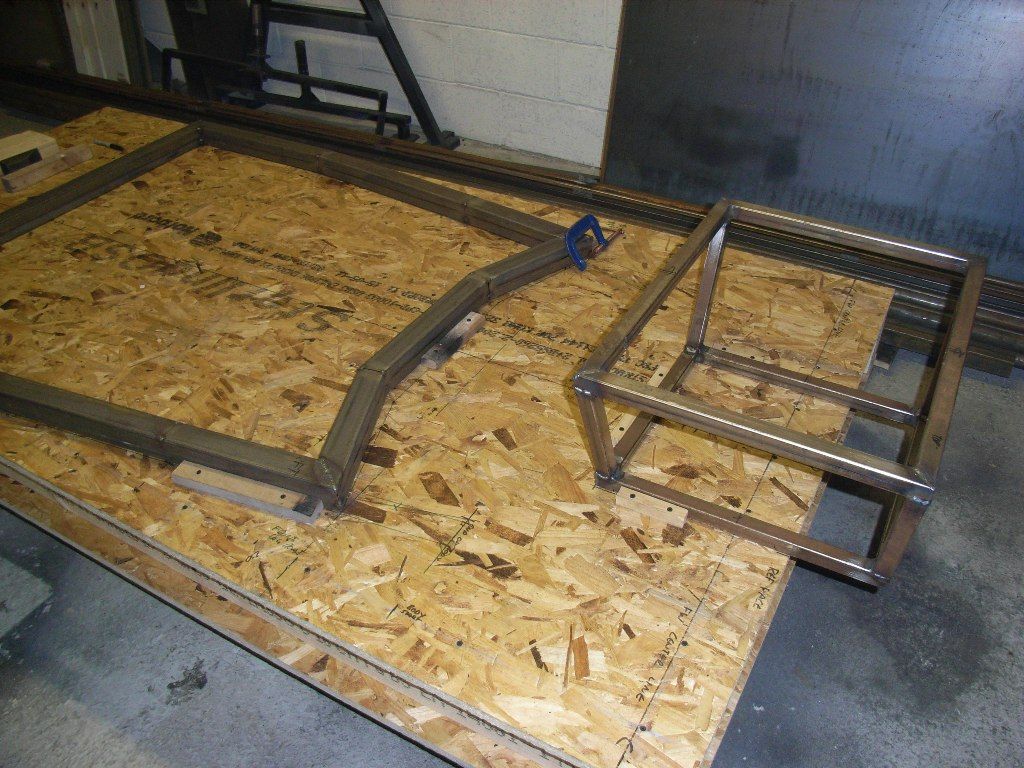 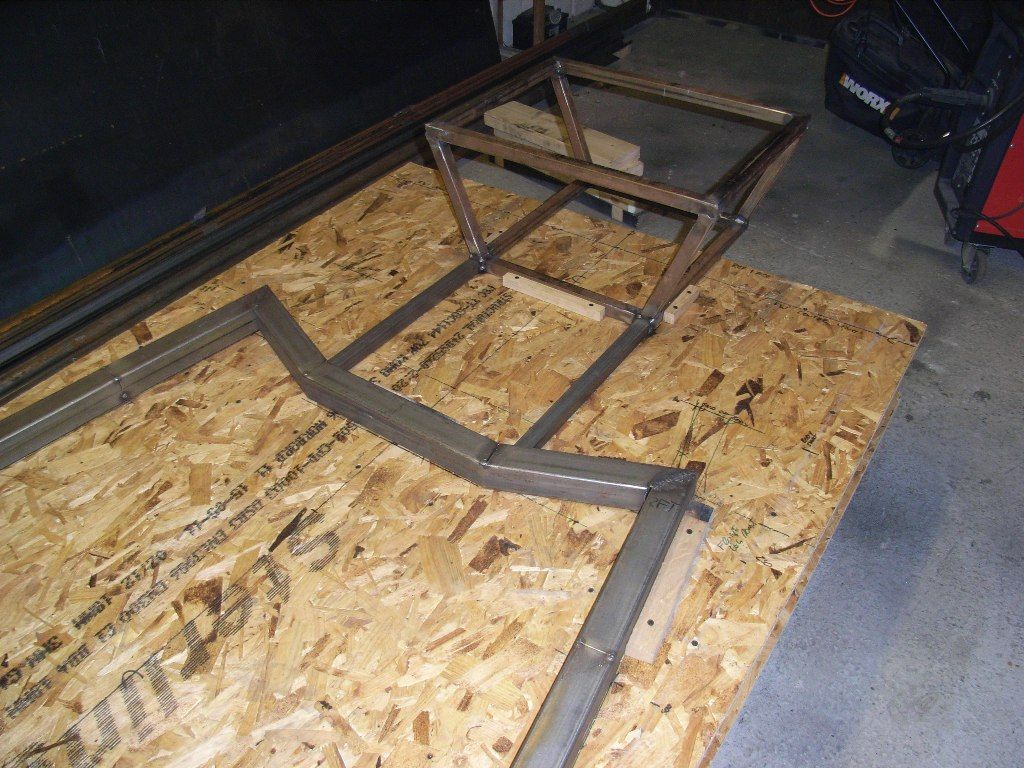 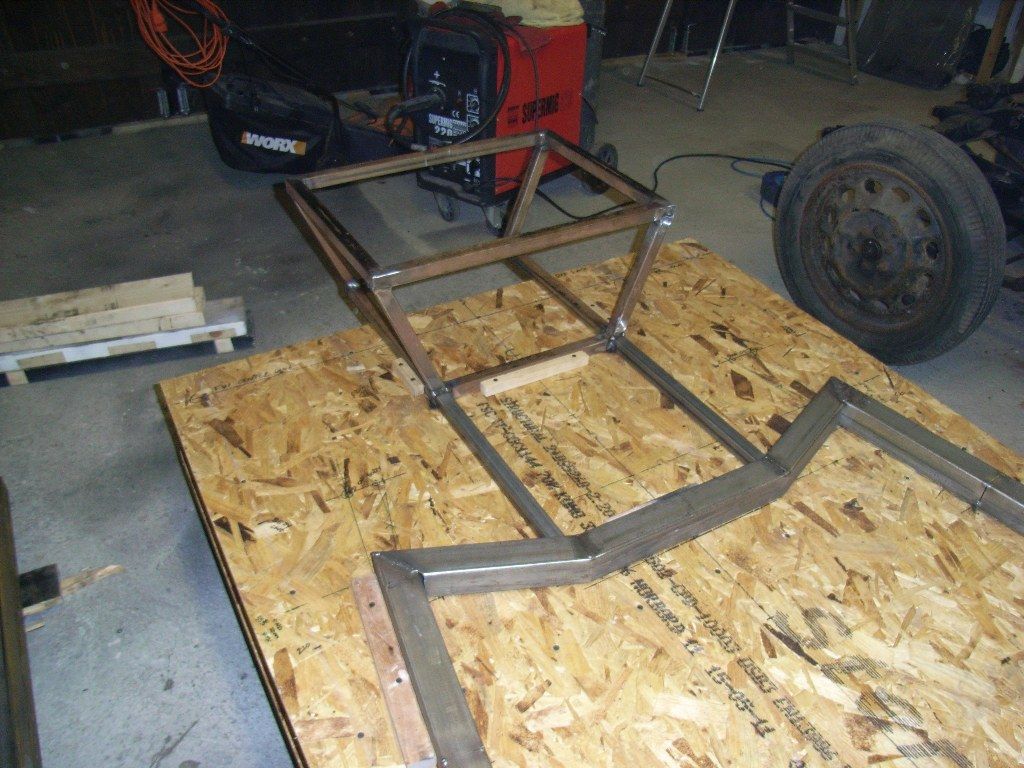 Its not got any of the diagonals in yet, but i want to get it the main chassis together and welded first, to try and prevent things being pulled. Will need to get an engine and box sorted soon as I want to make sure I don't build things too tight. Hopefully get some more done next week. |
| |
|
|
jonomisfit
Club Retro Rides Member
Posts: 1,787
Club RR Member Number: 49
|
|
|
|
Well.... I had two weeks off over Christmas and succeeded in getting into the workshop this afternoon only :-( Still I did get some progress. Managed to make the rear suspension frame although ran out of time to get it fitted. 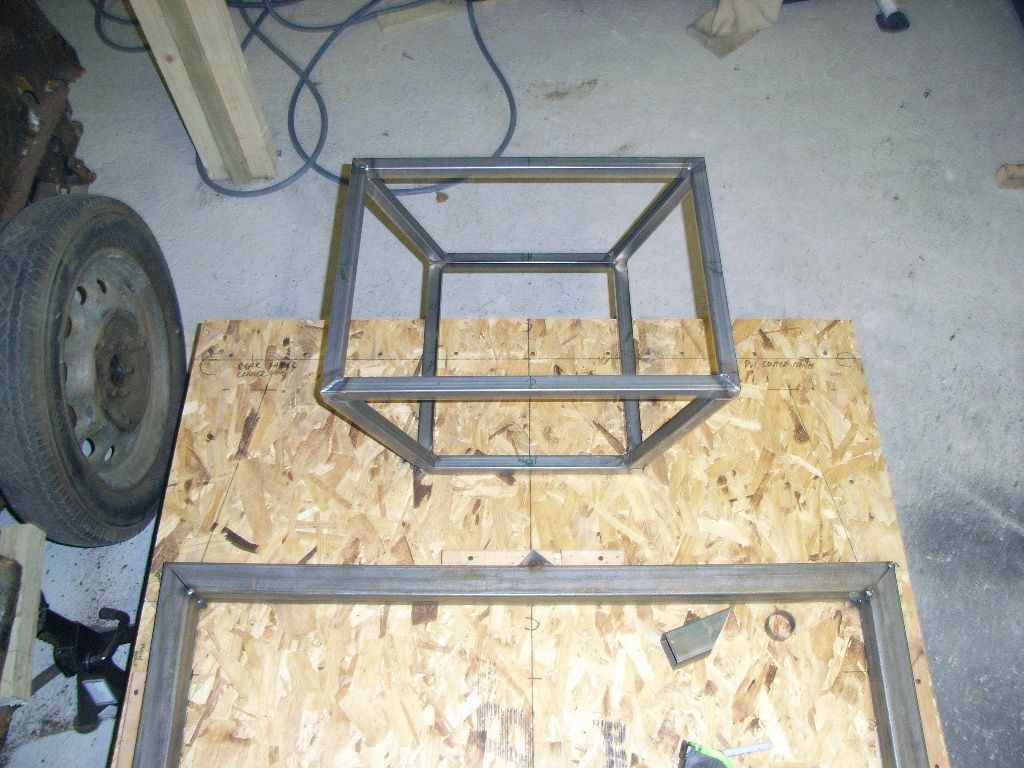 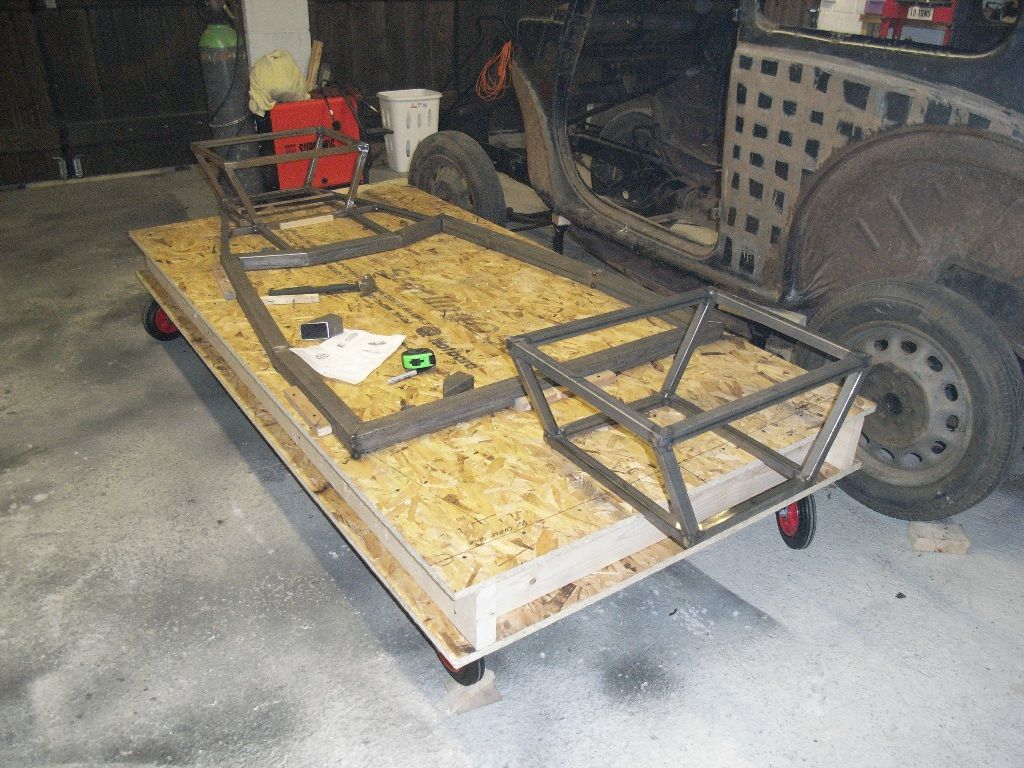 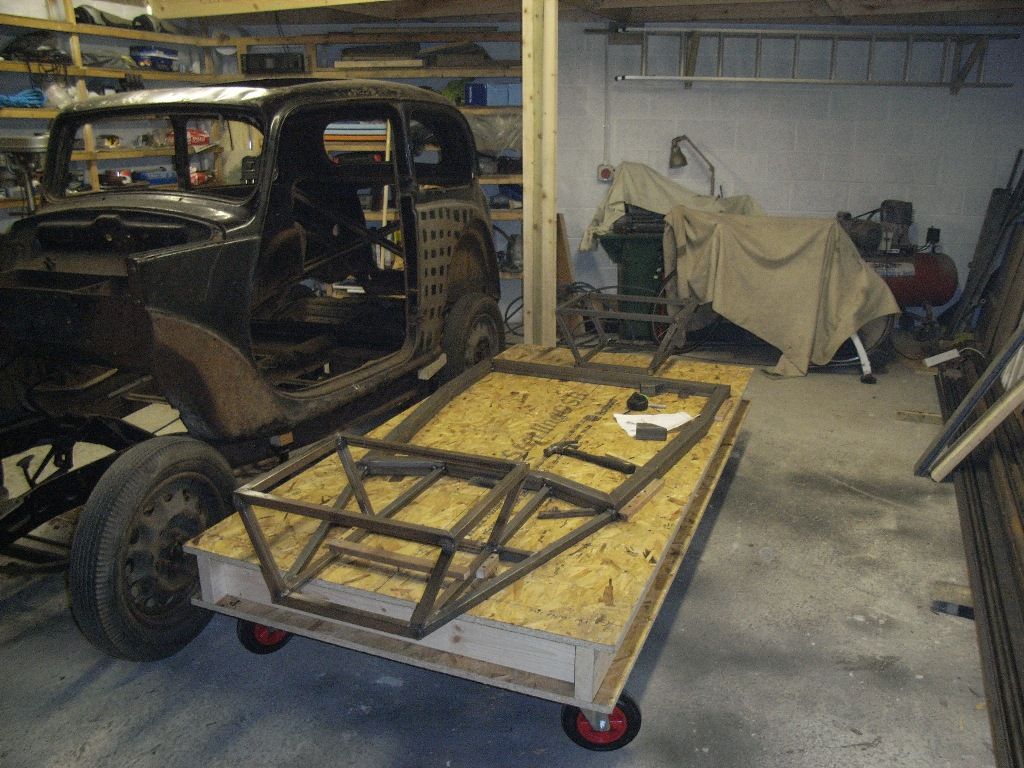 I managed to get eh front one tied in though. I've also ordered some parts so hopefully will manage to make some progress shortly. Next step after fitting the rear sus frame is sticking the body on it so I can check measurements for the cage I need made. 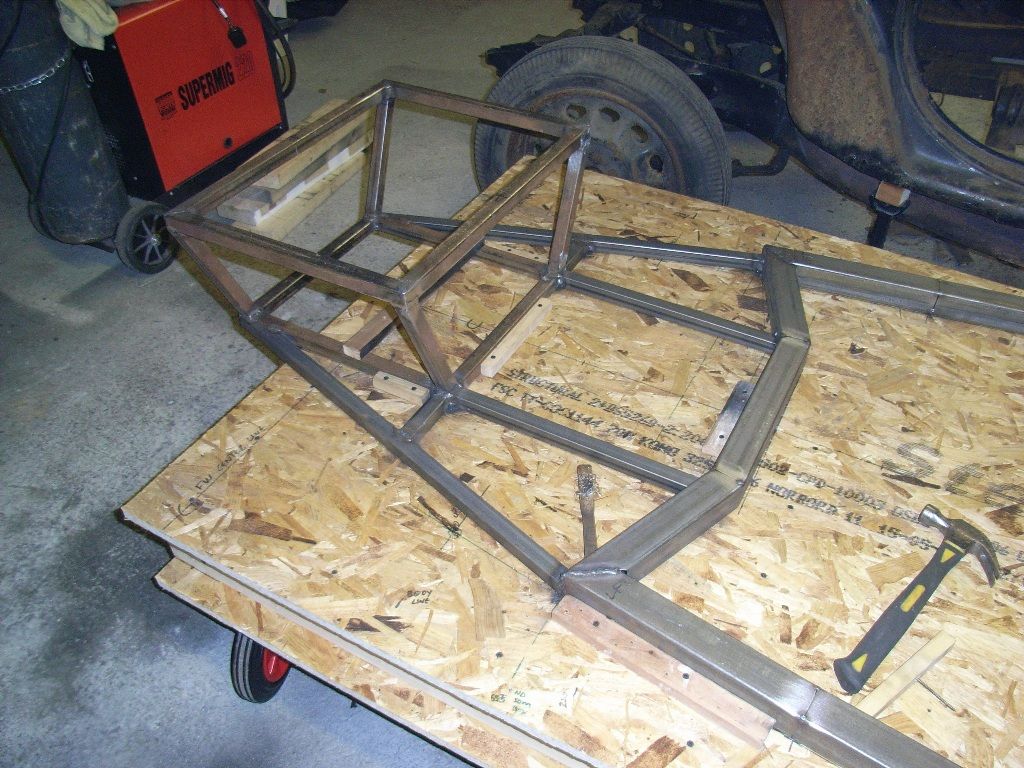 |
| |
|
|
jonomisfit
Club Retro Rides Member
Posts: 1,787
Club RR Member Number: 49
|
|
Jan 13, 2013 20:18:00 GMT
|
I mainly ended up finishing the decorating this weekend, but gt a couple of hours in the workshop. I've been trying some different bits out in CAD and starting to get there. 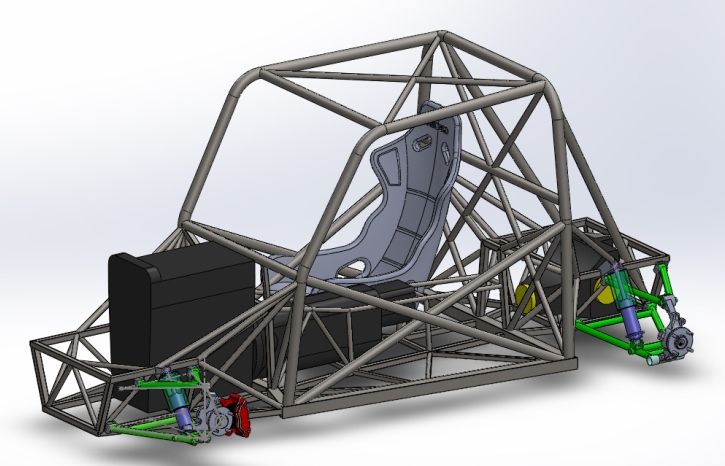 Stuck the body onto the chassis to check some things out. 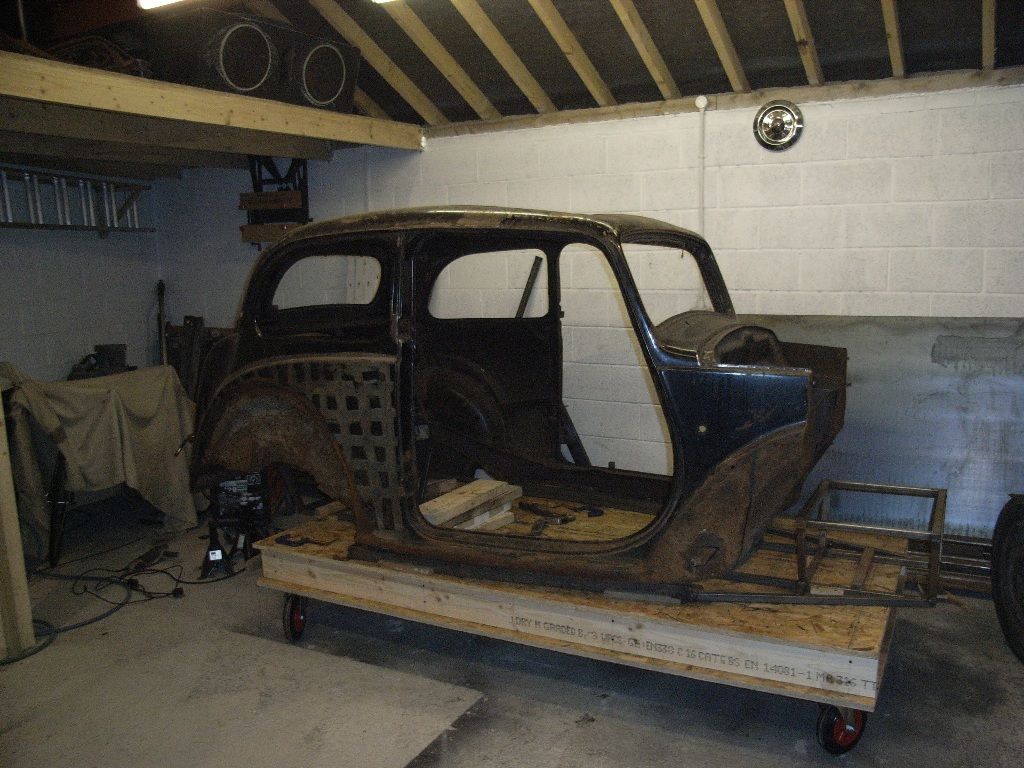 Welded in the rear suspension module. 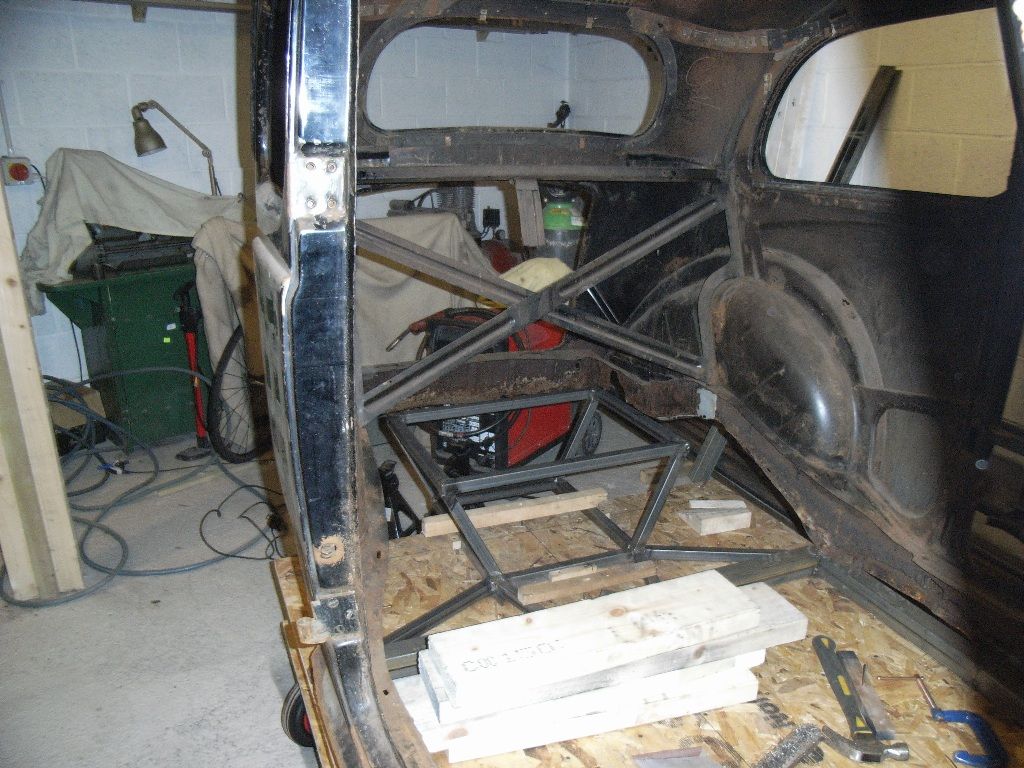 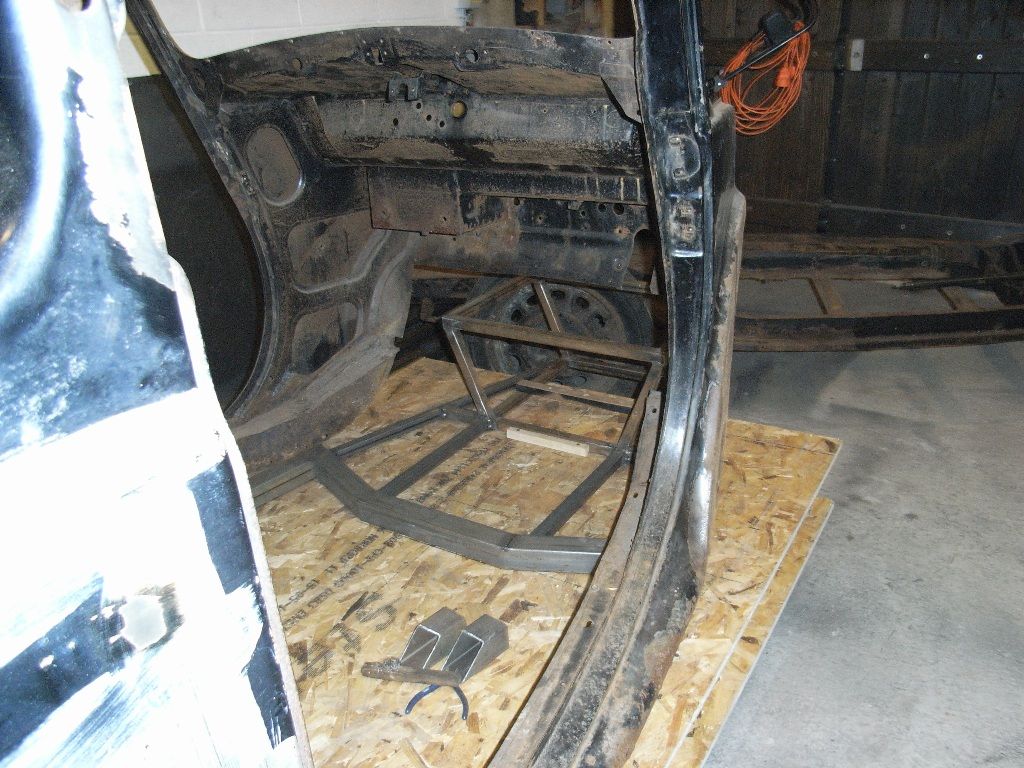 Hard to believe these are 4 seat cars when you see how little space there is inside. I put some pieces of cage tube in to get an idea of how it impacts on the space. I'm definately goin to bave to bend the door bars out into the door frame a bit. 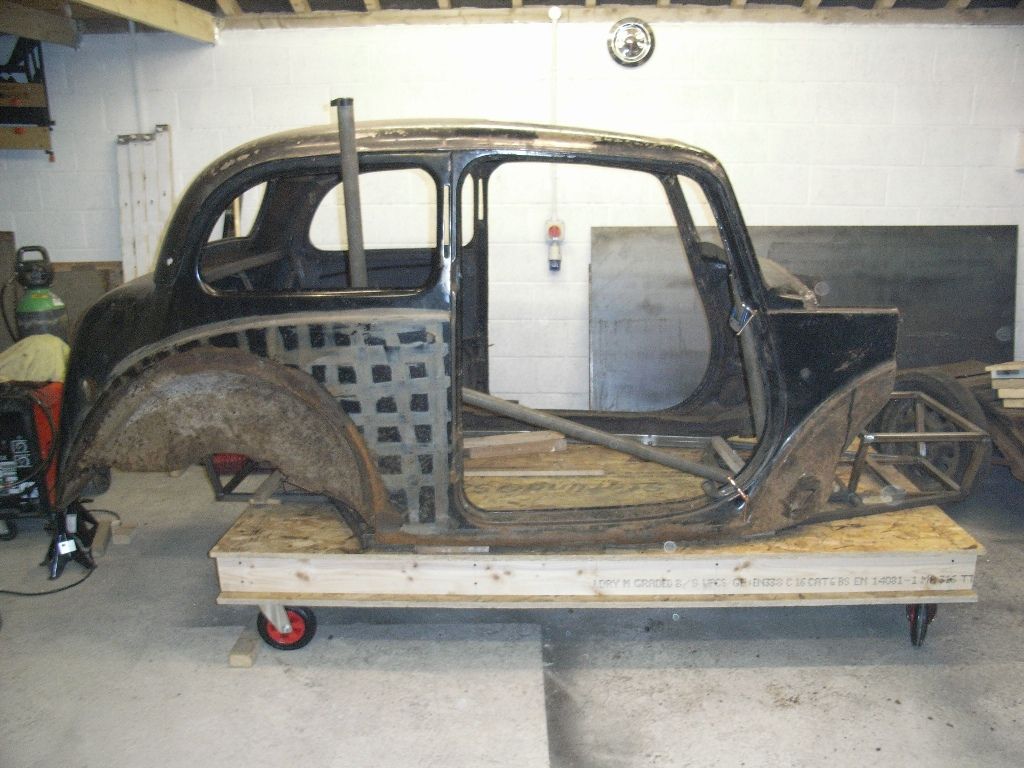 I also tried the front inner wing on to make sure i don't poke into the wings. 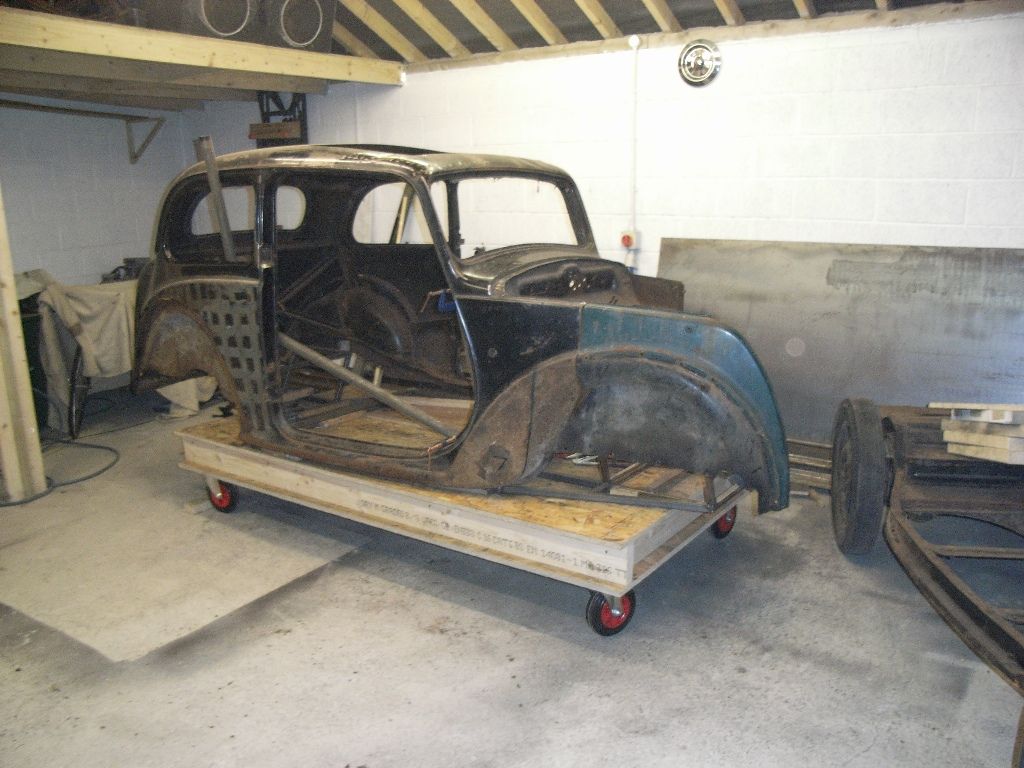 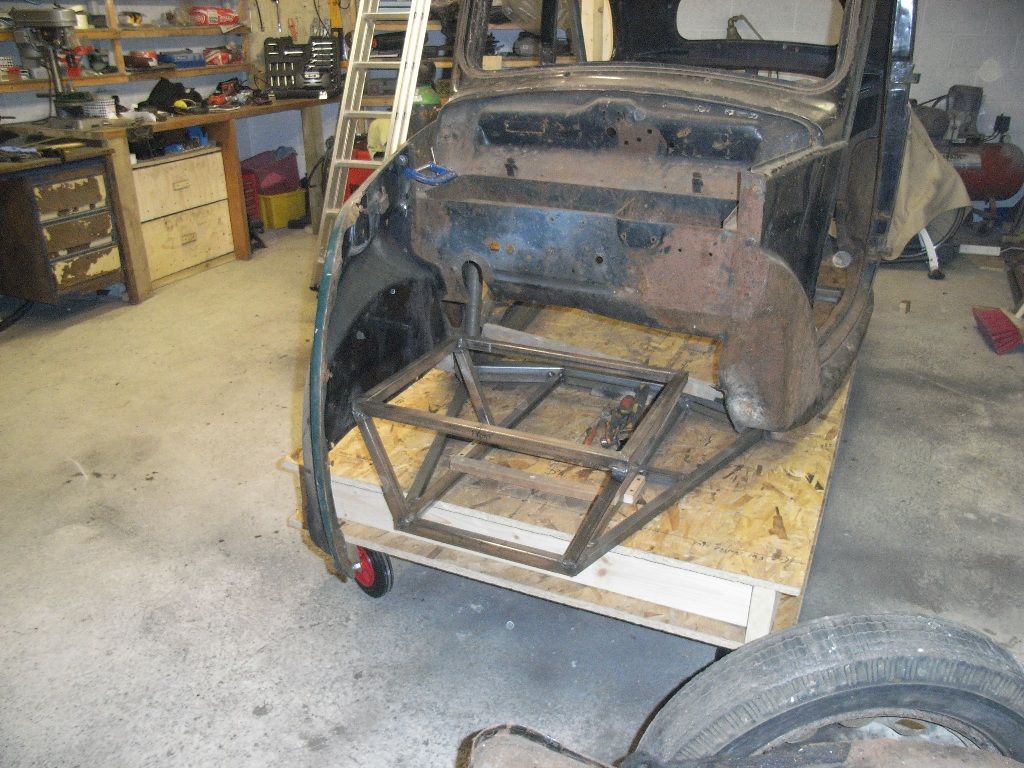 there's still a load of room. Unfortunately the next few weeks i'm going to get nothing done on it as i'm indulging in my other passion (playing in a band .... www.facebook.com/akaizenblitz ) and we're off into the studio to record some more things. |
| |
|
|
sonus
Europe
Posts: 1,391
|
|
|
|
Wow  Love the idea. Looking forward to see this progress. |
| |
Current
1968 TVR VIXEN S1 V8 Prototype
2004 TVR T350C
2017 BMW 340i
Previous
BMW 325d E91LCI - sold
Alfa Romeo GTV - sold
Citroen AX GT - at the breakers
Ford Puma 1.7 - sold
Volvo V50 2.0d - sold
MGB GT - wrecked by fire
MG ZT 1.8T - sold
VW E-golf Electric - sold
Mini Countryman 1.6D -sold
Land Rover Discovery TD5 - sold
|
|
jonomisfit
Club Retro Rides Member
Posts: 1,787
Club RR Member Number: 49
|
|
Feb 18, 2013 20:59:25 GMT
|
So, after much time spent working in the studio and generally faffing about doing other things, i finally got some time in the workshop. I was held up a bit as my cage didnt turn up when it was supposed to..... Still should be here this week, just in time for me to have 3 weekends on the trot when I cant hit the workshop :-) Anyway, you don't want my rabbitting, here's some pics. 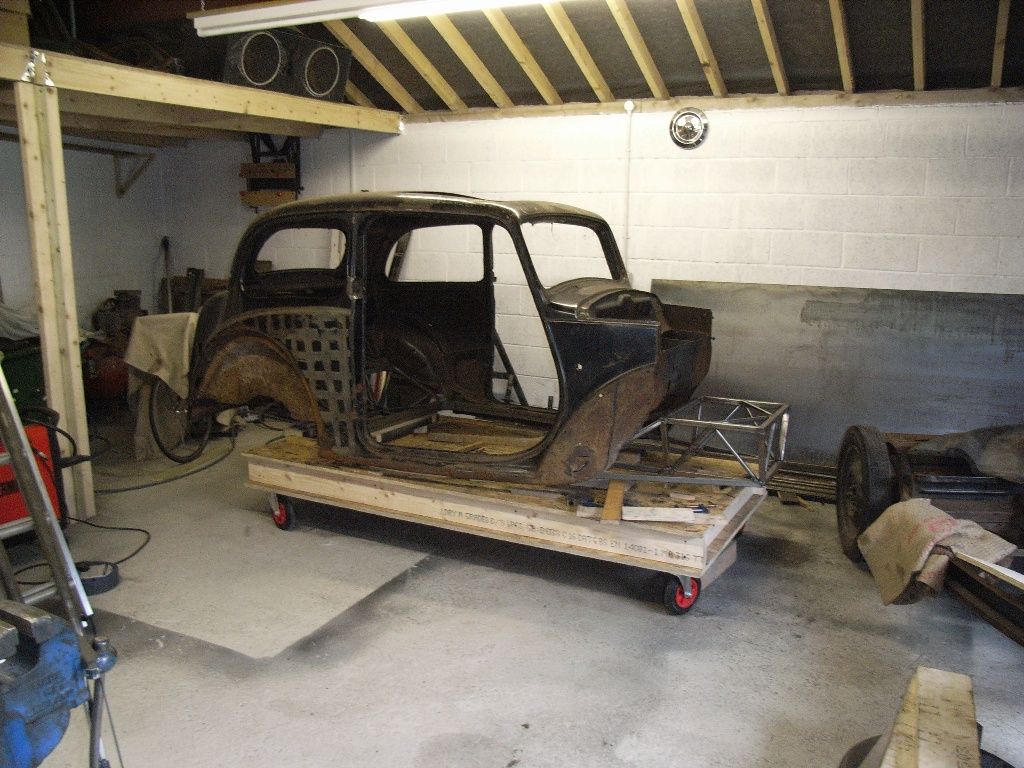 Front and rear suspension box stiffening going in. 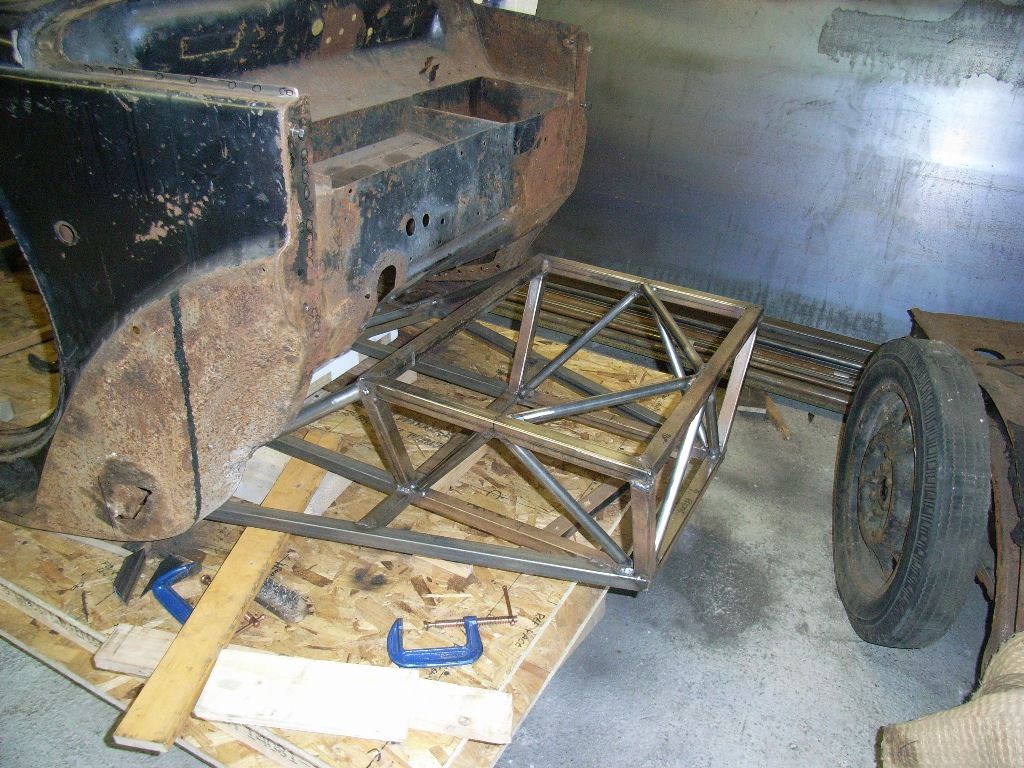 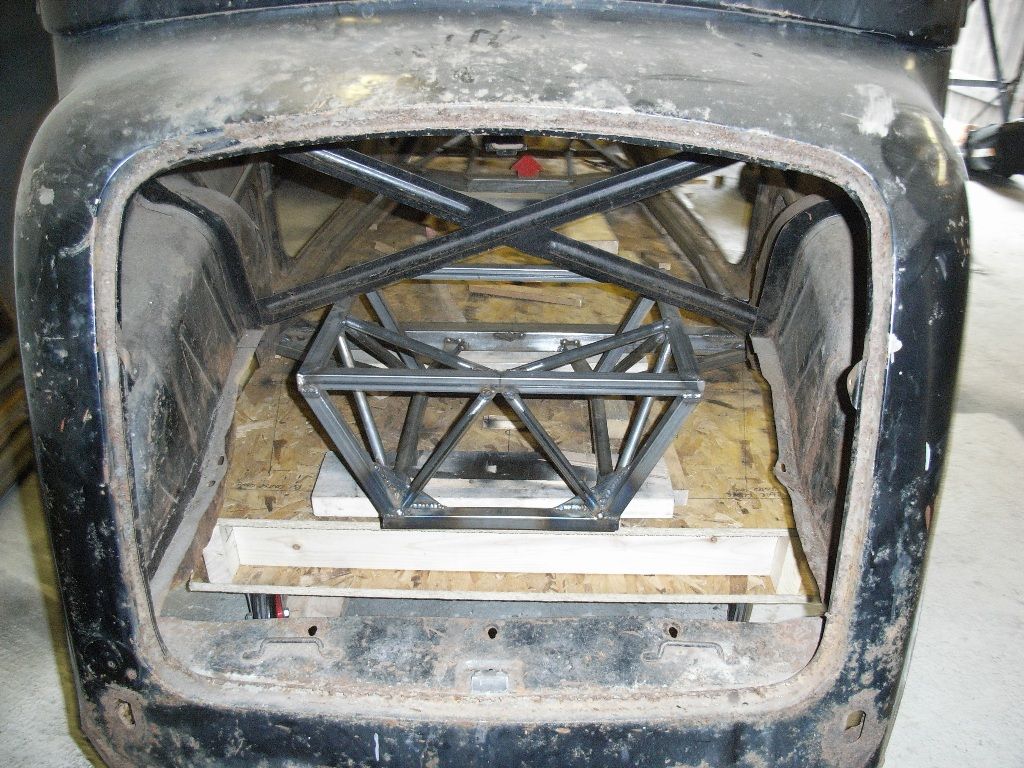 Cage rear stays support plates 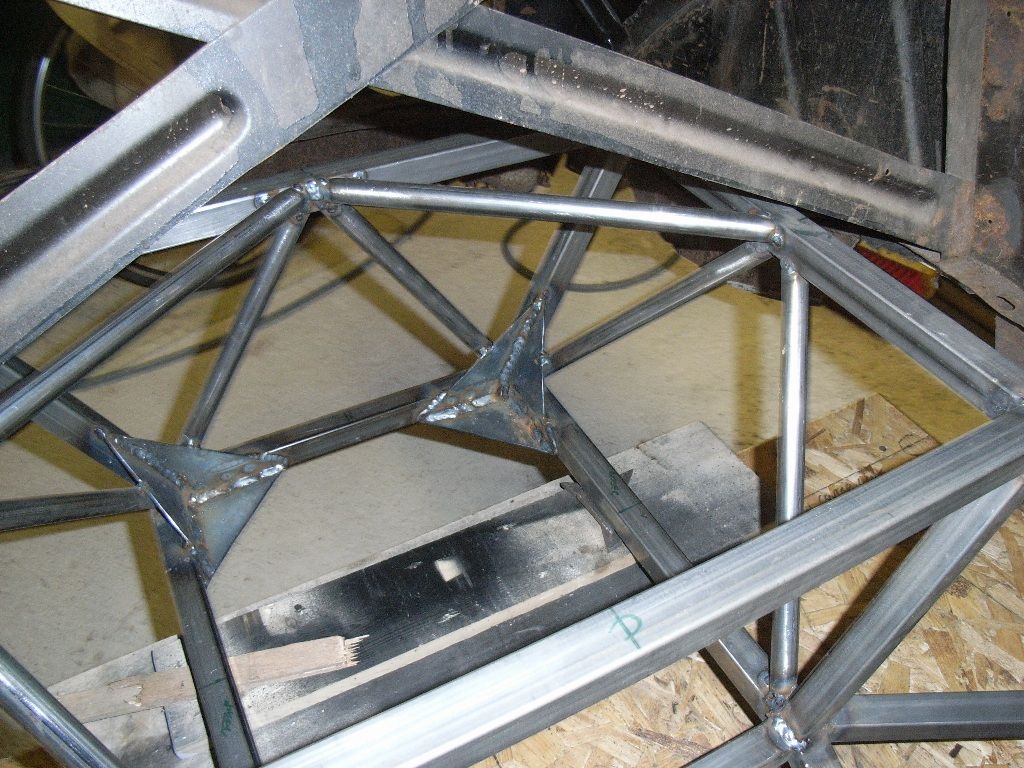 Main Hoop doubler gussets 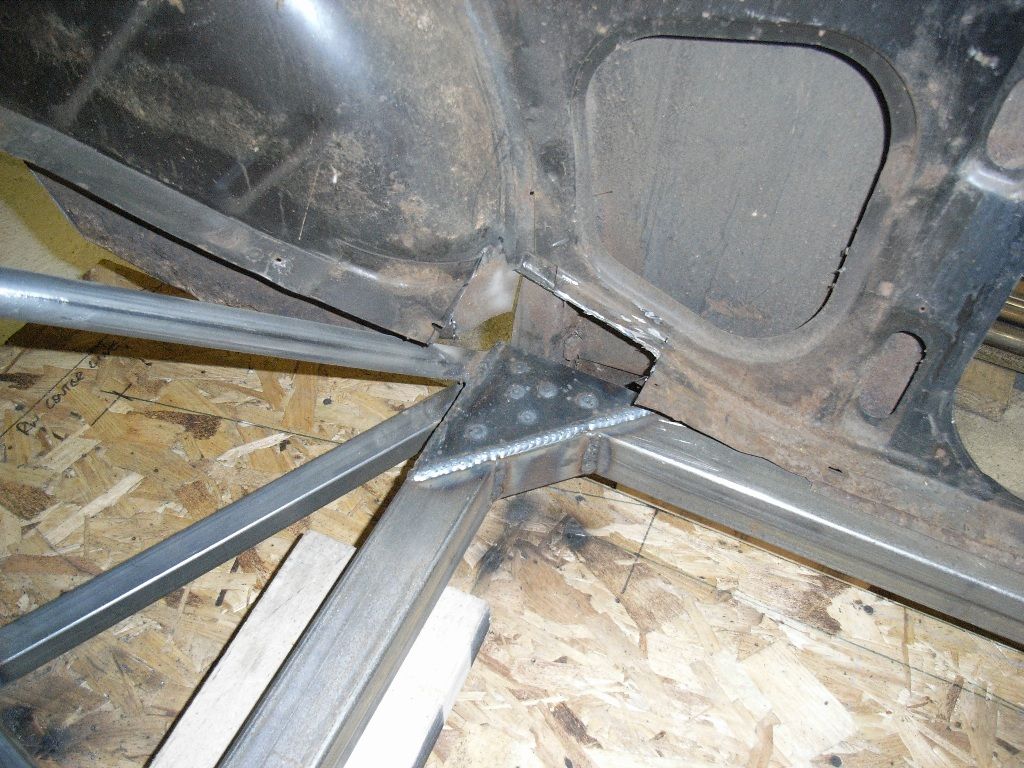 Suspension brackets setting jig 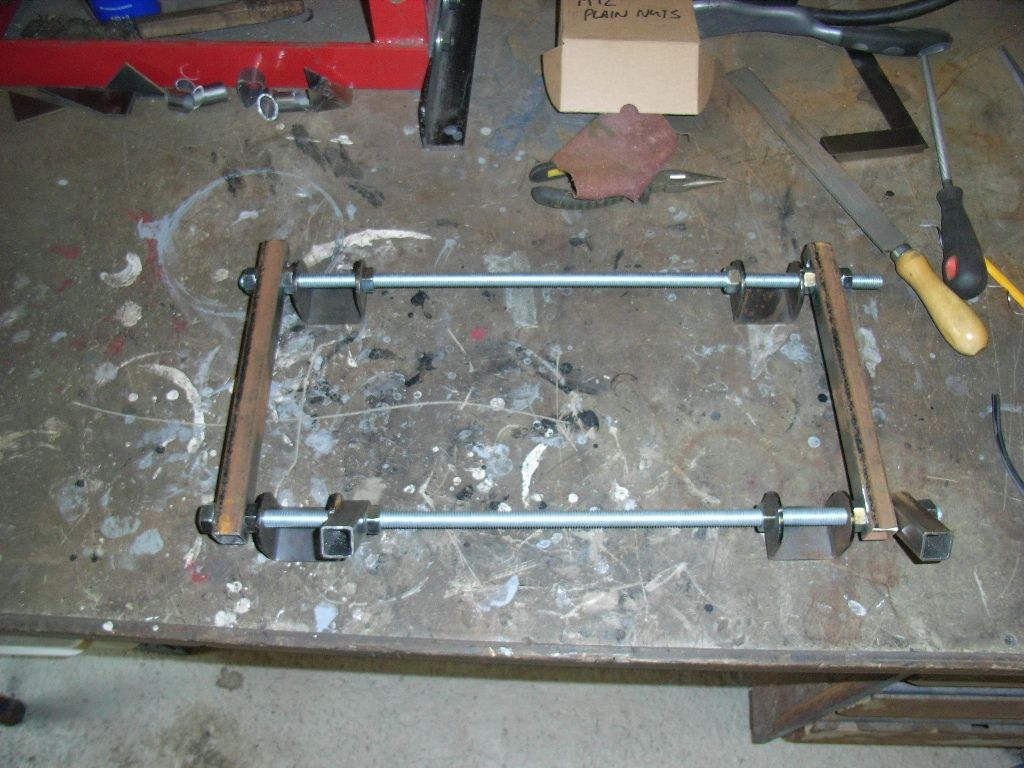 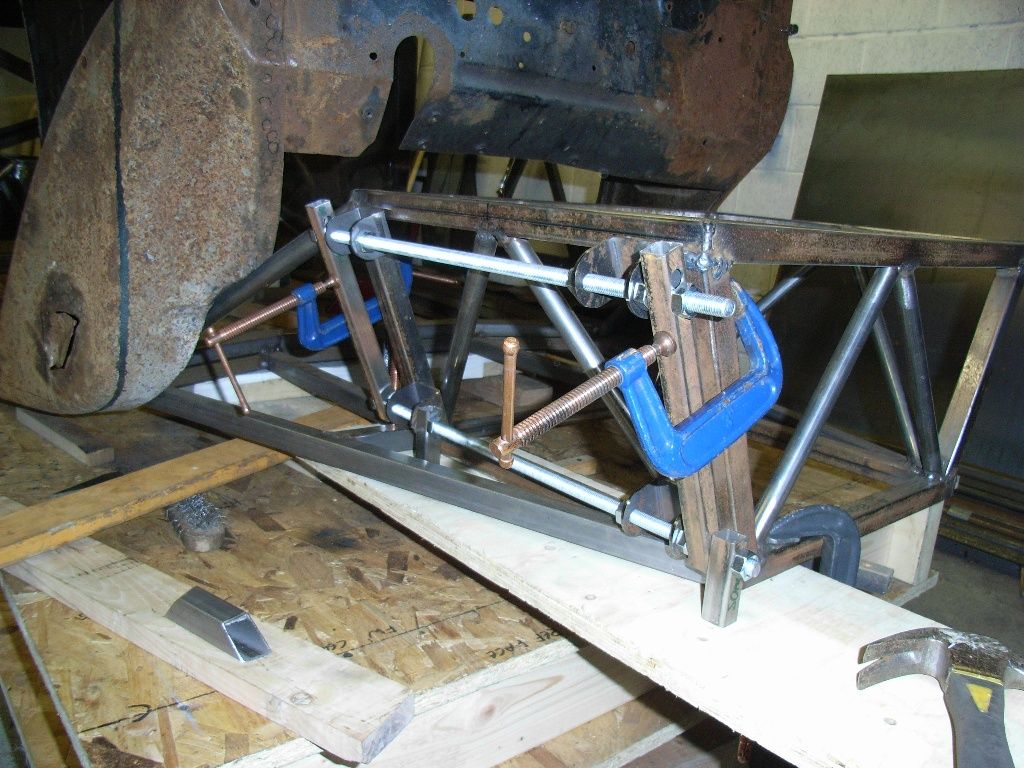 Front brackets in 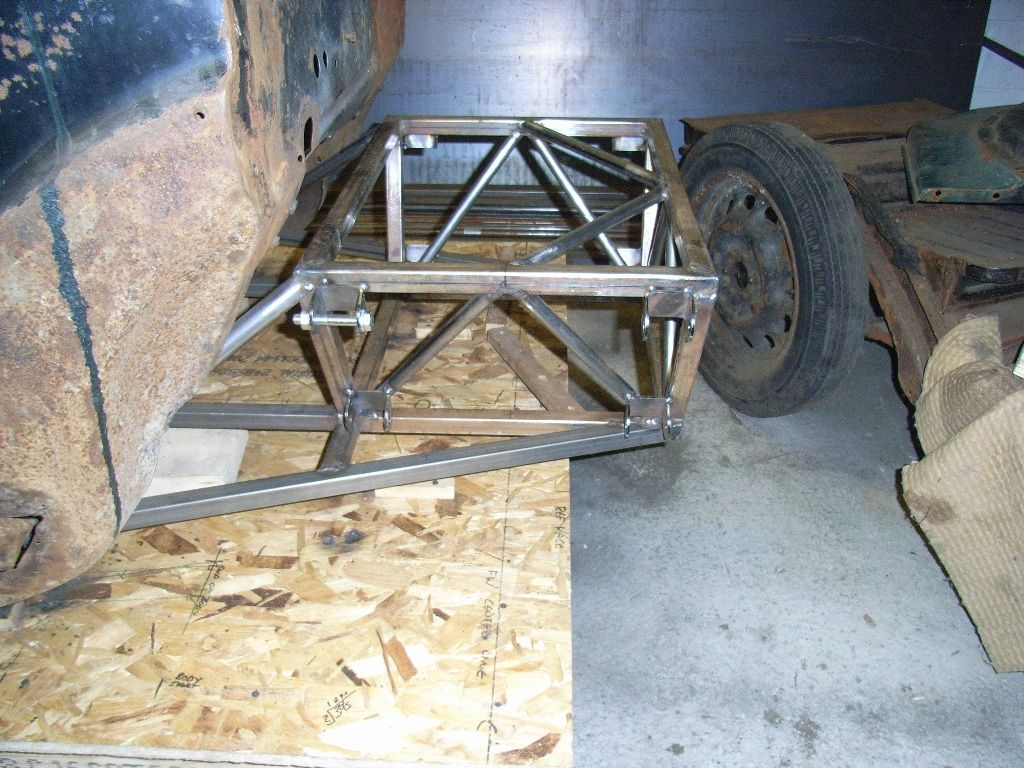 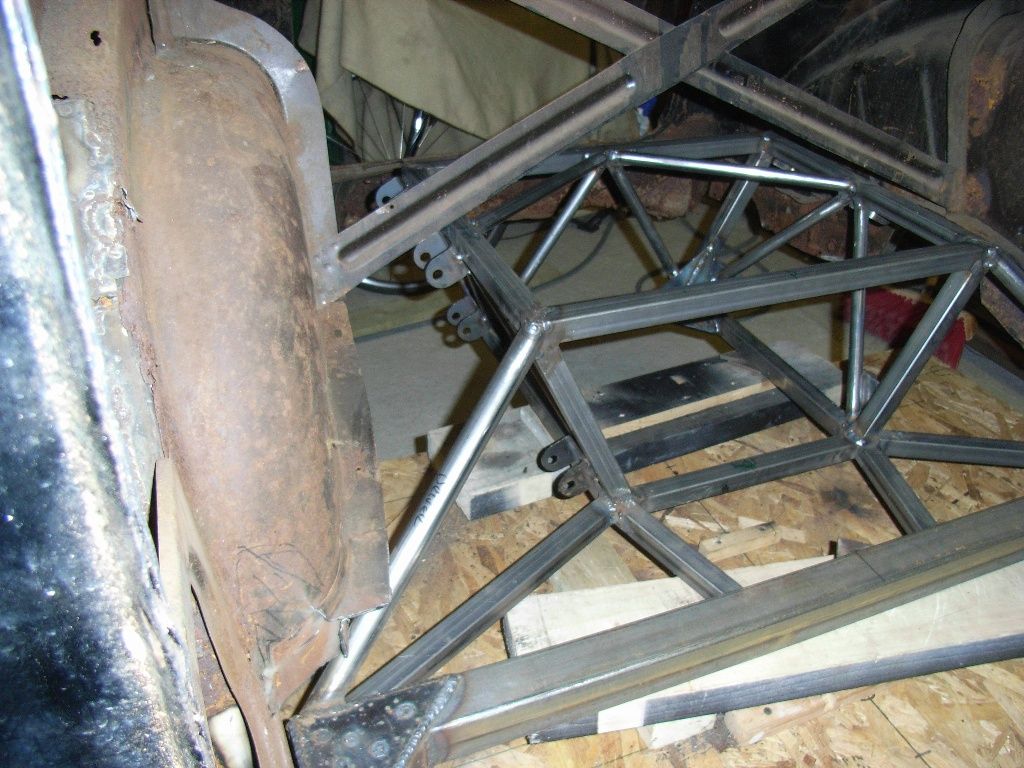 I then started on the jig for making the rear suspension components..... i may have over specced the steel, but it certainly wont pull when welded... 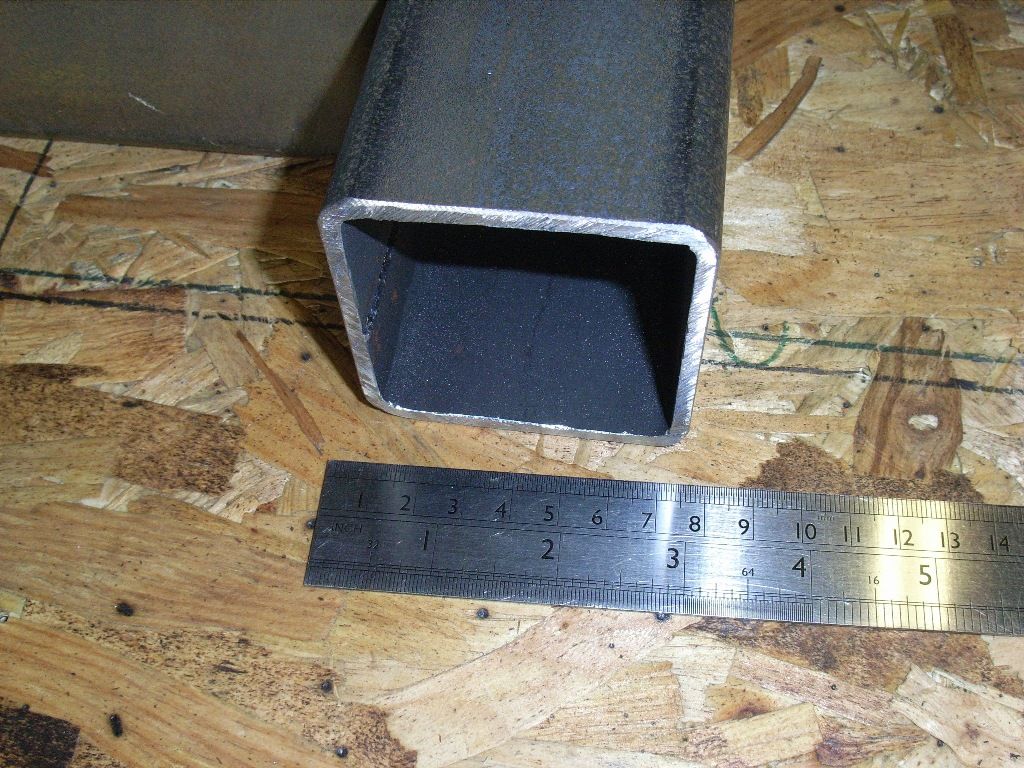 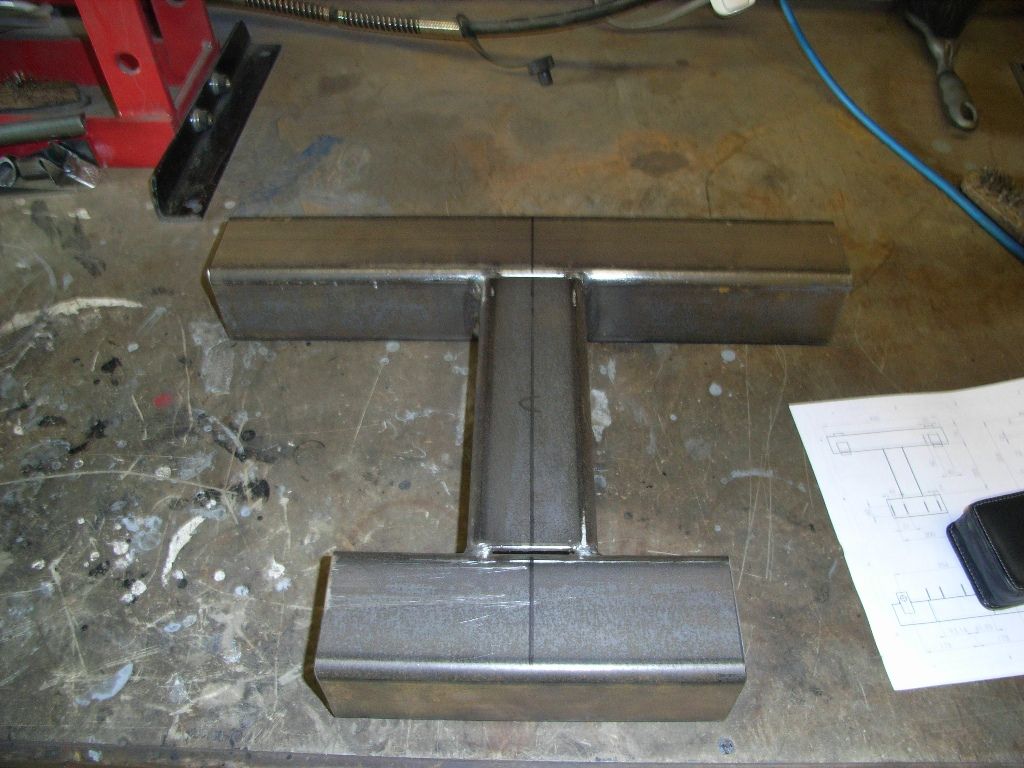 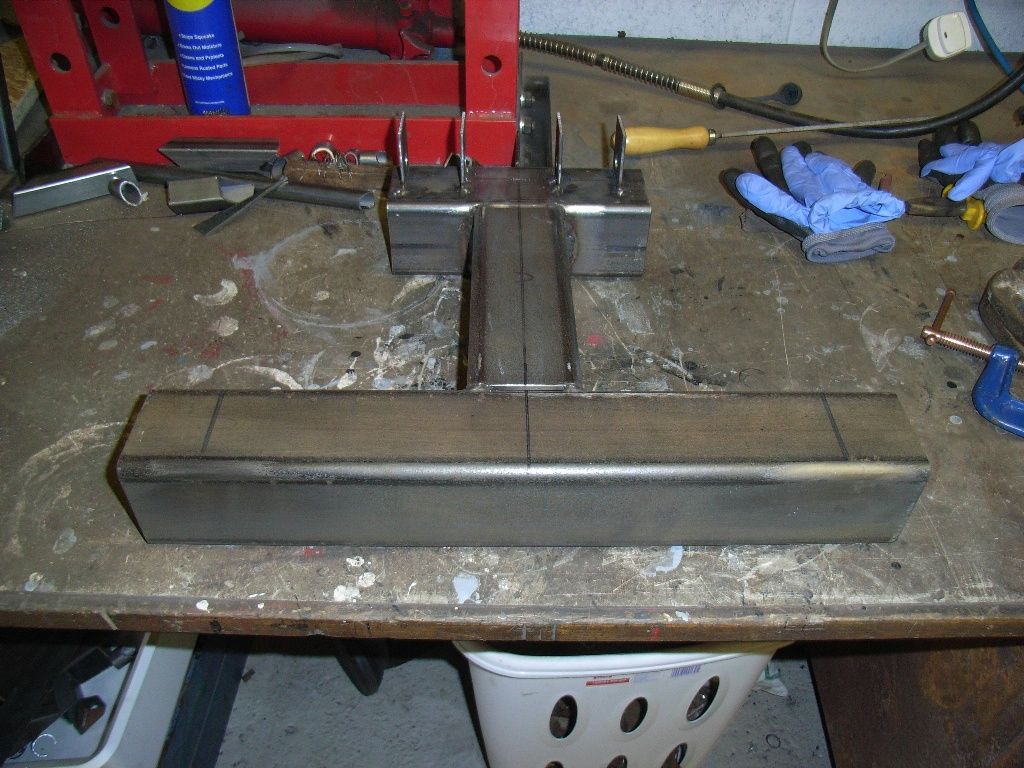 There's still quite a bit of work to go on it. |
| |
|
|
|
|
|
Feb 18, 2013 23:49:50 GMT
|
|
Looking at the front end of this, will the engine end up sitting quite high?
|
| |
|
|
jonomisfit
Club Retro Rides Member
Posts: 1,787
Club RR Member Number: 49
|
|
Feb 19, 2013 21:06:05 GMT
|
|
The rear transverse member at the front is just a temporary piece. Its there to hold it all nicelly square and make it easier to put together.
Once the rest of the structure is tied together and things cant move, it'll be cut out and the end plated over. Its about between where cylinder number 1 and 2 are. The bottom of the sump will be notched round the lower member.
|
| |
|
|
|
|
|
Feb 21, 2013 17:30:12 GMT
|
Wow love this build already, ill be keeping a close eye on things in here  what's your plans with engine? I see you might be doing a BMW diesel? I'd love to build a sit up and beg with a chassis like this and a turbo lump  |
| |
Nobody dies a virgin, because lifes curse word us ALL
|
|
jonomisfit
Club Retro Rides Member
Posts: 1,787
Club RR Member Number: 49
|
|
Feb 21, 2013 20:38:13 GMT
|
|
I'm still in two minds as to what i'm going to go for.
It either going to be a lightish v6/v8 Jag etc engine, or something like a modern diesel. Will see how things develop.
|
| |
|
|
|
|
jonomisfit
Club Retro Rides Member
Posts: 1,787
Club RR Member Number: 49
|
|
|
|
Bit of a short weekend this one. Was up in scotland seeing some friends and doing some bits for my dad. Still got today in the workshop. My new hoist turned up this week. 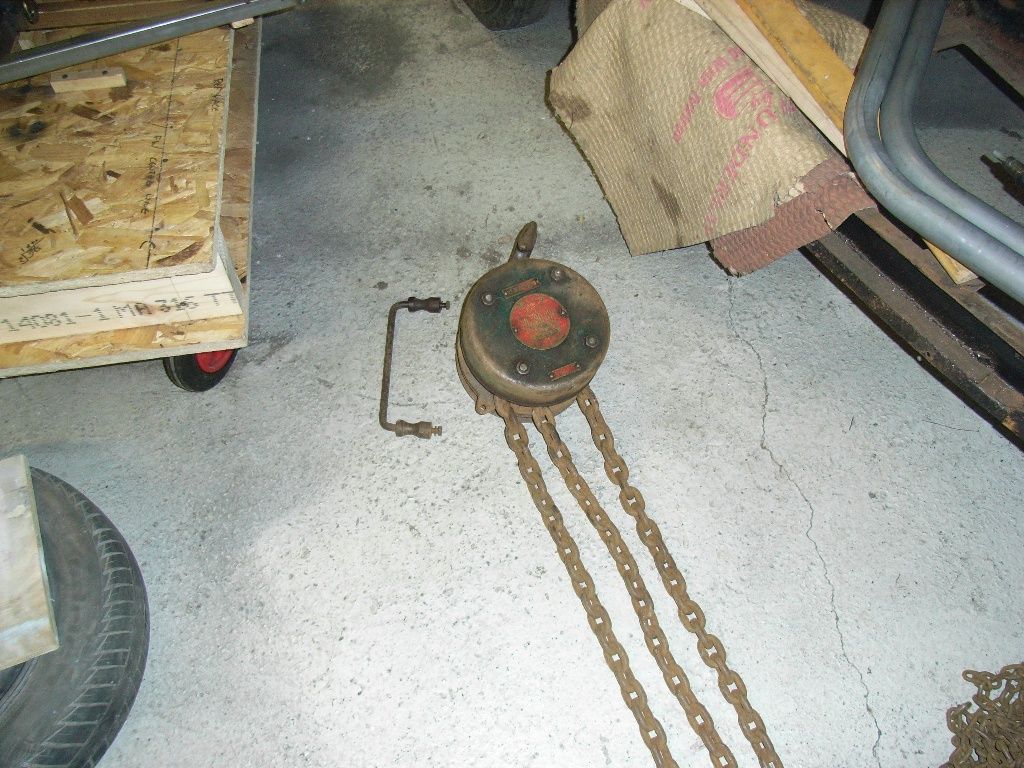 An old one, but seems in good condition with no signs of wear. Rated to 30 cwt, so about 1300 kg, not that i'd lift anything like that with it. On the plus side, it has a 9m lift on it! 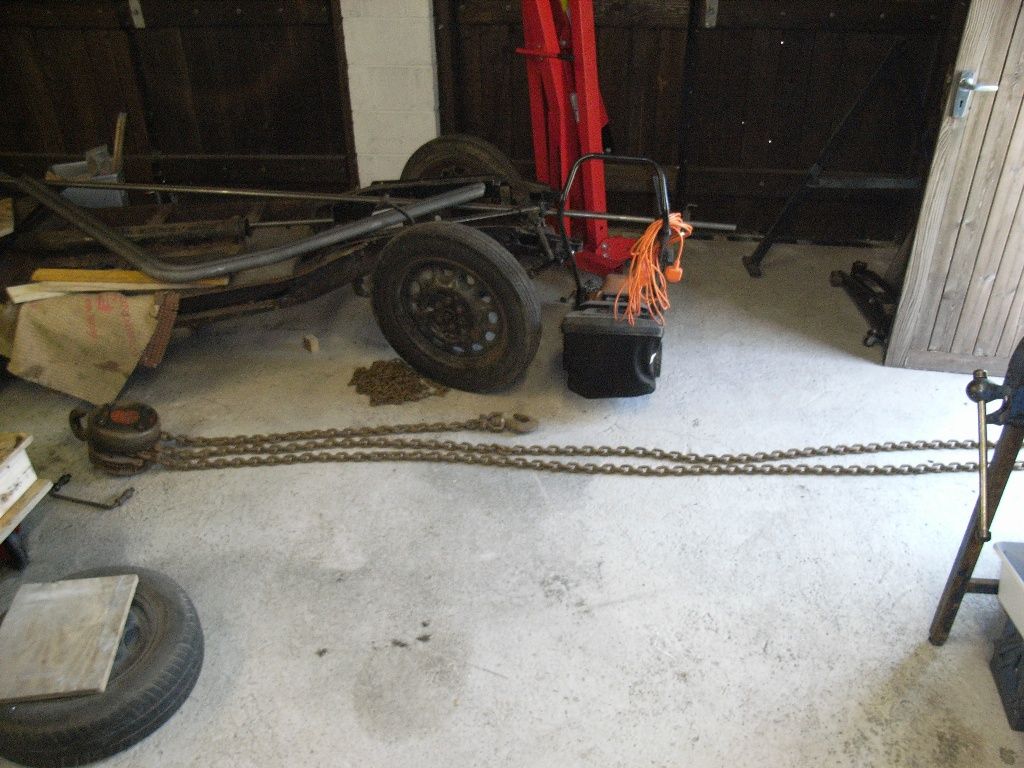 Once I get a beam trolley its going up here. 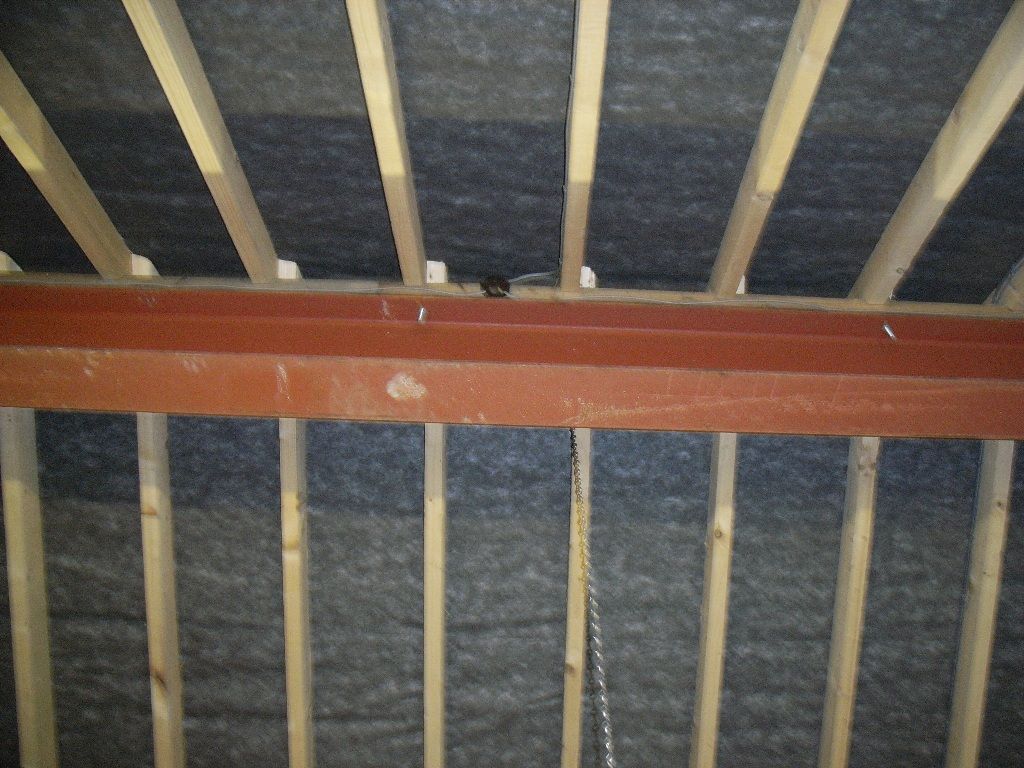 My cage also turned up so got that fitted today. 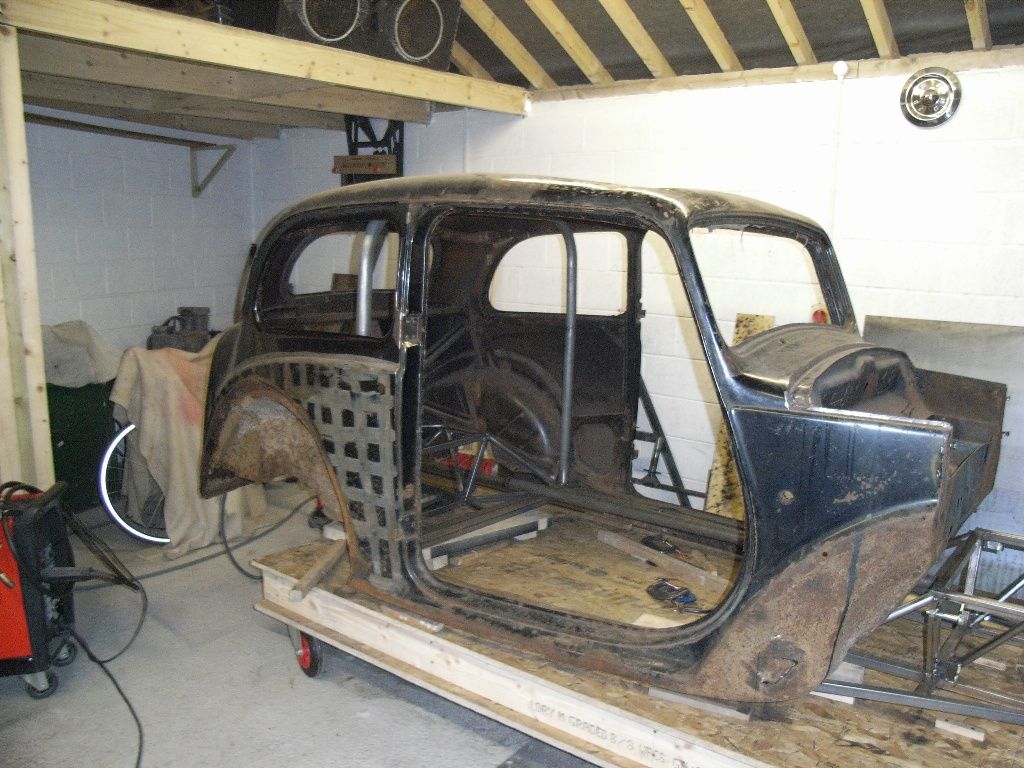 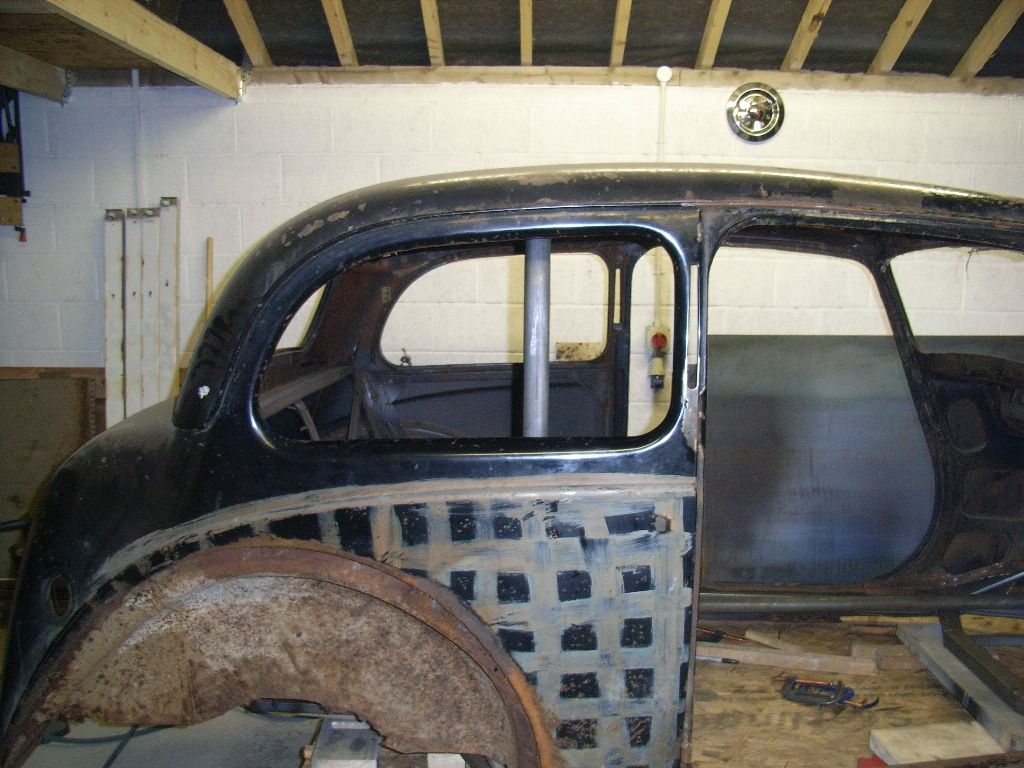 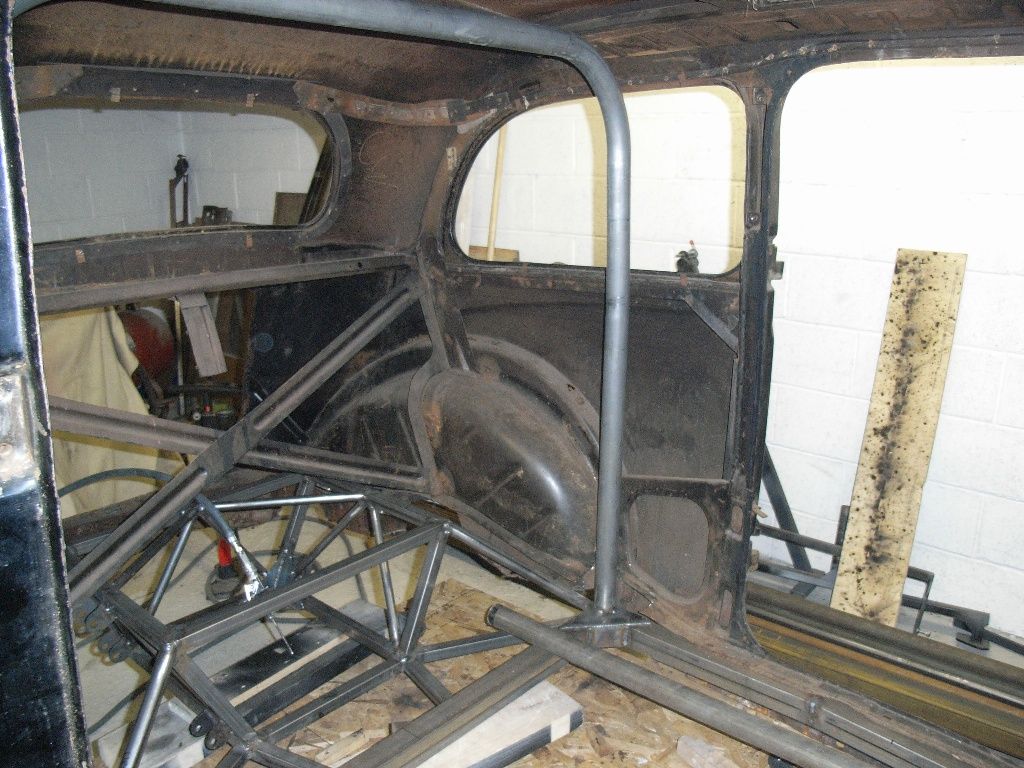 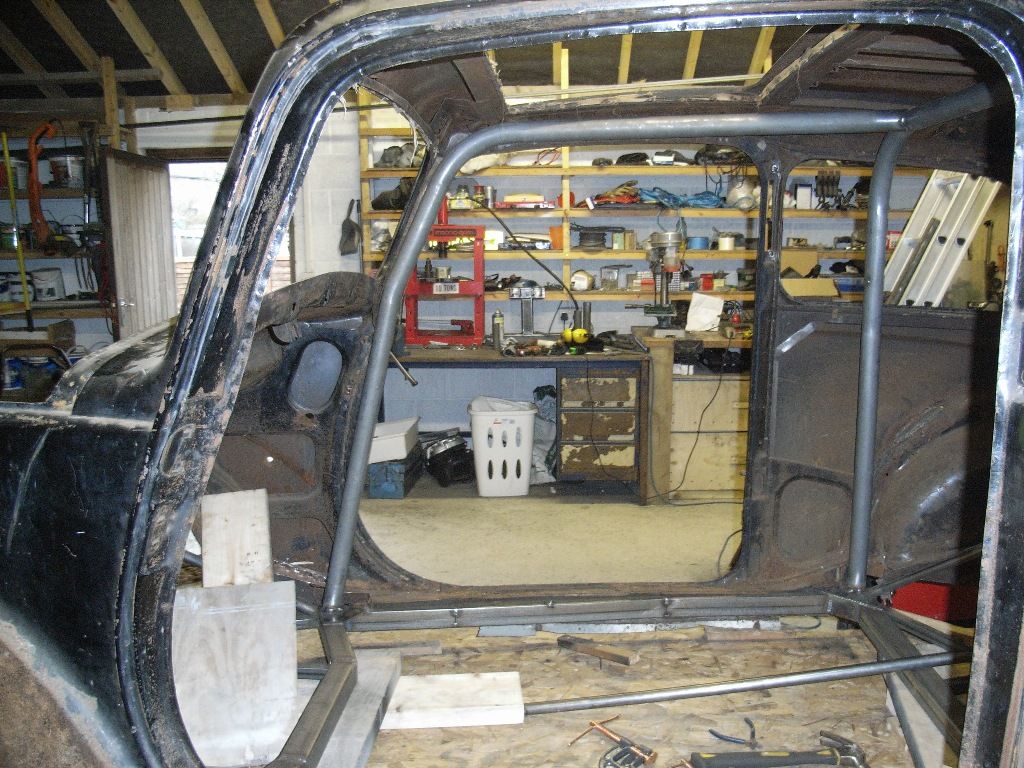 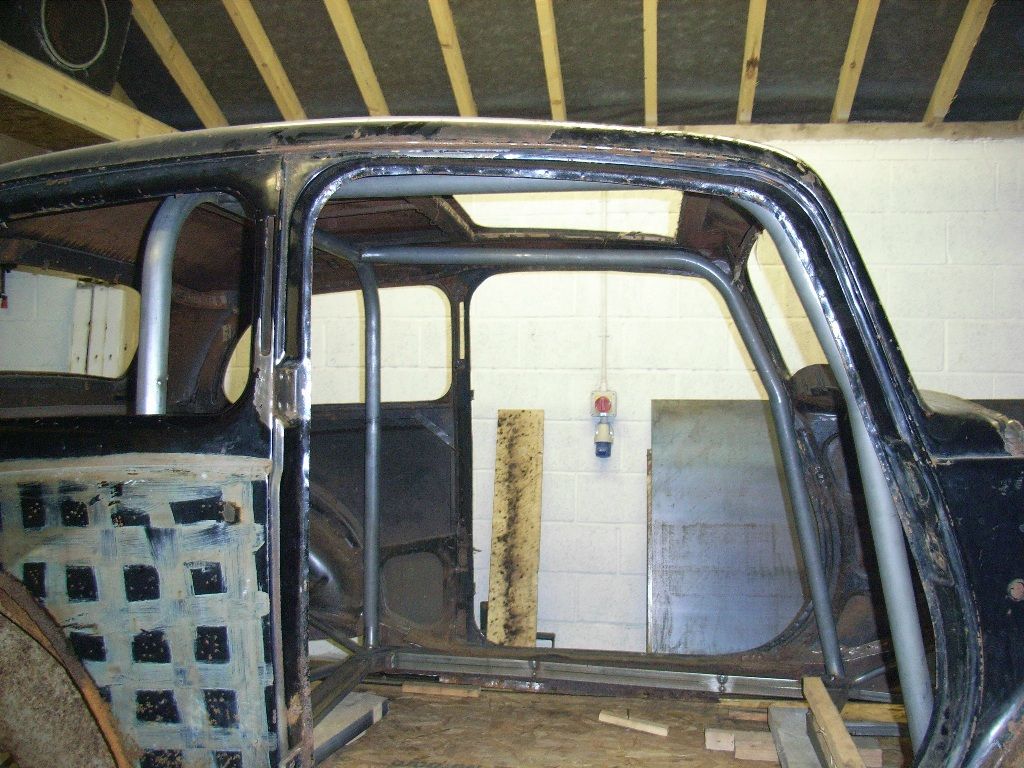 I pushed the legs as far into the screen as I could get them, to try and minimise impact on visibility from the driver seat. Will see how it goes. 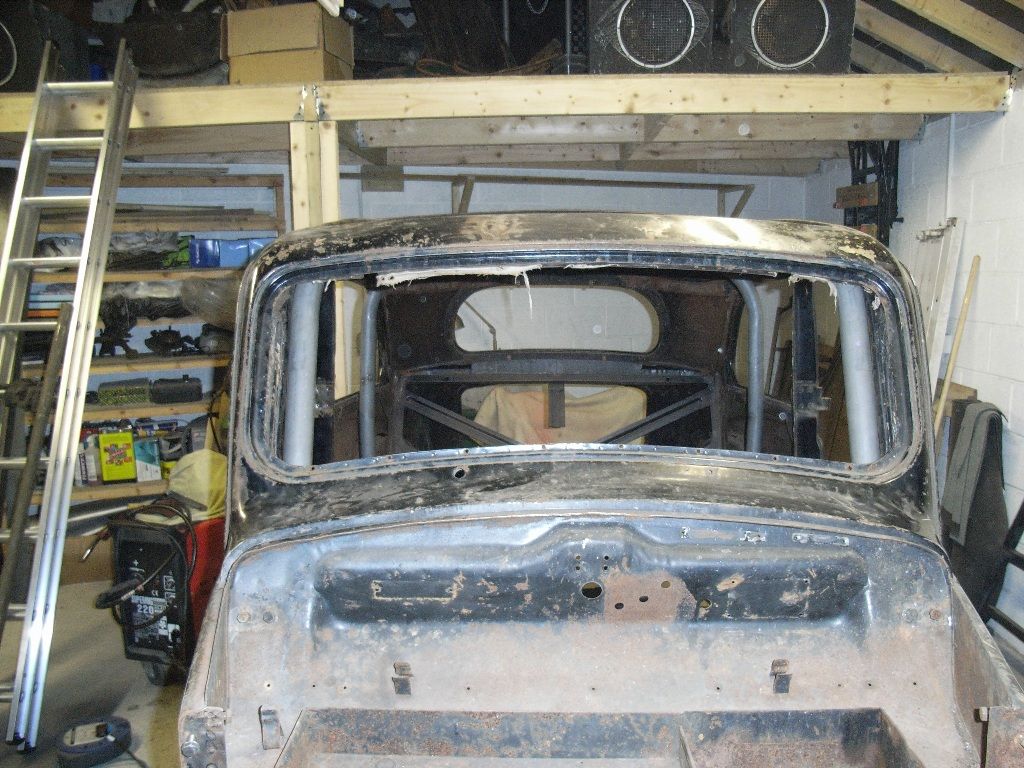 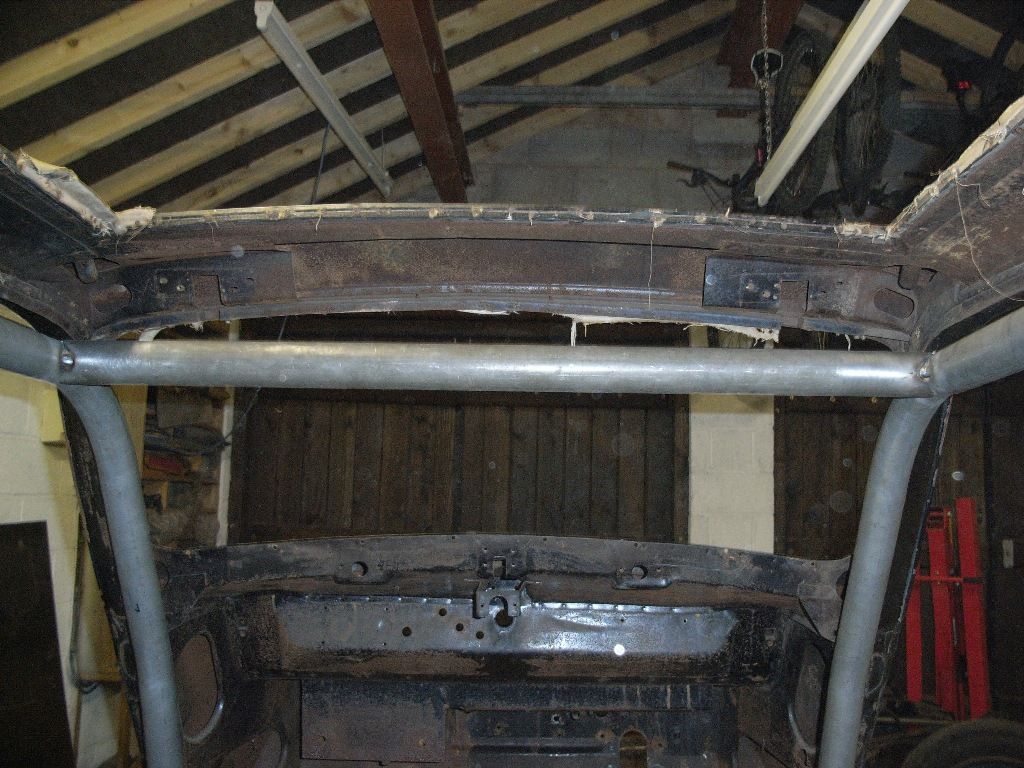 Should get some progress next weekend as actually stand a chance of being here. I also clamped the frame back down onto the build table to make sure everything is fully square before final welding in the cage, making the back stays and tying in the front suspension. All seems good at the moment. |
| |
|
|
|
|
|
|
|
|
With the cage in that looks cosy. Enough room for the driver and not a lot else.
|
| |
|
|
jonomisfit
Club Retro Rides Member
Posts: 1,787
Club RR Member Number: 49
|
|
|
|
|
i know, you wouldnt think it was a car for a family of four!
How things have changed.
|
| |
|
|
jonomisfit
Club Retro Rides Member
Posts: 1,787
Club RR Member Number: 49
|
|
Mar 10, 2013 20:15:12 GMT
|
I got a little bit more done on the morris this weekend. Doesnt look much for the effort it took. Rear cage stays in 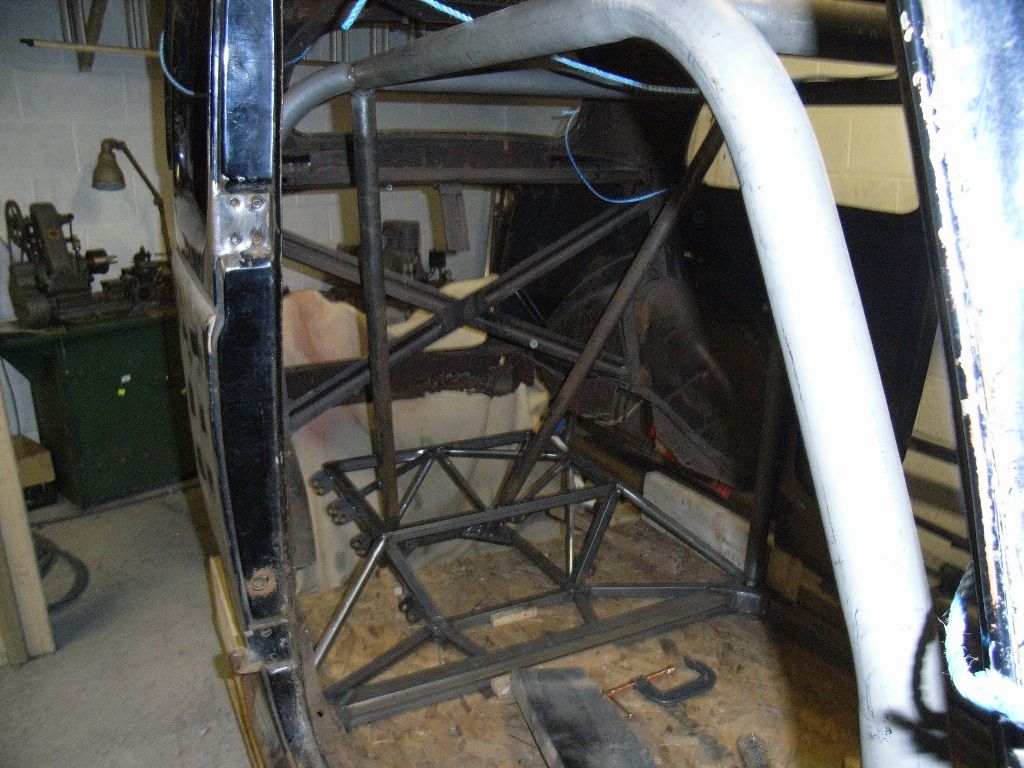 Detail of the lower rear stay mounts. Its only tacked at the moment, but will be finish welded. 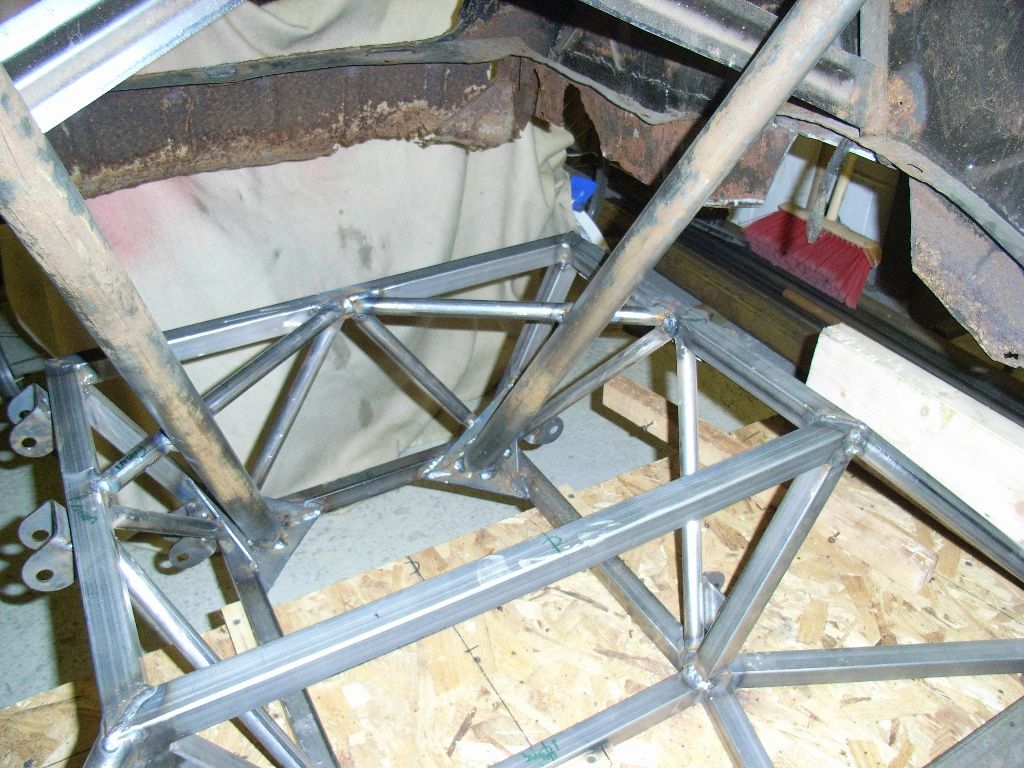 Also tied to diff / rear suspension cage diagonals to nicely stiffen up. 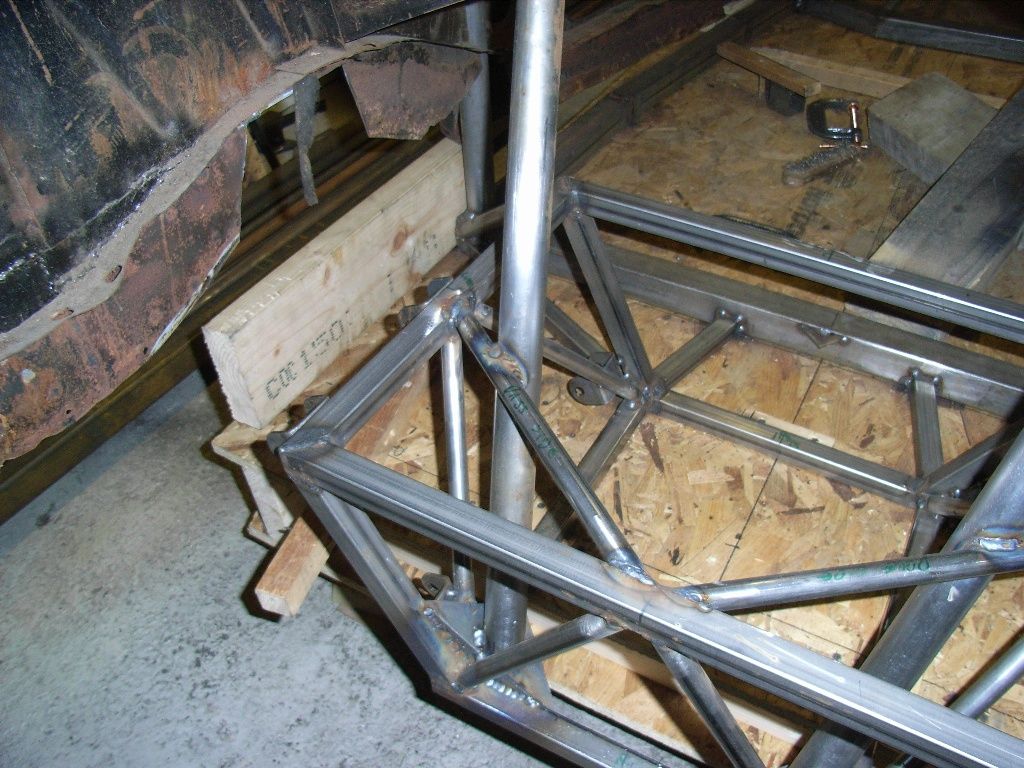 Front cross bar in 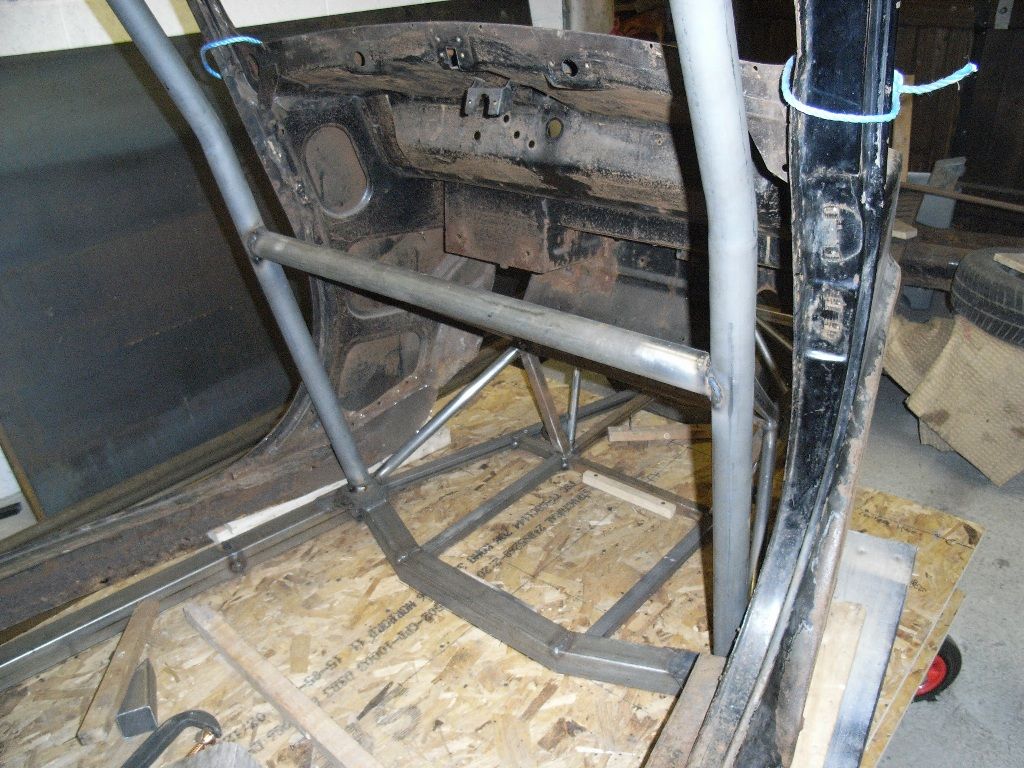 Along with front module upper bars 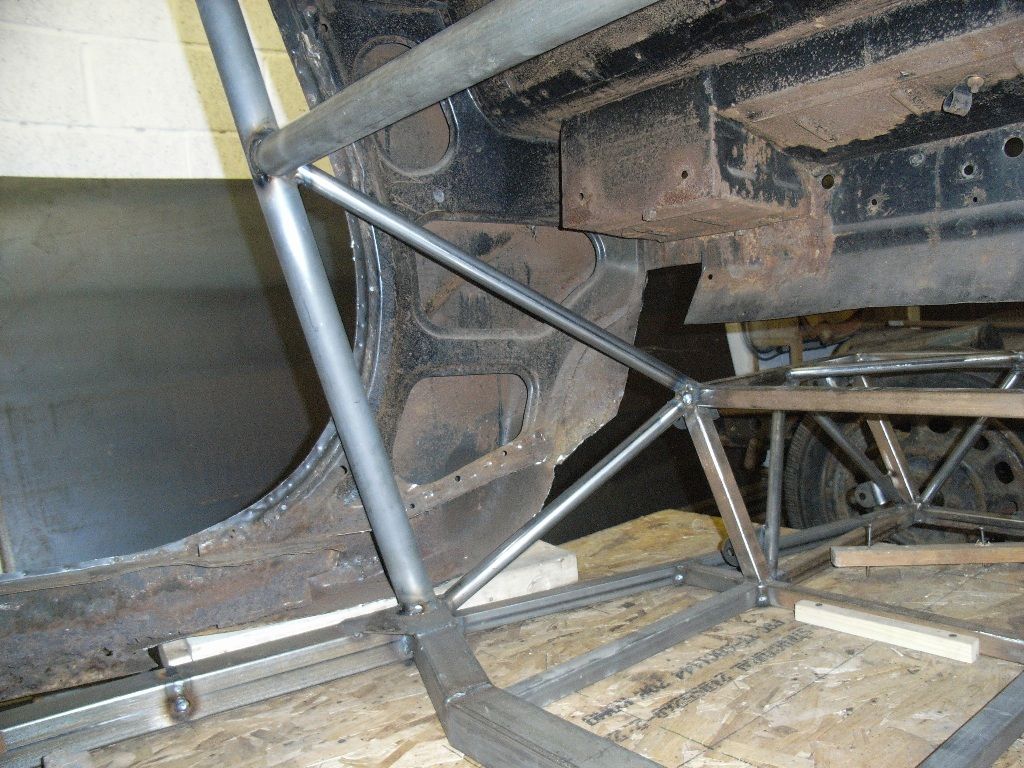 I was pretty happy as welded these in front and rear, and when released from the braces, the whole lot moved up 2mm at the front, and 3mm at the rear. It was also equal side to side, so isnt attempting to twist out of true, at least not yet. I then spent the rest of today turning up bits for the suspension jigs. Bored some holes in the front adjuster mounting plate (not pics taken), then turned some bobbins to hold the wishbone tubes in the right place. 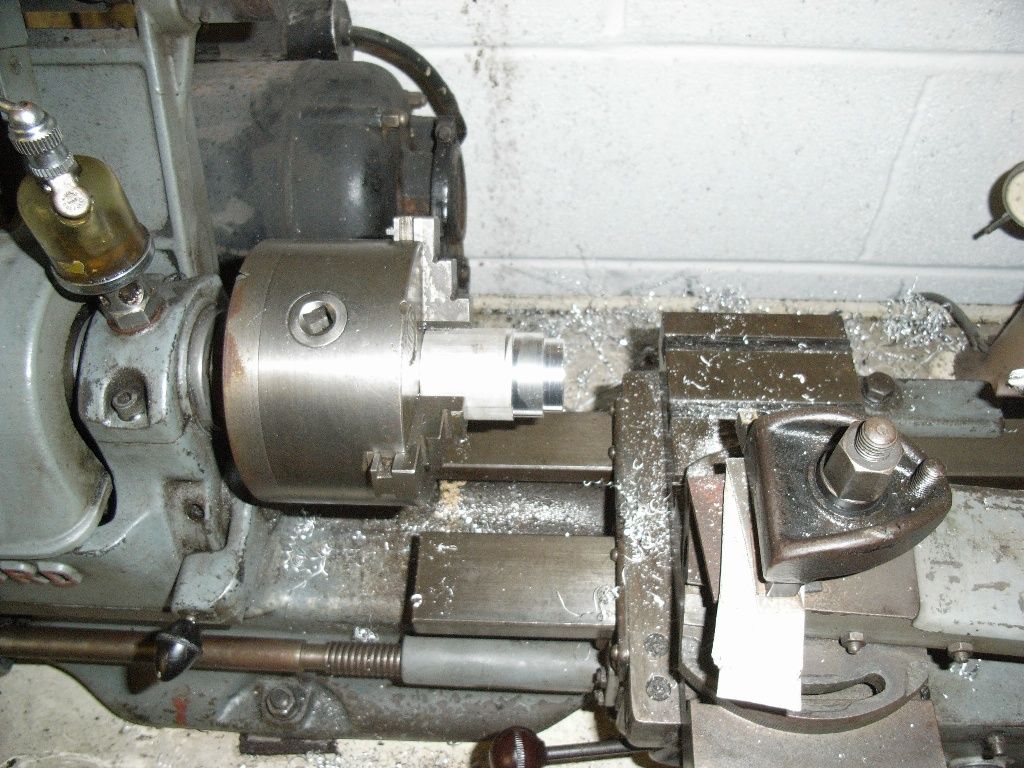 First time i've turned anything in ages, and had bought a new tool (indexible carbide cutter) which made a big difference. Really need to get a rhd and left hand tool, and a parting tool. 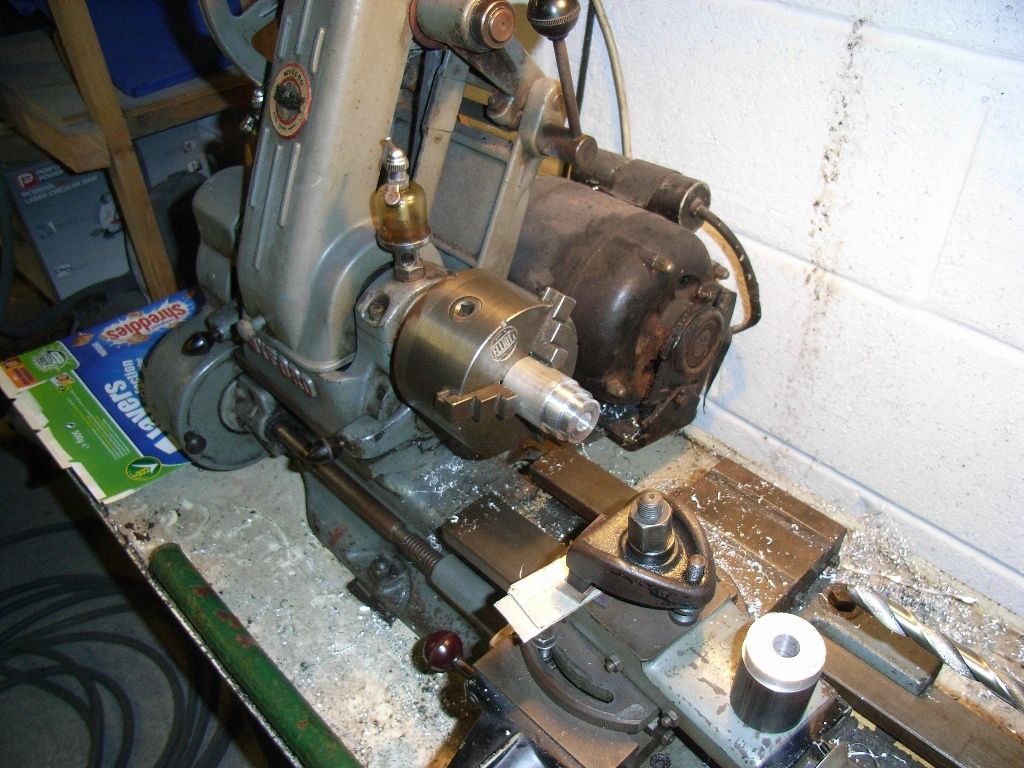 They worked well 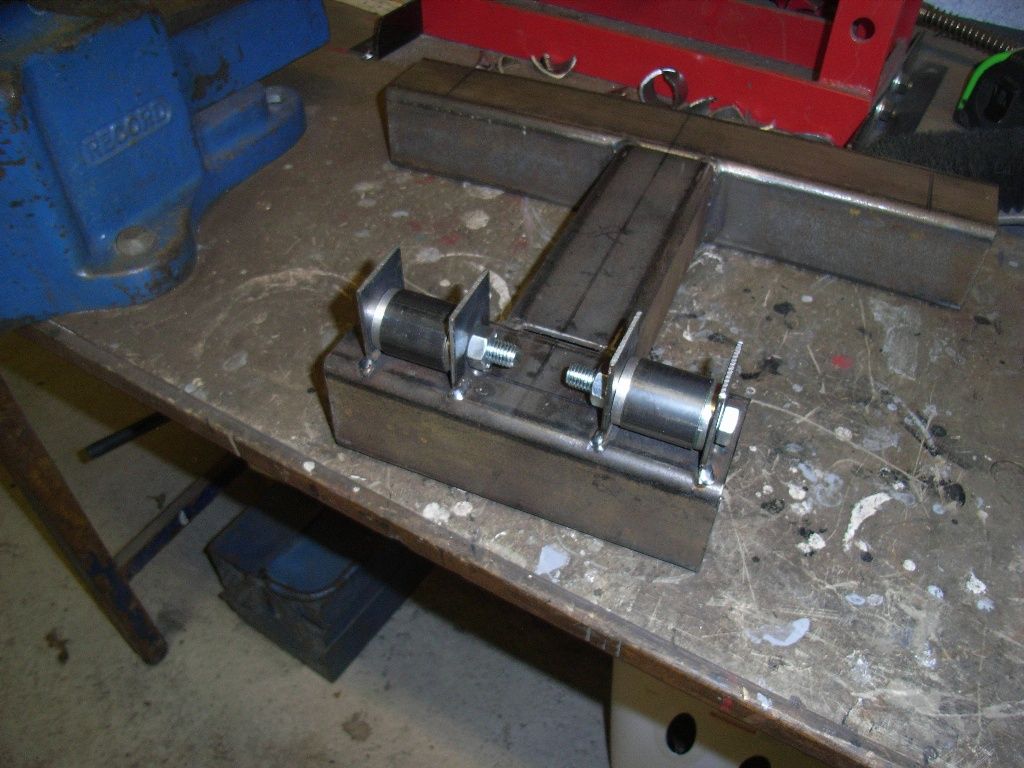 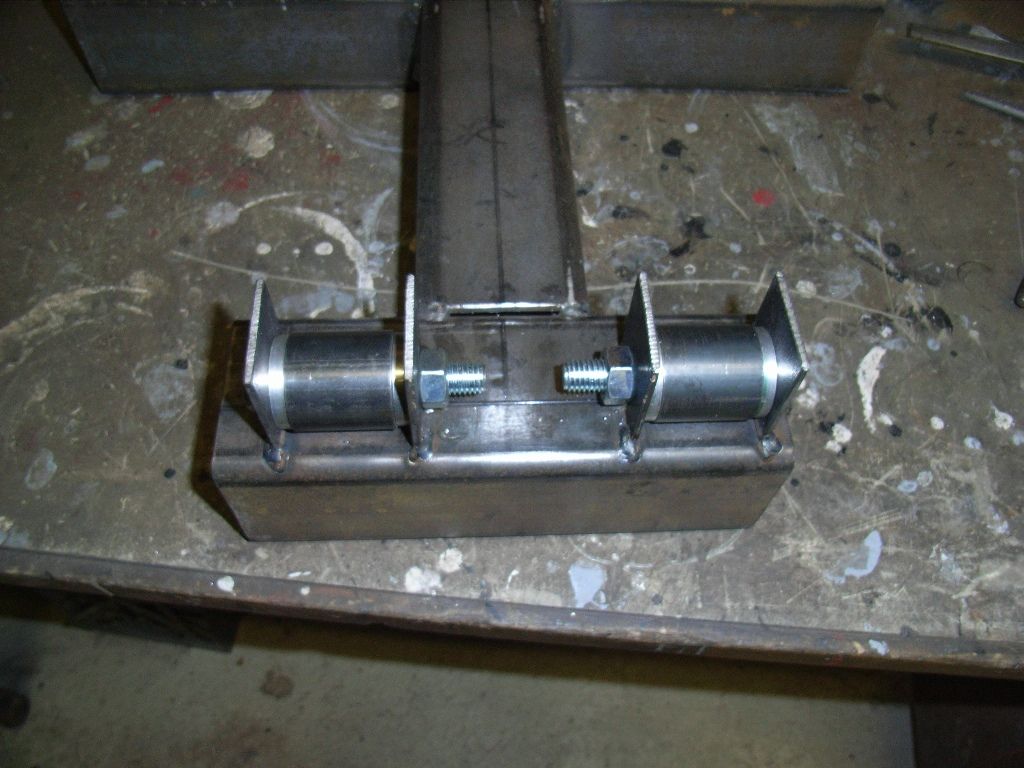 And then i realised i had a "macro" button, so tried some pics with than on. 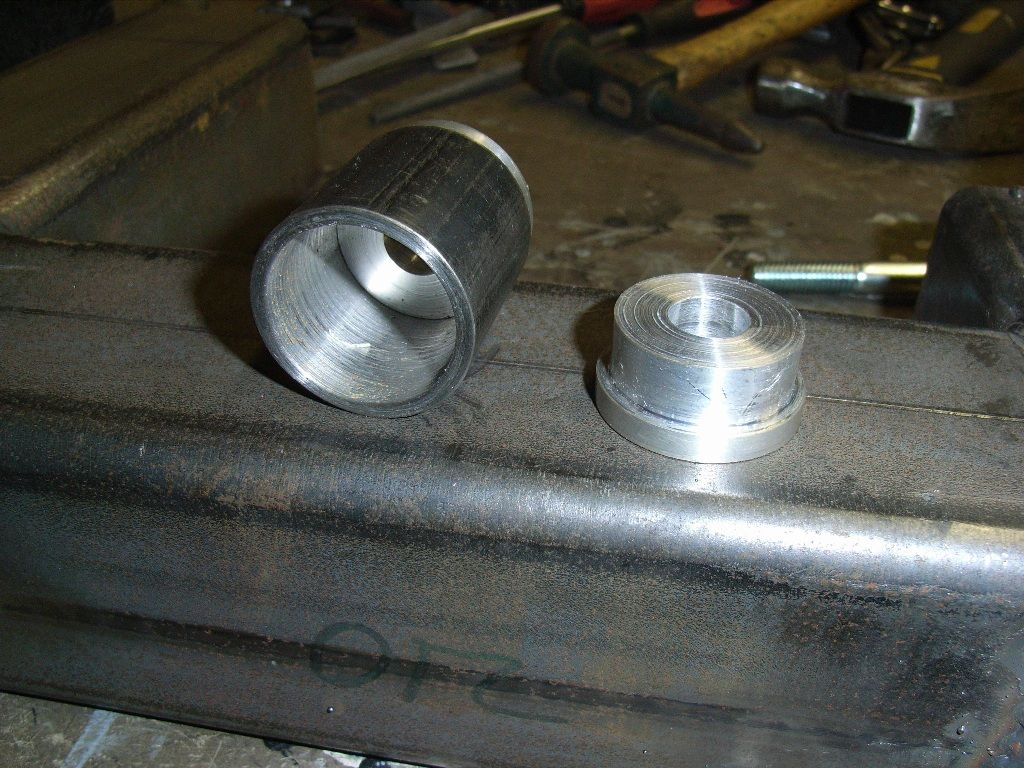 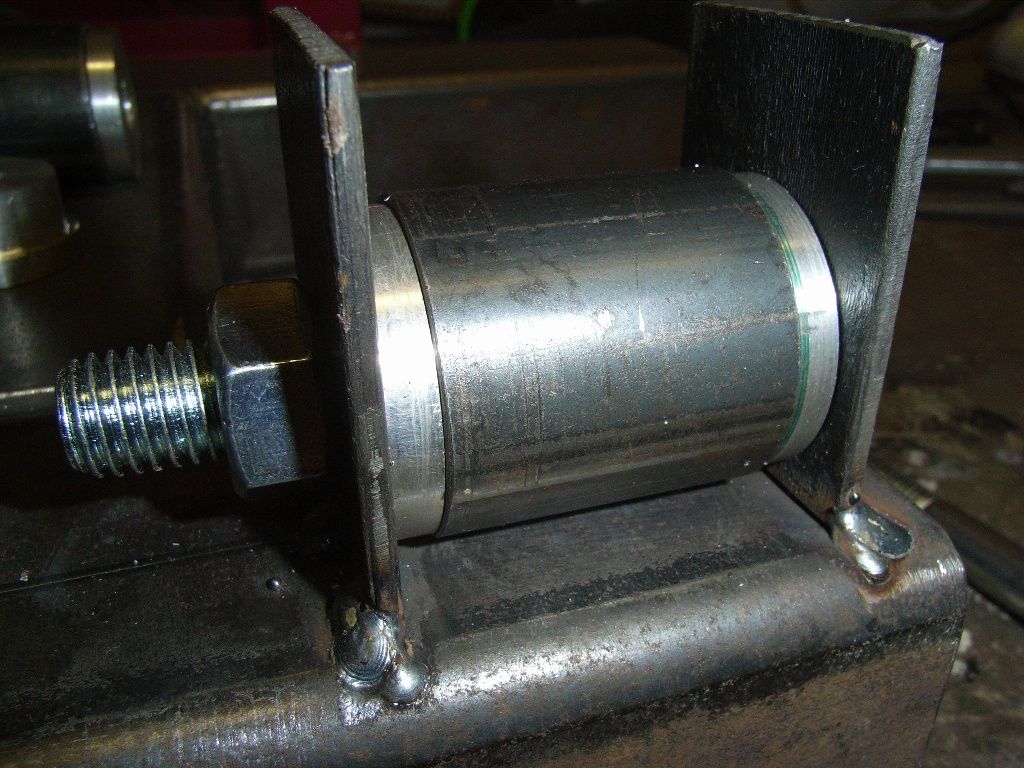 Should hopefully get the lower rear wishbone jig complete next weekend. If I don't get sidetracked again as back in the studio recording some more bits at the moment and putting finishing touches to our album. |
| |
|
|
jonomisfit
Club Retro Rides Member
Posts: 1,787
Club RR Member Number: 49
|
|
Mar 18, 2013 19:25:09 GMT
|
I got a small amount done this weekend. Turned up the first couple of adjusters that form part of the wishbones. Only issue was an M20 tap is too big for my present tap wrench and i couldnt get enough torque with a spanner to drive it through. Need to order a bigger one. 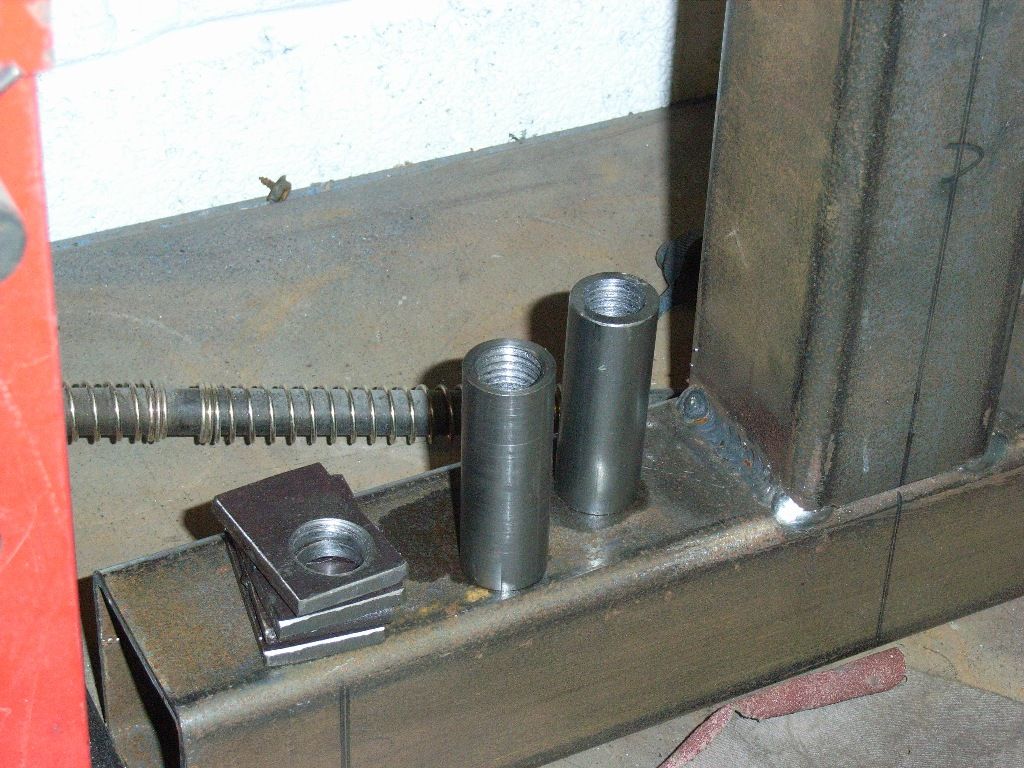 Consoled myself by fitting some more of the triangulation tubes to the car. 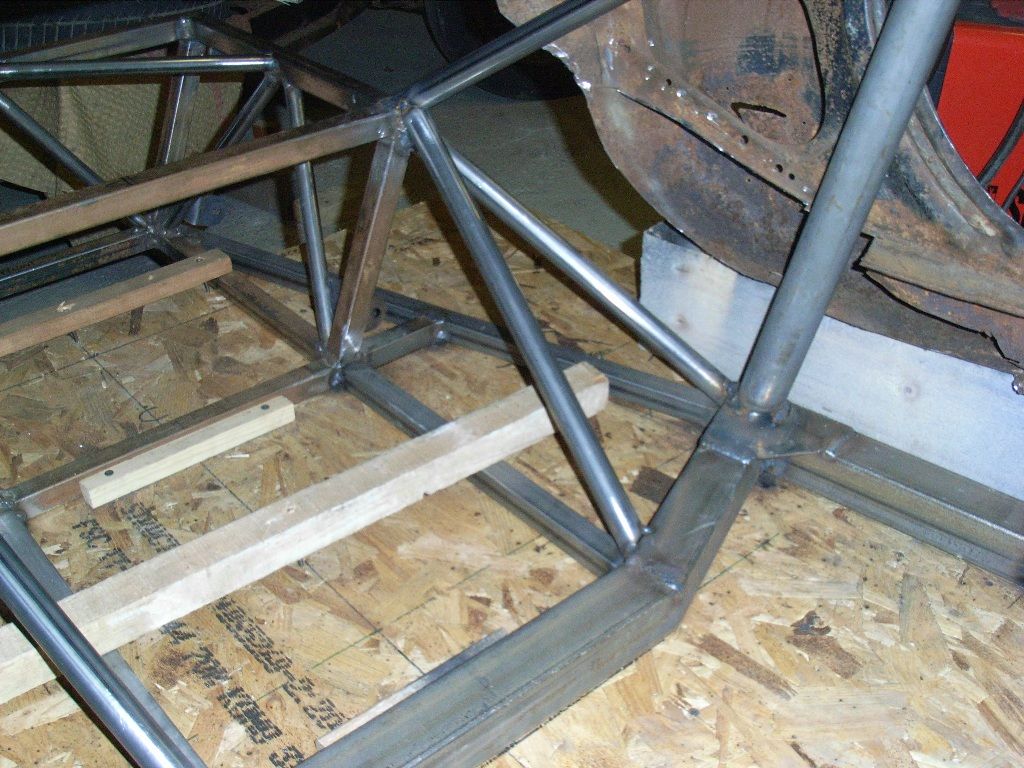 Started work on the transmission tunnel opening in the front bulkhead. The tube across the front is just to hold it square. 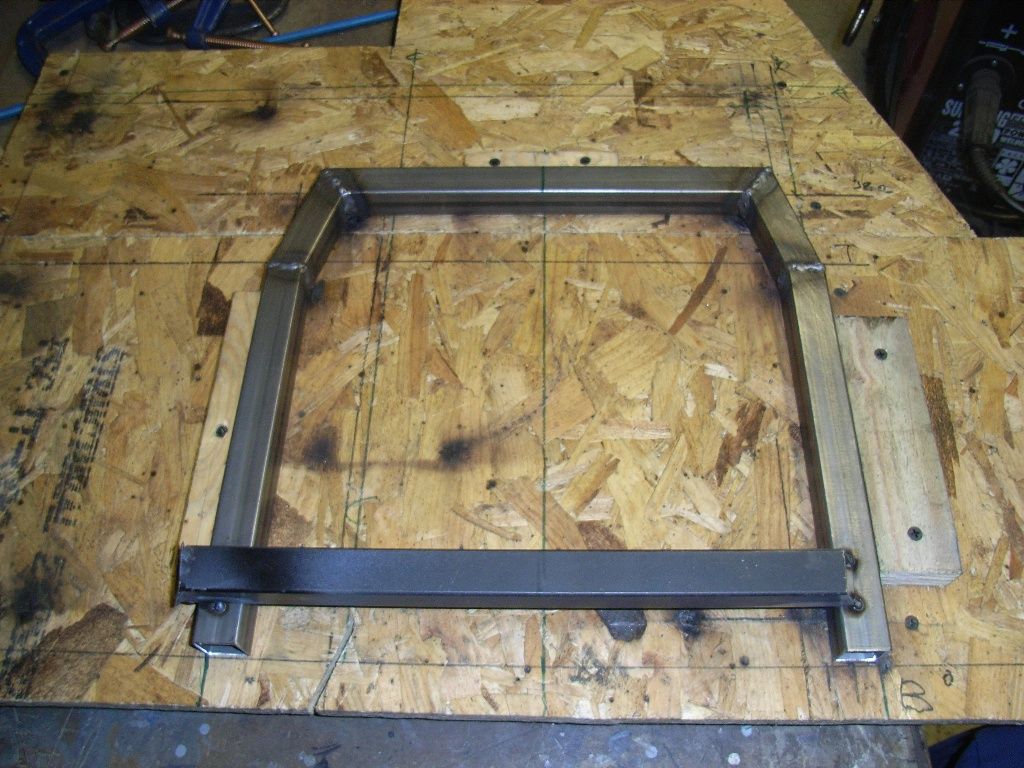 Positioned and tacked in. I don't want to final weld it until i've checked the gearbx against it.... which means getting a gearbox first, not just working from dimensions. 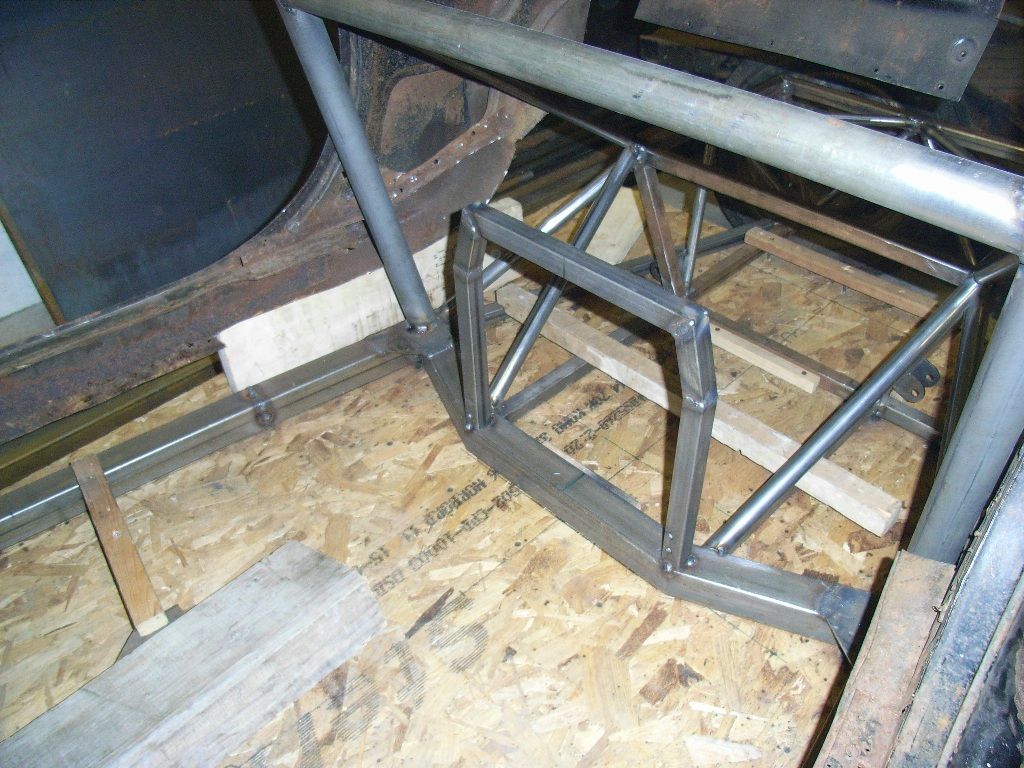 Also put in a couple of brackets to tie the front module together, ready for me to cut out the temporary cros brace thats in the middle of where the engine will go. 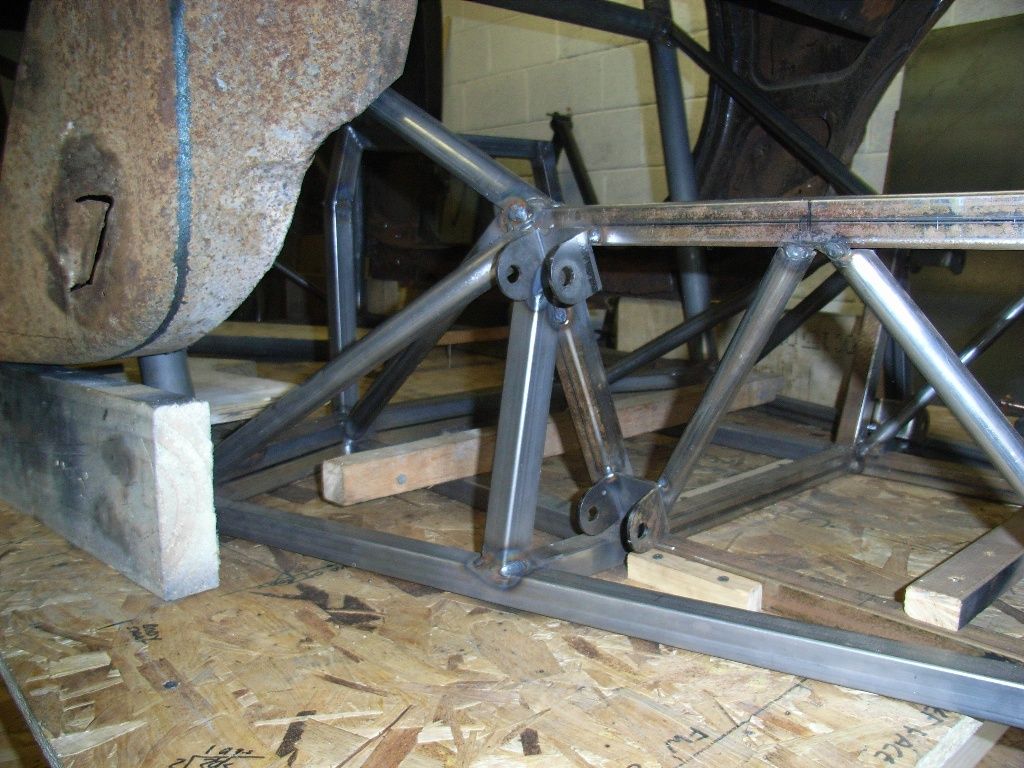 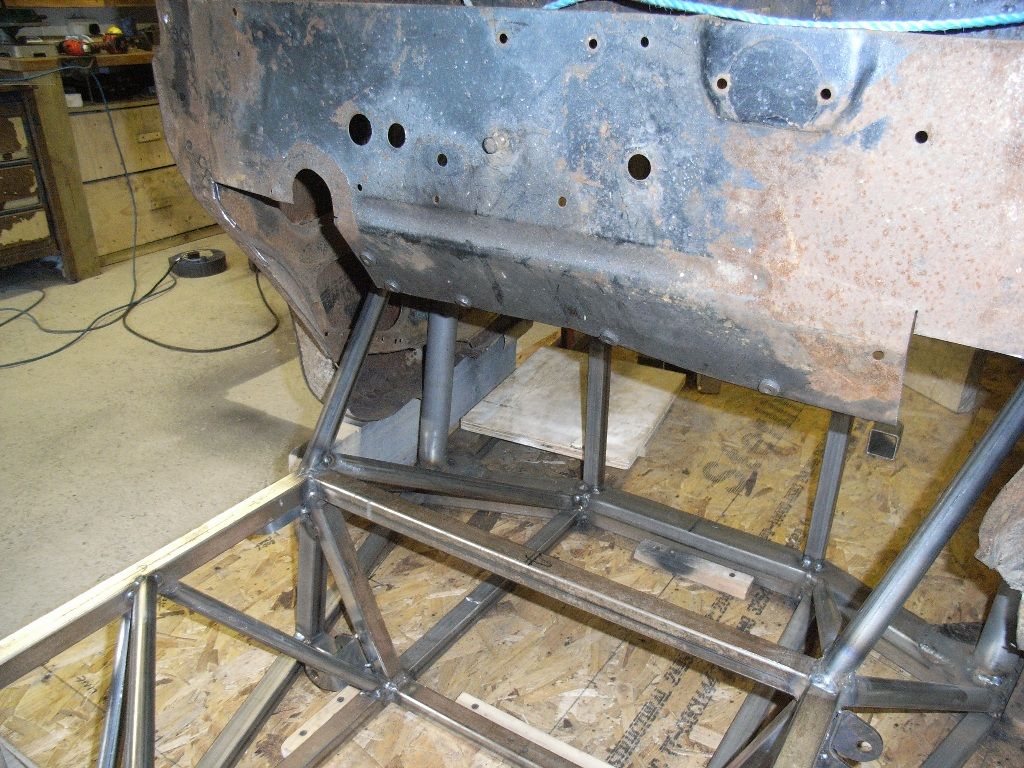 There was also a spell spent tidying the workshop as it was a bit of a mess. |
| |
|
|
PhoenixCapri
West Midlands
Posts: 2,685
Club RR Member Number: 91
|
|
Mar 18, 2013 20:20:26 GMT
|
Interesting build and a strong looking chassis, nice to see someone using some FEA to develop one. Looking forward to the end result  |
| |
|
|
luckygti
Posted a lot
   I need to try harder!
Posts: 4,912
|
|
Mar 18, 2013 20:52:46 GMT
|
Amazing work there, really interesting to see the calculations and CAD stuff too. Not much of an idea of what I'm looking at though  Bookmarked though as I can see this being one hell of a car ;D |
| |
|
|
|
|
|
Mar 19, 2013 10:04:53 GMT
|
|
As you're building up the space frame - is it a space frame? It looks more space framey than chassis-y to me - having such a rough shell to begin with does make sense as it looks like much of the really bad areas of the shell have had to be removed to accommodate the new steel. Deliberate, or just serendipitous?
|
| |
|
|
Lacy
Part of things
 
Posts: 247
|
|
Mar 19, 2013 11:09:44 GMT
|
|
Yet another thread that leaves me feeling utterly inadequate...Brilliant stuff...bookmarked!
|
| |
2007 Porsche 987 Boxster S 'Percy'
1994 Landrover 300tdi 90 CSW 'Connie'
2001 Buell M2 'Bertie'
1976 Kawasaki Z1000 A1 'Nobby'
....and my wife has some nondescript modern box of some sort
|
|
75nut
Part of things
 
Posts: 512
|
|
Mar 19, 2013 12:04:37 GMT
|
|
Ditto to above, some seriously sexy metal work going on! Your lathe work is beautiful
|
| |
90 Alfa 75 3.0 V6 Cloverleaf
79 MGB Roadster
88 Saab 900i Convertible
94 MK1 MX5 1.6
05 Volvo V70
|
|
|
|


 what's your plans with engine? I see you might be doing a BMW diesel? I'd love to build a sit up and beg with a chassis like this and a turbo lump


 Bookmarked though as I can see this being one hell of a car ;D