jonomisfit
Club Retro Rides Member
Posts: 1,787
Club RR Member Number: 49
|
|
|
|
Pretty minimal progress this weekend as was mainly prepping for a mountain bike race I was competing in today. I did get the other rear closer panel tacked in. Panel 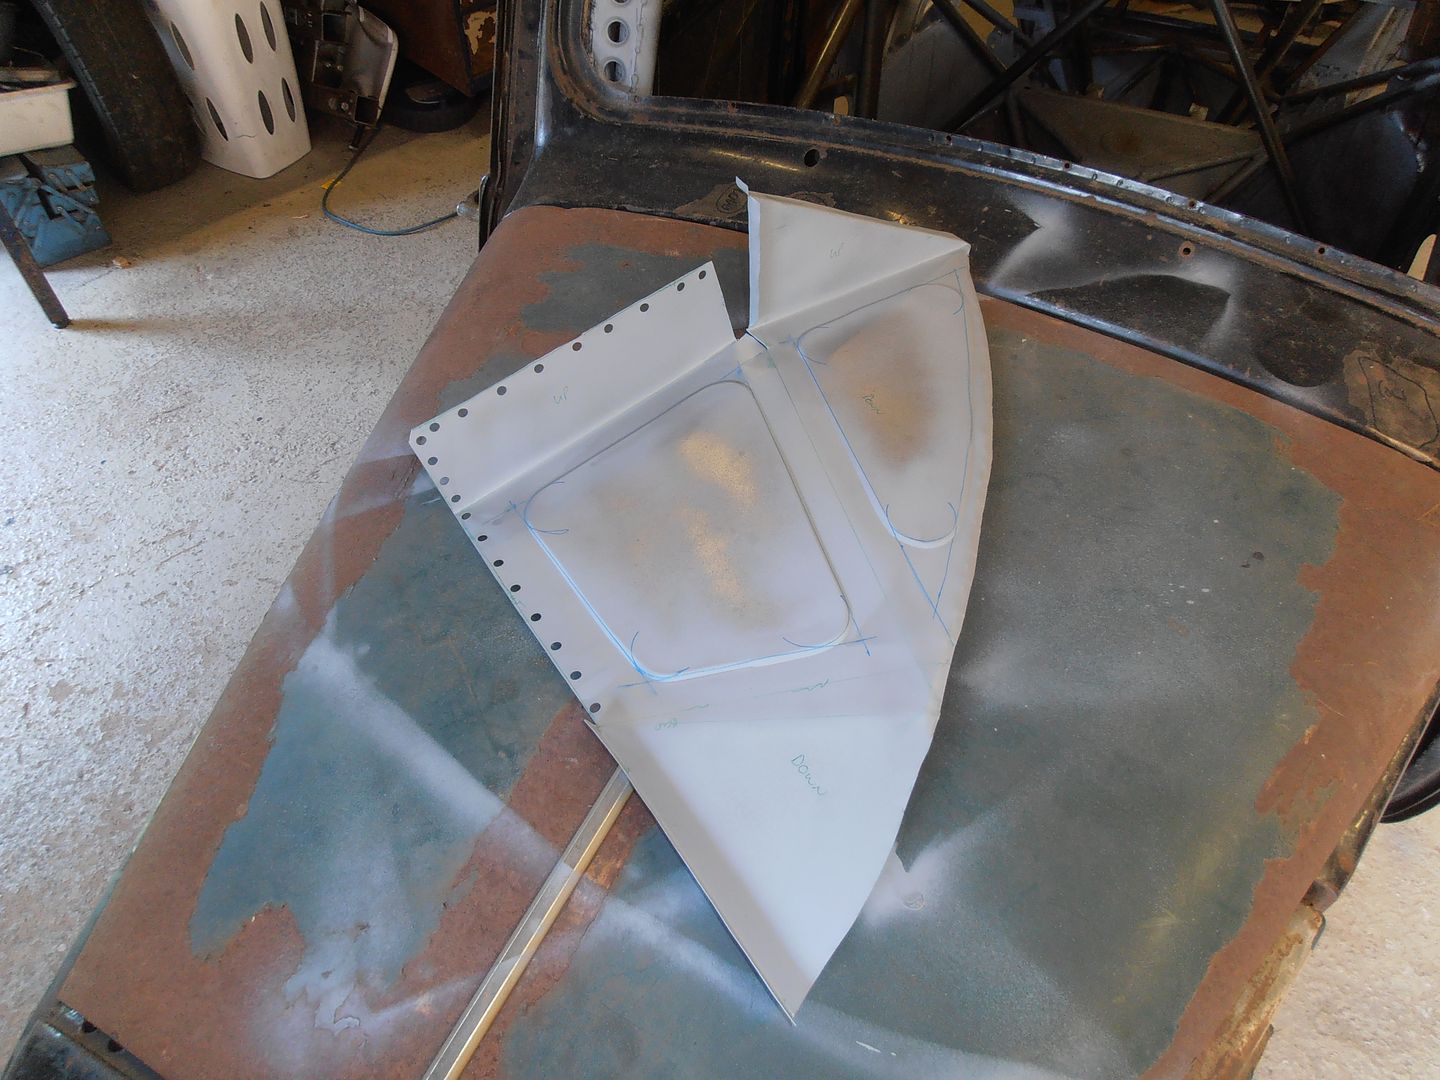 Cleaned up and zinc primed the frame behind the arch. 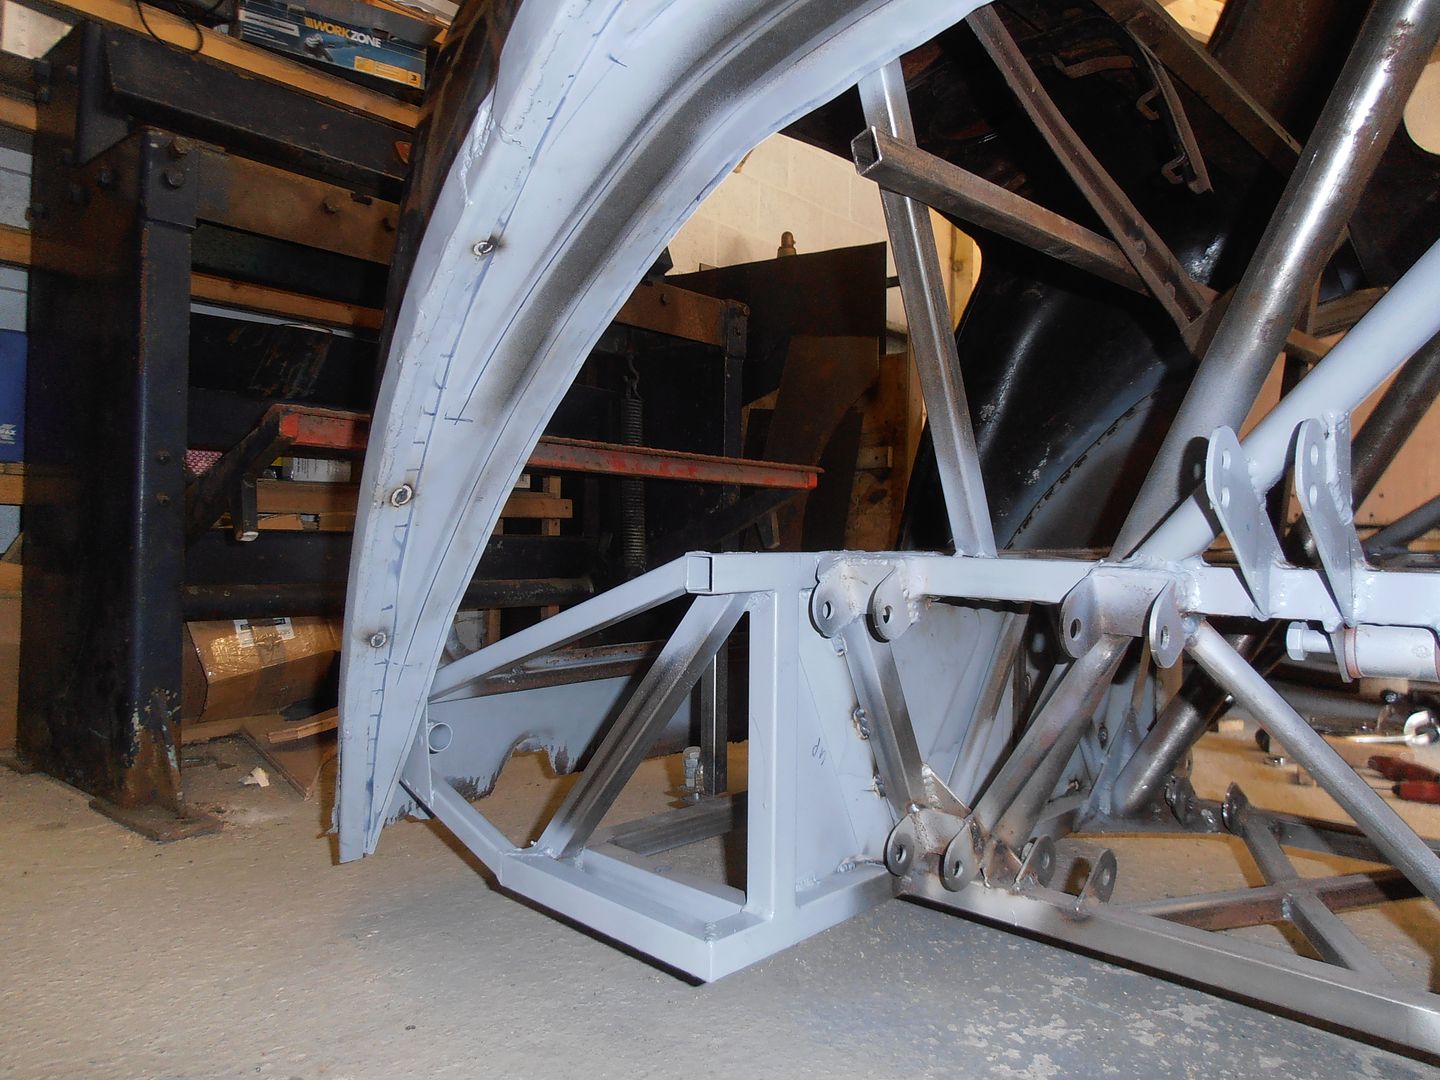 and tacked it in 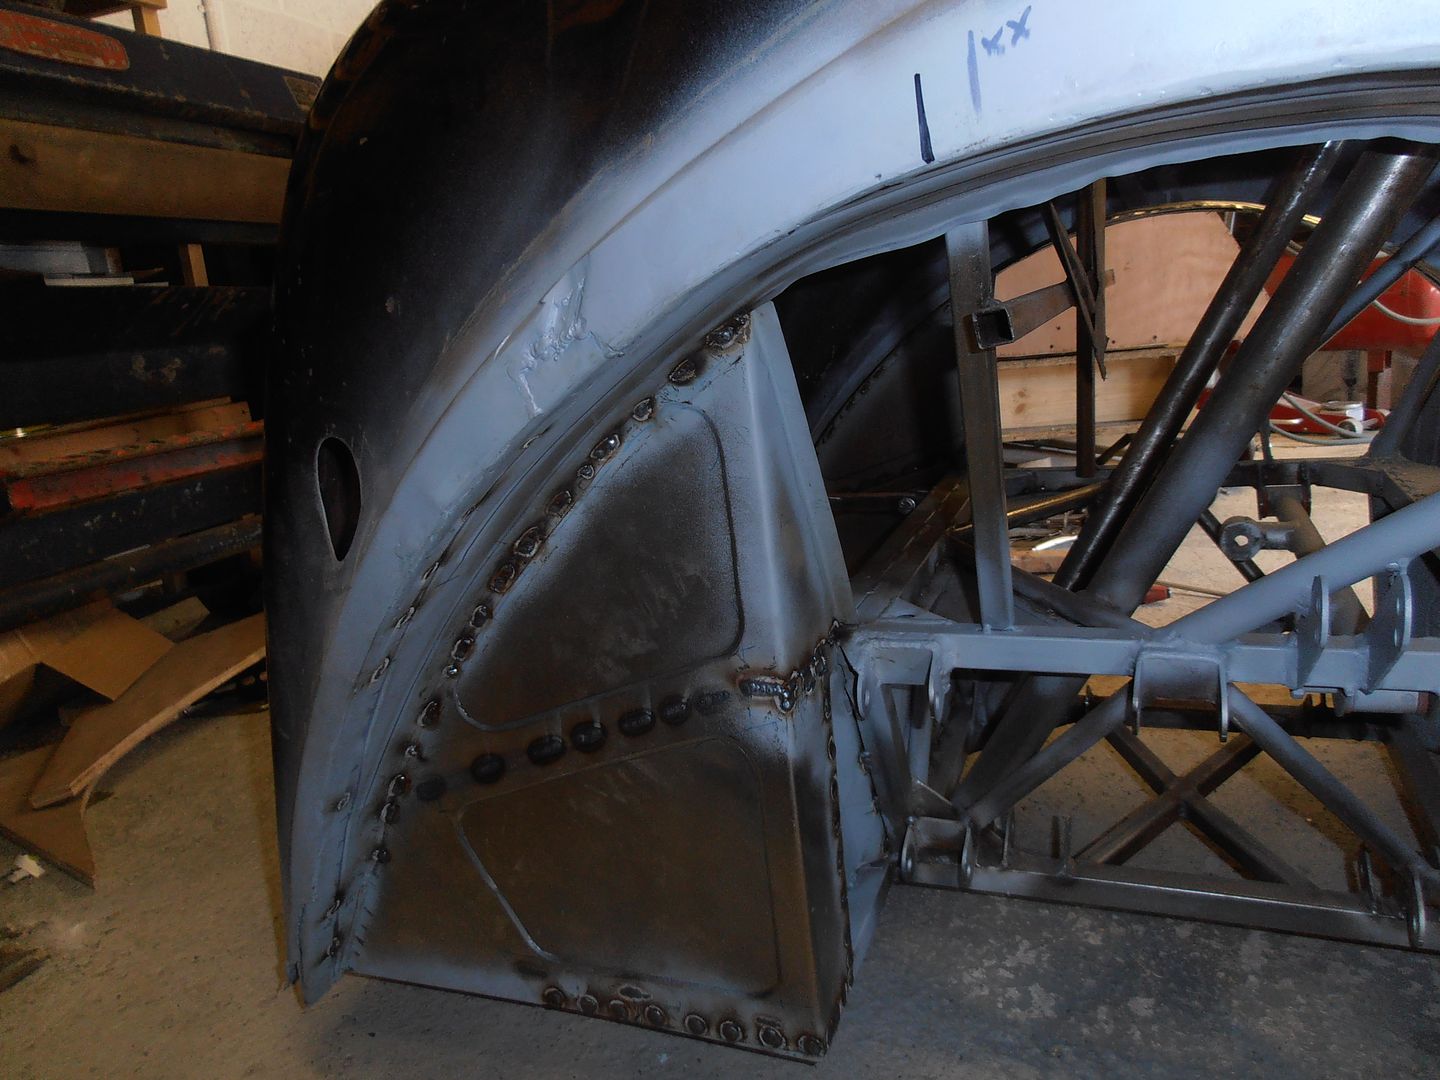 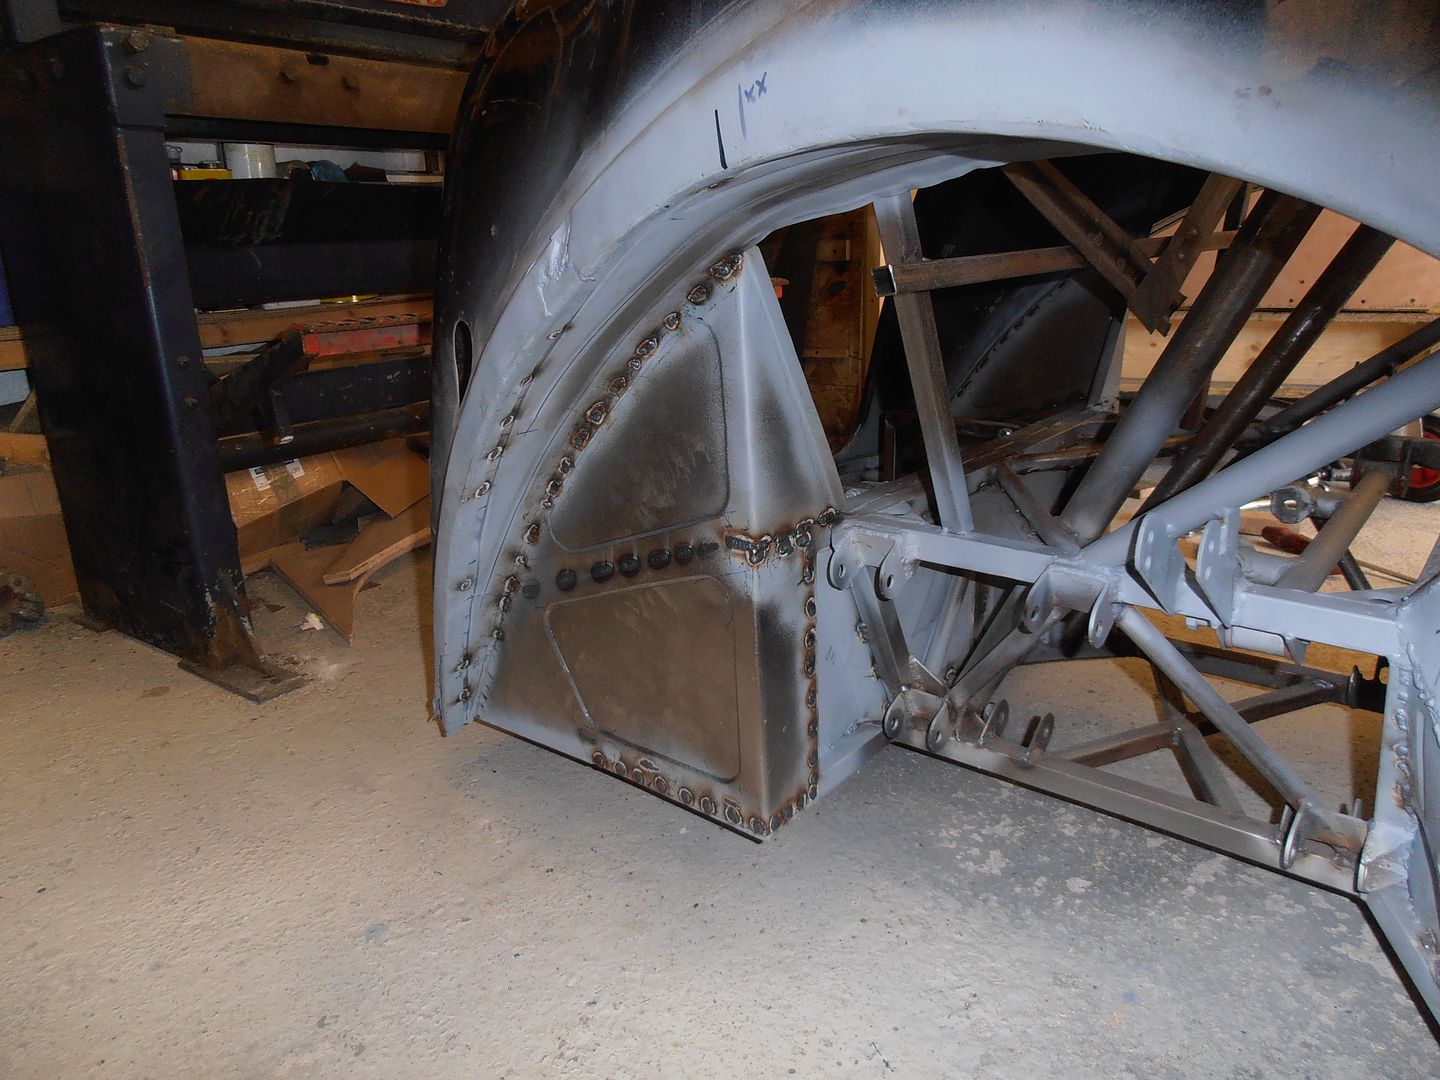 with the panels securely tacked in place and giving a fair bit of stiffness to that are of the shell, i could then take out the rear cross bracing, as this gets in the way of the mid closer panels. 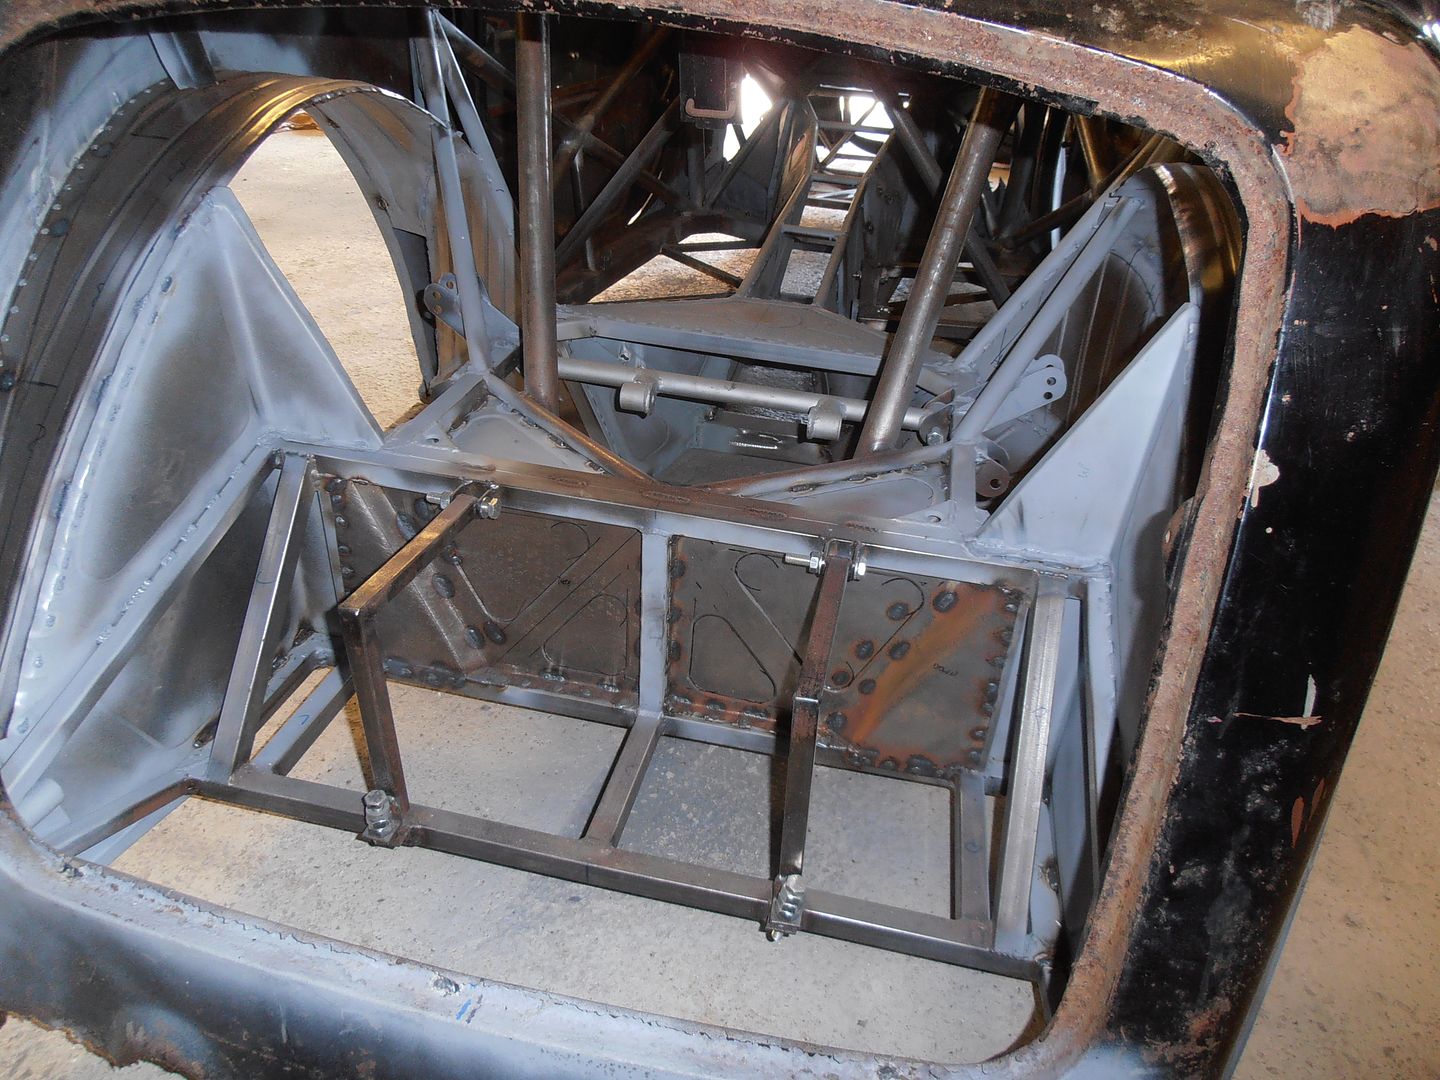 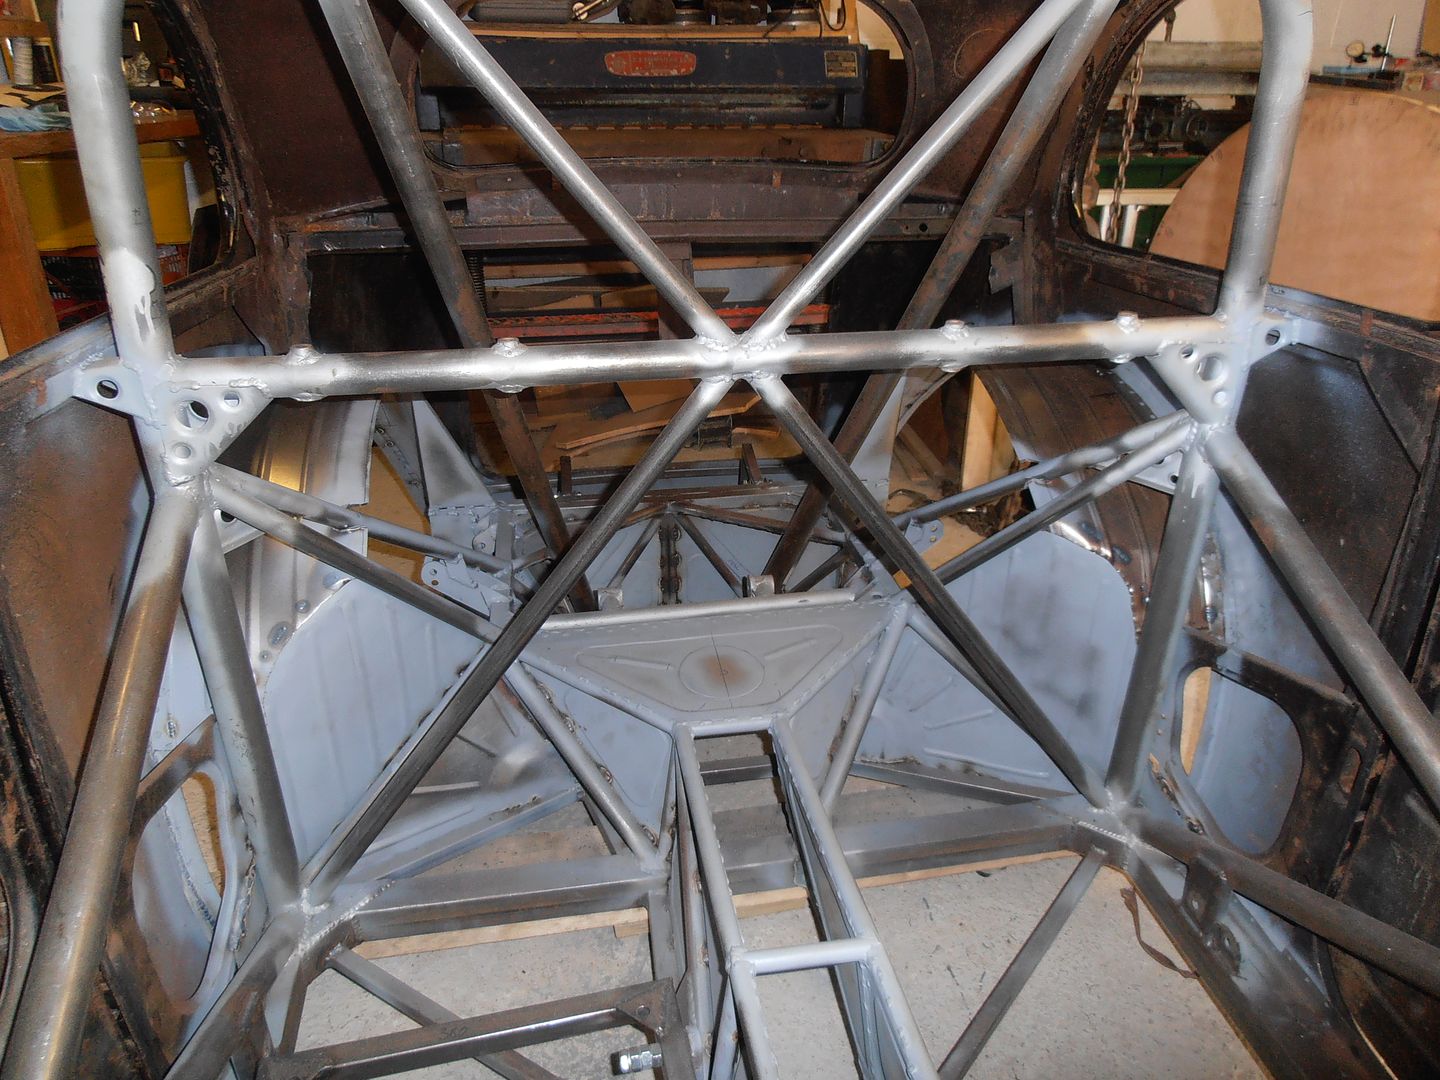 which also makes access a lot easier I still need to cut out the upper seat back mounting point as its no longer used. Next weekend i should hopefully get some more work done. |
| |
|
|
|
|
vulgalour
Club Retro Rides Member
Posts: 7,271
Club RR Member Number: 146
|
|
|
|
|
I was pretty confused about all the bits of metal bar and tubing when you were building the frame up, now I see some panels going on it makes a lot more sense, at least in photographs. This is going to be a really smart little car.
|
| |
|
|
jonomisfit
Club Retro Rides Member
Posts: 1,787
Club RR Member Number: 49
|
|
|
|
|
Its definitely not the most straight forward of frames to hang a car body on. I may have got a bit carried away on CAD and over complicated things a bit.
...........But then again I wouldn't be a proper engineer if I didn't. :-)
It probably doesn't help i only ever seem to take pics of the bit I'm working on, and no wider angle ones putting it in context.
|
| |
|
|
fogey
Posted a lot
  
Posts: 1,620
|
|
|
|
|
Bloody Hell! Just looked at this thread for the first time 'cus I thought Morris 8 was just a little too old and boring . . . how wrong was I !!
|
| |
|
|
jonomisfit
Club Retro Rides Member
Posts: 1,787
Club RR Member Number: 49
|
|
Jul 12, 2015 19:11:56 GMT
|
Thanks. The thread title doesn't really say that much about whats going on. Some progress this weekend. Cardboard template 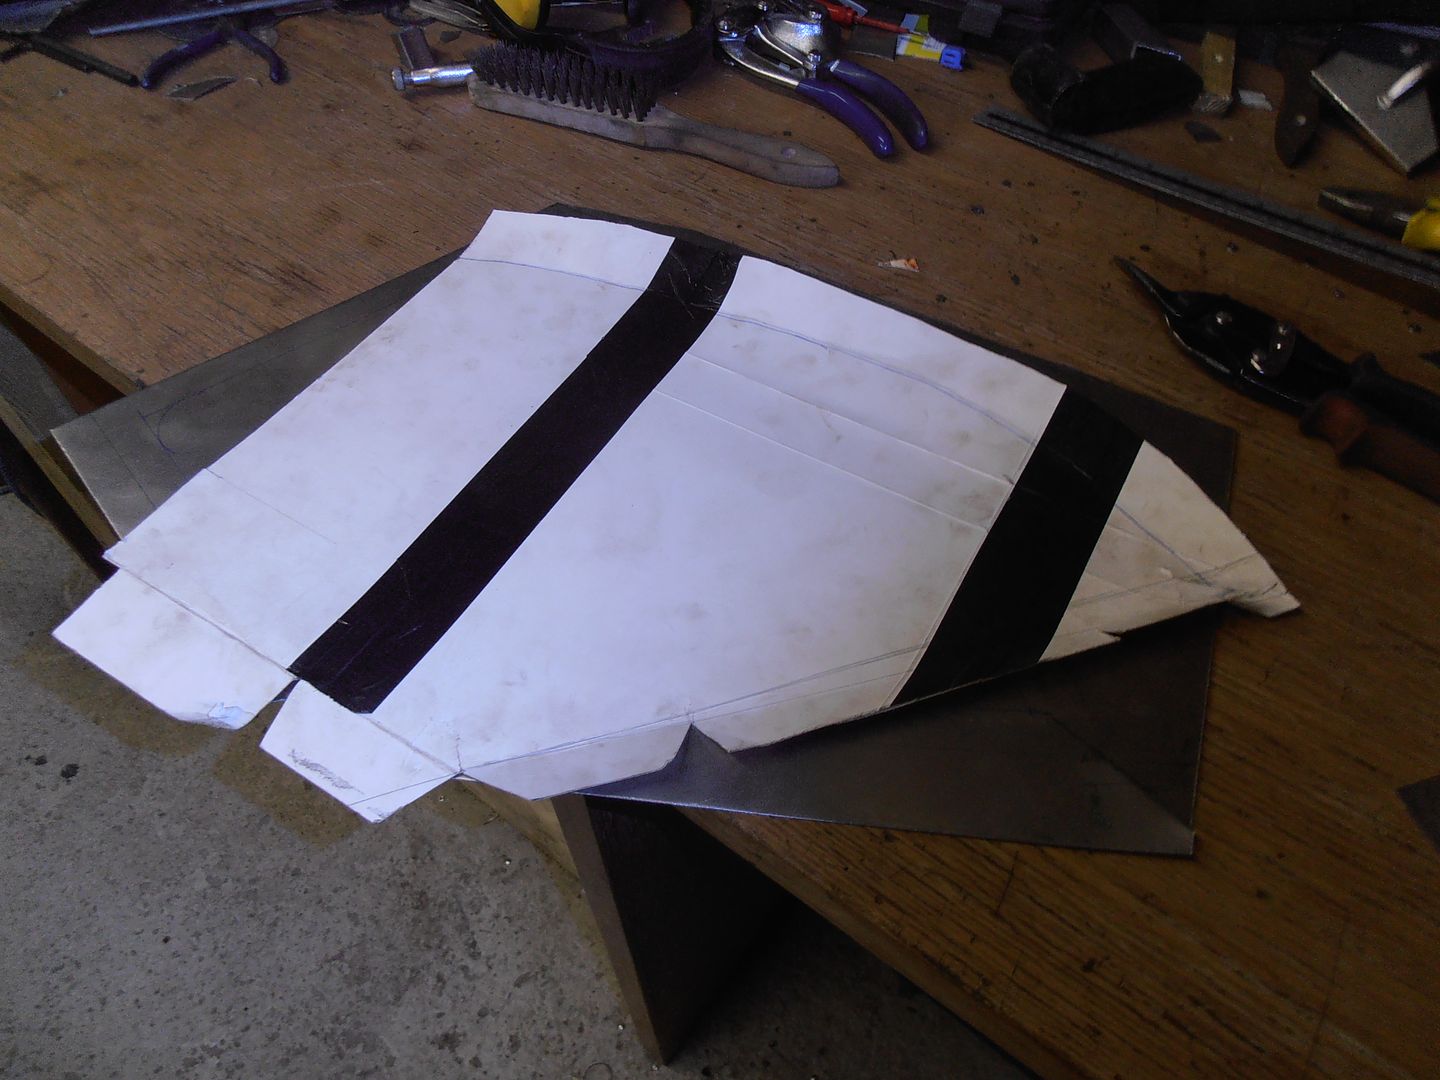 Steel with bend lines etc marked on 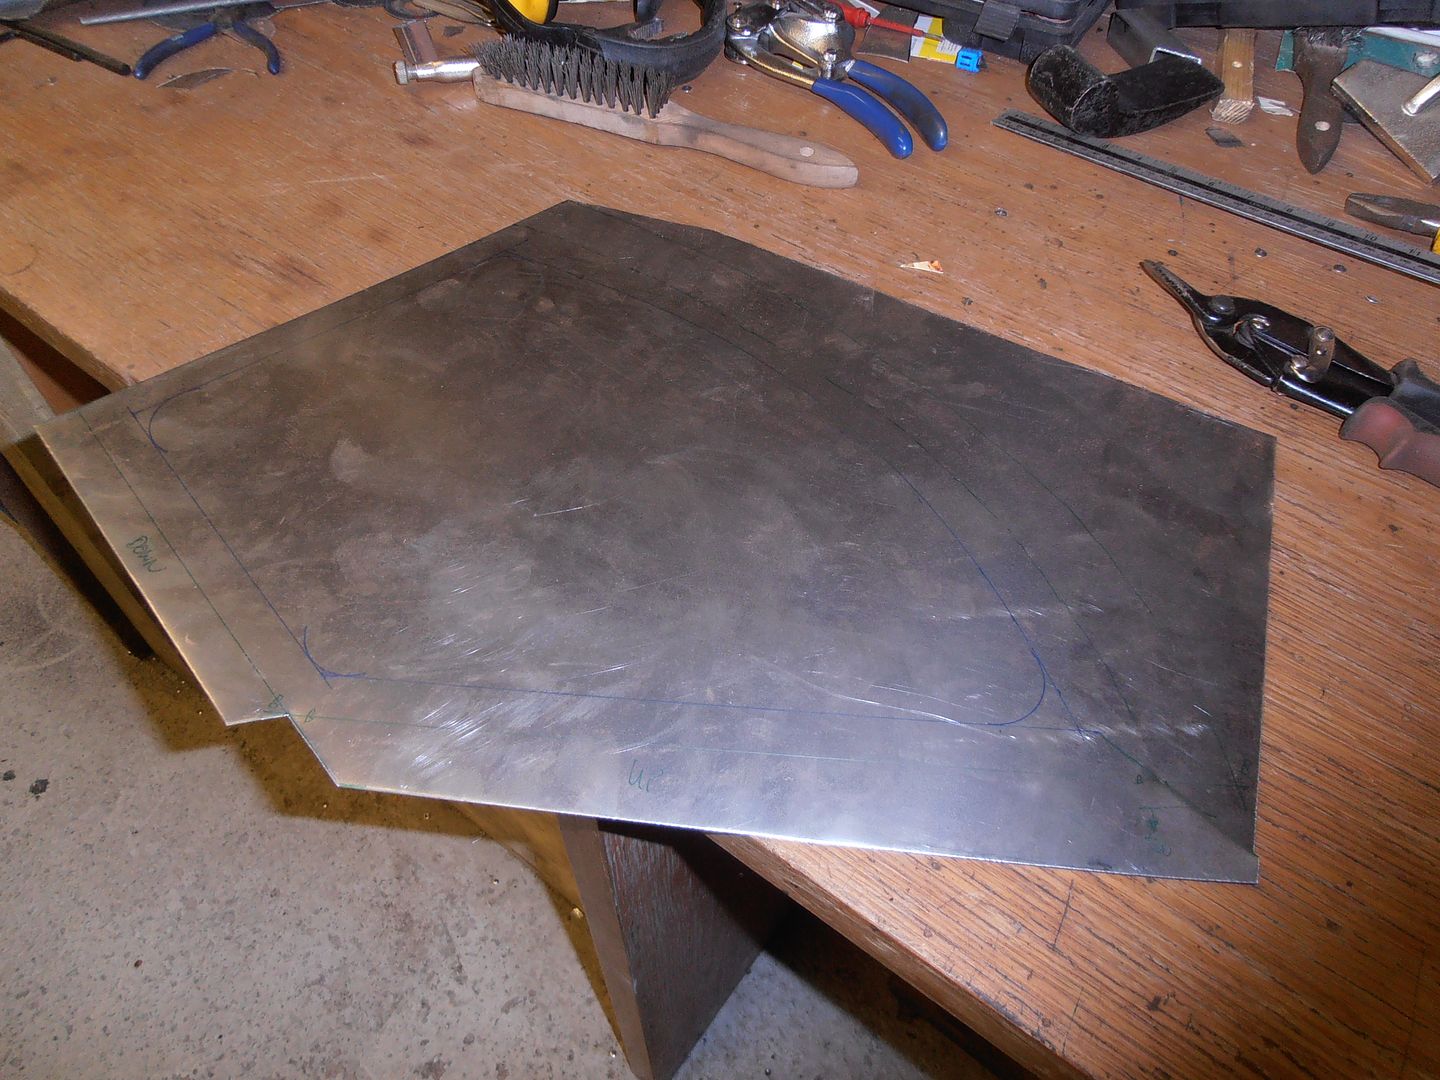 Swaged panel. 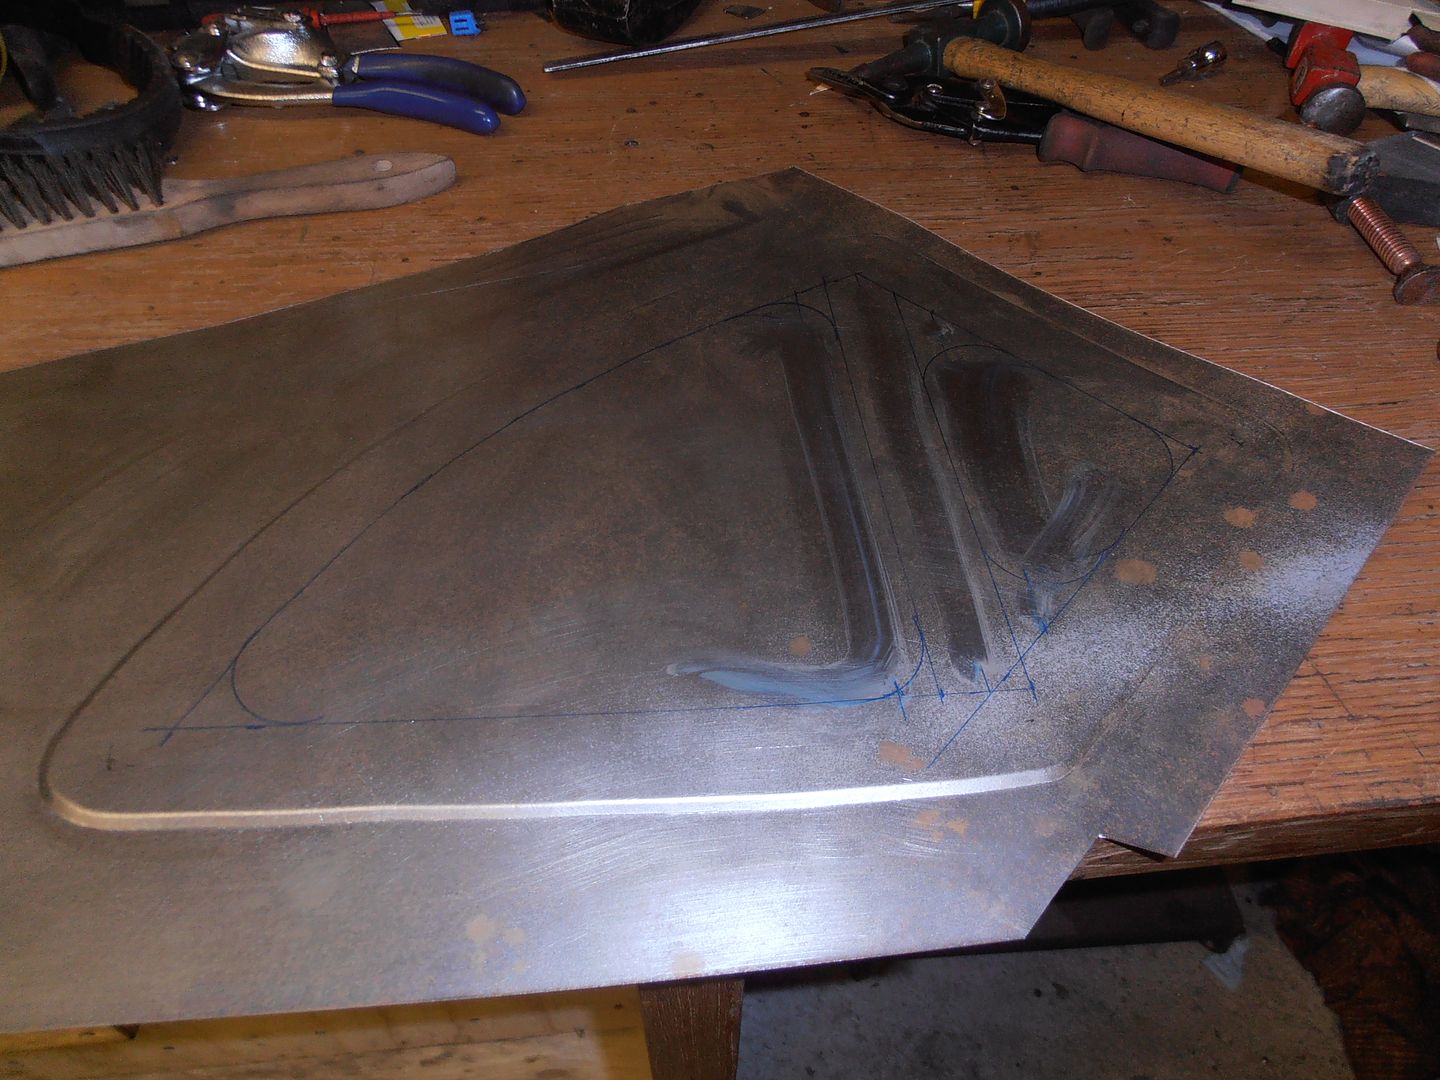 I then decided the area was too big to leave as it was, mainly as I think it'd drum pretty easily. So i marked it up on the reverse and swaged a second pattern back the way. 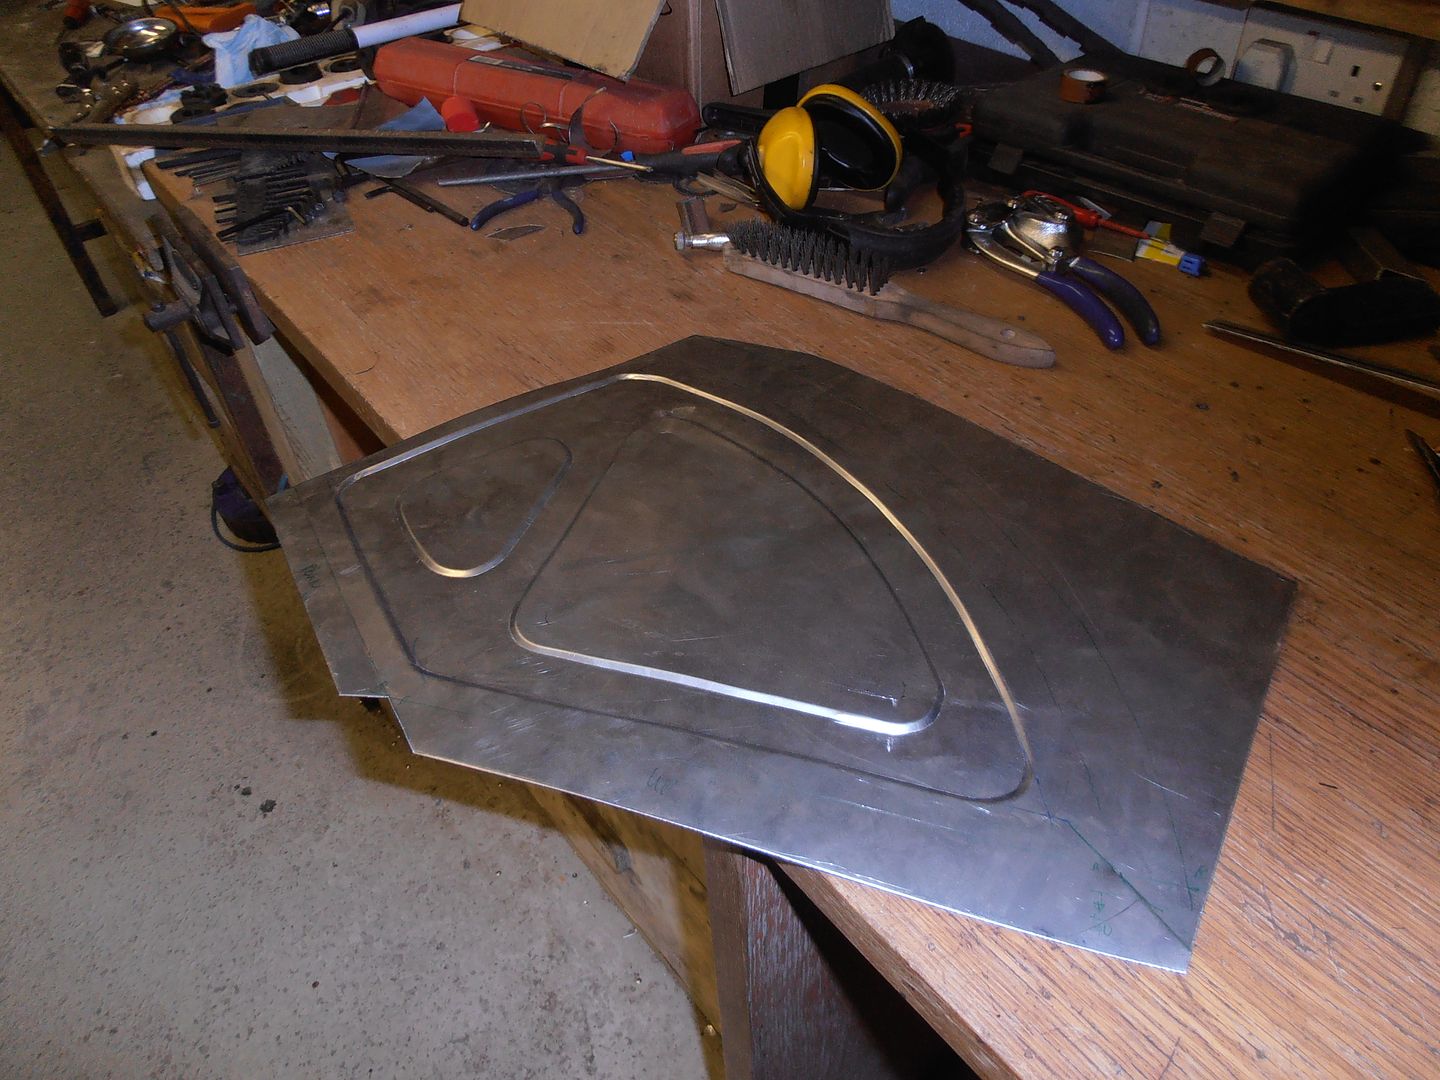 it came out much better than i thought it would and not too much distortion to the panel. folder up the lips, top edge needed a work over in the shrinker to get out ripples 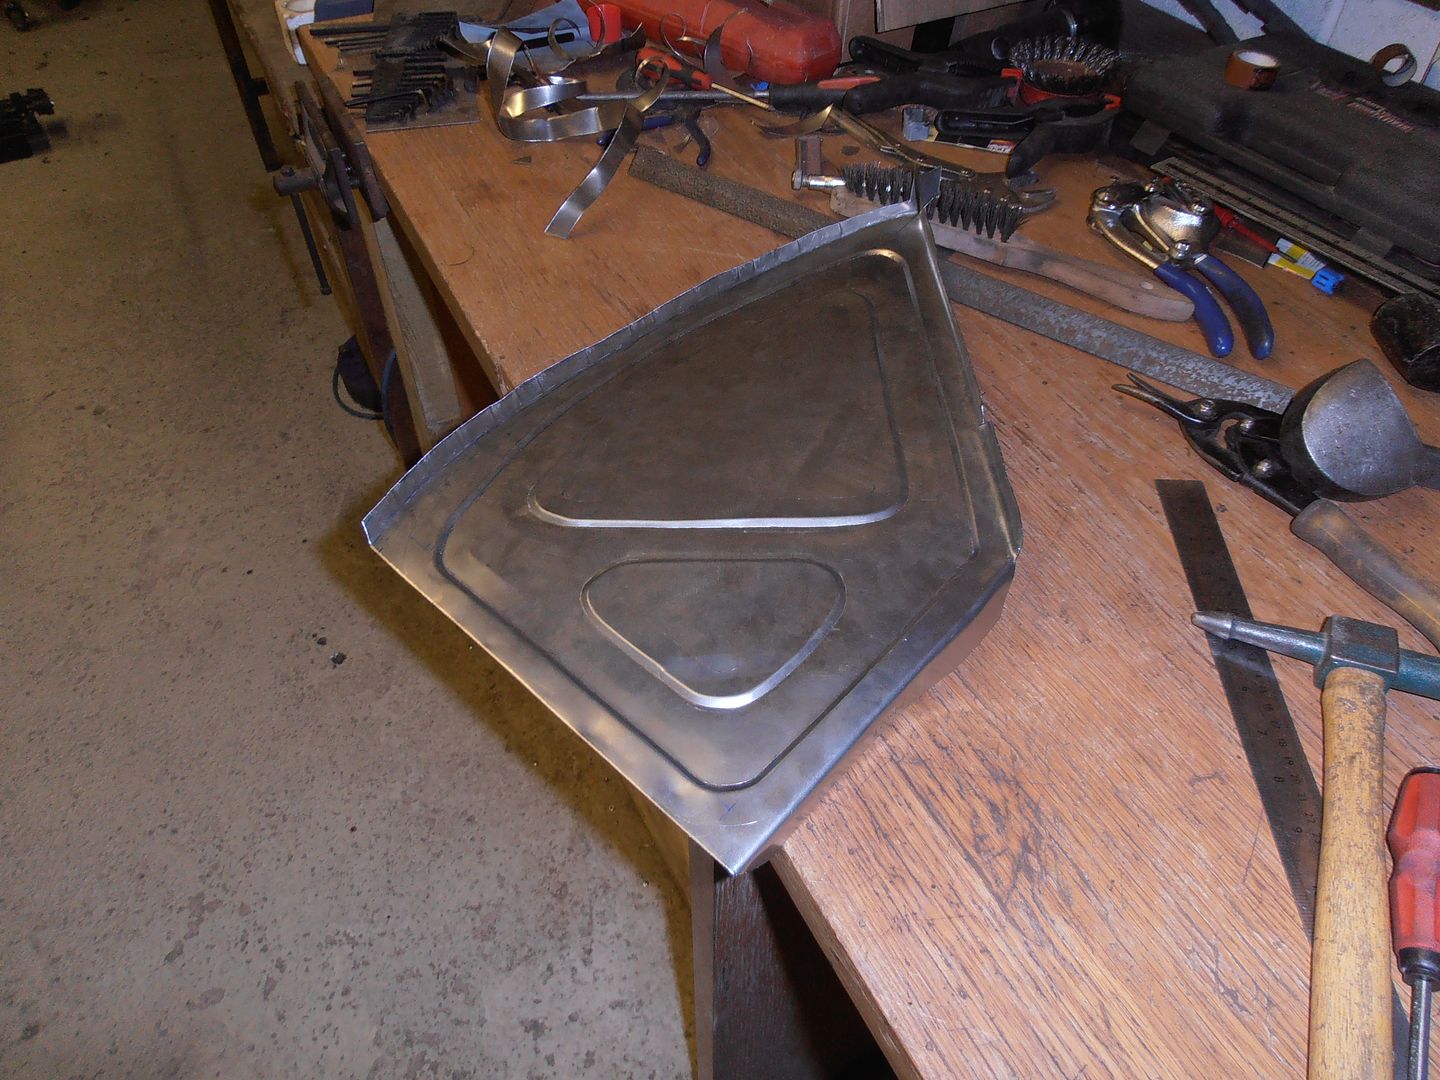 in position 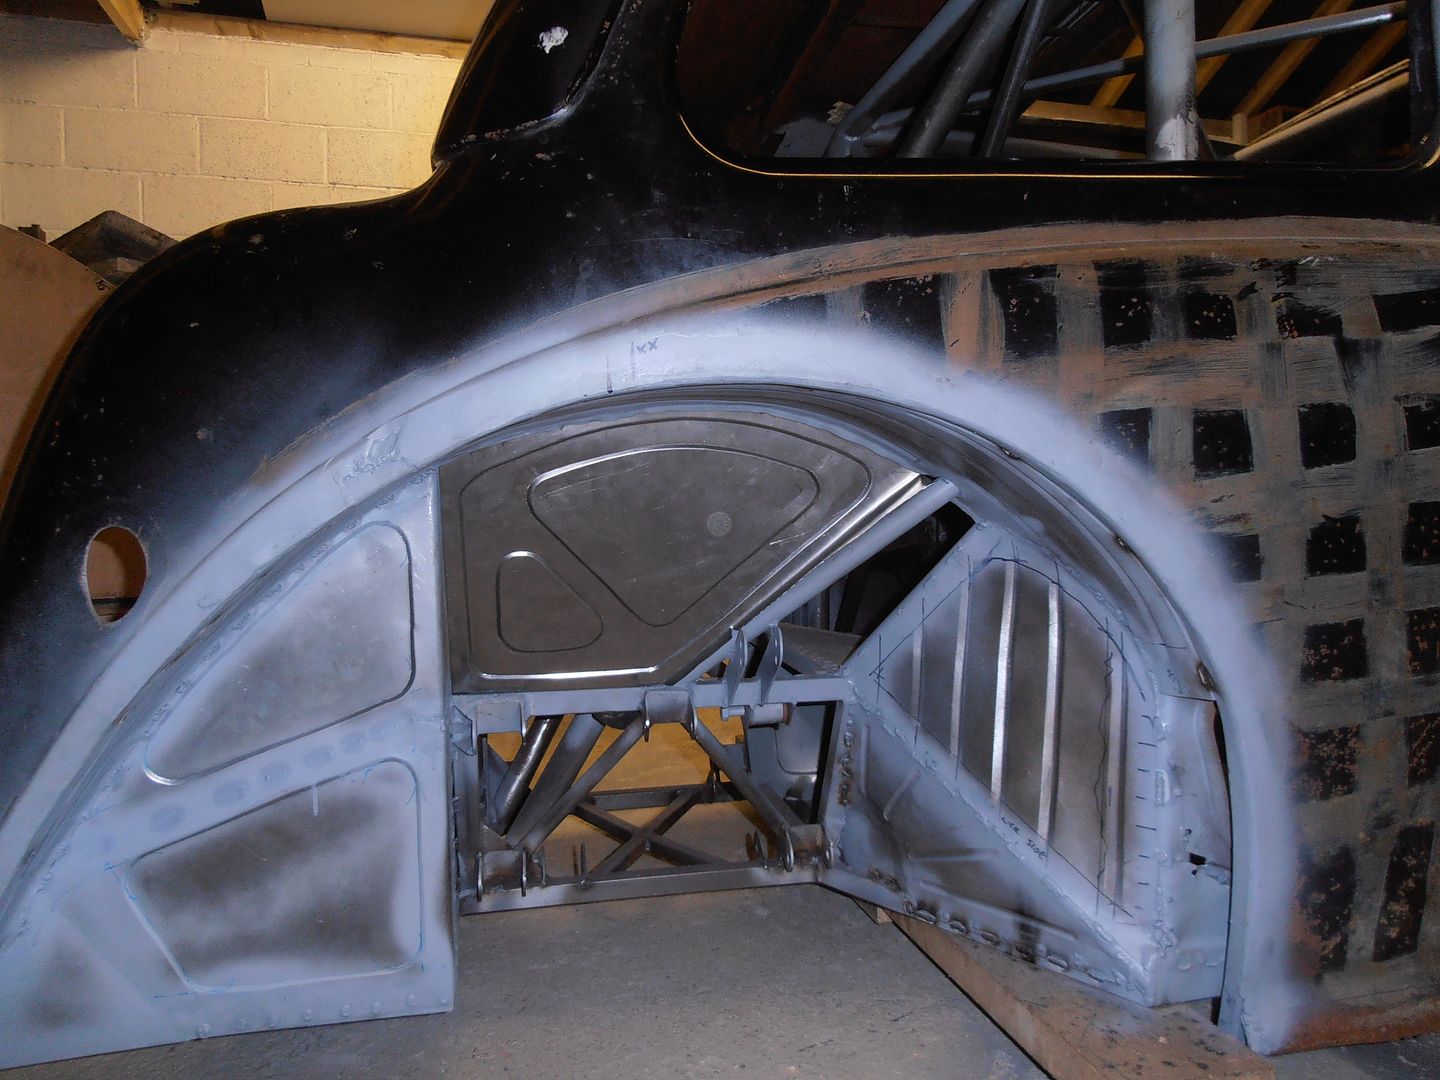 welded 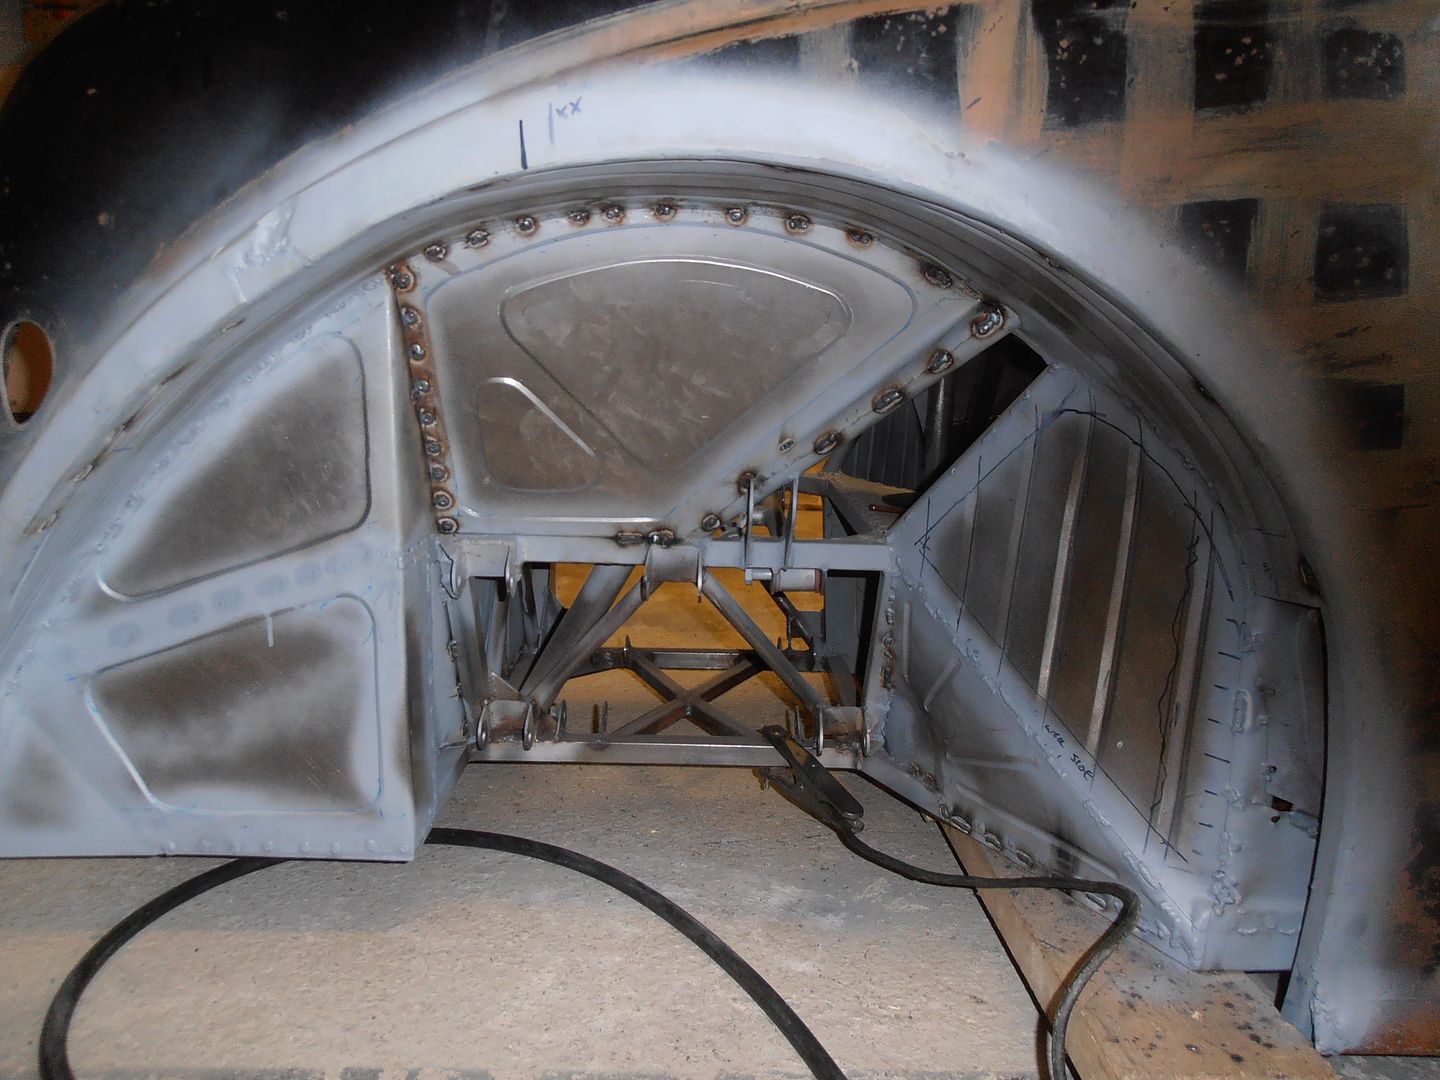 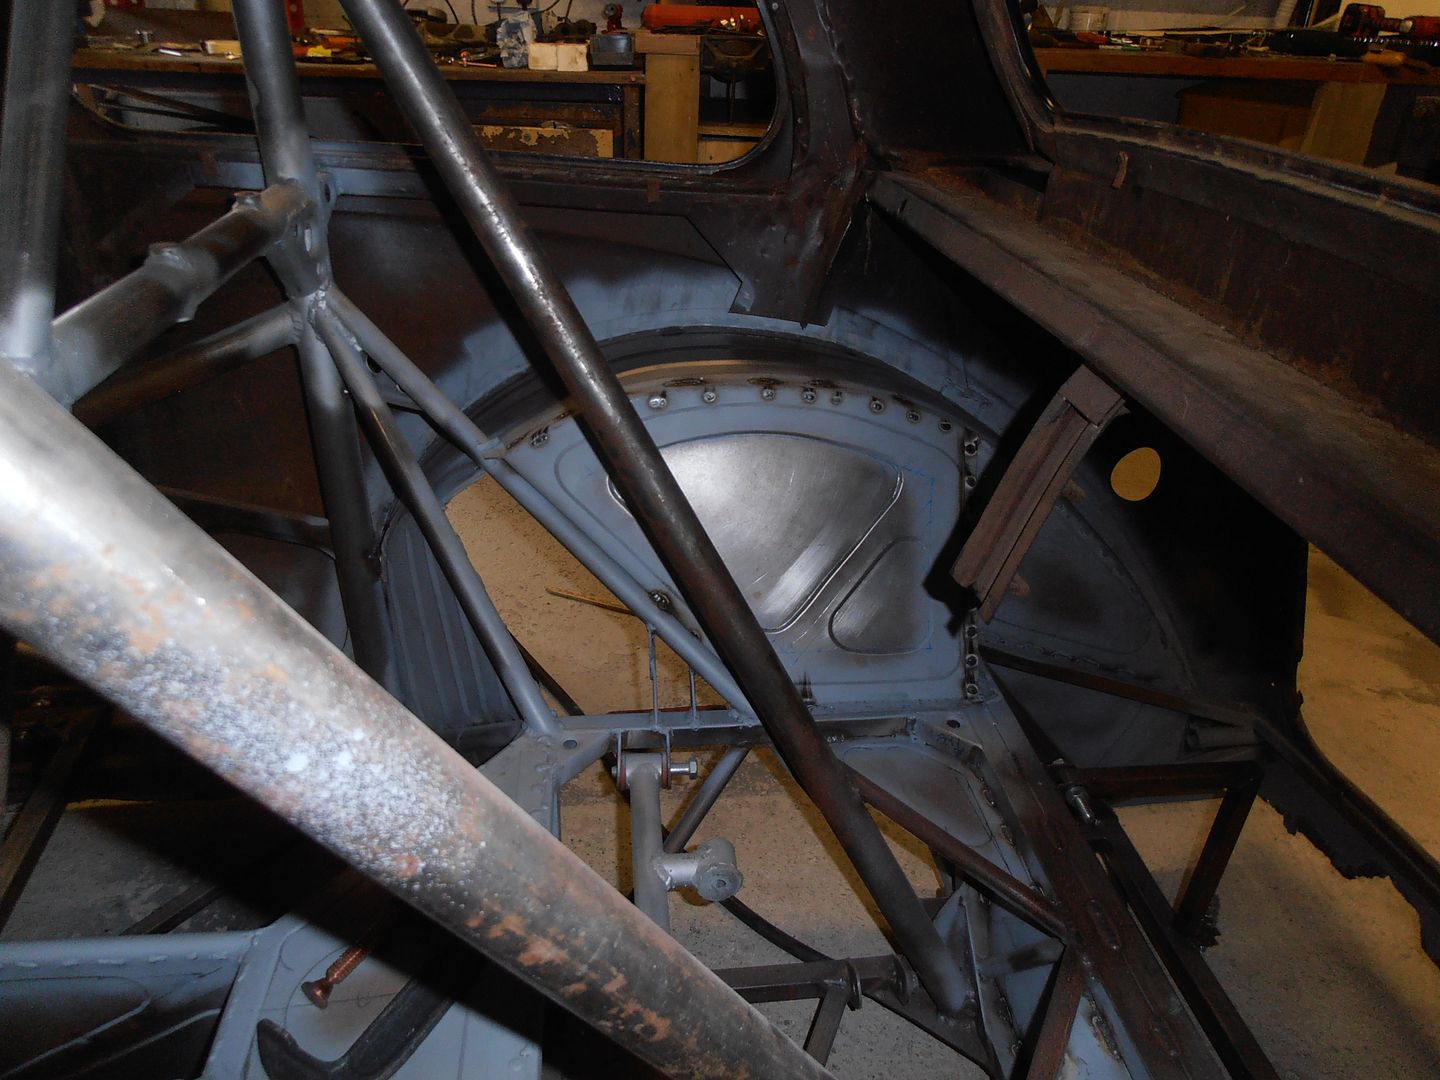 giving it a press its got a fair bit of strength to it, i'm doubly shure it'd have drummedd if i hadnt put the second swaging in it knocked up infills for the remaining gaps 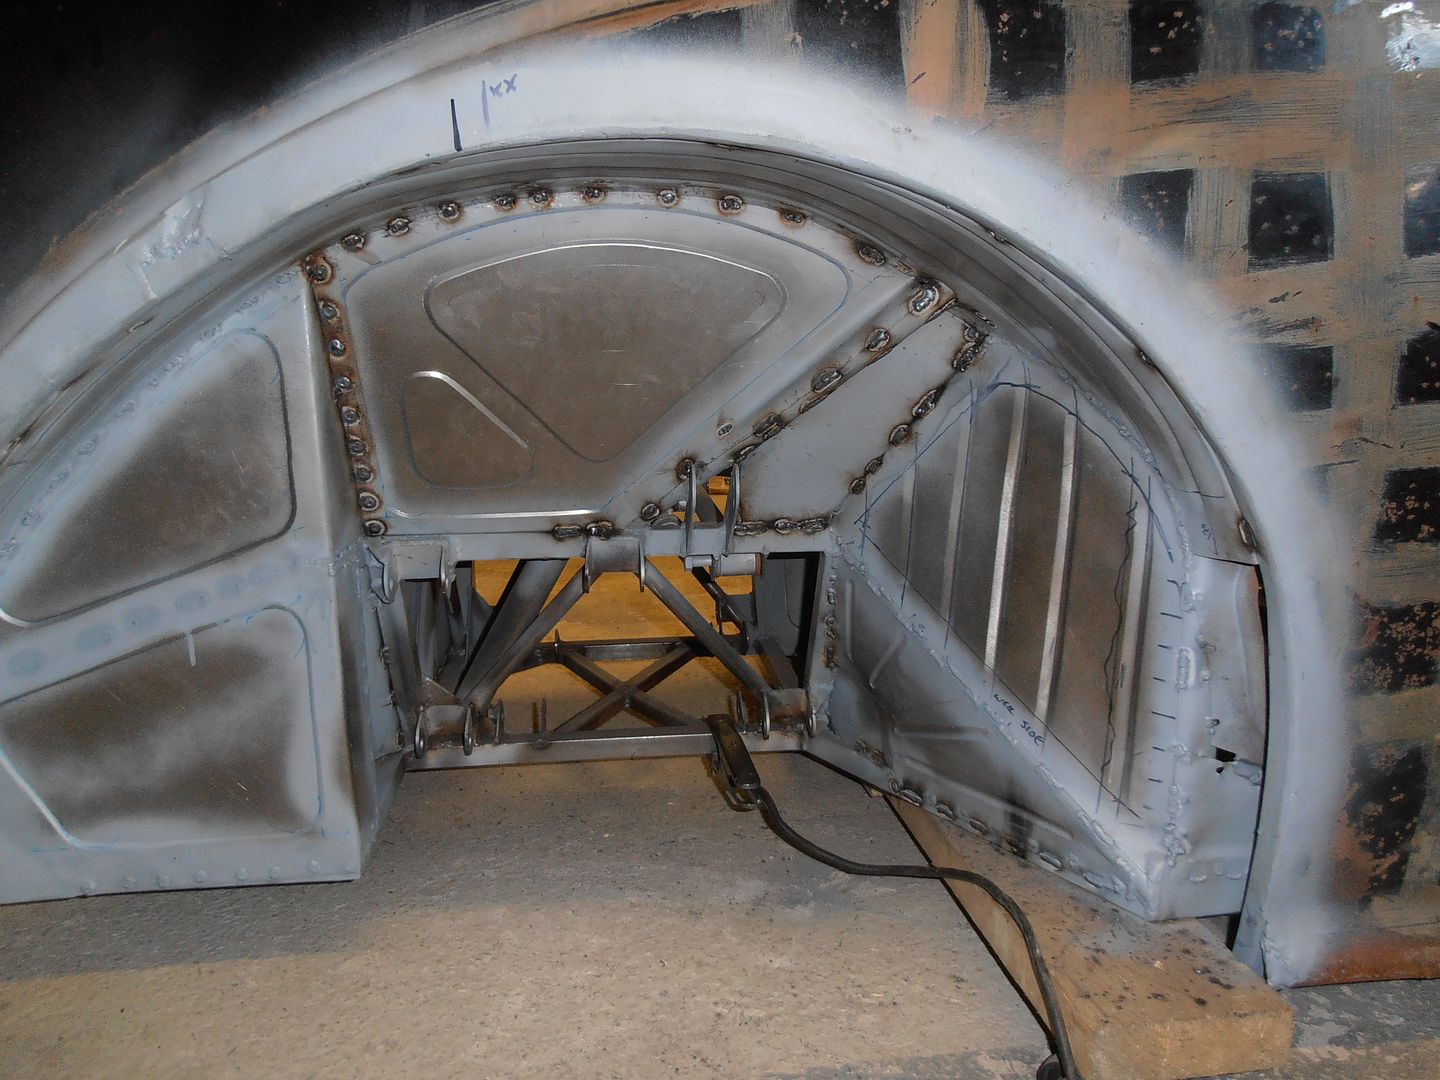 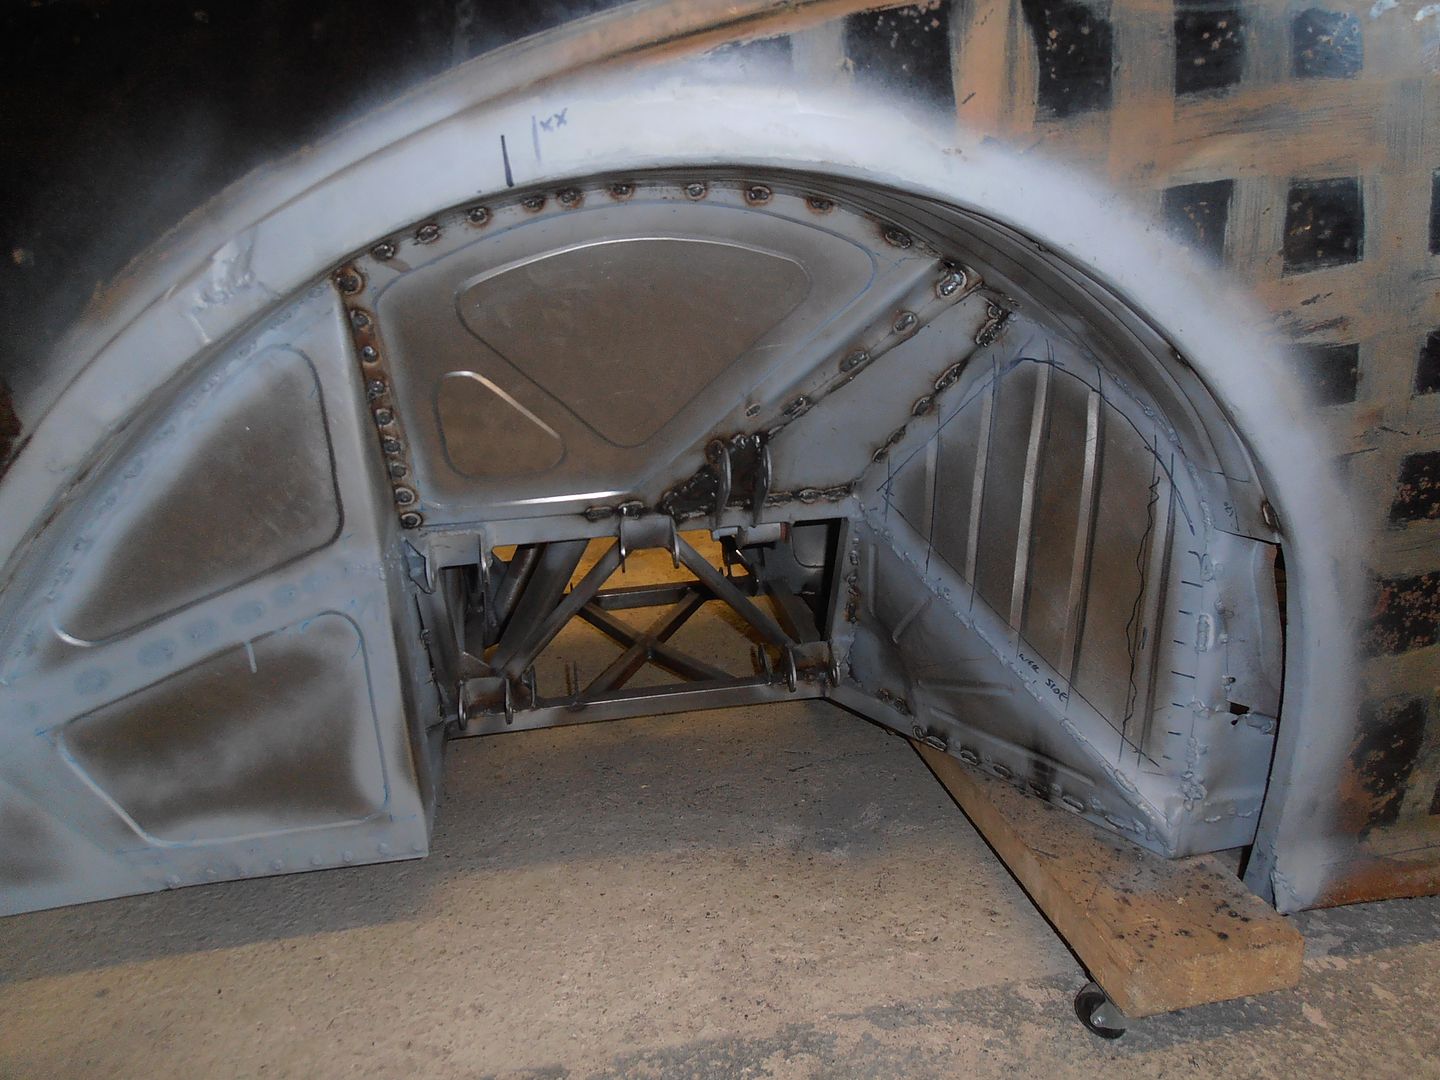 and removed the fuel filler hole 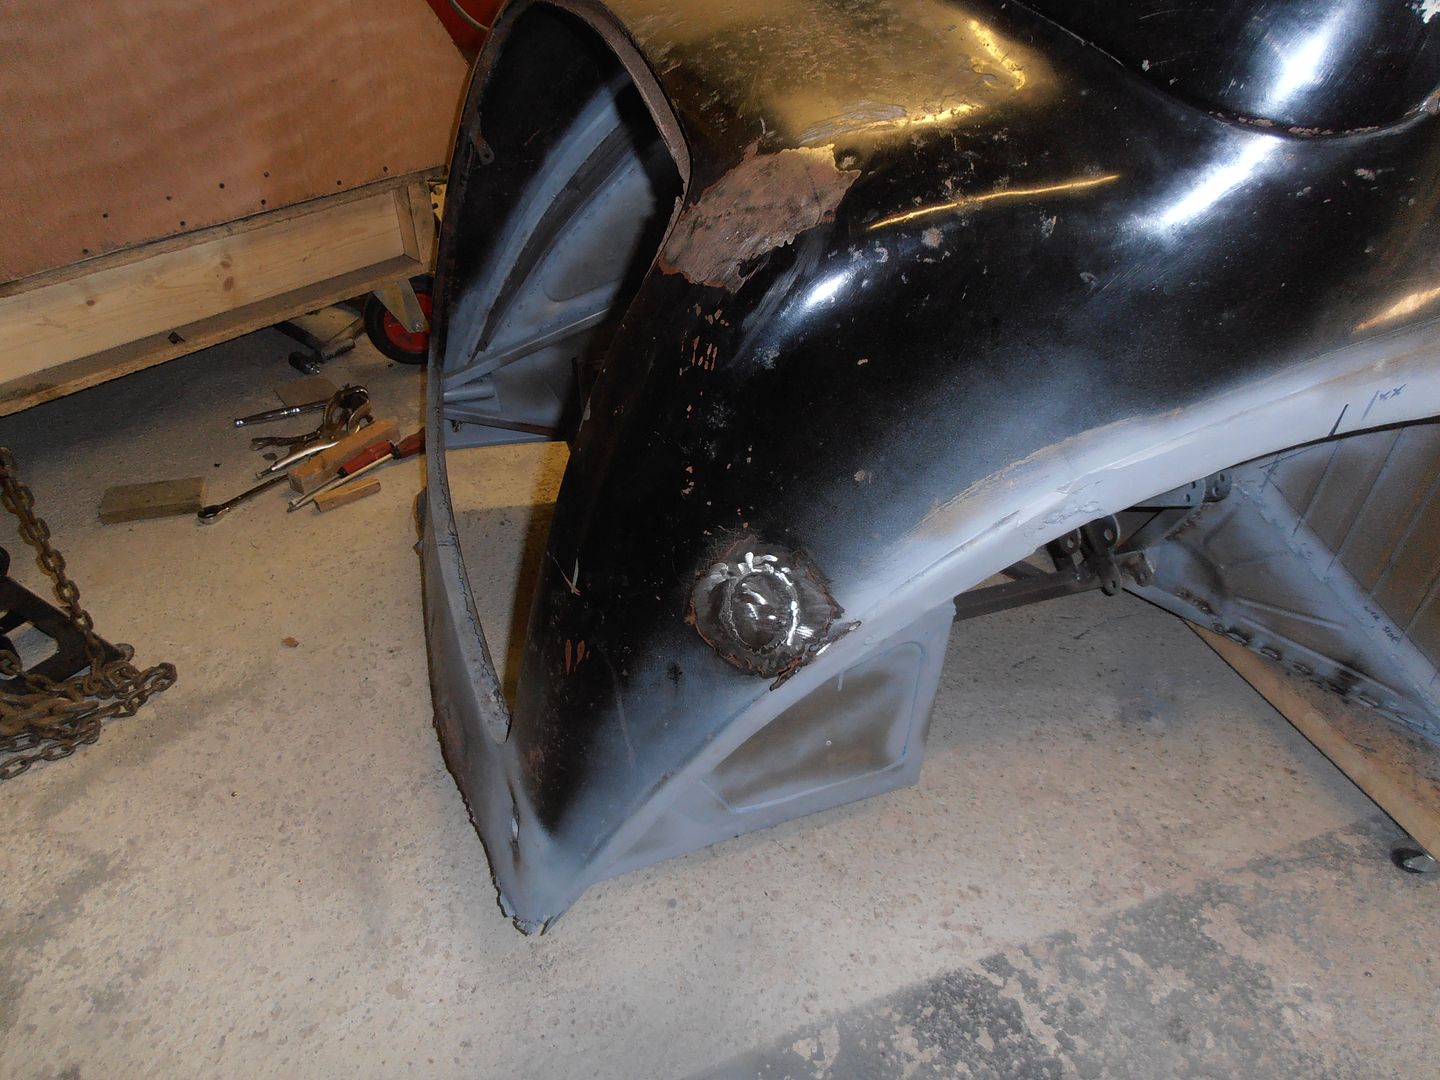 inside 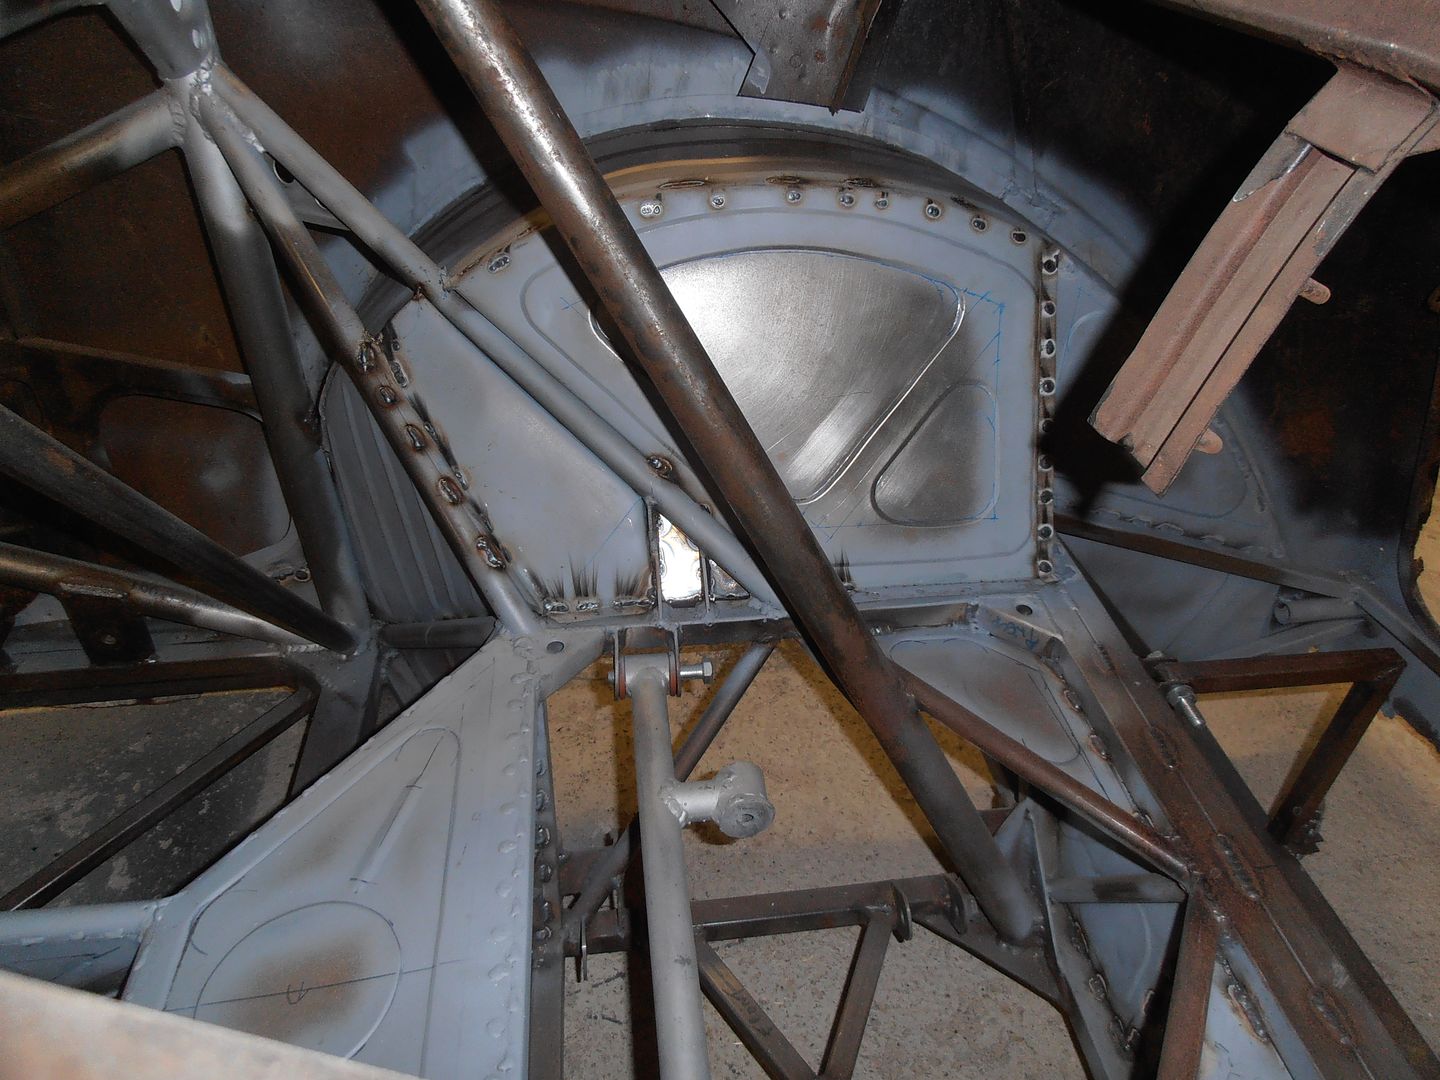 first side came out ok, so onto the passenger side 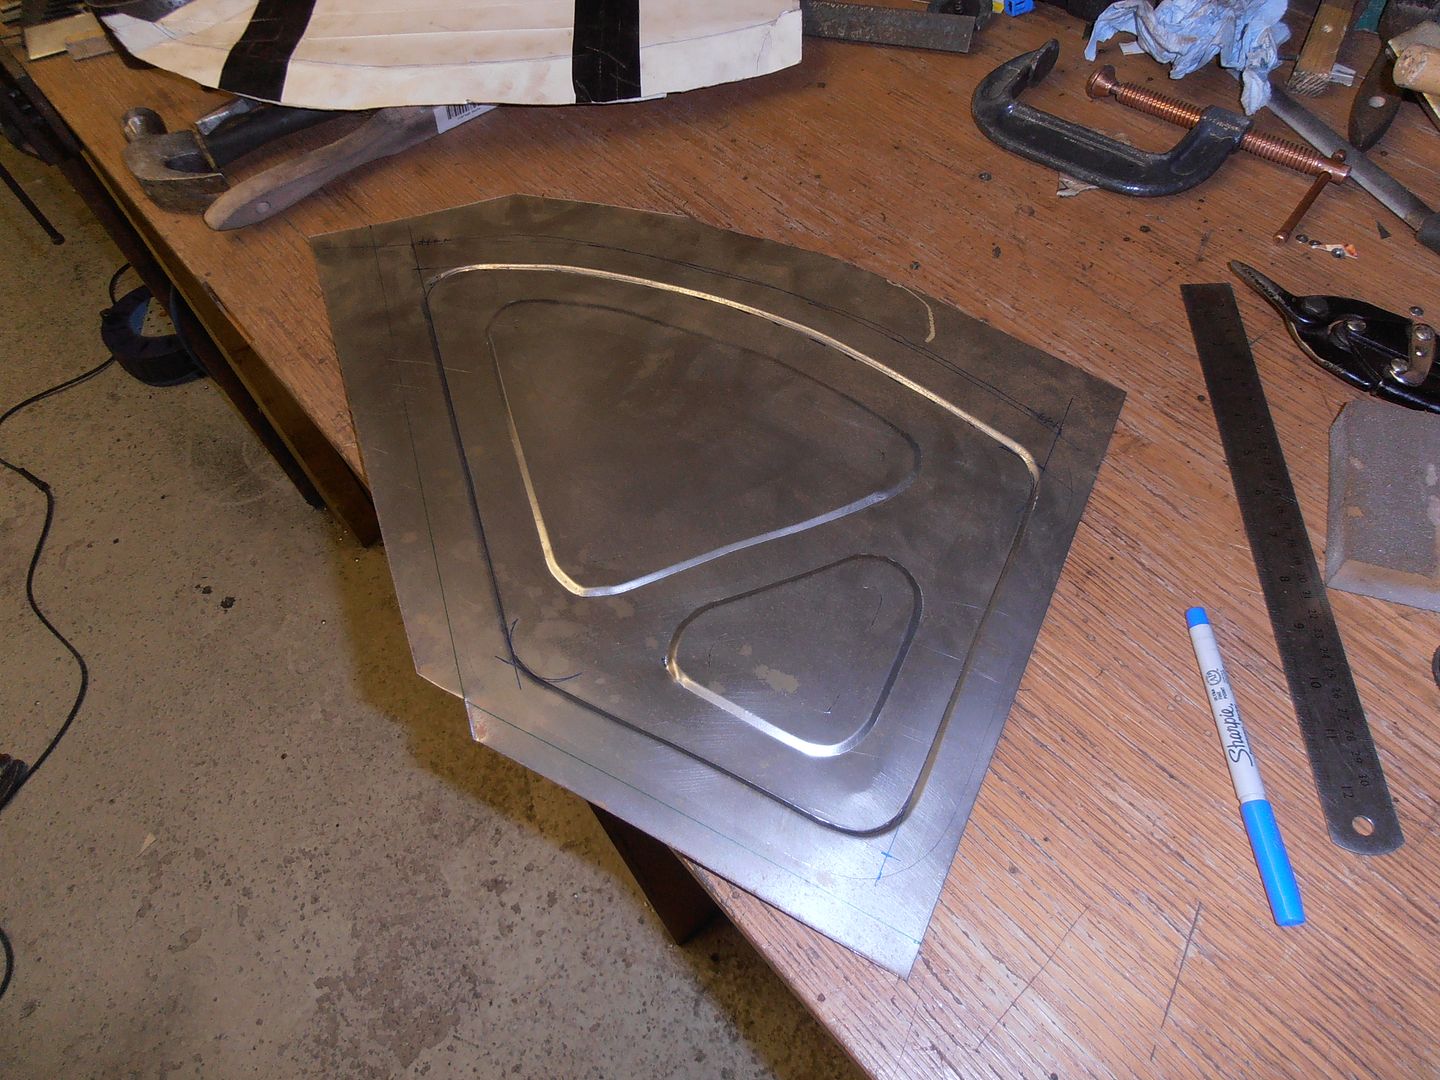 end of todays progress. Clamped it in position but needs some final trimming and fettling. 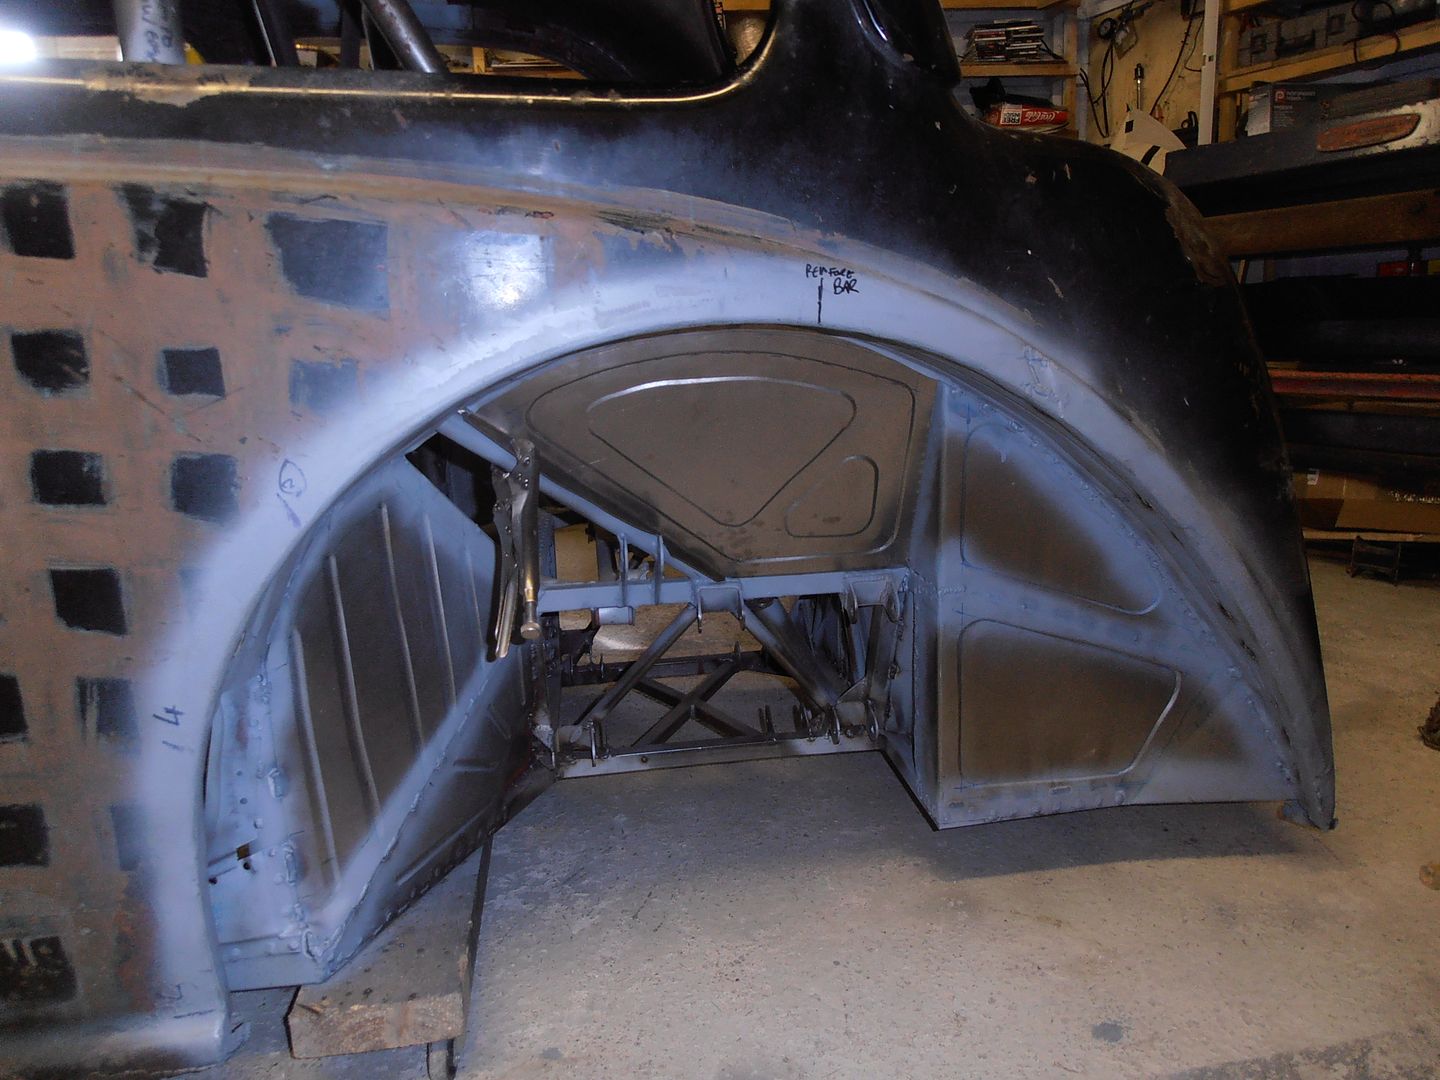 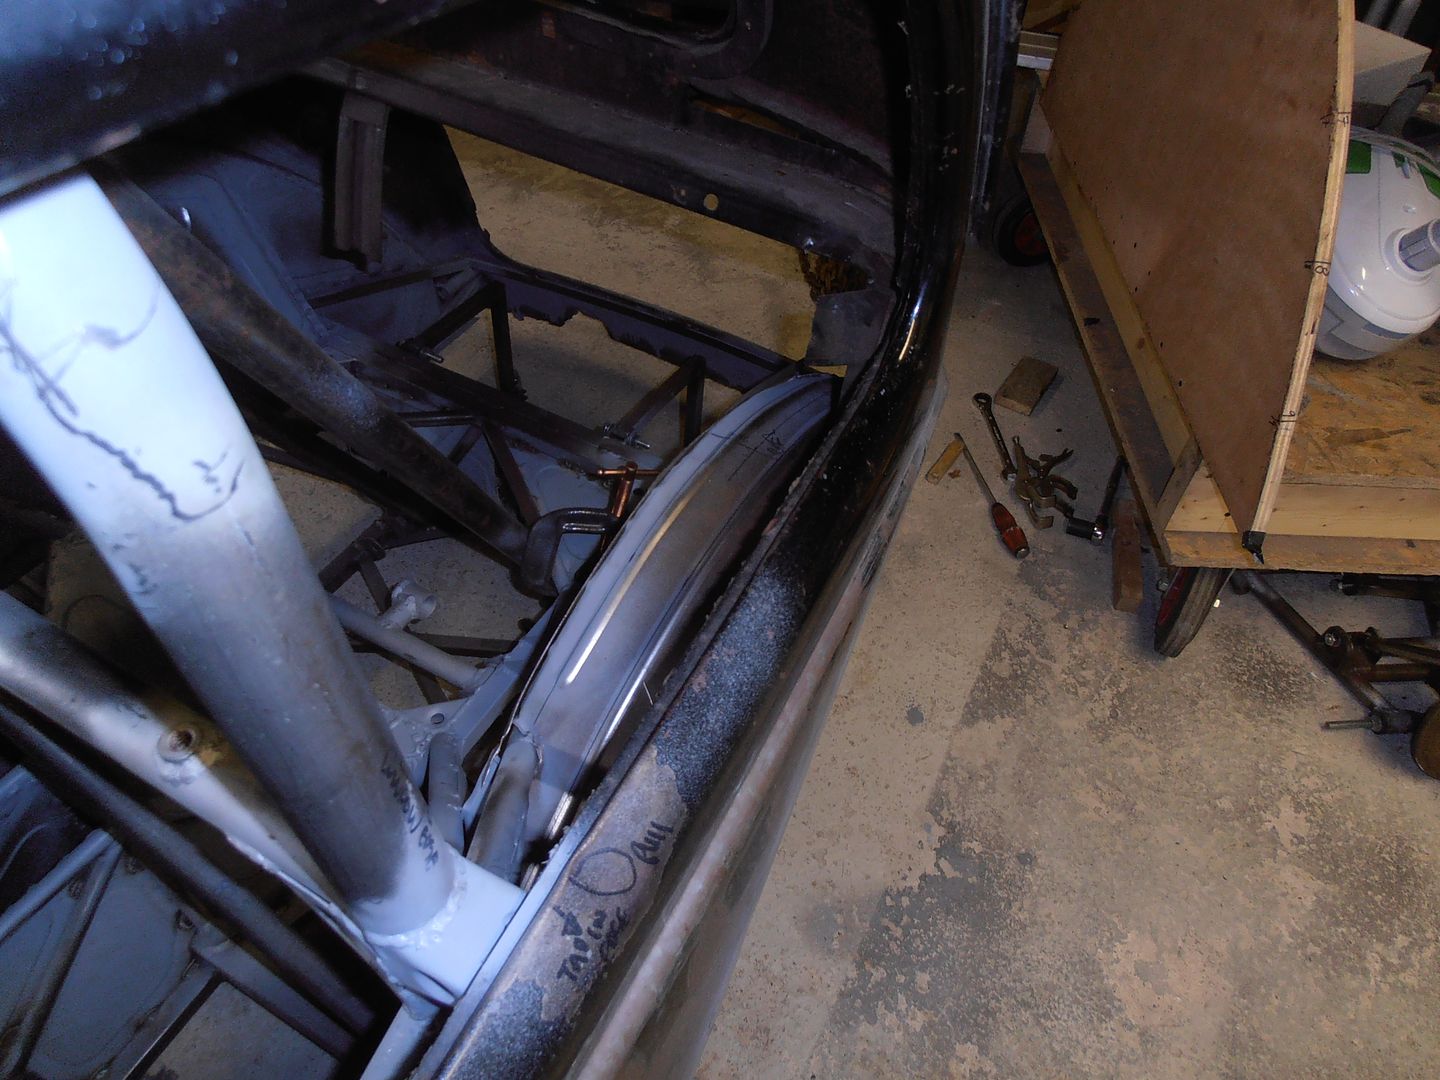 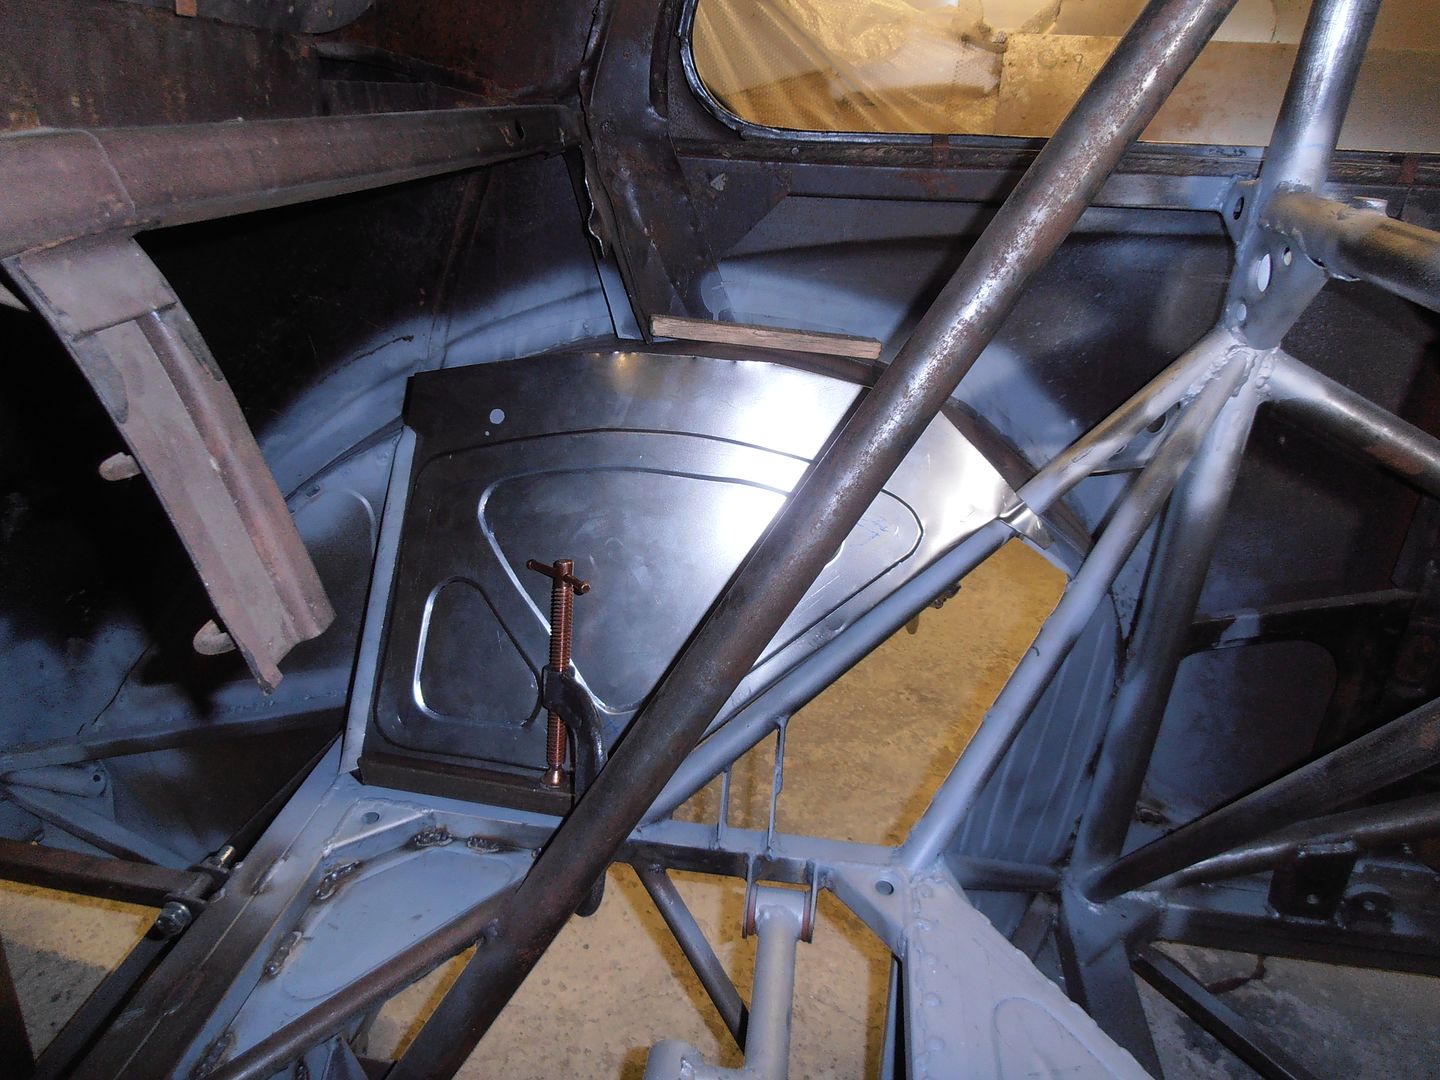 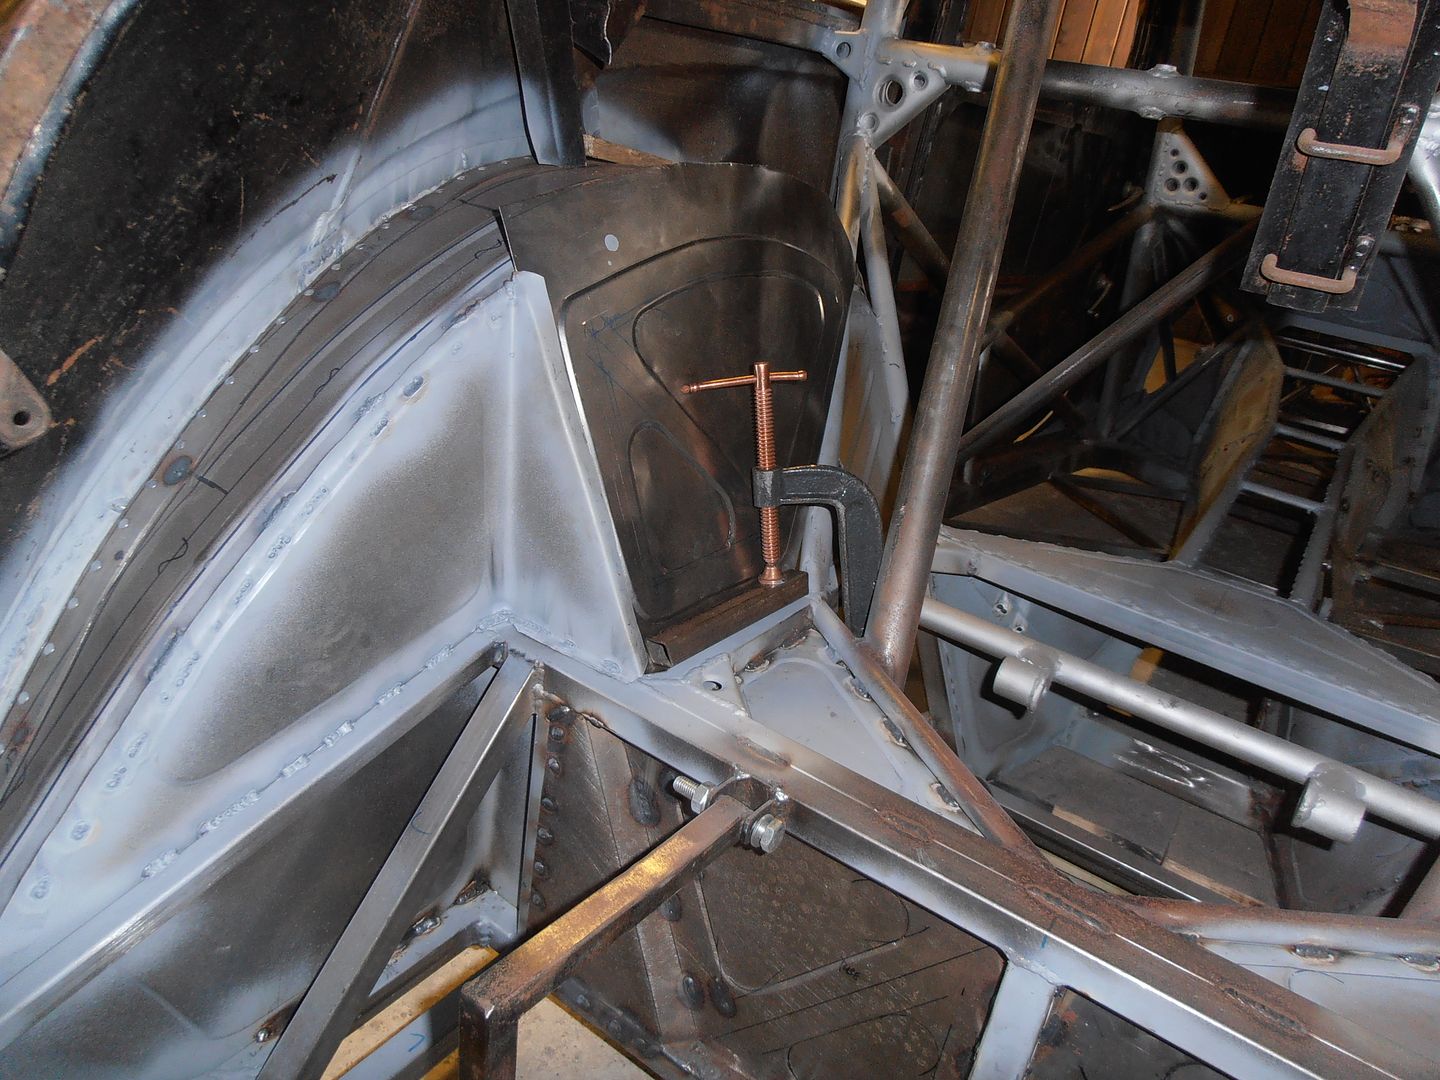 Paneling round a lot of tubes is a right pain in the backside... Hopefully more progress next weekend. |
| |
|
|
vulgalour
Club Retro Rides Member
Posts: 7,271
Club RR Member Number: 146
|
|
Jul 12, 2015 19:28:19 GMT
|
|
That's one of the most handsome inner arches I've ever seen.
|
| |
|
|
jonomisfit
Club Retro Rides Member
Posts: 1,787
Club RR Member Number: 49
|
|
Jul 12, 2015 20:17:55 GMT
|
|
Thanks vulgalour.
Its come out ok considering how many tubes etc are there and in the way.
No-one will be able to see any of it when the cars done, but that's ok as I'll know its there :-)
|
| |
|
|
|
|
|
Jul 12, 2015 20:36:04 GMT
|
Thanks vulgalour. Its come out ok considering how many tubes etc are there and in the way. No-one will be able to see any of it when the cars done, but that's ok as I'll know its there :-) It is worth it, if only to add depth to the panel yes. Excellent work. Have been watching but not commenting. Enjoying seeing this progress. --Phil |
| |
|
|
mylittletony
Posted a lot
  
Posts: 2,401
Club RR Member Number: 84
|
|
Jul 13, 2015 11:59:21 GMT
|
This should be one of those cars that's on axle stands (or purpose made hub stands) at a show, with the inner arches all shiny and stuff.  |
| |
|
|
|
|
|
|
|
This should be one of those cars that's on axle stands (or purpose made hub stands) at a show, with the inner arches all shiny and stuff.  Agreed. with the attention to detail that's gone into this so far, it should be seen by a wider audience! |
| |
|
|
|
|
vulgalour
Club Retro Rides Member
Posts: 7,271
Club RR Member Number: 146
|
|
Jul 14, 2015 23:01:15 GMT
|
|
Agreed here too!
|
| |
|
|
jonomisfit
Club Retro Rides Member
Posts: 1,787
Club RR Member Number: 49
|
|
Jul 18, 2015 18:53:30 GMT
|
Well... as usual things look better in strategically angled photos than they necessarily do in real life. Today's limited progress. Trimmed panel to size 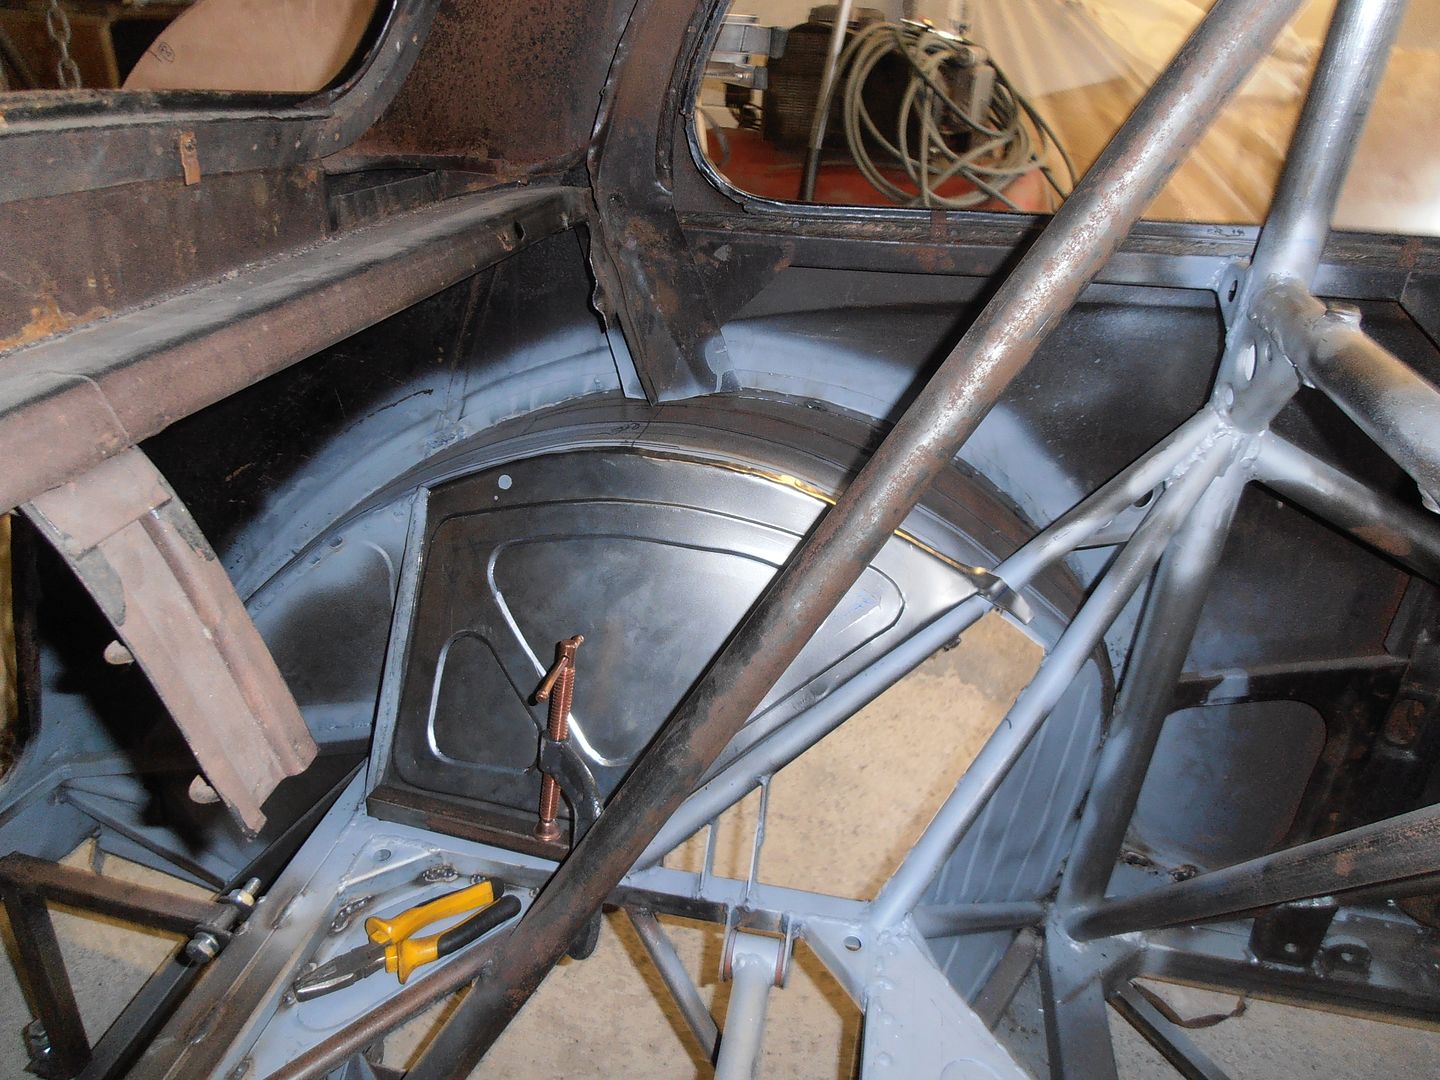 Created return lip at top 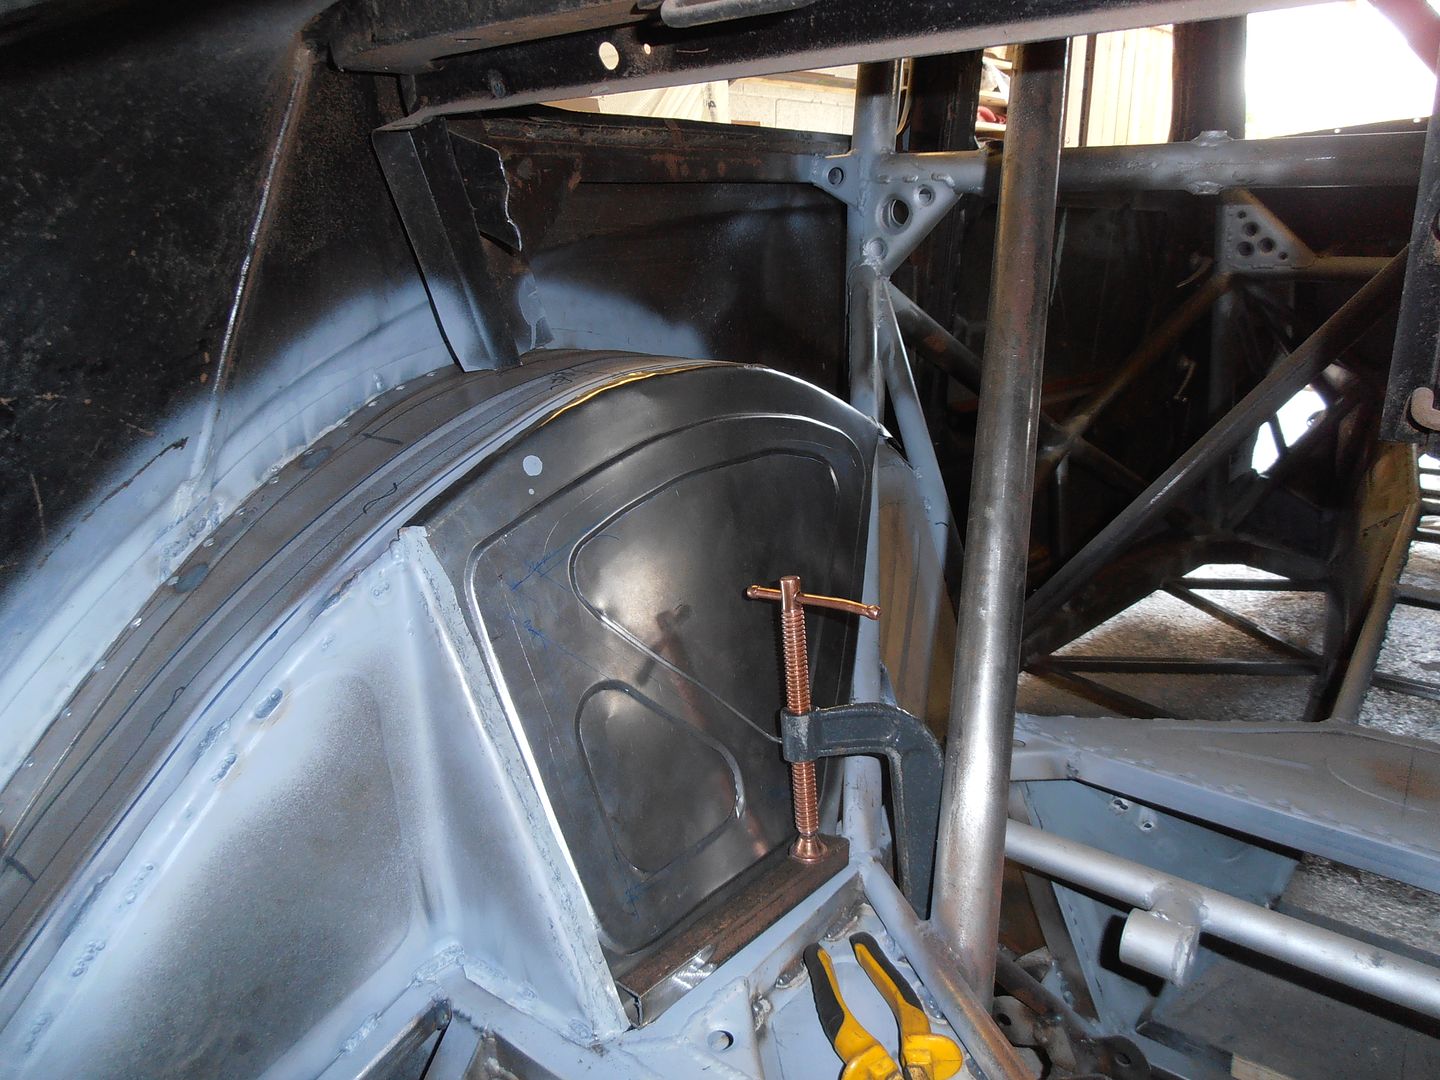 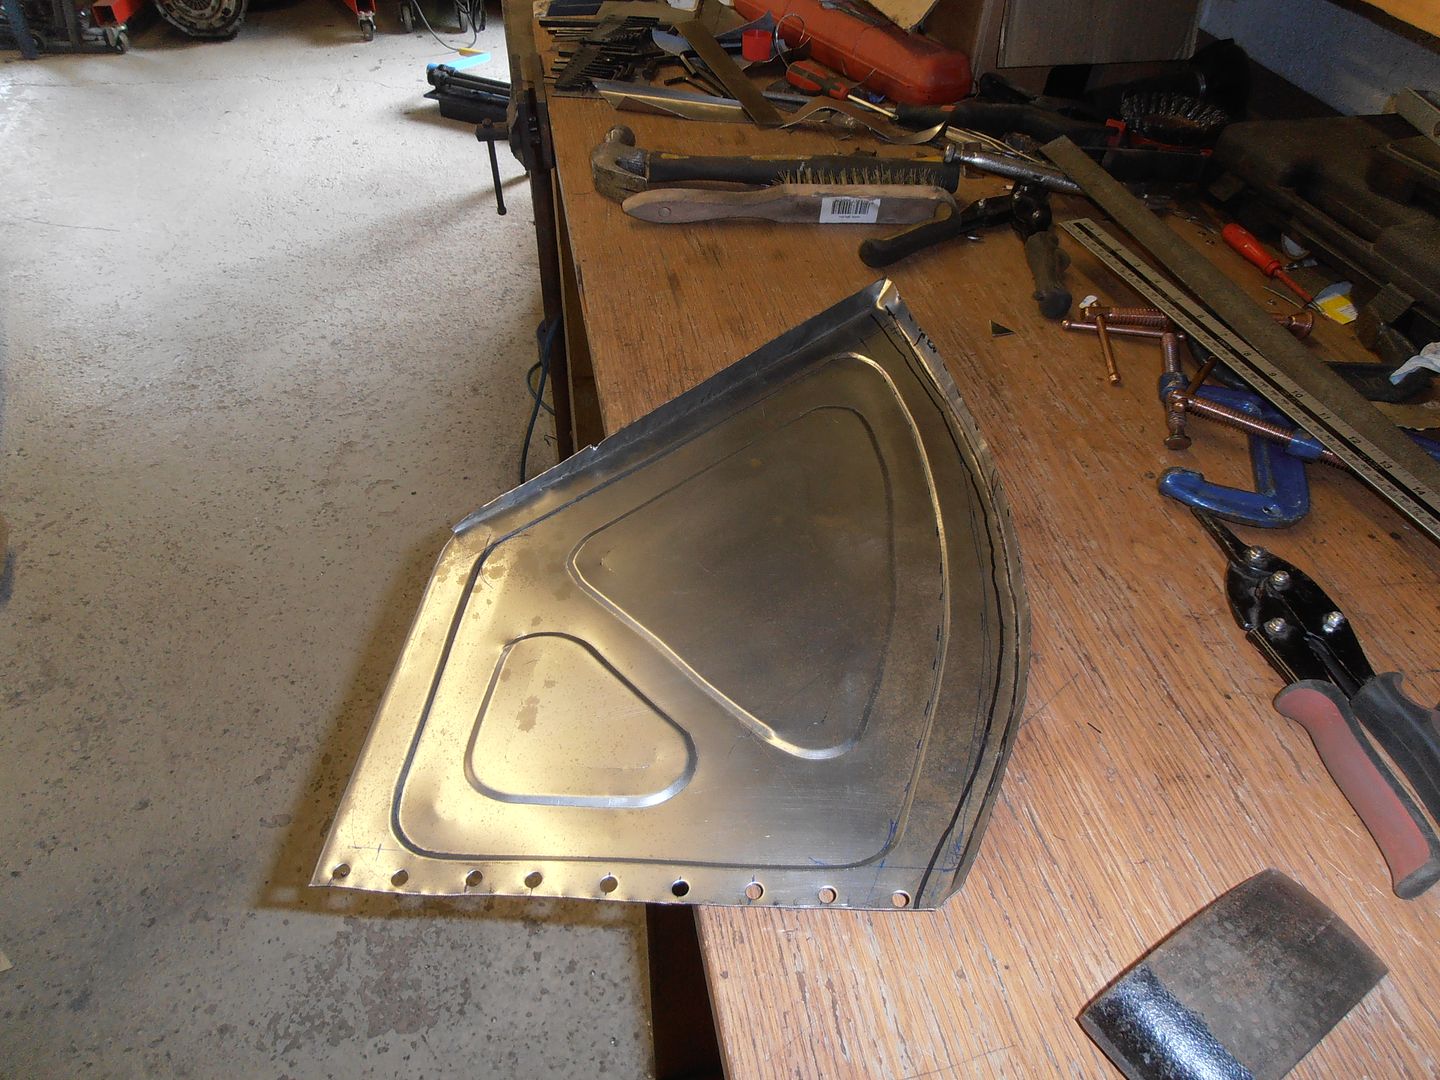 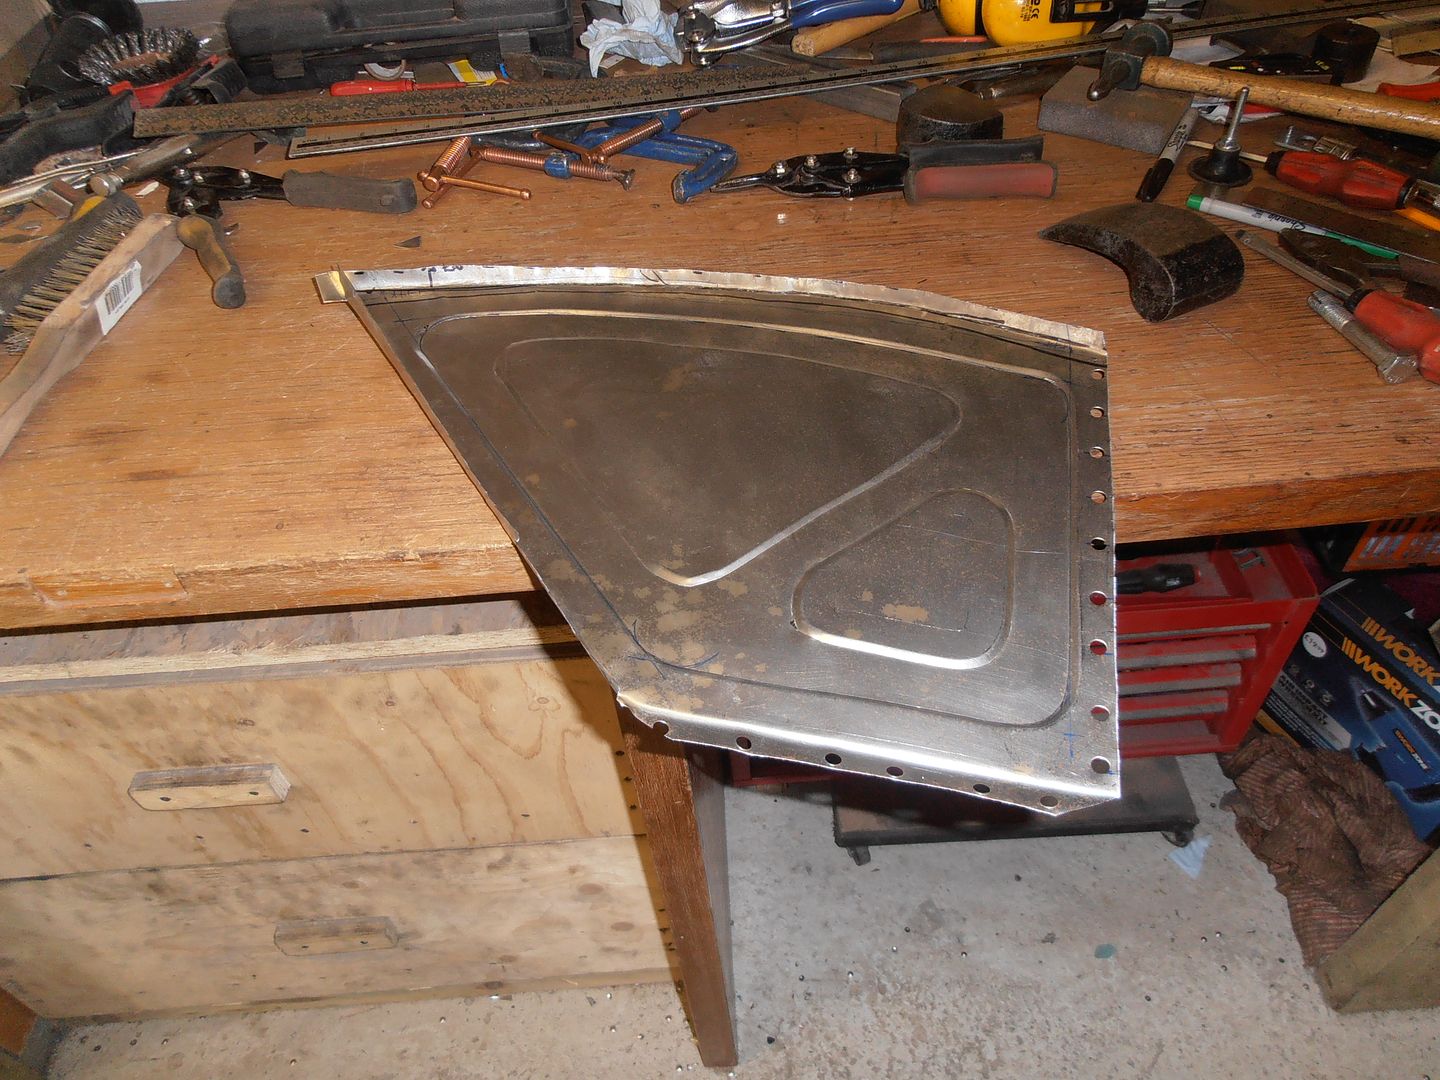 Welded in 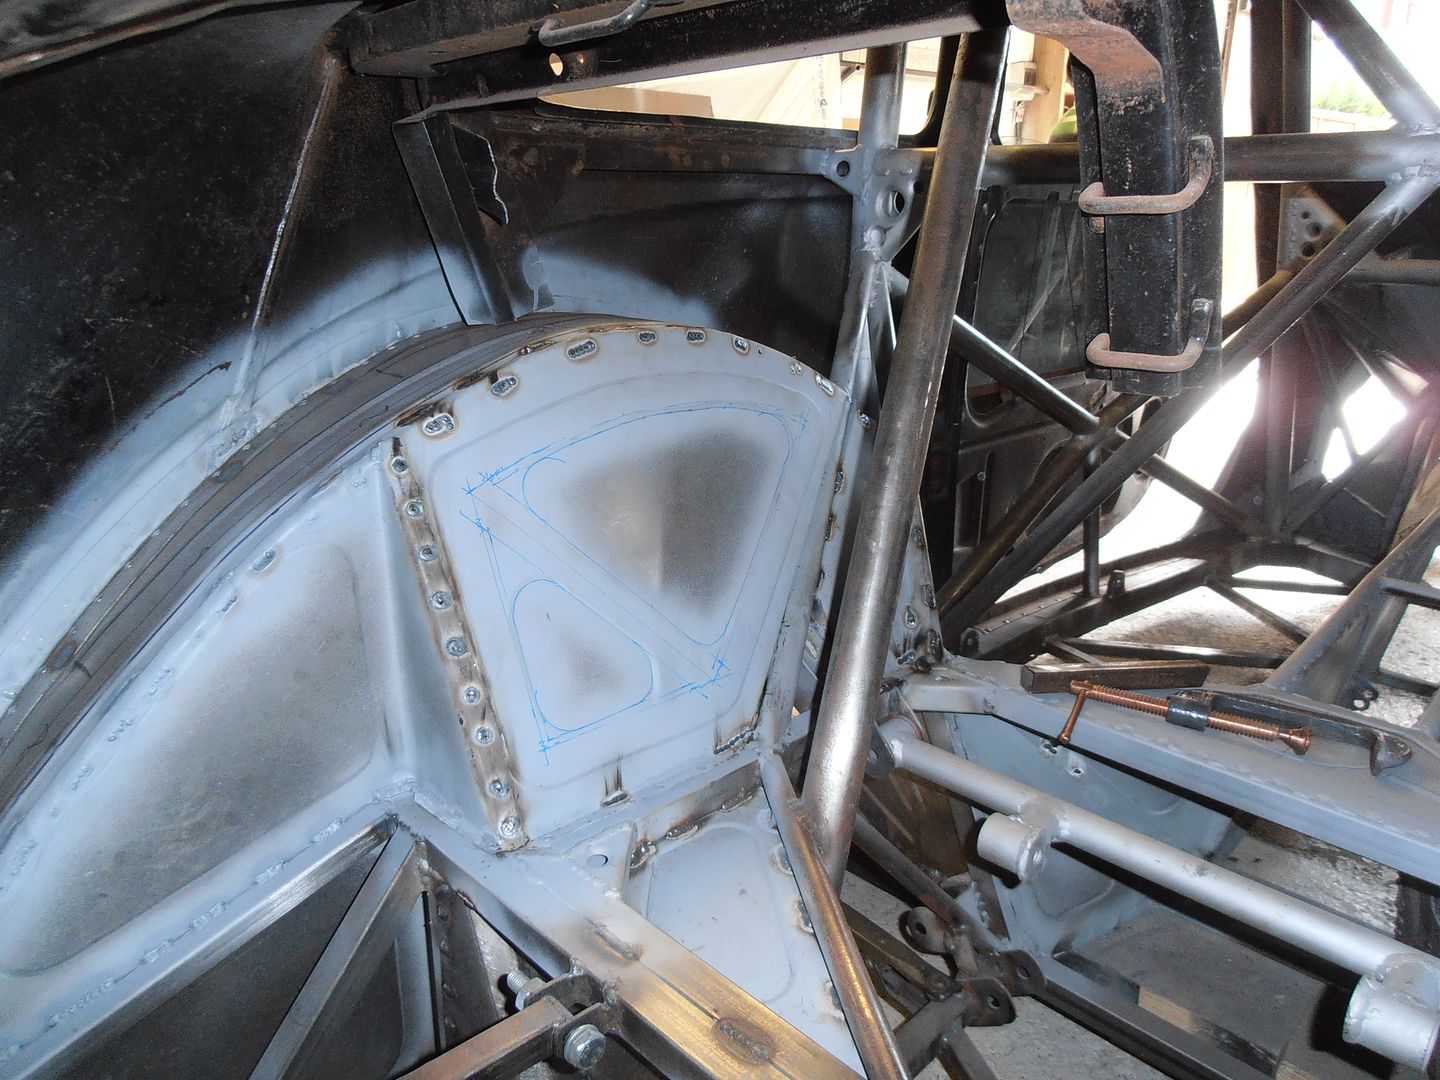 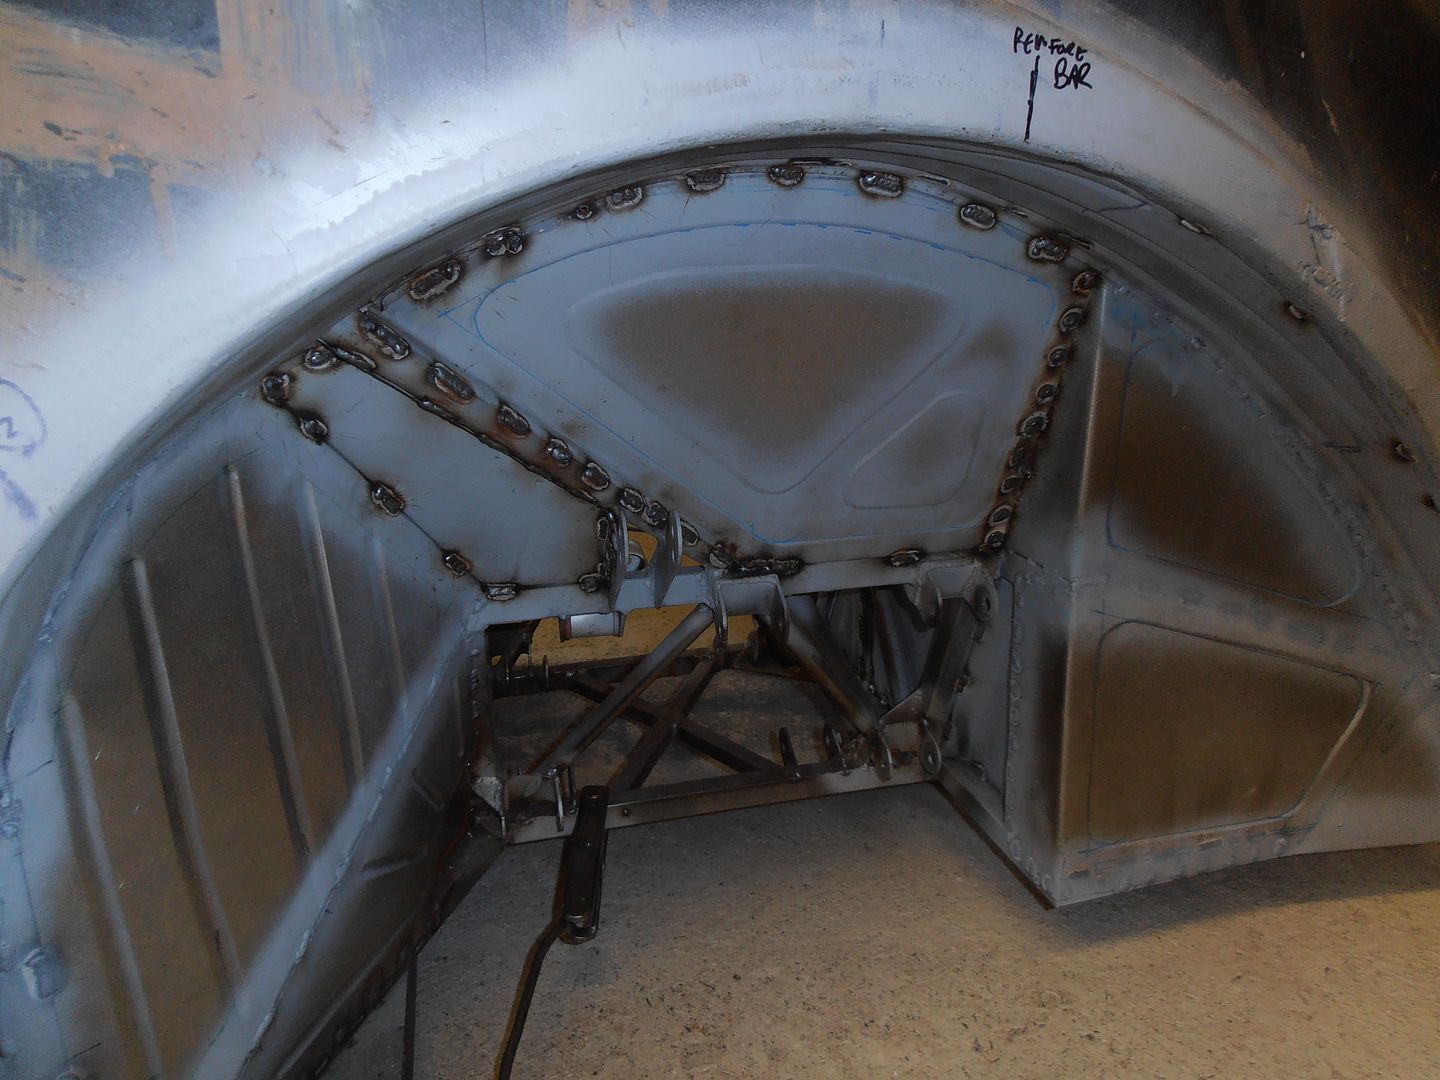 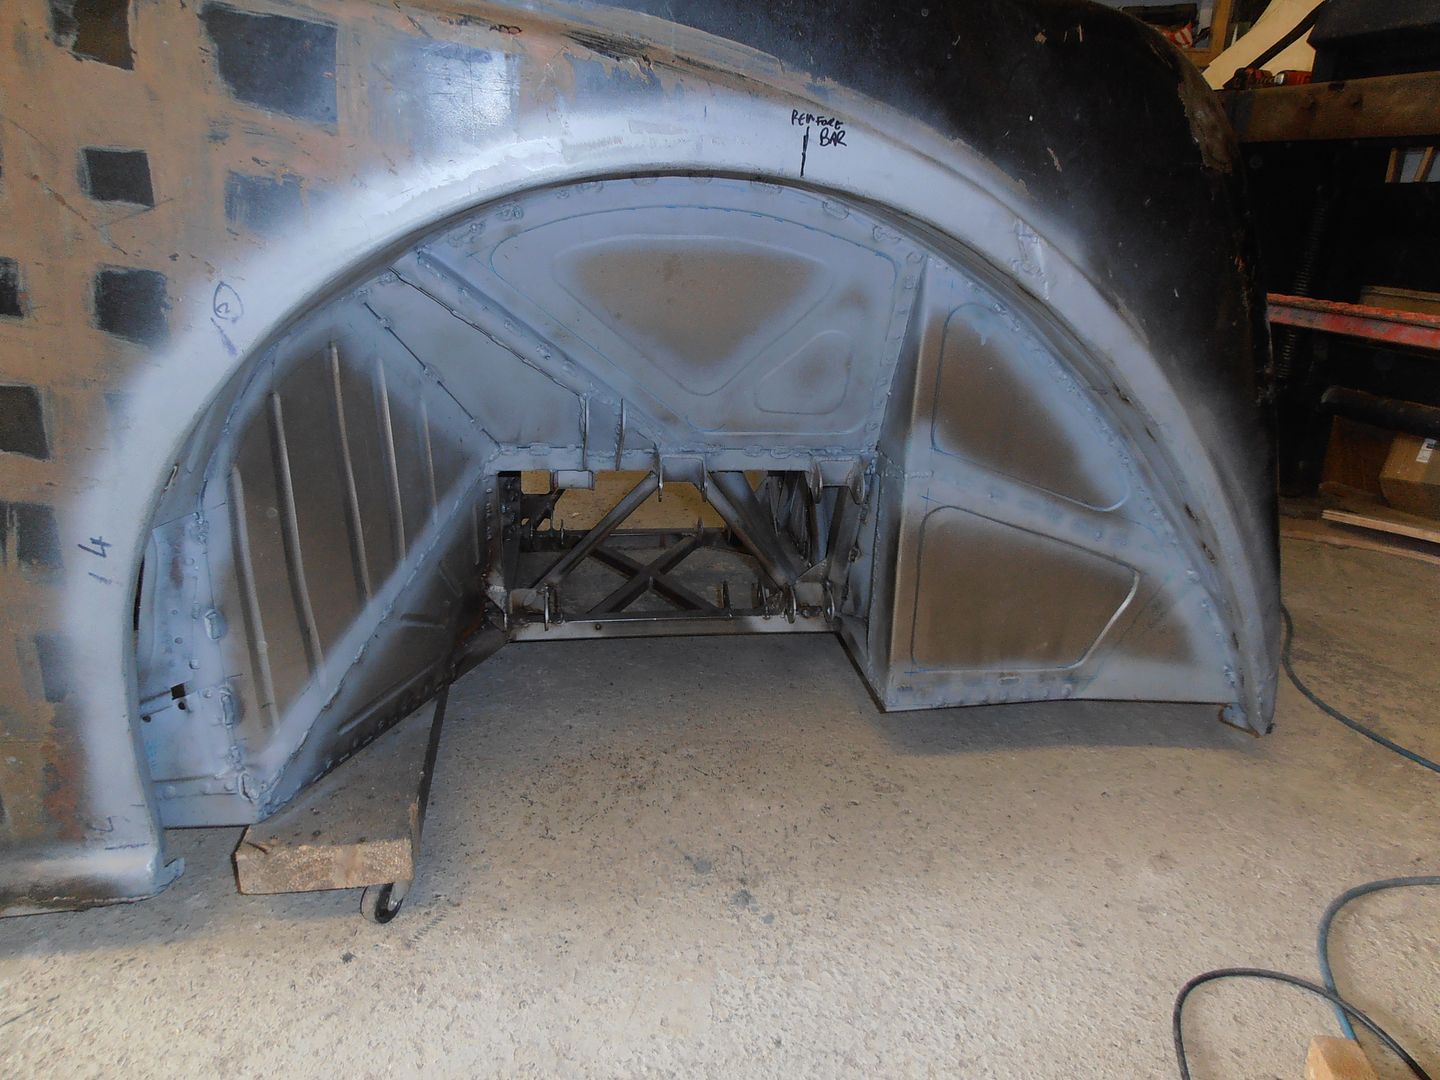 Just the front closers on both these to do now, but i want to set the wings first and then work from there.... so i decided to jump back to the front Welded in the first of the closer panels 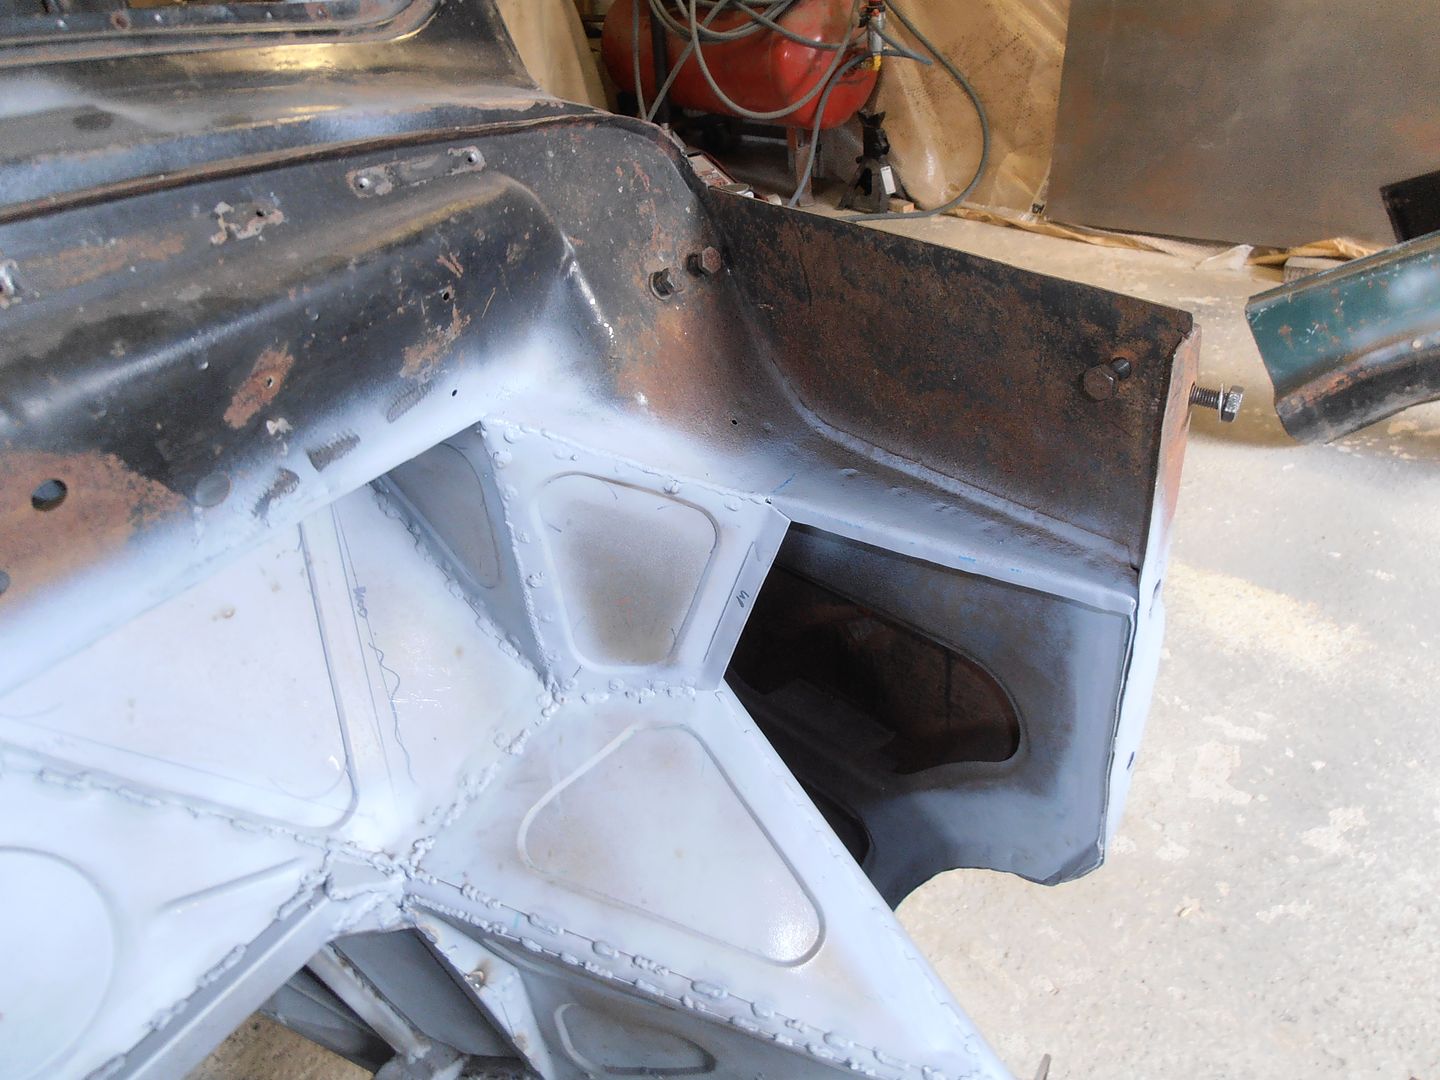 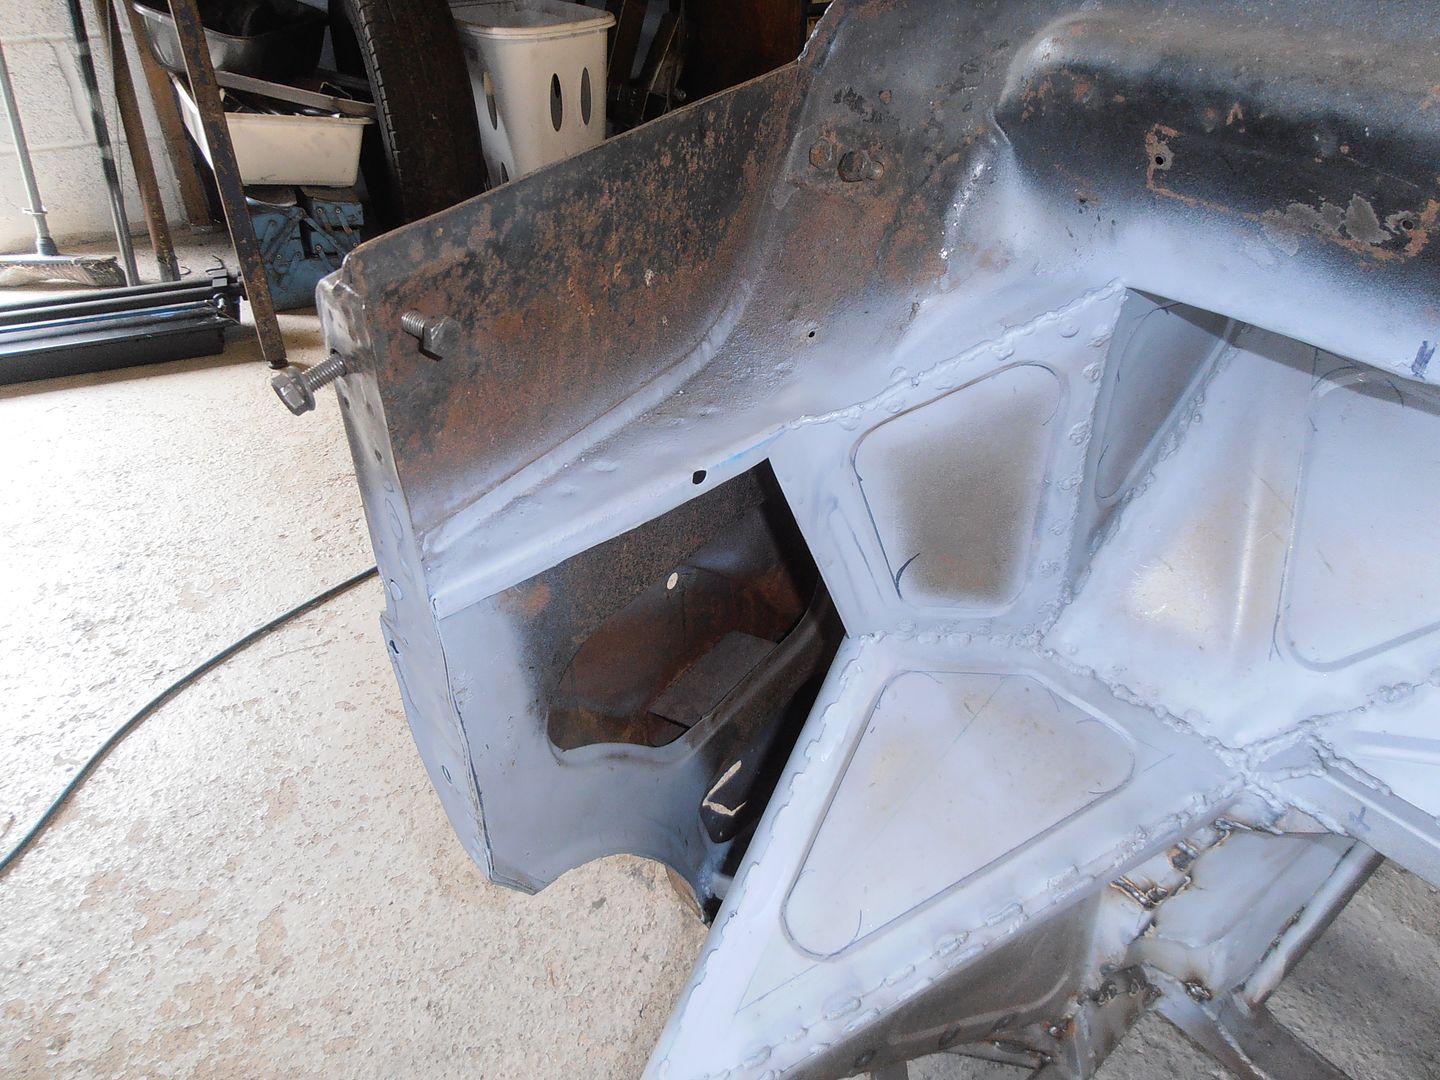 Then made up some stiffeners to help support the lower end of the panels 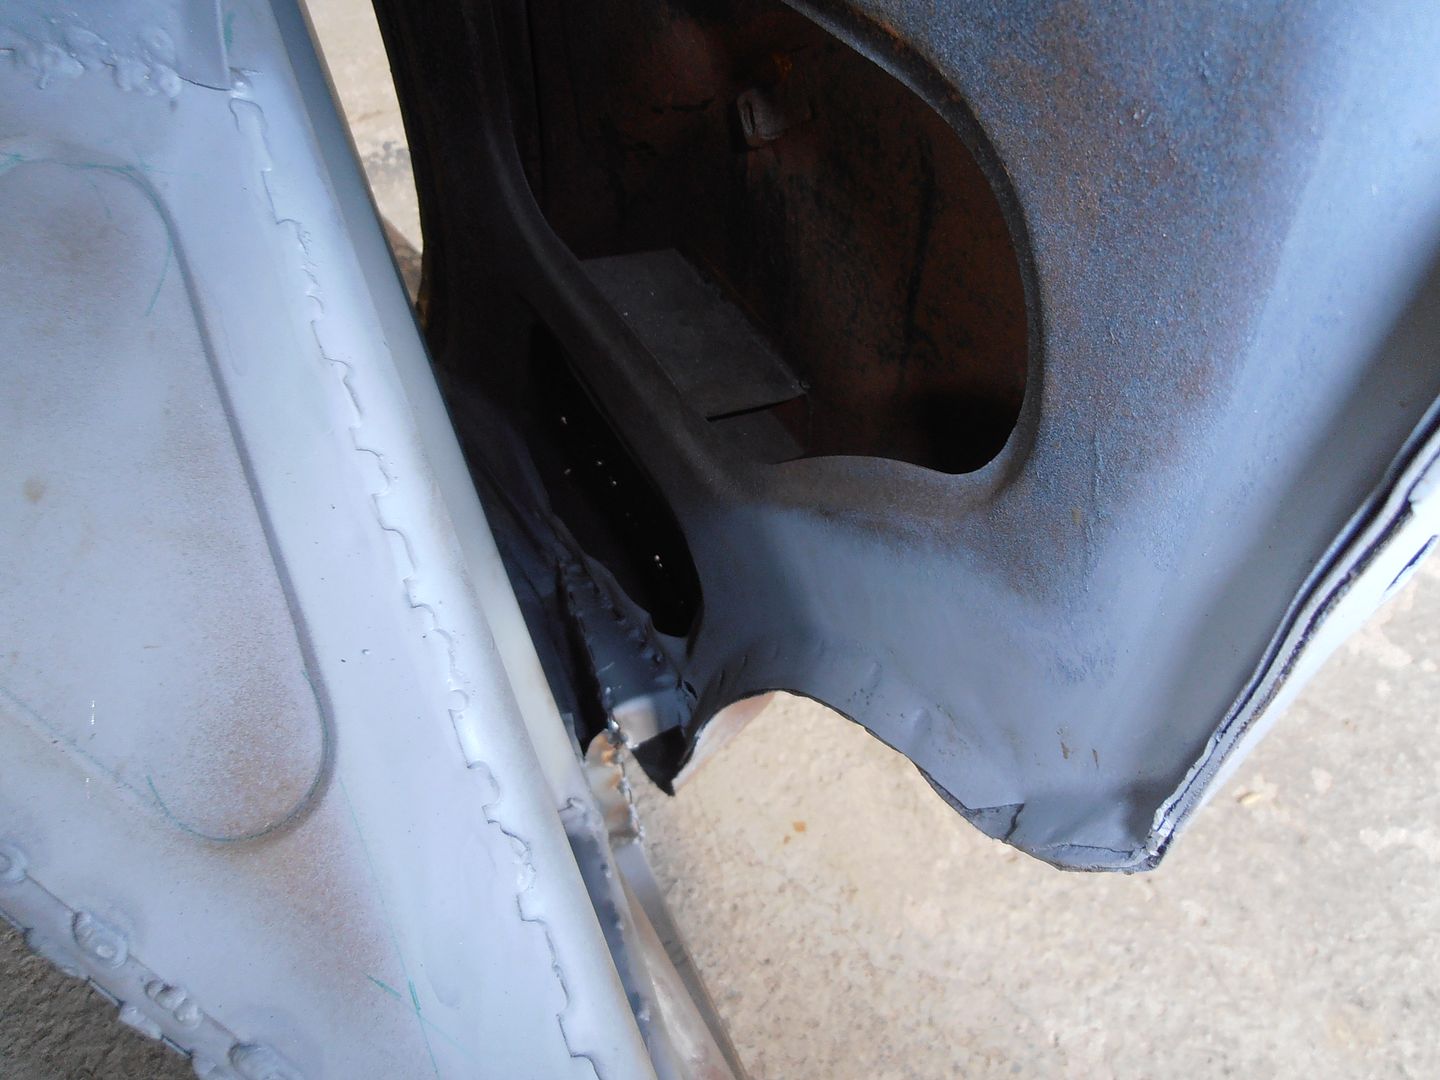 These will be closed inside when the front closer plates are put on Then start the tie back from the inner wing mounting panel to the chassis Paper template 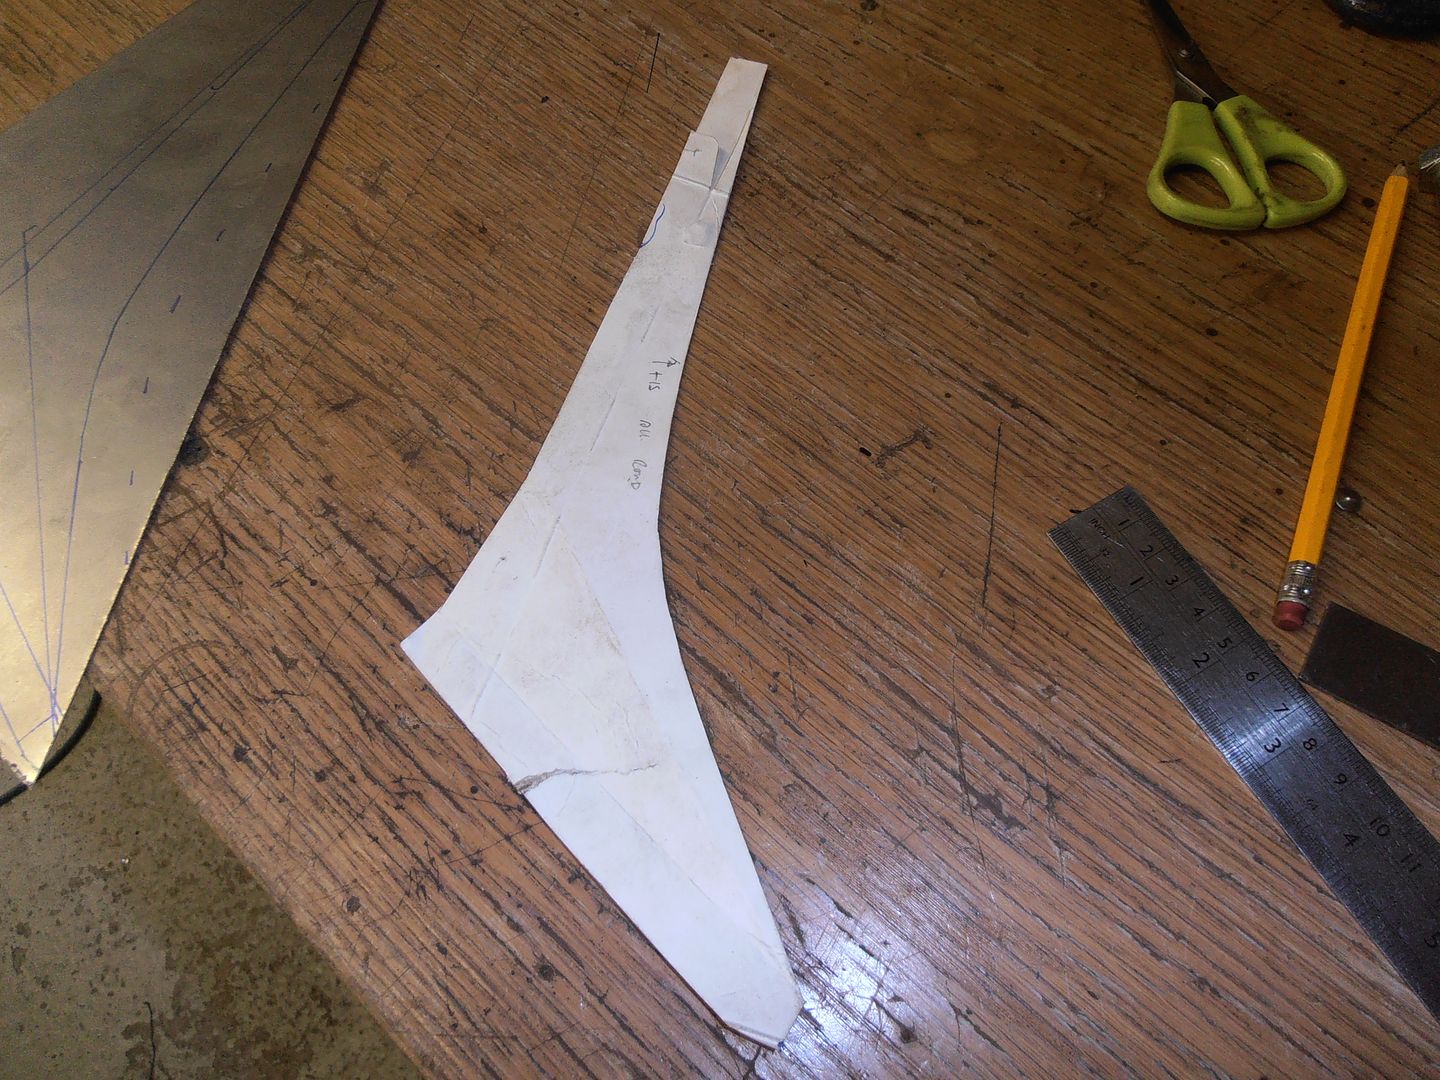 copy to steel 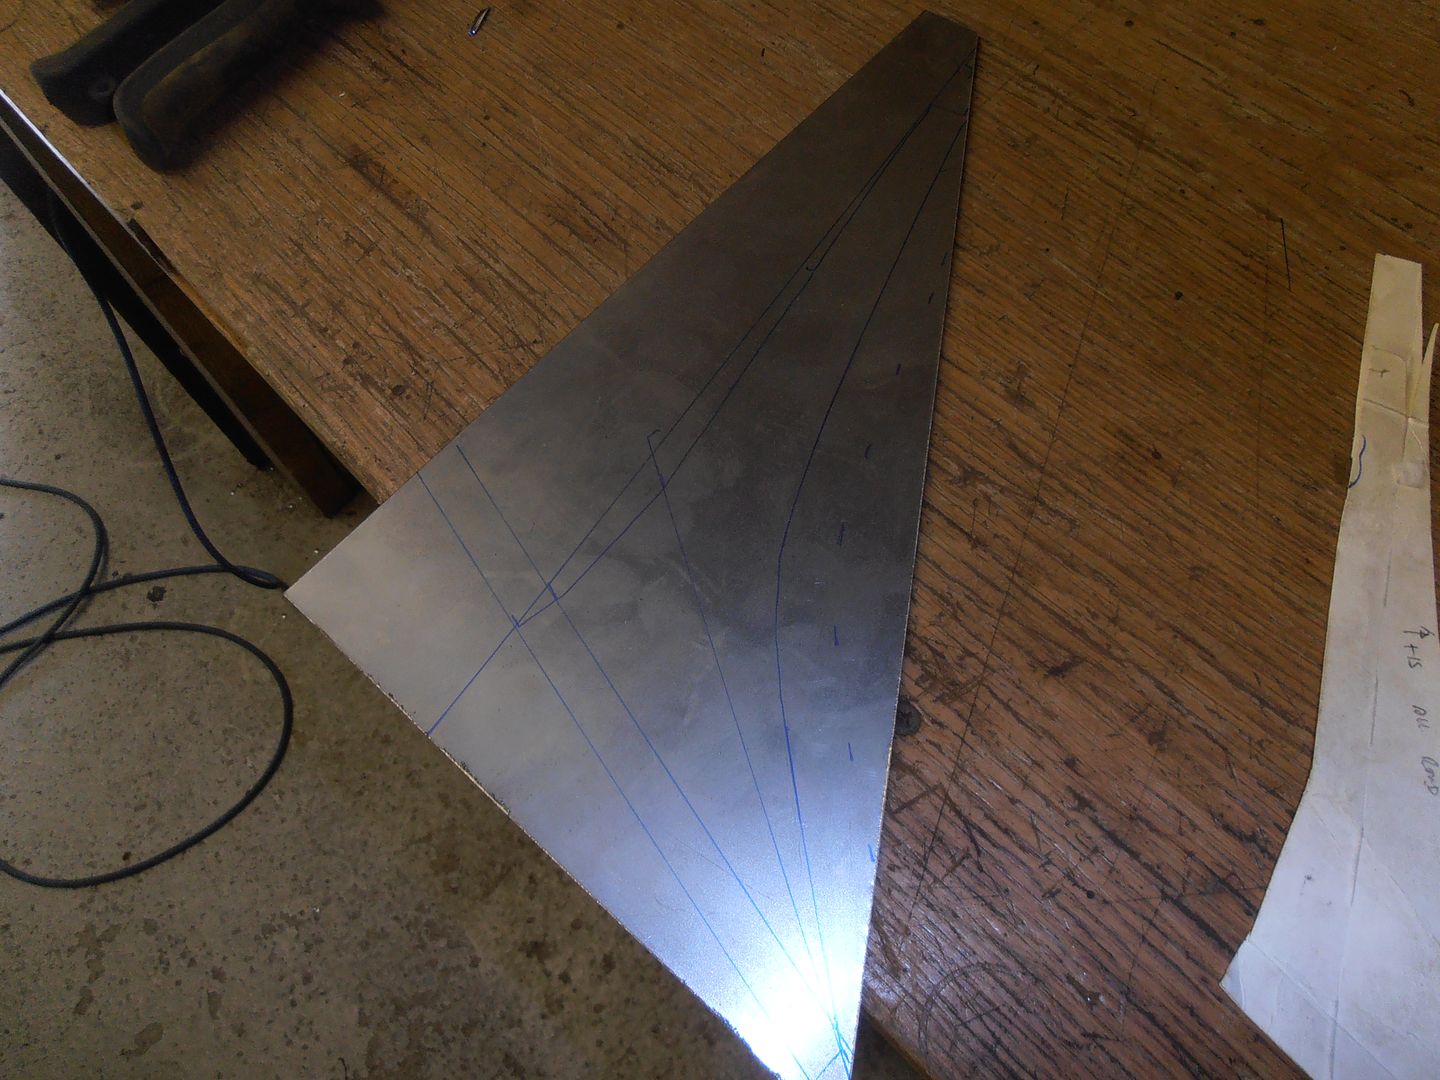 forget to take photos for a bit.... The welded on 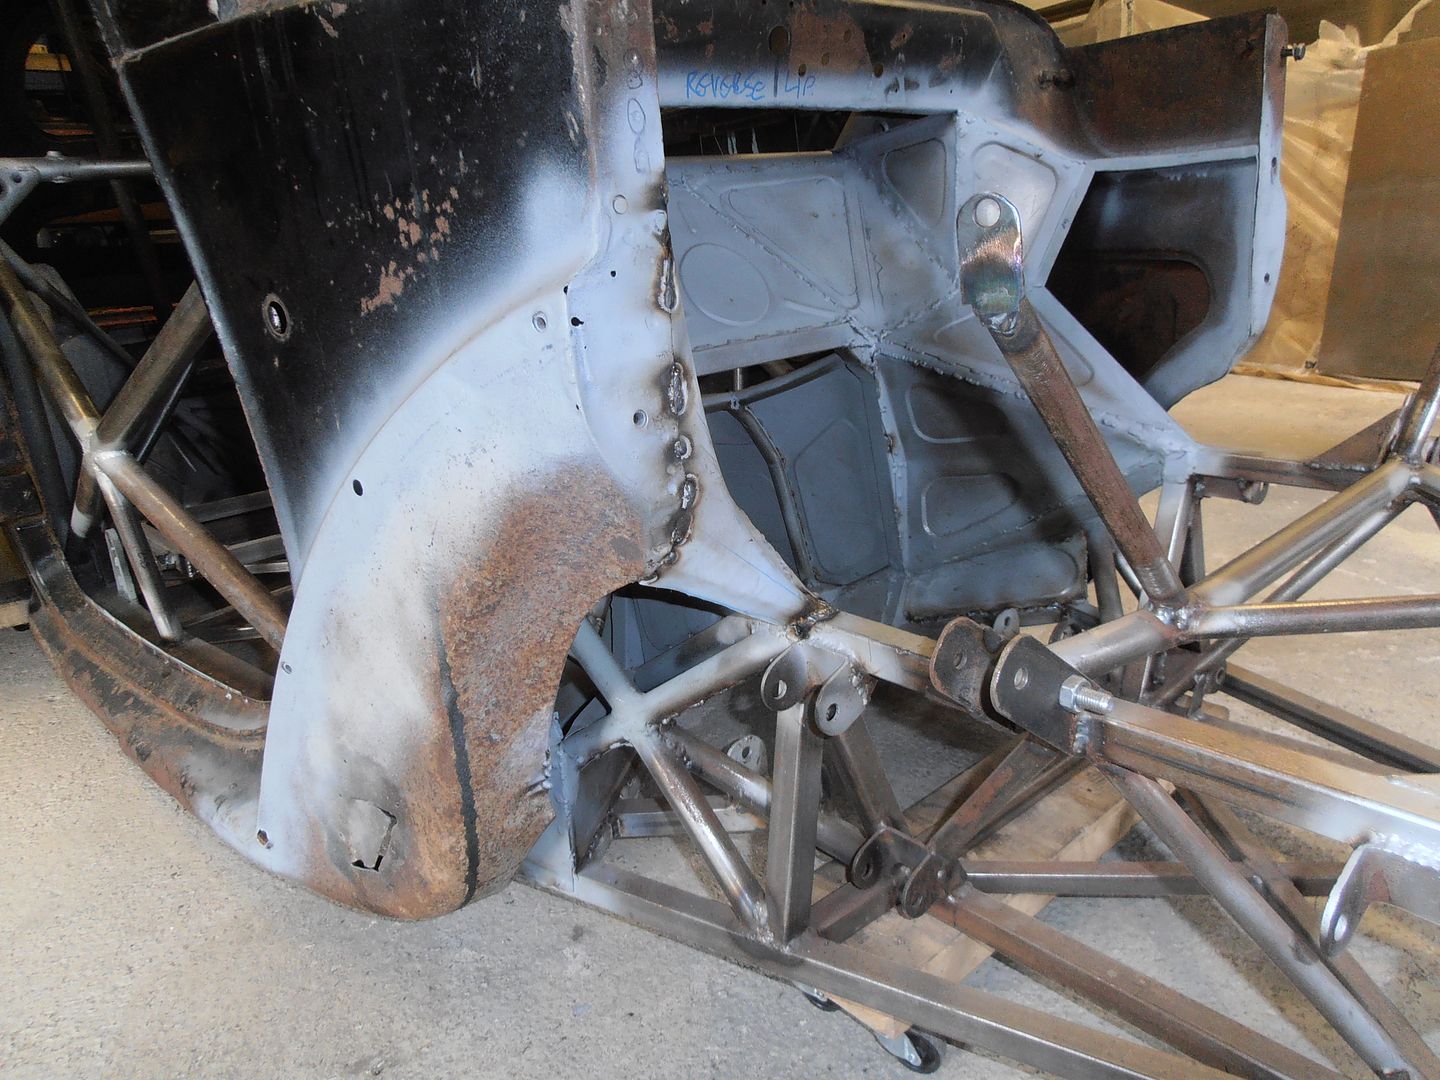 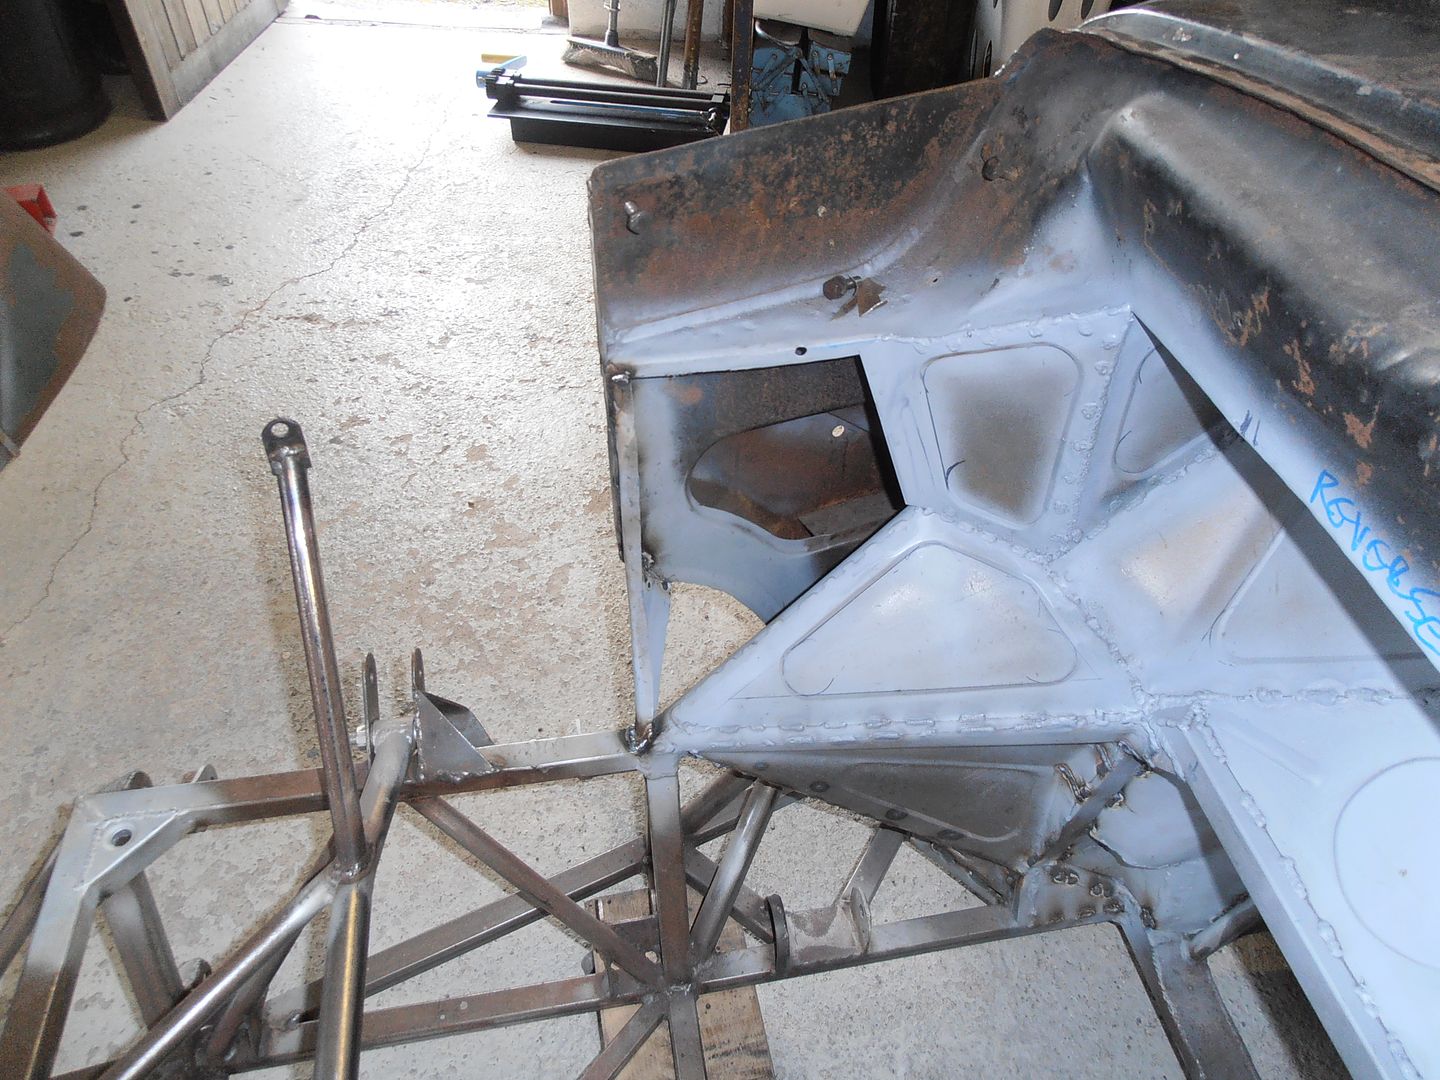 Due to the somewhat poor photography its not so clear to see, but this acts as the support/shape for the closer panel which will hopefully get made tomorrow. |
| |
Last Edit: Jul 18, 2015 18:53:51 GMT by jonomisfit
|
|
richrolls
Part of things
 
Posts: 318
Club RR Member Number: 38
|
|
Jul 18, 2015 19:18:03 GMT
|
|
Complete and utter quality work and vision/execution of ideas..Beautiful.
|
| |
|
|
jonomisfit
Club Retro Rides Member
Posts: 1,787
Club RR Member Number: 49
|
|
Jul 19, 2015 18:51:18 GMT
|
Thanks. People keep saying complementary things... i better not balls it all up then! Today's pics Start with cardboard 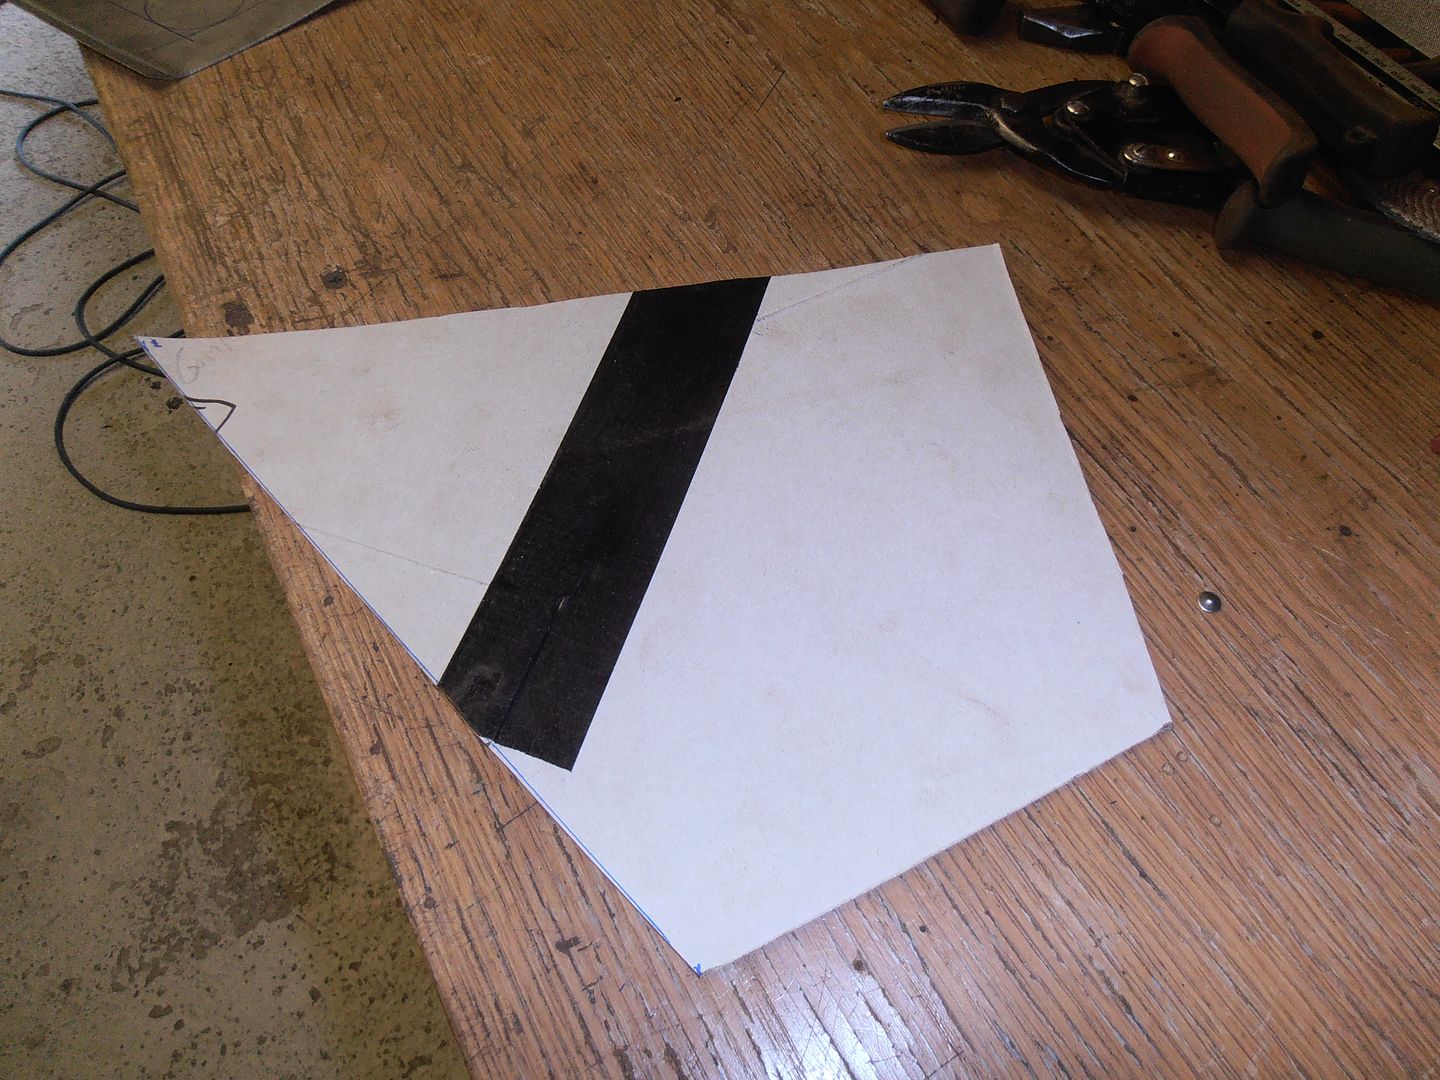 Transfer to steel 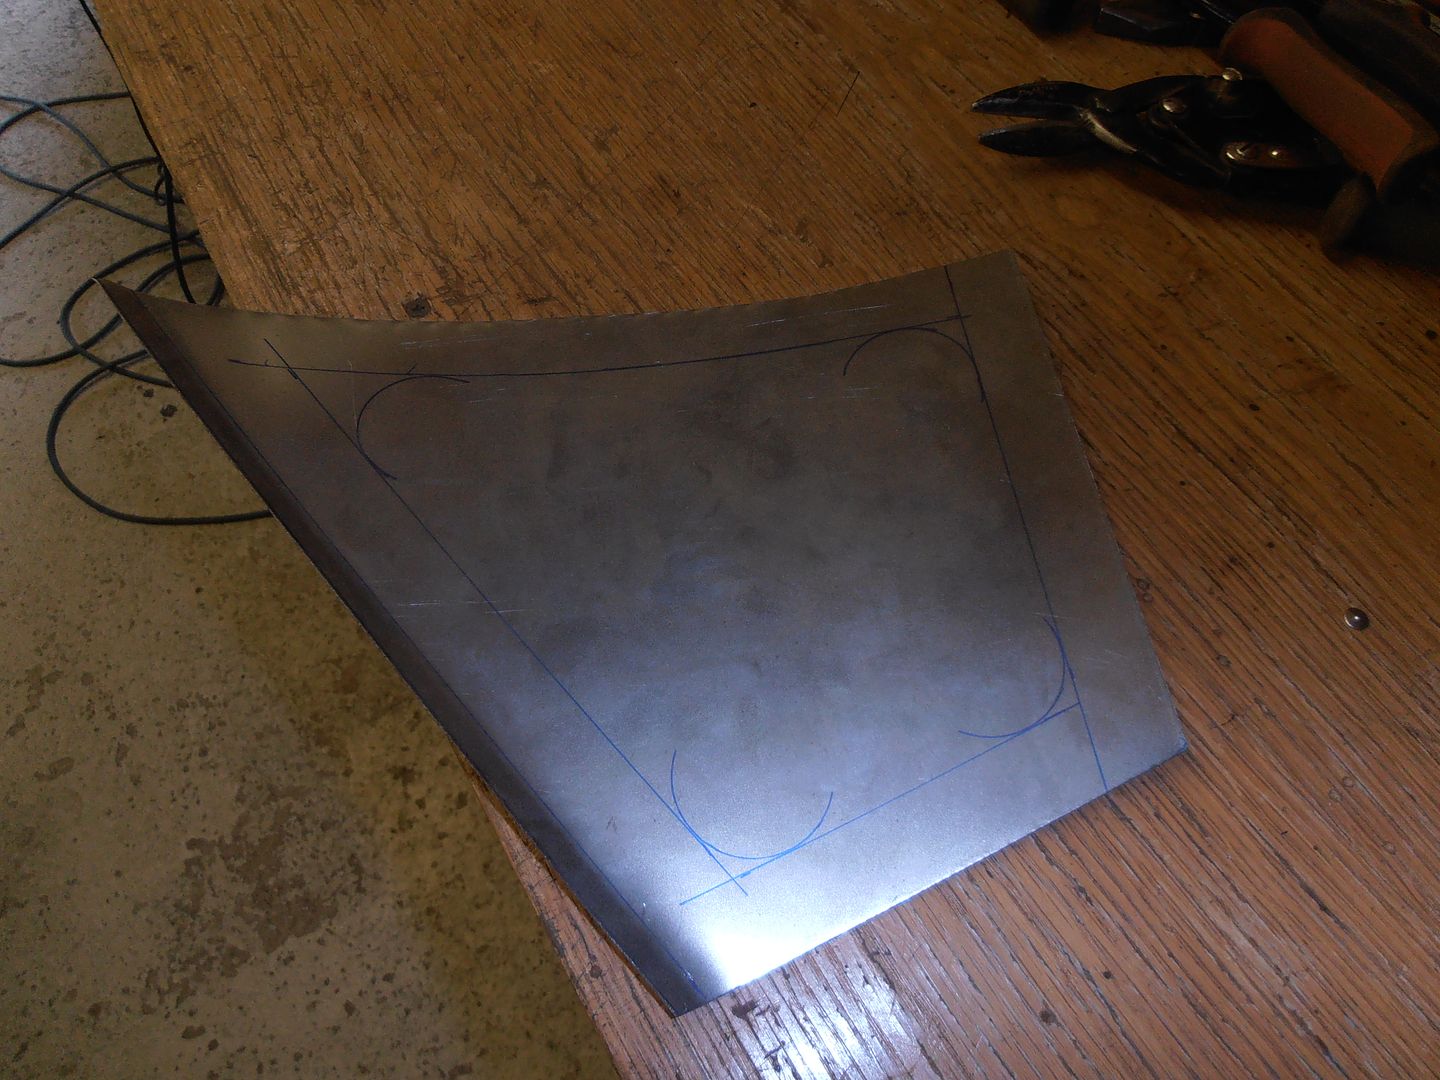 Swage and punch plug weld holes 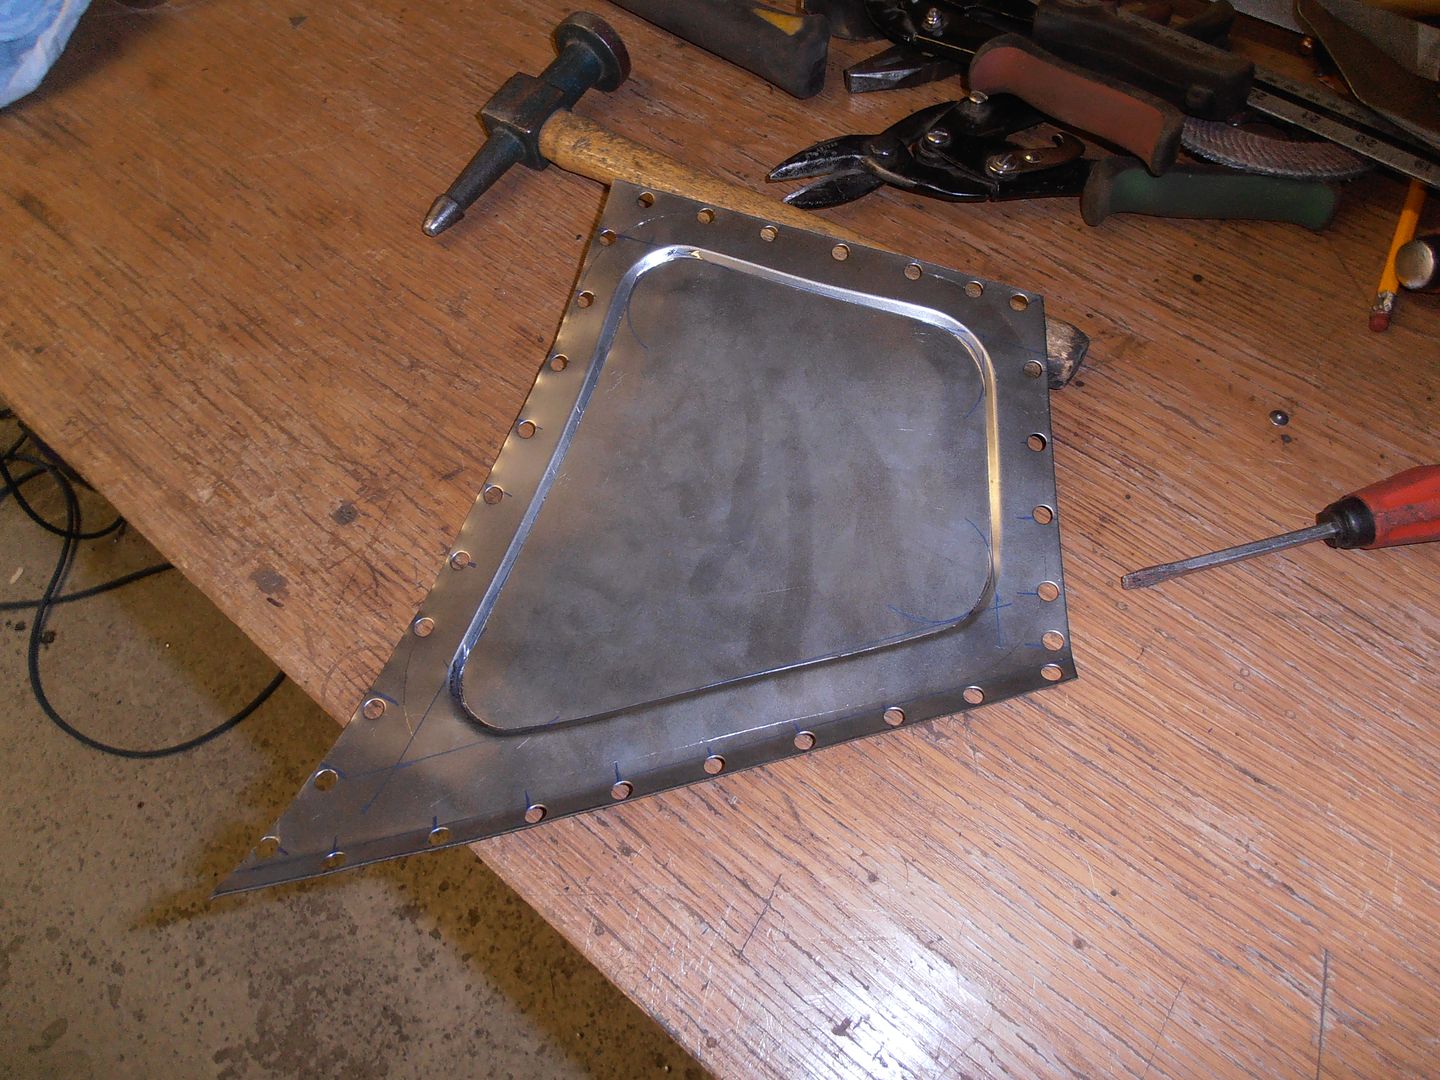 I then held it in position to check final fit. It was at this point i thought "balls, you've forgotten to check if the wheels clear on full bump and lock"...... 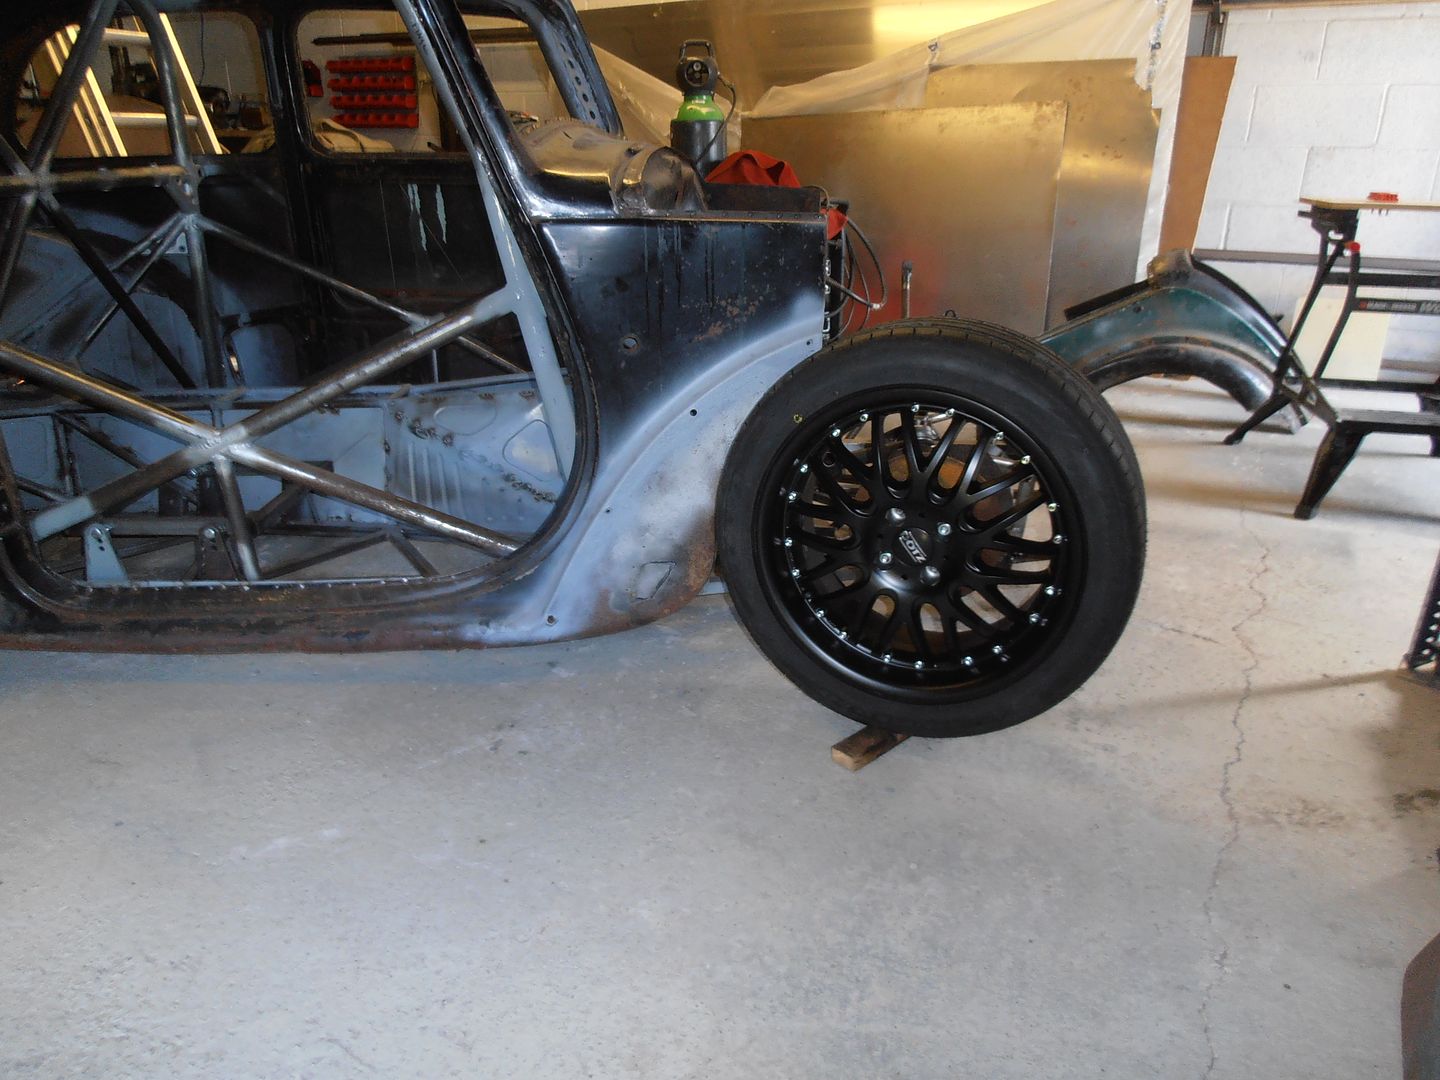 Oh, they don't..... 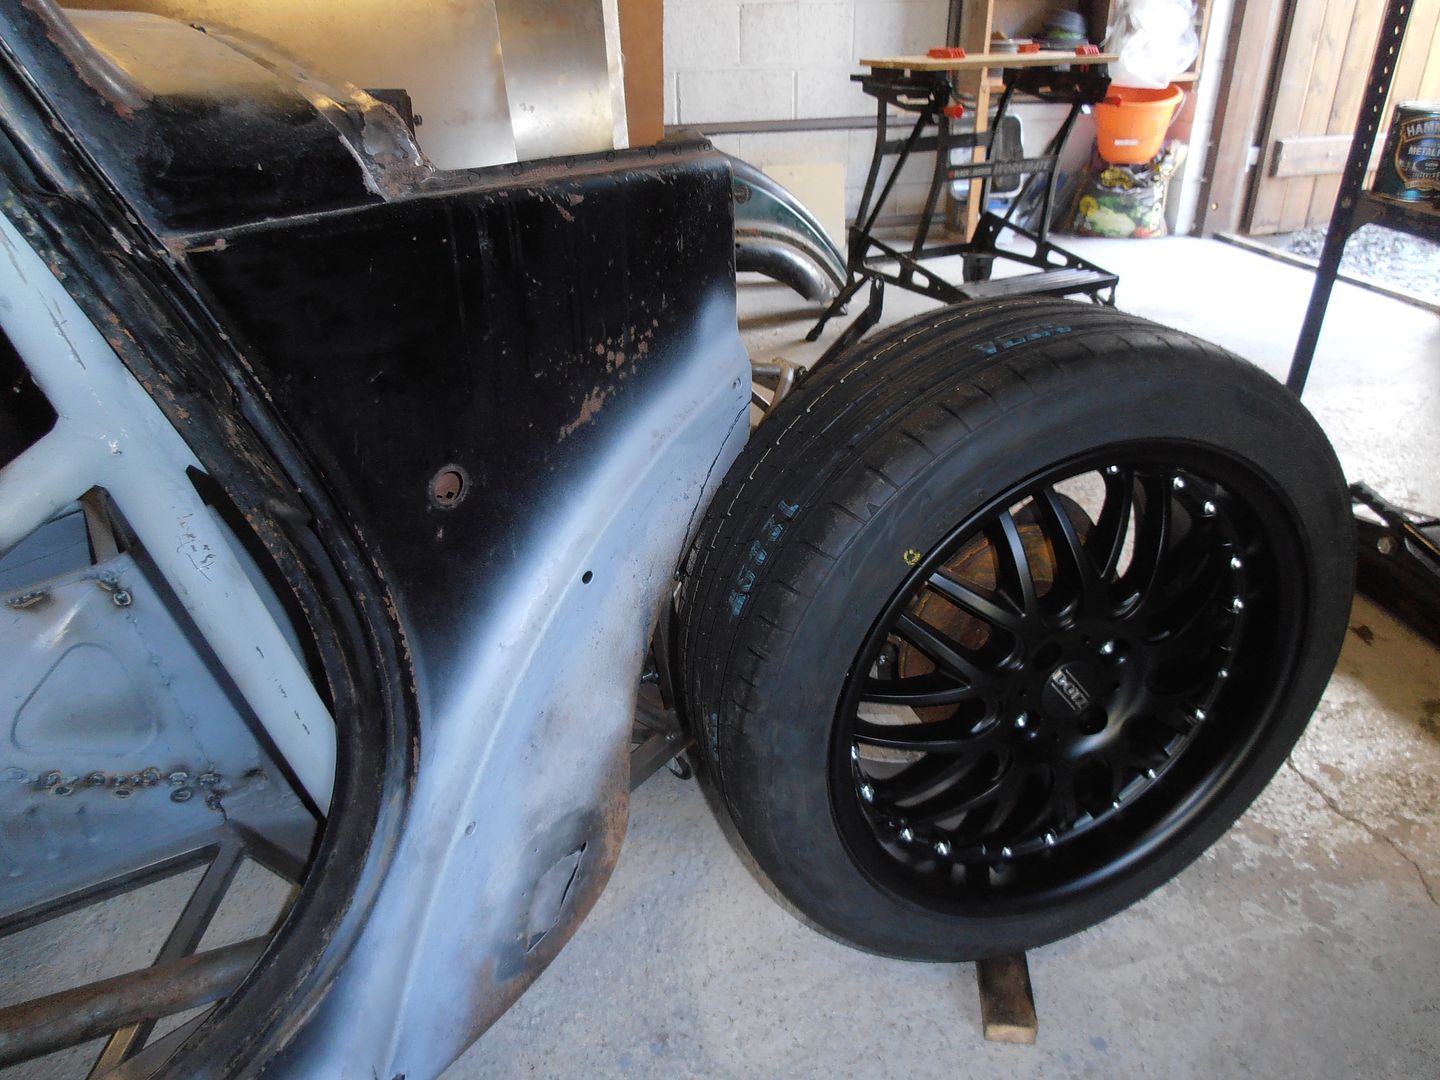 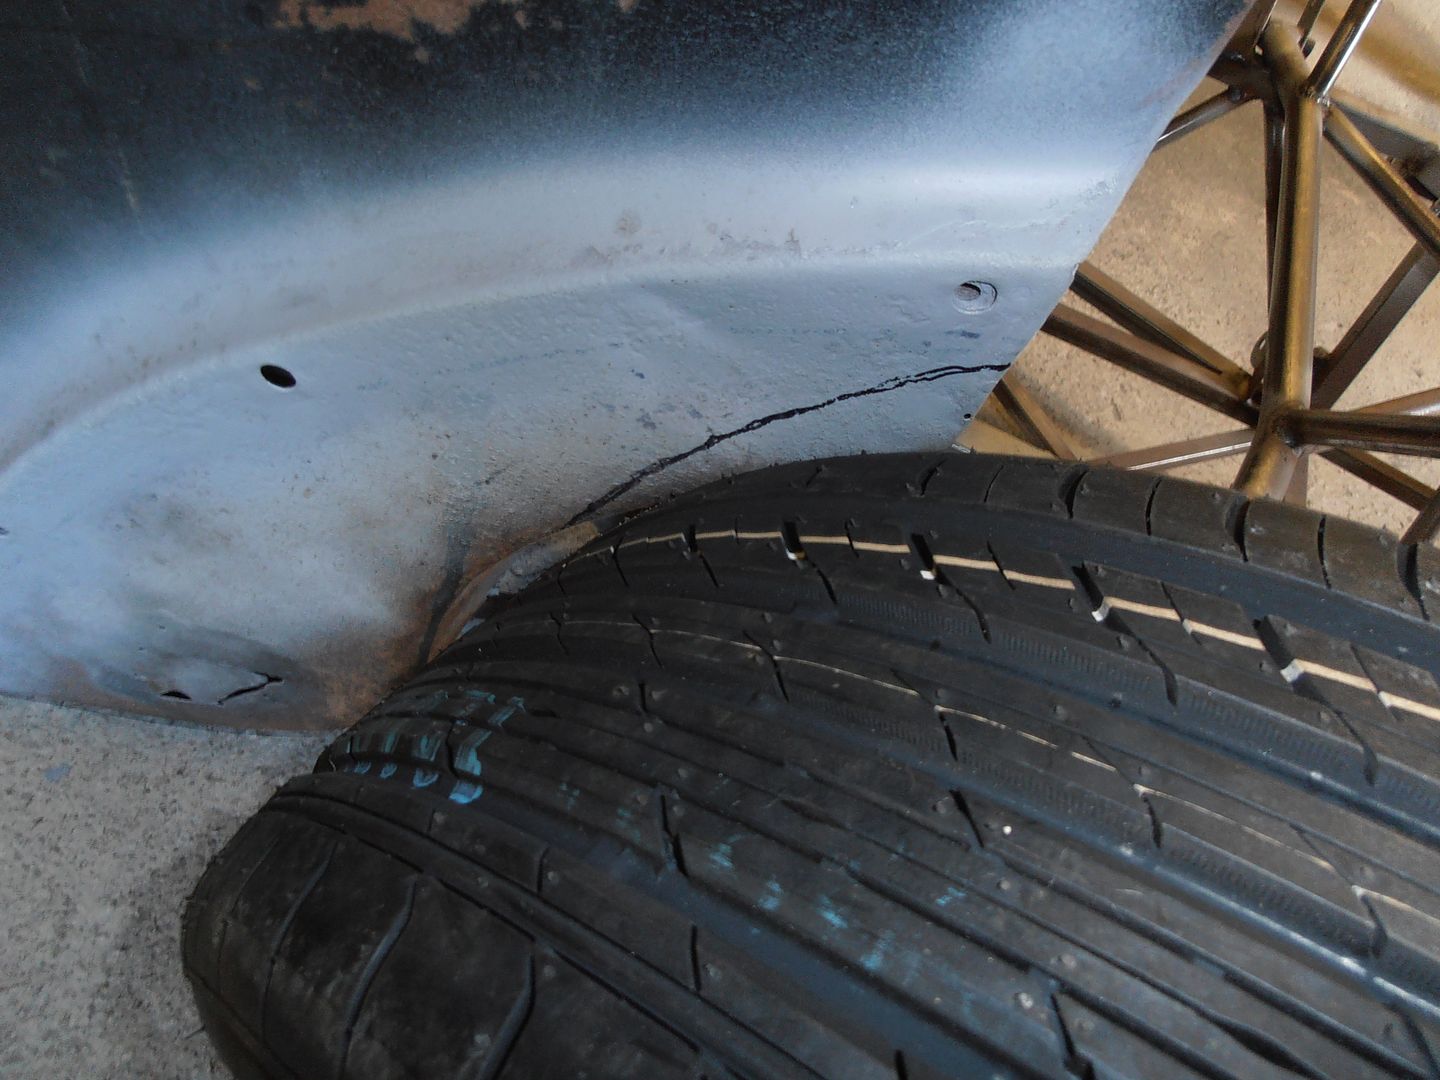 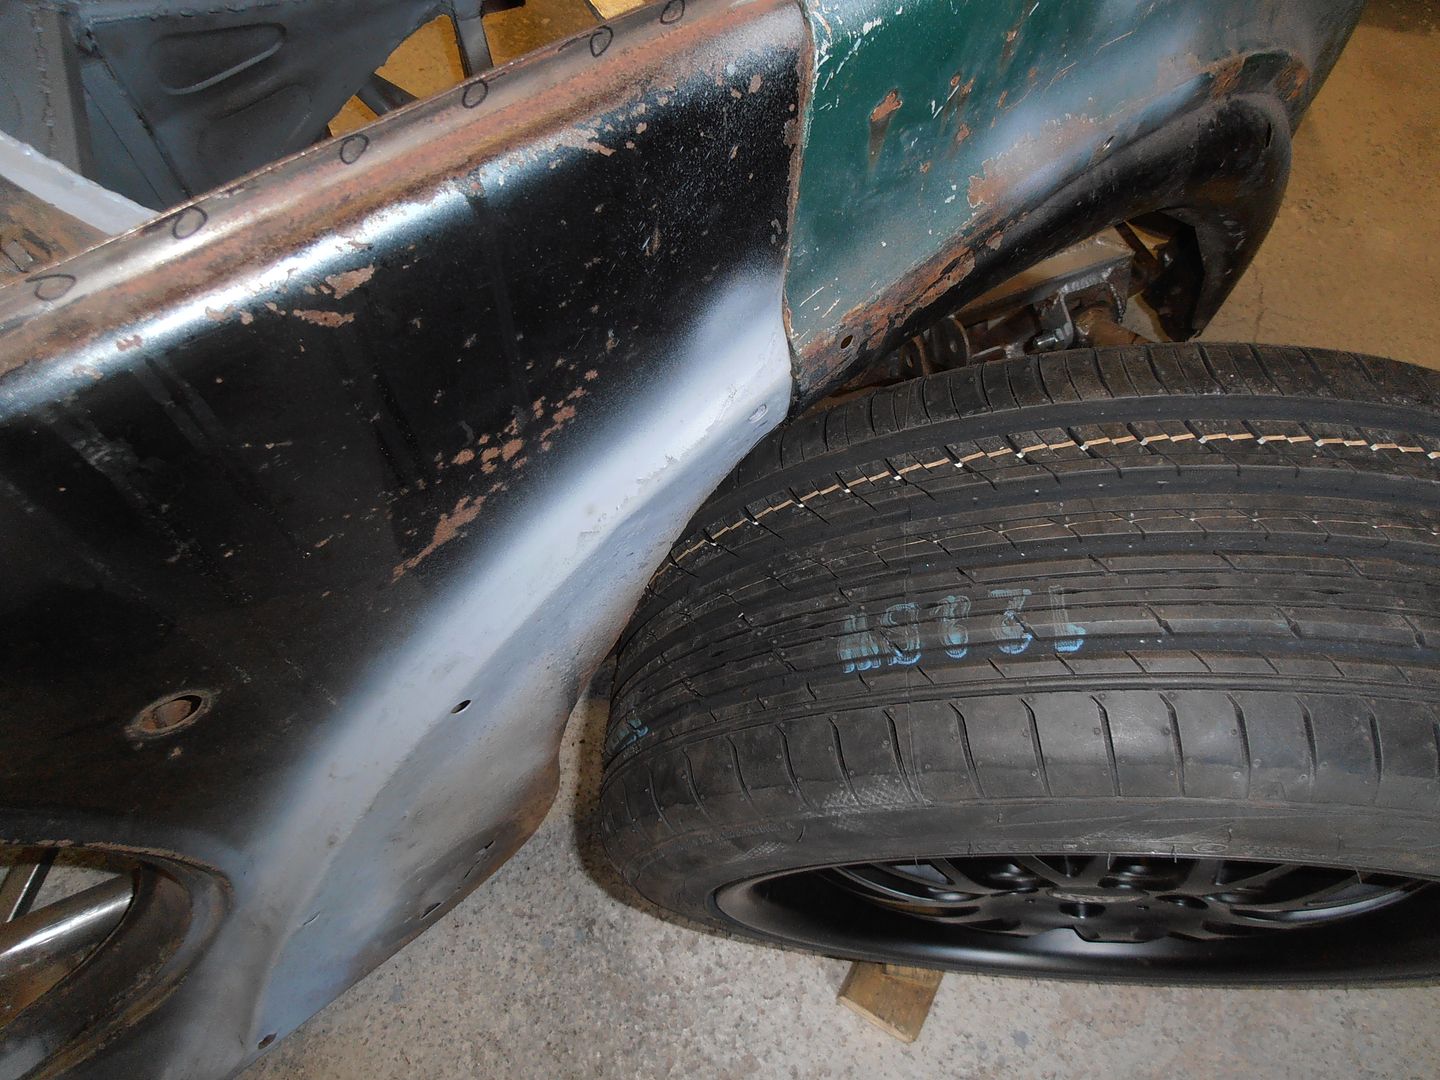 Now... i could probably get away with accepting there's only limited lock on full bump (at ride height and mid bump its all clear).... but more lock means its easier to save the car in a spin, and sods law says it'll be on bump just when you need it. Do it properly. Nothing a grinder, hammer, and few hours wont sort. more clearance 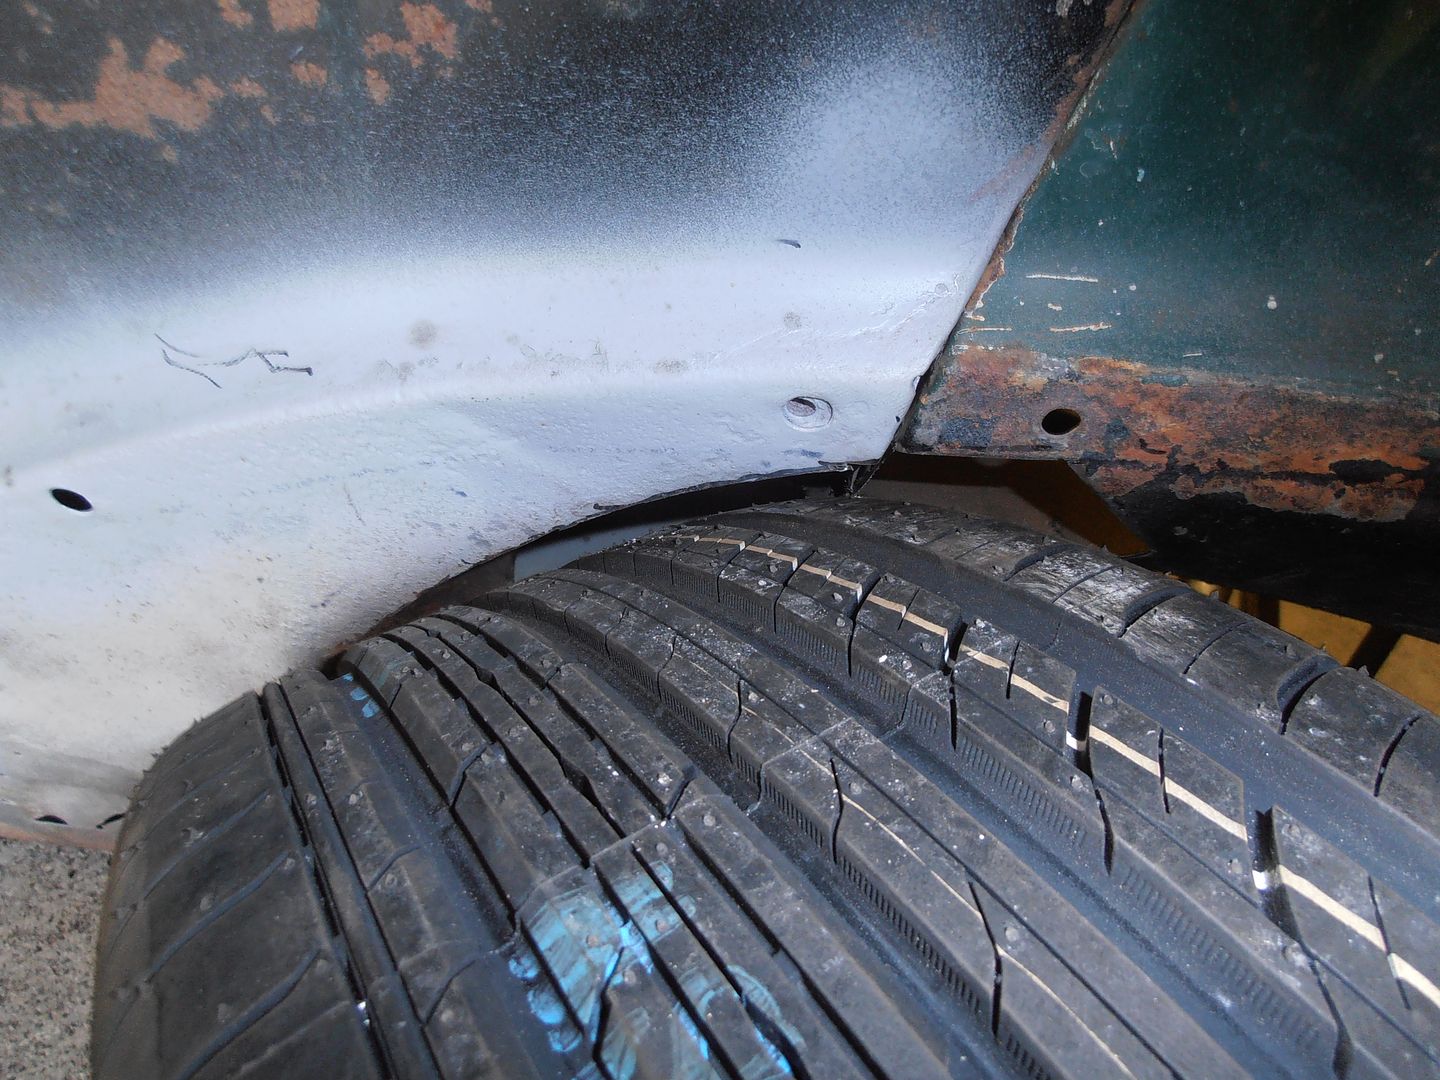 Gives more lock 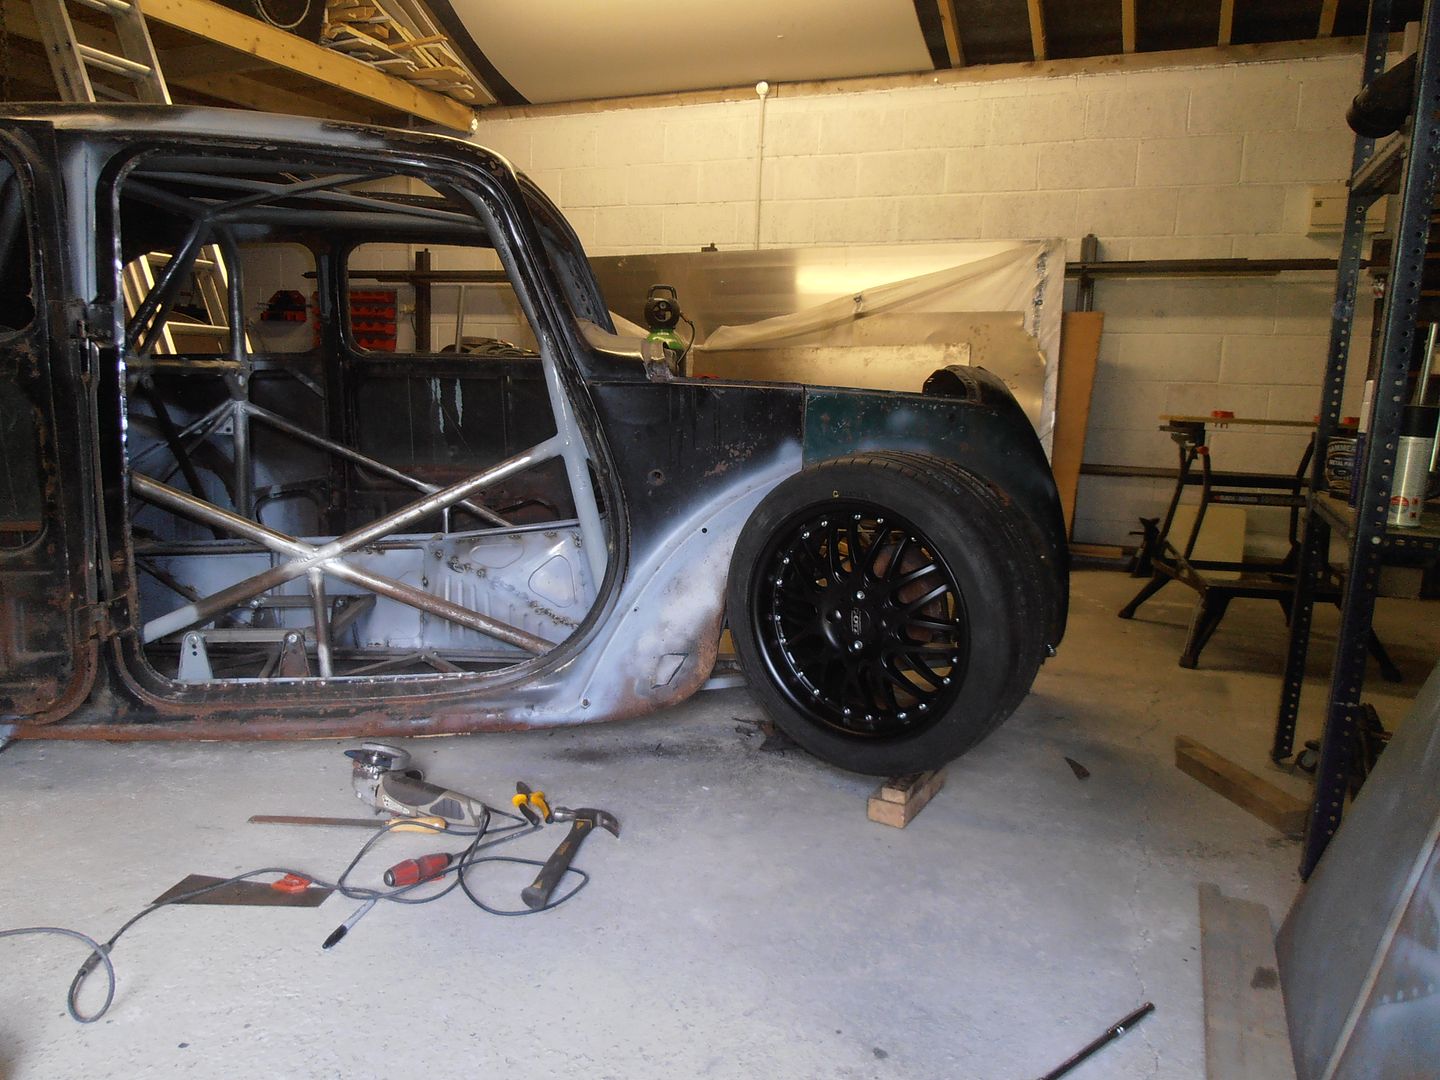 But there's still more to get. Trim a bit more 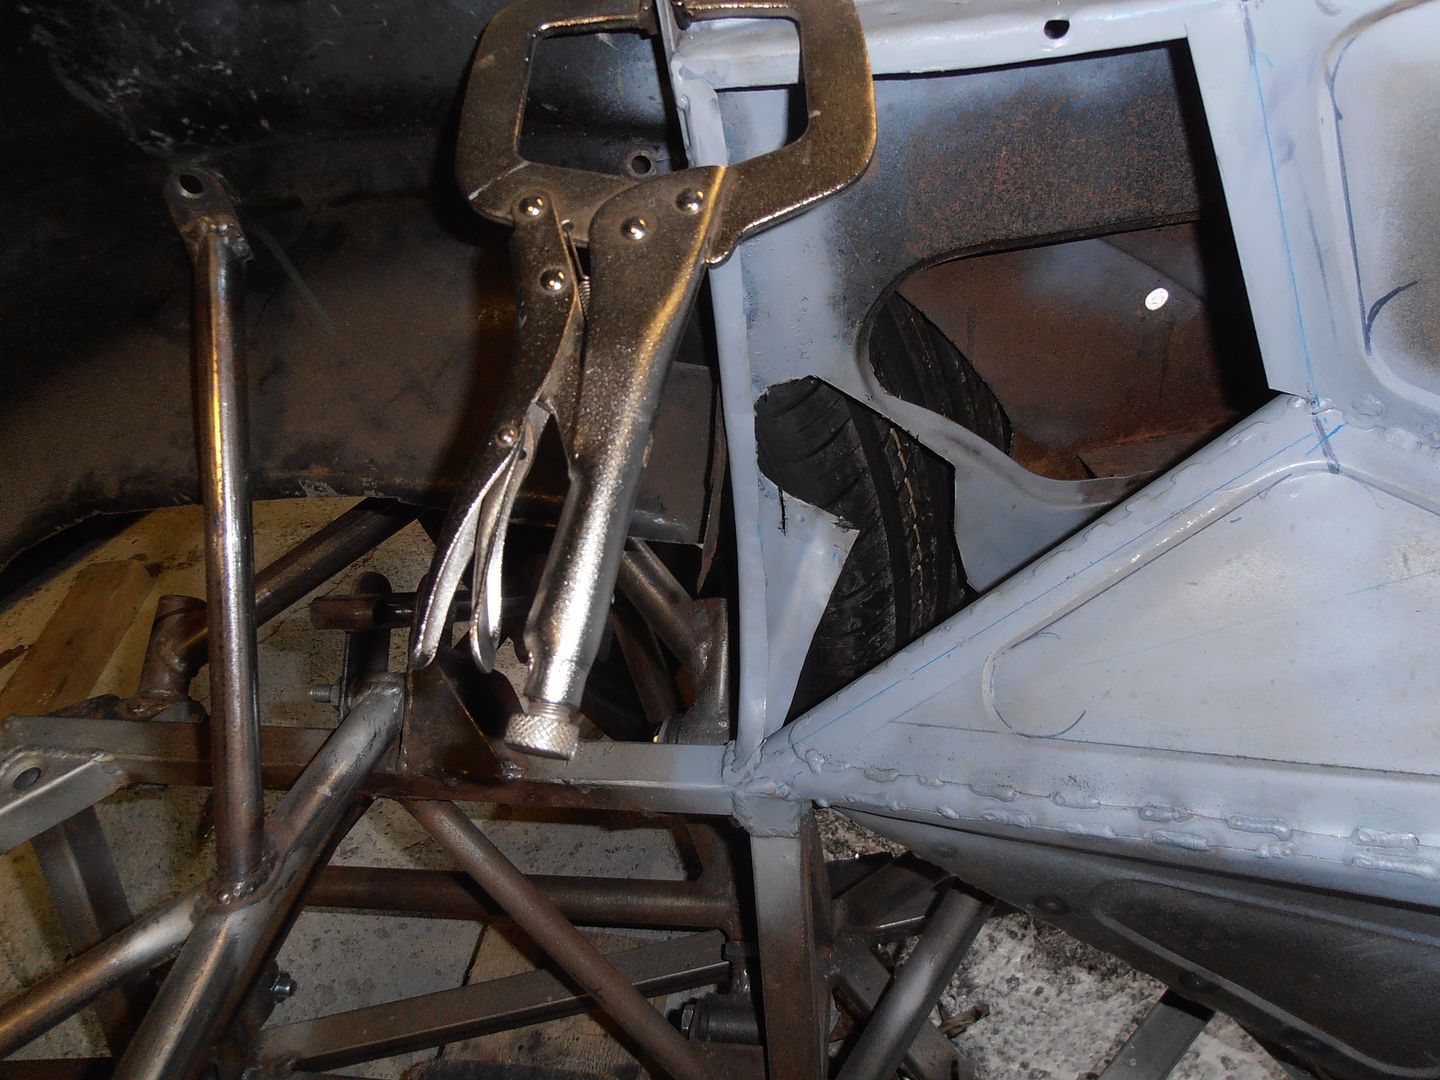 It's now limited by both upper and lower wishbones, so this is enough clearance forget to take pictures.... 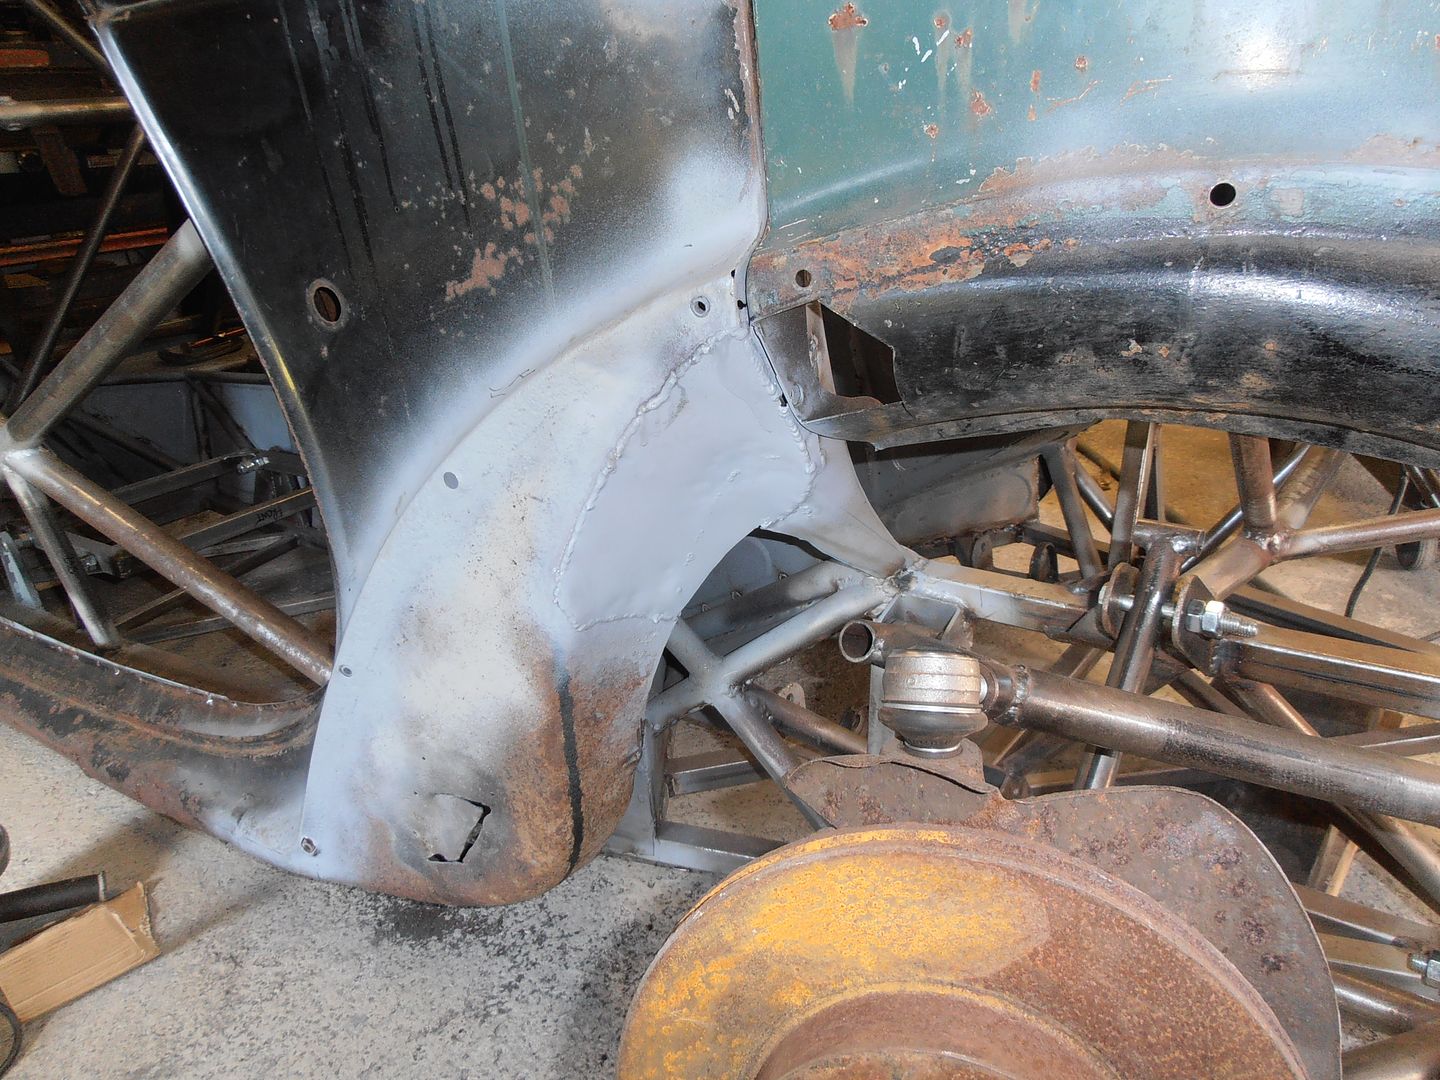 Panel made, welded in, tacked to the internal reinforcing piece i made but forgot to photo. Needs cleaned up to blend it in. Un-cut passegers side for comparison. 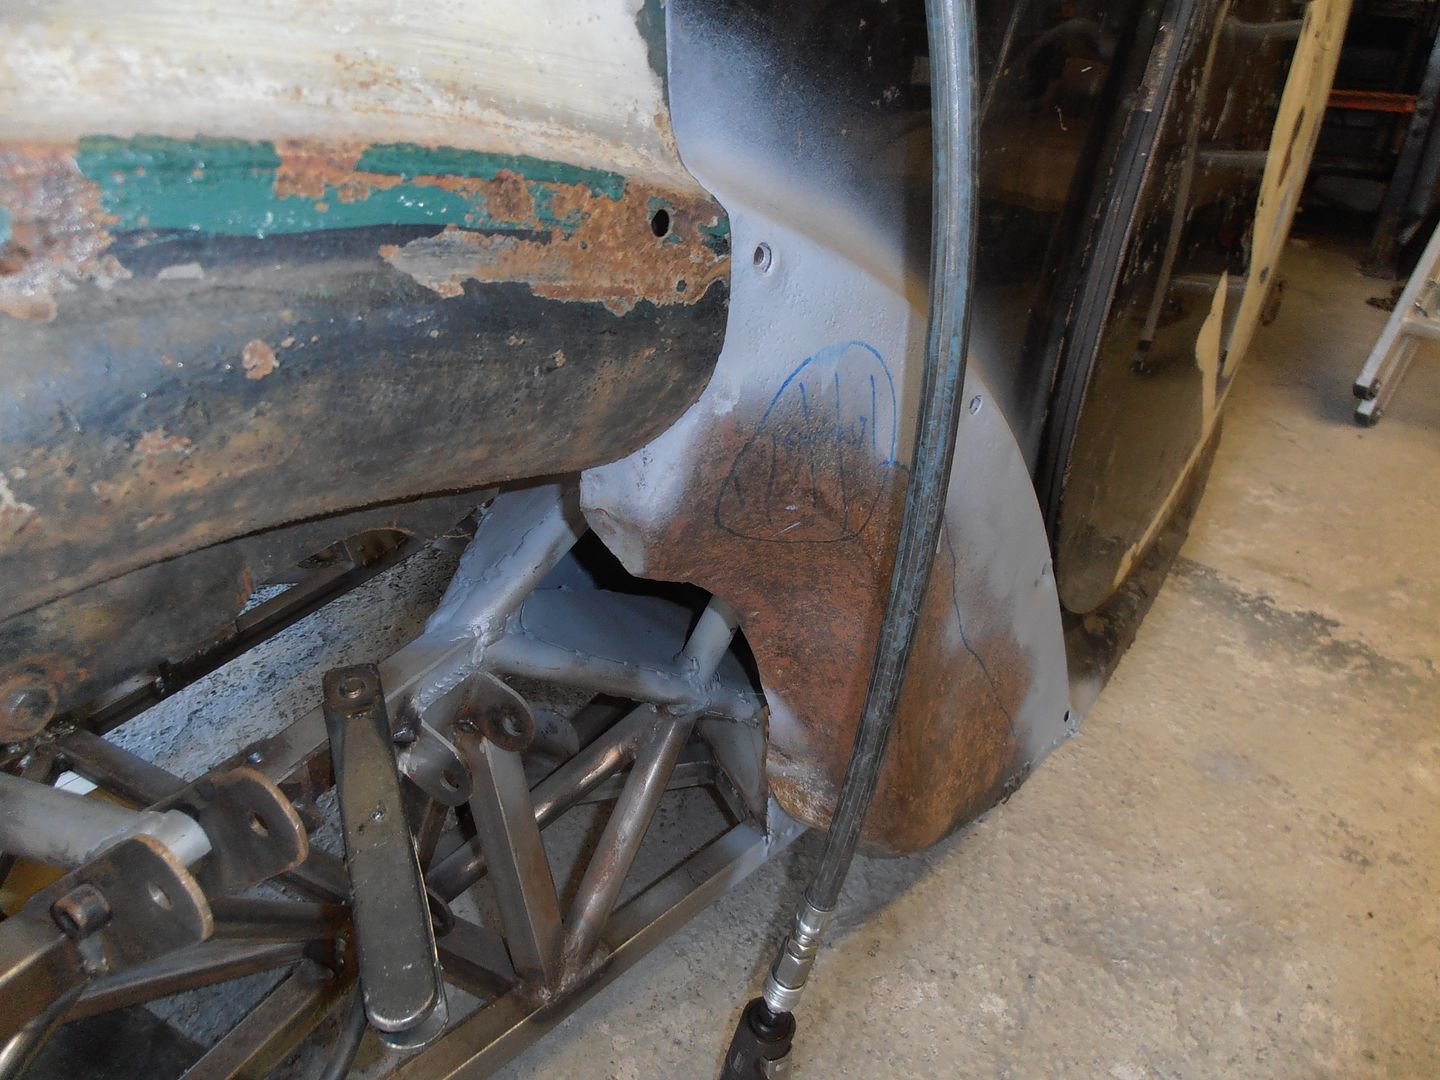 Internal pic showing reinforcing plate 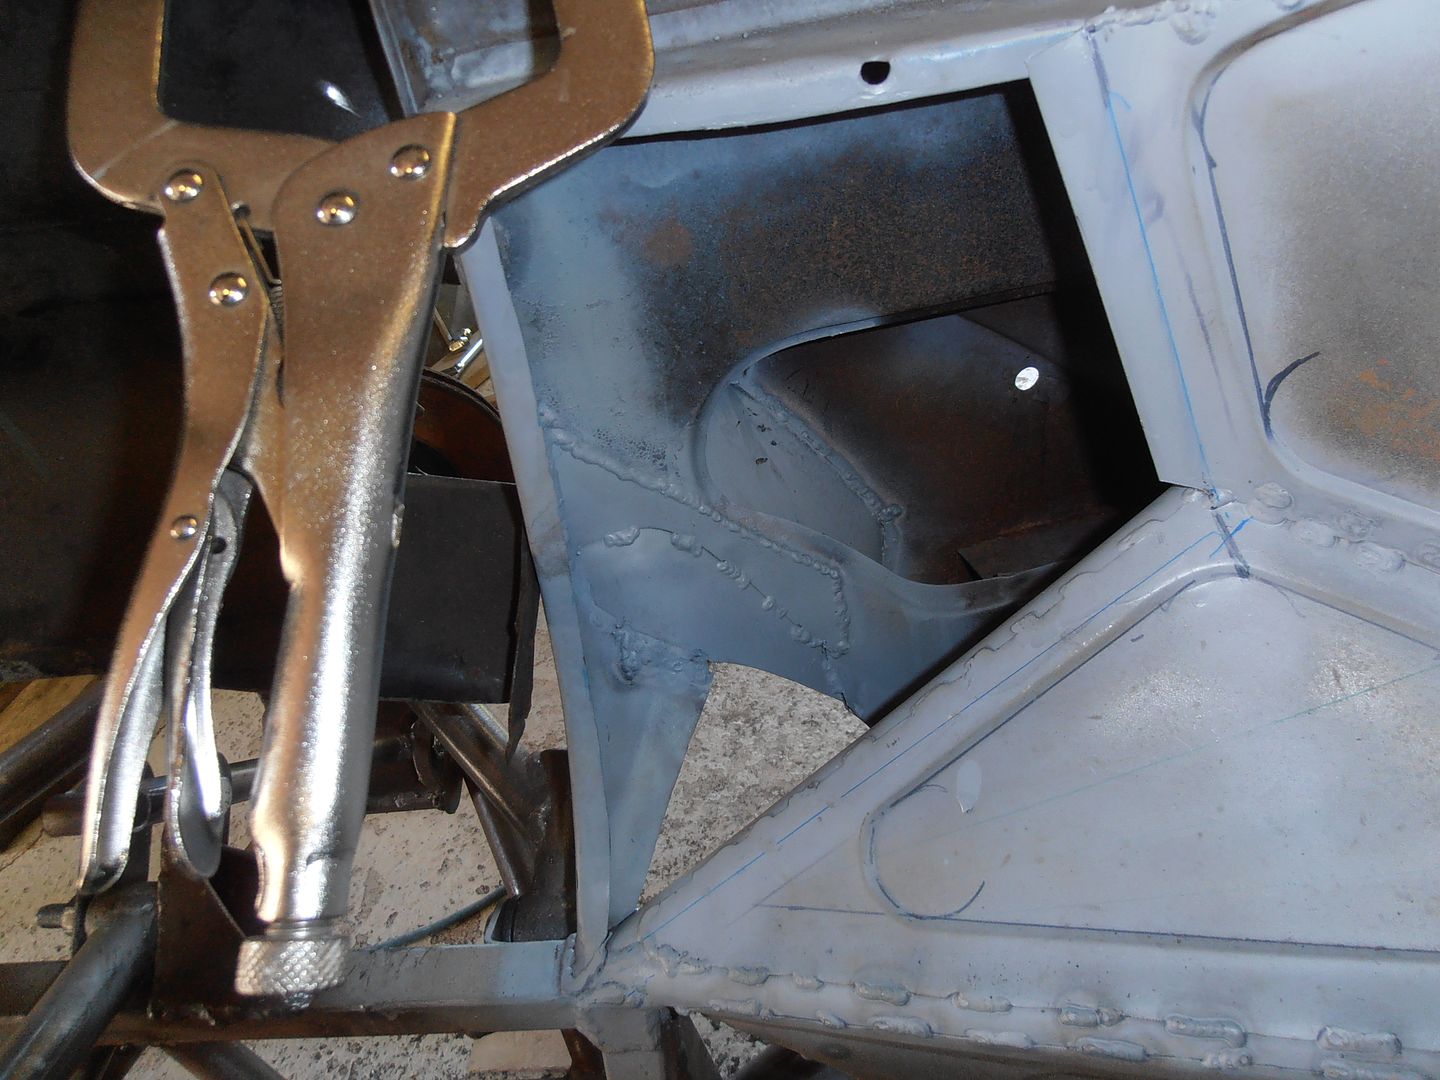 On full bump. about 10 - 15mm of clearance 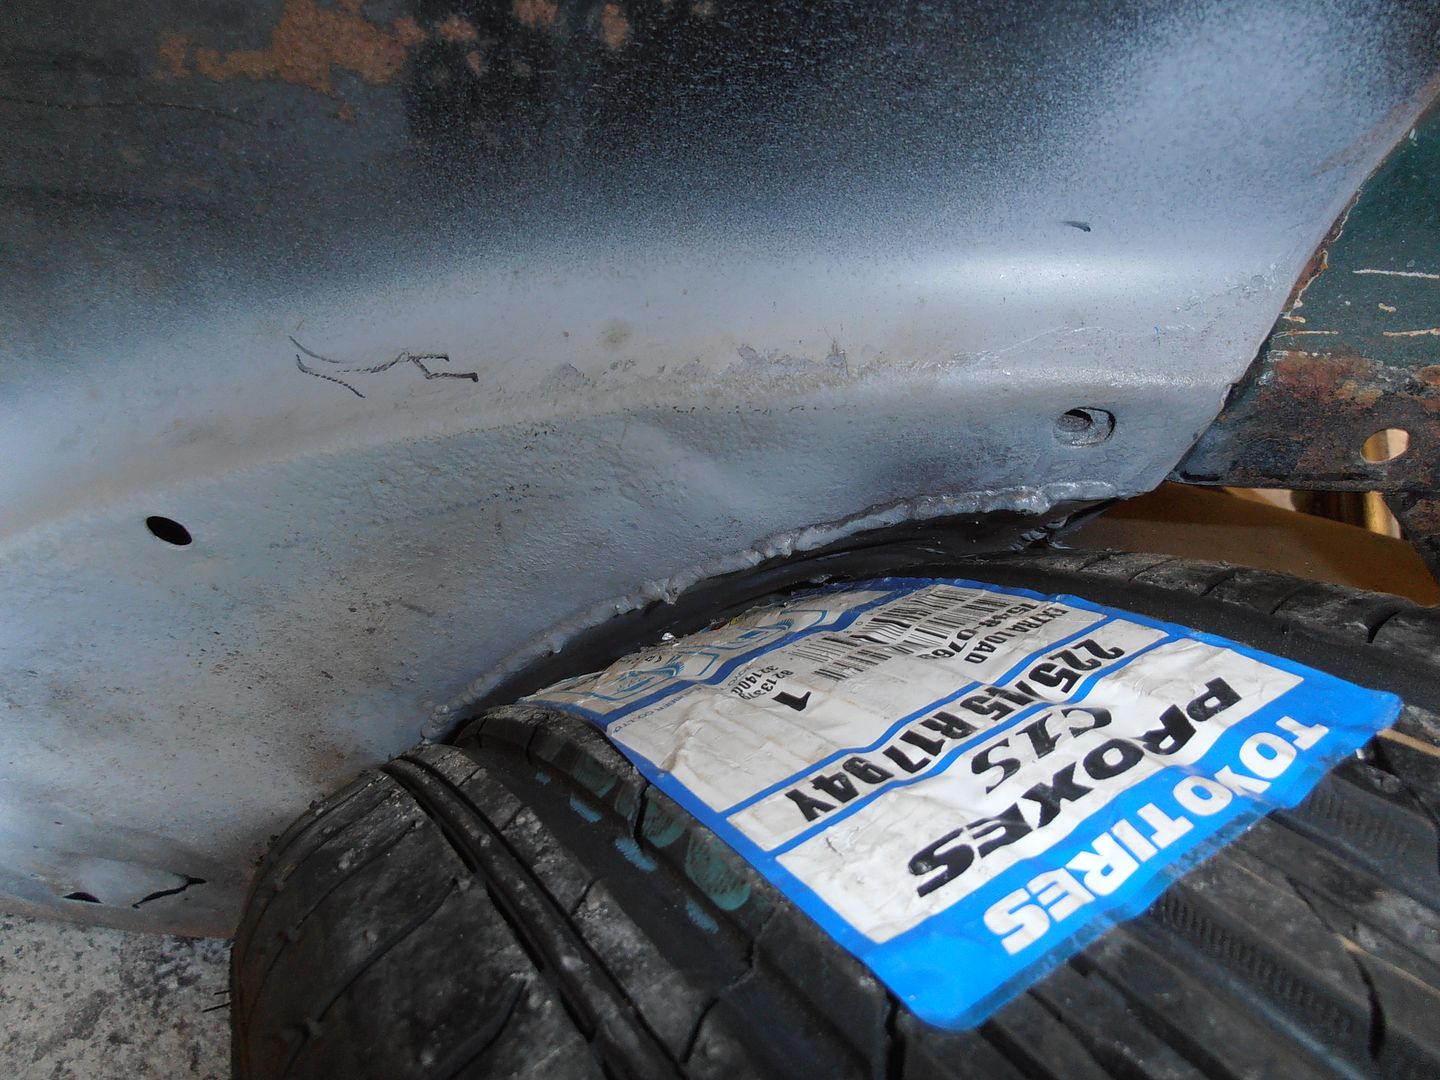 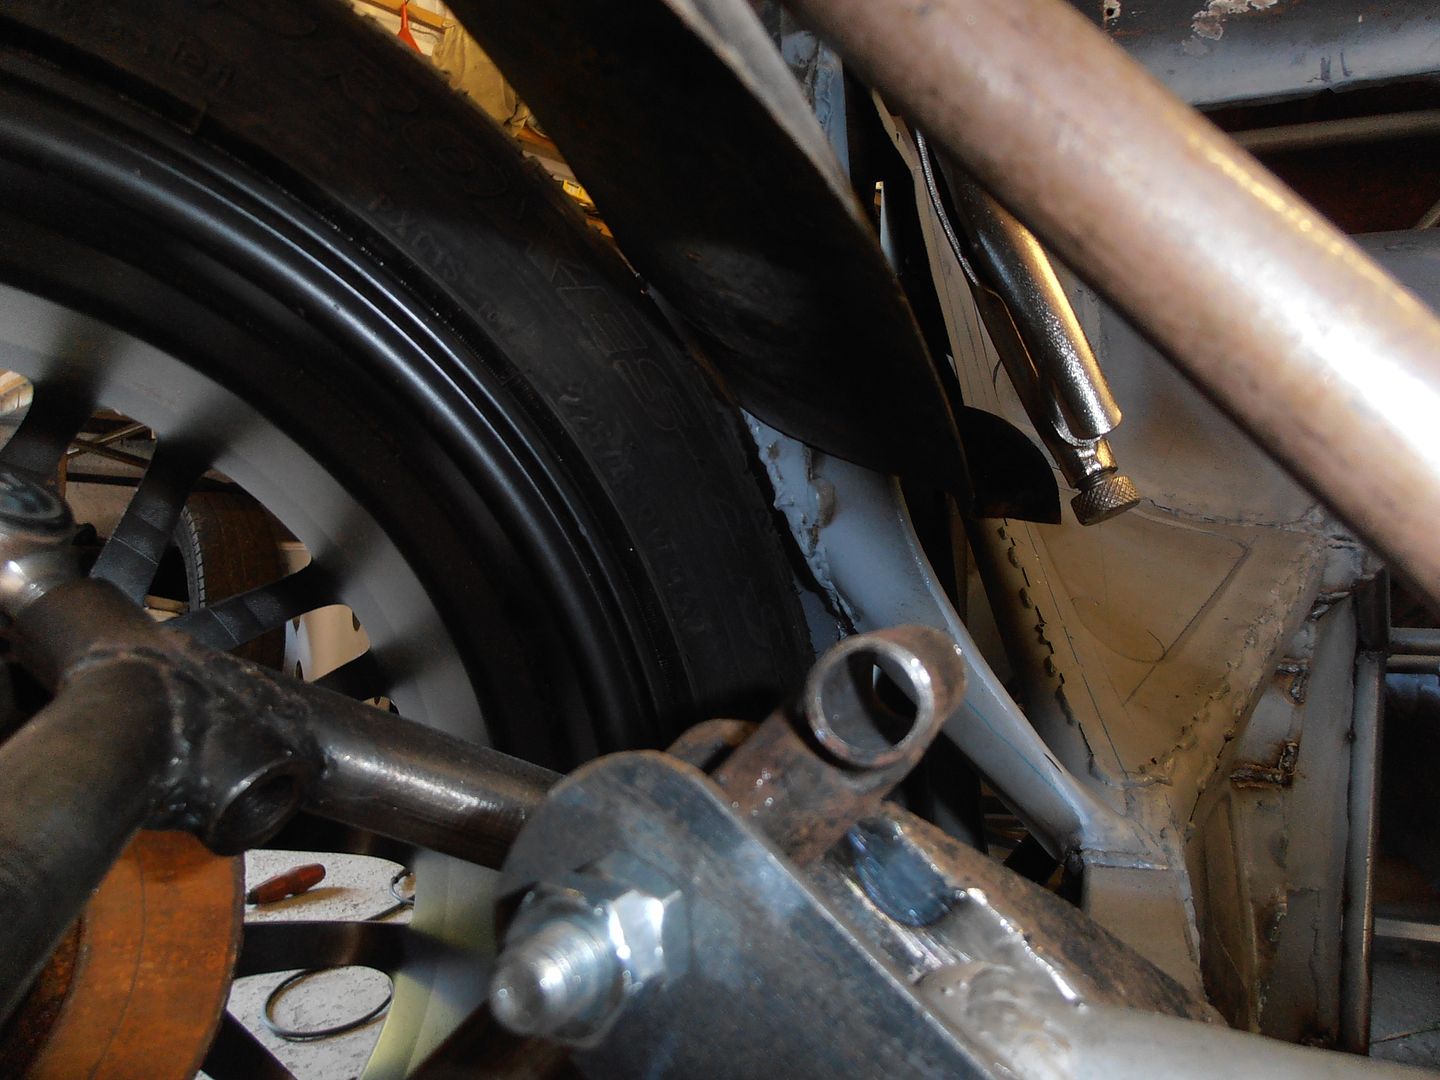 loads of lock. 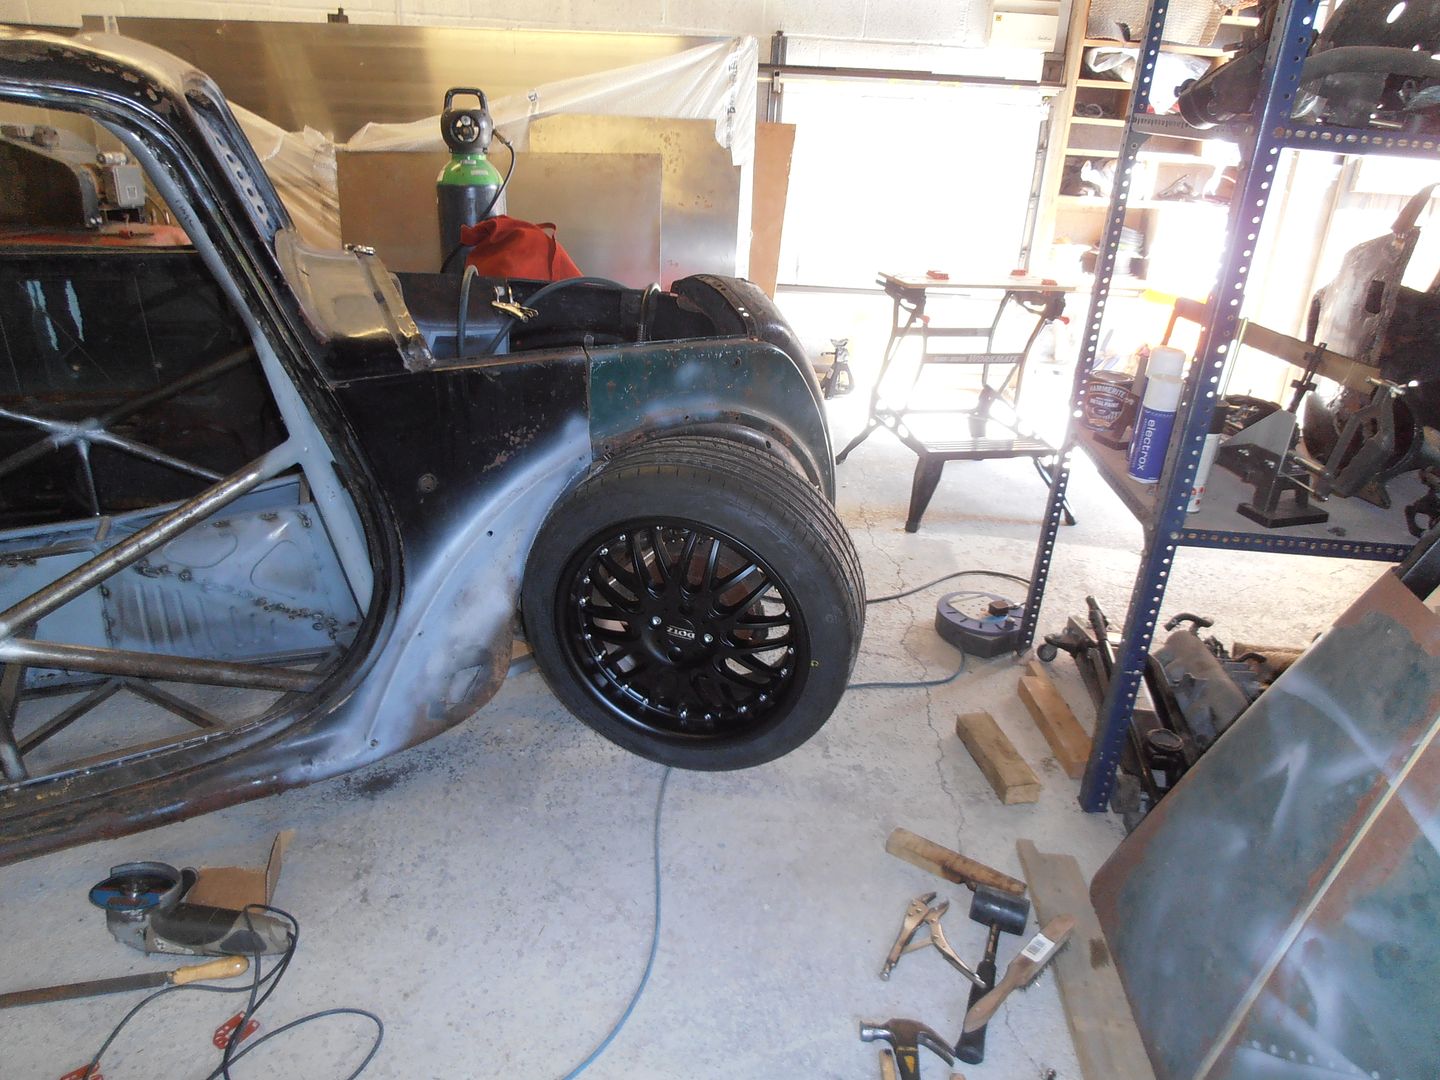 The front inner wing needs a nibble out of it as well 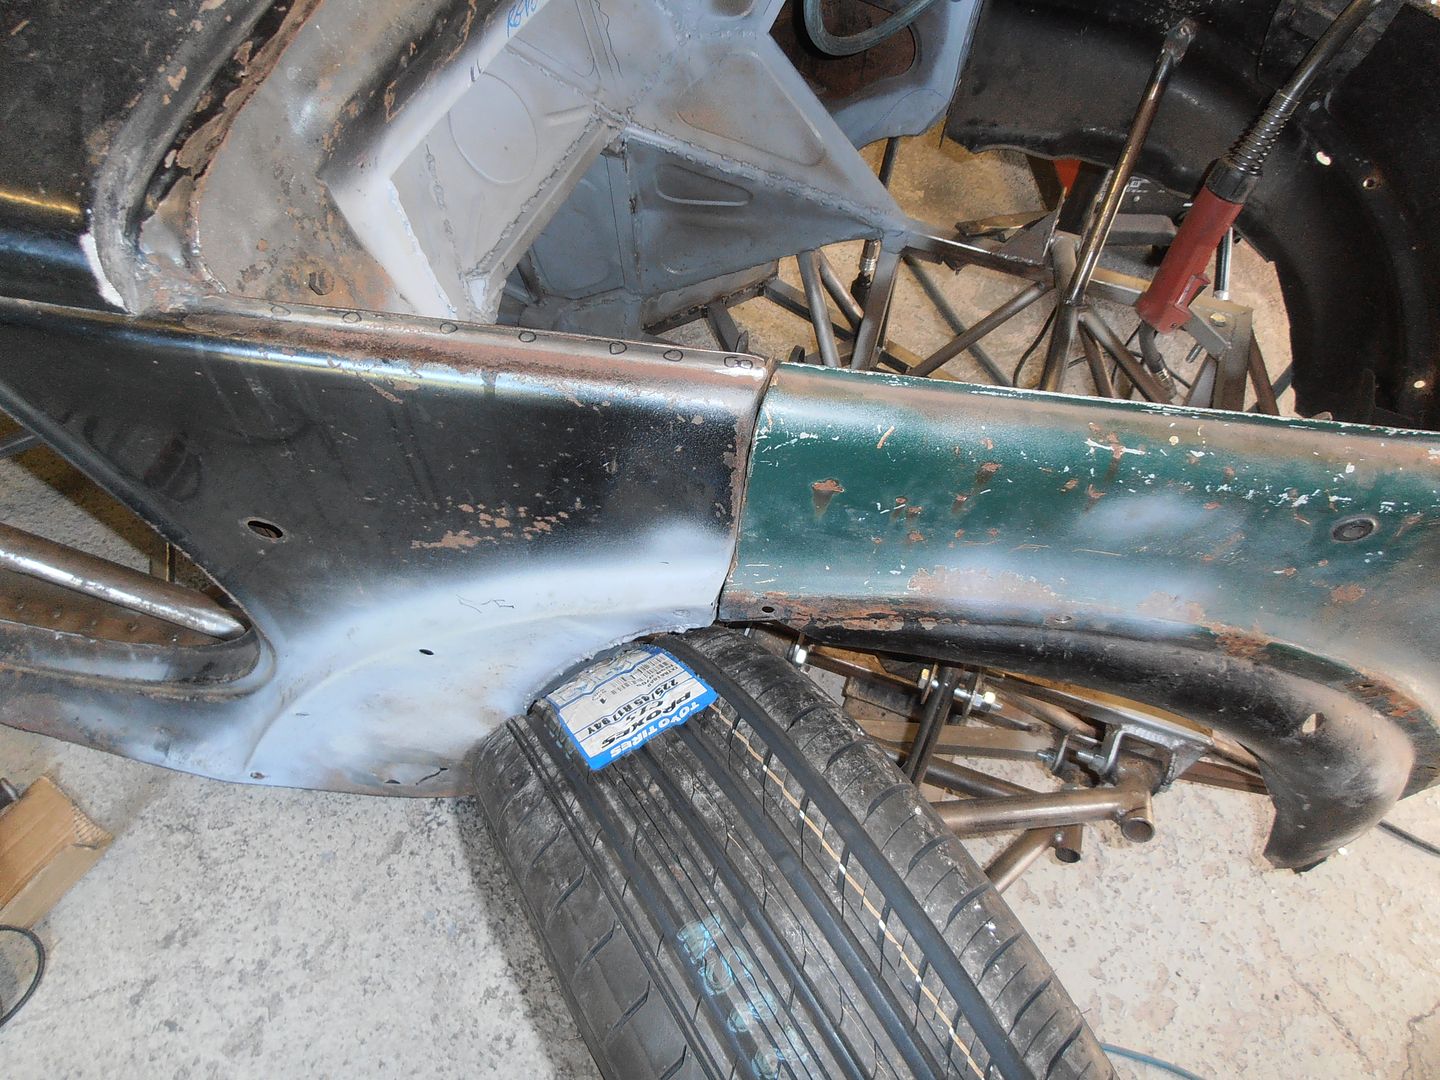 ... and then completely forget to take pics again until the next infill panel is tacked in 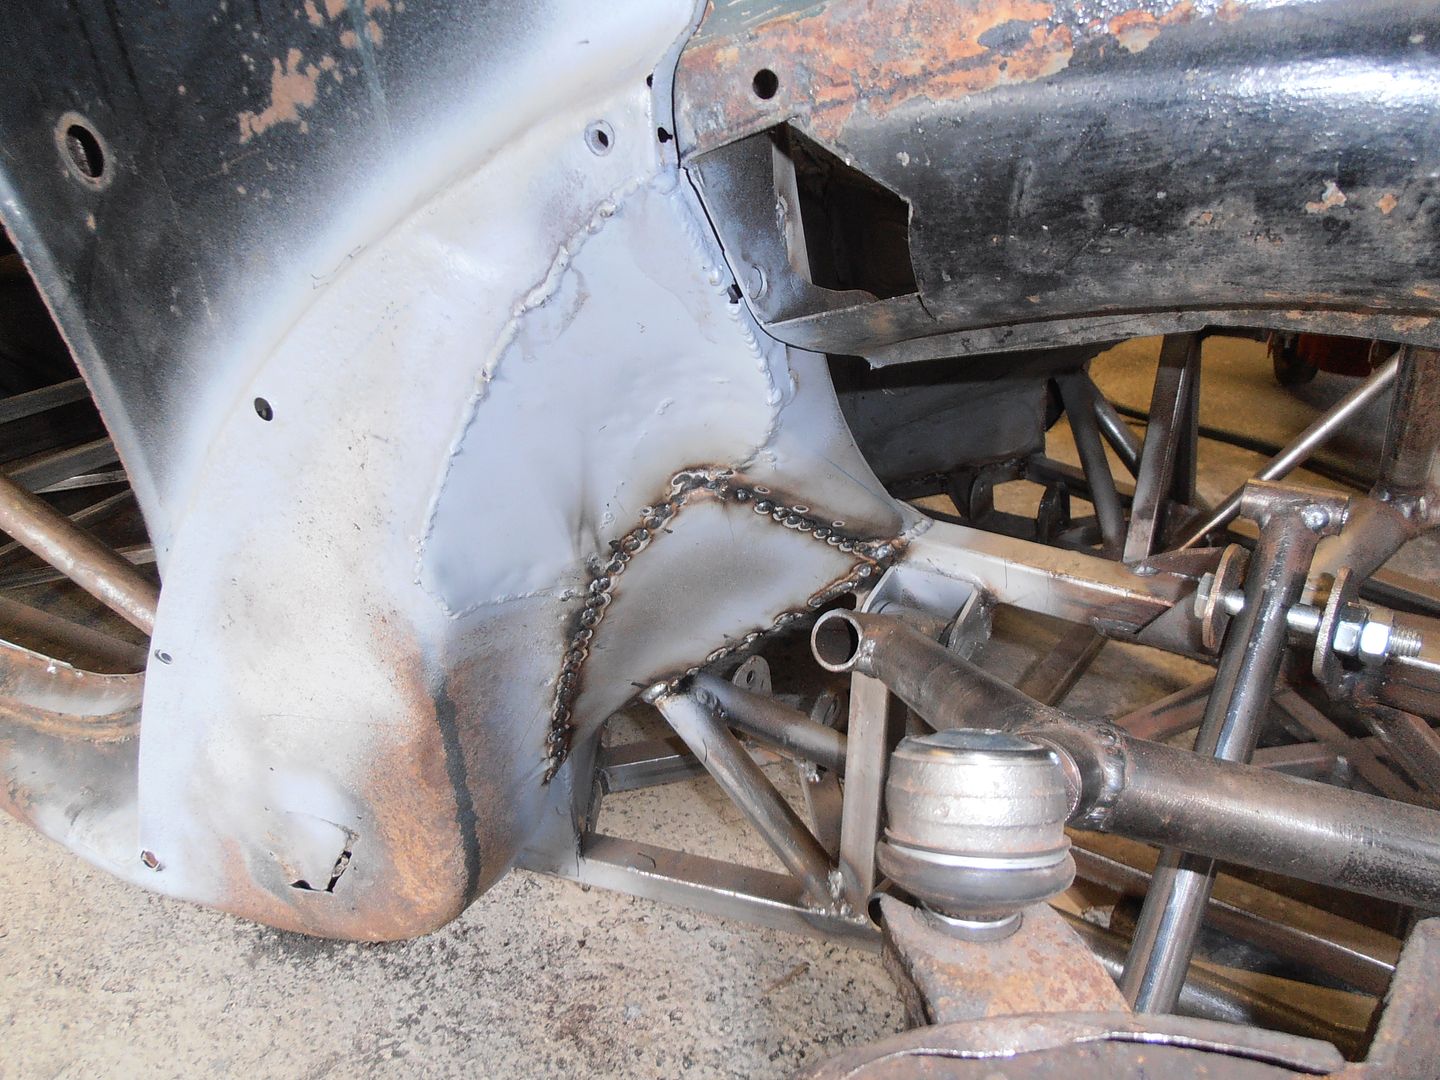 This has a horrible curve to it that too a lot of faffing , followed by partly tacking in and using the "adjuster" on it. I made a step along the edges it touches other panels, so when fully welded and ground back it should blend in nicely with little indication its a separate piece. I then decided i should replace the captive wing nuts with M8 versions, rather than the present imperial? witworth? other pre war "standard" threads... I drilled all the cages out, and just need to fab some little plates with nuts on to weld back in. This is a job for next weekend...assuming I'm not drunk somewhere. Once they're done I can fit the panel I made at the start of the post. Then its onto the other side. |
| |
|
|
vulgalour
Club Retro Rides Member
Posts: 7,271
Club RR Member Number: 146
|
|
|
|
|
What an awkward fiddly job that is, but worth it. Quite sure you would have regretted not doing it.
|
| |
|
|
|
|
|
Jul 20, 2015 13:26:46 GMT
|
|
i think most would just chanced it, wise move to take a fillet out of the inner wing.
even if it never gets to that extreme articulation you still have a bit of tyre wall flex, elasticity in the bushes and suspension that could put it close
|
| |
|
|
jonomisfit
Club Retro Rides Member
Posts: 1,787
Club RR Member Number: 49
|
|
Jul 20, 2015 21:34:24 GMT
|
|
Even if I don't need it, its better putting in now and not needing, than having to try to fix after everything else is done.
As you say Darrenh it'll move a bit further with the bush flex etc. as well.
|
| |
|
|
jonomisfit
Club Retro Rides Member
Posts: 1,787
Club RR Member Number: 49
|
|
Jul 25, 2015 13:30:47 GMT
|
Pretty minimal progress this weekend as i'm away out. i'm also busy for the next 4 weekend so likely to be a while till there's progress again. Captive nut plates for the wings. I wanted to make sure the nuts ended up centred in the holes, so i turned a small collar onto a nut as a spacer. This ensures they were central when welded. 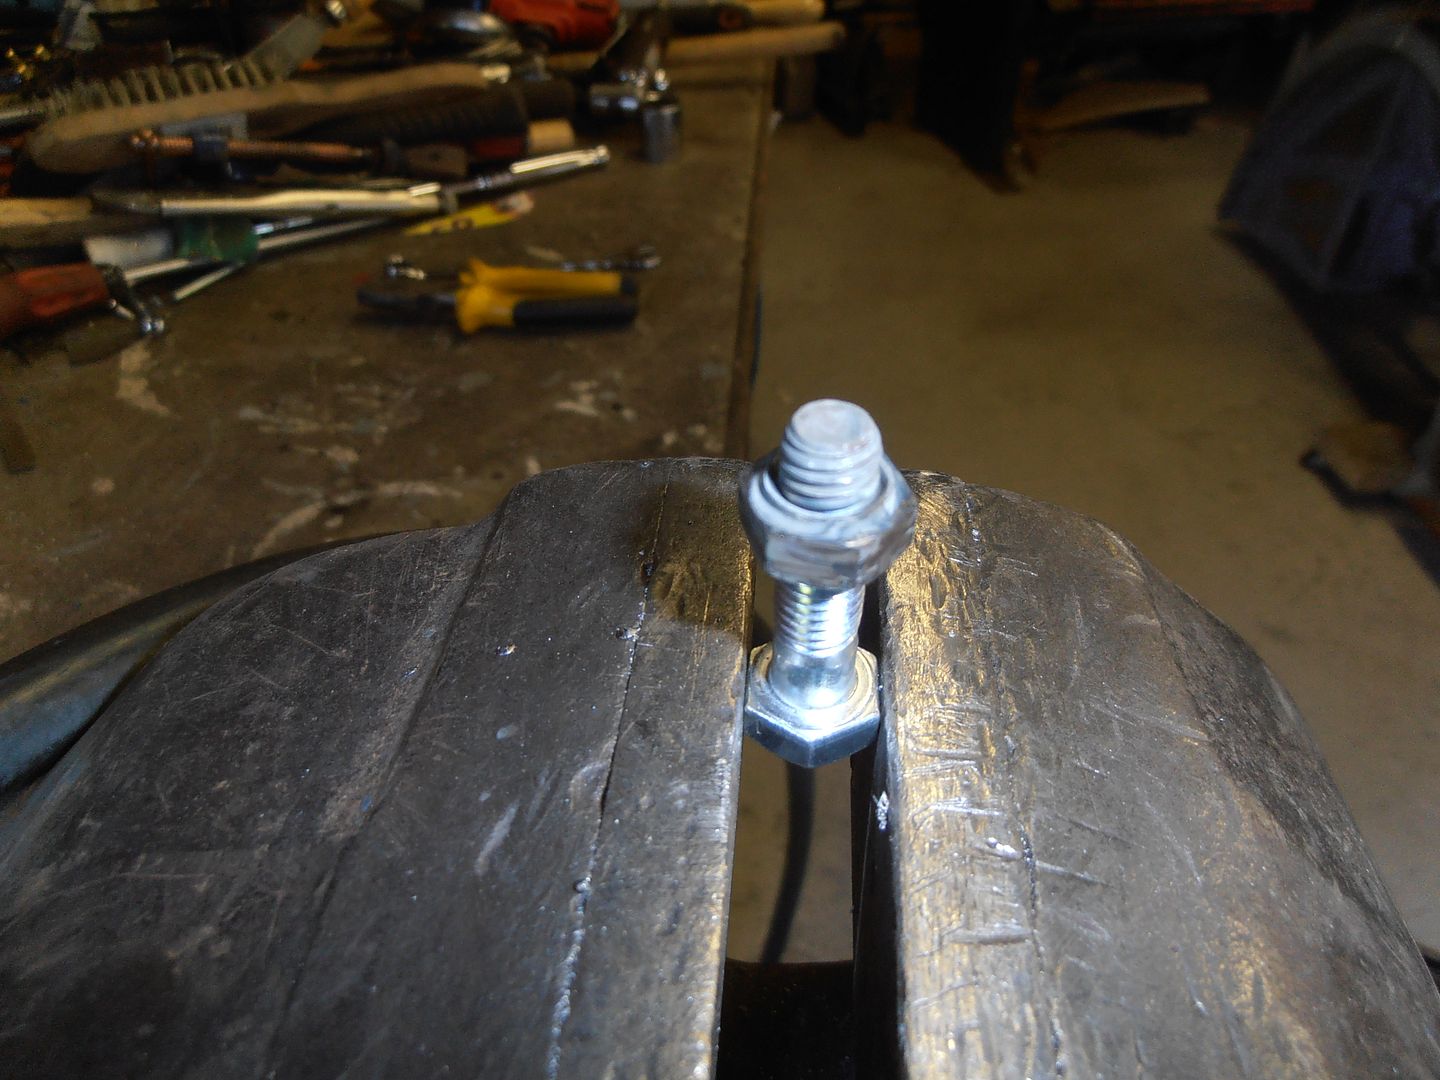 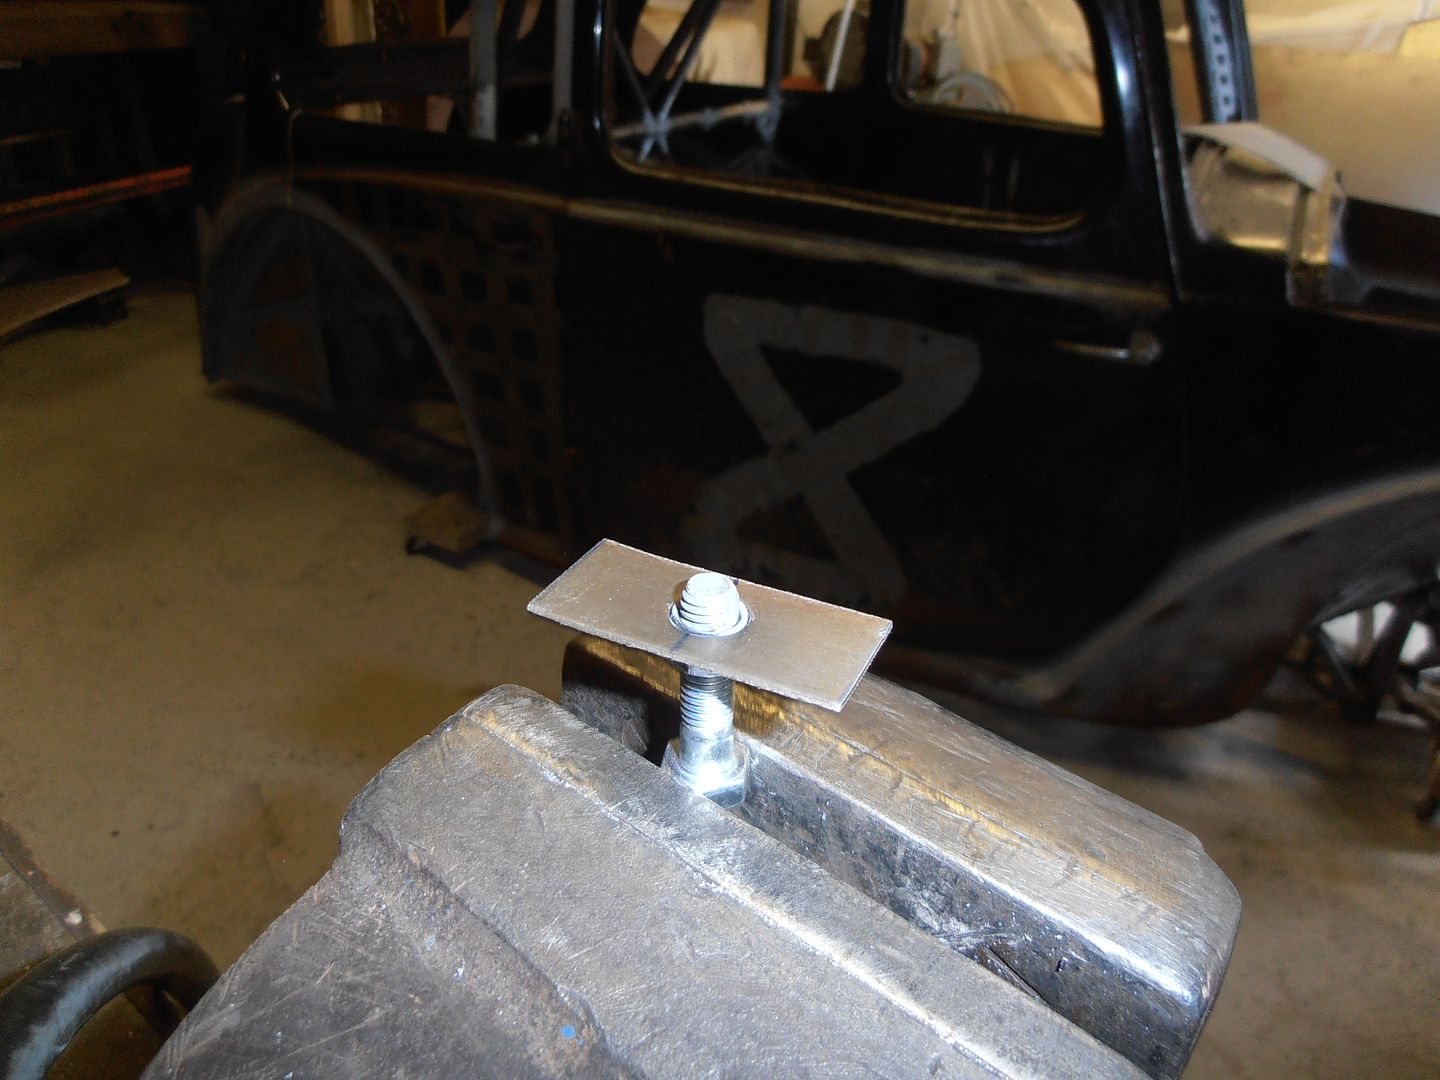 nuts welded on 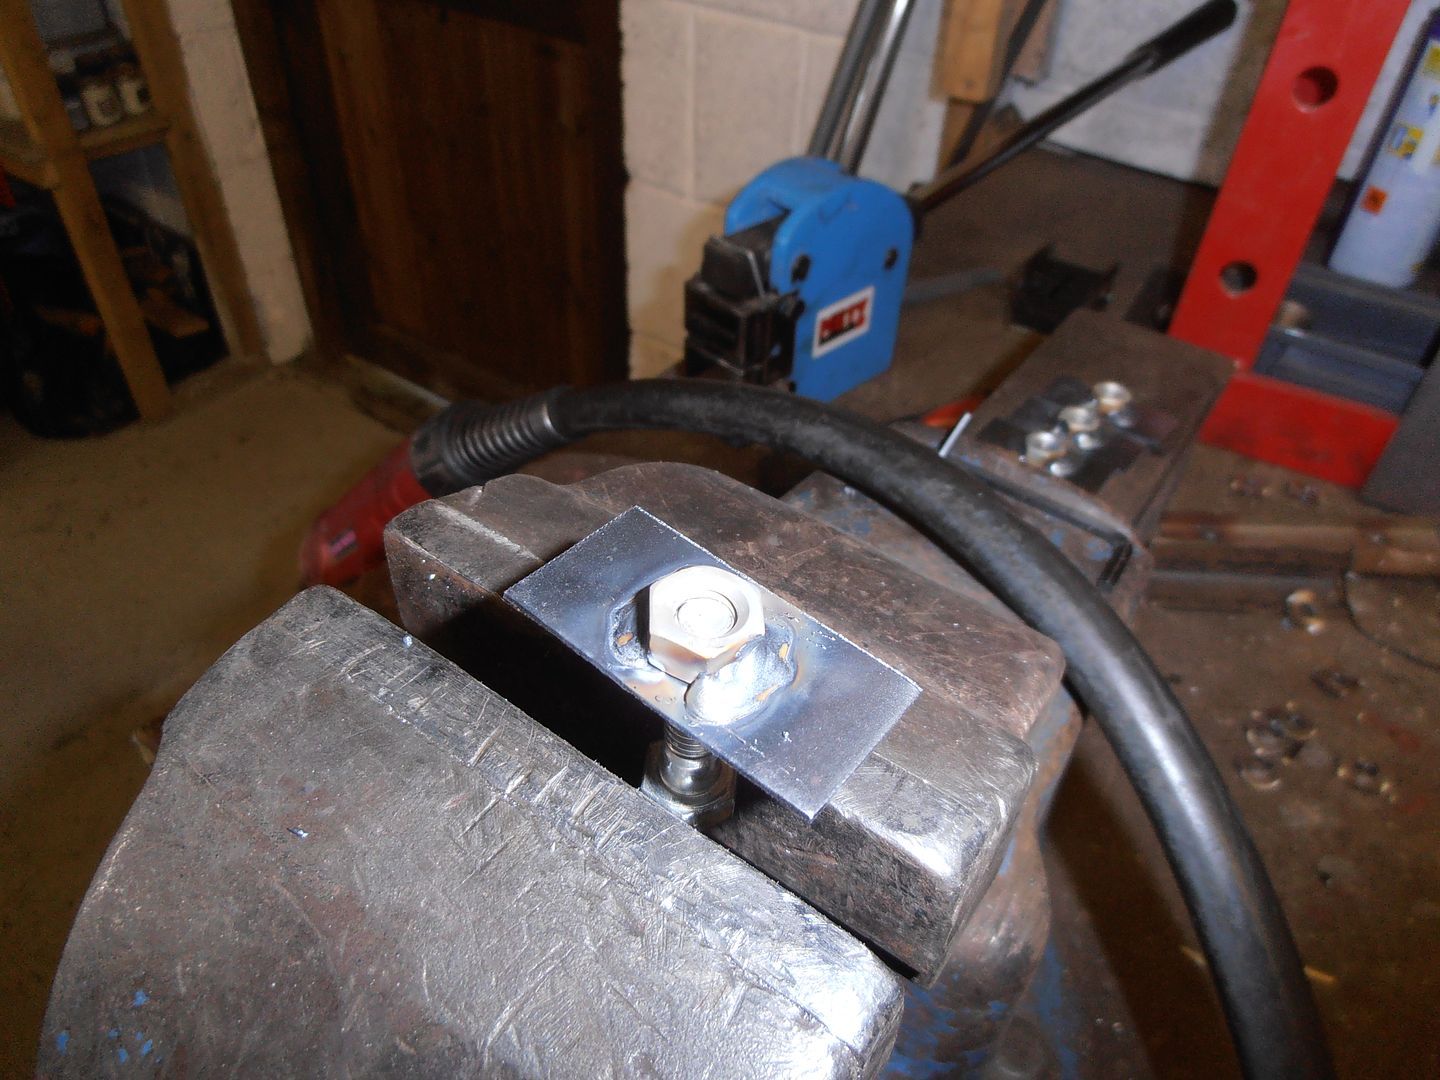 I then used the centering tool to make sure they were centered when I welded to the shell. 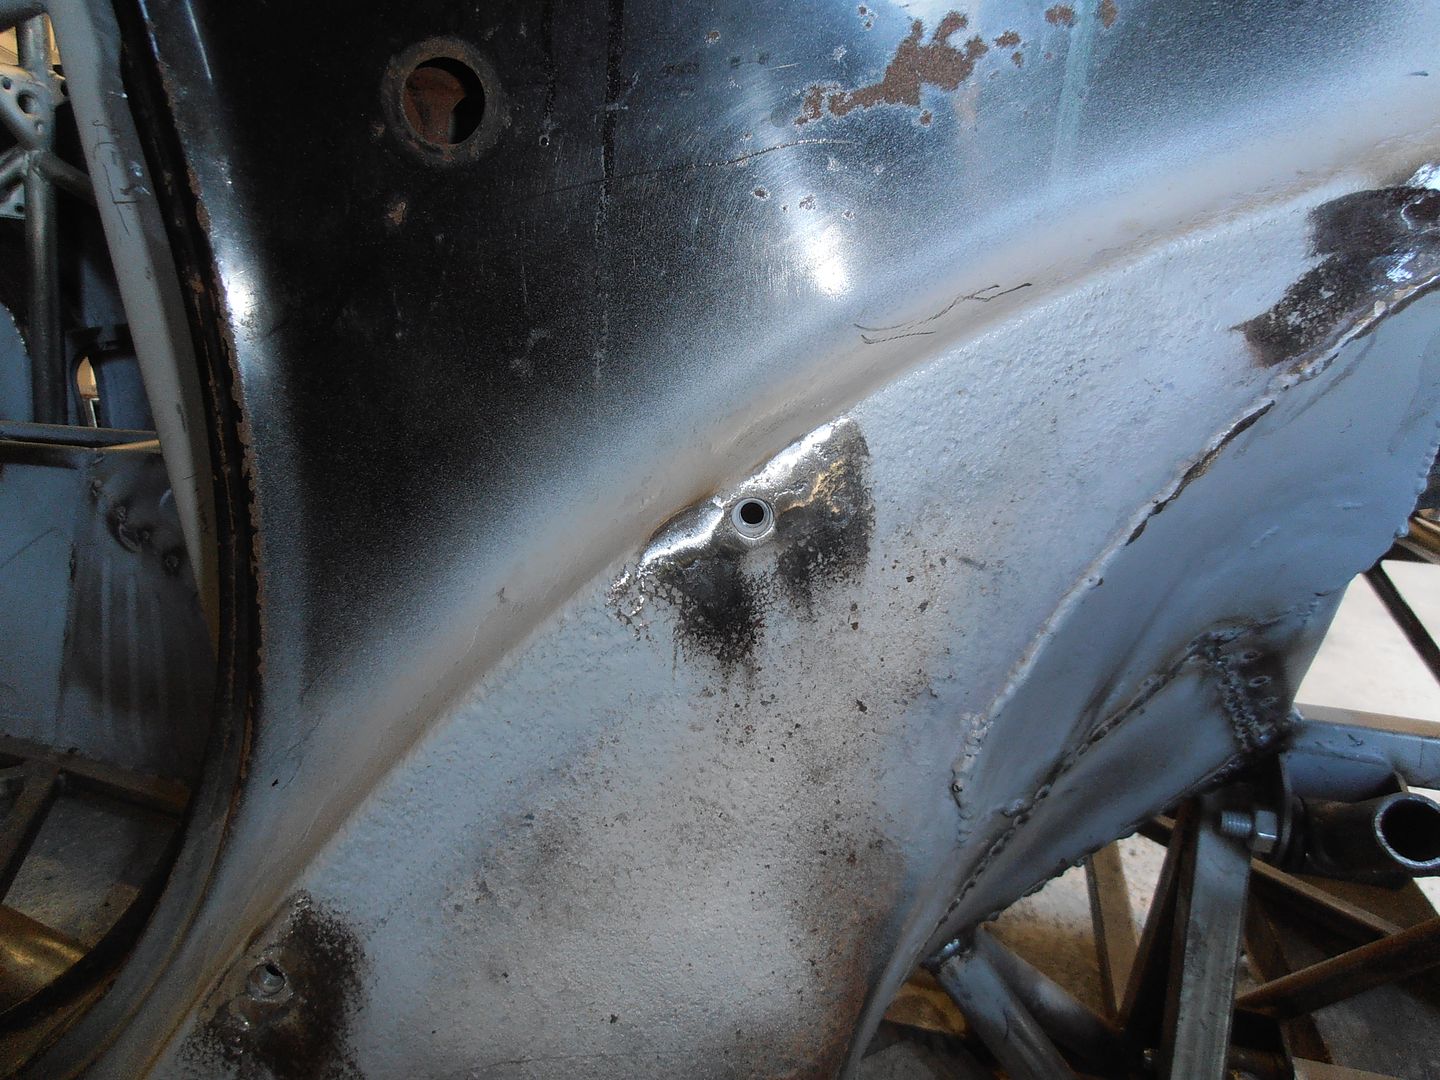 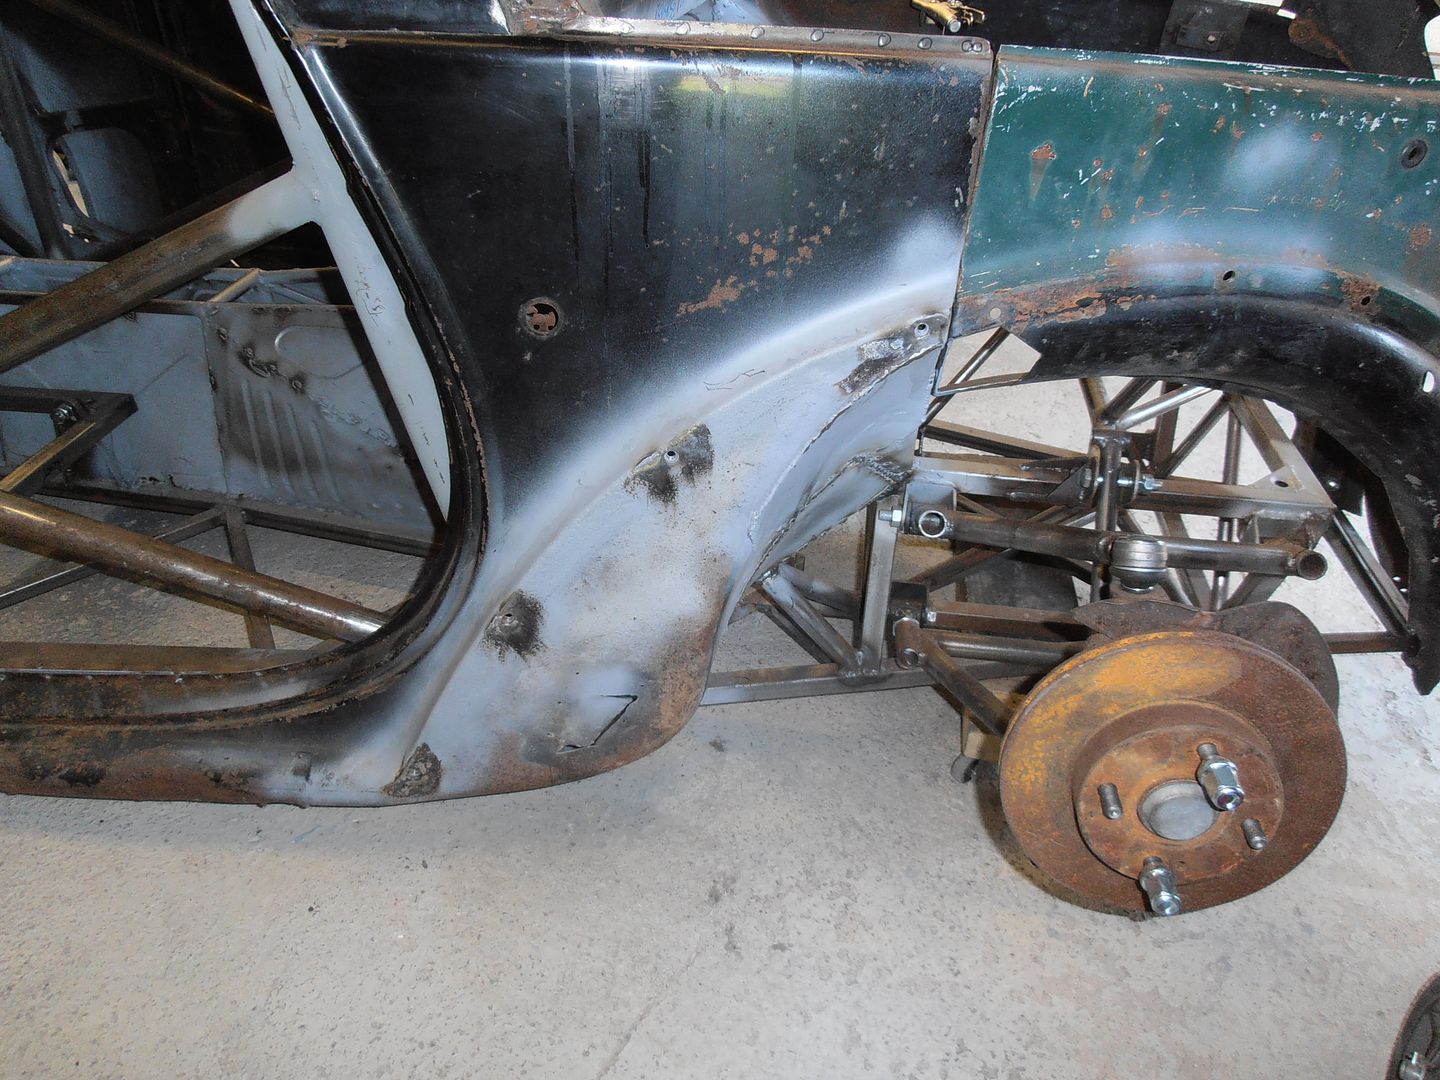 with these done i could then fit the closer plate to the inner wing 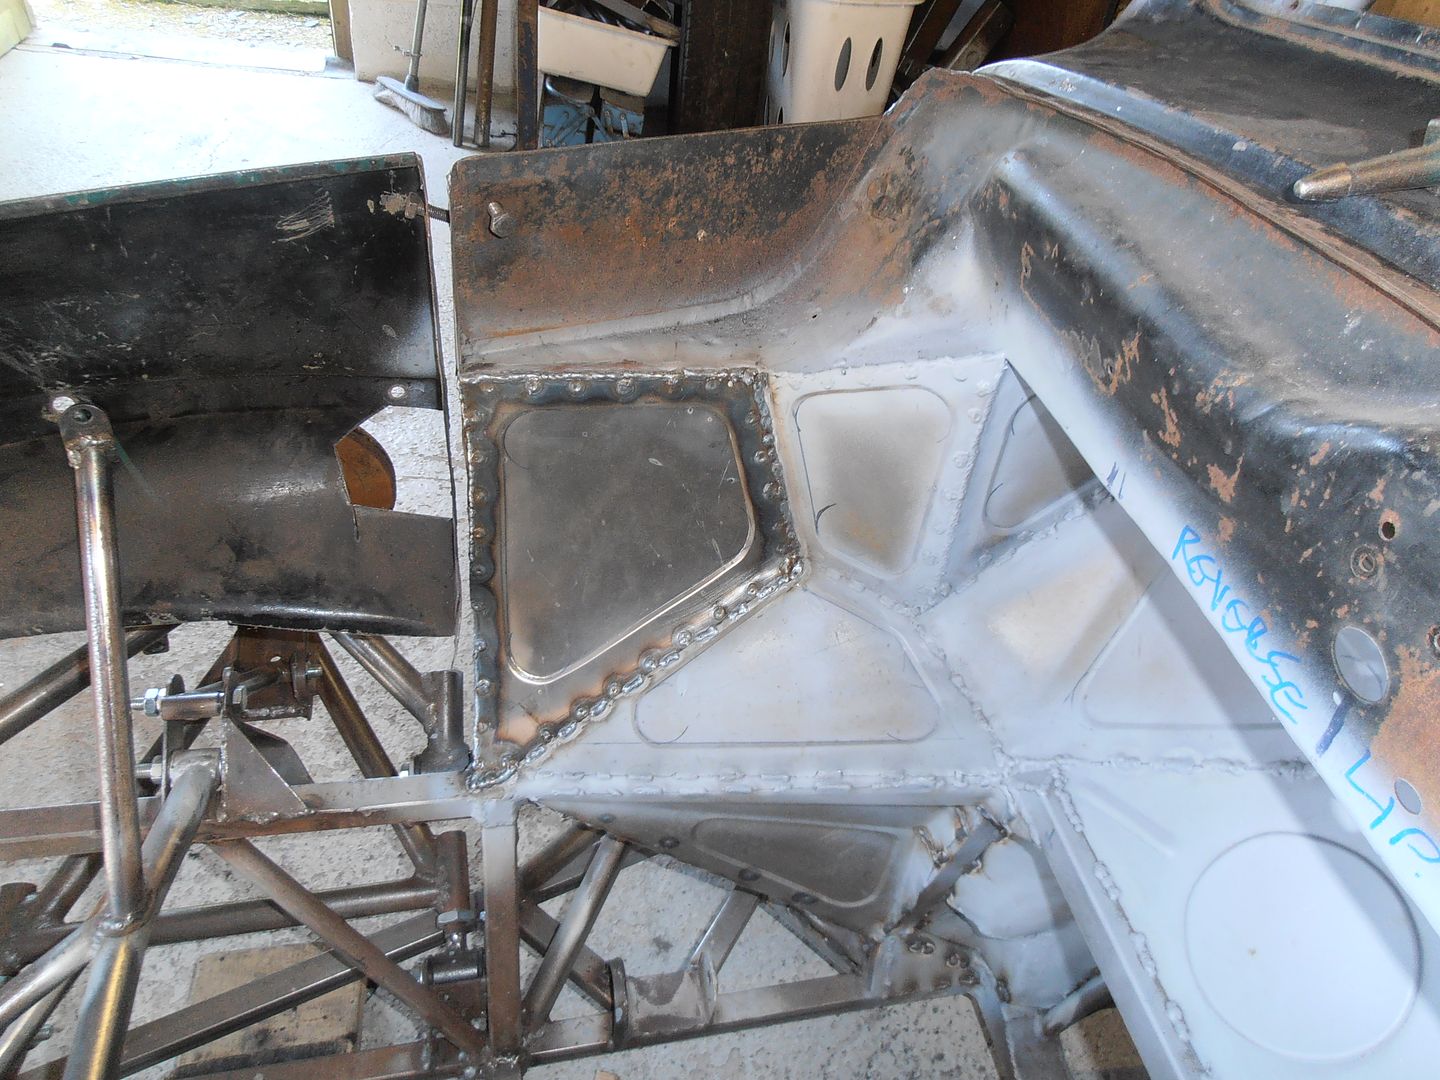 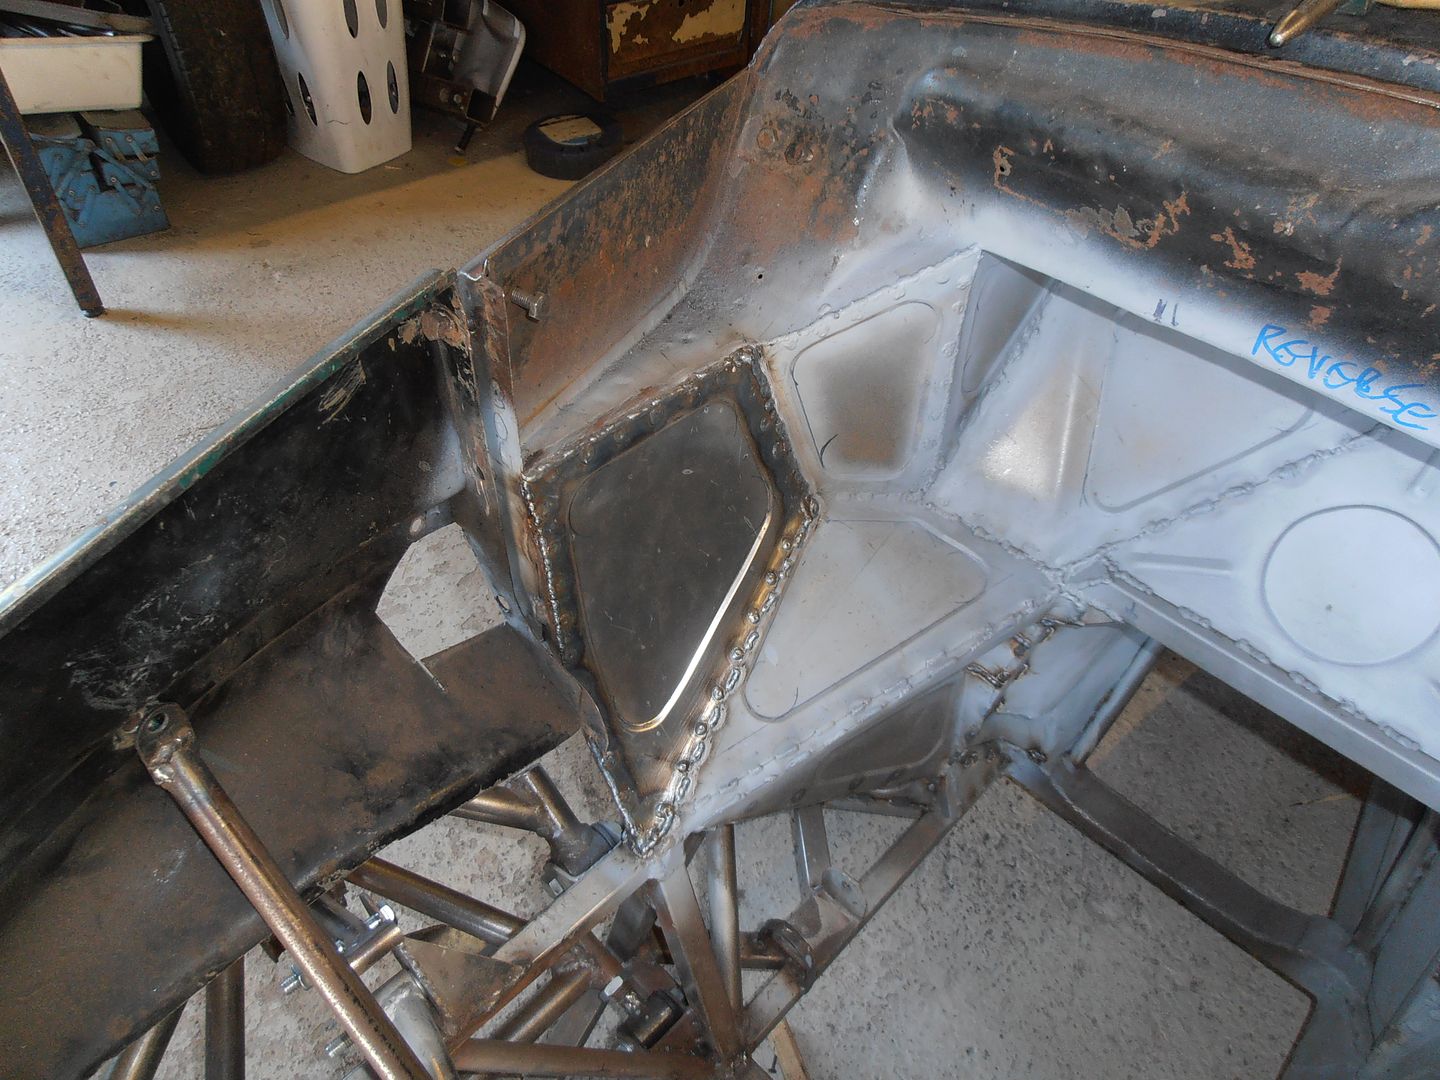 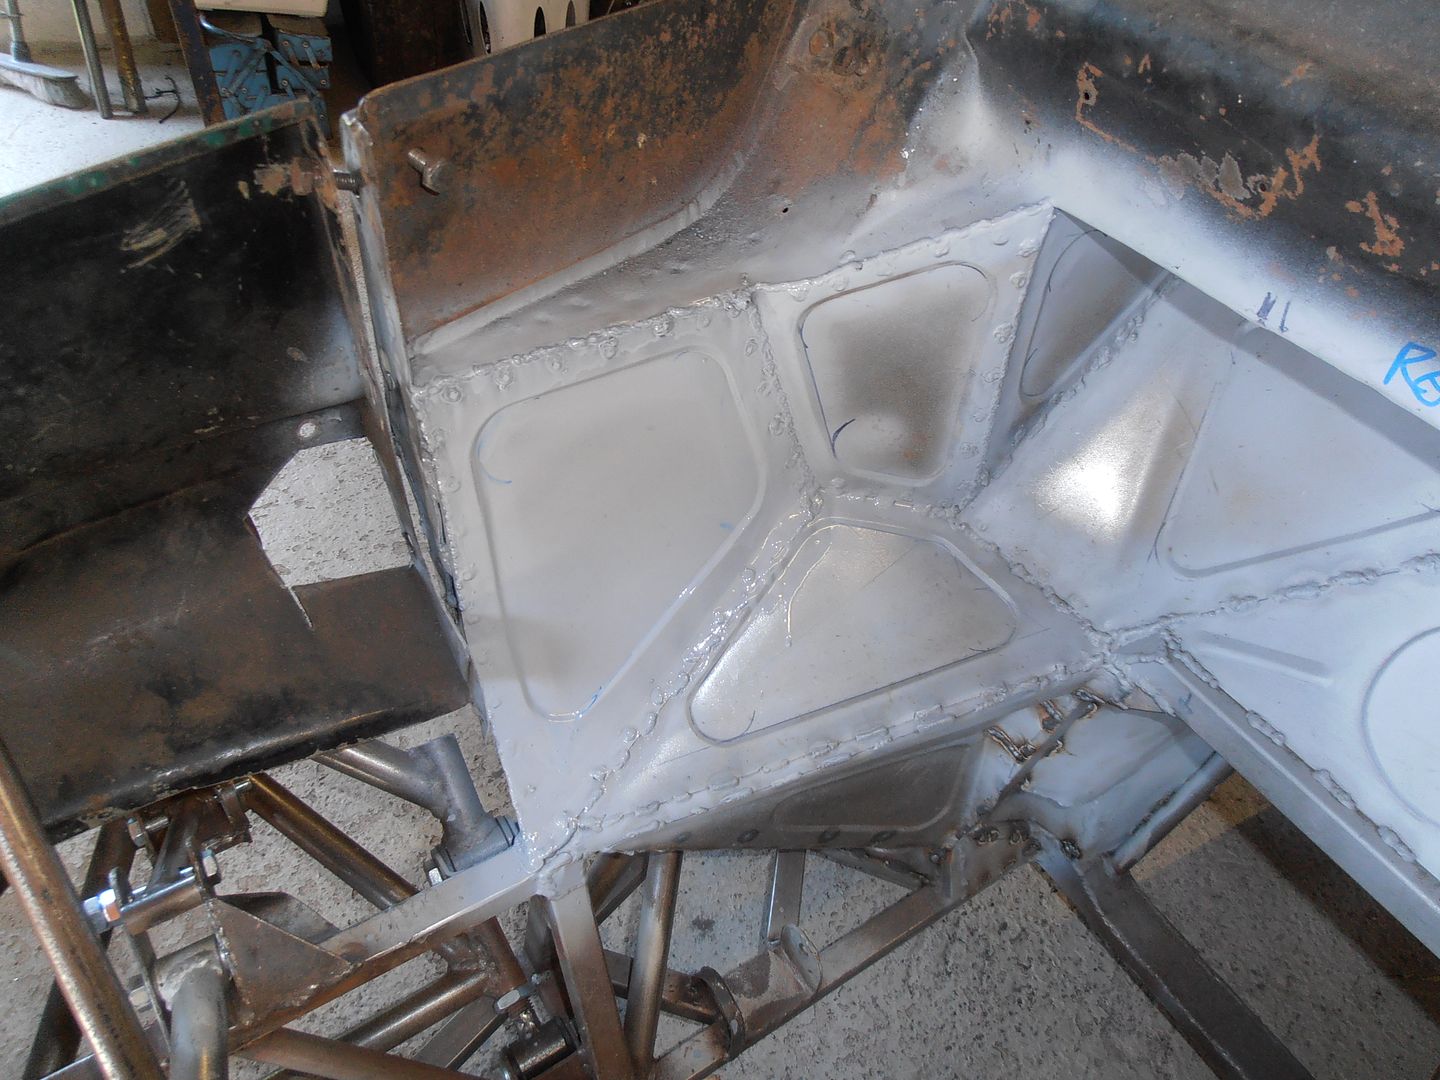 once its all ground back and filled it should look not bad i think. Otherside to do next. |
| |
|
|
vulgalour
Club Retro Rides Member
Posts: 7,271
Club RR Member Number: 146
|
|
Jul 26, 2015 17:46:02 GMT
|
|
Nobody but the people reading this thread and you will ever know the nice solution to those captive nuts. Seems like this has gone from a selection of tubes to an almost complete car in no time.
|
| |
|
|
|
|
|
Jul 26, 2015 17:48:49 GMT
|
|
Loving this. Keep the updates coming. Nice choice of wheels BTW
|
| |
|
|
|
|


