thehawk
Part of things
  I Love It When They Call Me Big Poppa...
Posts: 61
|
|
|
|
When I turned 17 and I just started learning to drive my grandad called me saying he had found the perfect first car it just need a little TLC. So the next day we went and had a look at the Peugeot at first glance it seemed to be in good nick and was told the only major rust was on the front wings and was a bit of corrosion on the front panel and tailgate so we picked it up for the princely sum of 250.00 pounds! (excuse the bad phone photography) 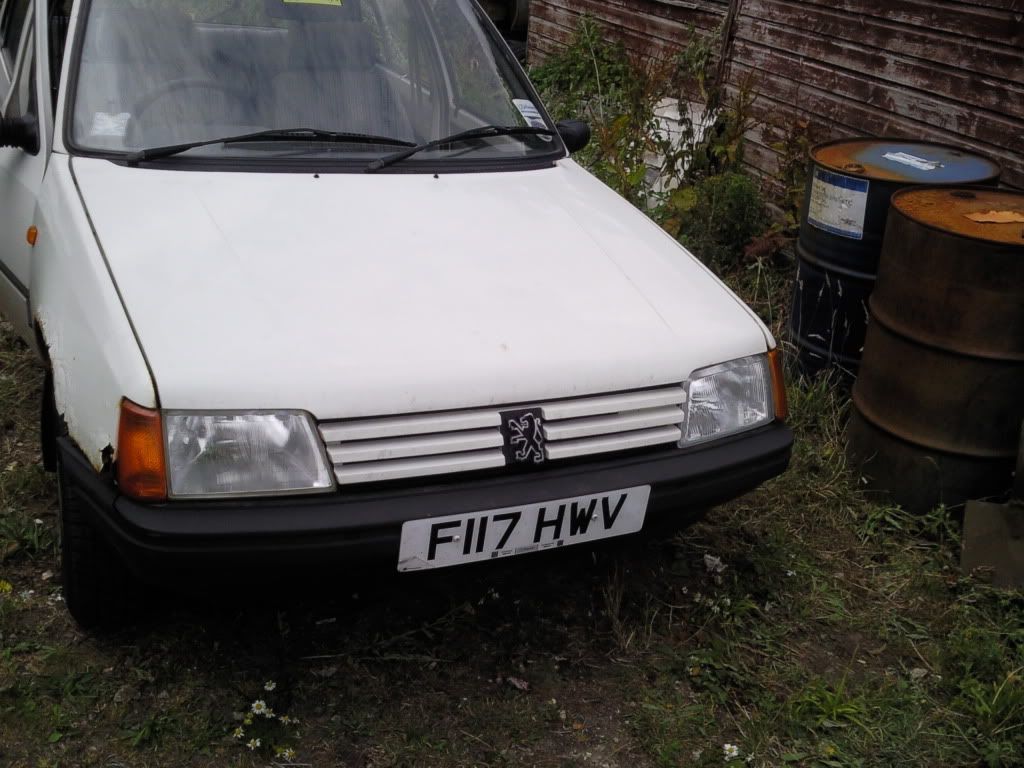 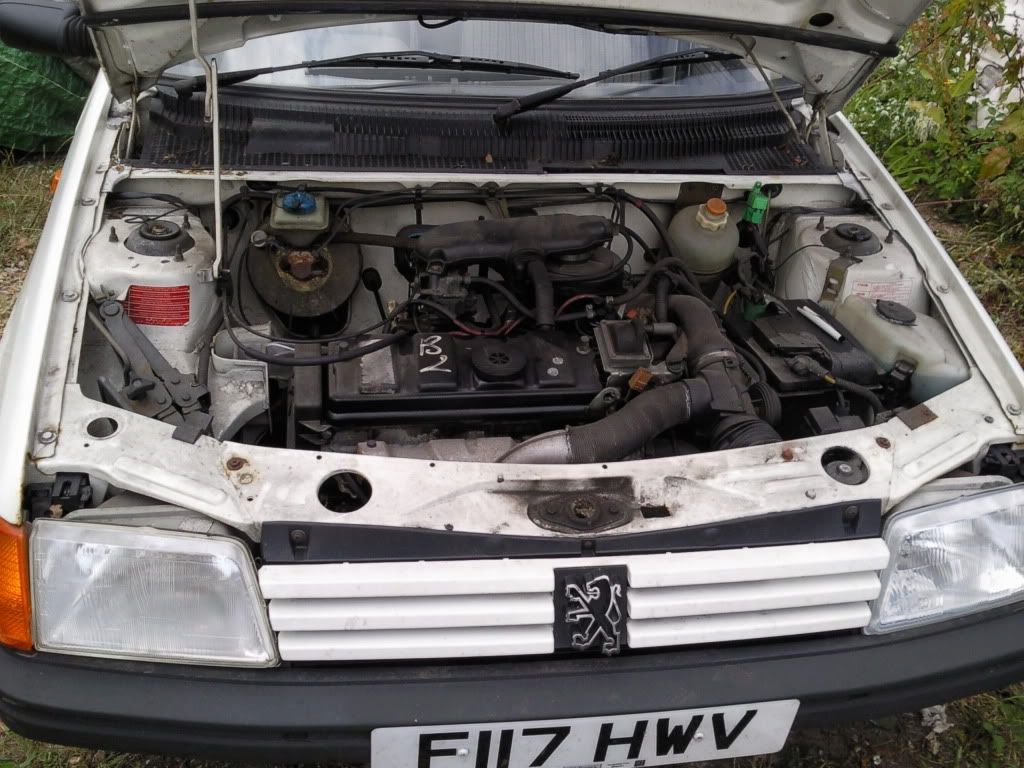 So as the car stood it had 60000 on the clock was tidy runner but it had failed its MOT because of the sharp edges on the rusted wings so set about taking off the wings. Just a week after purchasing the car my grandad was taken ill and I could only have access to where the car was stored when he was there due to many factors the major one being its location. 9 months and a full English winter had gone until my grandad was fighting fit and ready to work again and our worse fears had been confirmed... The minor corrosion on the tailgate had turned into full on rust 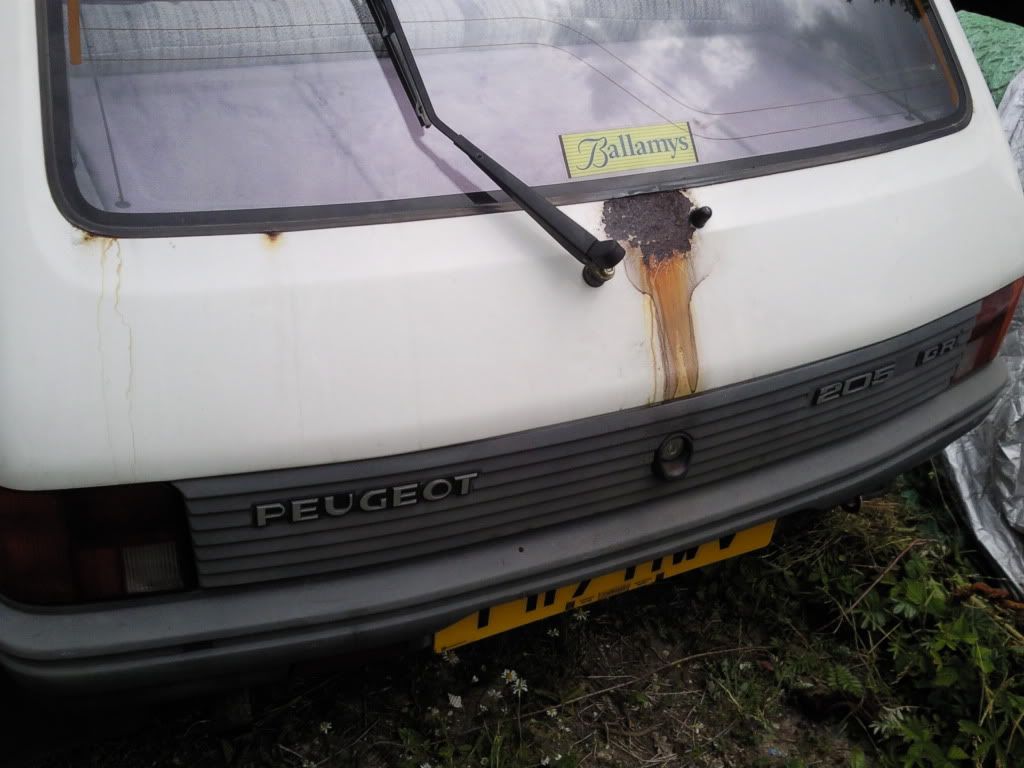 And the front panel...Well the less said about that the better  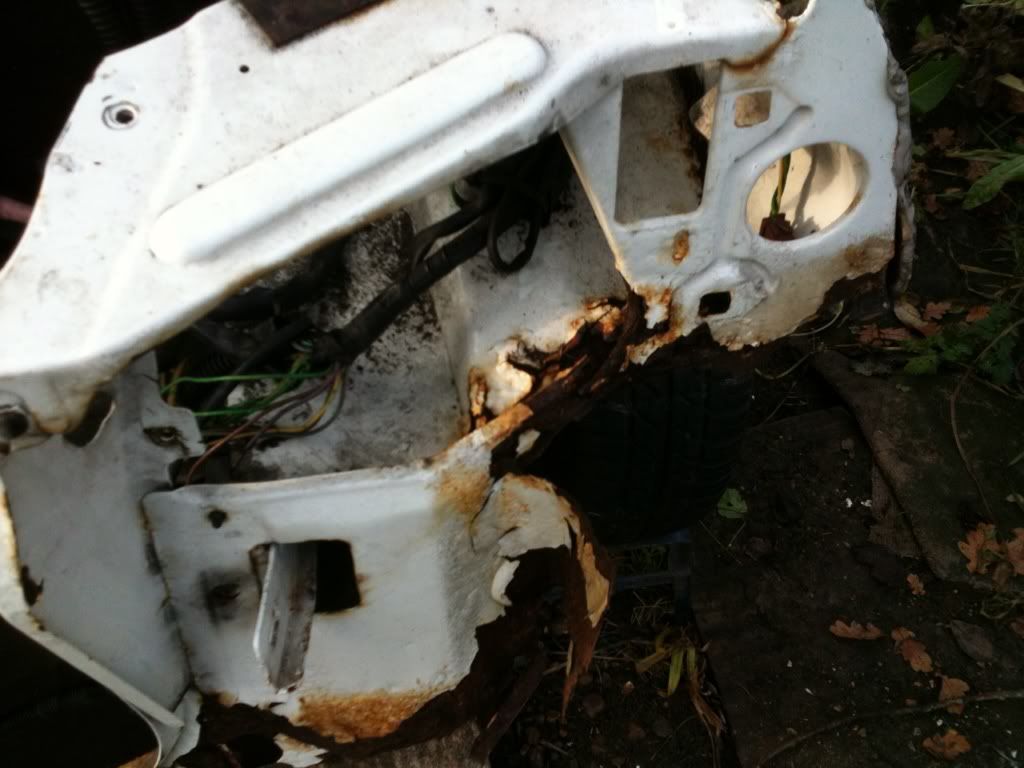 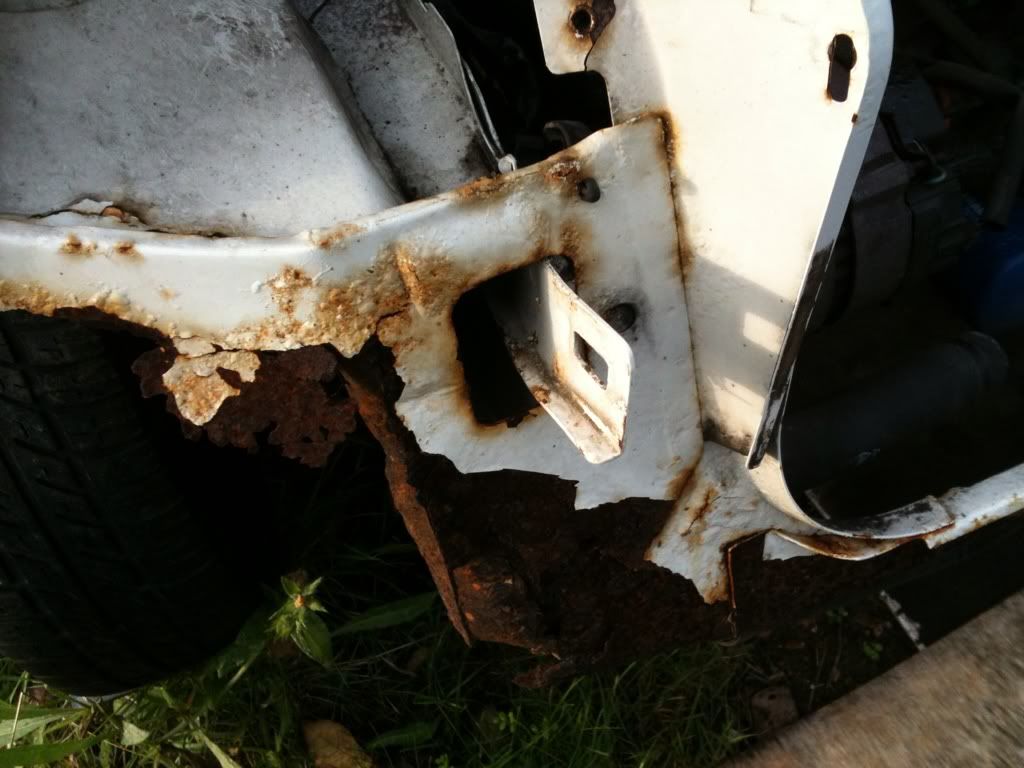 So after the inspection of all the bad points we called it a day and did what anyone in our situation would do and discussed our options over a pint ;D We decided we had two options either scrap the car and try to get our 250 pounds back or do the project and end up with a tidy car at the end of it. As you can probably guess by now we did the later  A week later a friend of mine text me saying a good mate of his crashed his 205 GTI and smashed the entire front end of the car and has a tail gate with glass and wiper motor for sale so with a bit of haggling I got a tail gate and GTI front valance which was a great bargain but there was just one problem... 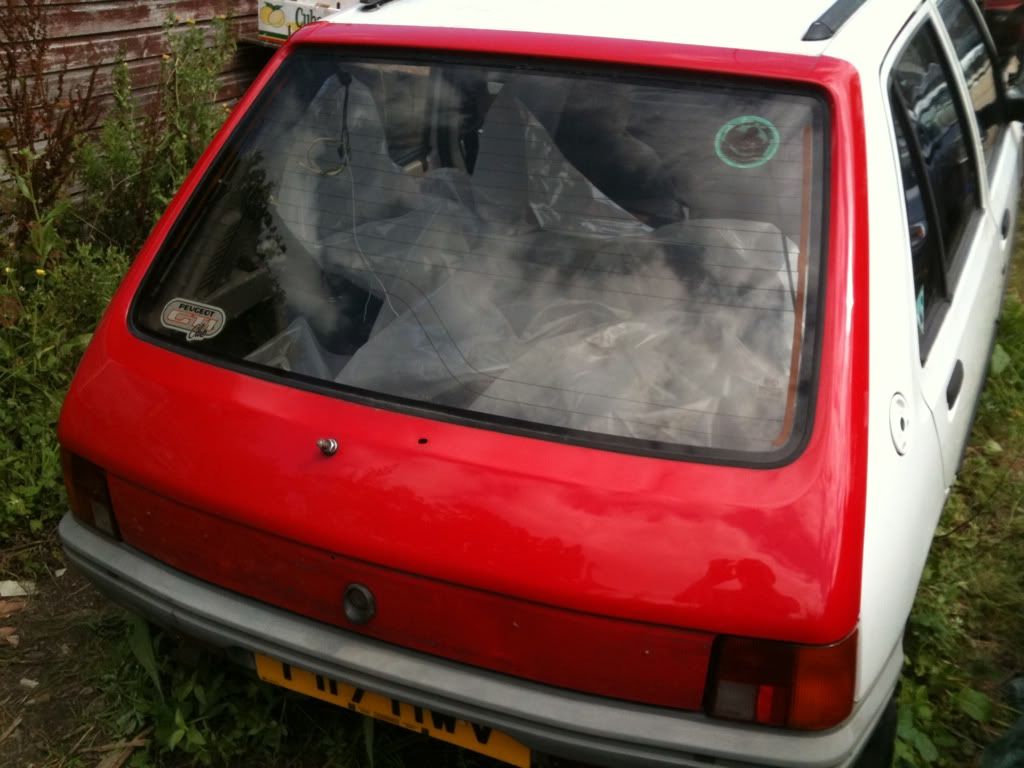 Next I spent about 3-4 weeks trying to source a replacement front panel but once I managed to get that it was full steam ahead removing the rotten old one. Which meant only one thing...POWER TOOLS ;D ;D 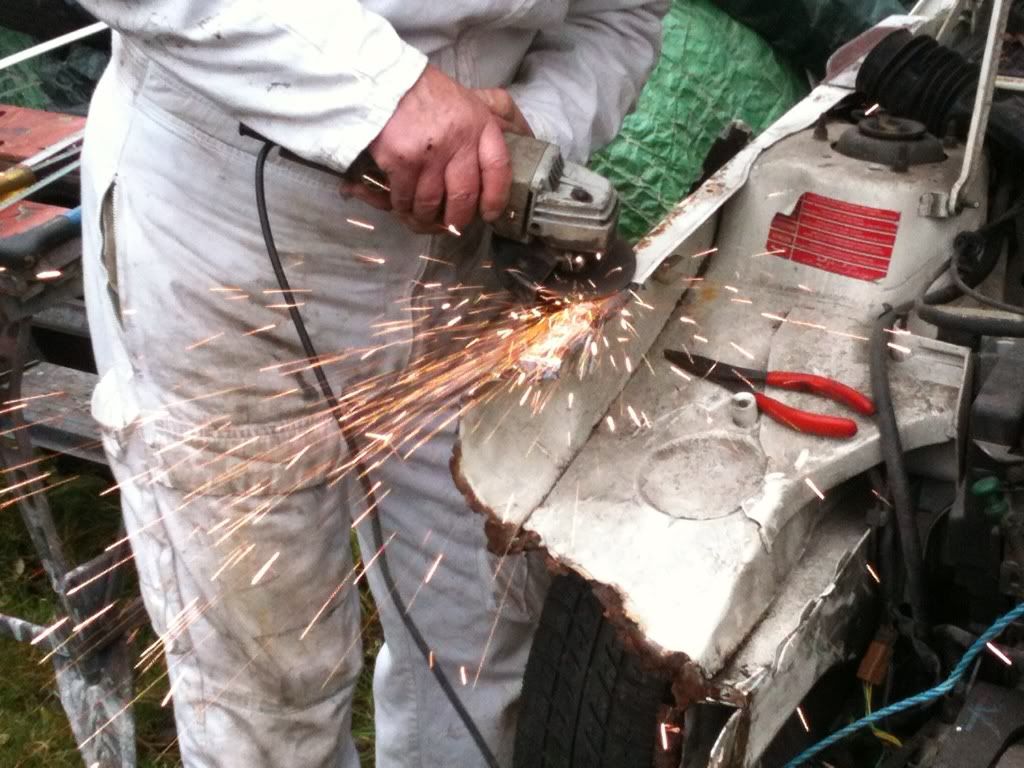 After the cutting was done we offered up the new front panel to see how well it fitted as we had our doubts as it was a pattern part. 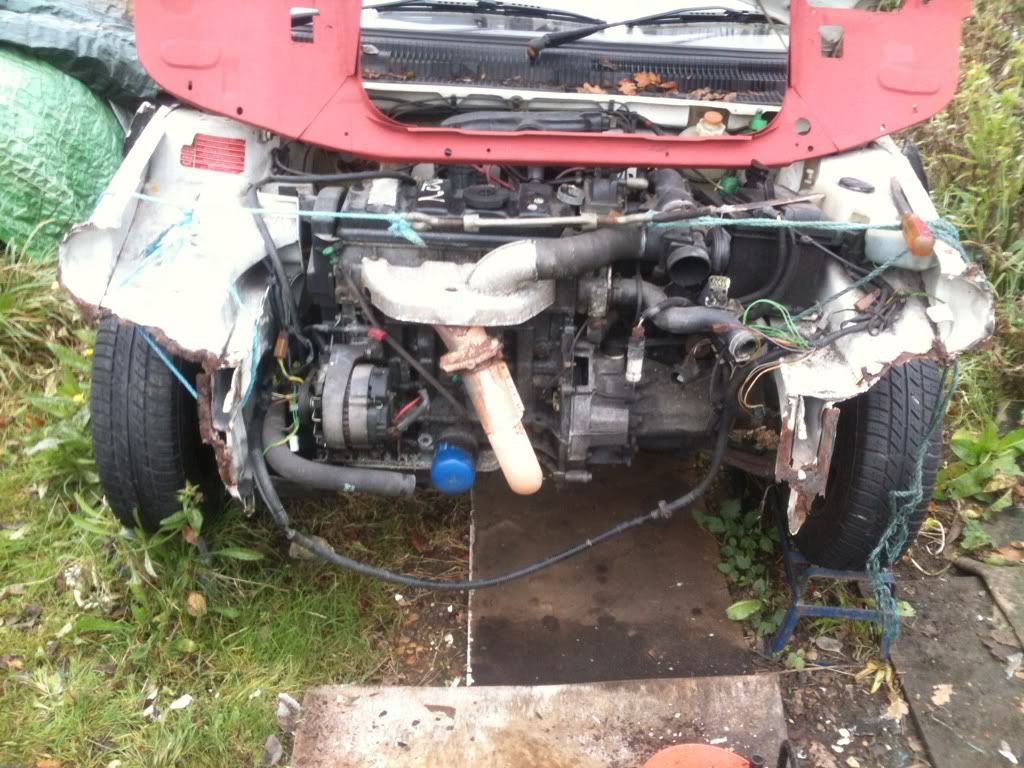 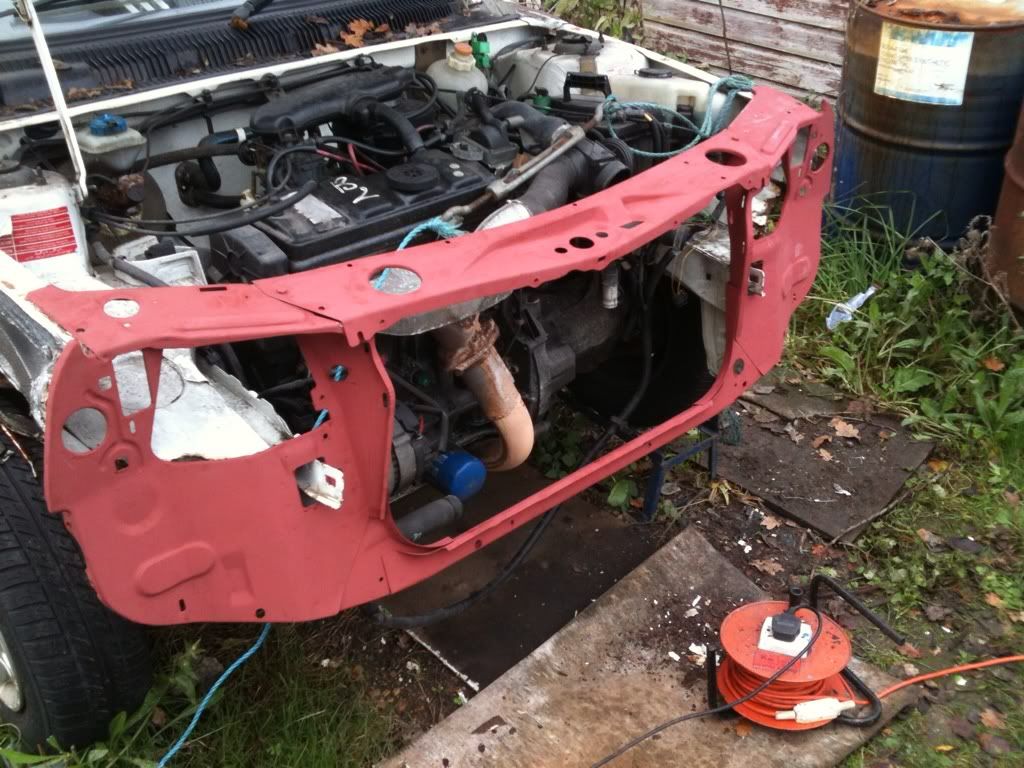 We had to make a few minor adjustments such make a bit of metal to bridge the gap between the car and the new panel. We managed to get the panel riveted in place but then got rained off which is a shame as it was going to be the last session for a few weeks due to work and family commitments. The next session was an eventful one we managed to get the front panel welded in place. The next day I coated the front panel in white Hammerite as it was going to be seen so a paint match wasn't essential. After the Hammerite had dried I had a few hours to spare so I managed to get the new wings fitted and panel gaps looking good  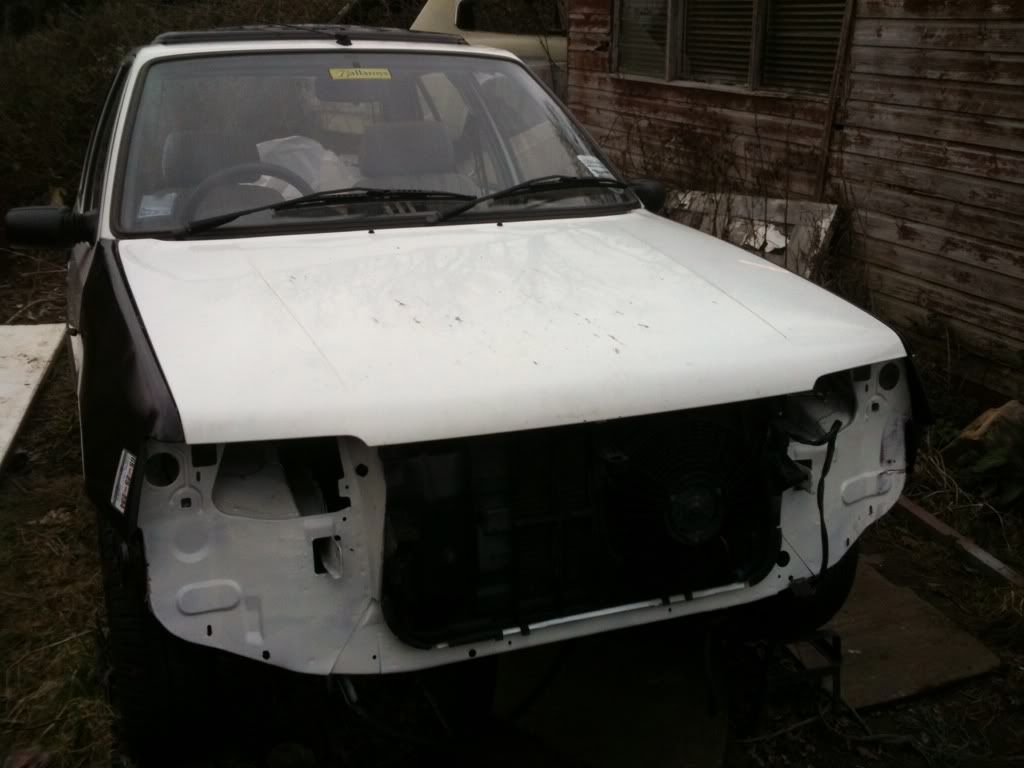 The next stage was to get the car ready for spray unfortunately I didn't manage to get many pictures of it because we had a very tight window to get in prepped, sprayed and out. But here's a one I got on my phone. (excuse the instagram filter) 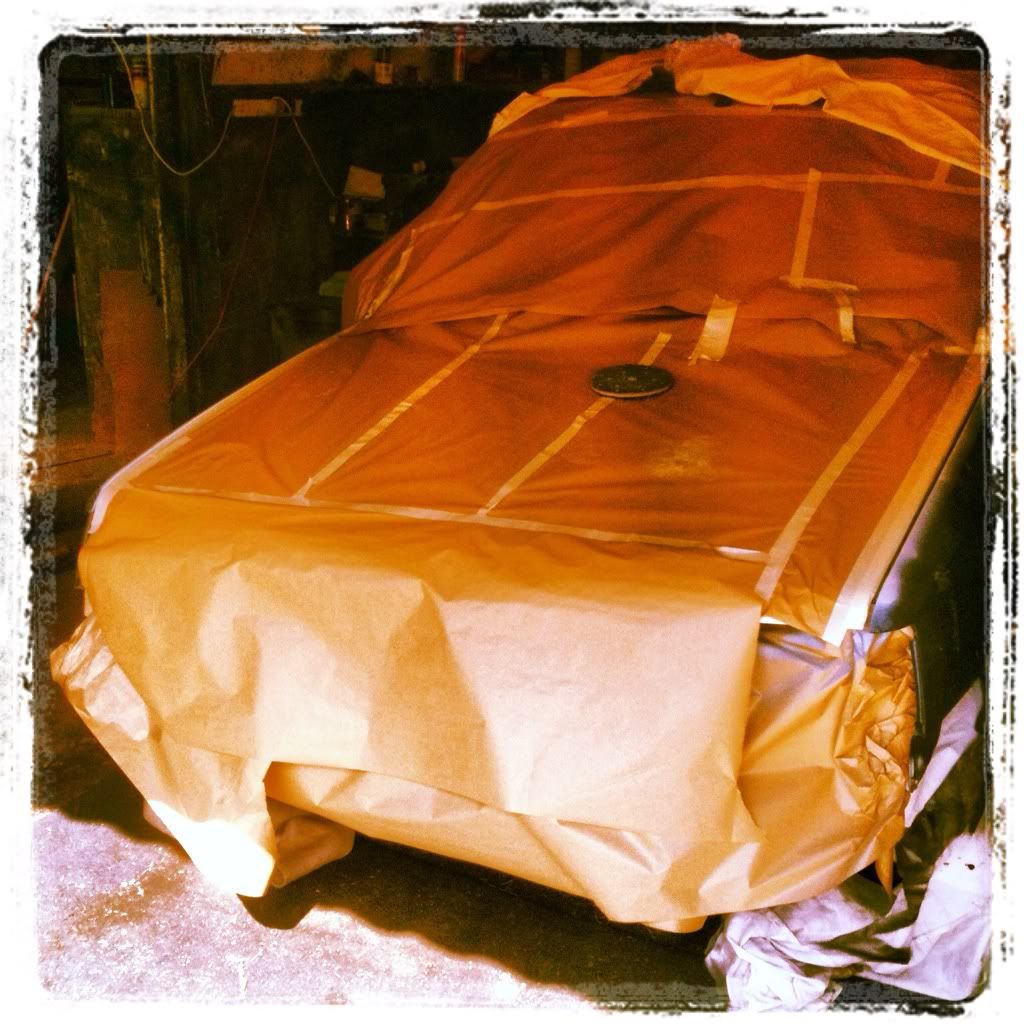 A few days after spray I managed to get a few hours in before work which meant I could get the lights and grille fitted up. 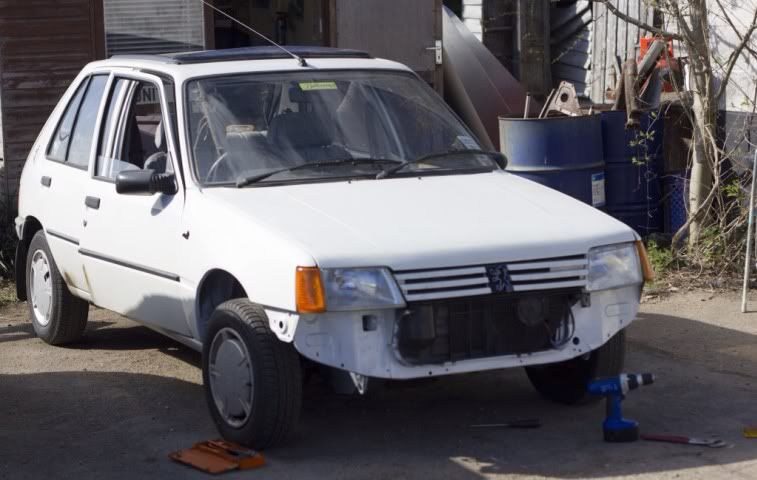 But as I went to put the front bumper and GTI front valance I hit a few snags one small snag I found was the bumper had a slight crack in so I had to do a quick bit of fiberglass work. 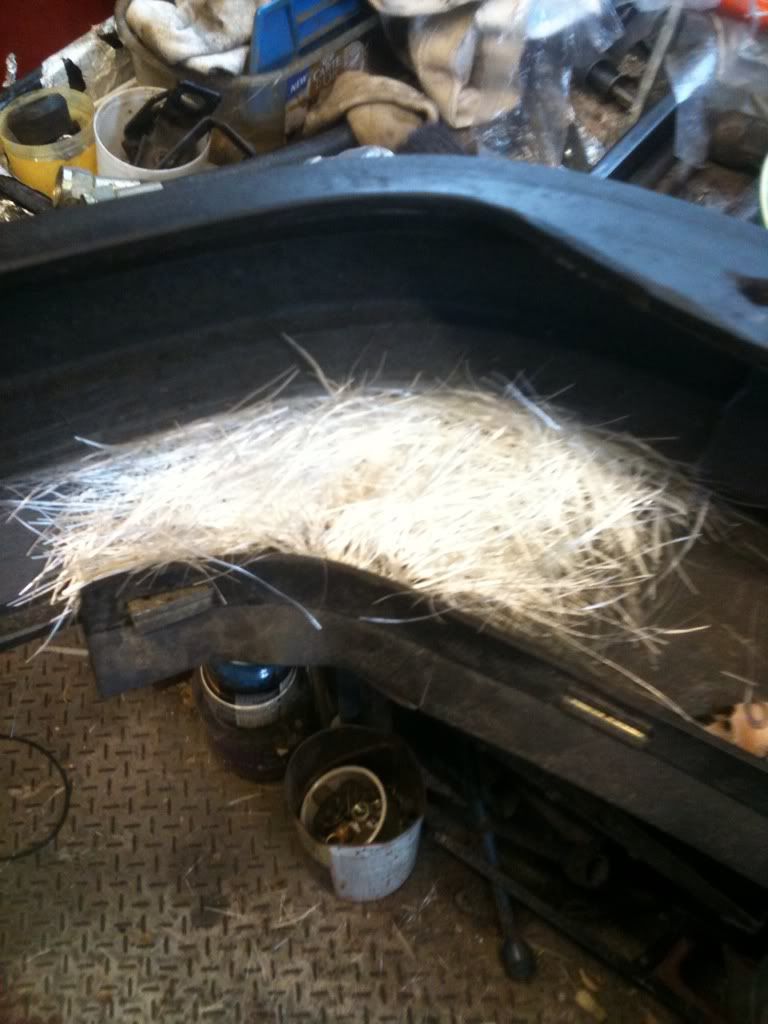 But the major issue being the supports tubes that attach from the car to the valance rotted away  so thinking on our feet we cut two legs of an old stool hammered the end down and drilled a hole through it and as you can see from the ropey phone photo bellow it worked well. 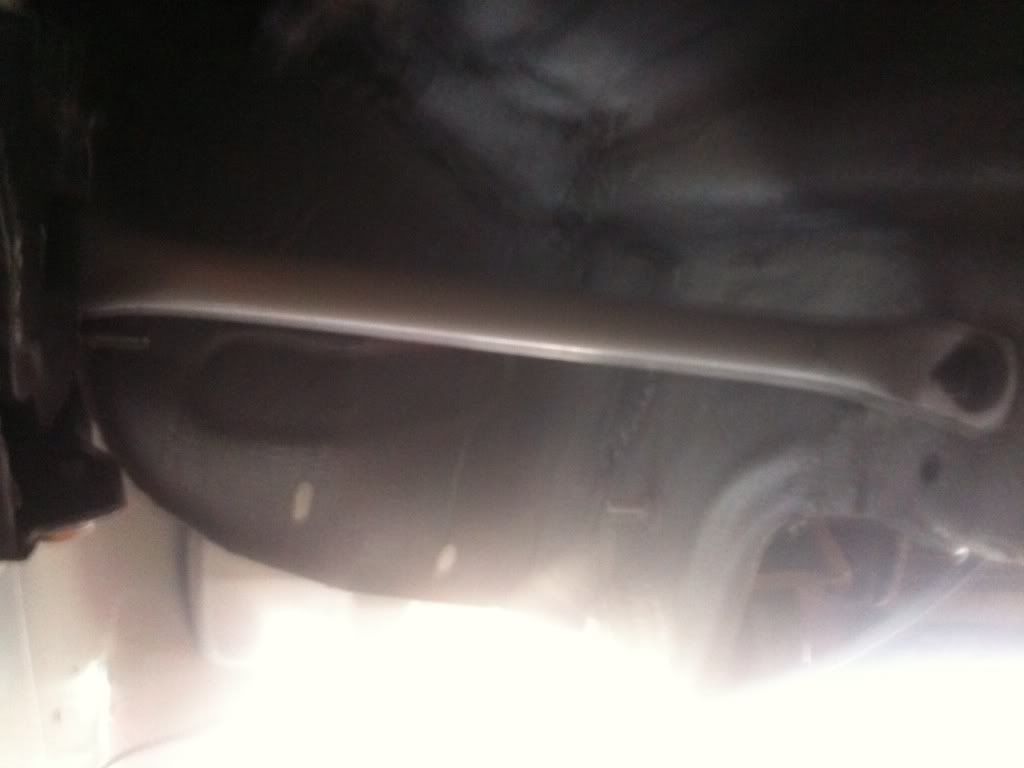 So once the GTI valance and Front bumper were fitted the car was pretty much complete so I wont beat about the bush hear it is! (oh and when I'm next on the car I will get some shots of the rear including the sprayed tailgate) 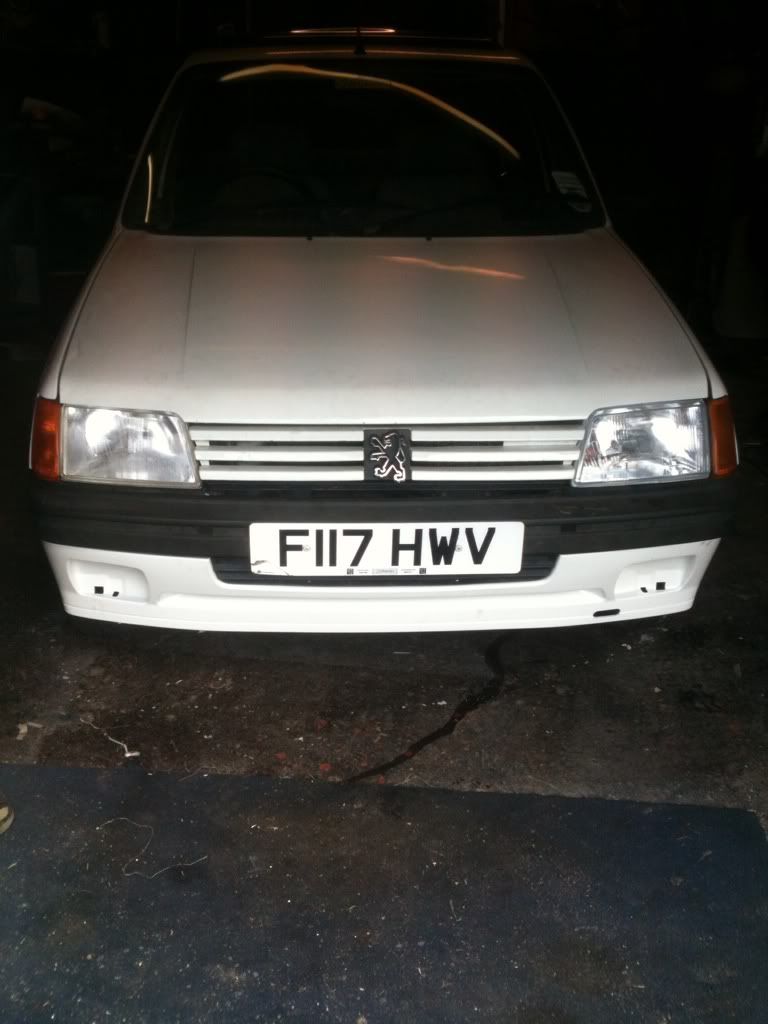 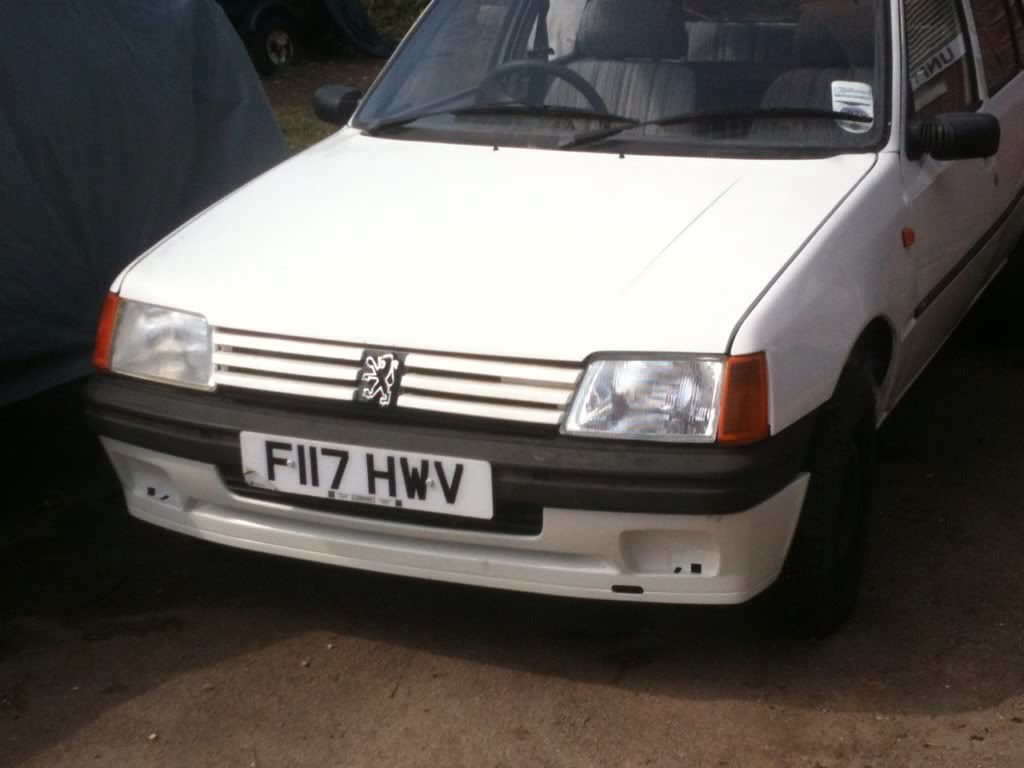 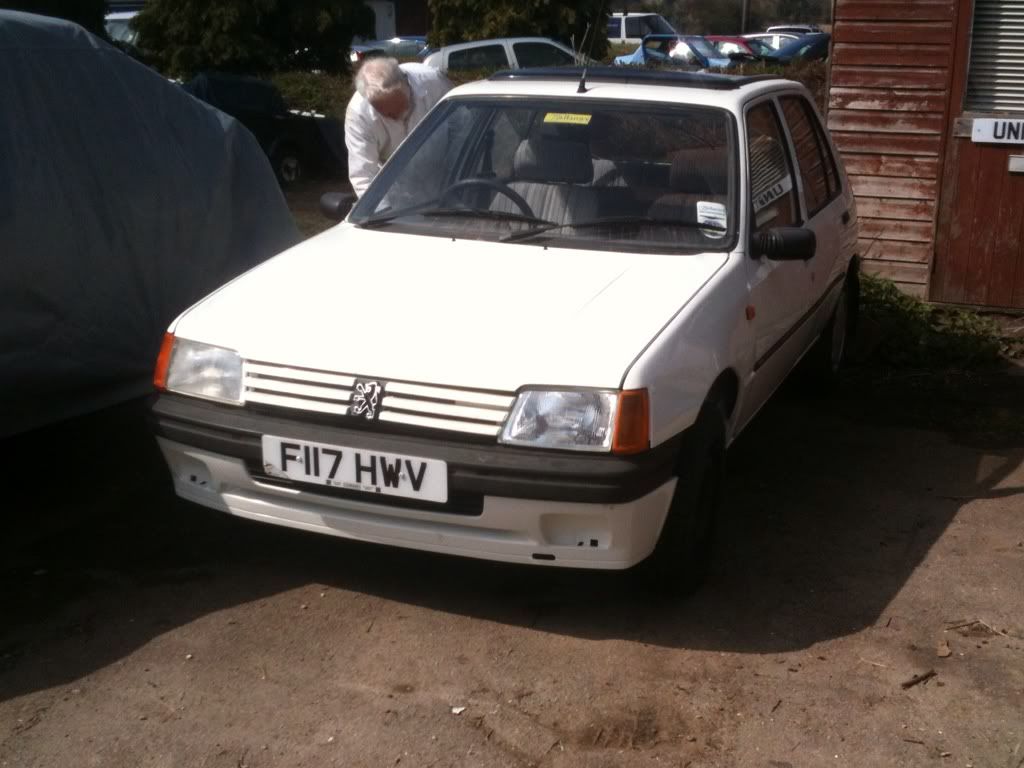 This brings us up to the past week which was spent giving the car a service you change of oil, filters and spark plugs. The car was then sent on down to the garage on the same small industrial estate for an MOT which it failed  But it was only on 3 small things which are as follows: - There is an imbalance in the breaks due some corrosion on the disks where the car has been standing outside 90% of the time
- The Headlights are aimed to high
- The Indicator has stopped working
These jobs will be done promptly ready for a retest at the beginning of next week! I hope you enjoyed reading this write up on a project that's last about a year and a half and is still ongoing, and I will get some pictures with my DSLR when the cars on the road! Enjoy Dale |
| |
Last Edit: Jul 27, 2012 0:54:29 GMT by thehawk
|
|
|
|
recarouk
Yorkshire and The Humber
Posts: 435 
|
|
|
|
|
bloody good on you for tackling such a big job, and the end result is a credit to you and your grandfather. awesome work.
|
| |
|
|
thehawk
Part of things
  I Love It When They Call Me Big Poppa...
Posts: 61
|
|
|
|
|
Thanks means alot it took a lot of hard graft but i got there in the end! was up on it today and i sorted out the MOT failures so hopefully it all goes to plan!
|
| |
|
|
ChasR
RR Helper
motivation
Posts: 10,307
Club RR Member Number: 170
|
1988 Peugeot 205 GR ChasR
@chasr
Club Retro Rides Member 170
|
|
|
Quite a bit of hard graft going on there  . Certainly an improvment and it is always great to rescue a classic from the scrapheap. |
| |
|
|
Kieran
East of England
Posts: 148
|
|
|
|
Nice work, glad to hear you didn't fail the MOT on anything major.  |
| |
|
|
thehawk
Part of things
  I Love It When They Call Me Big Poppa...
Posts: 61
|
|
|
|
Quite a bit of hard graft going on there :)Certainly an improvment and it is always great to rescue a classic from the scrapheap.. Thanks it was a lot of hard work but I think I will appreciate in the long run! There's still a few jobs I need to do and there's some stuff I would like to do to it! the only real let down on it now is that it has some corrosion on the drivers side doors but I will treat those ASAP! Nice work, glad to hear you didn't fail the MOT on anything major  Yeah there was a sigh of relife from everyone when it was just those small things! I sorted them all out today! The one that took the most time was the indicator as the earth wire had come off and it took a bit of time to diagnose it  |
| |
Last Edit: May 2, 2012 21:47:51 GMT by thehawk
|
|
|
|
|
|
|
|
Lovely car! looks like a very good job you did there on the welding/fabrication/painting front too.
I can do mechanicals/oily bits all day long but anything but basic bodywork has me scratching my head somewhat.
These really are great little motors, I'm same age as you Dale and run one as my daily hack. What spec is yours? Mines a 1991H XL model, with the 1.1 carb'd TU motor. Doesnt go anywhere fast and the gearbox is like stirring lumpy custard, but hey I've topped her out at 90 and she'll do 45 to the gallon on a good run.
Its got GTi wheels, seats, red carpet and wheels which give it a little more presence, too.
The sheer amount of stuff you can cram into the back of one of these with the seats folded down is quite surprising, too.
But yeah good luck cracking on with the retest, the way I look at a first MOT on a car is thus:
Nothing wrong with it failing, as long as it doesnt fail on anything I've tried to fix.
Looking forward to more updates 8)
Dave
|
| |
1986 BMW 628csi, 2003 Alfa Romeo 147, 1992 Jaaaaag XJ40, 1982 BMW R100 cafe racer.
|
|
|
|
|
|
|
|
PS, I've got a few 205 odds and sods in the workshop if they're of any interest to you. Full set of phase 2 lights (tail clusters, front indy's, pair of headlamps), three good 14" tyres, and some assorted dashboard instruments spring to mind, I'll let you know what else there is once I've sorted the place out and found everything.
|
| |
1986 BMW 628csi, 2003 Alfa Romeo 147, 1992 Jaaaaag XJ40, 1982 BMW R100 cafe racer.
|
|
thehawk
Part of things
  I Love It When They Call Me Big Poppa...
Posts: 61
|
|
|
|
Hi there Dave thanks for the long response! I didn't do the welding on the car but all the fabrication making of all the metal holding the panel in place was done by me and i also riveted and fixed the panel in place ready for my grandad to MIG it up. All the spray work was done by a chap who my grandad works for part time restoring classics cars so i managed to get a good deal on that. The motor on mine is 1360 TU Carb'd Lump. Which I've heard reading up on them is quite nippy! ;D I'm debating whether to put a carb of the 205 XS on once i put got it looking its best as i heard that was a better carb set up all round! And that's a good theory about MOT's the one thing that went wrong that i did was put the lights back in  but there sorted now! And yeah shoot me a PM or something with regards to the parts you have as there might be a few bits i need Thanks for the response again Dale |
| |
|
|
|
|
|
|
|
No worries Dale, good to see another one in safe hands. I'm liking the hearing-aid-beige hue too, then again I am a bit of a headcase..... A 1360 you say, one up from mine then  Yeah from what I've heard the 1.4 TU is one of the best-all-round motors, decent enough in standard form and simply a good deal better than the 1.1 I put a question on 205GTidrivers (The best 205 forum I've found, caters for all models despite the name. I go by the same moniker on there although I don't post much, more of a lurker) about how to squeeze more power from my motor and word on the street is theres basically no point, just drop a 1.4 in and then take it from there. 205 XS (they had 1.4 XU motors, right?) carbs are apparently a good shout too, but I'd have to do a bit more research. I have a basic grasp of peugeot motors but a bit more in-depth knowledge about beemer motors lol And yes, once I've gone at the workshop with a binbag and a shovel I'll drop you a line about the parts I've got. Theres also 3 205's in my local wreckers at the mo if you were after anything particular, I'm going over to get some bits for my nans rover at the weekend so could have a dig if you like  Anyway take it easy Dave |
| |
1986 BMW 628csi, 2003 Alfa Romeo 147, 1992 Jaaaaag XJ40, 1982 BMW R100 cafe racer.
|
|
|
|
thehawk
Part of things
  I Love It When They Call Me Big Poppa...
Posts: 61
|
|
|
|
No the XU engines were gti's and all non gti's were given the TU engine! I posted a similar question to you on there about getting some ore power out of my car but obviously got a few more options I have the 1.4 already! here's the link it might help! forum.205gtidrivers.com/index.php?showtopic=131923&hl=&fromsearch=1 With regard to parts there's nothing in particular I need but still let me know about your bits as some bits may come in handy! I took some pictures of the back of the car earlier today ill look to get them up tomorrow! Dale |
| |
Last Edit: May 4, 2012 0:15:49 GMT by thehawk
|
|
Wizzpop
Part of things
  "Go boil an egg!"
Posts: 110
|
|
|
|
|
Wow, that looks great. Has proper retro presence/style. Cant wait to get my GTI on the road...this post isnt helping!! lol.
You will find the TU was in the Citroen AX GT's too - that was my first car and put big carbs on that. Before the big carbs on engine #2, i changed the orig TU engine to a TU from a Citroen BX!!! So if you need oily bits - look at AX and BX's too!!
|
| |
Current rides:
Peugeot 205 1.9 GTi
Previous chariots:
'88 Merc E230
'91 MR2 GTi16 T-Bar
'87 Ford Escort RS Turbo S2
'88 E30 BMW 318
'88 Citroen AX GT
|
|
thehawk
Part of things
  I Love It When They Call Me Big Poppa...
Posts: 61
|
|
|
|
Wow, that looks great. Has proper retro presence/style. Cant wait to get my GTI on the road...this post isnt helping!! lol. You will find the TU was in the Citroen AX GT's too - that was my first car and put big carbs on that. Before the big carbs on engine #2, I changed the orig TU engine to a TU from a Citroen BX!!! So if you need oily bits - look at AX and BX's too!! Thanks for that the main reason i went through with the project is that i thought how awesome it would be to have something retro as my first car! And i did know about the AX GT having the same engine! Out of curiosity what carbs did you have on you AX? As an all round update the car got through the MOT today so now i gotta fork out a large some of money for insurance and tax   ;D Dale |
| |
|
|
thehawk
Part of things
  I Love It When They Call Me Big Poppa...
Posts: 61
|
|
May 24, 2012 21:45:58 GMT
|
As a quick update me and my friend embarked on a 2 and a half hour road trip to the car show japfest at castle combe! It made it there fine but as we were sat in the queue to get in the car started to smoke quite badly. The smoke was blue which made me instantly think oil. So I waited for the engine to cool and checked the levels and it was all fine and it hasn't smoked like that since  so any suggestions on this would be appreciated. I have been driving the car daily with no real issues and I'm just waiting till pay day so I can afford to lower it ;D today was one of the first real scorchers of the year so I ceased the opportunity to take a few snaps enjoy! 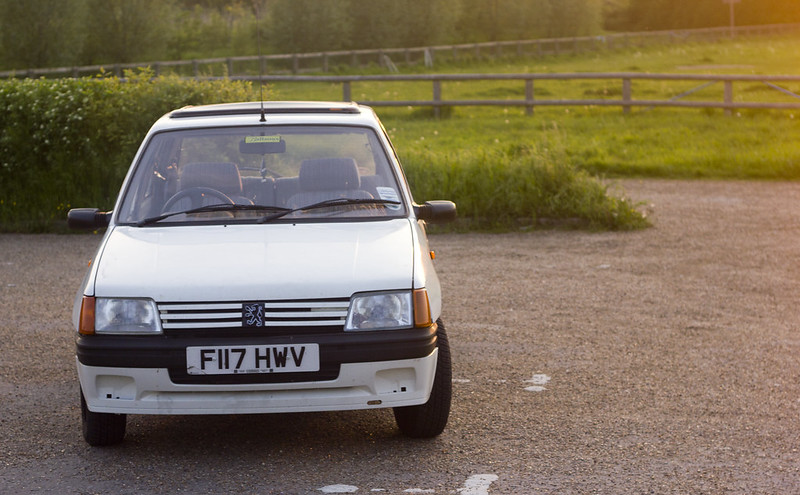 IMG_3634 IMG_3634 by Dale Sparrowhawk, on Flickr 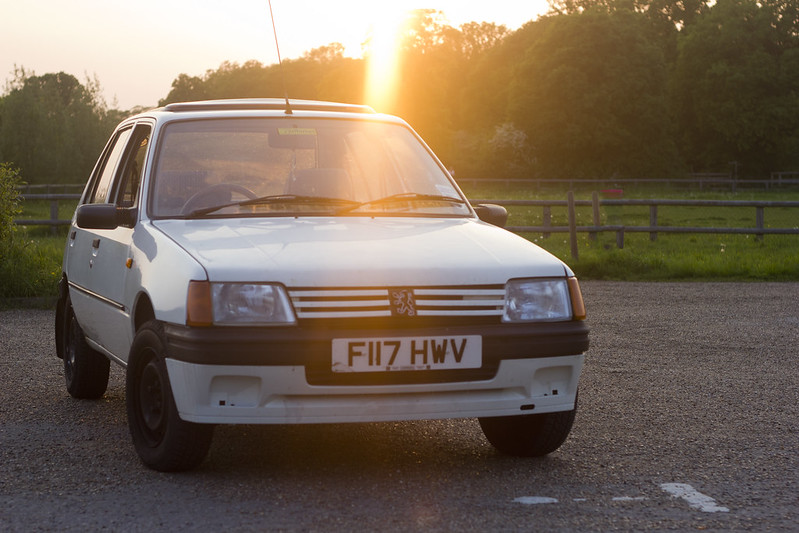 IMG_3651 IMG_3651 by Dale Sparrowhawk, on Flickr |
| |
Last Edit: Jul 27, 2012 0:57:03 GMT by thehawk
|
|
|
|
|
May 25, 2012 15:29:25 GMT
|
|
was the fan kickin in?
|
| |
2001 HONDA CT110 (NOT RCV)
|
|
craig1010cc
Club Retro Rides Member
Posts: 2,998
Club RR Member Number: 35
|
1988 Peugeot 205 GR craig1010cc
@craig1010cc
Club Retro Rides Member 35
|
May 25, 2012 16:16:21 GMT
|
|
My guess would be valve stem seals are worn if it was coming out the back, my corrado used to smoke well when stuck in traffic on a hot day, but hardly used any oil or smoked the rest of the time
|
| |
|
|
|
|
|
May 25, 2012 16:48:12 GMT
|
Well done mate! Respect is overdue to both you and your grandad! Roll on pay day! I wann la see this little beauty sat on its a$$!  Keep us well posted mate |
| |
|
|
thehawk
Part of things
  I Love It When They Call Me Big Poppa...
Posts: 61
|
|
May 26, 2012 19:59:32 GMT
|
Yeah the fan kicks in no problem and the coolant and oil levels are all good My guess would be valve stem seals are worn if it was coming out the back, my corrado used to smoke well when stuck in traffic on a hot day, but hardly used any oil or smoked the rest of the time Yeah this suggestion was made by a couple of other people but like i said its been fine since with all the a to b driving etc Well done mate! Respect is overdue to both you and your grandad! Roll on pay day! I wann la see this little beauty sat on its a$$!  Keep us well posted mate Thanks mate! Ill keep this threads well updated! I'm still trying to decide what wheels to put on i was considering banded steels? Thanks for all the feedback Dale |
| |
|
|
thehawk
Part of things
  I Love It When They Call Me Big Poppa...
Posts: 61
|
|
|
|
A few updates on the 205 front, at the beginning of last month a friend of mine let me know there was 5 door 205 like mine at the local breakers yard with mostly intact panels and that i should head down there and try and replace the rusted rear door as in his words "It looks f**king horrible". The next morning i set off down to the breakers and within half an hour i had a brand new door. That afternoon me and my friend set about fitting the new rear door it took a few attempts to get the fit right but as you can see its fits fine and is 100% rust free.  Once the door was fitted i realised that i would have to do something about the rubber strips on the doors as the new one didn't come with one. I had a quick look at them and saw how much mould i promptly removed it all as I'm trying to go for a bit of a cleaner look but the fact that its stood for so long isnt helping matters  . I intend on placing some carriage tape in the door recesses once i decide on the right colour. And the final job i did since the last update was something i kept promising myself i'd do when i had some spare money and that was to lower it. Last week i had a very large box arrive at my door and inside was the key to making my rolly polly pug at least 90% cooler... 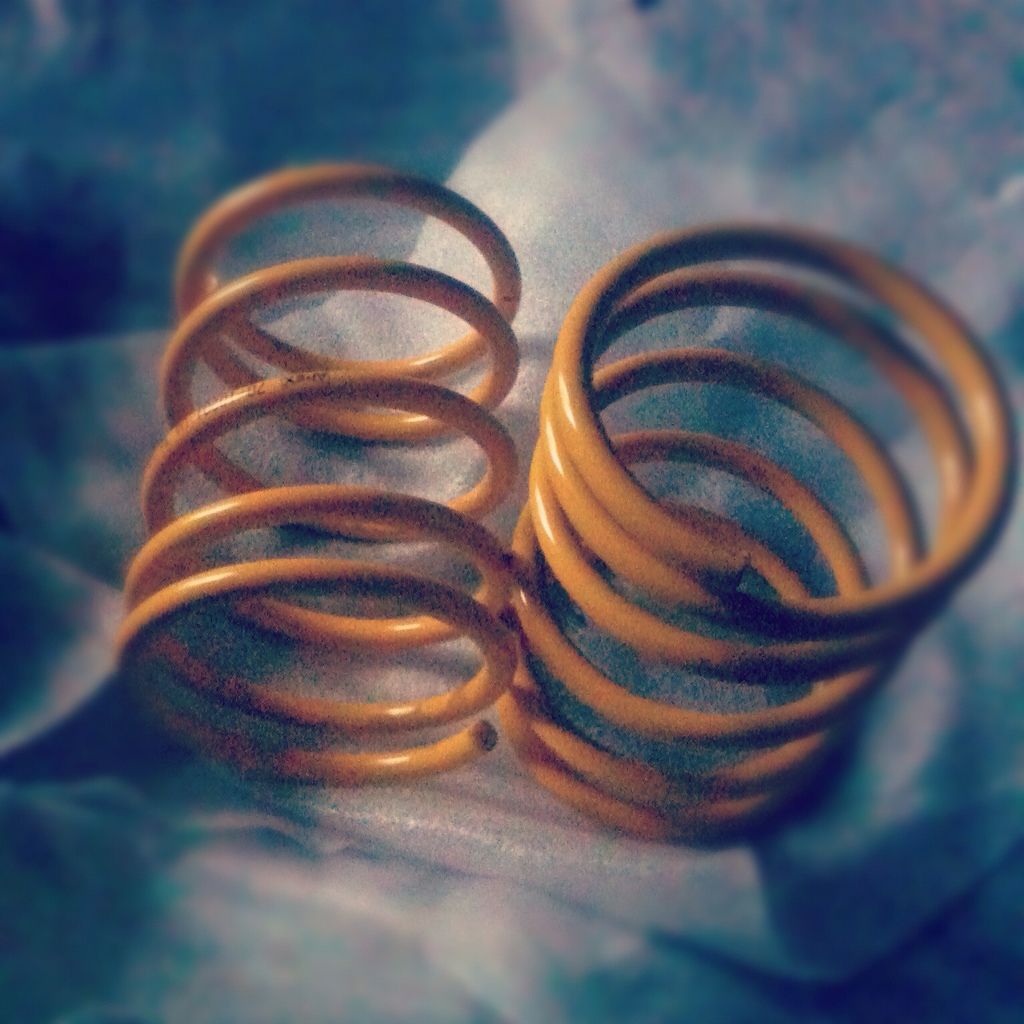 So we jacked up the car and put axle stands underneath with the assumption that once the bolts the strut in place we would simply be able to shimmy the strut free, that was not the case... We didn't realise how seized everything would be on the car but we managed to get the hub away from the car which we had more room to manoeuvre the strut from the hub. Then IT happend in the process of struggling with the strut the drive shaft dropped out of the gear box which then proceeded to leak every last drop of gear box oil as the french thought they would design there gearboxes in felt tip pen... 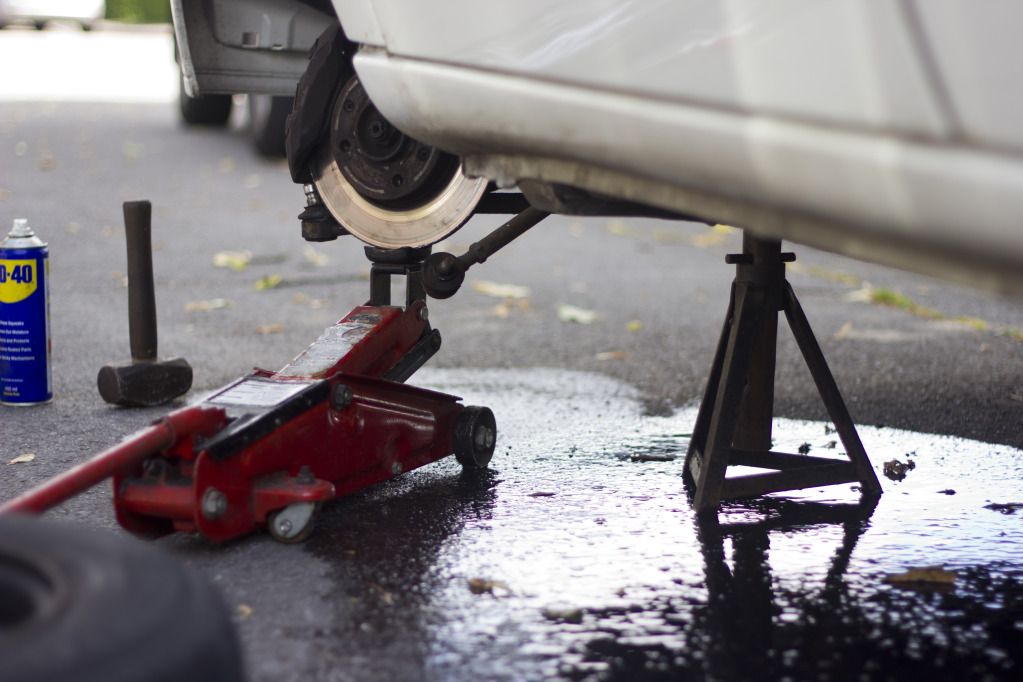 Once the strut was out i set to work on getting the spring off while my friend attended to more important matters... 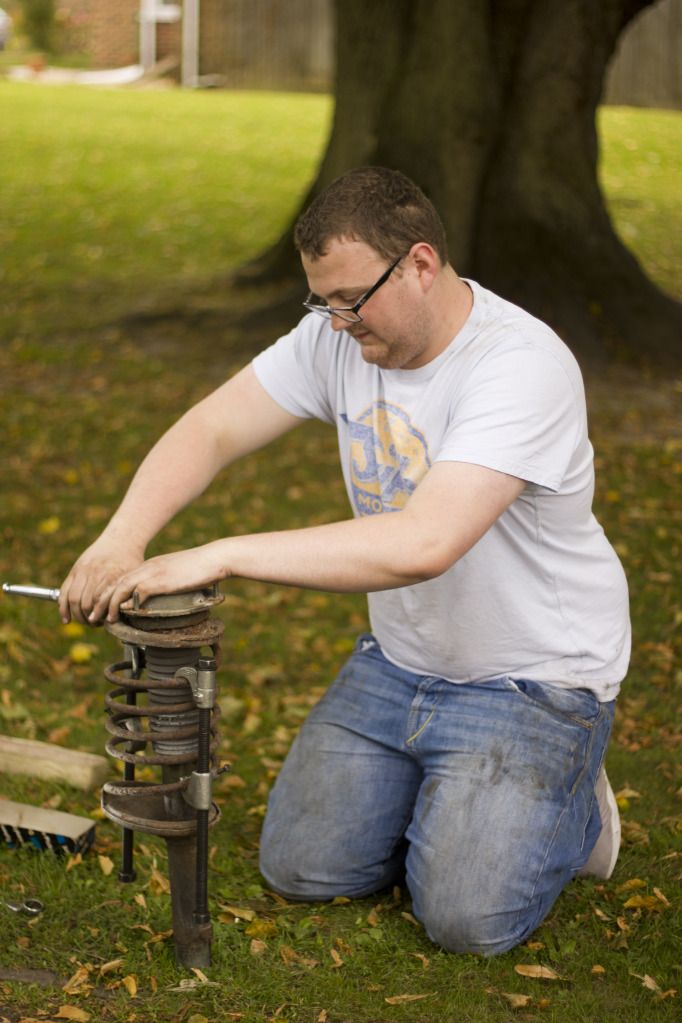 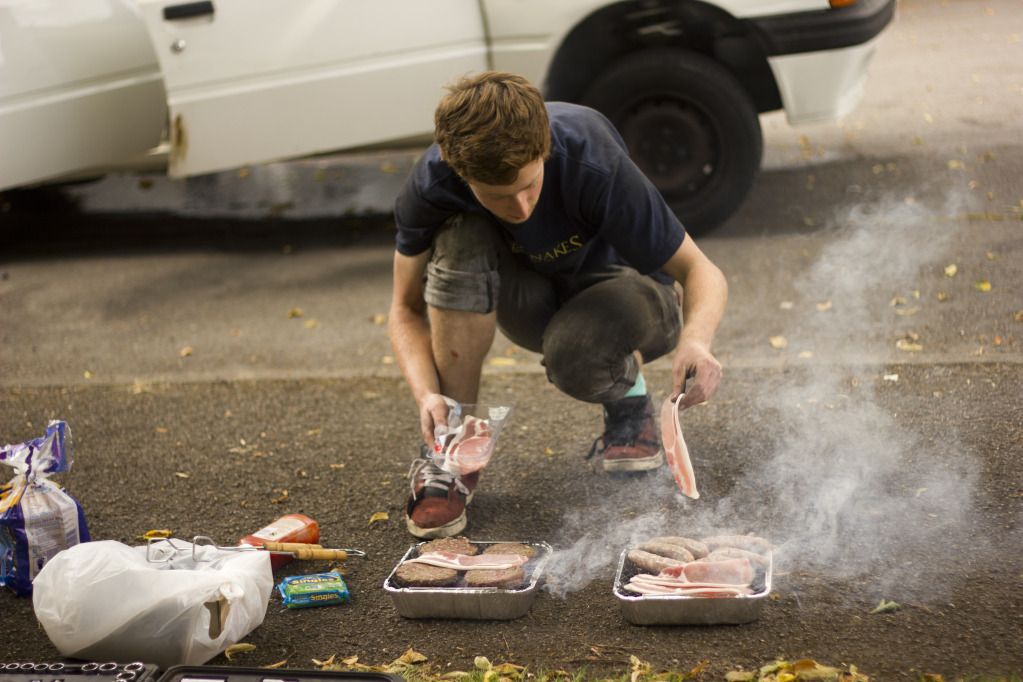 The old spring came off the strut without a hitch, next i put the new 50mm Apex spring on the strut and put the top mounts back on as you can see i used cable ties to stop the spring from moving while i did up the top mounts. The springs are shorter and needed little no compression which is always good as there's something scary about tampering with something that could potentially kill you  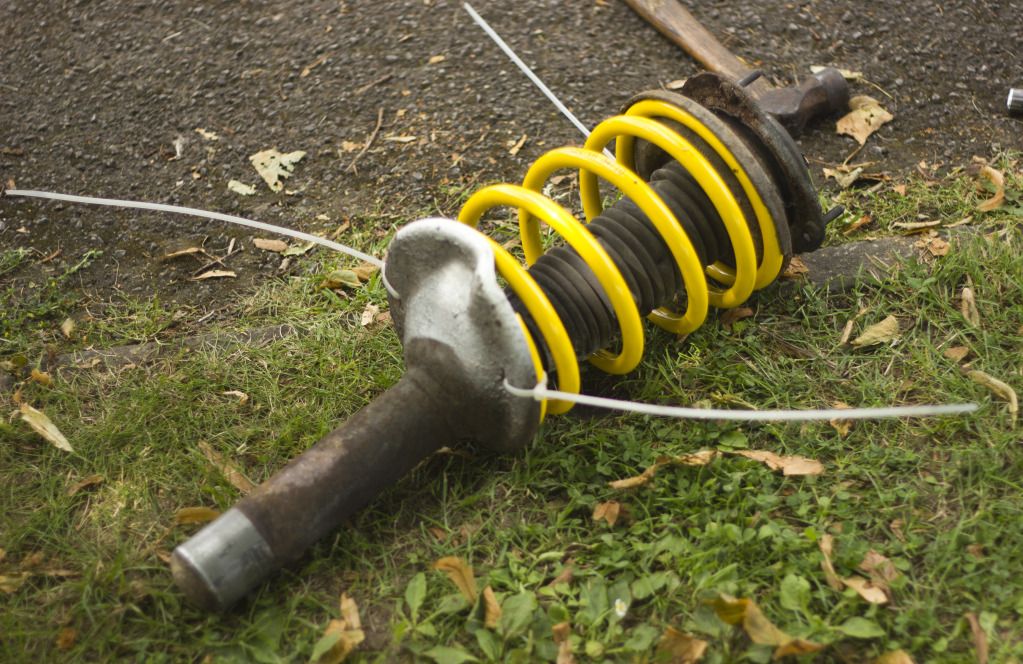 Once the first side strut was but back in and the hub reassembled we moved over to the other side and repeated the same process. This took half as much time as the opposite side because it wasn't anywhere near as seized and we were able to work the strut free. With both sides of the car put together and a run to halford for 2 litre of gearbox oil the car was ready for its first trip out. 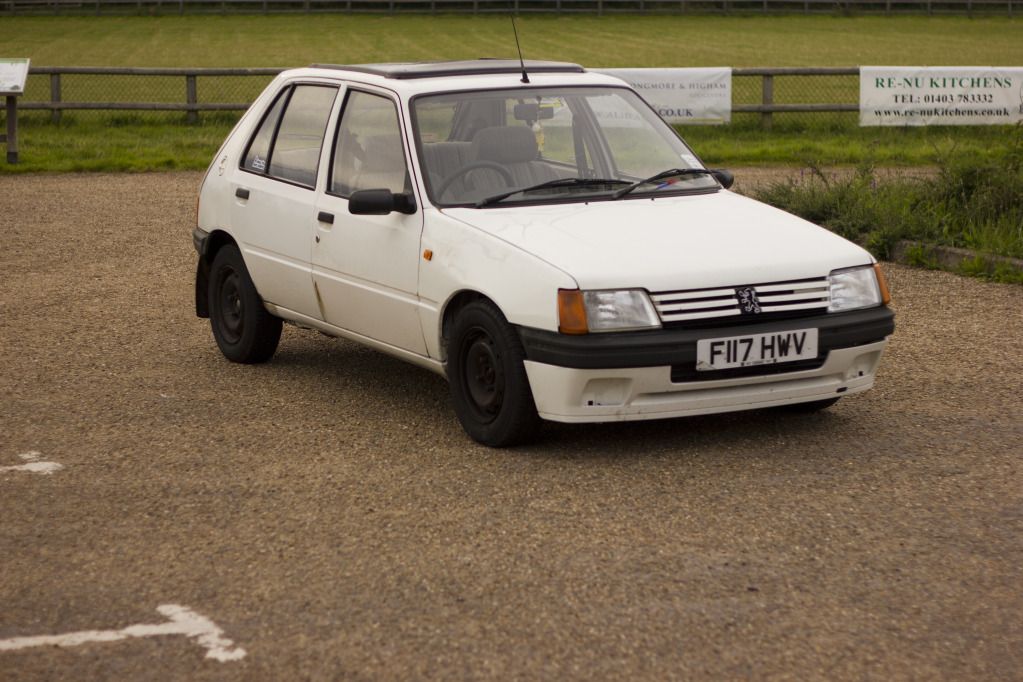 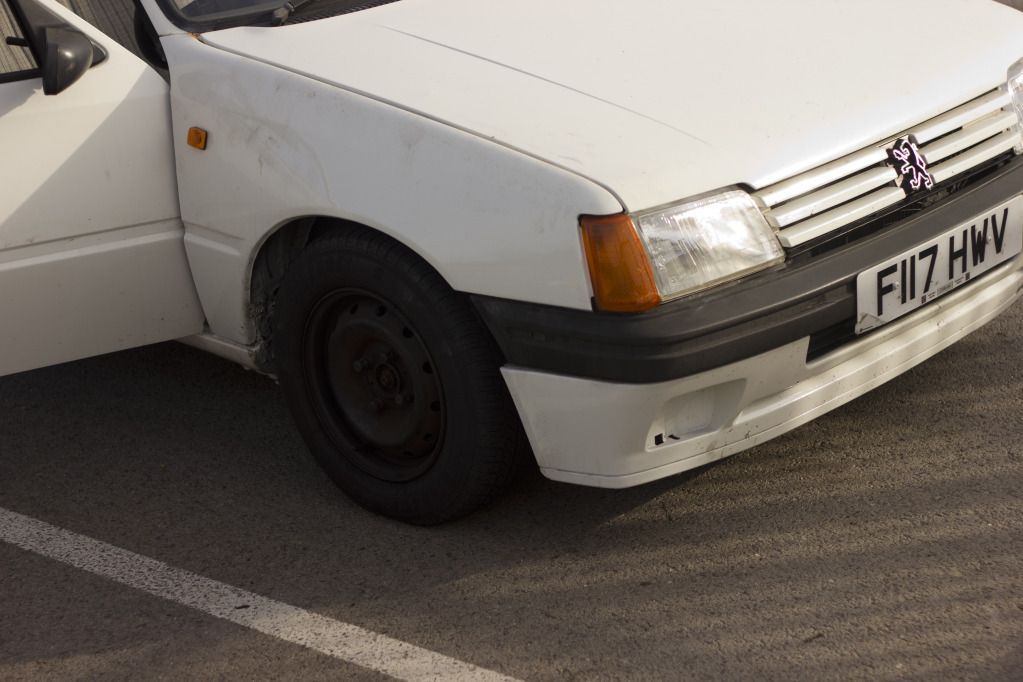 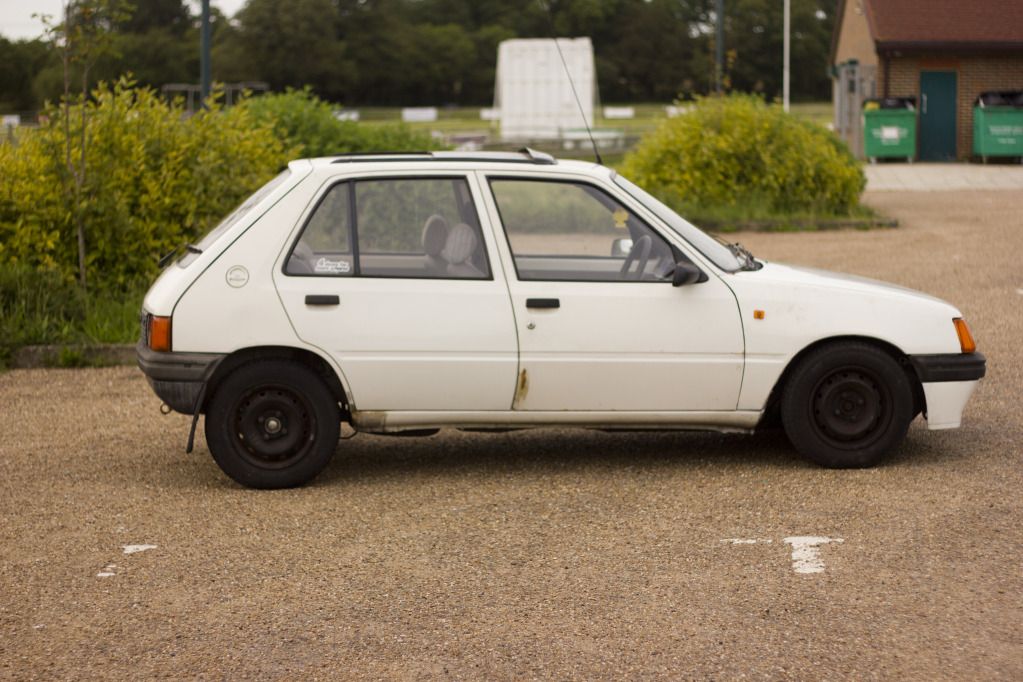 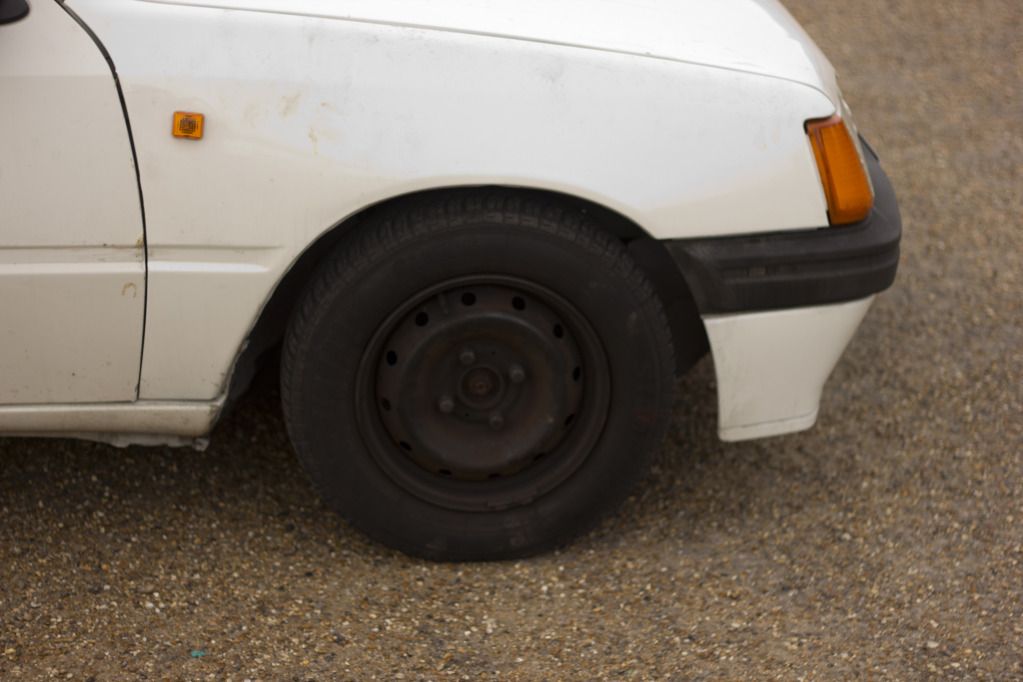 Some plans for the future are some new wider wheels and to adjust the torsion bar at the back to lower it slightly to match the front but i'm waiting for a day when me and a friend who has done the process before to oversee as i don't want another gearbox spill incident ;D Cheers for taking the time to read Dale |
| |
|
|
Mike
East Midlands
Posts: 3,387
|
|
|
|
|
Looks much better! I did the exact same thing with the driveshaft when I did the suspension on a 205 I had...
|
| |
|
|
|
|


 so thinking on our feet we cut two legs of an old stool hammered the end down and drilled a hole through it and as you can see from the ropey phone photo bellow it worked well.


 But it was only on 3 small things which are as follows:


 so thinking on our feet we cut two legs of an old stool hammered the end down and drilled a hole through it and as you can see from the ropey phone photo bellow it worked well.


 But it was only on 3 small things which are as follows:


 .
.
 but there sorted now!
 ;D
;D so any suggestions on this would be appreciated. I have been driving the car daily with no real issues and I'm just waiting till pay day so I can afford to lower it ;D today was one of the first real scorchers of the year so I ceased the opportunity to take a few snaps enjoy!


 . I intend on placing some carriage tape in the door recesses once i decide on the right colour.


