MrOtter
West Midlands
"Your car is your story, so don't let someone else write the book." - Moog
Posts: 281
|
|
Apr 17, 2012 18:28:43 GMT
|
This won't be a thread for a total re-build (well it might be one day...), but I've fancied starting a project thread for a while, as much to keep a track of what I do to the car for myself as well as to keep some of you guys entertained! I picked the mini up about a year and a half ago as my first car, a 1992 City E that was pretty much standard apart from a few little blingy bits, such as having bonded on and smoothed in Group 5 wheel arches, tatty 13x7 Superlights, and clear rear lenses. I haven't got many pictures of what the car has looked like at it's many stages of modification, but suffice to say I have changed a lot on it since I got it. The first thing I knew I wanted to do was to make the car look a bit more like a Mk1 Mini, a bit more retro, so I thought the best way to start that off was with an 8.4" to 7.5" Cooper S brake disc conversion kit, and some 10" wheels obviously! The first show I went to was MITP in August 2010, a couple of weeks after I bought the car. I spent a rather large amount of money there on some brand new 6x10 Mambas, some brand new bumpers, over riders and corner bars, a Mk1 Morris Cooper grille, and a few other bits and pieces. The rest of the modifications since then have been mostly a blur of blood, sweat, and burning money, so I'll try and list what I've done to her over all: Bodywise: Mk1 grille (along with removing lip on bonnet), Mk1 bumpers with over-riders and corner bars, Italian Job style leather bonnet straps and three spot light lamp bar (now with two extra fogs on home made brackets), Wind deflectors, Sticker-bombed A-Panels (mostly to cover up rust), Group 2 Wide wheel arches, 6x10 Wellers to replace the Mambas, Mk1 Rear lights, Mk1 Bootlid Interior: Installation of dashboard and three clock setup, with three auxiliary dials and a stereo in the middle, Home made centre console (was actually my A-Level Design Technology Project), Speakers in rear parcel shelf and up front beneath the dash, along with a compact sub-woofer under the rear seats, Cobra Classic (imitation) seats, Mountney steering wheel and cheap leather gear knob Engine: Started off with a standard 998 (flat top pistons and long final drive being an "E" model), now has: Single box RC40 (pipe flairs out to 2" at the tip), on a Maniflow freeflow manifold, Twin HS2 carbs, 12G295 head, Aldon electronic ignition (no more points to worry about), Splitfire HT Leads, Minispares 2-core performance radiator Suspension/Brakes/Other odds and sods: Hi-los front and rear, Adjustable heavy duty tie-rods, 7.5 Cooper S set-up with Goodridge braided hoses, Poly bushed engine steadies with additional steady on rear left hand side of gearbox, Solid mounted front subframe I'm sure there's other stuff that I've missed, but that's enough to bore you for a while  I use the car every day to drive in to uni and back, and frequently travel up and down the motorway to see my Dad back at home (about 80 miles one way) and to see my girlfriend at her uni (about 180 miles one way), so the Mini gets a few miles put on it! I've still got plans for many other modifications such as suspension upgrades and maybe converting the doors to Mk1 hinges, and I really need to sort out some of the rust this summer as it's getting pretty bad in places now. Whatever happens shall depend on if I can find a part time job over the summer. I'm at uni at the moment so I've spent most of my grant money on the car (rather than drinking myself to death like a proper student) and I really need to keep the rest back for insurance in the summer, which isn't cheap being a 19 year old male. Here's a few pics of what the car looks like now:  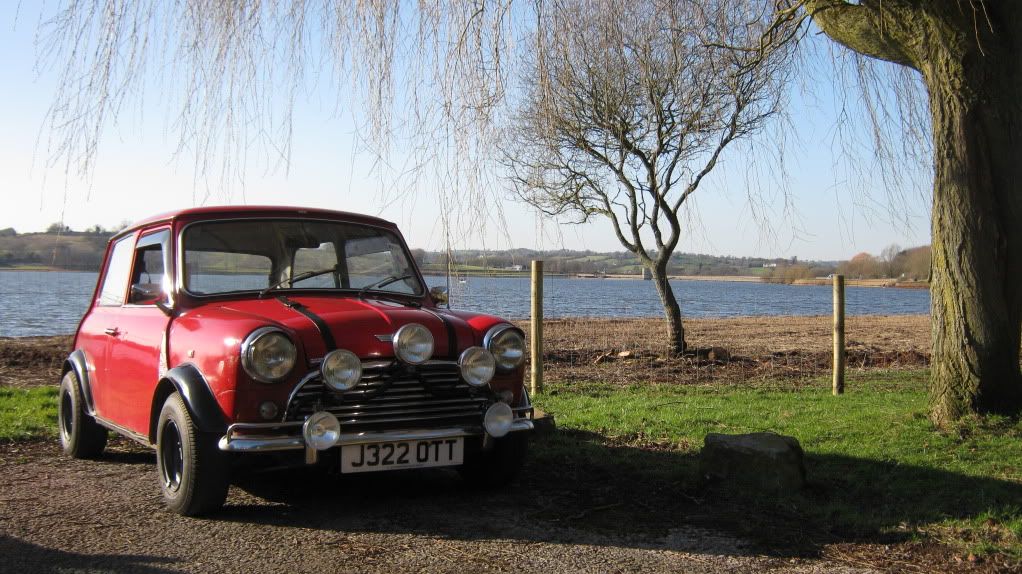 With a couple of mates cars at uni: 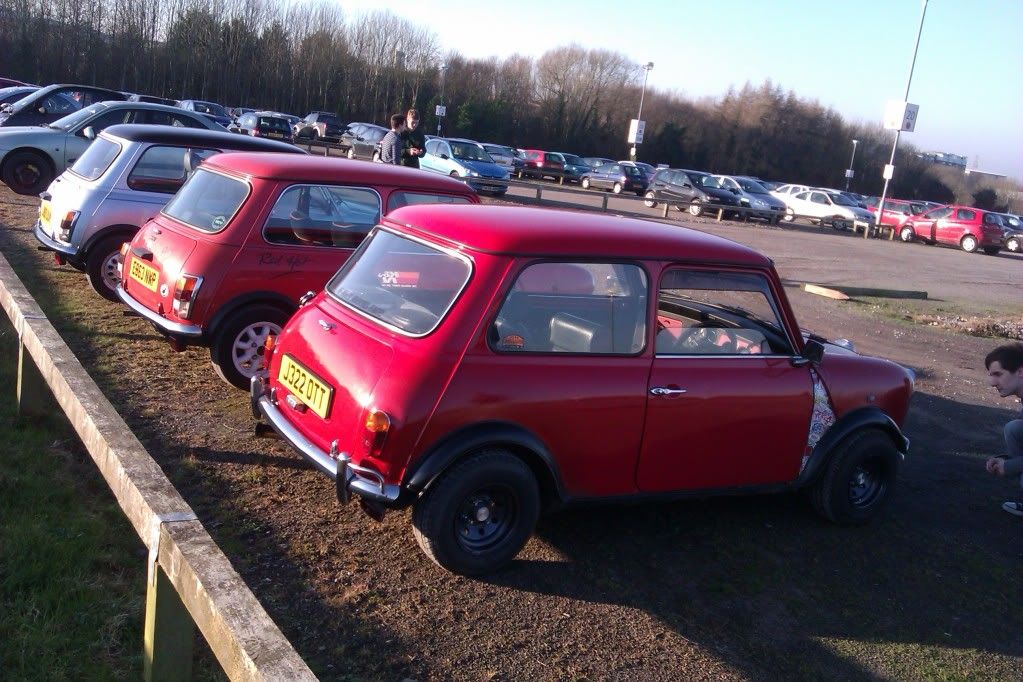 At a small mini gathering in Bristol in January: 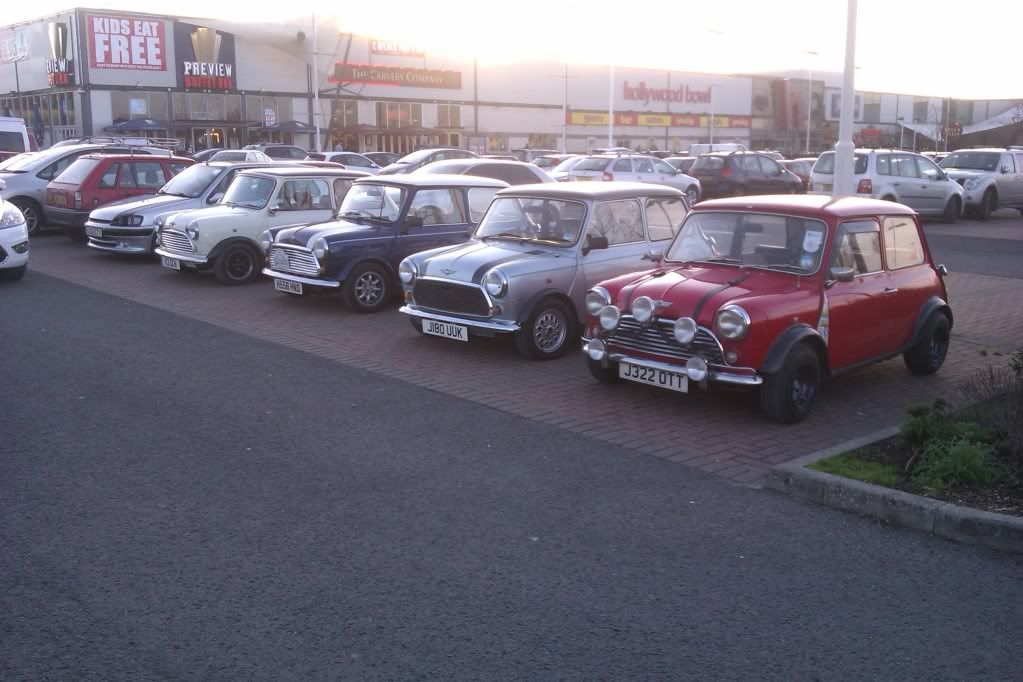 I took it to Slark Race Engineering to get it tuned on their rolling road about a month ago now, the final results were 43bhp at the wheels, 56bhp at the flywheel, and 57ft/lbs of torque. Not too bad considering it's done almost 100,000 miles now. 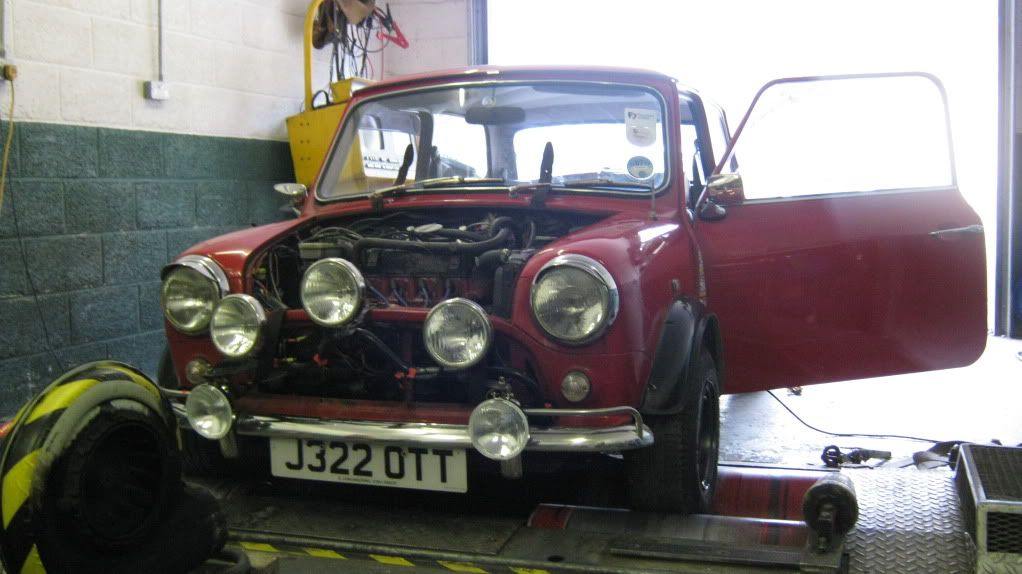 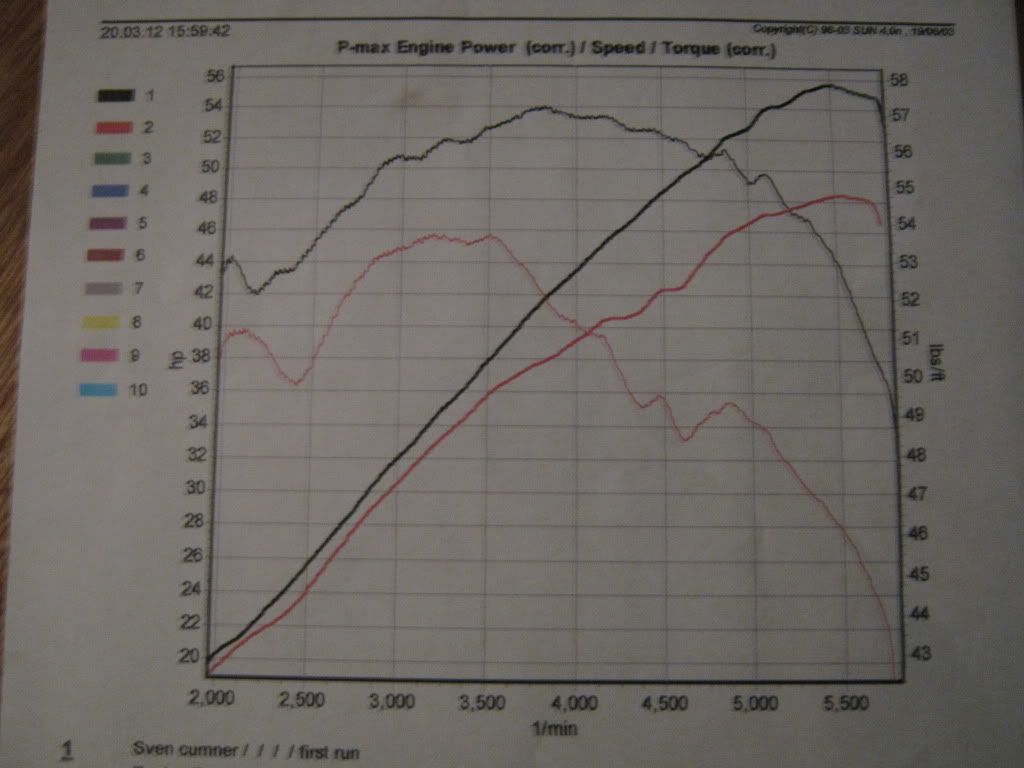 Thanks for reading! Any comments/suggestions/questions are very much welcome  Sven |
| |
Last Edit: May 16, 2016 18:21:00 GMT by MrOtter
|
|
|
|
|
|
|
Apr 17, 2012 19:20:32 GMT
|
looks really nice, mini's need to be on 10s!! i would loose the headlight eye lid things tho but thats just me  |
| |
|
|
MrOtter
West Midlands
"Your car is your story, so don't let someone else write the book." - Moog
Posts: 281
|
|
Apr 17, 2012 19:56:58 GMT
|
It's surprised me how many people have said that lately! I took them off the other day (they've been on the car since I bought it), and it looked a bit odd at first, but I'm beginning to see why not many people like them, they do make it look a bit girly and naff. Glad you like it, cheers |
| |
Last Edit: Apr 17, 2012 19:58:22 GMT by MrOtter
|
|
luckygti
Posted a lot
 I need to try harder!
Posts: 4,912
|
|
Apr 17, 2012 22:34:10 GMT
|
Looks good, sounds even better. I've always loved Mini's, but there's no way I could drive one that far anymore Mind you, my 205 reminds me of my brothers 998 now it doesn't have an interior |
| |
|
|
MrOtter
West Midlands
"Your car is your story, so don't let someone else write the book." - Moog
Posts: 281
|
|
Sept 28, 2012 20:37:06 GMT
|
So, I haven't updated this in a long time, apologies! I've done a lot on it over the summer, and there's a more detailed project thread on the mini forum if you want the extra details, but I'll keep it nice and to the point for RR. All of the following work was done in June and July. First things I did were just minor cosmetic changes, after buying a few bits from Bristol Mini Day back in June. Some stickery goodness for the wheels: 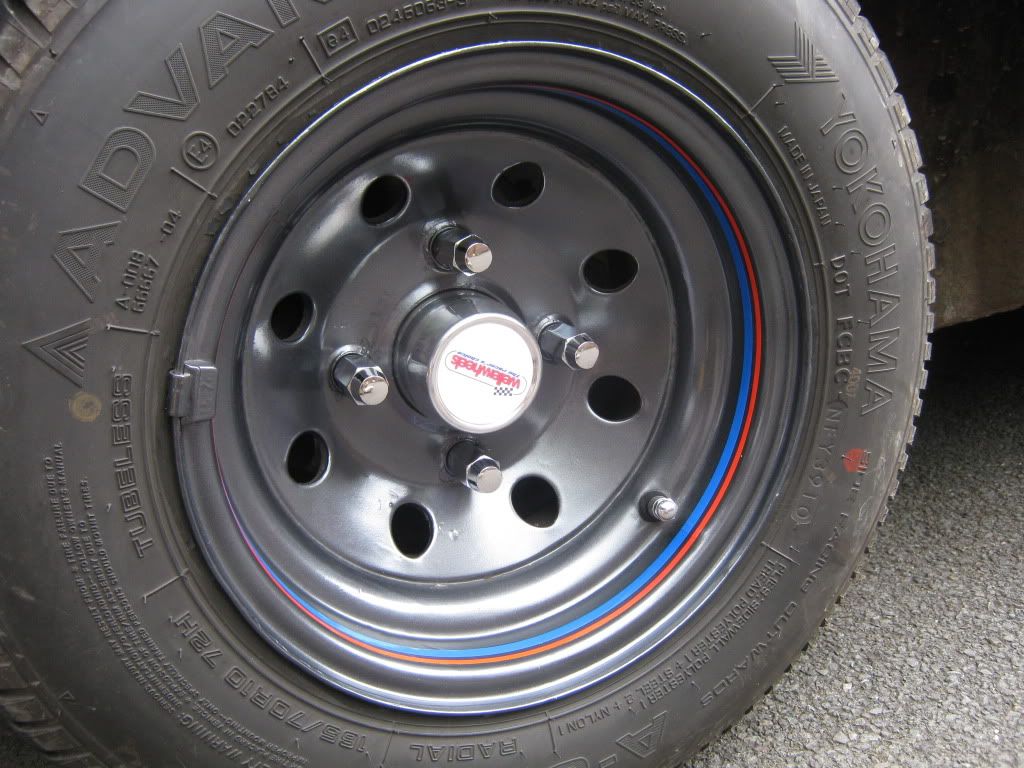  A new bonnet badge, from this: 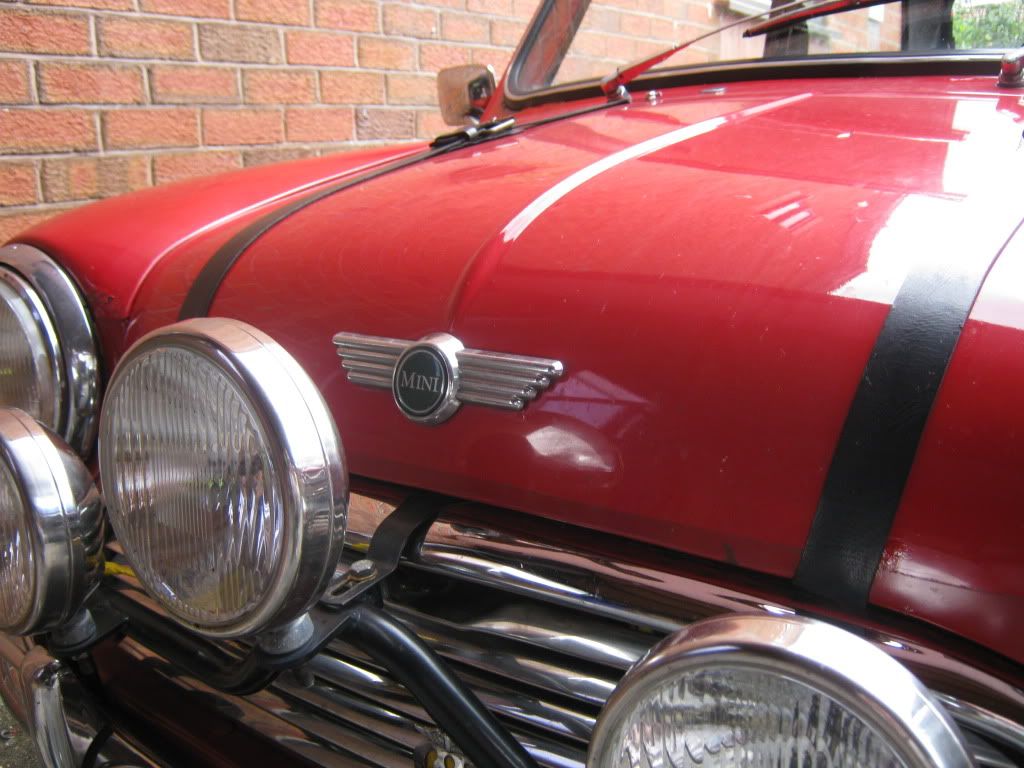 To this, which I repainted to match the cars colours rather than the original badge colours: 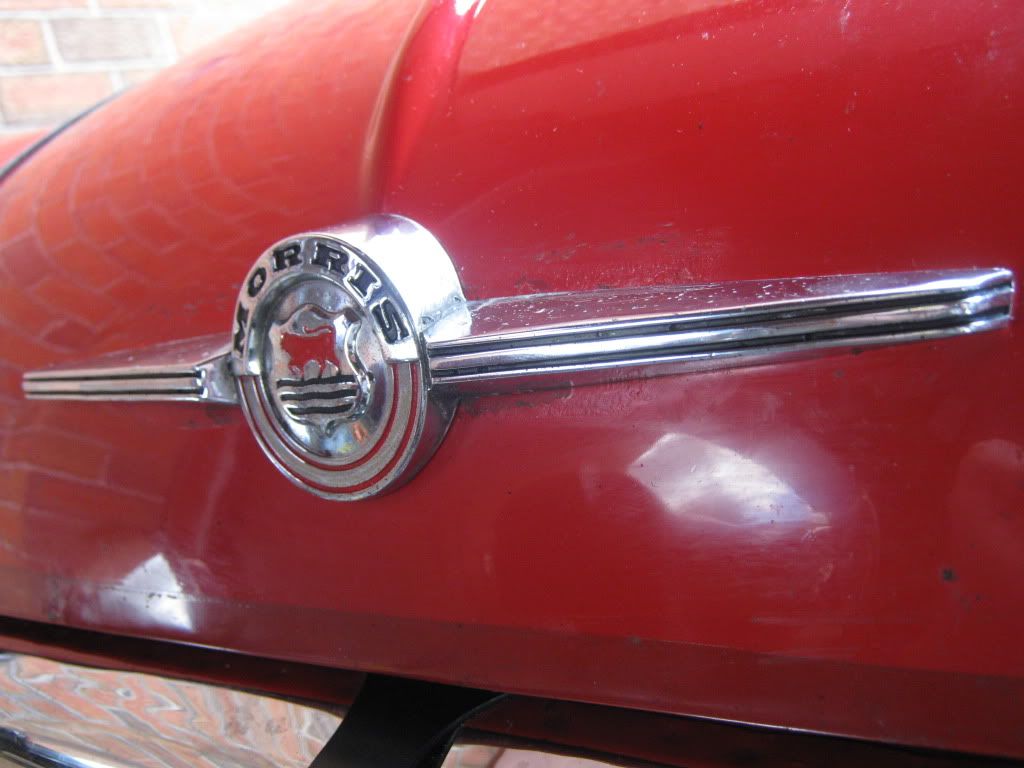 Then not long after this I repainted the garage at home, I know it's not about my car but it's closely related so here are a few pics! What it was - bare brick walls and a bluey grey floor: 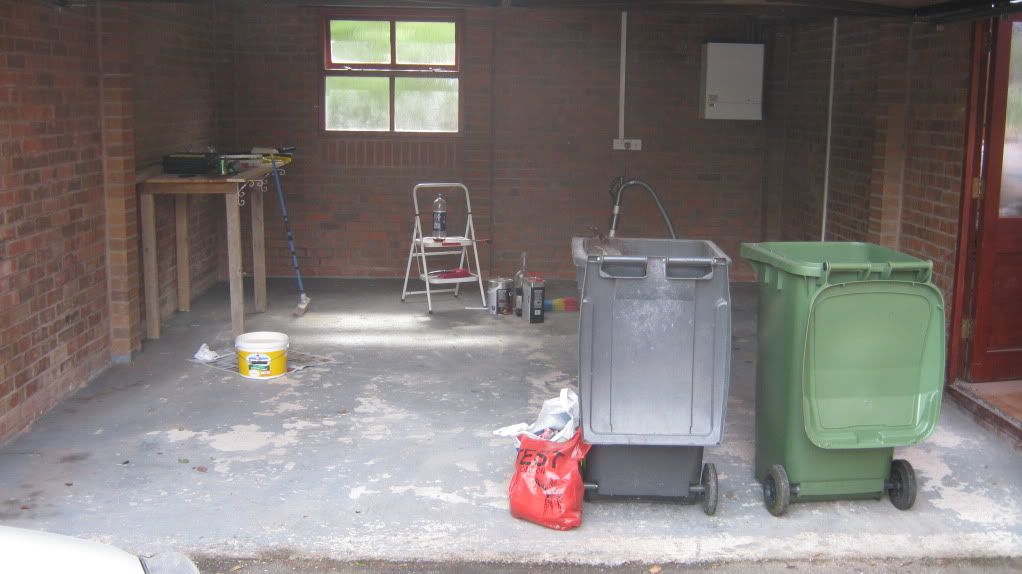 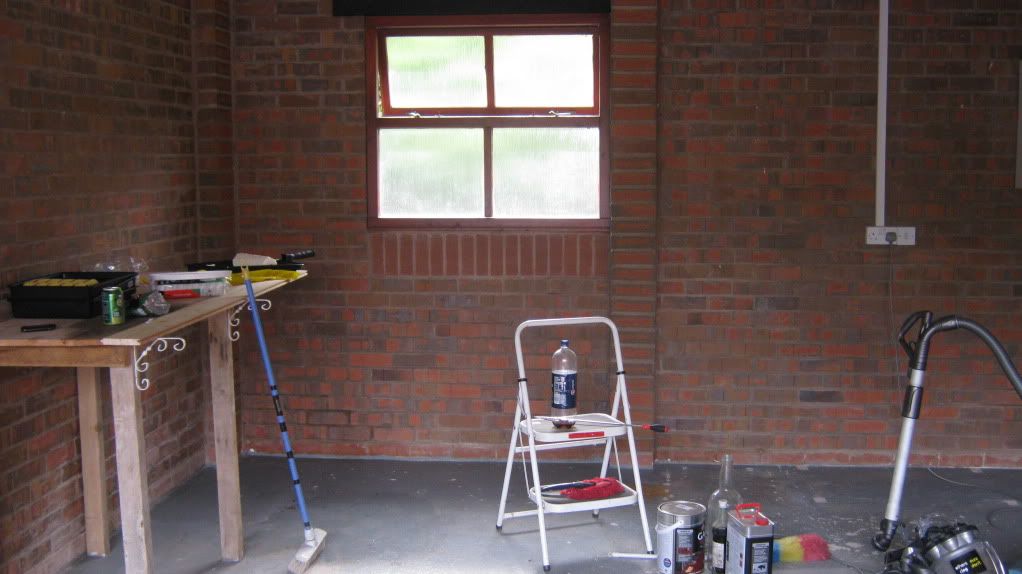 Some white walls were needed: 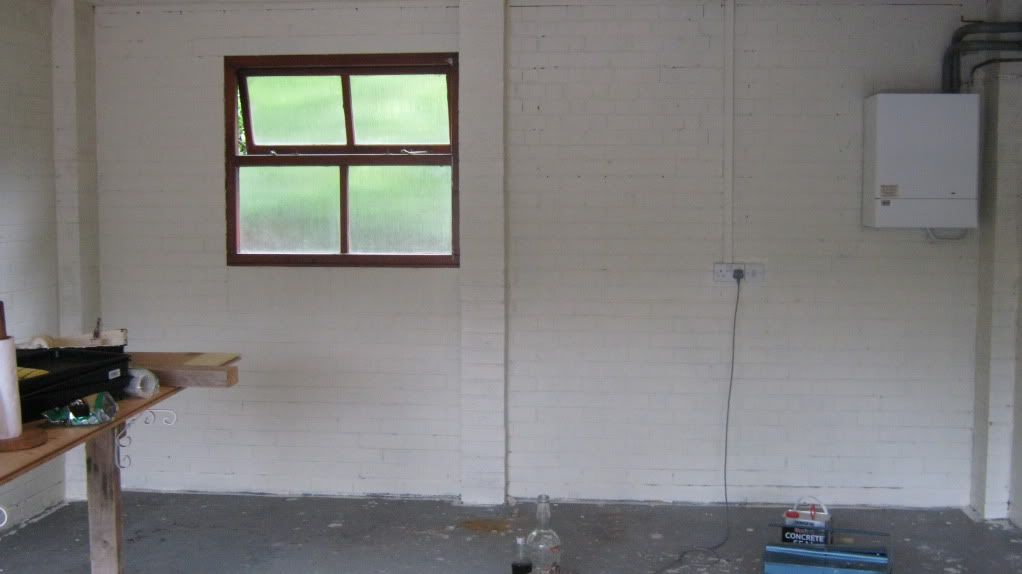 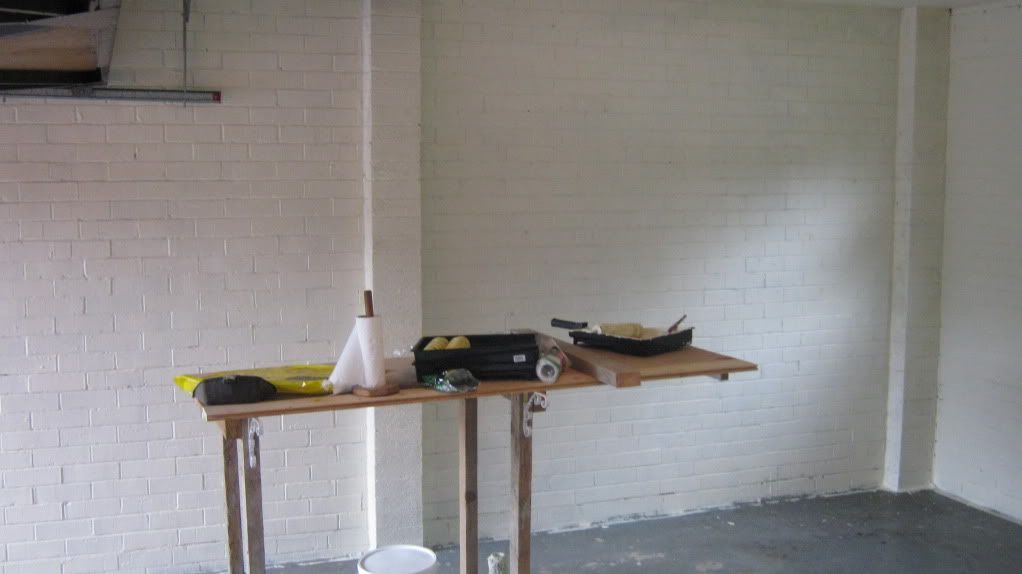 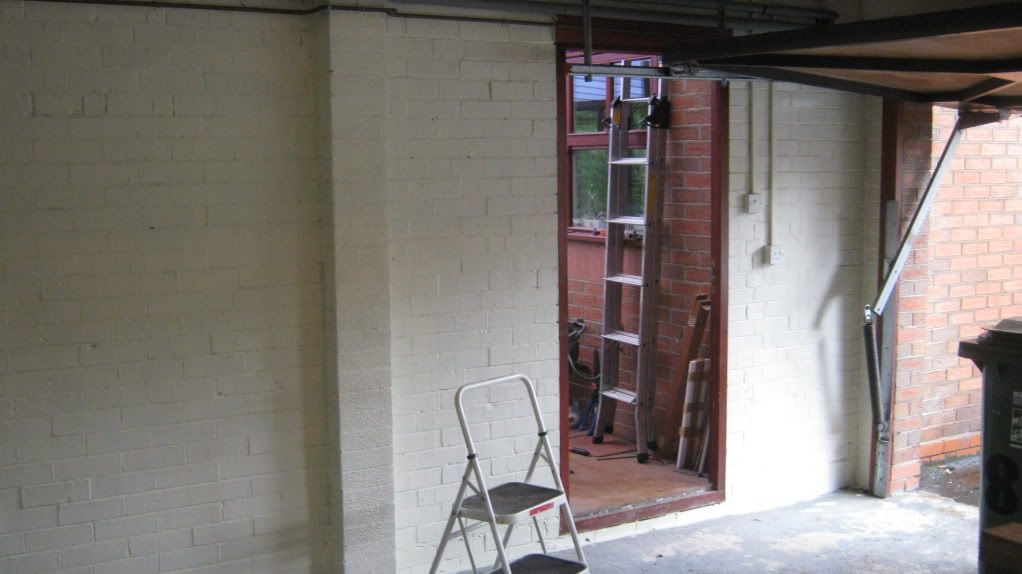 Then some red on the floor! 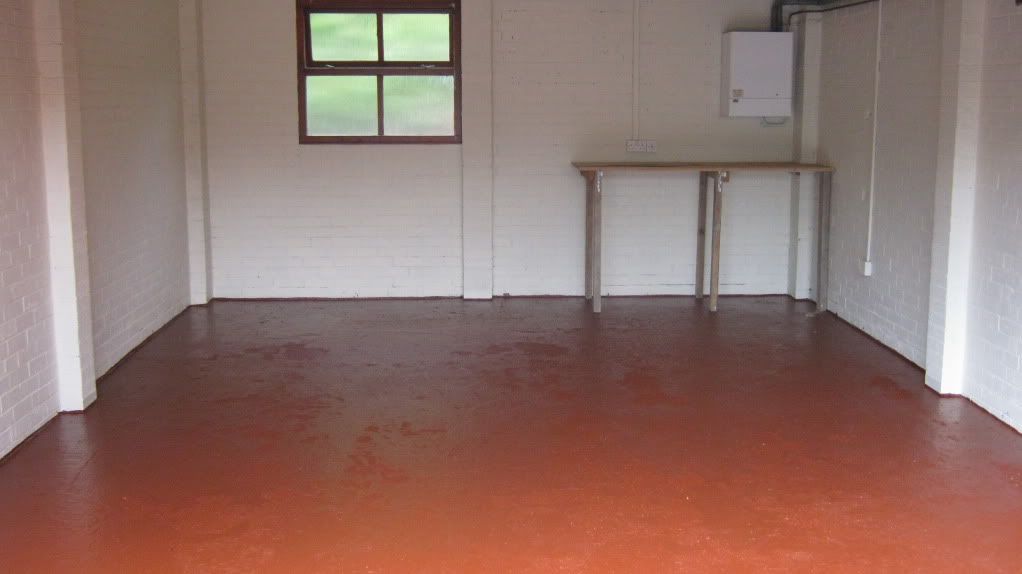 A bit of an improvement over what it was before! Also gave me a chance to throw out and sort through a LOAD of old curse word from the work bench and the cupboard, etc. So it's now a lot more sparse and organised (even if it doesn't look it!). 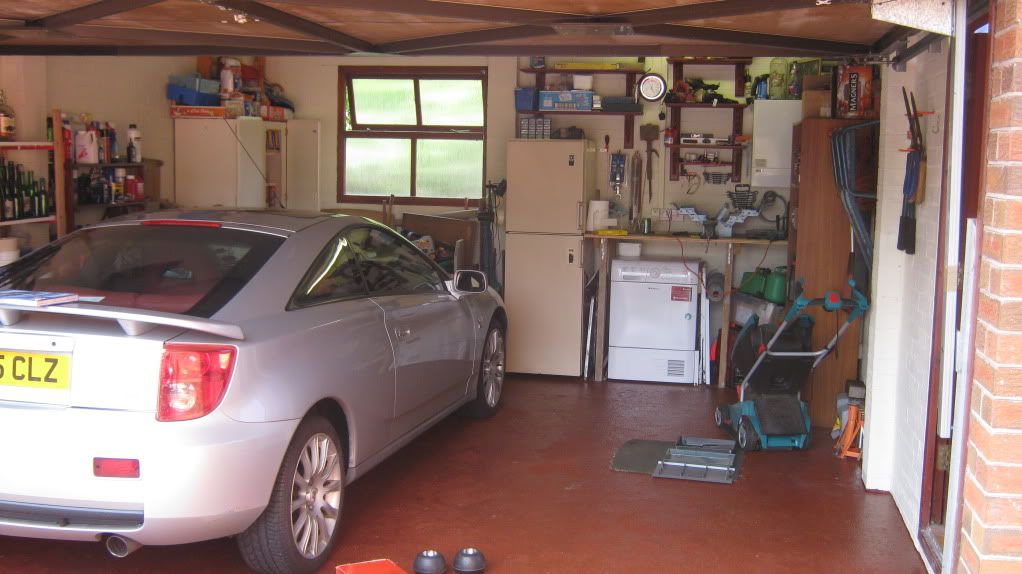 Anywho, back to the Mini. I repositioned the fog light and reverse light at the rear to be more central and properly fixed in place. They weren't ideal where they were on the edges of the valance, getting muck thrown at them from the wheels and wobbling about on bodged brackets. 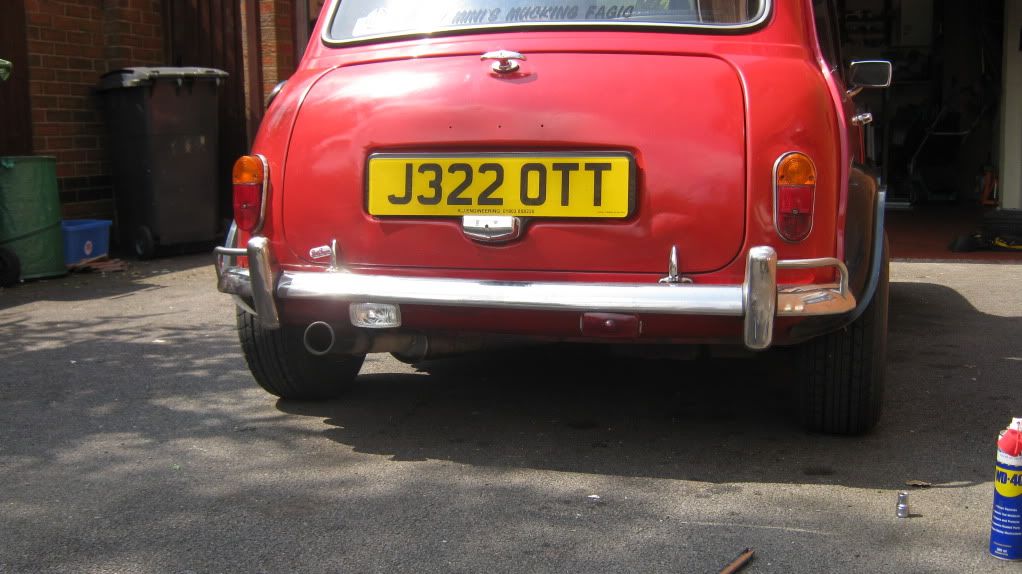 I changed the rear brake shoes and then replaced all of the rubber suspension springs on the car. Here's a comparison between new and old: 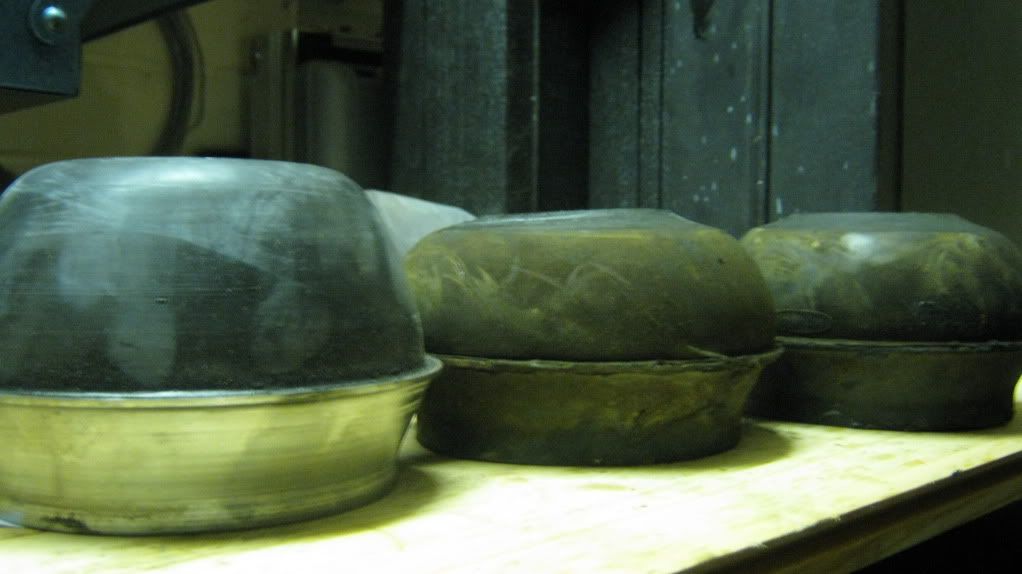 I then had to do the CV joints, as they were clicking badly on full lock and were making a clicking noise under deceleration. Old worn joint: 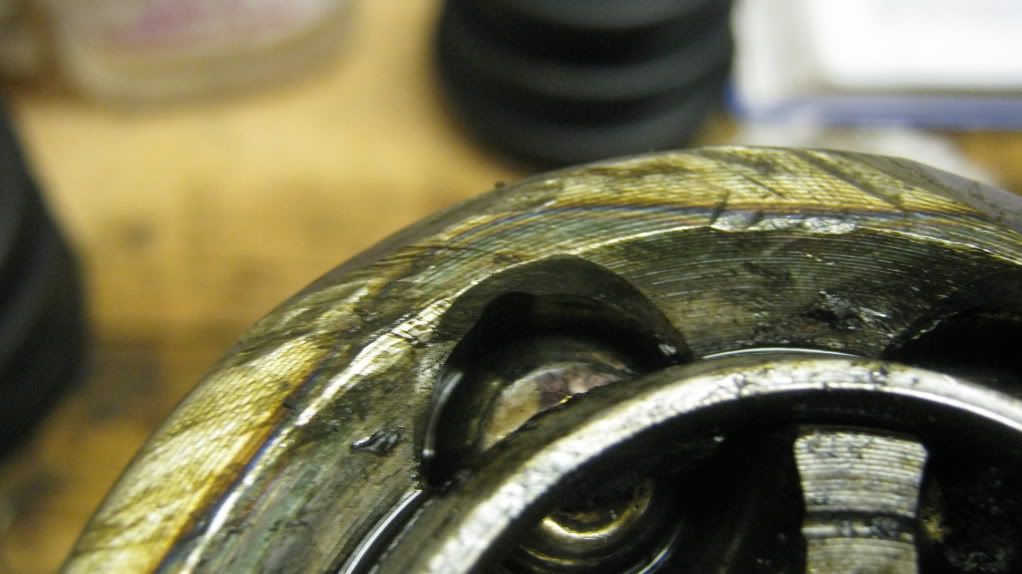 Nice shiny new one: 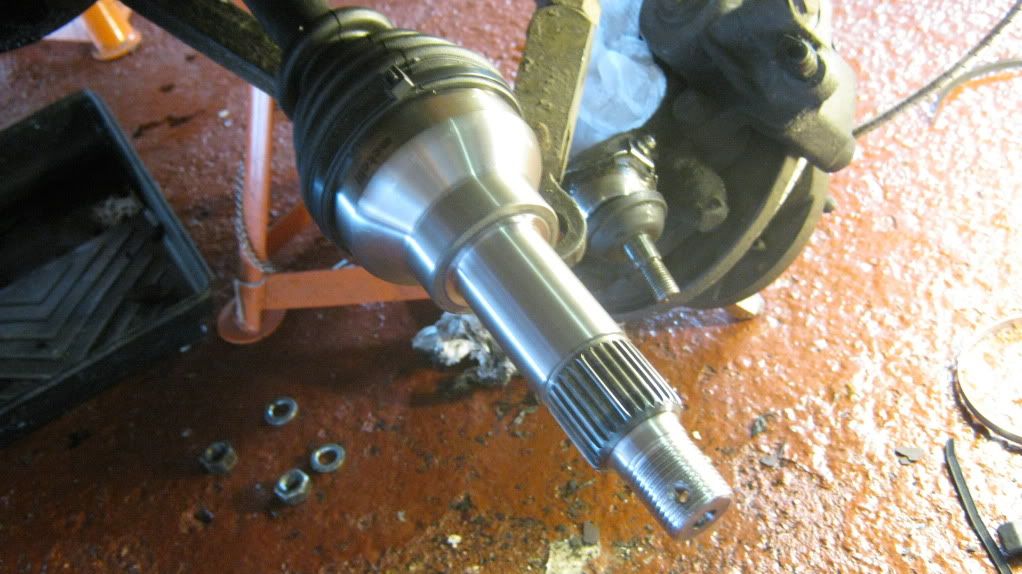 Next job was fitting my boot badges. The bootlid on the car is from a much earlier Mk2 Mini and had no badges when I bought it, although I could tell that it was originally from a Mini 850 as that was the outline left in the paint from the original badge! This meant that there were three holes in the bootlid and I had no badges to fill those holes with, so I left it for over a year like this: 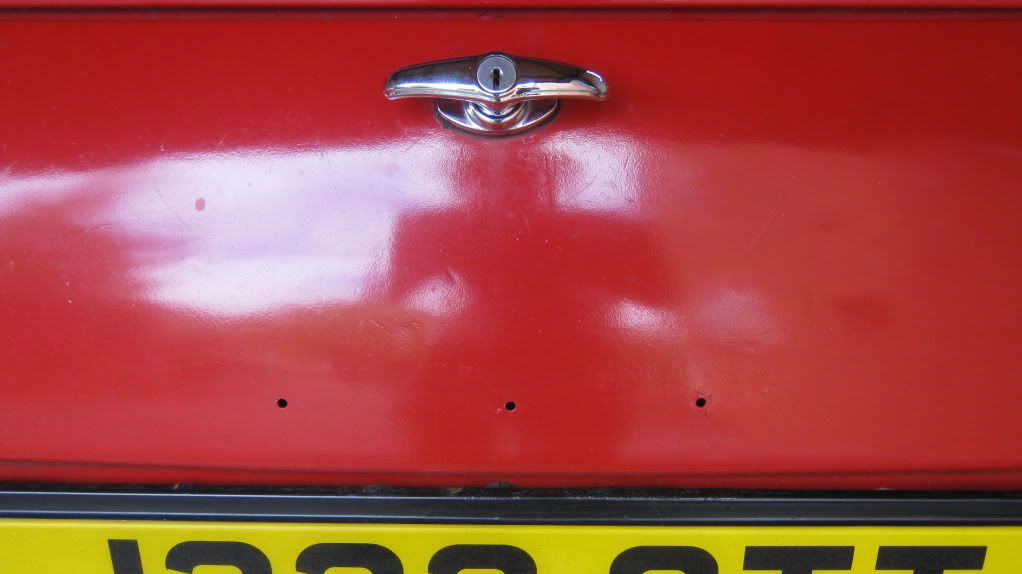 This obviously let a bit of rain in and looked pretty pants, so I bought some 'Austin' and 'Mini' script badges at Gaydon in July. First thing to do was offer up the badges and mark where the new holes needed to be drilled, as these badges needed completely different holes to the ones that were already in the bootlid. 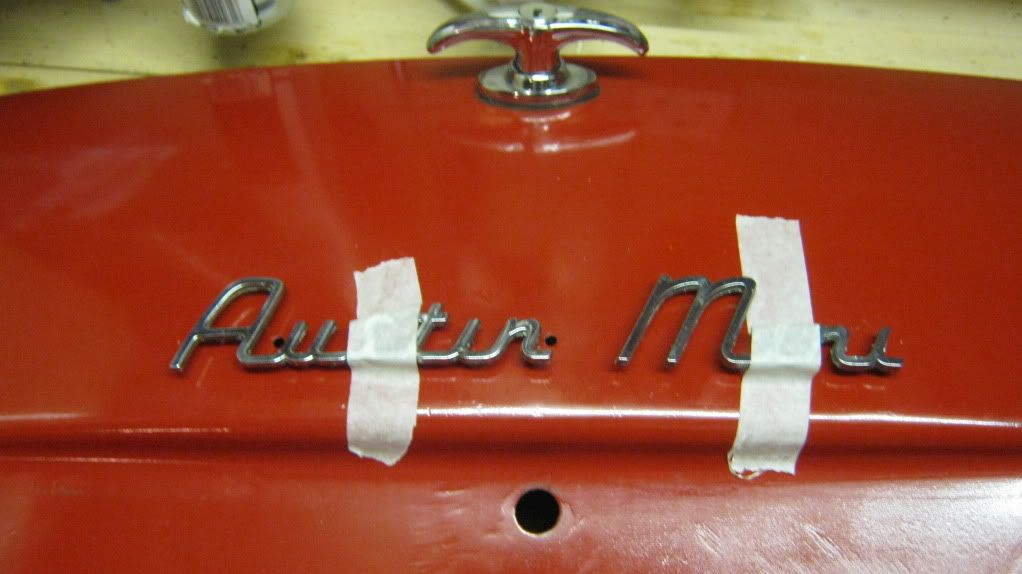 I then drilled the holes: 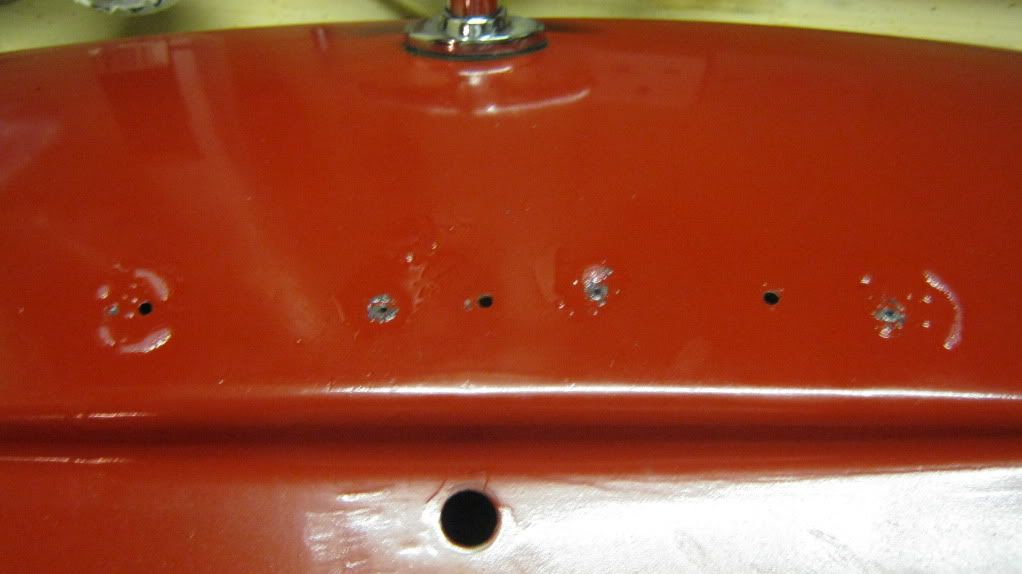 Test fitted the badges:  Welded up the old holes and smoothed off the welds: 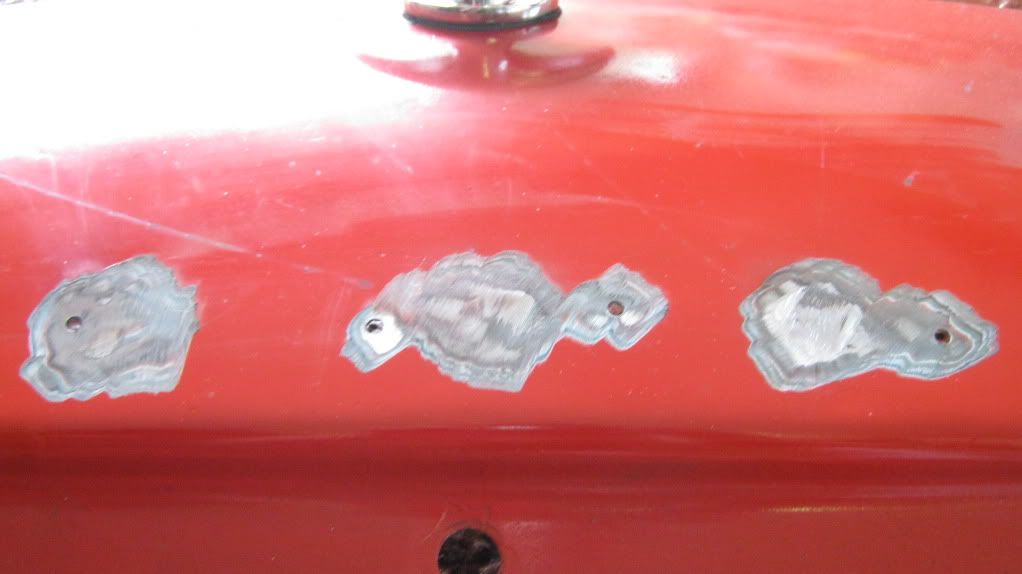 This lid must weigh more in paint and rust than it does in good steel... 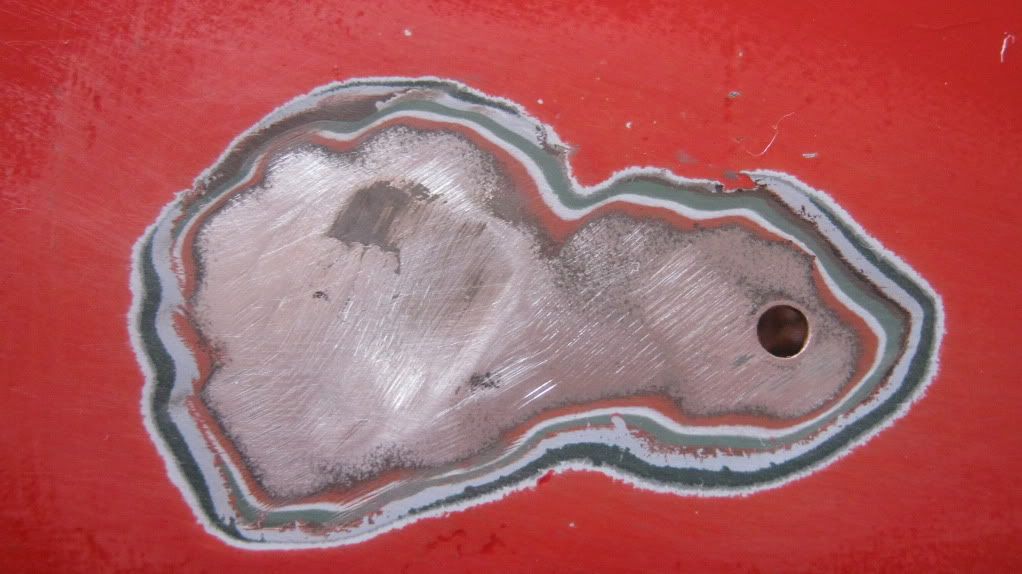 A lick of paint: 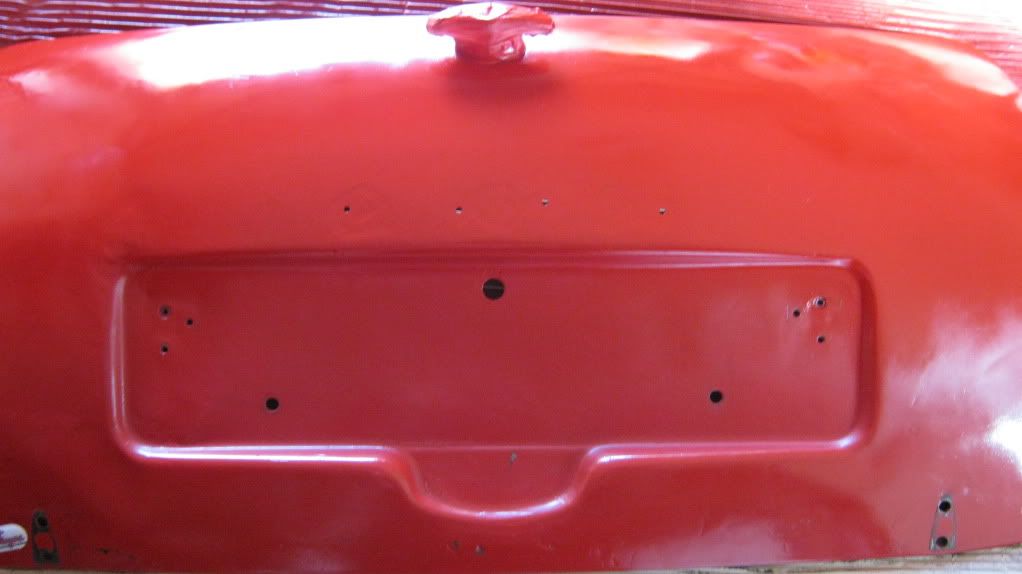 Back on the car: 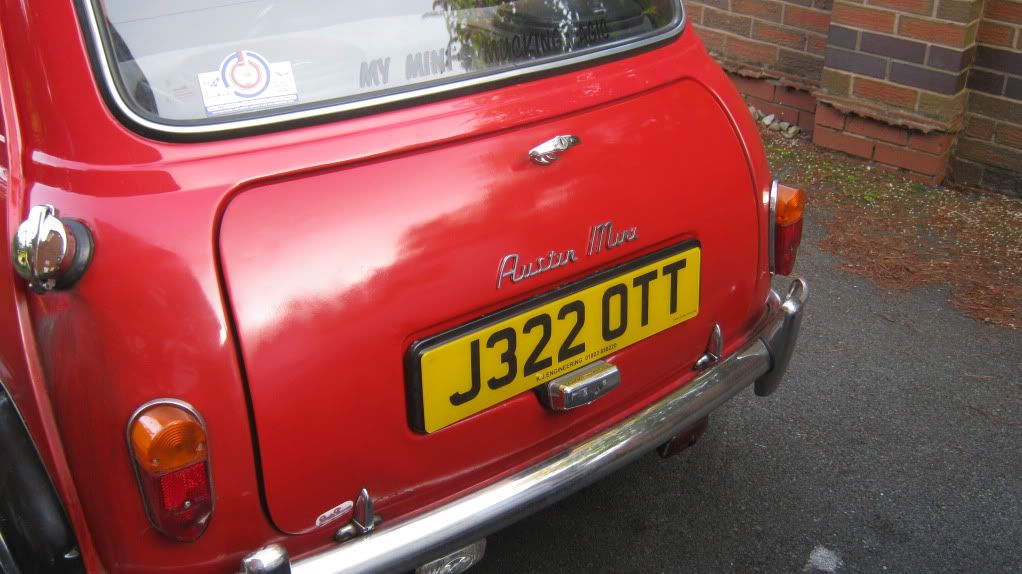 You may now have noticed that the car says Morris on the front, Austin on the back, and Rover on the V5. Win for consistency! I then went to Mini in the Park at Santa Pod and bought a new heater fan (old one was grumbling like a curse word) and a new set of floor mats, along with some other items that will be revealed in the next update!  That was all of the minor jobs, and the next update will show you the major work I did from mid-August to mid-September, when I didn't really have any spare time for the entire month due to working on the car so much... |
| |
|
|
MrOtter
West Midlands
"Your car is your story, so don't let someone else write the book." - Moog
Posts: 281
|
|
|
|
Right, so over the summer I'd been building up the pile of panels to replace the front end, as it had kind of fallen apart during the past 2 years since I bought the car. So, front panel, wings, A-panels, and scuttle to replace, along with any other repairs needed to whatever I find underneath. Oh and I'd never done any serious bodywork before I started this, apart from the Mk1 rear light conversion, so this was going to be a bit of a learning curve for me. This work was done about a month and half ago now. I also want to add before I go through this, that I'm not seeking to create a concourse car here, I just want to repair it and keep it on the road with strong repairs, but not with any massive bodges like plating over old rust, so don't have a go at me if it doesn't look neat when it's done  Time to crack on I guess. First thing was to strip off all the brightwork and lights and so on and see just how bad it was underneath. Not exactly showroom condition... 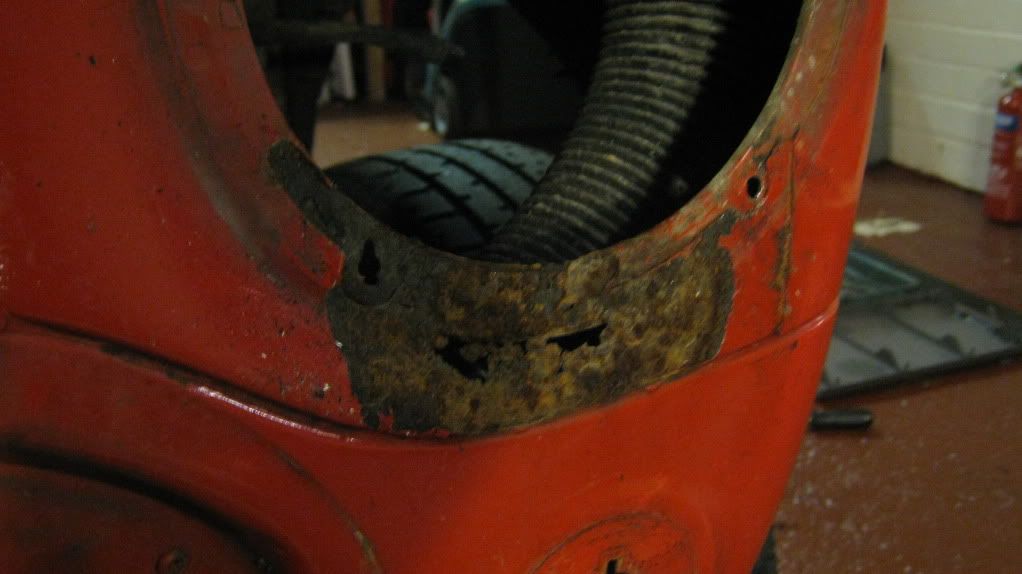  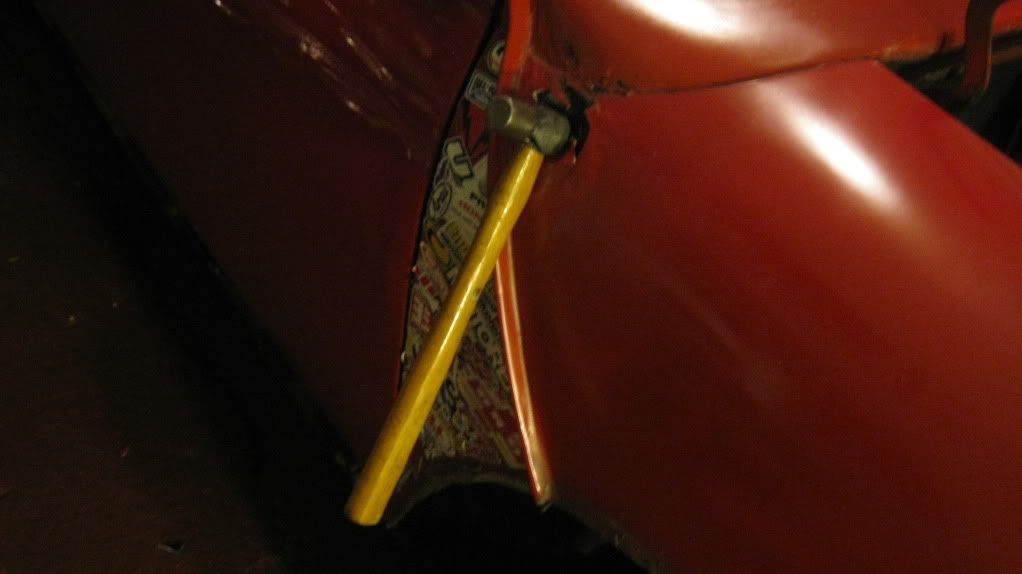 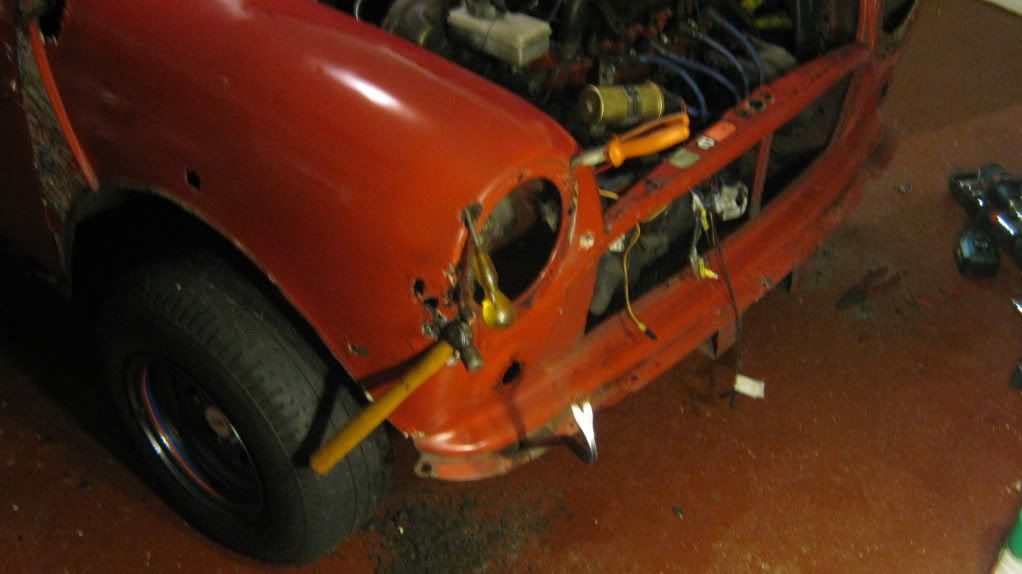 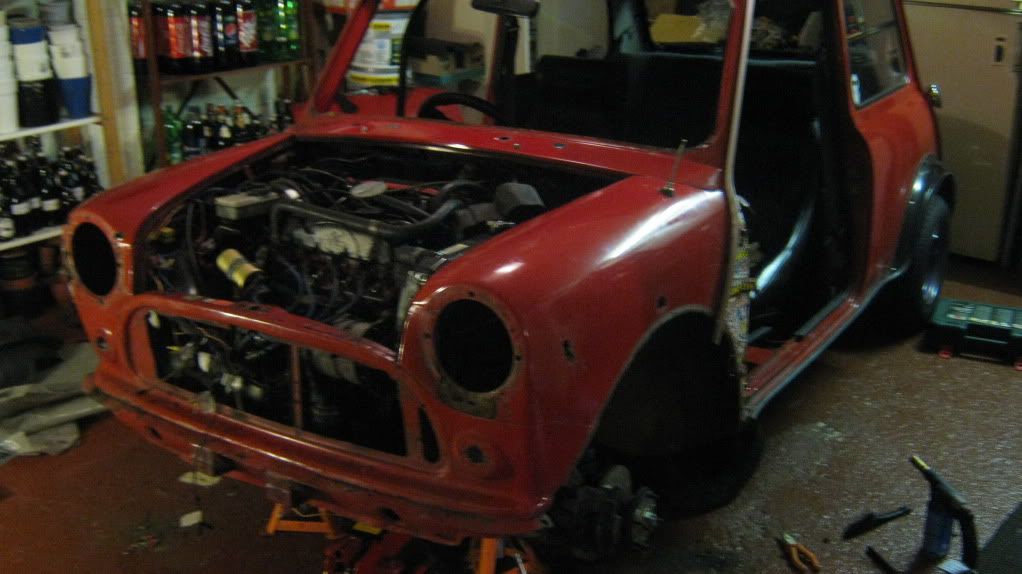 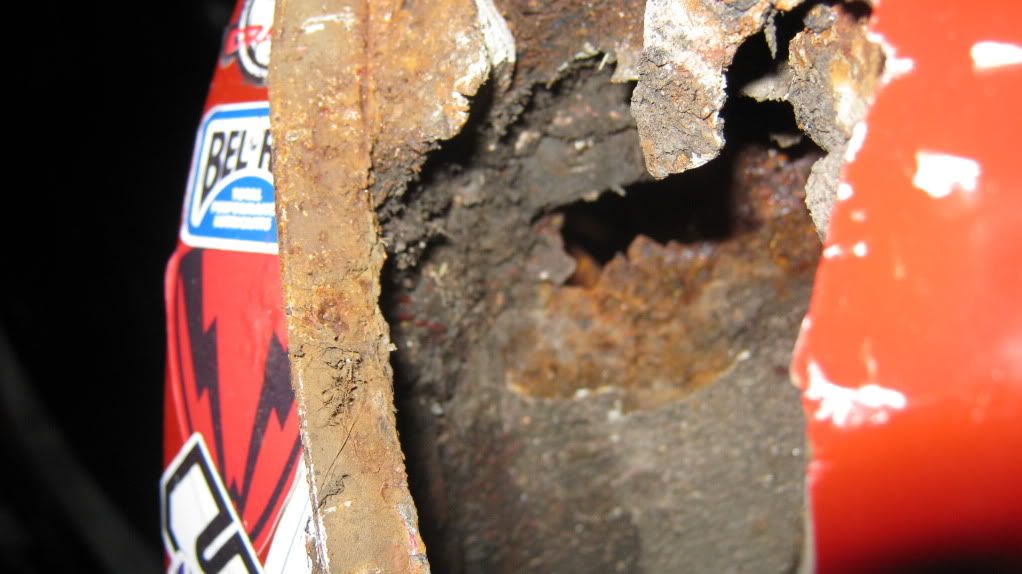 Then it was time for the old panels to be relegated to the skip. 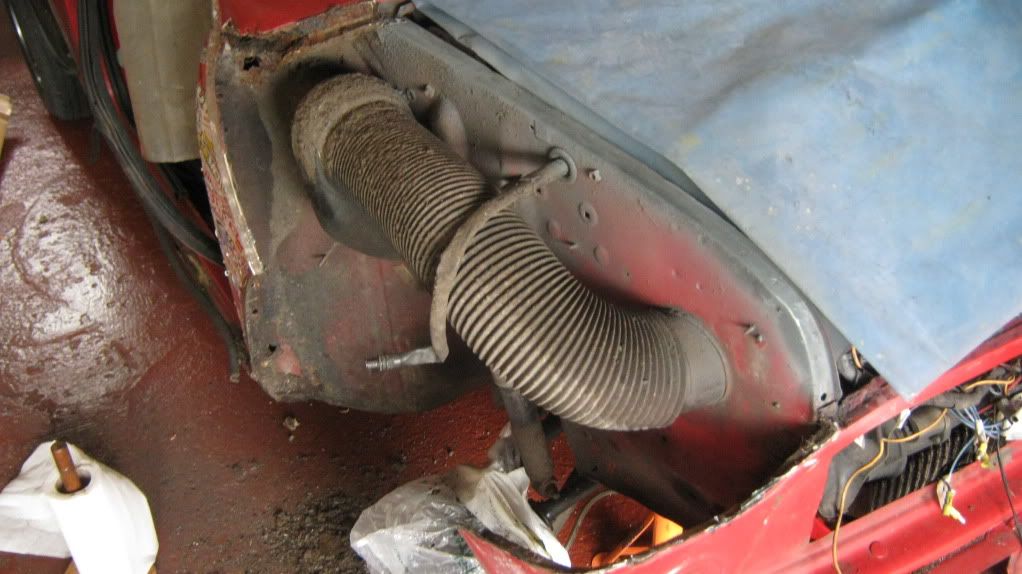 Tarp to protect all the expensive/important bits in the engine bay. 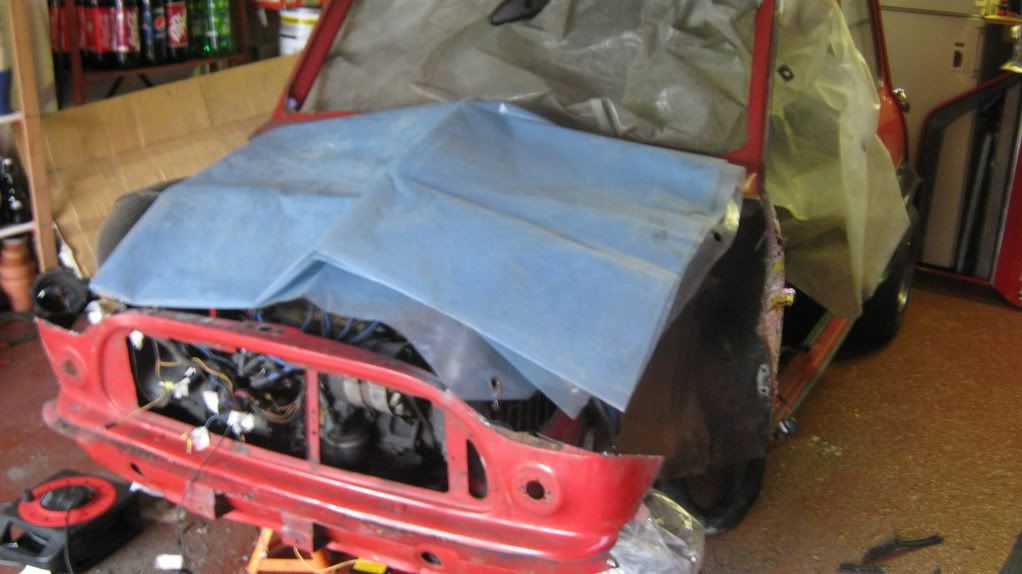 Centre punching spot welds. 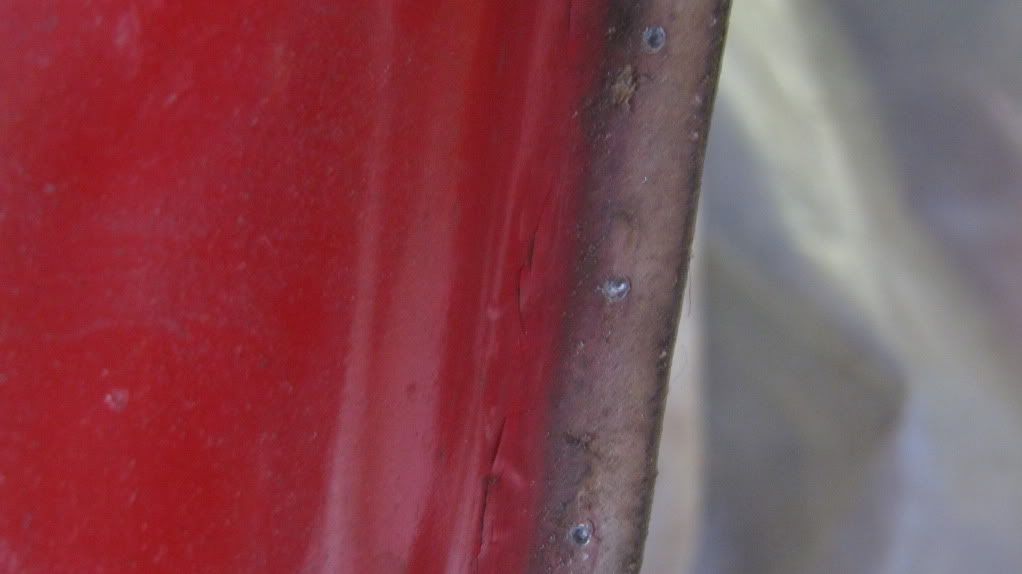 Spot weld drill bit to get rid of them. 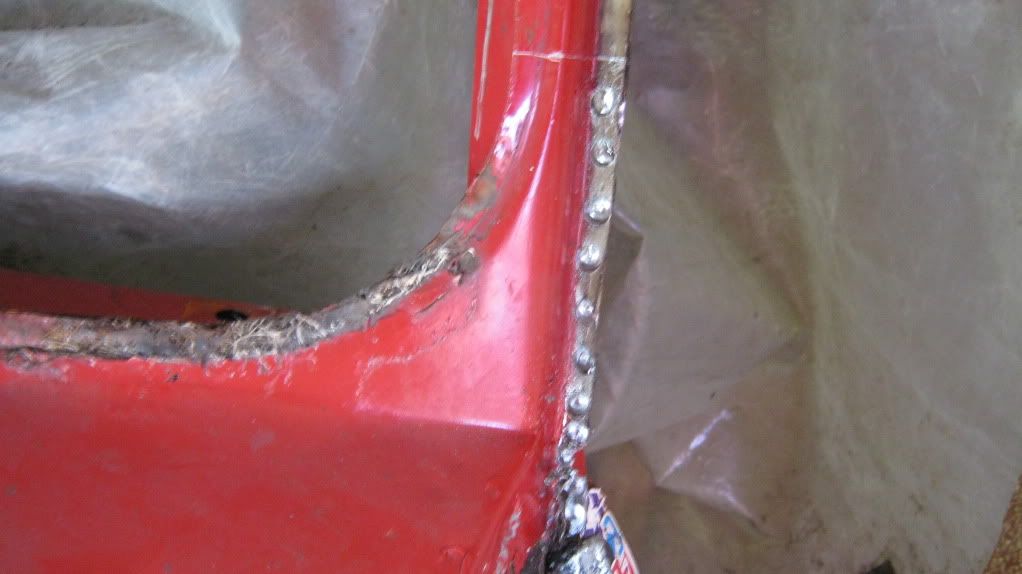 That wasn't too hard... 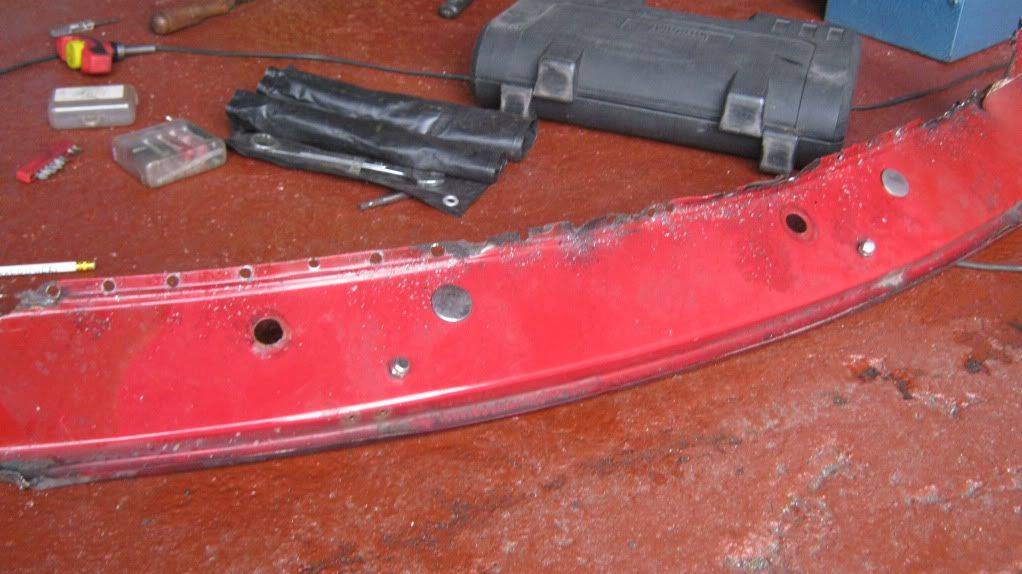 You've got to be careful when cutting through the box section part of the scuttle on the sides here, as on the passenger side there is part of the wiring loom running through, and on the drivers side the windscreen washer fluid tube (only on the Mk5+ shells like mine). 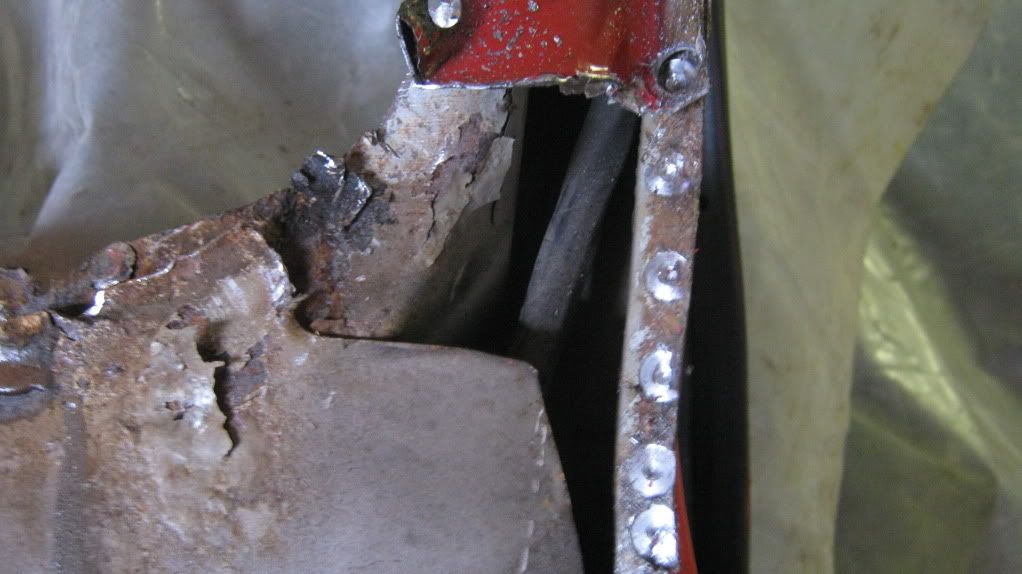 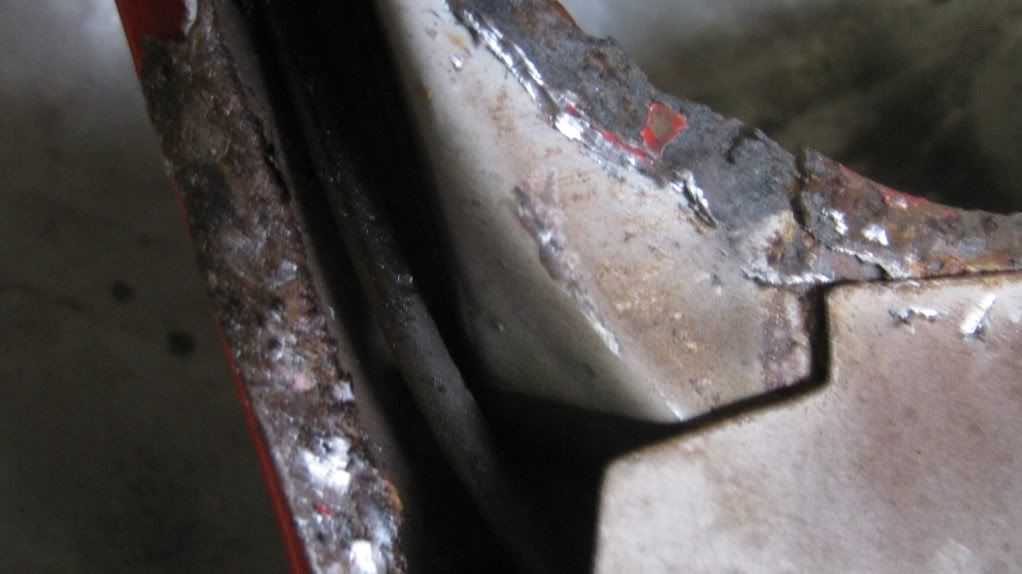 The scuttle closing panel on the drivers side was just layers of rust held together with underseal and fell off in my hand. 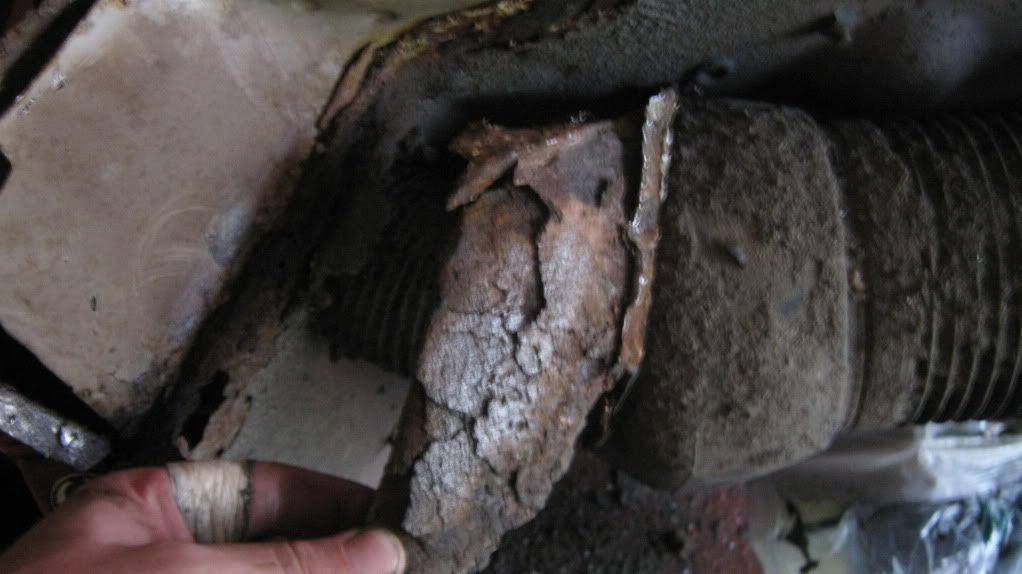 The area round the air vent was a bit, err, drafty...  So, there were quite a few bits that needed repairing before I could go about fitting the new panels, but I still needed to get the old A-panels off. Quite possibly the first stickerbombed A-panels on a mini, which I have seen copied a few times by others, so I can almost think I started a trend with that... I know it's not to everyone's taste, but it was different and saved me repairing the rust until now! So I began on the drivers side. 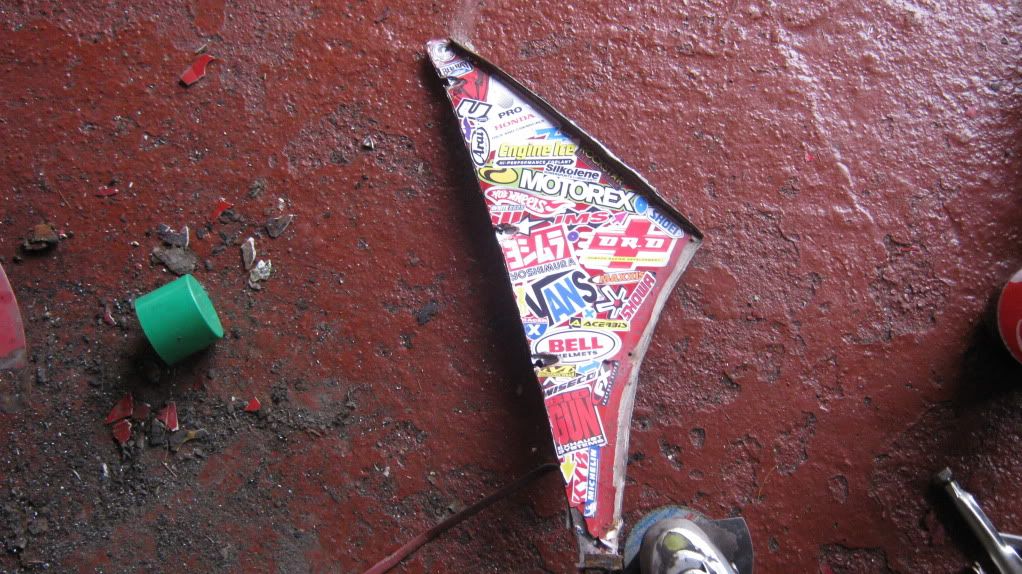 Definitely a few patches needed here... 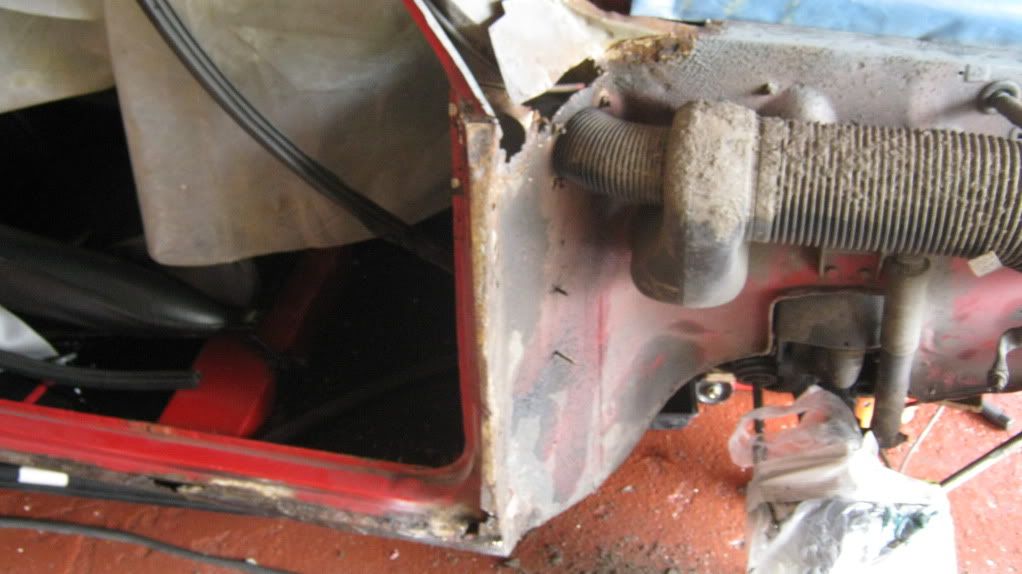 I didn't know where to start! Bottom to top seemed logical enough. 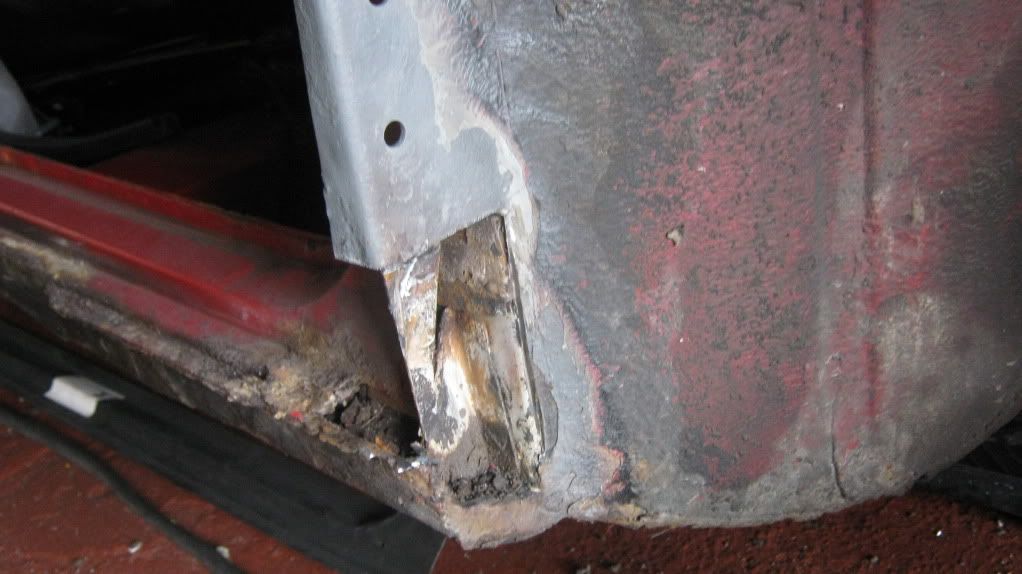 Made myself a template from an old pizza box and transferred to metal. 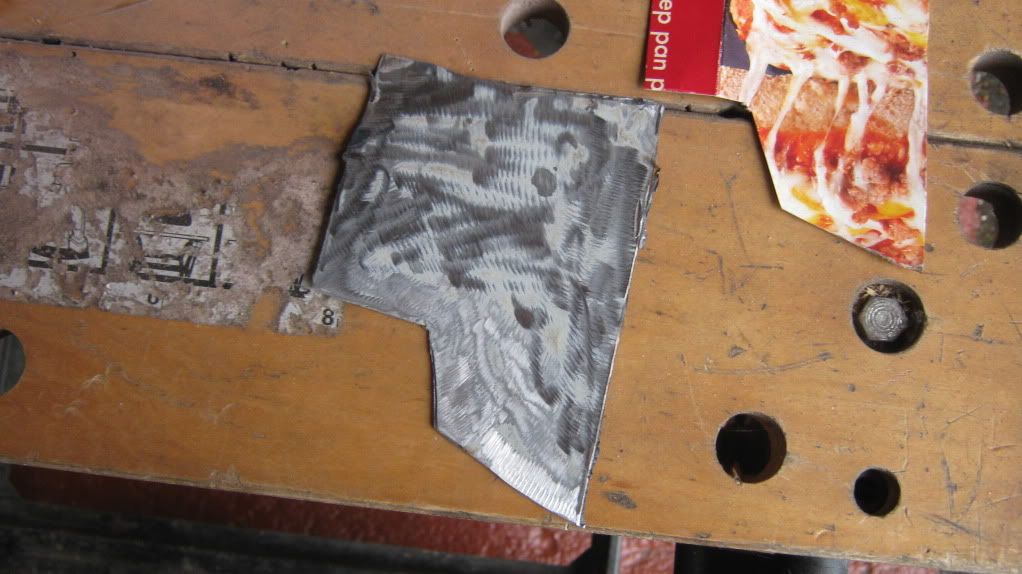 Welded to the car. 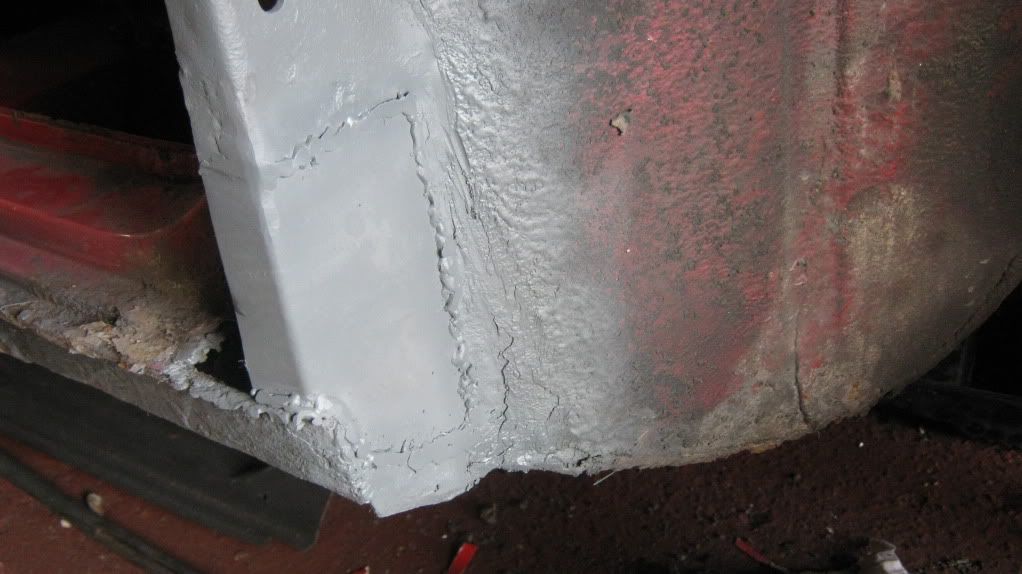 The top dash rail, bulkhead, and flitch needed repairs. 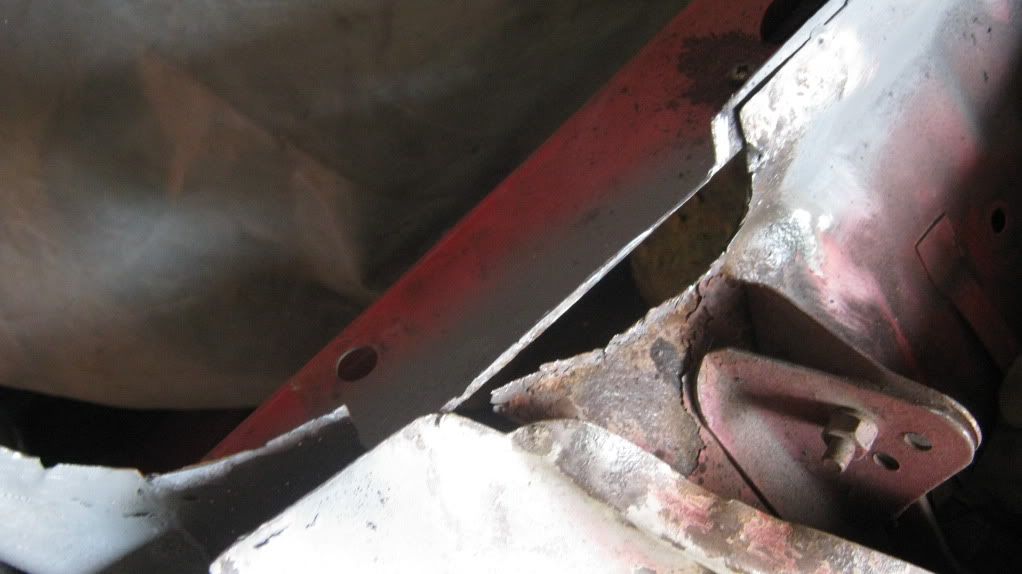 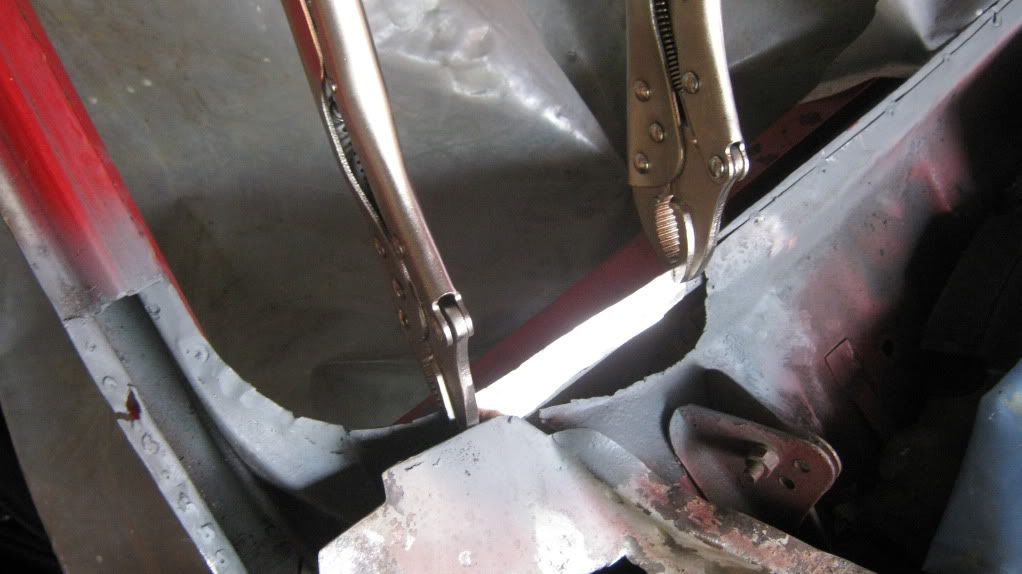 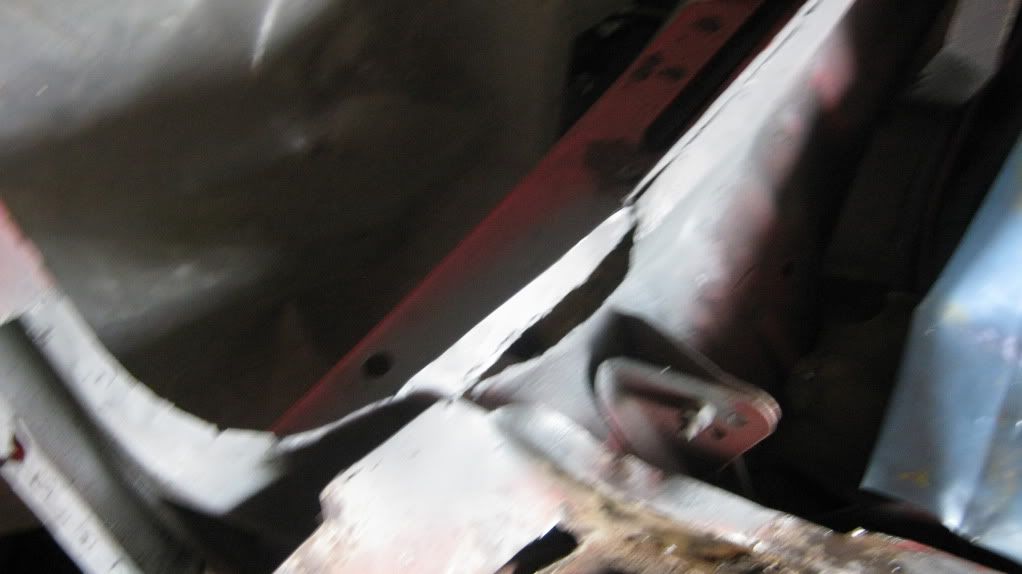 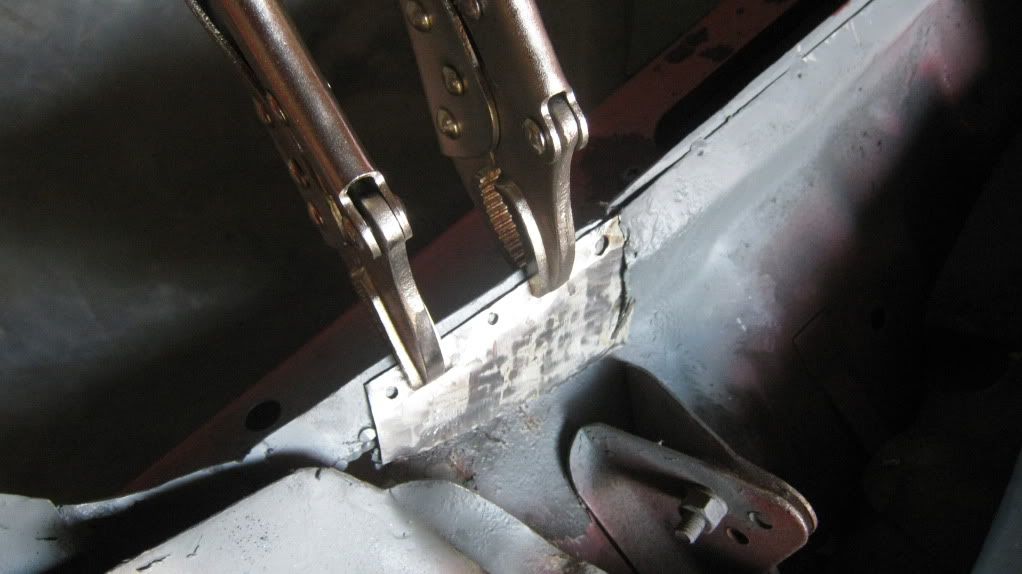 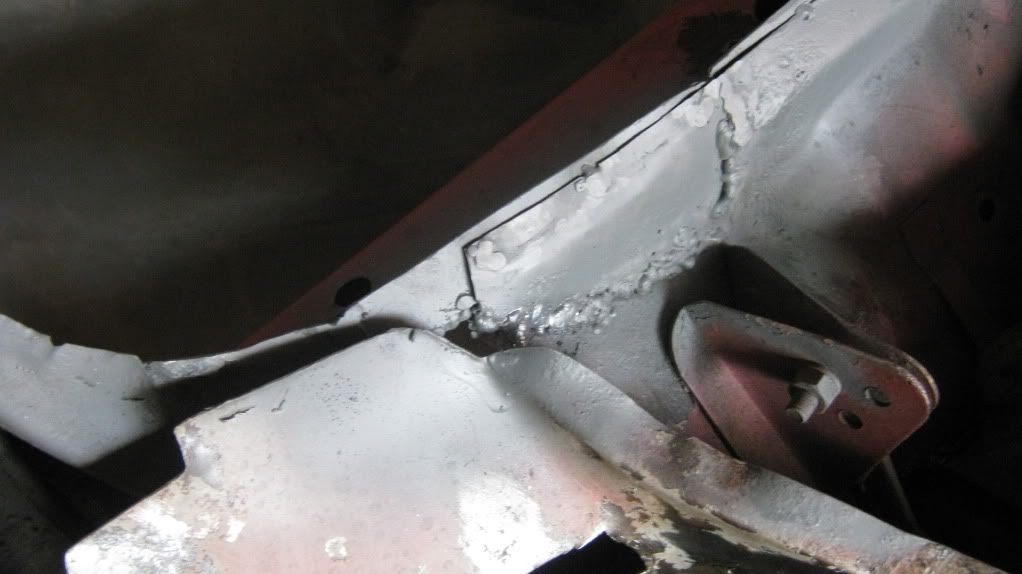 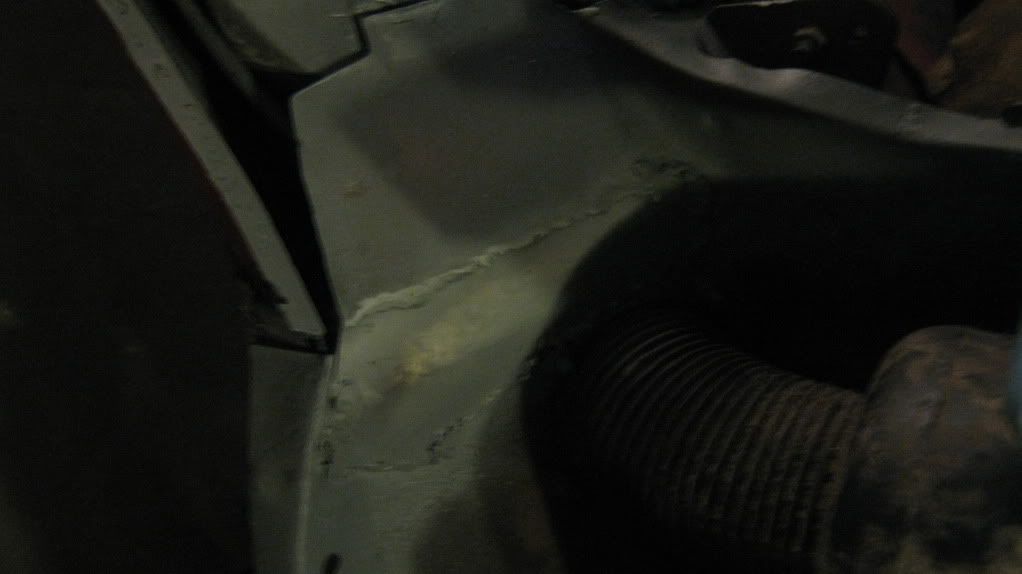 Some nice progress so far. 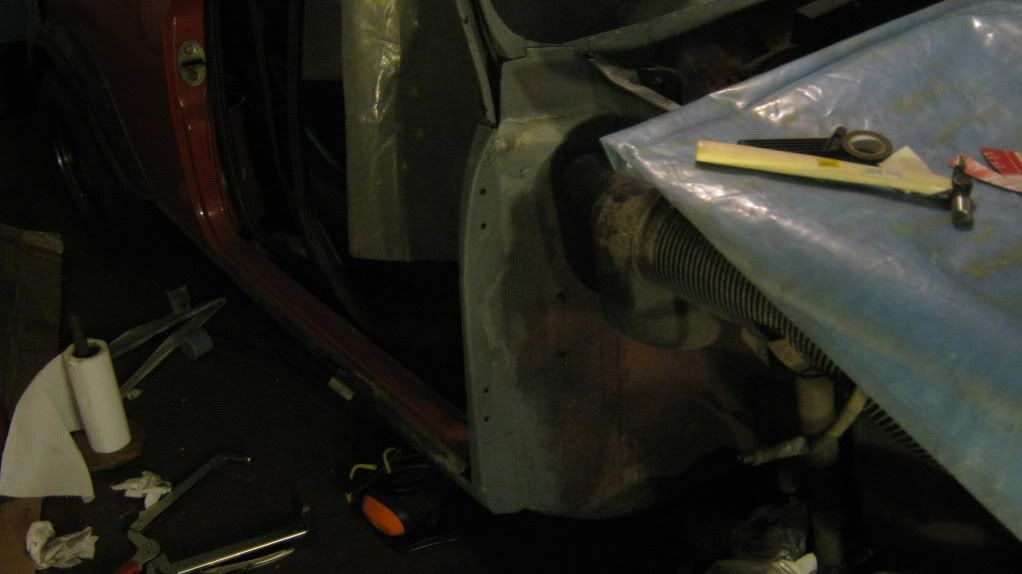 I then made a scuttle closer for the driver's side. 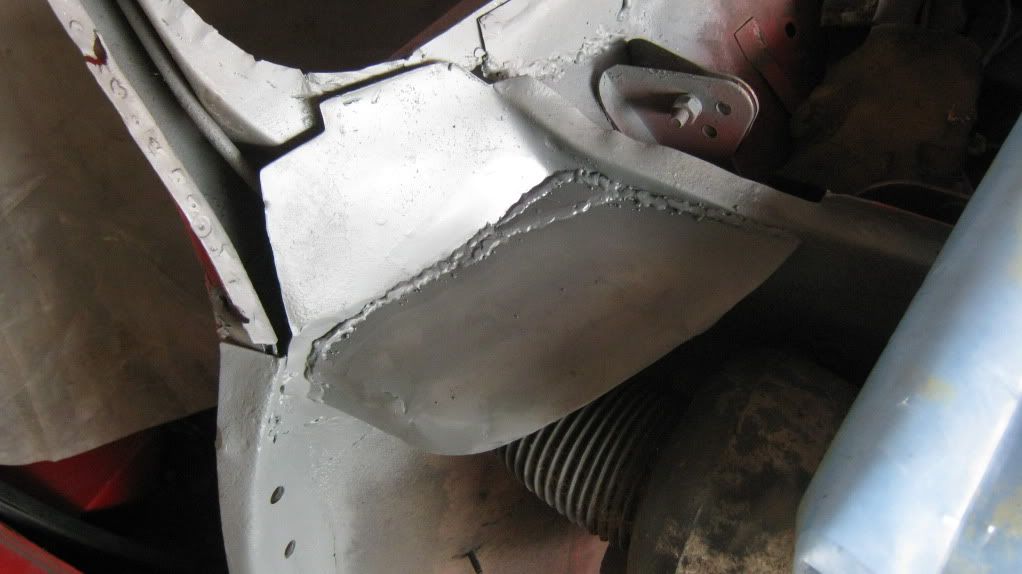 That was the driver's side done, and I only needed a little patch on the passengers side. 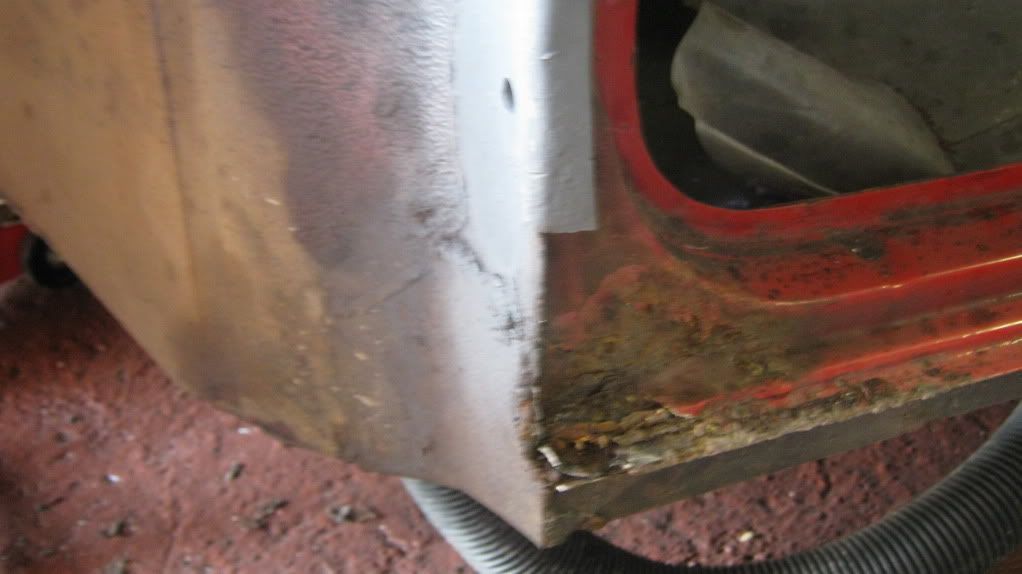 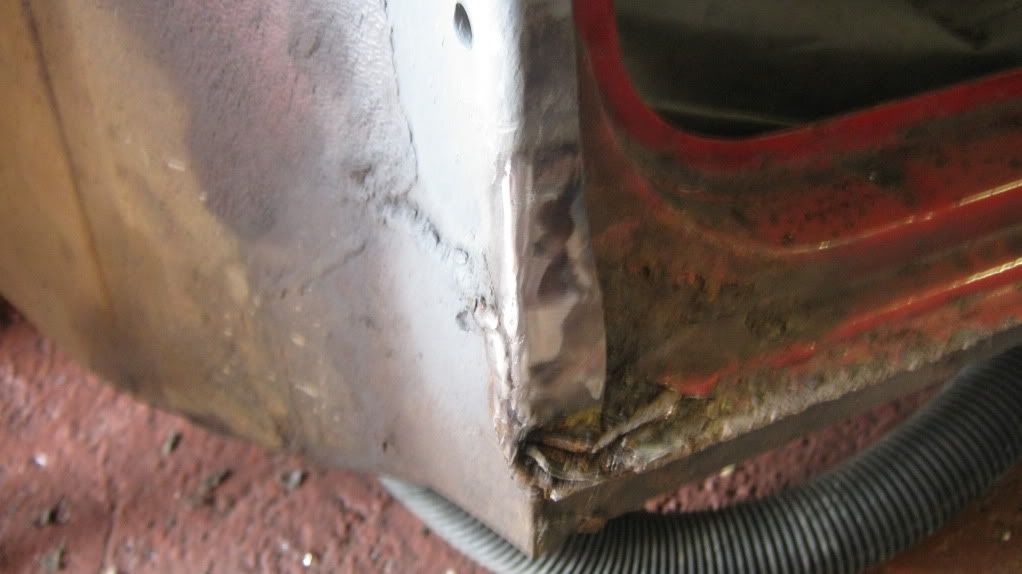 Oh yeah, because I'm a penny pinching student I didn't bother buying any sheet steel for these repairs, as I knew I'd have some lying around somewhere... 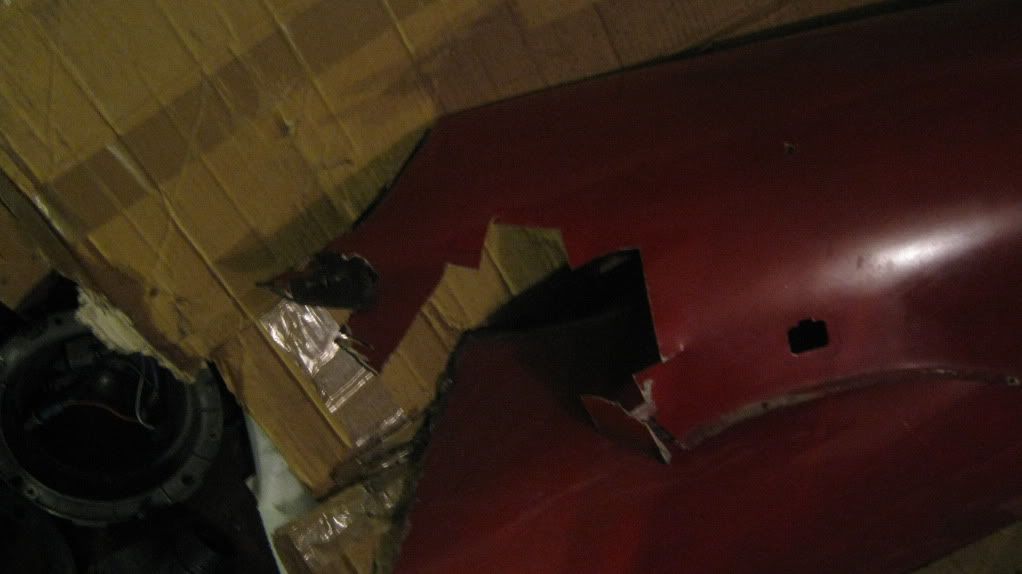 So that was all of the repairs done, which is a pretty naff job to have to do as it never really feels like you're getting anywhere doing those little bits... Mmm, a test fit of the scuttle was needed for a mojo boost!  I deleted the spare wiper holes on the scuttle, as I don't like the way it looks on Minis with the big grommets in covering the holes for LHD drive cars... 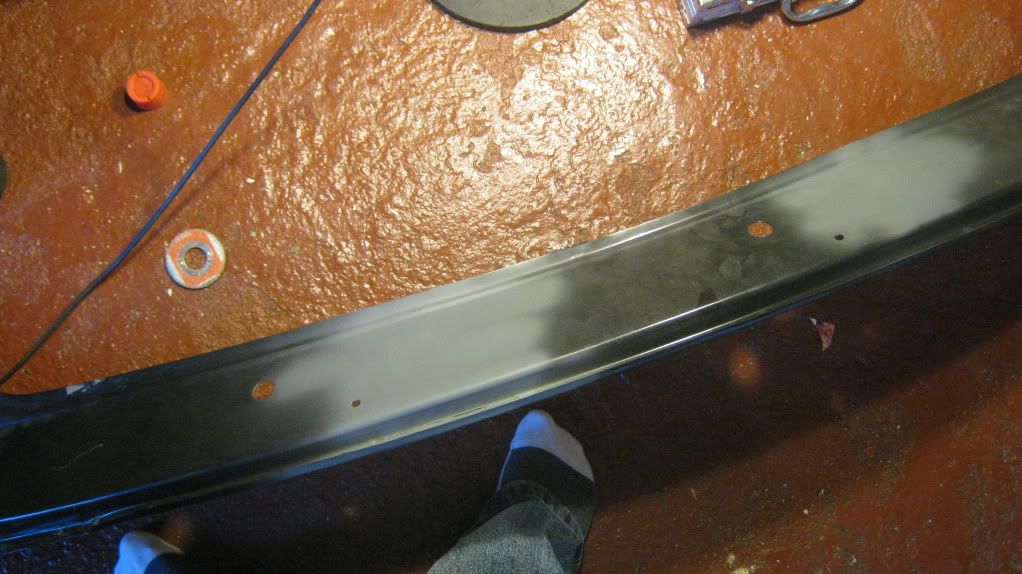 The new panels were almost ready for welding, but I first needed to drill about 4 million holes for the plug welding. That must have been the worst part of this front end replacement, because everything is spot (plug with a MIG) welded together, I must have easily drilled a few hundred holes by the end of it... New panels will be going on in the next instalment, so stay tuned... If you've made it this far, then thank you very much for reading! Cheers guys and gals The Otter |
| |
|
|
MrOtter
West Midlands
"Your car is your story, so don't let someone else write the book." - Moog
Posts: 281
|
|
Oct 11, 2012 22:34:44 GMT
|
Next thing to do was to put the new scuttle on and in the right place to make sure the windscreen fitted after I was done of course! I'd carefully measured the windscreen aperture in a few places before I cut the old panel off, so I could use these measurements when fitting the new panel. It took a while to drill all these... 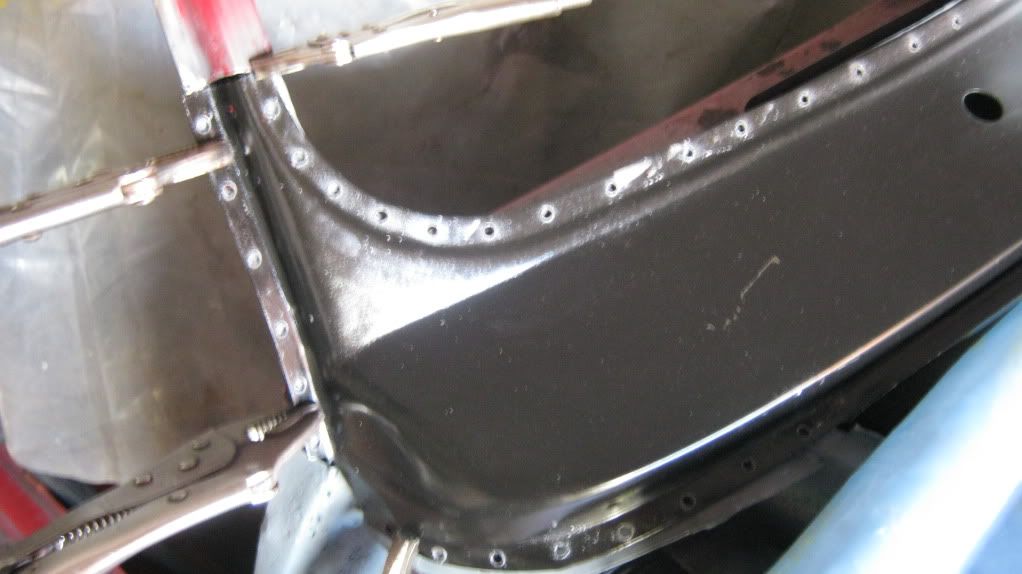 Luckily I'd decided to stock up on cheap mole grips before I started this front end job. 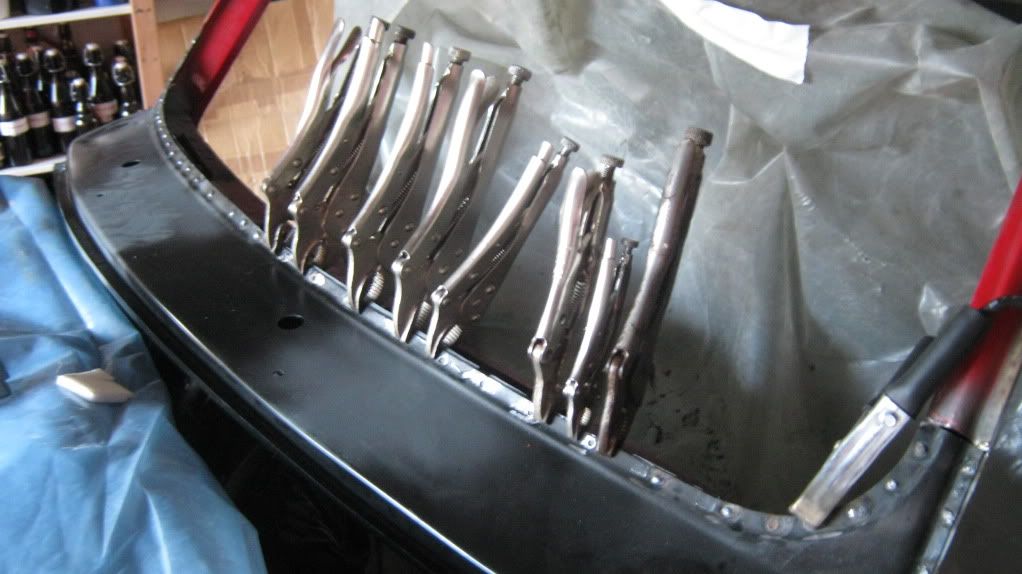 Many plug welds later and the scuttle was in. 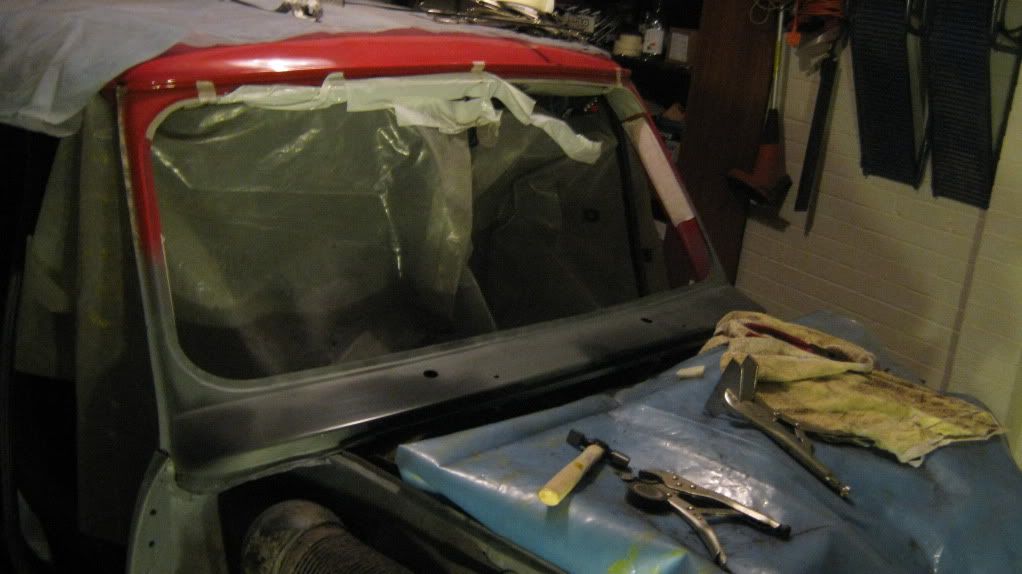 It was getting a bit late in the evening to still be doing bodywork after I'd put the scuttle in, so I decided to strip and regrease the wiper motor and wheel boxes. 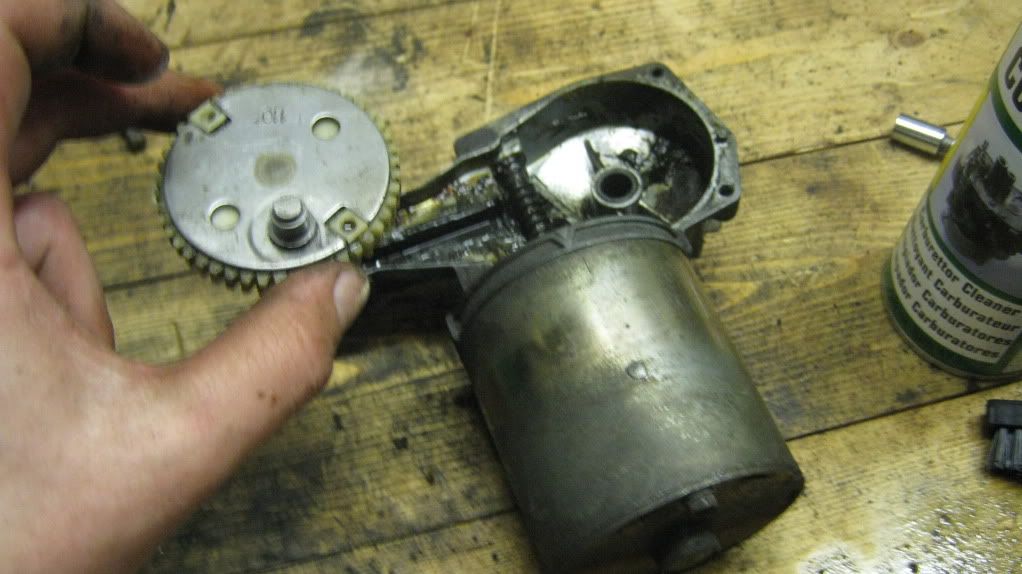 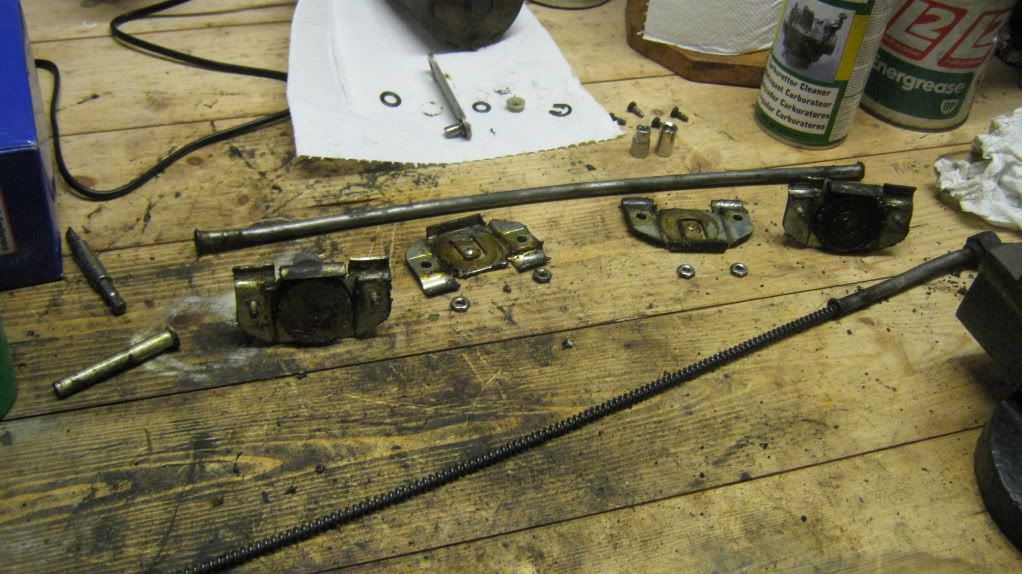 Then the next day I carried on pulling the rest of its face off. 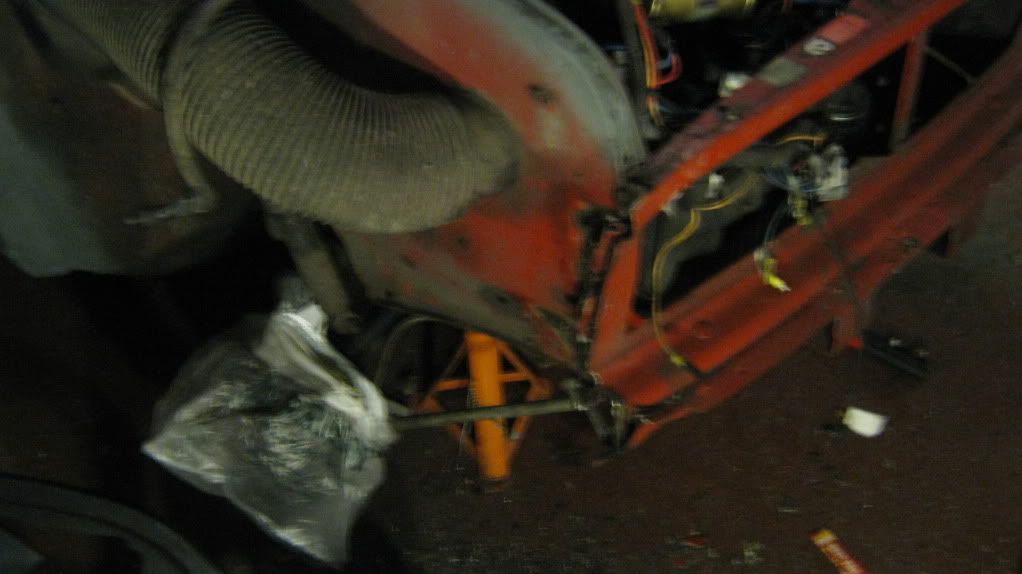 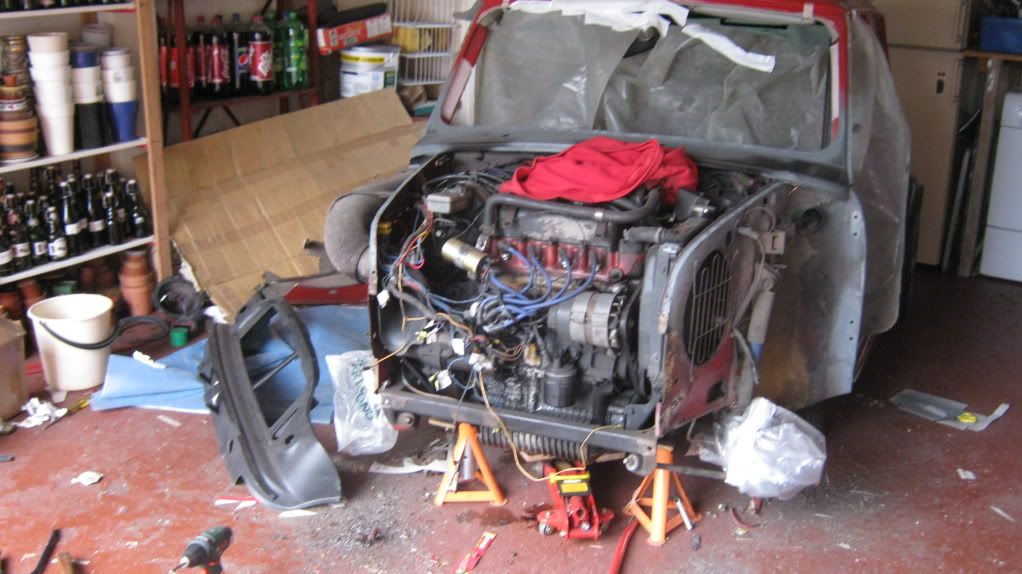 After all the old stuff was removed I had to give everything a quick trial fit, just to remind myself of the goal of the project. 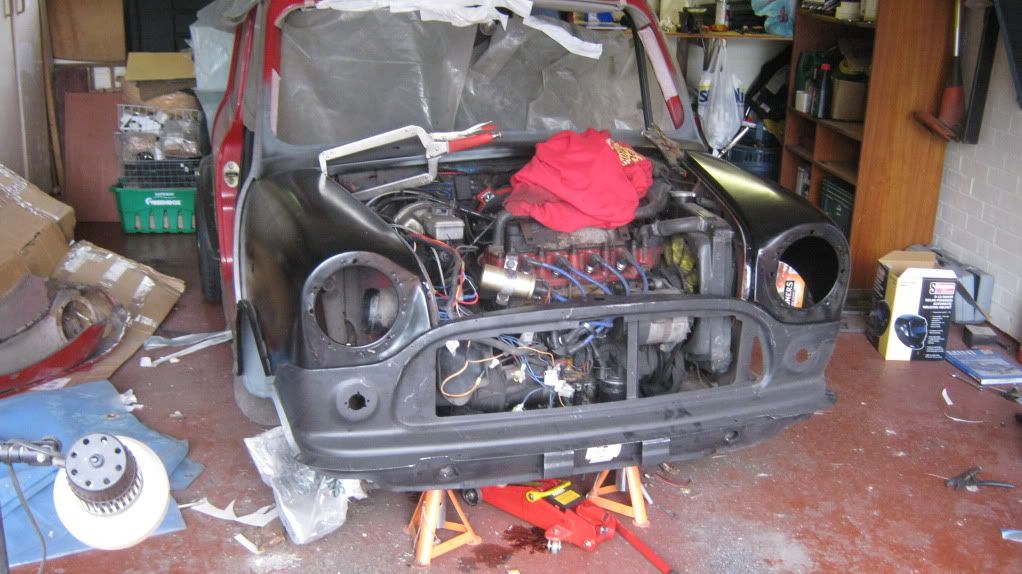 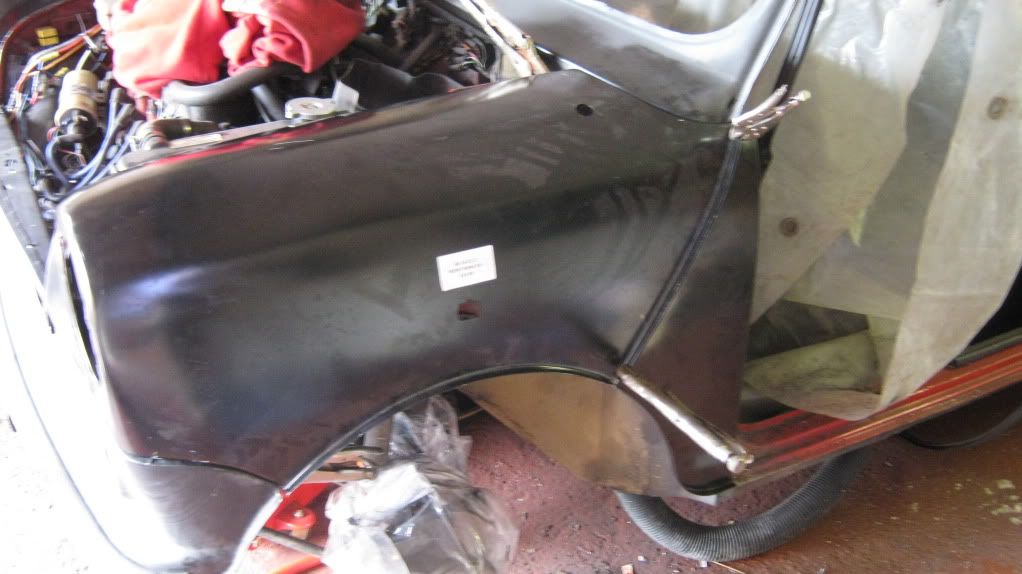  Not a bad fit overall really, seeing as only the scuttle was a genuine panel! I transferred over the subframe mounts (aftermarket solid ones) to the new front panel. 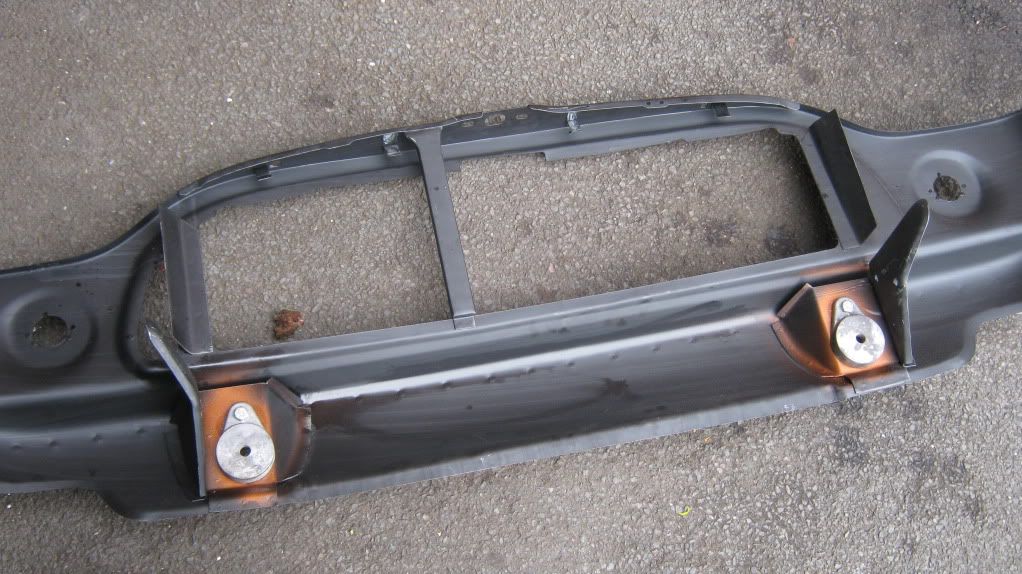 Then whilst I was checking over the scuttle, I noticed the windscreen demister vents were so warped out of shape that they were just blowing air at the underside of the dash rail. Possibly why my windscreen didn't like demisting in the winter! 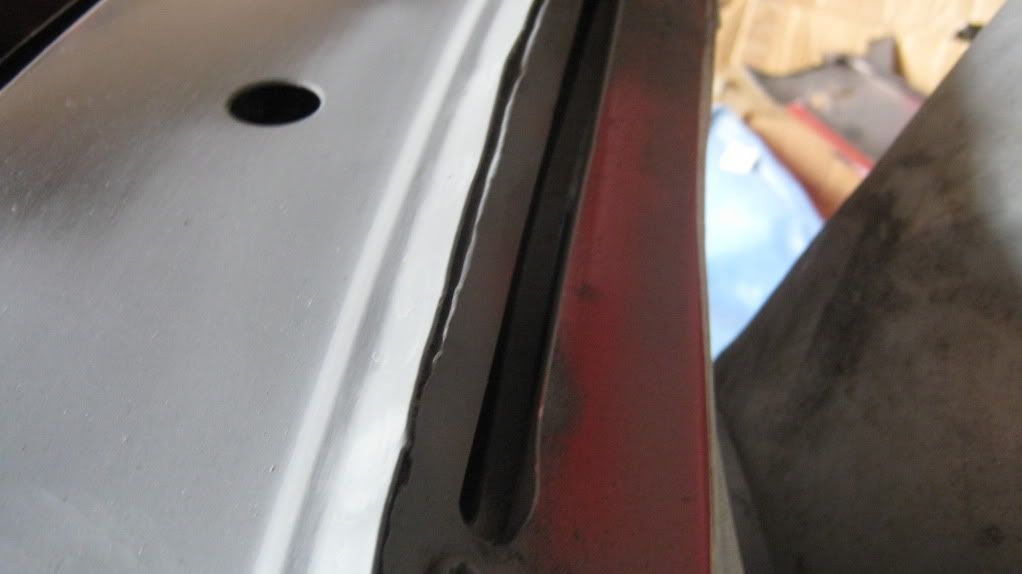 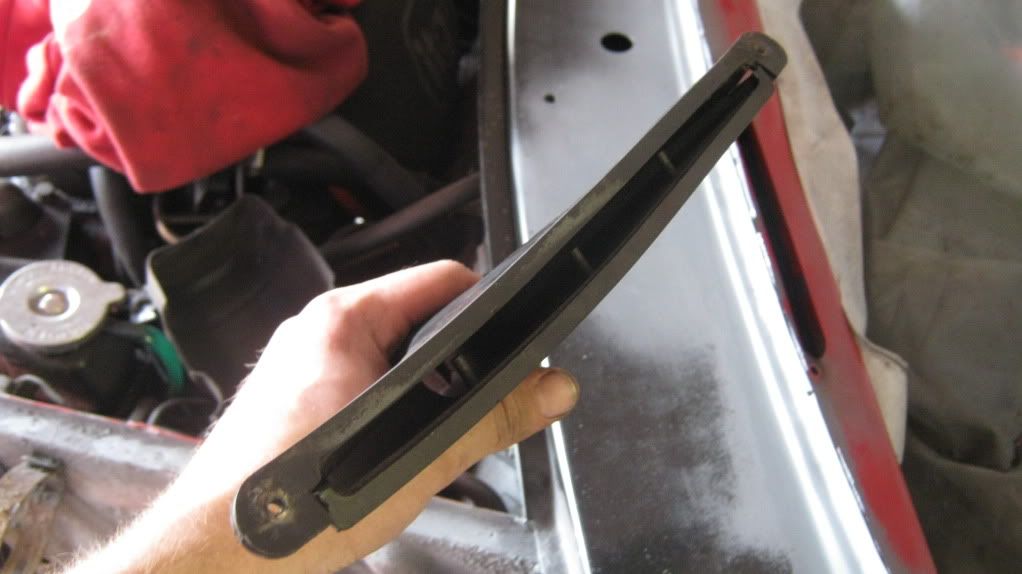 So I bent them back as best I could and only time will tell if they just warp back to the same position they were in before. 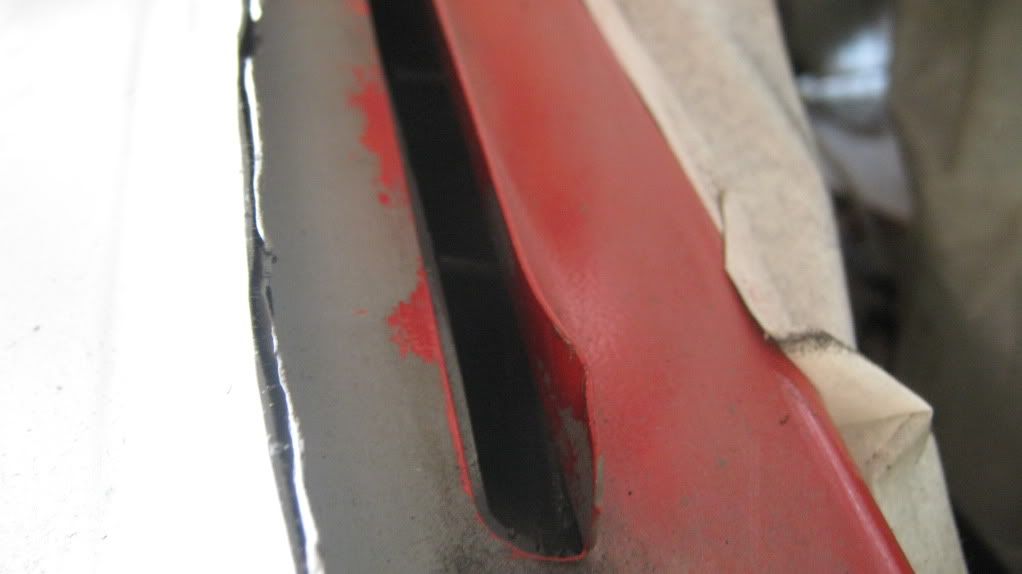 Next job was to weld up the holes for the self tapping screws that secure the later type grill to the front panel. I've retro fitted a Mk1 grille and moustache to my car, so I don't need any of these holes. 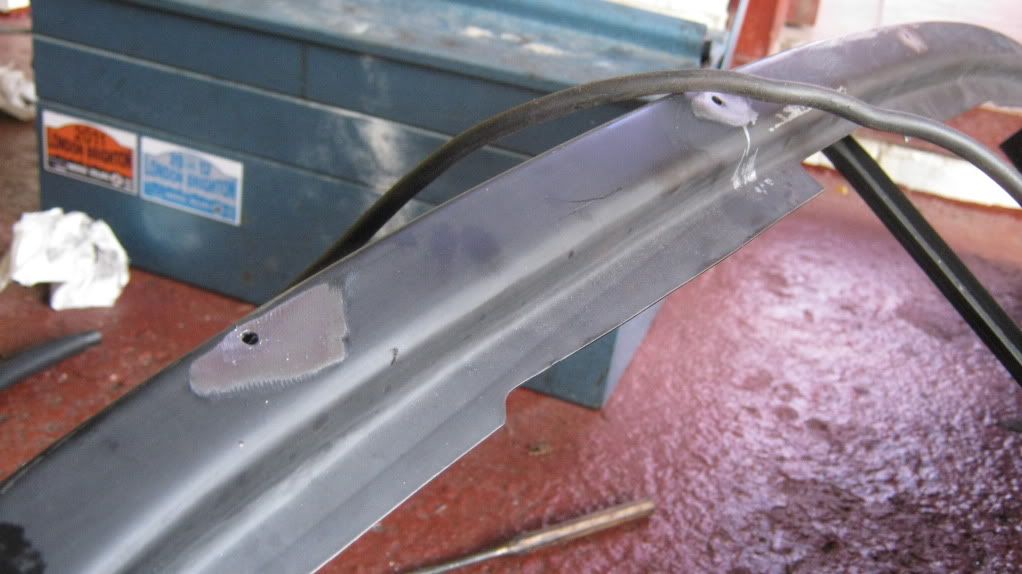 All gone. 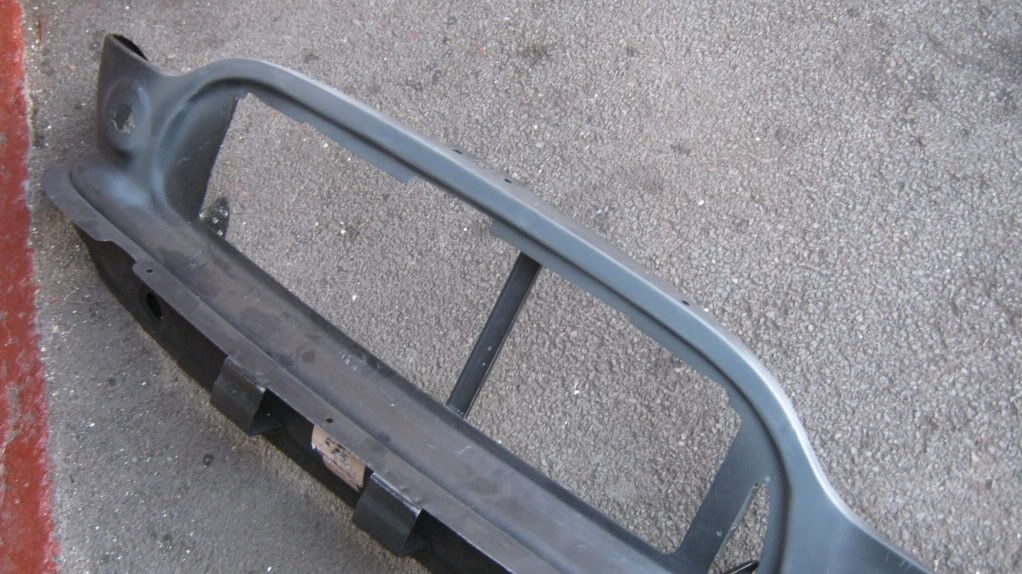 Still a bit more drilling to do for the plug welds. Ugh. 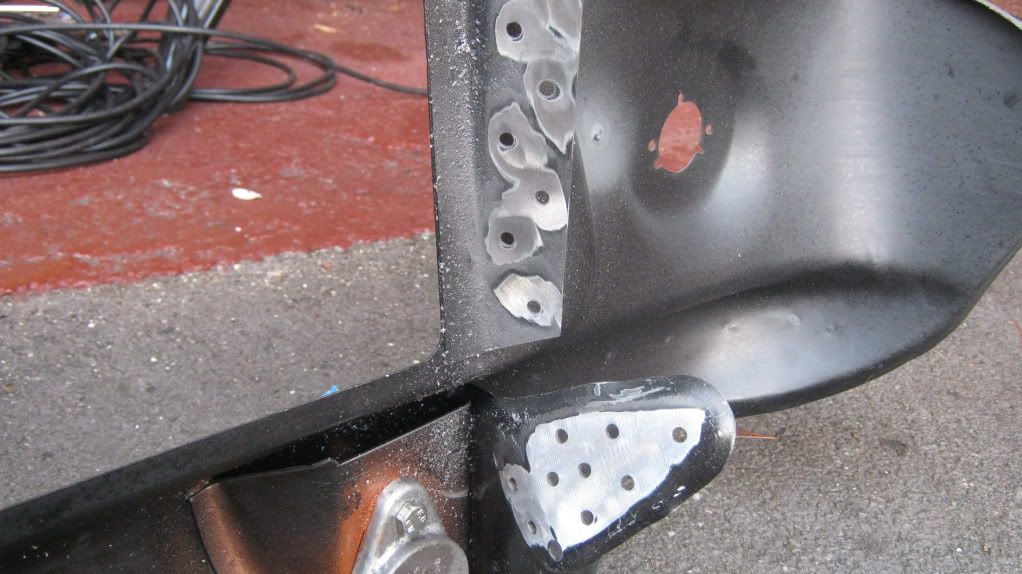 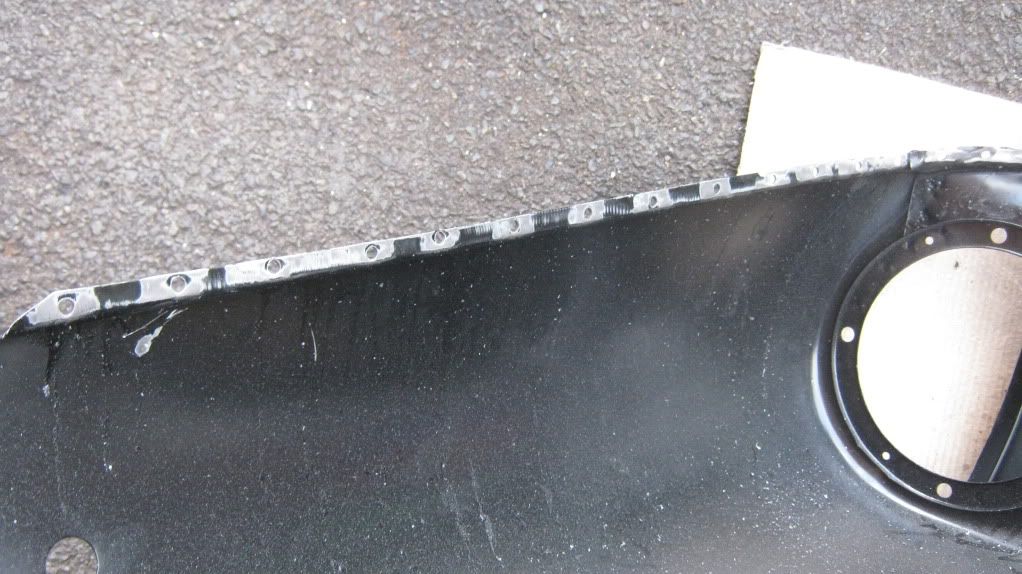 I also picked up my door that day from the mini specialist I'd dropped it off at to get a snapped hinge stud replaced. It's a fiddly job, drilling out the old stud (hardened by welding) and then welding in a new stud in it's place, while making sure it's perfectly in line of course, so I paid the princely sum of £10 to get it done for me whilst I cracked on with the rest of the bodywork. 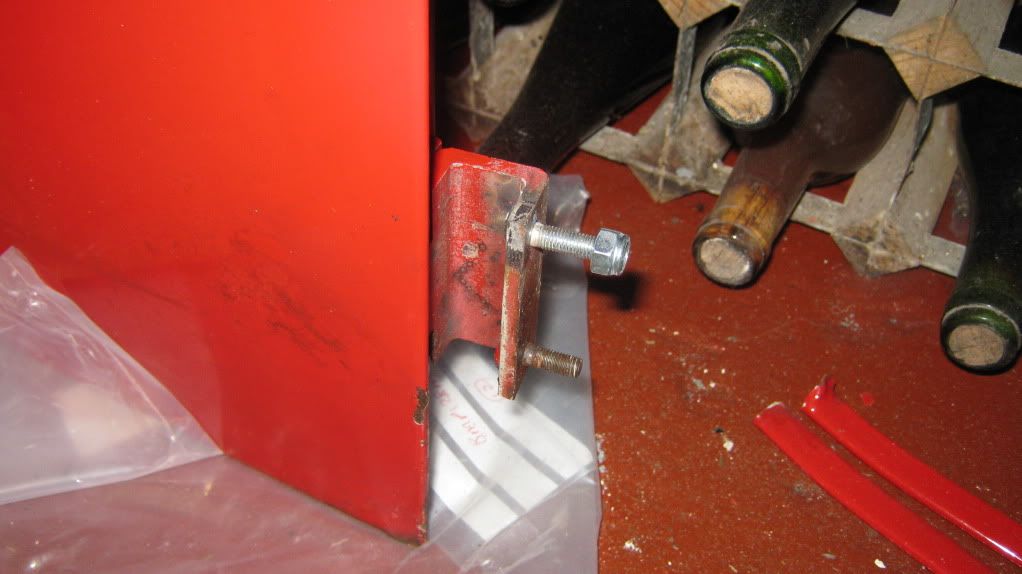 Front panel and wings welded in place. 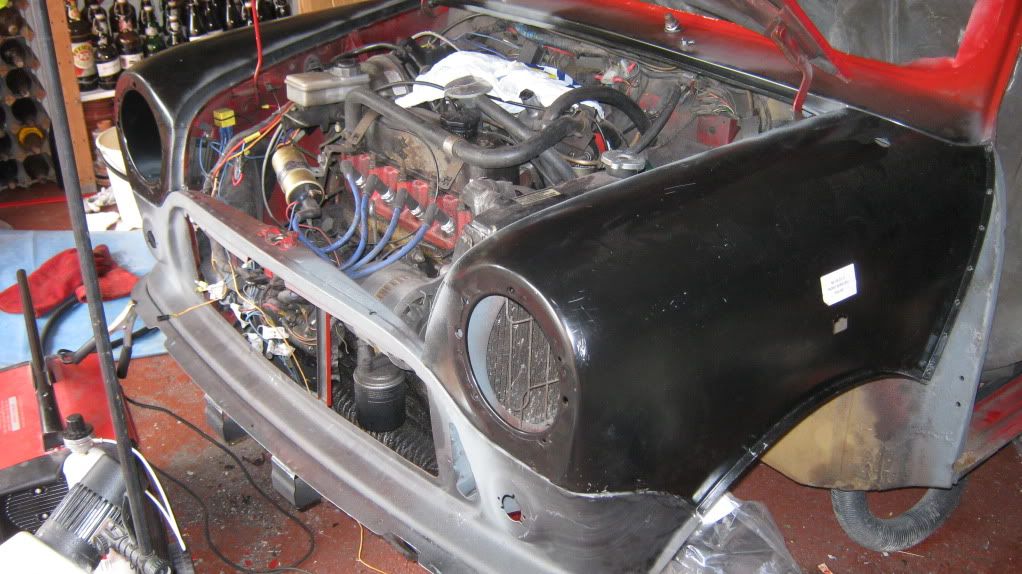 Then the A-panels. 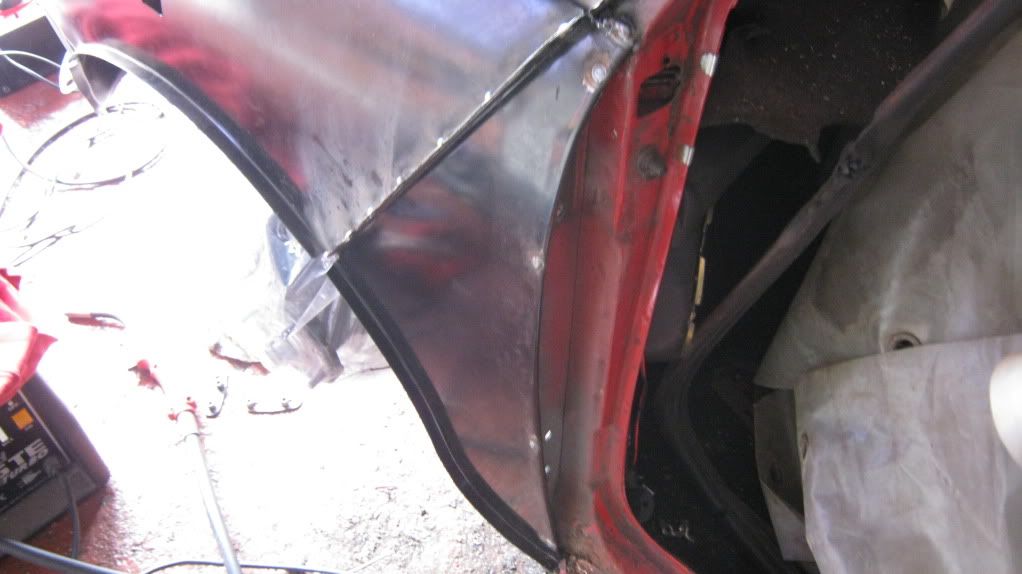 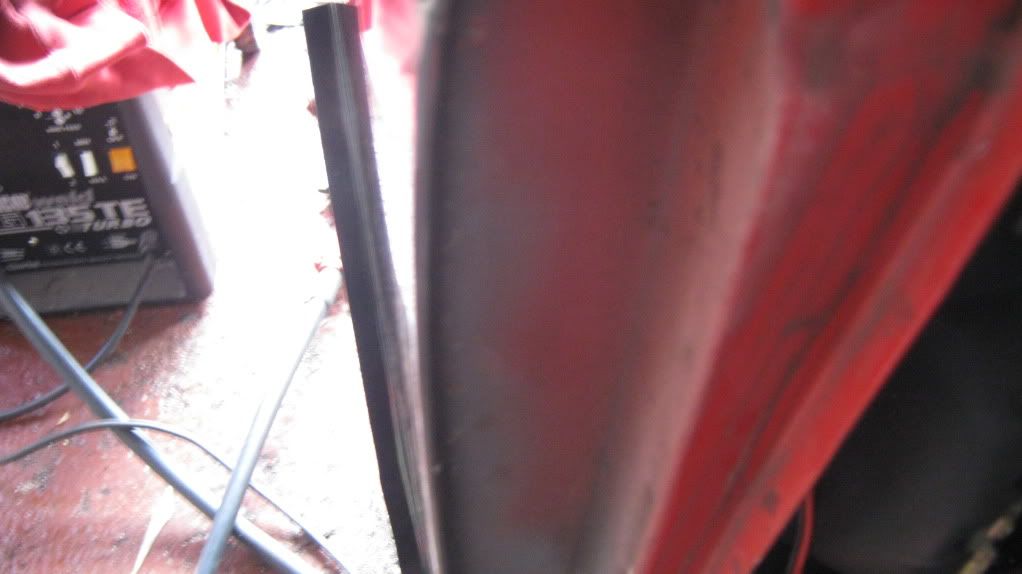  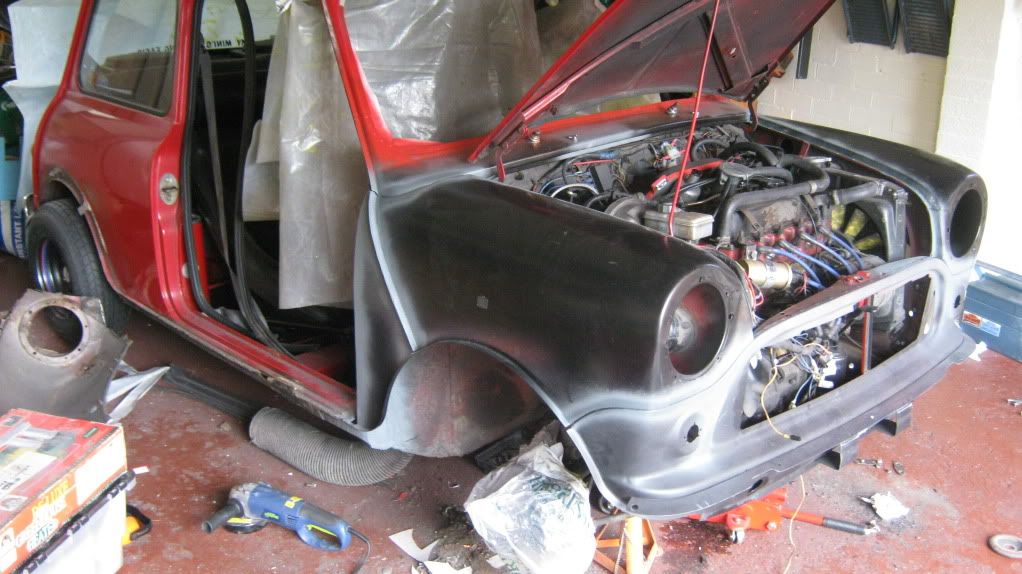 Then after a good pasting of sikoflex, underseal, and stonechip, it was ready to go back together. 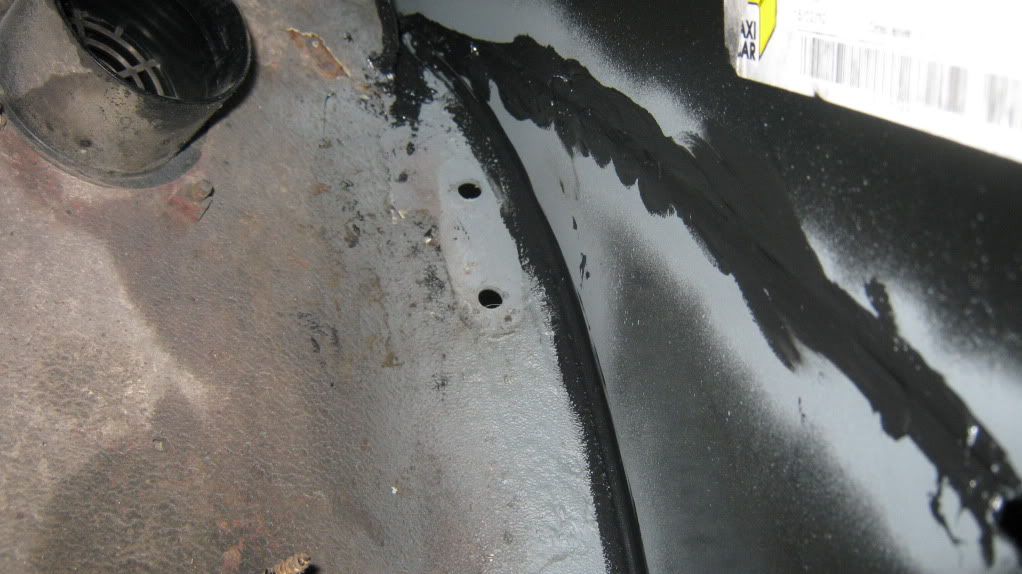 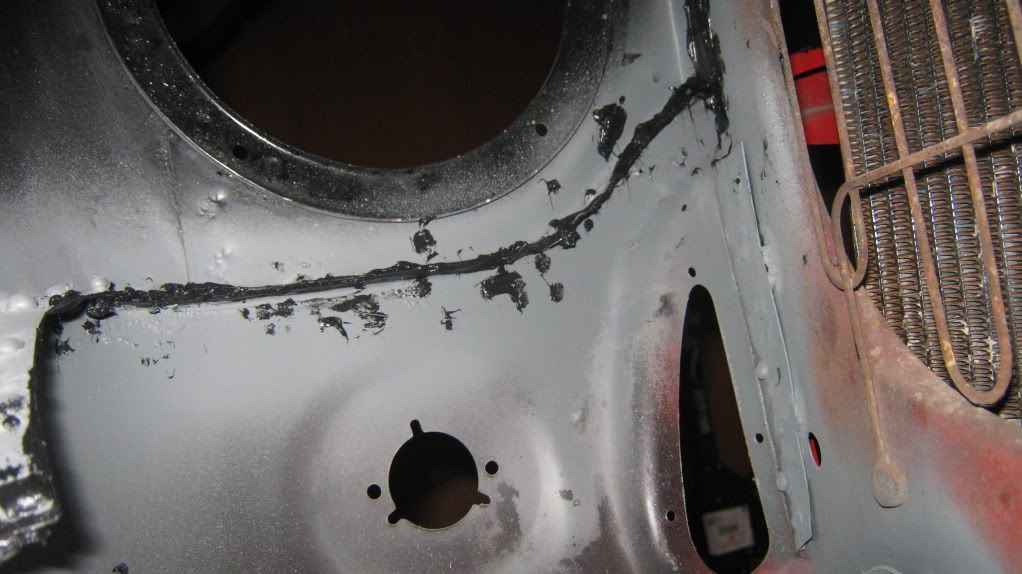 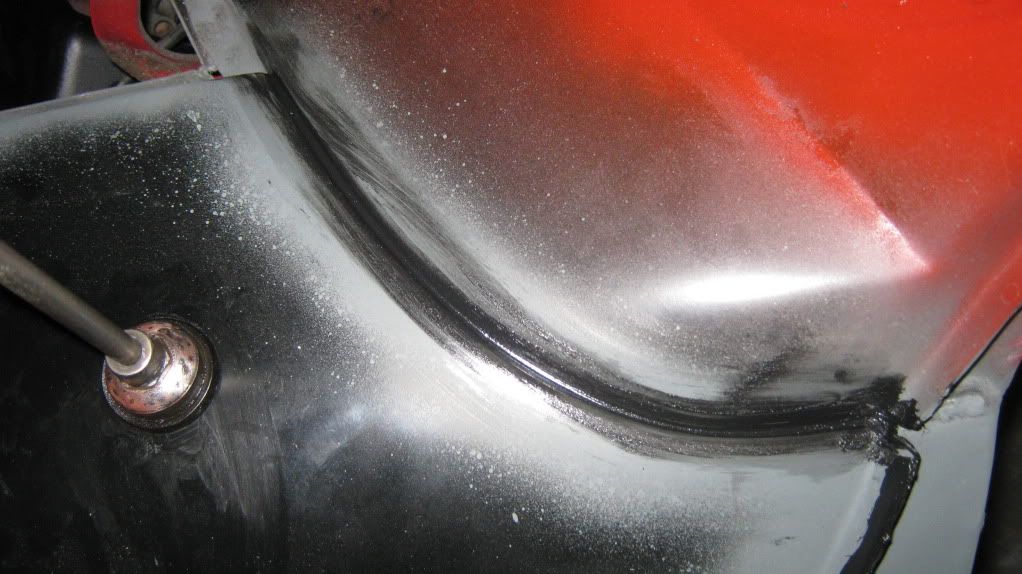 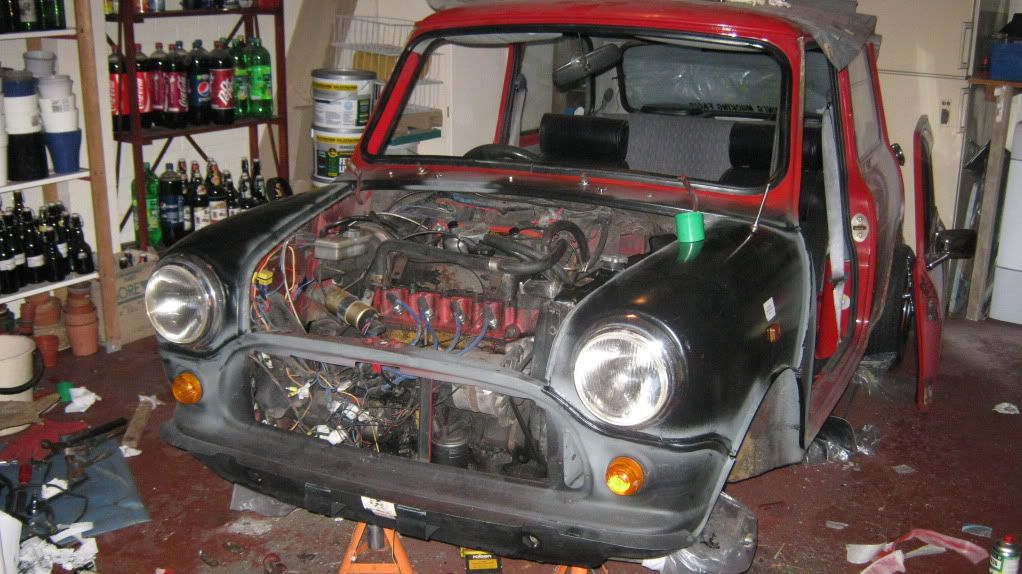 Finally, I got it back on it's wheels! I hadn't painted it yet because I needed to use the car the next day, and because I still needed to drill the holes in the wings for the arches that I hadn't got fixings for yet. So, a drive to screwfix was in order, I'm sure nobody would have noticed the 2 inches of poke right? 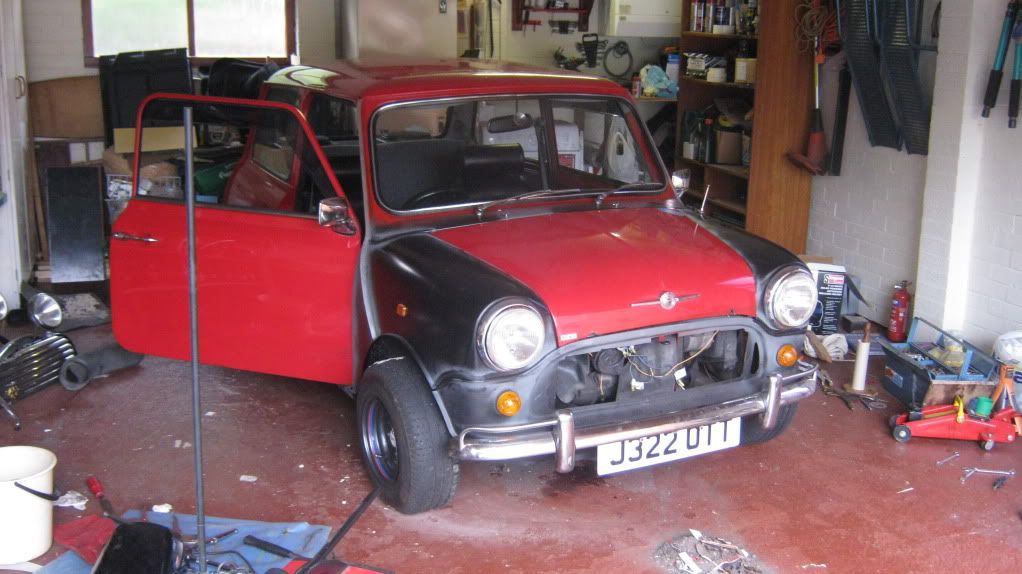 After I got back I test fitted the new arches with masking tape to see how they would sit after it was done.  A bit more poke than I was hoping for... oh well 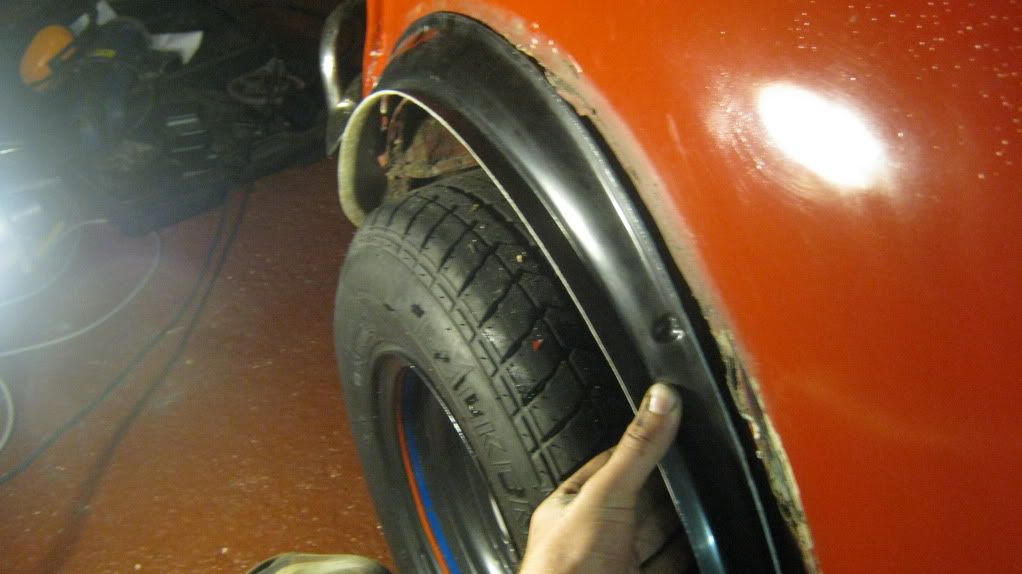 I still had a lot of work to do to the rear of the car before I could fit the arches though. When I bought the car it had blended in arches, so when I came to replace them with the Group 2 wides (as in earlier pictures) I simply used an angle grinder to cut off the old arches and just screw the new ones over the remaining lip of the old ones. Now I had some smaller and narrower arches to go on, I had to get rid of that old lip and all the filler that was put in to blend them in to the rest of the car. Boy was that a messy job, bloody filler dust  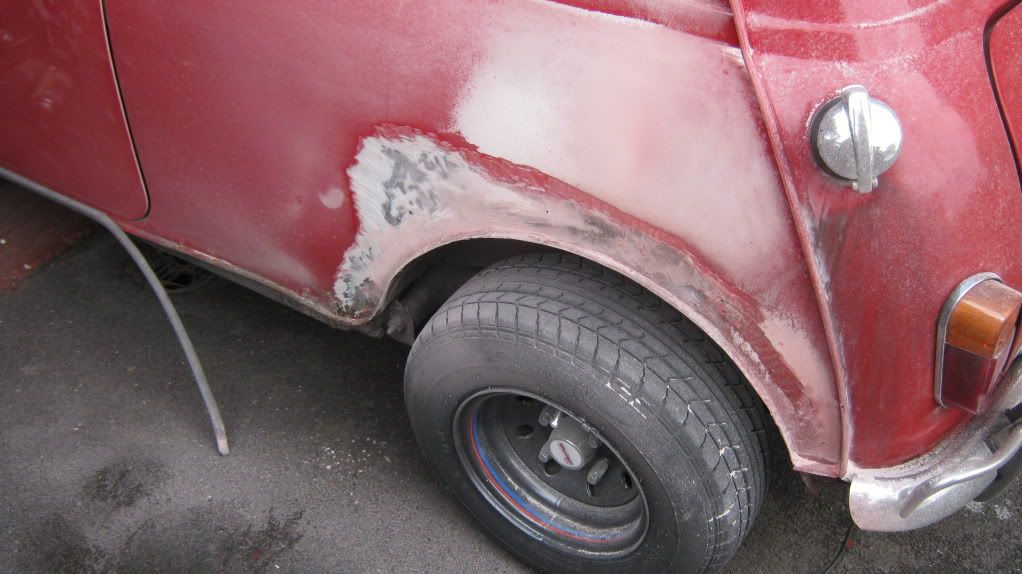 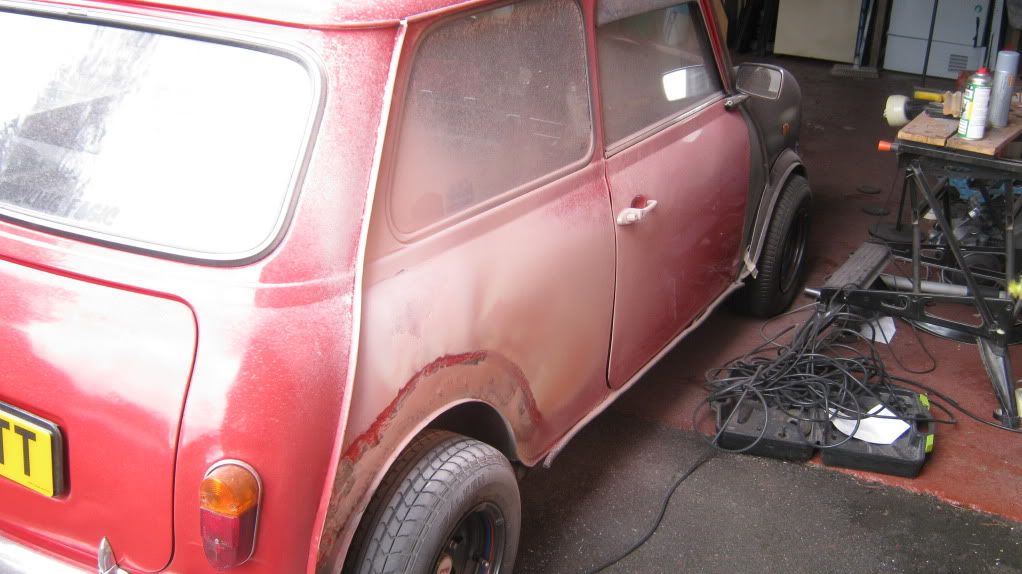 Whilst I was at it, I found a bit more rust that needed seeing to. 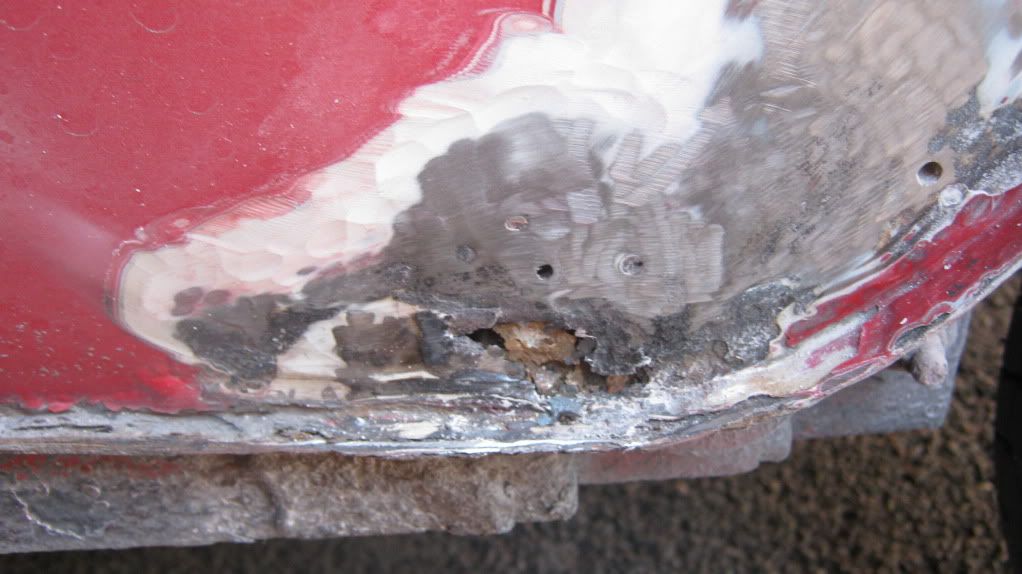 Along with all of the holes from the previous sets of arches on the car. God knows how many arches this thing has had, but there were 22 holes on EACH side of the car! So they needed welding up as well! 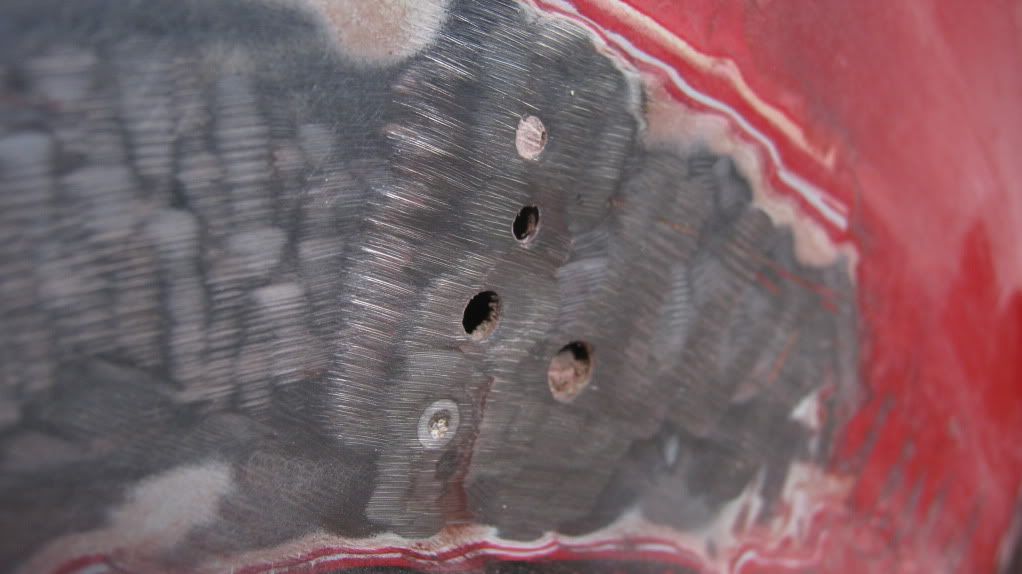 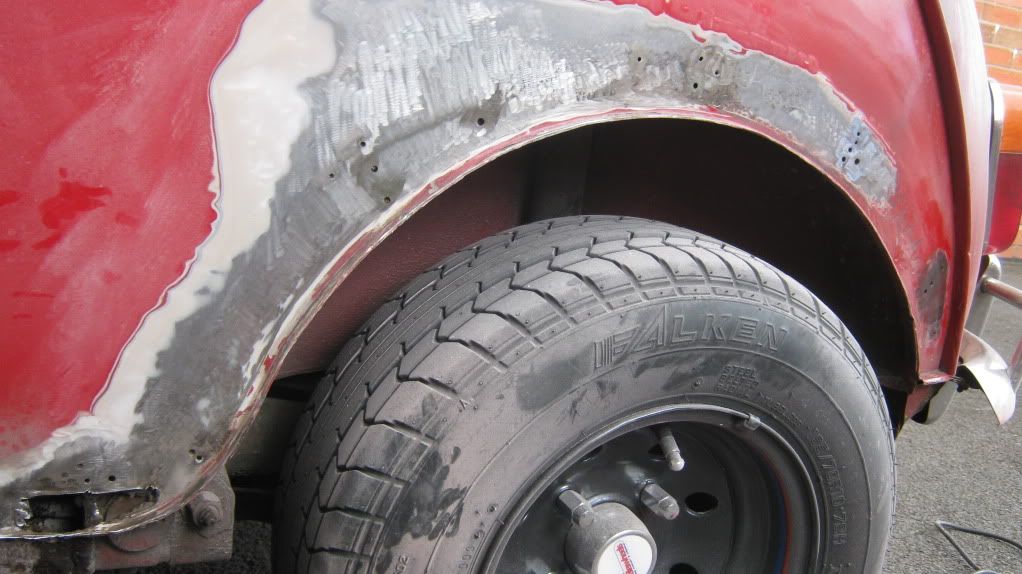 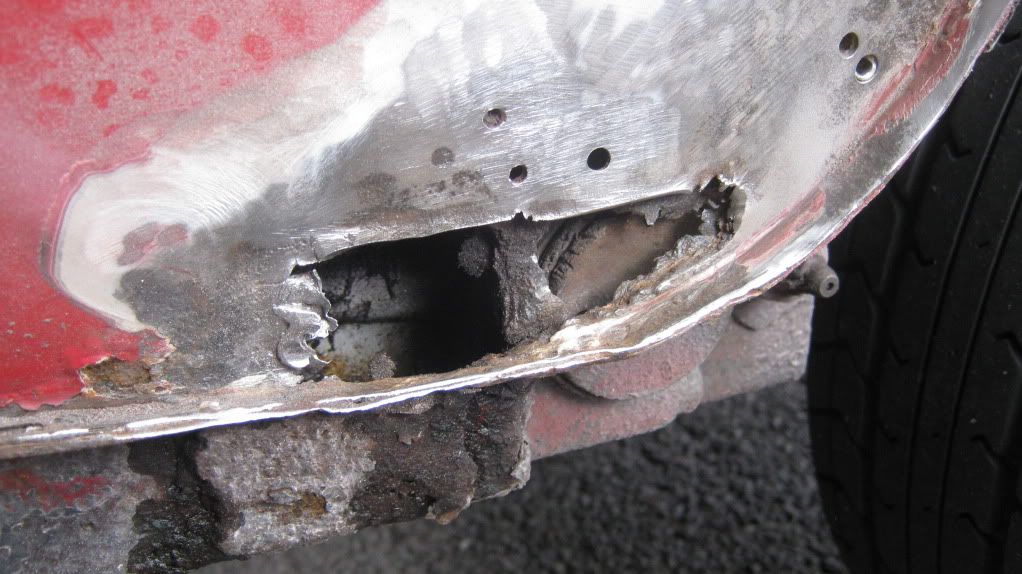 I did a nice looking weld for a change, so thought I'd take a close up of it. 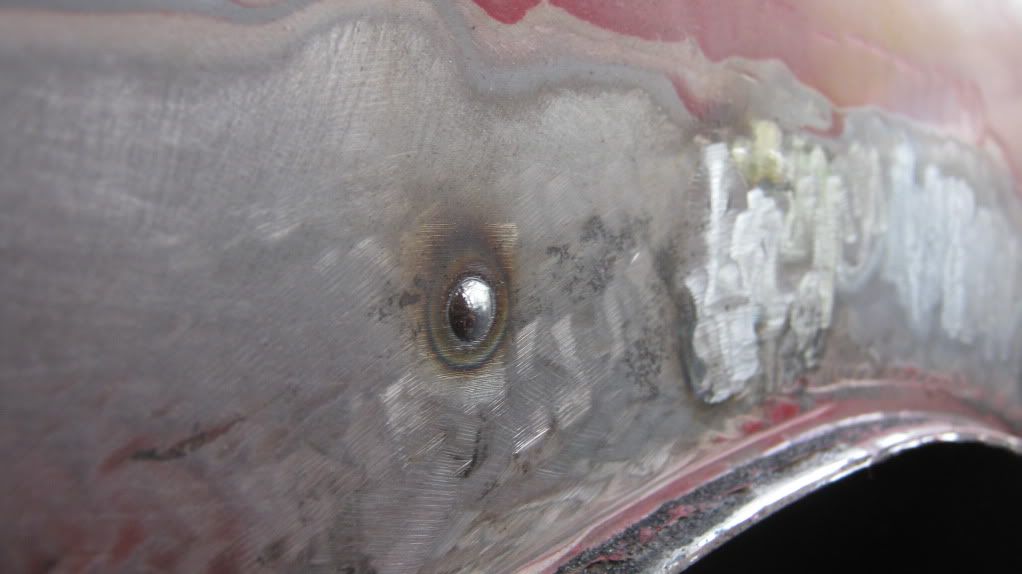 Making some progress. 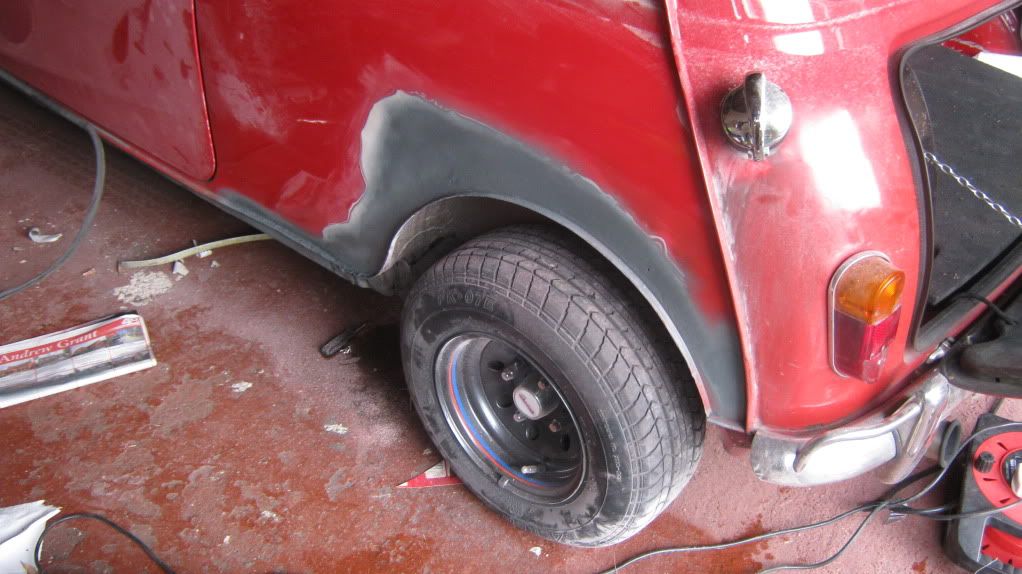 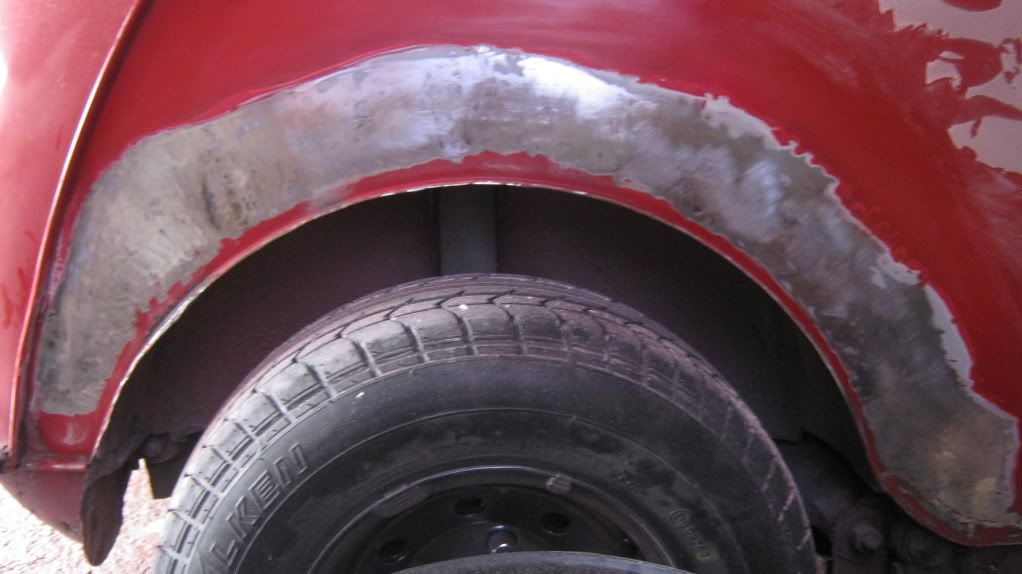 By the end of the day I was ready to fit the arches. 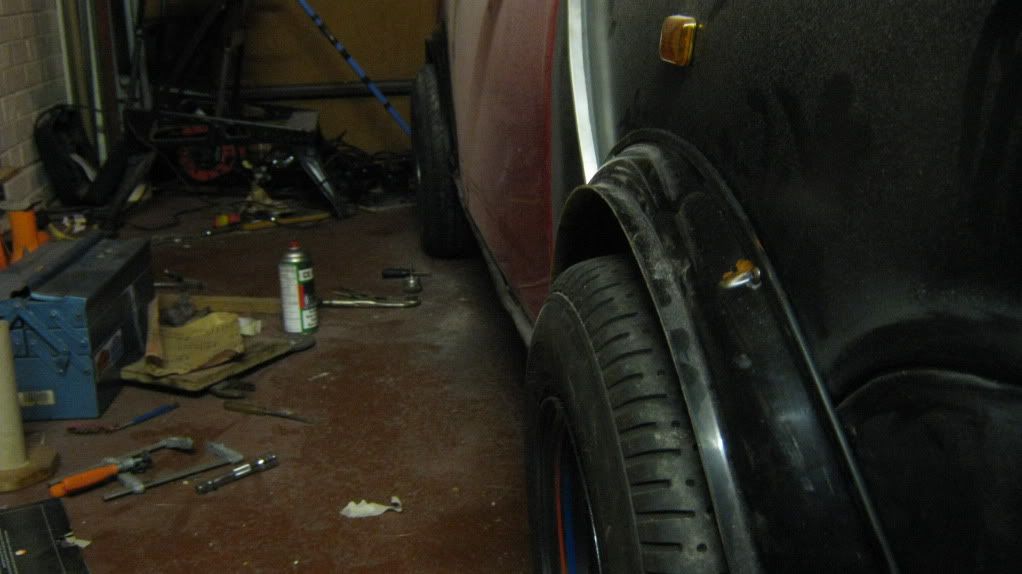  I just managed to get it together in time and I drove the car like this for a few days whilst I visited family 100 miles away. I got a few more looks than usual that's for sure. I still even had the price tag for the passenger wing in place right there ;D 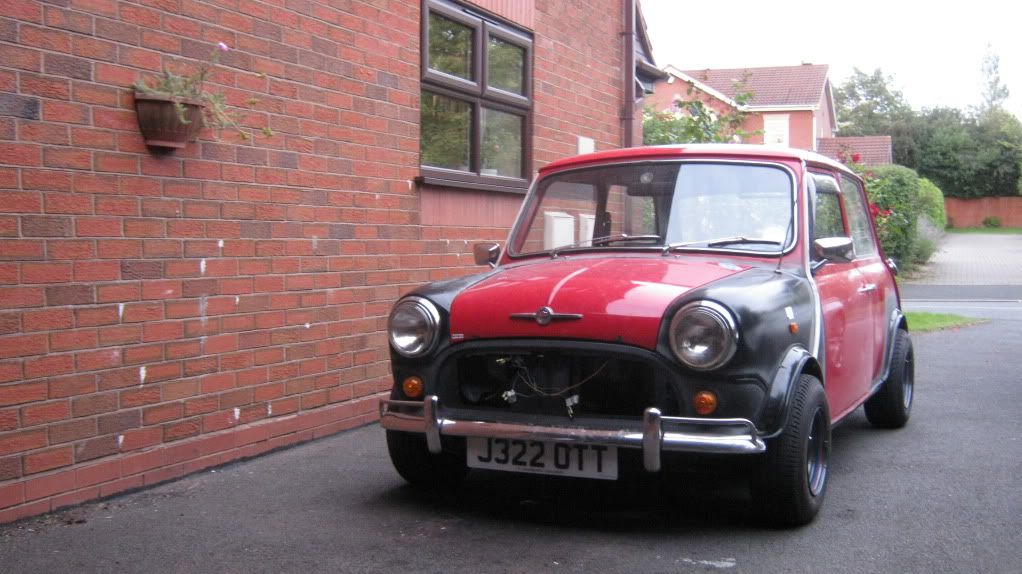 Next update should bring this up to date finally, with some arch cutting, more odd jobs, and some lovely Halfords rattle can paint on the front end. Thanks for reading. Sven |
| |
|
|
|
|
|
Oct 12, 2012 11:20:42 GMT
|
|
Really like your Mini, great fun, and impressed with the work you've done. Good man!
|
| |
Currently: 1974 Beetle - Golf -
Previously: e38 735i, e34 525iSE, 1972 Beetle, 1991 Scirocco Scala, Morris Minor, 1983 Polo Breadvan, 1991 Mazda MX6
|
|
MrOtter
West Midlands
"Your car is your story, so don't let someone else write the book." - Moog
Posts: 281
|
|
Oct 15, 2012 23:51:24 GMT
|
Thanks doctorblack, glad you like it! So then, carrying on the story, the next thing I had to do was cut the front of the wheel arch area of the wings/front panel to give clearance for the 6" wide wheels. As you can see, I had a bit of a tough time tackling corners at anything above 0.1mph for the few days I drove it like this. 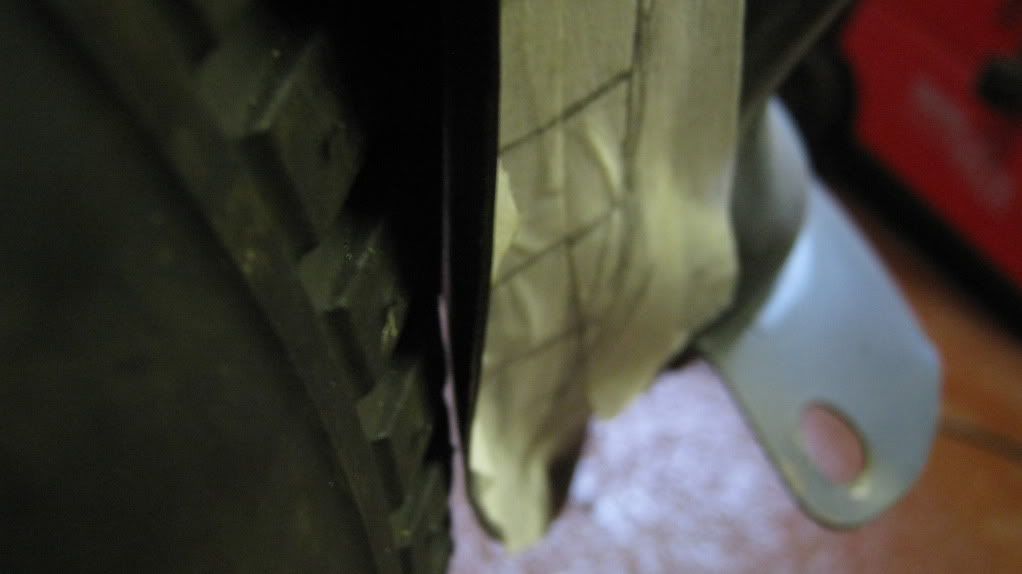 So I set about making slits in the arch lip to bend the metal back, then I would create a new lip and weld up the gaps. 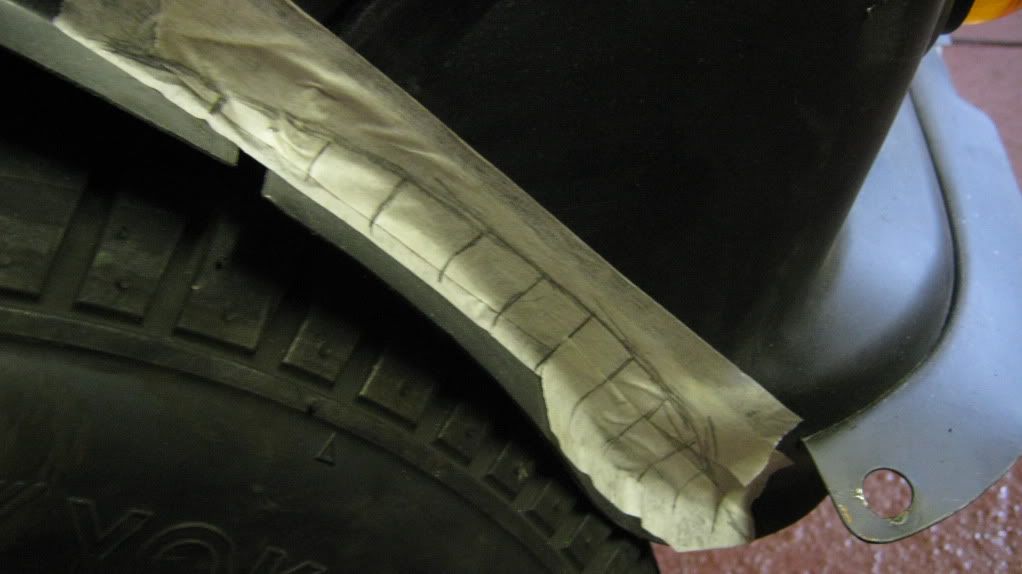 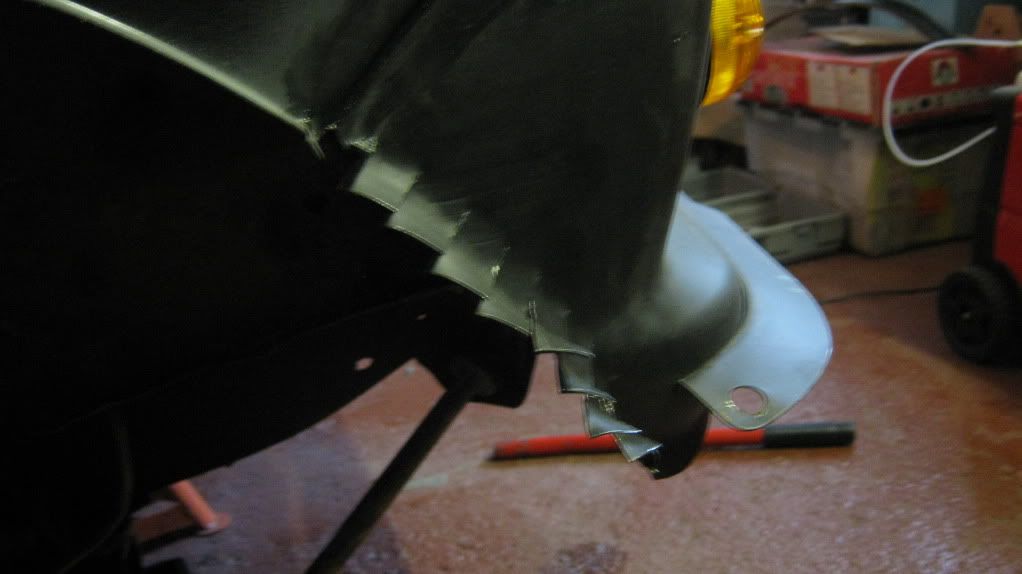 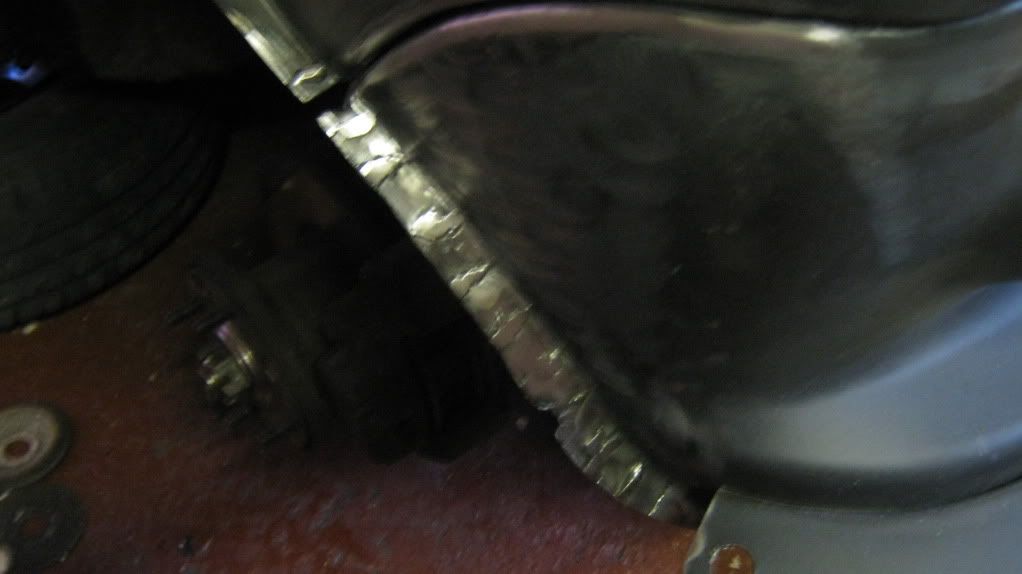 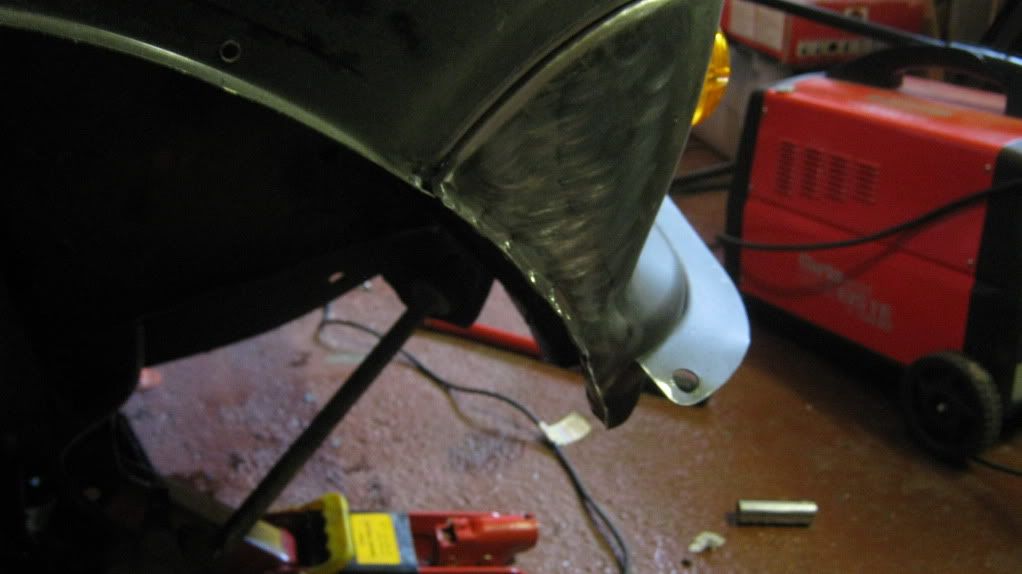 Repeated on the passenger side of course. Then with all the welding, drilling, and cutting done, it was time for a cheap spray job! Tidying up the imperfections. 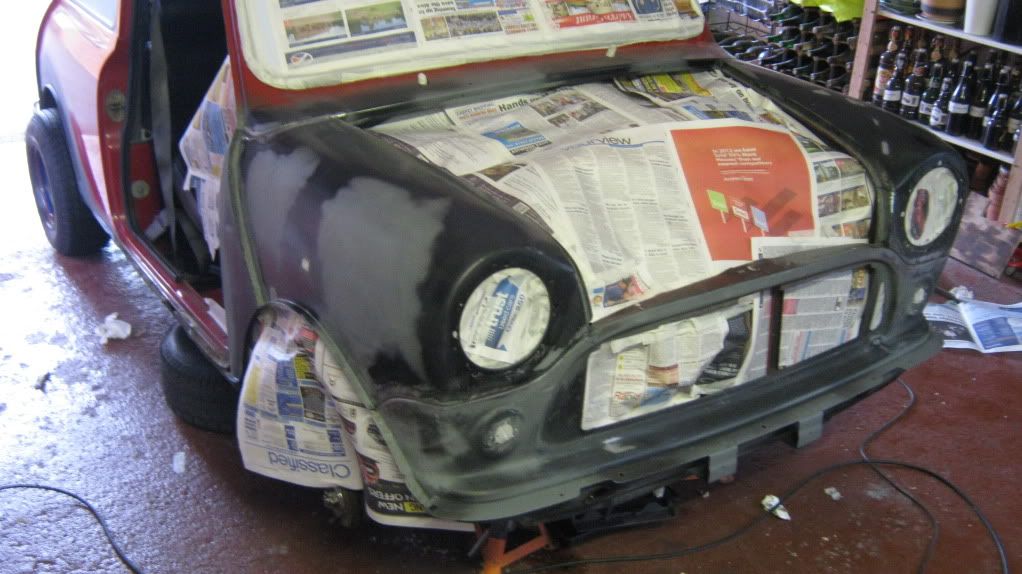 Primered. 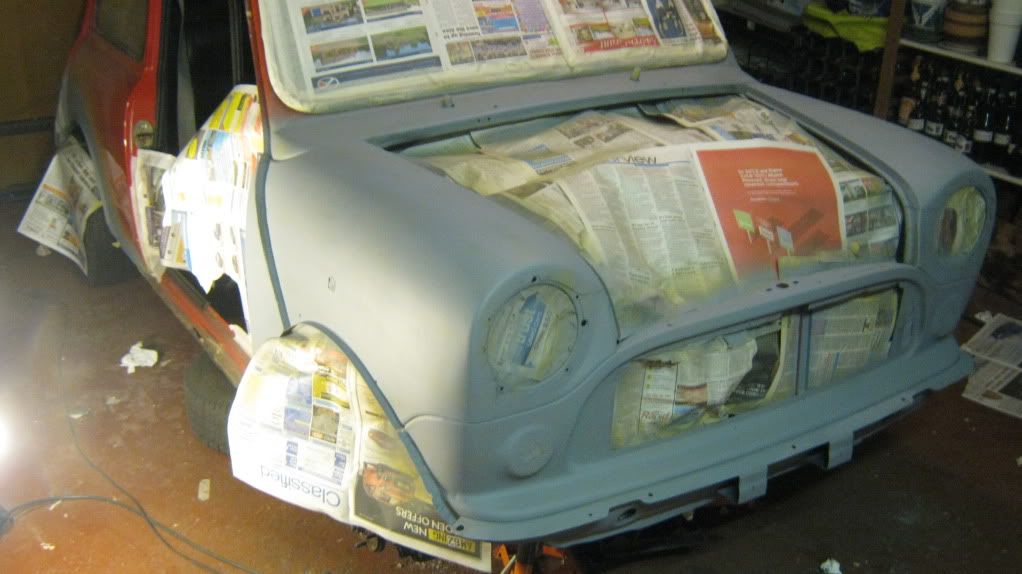 Red. 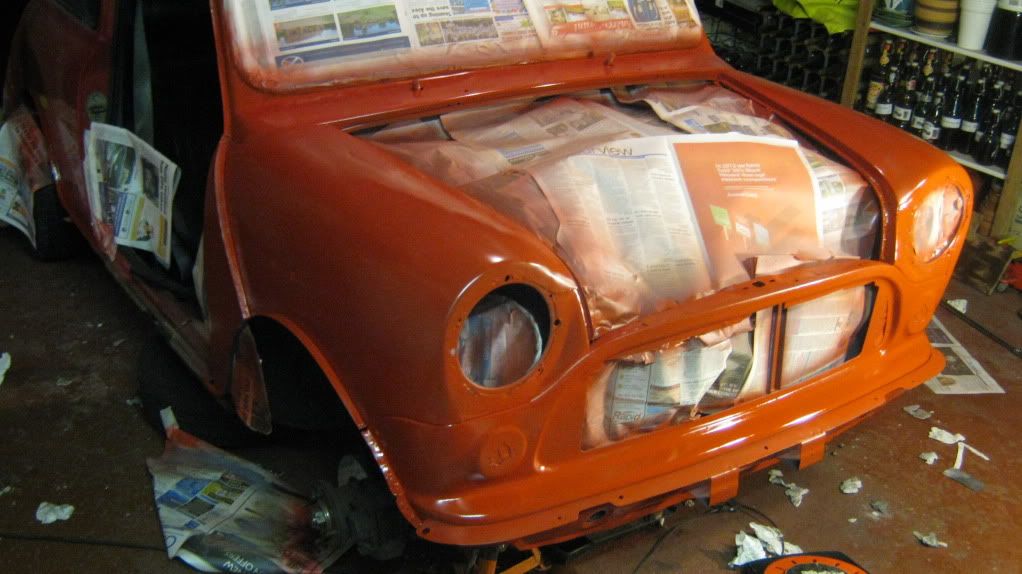 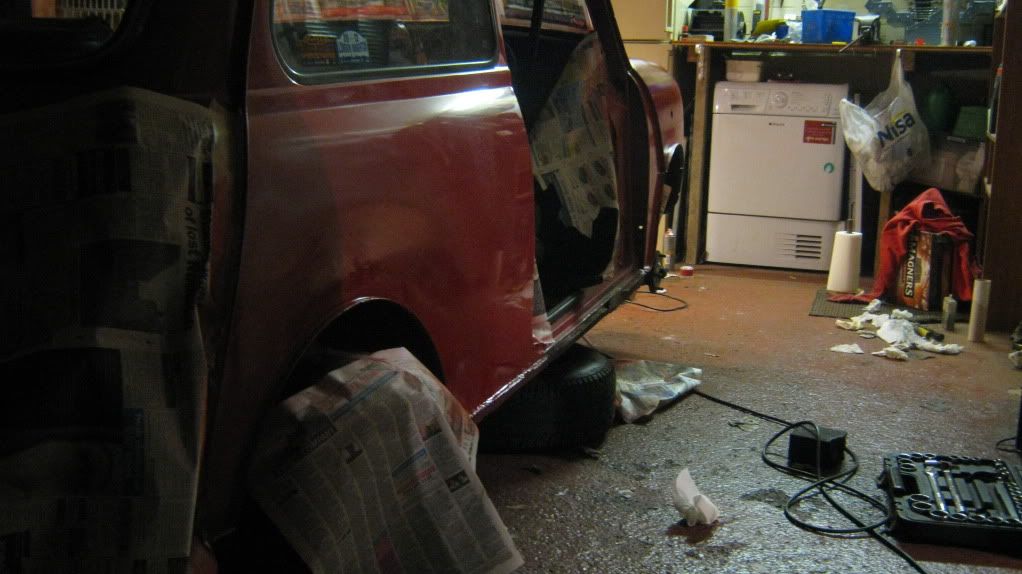 Then whilst I left that to dry for a couple of days I got on with some other bits and pieces. First up was painting the arches. Even though they come from the factory with a glossy black gel coat, they inevitably get scuffed during transit and trial fits and so on, and I also never liked seeing the bare resin/fibre finish on the underside of my old arches, so I decided to paint the new arches inside and out in gloss black. 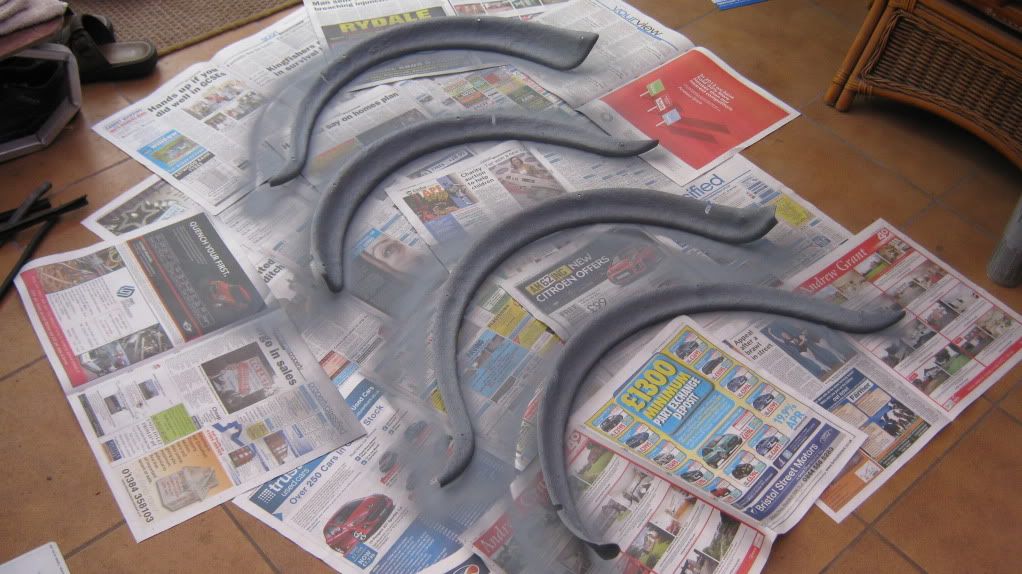 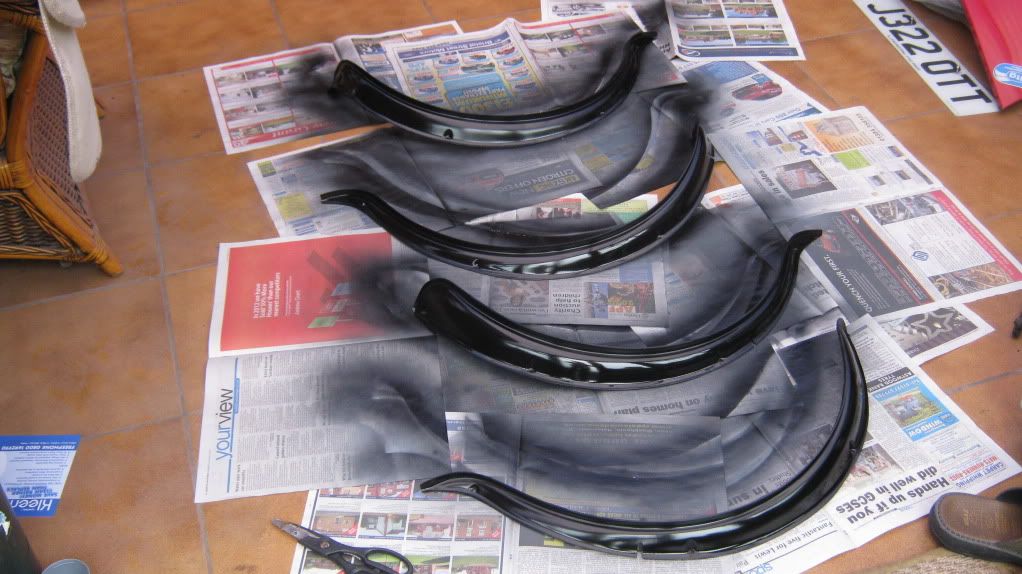 Whilst I was making merry with the paint, I thought it would be a good idea to refurb the lamp bar seeing as it was starting to go rusty in a couple of spots. 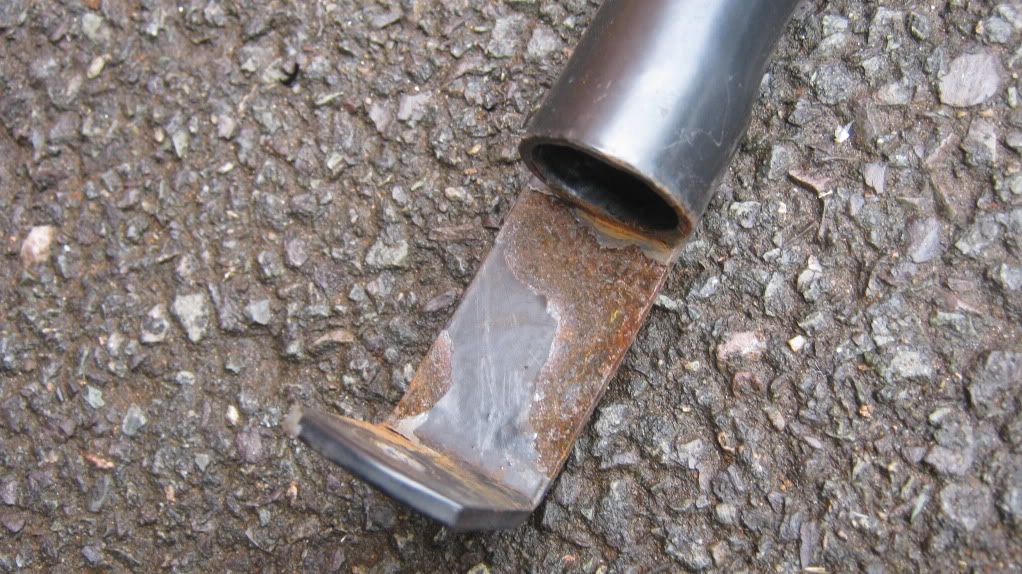 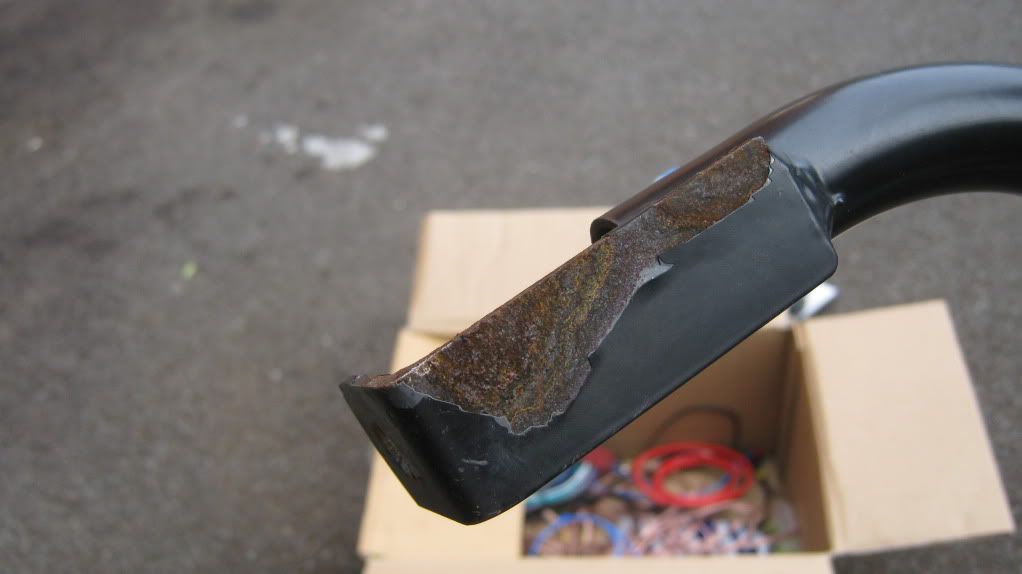 A few coats of satin black after treating the rust and it was good as new, with a few changes to help me neaten up the wiring. 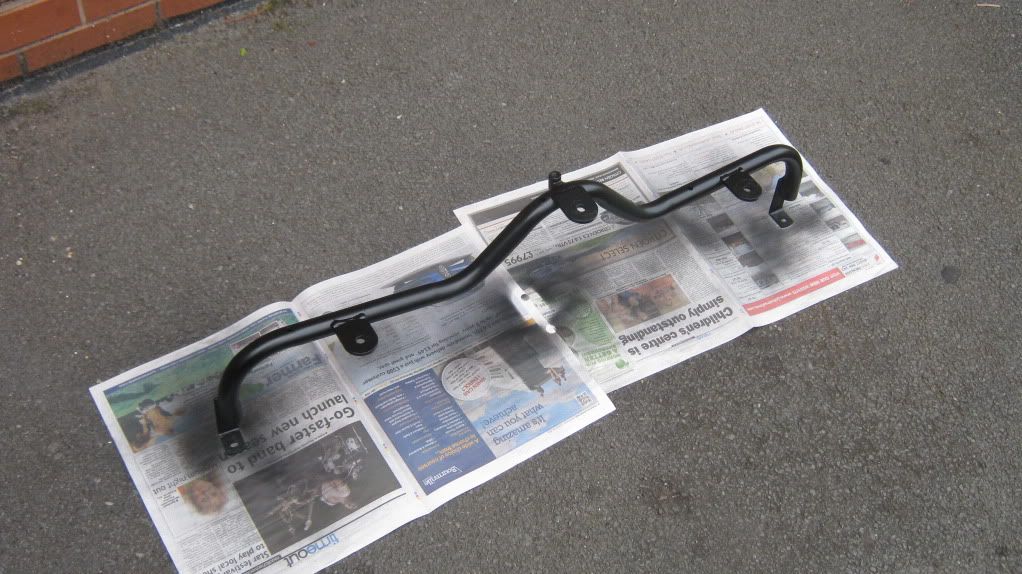 I previously had the wiring for the lamps running straight back from the lights and through the centre of the grille, which was easy but it meant that every time I wanted to take off the grille I had to disconnect the lamps, not a major headache I know, but something that had always bugged me. It also didn't look brilliant having the wiring dangling about with nasty yellow connectors, so I wanted to neaten it up. The way I did this was to drill holes in the lamp bar next to the lights, and then spend an annoyingly long time feeding the wiring through the bar and out the bottom corner closest to the relay in the engine bay. You can see a couple of the extra holes in this photo, before I fitted the wiring. 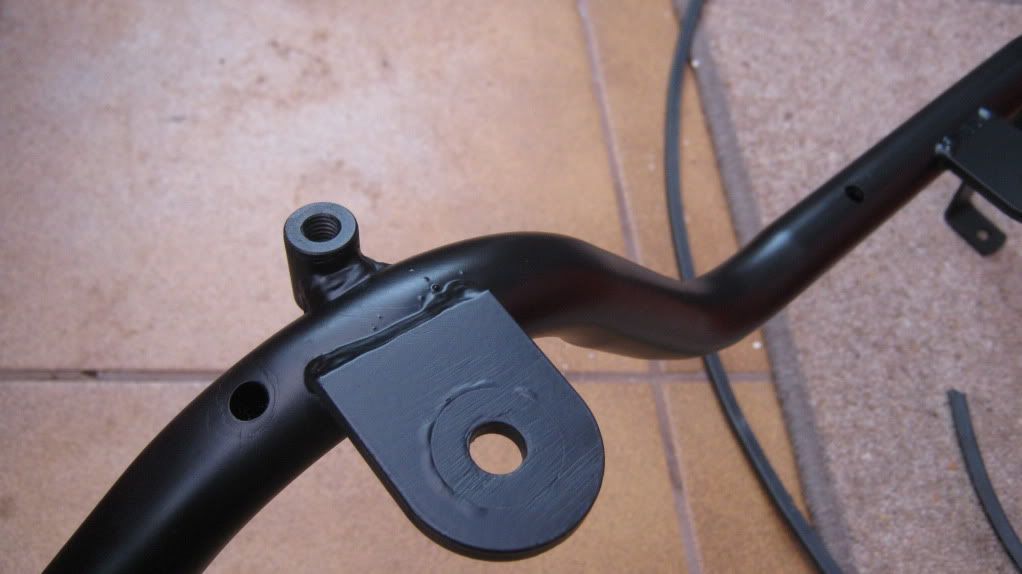 So now I've got all the connectors neatly in the bottom corner of the grille, going under the bottom slat so I can remove the grille without touching the lights! Then I went about putting it all back together again. 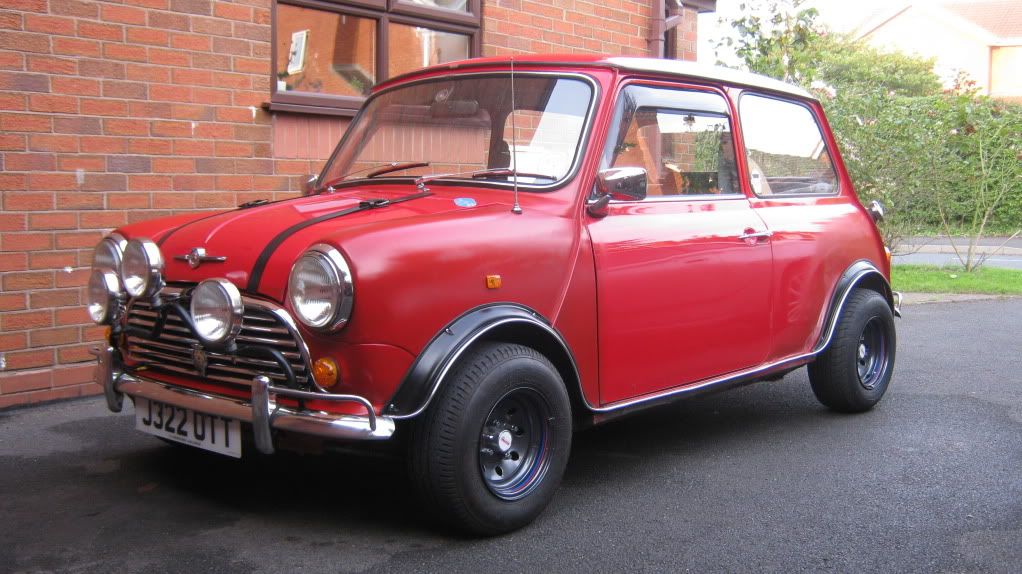 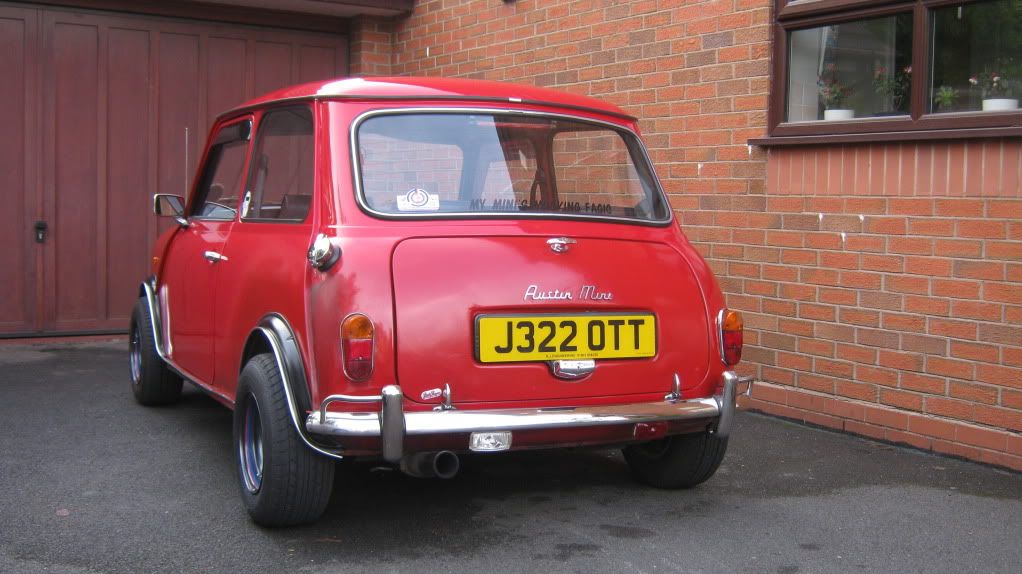 As you can see, the paint finish was absolutely, wonderfully... awful. But it's what I was expecting, and after a couple of weeks to let the paint harden I gave it a rub down and a polish and it ended up like this, still obviously a very different shade of red but there's nothing I can do about that for now unfortunately.  (These following two pictures were taken semi-professionally for me by a friend, Joe Steel, so credit to him for these) 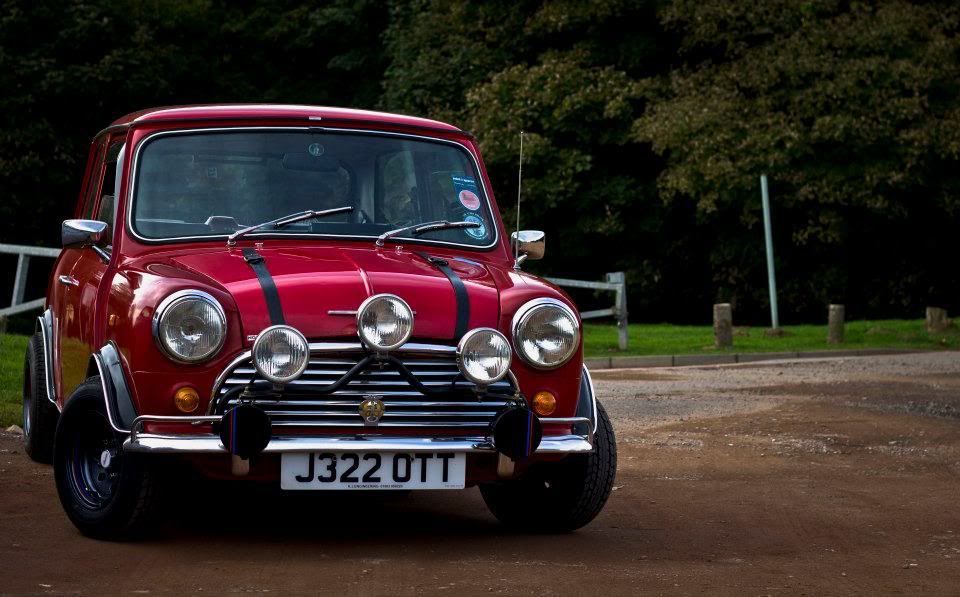  Forgive me, I kind of rushed to those photos, and I did kind of miss out a lot of work! That was the replacement of the drivers side sill and repairs to the doorstep and floorpan. I had intended to do the passengers side at the same time, but I kind of ran out of inclination and time. I'll let the pictures do the talking. 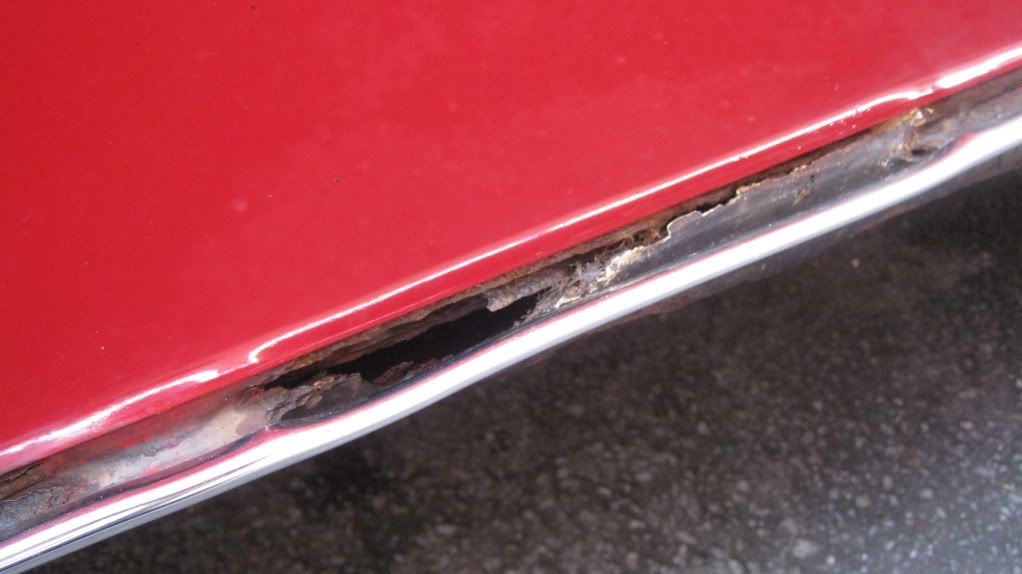 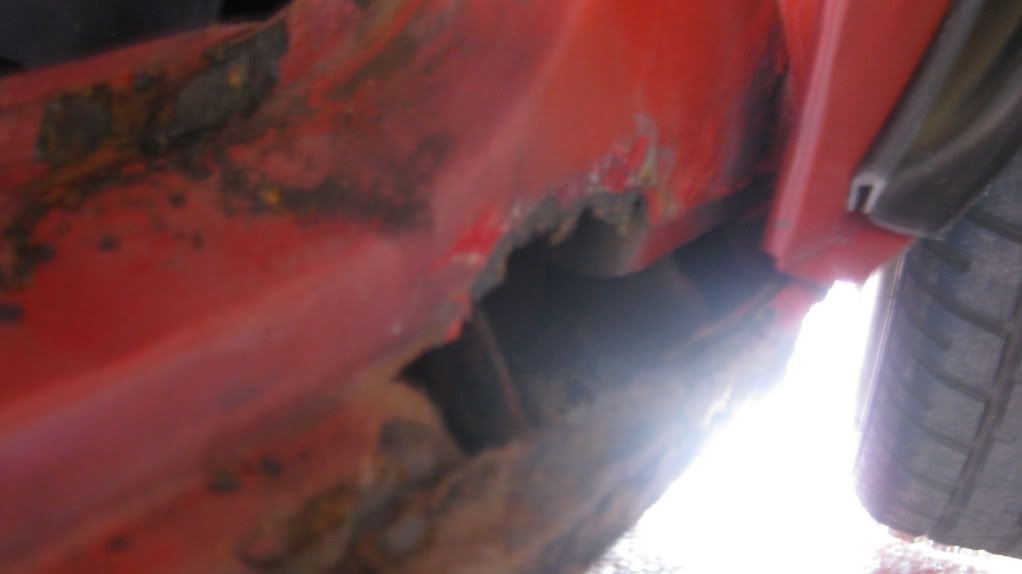 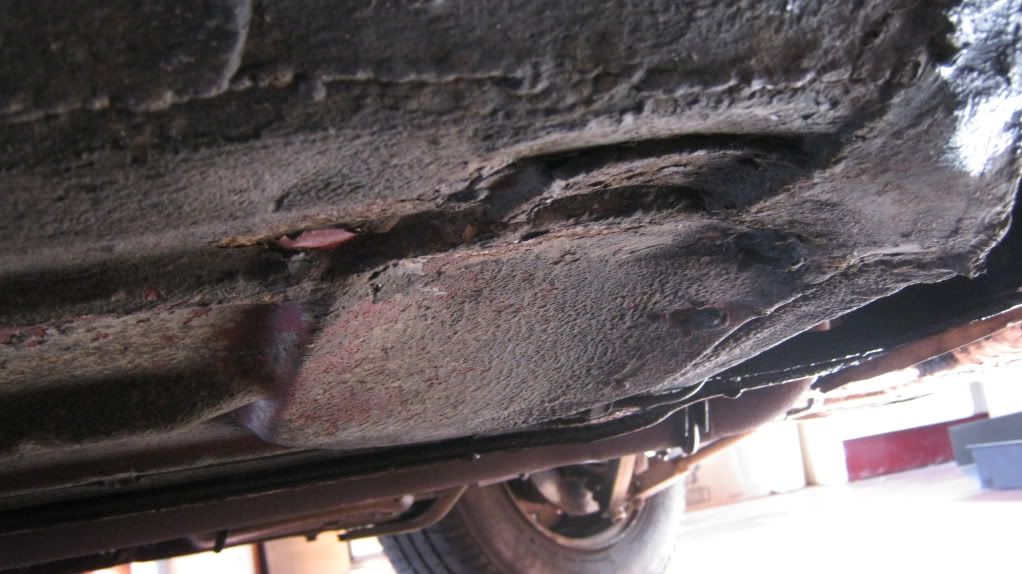  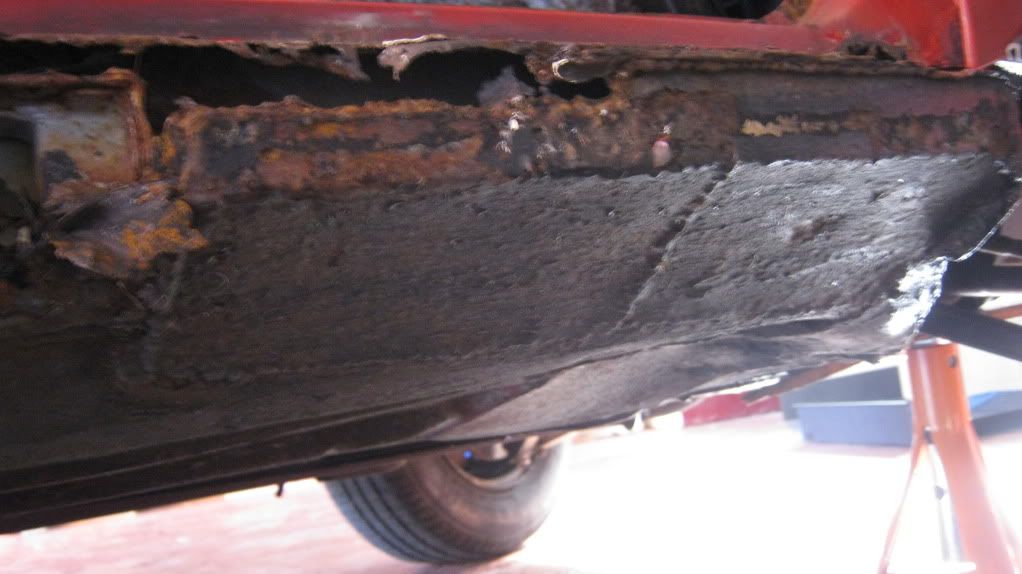 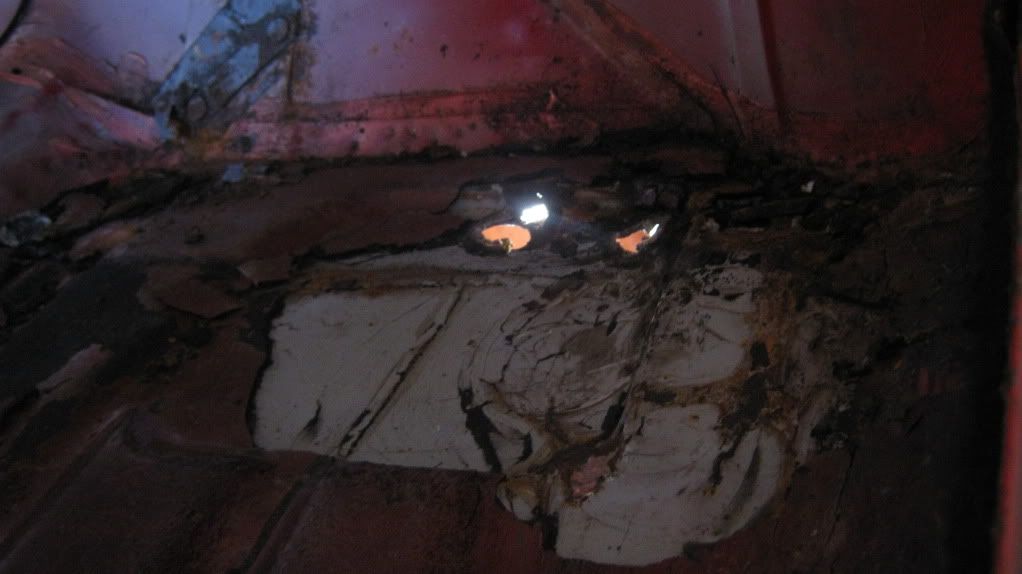 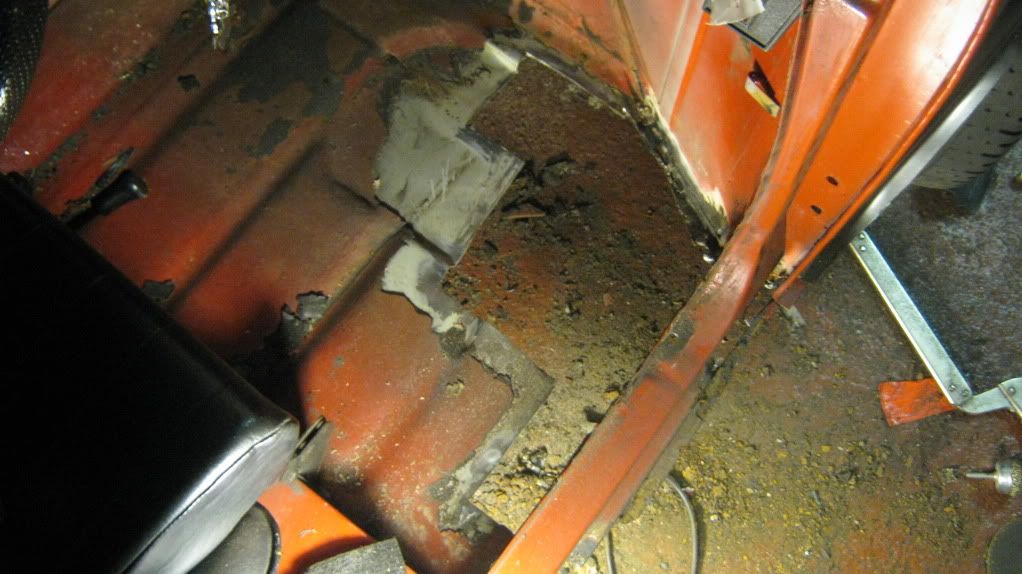  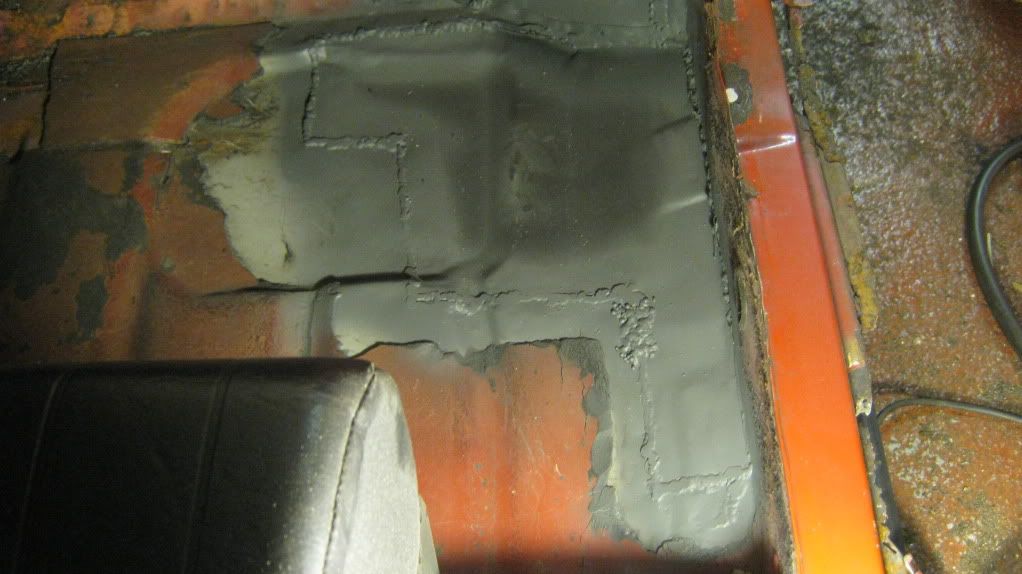 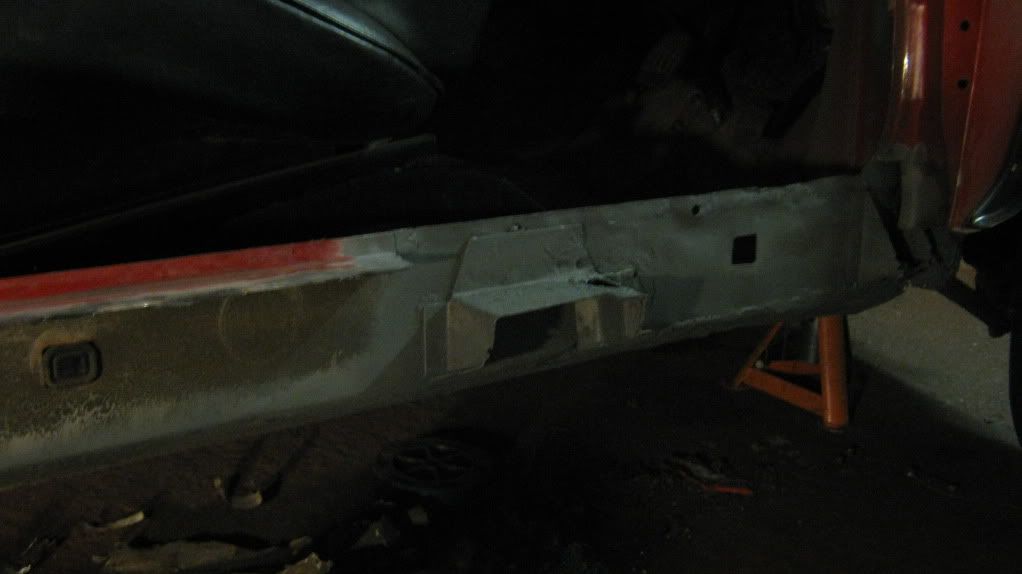 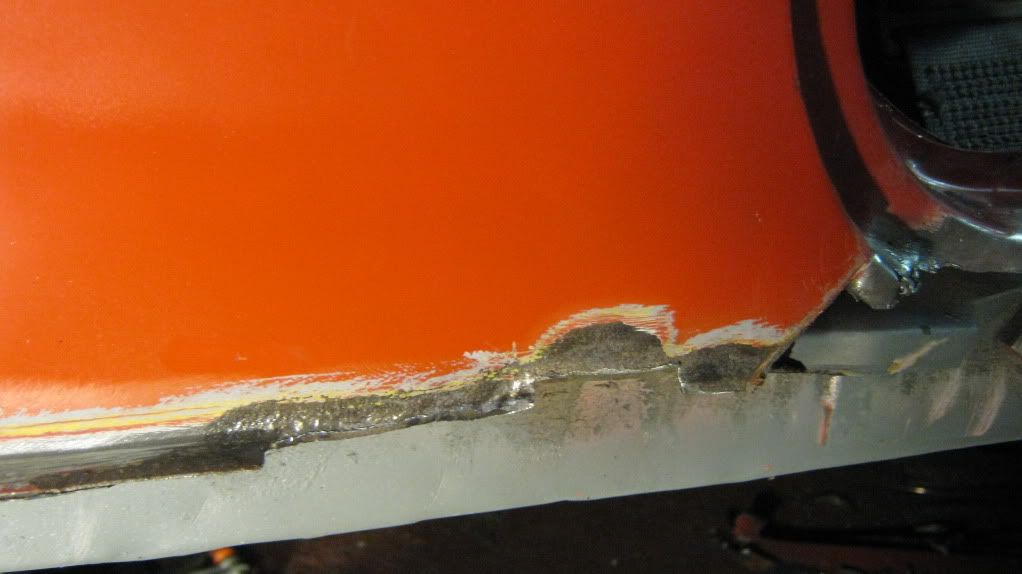 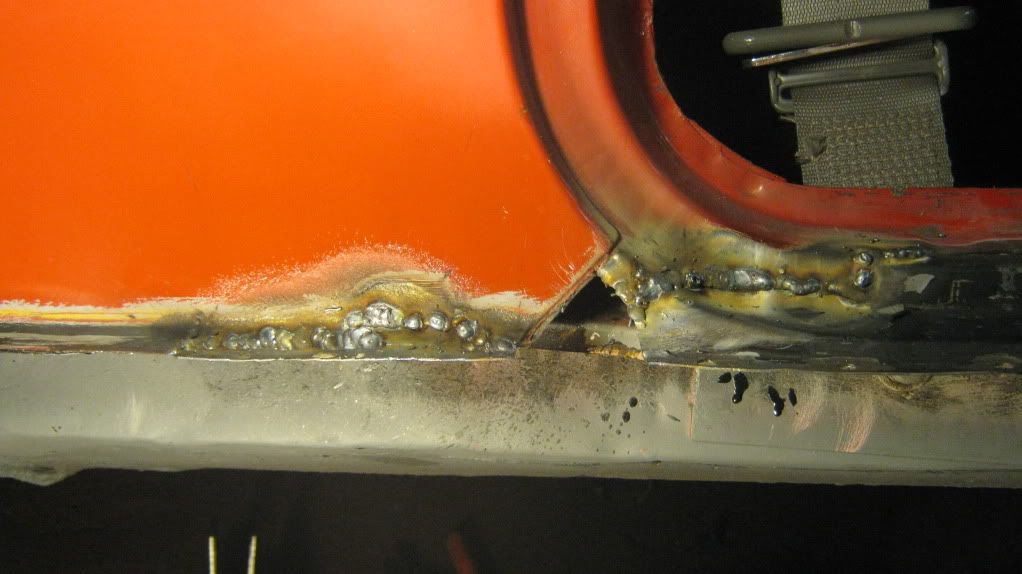 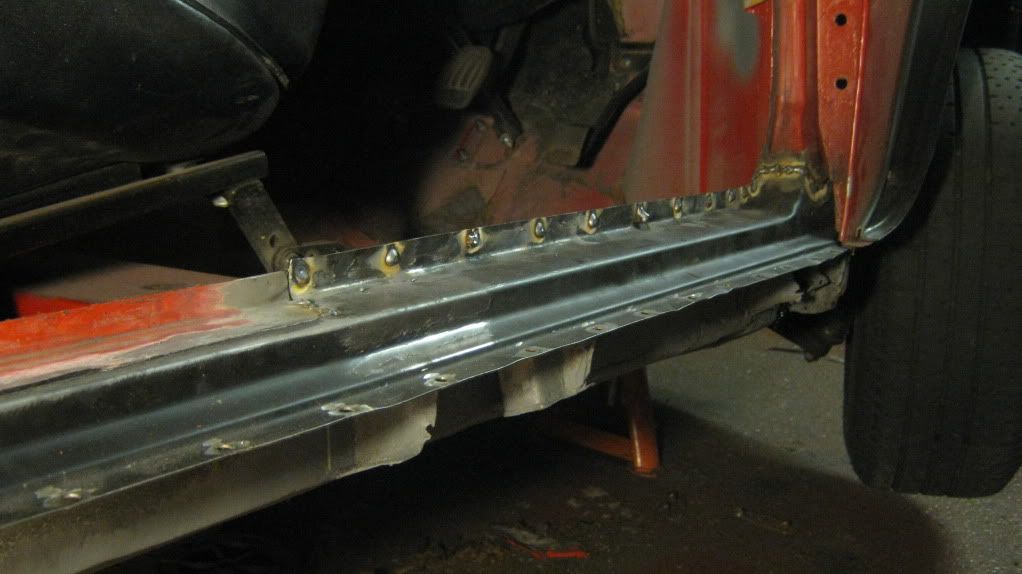 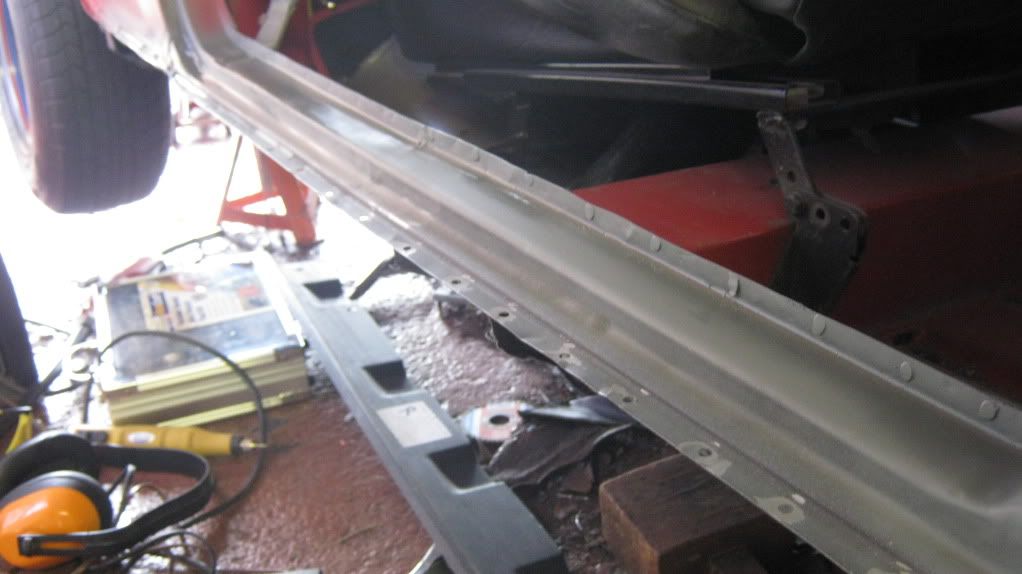 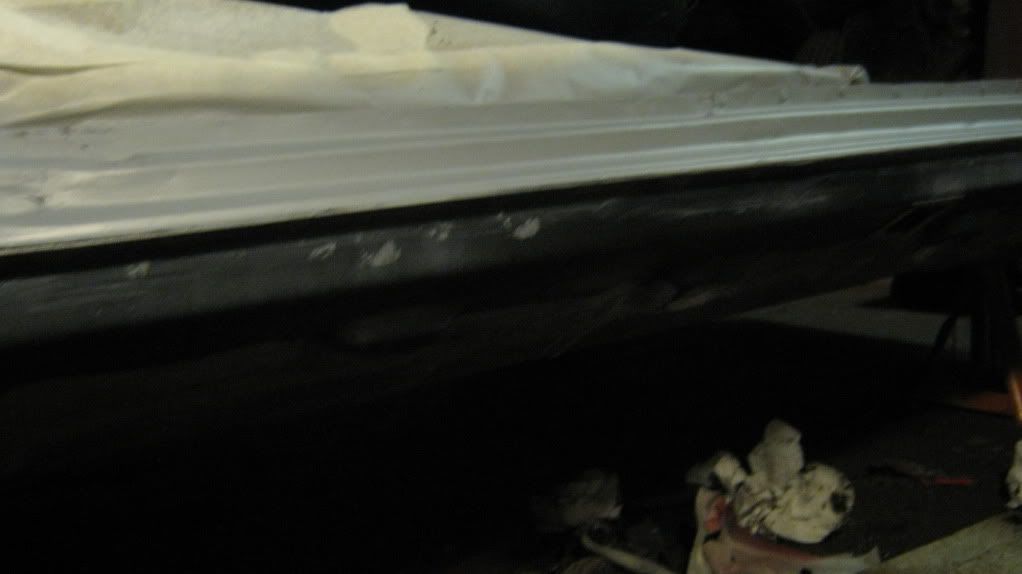  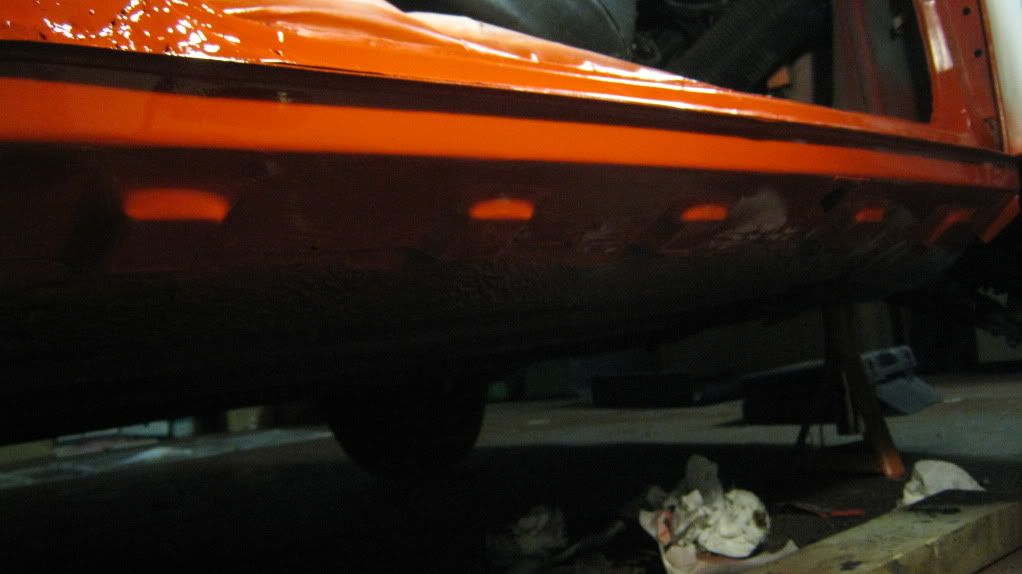 Here's the passenger side, which I'll deal with next Spring/Summer. What a mess! 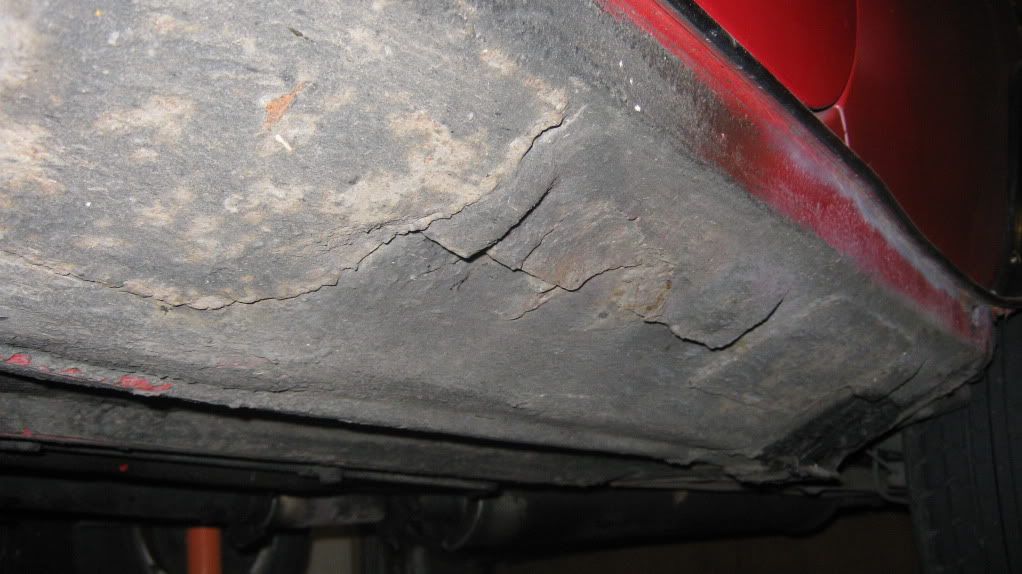 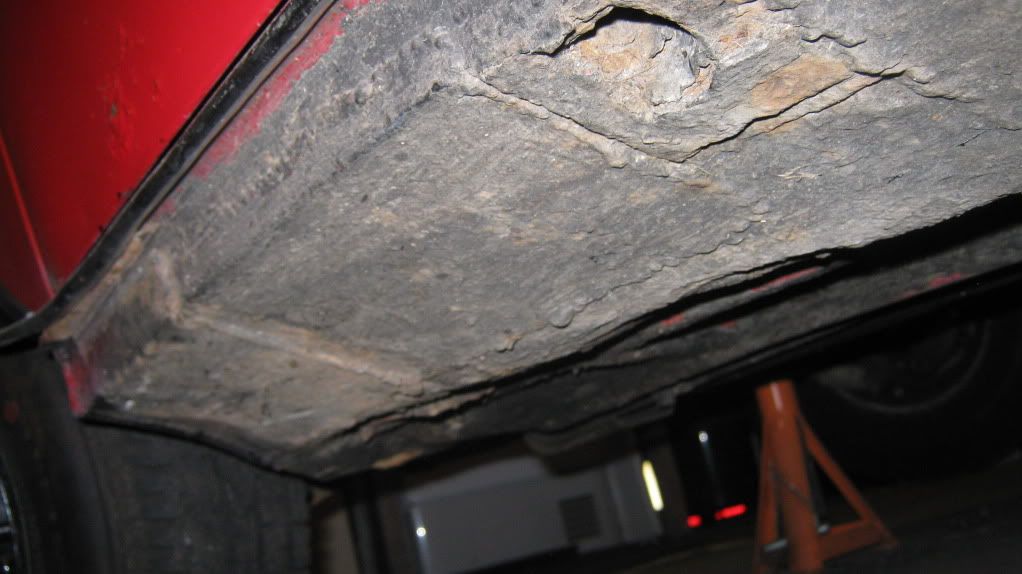 Oh yeah, I forgot to mention that the sill replacement was finished on the morning of MOT day, I did cut it a bit close there! So, MOT then, it should have failed on emissions and the number plate light, but me and the tester have an understanding you see But it did fail on the passengers side top arm bearing, which was perfectly fair enough and I'm annoyed that I didn't notice it earlier, there was a load of play in it! So, I had a top suspension arm to refurb. Got the old bearings out by first prising out the needle rollers. 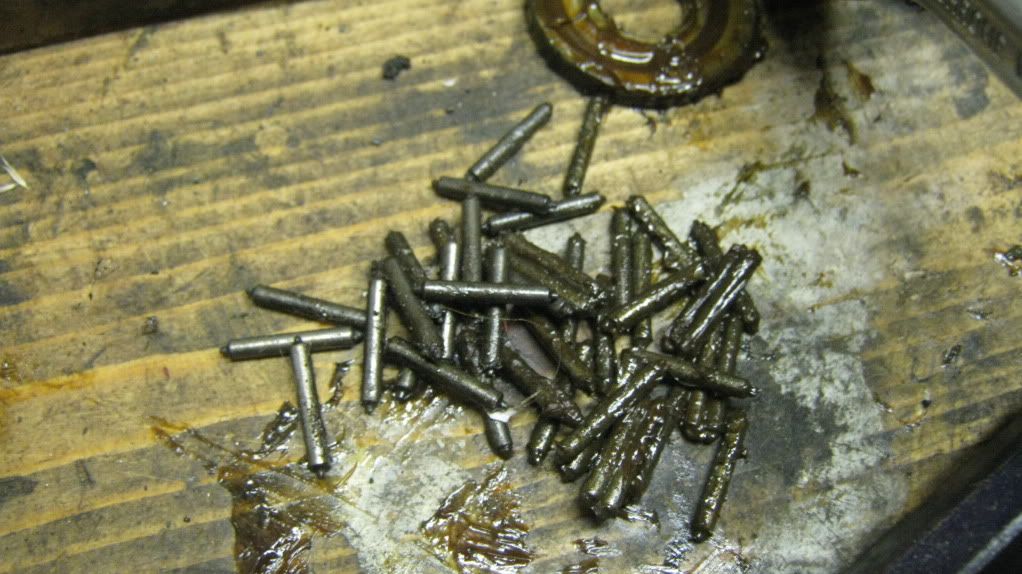 Then using my cheap fake dremel to grind through the bearing face so it was weak enough to deform, and then whack it out from the rear with a long screwdriver and a hammer.  Then it was a simple case of cleaning it all up and tapping in the new bearings. 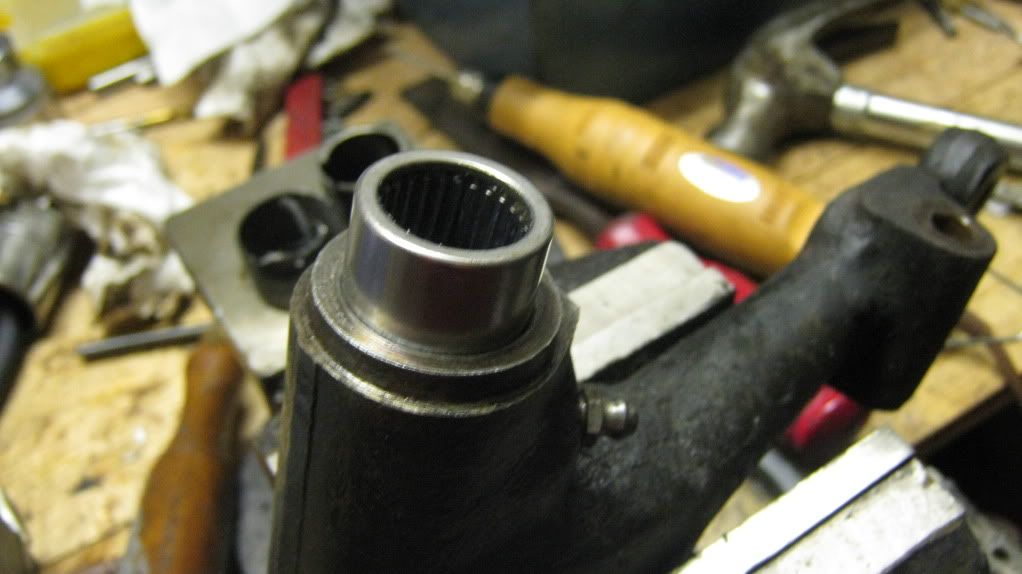 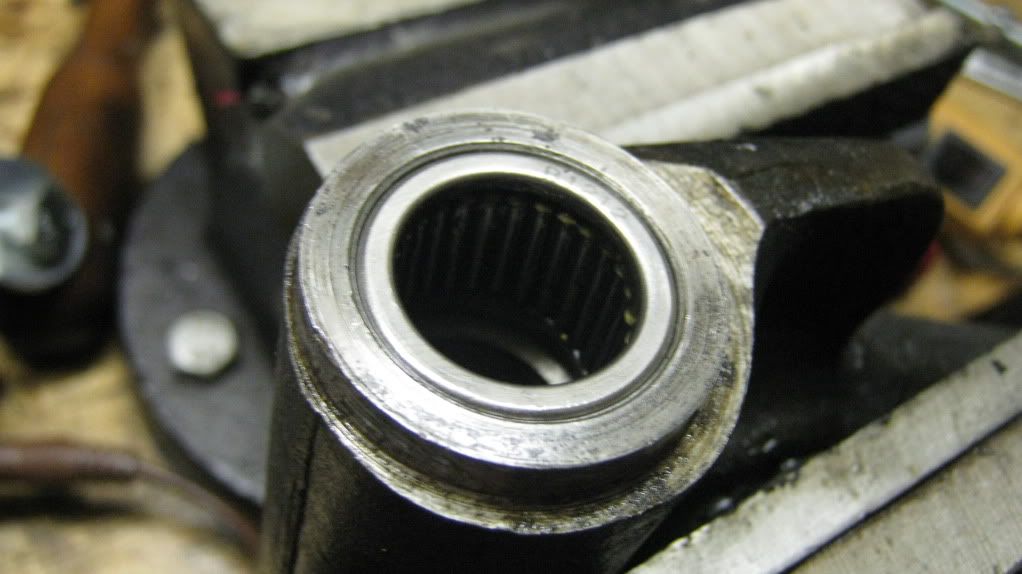 Job done, cheapest MOT so far with only one fail! Then of all the times (in my favour for a change), the car developed an issue with the indicators/hazards about 5 hours after getting it's fresh ticket. It took me two very frustrating days to find that it was this (which was shorting on the front panel):  and the hazard switch which were the root of my problems. After I finally got all of this fixed, that was my summer of work on the car over for another year, and it was time to head back down to Bristol for my second year of Uni. On the drive down there from home, it was raining and blowing a gale, and I only then found out that the windscreen was now leaking. I can only assume it was because my scuttle replacement wasn't spot on, but it was almost pouring in on both corners  So, two weeks later I made the trip back home to where all my tools are, and where the garage is, and set about fixing the issue. First things first, windscreen out. 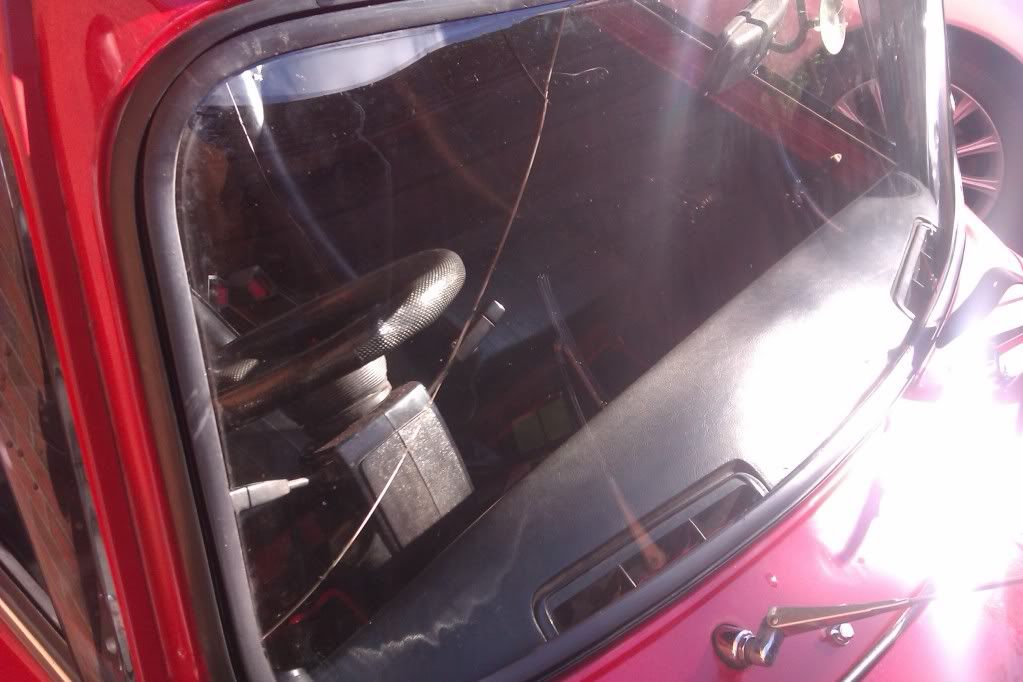 Ahh. That didn't go to plan... Thankfully I made it to a mini spares place that had windscreens in stock that was closing in about half an hour (I did this at about 2 in the afternoon on a Saturday, when I needed the car to go back to Uni the next day). £45 out of pocket and a ruined (almost brand new) windscreen will teach me to be patient and not try to lever out a screen from the corner again! Needless to say that I got the new windscreen home and refitted it with as much proper windscreen sealant as I could to prevent any leaks, and it certainly seems to have worked so far. I've also hatched a plan to run the car on some original narrow 3.5" wide 10" steels for the winter, just in case we get some snow or ice this year, as I know from previous experience that these 6" wide wheels are awful (and dangerous for the way I drive...) to live with in a bad winter. I picked up these 10 wheels with knackered tyres for £22 off eBay, and I'd already bought a set of tatty chrome hub caps for £8, I now just need to get some tyres, valves, and wheel nuts and I'll have my winter wheels sorted. 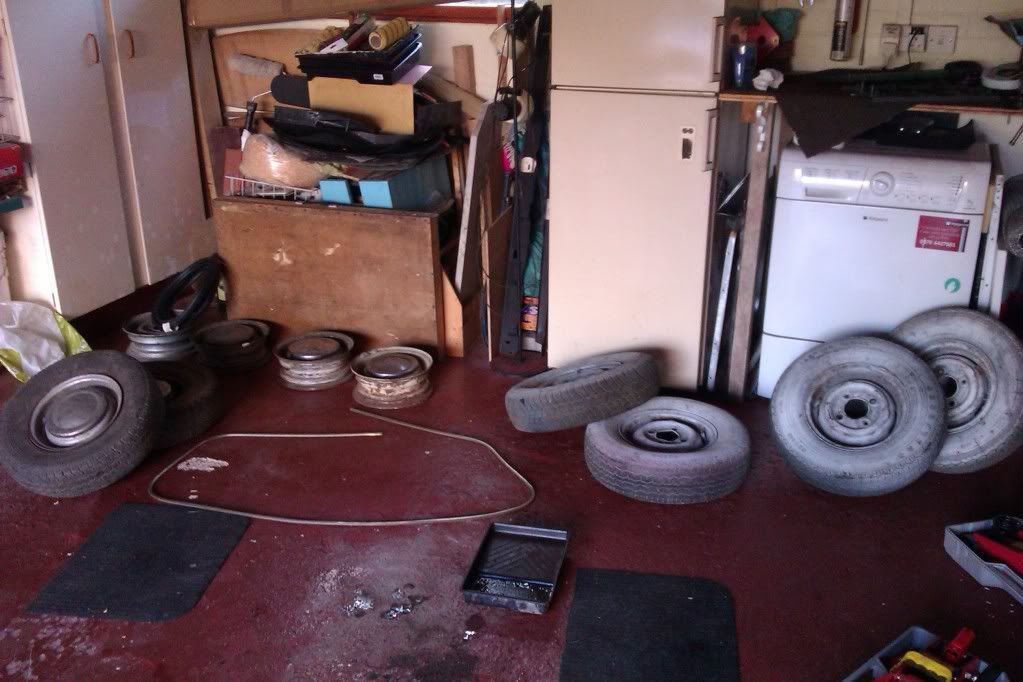 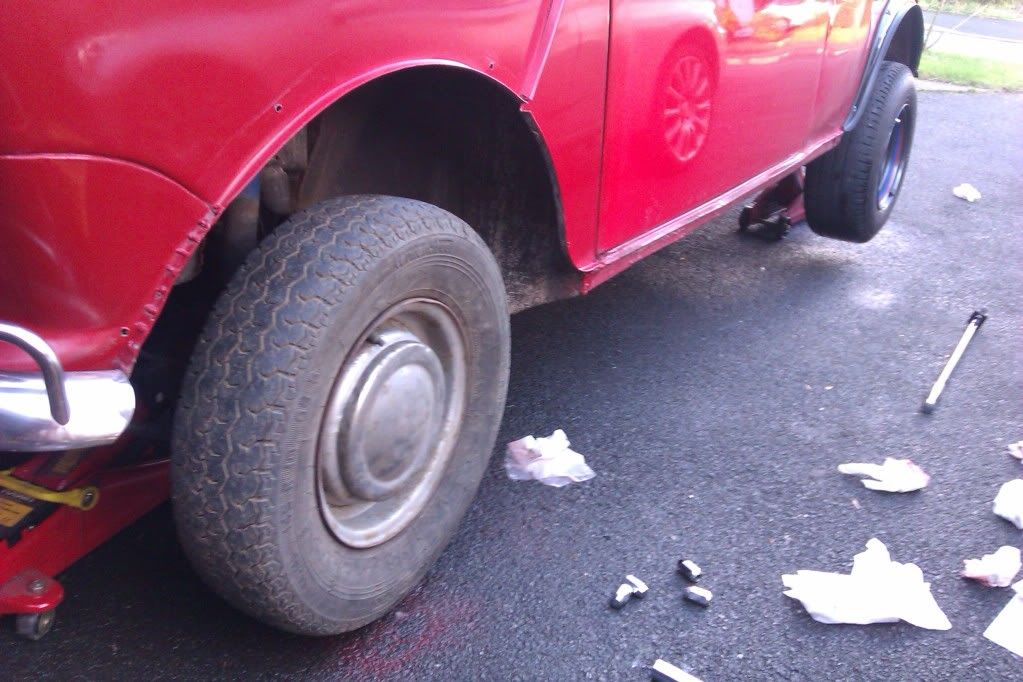 In preparation for winter I also got me one of these off the 'bay. 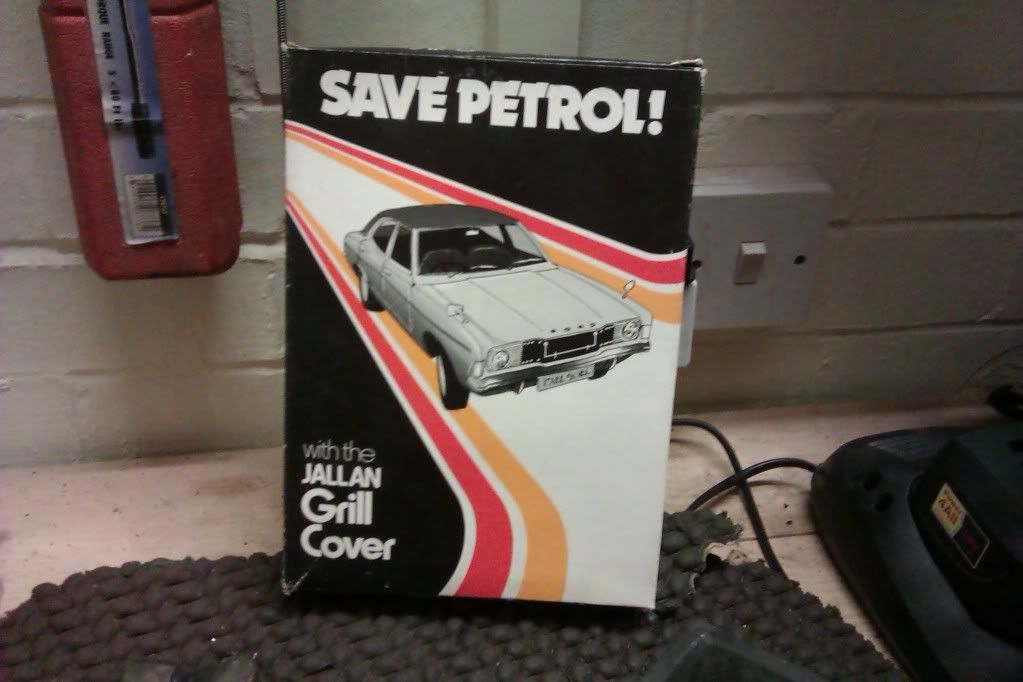  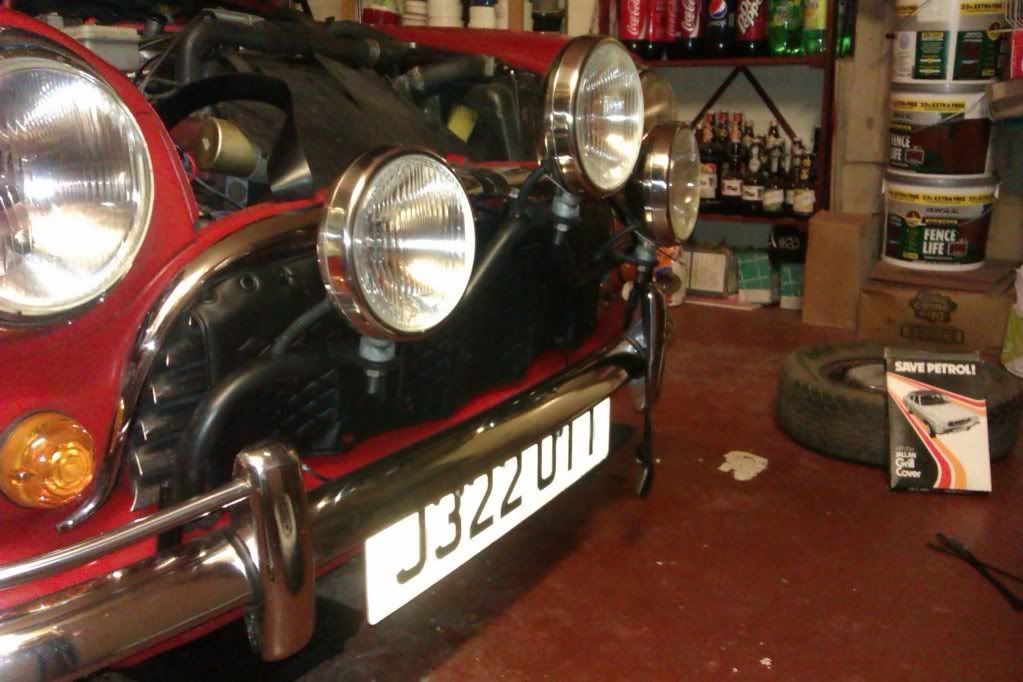 Finally! Up to date! Next thing to do will probably be to get four of these 10" steels refurbed and fitted to the car in December sometime, so there probably won't be any updates for a while. If you've managed to read through all of my drivel so far then thank you very much and I hope you've enjoyed my project so far! I'll be popping down to Area 52 at the weekend, so might meet some of you lot there... Cheers Sven |
| |
Last Edit: Oct 21, 2012 19:07:46 GMT by MrOtter
|
|
|
|
|
Oct 16, 2012 14:11:08 GMT
|
|
Looks great, how come so many people seem to be able to weld? How does that grill cover save petrol? So many questions.
|
| |
Currently: 1974 Beetle - Golf -
Previously: e38 735i, e34 525iSE, 1972 Beetle, 1991 Scirocco Scala, Morris Minor, 1983 Polo Breadvan, 1991 Mazda MX6
|
|
|
|
MrOtter
West Midlands
"Your car is your story, so don't let someone else write the book." - Moog
Posts: 281
|
|
Oct 16, 2012 18:40:50 GMT
|
Well I taught myself to weld by welding on the car, if you can afford the initial outlay (totally worth it) of say £300-£400 or so on the welder and all the bits and pieces associated with welding, then it's really not that hard. I'd maintain that most peoples issues with welding come down to not having the settings right. I will say though, before anyone puts me down, that there is NOTHING like experience and practice with welding - it doesn't take too long to be able to make a strong weld, but a nice looking super strong weld takes months/years of practice. I'd been welding little bits here and there on the car before I started on the front end, and I only really noticed an improvement in my welds by the time I was almost finished with the sill replacement. It's a skill to be learned the hard way, but it's so worth it in the end when you can literally save thousands by doing panel repairs/replacements yourself. That grille cover doesn't really save you petrol (I don't think anyway!), that's just the gimmick it was sold under back in the 70s (it's a new old stock item), but it will help to keep the engine warmer when driving (apparently what saves you the petrol, just keeping the engine warm) if the weather gets properly cold this year. I remember last year having the carb ice up on me a few times, so I want to try and prevent that from happening to the twins this year. You can buy specific mini grille covers, but they cost about five times the price of this generic one, which fits almost perfectly anyway. Thanks for the questions Doctor |
| |
|
|
|
|
|
Oct 16, 2012 19:28:08 GMT
|
|
And thank you, sir, for your comprehensive answers!
In retrospect, I really wish I had practiced welding years ago when I had my Beetle which had seemingly been parked in the sea for much of it's life. I guess it's websites like this which give people inspiration to have a crack themselves. Perhaps much to the dispair of the professionals!
|
| |
Currently: 1974 Beetle - Golf -
Previously: e38 735i, e34 525iSE, 1972 Beetle, 1991 Scirocco Scala, Morris Minor, 1983 Polo Breadvan, 1991 Mazda MX6
|
|
MrOtter
West Midlands
"Your car is your story, so don't let someone else write the book." - Moog
Posts: 281
|
|
|
|
Been a while since I updated, so there's a few things to rattle through here. First is my new set of headlights, Lucas P700 replicas. No better in terms of performance than the Autopal halogens I had on before, but they look a million times sexier (well, as far as sexy lights go anyway). 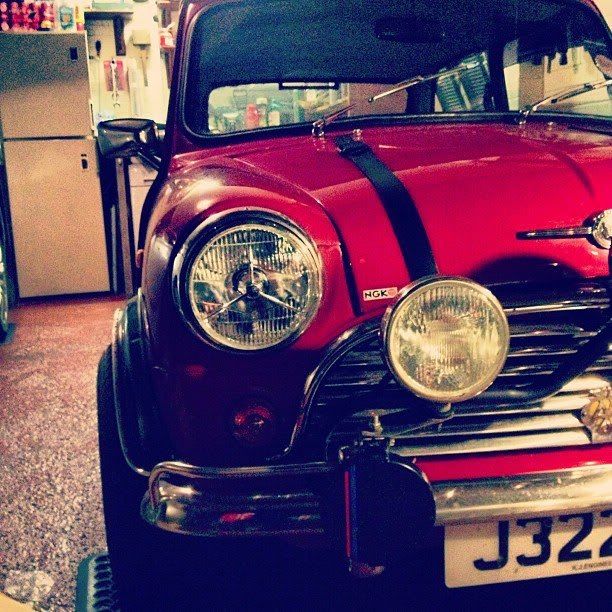 Then, to cut a long story short, I had a lot of tyres to fit to a lot of wheels, so the car was packed up like this for a trip to the tyre fitters. 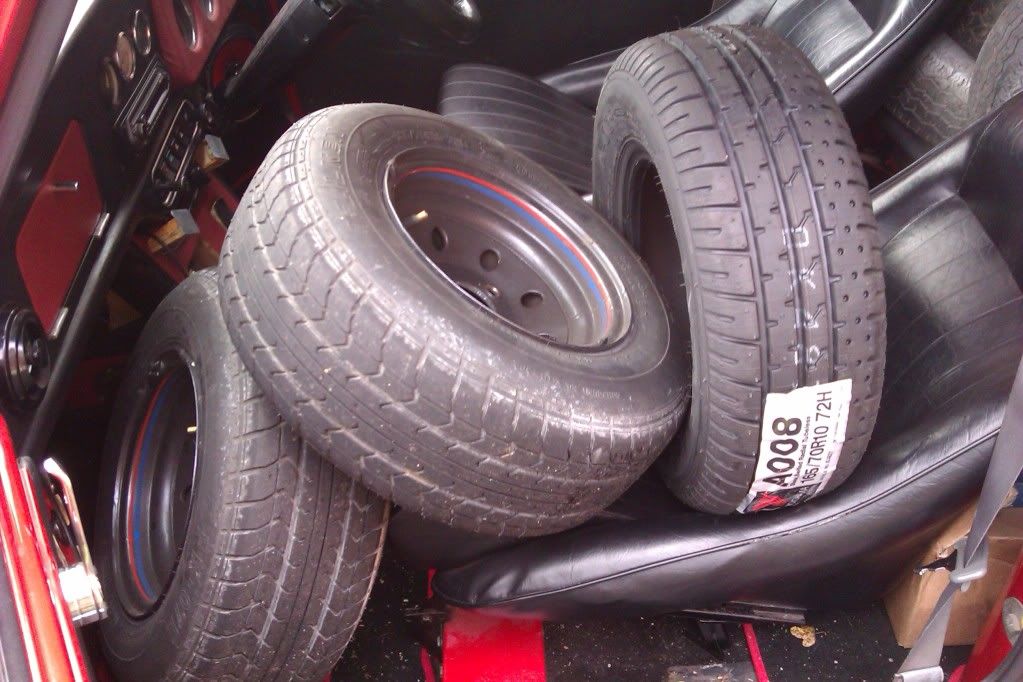 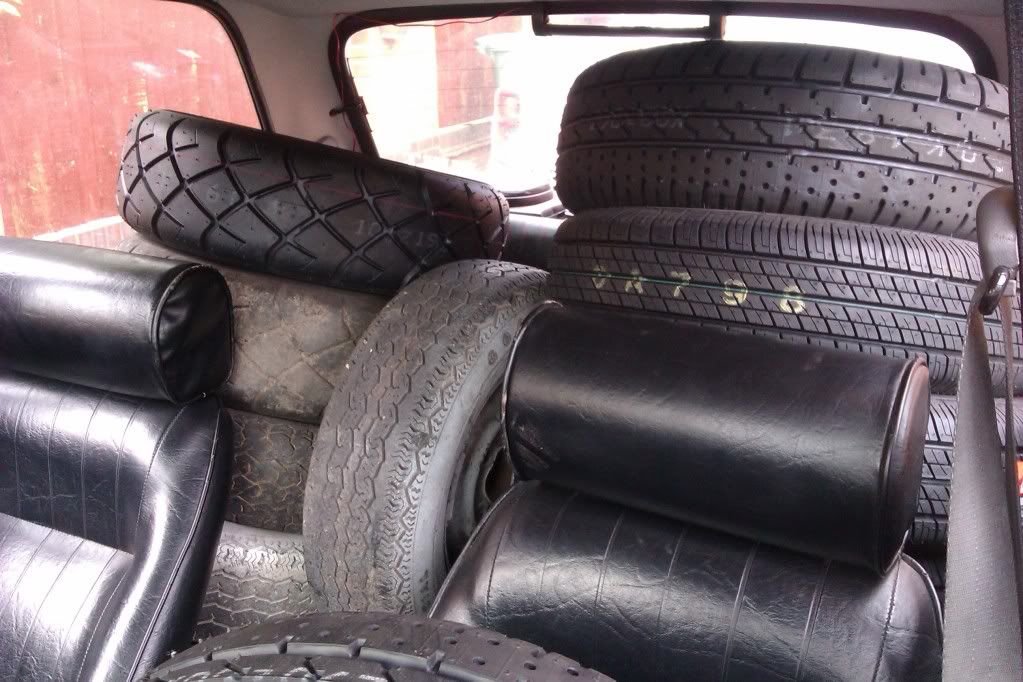 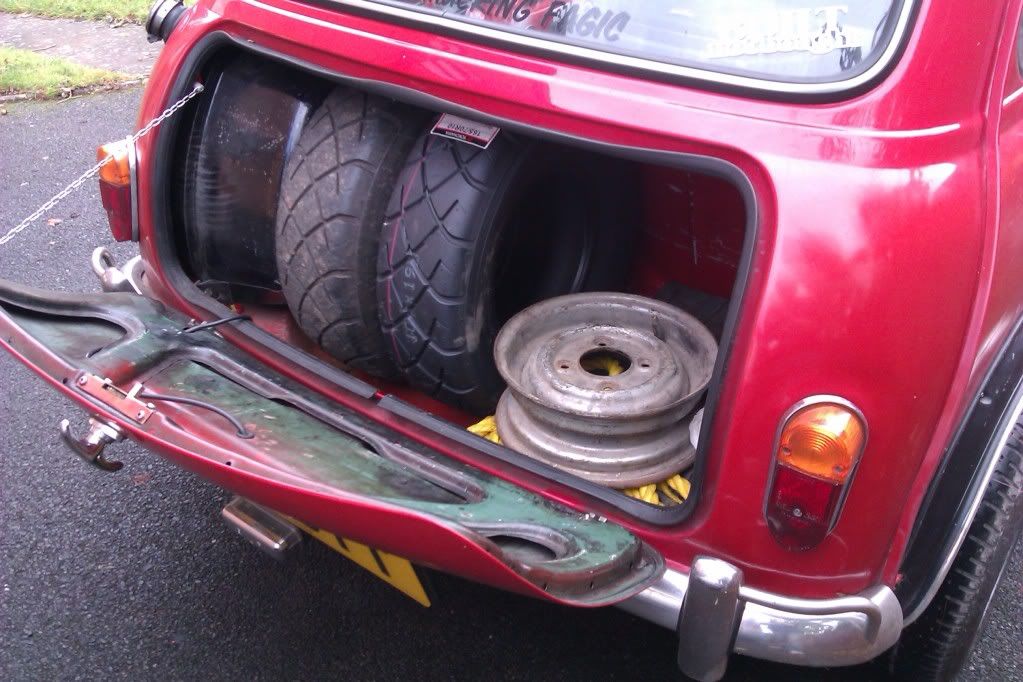 One set of which are pictured below. 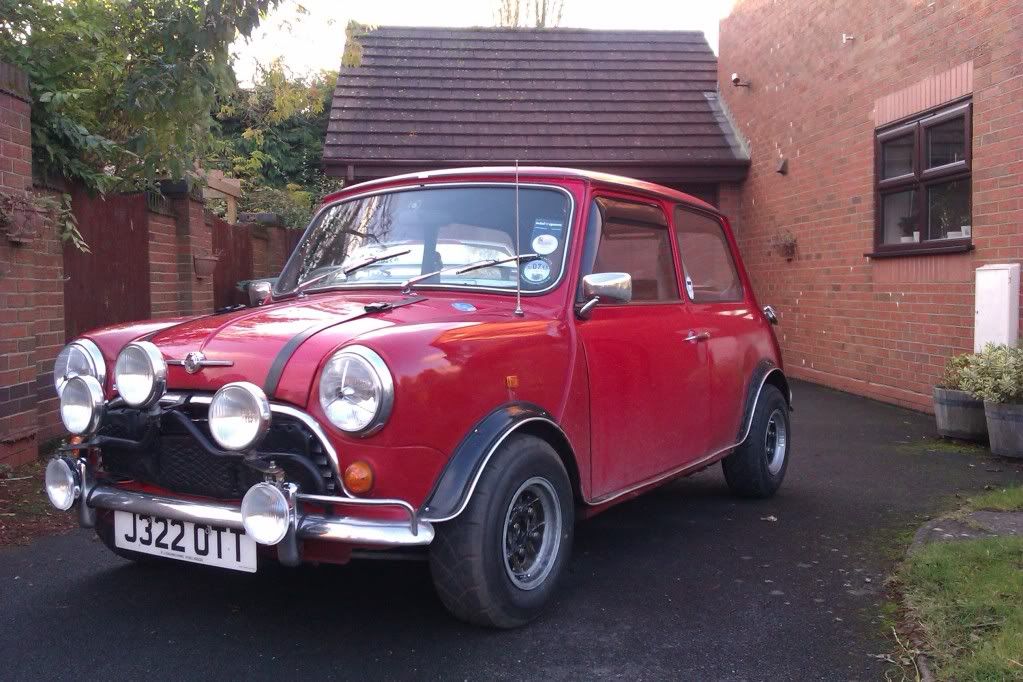 A set of original 6x10 Mambas, acquired through a deal with a mate that wanted my reproduction 6x10 Mambas. They're in need of a refurb but are straight and now have a brand new set of super sticky tyres on them! They sit under the arches a bit more sensibly than the Wellers. 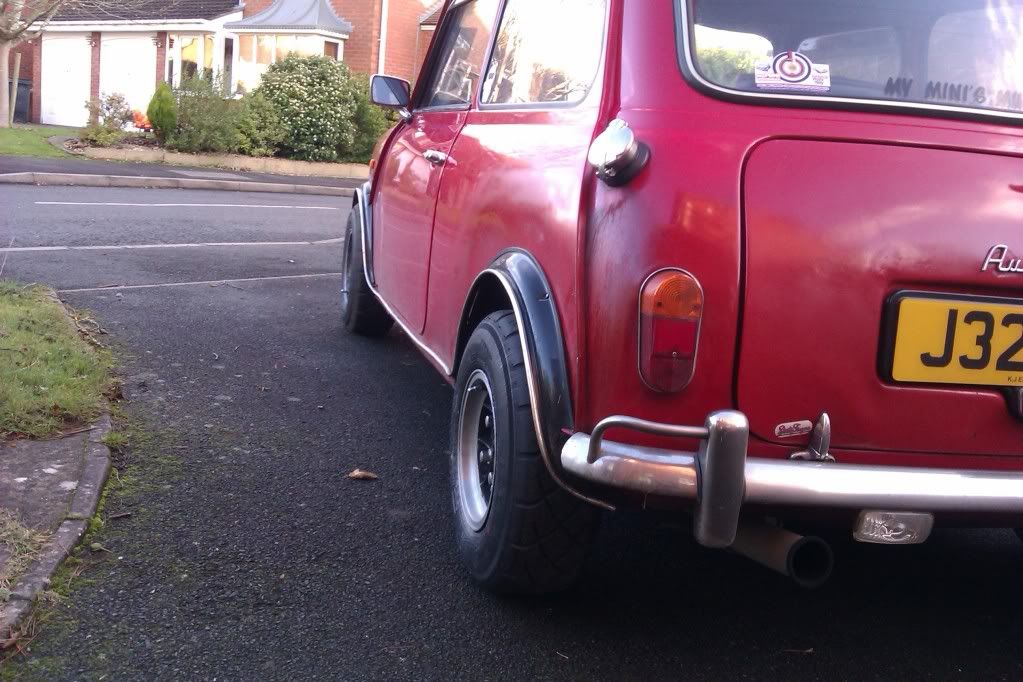 Thought I'd test out the narrow steel wheels I'd lined up for winter as well. In need of a refurb at this stage, but they now had brand new tyres on so were almost ready to go. 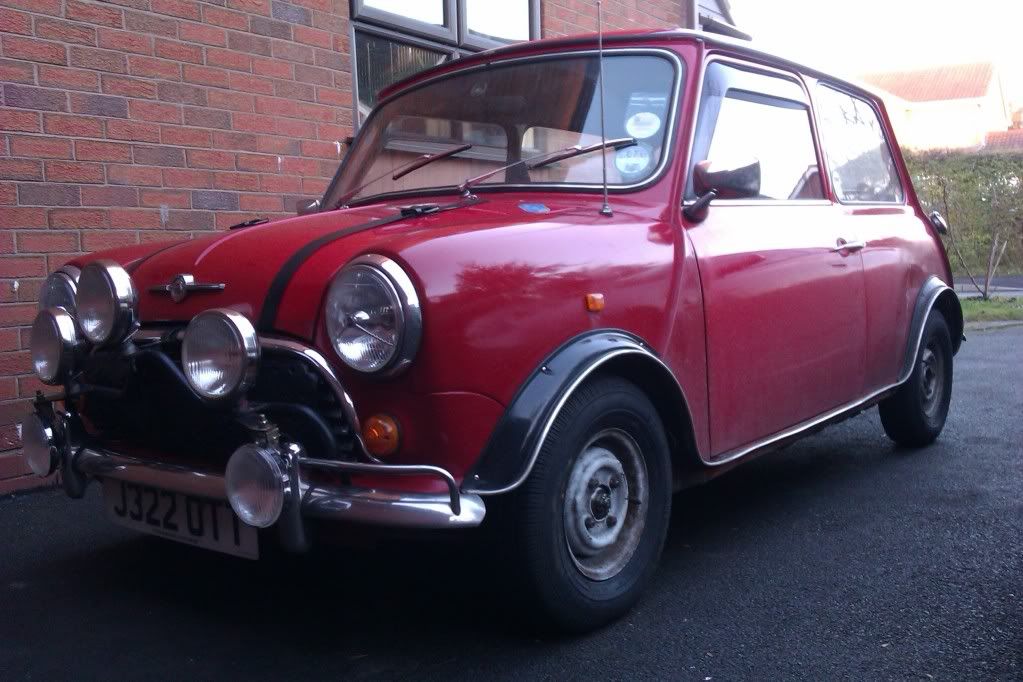 It took me a long time, with a lot of wire brushing and sanding down to get them ready for a lick of paint, but I got there in the end. 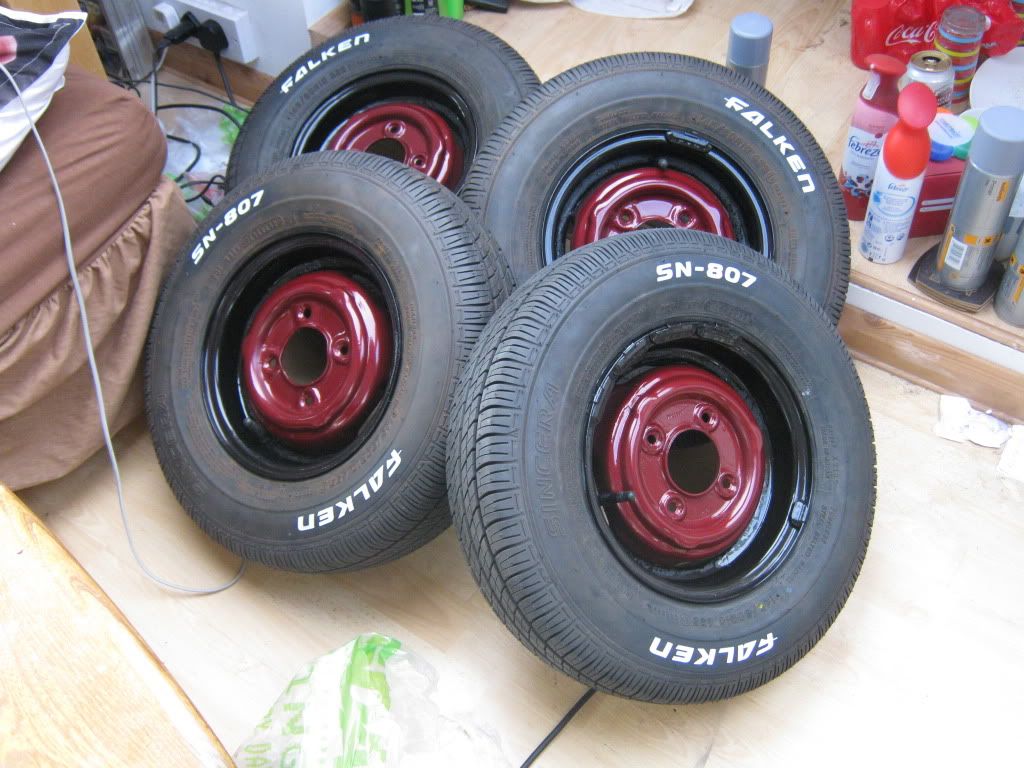 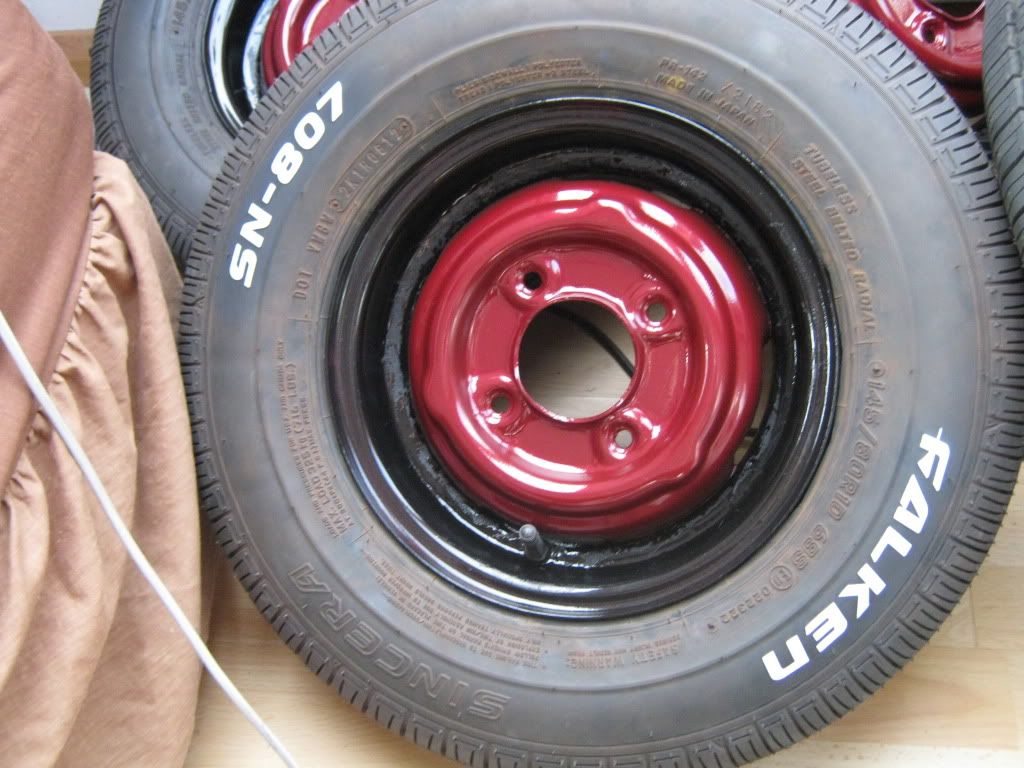 Even got them on to the car at Area 52 in December. Big steelies. 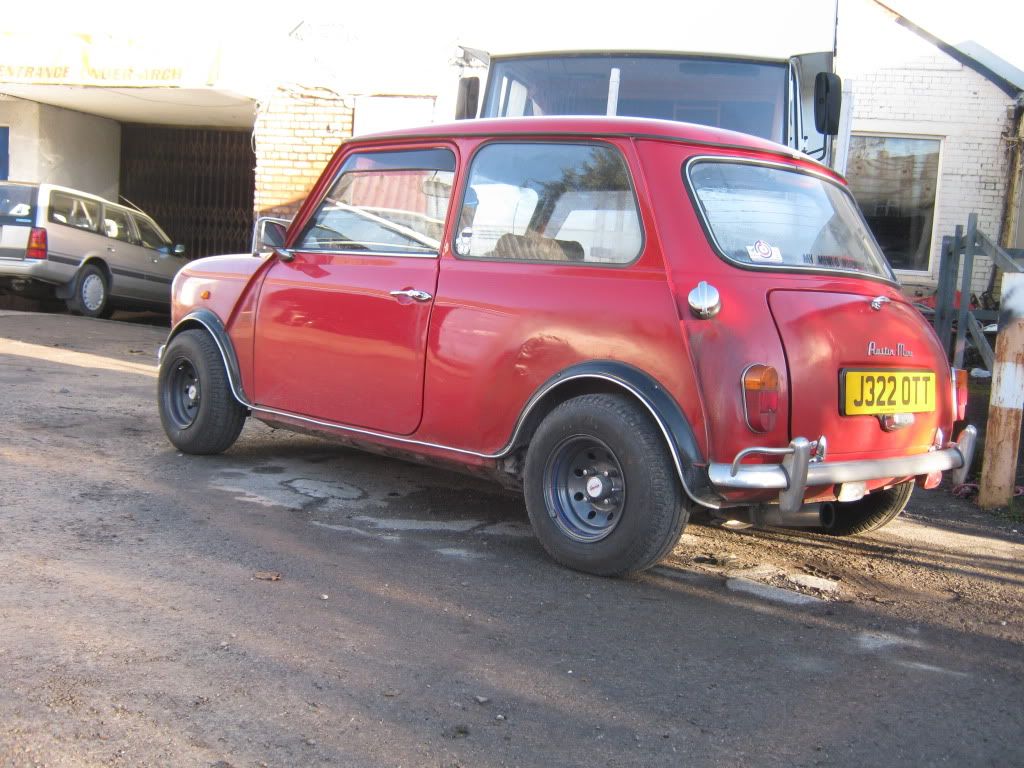 Little steelies.  Feels a bit different to drive now, not as much grip as the wide wheels but you get more feel through the steering wheel, and the car yaws around more and feels a bit looser in terms of road holding. Should also be much nicer to drive through any snow or ice, if we get any that is. For my Christmas pressie, I got a full alarm and central locking kit for the car, which I fitted over the course of about 5 days, basically just drilling holes in the doors and doing lots and lots of bloody wiring! No pictures obviously, it's all hidden away and I'm sure you all know what an alarm and central locking does! One of my leather bonnet straps has also torn at the rusty buckle (cheap nasty leather that's falling apart) so I've arranged to get a new set made out of much nicer leather with solid brass buckles. Hopefully they'll get here soon before this old strap falls apart completely. Next big job will soon be fitting a set of Protech adjustable lowered shocks, so that's another major step towards sorting out the ride and handling to how I want it. Can not wait to get those on! I'll leave you with a pic of how she's sitting at the moment. 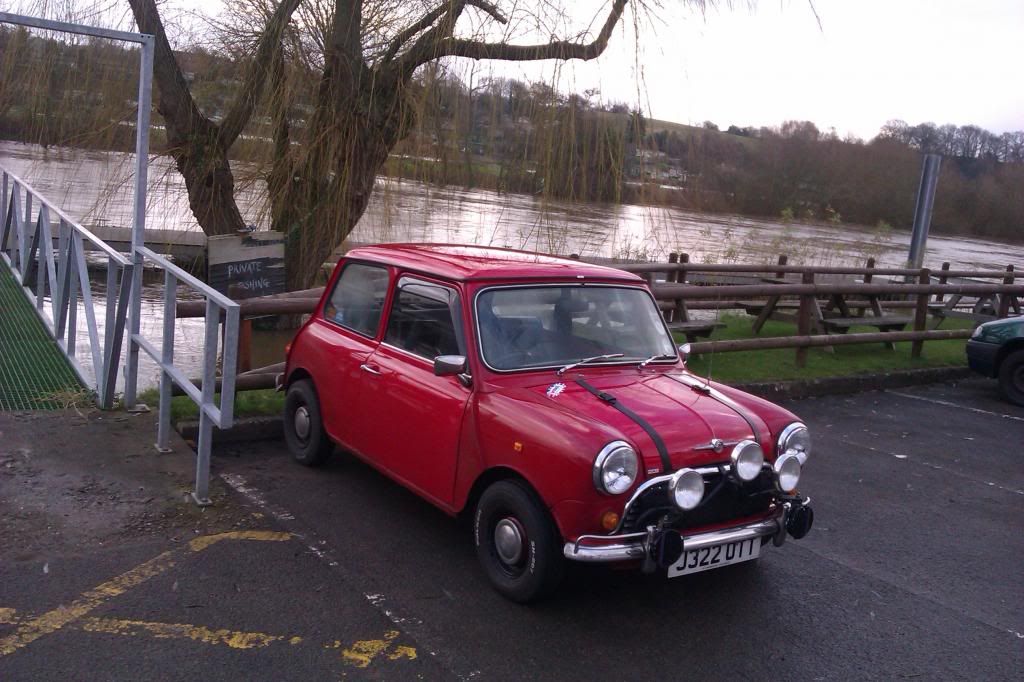 Cheers The Otter |
| |
|
|
MrOtter
West Midlands
"Your car is your story, so don't let someone else write the book." - Moog
Posts: 281
|
|
|
|
Mmm... Protech... *dribble*  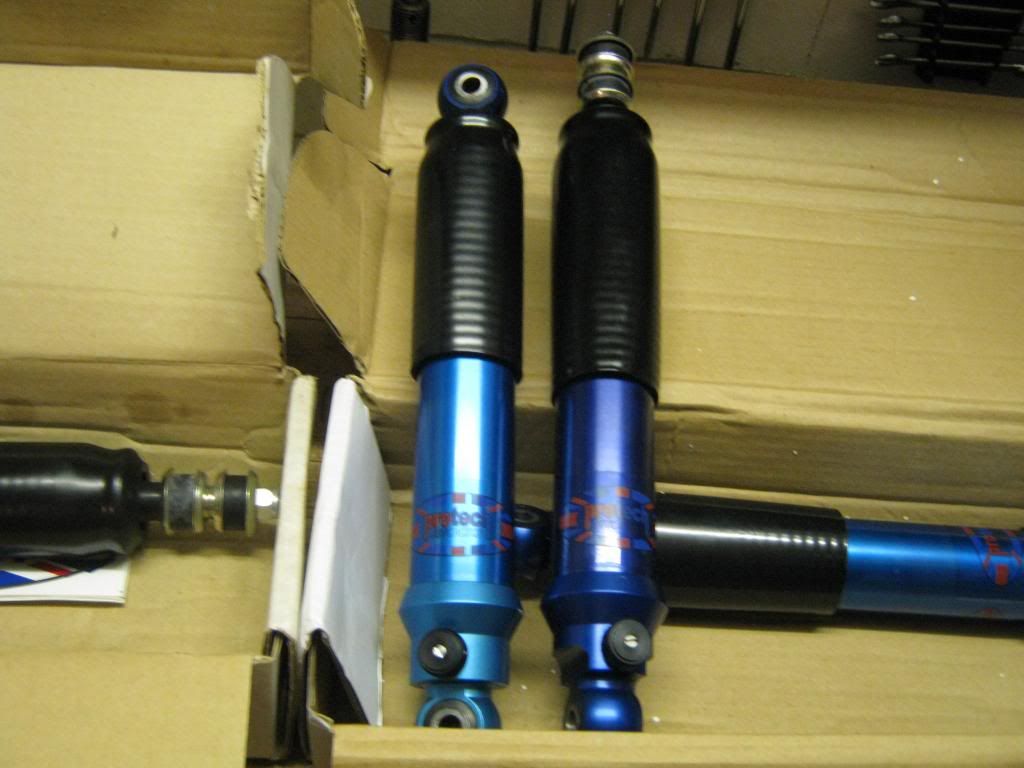 I had a small issue with one of the shocks when I bought them, so they went back to Protech to get repaired and I got them back a few days ago. When I say small issue, the adjuster on one of the fronts was leaking, so every time you compressed the shock it squirted fluid all over the place... so it would have been a big issue had I not realised until I'd fitted them! None the less, fantastic customer service from Protech, I know everyone makes mistakes and I'm very glad they sorted it out for me so quickly. I also now has eBay stickerz  Another update due when the shocks and straps are on - coming soon. Cheers Otter |
| |
Last Edit: Feb 4, 2013 17:25:20 GMT by MrOtter
|
|
MrOtter
West Midlands
"Your car is your story, so don't let someone else write the book." - Moog
Posts: 281
|
|
|
|
A few little things to update with. Firstly, fitted some old style indicators with the glass lenses and chrome rings, looks a lot nicer I think. 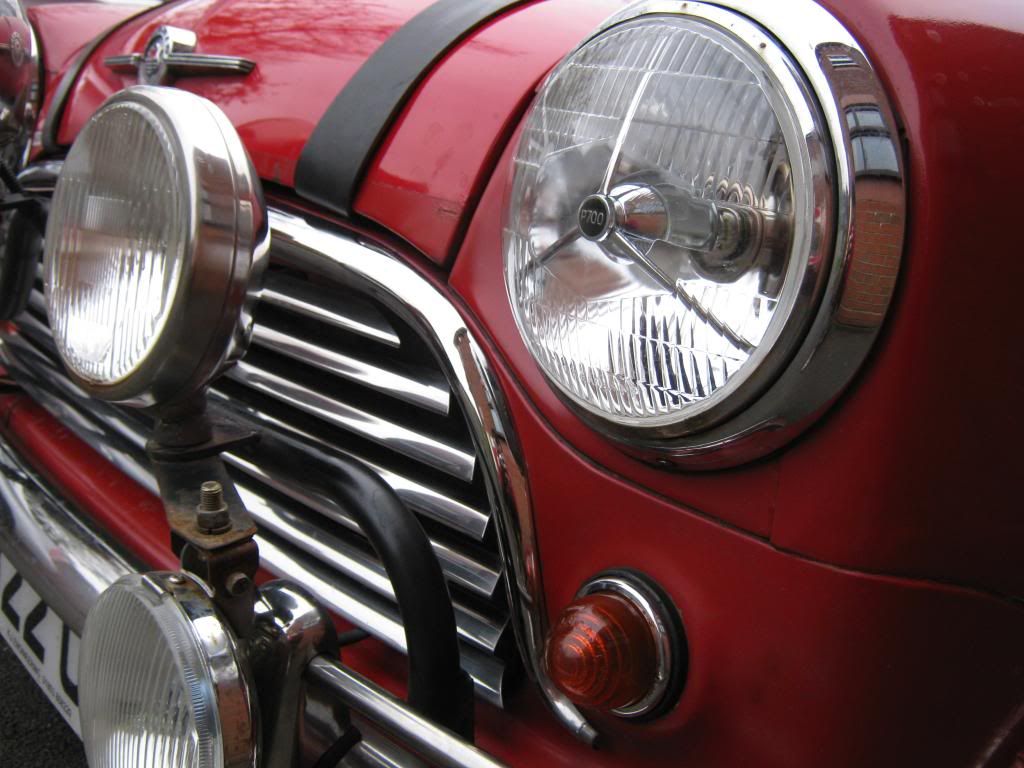 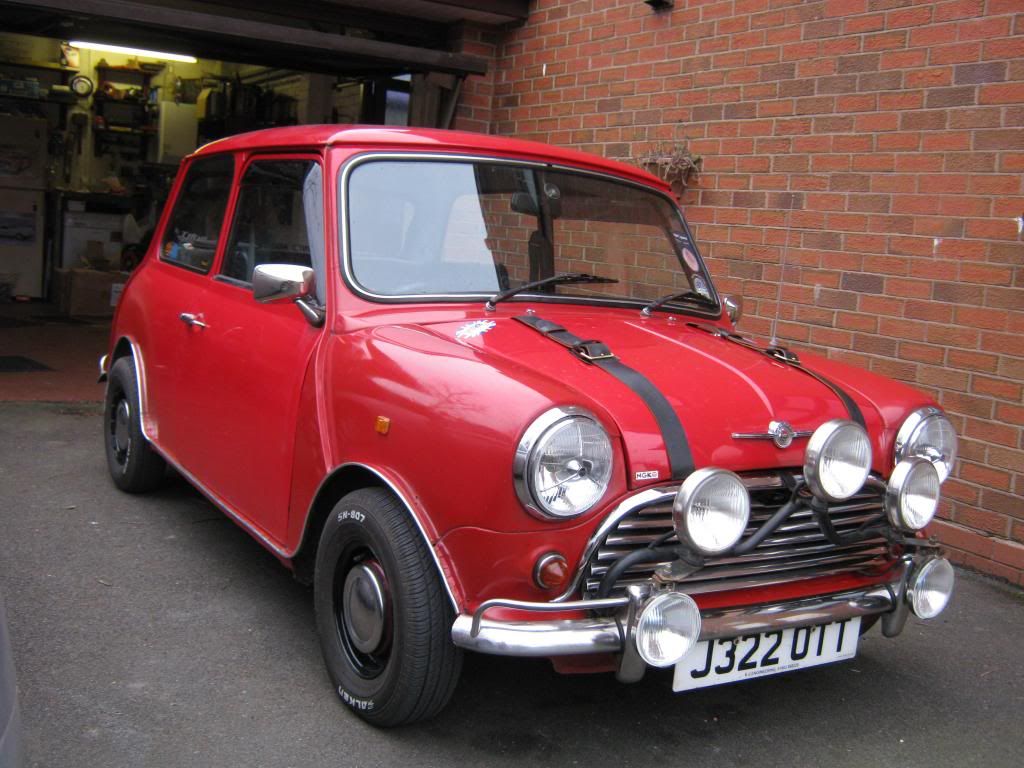 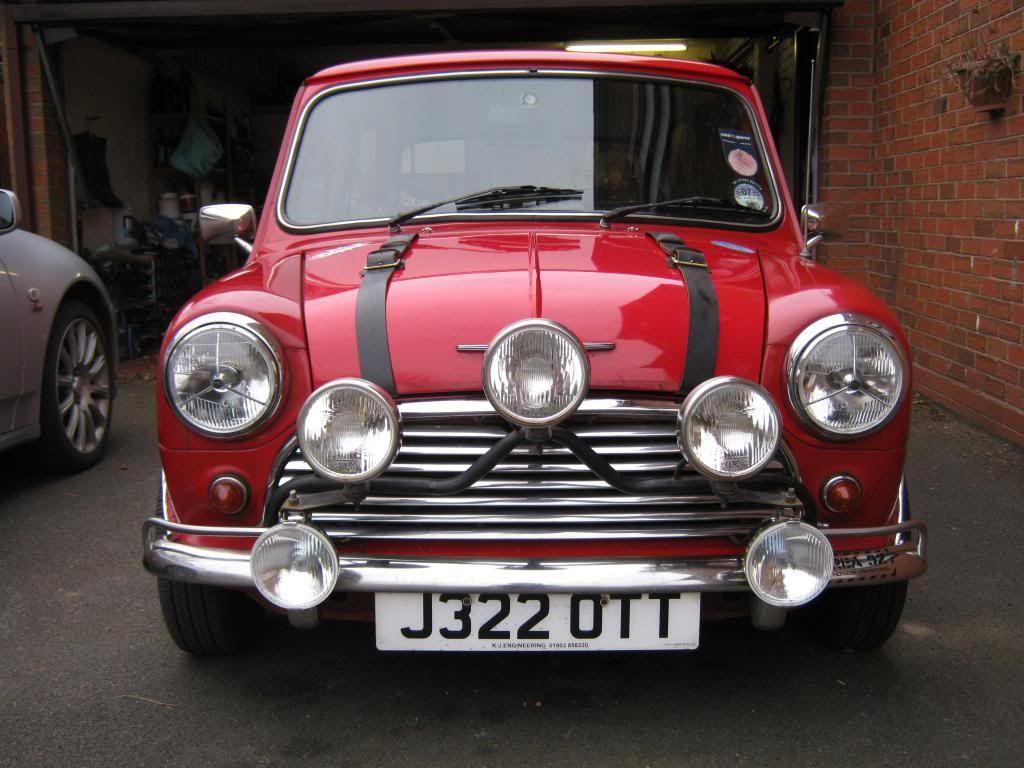 Then, I got a new rear seat to replace the old one that had gotten soaked with battery acid! Old: 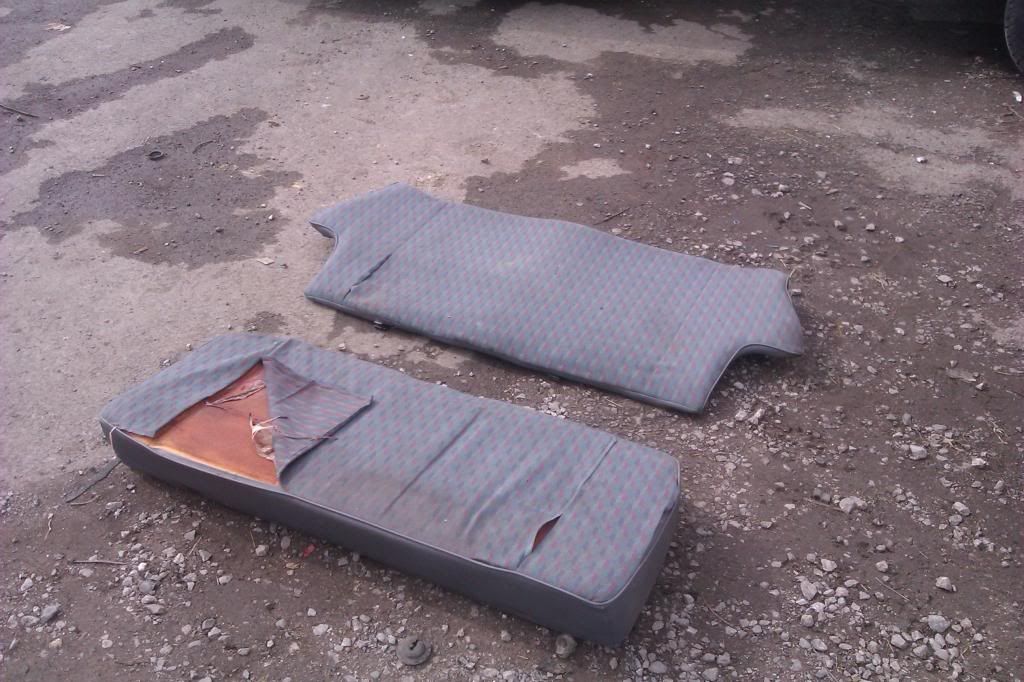 New: 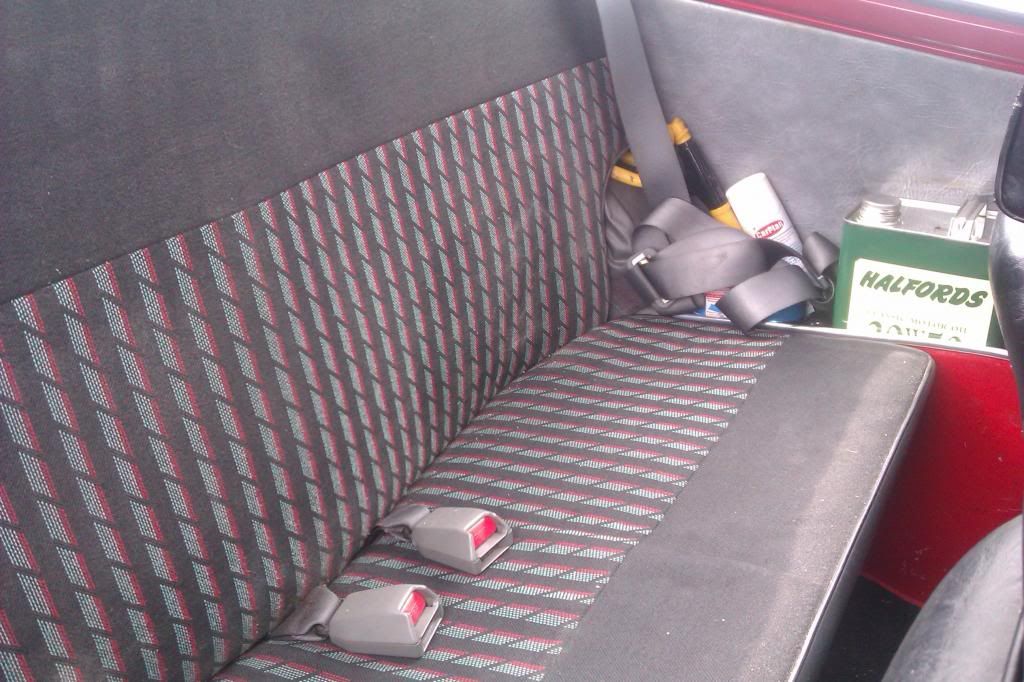 Then I decided it was time to get my Wellers/arches back on, but I fancied a change of colour first. 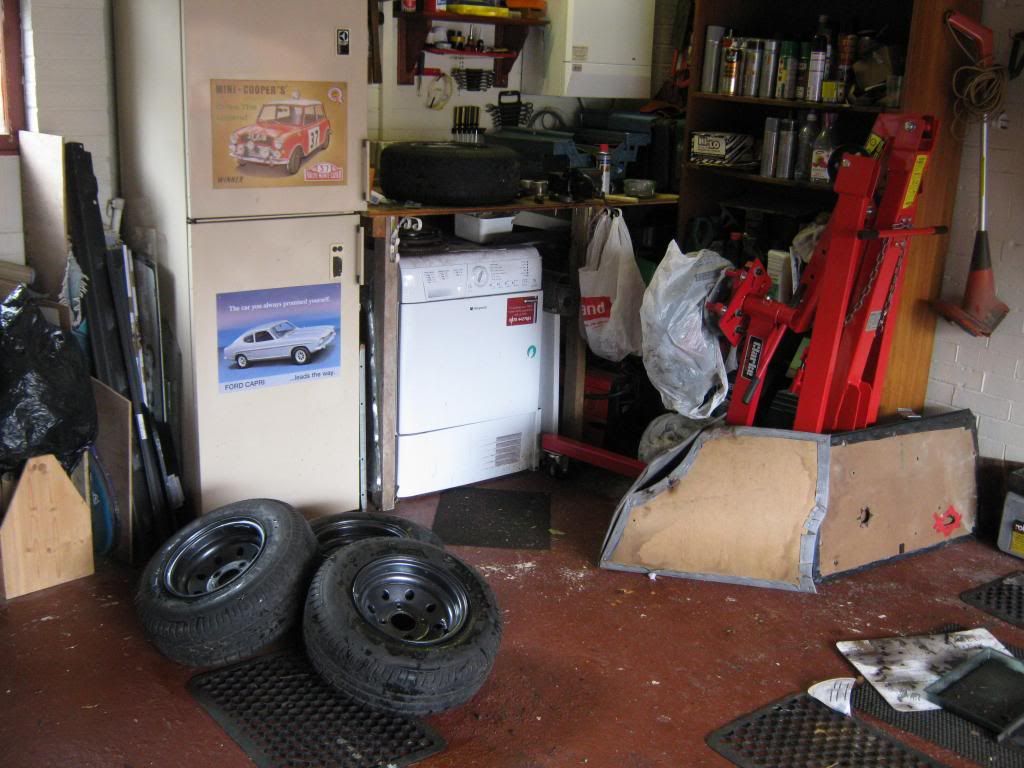 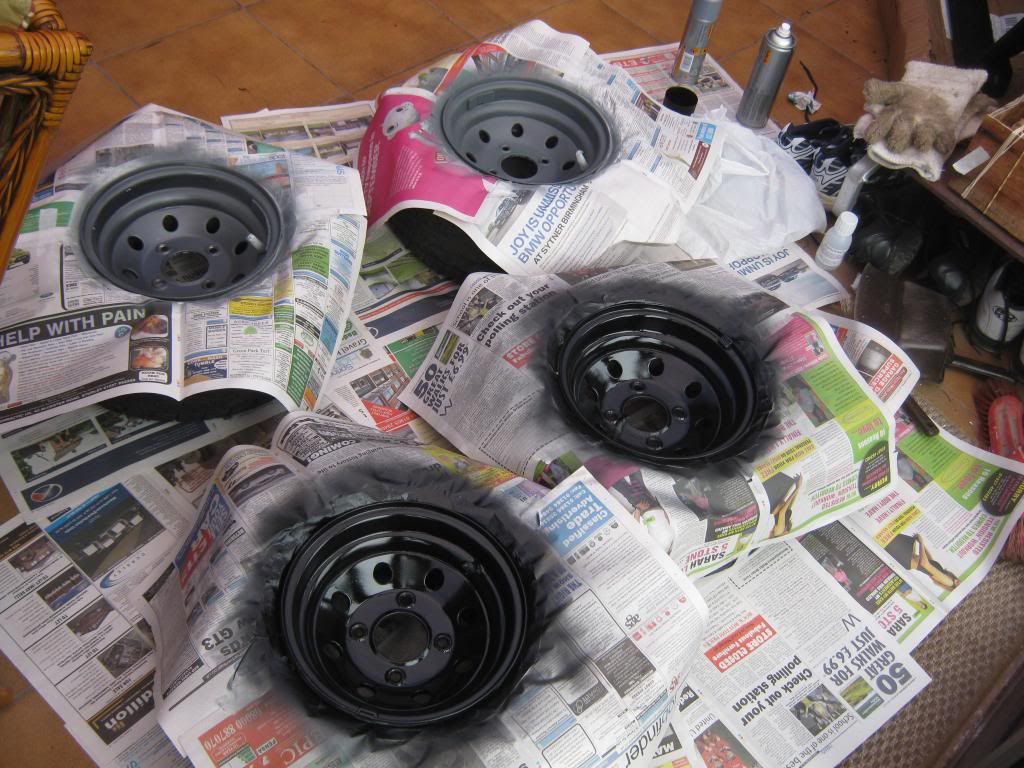 Thought I'd try satin black, see how it looked. 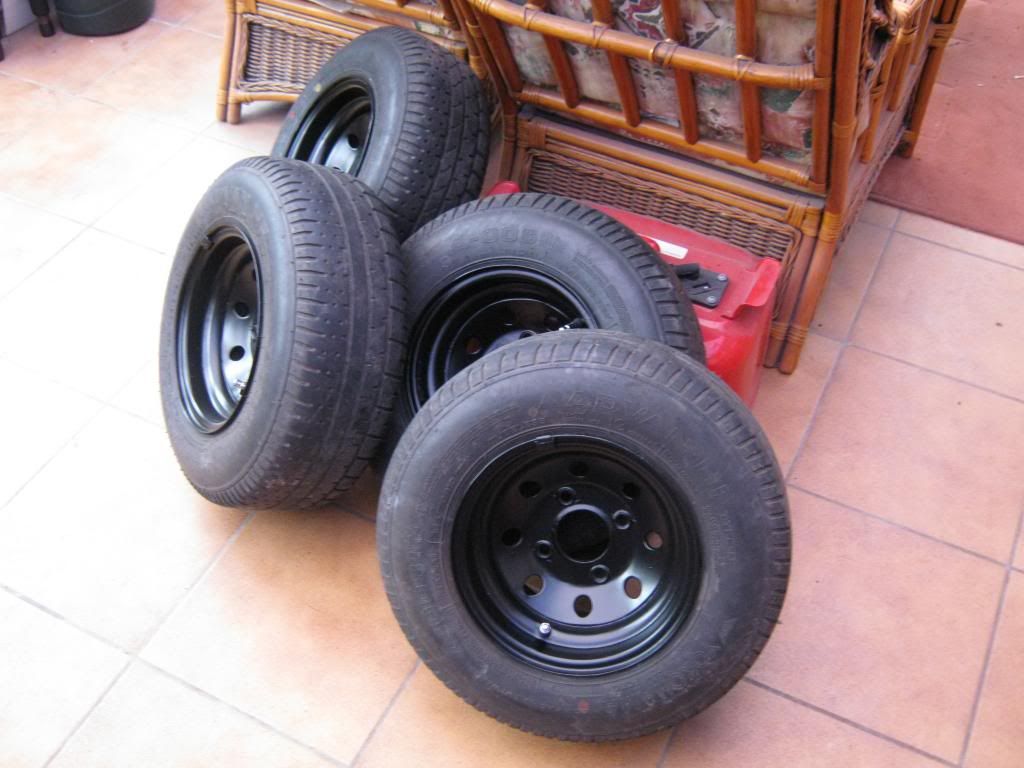 Not too bad I reckon. 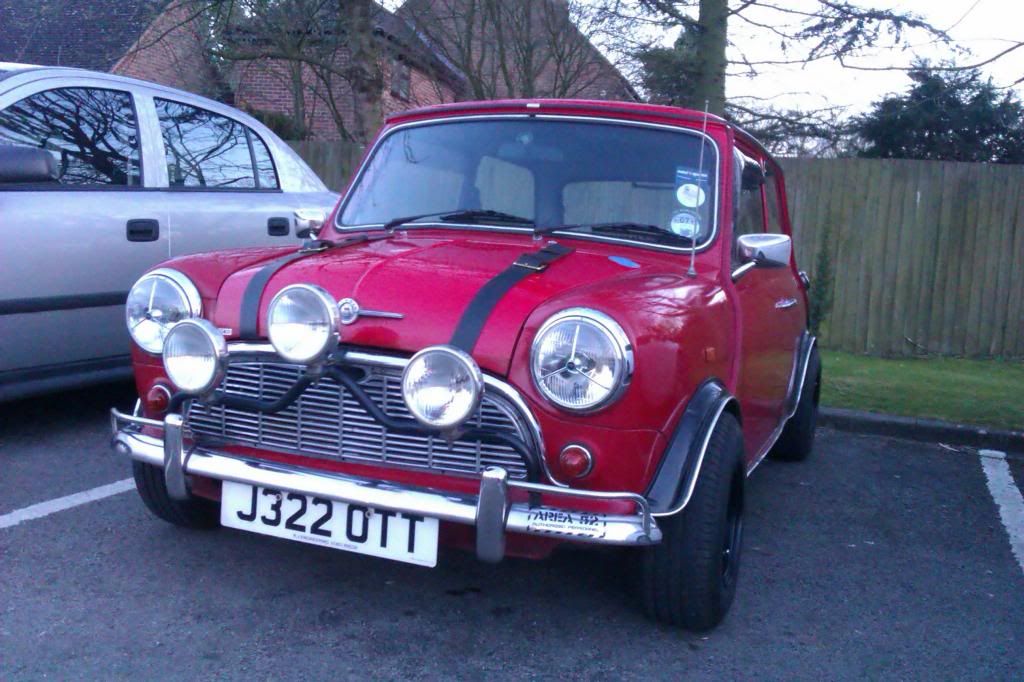 Probably no more updates for a while, can't afford any new bits whilst I'm saving up to re-build my 1275 engine. Cheers |
| |
|
|
MrOtter
West Midlands
"Your car is your story, so don't let someone else write the book." - Moog
Posts: 281
|
|
|
|
|
Here, have a video of me showing off my new Accuspark rev limiter.
|
| |
Last Edit: Apr 20, 2015 11:30:07 GMT by MrOtter
|
|
|
|
|
|
|
|
I like how you've gone about this, and most of the mods you've done.
|
| |
|
|
Bioshock
Posted a lot
It aint hip to be square.
Posts: 1,861
|
|
|
|
|
That is a great looking mini.
I like everything about it. Good work fella.
|
| |
Almera GTI = ugly bird who turns out to be great in the sack = Win
|
|
OVY871
Part of things
Owner of Austin A35 Saloon
Posts: 321
Club RR Member Number: 66
|
|
|
|
|
|
| |
|
|
grumpy
Part of things
Posts: 557
|
|
|
|
|
You did ask for suggestions so have you thought of getting a small oil cooler for it , I found they really helped in summer especially if you do a fair few miles in one go . If you do get one though please don't put on the outside with the pipes hanging out a la the lastest fashion - it looks [re]tardy ! Also i take it you read clive trickeys mini books ? Old skool stuff that still applies .
|
| |
|
|
|
|


