|
|
|
|
|
hi all, thought I'd share with you guys something I havent seen on here much. shes a '69 Hillman Imp, only one owner from new! I nabbed her off ebay in a last second bid, was stoked when I won. 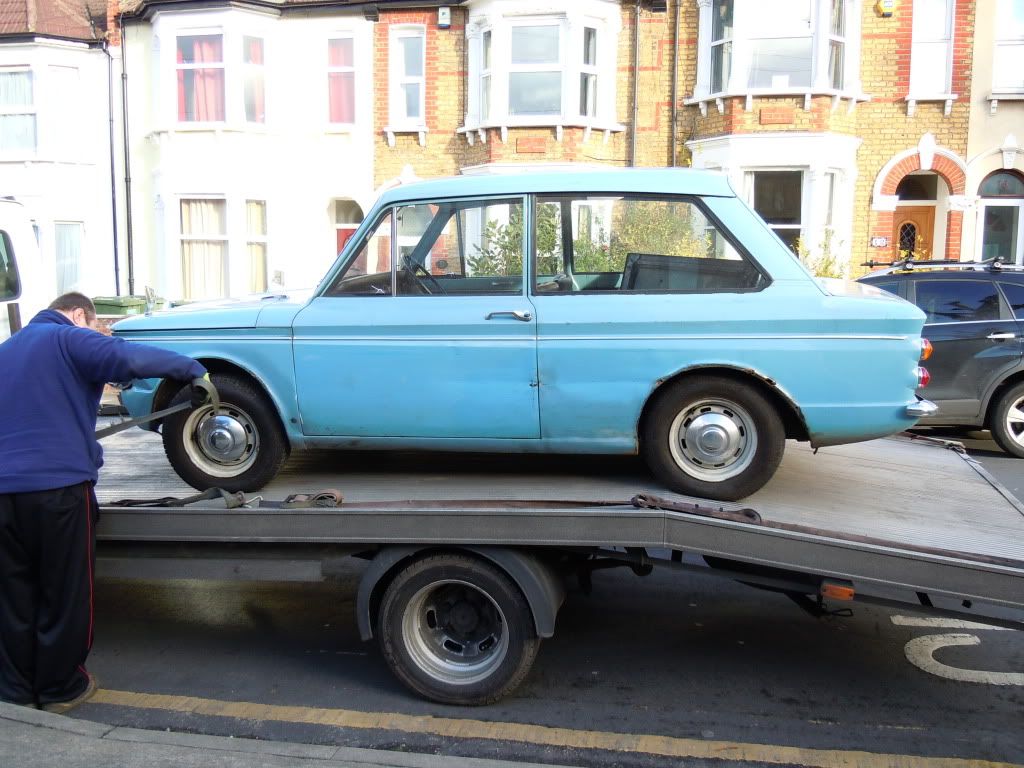 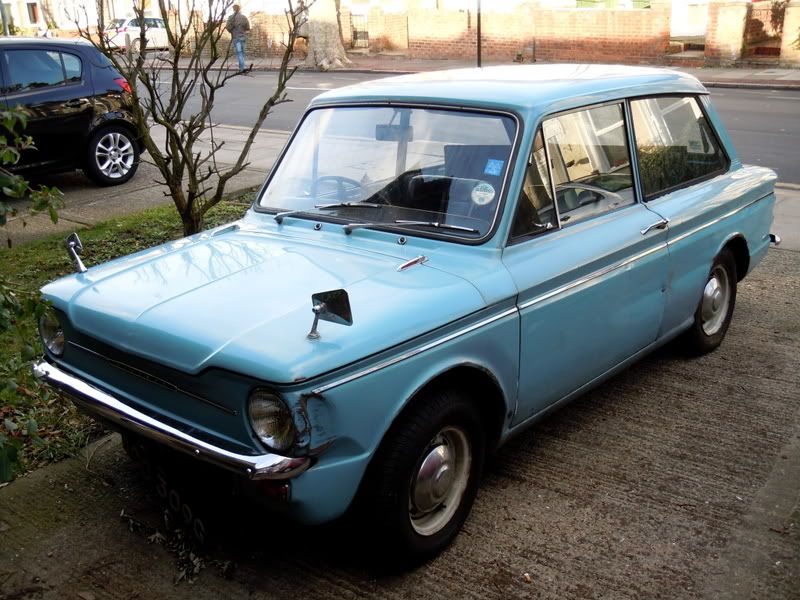 turns out theres a bit of history with it, the previous owner had driven the car until she was 90! then after sadly passing away the car made its way to a family friend, from whom I purchased the car. he had not registered the car in his name because turns out he already has a magazine featured imp (spotless) lovely chap. I'm told doris (previous owner) took good care of the imp and never let anyone else drive her! I thought it'd only be suitable to name the car after her, doris it is! when she's finished she'll hopefully be a fast road car/ ocassional track test here and there she reads 80737 on the clock and clearly needs some attention on the bodywork.  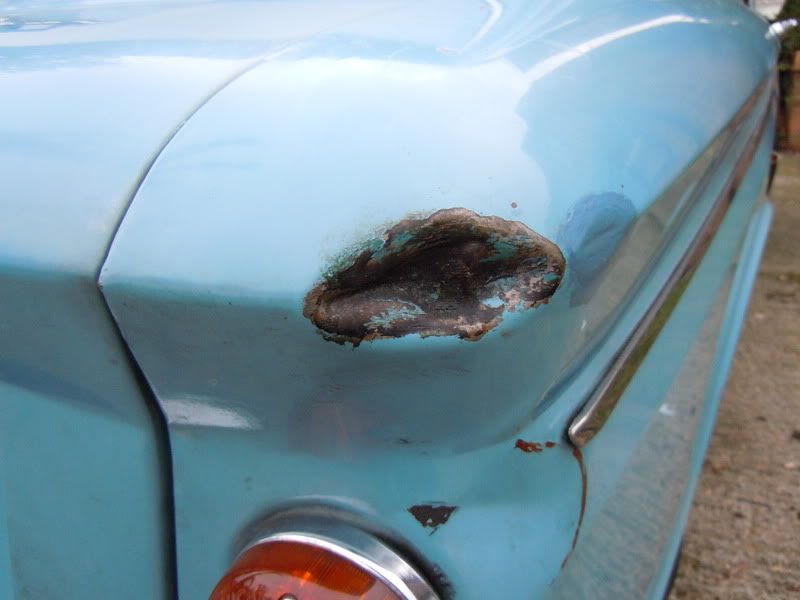  other than these little bits she's solid, no rusty sills or floors, 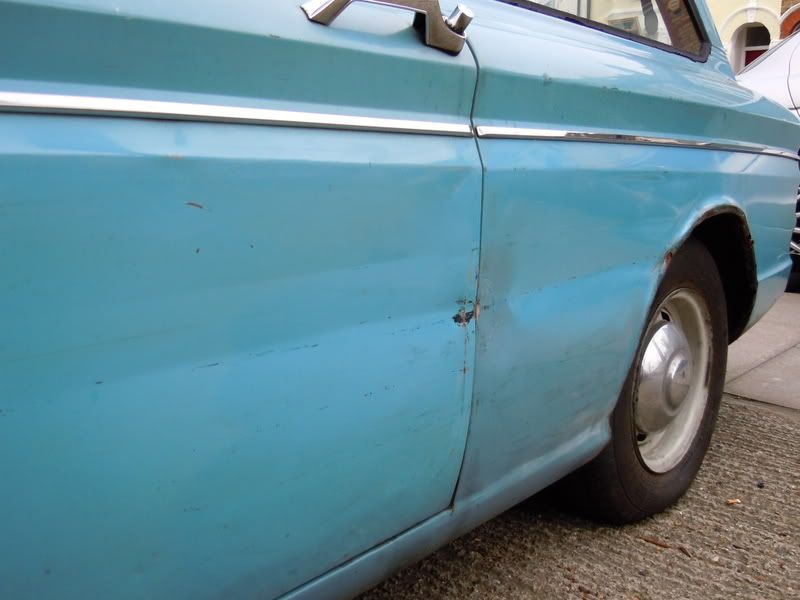 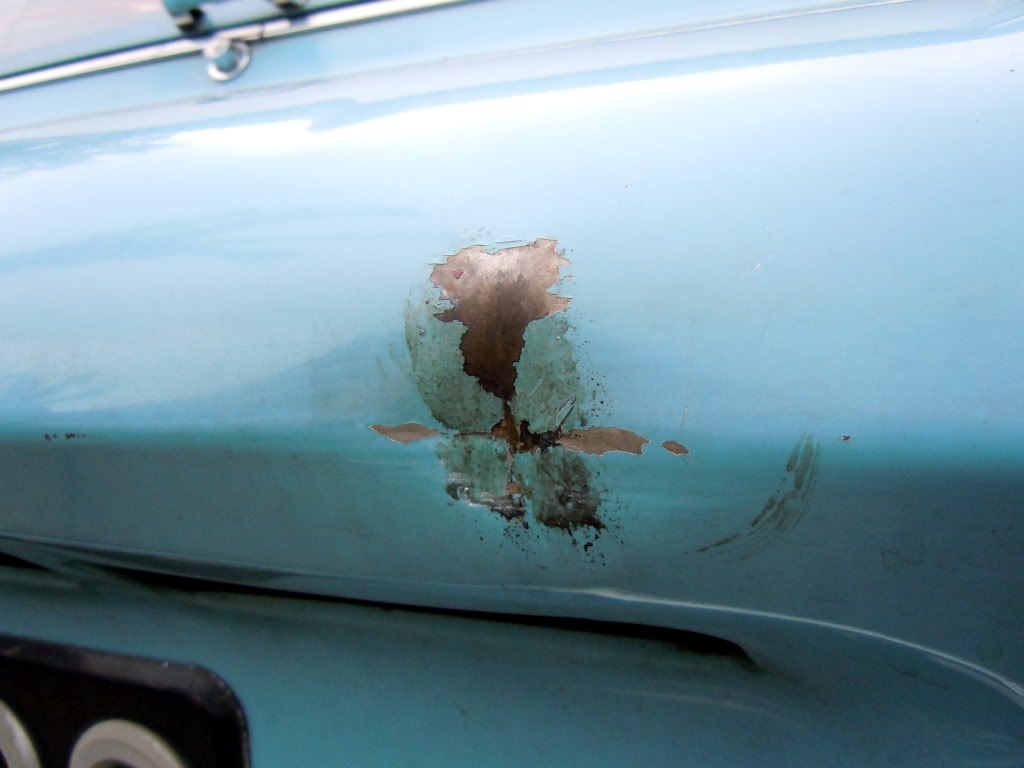 proves that women arent the most careful of drivers in the back its an all alloy 875cc lump and gearbox, no rad at the front, std was apparently good for 42bhp, in the present day I doubt she's got that much left in her! 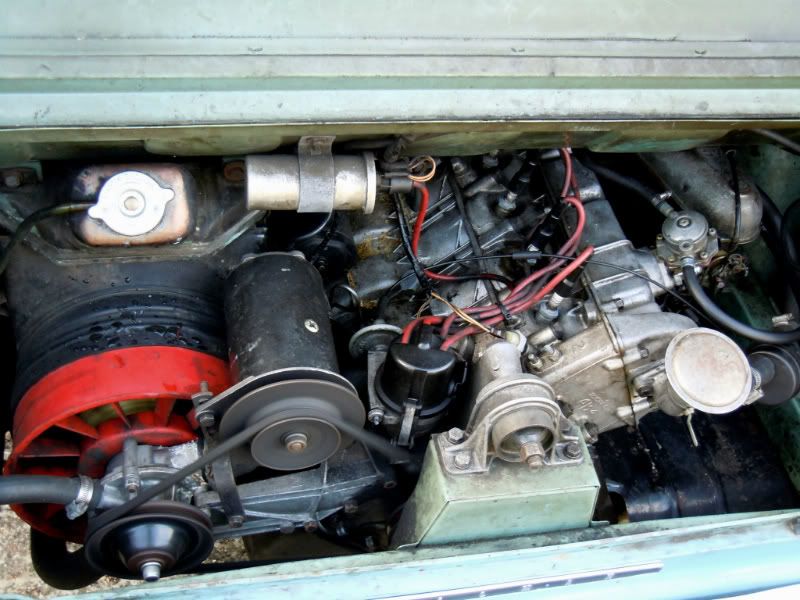 love this period feature ha!  so she started up once when she was loaded off the truck and then never again, seems the points are out. had to put it back on a truck to take it to the garage - drama already!  got doris in the hole she'll be stuck in for months. interesting fact is that my mate bought a hillman imp, from a guy on here I'm sure, just a week after I picked up mine. 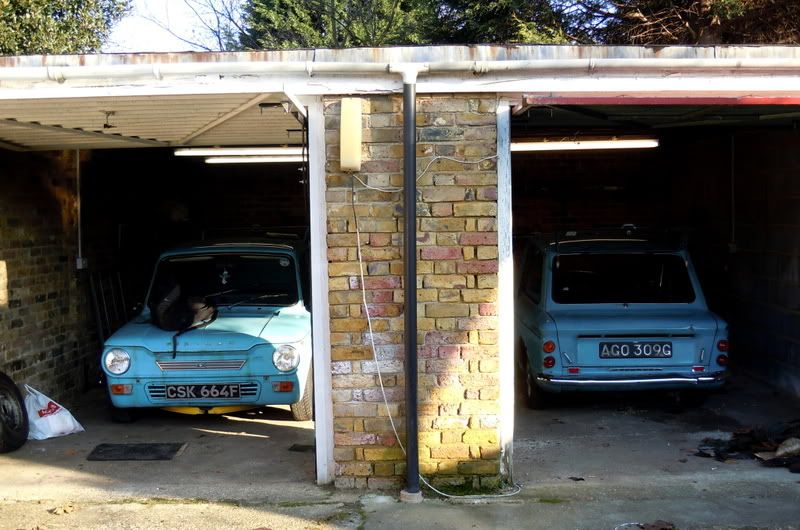 we plan to fully restore both of them, without spending an arm a leg and hopefully learning some new stuff on the way as this is my first car and his too 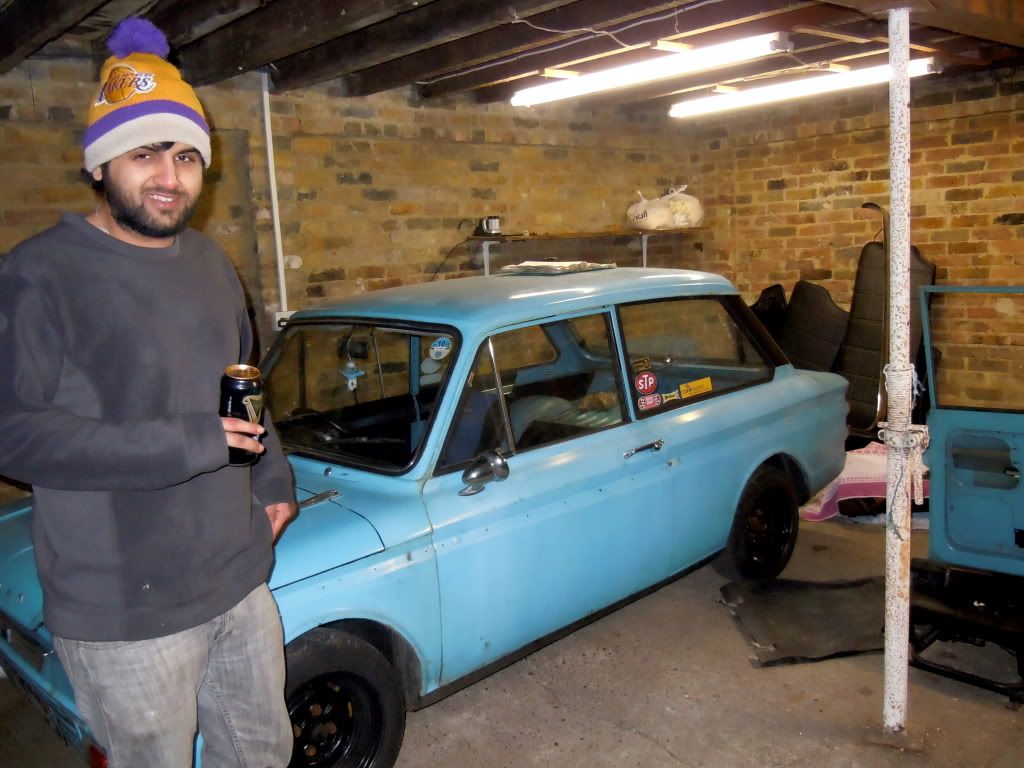 told kapow its only real beer in the garage, not guinness! ;D still doesnt listen! I must note that I will be getting (extensive) help from my dad who I'm pretty sure was born with a spanner in one hand and welder in the other! without his help this project wouldnt be going anywhere! 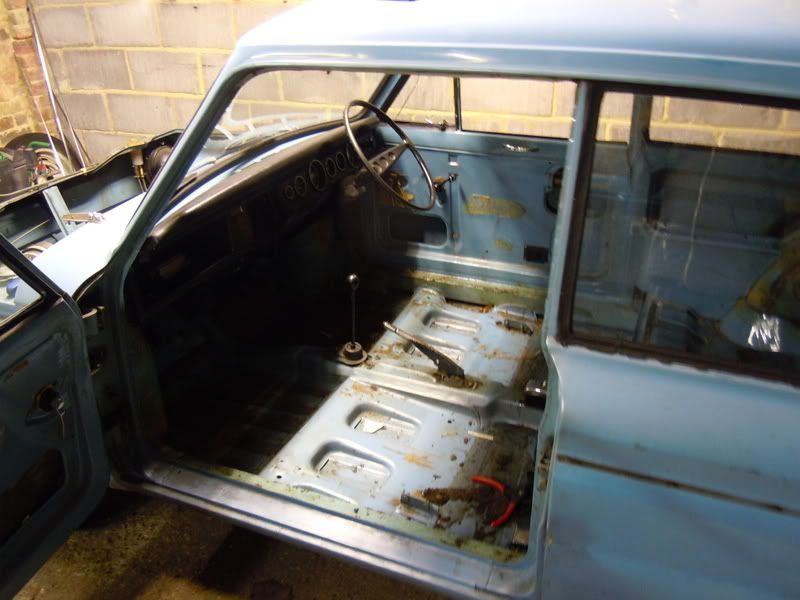 start with the striptease 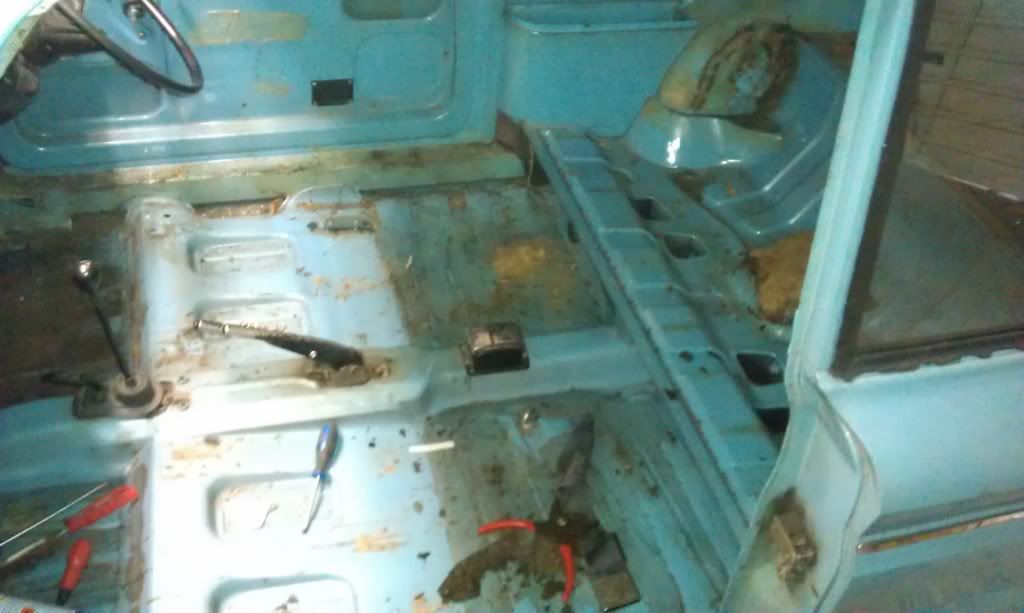  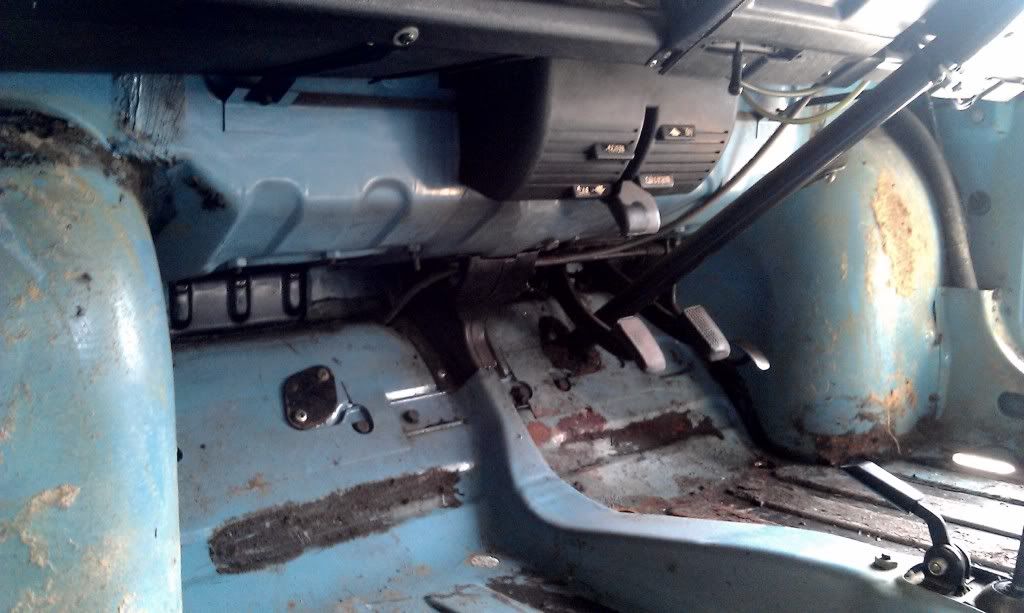 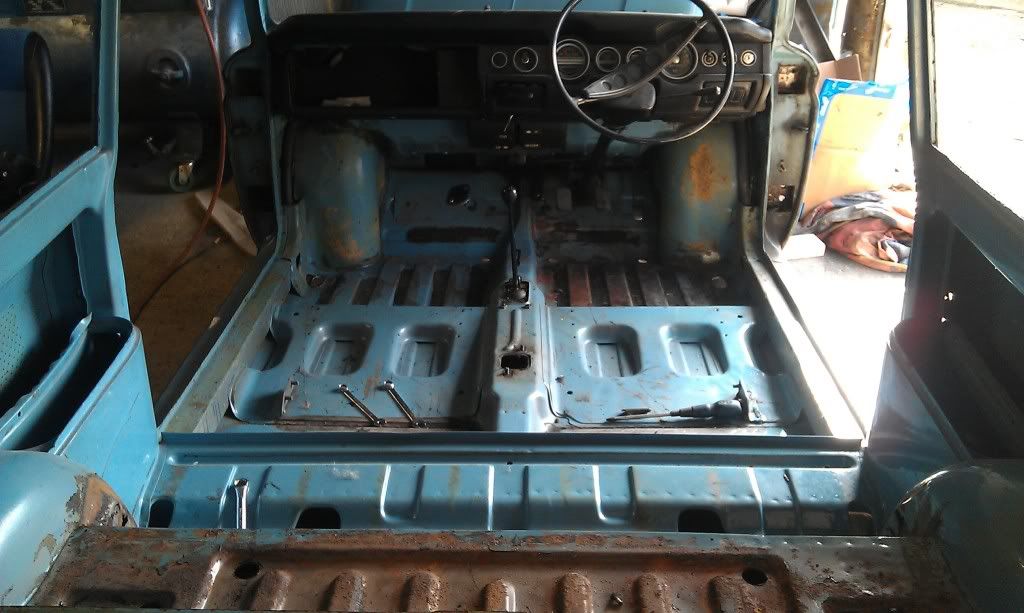 car doesnt look happy lol  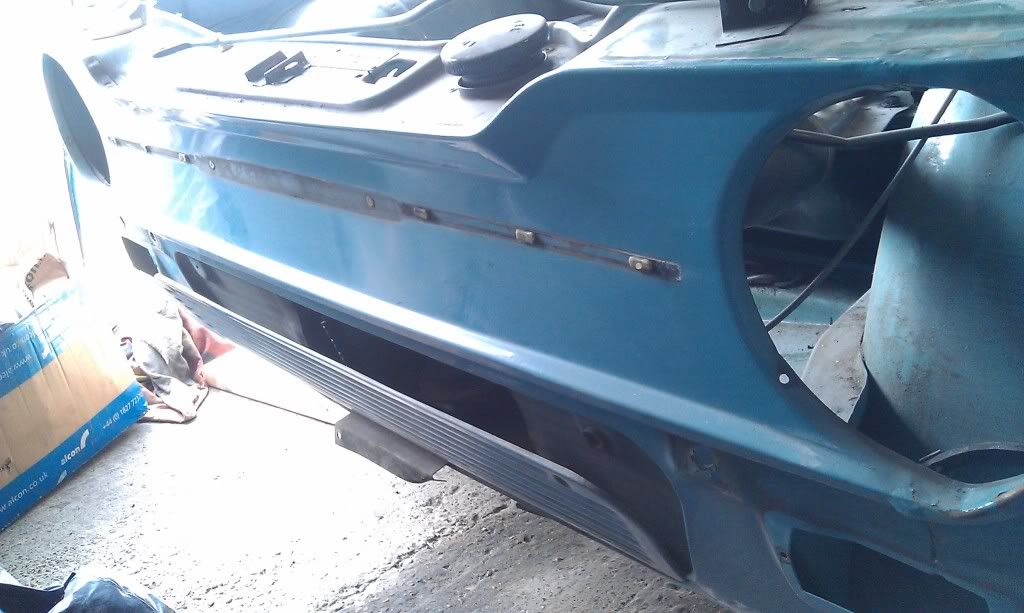 windows, seats and doors off 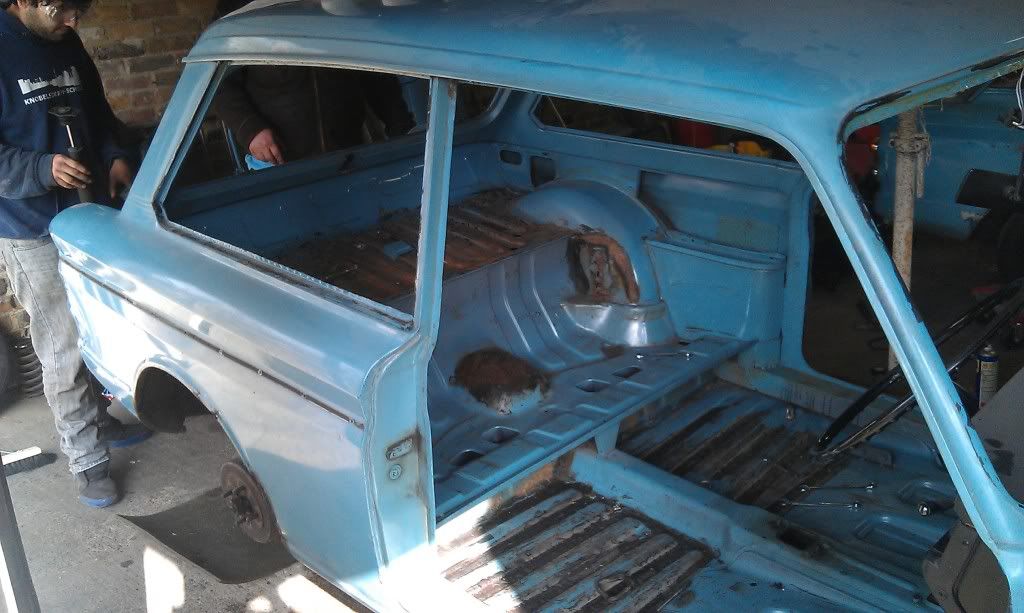 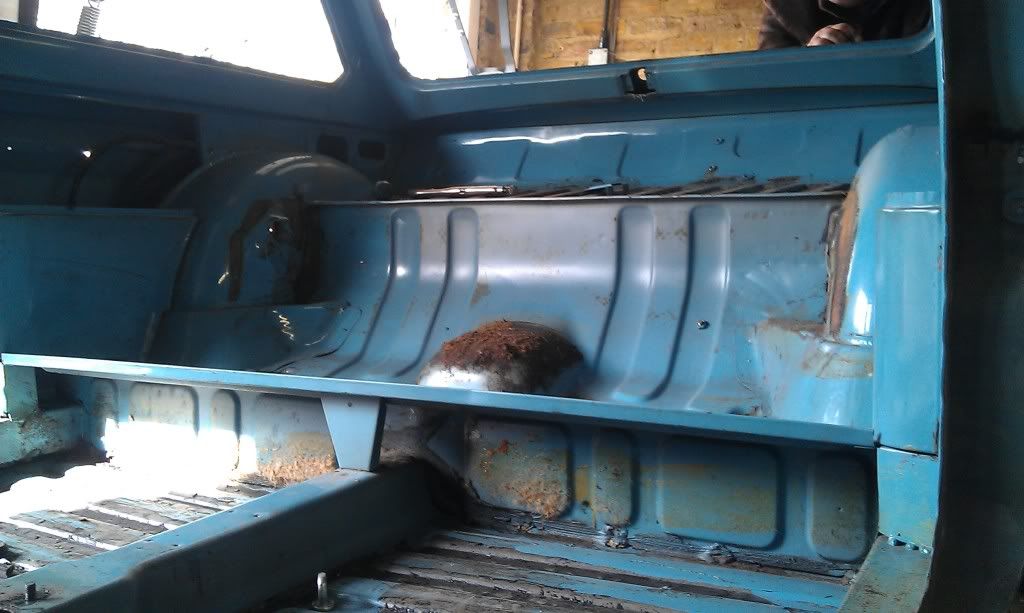 little nasty bit of rust inner real wheel arches, both sides looks like moisture collected under the rear couch :/ 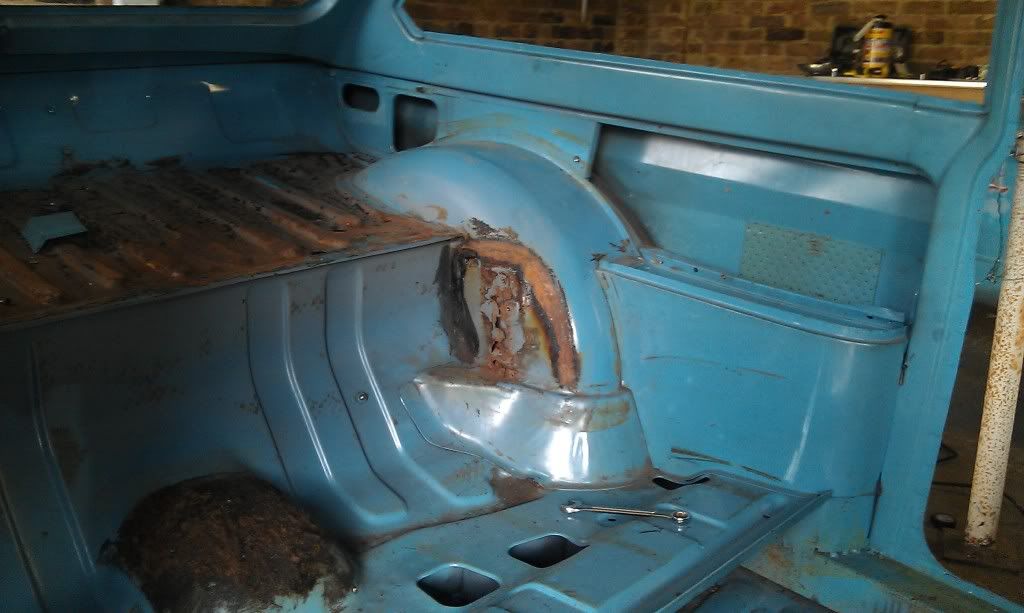 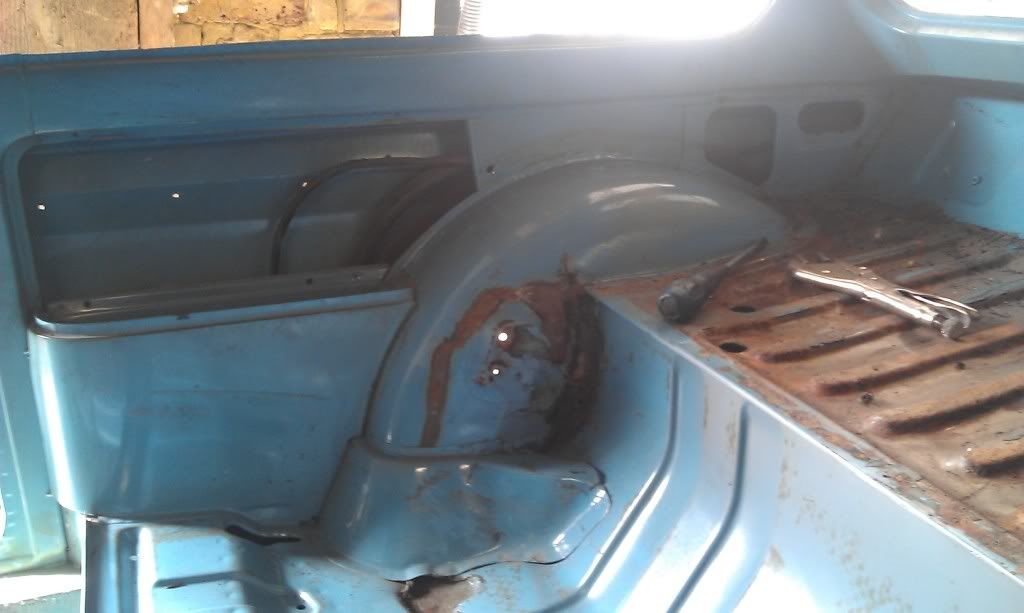 a nightmare!  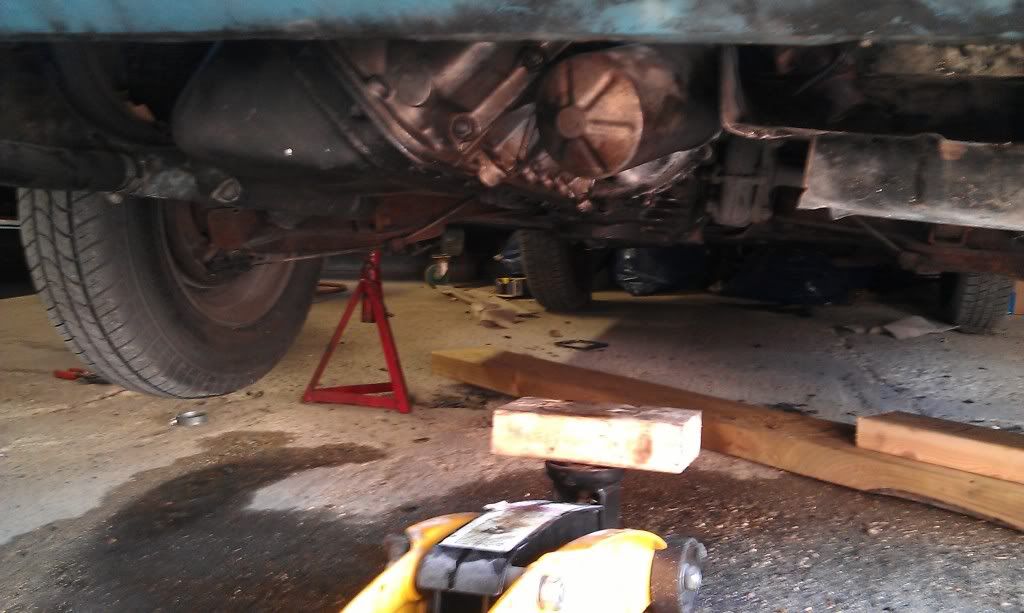 gutted out  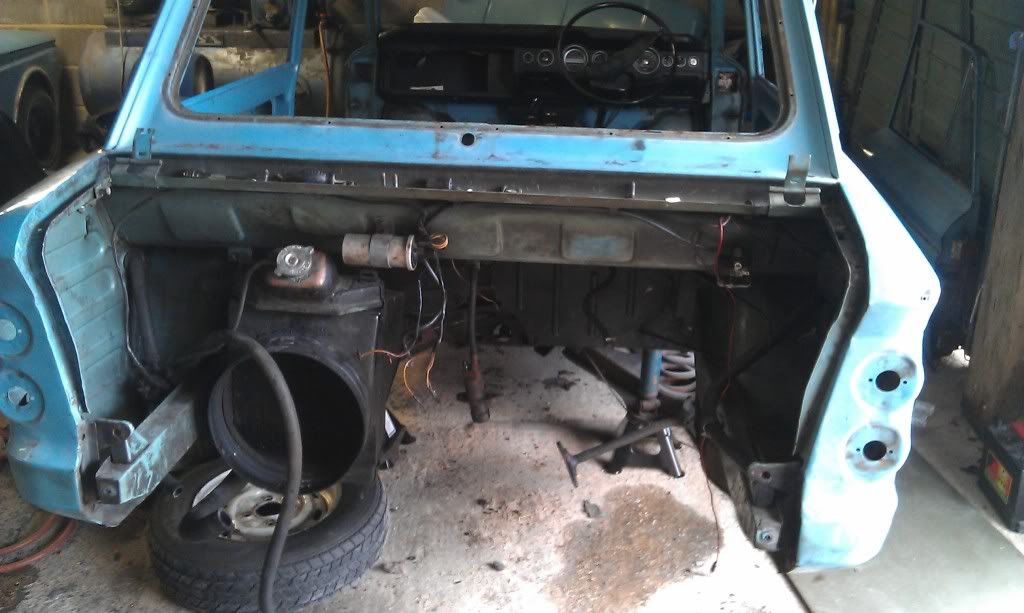 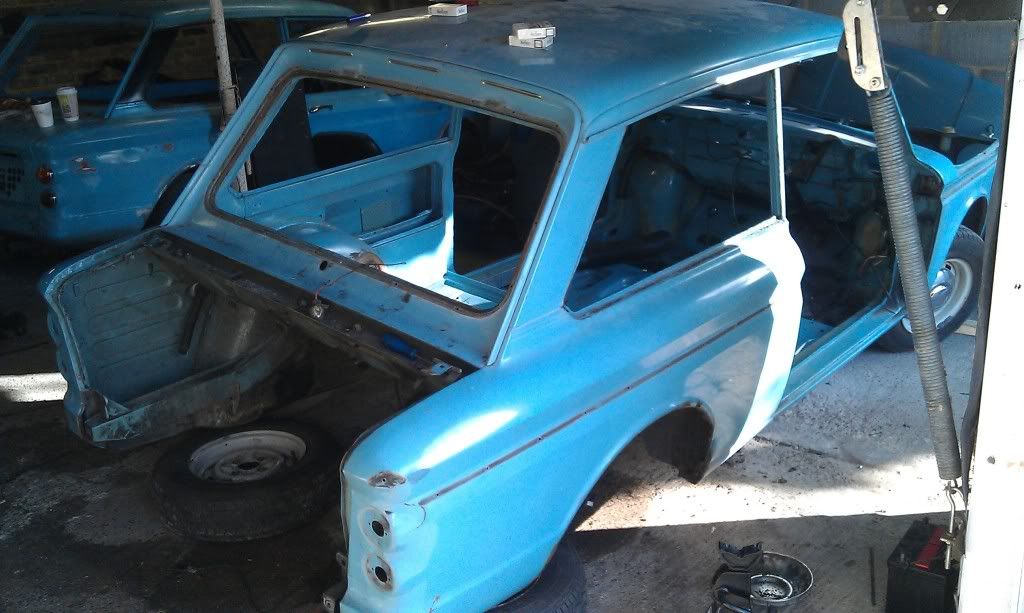  grilles out 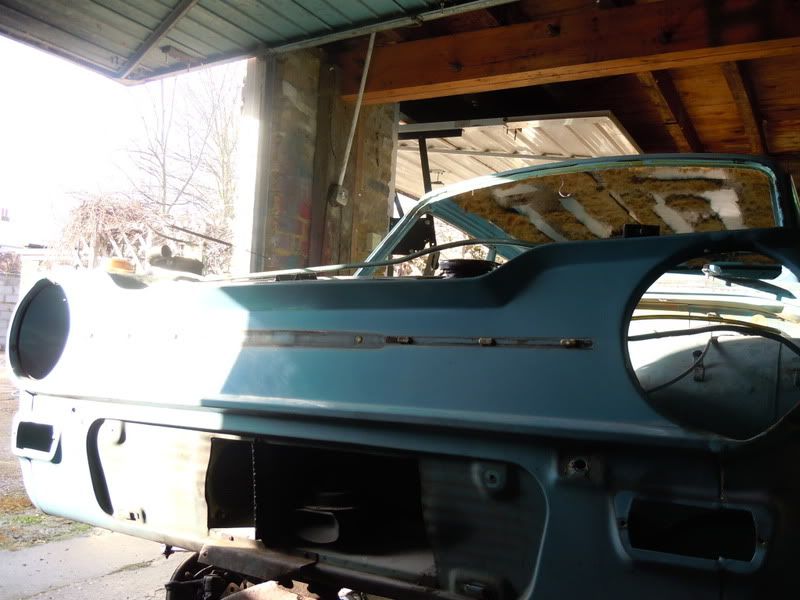  kaboom!  took 3 people and about 2 hours to get it all out. haha we work slow?  |
| |
|
|
|
|
|
|
|
|
|
2 hours that is slow, doris is gonna be fantastic though, got a small hankering for a imp myself  |
| |
|
|
|
|
|
|
|
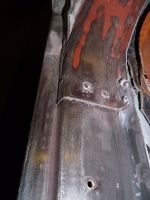
Yay, another Imp. ;D There's a link to mine in my signature. That looks like a nice starting point - a reasonable amount of rust, but not enough to make the project impossible. That rust around the rear inner arches is quite a common spot. It's best to repair it from the outside of the car, as the cone-section spring seat supports have often gone as well. I had to repair that section on mine for the MOT a couple of years ago. I do have a photo somewhere showing the amount of metal I removed on the pasenger side of the car, which went right up around the seat mounting captive nuts - but I don't have it on photobucket. I'll upload it later and post it here so you can see it. Here's a photo that shows how much I had to cut out just below that on the driver's side: 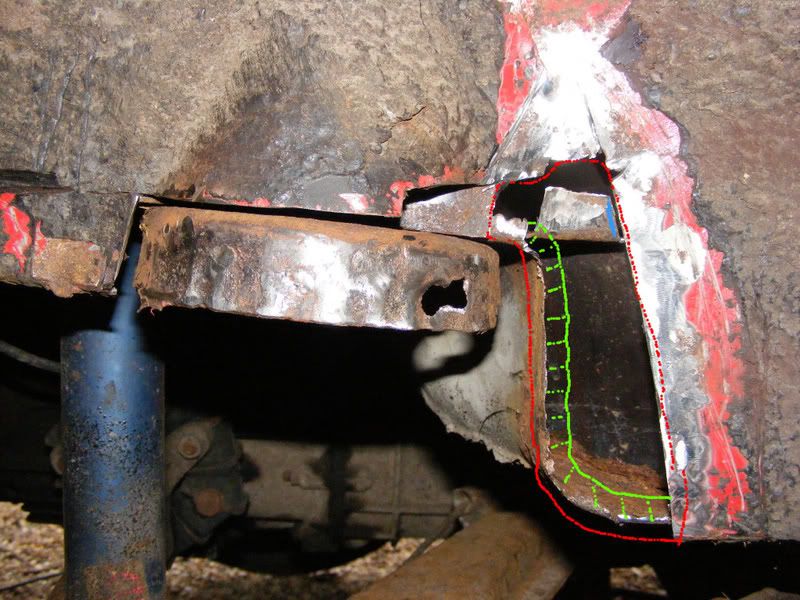 The green hatched area shows where there is a return for the join on the innermost panel. The red line shows the extent of the inner wing repair panel, and then there was a repair needed to the bottom of the suspension cone. It's definitely had work to the sills: there should be a seam running down the sill in line with the back edge of the door. It could be a cover sill or it could be filler - it might be worth investigating further, as cover sill don't really add much strength. It rather looks as though there is filler at the 'step' between the rear wing and the top of the sill in your 6th photo, which is probably consistent with cover sills. It would be worth attacking the inner sill with a screwdriver through the gap between the heater hose boxes and the floor. That will give you an idea of what you are working with. As for engine removal, the last time I had it out on my own (to replace the clutch) it took me 10 hours from disconnecting the battery to going for a test drive - including packing away all the tools, bleeding the cooling system, etc. So 2 hours to remove it isn't bad going at all. |
| |
|
|
djefk
Part of things

Posts: 844
|
|
|
|
|
Wowzers! Doris has taken more hits than a Brixton crack head!! All I see are dents and scrapes on every panel / chrome piece - The old lady must have had less spatial awareness than the Ghost Buster Marshmellow Man after a tanker-load of Vodka!
Good luck, I tip my hat to thee for saving it, looks good enough to start with as a base and what a lovely bit of history to it too.
|
| |
|
|
|
|
|
|
|
WOW - another Imp on here! I thought when I started a thread on mine last week that there weren't many posted on this forum  Great to see another one (well two by the looks of it!) being saved. That looks like a sound shell; certainly the floor and suspension mount areas look solid. As pointed out above, have a nose around the sills. You'll be able to see what they should look like with the correct 'step' in line with the door if you search for my thread on here '1970 Stiletto and 1969 Imp Van'. How does the rear window hatch look? |
| |
|
|
|
|
|
|
|
cheers all for the enthusiasm and good words, shes sucked a lot of money out of me already with getting the garage sorted, da sander angle grinder, compressor etc. but I'm determined to keep it going. yeah a bit of sanding on the sills shows some filler there, as for the inner seals, once i get the rubber hoses out ( which will no doubt be a pain in the a*%) i'll have a poke about in there see if its all ok. dinglem as for the rear window i don't have a pic to show but its actually in good condition, no rot, a teeny bit of surface rust which can be sorted but nothing drastic like ive seen on other imps. trying to post all the progress up to today, get this up to date old dash 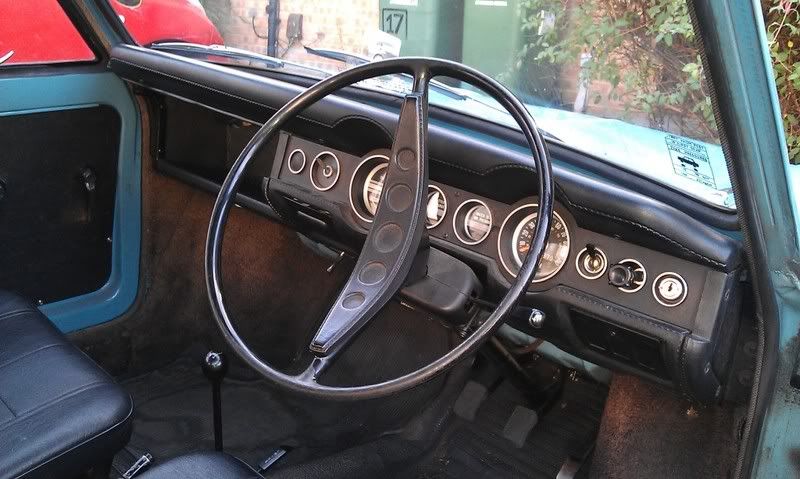 idea for new dash, all foam and vinyl has been removed, wanted to repaint the dash, will i get away with it looking so shaved? 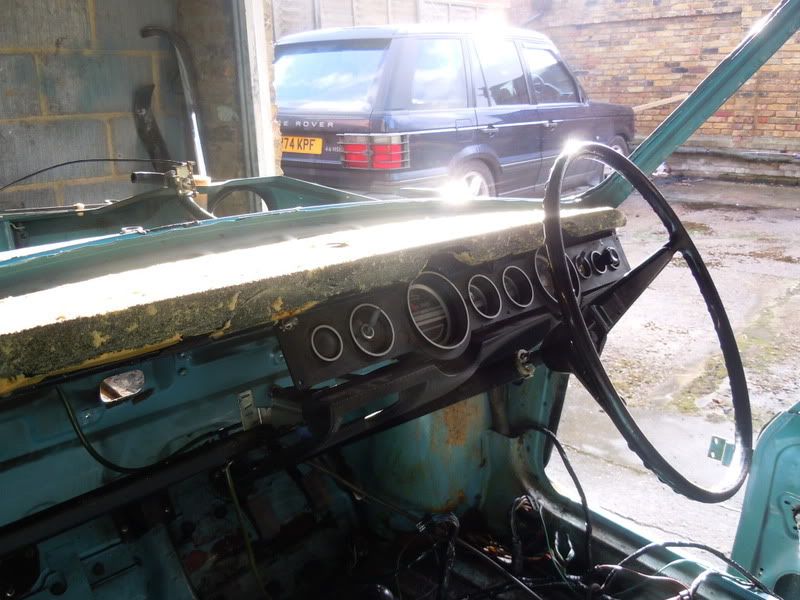 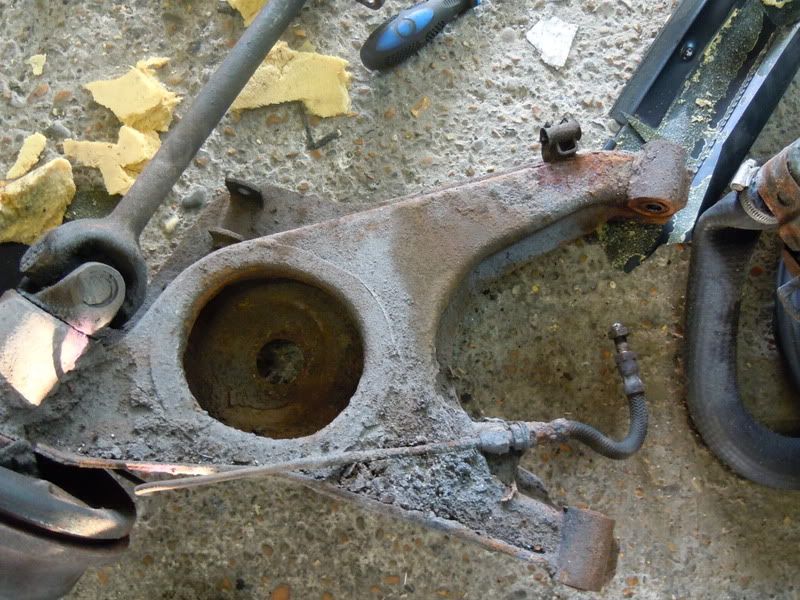 rear supsension arms = one is buggered 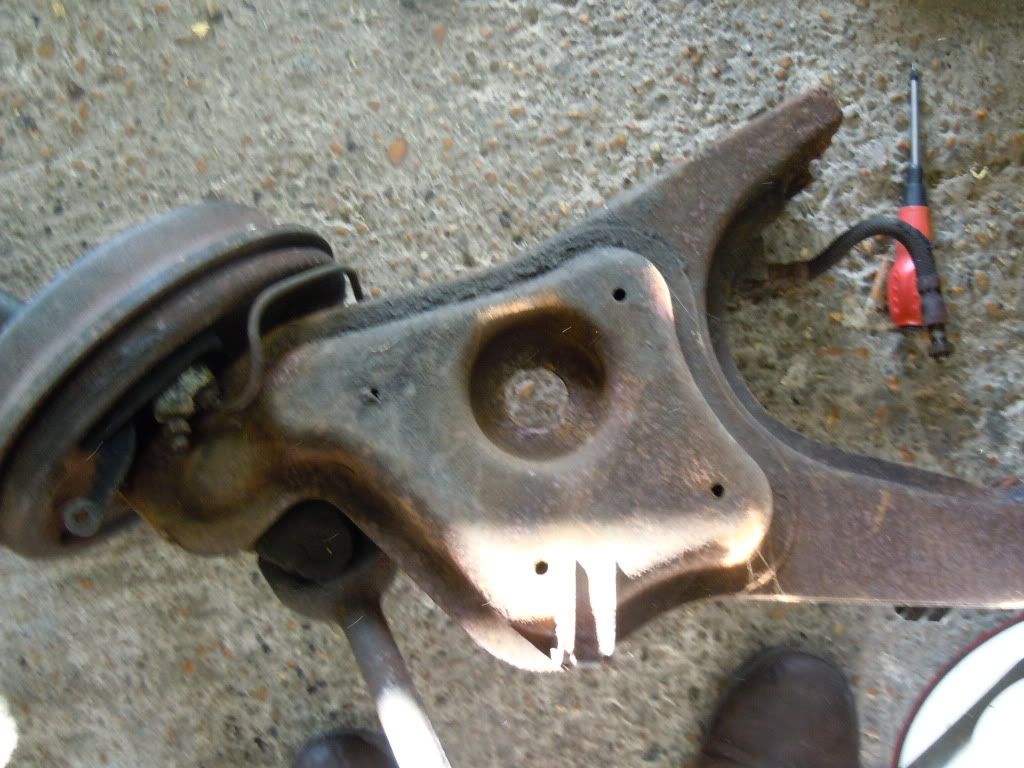 started getting the dents out 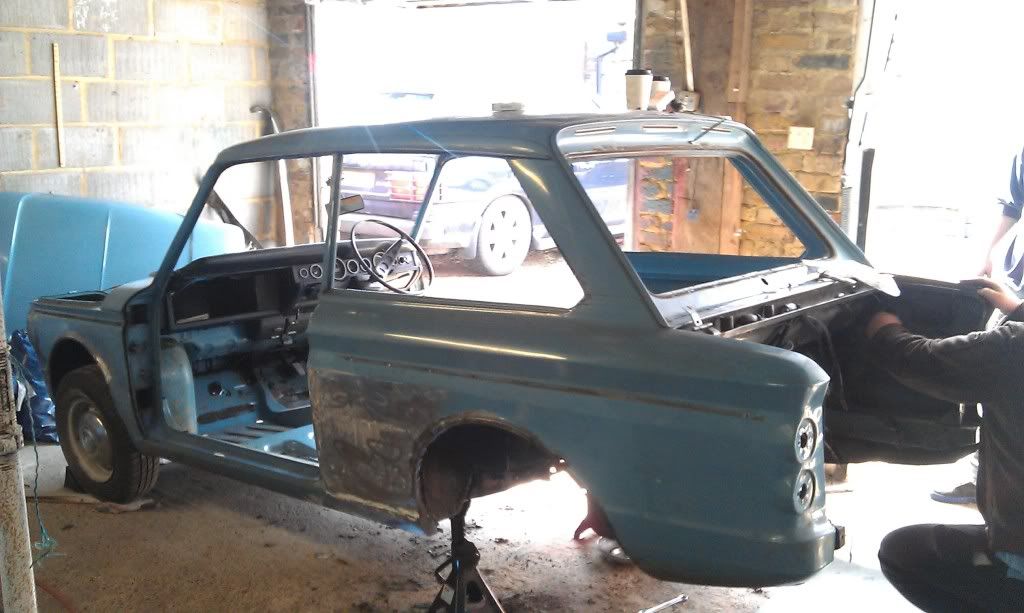 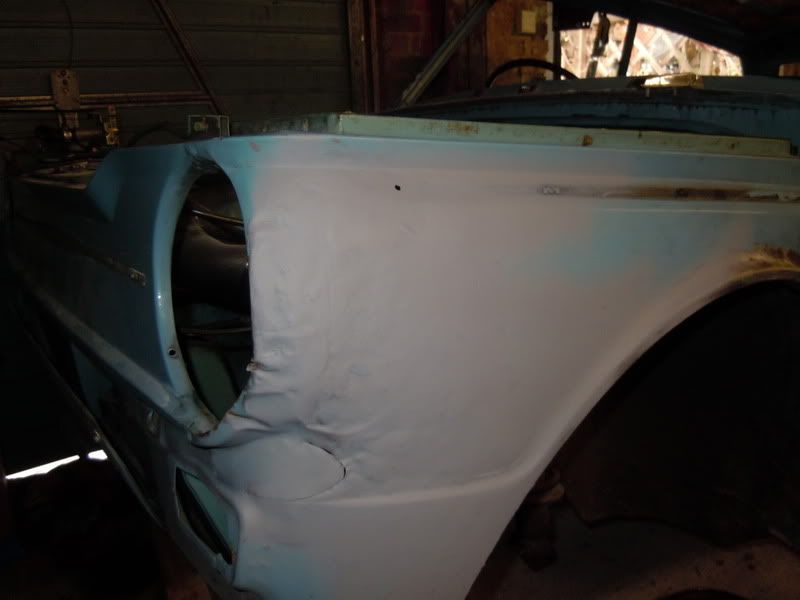 much better 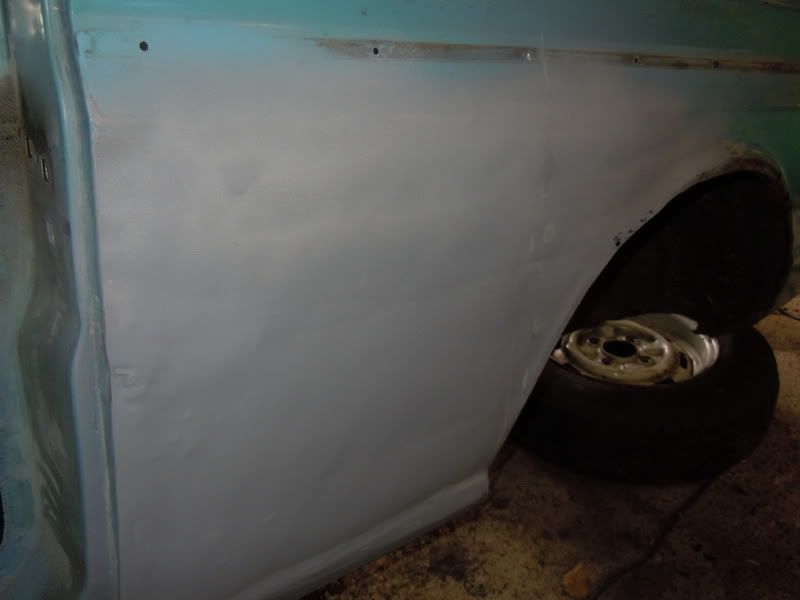 got the steering column and front suspension arms out today, they look okay just need a clean up. 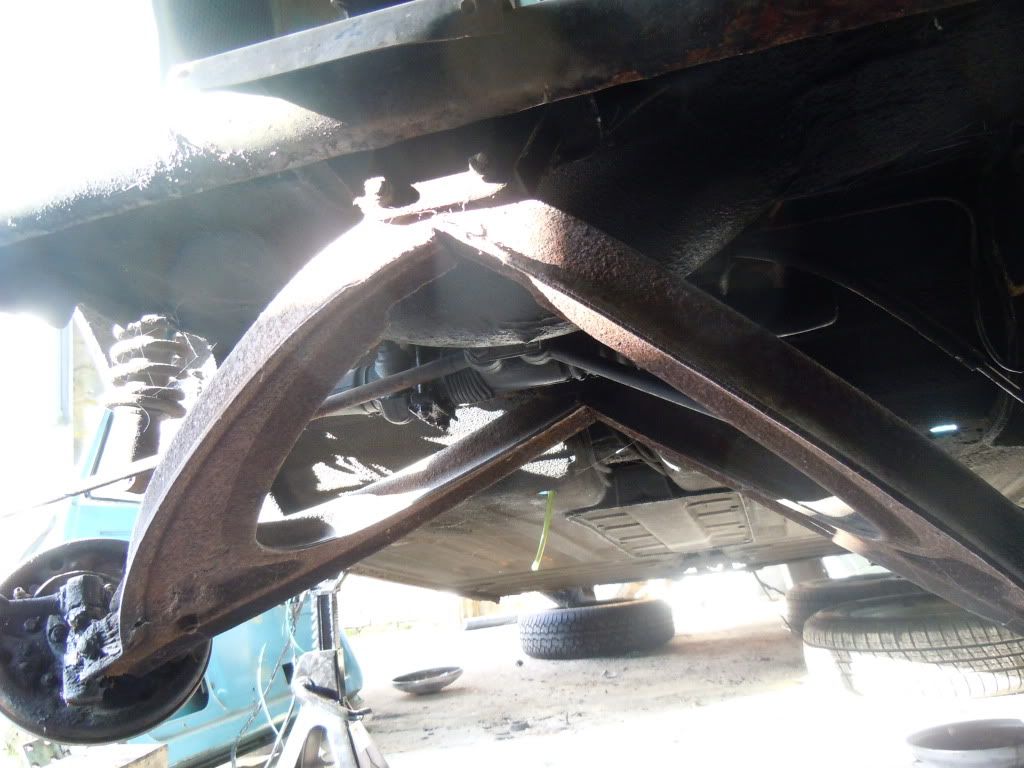 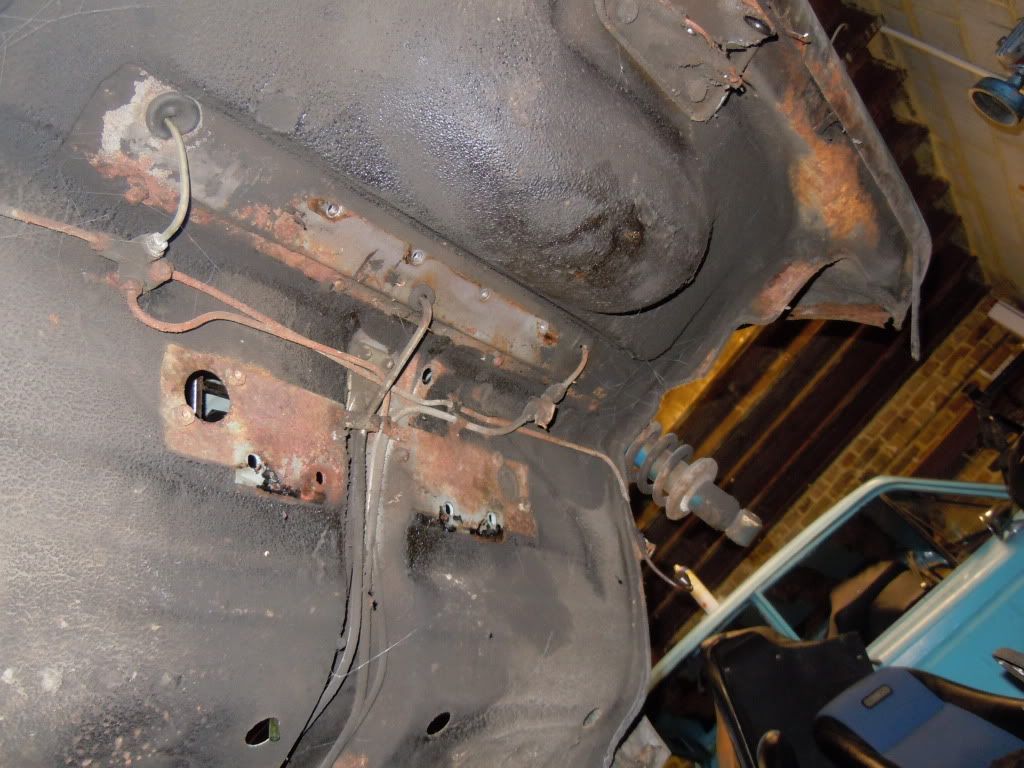 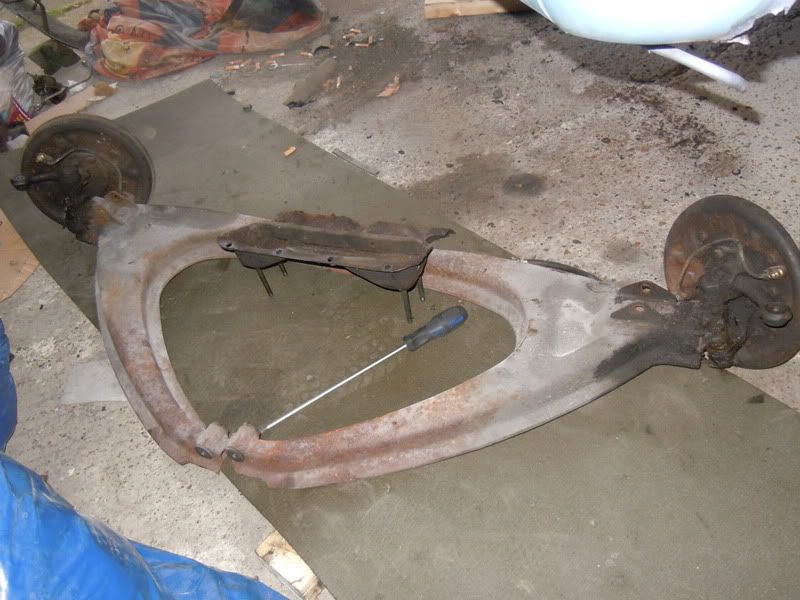 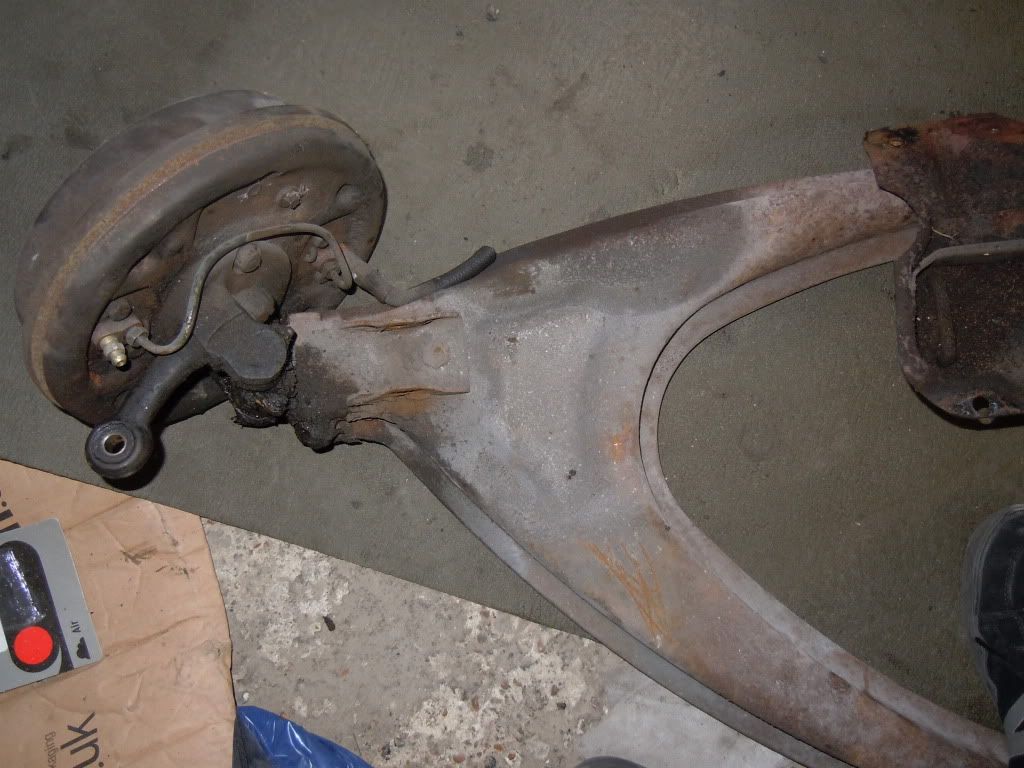 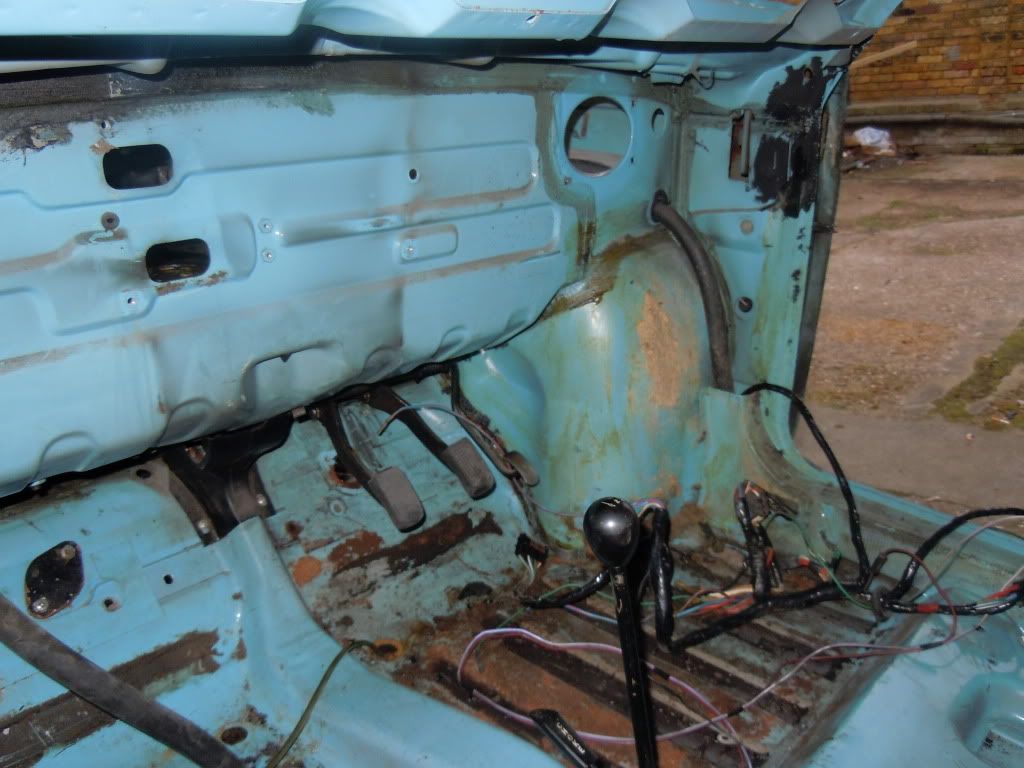 oh and still gotta get the shocks out  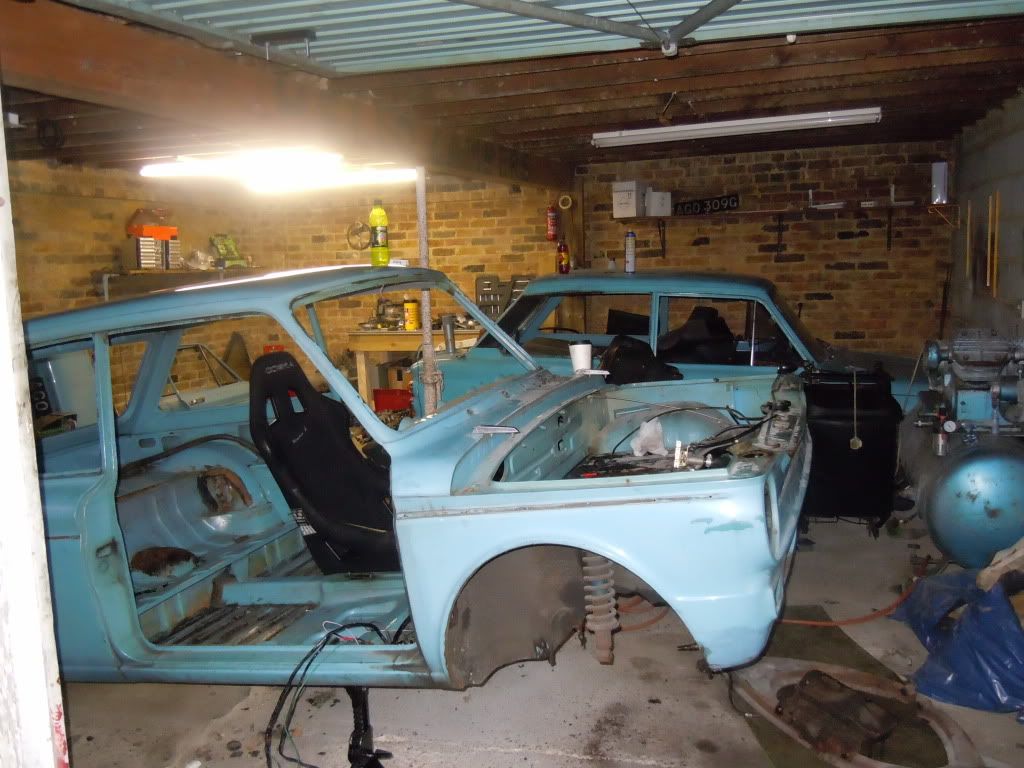 just having a look! not getting ahead of myself i promise ha  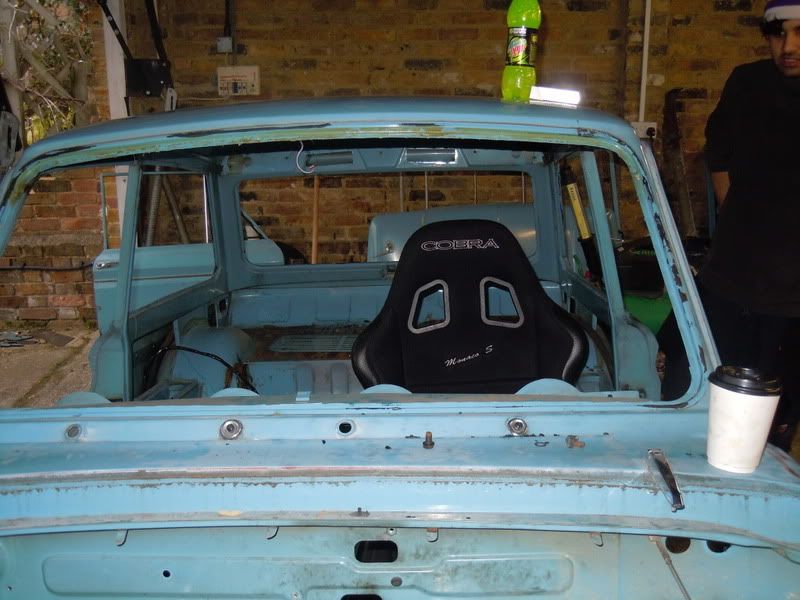 tomorrow will be the fuel tank out, pedal box, gear level/choke, and then the shell can be turned on its side for body prepping. does anyone know if its safe to attempt a repair on the rear suspension arms or considering the age shall i just replace them? will take a good pic of the damage tomorrow shopping wish list: wide arches front splitter new suspension & bushes all round but I'm broke! |
| |
|
|
|
|
|
|
|
Wowzers! Doris has taken more hits than a Brixton crack head!! The old lady must have had less spatial awareness than the Ghost Buster Marshmellow Man after a tanker-load of Vodka! ha sounds about right! looks like she tried a bit of rallying herself |
| |
|
|
|
|
|
|
|
|
Couple of thoughts:
1) While it's off, change the steering rack centre gaiter for a new one from Malcolm Anderson. They're ~£25 and, being new production, should last a good while before starting to split like the old stock ones do.
2) Careful with those shocks - the springs are still under tension like that, so if you undo the nut the shcok will be fired at the floor. Trolley jack under the lower eye or spring compressors required here.
Difficult to see what state the rear arm is in. If it's got surface rust but is sound, try to save it - they're becoming increasingly uncommon and expensive. Especially driver's side ones. OTOH, I don't think welded repairs to suspension compnents are acceptable at MOT time - but I could be wrong there.
|
| |
|
|
foxy99
Posted a lot
Posts: 1,443
|
|
|
|
|
It looks amazingly solid. And same colour (?) as your mate's. They would look great as a pair.
|
| |
1974 Daimler Double-Six VDP
1965/67 Hillman Imp pick-up
1984 VW Polo breadvan
1970s Yamaha Twins (4)
1976 Honda SS50ZK1
|
|
|
|
|
Mar 10, 2012 18:51:02 GMT
|
jrevillug - cheers for the heads up about the steering, I'll have to order one of those. well i failed yet again today to take a decent picture of the damaged arms but ive got alex (the guy i bought it off) trying to track me down a set of good ones, ive got faith he'll find me some! with a car this age i don't really wanna risk trying to repair it. thing is searching for some imp parts nowadays is like looking for golden eggs!  and hah yes ive got the clamps to sort the springs out tomorrow hopefully once i've got it on its side. i don't have a spitroast so it'll be on its side on some tires or a matress  to sort the underneath out. foxy - thanks I'm pleased with her, and yeah both the same colour, i think its tahiti blue or something? just pure chance that we ended up with twins haha. she wont be staying blue for much longer. 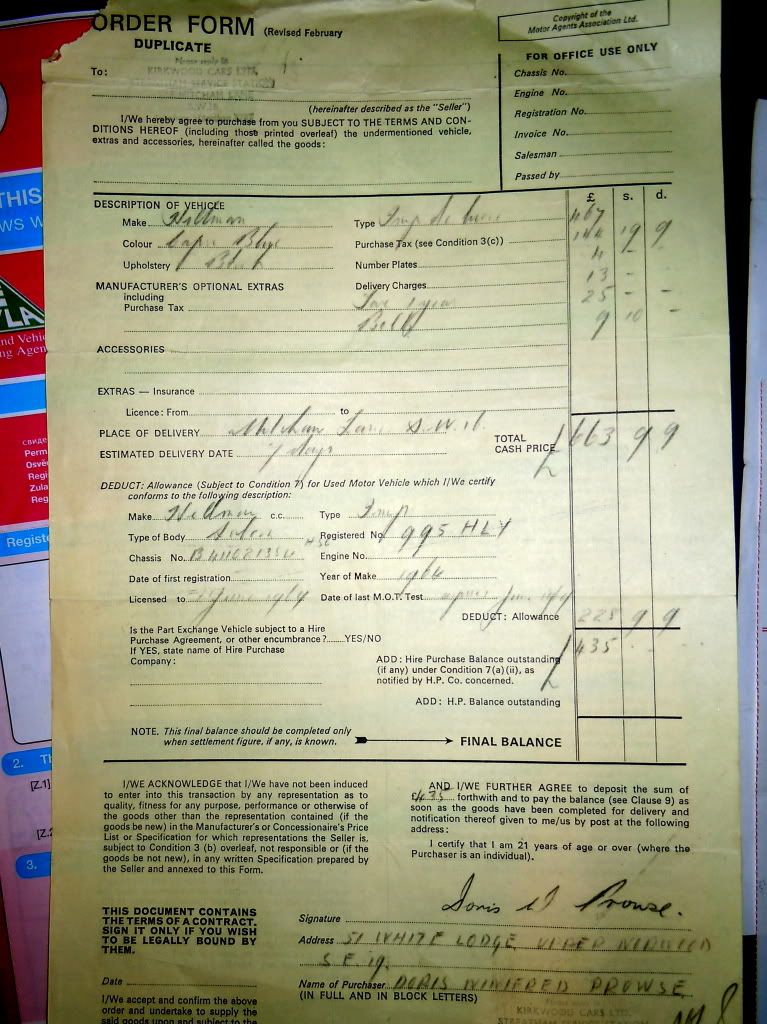 found a few interesting bits including the original bill of purchase, and even a fuel ration stamps book haha  something from way before my time! 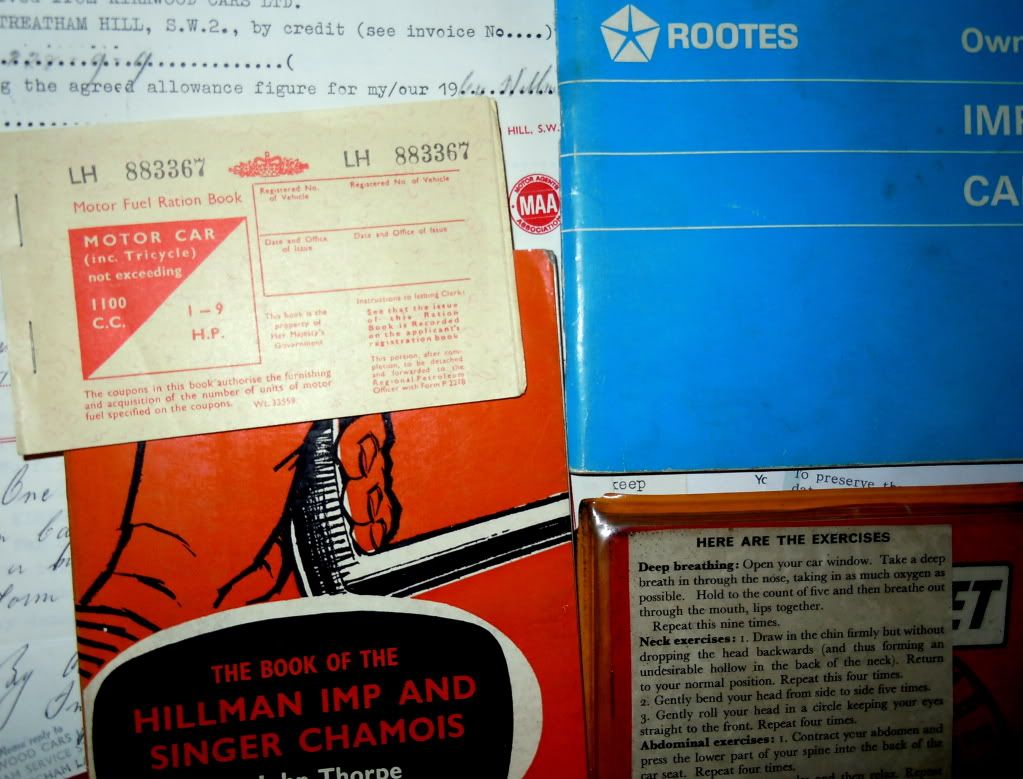 if you look closely, the car brand new was £663.99!!! |
| |
|
|
|
|
|
|
|
Mar 10, 2012 19:59:55 GMT
|
|
What a great project. Looks like you are making good progress too.
keep up ther good work. Its nice to see more Imps popping up !
|
| |
1965 Imp
1982 Golf GTi
|
|
|
|
|
Mar 11, 2012 12:08:58 GMT
|
yeah cheers donspeed we're slowly getting there. have you got a link to the build of your imp there? always nice to see how other people are doing things. not much exciting stuff to report today, managed to get the car on its side (the hillbilly way ) and get a good look at the underneath my dads head looks like an egg haha 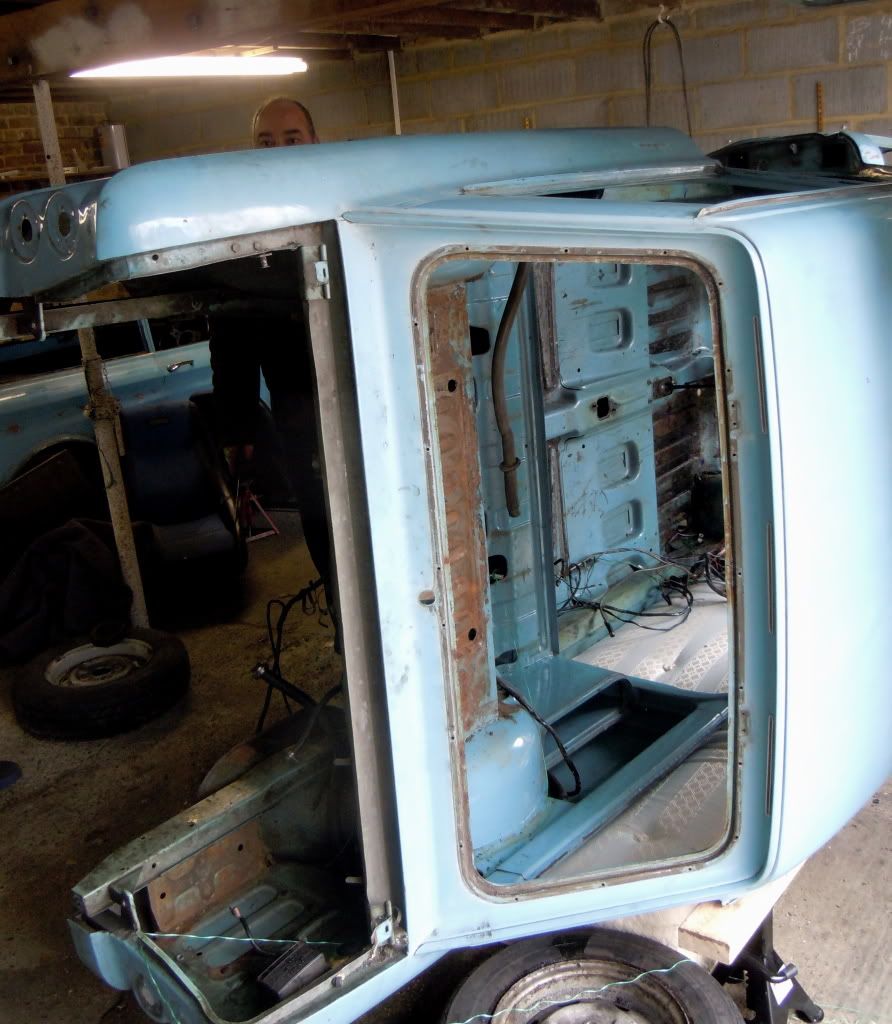 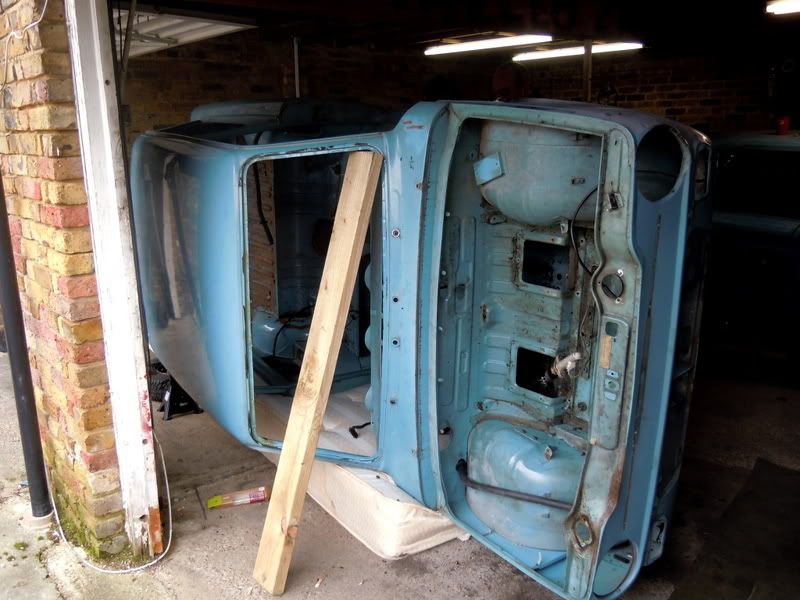 just resting on my sisters old matress, with an axle stand supporting the rear quarter, its stable  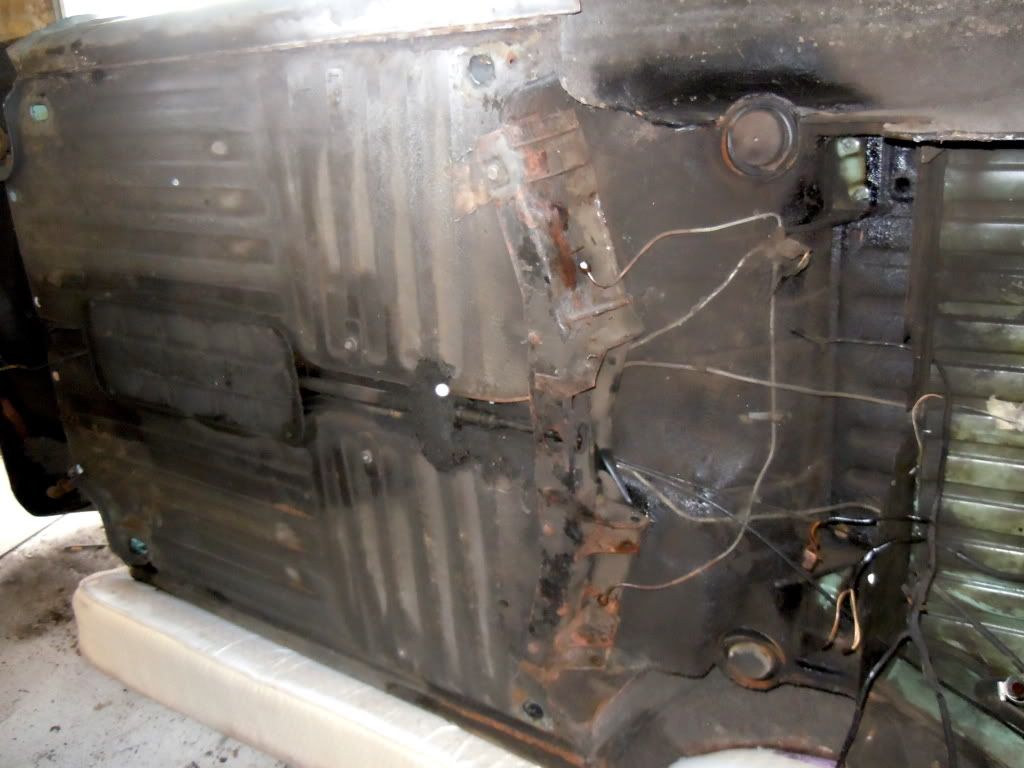 the rear left silll needs some repairing done, looks like theyve tried to weld it before 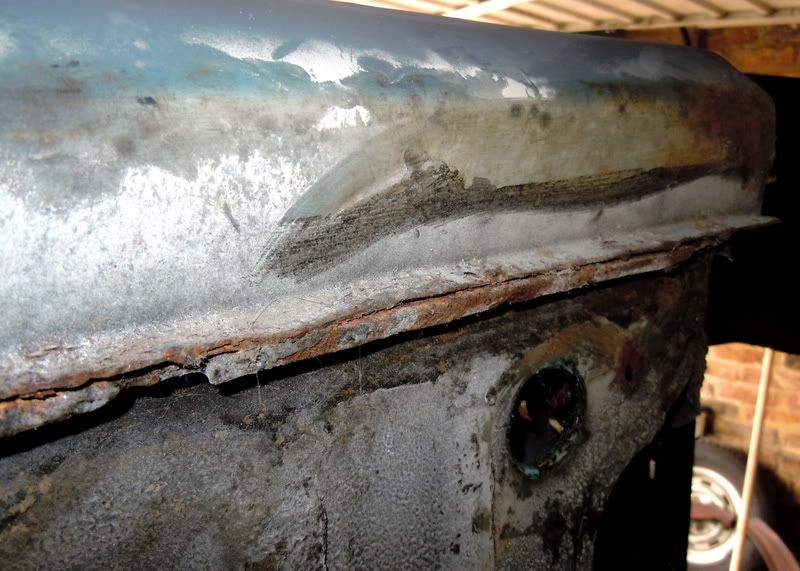 rear sill on the other side needs some tlc too 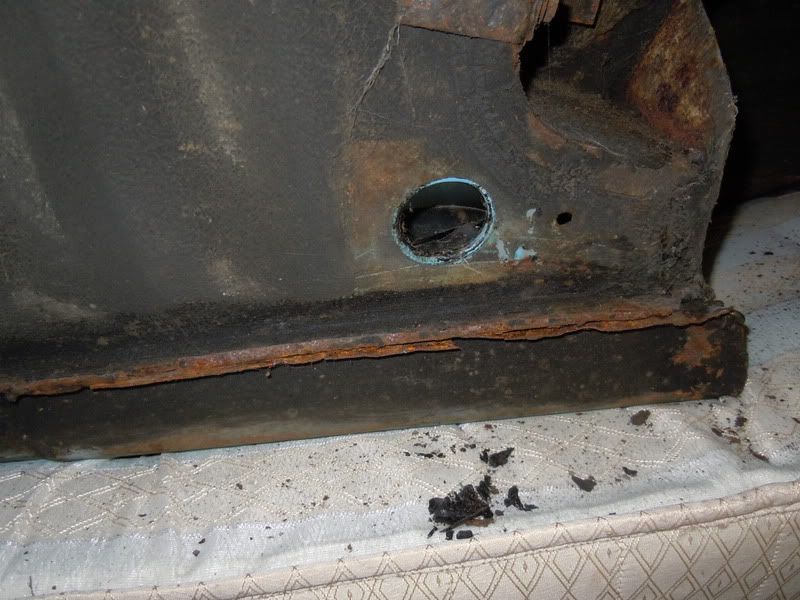 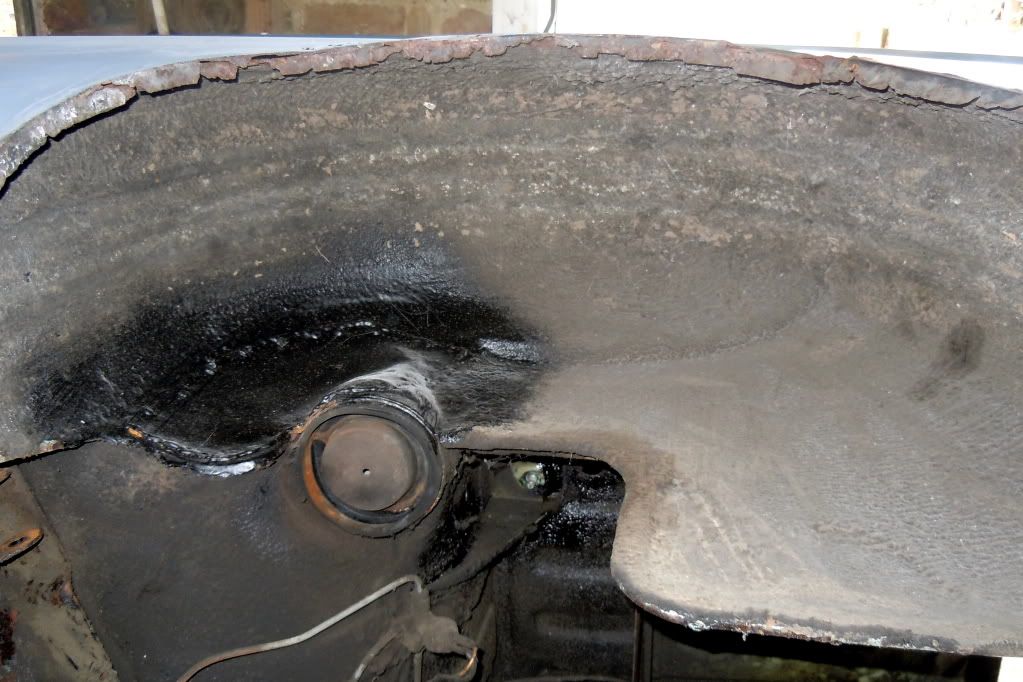 luckily i found no rot here 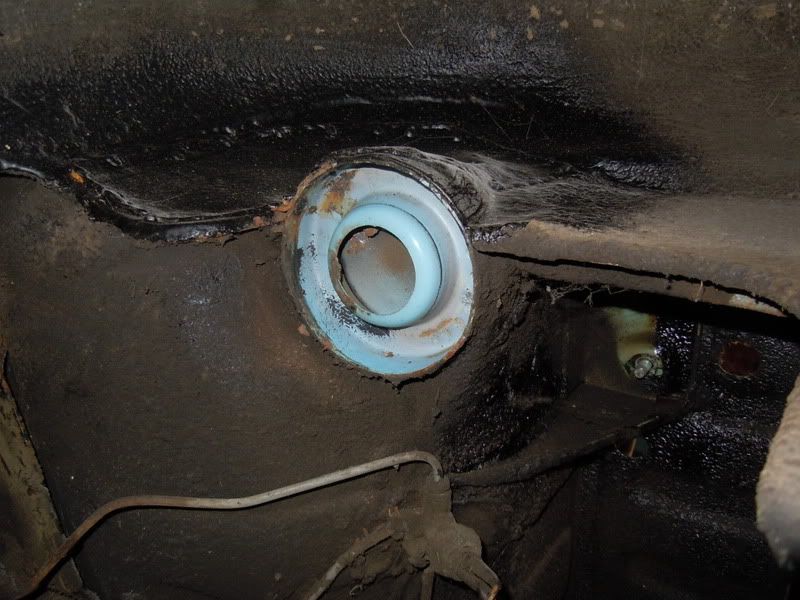 all in all the underneath looks goodish, 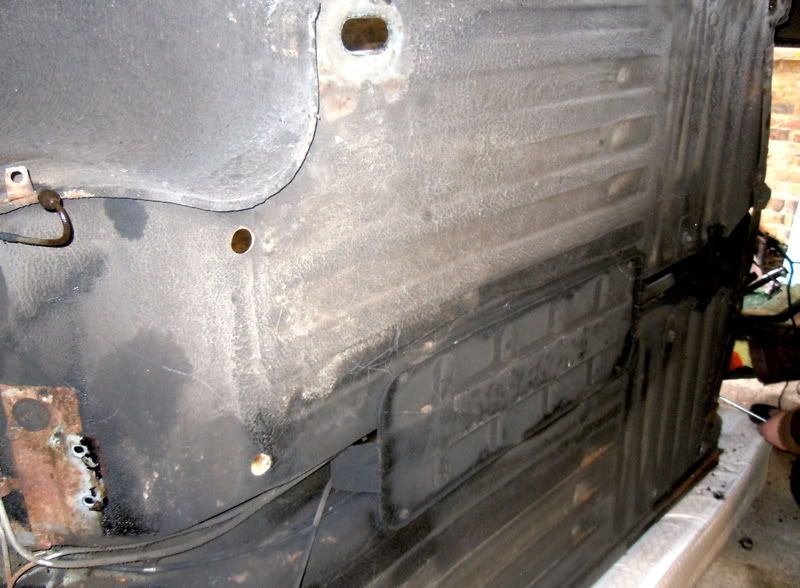 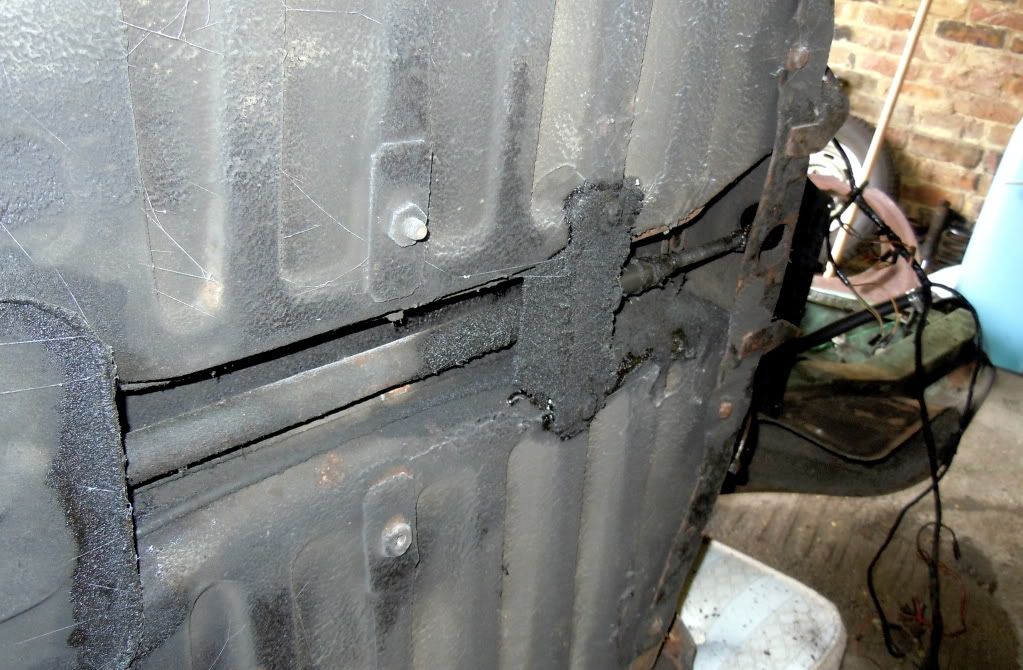 left rear arch shows the extent of the rot :/ these will be cut out and boxed in to make way for the new arches 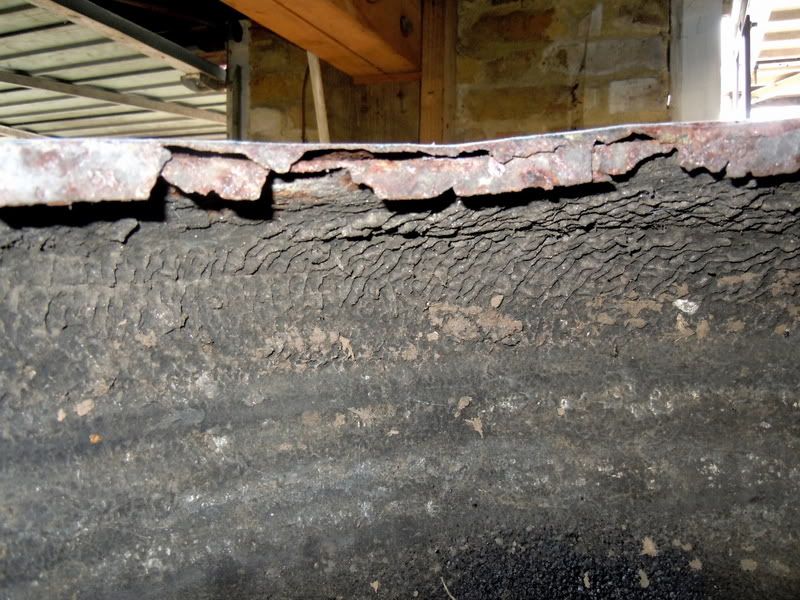 yummy my favourite 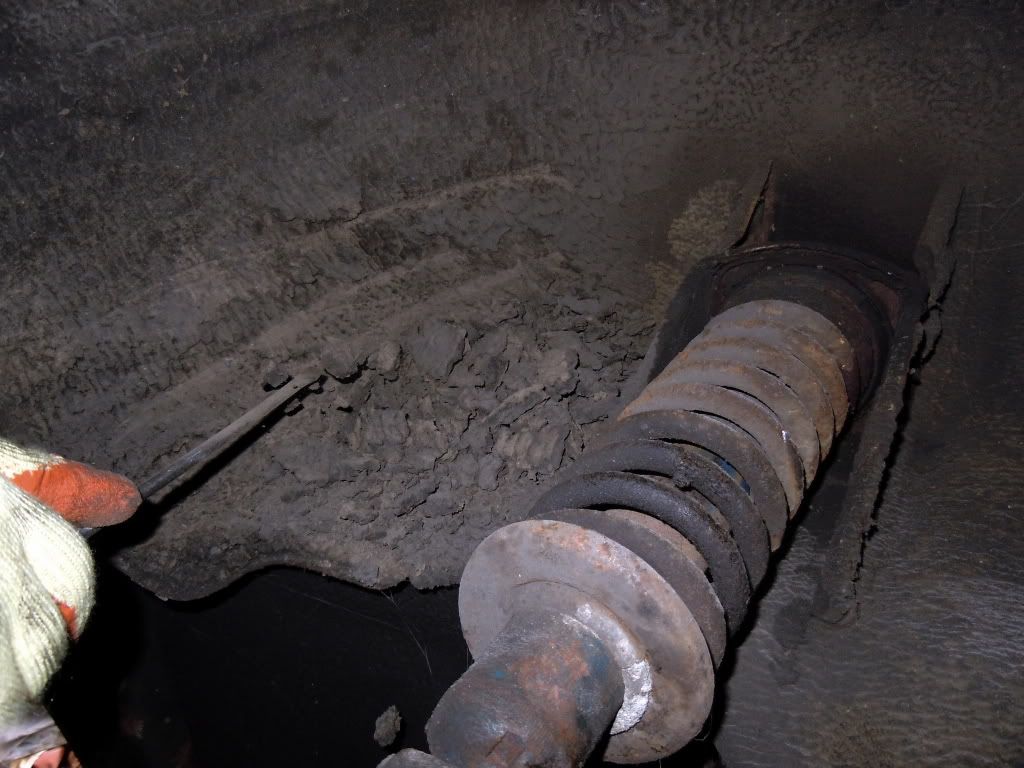 next will be the shocks out/cross member/gear and choke lever and then the laborious task of scraping all the curse word from underneath! anyone in s london wants to come and help youre welcome to haha |
| |
|
|
|
|
|
Jul 24, 2012 17:32:26 GMT
|
sorry for the lack of updates work has been slow with the cars the past few months with uni work and trying to accumulate parts and tools for the job so whats new? 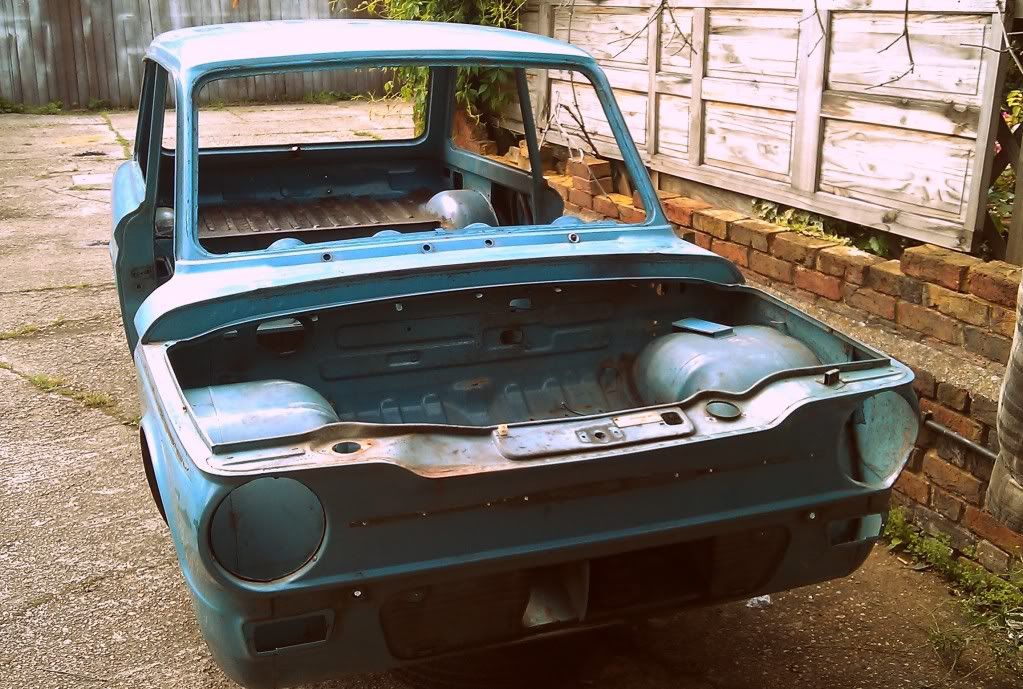 the suspension components have been removed, the underneath of the car has been sandblasted and rust treated. it didnt look too bad at all underneath no major surprises, the sills wont need to be changed as there is no rot in there surprisingly. 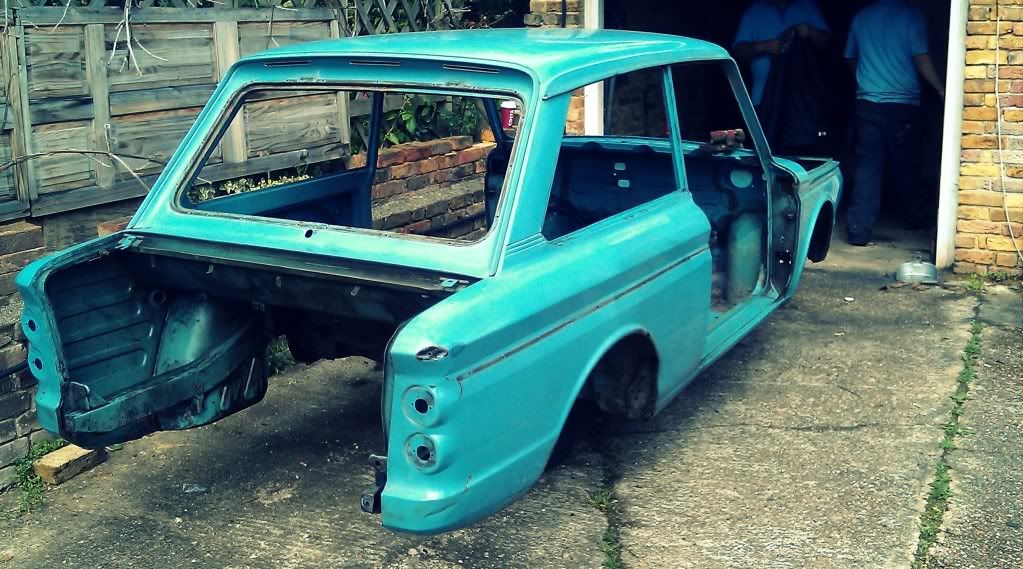 the body is almost ready for paint prep 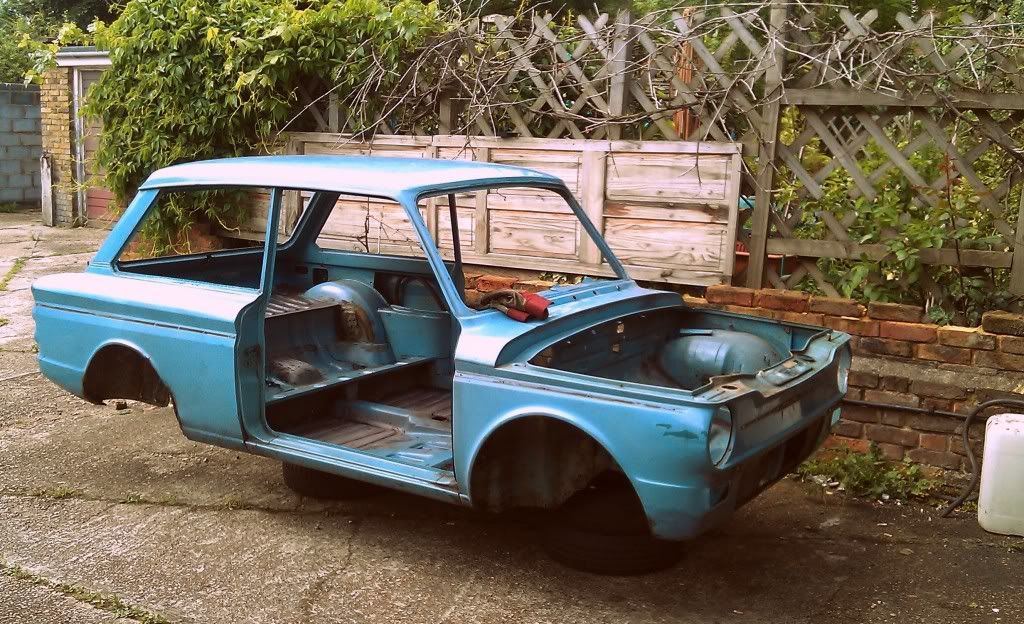 front looks decent too, no rust just needs a bit of a clean 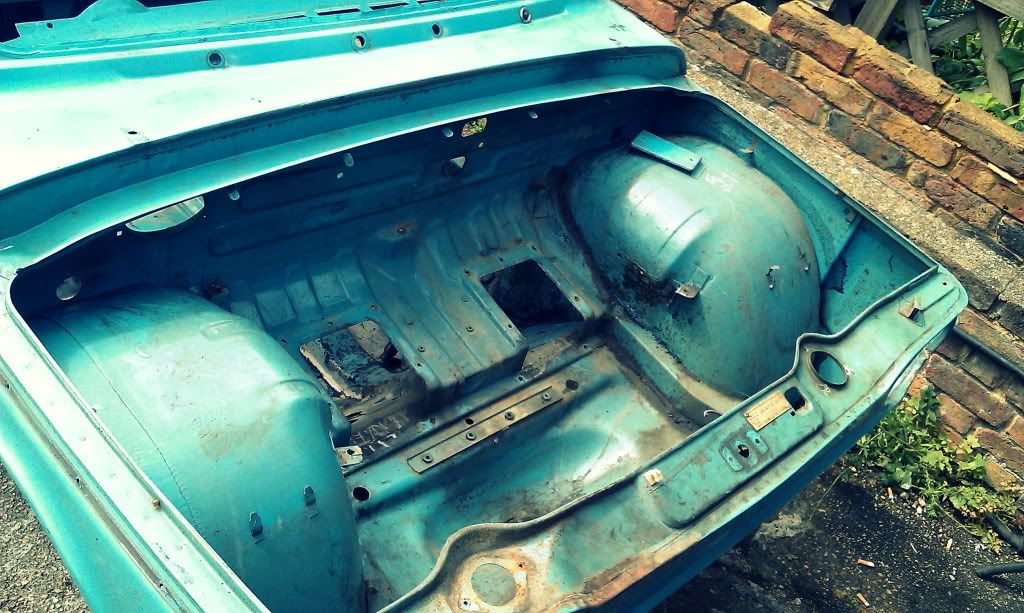 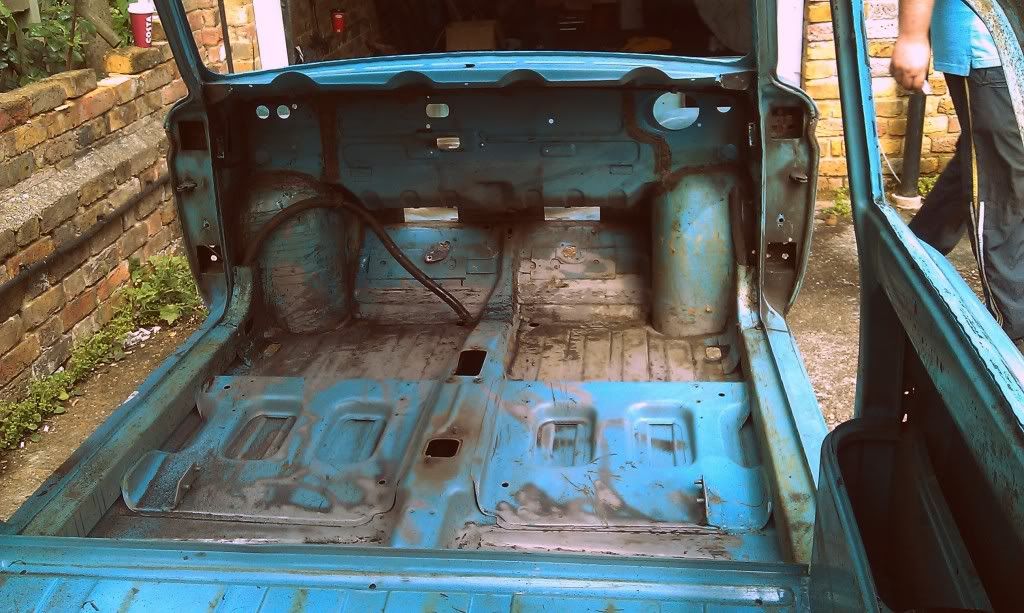 dragged the car back in the garage and trial fitted the wide arches that'll be going on 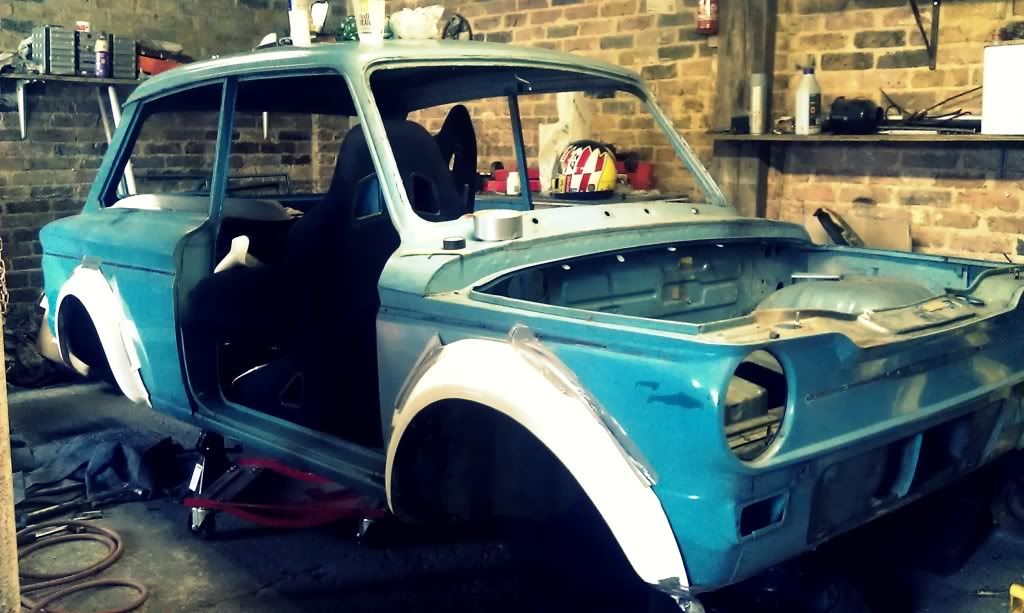 wide at the front 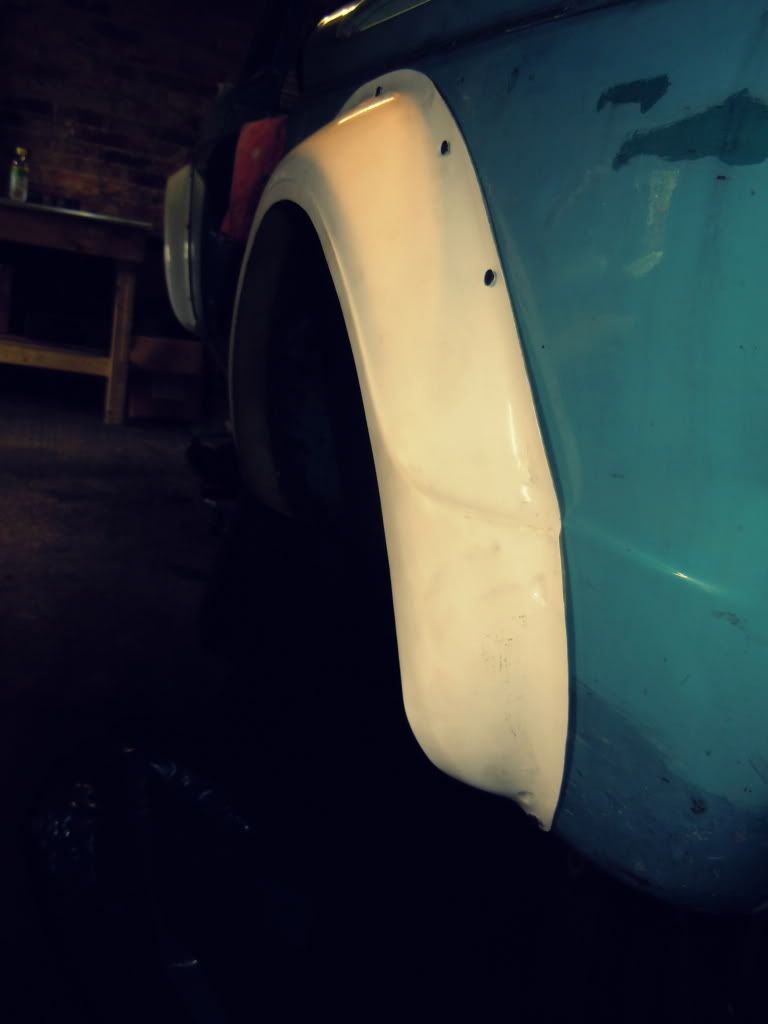 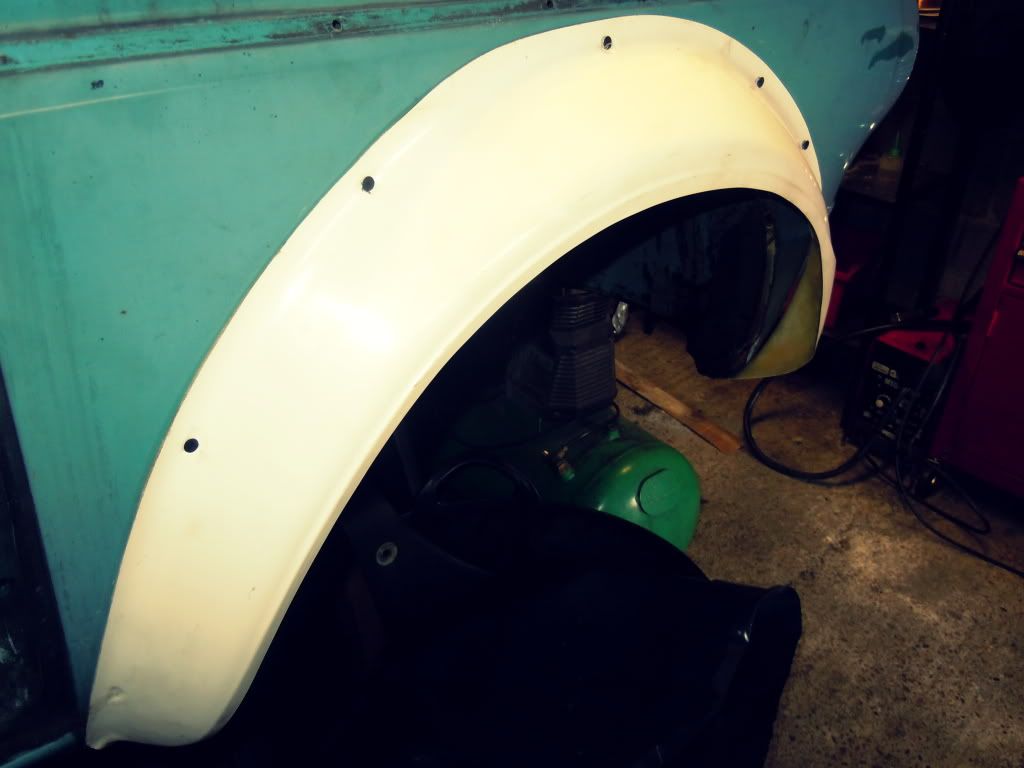 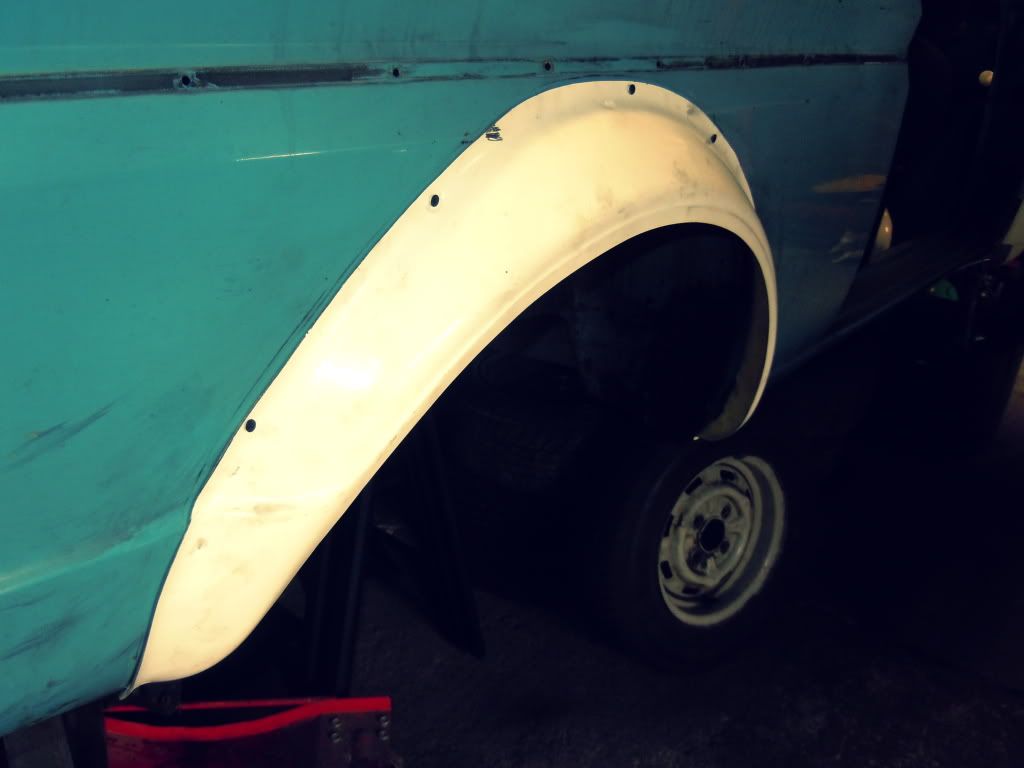 nice and wide at the back too. is a 1" spacer on each side at the rear the most i'll be able to get away with? the arch will need reworking to allow the wider rear tyres to travel up and down without fouling. at this stage its a pain to calculate what the ride height will be and how much travel ill get when i havent bought my wheels&tyres yet. argh 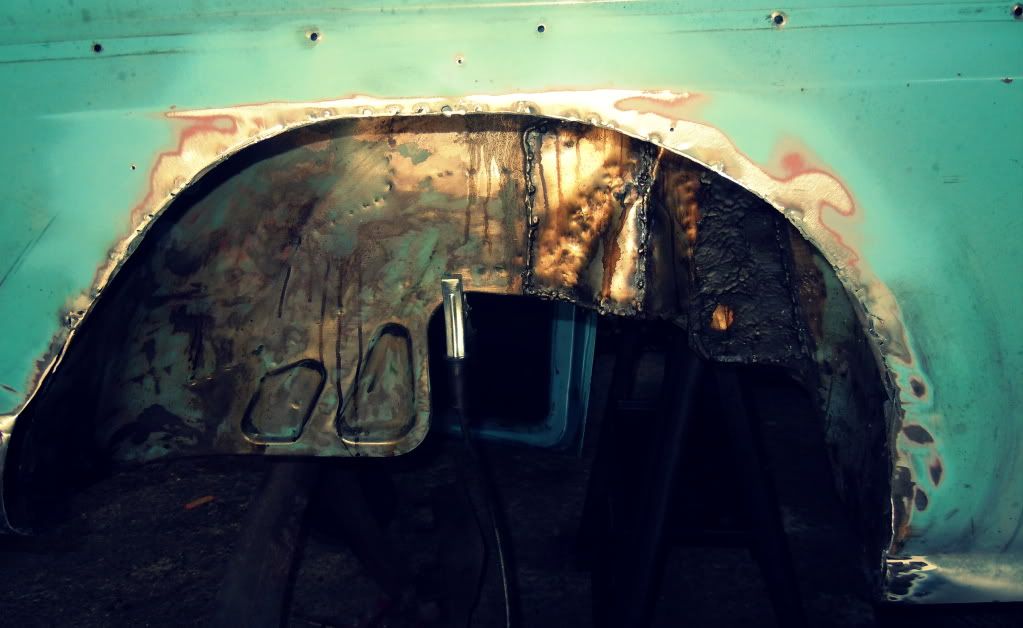 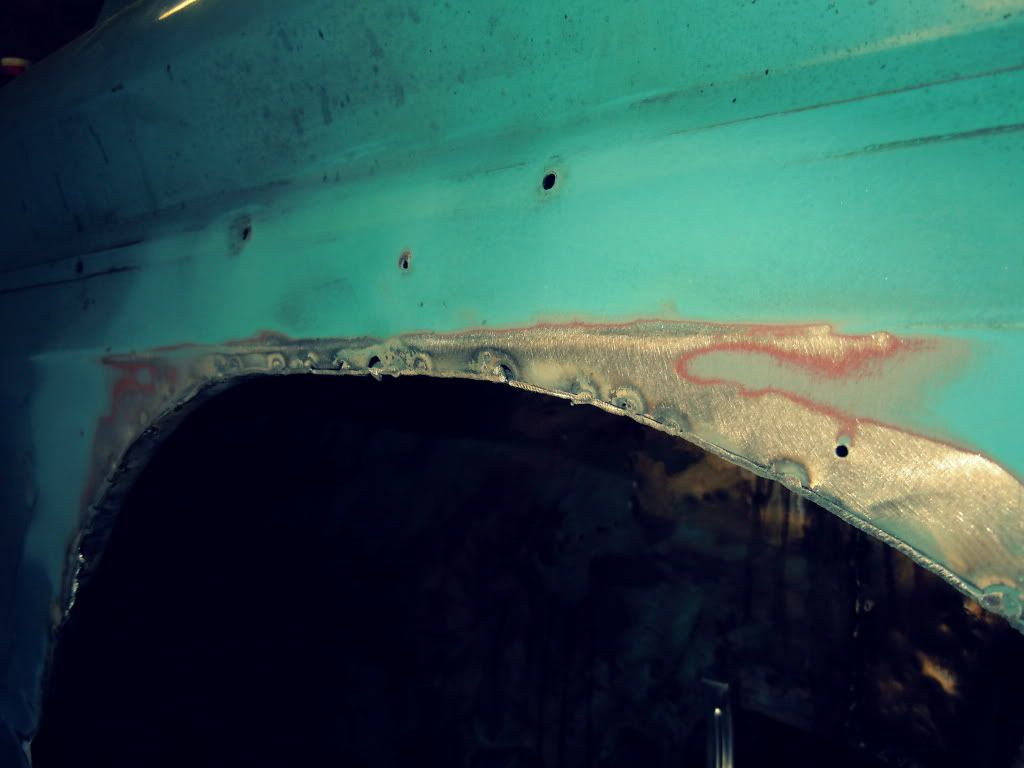 my dads spot welds to join the inner arch to the outer body, the rot and what was left of the original arch has been cut away. since 3 of the 4 wheel arches were rotten when i bought the car, i thought it would be a good opportunity to improve the shape of the car a bit. 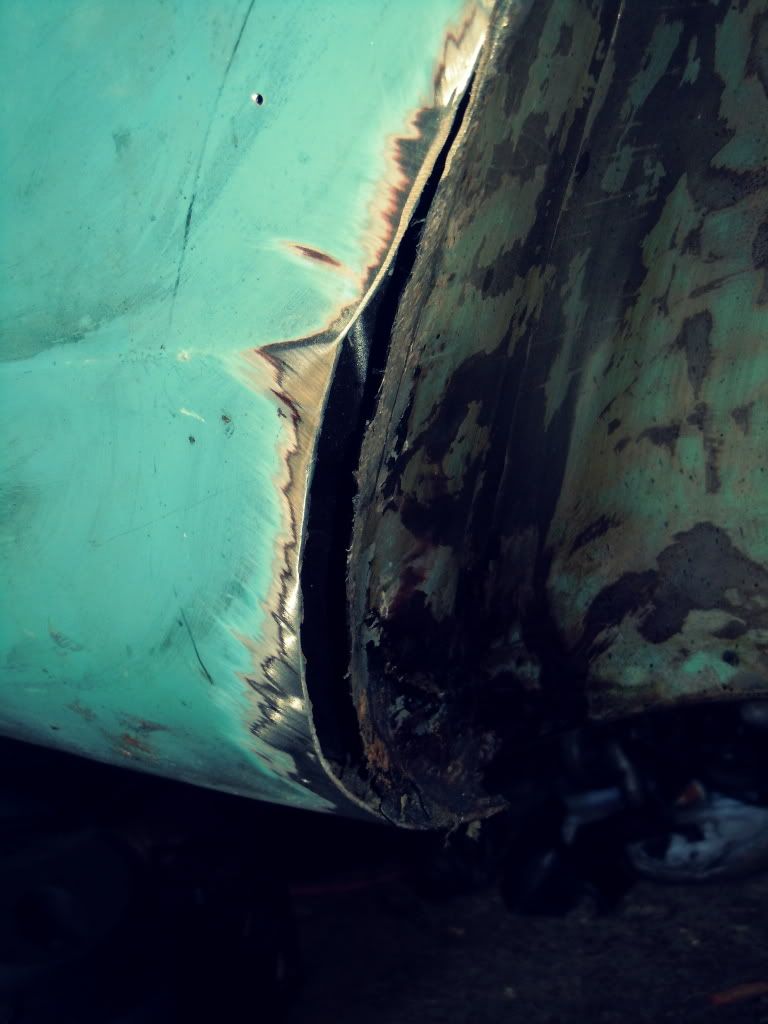 theres a gap near the bottom of the arch that will be welded with a plate of steel and trimmed/cleaned 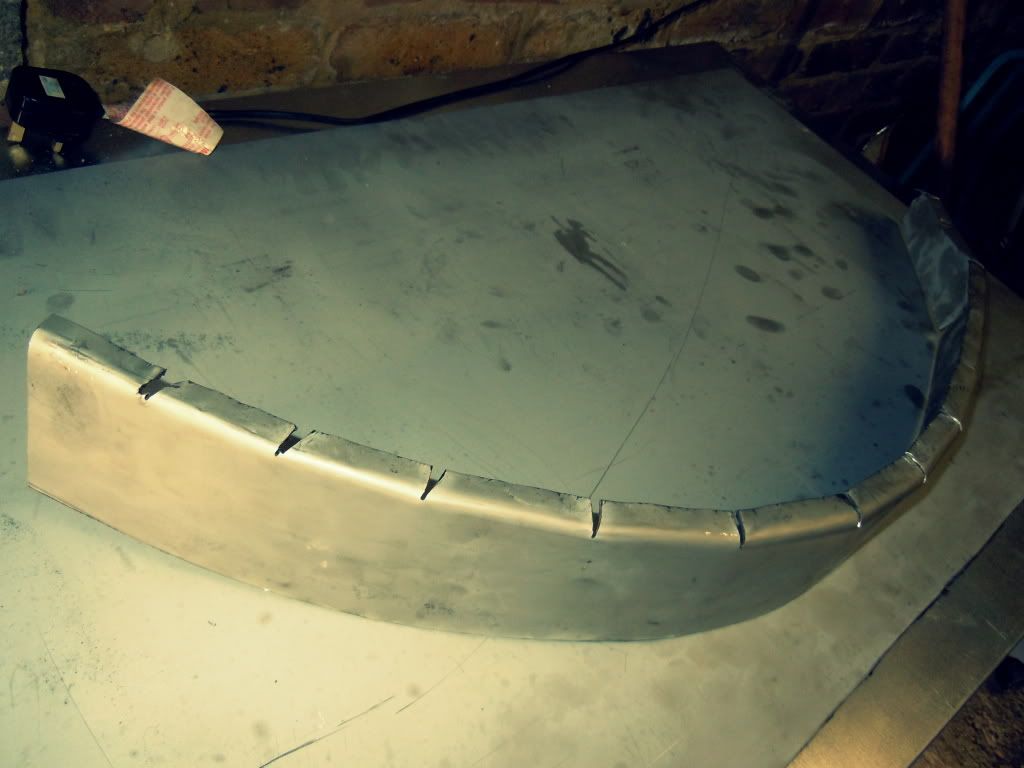 first stage of building the arch extension, turns out it is cheaper to make your own extensions that to track some down for a fair price and buy them not knowing how well they may fit 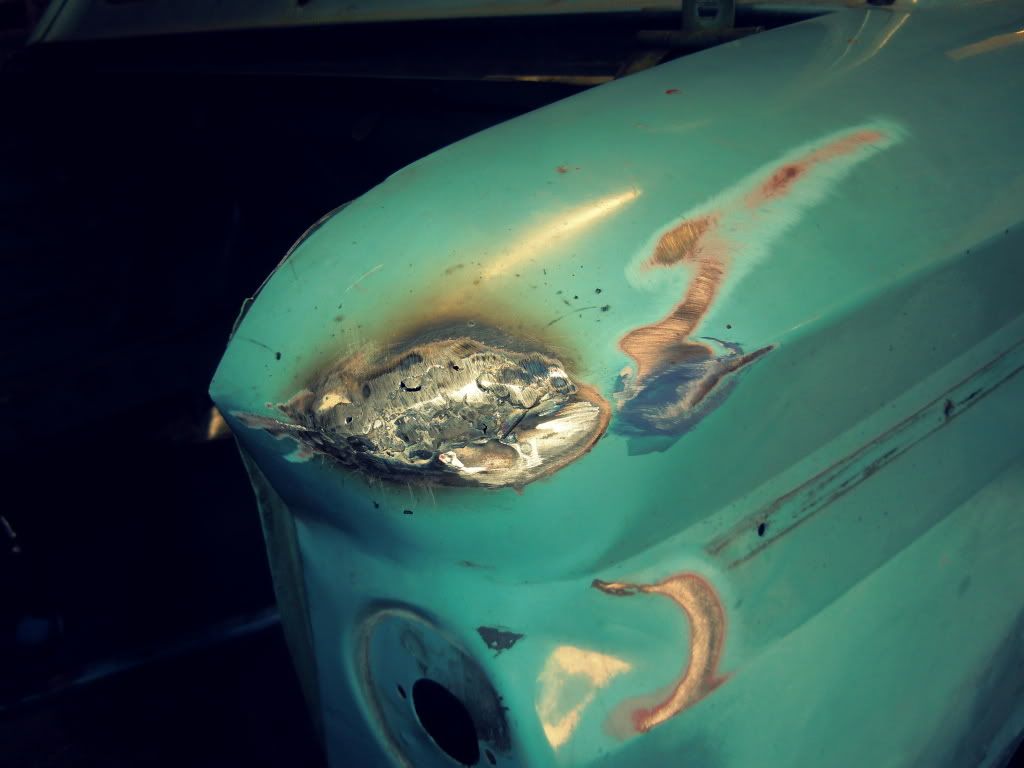 having a go at sorting out the nasty dent that was above the light needs some more work. |
| |
|
|
|
|
|
|
|
better believe it progress is being made! since the other other imp in the garage needed a new sill & floor & a few repair patches to be welded mines been sat there for a bit! its all ok though its twice the learning working on 2 imps which can't be bad. a couple of pictures of the work, don't have a finished pic of the floor and sill yet since my camera broke ): sorry for crappy mobile photos 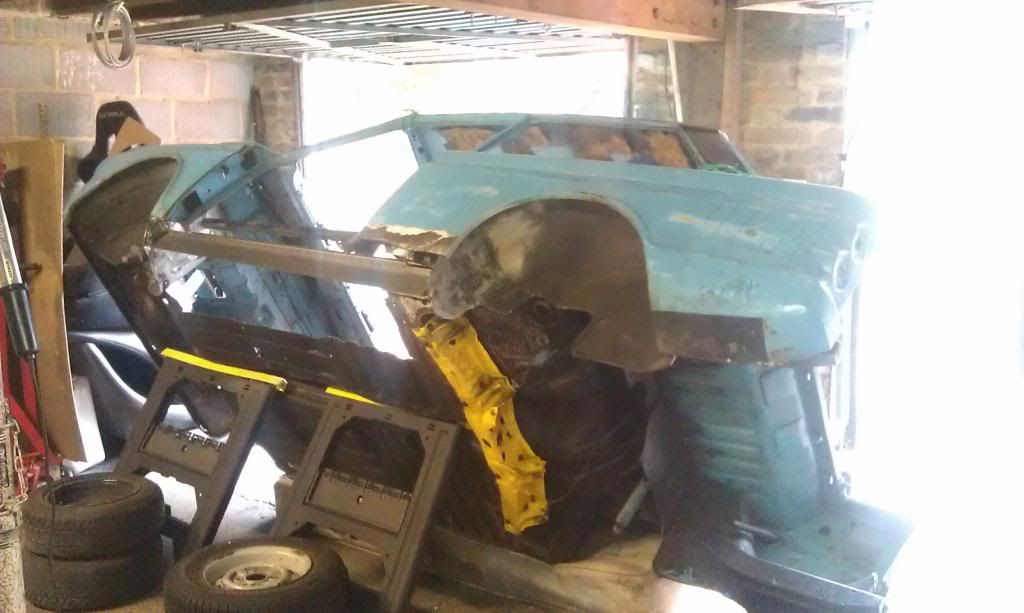 the sill and floor turned out well in the end. 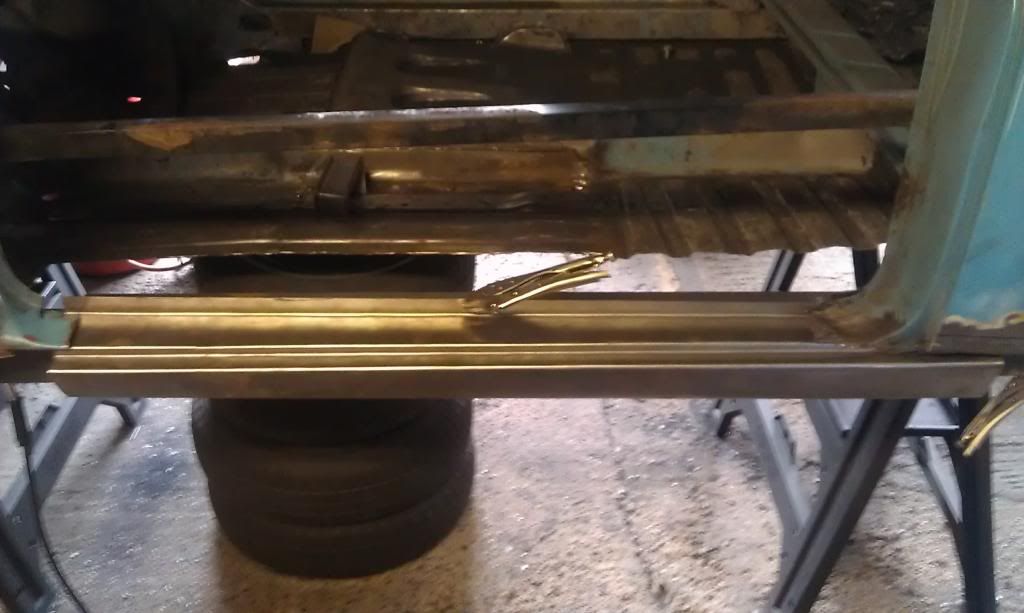 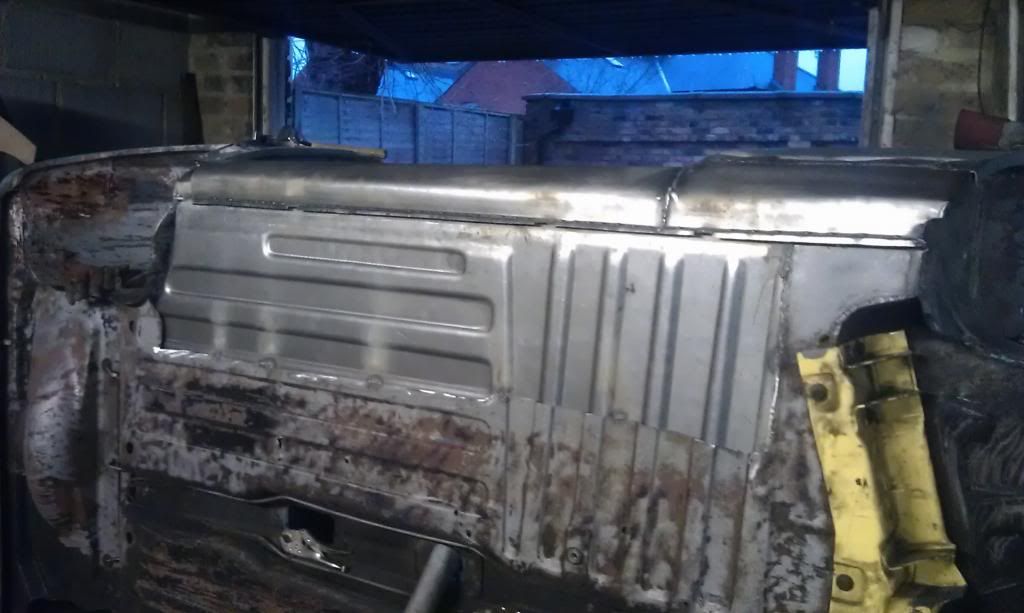 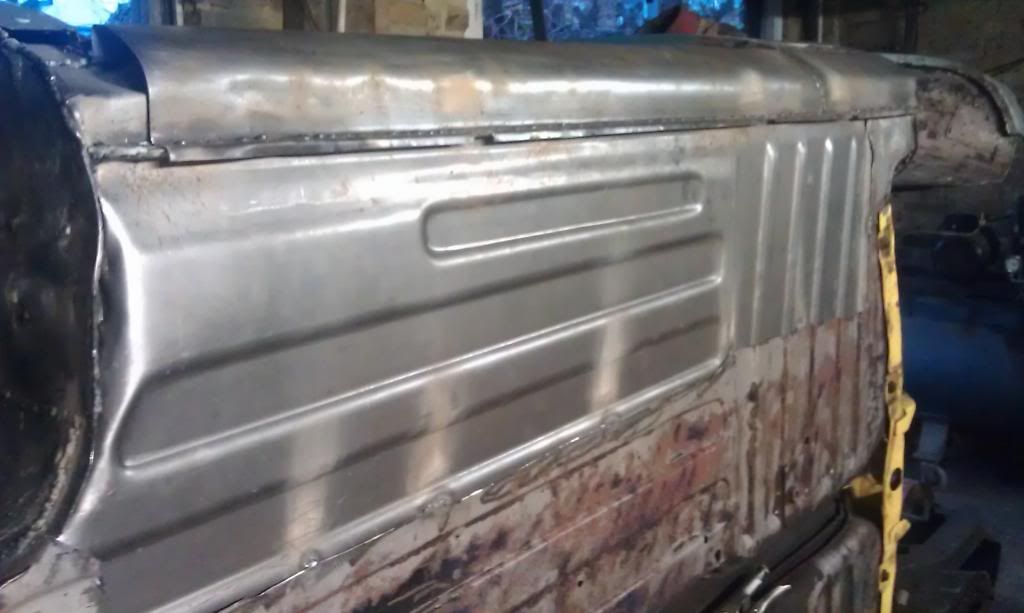 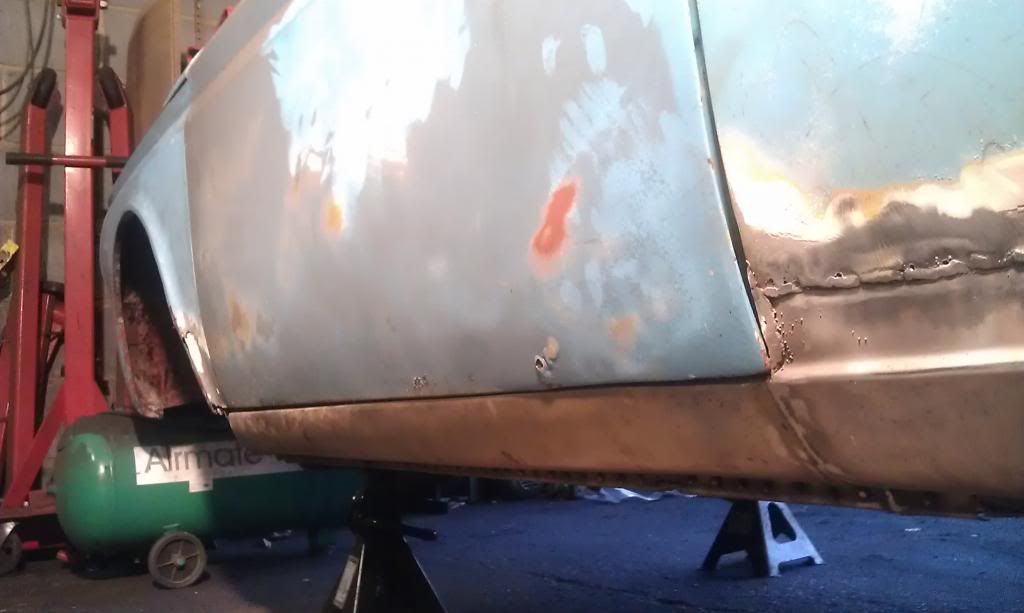 old doris back in the limelight however 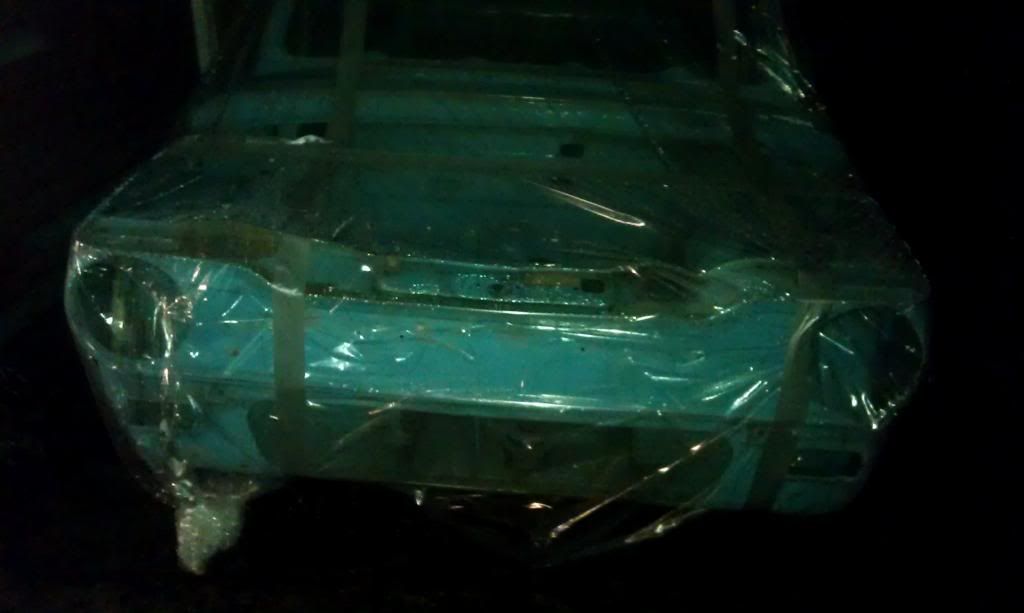 some strange times led to her being shrinkwrapped and left outside for one night! waa 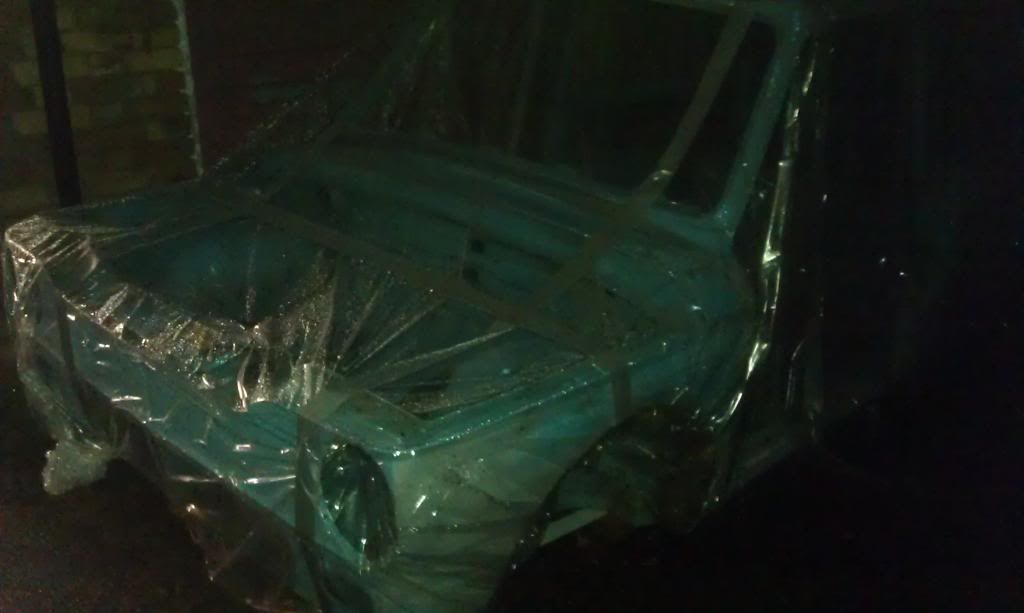 the underside and arches of the drivers side have been sealed ready for the wide arches and has been treated to some fancy zinc rich epoxy primer the floor is all ready now and looking nearly new 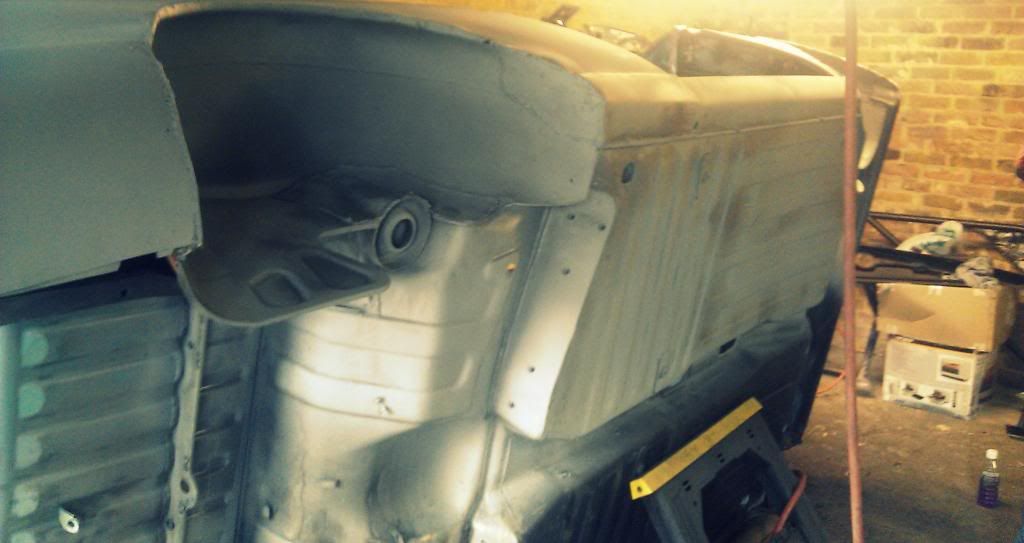 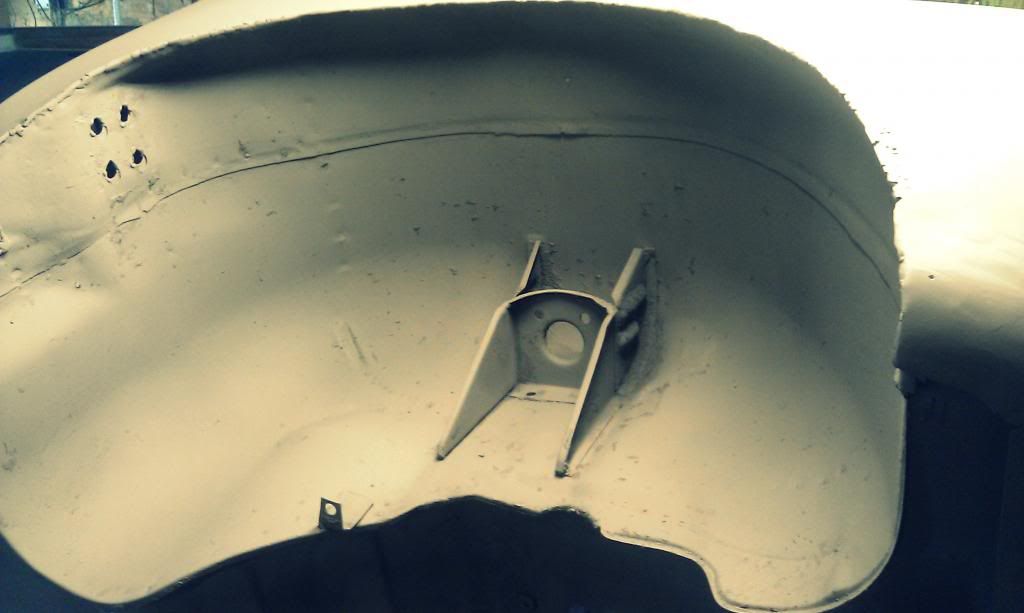 it claims to be able to repair itself if it suffers a scratch or mark that goes through all the layers down to the bare metal, hopefully it does what it says on the tin! red section shows the weld that was already there and the green section is a new weld after I cut the end of the sill open a little to check the condition inside. nothing terrifying in there, i have a suspicion its a replacement sill anyway  itll be cleaned up a bit more  there is a bit of a dent on the floor here, not sure if this was from a front impact or driving over a big rock? I'm happy to just leave it there really since there's no real damage. 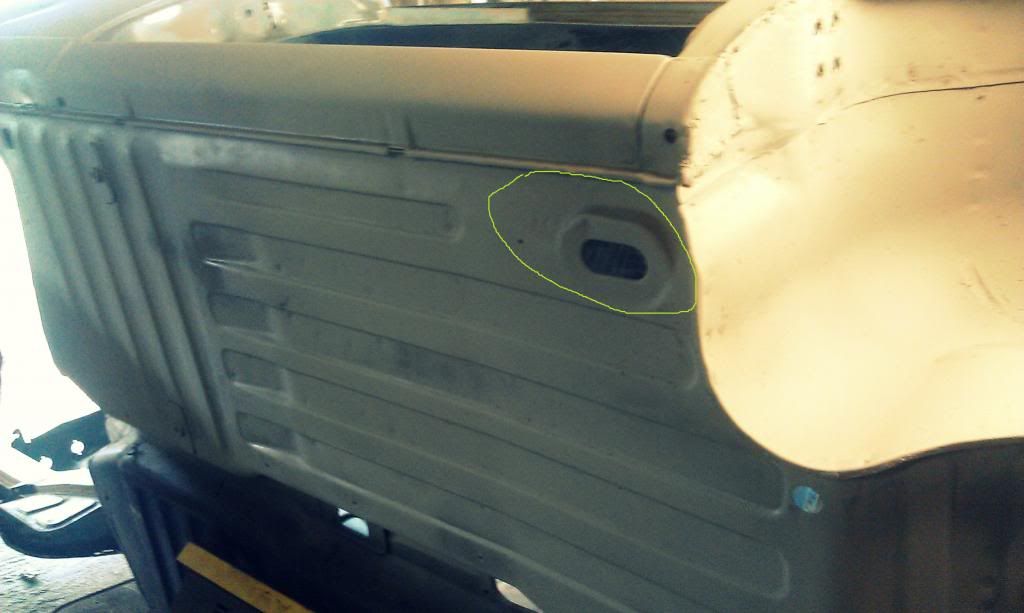 and no one will ever be inspecting my floor 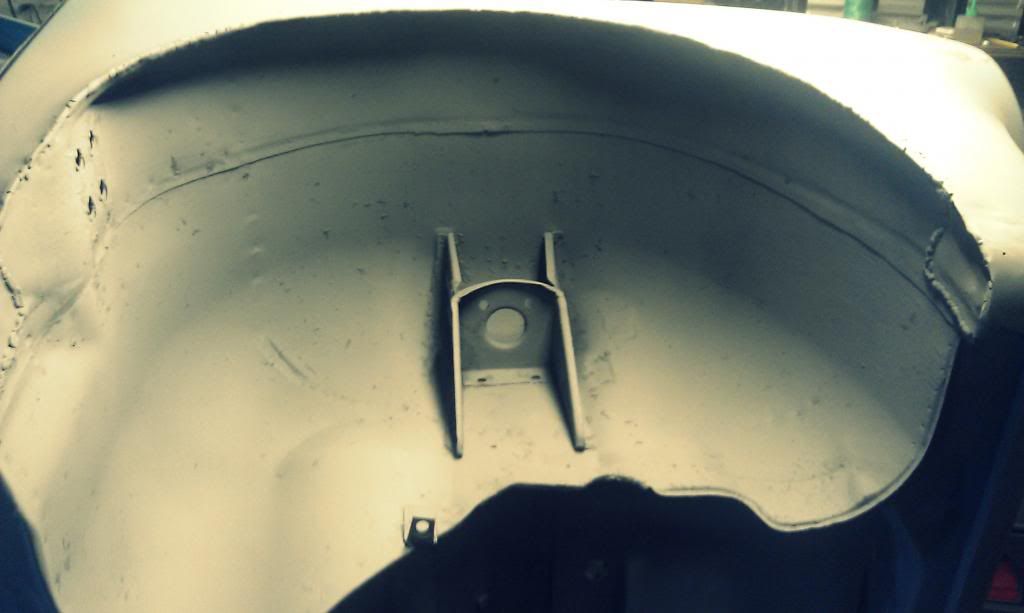 this side is almost complete i have a week off uni now so more progress very soon. |
| |
|
|
randywanger_
Part of things
Nissan Bluebird P510 SSS Coupe
Posts: 946
|
|
|
|
|
Love this! Where did you get the arches from?
|
| |
|
|
|
|
|
Feb 18, 2013 17:16:22 GMT
|
cheers oh they're from malcolm anderson, they're usually in stock but you'll have to look lots of people are after them now. £120 for the 4 Well then, I did some more work on her today some finalized repairs with a little filler    before and after shot  front of the sill 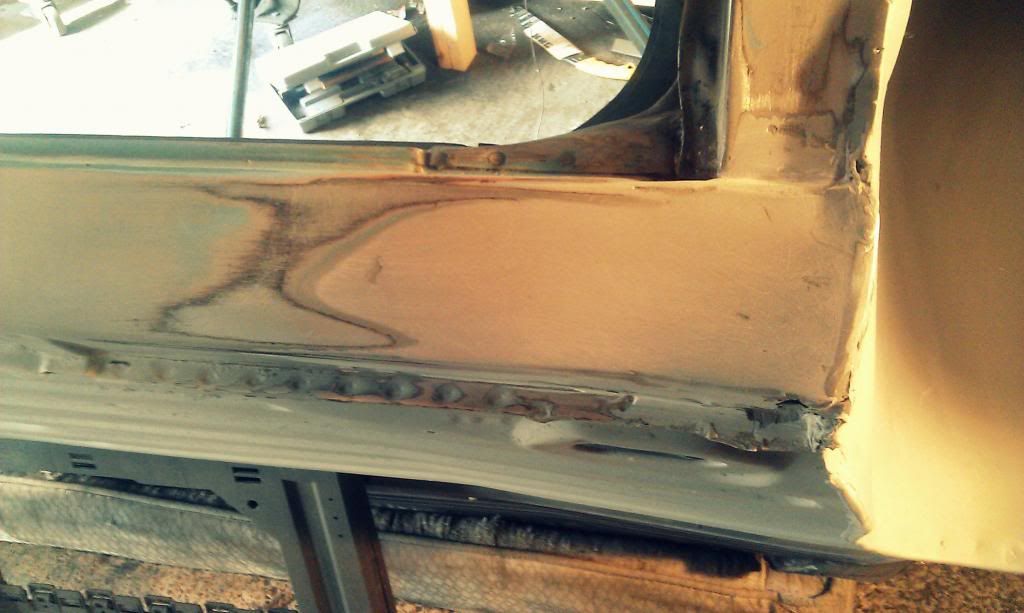 back (end) of the sill, kinda hard to see the contour lines because of the light and multiple colours but they're pretty much spot on 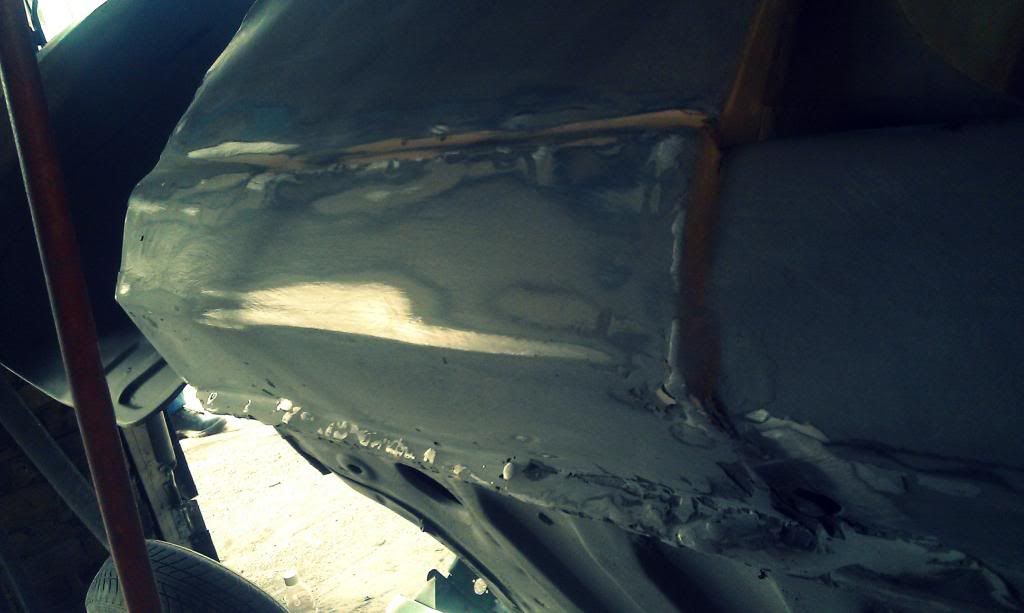 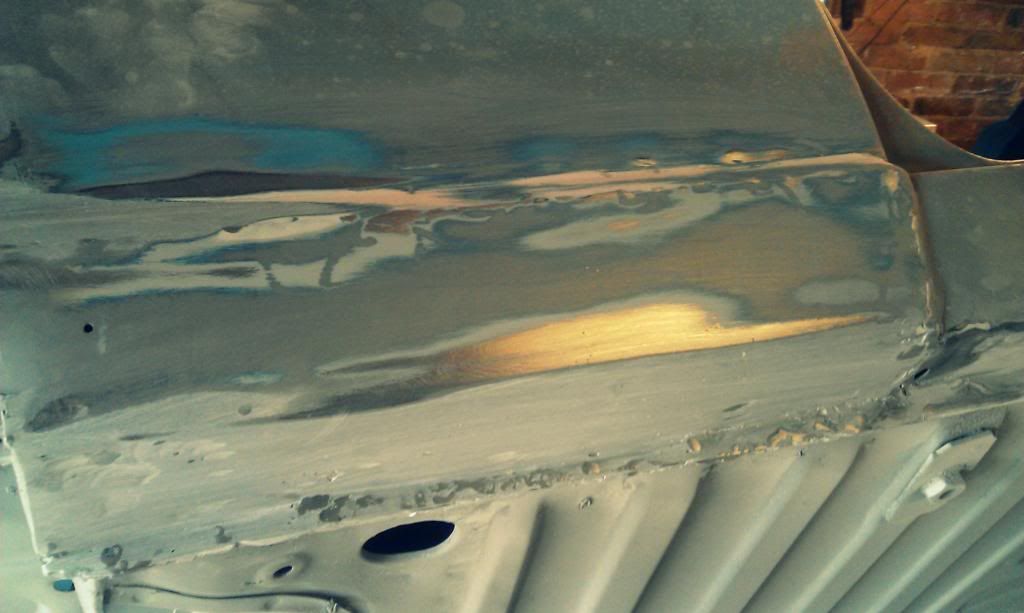 taped off the side of the car so we could seam seal and then stone chip the underneath 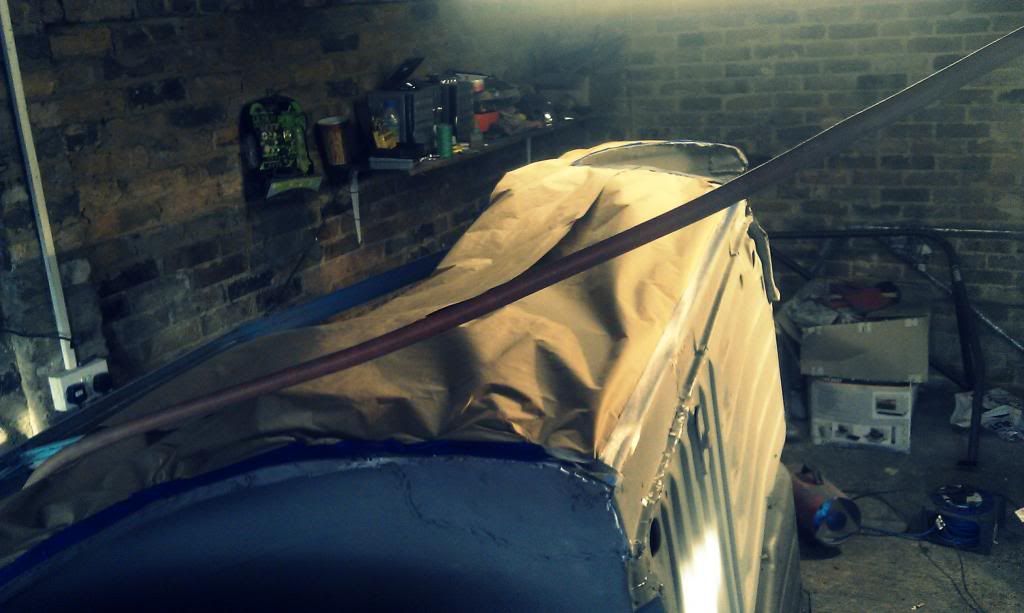 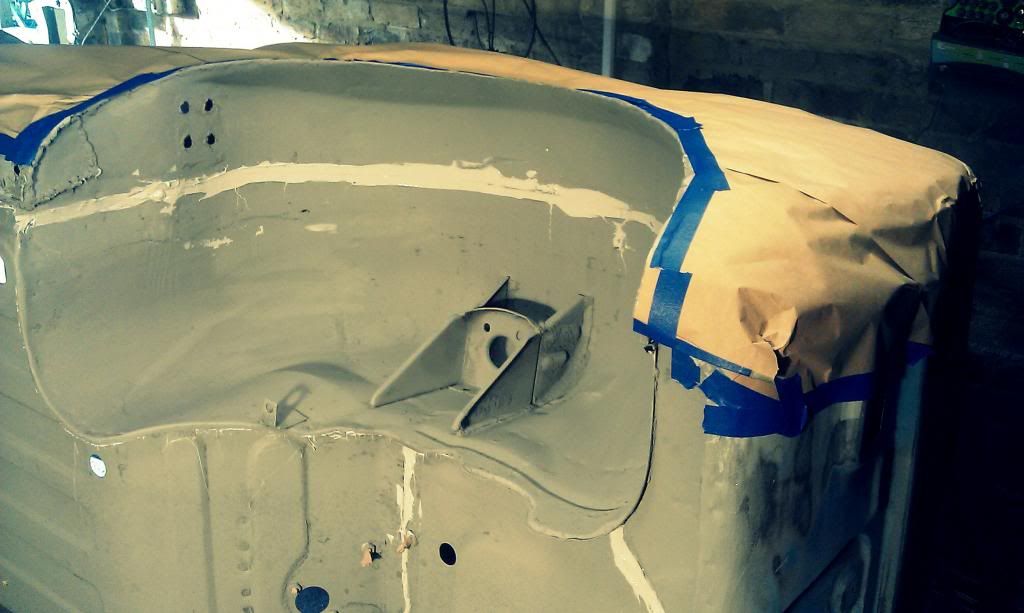 and this is the same arch after stone chip 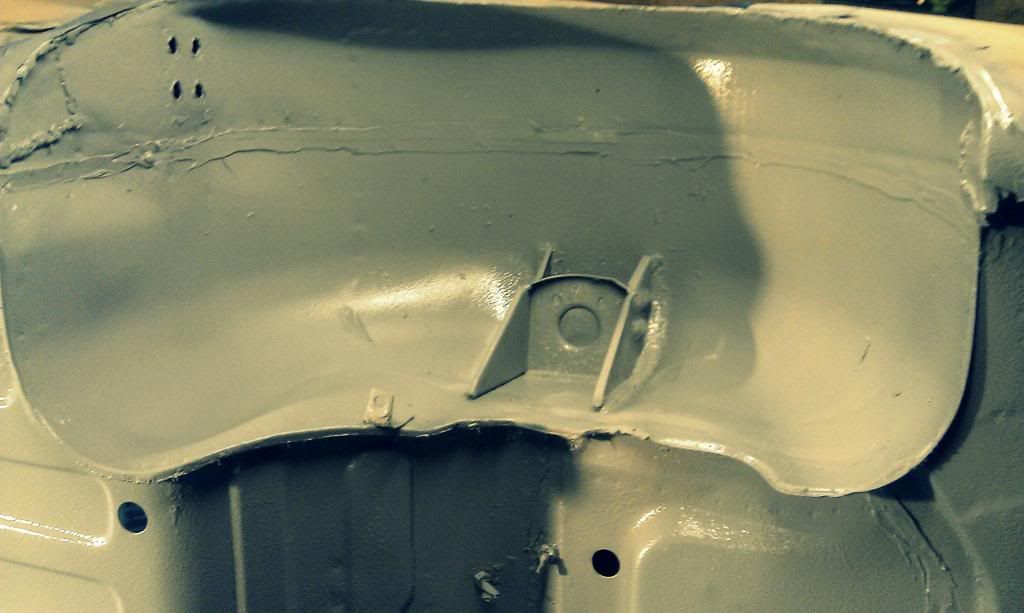 finally, the floor... looks nice i think 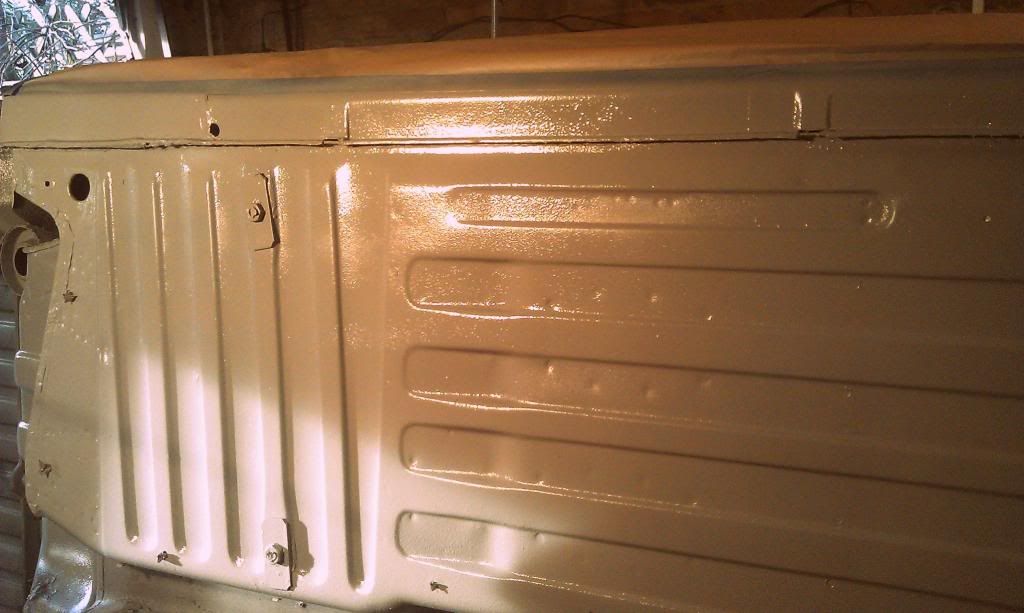 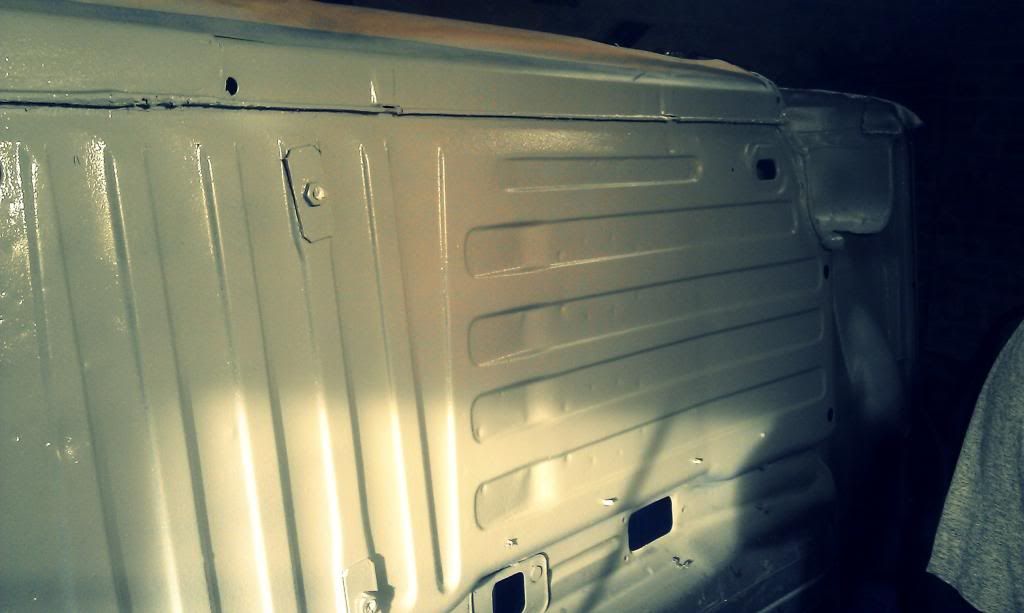 it will still take high build primer and a topcoat of paint underneath so there'll be plenty of rust protection |
| |
|
|
|
|
|
|
|
a wee update from the garage 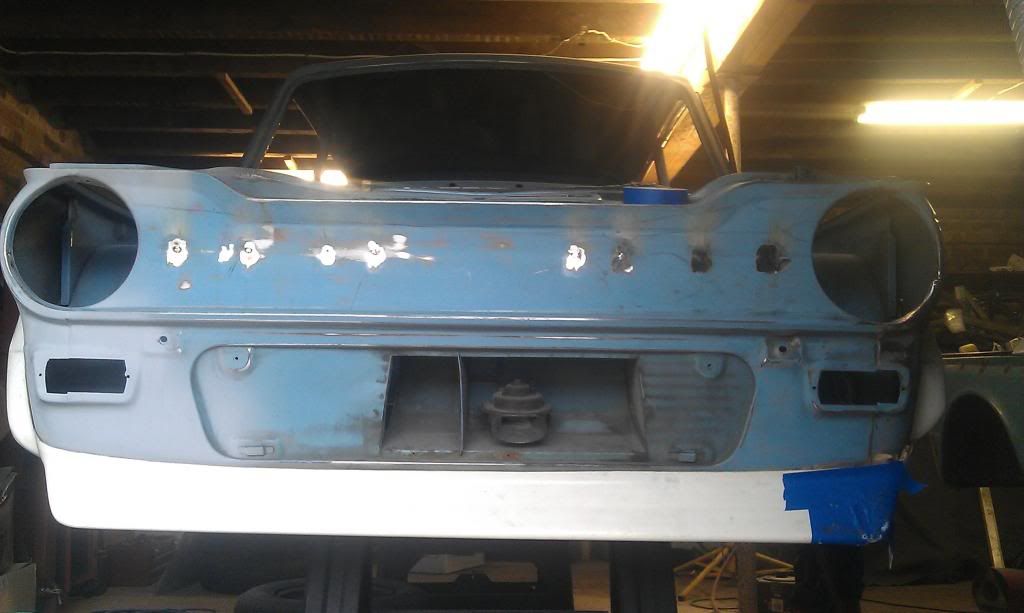 [/URL] 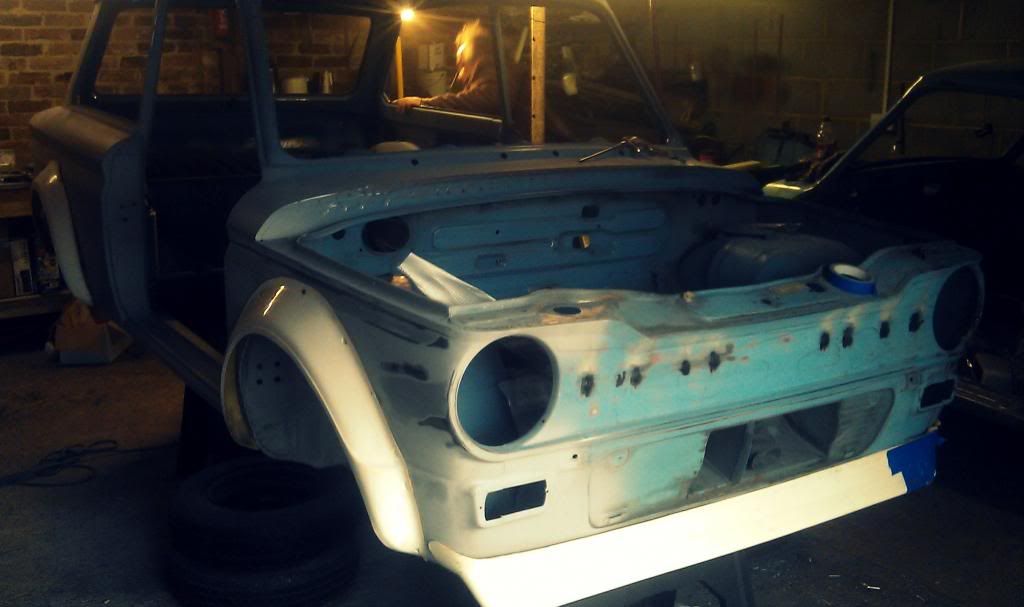 [/URL] it's slowly getting there... 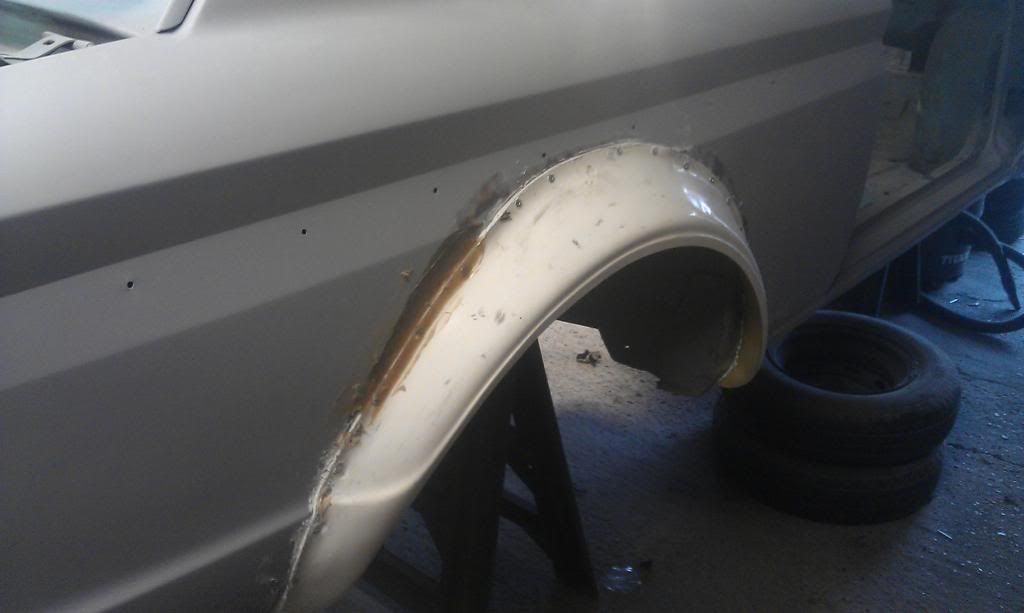 [/URL] 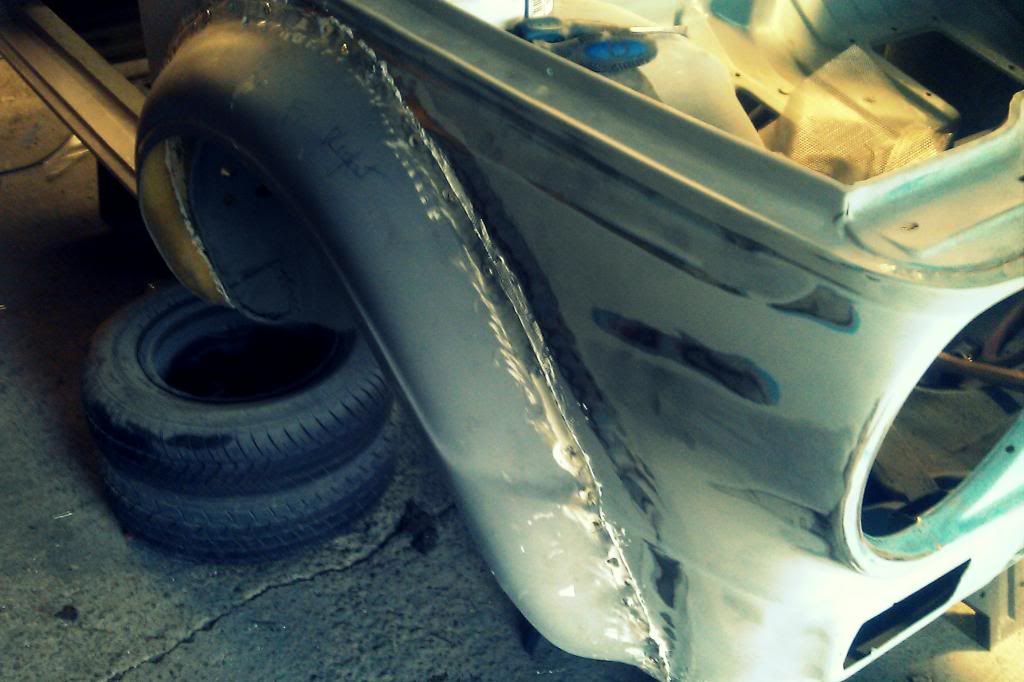 [/URL] and the front which will soon look like nothing had ever happened!  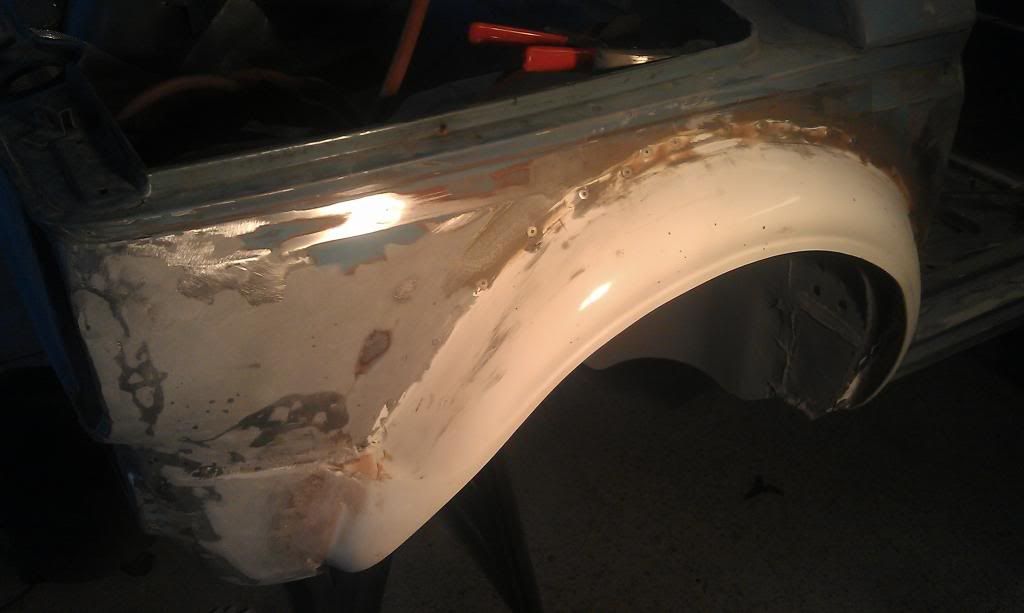 [/URL] all 4 arches are attached now and almost almost blended in to a good standard trying to use minimal amounts of filler to complement the lines if the temps stay above 12 degrees while I prepare her for the high-build primer then maybe we will some paint going on sooner than what was expected! all the paint, thinners, lacquer and primer are sitting there waiting to go on plenty of work to be done in the meantime! shiny new suspension on the way 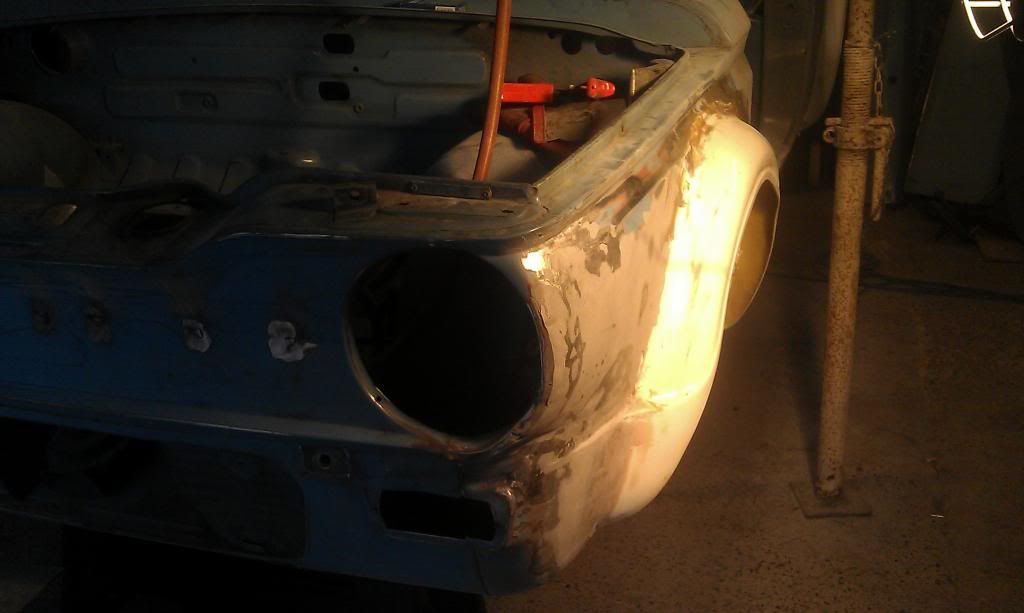 [/URL] |
| |
|
|
|
|
|
|
|
|
Great work mate,good to see another 2 imps being saved.
|
| |
|
|
|
|
|
Apr 26, 2013 14:01:08 GMT
|
so i did manage to take her out for a bit in the sun for some vit. d and a good wash while it lasted! crappy phone pics and no post wash pics i'm a bit unorganised haha 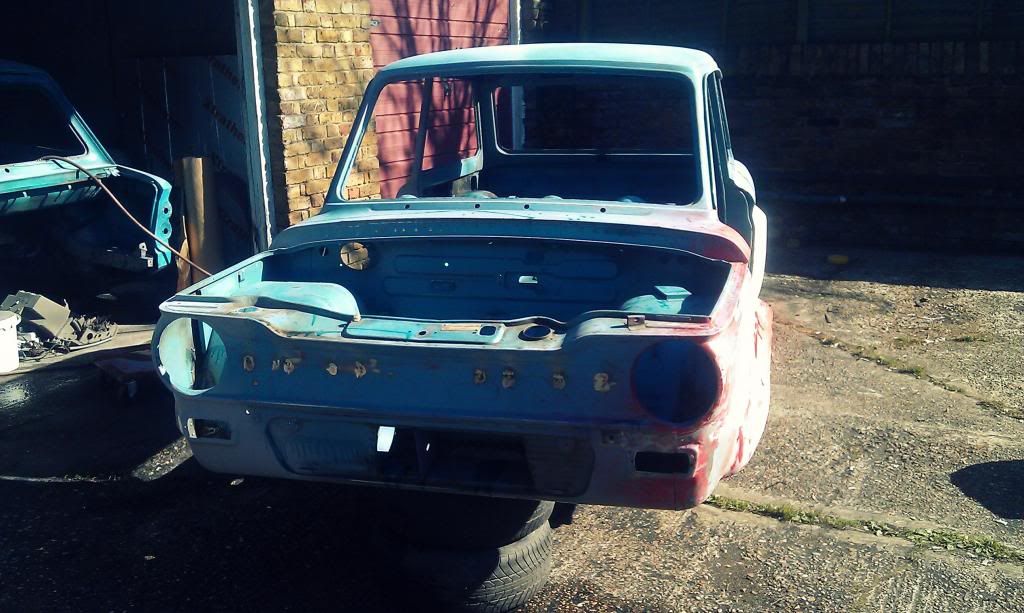 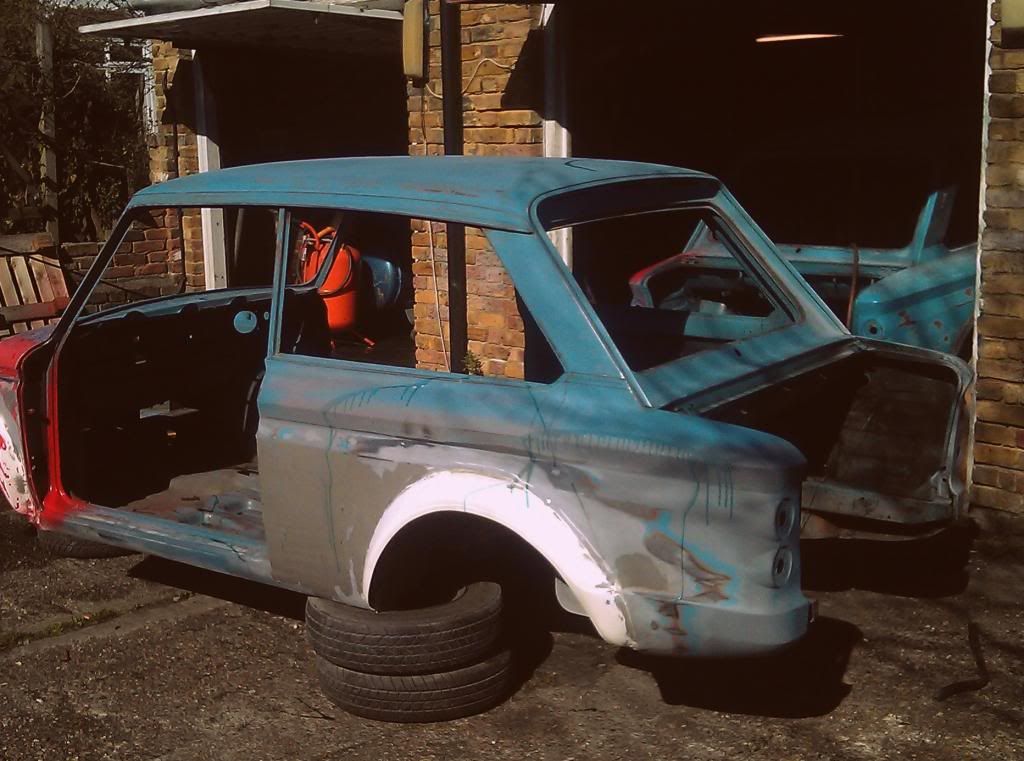 bodywork is going slow due to uni deadlines  but this leading onto paint prep is the slow part I guess. my friend has now decided he wants the fibreglass arches on his 65 Imp, and it still requires a little more welding so paint isn't likely to happen soon but we can still prepare my car in the meantime 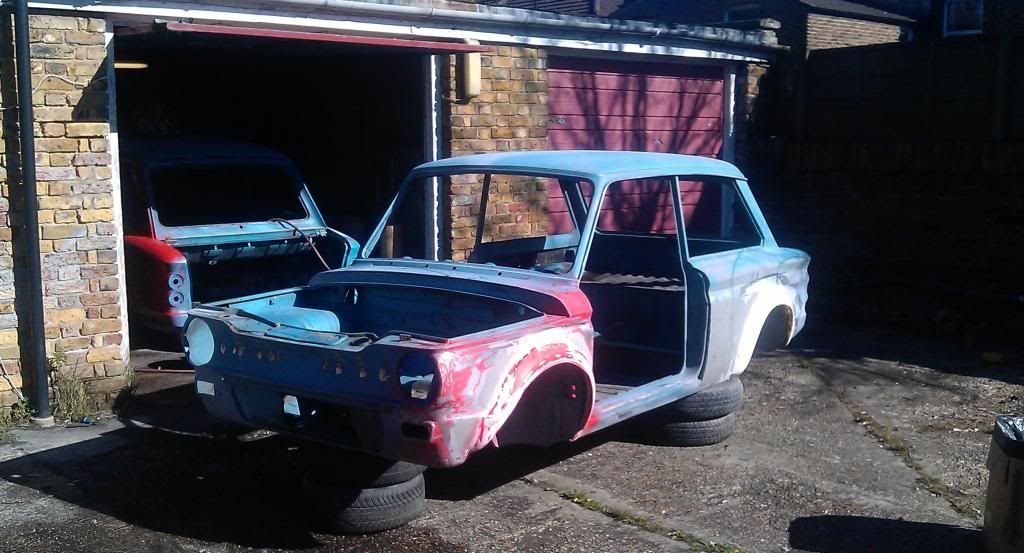   until the suspension arrives and I can put some wheels on her to make moving the cars around easier, I'll have to continue imagining doris as a boat and not a car! 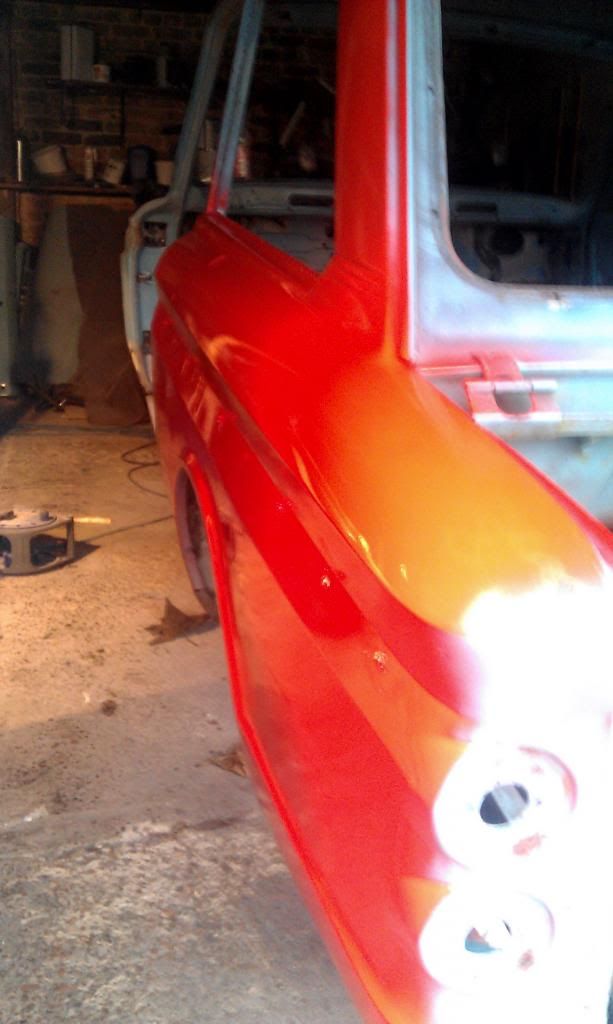 the red is just a little tryout for friends car mine will be gunmetal grey. |
| |
|
|
bazzateer
Posted a lot
Imping along sans Vogue
Posts: 3,653
|
|
Apr 26, 2013 15:50:40 GMT
|
|
Two more Imps coming back to life! Excellant!
|
| |
1968 Singer Chamois Sport
1972 Sunbeam Imp Sport
1976 Datsun 260Z 2+2
1998 Peugeot Boxer Pilote motorhome
2003 Rover 75 1.8 Club SE (daily)
2006 MG ZT 190+ (another daily)
2007 BMW 530d Touring M Sport (tow car)
|
|
|
|


 took 3 people and about 2 hours to get it all out. haha we work slow?


 Great to see another one (well two by the looks of it!) being saved.


 to sort the underneath out.
 something from way before my time!


 but this leading onto paint prep is the slow part I guess. my friend has now decided he wants the fibreglass arches on his 65 Imp, and it still requires a little more welding so paint isn't likely to happen soon but we can still prepare my car in the meantime