|
|
|
Feb 23, 2015 19:05:32 GMT
|
Hi Dom, I will be using epoxy resin anyway, but the latex is a good shout. It was a bi*ch to get the foam out last time! I have found that packing tape is totally non stick to resin too, so some of that will be going on the flat bits  |
| |
|
|
|
|
|
|
|
Feb 23, 2015 21:40:15 GMT
|
Yeah when I did a bike fuel tank it took about 25L of thinners to melt the foam out  Worked well then |
| |
|
|
Colonelk
Posted a lot
  
Posts: 3,742
Club RR Member Number: 83
|
|
Feb 23, 2015 22:05:00 GMT
|
|
Manifolds are looking ace! Hope my ham fisted efforts look 1/10th as good!
Also, adding my best wishes to your daughter and all in the household.
|
| |
|
|
|
|
|
|
|
Hi Elk, thank you for the kind words  What manifolds are you making up? What material are you using? And thank you for the best wishes, she is back in for treatment this week, still smiling like a trooper. Occasional cracks show with a few tears, but she always perks back up  |
| |
|
|
|
|
|
|
|
|
We need pics of this new motor !!!
|
| |
|
|
|
|
|
Jul 12, 2015 18:30:05 GMT
|
Ok, so not sure where we got to, but this is where we are now... After a number of chemo rounds, scans and changes to the treatment, we were informed that the chemo had not touched it. They wanted to operate asap and do what they could. She was under for seven hours, they took everything they could without cutting parts of her vertebrae off. The tumor was in her chest cavity, growing off her spine, over the diaphragm and pushing her heart and lungs out the way. She woke up and was breathing for her self, so no need to the ICU bed that was organised and waiting. We were expecting a two plus week stay in hospital, but as usual she amazed us. Off the morphine after 18 hours, chest drain out after 24, all the lines out by 36 and the final arterial line out at 48 hours. Then we were sent home!!! The agonising wait to hear about the biopsy results took around 10 days. What they found was astonishing. The tumor was found to have differentiated, something none of us thought possible. It had gone benign! Now we are not out of the woods yet, as there may be malignant material left around her spine that they could not remove, but we know that the chemo does not work on her, so we are praying that this is not the case. There are some specialist scans coming up that will give us a better idea on what else is in there. Fingers crossed. She was diagnosed just as I was about to send the car to the fabricators and then the paint shop. Unavoidable but still not great. I could not look at the car for a while as it was just another level of stress that I could not comprehend. But as time went on both my wife and I needed coping mechanisms, as what was the unthinkable became the normal a bit more brain power could be applied elsewhere. I went out to the garage and had a little play, I think I cleaned some rust off a subframe? Either way it was a little step, that started to snowball further and further. Between supporting my wife when staying in hospital with Rubes (over 50% of the time!) I was working a full 9 hour day every day, visiting them, looking after our dogs and the house. There was still a little time to get out there and tinker. I cancelled the chassis work and decided to take it on myself, and the painter just postponed everything for me, stored the parts he had started and just asked me to let him know when I was ready to kick off again. And that is where we are, the shell is ready to go to paint! The spec is reduced slightly due to time and tools available, but I have my pedal box, harnesses and proper mounts, seats moved back over 300mm and all associated plates and strengthening required. Also things have moved on in the engine dept, I have an Altezza black top sitting in the garage awaiting some love, pistons and a turbo  On Friday morning, it took 11 minutes to get the shell out of the garage and onto the back of a beaver tail recovery lorry, this was it's long journey to the other side of the village, around a mile! 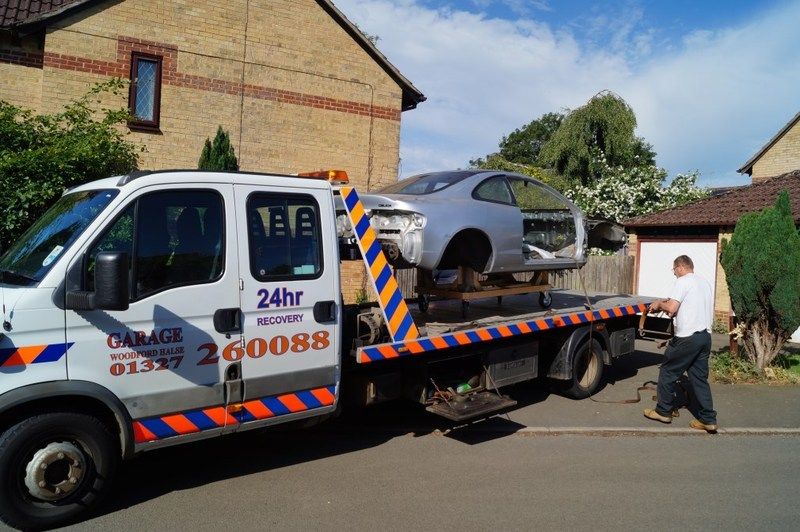 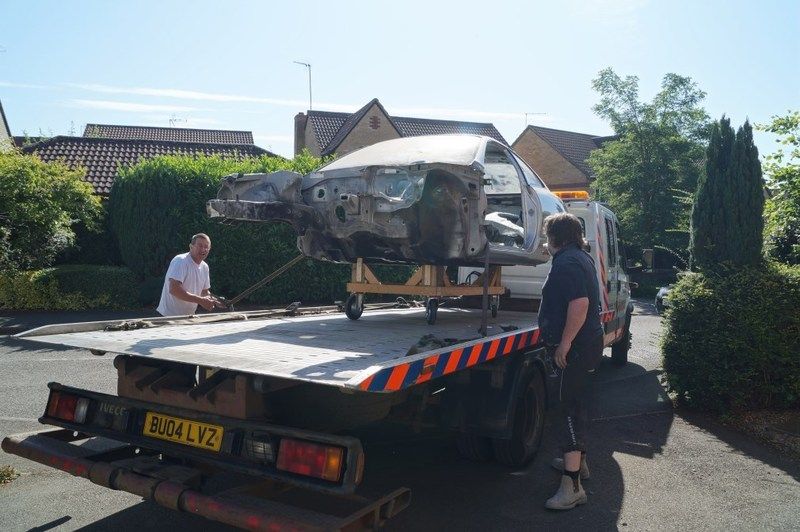 Bye bye car! 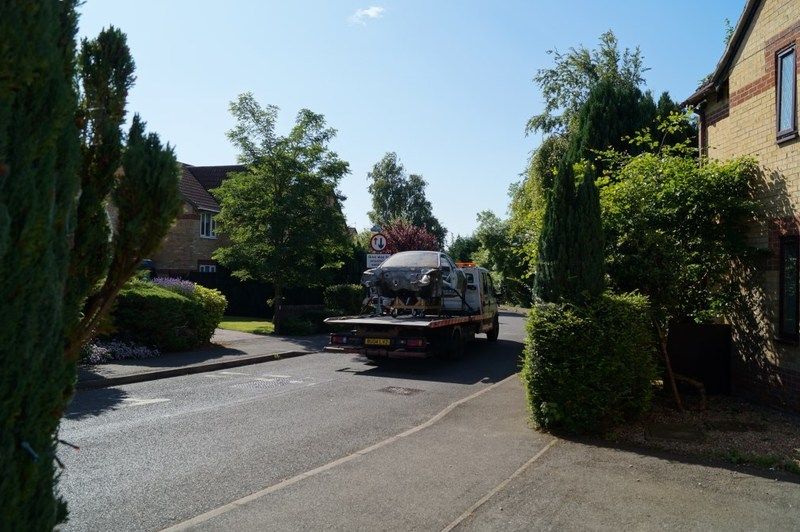 By this point, I had also taken delivery of a rather special engine, the BEAMS dual VVT-I black top engine. Originally situated in longitudinally in a Toyota Altezza RS200 (Lexus is200 to you and I), this engine was a Japanese market only special. 212hp naturally aspirated with dual variable cams, long duration and high lift, titanium valves and bigger shimless buckets, and the all important strengthened block. This was the final hurrah for the 3S-GE engine. 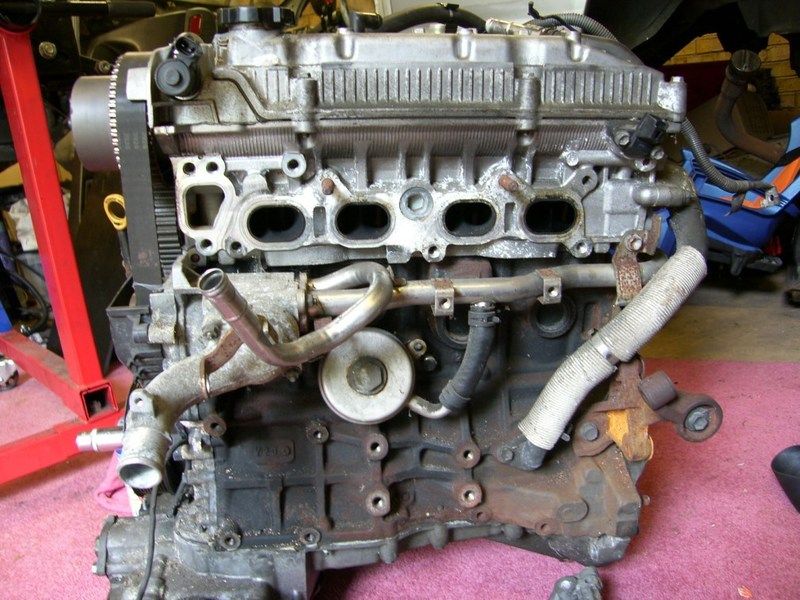 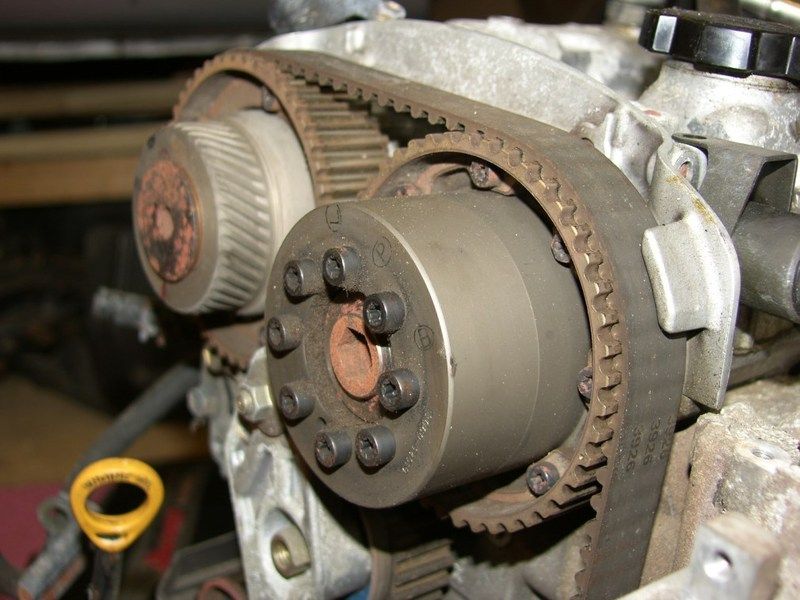 Much needs sorting out, as the port spacing and sizes are totally different to the 3S-GTE, as can be seen here, the gasket for the 3s-gte over the 3s-ge beams ports - 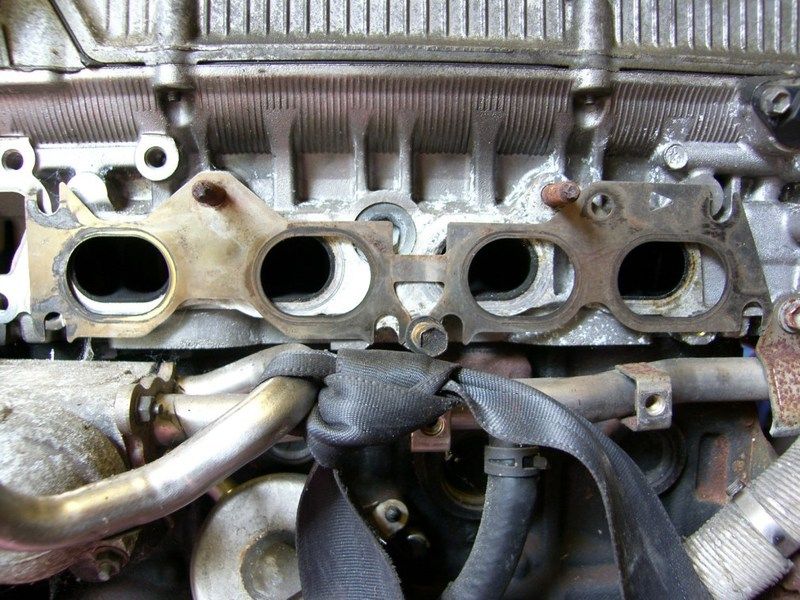 There are many changes to the cam drive and block, most of them can be overcome by using 3s-gte parts bolted on to the block of the 3s-ge. Initially I thought I would make the drivers side engine mount and keep the BEAMS cam tension arrangement, but looking at it, the 3s-gte parts will make a much neater job - 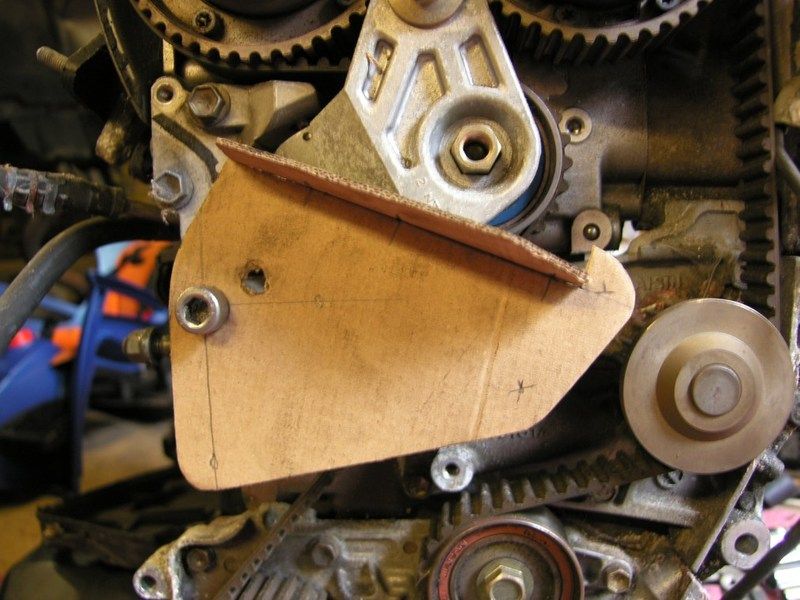 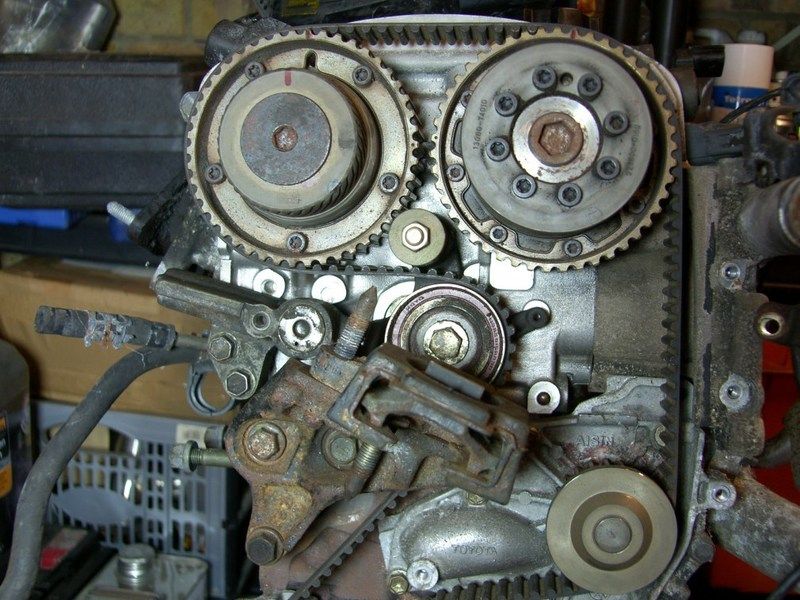 I also found an ideal spot for a tiny little Daihatsu Charade GTti alternator - 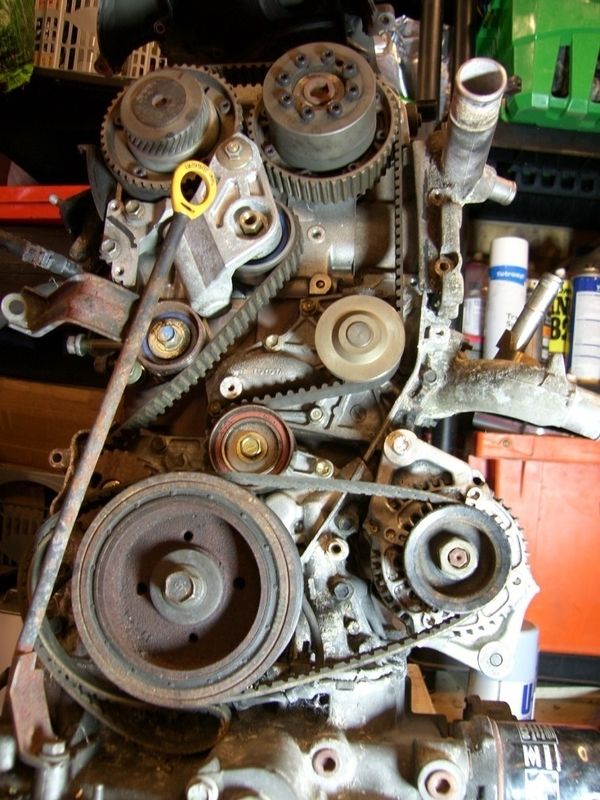 TIDY! 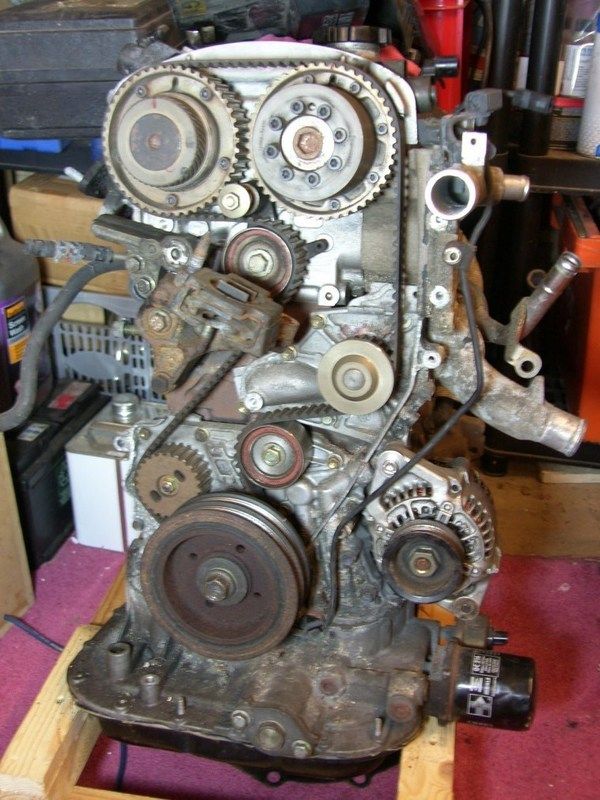 With so much space and nothing to cover in paint, I decided to get the subframe painted up, initially brush painted Zinc 182, then rattle canned with 'Bumper' grey paint and some lacquer. Looks tidy  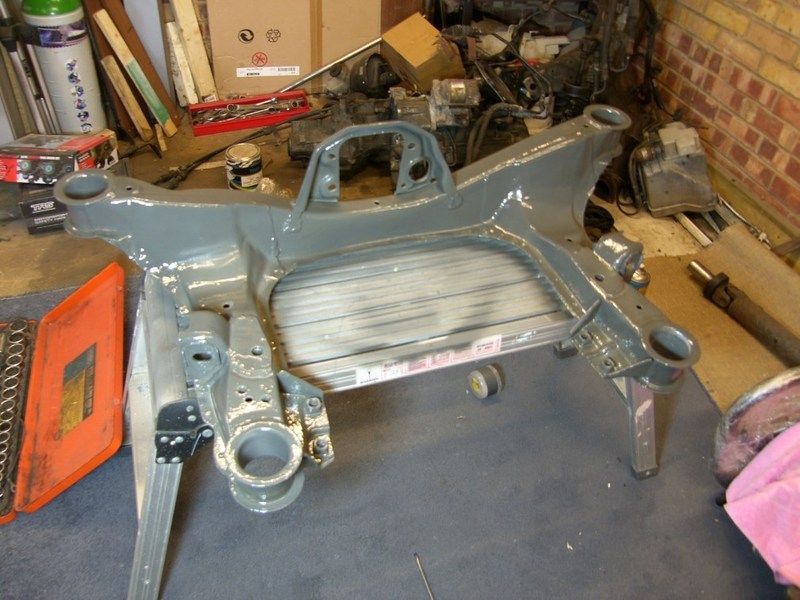 I could not resist it, popped the bushes in to see how it would look  ~ 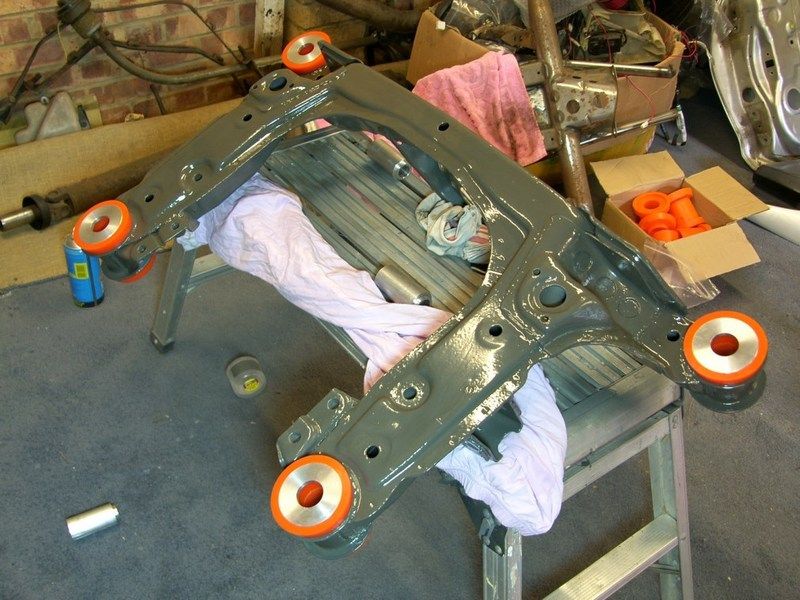 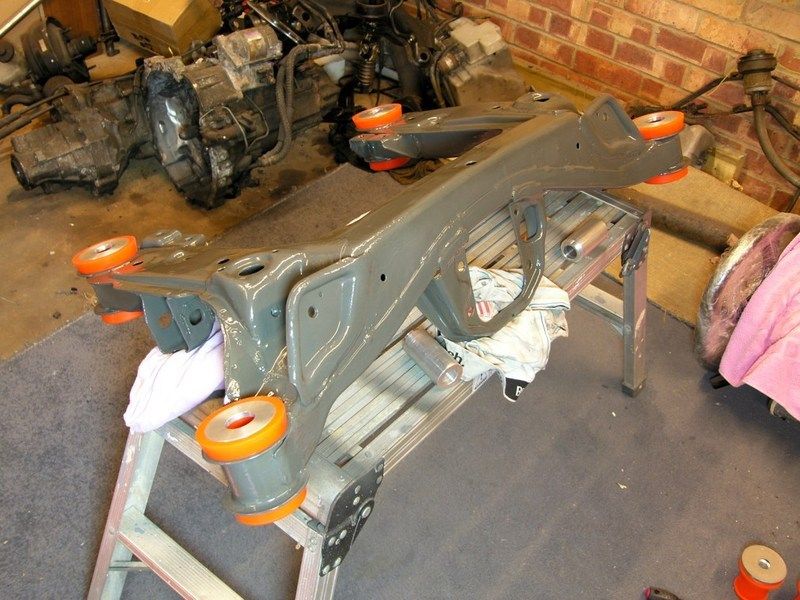 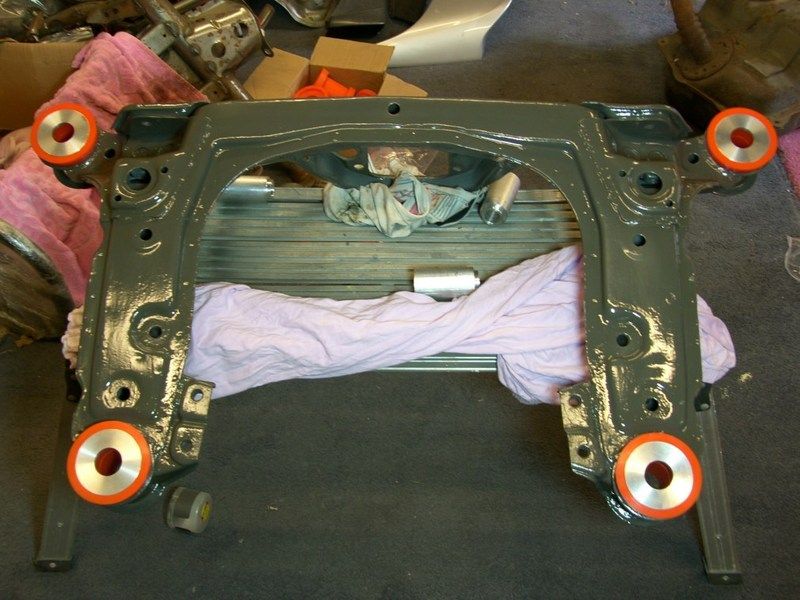 So, over the coming months we will see a painted shell and hopefully some along the route pictures, an engine stripped and then rebuilt with forged rods and pistons, then slowly but surely the car come back together  Thanks chaps  |
| |
Last Edit: Jul 12, 2015 18:42:26 GMT by Blown_Imp
|
|
|
|
|
Jul 12, 2015 22:00:57 GMT
|
|
Good news on the car front, but hopefully GREAT news on the family one! Fingers crossed here.
|
| |
|
|
|
|
|
Jul 12, 2015 22:28:51 GMT
|
|
Another import option, should you ever want to cross breed, is the 3S-GTE from a Caldina ST246. Already E-W orientation, and AWD, but they only come in tiptronic auto.
Also, you seem pretty switched on (love your fab work), so can you explain how are you going to mod the Beams to cope with boost? Isn't the compression up around the 11-11.5:1 area? Because in my mind, to get it down to boost friendly compression ratios, you'd have to de-stroke the engine, thus removing some of the parts that made the Beams so tidy.
|
| |
|
|
|
|
|
|
|
Thanks GeorgeB, things feel much more settled at home, we still have one radioisotope scan and MRI scans every 3 months but that is nothing compared to the past year! Sciclone, the ST246 engine is a good one with a strong block but it misses out on the reduced valve angle and VVT-i. You are right about the high compression, the compression is set via the volume between the piston and head at top dead centre. In theory de-stroking the engine would reduce the compression but there are some vital gas dynamics that are lost in the process, the same goes for putting in two / thicker head gaskets. Around the perimeter of any given piston or head you will find a band around the edge that sits closer than the middle, the function of this is to provide turbulence to the charge at TDC. 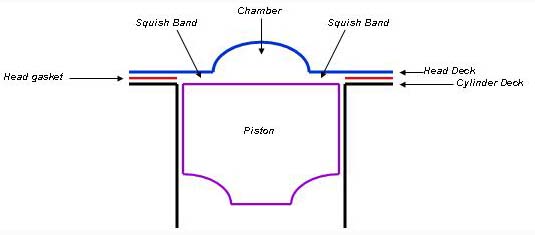 As the piston approaches TDC the gas in this diminishing gap gets rapidly accelerated towards the center of the combustion chamber, where all the action is happening! Since detonation always initiates at the edges of the chamber, the less mixture you have there the better. So....for the beams engine I will be putting in new pistons that have a bigger bowl in the center but retain that close fitting ring around the outside  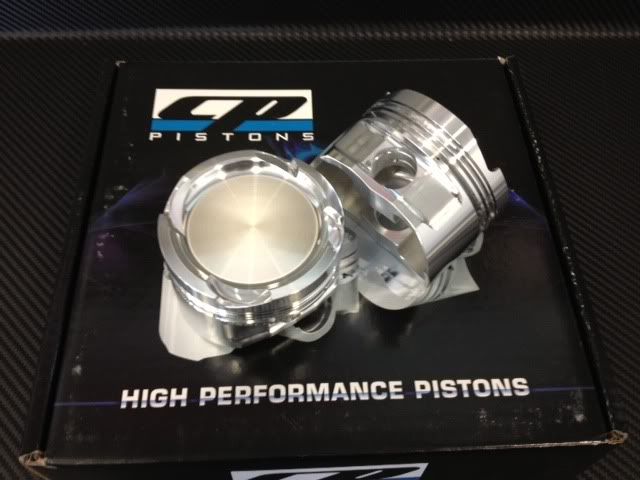 z4.invisionfree.com/lexusaltezzaclub/index.php?showtopic=13458 z4.invisionfree.com/lexusaltezzaclub/index.php?showtopic=13458Cheers J |
| |
|
|
|
|
|
|
|
|
(I'm an ex Toyota mechanic, so that's the reason I was asking). They're some big bowls on those piston heads. At least with them being made by a known manufacturer, they shouldn't have left too little material between the top of the piston and the area above the wrist pin. Last thing you want is another blow through.
|
| |
|
|
|
|
|
|
|
|
|
Yeah, the CROWNs on those pistons will be plenty thick  My only issue is the material, they are 2000 series aluminium where I would prefer 4000. 4000 is not as ductile as 2000 but because of that, it lasts a lot longer from a wear point of view. Because I am not going for outright power, I can sacrifice a bit of strength in return for that longevity. Also Pankl the company that make them also do a lot of F1 bits, experience counts for a lot and these guys have it  |
| |
|
|
|
|
|
Jul 31, 2015 11:05:15 GMT
|
|
|
| |
Last Edit: Jul 31, 2015 11:07:07 GMT by Blown_Imp
|
|
mylittletony
Posted a lot
  
Posts: 2,426
Club RR Member Number: 84
|
|
Jul 31, 2015 11:57:05 GMT
|
|
I'm a) late to this thread, b) excited to see the progress and finished article, and c) very pleased to hear the news about your daughter.
Excellent on all fronts!
|
| |
|
|
oukie
Part of things
 
Posts: 307 
|
|
Jul 31, 2015 16:32:44 GMT
|
|
I too am late to this thread, being a new member to RR.
But I was drawn in because it's Japanese, Toyota, forced induction and just epic.
I own a mk1 mr2 supercharger, with a few mods, I'm also a family man with young children.
I myself had a serious health scare at the end of last year/beginning of this year, knowing what this does to your stress levels and just knowing what a total head curse word it all is, for you to not just deal with it but actually push on with work on your car is inspiring.
Glad things are looking better with your young one, hope everything keeps going in the right direction.
Bookmarked,
Chris
|
| |
Last Edit: Jul 31, 2015 16:38:38 GMT by oukie
Mr2 mk1 x4
Honda Accord 2.4 Executive (luxo barge)
|
|
|
|
|
Jul 31, 2015 21:31:30 GMT
|
Wow, dude, just catching up on this. you have a helluva lot on your plate as always, so fingers crossed for you on the family front that it's heading in the right direction. Nice to see the car taking another turn, too  |
| |
"Mechanical Power Subduing Animal Speed" (Robert Trevithick, 1808)
'72 BMW 2000 Touring
'99 TT 180 (mrs)
'72 BMW 2500
|
|
|
|
|
Jul 31, 2015 21:32:55 GMT
|
Damn, I saw something the other day in that colour and it did just look the mutts. |
| |
|
|
|
|
|
Aug 29, 2015 18:49:57 GMT
|
Evening Guys! Right, so I have been making steady progress, not much to show for it as the work is mostly boring. Strip component, wire wheel, rust cure, zinc prime, top coat, lacquer, repeat.... I have been busy in other ways too though, I have ordered the following - Heated Windscreen, this is a special order from Ricky Evans Motorsport, suppliers to WRC teams  I managed to get a group buy together which meant we could get over the minimum order, happy days! Anyone who has been in a car with a heated screen will know what a boon they are, that and the fact that just about every serious motorsport team will run one for driver convenience  Pistons / Rods / OEM gasket set / timing belt / thermostat and ACL race bearings, all from New Zealand  It took a bit of procrastination on my part to get this one done, as it was a big order, but they are in the air as we speak. I have gone for Pankl pistons in Rolls Royce 58 material, more commonly known as 2618. The history behind this aluminium is fascinating for me, first produced for the Merlin and Griffon engines when the supercharger boost was turned up and the original piston material could not take the heat. Later is was used to build all of the airframe for Concorde and most recently used in the Cosworth V8 F1 engine. Good enough for them, good enough for me! Finally, a fuel pressure regulator. Took a while again, but I now have something that will do the job well and for a good price. This is still a budget project, there is just a lot of project to get through  Some pics - I dicked about with some bolts a couple of weeks back, I am planning to re-plate every bolt that goes back on the car. I can get them new but Toyota want mega money, so a plating kit, power supply and some time, and every bolt should be as good as new. There will be many processes, first up will be stripping the old plating, I know acid eats Zinc, so the barrel of sulphuric that I have in the garage came handy. 10 mins fizzing and we were mint! Start point - 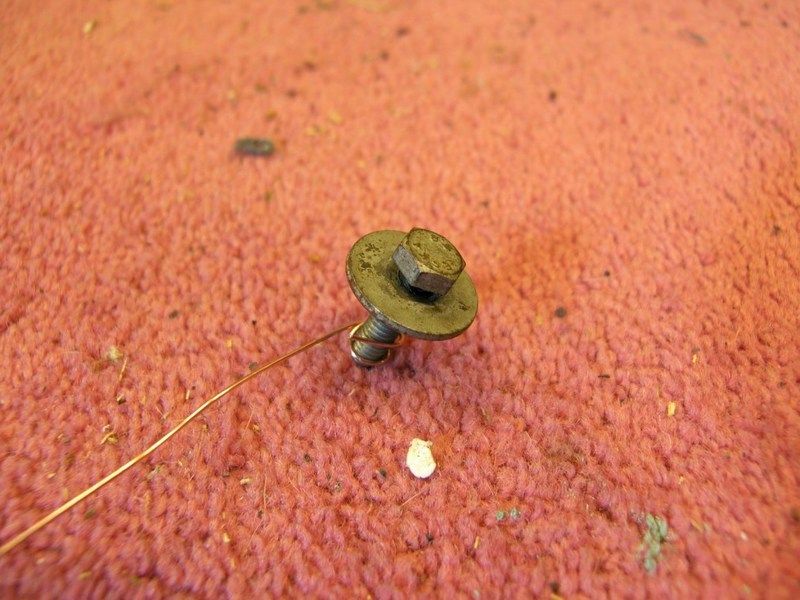 Fizz!!! - 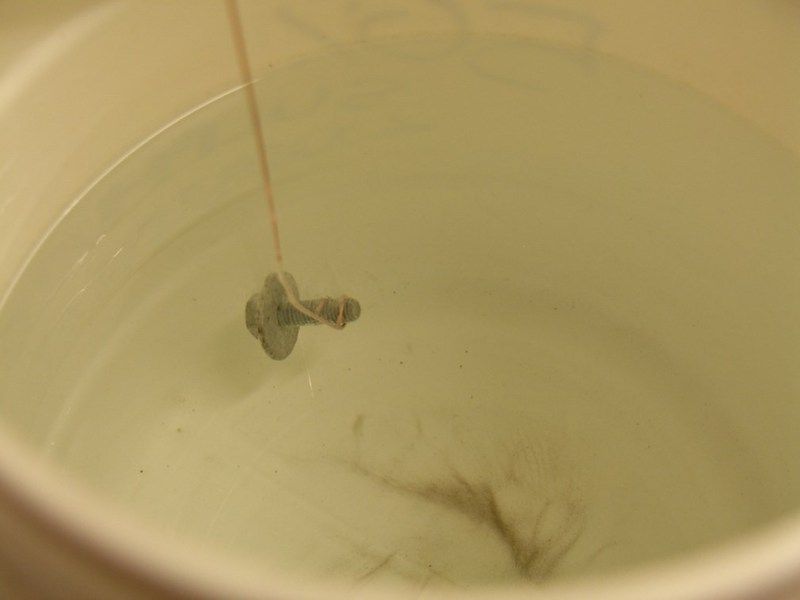 Clean  - 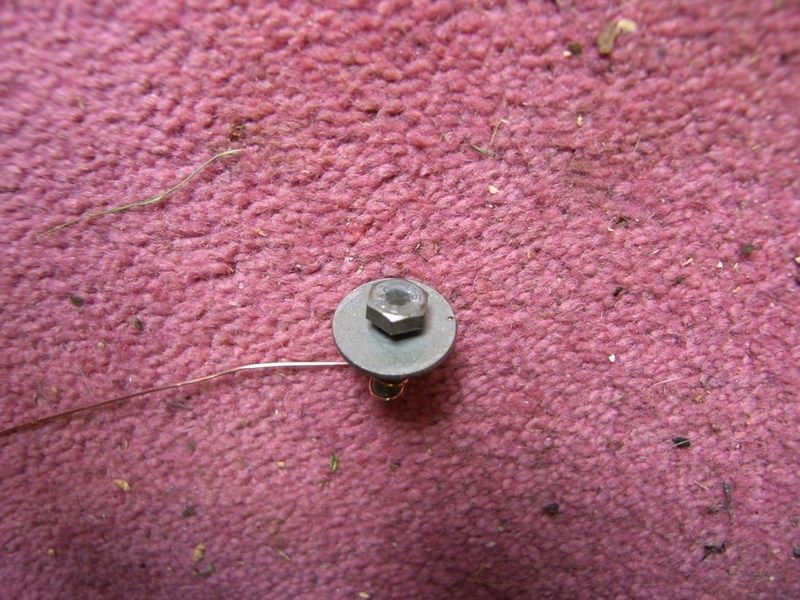 The fuel tank looked a state, but when you got into it there was actually very little bad corrosion, just surface and a lot of dirt 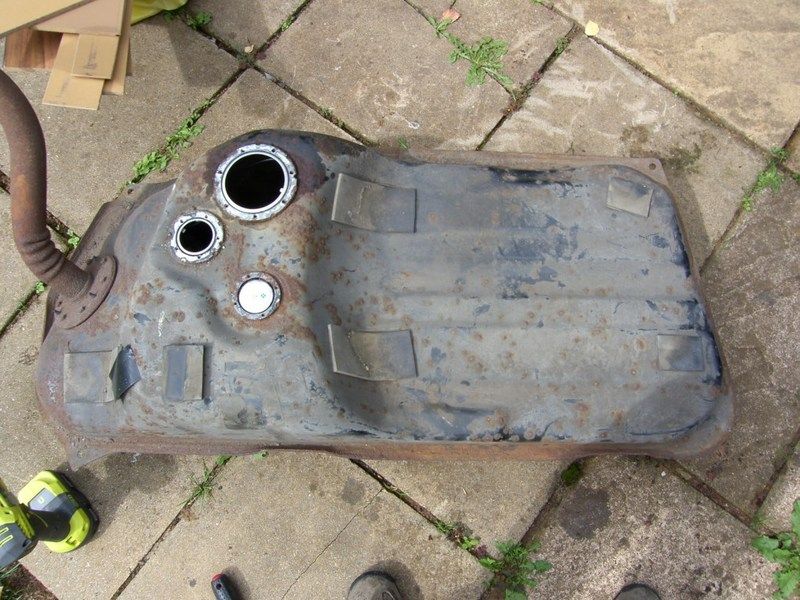 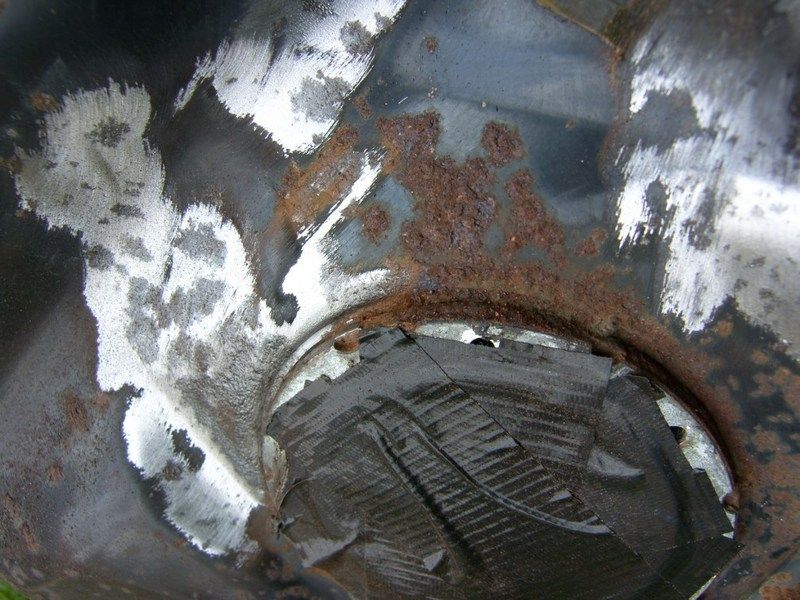 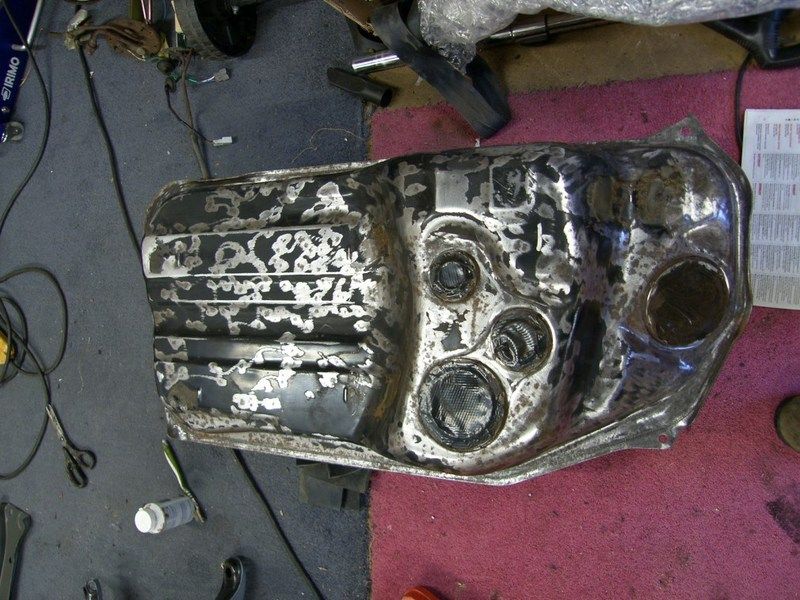 It is now painted and looking really good  Plan is to build up a stainless pump plate with -6AN fittings and an internal 255lph pump. I have also started cleaning the plastics that were under the car, these were lightly covered in underseal and grubby, making them look grim. A bt of time with some white spirit / petrol and a rag resulted in this - 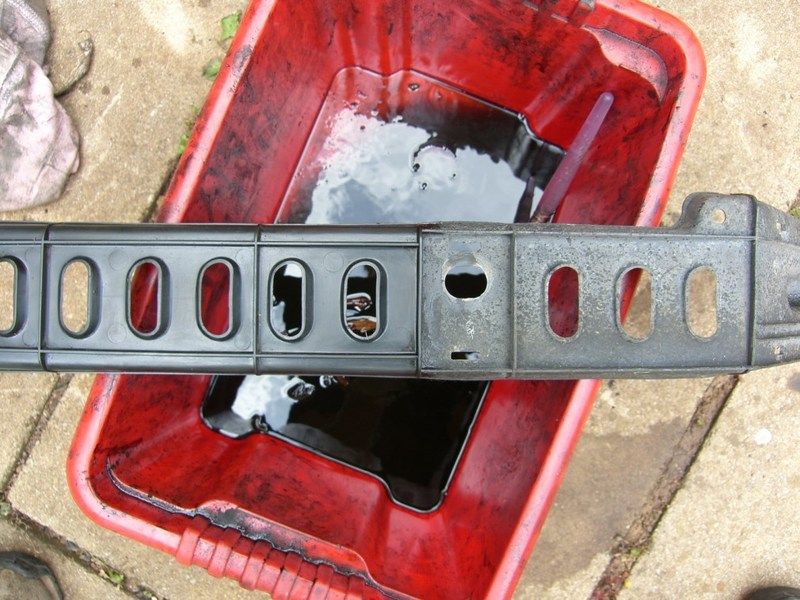 Good as new! Also stripped and rebuilt the rack, it was looking really sorry for it's self but under the grub it was not too bad. The TRE's were in ace condition too! 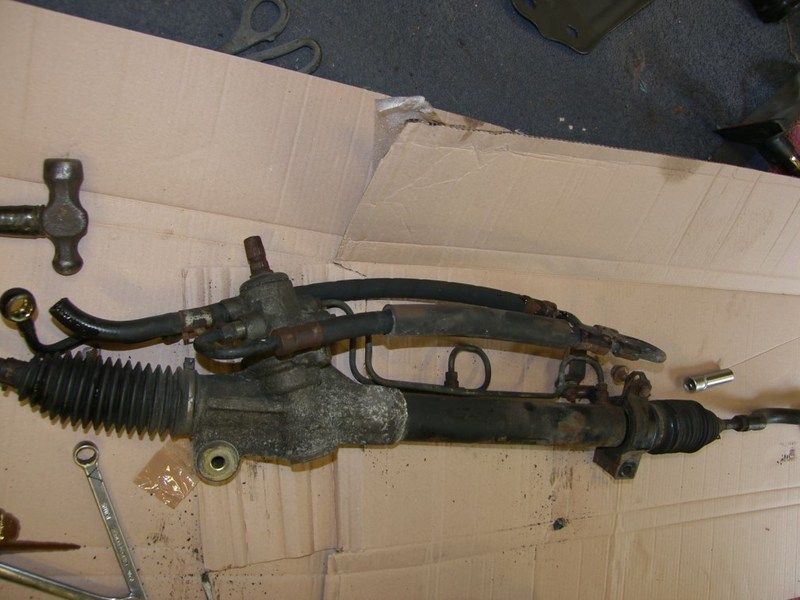 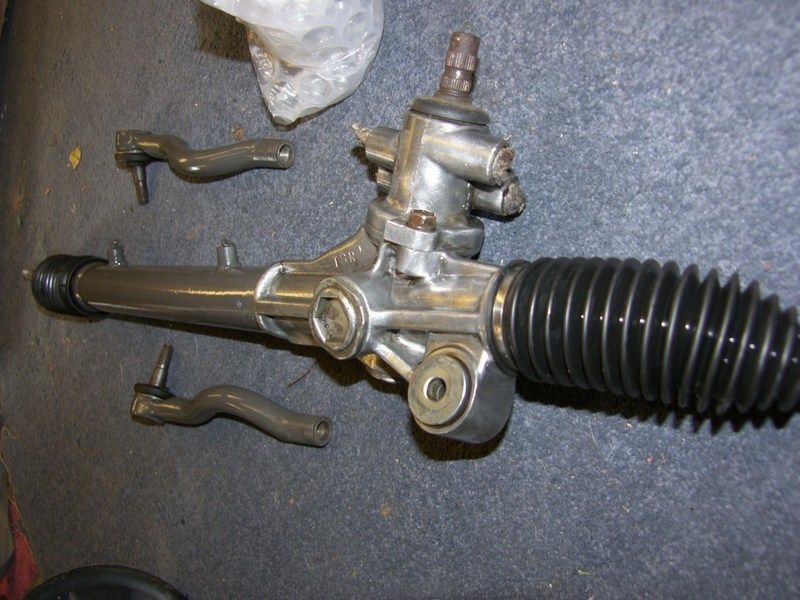 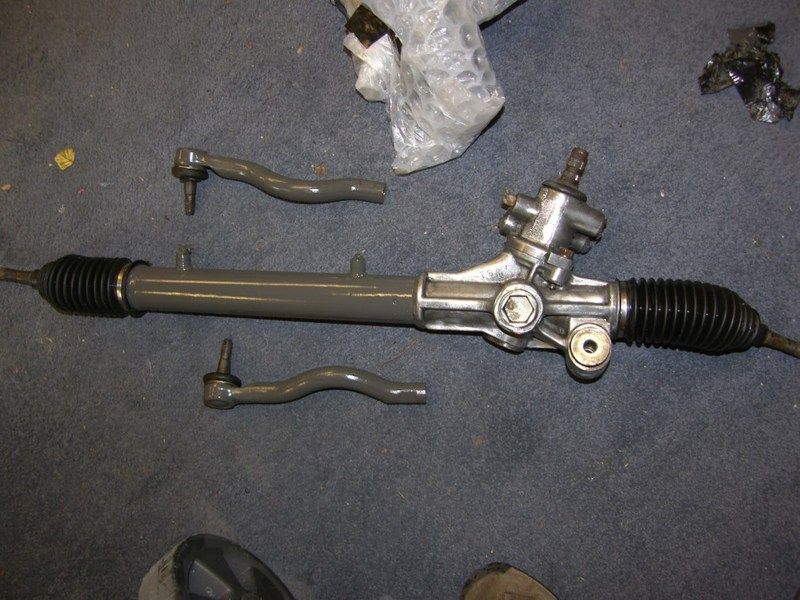 Finally a picture of the first SS lower, painty  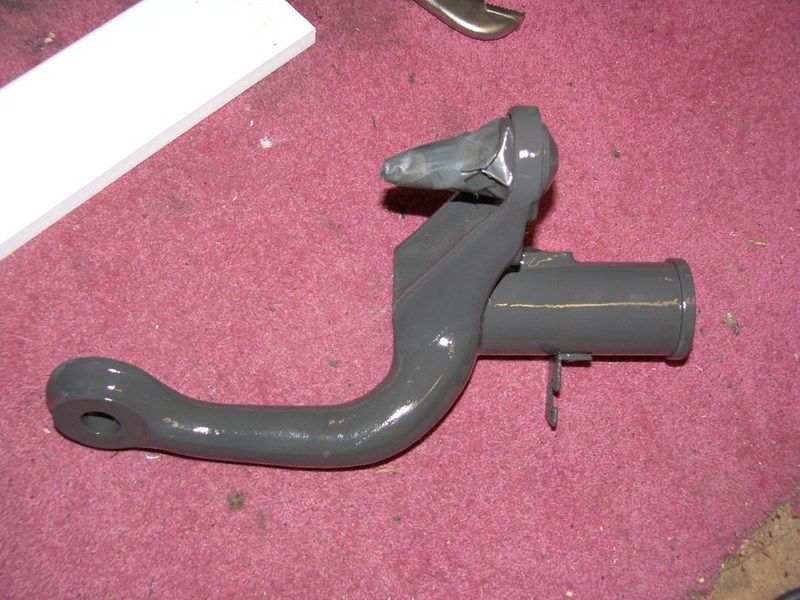 More soon  |
| |
|
|
|
|
|
Aug 31, 2015 19:44:35 GMT
|
Had a good day today, it was whizzing it down so garage was calling! I am quite frankly bored of the cleaning / painting routine, still quite a bit to do but it was time for a change. I started by putting the two pipes back on the rack, pretty pleased with it tbh  I made sure that the little brass inserts were in place and all the face nice and clean. Even though these seal on the cup / cone, I decided to pop a little system sealant on the threads. 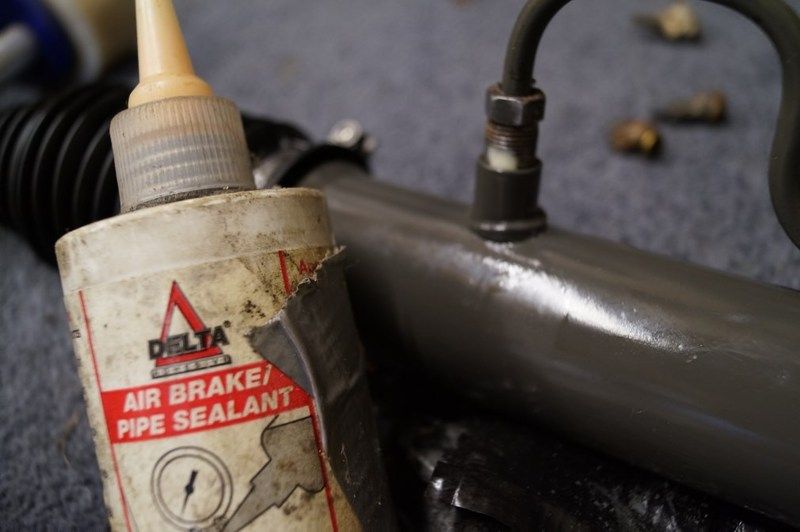 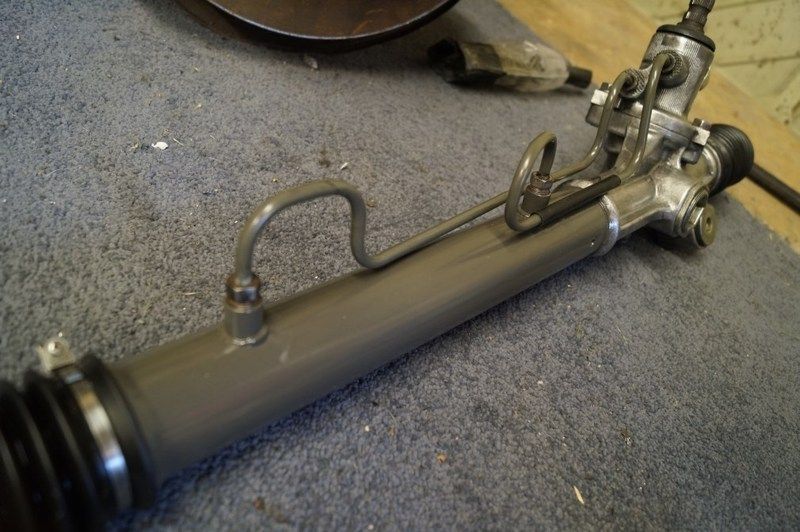 On to the fun stuff! I have been thinking about how to make my inlet plenum, I would use the standard intake for the BEAMS engine as it is lovely, tidy runners, trumpets, big plenum. The issue? None available second hand, one new one from Hurley but they want £350! So back to the carbon solution, not easy, but it is fun and will leave me with a plenum that is much better than stock. I have decided to build the trumpets into the plenum rather than put the inside like the last one I did. So how to get the trumpet shape nice and evenly into the foam? After some mulling (weeks worth) I had a light bulb moment, cutting tool! Out comes the steel and marking tools - 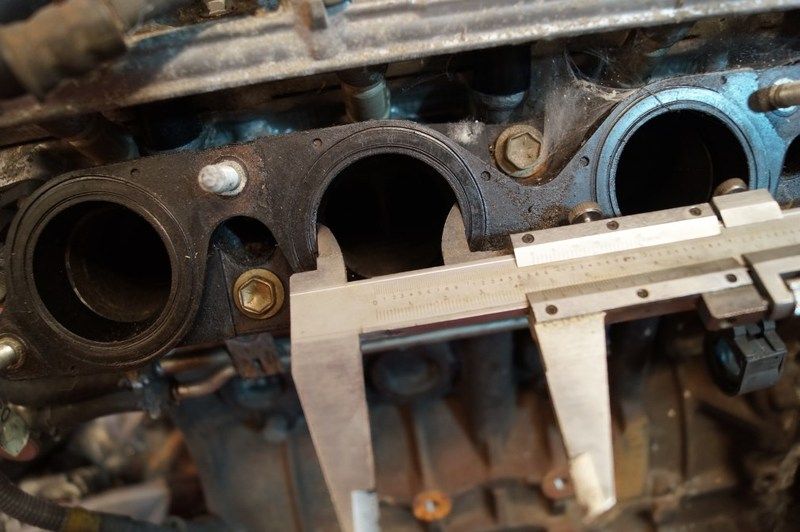 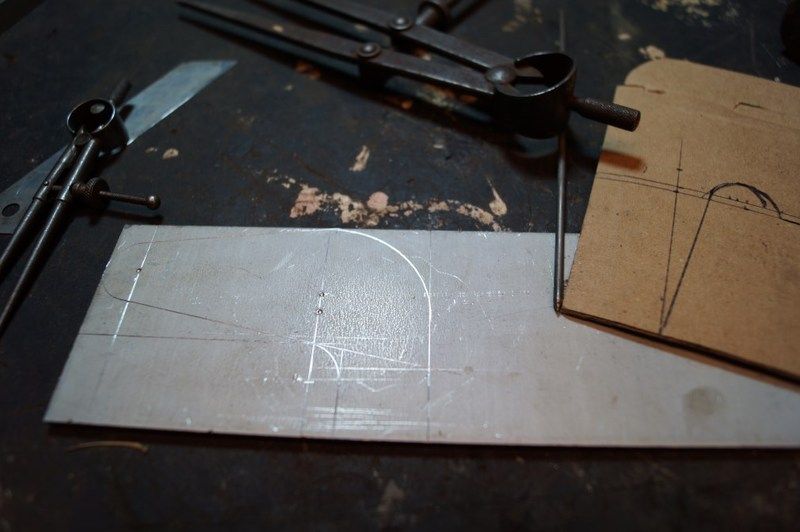 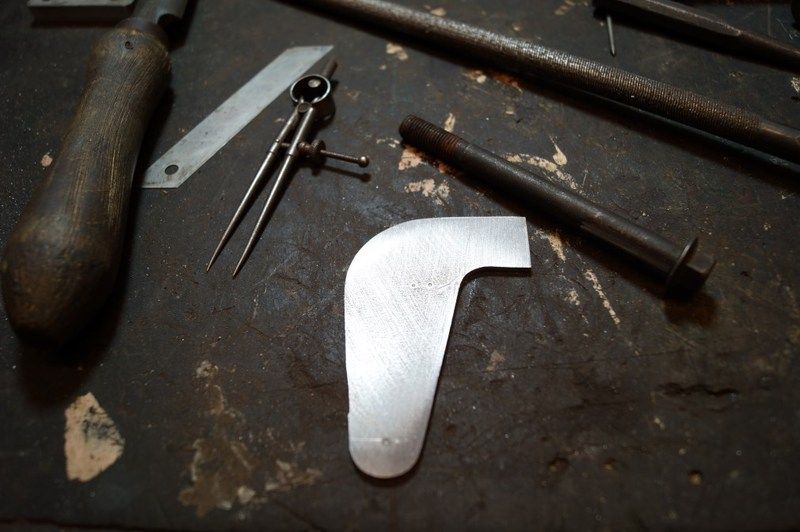 A bit of cutting, filing and welding later (being sure to leave a nice sharp edge) we had a tool, ideal for fitting into the drill! This ended up being one of the messiest jobs I have performed in the garage, the foam dust / bits went EVERYWHERE  I took a little film of it working too  Practice piece - 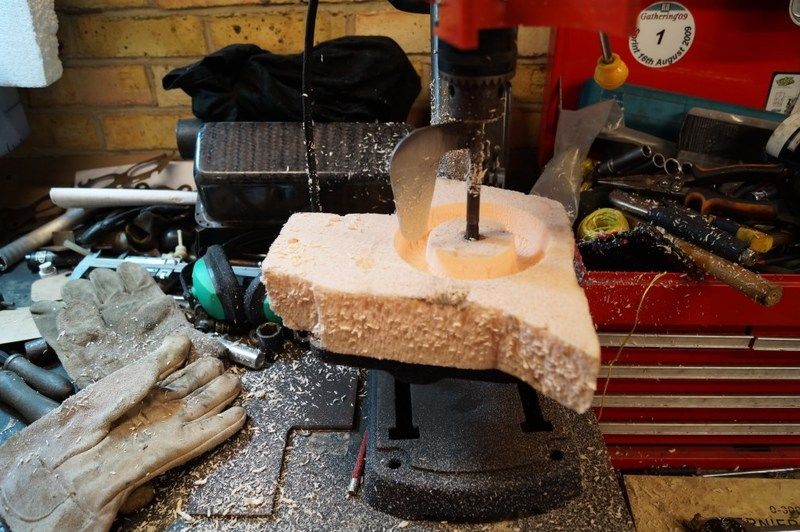 (I was bit worried about the large spinning bit of metal, so I put on some protective gear, yes that is protection in my garage!) MESS! 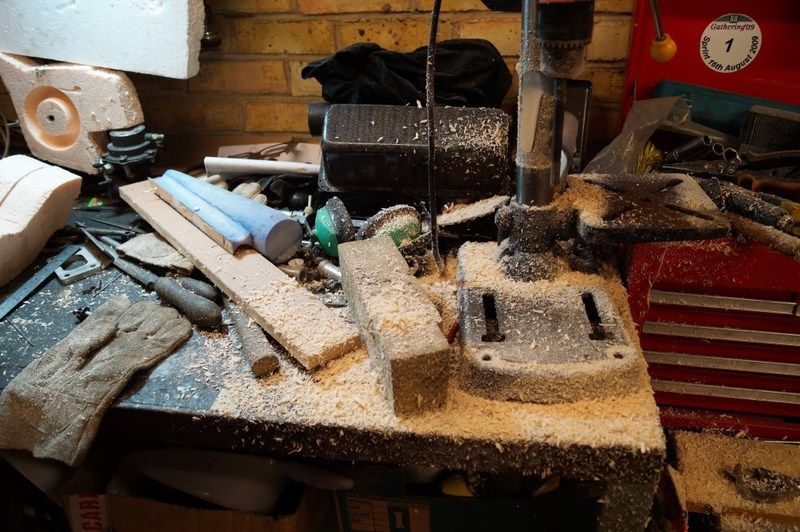 And taped onto the standard intake adaptor - 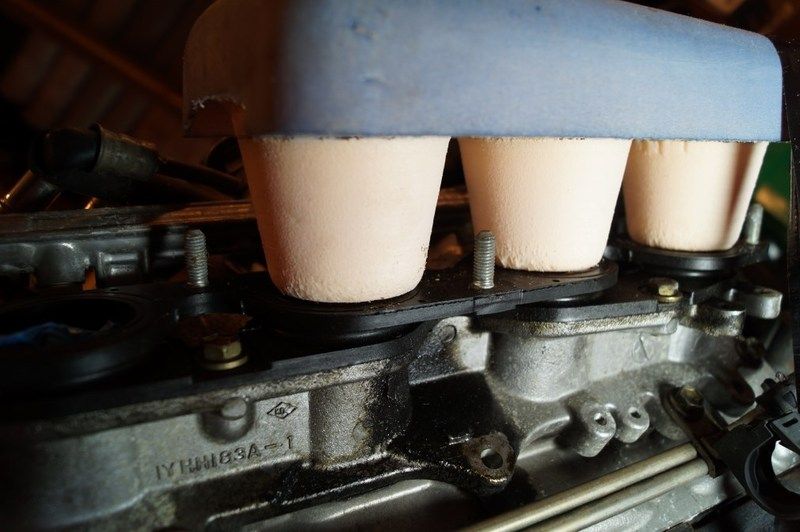 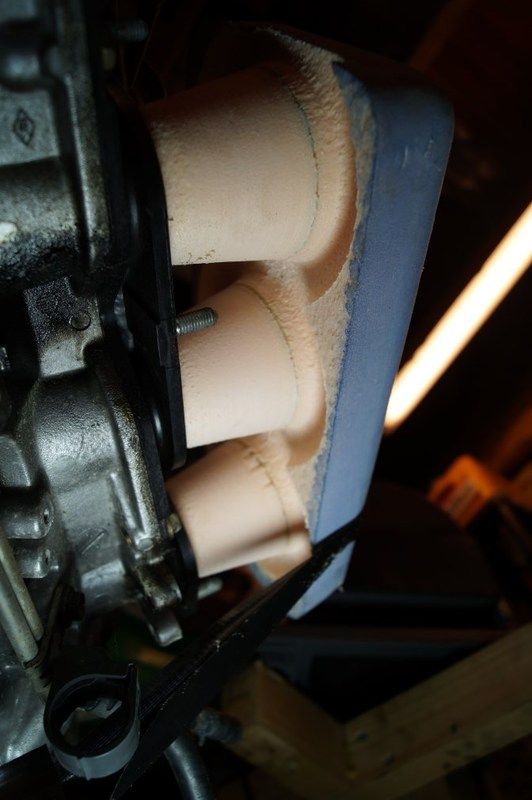 Not bad, needs some refinement, the bit that attaches into the chuck needs to be longer and I also measured everything up without taking into account the thickness of the shaft! So the trumpets are a little too large. I will either adapt this one of make another one, that and get some more foam as I have run out  After taking Ruby and the dogs for a rather wet walk, Michelle told me to get back out in the garage for a couple of hours. I decided to get the next bit done, the flange for the intake system. I had a sheet of phenolic plastic, stiff, heat proof and easily cut, it will be ideal to mould the carbon onto later. I marked it out and then rough cut it - 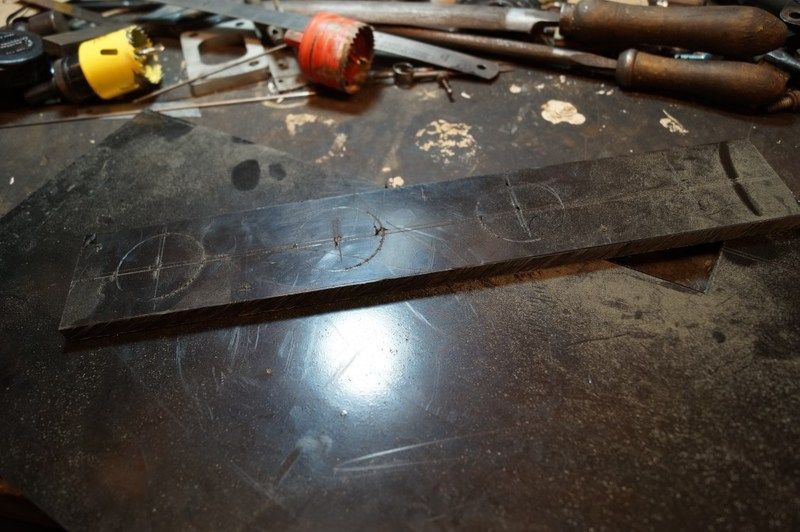 After cutting and shaping, this is the result - 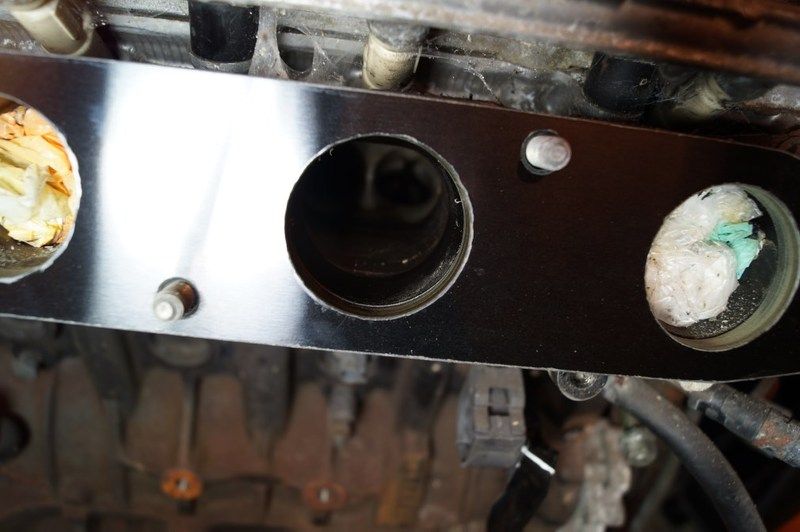 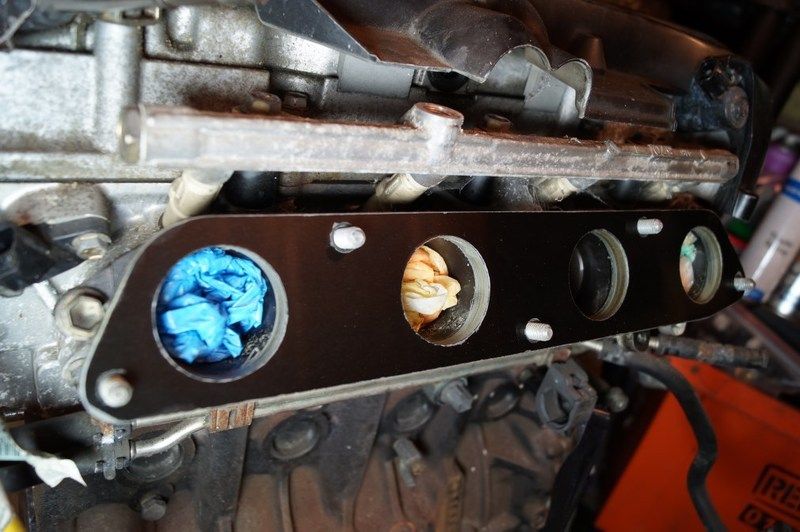 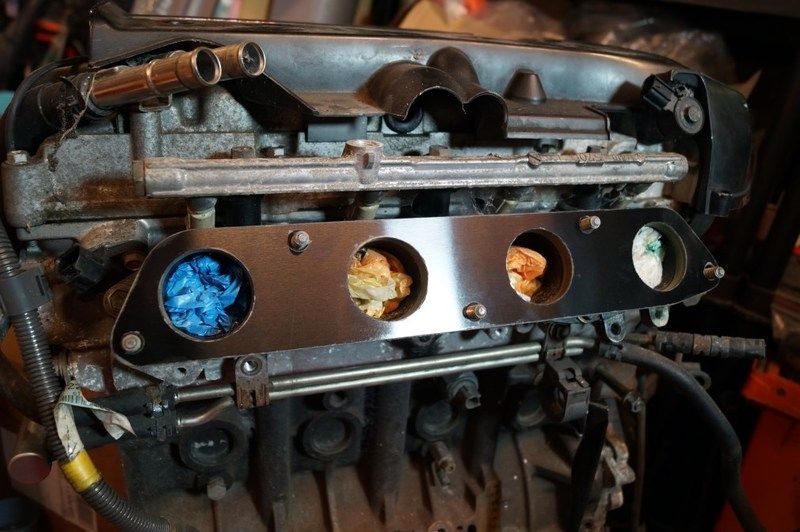 Lovely! That was it for today, had some fun and learnt some new things, just need to get the engine in to work out how much space I have for the plenum  J |
| |
|
|
Clement
Europe
ambitious but rubbish
Posts: 2,095
|
|
Aug 31, 2015 20:09:22 GMT
|
|
That is utterly brillant! One of those tricks you want to keep in a little corner of your mind when you read build threads, you know it'll be useful eventually. That plenum will be quite a sight I reckon!
|
| |
|
|
|
|
|
Aug 31, 2015 20:30:46 GMT
|
|
Thanks clement, I do occasionally have bright ideas :-D just not close enough together to change the world :-D
I am going to try and integrate a logo somehow, maybe laser the top carbon layer or put in some raised lettering between layers?
|
| |
|
|
|
|


 [*]
[*] [*]
[*]


 What manifolds are you making up? What material are you using?


