|
|
|
Feb 19, 2012 13:35:19 GMT
|
Good morning chaps, I have been looking for an ST205 for quite some time, putting in a concerted effort since seeing one blatting round the roads at the base of snowdon thorugh the snow. Now I like my projects, and in full understanding of the issues involved I went to look at an ST205 with a slipping clutch yesterday, the result is this - 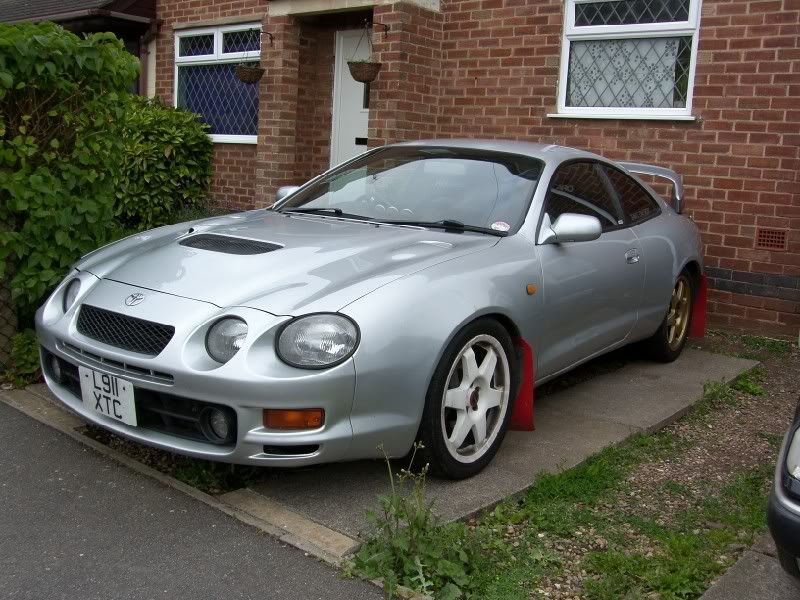 Yes the wheels don't match, and it is in need of work, but there is a good history file and the slipping clutch led me to finding this in the folder - 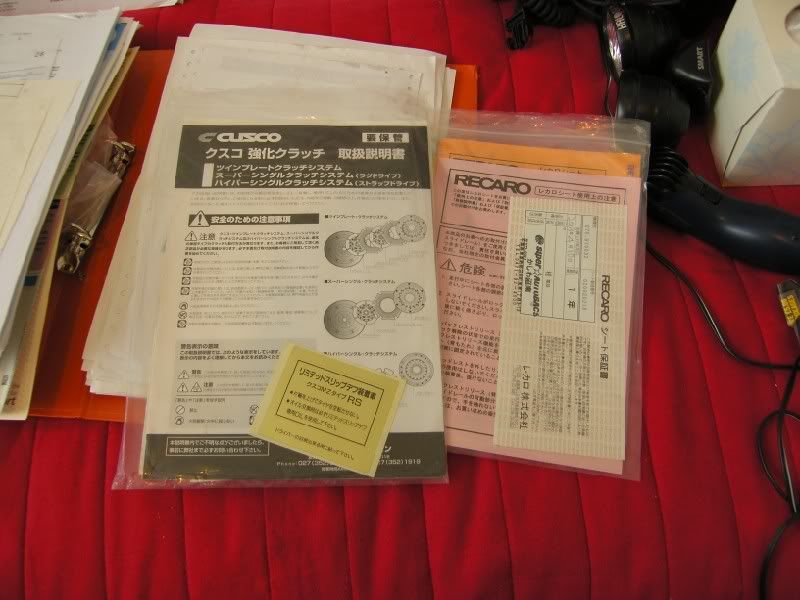 Hmmmm, Cusco super single clutch kit? No wonder it is worn out! A sintered plate on a road car is generally a bad idea, slipping to get out of junctions is going to rape the plate in double time :? Either way, it has some shiny bits, C-One coilovers (in need of a rebuild, might tackle this one myself), C-One exhaust, recent cambelt and service, Recaro seats in jolly good condition, all in all not too bad. 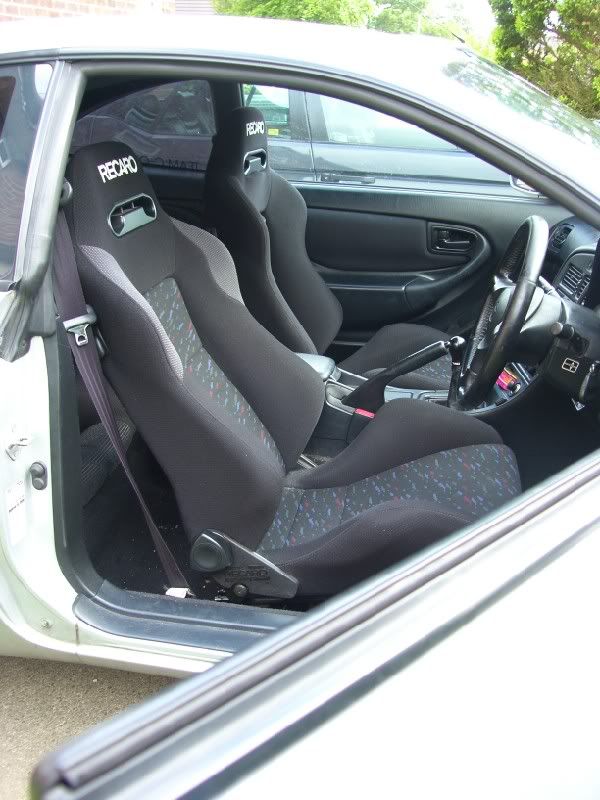 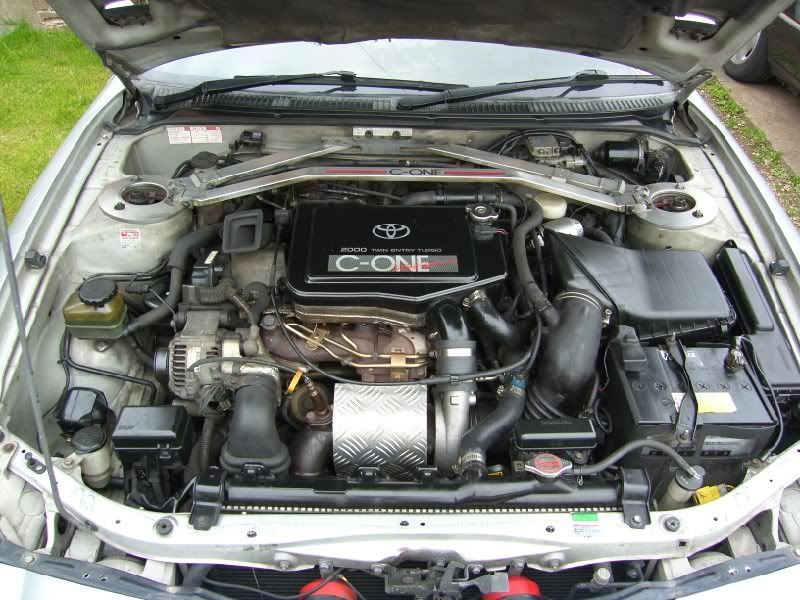 So bits to sort out, are wheels (get those pesky subaru speedlines off the back end), this little bump on the drivers rear quarter - 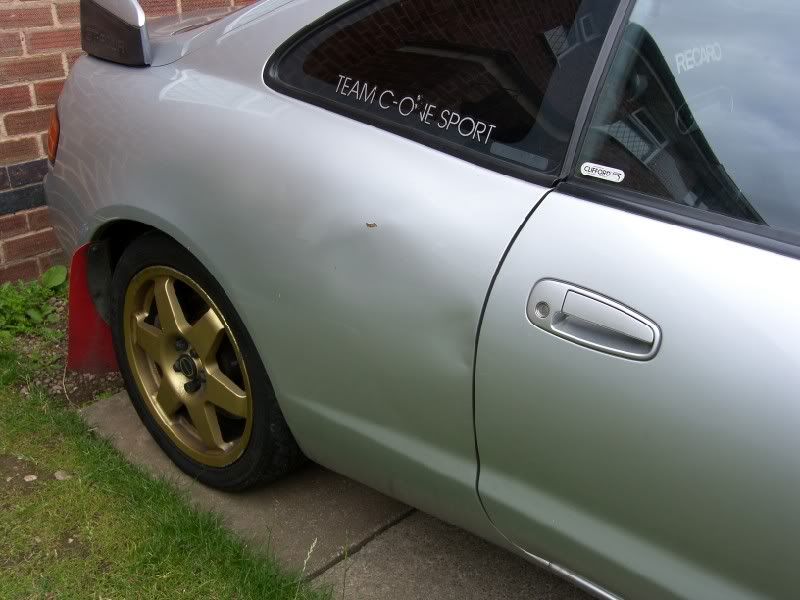 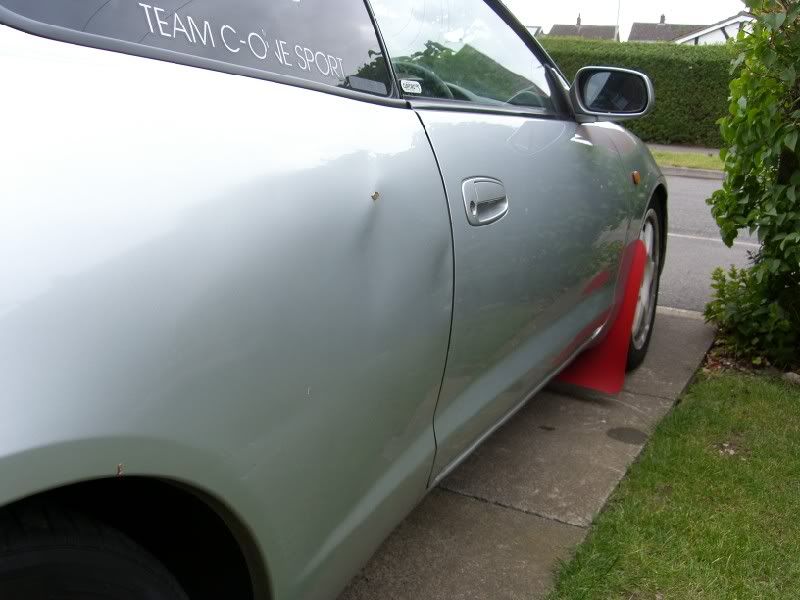 And start looking into the what wheres and hows of this Cusco clutch. First mechanical items to be attacked were the coilovers, I could see that a couple were leaking and knowing from literature the complexities of the SS front end, I started with the rear McPhersons. Here is the image the greeted me once the wheels was removed - 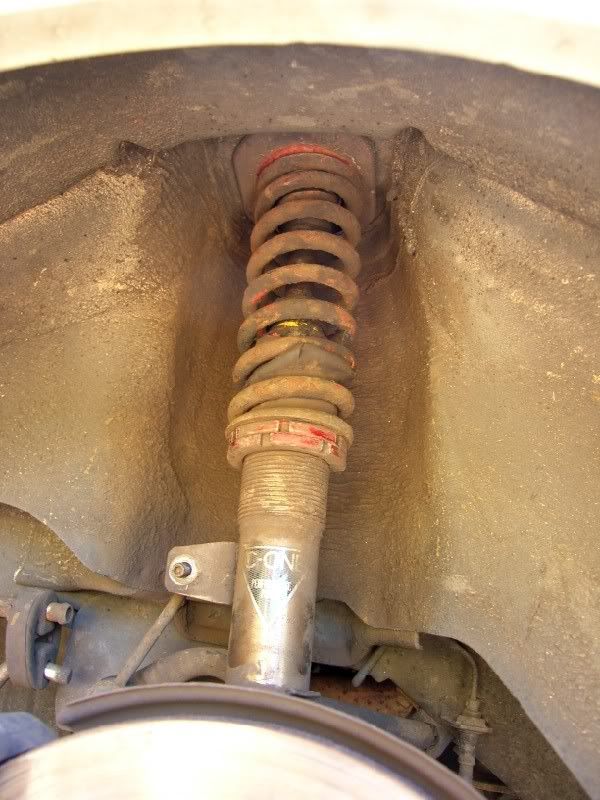 C-One coilover set up, I removed the assembly and started to dissasemble and clean, using my old favourite bio washing powder, nasty for your skin, but excellent on oils! - 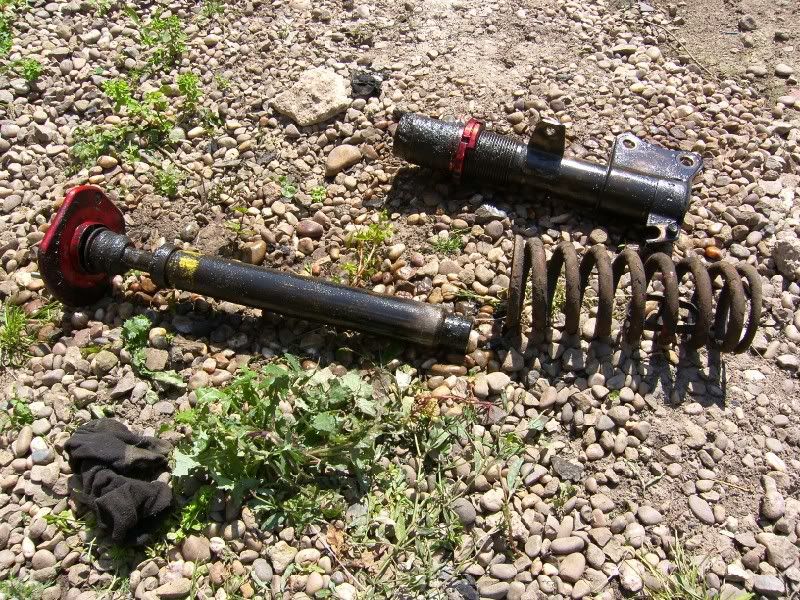 The results - 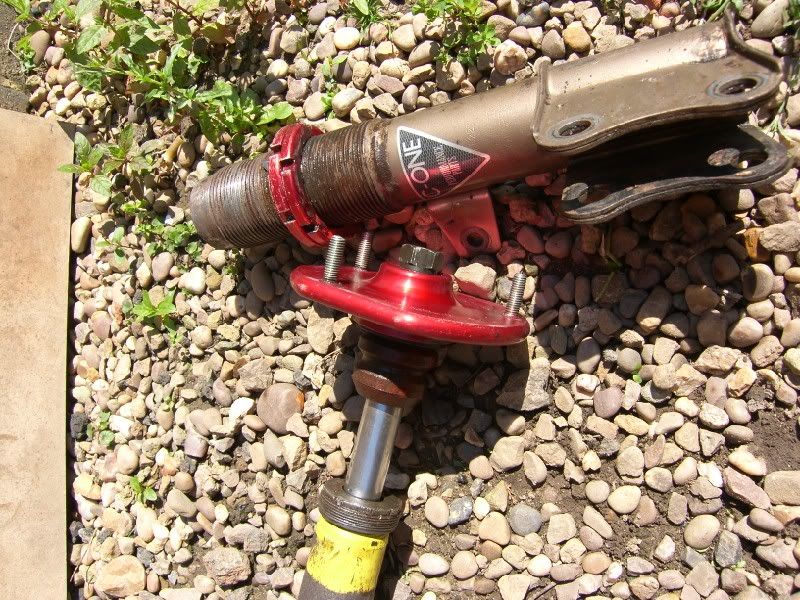 As you can see, here is the reason it was leaking - 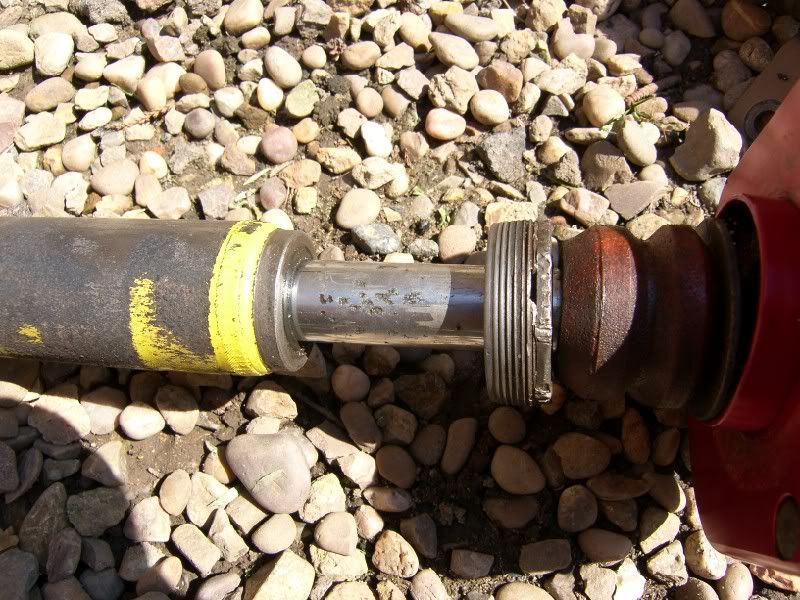 Badly pitted shaft! They have been moving around in the housing too, gland nut was not properly tightened - 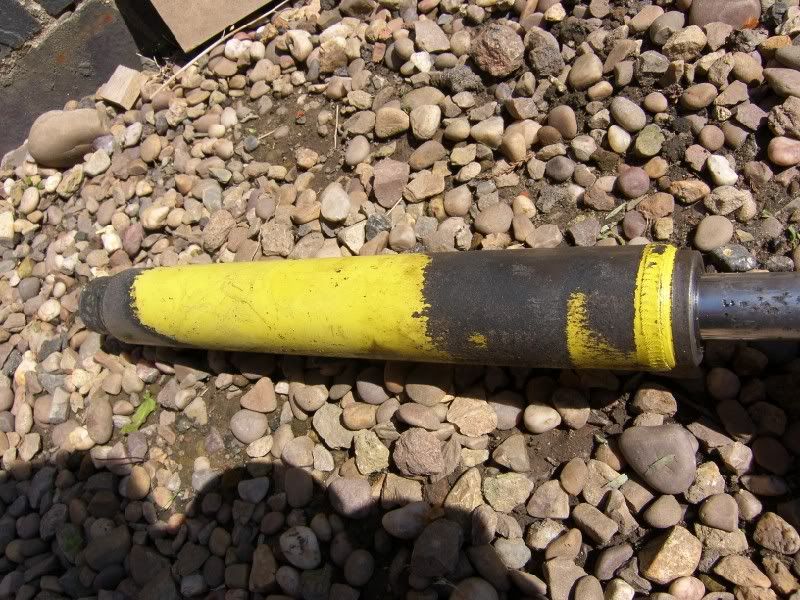 So I am now looking to replace the damper inserts, probably all round TBH, I have the dimensions but I have no idea where to get replacements as I want non adjustable items with a reasonably complient damping rate, the car is to be a B road stormer not a track tart! :lol: I also had a quick look at some of the paint issues, first up the passenger wing mirror, the finish was terrible with what can only be described as 'hatchings' in the surface - 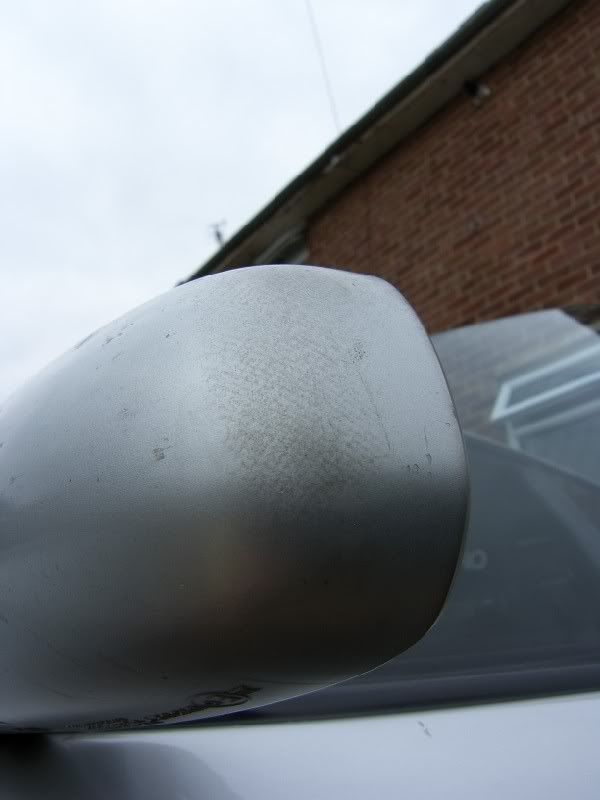 10 mins with two grades of cutting compound and a polish, the not perfect but much better results - 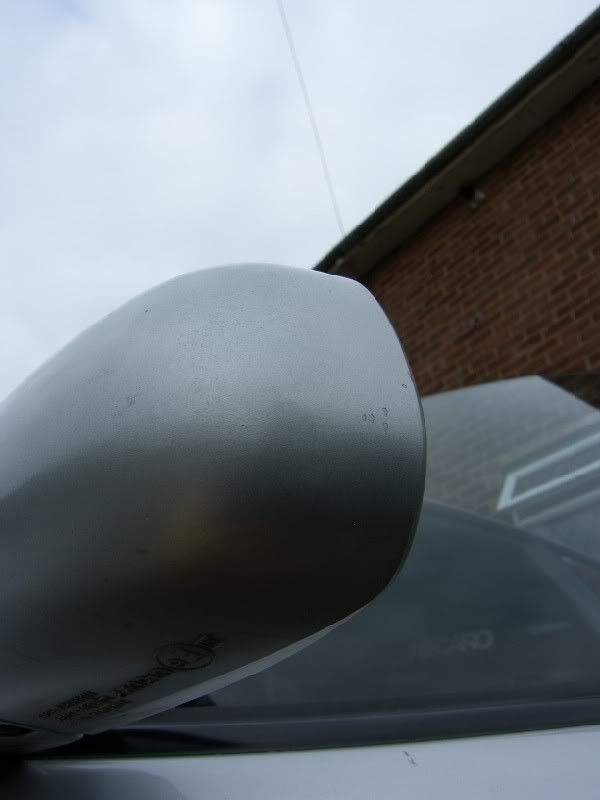 Finally, why milky? Well while I was messing around getting my hands dirty, my wife was cleaning the inside, and under the spare wheel she found no less than 9 of these - 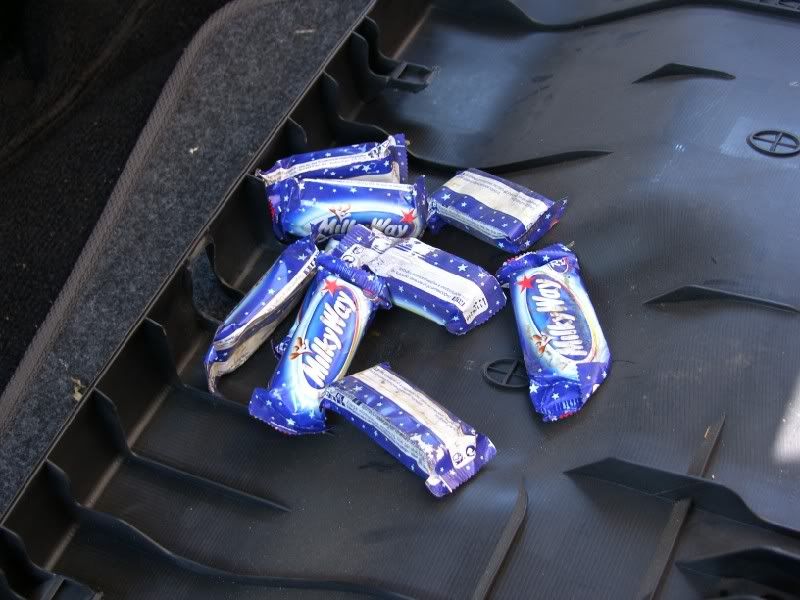 So for concealing 9 mini milky way bars, it shall be known as milky from now on :? Keep your eyes open for updates of a more thrilling nature soon, Cheers, J |
| |
Last Edit: Apr 5, 2023 19:24:51 GMT by Blown_Imp
|
|
|
|
|
|
|
Feb 19, 2012 13:37:33 GMT
|
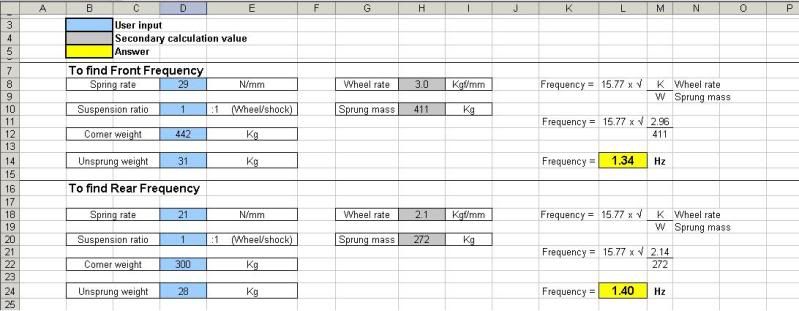
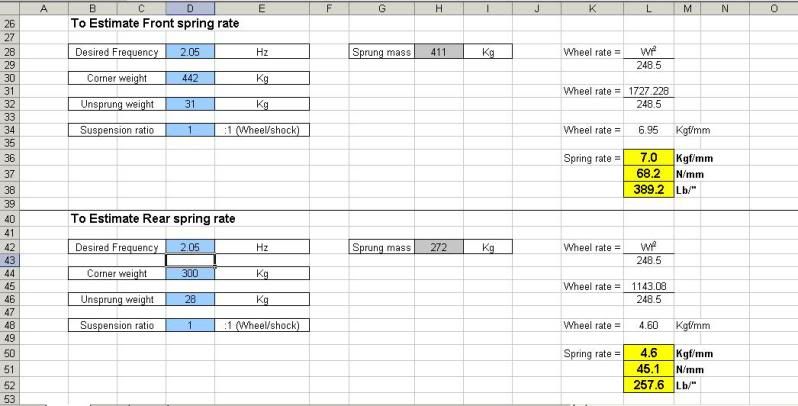
220911 Right bit of an update, First things first, Milky ate my mobile phone! I was working on the car when it started to rain, so I gathered up the tools and made my way back indoors for a coffee, I thought ‘just check gt4oc on my phone, see whats going on…..hmmmm, where is my phone?’ Well after a bit of a search I realised I had left in under the bonnet of the celica, right under the hinges, screen up! Balls! Quick call to the insurance company (house phone!) and it is off to the menders  So please excuse the poor photos, I had to dig out my old digi cam and it seems to have deteriorated over time (I think tech has moved on but I’m in denial!). So progress over the past couple of weeks has included a lot of calculations to confirm my suspension and spring choice, I have ended up ordering BC’s with a 6/4kg/mm spring rate. Here are the excerpts from the suspension thread I had – I ended up ordering them from Corby Motorsport, the vendor was a pleasure to deal with, delivery time was spot on considering the custom spring rates, and all in it was £600!!!!! They come highly recommended from me  So the front end of the car has been stripped of it’s struts, the ball joints were not too bad, I used the big lump hammer to shock the tapers off their seats, took about 40 mins per side to remove. Once side appears to be in very good condition, the other side is in need of a fig8, not too bad though. Both of the upper ball joints need replacements before I fit the new c’overs. Other than that I have been cleaning and tinkering, the strut brace was removed when taking the top mounts out, it is a really nice C-one unit in CNC’d aluminium, but in need of attention due to corrosion setting in on the ally. I attempted to compound it back, only the main bars responded to this, I think they were lacquered from new, all of the associated bracketry has taken a beating and just would not clean up. C-One Strut brace – 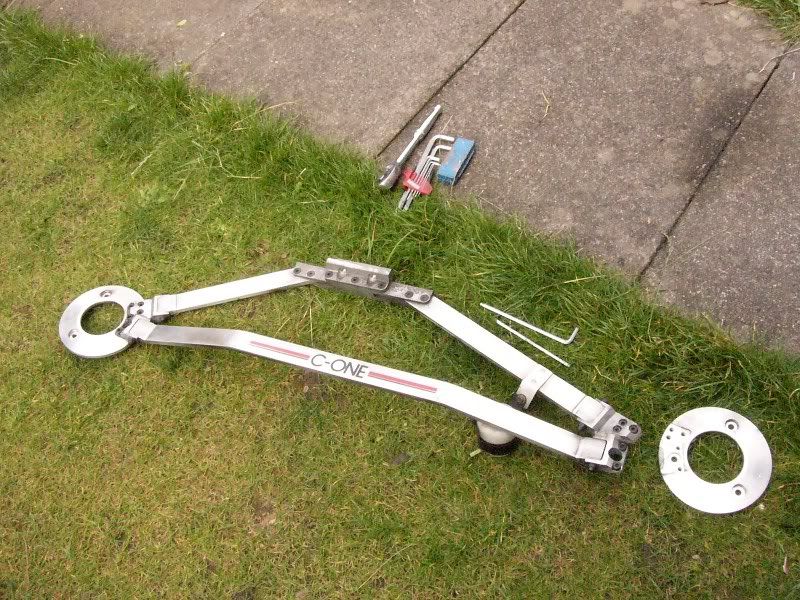 Condition of brackets – 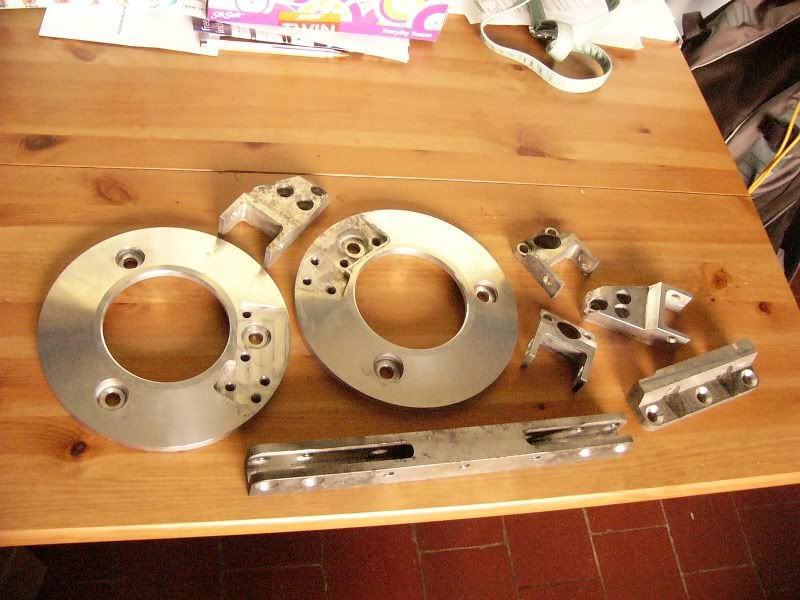 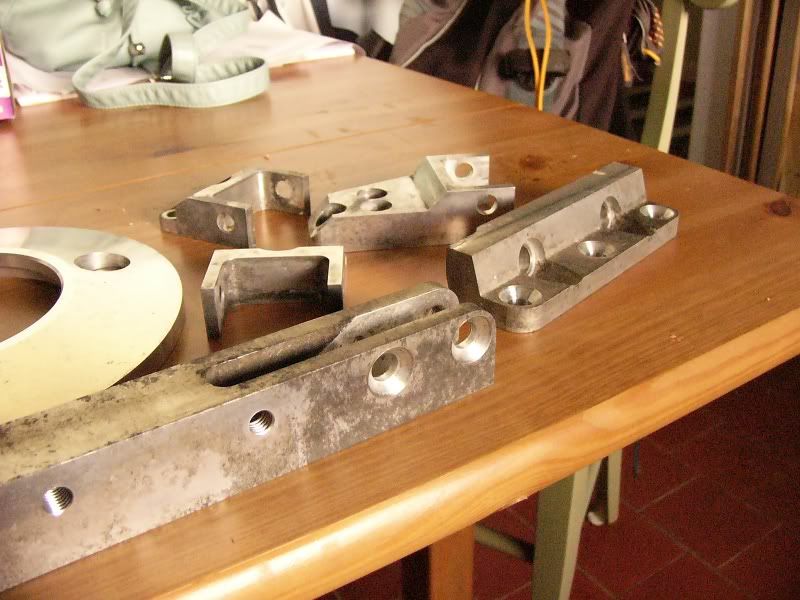 I decided to get them glass bead blasted, the result is stunning and originally I was just going to lacquer at this point, however I have been reading about home anodising, and as they have come out so good I think I should put a little more effort in, learn a new skill, and give it a go! Post blasting – 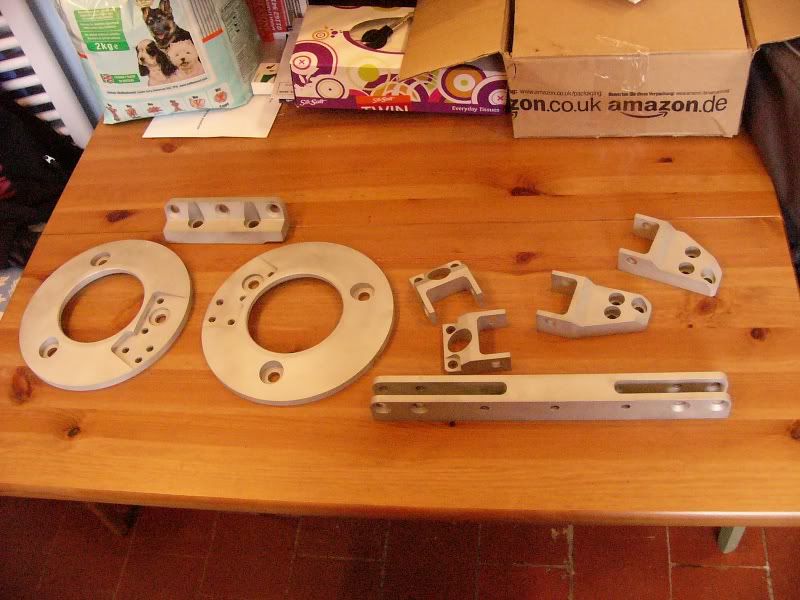 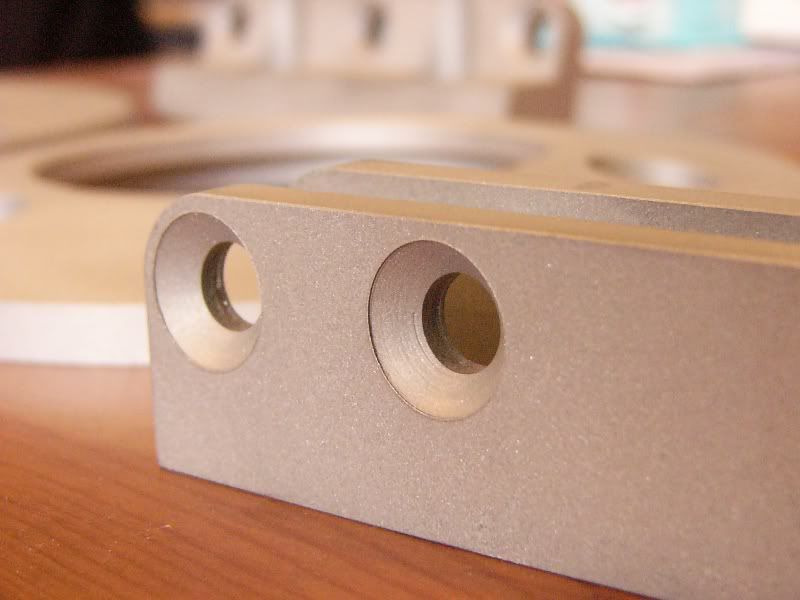 Other than that, a lot of removing components and cleaning (sorry for the blown out picture!) – 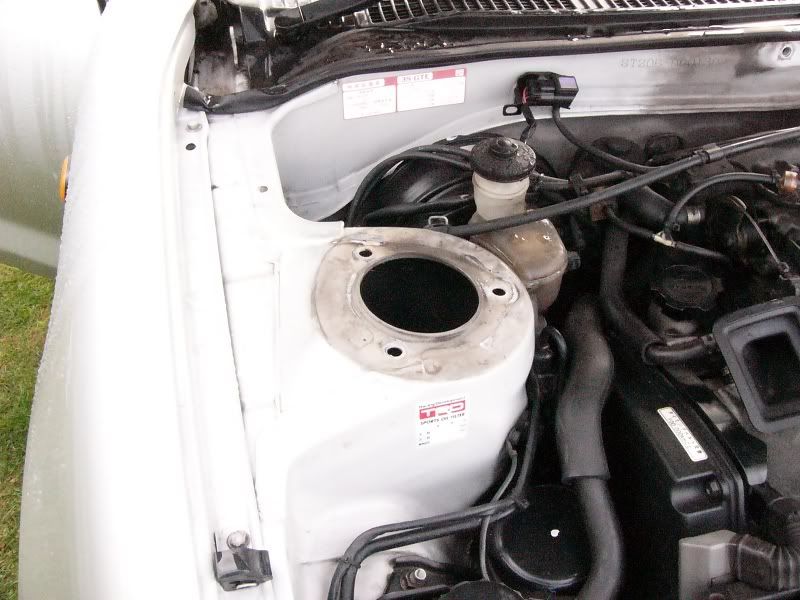 And I thought I would just pop this here – 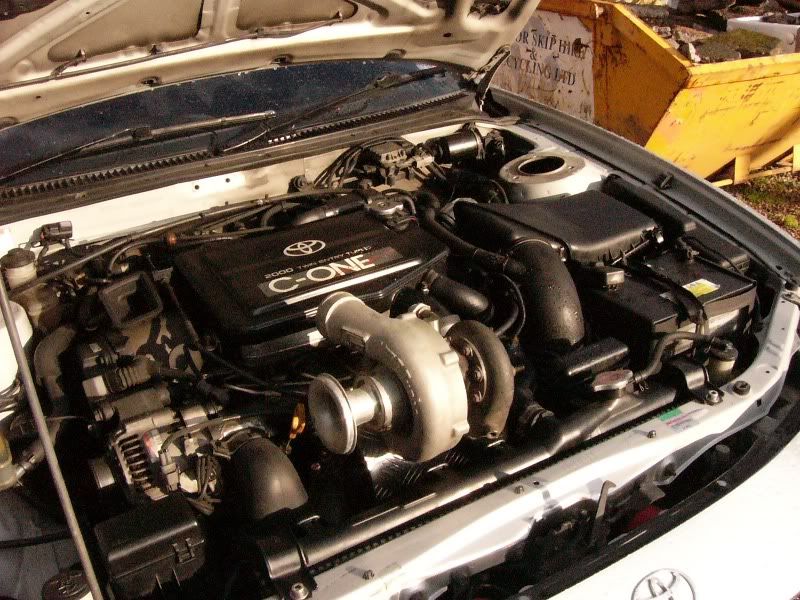 Looks rather good doesn’t it? Might have to give it a permanent home! I will update over the next few days as I get the coilovers ready to fit, source some spacers for the back end and a set of brake pipes, and fit my new steering wheel  Hope you are all well, J |
| |
|
|
|
|
|
Feb 19, 2012 13:37:54 GMT
|
Right, finally time for another update! Been a busy couple of months with interviews for new jobs, Christmas etc etc, the result being the Celica coming bottom of the list  Now in the new year things are settling down, I have got the job I wanted and am waiting for the contract to arrive, the house is nearly finished ready to go on the market, and the Celica is finally getting closer to being back on it’s wheels. First of all the last of the items from 2011, I spent a bit of time re-organising the dash and numerous gauges. Initially the defi oil temp / oil pressure / water temp and the omori stepper boost gauges were mounted to the left of the binnacle on top of the dash, in full view of any unsavoury characters and also obstructing my view out. I moved the boost gauge so that it sat on the column cowl, this was neat and tidy and only obstructed the stock boost gauge and the bottom of the rev counter. 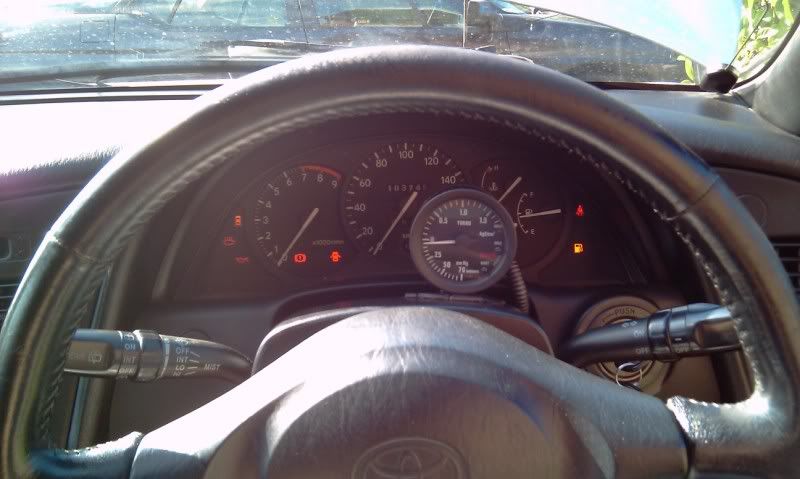 The defi gauges were moved into the glove box, they can be easily seen if required, but also closed away when not needed. 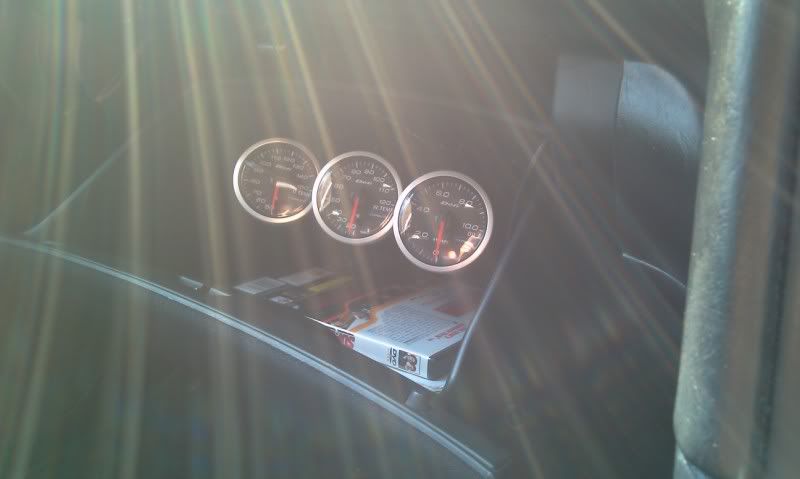 Just after this it was my birthday, I took the day off and my wife and I took our other toy out to stretch it’s legs. It was the last warm day of the year and a week day, the track was so quiet, we were sharing it with two other karts all day, immense fun for £30! 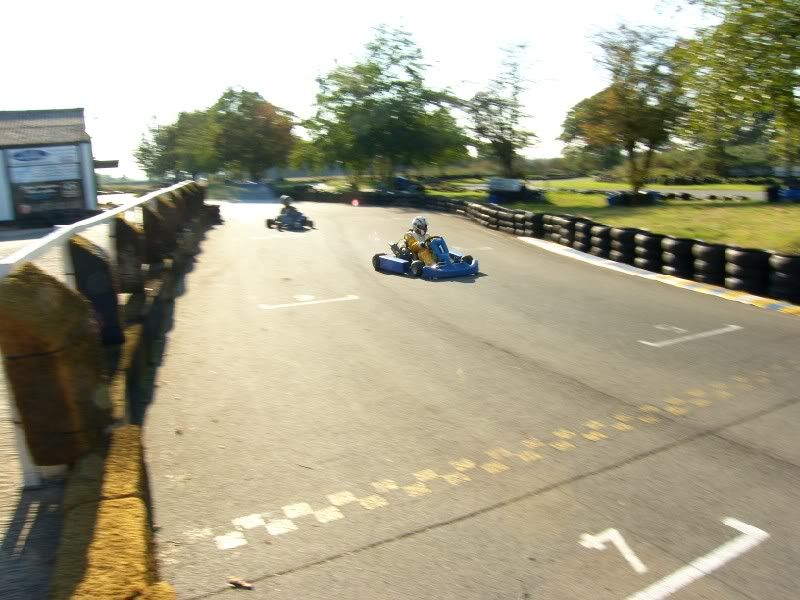 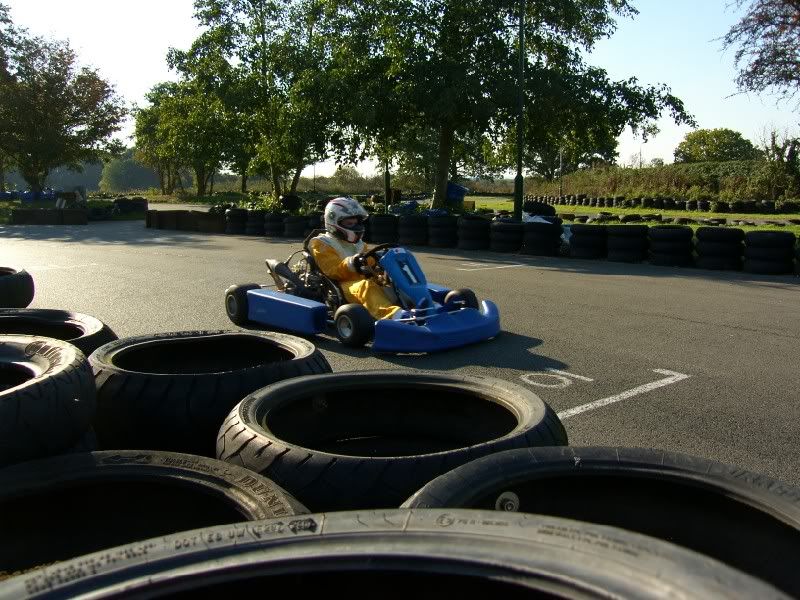 Here is my build thread for the kart if anyone is interested - www.karting1.co.uk/forum/viewtopic.php?t=7200&sid=975e6fe1548910199903b5e873cc3ab5 The BC coilovers arrived and the strip down could commence, the car came with C-One coilovers which I am sure, were excellent when new, however the are now tired and in need of replacement. The rears were easy to remove, fronts less so! The tapered joints took a hell of a lot of ‘caressing’ with a big hammer to remove, once off they were treated to a nice new hacksaw blade and the superslut lower parted from the C-One uppers. The lowers were well corroded after years of sitting under a rally weapon, this gave me a chance to have a go at electrolysis to remove the oxidised surface. I used an electrolyte made from bicarbonate of soda and water, the power source was a battery charger, and the cathode a large lump of cast iron. Once connected up it was just a case of time. 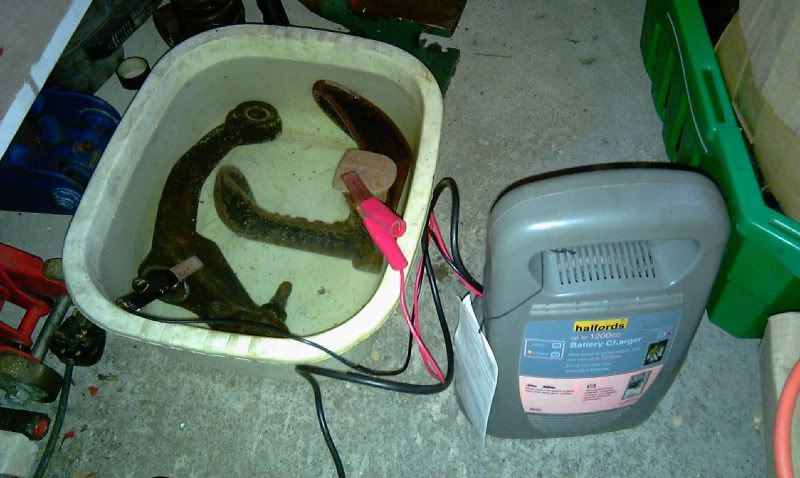 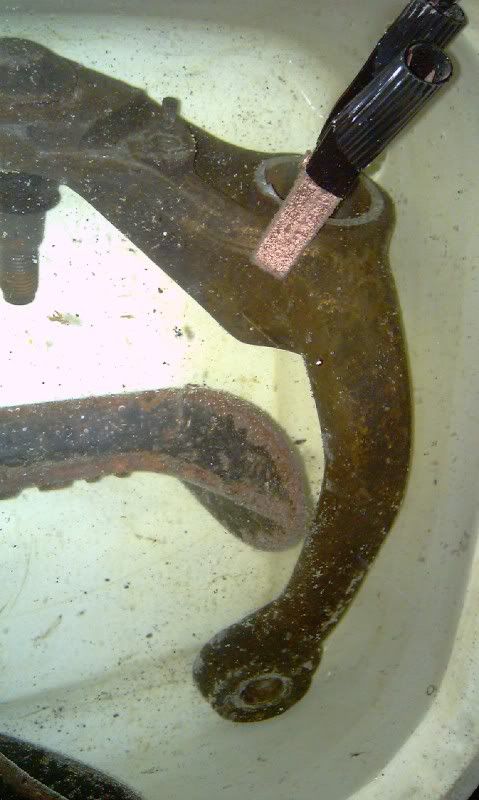 After a few hours each, the lower legs were in pretty good shape, a bit of a scrub to remove some loose bits and they were ready for welding to the BC lower adjustable legs. At this point I decided to remove a couple of sharp edges with the die grinder, this then turned into a marathon session to remove all the forging marks and remove any stress raisers! Once they were prepped the TIG was busted out for welding action, some parts were pretty hard to access but the final result was acceptable and should be durable. 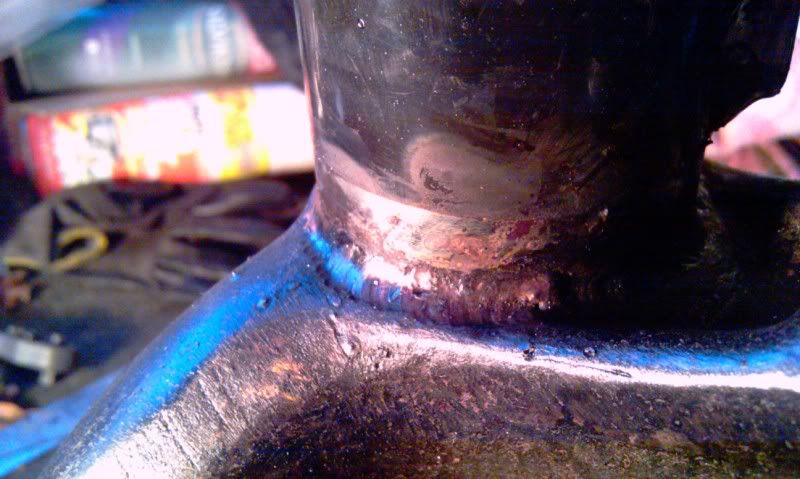 Once welded the legs were coated in a pre-paint surface preparation solution, etch primed and given a coat of gloss black. 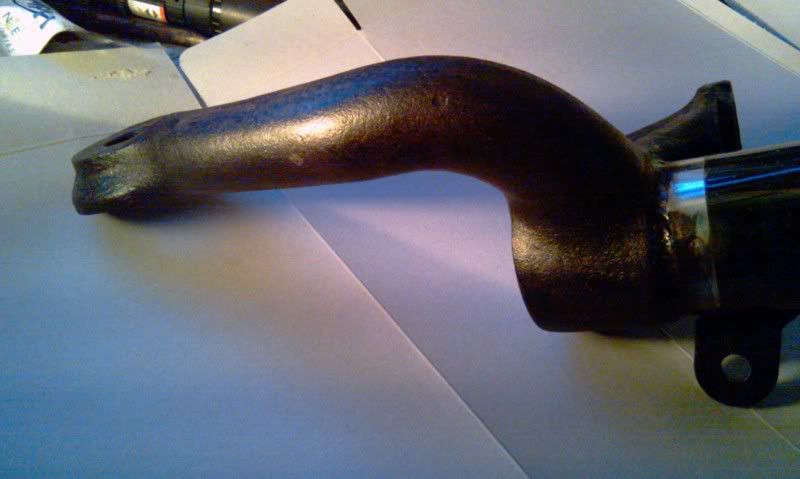 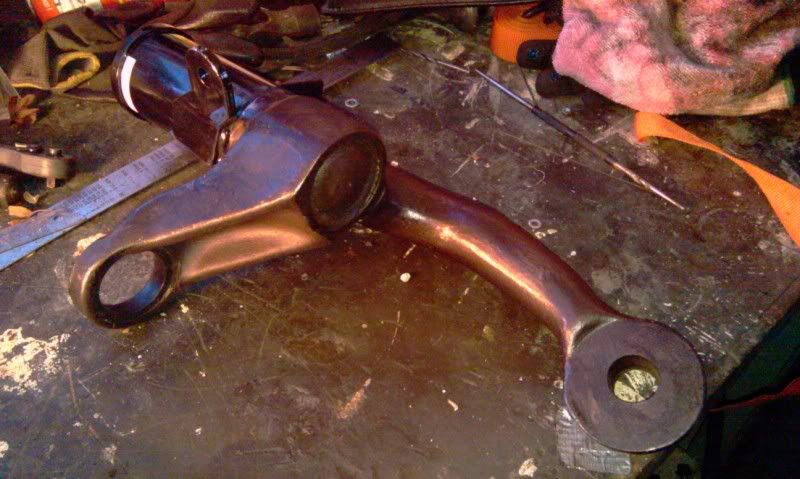 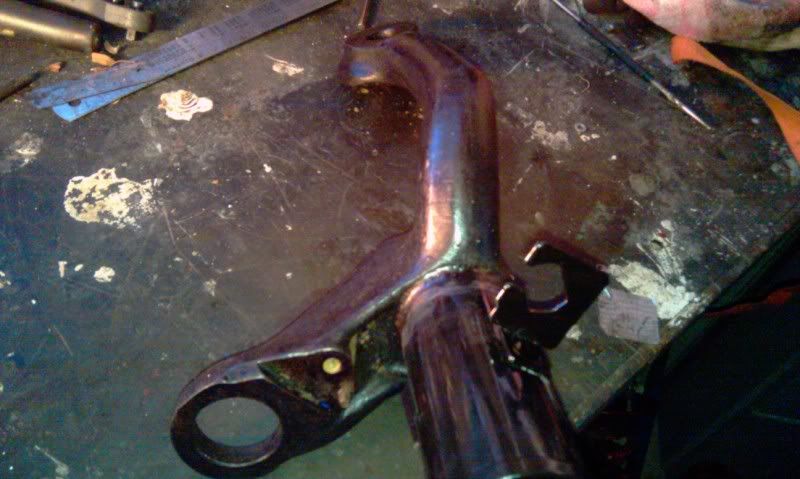 Once the paint had flashed off I used a pair of dividers to scribe a line around Fig8 mounting point, having paint under a bolted joint is a really bad thing. Once torqued up the paint will creep out resulting in the tension backing off and the joint fretting and possibly failing. This scribed line allowed the paint to be removed in a neat fashion around the bolted area and the joint to remain intact. 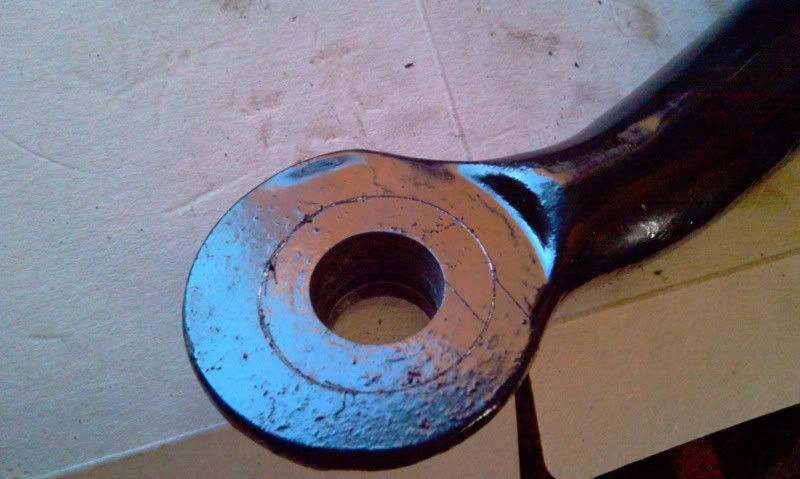 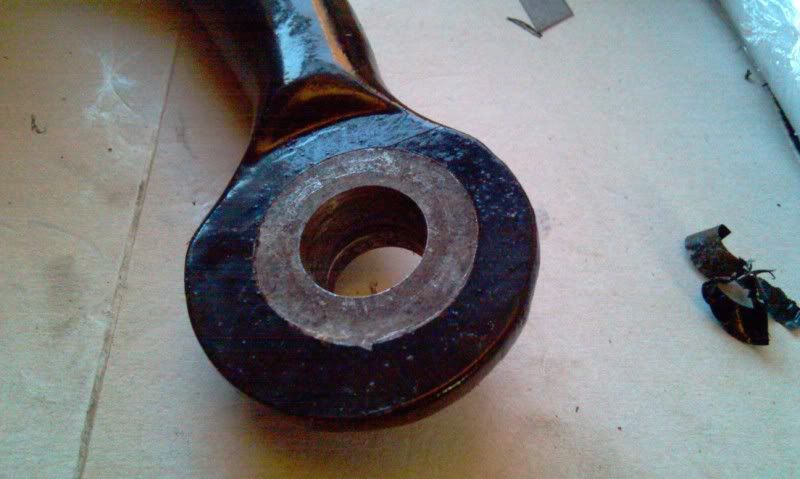 Both front and rear units were then built up copious amounts of grease to prevent corrosion, the front units fitted with new ball joints, and then fitted to the car. 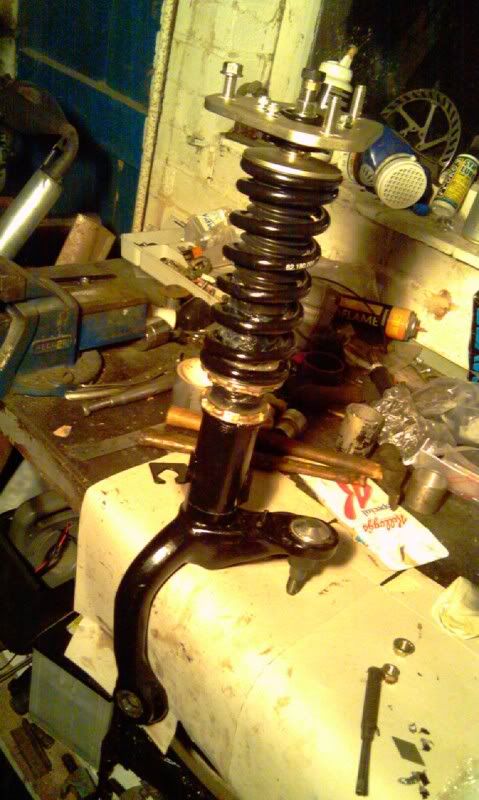 Old ones off, new ones on! 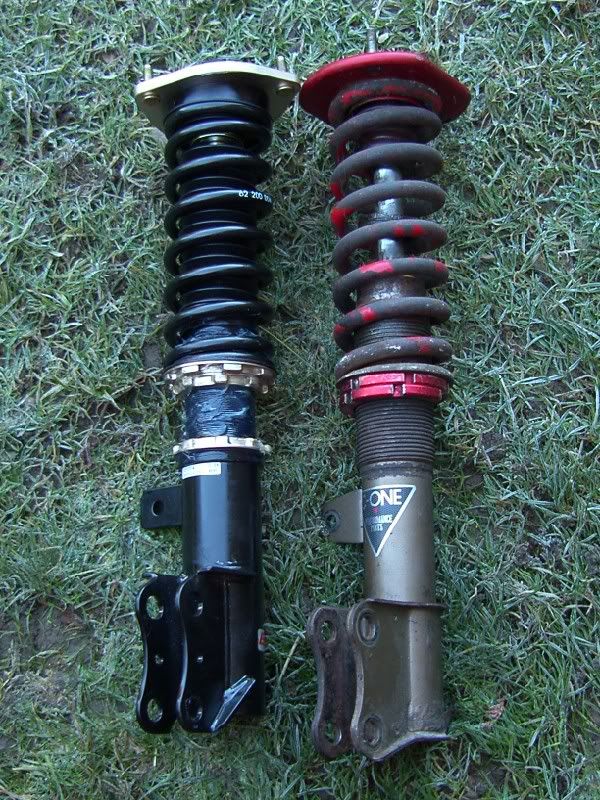 At this point all of the brakes have been removed, the old perished lines are being sent to a hose specialist to be re-manufactured with stainless braided hose, but still using all of the original mounting points to prevent the fatigue that has plagued most aftermarket braided hoses. The callipers are all in good shape and have been given a hot de-grease ready for paint. Once the hoses have arrived the brake system can be rebuilt, rear spacers fitted and the car can go back on it’s wheels! Then it is a new clutch plate and I can start driving it  Thanks for reading. J |
| |
|
|
|
|
|
Feb 19, 2012 13:38:24 GMT
|
Bit more progress, the brake lines finally arrived, although it took quite a long time to sort out the result appears to be very good indeed. 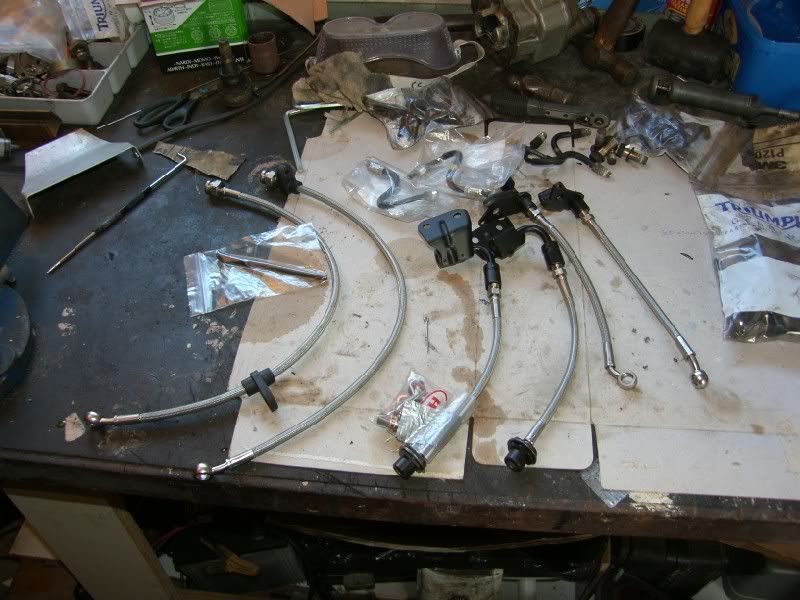 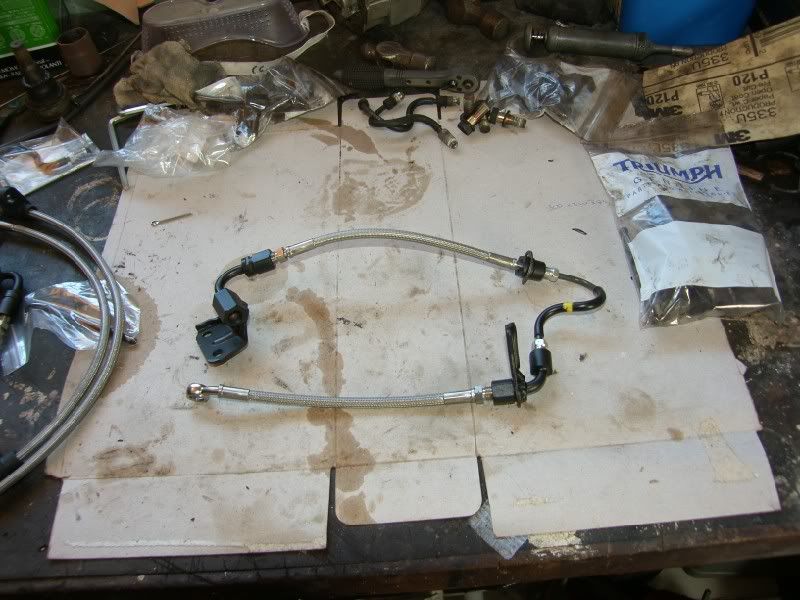 Hosequip have used all the original fittings so that the hoses are properly supported, this should prevent the issues seen previously with braided hoses on ST205’s. So the build up of the brakes could proceed in earnest, the callipers were sealed and then cleaned in an almost boiling mixture of degreaser and biological washing powder, this stripped off all the grime and grease from years of use. All of the anti squeal shims, brackets, pins etc etc were also cleaned ready for re-assembly. 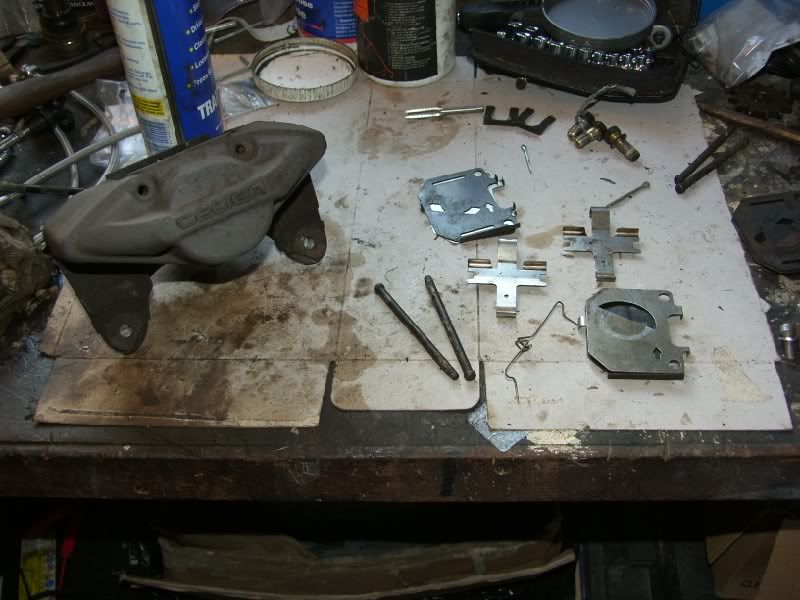 Everything was copper slipped for steel on steel joints and greased for steel on aluminium (copperslip on aluminium can cause galvanic corrosion and actually make things worse!), and put back together with new pads – 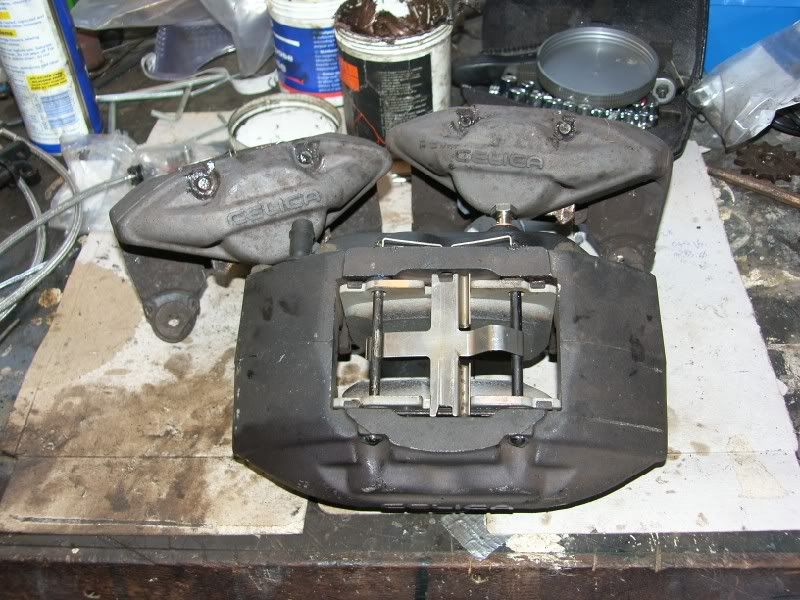 The threads in the coilovers were cleaned of paint 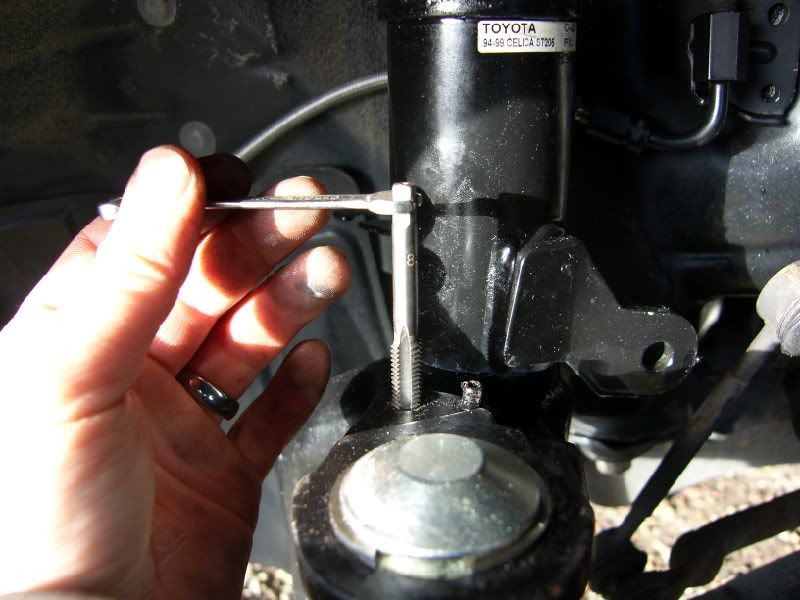 And the hoses fitted, the joiners needed a little bit of adjustment to fit the coilovers, but only a couple of mm so no major surgery. 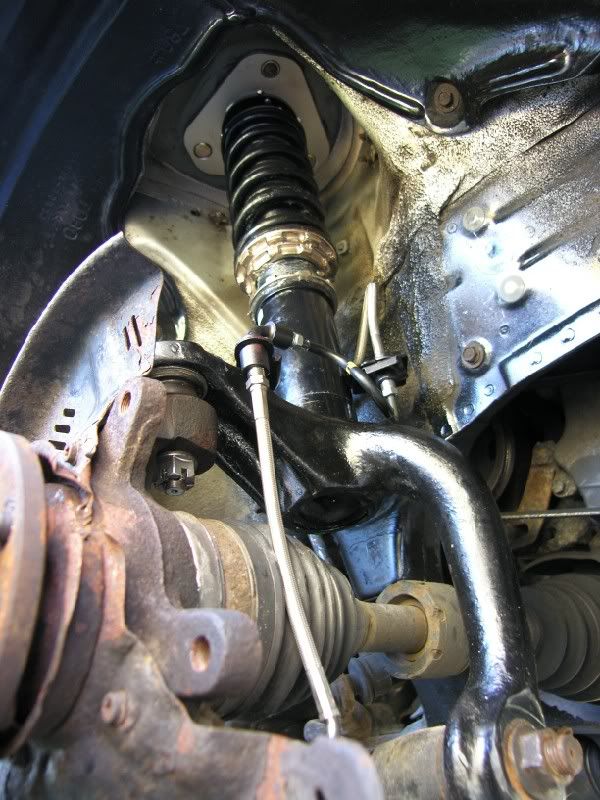 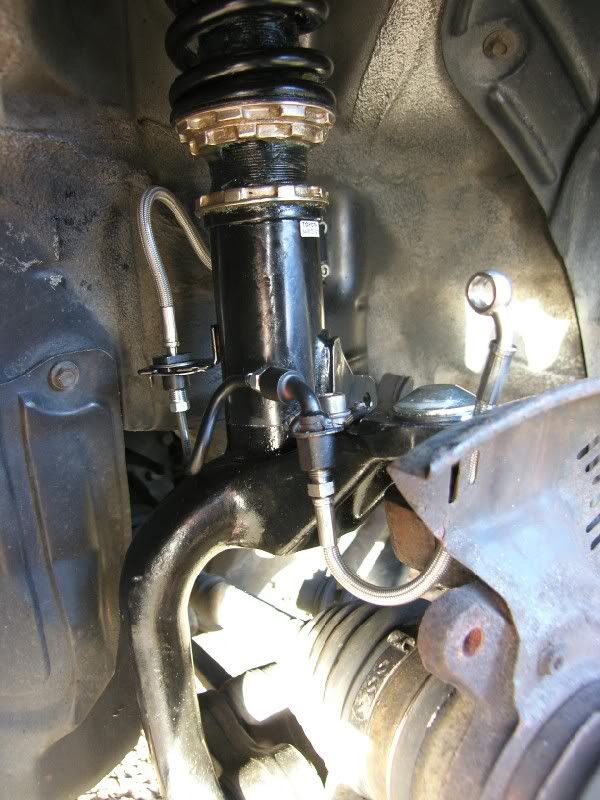 The result is pretty neat really, just need to bleed the system and get the car back on it’s wheels. Finally I also had a sort out in the workshop, got a few bits to sell off I think, too many turbochargers and intercoolers etc! 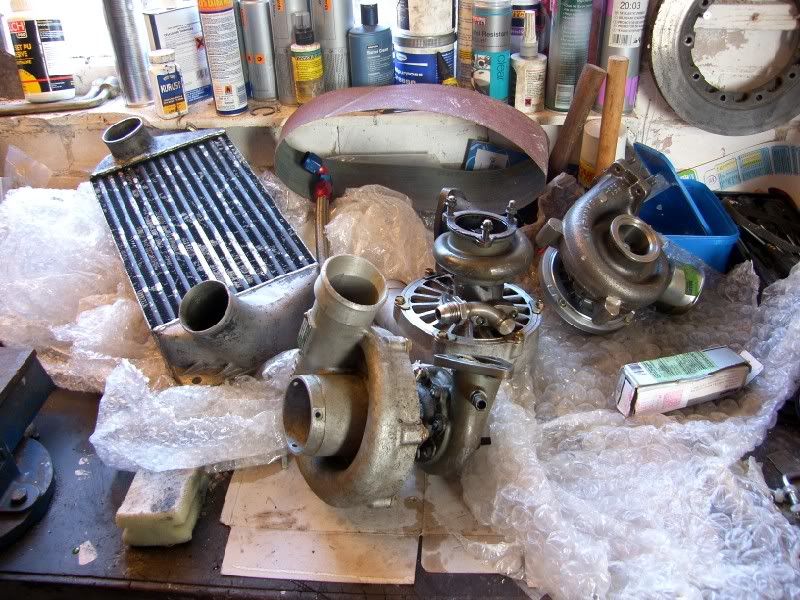 I need to sort out the clutch next, I cannot decide whether to fit a new sintered plate into the current clutch or fit a new cerametallic one? If I do keep the sintered item do I get a plate imported from Japan for around £300, for get a helix item to fit in it’s place. I am also concerned about using a sintered clutch on the road, they are not really made for changing gear as far as I know? Hope your all well, J |
| |
|
|
|
|
|
Feb 19, 2012 13:43:36 GMT
|
The problem with you is you do things in such a slap dash and half arsed manner ...  I do love your turbo collection, maybe you should get a chain made and wear them round your neck like Mr.T. |
| |
|
|
|
|
|
Feb 19, 2012 14:09:55 GMT
|
|
Fantastic!!! Love the spring rate decideage. Thats the most logic i've so far seen anyone apply to it, makes perfect sense now.
|
| |
1974 Lancia Beta Saloon
1975 Mazda 929 Coupé
1986 Mazda 929 Wagon
1979 Mazda 929 Hardtop
1982 Fiat Argenta 2.0 iniezione elettronica
1977 Toyota Carina TA14
1989 Subaru 1800 Wagon
1982 Hyundai Pony 1200TL 2-dr
1985 Hyundai Pony 1200 GL
1986 Maserati 425 Biturbo
1992 Rover 214 SEi 5-dr
2000 Rover 45 V6 Club
1994 Peugeot 205 'Junior' Diesel
1988 Volvo 760 Turbodiesel Saloon
1992 Talbot Express Autosleeper Rambler
2003 Renault Laguna SPEARS OR REAPERS
|
|
|
|
|
Feb 19, 2012 14:20:06 GMT
|
|
Haha, Mr T......urbo
The engine is coming out next so the clutch can be replaced, I think that whilst it is out I ought to rebuild it with forged pistons and rods ready for future upgrades planned.
The aim is 400bhp at the wheels, which should be around 480ish bhp at the crank. Pending the correct intercooling etc and the turbo working as it should, I think that about 1.6bar will push enough air into the engine for it ;-)
J
|
| |
|
|
eadon
Part of things
 
Posts: 25
|
|
Feb 19, 2012 15:08:24 GMT
|
|
Wicked build mate! Also recognise the karting track, Stertton 2000. I ride pit bikes there every now and again. Look foward to seeing this one come along good luck with the build!
|
| |
|
|
|
|
|
|
|
|
Nice build - looks like a fun car!
|
| |
|
|
|
|
|
Feb 20, 2012 19:54:14 GMT
|
|
thanks guys, I'm really looking forward to out being on the road, I'm torn between getting it running and driving it, or tearing the engine down and building it up ready for 500bhp? tough one!
|
| |
|
|
|
|
|
|
|
Feb 20, 2012 20:52:54 GMT
|
Looking good fella, nice info on the spring rates too  I think I'll be weighing the components as I strip them off the kadett now so I can do the same ! A mate I share a unit with is a ride & handling engineer at Lotus and he's already offered to build me some dampers to suit  |
| |
|
|
|
|
|
Feb 21, 2012 20:16:00 GMT
|
|
hi dom, I have the spread sheet available for the spring rates, ill mail it to you :-)
I am unsure of how the dampers will react to the specified springs, fortunately corby motorsport will supply new ones of any rate for £80!
|
| |
|
|
|
|
|
Feb 21, 2012 20:57:42 GMT
|
Cool that'll be really useful, cheers fella  |
| |
|
|
|
|
|
Feb 21, 2012 21:18:13 GMT
|
Great attention to detail. Love that age gt4's, something that makes them interesting compared to subarus etc etc. Where did you get the spring rate/freq chart? Any chance of a link  |
| |
|
|
|
|
|
Feb 21, 2012 21:42:09 GMT
|
|
did not get it anywhere as such, a good friend built it in excel, and I have updated the maths as and when required. All of the information is available in books like alan stainforths designing building and testing high performance suspension systems, if I get time over the coming days I will go over the basic mathematics :-)
and no dom, not been in the spec c yet, seen some pictures and it looks like the kind of set up I want in the celica :-D rx6d's look brilliant :-)
|
| |
|
|
|
|
|
Feb 25, 2012 17:28:32 GMT
|
Bit of an update, shes back on her wheels! Todays tasks were - swap rear calipers side to side (felt proper special, bleed nipples go at the top, not the bottom!) fit final clip to brake line bleed brakes check all nuts / bolts and fit split pins wheels back on and back on the ground pop up and down the road to see how she feels! Well the caliper swap was an easy five minutes, just felt a bit silly thats all! Next up I had help from the very understanding other half - 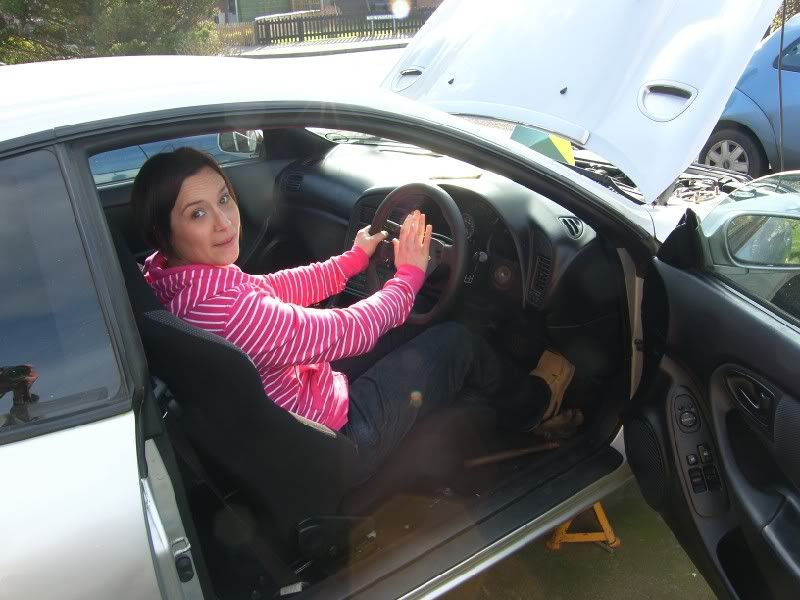 And the woof -  She was on the pedals and doing a sterling job, down...up....down....up....down (steady on back there!), dog sat in the sunshine overseeing all  I was on the calipers with this little rig - 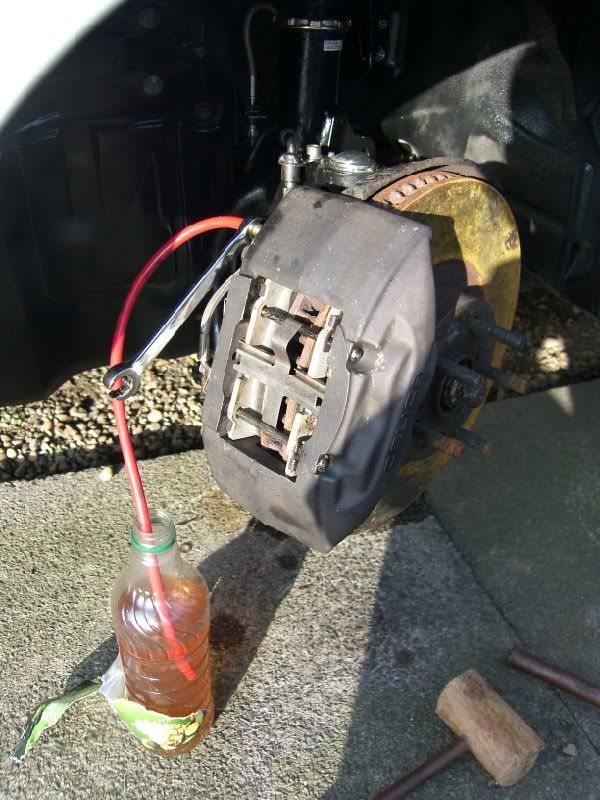 As long as the pipe is in the fluid, it bleeds perfectly! After putting a whole litre of Toyota fluid in there, we have an acceptable pedal, still think there is some air hiding in there, might work its own way out via gravity over the coming idle time on the drive? Then it was wheels on and a pop round the block - 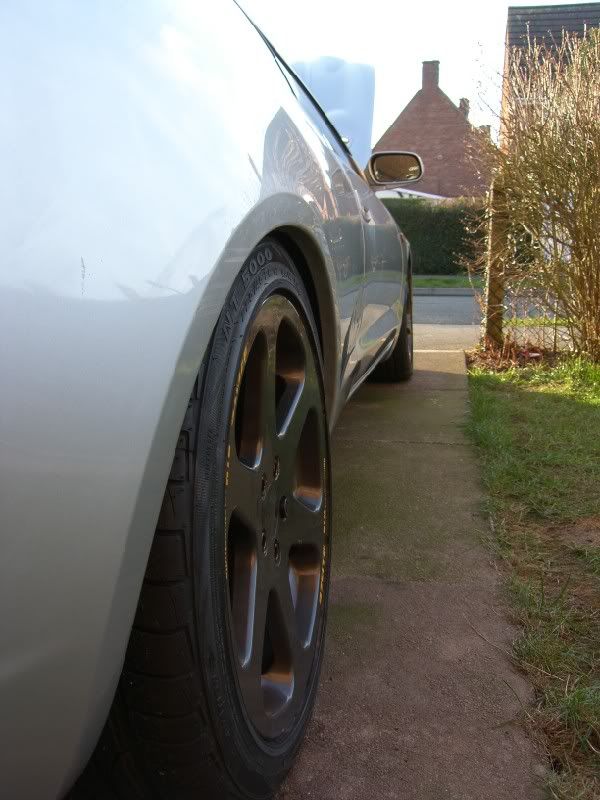 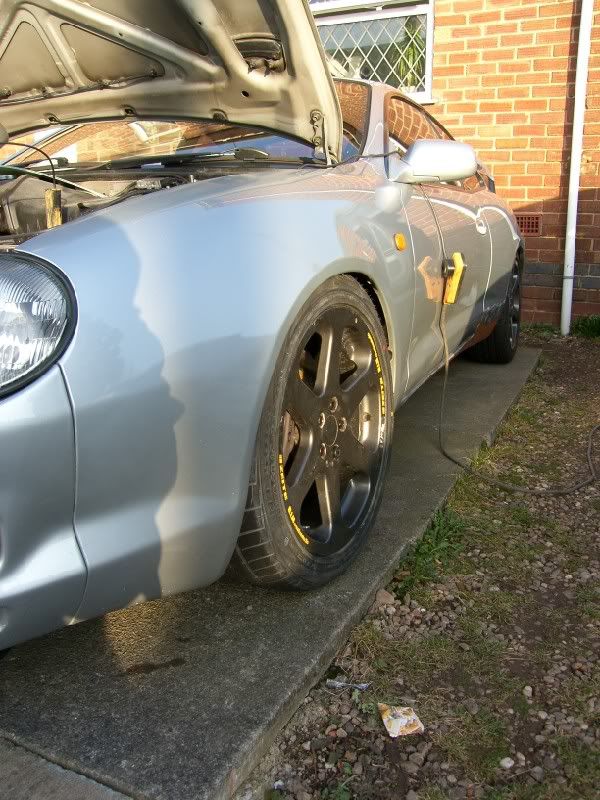 Click V  Click ^ I tell you what, the Cusco plate LSD scared the life out of me, I had no idea it was going to clonk like it does on tight turns, DUNKDUNKDUNKDUNK. I pulled off the drive slowly and promptly reversed it back again, then got out to check for wheels catching coilovers arches etc etc! No sign of any perverse rubbing, so a quick drive up and down the road shows everything is well. Next up it will be raised by about an inch, its waaay too low at the moment, catches when steering etc. Then I need to think about clutch and getting the geometry sorted out  fun times! |
| |
Last Edit: Feb 25, 2012 17:33:02 GMT by Blown_Imp
|
|
|
|
|
Feb 25, 2012 17:41:39 GMT
|
|
Brilliant work there mate.. These are a great car, have had a few myself, health to drive!
|
| |
|
|
|
|
|
Feb 25, 2012 17:54:29 GMT
|
Thank you, I am pretty pleased with the progress too  What ones have you had? I think the ST185 is the prettiest, ST165 the most purposeful, and the ST205 technologically the best. I can't wait to get it out on the open road, feel all that boost  |
| |
|
|
|
|
|
Feb 25, 2012 18:00:03 GMT
|
|
I've had 3 st205's, 2 185's and one 165.. All great fun cars. Now have a Supra 2.5tt, some pics up on the site.. You will love the boost. I have always had turbos since buying my first one.
|
| |
|
|
|
|
|
|
|
I've had a few turbo cars, mostly small capacity buzz bombs  The car that really made me want a rally weapon was my dad's Evo Xtreme, it just did everything so well! |
| |
|
|
|
|


 [*]
[*] [*]
[*]


