|
|
|
Feb 19, 2012 20:09:02 GMT
|
Almost there with the sill, but still not quite yet So started to piece together the rear section of the sill to Wheel arch 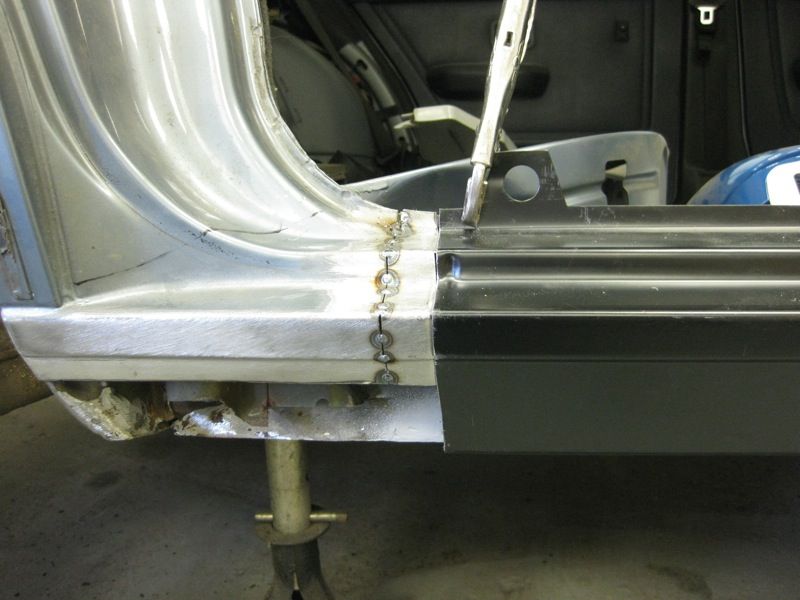 Thought I'd better have a bit more investigate this 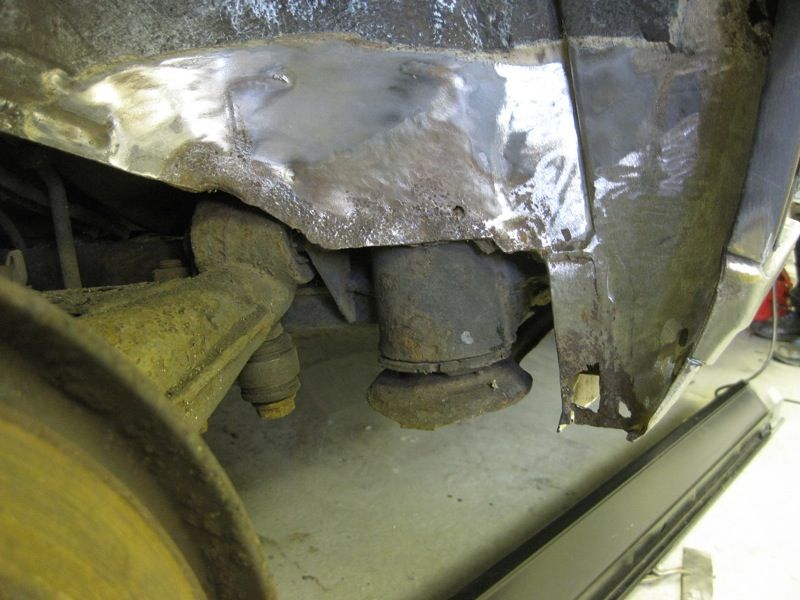 Which was a bad idea, as it shows that we now have a bigger problem 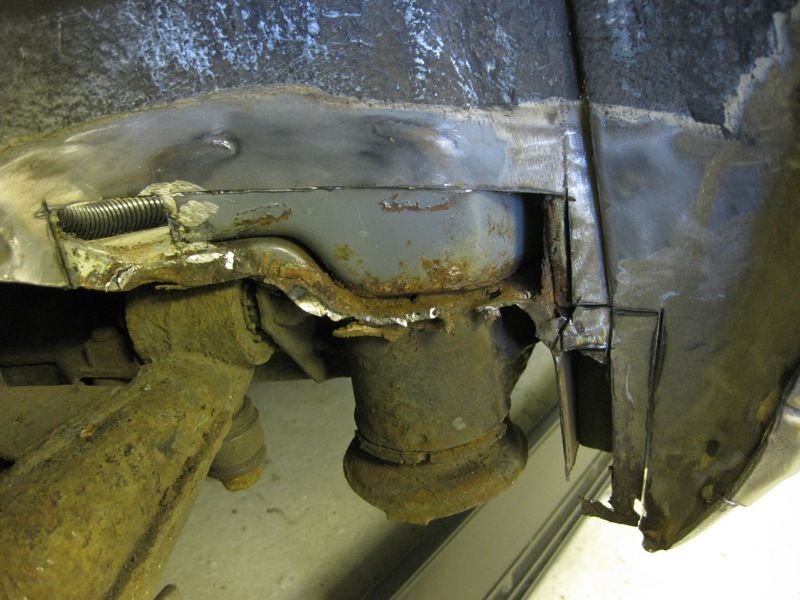 The metal above the subframe is rotten, I really did not plan on having to drop the subframe as well Heres a view from the inside 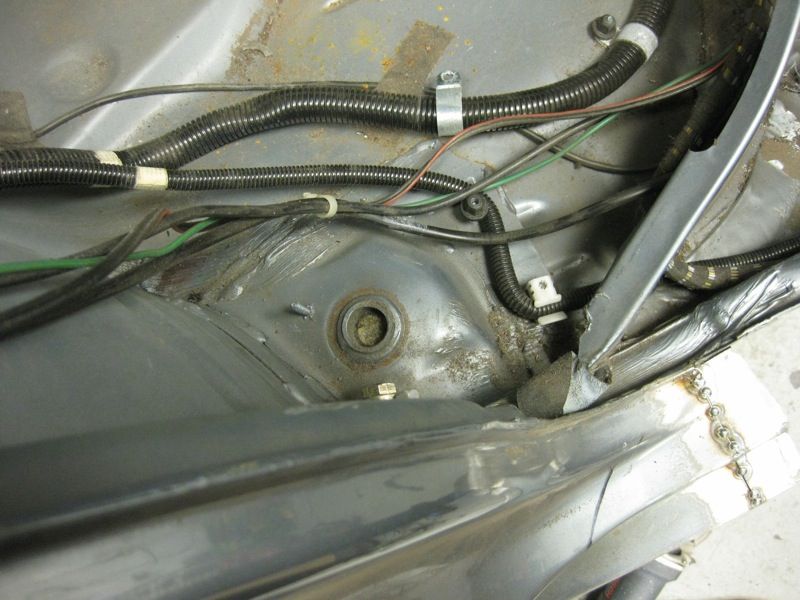 Started to undo the subframe, then thought better of it, with the sill still not fitted, the car is not exactly at its strongest, so decided to leave that, have a think about it and come back to it later The rear of the sill, like the front, needed extending, so made this 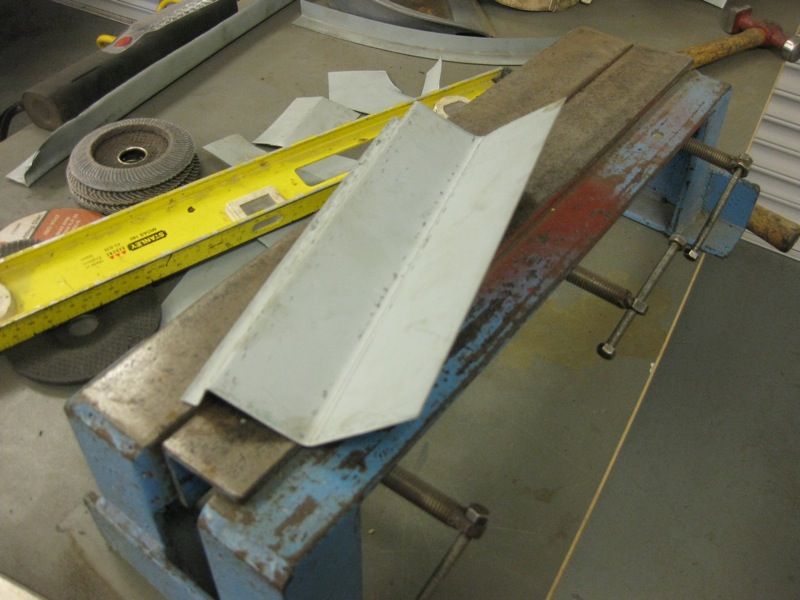 Which goes here 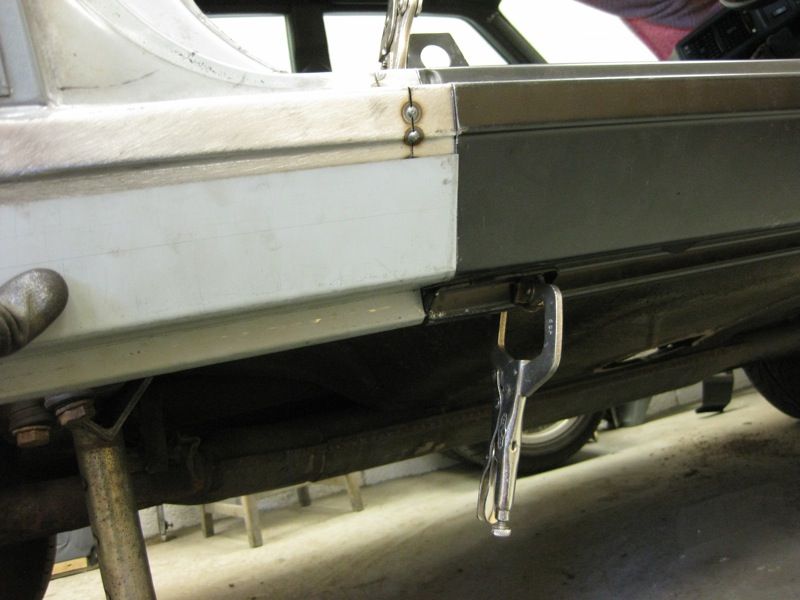 But before that, need to fix the inner sill 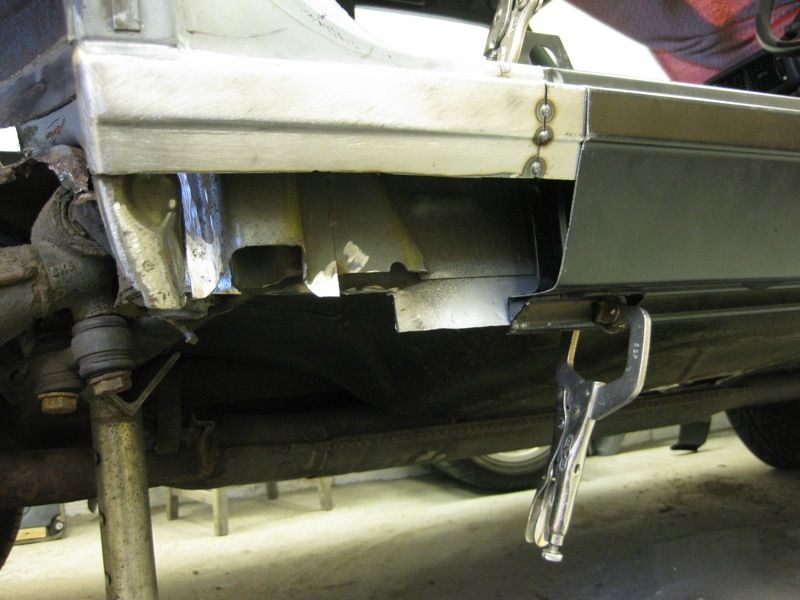 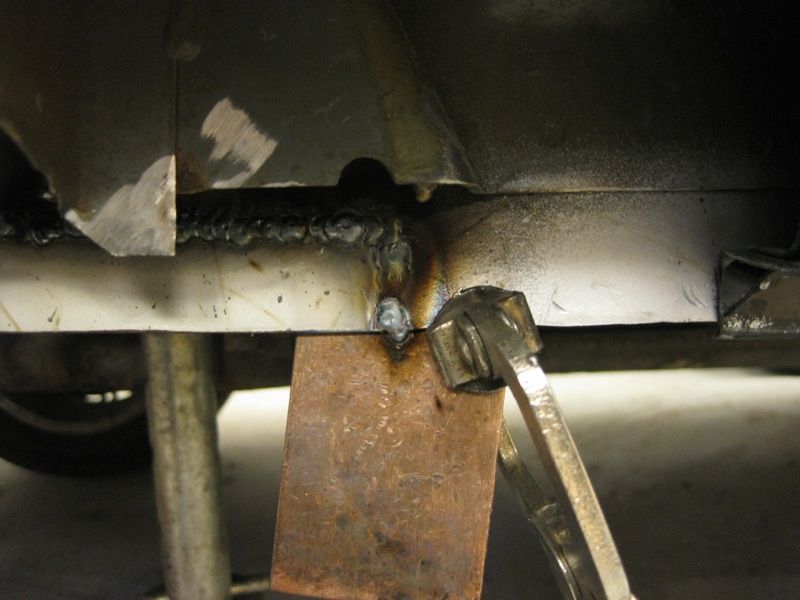 And the inside of the arch 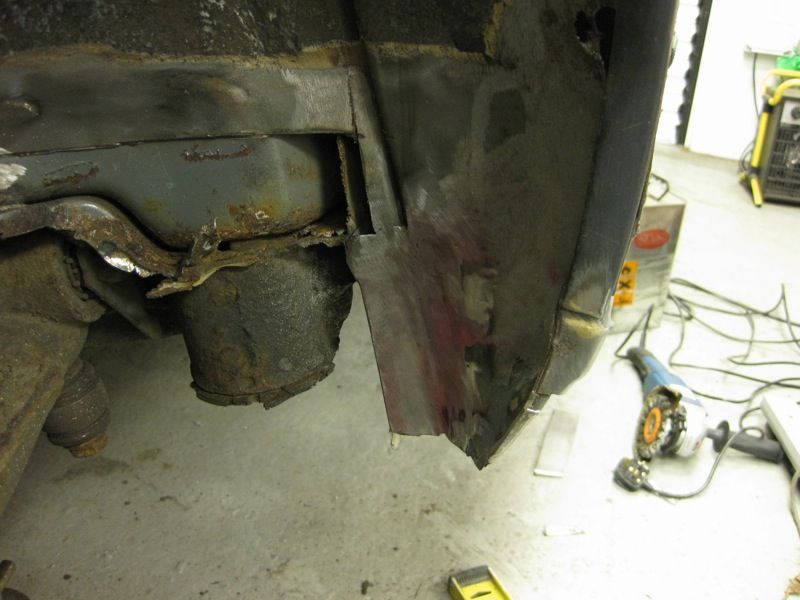 Then after a bit of trimming and joddling 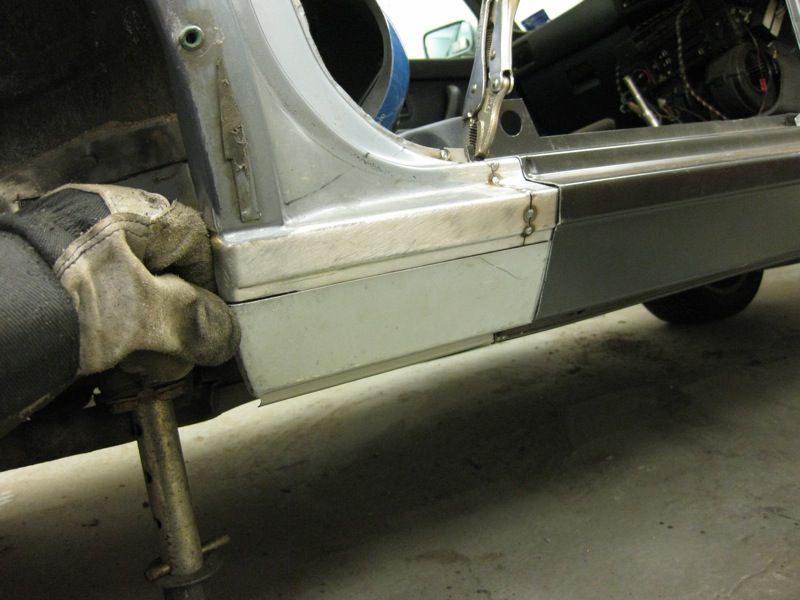 Then a coat of zinc primer, to the inner sill and inside of the outer sill, to protect it all 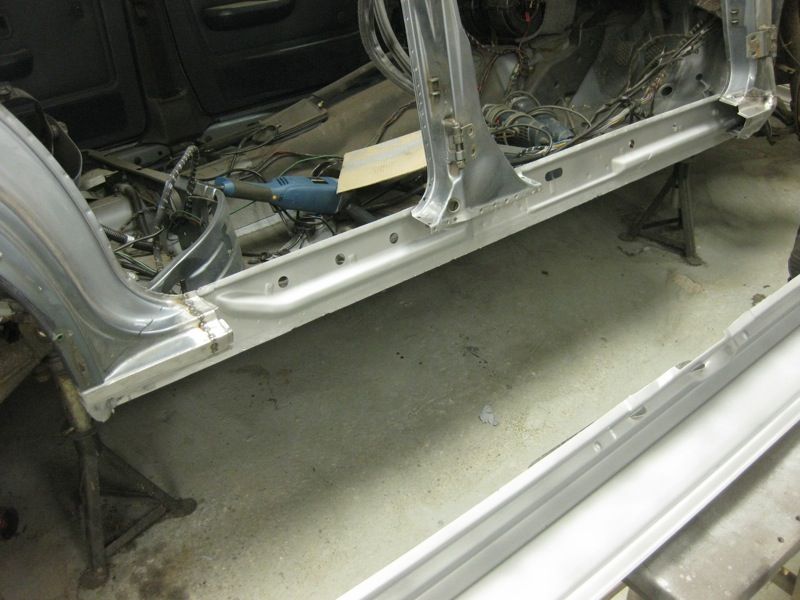 Needed to add another drain hole in the new end section, to match this 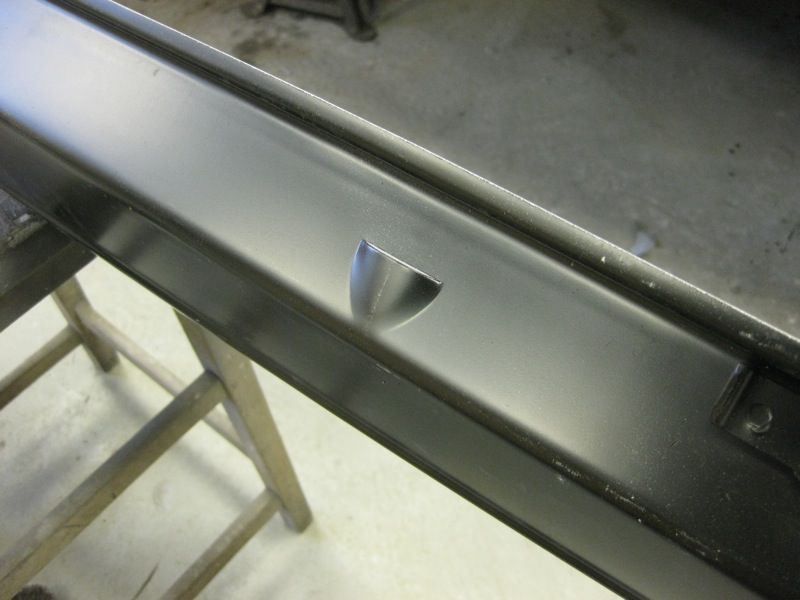 So out with the Dremmel 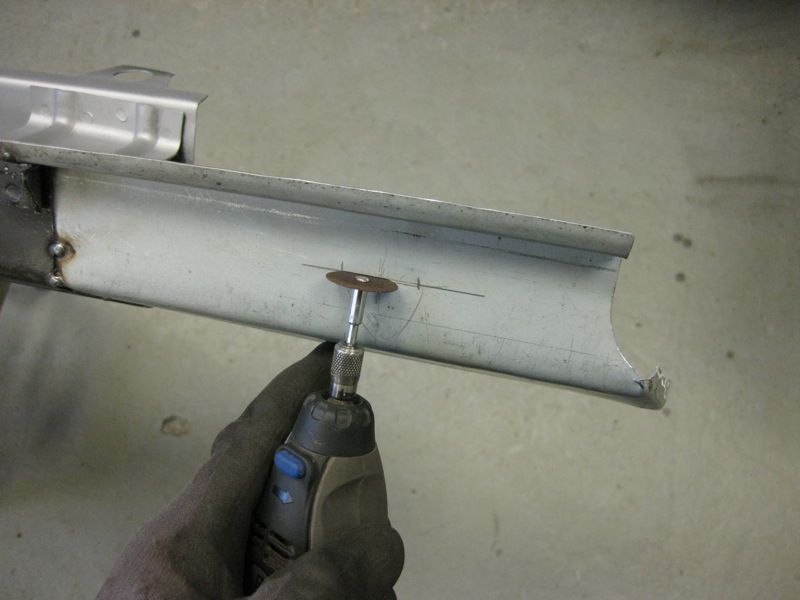 and cut the end of my old jack handle 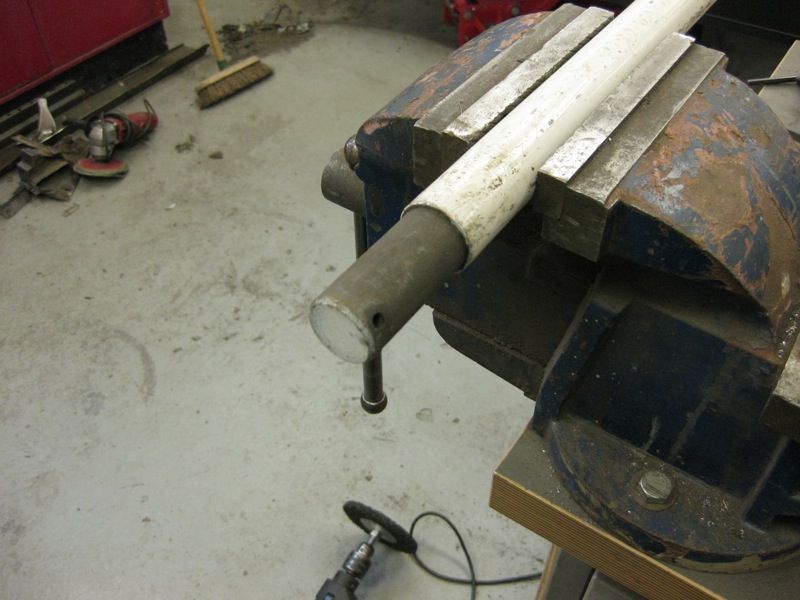 Placed in an open vice 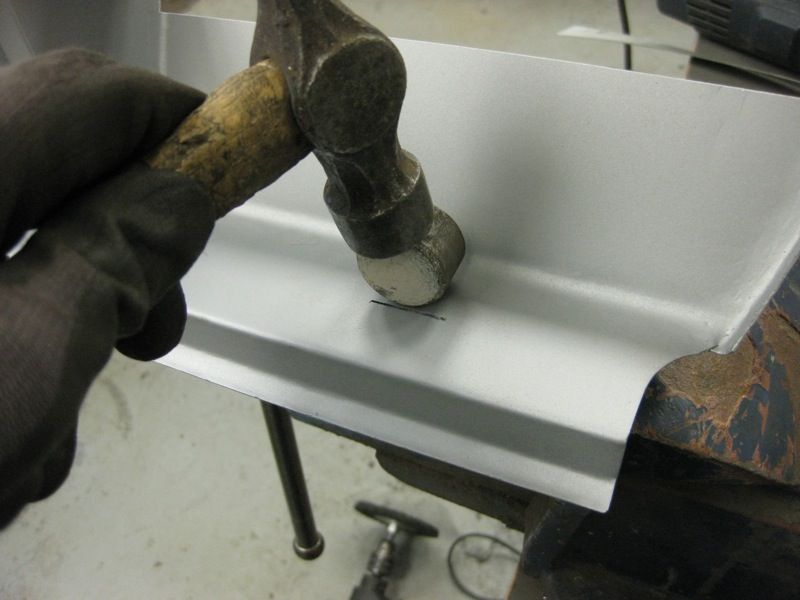 and a couple of taps later, we're done 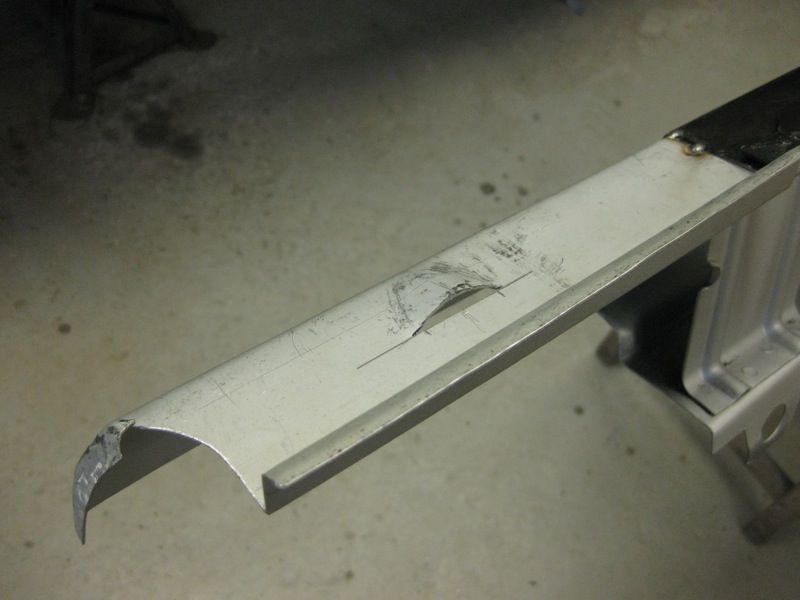 so weld that on 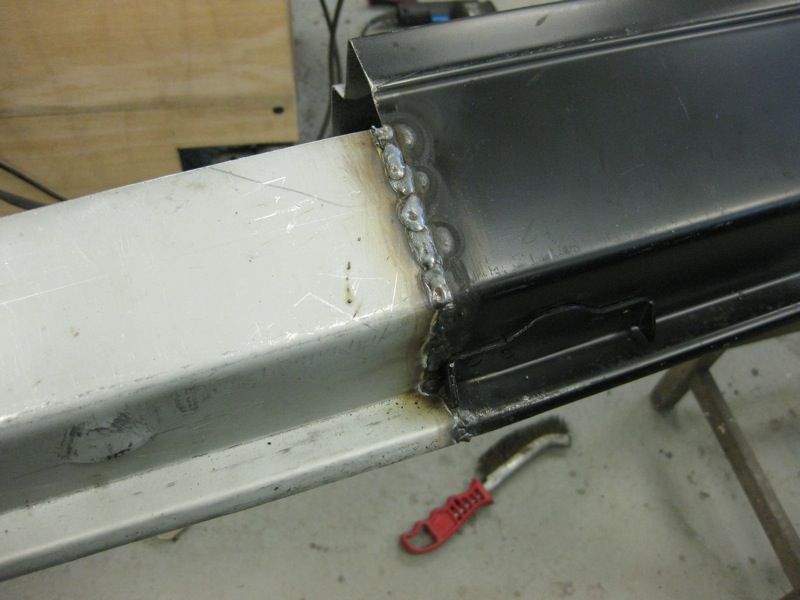 and dress off 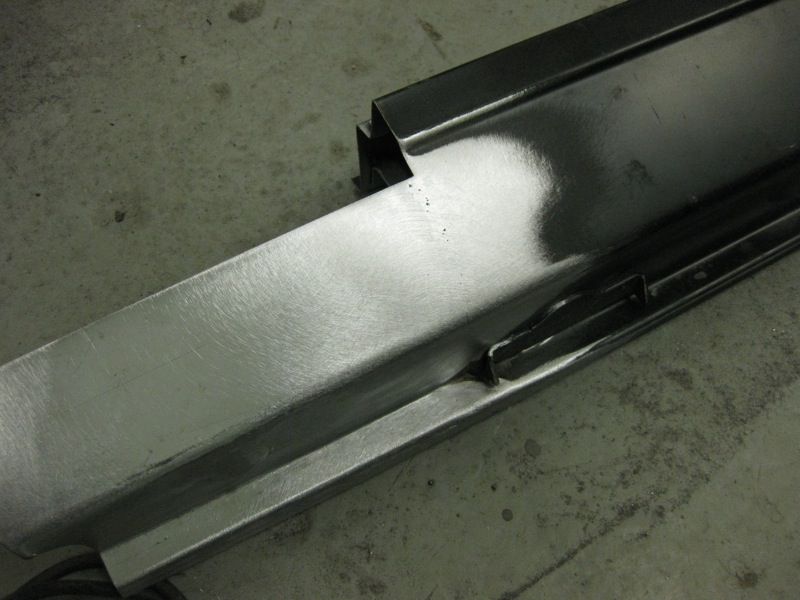 then repeat for the rear door step 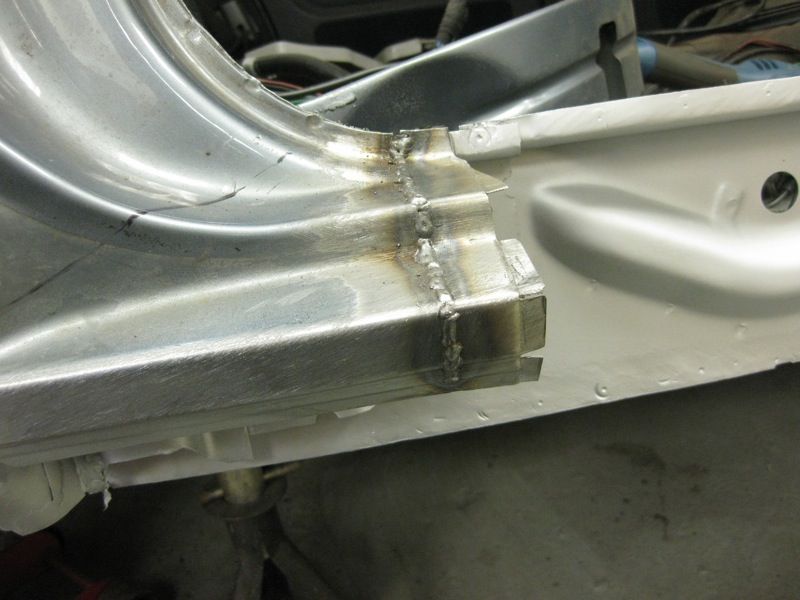 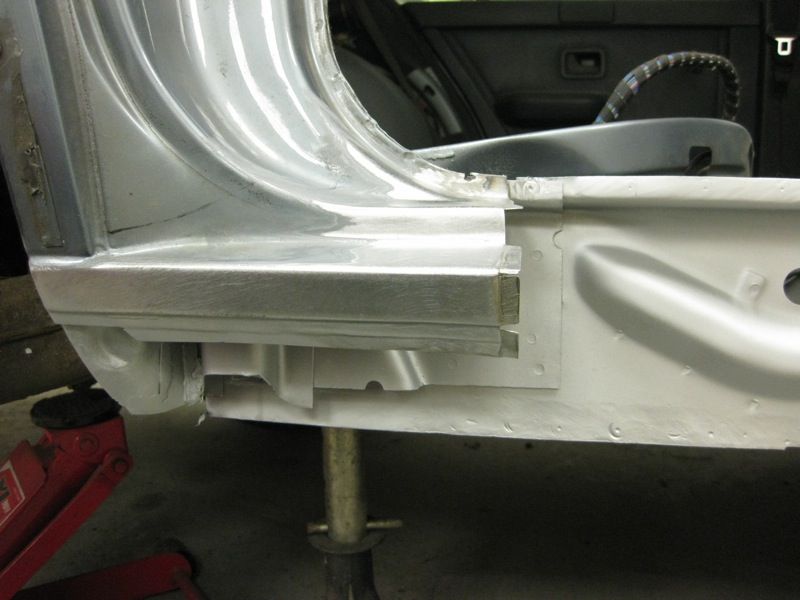 Then its onto the front 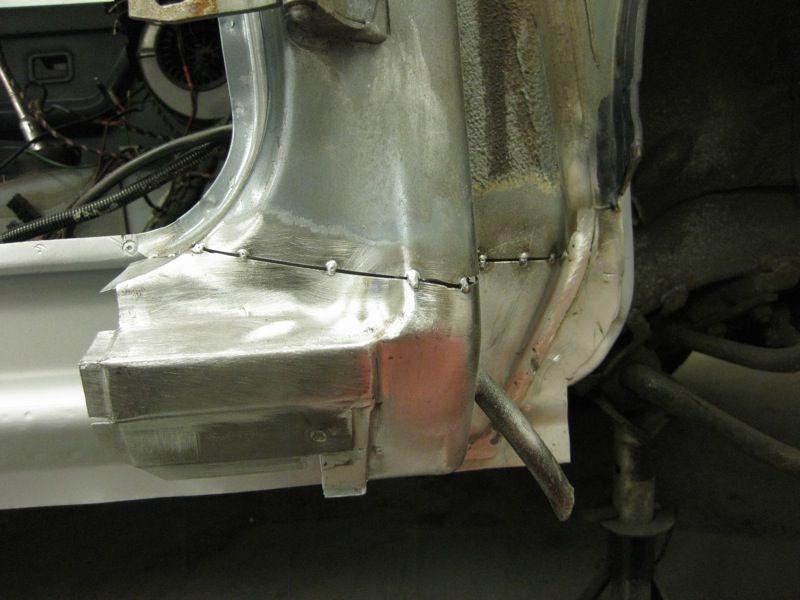 as requested by bstardchild, I'll try to show the cleaning off in steps, hopefully it will make sense The first most important thing is to make sure that both pieces are perfectly level all the way along, before you weld it, the gap between them, is due to the thickness of the cutting discs used to cut it off in the first place, but this will help to ensure that I get good penetration, this is the second most important thing with a repair like this. As if you don't it will just crack once you start grinding it then weld in spots or sections, until your all done 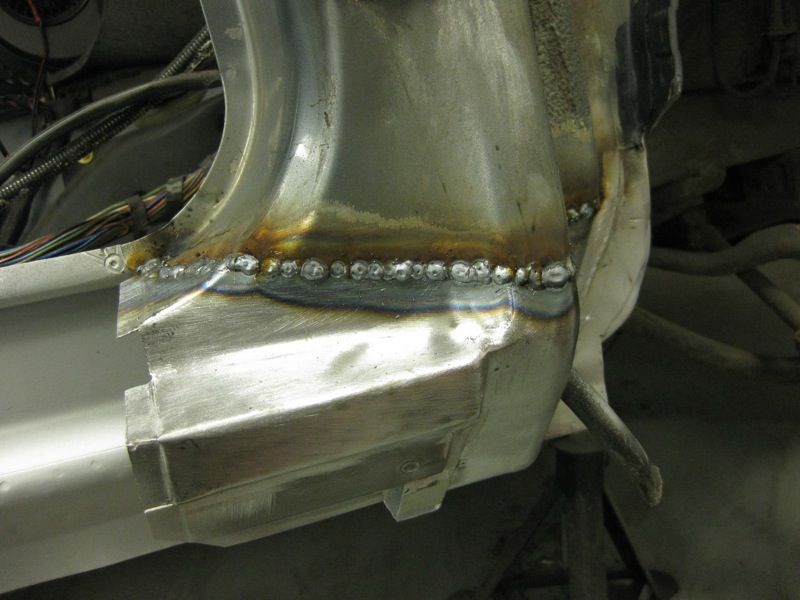 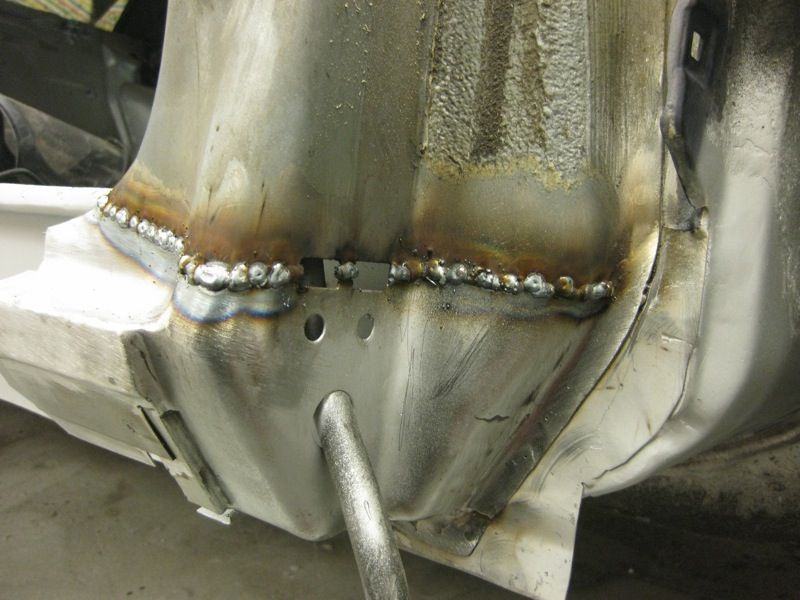 start with the 60 grit flapwheel 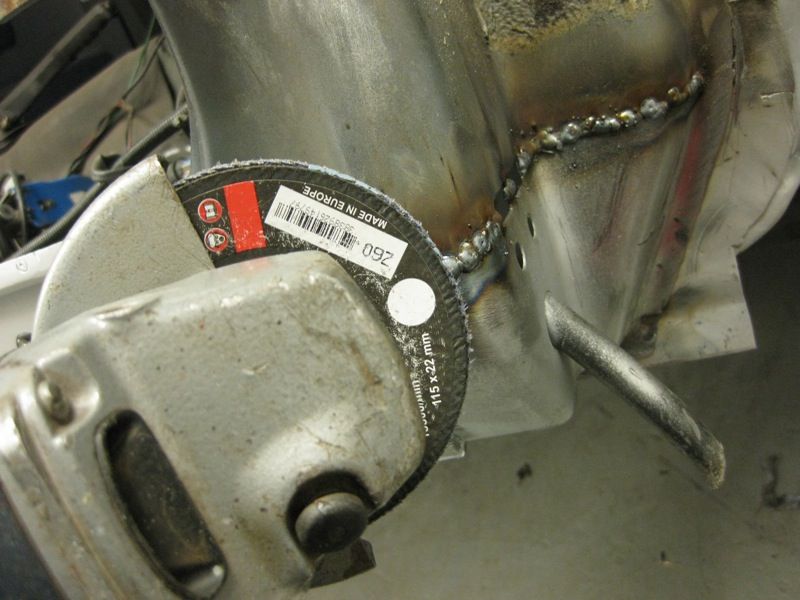 or Roloc disc for the tight spots 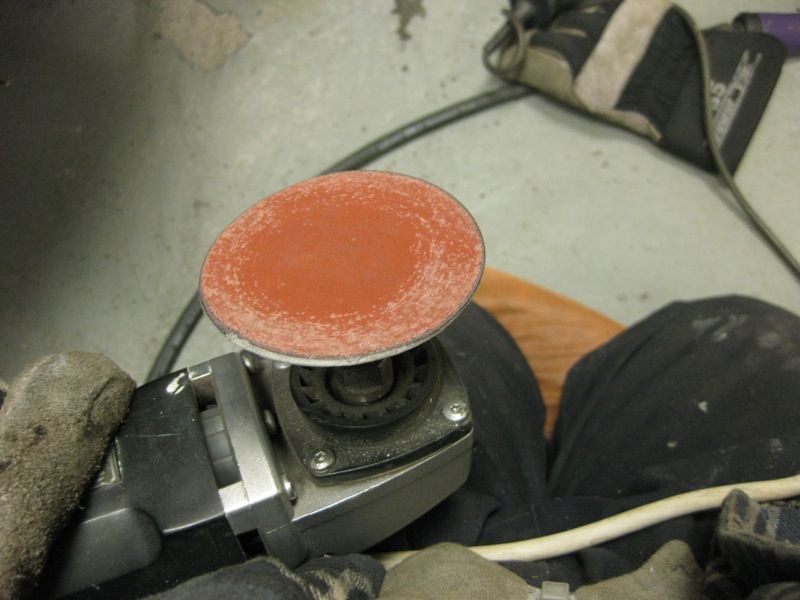 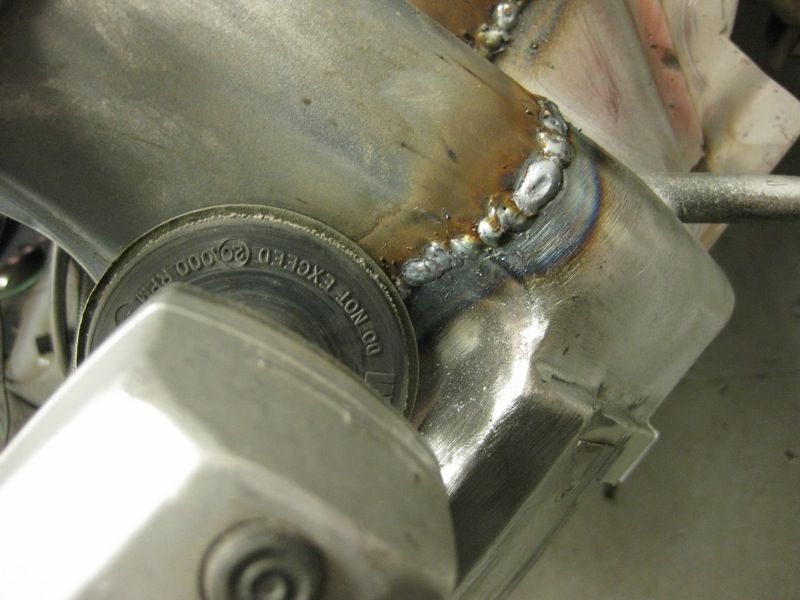 and power file with a new 40 grit belt on for the really tight and awkward bits 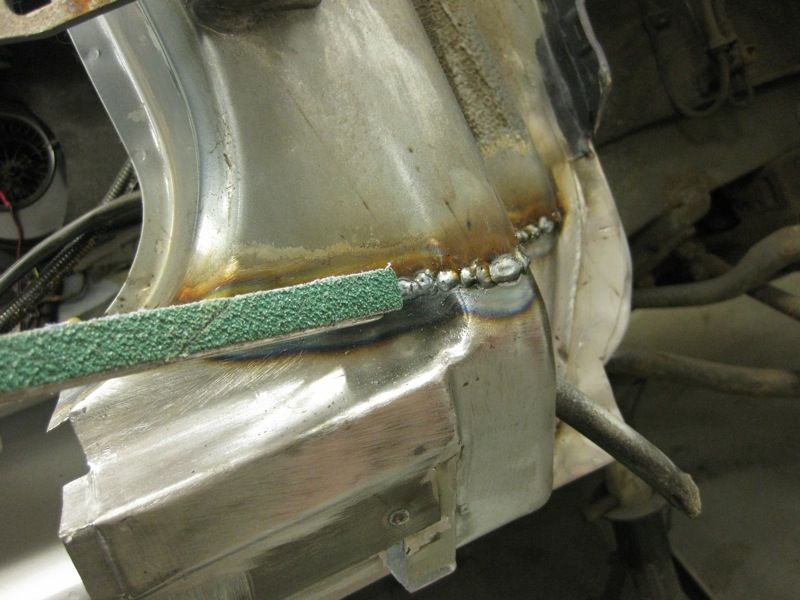 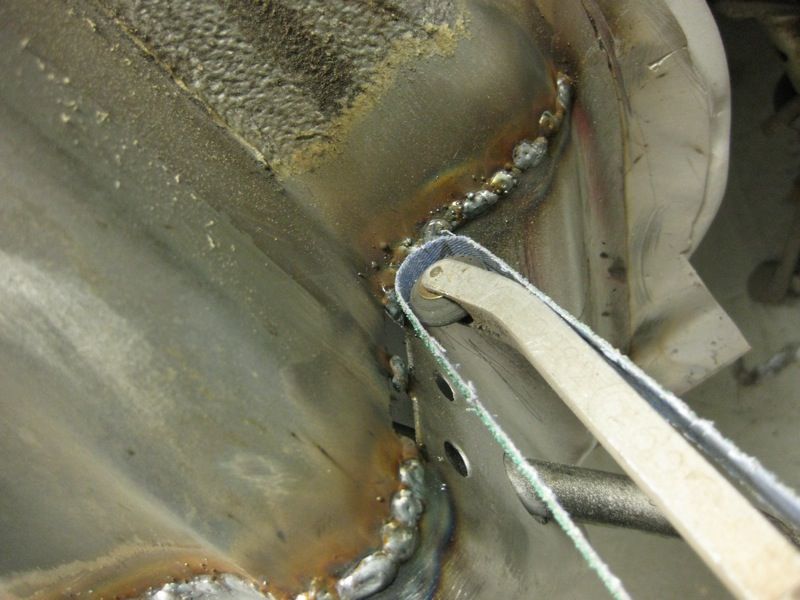 take the rough off first with the Roloc or flap disc, making sure to keep them flat with the metal and try not to dig in either side 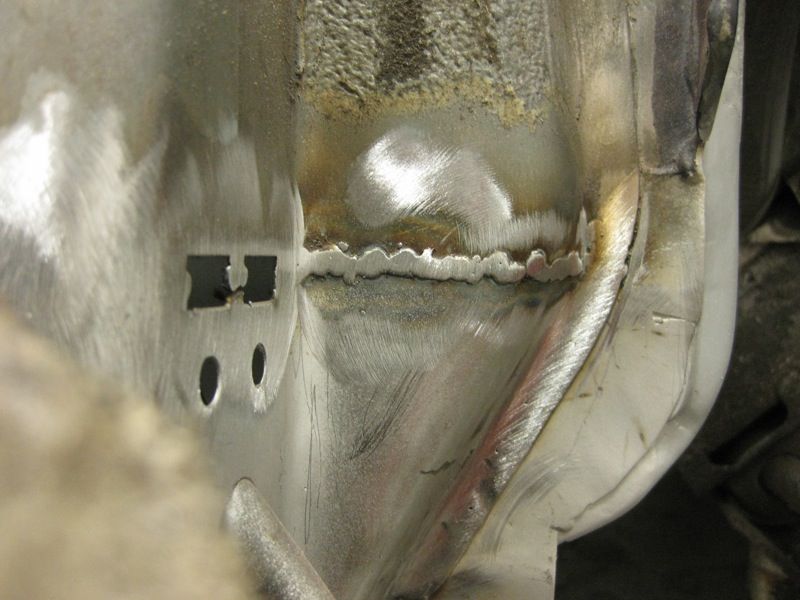 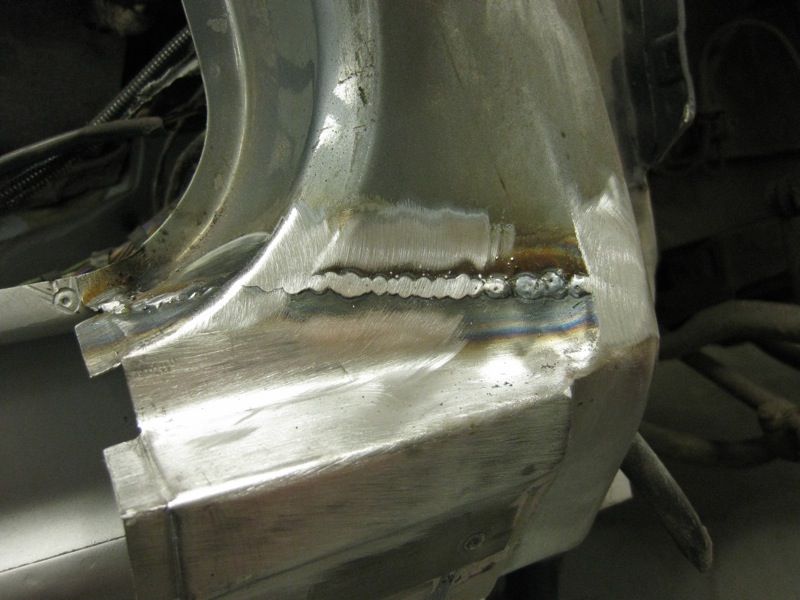 then the power file 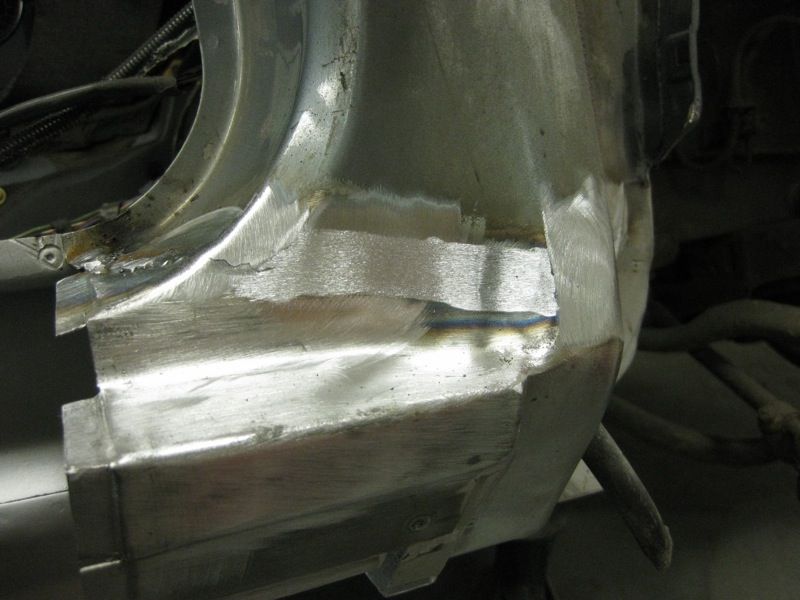 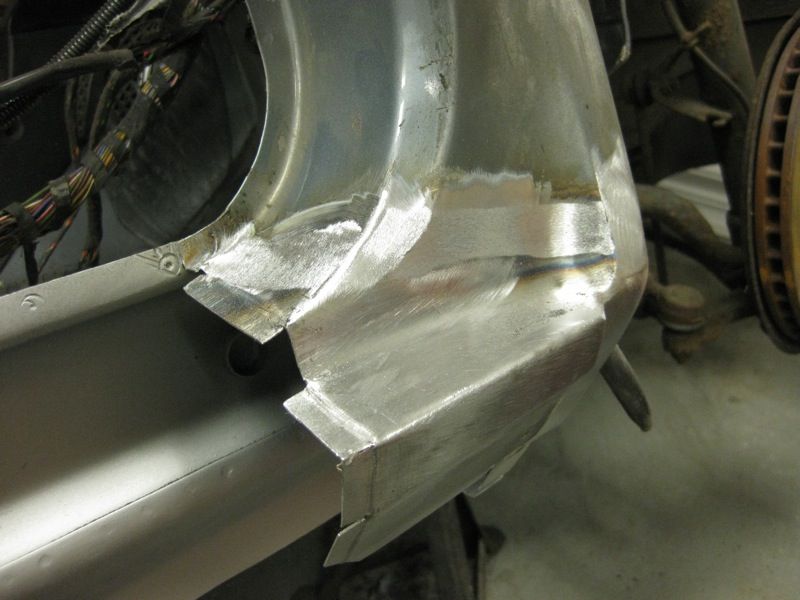 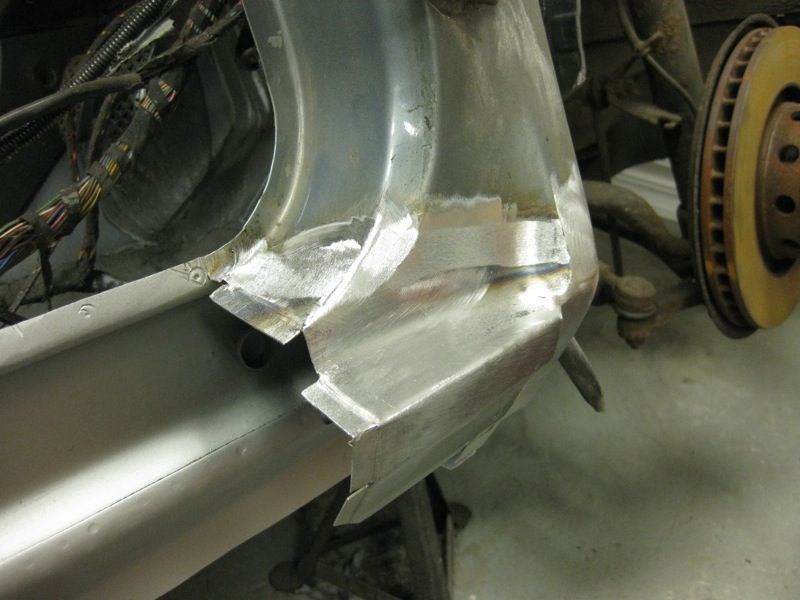 and a plain and simple square file for the detail 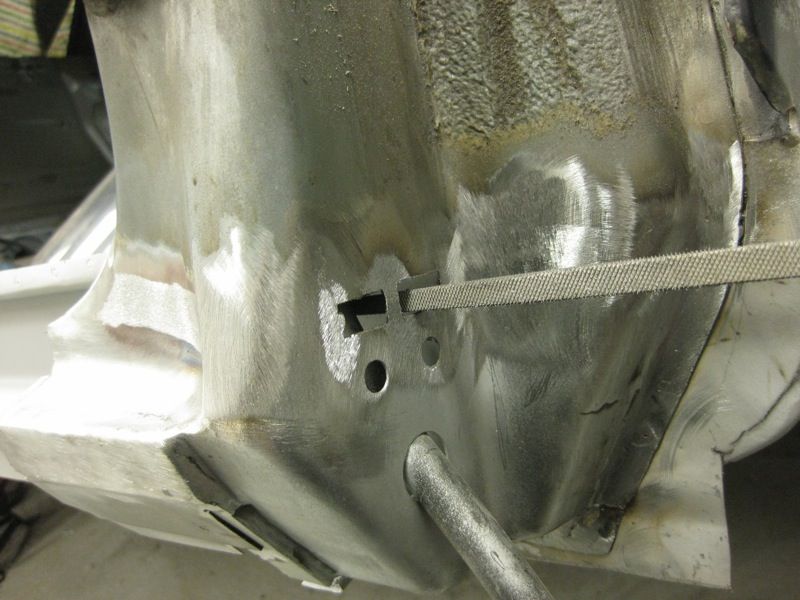 and then to smooth it all off and round the corners, a 60 grit disc on the DA 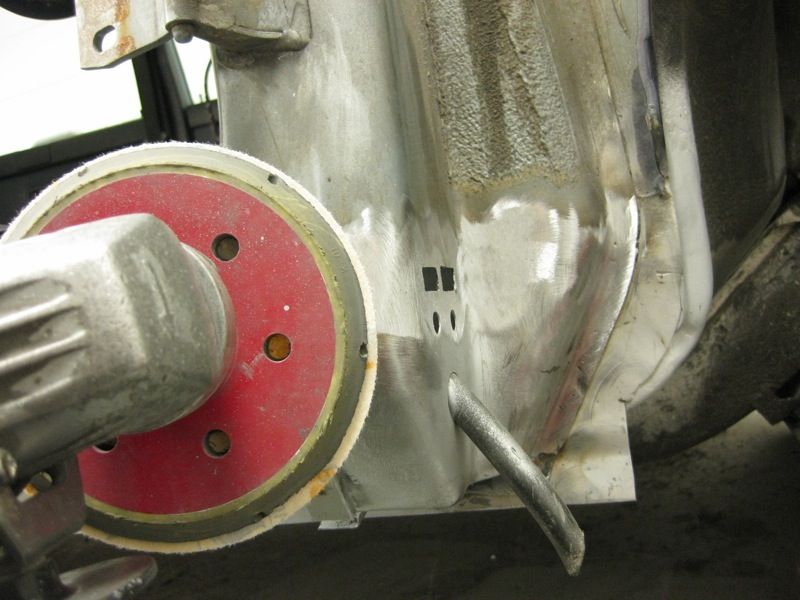 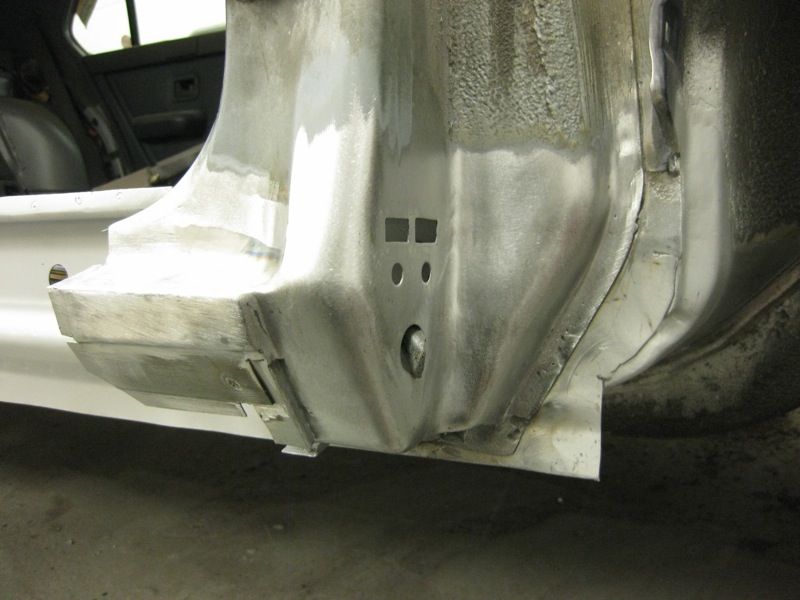 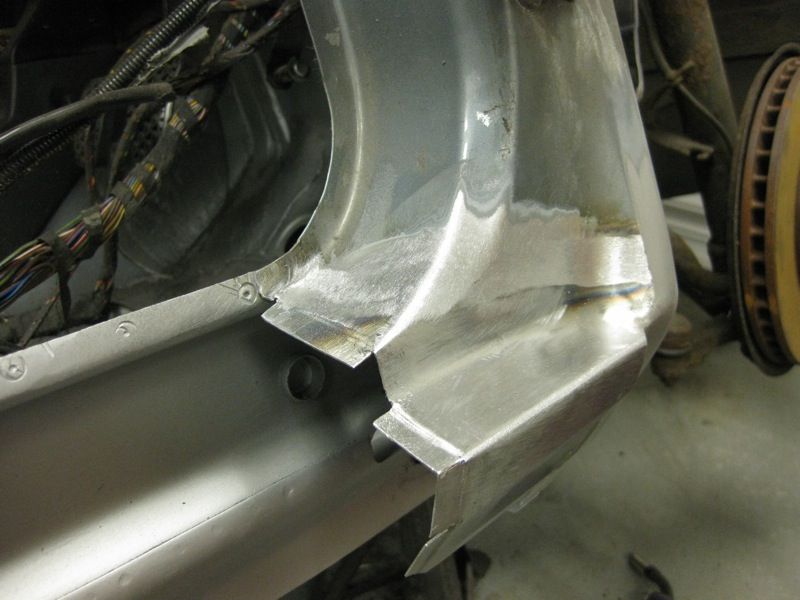 Not entirely necessary to go any further seeing as its going to get painted, put to get into the spots that the DA could not, there's always a Scotchbrite disc for the Roloc 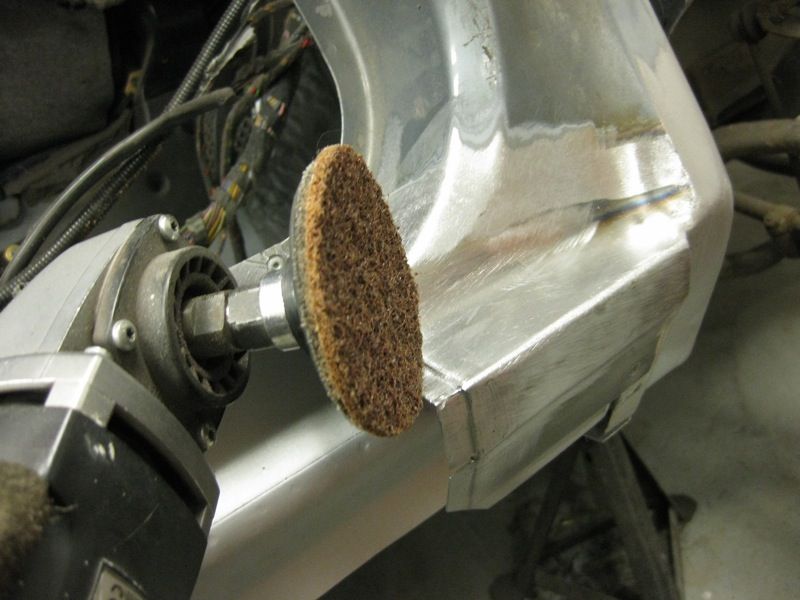 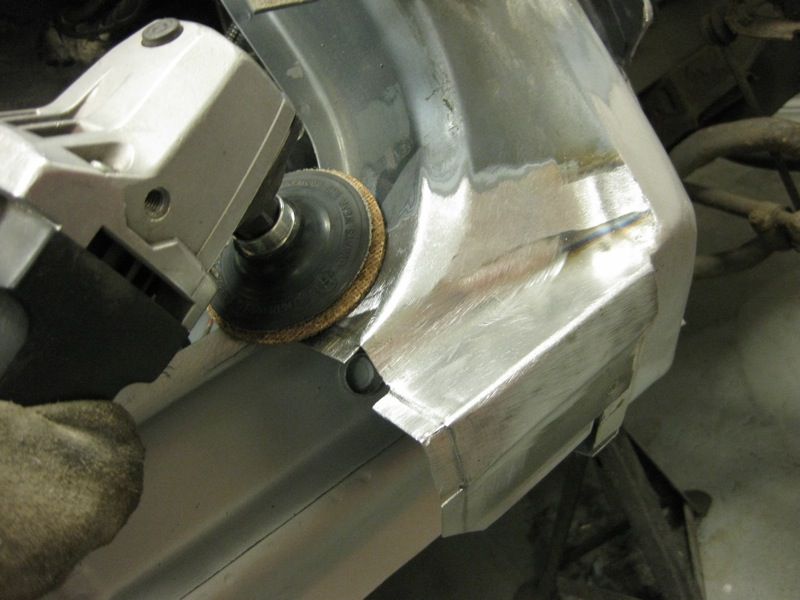 Which just helps to smooth it all out 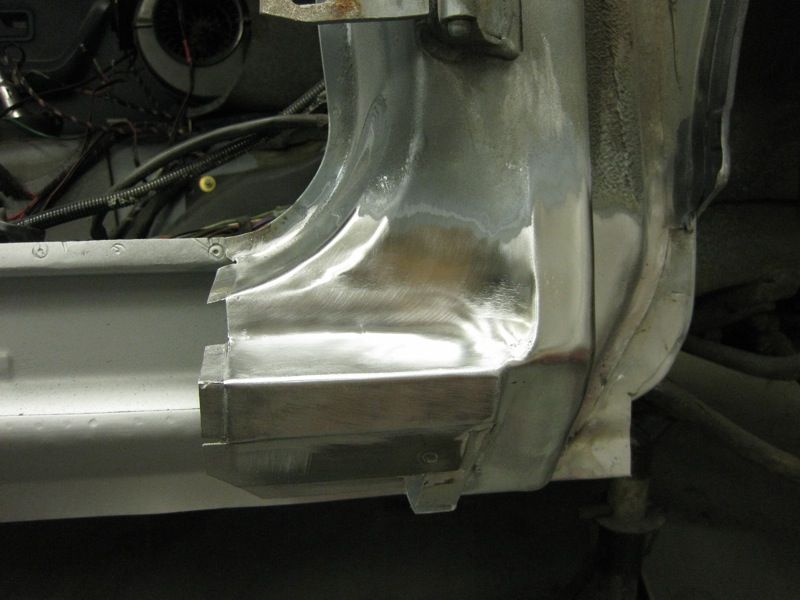 and jobs done 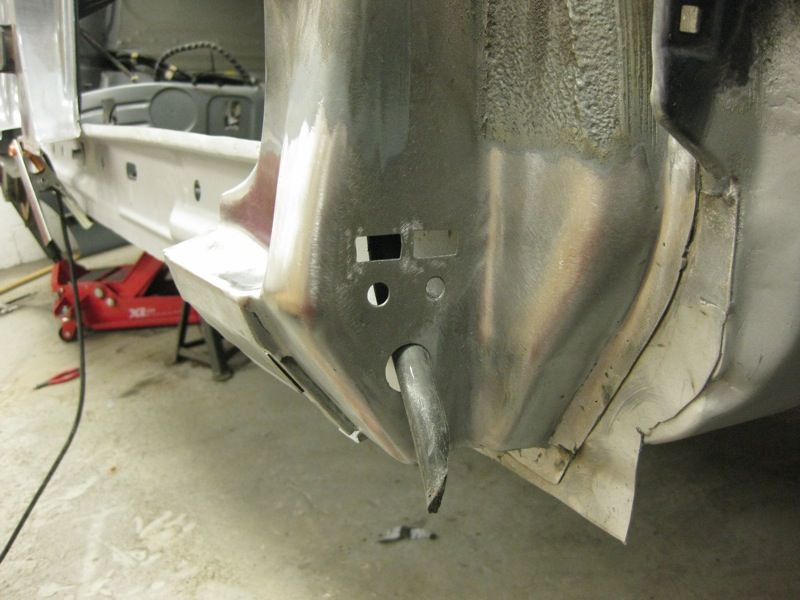 Just leaves a small spot on the centre pillar, one of the spot welds that I drilled out was a bit too close to the edge, so thought it best to partly weld that up before the sill was in place 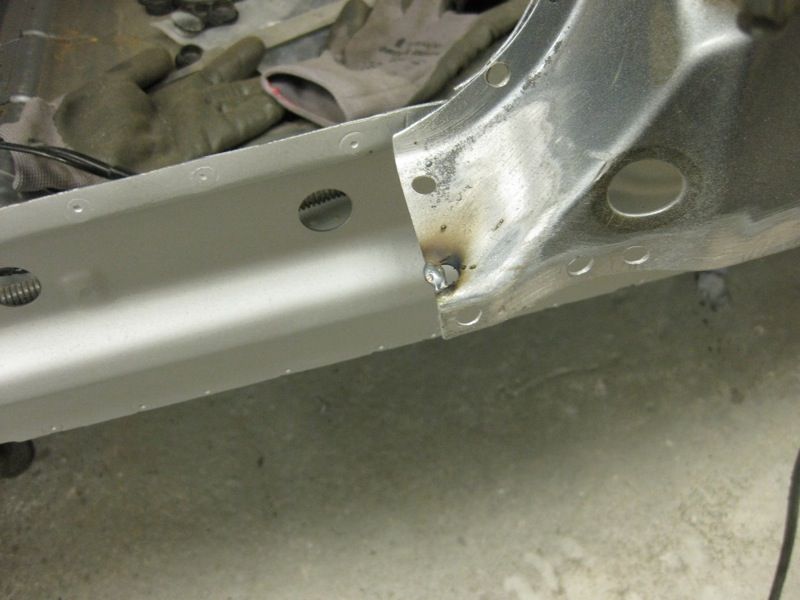 and grind 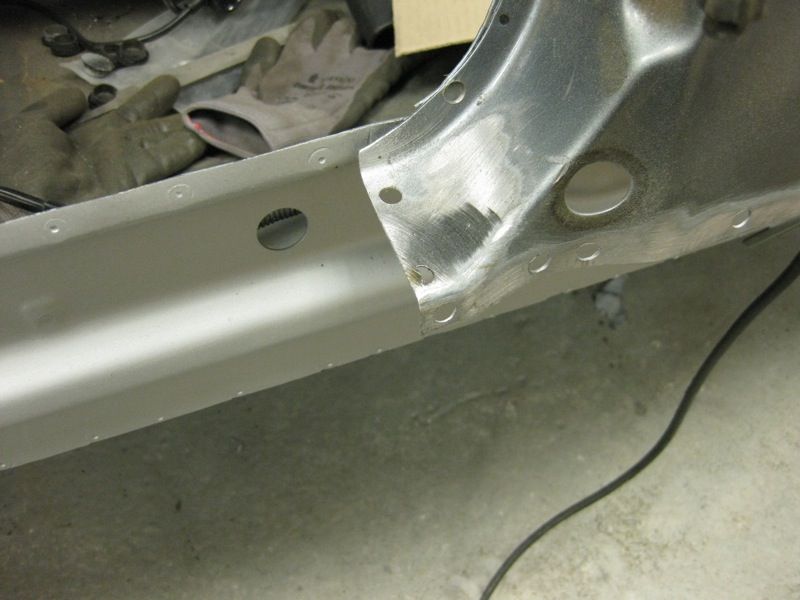 and thats it for this weekend, seems like an absolute age to get to this point, but finally the sill is ready to go on      |
| |
|
|
|
|
|
|
|
Feb 19, 2012 20:31:49 GMT
|
|
As usual Tony,
Absolutely fantastic,
Please keep the updates coming,
|
| |
BMW E39 525i Sport
BMW E46 320d Sport Touring (now sold on.)
BMW E30 325 Touring (now sold on.)
BMW E30 320 Cabriolet (Project car - currently for sale.)
|
|
|
|
|
Feb 19, 2012 21:26:28 GMT
|
|
Well thats the weekend officially over.....
Thanks for the update Tony, enjoyable as always.
With regards to your powerfile, I bought one years and years ago(think its a Sealey one) and was disapointed with it to be honest. But seeing the 40grit disc you use I realise I probably wasnt using a coarse enough belt. Think I will dust it off this week and get some new belts and see where we get to. Does yours take the weld down at a fair speed?
|
| |
1971 Ford Escort
1997 Peugeot 106 GTI
1998 Peugeot 106 GTI
2014 Ford Fiesta Zetec S
|
|
|
|
|
Feb 19, 2012 21:46:42 GMT
|
Well thats the weekend officially over..... Thanks for the update Tony, enjoyable as always. With regards to your powerfile, I bought one years and years ago(think its a Sealey one) and was disapointed with it to be honest. But seeing the 40grit disc you use I realise I probably wasnt using a coarse enough belt. Think I will dust it off this week and get some new belts and see where we get to. Does yours take the weld down at a fair speed? Danny about 30 seconds from this  to this  If the belt is too fine, it will just ride up and down the weld, smoothing it out but not grinding it down |
| |
|
|
|
|
|
Feb 19, 2012 21:49:52 GMT
|
That is exactly what it did Tony, thank you for the reply.  |
| |
1971 Ford Escort
1997 Peugeot 106 GTI
1998 Peugeot 106 GTI
2014 Ford Fiesta Zetec S
|
|
|
|
|
|
|
|
|
Wow  I have to get me one of those power files  May ask, how long have you been doing stuf like this?  Cheers, Jan |
| |
|
|
|
|
|
Feb 20, 2012 12:52:13 GMT
|
Wow  I have to get me one of those power files  May ask, how long have you been doing stuf like this?  Cheers, Jan A power file is must have as far as I am concerned, I've been doing this for just over 25 years |
| |
|
|
|
|
|
Feb 20, 2012 16:07:09 GMT
|
|
Amazing metal work! I always love looking at your threads.
|
| |
'84 308 GTS /// '88 528e /// '88 M5 /// '89 944 Turbo /// '98 E430
|
|
|
|
|
Feb 20, 2012 18:56:43 GMT
|
A power file is must have as far as I am concerned, I've been doing this for just over 25 years Certainly looks like  I'm using onlyflap discs to grind down welds at the moment, and I'm always worried that I remove too much of the surrounding metal. A power file would make this a lot easyer to controll I guess. |
| |
|
|
|
|
|
|
|
Feb 21, 2012 11:22:03 GMT
|
Nice work Tony as always but can you pull your finger out?   |
| |
E28 M5 #31 Awaiting preparation!
E28 M5 #70
E60 530d sport
E60 525d sport
E39 530d sport t.
E39 535a sport
|
|
Tarka
Part of things
 
Posts: 905
|
|
Feb 21, 2012 16:28:25 GMT
|
I always wondered what drove a man to love another man, but spending time looking (gazing) at your lovely clean welds and meticulous tidying makes me want to sweep you away and spend the day buying scatter cushions in IKEA. You fancy a break from all that dirty metal work??  |
| |
Last Edit: Feb 21, 2012 16:28:52 GMT by Tarka
Sharks in the garage.🐬🇩🇪
I'll finish my projects when you've finished your's!😎😜
|
|
teaboy
Posted a lot
   Make tea, not war.
Posts: 2,126
|
|
Feb 21, 2012 17:32:56 GMT
|
I always wondered what drove a man to love another man, but spending time looking (gazing) at your lovely clean welds and meticulous tidying makes me want to sweep you away and spend the day buying scatter cushions in IKEA. You fancy a break from all that dirty metal work??  Now that is funny ;D |
| |
|
|
|
|
|
Feb 21, 2012 20:17:48 GMT
|
Nice work Tony as always but can you pull your finger out?   don't worry Jimmy, working as fast as I can I always wondered what drove a man to love another man, but spending time looking (gazing) at your lovely clean welds and meticulous tidying makes me want to sweep you away and spend the day buying scatter cushions in IKEA. You fancy a break from all that dirty metal work??  Tarka, I'm flattered, but Marks and Spencers is more my taste   |
| |
|
|
|
|
|
Feb 22, 2012 10:51:53 GMT
|
Hi Tony, I joined this forum specifically to comment on your work. Your restoration metalwork is the best I've seen on any forum, certainly equal to the Thai VW guys and way beyond even most professional restorers and body men. Having been on a restoration course and restored a few cars over the years myself I can understand how you make most of the repair panels, and appreciate the skill care and effort going into this work, but this one has got me stumped :- how did you go from this 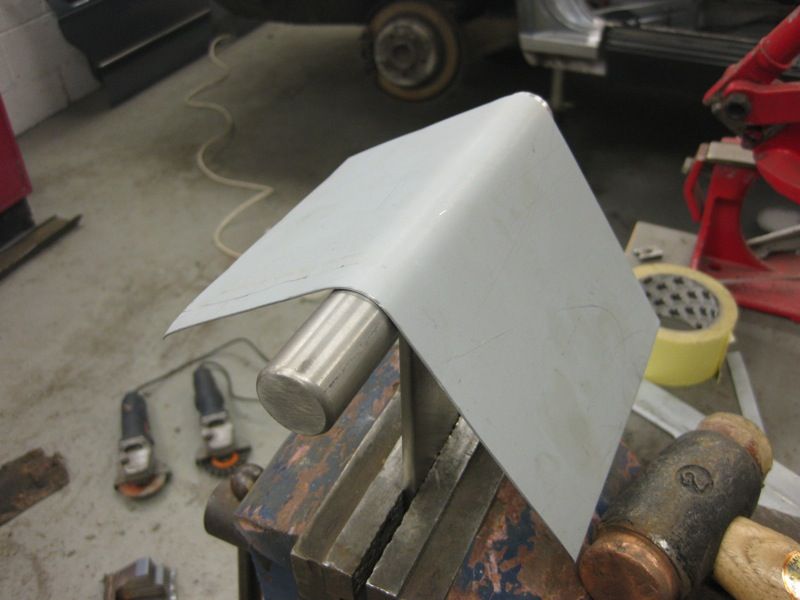 and this 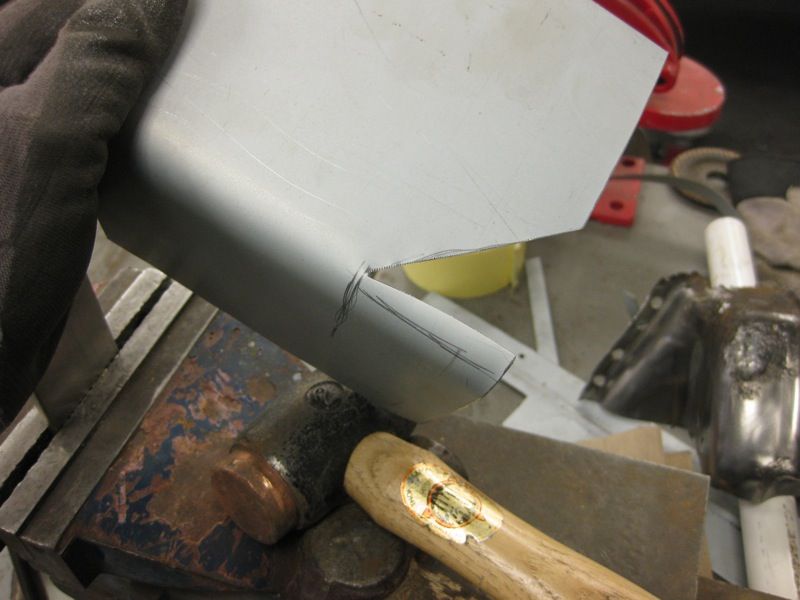 to this ?? :- 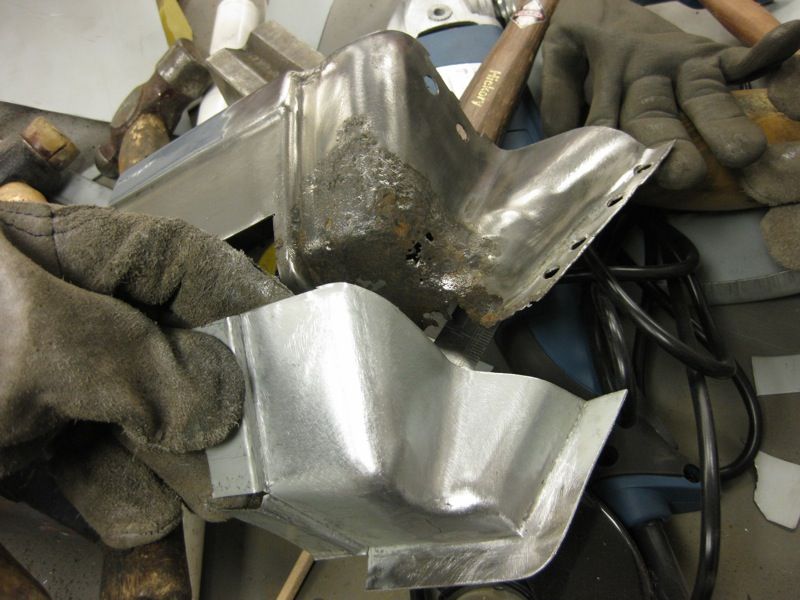 I'm guessing this section was made in three (or more likely two) pieces and welded together and ground smooth, as that right angle flange looks too tight to form even with s stretching machine! More photos please, or could you show how you made it when making the other side front sill piece. A few more questions, if you don't mind:- 1. What brand finger sander belt do you use, the ones I have wear out in no time. 2. With your grind it smooth invisible welding method, do you even get any pinholes in between the welds once ground down? if so how do you deal with these? 3. What work light do you use?? All the photos are well lit. 4. Take it that the owners of the cars you work on protect the insides of box sections with paint and or wax injected after the work is complete? Must take a steady hand and a good eye to grind just the welds down without thinning either the work or repair piece! With such skills you should apply for a job (even if just evenings) as a lecturer on a restoration course! I hope the questions are not too bothersome, and many thanks in anticipation of the answers, regards John |
| |
|
|
Clement
Europe
ambitious but rubbish
Posts: 2,095
|
|
Feb 22, 2012 11:01:42 GMT
|
|
I've always wondered about question no.4, does weldthrough primer protect from rust ? Or wax alone is enough ?
|
| |
|
|
|
|
|
Feb 22, 2012 11:08:27 GMT
|
|
Weld thru gets burnt off on the inside if a weld seam and rust can start here. I hope the new owners of the cars did thoroughly cavity wax the box sections!
Froggy, I don't think you can ever have "enough" to protect against rust. The next car I restore is going to have weld thru, then paint inside cavities (applied with a clean wax lance) then wax.
|
| |
|
|
|
|
|
Feb 22, 2012 20:16:42 GMT
|
Hi Tony, I joined this forum specifically to comment on your work. Your restoration metalwork is the best I've seen on any forum, certainly equal to the Thai VW guys and way beyond even most professional restorers and body men. Having been on a restoration course and restored a few cars over the years myself I can understand how you make most of the repair panels, and appreciate the skill care and effort going into this work, but this one has got me stumped :- how did you go from this  and this  to this ?? :-  I'm guessing this section was made in three (or more likely two) pieces and welded together and ground smooth, as that right angle flange looks too tight to form even with s stretching machine! More photos please, or could you show how you made it when making the other side front sill piece. A few more questions, if you don't mind:- 1. What brand finger sander belt do you use, the ones I have wear out in no time. 2. With your grind it smooth invisible welding method, do you even get any pinholes in between the welds once ground down? if so how do you deal with these? 3. What work light do you use?? All the photos are well lit. 4. Take it that the owners of the cars you work on protect the insides of box sections with paint and or wax injected after the work is complete? Must take a steady hand and a good eye to grind just the welds down without thinning either the work or repair piece! With such skills you should apply for a job (even if just evenings) as a lecturer on a restoration course! I hope the questions are not too bothersome, and many thanks in anticipation of the answers, regards John James, I appreciate your comments, and your questions are by no means bothersome The section was indeed made in 2 sections, although I did wonder after I had finished, that with a bit more thought I could have squeezed it out of 1, you are also correct in that the bottom flange is way to tight to form as a stretch, below I have marked the infill piece that was welded in separately 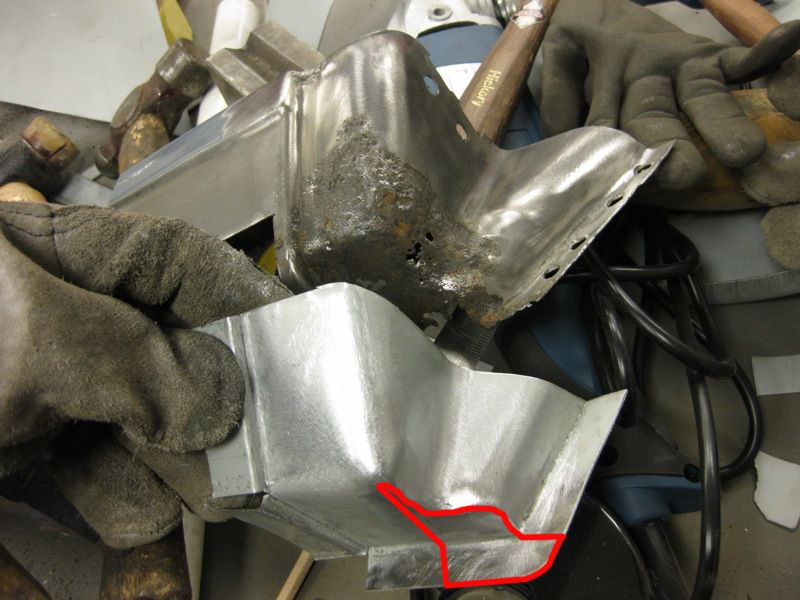 If you deduct that section, you can hopefully see how the remaining part could then be developed out flat I had not taken many photos of this, as I am always conscious about trying to vary the content of the thread, so as not to make it boring In answer to you other questions I would say 1. The belt size I use is an industrial size and is longer than the Black and Decker DIY style belts, as they are designed for the industrial market they are therefore better made and last longer, as for the make I am not sure, I get them whenever I can from the internet or Ebay, don't get me wrong I used a B+D machine with great success for years, but your right the belts can soon wear out 2. Yes Pinholes can happen, but I would then simply apply another spot of weld to fill them up and then regrind smooth 3. I have never really thought about the light for the photos, but yes I can see what you mean, I have fitted a lot of fluorescent lights on my garage ceiling, and I also have the walls painted white and the ceiling white, this all helps to reflect the light around the room 4. I always tell people to fill all the cavities that they can with a wax based spray, the weld thru primer that I use is also a zinc rich primer , so it does offer a good level of protection by itself, but as you rightly point out it will be burnt off where the weld is, so as much coating as you can get in afterwards would always be my recommendation 5. There is absolutely no doubt that grinding a weld flat, without damaging the surrounding metal takes practice, and I have had my fair share of grinding through in the past, but with the right equipment and a systematic approach, it can be done. Hope that helps Tony     |
| |
|
|
dbdb
Part of things
 
Posts: 821
|
|
Feb 22, 2012 20:29:05 GMT
|
|
Beautiful work is a pleasure to see.
David
|
| |
|
|
iant
Part of things
 
Posts: 155
|
|
Feb 22, 2012 22:04:27 GMT
|
|
Genius at work! Top thread.
|
| |
|
|
|
|


