|
|
|
|
|
Christmas....get in the way? Pansy. (But then I moved to another country to escape the 'family hoards', one epic roast in the oven, 3 beers deep in some Christmas ale, it's EVEN started snowing in dear Waterloo, Ontario, damn straight I'm stripping the datto!). any chance of those photos Bruce (as and when you are at the unit)  ? |
| |
|
|
|
|
|
|
|
Dec 30, 2011 13:51:15 GMT
|
|
A bump to remind everyone to bully Bruce into giving us a proper update...
|
| |
|
|
CIH
Posted a lot
  
Posts: 1,466
|
|
Dec 31, 2011 14:21:39 GMT
|
Regarding the headlights, perhaps something along these lines;  |
| |
|
|
|
|
|
Dec 31, 2011 19:34:59 GMT
|
A bump to remind everyone to bully Bruce into giving us a proper update... BULLY!!  OK, OK, you got me. Guess who didn't take any photos over the weekend?? I was kinda wrapped up in all the stuff going on and didn't stop for a moment to get any shots. Luckily Diabolu and Pollitt did, so I'll stick those up in a minute. I'll also be at the unit tomorrow and Monday so will take lots of shots to show some of the stuff done so far. Regarding the headlights, perhaps something along these lines; Sorry Dude, but while I like the fixed light/clear cover race look on some cars, I'm not feeling that at all for the Elite. For this car I really want to stick to pure 70's pop-up fantasticallness. I am convinced, however, that if I am going to the trouble of making a motor mechanism to work in there, I will make it Lo-Pro while I'm at it.  |
| |
|
|
|
|
|
Dec 31, 2011 20:31:22 GMT
|
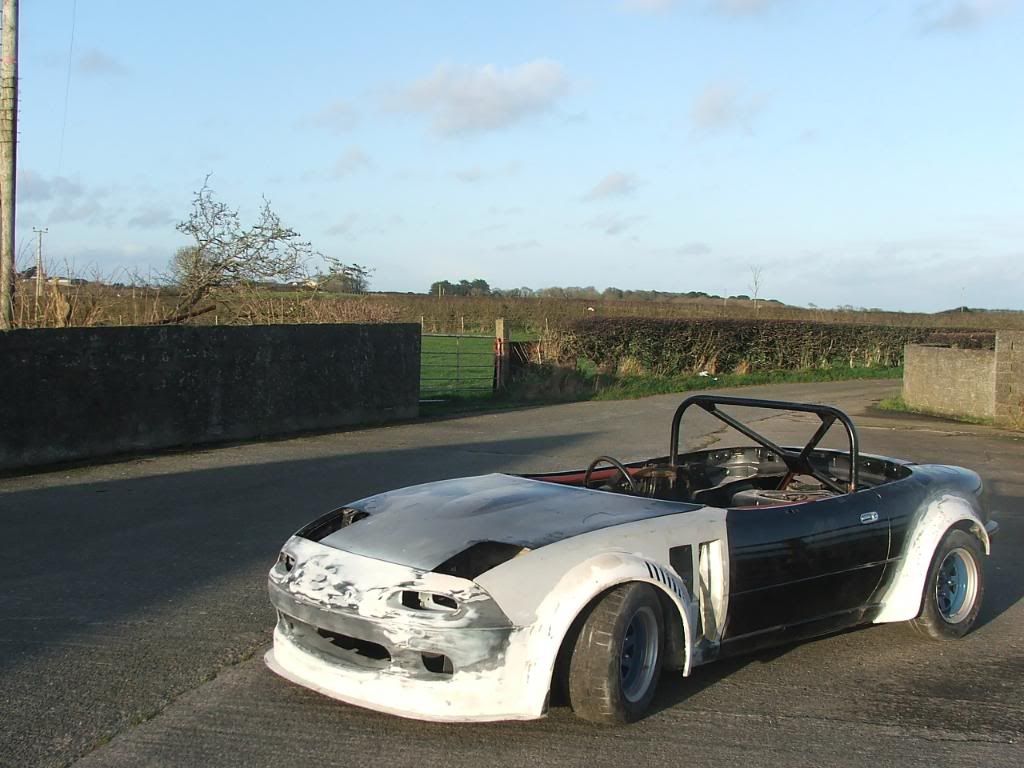
These photos are courtesy of Diabolu who was snapping away all weekend (thankfully) - I will get some more detailed pics of specific bits when I am down at the unit tomorrow... I know this isn't all strictly about the Elite, but it all makes part of the story as to why I couldn't get any progress on the Lotus until now. BOXING DAY: 26th December, people start descending on Area 52 for the Post-Christmas 'Getaway'. I had spent all of Christmas Eve on my MX5/Eunos 'breaker'. I started stripping it late morning and woked on until about 7pm. I returned about 4pm on Boxing Day in order to get it as stripped as possible and (ideally) fully stripped to a bare shell by midday on the 27th. This would mean I could finally put the Lotus on the ramp (for a proper inspection) which was currently tied up with the MX5. We got to work about 5pm on Boxing Day. Booze helped the process  From L>R: Rich, The Pollitt, Moi, Sleeperviva and VIP 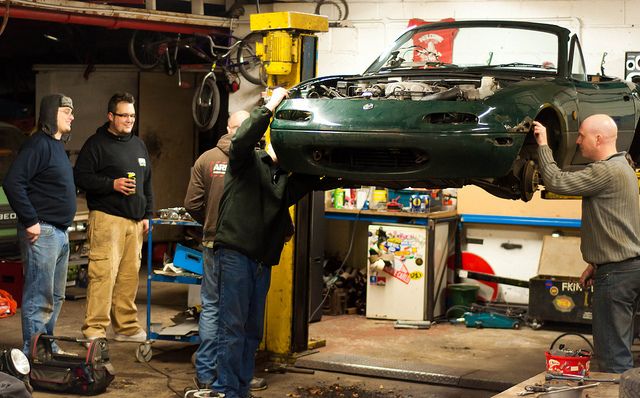 Steve (Sleeperviva) on bodywork removal duties 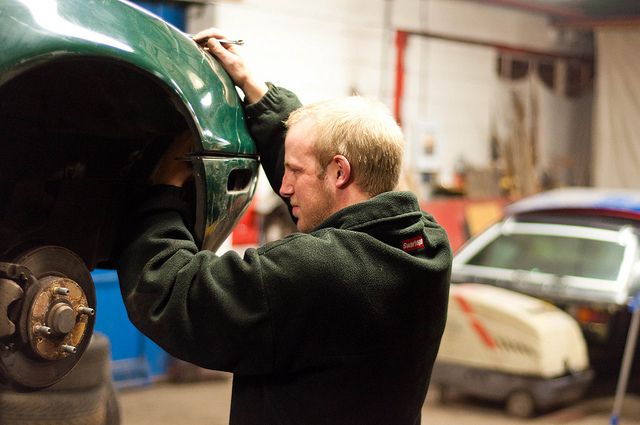 I was tackling the rusted/seized bolts (my responsibility if I cut into and ruined a good, sellable panel or piece of trim) 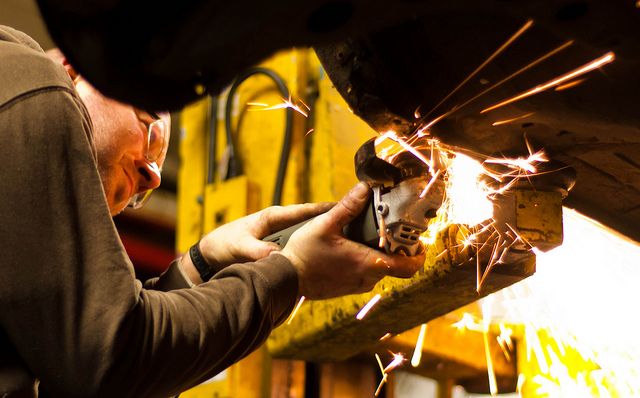 Rear brake lines...just what tin-snips were invented for 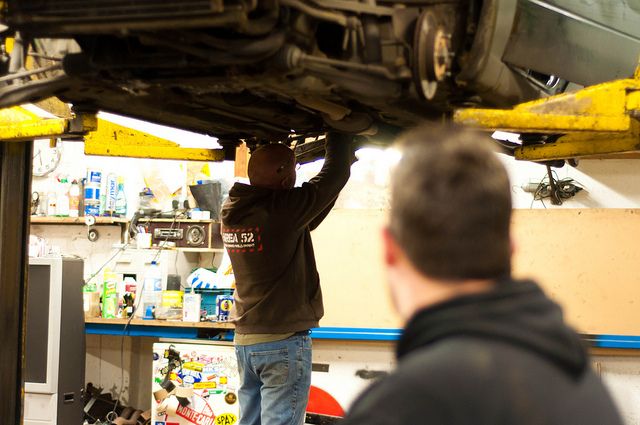 Exhaust removal....  With the underside all done, time to start on the upper side of the car, mainly the fiddly process of removing the entire wiring loom...I deal with the cabin area while Pollitt uses his Jedi mind trick to undo all the loom in the engine bay (in reality, this didn't work and I did it myself afterwards.....it was an impressive show he put on though) 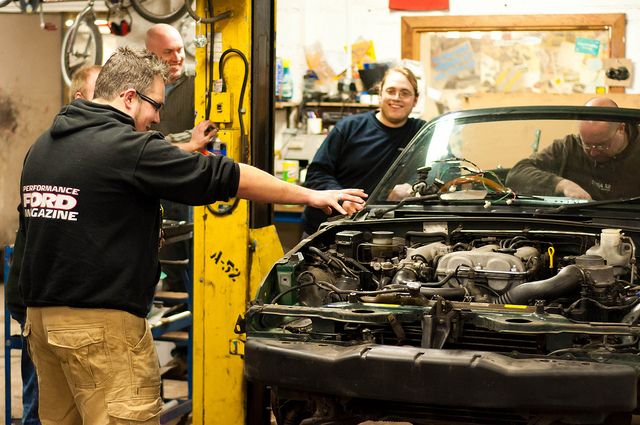 Proof that good old manual labour can triumph over the powers of the Pollitt/Jedi. 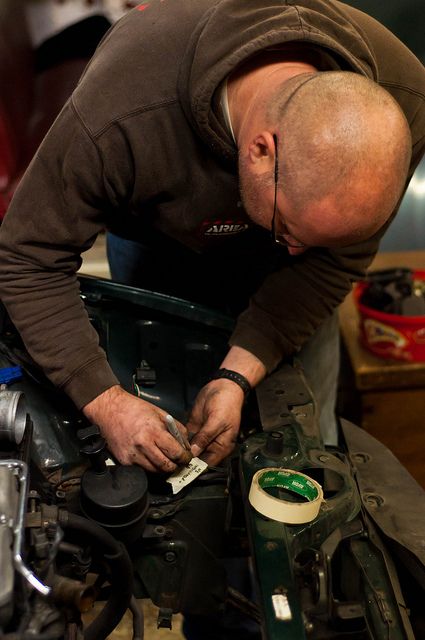 VIP & I worked into the night disconnecting everything, ready for the main body/running gear seperation the next morning while the others headed home and Pollitt & Diabolu snored their little heads off in the snug. This meant that the next morning (27th) the body and running gear could go their seperate ways: 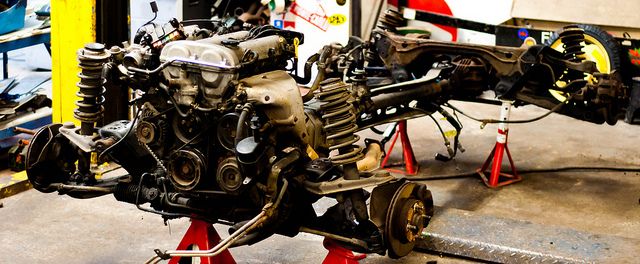 With the arrival of more people (Ben90210, Tofufi, KevFromWales, BrianDamaged etc...) splitting the running gear down into storable 'chunks' took no time at all: 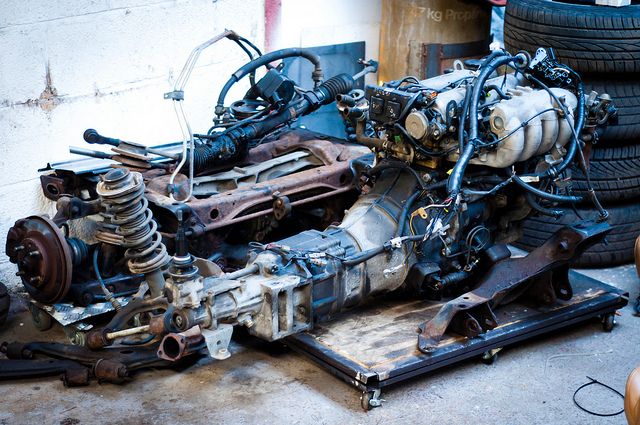 With the bodyshell carried outside into the yard, the ramp was finally, at last, free for the Elite to make its way onto it. Details of that to come in a bit... |
| |
|
|
|
|
|
Dec 31, 2011 21:05:20 GMT
|
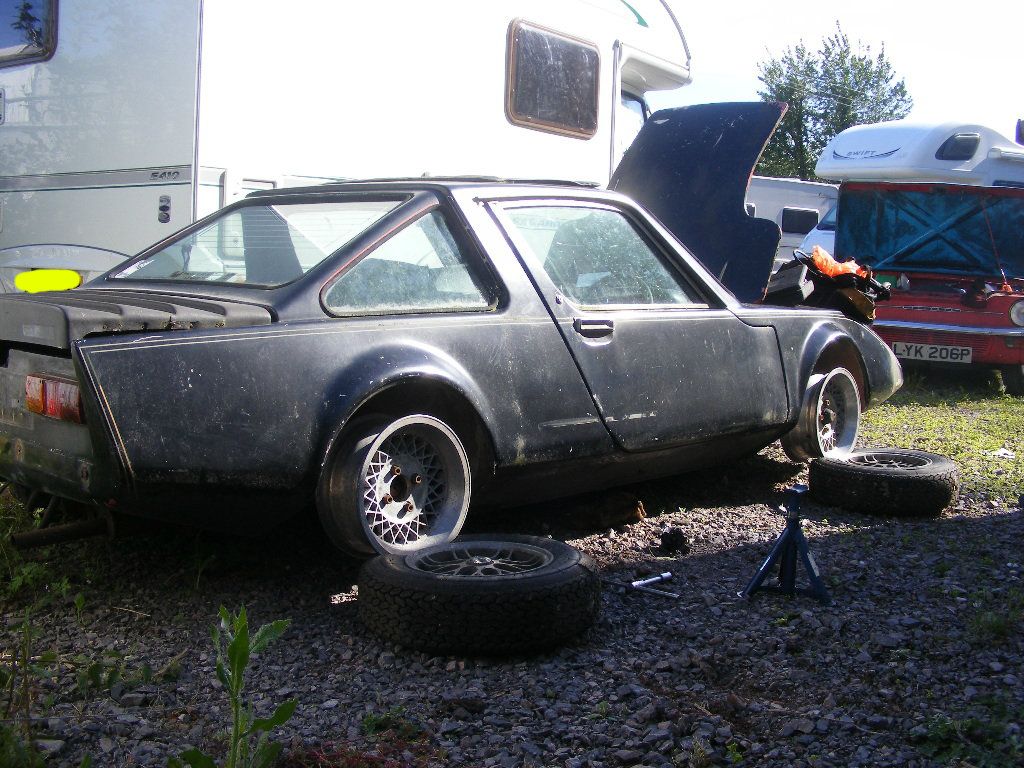
With the Eunos completley stripped and out of the way, the ramp was now free for the Elite. The rear end was still locked up fairly well (seized brakes believed to be the cause) so dollys were utilised to move it about the unit and get it lined up with the ramp 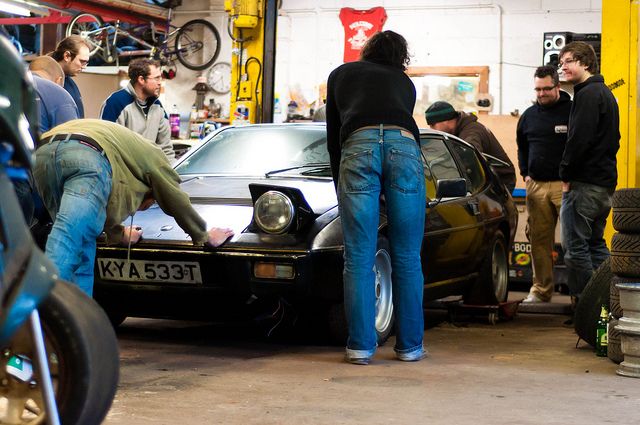 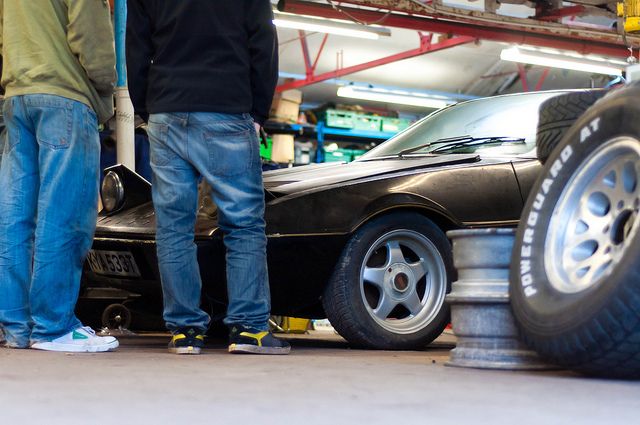 Chris (Diabolu) took various pics of it before anything else happened: 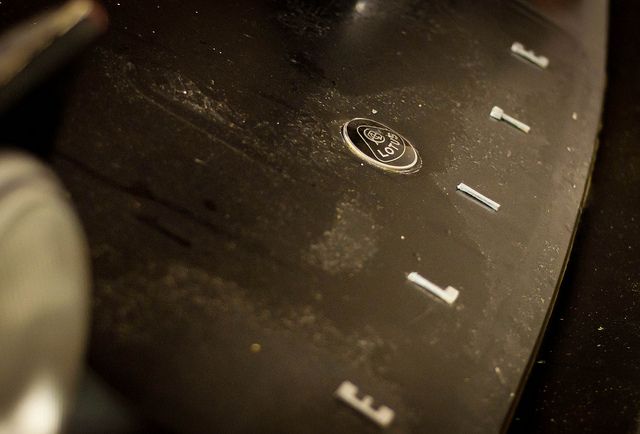 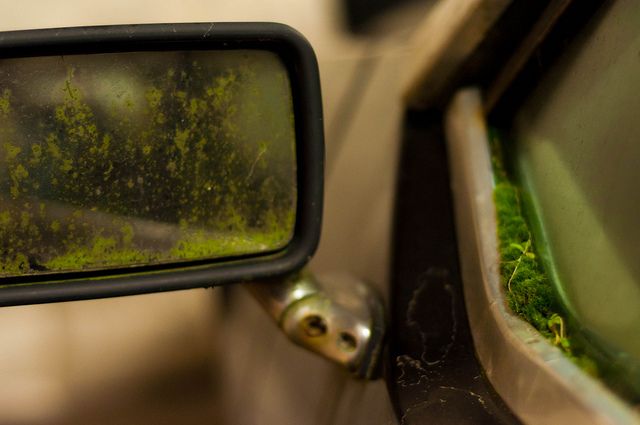 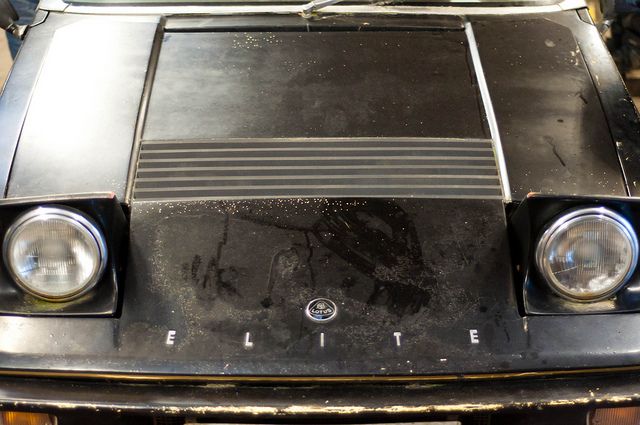 Ben & Robin take a minute to lift the bonnet.... 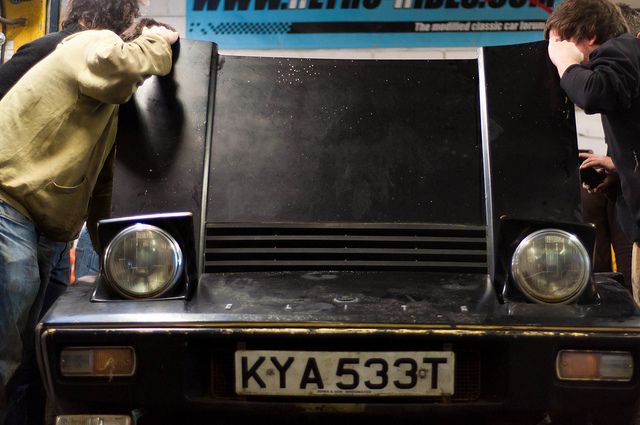 ....and have a browse over this: 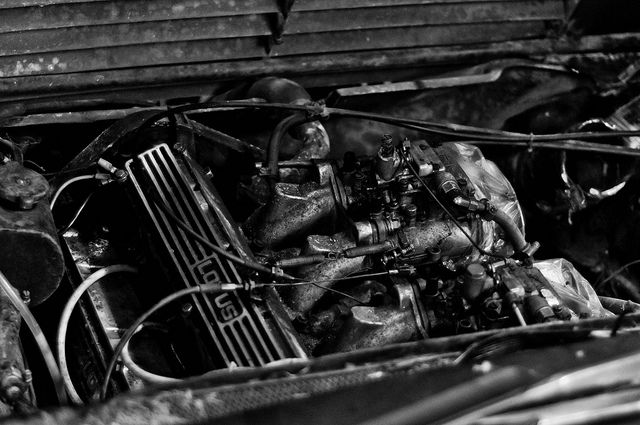 I jack the car up so the dollys can be removed ready to push it properly over the ramp 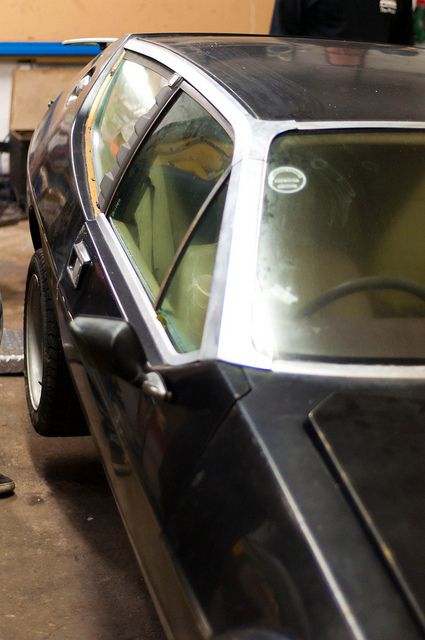 Considering the car is fibreglass and the chassis is a backbone type (running down the centre of the car) the only place to realy lift it on the ramp is on the floorpan. Yep....nearly 1 ton of GRP Lotus lifted by 4 small pads pressing onto the fibreglass floor. Very early on, pretty much as soon as I'd viewed the car, I had decided to make some spreader plates to help minimise the risk of the floor giving way on the ramp. I found some steel tube that slotted perfectly over the feet of the ramp....and Ian kindly donated some 5mm plate to the cause - enough to make some spreader plates. I started chopping the steel tube into 4 pieces 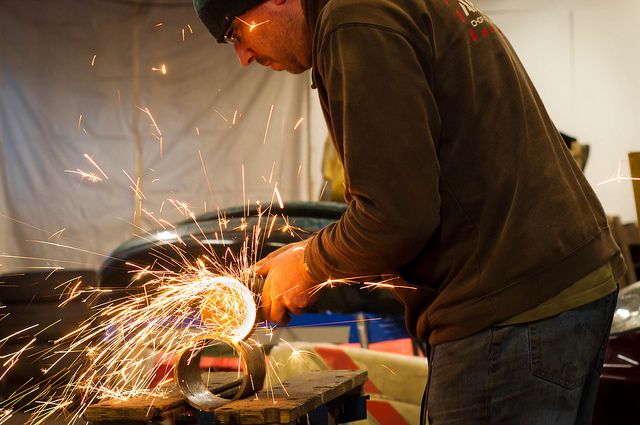 While all the noise and sparks were going on, the others chilled and chatted about anything & everything. Random conversations are a staple part of Area 52 life. 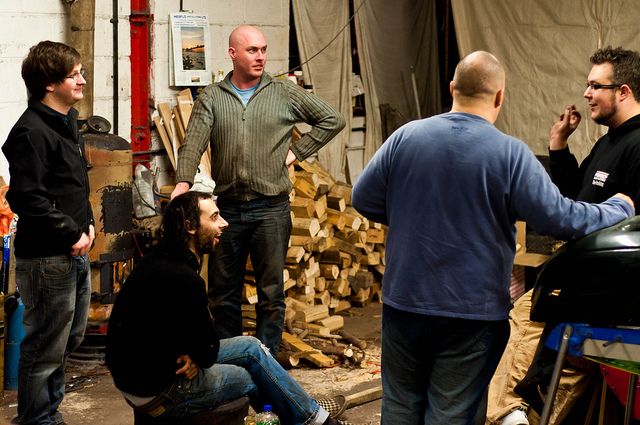 Outside Rich was busy trying his new Comp splits on his MG. Brought along by KFW, they look superb on the BRG wonder 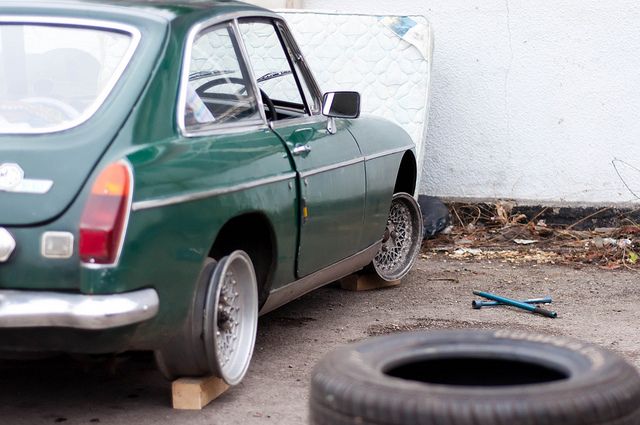 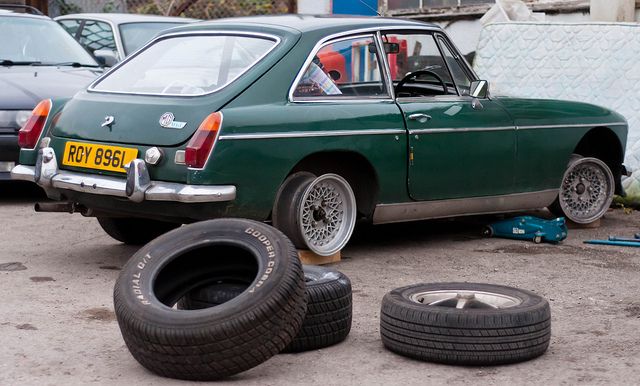 Once trial fitted, Rich starts the process of splitting them apart for a refurb: 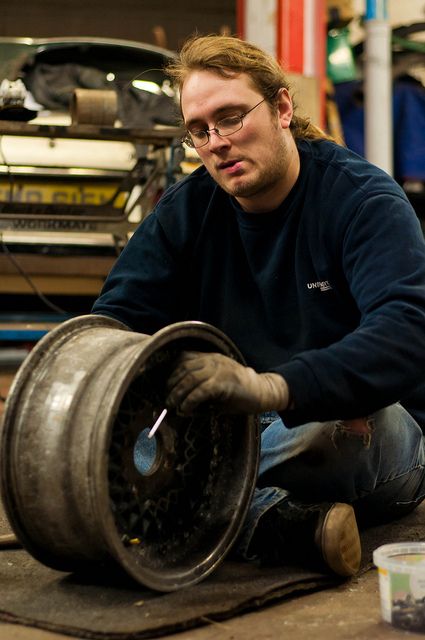 Next up.......in the air she goes!! |
| |
|
|
|
|
|
Dec 31, 2011 21:21:40 GMT
|
I didn't get any shots of the spreader plates finished, but after an hour or so of grinding and some welding (including some by The Pollitt....who LOVES a chance to melt metal together) they were complete and slotted onto the ramp. Perfect fit, but now for the nervous bit...seeing if they actually work! Some careful placement and some double/triple checking between BiAS and myself, we are finaly ready to lift the Elite. This shot perfectly illustrates the tension in the unit. The music is turned off, everyone is silent and crouched watching & listening intently for any signs of cracking and certain doom!  Gradually the car rises without so much as a creak or a crack. Perfectly happy on the spreader plates and in the air for the first time in many years. But what horrors are we going to find underneath? A chassis 'known' to rust which has been sat on a grassy garden for over 6 years....what on earth have I let myself in for? 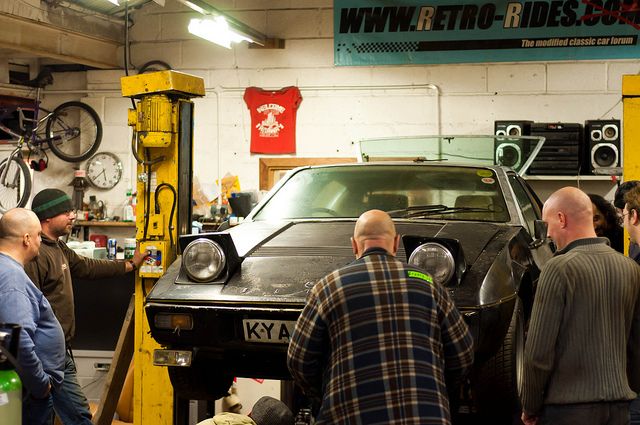 All thoughts of personal safety are put to one side despite all the nerves of the car not lasting long on the spreader plates and curiosity leads everyone to the underside of the car, peering up into the chassis looking for any signs of solid metal... 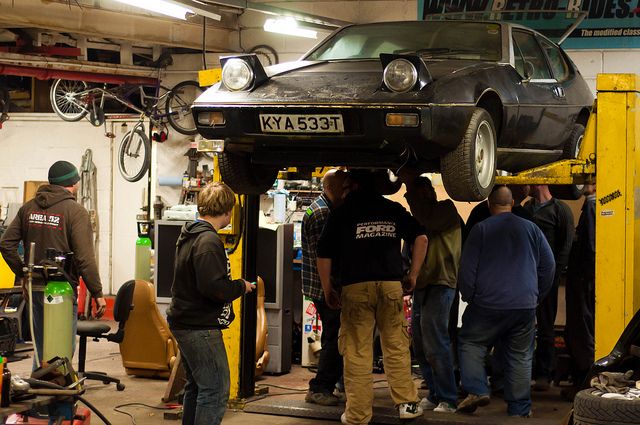 However, Pollitt perfectly sums up the findings in this shot. A remarkably solid chassis with only minor surface rust and the only bit of welding needed (without checking the thing off the car) is a patch about 2"x1" on the rear subframe. Happy? Me? You bet! 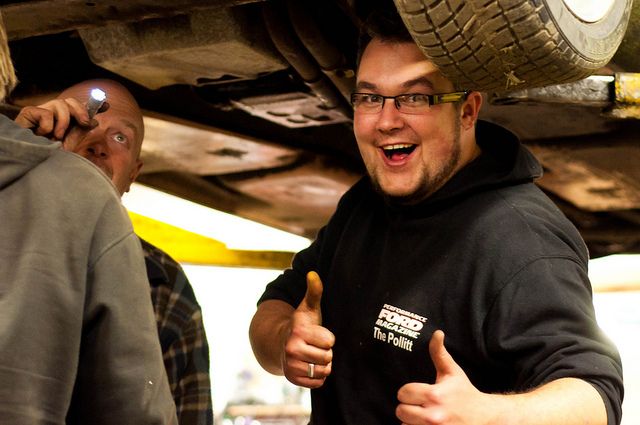 With all that established, Ian (BiAS) and I get to work removing the seized on wheel centre caps (centre cap locking bolts well rusted into place, no key! Centre caps themselves badly corroded into the wheels) while Rich heads straight to the front to remove the aftermarket foglight. Cool light, but I want 'clean & simple' for this car. 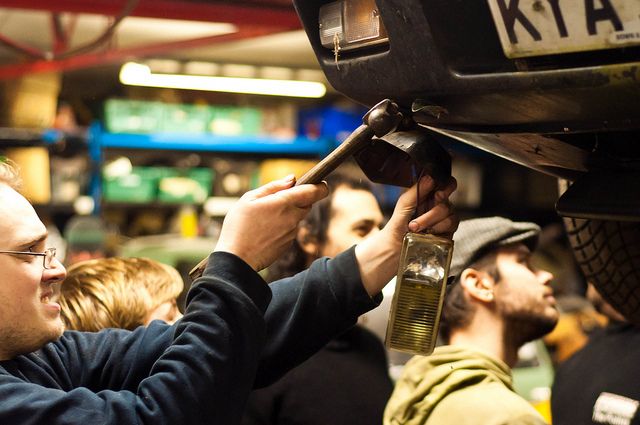 This pic seems to sum up most peoples view of the car. It brings a smile to peoples faces, it's cool, it's fun and it's going to be a brilliant project.... 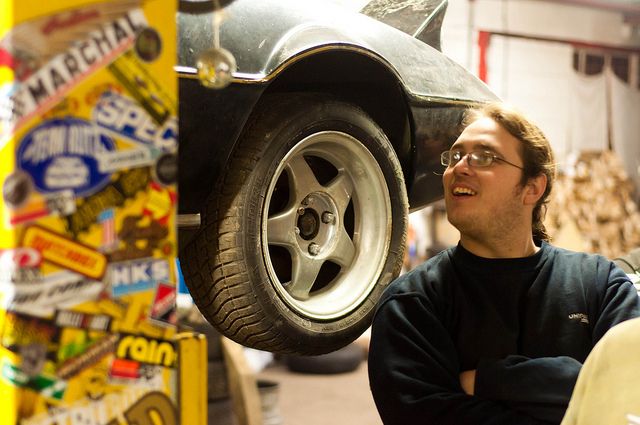 More to come later....... |
| |
|
|
|
|
|
|
|
It's funny how you take some things for granted - like putting a 'normal' car onto a 2 post ramp. I've never really given it any thought before buying this car.....just drive it into position, align the 'feet' and up she goes. The only hassle previously was for really lowered cars where some blocks had to be used to ge the car high enough to put the feet under. Having this GRP car has really made me conscious of how ramps are used and how invaluable they are. Putting the spreader plates in place and seeing it go up in the air without any hassles was such a relief - this is probably going to be the most intense, extensive and thorough build I've ever done, so to be able to call on the ramp to assist in this is such a weight off my mind. Anyway, once Ian & I had got all the centre cap locking keys out and the centre caps themselves off, the next stage was to remove the wheels. Dead easy - the new Area 52 air gun is superb and a massive thanks must go to Rich and all the guys for chipping in to buy it. It's such an asset to the unit. 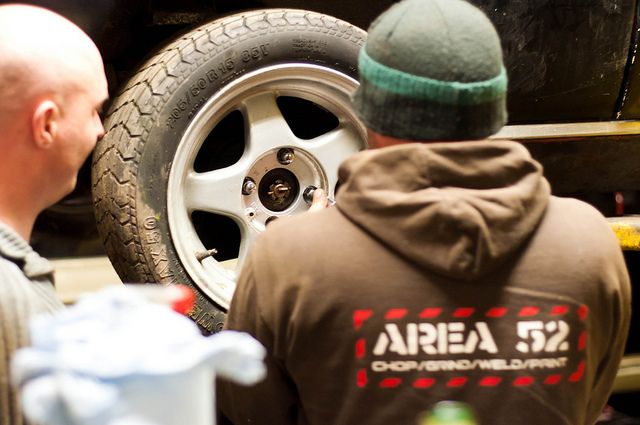 Literally as soon as the wheels are off, the modding starts. Front fogs have been removed already and Rich has fired straight into the next task - de-tangoing the indicators. I've remove the registration plate to reveal a nice air cut-out in the bumper. Kev looks at the reg plate bracket wondering if there is something that can be done to make it look a bit better 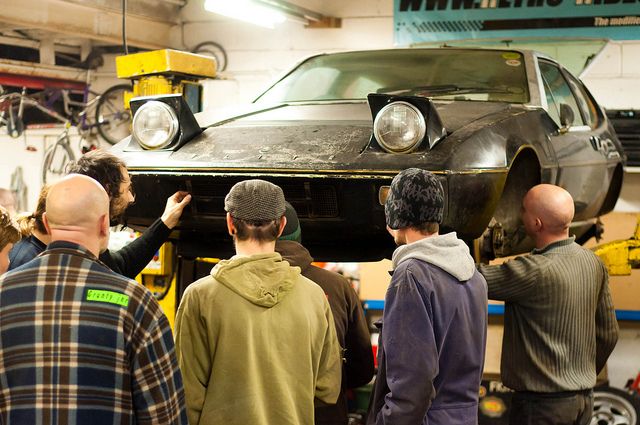 You can see the bracket in this shot more clearly... 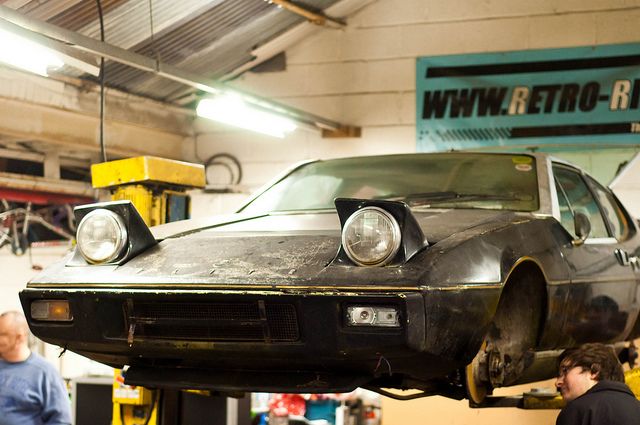 Before Kev even has chance to finish his train of thought, I am in there with a grinder. Who needs a front plate anyway? That's what the rear ones are for surely? 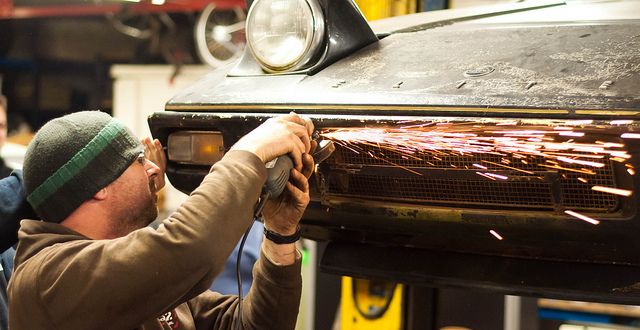 Within minutes of giving the front end a slight freebie makeover, Ed (RatDat) and I start work on the rear suspension. On go the spring compressors.... 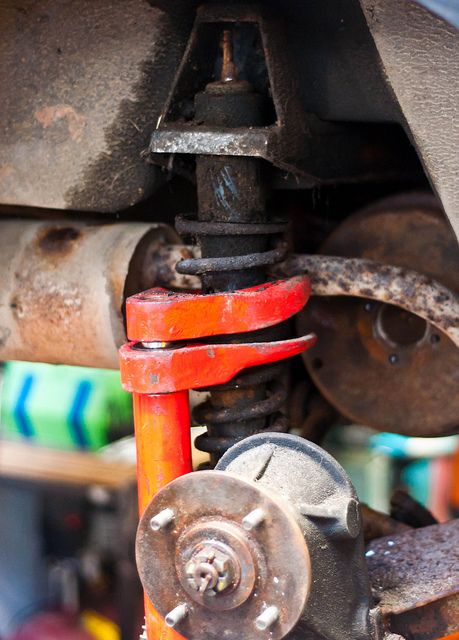 .....and off comes the rear strut (luckily, Lotus decided to design the Elite with suspension that ProComp can easily make some adjustable coiloivers for ;D 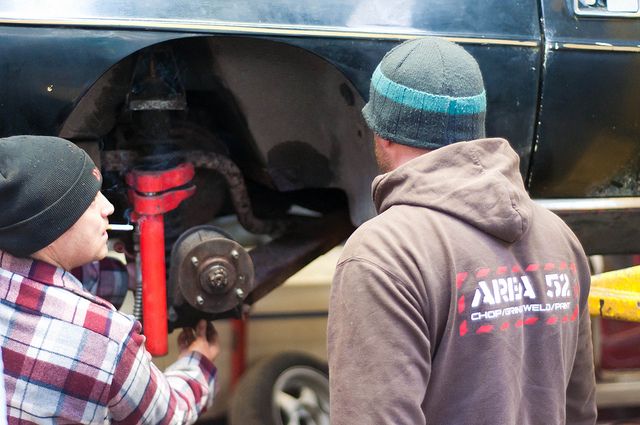 Next up, Ed & I start removing the rest of the rear suspension. Thanks to Dan (VIP) soaking everthing in penetrating oil at the start, all the bolts come out easily. Except for the 12" long 1/2" thick metal bar/pin that holds the trailing arm to the lower section of the main hub and the rear locating arm. 8" of interferance friction with numerous years of corrosion from ally against steel. Getting this out was a LOT of fun... 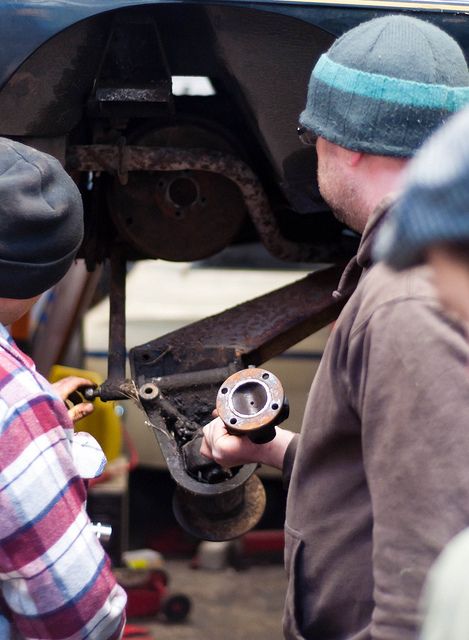 The other side involved complete removal of the rear suspension arms and some heavy duty hammer action to get the pin out. 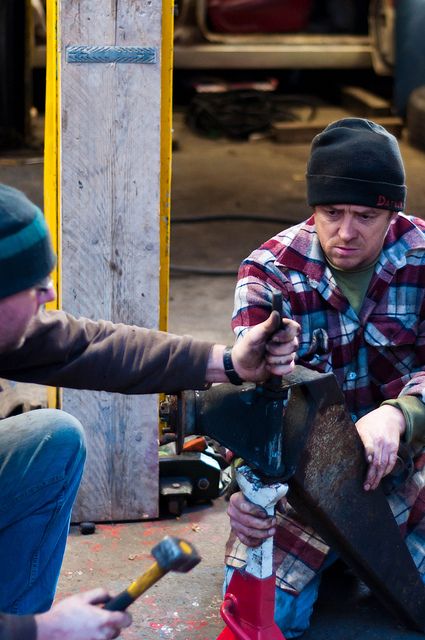 We ended up mangling the pin in the process but Ed has kindly offered to machine up some new ones for me (Thanks Ed  ) - the first side took 1hr to remove just the pin, the second side 2hrs! Worth it though just to know that the rear suspension will come apart a lot more easily in the future (and it will certainly be coming apart a few times before this car hits the road) 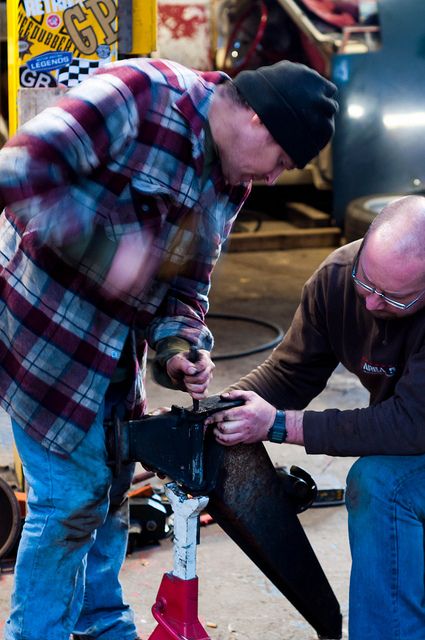 With everything refitted and the wheels back on, the car is currently sat on the ramp awaiting the front suspension removal & refit. More updates to come very soon but I just wanted to thank everyone for the brilliant and very enjoyable post-Christmas bash and all the laughs we had over those three days. HAPPY NEW YEAR everyone ;D |
| |
|
|
|
|
|
|
|
|
Awesome to see it getting started on!
|
| |
Koos
|
|
|
|
|
|
|
|
I cant wait to see what you do to this your a star i love the projects youve done especially the rascal you still got that badboy??? i love the old lotus's
|
| |
DREAMER
|
|
|
|
bryn
Posted a lot
  
Posts: 3,913
|
|
|
|
|
Gah... Everytime I wander into this section I end up seeing something you're up to Bruce. Seriously dude I'm spitting feathers here, I'm in France at mother Bryns and I haven't been to A52 in too long, looking at these pics just annoys me ;D. Before I get busy again in March I'm spending some man time in Brizzo.
Oh and the Lotus? Inspired, truly inspired. I can completely see where you're going with this one. I'll call you when I'm back ;D
|
| |
Volvo, Buggy, Discovery and an old tractor.
|
|
|
|
|
|
|
Awesome to see it getting started on! Thanks Mark, It's not much of a start, but even getting it to 'reliably' go up on the ramp was quite an acheivement to me....never had to deal with plastic bodied cars on the ramp before. Well, certainly not one that didn't have a 'normal' chassis, outriggers etc.. Just sussing out everything and pulling things apart is a learning curve for me. It's quite nicely put together (for a low production 70's hand build car) but some of the seized bolts and components are going to prove a bit of a challend I reckon. I cant wait to see what you do to this your a star I love the projects youve done especially the rascal you still got that badboy??? I love the old lotus's Hi Dude, thanks for the comments. I can't wait for more to happen and hope I can do the car justice. I do still have the Rascal but it will probably be up for sale sometime this coming year once I can get it completely finished and MOT'd. I don't want to sell it, I LOVE it to bits, but space for this project as well as funds will be needed before too long, so something has to give  .....I haven't been to A52 in too long, looking at these pics just annoys me ;D. Before I get busy again in March I'm spending some man time in Brizzo. Oh and the Lotus? Inspired, truly inspired. I can completely see where you're going with this one. I'll call you when I'm back ;D Dude, even though I LOVE being at Area 52 whenever I can, I am sure it's no substitute for being in France and being pampered by Mamma Bryn? Having said that, I reckon taking a day or two out of your crazy schedule and getting some serious 'old mates, good times' playing in at the unit would be awesome. You name the date, I'll make sure we get it to work. Glad you like the new motor. You really need to see it in the flesh to A) fully appreciate how utterly bonkers it is, and B) to realise the enormity of the project I've foolishly let myself in for.  Hope to hear from you soon Bud. |
| |
|
|
|
|
|
|
|
Before I post up progress from today, I feel compelled to put these pictures up that Chris (The Pollitt) took over the Post-Christmas Getaway. He's posted a lot more in the Area 52 thread, but most of these are applicable here so I figured I'd copy them across.... Everyone seem to love taking this shot: 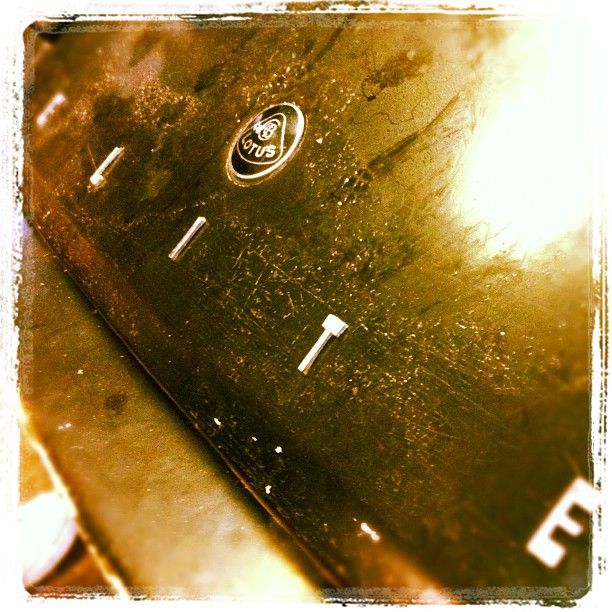 Lined up ready to go on the ramp. Just the matter of some all important spreader plates to fabricate first 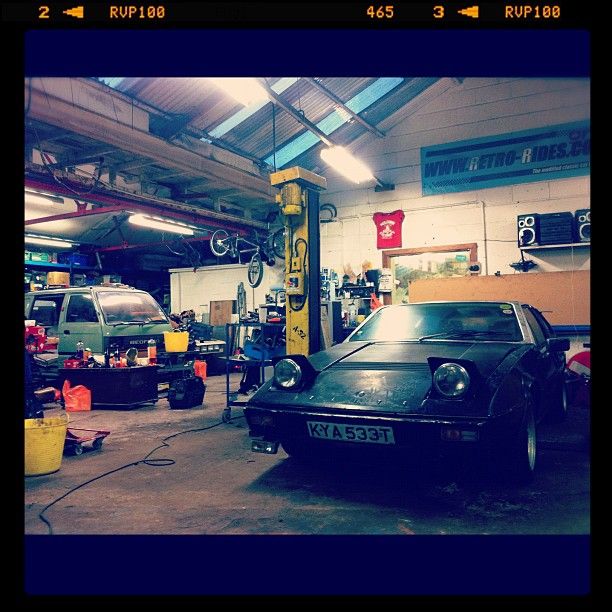 MASSIVE MASSIVE TV, Forza 4 and 70's Lotus. Only at Area 52. 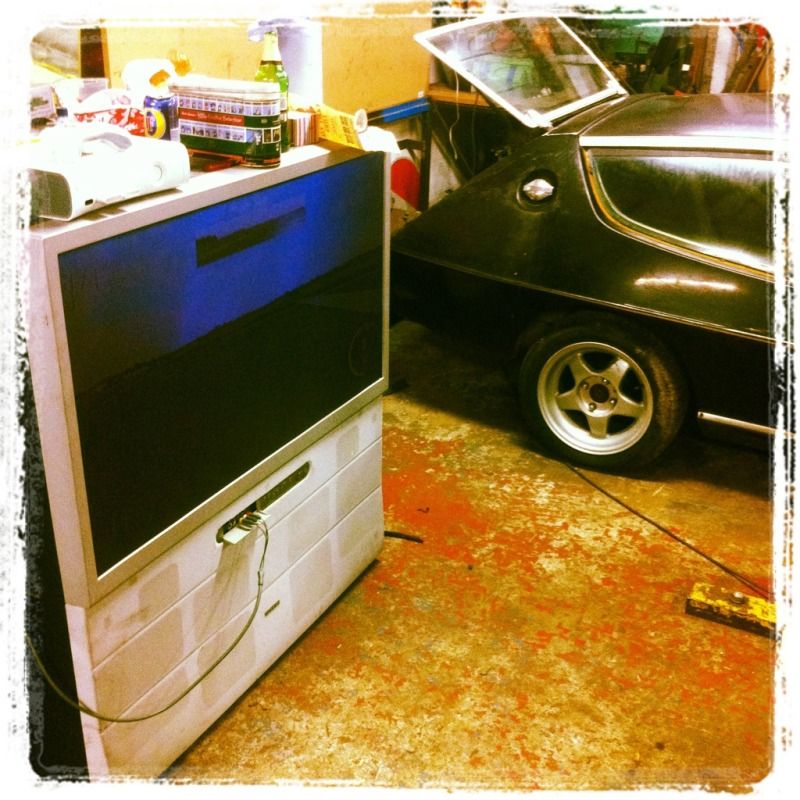 Can't wait to see the Elite with the pop-up lights in the down position. 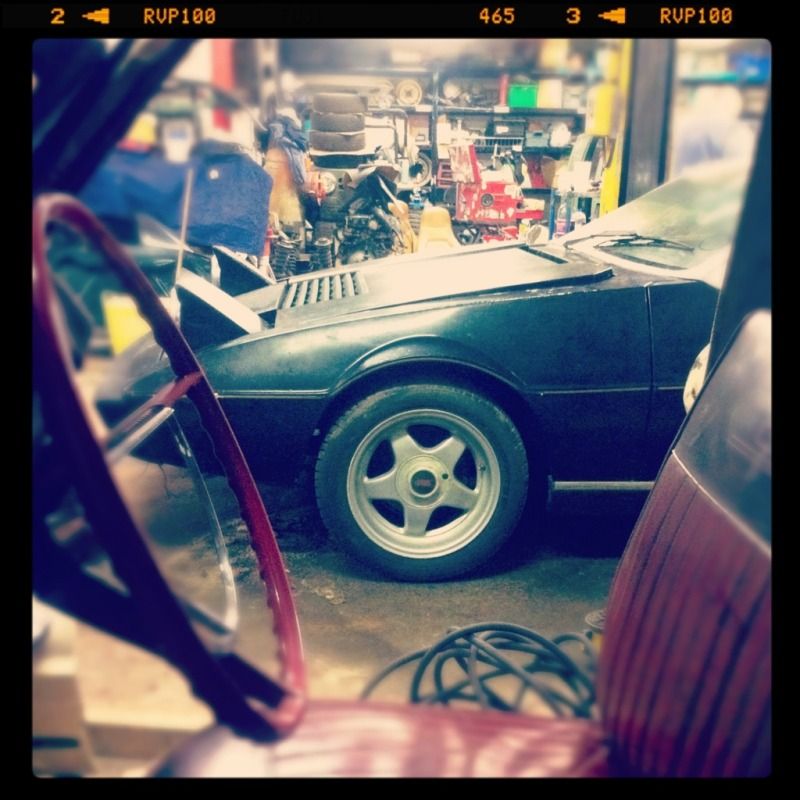 Cutting the tubing up for the spreader plates. 5mm thick - took some time to cut four of them. Mrs BiAS and Diabolu try to solve those bloody annoying wooden Christmas puzzles (turns out Chris is flipping good at them) while Rich works on his Compomotive splits... 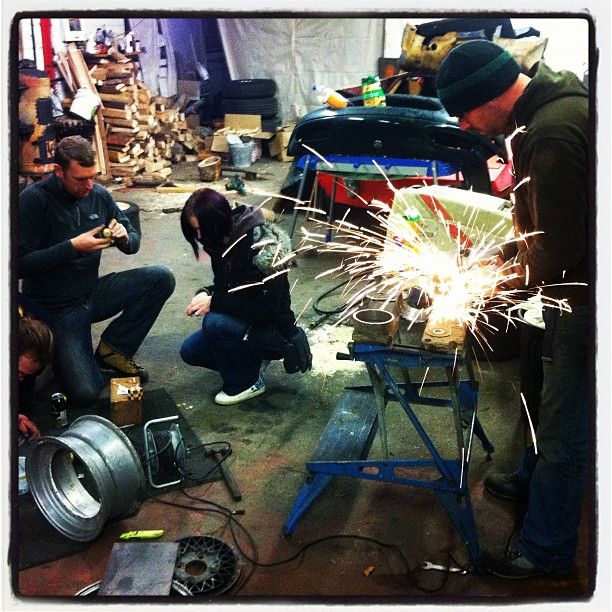 Tubing all cut, 5mm plate (kindly donated by BiAS) all cut into sections and now being prepped for melting together 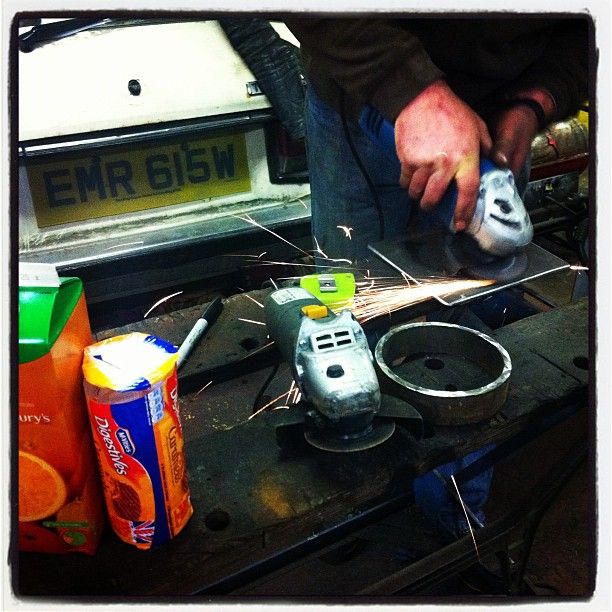 I put the Mig into action for the first one and let Pollitt & Ben do the others. Everyone loves a bit of Mig action at Area 52. 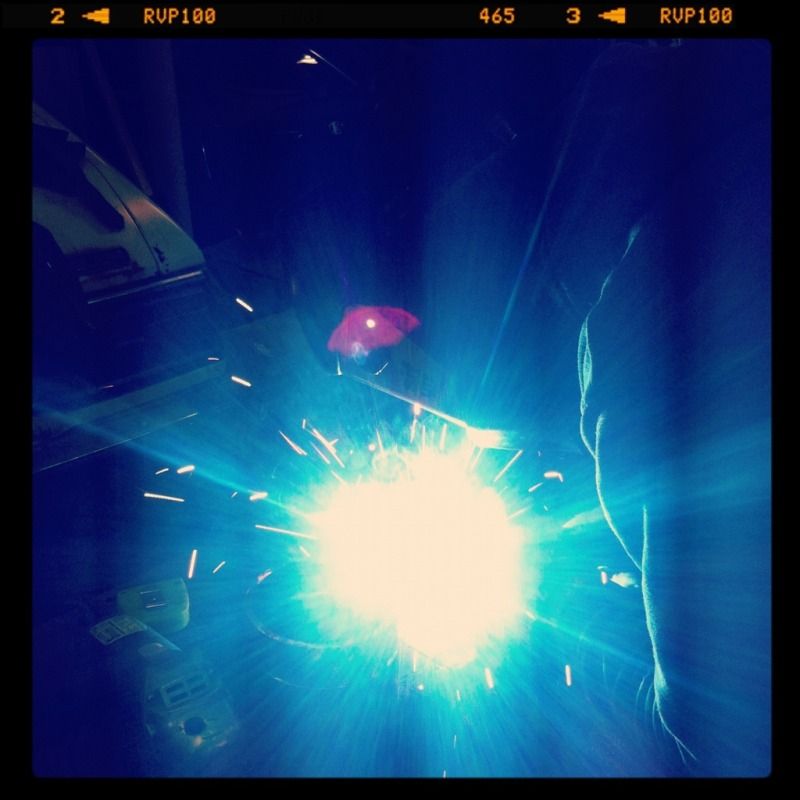 Rich gets his splits...errr...split! This makes him happy ;D 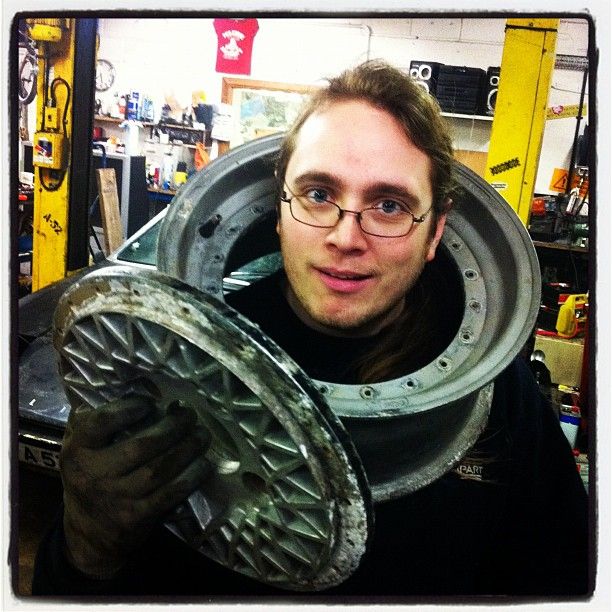 Ed (RatDat) and I try every method possible to remove the 12" long pins that are truly seized into the rear hubs. I mean properly seized. At least 8" of interference fit of alloy hub and steel pin, throw in many years of corrosion and you've got a recipe for some seriously stuck metal. 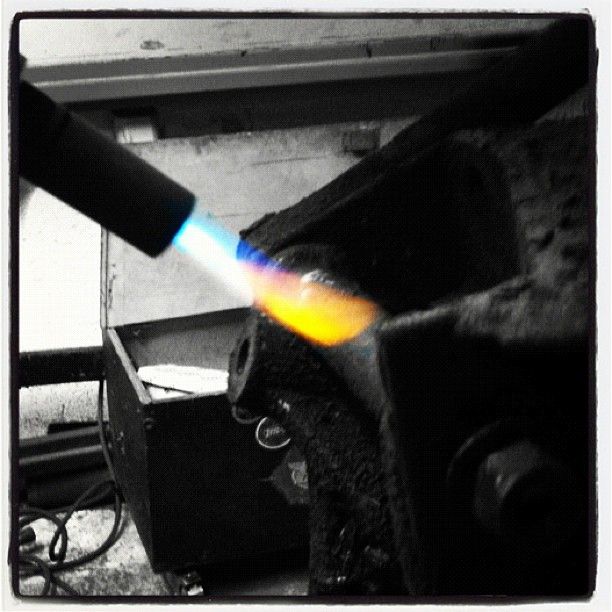 One shot....just for fun. BiAS' "zombie" boot. Made me laugh...lots. And quite a few others too! 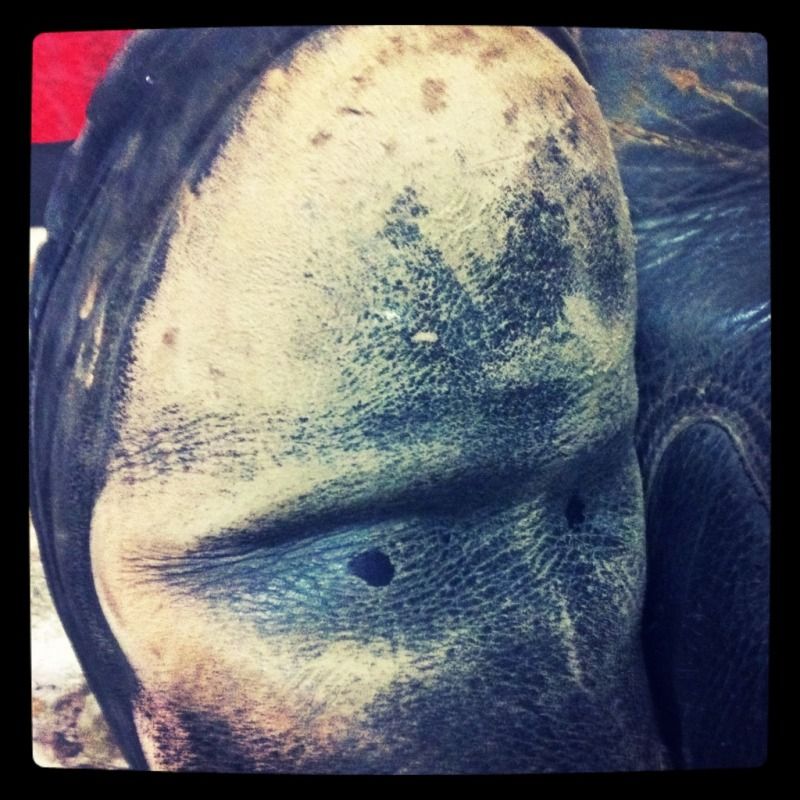 Photos and details of todays fun to come very soon... |
| |
|
|
Davey
Posted a lot
   Resident Tyre Nerd.
Posts: 2,348
|
|
|
|
|
God i'm jealous. Great read.
|
| |
K11 Micra x3 - Mk3 astra - Seat Marbella - Mk6 Escort estate - B5 Passat - Alfa 156 estate - E36 compact
Mk2 MR2 T-bar - E46 328i - Skoda Superb - Fiat seicento - 6n2 Polo - 6n polo 1.6 - Mk1 GS300
EU8 civic type S - MG ZT cdti - R56 MINI Cooper S - Audi A3 8p - Jaguar XF (X250) - FN2 Civic Type R - Mk2 2.0i Ford Focus - Mercedes W212 E250
|
|
|
|
|
|
|
God i'm jealous. Great read. Thanks Dude. I still have to pinch myself that I'm now the owner of a Lotus! I know it's not a very valuable one in the grand scheme of things and probably never will be, but I love it and actually couldn't imagine owning any of the other models. I would very much like to have an Esprit, but this is more practical and more 'me'. The Elite really, really floats my boat...and then some. ;D Something I forgot to mention. While Ed and I had the read suspension apart we also removed the rear drums which were both very seized on. Now the rear wheels turn beautifully which should make moving it around the unit a little easier. Todays progress: Here are the spreader plates doing their job. Approx 8" x 6" 5mm plate welded to some 5mm tubing which sit perfectly over the feet of the ramp. The tubing keeps the spreader plates perfectly located and the plates themselves each give approx 3 times the surface area of the ramp feet. 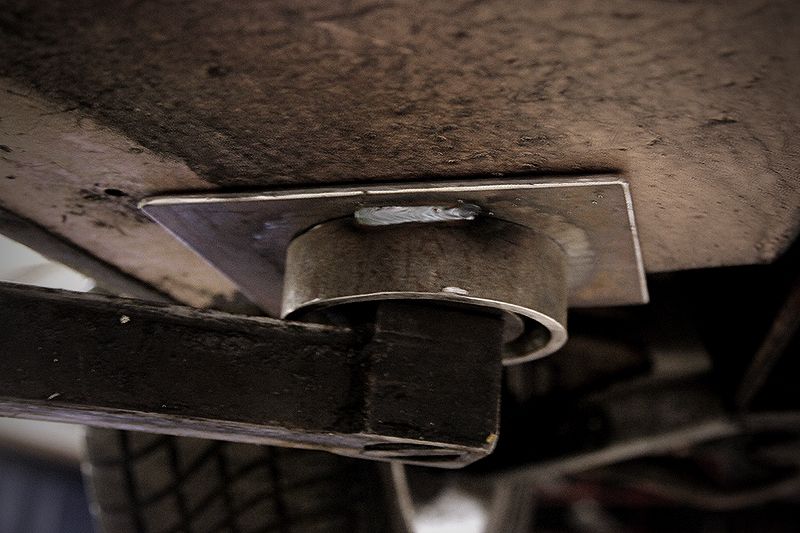 The floor of the Lotus is pretty thick anyway, but why take the risk? I've also placed the spreader plates on the ends of the floorpan on each corner so that they run off the end of the floor slightly. That means the vertical part of the wheelarch where it meets the floor acts as a stronger section than if the plates were located just on a completely flat area of floor where it could flex much more easily. 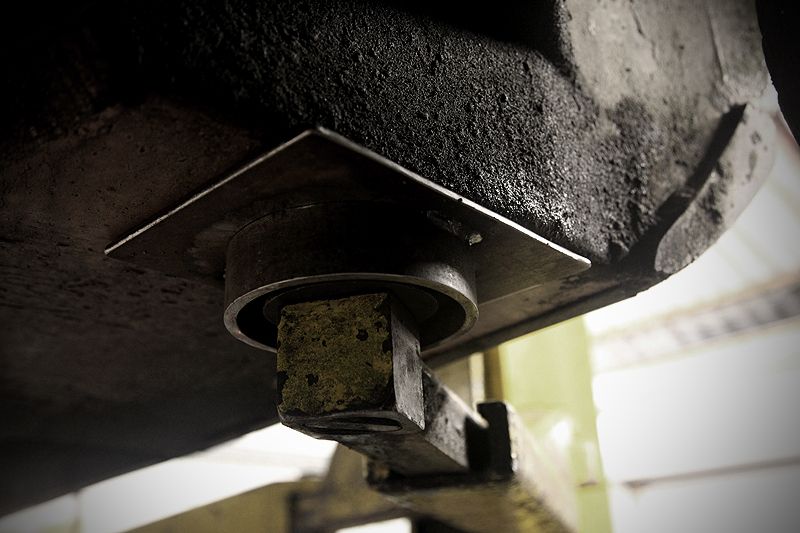 Next: front offside suspension removal |
| |
|
|
|
|
|
|
|
We get an esprit in for servicing every now and then and always use spreader plates, didn't once and it was fine but better just to not risk it. Great write up btw  |
| |
Mazda mx5 mk1 eunos Track car Project
1973 Vauxhall Firenza
|
|
|
|
|
|
|
|
Just read the whole thread as New Years Day slips away here in the Western US. As much as I envy your Lotus, I'm finding myself envying your petrol head friends at least as much. I've got a great collection of good/longtime friends, but none of them are into cars.
In the hippie haven I live in the only kind of transport that anyone would have an interest in would have to be powered by pedals, solar electricity and bong resin. I'm quite secretive that my Fiat 124s have no emissions controls whatsoever.
The thought of a skilled, well educated and reliable team of willing people sounds awesome, and is clearly a blessing to you. Happy New Year, and thank you for posting OFTEN!
|
| |
|
|
|
|
|
|
|
One problem we had to overcome before being able to get to the suspension was removing the wheels. Not normally a problem, but this car had locking centre caps on the aftermarket wheels and seeing as it had been stood outside for 6 years (at lease, the previous owner didn't know how long it had been stood up before he got it) the locking bolts on the centre caps were seized on good & proper. With the smallest punch I could find I angled it into one of the holes on the centre cap bolt and hammered it LOTS to try and get it to turn. Around the point where the hole started to deform (usually having to do this on each of the holes in turn) it just broke free enough to start turning. You can see the deformation on each hole of this bolt from the hammer/punch action 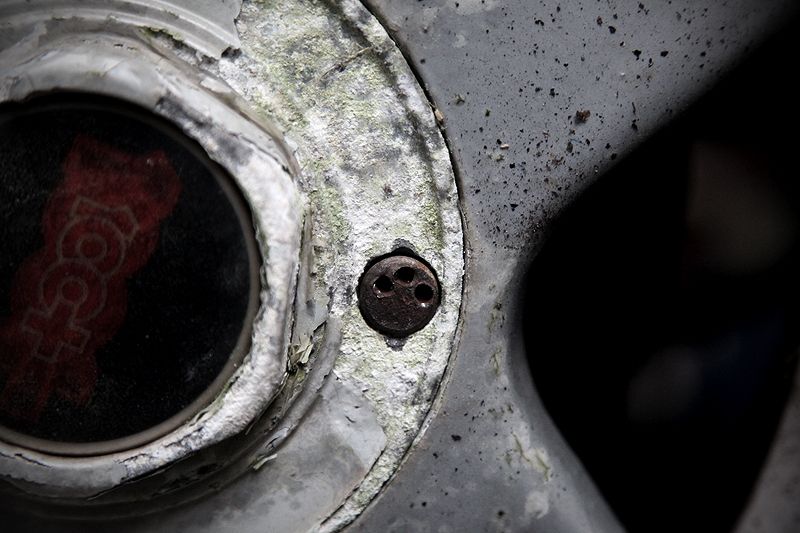 With the bolt just starting to turn, some long nosed pilers could be used to remove the bolt. Previous attempts to do this with just the pliers resulted in them bending to the point where I thought the tips would snap. Like I say, they were in good & tight! 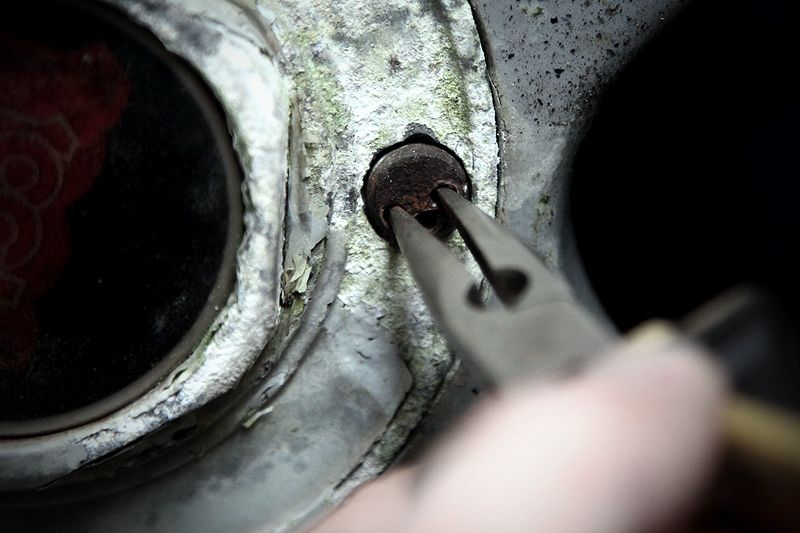 The caps themselves were so corroded into the wheels that it took some pretty aggressive hammer action onto the centre 'hex' part of the cap to start breaking them free. Once they started to move, a screwdriver through the locking bolt hole was enough to lever the caps off. 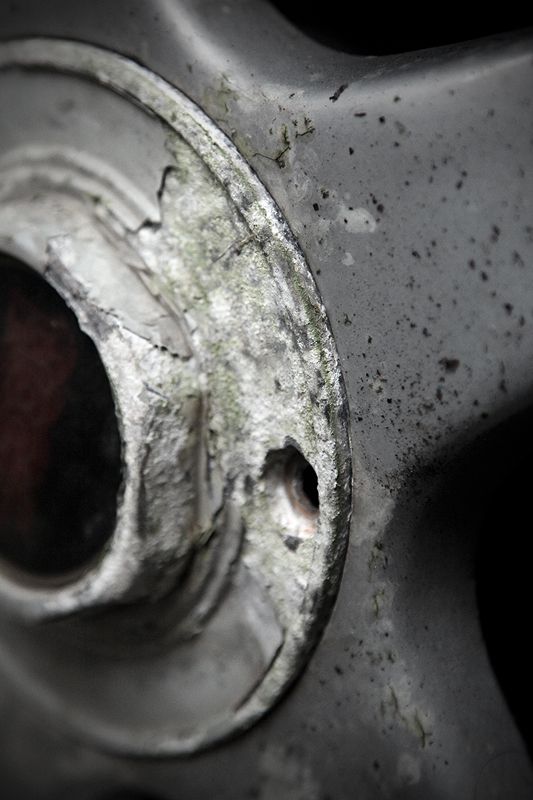 This is one of the better wheels. The others were very corroded around the area where the centre cap sat. The wheels can now be removed ;D (these photos were taken today, but the cap removal happened a few days ago. I only took the shots today to illustrate how stuck on the caps were) 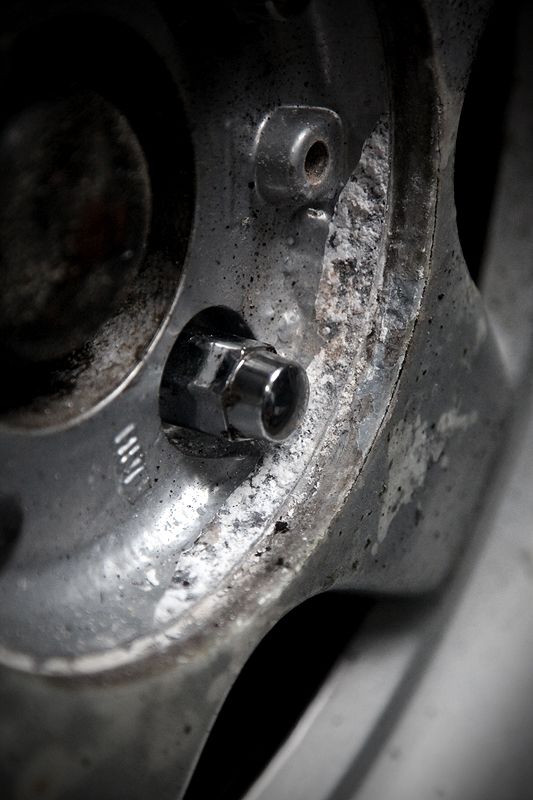 One very rusty brake disc. When I get around to sorting the brakes, these will be put on the A52 lathe and given a light skim. The corrosion is consistent and luckily very little pitting has occurred - the discs themselves have virtually no lip at all so should be saveable rather than having to buy new discs. The calipers are 3 pots! Yep...two cylinders on the outside and one larger one inside. Never seen this arrangement myself. 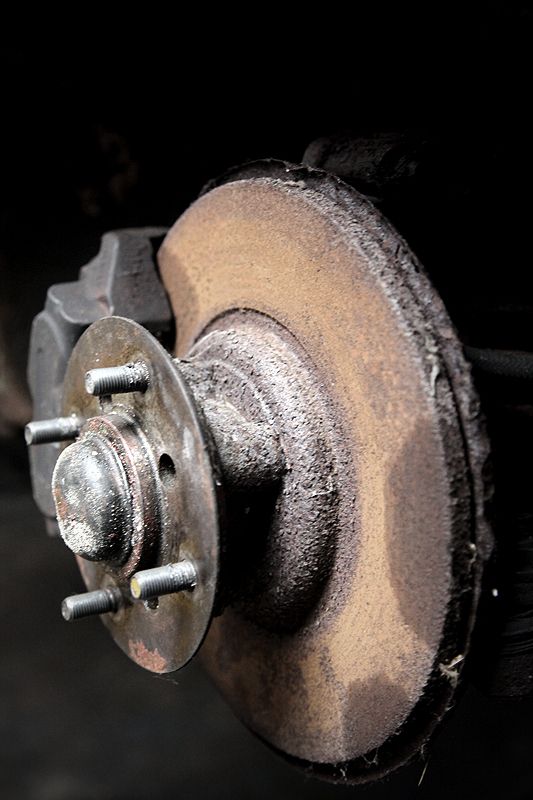 Suspension consists of a Triumph arrangement with upper wishbone, lower suspension arm which holds the anti-roll bar & lower strut mount, classic trunion on the lower part of the hub and conventional balljoint on the upper part. 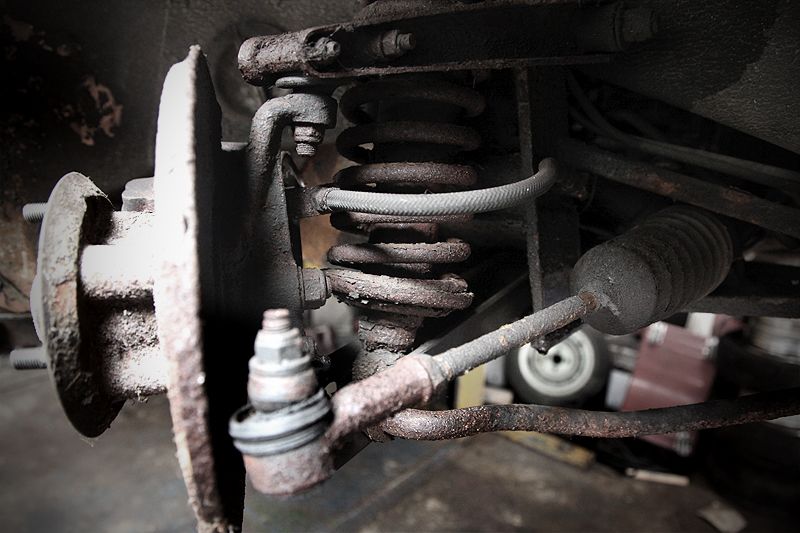 The coilover strut arrangement is fairly straightforward with a hoop/eye at the bottom onto the lower suspension arm and a pin at the top going through the chassis mounted suspension tower. What is new (to me) is that the spring locates under the suspension tower and is held in with only the spring tension. You can't remove the strut like on most modern cars, you need to compress the spring in situ first then undo the upper shock mount. The only problem is that there is virtually no room to get a spring compressor in there. Seeing as the lower arm is under all the spring tension, it seemed logical to remove the upper wishbone first (which isn't under tension when the suspension is at full drop) and pull this out of the way. I was dreading taking the 14" long pin out after the fun Ed & I had removing the rear ones, but luckily, this one is through steel all the way, so seems to have avoided the corrosion issues we found with the steel in alloy rear arrangement. Undoing the nut on one end, the pin could be knocked out pretty easily (certainly in comparison to the rear pins!) Here it is about 1/3 of the way out 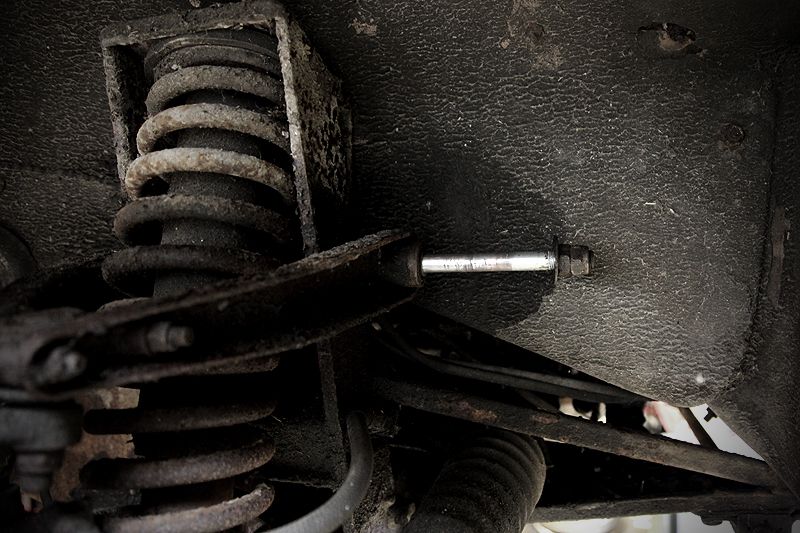 With the upper wishbone pin removed and the brake flexi disconnected from the caliper the whole hub & wishbone could be swung clear of the spring giving room to get the spring compressor in. I also removed the track rod end to give more movement to the hub assembly. It was going to come off anyway to get the hub out, so now seemed as good a time as any. 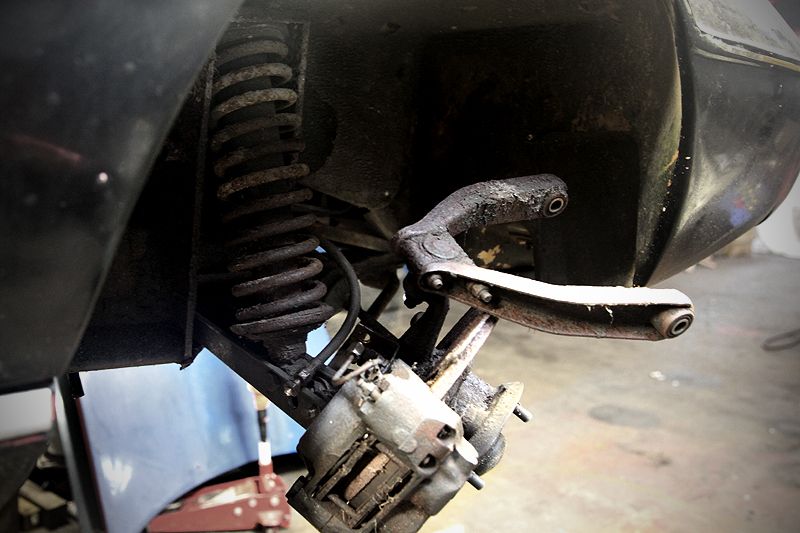 Thanks to the side sections of the suspension tower shrouding the upper half of the (rather long) spring, it was impossible to get my hydraulic spring compressor in apart from about five coils on the lower half. Even this was a struggle and had to be hammered in to get it to seat in the coils. Luckily, this was just enough to compress the spring enough to free it from the tower. I really wouldn't want to do this often! 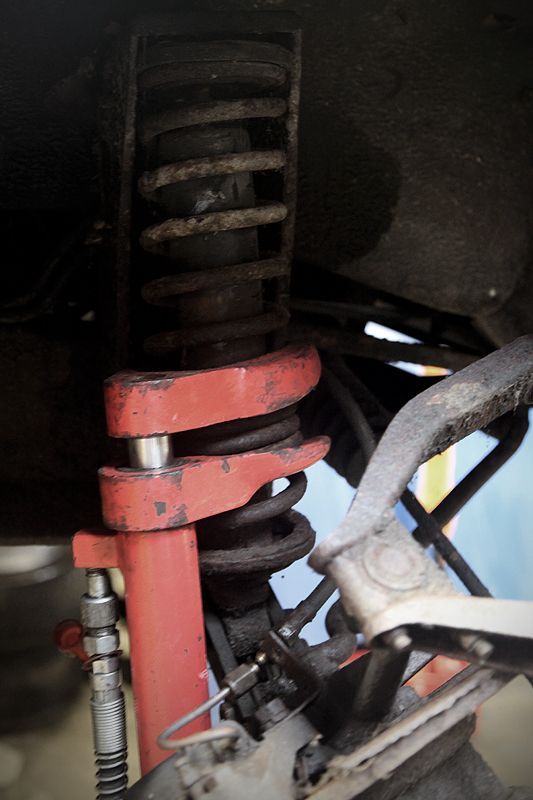 Even with five coils fully compressed I could only just pull the coil out from the suspension tower (there is a return lip on the tower that acts as a spring perch - about 15mm) You can just make out the upper rubber spring mount clearing the suspension tower. 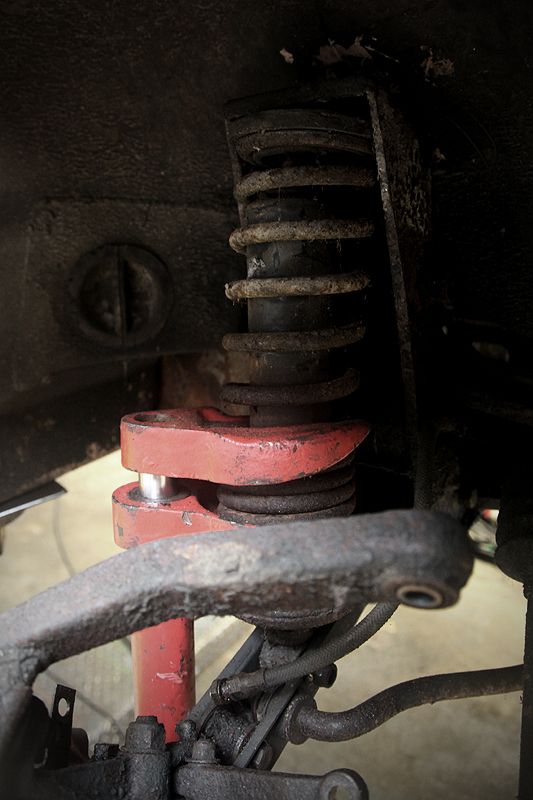 With the spring free I could remove the lower shock mount, the anti-roll bar (not as easy as you'd think - more about this another day) and the lower suspension arm mount I could now remove the whole hub assembly 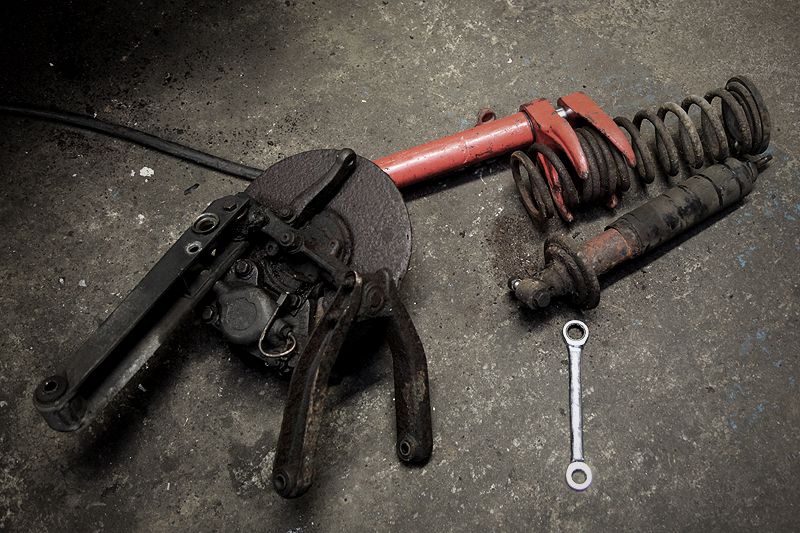 The suspension tower in all its glory. You can clearly see the tube the upper wishbone pivot pin sits in - about 9" of steel tube...lots of surface area for the pin to corrode onto. I was lucky! You can also see where the top of the spring sits - held only in place with the spring tension. I will hopefully address this when I get around to having some coilovers custom made so that the whole strut can be removed with the spring still under tension. 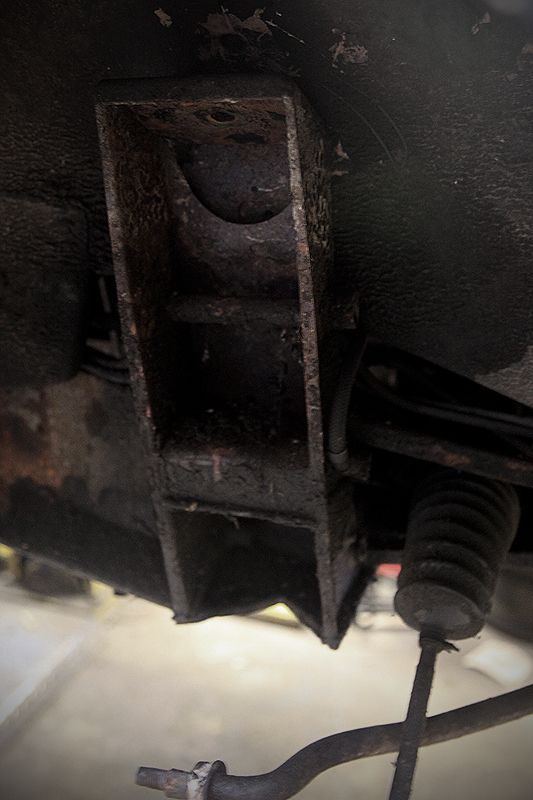 Caliper removed, I wanted to strip the whole hub down but very quickly became stuck when I couldn't remove the trunion mounting bolt from the lower suspension arm. The nut came off easily enough (refitted in this pic) and the bolt would turn after some persuasion, but no matter how hard I hit the bolt, it would not come out. Not even move. It would rotate and I even tried using a windy gun to see if it would 'unscrew' but no joy. Refitting the nut some of the way and hammering the living daylights out of it, it wouldn't shift. Luckily I didn't damage the bolt and the nut will still go on and off. If anyone has any ideas, I'm all ears  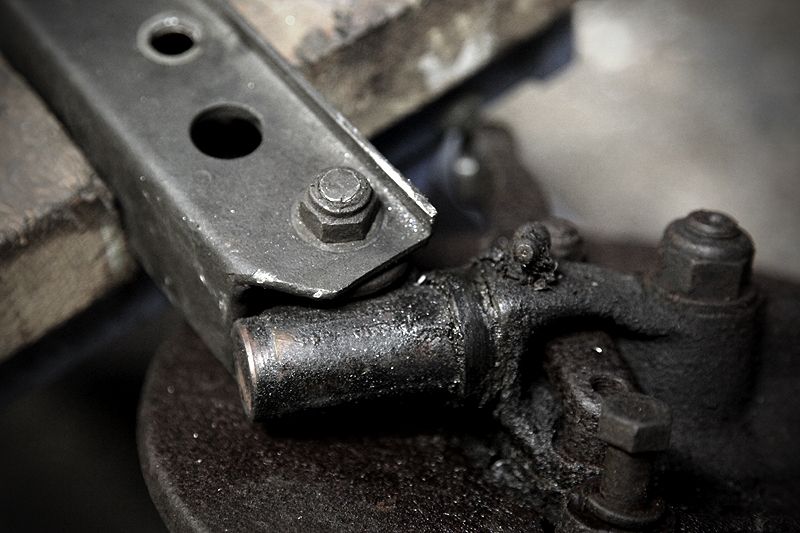 Time was getting on so I decided to cut my losses and refit all the suspension because I need the car to roll so that the ramp can be used by other cars soon. I will revisit this another time...probably when I know the car can hog the ramp for a while and probably when I come to remove the chassis in its entirety. I'm going to remove the front suspension other side very soon just to make sure it all comes apart the same as this side and so that I know that all four corners will come apart more easily when the big strip-down occurs. I'm off to bed now, but taking the workshop manual with me for some bedtime reading to see if there is something I have missed with this trunion bolt. As said before, all ideas and suggestions welcomed.  Thanks for tuning in.... |
| |
|
|
|
|
|
|
|
|
Love the write up Bruce. And as was brut up earlier in the thread, I did love the friendly spirit that was around at the Xmas playboy with he Lotus. I was feeling rotten for most of Christmas day but as soon as I'd jumped in th car early boxing day morning I was buzzing and ready for some atmosphere and car talk. It was great to see this project unfold from the start and hope that if I can be of use in any way during the build that I can be.
Take care and speak soon
Chris
|
| |
|
|
|
|
|
|
|
|
No suggestions for the bolt, I'm afraid. I did have a similarly difficult to remove bolt, and was eventually able to drift it out using a long punch.
The Imp uses the same semi-coilover setup at the front. The easy way to remove the spring is to put a jack under the lower arm, and raise the arm just enough to take the tension off the shock end-stop. You can then undo the shock's top mount and gently let the jack down, releasing the spring as you do so. No need for spring compressors at all. BTW, Protec are able to make shocks with adjustable damping and lower spring seats - but the standard top mounts - for the Imp, so will be able to do so for the Lotus.
If you do convert to coilovers it would be worth strengthening the metal around the top mount, as the forces will be more concentrated. Howver, I'm sure you've thought of this already.
|
| |
|
|
|
|
 ?
? ?
?


 [*]
[*] [*]
[*]


